1<!doctype html> 2<html lang="en"><head><meta charSet="utf-8"/><meta name="viewport" content="width=device-width, initial-scale=1, shrink-to-fit=no"/><link rel="stylesheet" type="text/css" href="/styles/main.css"/><meta data-react-helmet="true" name="description" content="Divesoft delivers superior tech dive gear and advanced diving technology for an underwater experience. Dive in with us for excellence and innovation."/><meta data-react-helmet="true" name="keywords" content="scuba tech, tech dive gear, tech diving gear, tech diving, technical diving, diving technology"/><meta data-react-helmet="true" name="theme-color" content=""/><meta data-react-helmet="true" property="og:type" content="website"/><meta data-react-helmet="true" property="og:title" content="Divesoft - Superior Quality Scuba Tech Diving Gear"/><meta data-react-helmet="true" property="og:description" content="Divesoft delivers superior tech dive gear and advanced diving technology for an underwater experience. Dive in with us for excellence and innovation."/><meta data-react-helmet="true" property="og:image" content="http://foxer360-media-library.s3.eu-central-1.amazonaws.com/divesoft/0362a462a7b830aa64aa8c70c5d1e0441dcd56f8_divesoft-photo-188.jpg"/><meta data-react-helmet="true" name="twitter:card" content="summary_large_image"/><meta data-react-helmet="true" name="twitter:title" content="Divesoft - Superior Quality Scuba Tech Diving Gear"/><meta data-react-helmet="true" name="twitter:description" content="Divesoft delivers superior tech dive gear and advanced diving technology for an underwater experience. Dive in with us for excellence and innovation."/><meta data-react-helmet="true" name="twitter:image" content="http://foxer360-media-library.s3.eu-central-1.amazonaws.com/divesoft/0362a462a7b830aa64aa8c70c5d1e0441dcd56f8_divesoft-photo-188.jpg"/><link data-react-helmet="true" rel="stylesheet" href="/styles/divesoft.css"/><link data-react-helmet="true" rel="shortcut icon" type="image/png" href="https://www.divesoft.com/assets/divesoft/favicon.png"/><title data-react-helmet="true">Divesoft - Superior Quality Scuba Tech Diving Gear</title></head><body><div id="root"><div class="page_loader page_loader--active"><div class="page_loader__bar"></div><div class="page_loader__shadow"></div></div><div class="layout"><header class="header"><div class="container container--wide"><a class="h-logo" href="/"><svg width="130" height="44" viewBox="0 0 130 44" fill="currentColor"><path d="M52.816 15.398h5.163c1.929 0 4.58 1.065 4.58 6.566s-2.651 6.585-4.58 6.585h-5.163zm4.718 11.007c1.605 0 2.431-1.566 2.431-4.436s-.821-4.418-2.43-4.418h-2.188v8.854zm6.8-11.007h2.53v13.151h-2.53zm4.184 0h2.612L73.56 26.4h.363l2.431-11.002h2.612l-3.113 13.151h-4.217zm12.115 0h7.693v2.187h-5.162v3.133h5.162v2.187h-5.162v3.452h5.162v2.187h-7.693zm11.513 9.322c0 1.002.162 2.048 2.068 2.048 2.048 0 2.168-1.447 2.168-1.887 0-1.002-.464-1.466-1.466-1.647l-2.187-.44c-2.55-.52-2.97-2.349-2.97-3.753 0-2.588 1.704-3.916 4.46-3.916 3.05 0 4.517 1.127 4.517 4.036h-2.531c0-1.166-.34-1.949-1.987-1.949-1.485 0-1.967.846-1.967 1.748 0 .883.382 1.347 1.328 1.528l2.612.52c2.287.445 2.77 2.111 2.77 3.635 0 1.385-.402 4.197-4.738 4.197-3.333 0-4.599-1.404-4.599-4.116h2.522zm8.195-3.797c0-4.718 2.249-5.802 5.043-5.802s5.042 1.084 5.042 5.802v2.11c0 4.738-2.268 5.803-5.042 5.803-2.77 0-5.043-1.065-5.043-5.802zm5.038 5.764c1.967 0 2.488-1.185 2.488-3.716v-1.986c0-2.531-.521-3.715-2.488-3.715-1.987 0-2.488 1.184-2.488 3.715v1.986c0 2.531.501 3.716 2.488 3.716m6.99-11.289h7.612v2.187H114.9v3.133h5.081v2.187H114.9v5.644h-2.531zm12.149 2.192h-2.932v-2.188H130v2.188h-2.951v10.964h-2.531zM21.126.876C9.48.876 0 10.35 0 22.002 0 33.65 9.474 43.124 21.126 43.124c11.647 0 21.122-9.475 21.122-21.122S32.774.876 21.126.876m0 39.674c-10.229 0-18.546-8.32-18.546-18.548S10.897 3.455 21.126 3.455c10.224 0 18.543 8.318 18.543 18.547.005 10.229-8.314 18.548-18.543 18.548"></path><path d="m29.579 29.939 6.15-6.151a2.525 2.525 0 0 0 0-3.572l-6.15-6.15c-.688-.688-2.05-1.252-3.019-1.252H13.142v2.584H26.56c.387 0 .922.224 1.194.496l5.296 5.296c.45.45.45 1.18 0 1.629l-5.296 5.296c-.234.234-.86.491-1.194.491H13.142v2.584H26.56c1.027 0 2.297-.525 3.018-1.251"></path><path d="M13.954 22.002a2.52 2.52 0 0 0-.74-1.786L8.39 15.388l-1.814 1.848 4.212 4.208c.31.31.31.811 0 1.117l-4.212 4.207 1.829 1.83 4.813-4.81a2.54 2.54 0 0 0 .736-1.786"></path></svg></a><div class="h-desktop"><nav class=""><ul class="h-list"><li><button class="h-nav-link">Products<svg width="24" height="24" viewBox="0 -3 11 24" fill="currentColor" class="h-nav-link-icon"><g transform="rotate(90, 5.5, 9)"><path d="M10.686 8.936c0-.874-.335-1.746-1.002-2.413L3.148 0 .686 2.496 6.392 8.18a1.066 1.066 0 0 1 0 1.513L.686 15.377l2.476 2.469 6.52-6.496a3.4 3.4 0 0 0 1.002-2.412"></path></g></svg></button><ul class="h-sublist h-sublist--hidden"><div class="container"><li><a class="h-nav-sublink" href="/en/products/ccr-liberty">CCR Liberty</a></li><li><a class="h-nav-sublink" href="/en/products/analyzers">Analyzers</a></li><li><a class="h-nav-sublink" href="/en/app">Divesoft.app</a></li><li><a class="h-nav-sublink" href="/en/products/others">Others</a></li></div></ul></li><li><a class="h-nav-link" href="/en/partners">Partners</a></li><li><a class="h-nav-link" href="/en/blog">Blog</a></li><li><button class="h-nav-link">Support<svg width="24" height="24" viewBox="0 -3 11 24" fill="currentColor" class="h-nav-link-icon"><g transform="rotate(90, 5.5, 9)"><path d="M10.686 8.936c0-.874-.335-1.746-1.002-2.413L3.148 0 .686 2.496 6.392 8.18a1.066 1.066 0 0 1 0 1.513L.686 15.377l2.476 2.469 6.52-6.496a3.4 3.4 0 0 0 1.002-2.412"></path></g></svg></button><ul class="h-sublist h-sublist--hidden"><div class="container"><li><a href="https://support.divesoft.com/" target="" rel="noreferrer noopener" class="h-nav-sublink">Knowledge base</a></li><li><a class="h-nav-sublink" href="/en/downloads">Downloads</a></li></div></ul></li><li class="h-nav-shop"><a href="https://eshop.divesoft.com" target="_blank" rel="noreferrer noopener" class="link link--secondary link--red">Shop</a></li></ul></nav><button>
2<svg width="24" height="24" viewBox="-2 -3 20 23" fill="currentColor"><path d="m12.414 11.632 3.302 3.369-1.09 1.113-3.303-3.37a6.82 6.82 0 0 1-4.33 1.55c-3.831 0-6.94-3.172-6.94-7.08S3.162.134 6.993.134c3.83 0 6.939 3.172 6.939 7.08a7.14 7.14 0 0 1-1.518 4.418m-1.547-.583a5.55 5.55 0 0 0 1.523-3.835c0-3.042-2.416-5.507-5.398-5.507S1.595 4.172 1.595 7.214 4.01 12.72 6.992 12.72a5.33 5.33 0 0 0 3.76-1.553z"></path></svg></button><a href="https://eshop.divesoft.com" target="_blank" rel="noreferrer noopener" class="link link--outline link--white">Shop</a></div><div class="h-mobile"><button><svg width="24" height="24" viewBox="-2 -3 20 23" fill="currentColor"><path d="m12.414 11.632 3.302 3.369-1.09 1.113-3.303-3.37a6.82 6.82 0 0 1-4.33 1.55c-3.831 0-6.94-3.172-6.94-7.08S3.162.134 6.993.134c3.83 0 6.939 3.172 6.939 7.08a7.14 7.14 0 0 1-1.518 4.418m-1.547-.583a5.55 5.55 0 0 0 1.523-3.835c0-3.042-2.416-5.507-5.398-5.507S1.595 4.172 1.595 7.214 4.01 12.72 6.992 12.72a5.33 5.33 0 0 0 3.76-1.553z"></path></svg></button><button><svg width="24" height="24" viewBox="0 -960 960 960" fill="currentColor"><path d="M120-240v-80h720v80zm0-200v-80h720v80zm0-200v-80h720v80z"></path></svg></button></div></div></header><section class="hero-v2"><div class="ssr-placeholder-slider"><div class="slide"><div class="picture"><img alt="ECHO Analyzer" class="mediaImage inner" src="https://foxer360-media-library.s3.eu-central-1.amazonaws.com/divesoft/77df3aabc10d015516e748622d5c96e95ea9542f_banner-hp-echo_3840_2560.webp" loading="lazy"/></div><div class="container container--wideOffset"><h1 class="slide__title">Precision Gas Analysis.<br/>Zero Compromise.<br/>Available now.</h1><a class="link link--primary link--white slide__link" href="/en/products/analyzers/echo">Discover<svg width="24" height="24" viewBox="0 -3 11 24" fill="currentColor" class="link--chevron link--chevron--right"><g transform="rotate(0, 5.5, 9)"><path d="M10.686 8.936c0-.874-.335-1.746-1.002-2.413L3.148 0 .686 2.496 6.392 8.18a1.066 1.066 0 0 1 0 1.513L.686 15.377l2.476 2.469 6.52-6.496a3.4 3.4 0 0 0 1.002-2.412"></path></g></svg></a></div></div><div class="slide"><video class="custom-video" src="https://foxer360-media-library.s3.eu-central-1.amazonaws.com/divesoft/docs/7022f3f68fa524f5ee6ab569a4df9be25e4c21fc_istock-1396851540-divesoft-1080p-h264.mp4" autoplay="" muted="" loop="" playsinline=""></video><div class="container container--wideOffset"><h1 class="slide__title">Built for the Depths.<br/>Trusted by Divers Worldwide.</h1></div></div><div class="slide"><div class="picture"><img alt="" class="mediaImage inner" src="https://foxer360-media-library.s3.eu-central-1.amazonaws.com/divesoft/5d1b1b669b0bb7548ffcfa2f5ddc546c2ac451ff_hero02_3840_2560.webp" loading="lazy"/></div><div class="container container--wideOffset"><h1 class="slide__title">Built for the Depths.<br/>Trusted by Divers Worldwide.</h1></div></div><div class="slide"><div class="picture"><img alt="" class="mediaImage inner" src="https://foxer360-media-library.s3.eu-central-1.amazonaws.com/divesoft/77d878376512d5ef24b9b938dc3ce3e6d73abb30_hero04_3840_2560.webp" loading="lazy"/></div><div class="container container--wideOffset"><h1 class="slide__title">Built for the Depths.<br/>Trusted by Divers Worldwide.</h1></div></div></div></section><section class="call-to-action call-to-action--white new-typo"><div class="container container--wideOffset"><h2 class="call-to-action__title">Divesoft rebreathers, analyzers and computers â reliable gear for divers exploring and growing safely underwater.</h2><div class="call-to-action__links call-to-action__links--below call-to-action__links--right"><a class="link link--primary link--black" href="/en/about-us">About us<svg width="24" height="24" viewBox="0 -3 11 24" fill="currentColor" class="link--chevron link--chevron--right"><g transform="rotate(0, 5.5, 9)"><path d="M10.686 8.936c0-.874-.335-1.746-1.002-2.413L3.148 0 .686 2.496 6.392 8.18a1.066 1.066 0 0 1 0 1.513L.686 15.377l2.476 2.469 6.52-6.496a3.4 3.4 0 0 0 1.002-2.412"></path></g></svg></a></div></div></section><section class="product-tile"><a href="/en/app"><div class="picture"><img alt="Divesoft.app mobile interface showing a comprehensive digital hub for divers" class="mediaImage inner" src="https://foxer360-media-library.s3.eu-central-1.amazonaws.com/divesoft/2434551be2dea8a4694d6e11aa455da4dc6dd1ba_divesoftapp_6000_2100.webp" loading="lazy"/></div><div class="container container--wideOffset"><div class="pt-block"><h2 class="pt-title">DIVESOFT.APP</h2><p class="pt-subtitle">One System for Everything</p></div><div class="pt-buttons"><a href="https://play.google.com/store/apps/details?id=com.divesoft.divesoft_app" target="_blank" rel="noreferrer noopener" class="link link--primary link--red">Google Play<svg width="24" height="24" viewBox="0 -3 11 24" fill="currentColor" class="link--chevron link--chevron--right"><g transform="rotate(0, 5.5, 9)"><path d="M10.686 8.936c0-.874-.335-1.746-1.002-2.413L3.148 0 .686 2.496 6.392 8.18a1.066 1.066 0 0 1 0 1.513L.686 15.377l2.476 2.469 6.52-6.496a3.4 3.4 0 0 0 1.002-2.412"></path></g></svg></a><a href="https://apps.apple.com/us/app/divesoft-app/id1545496130" target="_blank" rel="noreferrer noopener" class="link link--primary link--red">App Store<svg width="24" height="24" viewBox="0 -3 11 24" fill="currentColor" class="link--chevron link--chevron--right"><g transform="rotate(0, 5.5, 9)"><path d="M10.686 8.936c0-.874-.335-1.746-1.002-2.413L3.148 0 .686 2.496 6.392 8.18a1.066 1.066 0 0 1 0 1.513L.686 15.377l2.476 2.469 6.52-6.496a3.4 3.4 0 0 0 1.002-2.412"></path></g></svg></a><a class="link link--primary link--white" href="/en/app">Full dive<svg width="24" height="24" viewBox="0 -3 11 24" fill="currentColor" class="link--chevron link--chevron--right"><g transform="rotate(0, 5.5, 9)"><path d="M10.686 8.936c0-.874-.335-1.746-1.002-2.413L3.148 0 .686 2.496 6.392 8.18a1.066 1.066 0 0 1 0 1.513L.686 15.377l2.476 2.469 6.52-6.496a3.4 3.4 0 0 0 1.002-2.412"></path></g></svg></a></div></div></a></section><section class="product-tile"><a href="/en/products/analyzers/echo"><div class="picture"><img alt="ECHO Analyzer" class="mediaImage inner" src="https://foxer360-media-library.s3.eu-central-1.amazonaws.com/divesoft/5863c7fa7c960caa16b6e8097dbbe6a0853ed2bb_echo_6000_2100.webp" loading="lazy"/></div><div class="container container--wideOffset"><div class="pt-block"><h2 class="pt-title">ECHO</h2><p class="pt-subtitle">Know Before You Dive</p></div><div class="pt-buttons"><a href="https://eu1.hubs.ly/H0tXgPx0" target="_blank" rel="noreferrer noopener" class="link link--primary link--red">Buy<svg width="24" height="24" viewBox="0 -3 11 24" fill="currentColor" class="link--chevron link--chevron--right"><g transform="rotate(0, 5.5, 9)"><path d="M10.686 8.936c0-.874-.335-1.746-1.002-2.413L3.148 0 .686 2.496 6.392 8.18a1.066 1.066 0 0 1 0 1.513L.686 15.377l2.476 2.469 6.52-6.496a3.4 3.4 0 0 0 1.002-2.412"></path></g></svg></a><a class="link link--primary link--white" href="/en/products/analyzers/echo">Full dive<svg width="24" height="24" viewBox="0 -3 11 24" fill="currentColor" class="link--chevron link--chevron--right"><g transform="rotate(0, 5.5, 9)"><path d="M10.686 8.936c0-.874-.335-1.746-1.002-2.413L3.148 0 .686 2.496 6.392 8.18a1.066 1.066 0 0 1 0 1.513L.686 15.377l2.476 2.469 6.52-6.496a3.4 3.4 0 0 0 1.002-2.412"></path></g></svg></a></div></div></a></section><section class="product-tile"><a href="/en/products/ccr-liberty"><div class="picture"><img alt="CCR Liberty" class="mediaImage inner" src="https://foxer360-media-library.s3.eu-central-1.amazonaws.com/divesoft/ba240cfc03faefd0ac56b4791d7a5f582f3ad530_liberty-banner-homepage_6000_2100.webp" loading="lazy"/></div><div class="container container--wideOffset"><div class="pt-block"><h2 class="pt-title">LIBERTY</h2><p class="pt-subtitle">Reliability Designed for Every Dive</p></div><div class="pt-buttons"><a href="https://www.divesoft.com/en/ccr-liberty?config=eyJ0cmVlSWQiOiI2Mjk3M2NmZmRlYWMzNWUzMDQ4MmFlYzAiLCJub2RlR3VpZHMiOltdLCJkZXRhaWxOb2RlR3VpZCI6IiIsInNldHVwRGV0YWlscyI6e30sImRldGFpbFNldHVwIjp7InF1ZXN0aW9uR3VpZCI6IiIsImFuc3dlckd1aWQiOiIifSwiYWNjZXNzb3J5Q2F0ZWdvcmllcyI6e30sImRldGFpbEFjY2Vzc29yeSI6eyJjYXRlZ29yeUd1aWQiOiIiLCJxdWVzdGlvbkd1aWQiOiIiLCJhbnN3ZXJHdWlkIjoiIn19&step=nodes" target="" rel="noreferrer noopener" class="link link--primary link--red">Buy<svg width="24" height="24" viewBox="0 -3 11 24" fill="currentColor" class="link--chevron link--chevron--right"><g transform="rotate(0, 5.5, 9)"><path d="M10.686 8.936c0-.874-.335-1.746-1.002-2.413L3.148 0 .686 2.496 6.392 8.18a1.066 1.066 0 0 1 0 1.513L.686 15.377l2.476 2.469 6.52-6.496a3.4 3.4 0 0 0 1.002-2.412"></path></g></svg></a><a class="link link--primary link--white" href="/en/products/ccr-liberty">Full dive<svg width="24" height="24" viewBox="0 -3 11 24" fill="currentColor" class="link--chevron link--chevron--right"><g transform="rotate(0, 5.5, 9)"><path d="M10.686 8.936c0-.874-.335-1.746-1.002-2.413L3.148 0 .686 2.496 6.392 8.18a1.066 1.066 0 0 1 0 1.513L.686 15.377l2.476 2.469 6.52-6.496a3.4 3.4 0 0 0 1.002-2.412"></path></g></svg></a></div></div></a></section><section class="product-tile"><a href="https://toolkit.divesoft.com/" target="_blank" rel="noreferrer noopener"><div class="picture"><img alt="Label Printing" class="mediaImage inner" src="https://foxer360-media-library.s3.eu-central-1.amazonaws.com/divesoft/e43843c03d09a918bffd1350531de0ddc0563d11_labelprinting_6000_2100.webp" loading="lazy"/></div><div class="container container--wideOffset"><div class="pt-block"><h2 class="pt-title">LABEL PRINTING</h2><p class="pt-subtitle">Gas Mix Clearly Marked</p></div><div class="pt-buttons"><a href="https://eshop.divesoft.com/he-o2-printer-cable/7312" target="_blank" rel="noreferrer noopener" class="link link--primary link--red">Buy<svg width="24" height="24" viewBox="0 -3 11 24" fill="currentColor" class="link--chevron link--chevron--right"><g transform="rotate(0, 5.5, 9)"><path d="M10.686 8.936c0-.874-.335-1.746-1.002-2.413L3.148 0 .686 2.496 6.392 8.18a1.066 1.066 0 0 1 0 1.513L.686 15.377l2.476 2.469 6.52-6.496a3.4 3.4 0 0 0 1.002-2.412"></path></g></svg></a><a href="https://toolkit.divesoft.com/" target="_blank" rel="noreferrer noopener" class="link link--primary link--white">Full dive<svg width="24" height="24" viewBox="0 -3 11 24" fill="currentColor" class="link--chevron link--chevron--right"><g transform="rotate(0, 5.5, 9)"><path d="M10.686 8.936c0-.874-.335-1.746-1.002-2.413L3.148 0 .686 2.496 6.392 8.18a1.066 1.066 0 0 1 0 1.513L.686 15.377l2.476 2.469 6.52-6.496a3.4 3.4 0 0 0 1.002-2.412"></path></g></svg></a></div></div></a></section><section class="product-tile"><a href="/en/products/analyzers/analyzer-solo"><div class="picture">
2<img alt="SOLO trimix analyzer" class="mediaImage inner" src="https://foxer360-media-library.s3.eu-central-1.amazonaws.com/divesoft/0f0adade7a81a0ba7c1f642c91e903d17cb0853c_divesoft-uprava-solo_6000_2100.webp" loading="lazy"/></div><div class="container container--wideOffset"><div class="pt-block"><h2 class="pt-title">SOLO</h2><p class="pt-subtitle">Every Breath Measured with Trust</p></div><div class="pt-buttons"><a href="https://eshop.divesoft.com/analyzer-solo/8300" target="_blank" rel="noreferrer noopener" class="link link--primary link--red">Buy<svg width="24" height="24" viewBox="0 -3 11 24" fill="currentColor" class="link--chevron link--chevron--right"><g transform="rotate(0, 5.5, 9)"><path d="M10.686 8.936c0-.874-.335-1.746-1.002-2.413L3.148 0 .686 2.496 6.392 8.18a1.066 1.066 0 0 1 0 1.513L.686 15.377l2.476 2.469 6.52-6.496a3.4 3.4 0 0 0 1.002-2.412"></path></g></svg></a><a class="link link--primary link--white" href="/en/products/analyzers/analyzer-solo">Full dive<svg width="24" height="24" viewBox="0 -3 11 24" fill="currentColor" class="link--chevron link--chevron--right"><g transform="rotate(0, 5.5, 9)"><path d="M10.686 8.936c0-.874-.335-1.746-1.002-2.413L3.148 0 .686 2.496 6.392 8.18a1.066 1.066 0 0 1 0 1.513L.686 15.377l2.476 2.469 6.52-6.496a3.4 3.4 0 0 0 1.002-2.412"></path></g></svg></a></div></div></a></section><section class="product-tile"><a href="/en/products/analyzers/analyzer-he-o2"><div class="picture"><img alt="He/O2 Analyzer" class="mediaImage inner" src="https://foxer360-media-library.s3.eu-central-1.amazonaws.com/divesoft/ab09c25f96342ee4c30aa7b5db93ca13b70bf04c_heo2_6000_2100.webp" loading="lazy"/></div><div class="container container--wideOffset"><div class="pt-block"><h2 class="pt-title">He/O<sub>2</sub> ANALYZER</h2><p class="pt-subtitle">Proven and Trusted</p></div><div class="pt-buttons"><a href="https://eshop.divesoft.com/analyzer-he-o2/8313" target="_blank" rel="noreferrer noopener" class="link link--primary link--red">Buy<svg width="24" height="24" viewBox="0 -3 11 24" fill="currentColor" class="link--chevron link--chevron--right"><g transform="rotate(0, 5.5, 9)"><path d="M10.686 8.936c0-.874-.335-1.746-1.002-2.413L3.148 0 .686 2.496 6.392 8.18a1.066 1.066 0 0 1 0 1.513L.686 15.377l2.476 2.469 6.52-6.496a3.4 3.4 0 0 0 1.002-2.412"></path></g></svg></a><a class="link link--primary link--white" href="/en/products/analyzers/analyzer-he-o2">Full dive<svg width="24" height="24" viewBox="0 -3 11 24" fill="currentColor" class="link--chevron link--chevron--right"><g transform="rotate(0, 5.5, 9)"><path d="M10.686 8.936c0-.874-.335-1.746-1.002-2.413L3.148 0 .686 2.496 6.392 8.18a1.066 1.066 0 0 1 0 1.513L.686 15.377l2.476 2.469 6.52-6.496a3.4 3.4 0 0 0 1.002-2.412"></path></g></svg></a></div></div></a></section><section class="product-tile"><a href="/en/products/analyzers/dna"><div class="picture"><img alt="DNA Analyzer" class="mediaImage inner" src="https://foxer360-media-library.s3.eu-central-1.amazonaws.com/divesoft/da2c9000bfe9b4519bd2ec9f6505af9f6a242c6f_opravadnax-1_6000_2100.webp" loading="lazy"/></div><div class="container container--wideOffset"><div class="pt-block"><h2 class="pt-title">DNA</h2><p class="pt-subtitle">Compact Nitrox Analyzer with Accuracy</p></div><div class="pt-buttons"><a href="https://eshop.divesoft.com/dna/8460" target="_blank" rel="noreferrer noopener" class="link link--primary link--red">Buy<svg width="24" height="24" viewBox="0 -3 11 24" fill="currentColor" class="link--chevron link--chevron--right"><g transform="rotate(0, 5.5, 9)"><path d="M10.686 8.936c0-.874-.335-1.746-1.002-2.413L3.148 0 .686 2.496 6.392 8.18a1.066 1.066 0 0 1 0 1.513L.686 15.377l2.476 2.469 6.52-6.496a3.4 3.4 0 0 0 1.002-2.412"></path></g></svg></a><a class="link link--primary link--white" href="/en/products/analyzers/dna">Full dive<svg width="24" height="24" viewBox="0 -3 11 24" fill="currentColor" class="link--chevron link--chevron--right"><g transform="rotate(0, 5.5, 9)"><path d="M10.686 8.936c0-.874-.335-1.746-1.002-2.413L3.148 0 .686 2.496 6.392 8.18a1.066 1.066 0 0 1 0 1.513L.686 15.377l2.476 2.469 6.52-6.496a3.4 3.4 0 0 0 1.002-2.412"></path></g></svg></a></div></div></a></section><section class="call-to-action call-to-action--centered call-to-action--white new-typo"><div class="container container--wideOffset"><h2 class="call-to-action__title">Discover the numbers behind our trust.</h2><div class="call-to-action__links call-to-action__links--above call-to-action__links--right"><a href="https://eshop.divesoft.com/" target="_blank" rel="noreferrer noopener" class="link link--outline link--black">Shop All Divesoft Gear</a></div></div></section><section class="animated-metric-counter new-typo"><div class="container container--wide"><div class="amc-metric"><p class="amc-title">
2<span class="amc-count" aria-label="0" aria-live="off">0</span><span>Compromise</span></p><p class="amc-description">Safety-critical design, verified at every step.</p></div><div class="amc-metric"><p class="amc-title"><span class="amc-count" aria-label="0+" aria-live="off">0<!-- -->+</span><span>Countries</span></p><p class="amc-description">Our gear supports divers across oceans and communities.</p></div><div class="amc-metric"><p class="amc-title"><span class="amc-count" aria-label="0+" aria-live="off">0<!-- -->+</span><span>years </span></p><p class="amc-description">Experience in precision engineering for diving.</p></div></div></section><section class="call-to-action call-to-action--white new-typo"><div class="container container--wideOffset"><div class="call-to-action__links call-to-action__links--below call-to-action__links--right"><a class="link link--primary link--black" href="/en/about-us">About us<svg width="24" height="24" viewBox="0 -3 11 24" fill="currentColor" class="link--chevron link--chevron--right"><g transform="rotate(0, 5.5, 9)"><path d="M10.686 8.936c0-.874-.335-1.746-1.002-2.413L3.148 0 .686 2.496 6.392 8.18a1.066 1.066 0 0 1 0 1.513L.686 15.377l2.476 2.469 6.52-6.496a3.4 3.4 0 0 0 1.002-2.412"></path></g></svg></a><a href="https://eshop.divesoft.com/" target="_blank" rel="noreferrer noopener" class="link link--primary link--red">SHOP<svg width="24" height="24" viewBox="0 -3 11 24" fill="currentColor" class="link--chevron link--chevron--right"><g transform="rotate(0, 5.5, 9)"><path d="M10.686 8.936c0-.874-.335-1.746-1.002-2.413L3.148 0 .686 2.496 6.392 8.18a1.066 1.066 0 0 1 0 1.513L.686 15.377l2.476 2.469 6.52-6.496a3.4 3.4 0 0 0 1.002-2.412"></path></g></svg></a></div></div></section><section class="blog-preview-v2"><div class="container container--wideOffset"><div class="bp-card bp-card-desktop"><h2>Dive into more stories</h2><p>Our community grows through shared knowledge, support and safe explorationâhelping divers improve skills and enjoy diving more.</p><a class="link link--outline link--black bp-link" href="/en/blog">Blog</a></div><div class="custom-slider bp-slider"><div class="cs-track"><div class="bp-card bp-card-mobile"><h2>Dive into more stories</h2><p>Our community grows through shared knowledge, support and safe explorationâhelping divers improve skills and enjoy diving more.</p><a class="link link--outline link--white bp-link" href="/en/blog">Blog</a></div><a href="/en/blog/why-professional-divers-choose-the-liberty-ccr-when-simple-isn-t-enough"><div class="bp-article-card"><div class="bp-article-image"><div class="mediaRatio" style="padding-top:100%"><div class="picture"><img alt="" class="mediaImage inner" src="https://foxer360-media-library.s3.eu-central-1.amazonaws.com/divesoft/97d65c3dc48f7a7e7aa49261ad1a287933fce051_liberty-most-squared_960_960.webp" loading="lazy"/></div></div></div><div class="bp-article-card-body"><p class="bp-article-title">Why Professional Divers Choose the Liberty CCR: When Simple Isn't Enough </p><p class="bp-article-perex">A Liberty CCR may look complex at first glance. Four oxygen sensors. Dual controllers. Multiple displays. Redun
2dant systems throughout the unit.\nFor some divers, that raises an immediate question:\n\n"Isn't that overengineered?"</p><div class="bp-article-card-footer"><a class="link link--secondary link--white" href="/en/blog/why-professional-divers-choose-the-liberty-ccr-when-simple-isn-t-enough">Read</a><p class="bp-article-date">04/06/26</p></div></div></div></a><a href="/en/blog/po-limits-1-4-1-6-when-to-use-which-and-why"><div class="bp-article-card"><div class="bp-article-image"><div class="mediaRatio" style="padding-top:100%"><div class="picture"><img alt="" class="mediaImage inner" src="https://foxer360-media-library.s3.eu-central-1.amazonaws.com/divesoft/336a389ed86d247fa2f215a220456d8abf0d082b_blog_960_960.webp" loading="lazy"/></div></div></div><div class="bp-article-card-body"><p class="bp-article-title">POâ Limits 1.4 / 1.6: When to Use Which and Why </p><p class="bp-article-perex">Is 1.6 POâ safe? Should you always stay below 1.4? And why do so many experienced divers still use both limits depending on the dive phase?</p><div class="bp-article-card-footer"><a class="link link--secondary link--white" href="/en/blog/po-limits-1-4-1-6-when-to-use-which-and-why">Read</a><p class="bp-article-date">26/05/26</p></div></div></div></a><a href="/en/blog/end-30-m-as-a-standard-what-it-means-in-practice-for-gas-selection"><div class="bp-article-card"><div class="bp-article-image"><div class="mediaRatio" style="padding-top:100%"><div class="picture"><img alt="30m rule" class="mediaImage inner" src="https://foxer360-media-library.s3.eu-central-1.amazonaws.com/divesoft/28bc7b754efbb15f0a676bd72acd6d48a65dfd3f_30m-rule_960_960.webp" loading="lazy"/></div></div></div><div class="bp-article-card-body"><p class="bp-article-title">END 30 m as a Standard: What It Really Means for Trimix Gas Selection </p><p class="bp-article-perex">An END of 30 meters has become a common benchmark in technical diving, but applying it in practice is not always straightforward. Gas selection involves balancing narcosis, oxygen exposure, gas density, and the actual conditions of the dive, not just hitting a single number. This article looks at how the 30 m END guideline is used in real-world trimix planning and what divers should consider when choosing a breathing mix for deeper dives</p><div class="bp-article-card-footer"><a class="link link--secondary link--white" href="/en/blog/end-30-m-as-a-standard-what-it-means-in-practice-for-gas-selection">Read</a><p class="bp-article-date">19/05/26</p></div></div></div></a><a href="/en/blog/co/co-in-the-breathing-gas-sources-of-contamination-and-how-to-detect-it"><div class="bp-article-card"><div class="bp-article-image"><div class="mediaRatio" style="padding-top:100%"><div class="picture"><img alt="" class="mediaImage inner" src="https://foxer360-media-library.s3.eu-central-1.amazonaws.com/divesoft/3f3700be32e45f4cffae3d3f7f1549a4914481f2_dsc9706-squared_960_960.webp" loading="lazy"/></div></div></div><div class="bp-article-card-body"><p class="bp-article-title">CO/COâ in the Breathing Gas: Sources of Contamination and How to Detect It </p><p class="bp-article-perex">Breathing gas can look, taste, and smell perfectly fineâand still be dangerous. Carbon monoxide (CO) and carbon dioxide (COâ) are invisible threats that become far more serious at depth. In this guide, youâll learn where contamination comes from, how it affects your body underwater, andâmost importantlyâa practical inspection procedure you can apply before your next dive.</p><div class="bp-article-card-footer"><a class="link link--secondary link--white" href="/en/blog/co/co-in-the-breathing-gas-sources-of-contamination-and-how-to-detect-it">Read</a><p class="bp-article-date">05/05/26</p></div></div></div></a><a href="/en/blog/why-divers-analyze-their-gas-before-every-dive-echo-gas-analyzer"><div class="bp-article-card"><div class="bp-article-image"><div class="mediaRatio" style="padding-top:100%"><div class="picture"><img alt="Divesoft ECHO analyzer" class="mediaImage inner" src="https://foxer360-media-library.s3.eu-central-1.amazonaws.com/divesoft/cbda10f52f4fb518985783e6697daa4445f04d0f_why-divers_960_960.webp" loading="lazy"/></div></div></div><div class="bp-article-card-body"><p class="bp-article-title">Why Divers Analyze Their Gas Before Every Dive | ECHO Gas Analyzer </p><p class="bp-article-perex">Before every dive, experienced divers take a moment to analyze their gas. This simple habit ensures safety, confirms the exact breathing mix, and prevents costly mistakes. Discover why gas analysis matters and how modern tools like the ECHO analyzer are changing the process.</p><div class="bp-article-card-footer"><a class="link link--secondary link--white" href="/en/blog/why-divers-analyze-their-gas-before-every-dive-echo-gas-analyzer">Read</a><p class="bp-article-date">29/04/26</p></div></div></div></a><a href="/en/blog/wrong-gas-in-diving-how-accidents-happen-and-how-to-prevent-them"><div class="bp-article-card"><div class="bp-article-image"><div class="mediaRatio" style="padding-top:100%"><div class="picture"><img alt="Gas mixing - Divesoft analyzer" class="mediaImage inner" src="https://foxer360-media-library.s3.eu-central-1.amazonaws.com/divesoft/fedfc3de3747d9929e77dd37d0534d98416a35d3_644440bd87d0caa36e0a2c6e16d97bcd2a8d1c89-titulka-1752-1752_960_960.webp" loading="lazy"/></div></div></div><div class="bp-article-card-body"><p class="bp-article-title">Wrong Gas in Diving: The Small Checks That Prevent Big Problems </p><p class="bp-article-perex">Most dives start with a familiar routine. Divers prepare their equipment, check their cylinders, and review the dive plan one more time before getting into the water. Somewhere during those final checks, the breathing gas gets anal
2yzed too. The process itself takes only a moment, but experienced divers know very well that breathing the wrong gas underwater is not something to take lightly.</p><div class="bp-article-card-footer"><a class="link link--secondary link--white" href="/en/blog/wrong-gas-in-diving-how-accidents-happen-and-how-to-prevent-them">Read</a><p class="bp-article-date">07/04/26</p></div></div></div></a></div><button class="cs-arrow cs-arrow-left cs-arrow-disabled" aria-label="Previous slide" disabled=""><svg width="24" height="24" viewBox="0 -3 11 24" fill="currentColor"><g transform="rotate(180, 5.5, 9)"><path d="M10.686 8.936c0-.874-.335-1.746-1.002-2.413L3.148 0 .686 2.496 6.392 8.18a1.066 1.066 0 0 1 0 1.513L.686 15.377l2.476 2.469 6.52-6.496a3.4 3.4 0 0 0 1.002-2.412"></path></g></svg></button><button class="cs-arrow cs-arrow-right cs-arrow-disabled" aria-label="Next slide" disabled=""><svg width="24" height="24" viewBox="0 -3 11 24" fill="currentColor"><g transform="rotate(0, 5.5, 9)"><path d="M10.686 8.936c0-.874-.335-1.746-1.002-2.413L3.148 0 .686 2.496 6.392 8.18a1.066 1.066 0 0 1 0 1.513L.686 15.377l2.476 2.469 6.52-6.496a3.4 3.4 0 0 0 1.002-2.412"></path></g></svg></button></div></div></section><section class="showreel"><div class="slick-slider slick-initialized" dir="ltr"><div class="slick-list"><div class="slick-track" style="width:1700%;left:-100%"><div data-index="-1" tabindex="-1" class="slick-slide slick-cloned" aria-hidden="true" style="width:5.882352941176471%"></div><div data-index="0" class="slick-slide slick-active slick-current" tabindex="-1" aria-hidden="false" style="outline:none;width:5.882352941176471%"></div><div data-index="1" class="slick-slide" tabindex="-1" aria-hidden="true" style="outline:none;width:5.882352941176471%"></div><div data-index="2" class="slick-slide" tabindex="-1" aria-hidden="true" style="outline:none;width:5.882352941176471%"></div><div data-index="3" class="slick-slide" tabindex="-1" aria-hidden="true" style="outline:none;width:5.882352941176471%"></div><div data-index="4" class="slick-slide" tabindex="-1" aria-hidden="true" style="outline:none;width:5.882352941176471%"></div><div data-index="5" class="slick-slide" tabindex="-1" aria-hidden="true" style="outline:none;width:5.882352941176471%"></div><div data-index="6" class="slick-slide" tabindex="-1" aria-hidden="true" style="outline:none;width:5.882352941176471%"></div><div data-index="7" class="slick-slide" tabindex="-1" aria-hidden="true" style="outline:none;width:5.882352941176471%"></div><div data-index="8" tabindex="-1" class="slick-slide slick-cloned" aria-hidden="true" style="width:5.882352941176471%"></div><div data-index="9" tabindex="-1" class="slick-slide slick-cloned" aria-hidden="true" style="width:5.882352941176471%"></div><div data-index="10" tabindex="-1" class="slick-slide slick-cloned" aria-hidden="true" style="width:5.882352941176471%"></div><div data-index="11" tabindex="-1" class="slick-slide slick-cloned" aria-hidden="true" style="width:5.882352941176471%"></div><div data-index="12" tabindex="-1" class="slick-slide slick-cloned" aria-hidden="true" style="width:5.882352941176471%"></div><div data-index="13" tabindex="-1" class="slick-slide slick-cloned" aria-hidden="true" style="width:5.882352941176471%"></div><div data-index="14" tabindex="-1" class="slick-slide slick-cloned" aria-hidden="true" style="width:5.882352941176471%"></div><div data-index="15" tabindex="-1" class="slick-slide slick-cloned" aria-hidden="true" style="width:5.882352941176471%"></div></div></div><ul style="display:block" class="slick-dots"><li class="slick-active"><button>01</button></li><li class=""><button>02</button></li><li class=""><button>03</button></li><li class=""><button>04</button></li><li class=""><button>05</button></li><li class=""><button>06</button></li><li class=""><button>07</button></li><li class=""><button>08</button></li></ul></div></section><section class="explore-our-gear"><div class="container container--wideOffset"><h2>Explore our gear</h2><div class="eog-list"><div class="gear-item"><p class="gear-item-title">CCR Liberty</p><p class="gear-item-description">
2Reliable, modular rebreathers designed for confident diving at any level.</p><a class="link link--secondary link--red" href="/en/products/ccr-liberty">Learn more</a></div><div class="gear-item"><p class="gear-item-title">Analyzers </p><p class="gear-item-description">Accurate Oâ and He analyzers for safety on every dive.</p><a href="/en/products/analyzers" target="_blank" rel="noreferrer noopener" class="link link--secondary link--red">Learn more</a></div><div class="gear-item gear-item-hidden"><p class="gear-item-title">BOV/DSV/ADV</p><p class="gear-item-description">Seamless breathing control for safer, easier dives.</p><a href="/en/products/others/bovdsvadv" target="_blank" rel="noreferrer noopener" class="link link--secondary link--red">Learn more</a></div><div class="gear-item gear-item-hidden"><p class="gear-item-title">Extra Gear</p><p class="gear-item-description">Accessories built to last and enhance any dive.</p><a class="link link--secondary link--red" href="/en/products/others">Learn more</a></div><div class="gear-item gear-item-hidden"><p class="gear-item-title">Merchandise </p><p class="gear-item-description">Surface gear for divers, designed with passion.</p><a href="https://eshop.divesoft.com/products/merchandise?currency=CZK" target="_blank" rel="noreferrer noopener" class="link link--secondary link--red">Learn more</a></div><div class="eog-shop-link"><a href="https://eshop.divesoft.com" target="_blank" rel="noreferrer noopener" class="link link--primary link--red">Shop<svg width="24" height="24" viewBox="0 -3 11 24" fill="currentColor" class="link--chevron link--chevron--right"><g transform="rotate(0, 5.5, 9)"><path d="M10.686 8.936c0-.874-.335-1.746-1.002-2.413L3.148 0 .686 2.496 6.392 8.18a1.066 1.066 0 0 1 0 1.513L.686 15.377l2.476 2.469 6.52-6.496a3.4 3.4 0 0 0 1.002-2.412"></path></g></svg></a></div></div><button class="link link--outline link--white eog-show-more">Show more</button><div class="eog-links"><a class="link link--primary link--white" href="/en/blog">Blog<svg width="24" height="24" viewBox="0 -3 11 24" fill="currentColor" class="link--chevron link--chevron--right"><g transform="rotate(0, 5.5, 9)"><path d="M10.686 8.936c0-.874-.335-1.746-1.002-2.413L3.148 0 .686 2.496 6.392 8.18a1.066 1.066 0 0 1 0 1.513L.686 15.377l2.476 2.469 6.52-6.496a3.4 3.4 0 0 0 1.002-2.412"></path></g></svg></a><a href="https://eshop.divesoft.com" target="_blank" rel="noreferrer noopener" class="link link--primary link--red">Shop<svg width="24" height="24" viewBox="0 -3 11 24" fill="currentColor" class="link--chevron link--chevron--right"><g transform="rotate(0, 5.5, 9)"><path d="M10.686 8.936c0-.874-.335-1.746-1.002-2.413L3.148 0 .686 2.496 6.392 8.18a1.066 1.066 0 0 1 0 1.513L.686 15.377l2.476 2.469 6.52-6.496a3.4 3.4 0 0 0 1.002-2.412"></path></g></svg></a></div></div></section><section class="call-to-action call-to-action--centered call-to-action--black new-typo"><div class="container container--wideOffset"><h2 class="call-to-action__title">Need guidance? Contact Divesoft today.</h2><div class="call-to-action__links call-to-action__links--below call-to-action__links--right"><a class="link link--outline link--white" href="/en/contacts/contact-us">Contact Us</a></div></div></section><footer class="footer"><div class="container container--wide"><div class="footer-ascend"><button class="ascend-action"><svg width="24" height="24" viewBox="0 -3 11 24" fill="currentColor"><g transform="rotate(270, 5.5, 9)"><path d="M10.686 8.936c0-.874-.335-1.746-1.002-2.413L3.148 0 .686 2.496 6.392 8.18a1.066 1.066 0 0 1 0 1.513L.686 15.377l2.476 2.469 6.52-6.496a3.4 3.4 0 0 0 1.002-2.412"></path></g></svg><p>Ascend</p></button></div><div class="footer-identity"><svg width="130" height="44" viewBox="0 0 130 44" fill="currentColor" class="footer-logo"><path d="M52.816 15.398h5.163c1.929 0 4.58 1.065 4.58 6.566s-2.651 6.585-4.58 6.585h-5.163zm4.718 11.007c1.605 0 2.431-1.566 2.431-4.436s-.821-4.418-2.43-4.418h-2.188v8.854zm6.8-11.007h2.53v13.151h-2.53zm4.184 0h2.612L73.56 26.4h.363l2.431-11.002h2.612l-3.113 13.151h-4.217zm12.115 0h7.693v2.187h-5.162v3.133h5.162v2.187h-5.162v3.452h5.162v2.187h-7.693zm11.513 9.322c0 1.002.162 2.048 2.068 2.048 2.048 0 2.168-1.447 2.168-1.887 0-1.002-.464-1.466-1.466-1.647l-2.187-.44c-2.55-.52-2.97-2.349-2.97-3.753 0-2.588 1.704-3.916 4.46-3.916 3.05 0 4.517 1.127 4.517 4.036h-2.531c0-1.166-.34-1.949-1.987-1.949-1.485 0-1.967.846-1.967 1.748 0 .883.382 1.347 1.328 1.528l2.612.52c2.287.445 2.77 2.111 2.77 3.635 0 1.385-.402 4.197-4.738 4.197-3.333 0-4.599-1.404-4.599-4.116h2.522zm8.195-3.797c0-4.718 2.249-5.802 5.043-5.802s5.042 1.084 5.042 5.802v2.11c0 4.738-2.268 5.803-5.042 5.803-2.77 0-5.043-1.065-5.043-5.802zm5.038 5.764c1.967 0 2.488-1.185 2.488-3.716v-1.986c0-2.531-.521-3.715-2.488-3.715-1.987 0-2.488 1.184-2.488 3.715v1.986c0 2.531.501 3.716 2.488 3.716m6.99-11.289h7.612v2.187H114.9v3.133h5.081v2.187H114.9v5.644h-2.531zm12.149 2.192h-2.932v-2.188H130v2.188h-2.951v10.964h-2.531zM21.126.876C9.48.876 0 10.35 0 22.002 0 33.65 9.474 43.124 21.126 43.124c11.647 0 21.122-9.475 21.122-21.122S32.774.876 21.126.876m0 39.674c-10.229 0-18.546-8.32-18.546-18.548S10.897 3.455 21.126 3.455c10.224 0 18.543 8.318 18.543 18.547.005 10.229-8.314 18.548-18.543 18.548"></path><path d="m29.579 29.939 6.15-6.151a2.525 2.525 0 0 0 0-3.572l-6.15-6.15c-.688-.688-2.05-1.252-3.019-1.252H13.142v2.584H26.56c.387 0 .922.224 1.194.496l5.296 5.296c.45.45.45 1.18 0 1.629l-5.296 5.296c-.234.234-.86.491-1.194.491H13.142v2.584H26.56c1.027 0 2.297-.525 3.018-1.251"></path><path d="M13.954 22.002a2.52 2.52 0 0 0-.74-1.786L8.39 15.388l-1.814 1.848 4.212 4.208c.31.31.31.811 0 1.117l-4.212 4.207 1.829 1.83 4.813-4.81a2.54 2.54 0 0 0 .736-1.786"></path></svg><p class="footer-motto">Know your gear.<br/>Trust your training.</p></div><div class="footer-navigation"><nav class="footer-nav"><h6 class="footer-nav-title">Products<svg width="24" height="24" viewBox="0 -960 960 960" fill="currentColor"><path d="M320-240v-80h520v80zM120-440v-80h720v80zm0-200v-80h720v80z"></path></svg></h6><ul id="footer-products" class="footer-nav-list hidden"><li><a class="footer-nav-link" href="/en/products/ccr-liberty">CCR Liberty</a></li><li><a class="footer-nav-link" href="/en/products/analyzers">Analyzers</a></li><li><a class="footer-nav-link" href="/en/app">Divesoft.app</a></li><li><a class="footer-nav-link" href="/en/products/others">Others</a></li></ul></nav><nav class="footer-nav"><h6 class="footer-nav-title">Partners<svg width="24" height="24" viewBox="0 -960 960 960" fill="currentColor"><path d="M320-240v-80h520v80zM120-440v-80h720v80zm0-200v-80h720v80z"></path></svg></h6><ul id="footer-partners" class="footer-nav-list hidden"><li><a class="footer-nav-link" href="/en/partners">Partners</a></li><li><a class="footer-nav-link" href="/en/downloads/become-a-partner">Become a Partner</a></li><li><a class="footer-nav-link" href="/en/heroes">Heroes</a></li><li><a class="footer-nav-link" href="/en/libertydiversclub">Liberty Divers Club</a></li></ul></nav><nav class="footer-nav"><h6 class="footer-nav-title">Support<svg width="24" height="24" viewBox="0 -960 960 960" fill="currentColor"><path d="M320-240v-80h520v80zM120-440v-80h720v80zm0-200v-80h720v80z"></path></svg></h6><ul id="footer-support" class="footer-nav-list hidden"><li><a class="footer-nav-link" href="/en/contacts/contact-us">Contact us</a></li><li><a href="https://support.divesoft.com/" target="" rel="noreferrer noopener" class="footer-nav-link">FAQ</a></li></ul></nav><nav class="footer-nav"><h6 class="footer-nav-title">About<svg width="24" height="24" viewBox="0 -960 960 960" fill="currentColor"><path d="M320-240v-80h520v80zM120-440v-80h720v80zm0-200v-80h720v80z"></path></svg></h6><ul id="footer-about" class="footer-nav-list hidden"><li><a class="footer-nav-link" href="/en/about-us">About us</a></li><li><a class="footer-nav-link" href="/en/downloads/personal-data-protection-
2principles">GDPR</a></li><li><a class="footer-nav-link" href="/en/downloads/terms-and-conditions">Terms and conditions</a></li><li><a class="footer-nav-link" href="/en/about-us/eu-programme">EU programme</a></li></ul></nav></div><div class="footer-socials"><p class="footer-social-title">Follow us</p><div class="footer-social-icons"><a href="https://www.facebook.com/divesoft/" target="_blank" rel="noreferrer noopener"><svg width="24" height="24" viewBox="-300 -300 2684 2684" fill="currentColor"><path d="M1014.5-.5h54q371.7 13.596 654 252.5C1905.16 412.288 2020 612.455 2067 852.5q12.72 71.216 16.5 143v93c-17.29 287.98-130.96 529.81-341 725.5-163.43 146.52-354.77 234.02-574 262.5v-716c93.67.17 187.33 0 281-.5 19.84-105.04 39.17-210.2 58-315.5.9-.71 1.24-1.71 1-3h-340c-.17-48.668 0-97.334.5-146 1.22-40.208 10.89-78.208 29-114 23.63-38.256 57.46-62.756 101.5-73.5 37.78-9.026 76.12-12.859 115-11.5 35.36.239 70.69 1.239 106 3 1.42.951 3.09 1.284 5 1 .33-96.501 0-192.835-1-289a922 922 0 0 0-130-20.5q-108.12-11.688-216 2-102.375 11.791-192 62-98.552 59.3-145.5 164.5-31.336 72.023-42 150a937 937 0 0 0-9 123q-.75 74.498-.5 149h-214v319h214v693c-222.465-57.82-406.965-174.49-553.5-350C86.722 1518.79 7.889 1307.12-.5 1068.5v-54q17.835-428.811 323-727.5Q613.942 15.118 1014.5-.5"></path></svg></a><a href="https://www.youtube.com/@divesoft_tv" target="_blank" rel="noreferrer noopener"><svg width="24" height="24" viewBox="0 0 256 256" fill="currentColor"><path d="M104 162.892V93.108l61.333 34.893Zm136.429-91.741c-2.699-10.163-10.65-18.165-20.747-20.881-18.3-4.936-91.682-4.936-91.682-4.936s-73.383 0-91.682 4.936C26.222 52.986 18.27 60.988 15.57 71.15 10.667 89.57 10.667 128 10.667 128s0 38.43 4.904 56.85c2.699 10.162 10.65 18.165 20.747 20.882 18.3 4.935 91.682 4.935 91.682 4.935s73.382 0 91.682-4.935c10.096-2.717 18.048-10.72 20.747-20.883 4.904-18.42 4.904-56.849 4.904-56.849s0-38.43-4.904-56.85"></path></svg></a><a href="https://www.instagram.com/divesoft/" target="_blank" rel="noreferrer noopener"><svg width="24" height="24" viewBox="-150 -150 1300 1300" fill="currentColor"><path d="M292.92 3.5c-53.2 2.51-89.53 11-121.29 23.48-32.87 12.81-60.73 30-88.45 57.82s-44.79 55.7-57.51 88.62c-12.31 31.83-20.65 68.19-23 121.42S-.2 365.18.06 500.96.92 653.76 3.5 707.1c2.54 53.19 11 89.51 23.48 121.28 12.83 32.87 30 60.72 57.83 88.45s55.69 44.76 88.69 57.5c31.8 12.29 68.17 20.67 121.39 23s70.35 2.87 206.09 2.61 152.83-.86 206.16-3.39 89.46-11.05 121.24-23.47c32.87-12.86 60.74-30 88.45-57.84s44.77-55.74 57.48-88.68c12.32-31.8 20.69-68.17 23-121.35 2.33-53.37 2.88-70.41 2.62-206.17s-.87-152.78-3.4-206.1-11-89.53-23.47-121.32c-12.85-32.87-30-60.7-57.82-88.45s-55.74-44.8-88.67-57.48c-31.82-12.31-68.17-20.7-121.39-23S634.83-.2 499.04.06 346.25.9 292.92 3.5m5.84 903.88c-48.75-2.12-75.22-10.22-92.86-17-23.36-9-40-19.88-57.58-37.29s-28.38-34.11-37.5-57.42c-6.85-17.64-15.1-44.08-17.38-92.83-2.48-52.69-3-68.51-3.29-202s.22-149.29 2.53-202c2.08-48.71 10.23-75.21 17-92.84 9-23.39 19.84-40 37.29-57.57s34.1-28.39 57.43-37.51c17.62-6.88 44.06-15.06 92.79-17.38 52.73-2.5 68.53-3 202-3.29s149.31.21 202.06 2.53c48.71 2.12 75.22 10.19 92.83 17 23.37 9 40 19.81 57.57 37.29s28.4 34.07 37.52 57.45c6.89 17.57 15.07 44 17.37 92.76 2.51 52.73 3.08 68.54 3.32 202s-.23 149.31-2.54 202c-2.13 48.75-10.21 75.23-17 92.89-9 23.35-19.85 40-37.31 57.56s-34.09 28.38-57.43 37.5c-17.6 6.87-44.07 15.07-92.76 17.39-52.73 2.48-68.53 3-202.05 3.29s-149.27-.25-202-2.53m407.6-674.61a60 60 0 1 0 59.88-60.1 60 60 0 0 0-59.88 60.1M243.27 500.5c.28 141.8 115.44 256.49 257.21 256.22S757.02 641.3 756.75 499.5 641.29 242.98 499.5 243.26 243 358.72 243.27 500.5m90.06-.18a166.67 166.67 0 1 1 167 166.34 166.65 166.65 0 0 1-167-166.34"></path></svg></a><a href="https://x.com/divesoft/" target="_blank" rel="noreferrer noopener"><svg width="24" height="24" viewBox="-250 -250 1700 1727" fill="currentColor"><path d="M714.163 519.284 1160.89 0h-105.86L667.137 450.887 357.328 0H0l468.492 681.821L0 1226.37h105.866l409.625-476.152 327.181 476.152H1200L714.137 519.284zM569.165 687.828l-47.468-67.894-377.686-540.24h162.604l304.797 435.991 47.468 67.894 396.2 566.721H892.476L569.165 687.854z"></path></svg></a><a href="https://www.linkedin.com/company/divesoft/" target="_blank" rel="noreferrer noopener"><svg width="24" height="24" viewBox="-1000 -1000 10400 9790" fill="currentColor"><path d="M518 7780c-85-10-125-23-212-68-136-71-250-220-281-369C3 7241 3 549 25 447 56 298 169 150 307 77 447 4 120 10 3900 10s3453-6 3593 67c91 48 182 140 230 230 72 138 67-172 67 3588s5 3450-67 3588c-69 131-204 238-359 284-56 17-231 18-3419 19-1848 1-3390-2-3427-6m1802-3000V2920H1160v3720h1160zm1880 846c0-849 2
2-1034 15-1130 28-210 94-373 194-474 112-114 237-162 436-170 111-4 144-1 214 16 240 61 363 233 412 577 8 54 13 425 16 1138l5 1057h1149l-4-1237c-4-1351-2-1315-64-1592-122-555-428-862-953-956-146-26-462-32-592-11-343 57-646 244-819 505l-54 81-3-255-2-255H3040v3720h1160zM1909 2394c153-39 299-144 390-280 96-143 133-342 97-513-35-164-152-332-292-421-451-285-1035 33-1034 564 0 188 63 340 195 471 173 174 408 239 644 179m6191 4266c-110-58-146-189-81-294 26-41 88-81 141-90 80-14 190 50 219 127 27 72 4 173-51 224-56 53-162 68-228 33m195-34c67-51 91-139 60-214-32-76-86-112-166-112-161 0-237 188-126 309 55 59 165 67 232 17"></path><path d="M8120 6475v-105h55c46 0 60 4 80 25 32 31 31 41-6 76l-31 29 20 27c31 46 34 53 20 53-7 0-25-21-40-45q-27-45-48-45c-17 0-20 6-20 45 0 33-4 45-15 45-12 0-15-18-15-105m124-27c18-29-4-53-53-56l-41-3v82l41-3c27-2 46-9 53-20"></path></svg></a></div></div><div class="footer-sublayout"><div class="footer-newsletter"><p class="footer-newsletter-title">Subscribe to the newsletter</p><a href="https://mail.divesoft.com/newsletter" target="_blank" rel="noreferrer noopener" class="footer-newsletter-link"><div class="fake-input"><span>Your E-mail</span></div><button><span>Subscribe</span></button></a></div><div class="footer-career"><p class="footer-career-title">Work with us</p><a href="https://support.divesoft.com/career" target="_blank" rel="noreferrer noopener" class="link link--outline link--white">Career</a></div></div></div></footer></div></div>
2<script src="/scripts/env.js" type="text/javascript"></script>
2<script src="https://cdnjs.cloudflare.com/ajax/libs/core-js/2.6.11/core.min.js" type="text/javascript"></script>
2<script src="https://unpkg.com/unfetch/polyfill"></script>
2<script src="https://cdn.jsdelivr.net/npm/[email protected]/index.min.js"></script>
2<script crossorigin="true" src="https://unpkg.com/[email protected]/umd/react.production.min.js"></script>
2<script crossorigin="true" src="https://unpkg.com/[email protected]/umd/react-dom.production.min.js"></script>
2<script src="/scripts/divesoft.umd.js" type="text/javascript"></script>
2<script src="/scripts/components.umd.js" type="text/javascript"></script>
2<script src="/scripts/vendors.js"></script>
2<script charSet="UTF-8">window.__APOLLO_STATE__={"Website:cjv3l1ssi003u0836mwnotf8e":{"id":"cjv3l1ssi003u0836mwnotf8e","title":"Website","urlMask":"/","googleTrackingPixel":"GTM-5BJR5NZ","__typename":"Website"},"$ROOT_QUERY.fetchdata({\"where\":{\"datasources\":{},\"language\":\"cjv3kwvoj000u083611381c6o\",\"page\":\"cjv3l26tp004p0836i54n4u7a\"}})":{"website":{"type":"id","generated":false,"id":"Website:cjv3l1ssi003u0836mwnotf8e","typename":"Website"},"language":{"type":"id","generated":false,"id":"Language:cjv3kwvoj000u083611381c6o","typename":"Language"},"navigations":[{"type":"id","generated":false,"id":"Navigation:cjv3qu9uj00ec0836inttwa5b","typename":"Navigation"},{"type":"id","generated":false,"id":"Navigation:cjv3rxp9z00up0836ya50kwlw","typename":"Navigation"},{"type":"id","generated":false,"id":"Navigation:cjv3ryxer00w90836veijzz8o","typename":"Navigation"},{"type":"id","generated":false,"id":"Navigation:cjv3rzs0300xk0836elx9weyh","typename":"Navigation"},{"type":"id","generated":false,"id":"Navigation:cka6hjix038ws0788d6o033p4","typename":"Navigation"},{"type":"id","generated":false,"id":"Navigation:ckx4scrle00230a53e3oxvvaf","typename":"Navigation"},{"type":"id","generated":false,"id":"Navigation:cmecusngl0zid0832zenofm38","typename":"Navigation"},{"type":"id","generated":false,"id":"Navigation:cmecuvd1f0zlr0832yqjrxqr9","typename":"Navigation"},{"type":"id","generated":false,"id":"Navigation:cmecuxlqw0znh08321my8lk67","typename":"Navigation"},{"type":"id","generated":false,"id":"Navigation:cmecuyxyo0zoq0832k6lzxeuh","typename":"Navigation"},{"type":"id","generated":false,"id":"Navigation:cmecuz5lf0zp10832p27g5tnk","typename":"Navigation"},{"type":"id","generated":false,"id":"Navigation:cmecuzfh30zps0832devtiuzv","typename":"Navigation"},{"type":"id","generated":false,"id":"Navigation:cmecuzl130zq30832w4yid3iy","typename":"Navigation"}],"page":{"type":"id","generated":false,"id":"LocalizedPage:cjv3l26tp004p0836i54n4u7a","typename":"LocalizedPage"},"seo":{"type":"json","json":{"defaultImage":"http://foxer360-media-library.s3.eu-central-1.amazonaws.com/divesoft/0362a462a7b830aa64aa8c70c5d1e0441dcd56f8_divesoft-photo-188.jpg","description":"Divesoft delivers superior tech dive gear and advanced diving technology for an underwater experience. Dive in with us for excellence and innovation.","facebook":{"description":"Divesoft delivers superior tech dive gear and advanced diving technology for an underwater experience. Dive in with us for excellence and innovation.","image":"http://foxer360-media-library.s3.eu-central-1.amazonaws.com/divesoft/0362a462a7b830aa64aa8c70c5d1e0441dcd56f8_divesoft-photo-188.jpg","title":"Divesoft - Superior Quality Scuba Tech Diving Gear"},"focusKeyword":"divesoft","keywords":"scuba tech, tech dive gear, tech diving gear, tech diving, technical diving, diving technology","themeColor":"","title":"Divesoft - Superior Quality Scuba Tech Diving Gear","twitter":{"description":"Divesoft delivers superior tech dive gear and advanced diving technology for an underwater experience. Dive in with us for excellence and innovation.","image":"http://foxer360-media-library.s3.eu-central-1.amazonaws.com/divesoft/0362a462a7b830aa64aa8c70c5d1e0441dcd56f8_divesoft-photo-188.jpg","title":"Divesoft - Superior Quality Scuba Tech Diving Gear"}}},"languages":[{"type":"id","generated":false,"id":"Language:cjv3kwvoj000u083611381c6o","typename":"Language"},{"type":"id","generated":false,"id":"Language:cjv3kwvqp000y083655paa9mq","typename":"Language"},{"type":"id","generated":false,"id":"Language:cjv3kwvr000120836qost6hic","typename":"Language"},{"type":"id","generated":false,"id":"Language:cjv3kwvr700160836g1o92bot","typename":"Language"},{"type":"id","generated":false,"id":"Language:cjv3kwvrf001a0836eywye8m5","typename":"Language"},{"type":"id","generated":false,"id":"Language:cjv3kwvro001e08367bdy52lt","typename":"Language"},{"type":"id","generated":false,"id":"Language:cjv3kwvrw001i0836qbd7k4mh","typename":"Language"},{"type":"id","generated":false,"id":"Language:cjv3kwvs3001m0836l5xngl32","typename":"Language"},{"type":"id","generated":false,"id":"Language:cjv3kwvse001q08362uo6ar8x","typename":"Language"},{"type":"id","generated":false,"id":"Language:cjv3kwvsl001u0836q3pzoprv","typename":"Language"}],"datasourceItems":[],"project":{"type":"id","generated":false,"id":"Project:cjv3l1cht003e0836h39egd28","typename":"Project"},"__typename":"FrontendFetchData"},"Language:cjv3kwvoj000u083611381c6o":{"id":"cjv3kwvoj000u083611381c6o","code":"en","name":"English","__typename":"Language"},"Navigation:cjv3qu9uj00ec0836inttwa5b":{"id":"cjv3qu9uj00ec0836inttwa5b","name":"top","nodes":[{"type":"id","generated":false,"id":"NavigationNode:cll1zxmbt413l0735juf3u4nv","typename":"NavigationNode"},{"type":"id","generated":false,"id":"NavigationNode:cll1zxmca413r07352sq7i1w7","typename":"NavigationNode"},{"type":"id","generated":false,"id":"NavigationNode:cll1zxmcq413x0735r44c0v0k","typename":"NavigationNode"},{"type":"id","generated":false,"id":"NavigationNode:cll1zxmd641430735jdvdgqnw","typename":"NavigationNode"},{"type":"id","generated":false,"id":"NavigationNode:cll1zxmdh41490735vnb9ife0","typename":"NavigationNode"},{"type":"id","generated":false,"id":"NavigationNode:cll1zxmdr414f0735gzmdukkm","typename":"NavigationNode"},{"type":"id","generated":false,"id":"NavigationNode:cll1zxme0414l0735snj94vaf","typename":"NavigationNode"},{"type":"id","generated":false,"id":"NavigationNode:cll1zxmea414r0735q9juahb3","typename":"NavigationNode"},{"type":"id","generated":false,"id":"NavigationNode:cll1zxmeo414x0735g7e1vnp9","typename":"NavigationNode"},{"type":"id","generated":false,"id":"NavigationNode:cll1zxmez41530735nf6g4teu","typename":"NavigationNode"},{"type":"id","generated":false,"id":"NavigationNode:cll1zxmfb41590735x41ypgfh","typename":"NavigationNode"},{"type":"id","generated":false,"id":"NavigationNode:cll1zxmfl415f0735wqj4fe1q","typename":"NavigationNode"},{"type":"id","generated":false,"id":"NavigationNode:cll1zxmfw415l0735np92ao16","typename":"NavigationNode"}],"__typename":"Navigation"},"NavigationNode:cll1zxmbt413l0735juf3u4nv":{"id":"cll1zxmbt413l0735juf3u4nv","page":"cjv3rpryz00iw0836lc0zx81j","title":null,"link":null,"order":0,"parent":"cjv3rim6p00fm0836uts415d5","__typename":"NavigationNode"},"NavigationNode:cll1zxmca413r07352sq7i1w7":{"id":"cll1zxmca413r07352sq7i1w7","page":"ckl9hm0dx3lhp07881bt0smfi","title":null,"link":null,"order":1,"parent":"cjv3rim6p00fm0836uts415d5","__typename":"NavigationNode"},"NavigationNode:cll1zxmcq413x0735r44c0v0k":{"id":"cll1zxmcq413x0735r44c0v0k","page":"cjv3rr7on00ky0836fercz490","title":null,"link":null,"order":2,"parent":"cjv3rim6p00fm0836uts415d5","__typename":"NavigationNode"},"NavigationNode:cll1zxmd641430735jdvdgqnw":{"id":"cll1zxmd641430735jdvdgqnw","page":"cjv7uialr03nh0836yjoz2dji","title":null,"link":null,"order":3,"parent":"cjv3rim6p00fm0836uts415d5","__typename":"NavigationNode"},"NavigationNode:cll1zxmdh41490735vnb9ife0":{"id":"cll1zxmdh41490735vnb9ife0","page":"clfgt4fdjmf9v0835bv440kqj","title":null,"link":null,"order":4,"parent":"cjv3rim6p00fm0836uts415d5","__typename":"NavigationNode"},"NavigationNode:cll1zxmdr414f0735gzmdukkm":{"id":"cll1zxmdr414f0735gzmdukkm","page":"ckdsltzi07o520788tk0s6c4v","title":null,"link":null,"order":5,"parent":"cjv3rim6p00fm0836uts415d5","__typename":"NavigationNode"}
2,"NavigationNode:cll1zxme0414l0735snj94vaf":{"id":"cll1zxme0414l0735snj94vaf","page":"cjv3rim6p00fm0836uts415d5","title":null,"link":null,"order":0,"parent":null,"__typename":"NavigationNode"},"NavigationNode:cll1zxmea414r0735q9juahb3":{"id":"cll1zxmea414r0735q9juahb3","page":"ckx4slj6v005k0a53p9i6x50m","title":null,"link":null,"order":1,"parent":null,"__typename":"NavigationNode"},"NavigationNode:cll1zxmeo414x0735g7e1vnp9":{"id":"cll1zxmeo414x0735g7e1vnp9","page":"ck9v8ad582urj0788pmspzwzi","title":null,"link":null,"order":2,"parent":null,"__typename":"NavigationNode"},"NavigationNode:cll1zxmez41530735nf6g4teu":{"id":"cll1zxmez41530735nf6g4teu","page":"cjv3rrnkp00m80836ezb6g5y6","title":null,"link":null,"order":3,"parent":null,"__typename":"NavigationNode"},"NavigationNode:cll1zxmfb41590735x41ypgfh":{"id":"cll1zxmfb41590735x41ypgfh","page":"ckpcgx2c64h2d0788rft16oow","title":null,"link":null,"order":4,"parent":null,"__typename":"NavigationNode"},"NavigationNode:cll1zxmfl415f0735wqj4fe1q":{"id":"cll1zxmfl415f0735wqj4fe1q","page":"cjv3rrgwi00ll0836rvjysah5","title":null,"link":null,"order":5,"parent":null,"__typename":"NavigationNode"},"NavigationNode:cll1zxmfw415l0735np92ao16":{"id":"cll1zxmfw415l0735np92ao16","page":"claqj12ud2tqp08353972by7b","title":null,"link":null,"order":6,"parent":null,"__typename":"NavigationNode"},"Navigation:cjv3rxp9z00up0836ya50kwlw":{"id":"cjv3rxp9z00up0836ya50kwlw","name":"BottomABOUT","nodes":[{"type":"id","generated":false,"id":"NavigationNode:cmp13xtwj04s80826e9l59lr5","typename":"NavigationNode"},{"type":"id","generated":false,"id":"NavigationNode:cmp13xtwx04se0826oakagh1e","typename":"NavigationNode"},{"type":"id","generated":false,"id":"NavigationNode:cmp13xtx704sk0826z164hpk5","typename":"NavigationNode"},{"type":"id","generated":false,"id":"NavigationNode:cmp13xtxg04sq0826zv8wf057","typename":"NavigationNode"},{"type":"id","generated":false,"id":"NavigationNode:cmp13xtxo04sw0826ox676it1","typename":"NavigationNode"},{"type":"id","generated":false,"id":"NavigationNode:cmp13xtxy04t208262qudmfyx","typename":"NavigationNode"},{"type":"id","generated":false,"id":"NavigationNode:cmp13xty704t80826894v1zy2","typename":"NavigationNode"}],"__typename":"Navigation"},"NavigationNode:cmp13xtwj04s80826e9l59lr5":{"id":"cmp13xtwj04s80826e9l59lr5","page":"cjv3rufef00pl08362uyteabt","title":null,"link":null,"order":0,"parent":null,"__typename":"NavigationNode"},"NavigationNode:cmp13xtwx04se0826oakagh1e":{"id":"cmp13xtwx04se0826oakagh1e","page":"cjv83bs6804tb08366aj9zqyw","title":null,"link":null,"order":1,"parent":null,"__typename":"NavigationNode"},"NavigationNode:cmp13xtx704sk0826z164hpk5":{"id":"cmp13xtx704sk0826z164hpk5","page":"cjv83jag304vu0836fiuwysty","title":null,"link":null,"order":2,"parent":null,"__typename":"NavigationNode"},"NavigationNode:cmp13xtxg04sq0826zv8wf057":{"id":"cmp13xtxg04sq0826zv8wf057","page":"ckxg0xywi0qec0858k67qqwk1","title":null,"link":null,"order":3,"parent":null,"__typename":"NavigationNode"},"NavigationNode:cmp13xtxo04sw0826ox676it1":{"id":"cmp13xtxo04sw0826ox676it1","page":"cjv3ru1og00ob08363pvv76br","title":null,"link":null,"order":4,"parent":null,"__typename":"NavigationNode"},"NavigationNode:cmp13xtxy04t208262qudmfyx":{"id":"cmp13xtxy04t208262qudmfyx","page":"1778498223133","title":"Annoucements","link":"http://foxer360-media-library.s3.eu-central-1.amazonaws.com/divesoft/docs/aa22becc7a810dabc4af52edb7af4756d9080e7d_divesoft-sro-oznameni.pdf","order":5,"parent":null,"__typename":"NavigationNode"},"NavigationNode:cmp13xty704t80826894v1zy2":{"id":"cmp13xty704t80826894v1zy2","page":"cmp13w2es04lr0826703jqxwt","title":null,"link":null,"order":6,"parent":null,"__typename":"NavigationNode"},"Navigation:cjv3ryxer00w90836veijzz8o":{"id":"cjv3ryxer00w90836veijzz8o","name":"BottomCONTACTS","nodes":[{"type":"id","generated":false,"id":"NavigationNode:clzvapvln42zb0735e1m7k14t","typename":"NavigationNode"},{"type":"id","generated":false,"id":"NavigationNode:clzvapvly42zh07358ao7apyf","typename":"NavigationNode"},{"type":"id","generated":false,"id":"NavigationNode:clzvapvma42zn0735nco8cn0u","typename":"NavigationNode"},{"type":"id","generated":false,"id":"NavigationNode:clzvapvml42zt0735vqemlb0w","typename":"NavigationNode"},{"type":"id","generated":false,"id":"NavigationNode:clzvapvmu42zz0735xjqfeajg","typename":"NavigationNode"},{"type":"id","generated":false,"id":"NavigationNode:clzvapvn443050735k29exu1p","typename":"NavigationNode"},{"type":"id","generated":false,"id":"NavigationNode:clzvapvnd430b07355c1tkcxh","typename":"NavigationNode"},{"type":"id","generated":false,"id":"NavigationNode:clzvapvnm430h0735m39aipam","typename":"NavigationNode"}],"__typename":"Navigation"},"NavigationNode:clzvapvln42zb0735e1m7k14t":{"id":"clzvapvln42zb0735e1m7k14t","page":"cka6kn4hd3ahh0788k20h9ayy","title":null,"link":null,"order":null,"parent":null,"__typename":"NavigationNode"}
2,"NavigationNode:clzvapvly42zh07358ao7apyf":{"id":"clzvapvly42zh07358ao7apyf","page":"clzqqwm0l383j073591uq315q","title":null,"link":null,"order":0,"parent":null,"__typename":"NavigationNode"},"NavigationNode:clzvapvma42zn0735nco8cn0u":{"id":"clzvapvma42zn0735nco8cn0u","page":"clzqqw6f9383107358lya6tzp","title":null,"link":null,"order":1,"parent":null,"__typename":"NavigationNode"},"NavigationNode:clzvapvml42zt0735vqemlb0w":{"id":"clzvapvml42zt0735vqemlb0w","page":"ckx4slj6v005k0a53p9i6x50m","title":null,"link":null,"order":2,"parent":null,"__typename":"NavigationNode"},"NavigationNode:clzvapvmu42zz0735xjqfeajg":{"id":"clzvapvmu42zz0735xjqfeajg","page":"ck9v8ad582urj0788pmspzwzi","title":null,"link":null,"order":3,"parent":null,"__typename":"NavigationNode"},"NavigationNode:clzvapvn443050735k29exu1p":{"id":"clzvapvn443050735k29exu1p","page":"clfwgsbptnzzu0835o780vtem","title":null,"link":null,"order":4,"parent":null,"__typename":"NavigationNode"},"NavigationNode:clzvapvnd430b07355c1tkcxh":{"id":"clzvapvnd430b07355c1tkcxh","page":"ck92kt81u1xqe078857hjsosp","title":null,"link":null,"order":5,"parent":null,"__typename":"NavigationNode"},"NavigationNode:clzvapvnm430h0735m39aipam":{"id":"clzvapvnm430h0735m39aipam","page":"clsyeohcd8d1j0735f1581opx","title":null,"link":null,"order":6,"parent":null,"__typename":"NavigationNode"},"Navigation:cjv3rzs0300xk0836elx9weyh":{"id":"cjv3rzs0300xk0836elx9weyh","name":"BottomSUPPORT","nodes":[{"type":"id","generated":false,"id":"NavigationNode:clf2fceewkl520835vw1rizsd","typename":"NavigationNode"},{"type":"id","generated":false,"id":"NavigationNode:clf2fcef5kl580835azcm70jn","typename":"NavigationNode"},{"type":"id","generated":false,"id":"NavigationNode:clf2fcefikl5e0835fjkujv0w","typename":"NavigationNode"},{"type":"id","generated":false,"id":"NavigationNode:clf2fcefskl5k0835rkeb1kww","typename":"NavigationNode"}],"__typename":"Navigation"},"NavigationNode:clf2fceewkl520835vw1rizsd":{"id":"clf2fceewkl520835vw1rizsd","page":"cjv3rrnkp00m80836ezb6g5y6","title":null,"link":null,"order":0,"parent":null,"__typename":"NavigationNode"},"NavigationNode:clf2fcef5kl580835azcm70jn":{"id":"clf2fcef5kl580835azcm70jn","page":"cjvwcfsdy06ye0798aflb91my","title":null,"link":null,"order":1,"parent":null,"__typename":"NavigationNode"},"NavigationNode:clf2fcefikl5e0835fjkujv0w":{"id":"clf2fcefikl5e0835fjkujv0w","page":"ck9mb2bsa2kkj0788e35d3pf2","title":null,"link":null,"order":2,"parent":null,"__typename":"NavigationNode"},"NavigationNode:clf2fcefskl5k0835rkeb1kww":{"id":"clf2fcefskl5k0835rkeb1kww","page":"clf2f7jbtkl260835rps73xqp","title":null,"link":null,"order":3,"parent":null,"__typename":"NavigationNode"},"Navigation:cka6hjix038ws0788d6o033p4":{"id":"cka6hjix038ws0788d6o033p4","name":"BottomPRODUCTS","nodes":[{"type":"id","generated":false,"id":"NavigationNode:cmp2qrz8m07t00826n5lqopvo","typename":"NavigationNode"},{"type":"id","generated":false,"id":"NavigationNode:cmp2qrz9107t60826vu87fq7e","typename":"NavigationNode"},{"type":"id","generated":false,"id":"NavigationNode:cmp2qrz9d07tc0826l73ir0se","typename":"NavigationNode"},{"type":"id","generated":false,"id":"NavigationNode:cmp2qrz9p07ti0826ivf35u7n","typename":"NavigationNode"}],"__typename":"Navigation"},"NavigationNode:cmp2qrz8m07t00826n5lqopvo":{"id":"cmp2qrz8m07t00826n5lqopvo","page":"cjv3rpryz00iw0836lc0zx81j","title":null,"link":null,"order":0,"parent":null,"__typename":"NavigationNode"},"NavigationNode:cmp2qrz9107t60826vu87fq7e":{"id":"cmp2qrz9107t60826vu87fq7e","page":"cjv3rr7on00ky0836fercz490","title":null,"link":null,"order":1,"parent":null,"__typename":"NavigationNode"},"NavigationNode:cmp2qrz9d07tc0826l73ir0se":{"id":"cmp2qrz9d07tc0826l73ir0se","page":"cjv7uialr03nh0836yjoz2dji","title":null,"link":null,"order":3,"parent":null,"__typename":"NavigationNode"},"NavigationNode:cmp2qrz9p07ti0826ivf35u7n":{"id":"cmp2qrz9p07ti0826ivf35u7n","page":"ckfccnc4a98bx0788f7enal83","title":null,"link":null,"order":5,"parent":null,"__typename":"NavigationNode"},"Navigation:ckx4scrle00230a53e3oxvvaf":{"id":"ckx4scrle00230a53e3oxvvaf","name":"BottomEVENTS","no
2des":[{"type":"id","generated":false,"id":"NavigationNode:clmom2ygxafmk0735m2d1oqln","typename":"NavigationNode"},{"type":"id","generated":false,"id":"NavigationNode:clmom2yh8afmq0735ljyazhcz","typename":"NavigationNode"}],"__typename":"Navigation"},"NavigationNode:clmom2ygxafmk0735m2d1oqln":{"id":"clmom2ygxafmk0735m2d1oqln","page":null,"title":"Events","link":"https://www.facebook.com/divesoft/events","order":null,"parent":null,"__typename":"NavigationNode"},"NavigationNode:clmom2yh8afmq0735ljyazhcz":{"id":"clmom2yh8afmq0735ljyazhcz","page":null,"title":"Divesoft.blog","link":"https://www.divesoft.com/en/blog","order":null,"parent":null,"__typename":"NavigationNode"},"Navigation:cmecusngl0zid0832zenofm38":{"id":"cmecusngl0zid0832zenofm38","name":"header","nodes":[{"type":"id","generated":false,"id":"NavigationNode:cmtbkylke00hl08664ewjvpdz","typename":"NavigationNode"},{"type":"id","generated":false,"id":"NavigationNode:cmtbkylmi00hr0866zd2mj6fq","typename":"NavigationNode"},{"type":"id","generated":false,"id":"NavigationNode:cmtbkyln500hx0866owuyzefd","typename":"NavigationNode"},{"type":"id","generated":false,"id":"NavigationNode:cmtbkylnr00i30866t71a86nb","typename":"NavigationNode"},{"type":"id","generated":false,"id":"NavigationNode:cmtbkylof00i90866ablw9wcs","typename":"NavigationNode"},{"type":"id","generated":false,"id":"NavigationNode:cmtbkyloy00if0866z1r4x3mc","typename":"NavigationNode"},{"type":"id","generated":false,"id":"NavigationNode:cmtbkylph00il0866tw1xprco","typename":"NavigationNode"},{"type":"id","generated":false,"id":"NavigationNode:cmtbkylq400ir0866o40cs4hd","typename":"NavigationNode"},{"type":"id","generated":false,"id":"NavigationNode:cmtbkylqp00ix0866fys64exl","typename":"NavigationNode"},{"type":"id","generated":false,"id":"NavigationNode:cmtbkylra00j30866zxo0v14n","typename":"NavigationNode"}],"__typename":"Navigation"},"NavigationNode:cmtbkylke00hl08664ewjvpdz":{"id":"cmtbkylke00hl08664ewjvpdz","page":"cjv3rpryz00iw0836lc0zx81j","title":null,"link":null,"order":0,"parent":"cjv3rim6p00fm0836uts415d5","__typename":"NavigationNode"},"NavigationNode:cmtbkylmi00hr0866zd2mj6fq":{"id":"cmtbkylmi00hr0866zd2mj6fq","page":"cjv3rr7on00ky0836fercz490","title":null,"link":null,"order":1,"parent":"cjv3rim6p00fm0836uts415d5","__typename":"NavigationNode"},"NavigationNode:cmtbkyln500hx0866owuyzefd":{"id":"cmtbkyln500hx0866owuyzefd","page":"ckfccnc4a98bx0788f7enal83","title":null,"link":null,"order":2,"parent":"cjv3rim6p00fm0836uts415d5","__typename":"NavigationNode"},"NavigationNode:cmtbkylnr00i30866t71a86nb":{"id":"cmtbkylnr00i30866t71a86nb","page":"ckdsltzi07o520788tk0s6c4v","title":null,"link":null,"order":3,"parent":"cjv3rim6p00fm0836uts415d5","__typename":"NavigationNode"},"NavigationNode:cmtbkylof00i90866ablw9wcs":{"id":"cmtbkylof00i90866ablw9wcs","page":"cjv3rim6p00fm0836uts415d5","title":null,"link":null,"order":0,"parent":null,"__typename":"NavigationNode"},"NavigationNode:cmtbkyloy00if0866z1r4x3mc":{"id":"cmtbkyloy00if0866z1r4x3mc","page":"cmt2wpeyn05ao085625qymc9k","title":null,"link":null,"order":2,"parent":null,"__typename":"NavigationNode"},"NavigationNode:cmtbkylph00il0866tw1xprco":{"id":"cmtbkylph00il0866tw1xprco","page":"ckpcgx2c64h2d0788rft16oow","title":null,"link":null,"order":4,"parent":null,"__typename":"NavigationNode"},"NavigationNode:cmtbkylq400ir0866o40cs4hd":{"id":"cmtbkylq400ir0866o40cs4hd","page":"1778494686138","title":"Knowledge base","link":"https://support.divesoft.com/","order":0,"parent":"1778495346107","__typename":"NavigationNode"},"NavigationNode:cmtbkylqp00ix0866fys64exl":{"id":"cmtbkylqp00ix0866fys64exl","page":"cjv3rrgwi00ll0836rvjysah5","title":null,"link":null,"order":1,"parent":"1778495346107","__typename":"NavigationNode"},"NavigationNode:cmtbkylra00j30866zxo0v14n":{"id":"cmtbkylra00j30866zxo0v14n","page":"1778495346107","title":"Support","link":"#","order":5,"parent":null,"__typename":"NavigationNode"},"Navigation:cmecuvd1f0zlr0832yqjrxqr9":{"id":"cmecuvd1f0zlr0832yqjrxqr9","name":"footer-products","nodes":[{"type":"id","generated":false,"id":"NavigationNode:cmp112rew04sv0826wz2sn4jj","typename":"NavigationNode"},{"type":"id","generated":false,"id":"NavigationNode:cmp112rf604t10826xy5evnhq","typename":"NavigationNode"},{"type":"id","generated":false,"id":"NavigationNode:cmp112rfg04t708267w7m2iyu","typename":"NavigationNode"},{"type":"id","generated":false,"id":"NavigationNode:cmp112rfv04td0826ephzs0mj","typename":"NavigationNode"}],"__typename":"Navigation"},"NavigationNode:cmp112rew04sv0826wz2sn4jj":{"id":"cmp112rew04sv0826wz2sn4jj","page":"cjv3rpryz00iw0836lc0zx81j","title":null,"link":null,"order":0,"parent":null,"__typename":"NavigationNode"},"NavigationNode:cmp112rf604t10826xy5evnhq":{"id":"cmp112rf604t10826xy5evnhq","page":"cjv3rr7on00ky0836fercz490","title":null,"link":null,"order":1,"parent":null,"__typename":"NavigationNode"},"NavigationNode:cmp112rfg04t708267w7m2iyu":{"id":"cmp112rfg04t708267w7m2iyu","page":"ckfccnc4a98bx0788f7enal83","title":null,"link":null,"order":2,"parent":null,"__typename":"NavigationNode"},"NavigationNode:cmp112rfv04td0826ephzs0mj":{"id":"cmp112rfv04td0826ephzs0mj","page":"ckdsltzi07o520788tk0s6c4v","title":null,"link":null,"order":4,"parent":null,"__typename":"NavigationNode"},"Navigation:cmecuxlqw0znh08321my8lk67":{"id":"cmecuxlqw0znh08321my8lk67","name":"footer-partners","no
2des":[{"type":"id","generated":false,"id":"NavigationNode:cmtbl0xyf00lf0866f4zx3xz4","typename":"NavigationNode"},{"type":"id","generated":false,"id":"NavigationNode:cmtbl0xz200ll0866i7k7x4h9","typename":"NavigationNode"},{"type":"id","generated":false,"id":"NavigationNode:cmtbl0xzm00lr08667rinpdec","typename":"NavigationNode"},{"type":"id","generated":false,"id":"NavigationNode:cmtbl0y0200lx0866qjwe3v8r","typename":"NavigationNode"}],"__typename":"Navigation"},"NavigationNode:cmtbl0xyf00lf0866f4zx3xz4":{"id":"cmtbl0xyf00lf0866f4zx3xz4","page":"cmt2wpeyn05ao085625qymc9k","title":null,"link":null,"order":null,"parent":null,"__typename":"NavigationNode"},"NavigationNode:cmtbl0xz200ll0866i7k7x4h9":{"id":"cmtbl0xz200ll0866i7k7x4h9","page":"clf2f7jbtkl260835rps73xqp","title":null,"link":null,"order":3,"parent":null,"__typename":"NavigationNode"},"NavigationNode:cmtbl0xzm00lr08667rinpdec":{"id":"cmtbl0xzm00lr08667rinpdec","page":"cmdrby07306gx08323bs8w2wq","title":null,"link":null,"order":4,"parent":null,"__typename":"NavigationNode"},"NavigationNode:cmtbl0y0200lx0866qjwe3v8r":{"id":"cmtbl0y0200lx0866qjwe3v8r","page":"clsyeohcd8d1j0735f1581opx","title":null,"link":null,"order":5,"parent":null,"__typename":"NavigationNode"},"Navigation:cmecuyxyo0zoq0832k6lzxeuh":{"id":"cmecuyxyo0zoq0832k6lzxeuh","name":"footer-contacts","nodes":[],"__typename":"Navigation"},"Navigation:cmecuz5lf0zp10832p27g5tnk":{"id":"cmecuz5lf0zp10832p27g5tnk","name":"footer-support","nodes":[{"type":"id","generated":false,"id":"NavigationNode:cmp11qwj900640826ti4n2h40","typename":"NavigationNode"},{"type":"id","generated":false,"id":"NavigationNode:cmp11qwkn006a0826a19a9tm6","typename":"NavigationNode"}],"__typename":"Navigation"},"NavigationNode:cmp11qwj900640826ti4n2h40":{"id":"cmp11qwj900640826ti4n2h40","page":"cka6kn4hd3ahh0788k20h9ayy","title":null,"link":null,"order":null,"parent":null,"__typename":"NavigationNode"},"NavigationNode:cmp11qwkn006a0826a19a9tm6":{"id":"cmp11qwkn006a0826a19a9tm6","page":null,"title":"FAQ","link":"https://support.divesoft.com/","order":null,"parent":null,"__typename":"NavigationNode"},"Navigation:cmecuzfh30zps0832devtiuzv":{"id":"cmecuzfh30zps0832devtiuzv","name":"footer-about","nodes":[{"type":"id","generated":false,"id":"NavigationNode:cmp1403k6051v0826dik2tr3e","typename":"NavigationNode"},{"type":"id","generated":false,"id":"NavigationNode:cmp1403km05210826kwonk3mx","typename":"NavigationNode"},{"type":"id","generated":false,"id":"NavigationNode:cmp1403l005270826o93j4392","typename":"NavigationNode"},{"type":"id","generated":false,"id":"NavigationNode:cmp1403ld052d0826hb75qa7j","typename":"NavigationNode"}],"__typename":"Navigation"},"NavigationNode:cmp1403k6051v0826dik2tr3e":{"id":"cmp1403k6051v0826dik2tr3e","page":"ckgdfcdf4afxt0788jj7dwb6x","title":null,"link":null,"order":0,"parent":null,"__typename":"NavigationNode"},"NavigationNode:cmp1403km05210826kwonk3mx":{"id":"cmp1403km05210826kwonk3mx","page":"cjv83jag304vu0836fiuwysty","title":null,"link":null,"order":1,"parent":null,"__typename":"NavigationNode"},"NavigationNode:cmp1403l005270826o93j4392":{"id":"cmp1403l005270826o93j4392","page":"cjv3ru1og00ob08363pvv76br","title":null,"link":null,"order":2,"parent":null,"__typename":"NavigationNode"},"NavigationNode:cmp1403ld052d0826hb75qa7j":{"id":"cmp1403ld052d0826hb75qa7j","page":"cmp13w2es04lr0826703jqxwt","title":null,"link":null,"order":3,"parent":null,"__typename":"NavigationNode"},"Navigation:cmecuzl130zq30832w4yid3iy":{"id":"cmecuzl130zq30832w4yid3iy","name":"footer-events","nodes":[],"__typename":"Navigation"},"LocalizedPage:cjv3l26tp004p0836i54n4u7a":{"id":"cjv3l26tp004p0836i54n4u7a","content":{"type":"json","json":{"content":[{"name":"Header","data":{"products":[],"activeTab":"1","showScrollIndicator":true,"isTransparencyEnabled":true},"id":"#0","type":"component","lock":false,"position":0},{"name":"HeroV2","data":{"slides":[{"id":"4","productName":"","media":{"mimetype":"image/png","size":6707532,"hash":"77df3aabc10d015516e748622d5c96e95ea9542f","id":"cmojnxweh3vg30800k5tet07l","filename":"banner-hp-echo.png","category":"divesoft/","type":"image","alt":"ECHO Analyzer"},"title":"Precision Gas Analysis.<br>Zero Compromise.<br>Available now.","linkTitle":"Discover","linkUrl":{"url":"/en/products/analyzers/echo","pageId":"cmoikfi2o00jd0834i7cnst7d"}},{"id":"2","media":{"mimetype":"video/mp4","size":12615106,"hash":"7022f3f68fa524f5ee6ab569a4df9be25e4c21fc","id":"cmol8x9ku4v4q080073vl626u","filename":"istock-1396851540-divesoft-1080p-h264.mp4","category":"divesoft/docs/","type":"file"},"title":"Built for the Depths.<br>Trusted by Divers Worldwide.","linkTitle":"","linkUrl":{"url":"","pageId":"cjv3rim6p00fm0836uts415d5"}}
2,{"id":"1","media":{"mimetype":"image/png","size":15405316,"hash":"5d1b1b669b0bb7548ffcfa2f5ddc546c2ac451ff","id":"cmoa03re70q1o0800sbdit3sv","filename":"hero02.png","category":"divesoft/","type":"image"},"title":"Built for the Depths.<br>Trusted by Divers Worldwide.","linkTitle":"","linkUrl":{"url":"","pageId":"cjv3rim6p00fm0836uts415d5","urlNewWindow":true}},{"id":"3","title":"Built for the Depths.<br>Trusted by Divers Worldwide.","linkTitle":"","linkUrl":{"url":"","pageId":"cjv3rim6p00fm0836uts415d5"},"media":{"mimetype":"image/png","size":14855289,"hash":"77d878376512d5ef24b9b938dc3ce3e6d73abb30","id":"cmoa02iwd0pzu08006jigxsh6","filename":"hero04.png","category":"divesoft/","type":"image"}}],"activeTab":"4"},"id":"#2","type":"component","lock":false,"position":1},{"name":"CallToAction","data":{"backgroundColor":"white","isCentered":false,"title":"Divesoft rebreathers, analyzers and computers â reliable gear for divers exploring and growing safely underwater.","links":[{"title":"About us","url":{"url":"/en/about-us","pageId":"ckgdfcdf4afxt0788jj7dwb6x","urlNewWindow":false},"color":"black","type":"primary","id":"1"}],"linkPosition":"below","linkAlignment":"right"},"id":"#18","type":"component","lock":false,"position":2},{"name":"ProductTile","data":{"title":"DIVESOFT.APP","subtitle":"One System for Everything","image":{"recommendedSizes":{"width":"6000","height":"2100"},"mimetype":"image/png","size":2323410,"hash":"2434551be2dea8a4694d6e11aa455da4dc6dd1ba","id":"cmo9xl72f0o5d0800iiijy0e4","filename":"divesoftapp.png","category":"divesoft/","type":"image","alt":"Divesoft.app mobile interface showing a comprehensive digital hub for divers"},"eshopUrl":{"url":"https://play.google.com/store/apps/details?id=com.divesoft.divesoft_app","urlNewWindow":true},"detailUrl":{"url":"/en/app","pageId":"ckfccnc4a98bx0788f7enal83"},"imageMobile":{"mimetype":"image/png","size":2617258,"hash":"5a018938f2fe6011ea06d900d6f94994cbc0197c","id":"cmoa1jlga0r6k0800tfc7skjt","filename":"app-mobile.png","category":"divesoft/","type":"image","alt":"Divesoft.app mobile interface showing a comprehensive digital hub for divers"},"links":[{"id":"1","color":"red","title":"Google Play","url":{"urlNewWindow":true,"url":"https://play.google.com/store/apps/details?id=com.divesoft.divesoft_app"}},{"id":"2","color":"red","title":"App Store","url":{"urlNewWindow":true,"url":"https://apps.apple.com/us/app/divesoft-app/id1545496130"}},{"id":"3","color":"white","isOverlayLink":true,"url":{"url":"/en/app","pageId":"ckfccnc4a98bx0788f7enal83"},"title":"Full dive"}]},"id":"#23","type":"component","lock":false,"position":3},{"name":"ProductTile","data":{"title":"ECHO","subtitle":"Know Before You Dive","image":{"recommendedSizes":{"width":"6000","height":"2100"},"mimetype":"image/png","size":1048750,"hash":"5863c7fa7c960caa16b6e8097dbbe6a0853ed2bb","id":"cmo9xmety0o5x08000l1dol0i","filename":"echo.png","category":"divesoft/","type":"image","alt":"ECHO Analyzer"},"links":[{"title":"Buy","url":{"url":"https://eu1.hubs.ly/H0tXgPx0","urlNewWindow":true},"color":"red","id":"1"},{"title":"Full dive","url":{"url":"/en/products/analyzers/echo","pageId":"cmoikfi2o00jd0834i7cnst7d"},"color":"white","isOverlayLink":true,"id":"2"}],"activeTab":"1","imageMobile":{"mimetype":"image/png","size":1023459,"hash":"fd3386da1b19e01ede3ddb73d923a73fa0338493","id":"cmoa1ju9p0r6r0800ovre9mu9","filename":"echo-mobile.png","category":"divesoft/","type":"image","alt":"ECHO analyzer"}},"id":"#26","type":"component","lock":false,"position":4},{"name":"ProductTile","data":{"title":"LIBERTY","subtitle":"Reliability Designed for Every Dive","eshopUrl":{"url":"/en/products/ccr-liberty/configurations","urlNewWindow":true,"pageId":"cl7on204vv7pd0858ifbw2xst"},"imageMobile":{"mimetype":"image/png","size":1837377,"hash":"cc9b7232e6fa9c25dd27ef2b7dcfe9e3c4dcd0e1","id":"cmilyzhcripxv08500cv0cl4w","filename":"liberty-render-hp-mobile.png","category":"divesoft/","type":"image","alt":"CCR Liberty"},"image":{"mimetype":"image/png","size":2126424,"hash":"ba240cfc03faefd0ac56b4791d7a5f582f3ad530","id":"cmgey40o7ul7r085022qpyhxi","filename":"liberty-banner-homepage.png","category":"divesoft/","type":"image","alt":"CCR Liberty"},"detailUrl":{"url":"/en/products/ccr-liberty","pageId":"cjv3rpryz00iw0836lc0zx81j","urlNewWindow":false}
2,"links":[{"id":"1","title":"Buy","color":"red","url":{"url":"https://www.divesoft.com/en/ccr-liberty?config=eyJ0cmVlSWQiOiI2Mjk3M2NmZmRlYWMzNWUzMDQ4MmFlYzAiLCJub2RlR3VpZHMiOltdLCJkZXRhaWxOb2RlR3VpZCI6IiIsInNldHVwRGV0YWlscyI6e30sImRldGFpbFNldHVwIjp7InF1ZXN0aW9uR3VpZCI6IiIsImFuc3dlckd1aWQiOiIifSwiYWNjZXNzb3J5Q2F0ZWdvcmllcyI6e30sImRldGFpbEFjY2Vzc29yeSI6eyJjYXRlZ29yeUd1aWQiOiIiLCJxdWVzdGlvbkd1aWQiOiIiLCJhbnN3ZXJHdWlkIjoiIn19&step=nodes","pageId":"cl7on204vv7pd0858ifbw2xst"}},{"id":"2","title":"Full dive","color":"white","url":{"url":"/en/products/ccr-liberty","pageId":"cjv3rpryz00iw0836lc0zx81j"},"isOverlayLink":true}],"activeTab":"1"},"id":"#16","type":"component","lock":false,"position":6},{"name":"ProductTile","data":{"title":"LABEL PRINTING","subtitle":"Gas Mix Clearly Marked","image":{"recommendedSizes":{"width":"6000","height":"2100"},"mimetype":"image/png","size":502131,"hash":"e43843c03d09a918bffd1350531de0ddc0563d11","id":"cmo9xnllu0o730800v2tgl2kb","filename":"labelprinting.png","category":"divesoft/","type":"image","alt":"Label Printing"},"eshopUrl":{"url":"https://eshop.divesoft.com/he-o2-printer-cable/7312","urlNewWindow":true},"detailUrl":{"url":"https://toolkit.divesoft.com/"},"imageMobile":{"mimetype":"image/png","size":395172,"hash":"a36d20c64a4f6cc47ae3d3abb77d4251bea4463a","id":"cmoa1l2cr0r7n0800cbwwtr0g","filename":"label-mobile.png","category":"divesoft/","type":"image","alt":"Label Printing"},"links":[{"id":"1","url":{"url":"https://eshop.divesoft.com/he-o2-printer-cable/7312","urlNewWindow":true},"color":"red","title":"Buy"},{"id":"2","title":"Full dive","url":{"url":"https://toolkit.divesoft.com/","urlNewWindow":true},"isOverlayLink":true,"color":"white"}],"activeTab":"1"},"id":"#24","type":"component","lock":false,"position":7},{"name":"ProductTile","data":{"title":"SOLO","subtitle":"Every Breath Measured with Trust","eshopUrl":{"url":"https://eshop.divesoft.com/analyzer-solo/8300","urlNewWindow":true},"image":{"mimetype":"image/png","size":3135897,"hash":"0f0adade7a81a0ba7c1f642c91e903d17cb0853c","id":"cmg81q0mvt1730850i0otc6q6","filename":"divesoft-uprava-solo.png","category":"divesoft/","type":"image","alt":"SOLO trimix analyzer"},"detailUrl":{"url":"/en/products/analyzers/analyzer-solo","pageId":"cjztim1kk09fg0777nv63tf9b"},"imageMobile":{"mimetype":"image/png","size":3273507,"hash":"b85fb33a5fc341886bdef3037c7d41ee8834c9f2","id":"cmilyxlplipxa0850vjaw74v6","filename":"analyzer-solo-render-hp-mobile.png","category":"divesoft/","type":"image","alt":"SOLO trimix analyzer"},"links":[{"id":"1","title":"Buy","url":{"urlNewWindow":true,"url":"https://eshop.divesoft.com/analyzer-solo/8300"},"color":"red"},{"id":"2","title":"Full dive","isOverlayLink":true,"color":"white","url":{"url":"/en/products/analyzers/analyzer-solo","pageId":"cjztim1kk09fg0777nv63tf9b"}}],"activeTab":"2"},"id":"#13","type":"component","lock":false,"position":8},{"name":"ProductTile","data":{"title":"He/O<sub>2</sub> ANALYZER","subtitle":"Proven and Trusted","image":{"recommendedSizes":{"width":"6000","height":"2100"},"mimetype":"image/png","size":925731,"hash":"ab09c25f96342ee4c30aa7b5db93ca13b70bf04c","id":"cmoa1lpca0r8i0800u3lmd2if","filename":"heo2.png","category":"divesoft/","type":"image","alt":"He/O2 Analyzer"},"eshopUrl":{"url":"https://eshop.divesoft.com/analyzer-he-o2/8313","urlNewWindow":true},"detailUrl":{"url":"/en/products/analyzers/analyzer-he-o2","pageId":"cjztilv3509et0777ejgtlm67"},"imageMobile":{"mimetype":"image/png","size":1214238,"hash":"6ad2fc2f655018f612d43bfb02cdec1273bf1c0f","id":"cmohe5tn32xw00800fc98na9v","filename":"he-mobile.png","category":"divesoft/","type":"image","alt":"He/O2 Analyzer"},"links":[{"id":"1","url":{"urlNewWindow":true,"url":"https://eshop.divesoft.com/analyzer-he-o2/8313"},"title":"Buy"},{"id":"2","title":"Full dive","url":{"url":"/en/products/analyzers/analyzer-he-o2","pageId":"cjztilv3509et0777ejgtlm67"},"isOverlayLink":true,"color":"white"}]},"id":"#25","type":"component","lock":false,"position":9},{"name":"ProductTile","data":{"title":"DNA","subtitle":"Compact Nitrox Analyzer with Accuracy","eshopUrl":{"url":"https://eshop.divesoft.com/dna/8460","urlNewWindow":true},"image":{"mimetype":"image/png","size":1344450,"hash":"da2c9000bfe9b4519bd2ec9f6505af9f6a242c6f","id":"cmoihebjs3fi40800pg9t460m","filename":"opravadnax-1.png","category":"divesoft/","type":"image","alt":"DNA Analyzer"},"detailUrl":{"url":"/en/products/analyzers/dna","pageId":"clf9rs5c3ltkw0835vujrrtxu"},"imageMobile":{"mimetype":"image/png","size":13032645,"hash":"c7fb66064ea4219e565788fd650b45872aaa43fe","id":"cmilyx5muipwq08503k6tlofh","filename":"dna-render-hp-mobile.png","category":"divesoft/","type":"image","alt":"DNA Analyzer"}
2,"links":[{"id":"1","title":"Buy","url":{"urlNewWindow":true,"url":"https://eshop.divesoft.com/dna/8460"},"isOverlayLink":false,"color":"red"},{"id":"2","title":"Full dive","url":{"url":"/en/products/analyzers/dna","pageId":"clf9rs5c3ltkw0835vujrrtxu"},"color":"white","isOverlayLink":true}],"activeTab":"1"},"id":"#5","type":"component","lock":false,"position":10},{"name":"CallToAction","data":{"backgroundColor":"white","isCentered":true,"title":"Discover the numbers behind our trust.","links":[{"title":"Shop All Divesoft Gear","url":{"url":"https://eshop.divesoft.com/","pageId":"cjv3rim6p00fm0836uts415d5","urlNewWindow":true},"color":"black","type":"outline","id":"1"}],"linkPosition":"above","linkAlignment":"right"},"id":"#19","type":"component","lock":false,"position":12},{"name":"AnimatedMetricCounter","data":{"metrics":[{"value":"0","suffix":"","title":"Compromise","description":"Safety-critical design, verified at every step.","id":"1"},{"value":"50","suffix":"+","title":"Countries","description":"Our gear supports divers across oceans and communities.","id":"2"},{"id":"3","value":"20","suffix":"+","title":"years ","description":"Experience in precision engineering for diving."}],"activeTab":"1"},"id":"#10","type":"component","lock":false,"position":13},{"name":"CallToAction","data":{"backgroundColor":"white","isCentered":false,"title":"","links":[{"title":"About us","url":{"url":"/en/about-us","pageId":"ckgdfcdf4afxt0788jj7dwb6x"},"color":"black","type":"primary","id":"1"},{"id":"2","title":"SHOP","url":{"url":"https://eshop.divesoft.com/","urlNewWindow":true}}],"linkPosition":"below","linkAlignment":"right","activeTab":"1"},"id":"#20","type":"component","lock":false,"position":14},{"name":"BlogPreviewV2","data":{"title":"Dive into more stories","description":"Our community grows through shared knowledge, support and safe explorationâhelping divers improve skills and enjoy diving more.","blogUrl":{"url":"/en/blog","pageId":"ckpcgx2c64h2d0788rft16oow"},"articles":{"sourceType":"pages","data":{"title":"%page,annotations,title% ","perex":"%page,annotations,perex%","image":{"dynamiclySourcedImage":" %page,annotations,image%"},"url":{"pageSourcedUrl":true,"analyticsTag":""}},"filters":[],"tagIds":["clw52vo5mlckc0735dl0is8ok","clw52y9cclcle073501kwtw2u","clw52z09zlclk0735mxb7v53p","clw52zeqhlclq0735wrys6js8","cmfp50qhi00lk08324ek37f9g","cm5ww0z2w1b7708035dpdbq9a","cm5ww05zc1b5d0803zglvz927","cm5ww0t651b710803pcl02cn4"],"orderBy":"%page,createdAt%","order":"DESC","limit":6}},"id":"#12","type":"component","lock":false,"position":15},{"name":"Showreel","data":{"media":[{"id":"1","media":{"mimetype":"image/jpeg","size":14611225,"hash":"88c4747caf1986a9fab193ea054a1d0b3c36421b","id":"cmh4q7eci35d40850oaodvgq4","filename":"0n2a8855.jpg","category":"divesoft/","type":"image"}},{"id":"2","media":{"mimetype":"image/jpeg","size":14181709,"hash":"0ba6a0a2ddce29be72448b6389f4ed026cf8135f","id":"cmh4qcv1535fk08508fnv2b9h","filename":"0n2a8894-enhanced-nr.jpg","category":"divesoft/","type":"image"}},{"id":"3","media":{"mimetype":"image/jpeg","size":9770433,"hash":"e9f50cfc6693fc3460df7892421a10543cb17b95","id":"cmh4qh7c035j10850fh5n4r7m","filename":"0n2a9075.jpg","category":"divesoft/","type":"image"}},{"id":"4","media":{"mimetype":"image/jpeg","size":22525406,"hash":"3f4cc0ea0c8fc83595d6fd01d13f6116500c750c","id":"cmh4qo2ke35nv0850axr28mao","filename":"0n2a9519-enhanced-nr-edit.jpg","category":"divesoft/","type":"image"}},{"id":"5","media":{"mimetype":"image/jpeg","size":2912383,"hash":"2fe76c92ca587c543d6f9430b2ccd7c07265b441","id":"cmh4rvwnk368d0850htufx5ur","filename":"dsc00113-133.jpg","category":"divesoft/","type":"image"}},{"id":"6","media":{"mimetype":"image/jpeg","size":2335743,"hash":"cfae5109a2bbe4944b9826c0aa5b64c70ba86a7c","id":"cmh4rx3zv369c08506uc0n947","filename":"dsc00190-143.jpg","category":"divesoft/","type":"image"}},{"id":"7","media":{"mimetype":"image/jpeg","size":2310016,"hash":"5fe3aa120ca10a554442acfa84b024b8f9926a35","id":"cmh4ry7tq36a20850pudmbfmk","filename":"dsc00275-164.jpg","category":"divesoft/","type":"image"}},{"id":"8","media":{"mimetype":"image/jpeg","size":3070819,"hash":"2aff1d033e13152c6202c73106dca4f94d7ff9d0","id":"cmh4s0x7m36ao0850gvend7qk","filename":"dsc00276-165.jpg","category":"divesoft/","type":"image"}},{"id":"9","media":{"mimetype":"image/jpeg","size":2449544,"hash":"a08e6c1f2ac51fe9c114bf27733417d0e2199cf6","id":"cmh4s2ej036b00850qzr02e23","filename":"dsc00393-191.jpg","category":"divesoft/","type":"image"}}
2,{"id":"10","media":{"mimetype":"image/jpeg","size":1987713,"hash":"ea40135fbe3b305dcc153b5d2030a0d8dd750b1a","id":"cmh4s60yg36c70850r364dnhw","filename":"dsc00450-198.jpg","category":"divesoft/","type":"image"}},{"id":"11","media":{"mimetype":"image/jpeg","size":2442501,"hash":"fef5d4cd05b6ff49590760aebae767b43bf7acc5","id":"cmh4s7b9i36cl0850y0niihz6","filename":"dsc00550-213.jpg","category":"divesoft/","type":"image"}},{"id":"12","media":{"mimetype":"image/jpeg","size":2189861,"hash":"86ec5b62dc54571445ba62abc059c083e9f78433","id":"cmh4s86i736cr0850gnemxrf1","filename":"dsc09456-2.jpg","category":"divesoft/","type":"image"}}],"isFullWidth":true,"slides":[{"id":"1","media":{"mimetype":"image/jpeg","size":14611225,"hash":"88c4747caf1986a9fab193ea054a1d0b3c36421b","id":"cmh4q7eci35d40850oaodvgq4","filename":"0n2a8855.jpg","category":"divesoft/","type":"image","alt":"Two scuba divers on a boat"},"title":"Join the Ones Who Dive Deeper.","autoplayDuration":"9000"},{"id":"2","title":"Join the Ones Who Dive Deeper.","media":{"mimetype":"image/jpeg","size":14181709,"hash":"0ba6a0a2ddce29be72448b6389f4ed026cf8135f","id":"cmh4qcv1535fk08508fnv2b9h","filename":"0n2a8894-enhanced-nr.jpg","category":"divesoft/","type":"image","alt":"Detailed preparation of scuba diving equipment"},"autoplayDuration":"9000"},{"id":"3","title":"Join the Ones Who Dive Deeper.","media":{"mimetype":"image/jpeg","size":9770433,"hash":"e9f50cfc6693fc3460df7892421a10543cb17b95","id":"cmh4qh7c035j10850fh5n4r7m","filename":"0n2a9075.jpg","category":"divesoft/","type":"image","alt":"Technical diver at the surface"},"autoplayDuration":"9000"},{"id":"4","title":"Join the Ones Who Dive Deeper.","media":{"mimetype":"image/jpeg","size":22525406,"hash":"3f4cc0ea0c8fc83595d6fd01d13f6116500c750c","id":"cmh4qo2ke35nv0850axr28mao","filename":"0n2a9519-enhanced-nr-edit.jpg","category":"divesoft/","type":"image","alt":"Scuba diver gliding through the water"},"autoplayDuration":"9000"},{"id":"5","title":"Join the Ones Who Dive Deeper.","media":{"mimetype":"image/jpeg","size":2912383,"hash":"2fe76c92ca587c543d6f9430b2ccd7c07265b441","id":"cmh4rvwnk368d0850htufx5ur","filename":"dsc00113-133.jpg","category":"divesoft/","type":"image","alt":"Two divers in full gear ready for deployment"},"autoplayDuration":"9000"},{"id":"6","title":"Join the Ones Who Dive Deeper.","media":{"mimetype":"image/jpeg","size":2335743,"hash":"cfae5109a2bbe4944b9826c0aa5b64c70ba86a7c","id":"cmh4rx3zv369c08506uc0n947","filename":"dsc00190-143.jpg","category":"divesoft/","type":"image","alt":"Technical diver in full gear"},"autoplayDuration":"9000"},{"id":"7","title":"Join the Ones Who Dive Deeper.","media":{"mimetype":"image/jpeg","size":2310016,"hash":"5fe3aa120ca10a554442acfa84b024b8f9926a35","id":"cmh4ry7tq36a20850pudmbfmk","filename":"dsc00275-164.jpg","category":"divesoft/","type":"image","alt":"Meticulous dive preparation"},"autoplayDuration":"9000"},{"id":"8","title":"Join the Ones Who Dive Deeper.","media":{"mimetype":"image/jpeg","size":3070819,"hash":"2aff1d033e13152c6202c73106dca4f94d7ff9d0","id":"cmh4s0x7m36ao0850gvend7qk","filename":"dsc00276-165.jpg","category":"divesoft/","type":"image","alt":"Testing of scuba diving equipment"},"autoplayDuration":"9000"}],"activeTab":"8"},"id":"#17","type":"component","lock":false,"position":16},{"name":"ExploreOurGear","data":{"gear":[{"title":"CCR Liberty","description":"Reliable, modular rebreathers designed for confident diving at any level.","id":"1","detailUrl":{"url":"/en/products/ccr-liberty","pageId":"cjv3rpryz00iw0836lc0zx81j","urlNewWindow":false}},{"id":"2","title":"Analyzers ","description":"Accurate Oâ and He analyzers for safety on every dive.","detailUrl":{"url":"/en/products/analyzers","pageId":"cjv3rr7on00ky0836fercz490","urlNewWindow":true}},{"id":"4","title":"BOV/DSV/ADV","description":"Seamless breathing control for safer, easier dives.","detailUrl":{"url":"/en/products/bovdsvadv","pageId":"cjv7uialr03nh0836yjoz2dji","urlNewWindow":true}},{"id":"6","title":"Extra Gear","description":"Accessories built to last and enhance any dive.","detailUrl":{"url":"/en/products/others","pageId":"ckdsltzi07o520788tk0s6c4v"}},{"id":"7","title":"Merchandise ","description":"Surface gear for divers, designed with passion.","detailUrl":{"url":"https://eshop.divesoft.com/products/merchandise?currency=CZK","urlNewWindow":true}}],"blogUrl":{"url":"/en/blog","pageId":"ckpcgx2c64h2d0788rft16oow"}},"id":"#14","type":"component","lock":false,"position":17},{"name":"CallToAction","data":{"backgroundColor":"black","isCentered":true,"title":"Need guidance? Contact Divesoft today.","links":[{"title":"Contact Us","url":{"url":"/en/contacts/contact-us","pageId":"cka6kn4hd3ahh0788k20h9ayy"},"color":"white","type":"outline","id":"1"}],"linkPosition":"below","linkAlignment":"right","activeTab":"1"},"id":"#21","type":"component","lock":false,"position":18},{"name":"Footer","data":{"componentTemplateId":"cjvwimxrl08e40798hjs5ek9w"},"id":"#1","type":"component","lock":false,"position":19}],"id":"root","idBuffer":"#27","lastCommit":"d90473d9-440b-4e8b-bfa7-4ed9d9ea7701"}},"name":"Homepage","language":{"type":"id","generated":false,"id":"LocalizedPageLanguage:cjv3kwvoj000u083611381c6o","typename":"LocalizedPageLanguage"},"__typename":"LocalizedPage"},"LocalizedPageLanguage:cjv3kwvoj000u083611381c6o":{"id":"cjv3kwvoj000u083611381c6o","code":"en","__typename":"LocalizedPageLanguage"},"Language:cjv3kwvqp000y083655paa9mq":{"id":"cjv3kwvqp000y083655paa9mq","code":"cs","name":"ÄeÅ¡tina","__typename":"Language"},"Language:cjv3kwvr000120836qost6hic":{"id":"cjv3kwvr000120836qost6hic","code":"de","name":"Deutsch","__typename":"Language"}
2,"Language:cjv3kwvr700160836g1o92bot":{"id":"cjv3kwvr700160836g1o92bot","code":"ru","name":"Russki","__typename":"Language"},"Language:cjv3kwvrf001a0836eywye8m5":{"id":"cjv3kwvrf001a0836eywye8m5","code":"pt","name":"Português","__typename":"Language"},"Language:cjv3kwvro001e08367bdy52lt":{"id":"cjv3kwvro001e08367bdy52lt","code":"es","name":"Español","__typename":"Language"},"Language:cjv3kwvrw001i0836qbd7k4mh":{"id":"cjv3kwvrw001i0836qbd7k4mh","code":"pl","name":"Polski","__typename":"Language"},"Language:cjv3kwvs3001m0836l5xngl32":{"id":"cjv3kwvs3001m0836l5xngl32","code":"fr","name":"Français","__typename":"Language"},"Language:cjv3kwvse001q08362uo6ar8x":{"id":"cjv3kwvse001q08362uo6ar8x","code":"it","name":"Italiano","__typename":"Language"},"Language:cjv3kwvsl001u0836q3pzoprv":{"id":"cjv3kwvsl001u0836q3pzoprv","code":"sk","name":"SlovenÄtina","__typename":"Language"},"Project:cjv3l1cht003e0836h39egd28":{"id":"cjv3l1cht003e0836h39egd28","components":"divesoft","__typename":"Project"},"ROOT_QUERY":{"fetchdata({\"where\":{\"datasources\":{},\"language\":\"cjv3kwvoj000u083611381c6o\",\"page\":\"cjv3l26tp004p0836i54n4u7a\"}})":{"type":"id","generated":true,"id":"$ROOT_QUERY.fetchdata({\"where\":{\"datasources\":{},\"language\":\"cjv3kwvoj000u083611381c6o\",\"page\":\"cjv3l26tp004p0836i54n4u7a\"}})","typename":"FrontendFetchData"},"datasourceItems":{"type":"json","json":[]},"languageData":{"type":"json","json":{"id":"cjv3kwvoj000u083611381c6o","code":"en","name":"English","__typename":"Language"}},"languagesData":{"type":"json","json":[{"id":"cjv3kwvoj000u083611381c6o","code":"en","name":"English","__typename":"Language"},{"id":"cjv3kwvqp000y083655paa9mq","code":"cs","name":"ÄeÅ¡tina","__typename":"Language"},{"id":"cjv3kwvr000120836qost6hic","code":"de","name":"Deutsch","__typename":"Language"},{"id":"cjv3kwvr700160836g1o92bot","code":"ru","name":"Russki","__typename":"Language"},{"id":"cjv3kwvrf001a0836eywye8m5","code":"pt","name":"Português","__typename":"Language"},{"id":"cjv3kwvro001e08367bdy52lt","code":"es","name":"Español","__typename":"Language"},{"id":"cjv3kwvrw001i0836qbd7k4mh","code":"pl","name":"Polski","__typename":"Language"},{"id":"cjv3kwvs3001m0836l5xngl32","code":"fr","name":"Français","__typename":"Language"},{"id":"cjv3kwvse001q08362uo6ar8x","code":"it","name":"Italiano","__typename":"Language"},{"id":"cjv3kwvsl001u0836q3pzoprv","code":"sk","name":"SlovenÄtina","__typename":"Language"}]},"navigationsData":{"type":"json","json":[{"id":"cjv3qu9uj00ec0836inttwa5b","name":"top","nodes":[{"id":"cll1zxmbt413l0735juf3u4nv","page":"cjv3rpryz00iw0836lc0zx81j","title":null,"link":null,"order":0,"parent":"cjv3rim6p00fm0836uts415d5","__typename":"NavigationNode"},{"id":"cll1zxmca413r07352sq7i1w7","page":"ckl9hm0dx3lhp07881bt0smfi","title":null,"link":null,"order":1,"parent":"cjv3rim6p00fm0836uts415d5","__typename":"NavigationNode"},{"id":"cll1zxmcq413x0735r44c0v0k","page":"cjv3rr7on00ky0836fercz490","title":null,"link":null,"order":2,"parent":"cjv3rim6p00fm0836uts415d5","__typename":"NavigationNode"},{"id":"cll1zxmd641430735jdvdgqnw","page":"cjv7uialr03nh0836yjoz2dji","title":null,"link":null,"order":3,"parent":"cjv3rim6p00fm0836uts415d5","__typename":"NavigationNode"},{"id":"cll1zxmdh41490735vnb9ife0","page":"clfgt4fdjmf9v0835bv440kqj","title":null,"link":null,"order":4,"parent":"cjv3rim6p00fm0836uts415d5","__typename":"NavigationNode"},{"id":"cll1zxmdr414f0735gzmdukkm","page":"ckdsltzi07o520788tk0s6c4v","title":null,"link":null,"order":5,"parent":"cjv3rim6p00fm0836uts415d5","__typename":"NavigationNode"},{"id":"cll1zxme0414l0735snj94vaf","page":"cjv3rim6p00fm0836uts415d5","title":null,"link":null,"order":0,"parent":null,"__typename":"NavigationNode"},{"id":"cll1zxmea414r0735q9juahb3","page":"ckx4slj6v005k0a53p9i6x50m","title":null,"link":null,"order":1,"parent":null,"__typename":"NavigationNode"},{"id":"cll1zxmeo414x0735g7e1vnp9","page":"ck9v8ad582urj0788pmspzwzi","title":null,"link":null,"order":2,"parent":null,"__typename":"NavigationNode"},{"id":"cll1zxmez41530735nf6g4teu","page":"cjv3rrnkp00m80836ezb6g5y6","title":null,"link":null,"order":3,"parent":null,"__typename":"NavigationNode"},{"id":"cll1zxmfb41590735x41ypgfh","page":"ckpcgx2c64h2d0788rft16oow","title":null,"link":null,"order":4,"parent":null,"__typename":"NavigationNode"},{"id":"cll1zxmfl415f0735wqj4fe1q","page":"cjv3rrgwi00ll0836rvjysah5","title":null,"link":null,"order":5,"parent":null,"__typename":"NavigationNode"},{"id":"cll1zxmfw415l0735np92ao16","page":"claqj12ud2tqp08353972by7b","title":null,"link":null,"order":6,"parent":null,"__typename":"NavigationNode"}],"__typename":"Navigation"},{"id":"cjv3rxp9z00up0836ya50kwlw","name":"BottomABOUT","nodes":[{"id":"cmp13xtwj04s80826e9l59lr5","page":"cjv3rufef00pl08362uyteabt","title":null,"link":null,"order":0,"parent":null,"__typename":"NavigationNode"},{"id":"cmp13xtwx04se0826oakagh1e","page":"cjv83bs6804tb08366aj9zqyw","title":null,"link":null,"order":1,"parent":null,"__typename":"NavigationNode"},{"id":"cmp13xtx704sk0826z164hpk5","page":"cjv83jag304vu0836fiuwysty","title":null,"link":null,"order":2,"parent":null,"__typename":"NavigationNode"},{"id":"cmp13xtxg04sq0826zv8wf057","page":"ckxg0xywi0qec0858k67qqwk1","title":null,"link":null,"order":3,"parent":null,"__typename":"NavigationNode"},{"id":"cmp13xtxo04sw0826ox676it1","page":"cjv3ru1og00ob08363pvv76br","title":null,"link":null,"order":4,"parent":null,"__typename":"NavigationNode"},{"id":"cmp13xtxy04t208262qudmfyx","page":"1778498223133","title":"Annoucements","link":"http://foxer360-media-library.s3.eu-central-1.amazonaws.com/divesoft/docs/aa22becc7a810dabc4af52edb7af4756d9080e7d_divesoft-sro-oznameni.pdf","order":5,"parent":null,"__typename":"NavigationNode"},{"id":"cmp13xty704t80826894v1zy2","page":"cmp13w2es04lr0826703jqxwt","title":null,"link":null,"order":6,"parent":null,"__typename":"NavigationNode"}],"__typename":"Navigation"},{"id":"cjv3ryxer00w90836veijzz8o","name":"BottomCONTACTS","nodes":[{"id":"clzvapvln42zb0735e1m7k14t","page":"cka6kn4hd3ahh0788k20h9ayy","title":null,"link":null,"order":null,"parent":null,"__typename":"NavigationNode"},{"id":"clzvapvly42zh07358ao7apyf","page":"clzqqwm0l383j073591uq315q","title":null,"link":null,"order":0,"parent":null,"__typename":"NavigationNode"},{"id":"clzvapvma42zn0735nco8cn0u","page":"clzqqw6f9383107358lya6tzp","title":null,"link":null,"order":1,"parent":null,"__typename":"NavigationNode"},{"id":"clzvapvml42zt0735vqemlb0w","page":"ckx4slj6v005k0a53p9i6x50m","title":null,"link":null,"order":2,"parent":null,"__typename":"NavigationNode"},{"id":"clzvapvmu42zz0735xjqfeajg","page":"ck9v8ad582urj0788pmspzwzi","title":null,"link":null,"order":3,"parent":null,"__typename":"NavigationNode"},{"id":"clzvapvn443050735k29exu1p","page":"clfwgsbptnzzu0835o780vtem","t
2itle":null,"link":null,"order":4,"parent":null,"__typename":"NavigationNode"},{"id":"clzvapvnd430b07355c1tkcxh","page":"ck92kt81u1xqe078857hjsosp","title":null,"link":null,"order":5,"parent":null,"__typename":"NavigationNode"},{"id":"clzvapvnm430h0735m39aipam","page":"clsyeohcd8d1j0735f1581opx","title":null,"link":null,"order":6,"parent":null,"__typename":"NavigationNode"}],"__typename":"Navigation"},{"id":"cjv3rzs0300xk0836elx9weyh","name":"BottomSUPPORT","nodes":[{"id":"clf2fceewkl520835vw1rizsd","page":"cjv3rrnkp00m80836ezb6g5y6","title":null,"link":null,"order":0,"parent":null,"__typename":"NavigationNode"},{"id":"clf2fcef5kl580835azcm70jn","page":"cjvwcfsdy06ye0798aflb91my","title":null,"link":null,"order":1,"parent":null,"__typename":"NavigationNode"},{"id":"clf2fcefikl5e0835fjkujv0w","page":"ck9mb2bsa2kkj0788e35d3pf2","title":null,"link":null,"order":2,"parent":null,"__typename":"NavigationNode"},{"id":"clf2fcefskl5k0835rkeb1kww","page":"clf2f7jbtkl260835rps73xqp","title":null,"link":null,"order":3,"parent":null,"__typename":"NavigationNode"}],"__typename":"Navigation"},{"id":"cka6hjix038ws0788d6o033p4","name":"BottomPRODUCTS","nodes":[{"id":"cmp2qrz8m07t00826n5lqopvo","page":"cjv3rpryz00iw0836lc0zx81j","title":null,"link":null,"order":0,"parent":null,"__typename":"NavigationNode"},{"id":"cmp2qrz9107t60826vu87fq7e","page":"cjv3rr7on00ky0836fercz490","title":null,"link":null,"order":1,"parent":null,"__typename":"NavigationNode"},{"id":"cmp2qrz9d07tc0826l73ir0se","page":"cjv7uialr03nh0836yjoz2dji","title":null,"link":null,"order":3,"parent":null,"__typename":"NavigationNode"},{"id":"cmp2qrz9p07ti0826ivf35u7n","page":"ckfccnc4a98bx0788f7enal83","title":null,"link":null,"order":5,"parent":null,"__typename":"NavigationNode"}],"__typename":"Navigation"},{"id":"ckx4scrle00230a53e3oxvvaf","name":"BottomEVENTS","nodes":[{"id":"clmom2ygxafmk0735m2d1oqln","page":null,"title":"Events","link":"https://www.facebook.com/divesoft/events","order":null,"parent":null,"__typename":"NavigationNode"},{"id":"clmom2yh8afmq0735ljyazhcz","page":null,"title":"Divesoft.blog","link":"https://www.divesoft.com/en/blog","order":null,"parent":null,"__typename":"NavigationNode"}],"__typename":"Navigation"},{"id":"cmecusngl0zid0832zenofm38","name":"header","nodes":[{"id":"cmtbkylke00hl08664ewjvpdz","page":"cjv3rpryz00iw0836lc0zx81j","title":null,"link":null,"order":0,"parent":"cjv3rim6p00fm0836uts415d5","__typename":"NavigationNode"},{"id":"cmtbkylmi00hr0866zd2mj6fq","page":"cjv3rr7on00ky0836fercz490","title":null,"link":null,"order":1,"parent":"cjv3rim6p00fm0836uts415d5","__typename":"NavigationNode"},{"id":"cmtbkyln500hx0866owuyzefd","page":"ckfccnc4a98bx0788f7enal83","title":null,"link":null,"order":2,"parent":"cjv3rim6p00fm0836uts415d5","__typename":"NavigationNode"},{"id":"cmtbkylnr00i30866t71a86nb","page":"ckdsltzi07o520788tk0s6c4v","title":null,"link":null,"order":3,"parent":"cjv3rim6p00fm0836uts415d5","__typename":"NavigationNode"},{"id":"cmtbkylof00i90866ablw9wcs","page":"cjv3rim6p00fm0836uts415d5","title":null,"link":null,"order":0,"parent":null,"__typename":"NavigationNode"},{"id":"cmtbkyloy00if0866z1r4x3mc","page":"cmt2wpeyn05ao085625qymc9k","title":null,"link":null,"order":2,"parent":null,"__typename":"NavigationNode"},{"id":"cmtbkylph00il0866tw1xprco","page":"ckpcgx2c64h2d0788rft16oow","title":null,"link":null,"order":4,"parent":null,"__typename":"NavigationNode"},{"id":"cmtbkylq400ir0866o40cs4hd","page":"1778494686138","title":"Knowledge base","link":"https://support.divesoft.com/","order":0,"parent":"1778495346107","__typename":"NavigationNode"},{"id":"cmtbkylqp00ix0866fys64exl","page":"cjv3rrgwi00ll0836rvjysah5","title":null,"link":null,"order":1,"parent":"1778495346107","__typename":"NavigationNode"},{"id":"cmtbkylra00j30866zxo0v14n","page":"1778495346107","title":"Support","link":"#","order":5,"parent":null,"__typename":"NavigationNode"}],"__typename":"Navigation"},{"id":"cmecuvd1f0zlr0832yqjrxqr9","name":"footer-products","nodes":[{"id":"cmp112rew04sv0826wz2sn4jj","page":"cjv3rpryz00iw0836lc0zx81j","title":null,"link":null,"order":0,"parent":null,"__typename":"NavigationNode"},{"id":"cmp112rf604t10826xy5evnhq","page":"cjv3rr7on00ky0836fercz490","title":null,"link":null,"order":1,"parent":null,"__typename":"NavigationNode"},{"id":"cmp112rfg04t708267w7m2iyu","page":"ckfccnc4a98bx0788f7enal83","title":null,"link":null,"order":2,"parent":null,"__typename":"NavigationNode"},{"id":"cmp112rfv04td0826ephzs0mj","page":"ckdsltzi07o520788tk0s6c4v","title":null,"link":null,"order":4,"parent":null,"__typename":"NavigationNode"}],"__typename":"Navigation"}
2,{"id":"cmecuxlqw0znh08321my8lk67","name":"footer-partners","nodes":[{"id":"cmtbl0xyf00lf0866f4zx3xz4","page":"cmt2wpeyn05ao085625qymc9k","title":null,"link":null,"order":null,"parent":null,"__typename":"NavigationNode"},{"id":"cmtbl0xz200ll0866i7k7x4h9","page":"clf2f7jbtkl260835rps73xqp","title":null,"link":null,"order":3,"parent":null,"__typename":"NavigationNode"},{"id":"cmtbl0xzm00lr08667rinpdec","page":"cmdrby07306gx08323bs8w2wq","title":null,"link":null,"order":4,"parent":null,"__typename":"NavigationNode"},{"id":"cmtbl0y0200lx0866qjwe3v8r","page":"clsyeohcd8d1j0735f1581opx","title":null,"link":null,"order":5,"parent":null,"__typename":"NavigationNode"}],"__typename":"Navigation"},{"id":"cmecuyxyo0zoq0832k6lzxeuh","name":"footer-contacts","nodes":[],"__typename":"Navigation"},{"id":"cmecuz5lf0zp10832p27g5tnk","name":"footer-support","nodes":[{"id":"cmp11qwj900640826ti4n2h40","page":"cka6kn4hd3ahh0788k20h9ayy","title":null,"link":null,"order":null,"parent":null,"__typename":"NavigationNode"},{"id":"cmp11qwkn006a0826a19a9tm6","page":null,"title":"FAQ","link":"https://support.divesoft.com/","order":null,"parent":null,"__typename":"NavigationNode"}],"__typename":"Navigation"},{"id":"cmecuzfh30zps0832devtiuzv","name":"footer-about","nodes":[{"id":"cmp1403k6051v0826dik2tr3e","page":"ckgdfcdf4afxt0788jj7dwb6x","title":null,"link":null,"order":0,"parent":null,"__typename":"NavigationNode"},{"id":"cmp1403km05210826kwonk3mx","page":"cjv83jag304vu0836fiuwysty","title":null,"link":null,"order":1,"parent":null,"__typename":"NavigationNode"},{"id":"cmp1403l005270826o93j4392","page":"cjv3ru1og00ob08363pvv76br","title":null,"link":null,"order":2,"parent":null,"__typename":"NavigationNode"},{"id":"cmp1403ld052d0826hb75qa7j","page":"cmp13w2es04lr0826703jqxwt","title":null,"link":null,"order":3,"parent":null,"__typename":"NavigationNode"}],"__typename":"Navigation"},{"id":"cmecuzl130zq30832w4yid3iy","name":"footer-events","nodes":[],"__typename":"Navigation"}]},"pageData":{"type":"json","json":{"id":"cjv3l26tp004p0836i54n4u7a","content":{"content":[{"name":"Header","data":{"products":[],"activeTab":"1","showScrollIndicator":true,"isTransparencyEnabled":true},"id":"#0","type":"component","lock":false,"position":0},{"name":"HeroV2","data":{"slides":[{"id":"4","productName":"","media":{"mimetype":"image/png","size":6707532,"hash":"77df3aabc10d015516e748622d5c96e95ea9542f","id":"cmojnxweh3vg30800k5tet07l","filename":"banner-hp-echo.png","category":"divesoft/","type":"image","alt":"ECHO Analyzer"},"title":"Precision Gas Analysis.<br>Zero Compromise.<br>Available now.","linkTitle":"Discover","linkUrl":{"url":"/en/products/analyzers/echo","pageId":"cmoikfi2o00jd0834i7cnst7d"}},{"id":"2","media":{"mimetype":"video/mp4","size":12615106,"hash":"7022f3f68fa524f5ee6ab569a4df9be25e4c21fc","id":"cmol8x9ku4v4q080073vl626u","filename":"istock-1396851540-divesoft-1080p-h264.mp4","category":"divesoft/docs/","type":"file"},"title":"Built for the Depths.<br>Trusted by Divers Worldwide.","linkTitle":"","linkUrl":{"url":"","pageId":"cjv3rim6p00fm0836uts415d5"}},{"id":"1","media":{"mimetype":"image/png","size":15405316,"hash":"5d1b1b669b0bb7548ffcfa2f5ddc546c2ac451ff","id":"cmoa03re70q1o0800sbdit3sv","filename":"hero02.png","category":"divesoft/","type":"image"},"title":"Built for the Depths.<br>Trusted by Divers Worldwide.","linkTitle":"","linkUrl":{"url":"","pageId":"cjv3rim6p00fm0836uts415d5","urlNewWindow":true}},{"id":"3","title":"Built for the Depths.<br>Trusted by Divers Worldwide.","linkTitle":"","linkUrl":{"url":"","pageId":"cjv3rim6p00fm0836uts415d5"},"media":{"mimetype":"image/png","size":14855289,"hash":"77d878376512d5ef24b9b938dc3ce3e6d73abb30","id":"cmoa02iwd0pzu08006jigxsh6","filename":"hero04.png","category":"divesoft/","type":"image"}}],"activeTab":"4"},"id":"#2","type":"component","lock":false,"position":1},{"name":"CallToAction","data":{"backgroundColor":"white","isCentered":false,"title":"Divesoft rebreathers, analyzers and computers â reliable gear for divers exploring and growing safely underwater.","links":[{"title":"About us","url":{"url":"/en/about-us","pageId":"ckgdfcdf4afxt0788jj7dwb6x","urlNewWindow":false},"color":"black","type":"primary","id":"1"}],"linkPosition":"below","linkAlignment":"right"},"id":"#18","type":"component","lock":false,"position":2},{"name":"ProductTile","data":{"title":"DIVESOFT.APP","subtitle":"One System for Everything","image":{"recommendedSizes":{"width":"6000","height":"2100"},"mimetype":"image/png","size":2323410,"hash":"2434551be2dea8a4694d6e11aa455da4dc6dd1ba","id":"cmo9xl72f0o5d0800iiijy0e4","filename":"divesoftapp.png","category":"divesoft/","type":"image","alt":"Divesoft.app mobile interface showing a comprehensive digital hub for divers"},"eshopUrl":{"url":"https://play.google.com/store/apps/details?id=com.divesoft.divesoft_app","urlNewWindow":true},"detailUrl":{"url":"/en/app","pageId":"ckfccnc4a98bx0788f7enal83"},"imageMobile":{"mimetype":"image/png","size":2617258,"hash":"5a018938f2fe6011ea06d900d6f94994cbc0197c","id":"cmoa1jlga0r6k0800tfc7skjt","filename":"app-mobile.png","category":"divesoft/","type":"image","alt":"Divesoft.app mobile interface showing a comprehensive digital hub for divers"}
2,"links":[{"id":"1","color":"red","title":"Google Play","url":{"urlNewWindow":true,"url":"https://play.google.com/store/apps/details?id=com.divesoft.divesoft_app"}},{"id":"2","color":"red","title":"App Store","url":{"urlNewWindow":true,"url":"https://apps.apple.com/us/app/divesoft-app/id1545496130"}},{"id":"3","color":"white","isOverlayLink":true,"url":{"url":"/en/app","pageId":"ckfccnc4a98bx0788f7enal83"},"title":"Full dive"}]},"id":"#23","type":"component","lock":false,"position":3},{"name":"ProductTile","data":{"title":"ECHO","subtitle":"Know Before You Dive","image":{"recommendedSizes":{"width":"6000","height":"2100"},"mimetype":"image/png","size":1048750,"hash":"5863c7fa7c960caa16b6e8097dbbe6a0853ed2bb","id":"cmo9xmety0o5x08000l1dol0i","filename":"echo.png","category":"divesoft/","type":"image","alt":"ECHO Analyzer"},"links":[{"title":"Buy","url":{"url":"https://eu1.hubs.ly/H0tXgPx0","urlNewWindow":true},"color":"red","id":"1"},{"title":"Full dive","url":{"url":"/en/products/analyzers/echo","pageId":"cmoikfi2o00jd0834i7cnst7d"},"color":"white","isOverlayLink":true,"id":"2"}],"activeTab":"1","imageMobile":{"mimetype":"image/png","size":1023459,"hash":"fd3386da1b19e01ede3ddb73d923a73fa0338493","id":"cmoa1ju9p0r6r0800ovre9mu9","filename":"echo-mobile.png","category":"divesoft/","type":"image","alt":"ECHO analyzer"}},"id":"#26","type":"component","lock":false,"position":4},{"name":"ProductTile","data":{"title":"LIBERTY","subtitle":"Reliability Designed for Every Dive","eshopUrl":{"url":"/en/products/ccr-liberty/configurations","urlNewWindow":true,"pageId":"cl7on204vv7pd0858ifbw2xst"},"imageMobile":{"mimetype":"image/png","size":1837377,"hash":"cc9b7232e6fa9c25dd27ef2b7dcfe9e3c4dcd0e1","id":"cmilyzhcripxv08500cv0cl4w","filename":"liberty-render-hp-mobile.png","category":"divesoft/","type":"image","alt":"CCR Liberty"},"image":{"mimetype":"image/png","size":2126424,"hash":"ba240cfc03faefd0ac56b4791d7a5f582f3ad530","id":"cmgey40o7ul7r085022qpyhxi","filename":"liberty-banner-homepage.png","category":"divesoft/","type":"image","alt":"CCR Liberty"},"detailUrl":{"url":"/en/products/ccr-liberty","pageId":"cjv3rpryz00iw0836lc0zx81j","urlNewWindow":false},"links":[{"id":"1","title":"Buy","color":"red","url":{"url":"https://www.divesoft.com/en/ccr-liberty?config=eyJ0cmVlSWQiOiI2Mjk3M2NmZmRlYWMzNWUzMDQ4MmFlYzAiLCJub2RlR3VpZHMiOltdLCJkZXRhaWxOb2RlR3VpZCI6IiIsInNldHVwRGV0YWlscyI6e30sImRldGFpbFNldHVwIjp7InF1ZXN0aW9uR3VpZCI6IiIsImFuc3dlckd1aWQiOiIifSwiYWNjZXNzb3J5Q2F0ZWdvcmllcyI6e30sImRldGFpbEFjY2Vzc29yeSI6eyJjYXRlZ29yeUd1aWQiOiIiLCJxdWVzdGlvbkd1aWQiOiIiLCJhbnN3ZXJHdWlkIjoiIn19&step=nodes","pageId":"cl7on204vv7pd0858ifbw2xst"}},{"id":"2","title":"Full dive","color":"white","url":{"url":"/en/products/ccr-liberty","pageId":"cjv3rpryz00iw0836lc0zx81j"},"isOverlayLink":true}],"activeTab":"1"},"id":"#16","type":"component","lock":false,"position":6},{"name":"ProductTile","data":{"title":"LABEL PRINTING","subtitle":"Gas Mix Clearly Marked","image":{"recommendedSizes":{"width":"6000","height":"2100"},"mimetype":"image/png","size":502131,"hash":"e43843c03d09a918bffd1350531de0ddc0563d11","id":"cmo9xnllu0o730800v2tgl2kb","filename":"labelprinting.png","category":"divesoft/","type":"image","alt":"Label Printing"},"eshopUrl":{"url":"https://eshop.divesoft.com/he-o2-printer-cable/7312","urlNewWindow":true},"detailUrl":{"url":"https://toolkit.divesoft.com/"},"imageMobile":{"mimetype":"image/png","size":395172,"hash":"a36d20c64a4f6cc47ae3d3abb77d4251bea4463a","id":"cmoa1l2cr0r7n0800cbwwtr0g","filename":"label-mobile.png","category":"divesoft/","type":"image","alt":"Label Printing"},"links":[{"id":"1","url":{"url":"https://eshop.divesoft.com/he-o2-printer-cable/7312","urlNewWindow":true},"color":"red","title":"Buy"},{"id":"2","title":"Full dive","url":{"url":"https://toolkit.divesoft.com/","urlNewWindow":true},"isOverlayLink":true,"color":"white"}],"activeTab":"1"},"id":"#24","type":"component","lock":false,"position":7},{"name":"ProductTile","data":{"title":"SOLO","subtitle":"Every Breath Measured with Trust","eshopUrl":{"url":"https://eshop.divesoft.com/analyzer-solo/8300","urlNewWindow":true}
2,"image":{"mimetype":"image/png","size":3135897,"hash":"0f0adade7a81a0ba7c1f642c91e903d17cb0853c","id":"cmg81q0mvt1730850i0otc6q6","filename":"divesoft-uprava-solo.png","category":"divesoft/","type":"image","alt":"SOLO trimix analyzer"},"detailUrl":{"url":"/en/products/analyzers/analyzer-solo","pageId":"cjztim1kk09fg0777nv63tf9b"},"imageMobile":{"mimetype":"image/png","size":3273507,"hash":"b85fb33a5fc341886bdef3037c7d41ee8834c9f2","id":"cmilyxlplipxa0850vjaw74v6","filename":"analyzer-solo-render-hp-mobile.png","category":"divesoft/","type":"image","alt":"SOLO trimix analyzer"},"links":[{"id":"1","title":"Buy","url":{"urlNewWindow":true,"url":"https://eshop.divesoft.com/analyzer-solo/8300"},"color":"red"},{"id":"2","title":"Full dive","isOverlayLink":true,"color":"white","url":{"url":"/en/products/analyzers/analyzer-solo","pageId":"cjztim1kk09fg0777nv63tf9b"}}],"activeTab":"2"},"id":"#13","type":"component","lock":false,"position":8},{"name":"ProductTile","data":{"title":"He/O<sub>2</sub> ANALYZER","subtitle":"Proven and Trusted","image":{"recommendedSizes":{"width":"6000","height":"2100"},"mimetype":"image/png","size":925731,"hash":"ab09c25f96342ee4c30aa7b5db93ca13b70bf04c","id":"cmoa1lpca0r8i0800u3lmd2if","filename":"heo2.png","category":"divesoft/","type":"image","alt":"He/O2 Analyzer"},"eshopUrl":{"url":"https://eshop.divesoft.com/analyzer-he-o2/8313","urlNewWindow":true},"detailUrl":{"url":"/en/products/analyzers/analyzer-he-o2","pageId":"cjztilv3509et0777ejgtlm67"},"imageMobile":{"mimetype":"image/png","size":1214238,"hash":"6ad2fc2f655018f612d43bfb02cdec1273bf1c0f","id":"cmohe5tn32xw00800fc98na9v","filename":"he-mobile.png","category":"divesoft/","type":"image","alt":"He/O2 Analyzer"},"links":[{"id":"1","url":{"urlNewWindow":true,"url":"https://eshop.divesoft.com/analyzer-he-o2/8313"},"title":"Buy"},{"id":"2","title":"Full dive","url":{"url":"/en/products/analyzers/analyzer-he-o2","pageId":"cjztilv3509et0777ejgtlm67"},"isOverlayLink":true,"color":"white"}]},"id":"#25","type":"component","lock":false,"position":9},{"name":"ProductTile","data":{"title":"DNA","subtitle":"Compact Nitrox Analyzer with Accuracy","eshopUrl":{"url":"https://eshop.divesoft.com/dna/8460","urlNewWindow":true},"image":{"mimetype":"image/png","size":1344450,"hash":"da2c9000bfe9b4519bd2ec9f6505af9f6a242c6f","id":"cmoihebjs3fi40800pg9t460m","filename":"opravadnax-1.png","category":"divesoft/","type":"image","alt":"DNA Analyzer"},"detailUrl":{"url":"/en/products/analyzers/dna","pageId":"clf9rs5c3ltkw0835vujrrtxu"},"imageMobile":{"mimetype":"image/png","size":13032645,"hash":"c7fb66064ea4219e565788fd650b45872aaa43fe","id":"cmilyx5muipwq08503k6tlofh","filename":"dna-render-hp-mobile.png","category":"divesoft/","type":"image","alt":"DNA Analyzer"},"links":[{"id":"1","title":"Buy","url":{"urlNewWindow":true,"url":"https://eshop.divesoft.com/dna/8460"},"isOverlayLink":false,"color":"red"},{"id":"2","title":"Full dive","url":{"url":"/en/products/analyzers/dna","pageId":"clf9rs5c3ltkw0835vujrrtxu"},"color":"white","isOverlayLink":true}],"activeTab":"1"},"id":"#5","type":"component","lock":false,"position":10},{"name":"CallToAction","data":{"backgroundColor":"white","isCentered":true,"title":"Discover the numbers behind our trust.","links":[{"title":"Shop All Divesoft Gear","url":{"url":"https://eshop.divesoft.com/","pageId":"cjv3rim6p00fm0836uts415d5","urlNewWindow":true},"color":"black","type":"outline","id":"1"}],"linkPosition":"above","linkAlignment":"right"},"id":"#19","type":"component","lock":false,"position":12},{"name":"AnimatedMetricCounter","data":{"metrics":[{"value":"0","suffix":"","title":"Compromise","description":"Safety-critical design, verified at every step.","id":"1"},{"value":"50","suffix":"+","title":"Countries","description":"Our gear supports divers across oceans and communities.","id":"2"},{"id":"3","value":"20","suffix":"+","title":"years ","description":"Experience in precision engineering for diving."}],"activeTab":"1"},"id":"#10","type":"component","lock":false,"position":13},{"name":"CallToAction","data":{"backgroundColor":"white","isCentered":false,"title":"","links":[{"title":"About us","url":{"url":"/en/about-us","pageId":"ckgdfcdf4afxt0788jj7dwb6x"},"color":"black","type":"primary","id":"1"},{"id":"2","title":"SHOP","url":{"url":"https://eshop.divesoft.com/","urlNewWindow":true}}],"linkPosition":"below","linkAlignment":"right","activeTab":"1"},"id":"#20","type":"component","lock":false,"position":14},{"name":"BlogPreviewV2","data":{"title":"Dive into more stories","description":"Our community grows through shared knowledge, support and safe explorationâhelping divers improve skills and enjoy diving more.","blogUrl":{"url":"/en/blog","pageId":"ckpcgx2c64h2d0788rft16oow"},"articles":{"sourceType":"pages","data":{"title":"%page,annotations,title% ","perex":"%page,annotations,perex%","image":{"dynamiclySourcedImage":" %page,annotations,image%"},"url":{"pageSourcedUrl":true,"analyticsTag":""}}
2,"filters":[],"tagIds":["clw52vo5mlckc0735dl0is8ok","clw52y9cclcle073501kwtw2u","clw52z09zlclk0735mxb7v53p","clw52zeqhlclq0735wrys6js8","cmfp50qhi00lk08324ek37f9g","cm5ww0z2w1b7708035dpdbq9a","cm5ww05zc1b5d0803zglvz927","cm5ww0t651b710803pcl02cn4"],"orderBy":"%page,createdAt%","order":"DESC","limit":6}},"id":"#12","type":"component","lock":false,"position":15},{"name":"Showreel","data":{"media":[{"id":"1","media":{"mimetype":"image/jpeg","size":14611225,"hash":"88c4747caf1986a9fab193ea054a1d0b3c36421b","id":"cmh4q7eci35d40850oaodvgq4","filename":"0n2a8855.jpg","category":"divesoft/","type":"image"}},{"id":"2","media":{"mimetype":"image/jpeg","size":14181709,"hash":"0ba6a0a2ddce29be72448b6389f4ed026cf8135f","id":"cmh4qcv1535fk08508fnv2b9h","filename":"0n2a8894-enhanced-nr.jpg","category":"divesoft/","type":"image"}},{"id":"3","media":{"mimetype":"image/jpeg","size":9770433,"hash":"e9f50cfc6693fc3460df7892421a10543cb17b95","id":"cmh4qh7c035j10850fh5n4r7m","filename":"0n2a9075.jpg","category":"divesoft/","type":"image"}},{"id":"4","media":{"mimetype":"image/jpeg","size":22525406,"hash":"3f4cc0ea0c8fc83595d6fd01d13f6116500c750c","id":"cmh4qo2ke35nv0850axr28mao","filename":"0n2a9519-enhanced-nr-edit.jpg","category":"divesoft/","type":"image"}},{"id":"5","media":{"mimetype":"image/jpeg","size":2912383,"hash":"2fe76c92ca587c543d6f9430b2ccd7c07265b441","id":"cmh4rvwnk368d0850htufx5ur","filename":"dsc00113-133.jpg","category":"divesoft/","type":"image"}},{"id":"6","media":{"mimetype":"image/jpeg","size":2335743,"hash":"cfae5109a2bbe4944b9826c0aa5b64c70ba86a7c","id":"cmh4rx3zv369c08506uc0n947","filename":"dsc00190-143.jpg","category":"divesoft/","type":"image"}},{"id":"7","media":{"mimetype":"image/jpeg","size":2310016,"hash":"5fe3aa120ca10a554442acfa84b024b8f9926a35","id":"cmh4ry7tq36a20850pudmbfmk","filename":"dsc00275-164.jpg","category":"divesoft/","type":"image"}},{"id":"8","media":{"mimetype":"image/jpeg","size":3070819,"hash":"2aff1d033e13152c6202c73106dca4f94d7ff9d0","id":"cmh4s0x7m36ao0850gvend7qk","filename":"dsc00276-165.jpg","category":"divesoft/","type":"image"}},{"id":"9","media":{"mimetype":"image/jpeg","size":2449544,"hash":"a08e6c1f2ac51fe9c114bf27733417d0e2199cf6","id":"cmh4s2ej036b00850qzr02e23","filename":"dsc00393-191.jpg","category":"divesoft/","type":"image"}},{"id":"10","media":{"mimetype":"image/jpeg","size":1987713,"hash":"ea40135fbe3b305dcc153b5d2030a0d8dd750b1a","id":"cmh4s60yg36c70850r364dnhw","filename":"dsc00450-198.jpg","category":"divesoft/","type":"image"}},{"id":"11","media":{"mimetype":"image/jpeg","size":2442501,"hash":"fef5d4cd05b6ff49590760aebae767b43bf7acc5","id":"cmh4s7b9i36cl0850y0niihz6","filename":"dsc00550-213.jpg","category":"divesoft/","type":"image"}},{"id":"12","media":{"mimetype":"image/jpeg","size":2189861,"hash":"86ec5b62dc54571445ba62abc059c083e9f78433","id":"cmh4s86i736cr0850gnemxrf1","filename":"dsc09456-2.jpg","category":"divesoft/","type":"image"}}],"isFullWidth":true,"slides":[{"id":"1","media":{"mimetype":"image/jpeg","size":14611225,"hash":"88c4747caf1986a9fab193ea054a1d0b3c36421b","id":"cmh4q7eci35d40850oaodvgq4","filename":"0n2a8855.jpg","category":"divesoft/","type":"image","alt":"Two scuba divers on a boat"},"title":"Join the Ones Who Dive Deeper.","autoplayDuration":"9000"},{"id":"2","title":"Join the Ones Who Dive Deeper.","media":{"mimetype":"image/jpeg","size":14181709,"hash":"0ba6a0a2ddce29be72448b6389f4ed026cf8135f","id":"cmh4qcv1535fk08508fnv2b9h","filename":"0n2a8894-enhanced-nr.jpg","category":"divesoft/","type":"image","alt":"Detailed preparation of scuba diving equipment"},"autoplayDuration":"9000"},{"id":"3","title":"Join the Ones Who Dive Deeper.","media":{"mimetype":"image/jpeg","size":9770433,"hash":"e9f50cfc6693fc3460df7892421a10543cb17b95","id":"cmh4qh7c035j10850fh5n4r7m","filename":"0n2a9075.jpg","category":"divesoft/","type":"image","alt":"Technical diver at the surface"},"autoplayDuration":"9000"},{"id":"4","title":"Join the Ones Who Dive Deeper.","media":{"mimetype":"image/jpeg","size":22525406,"hash":"3f4cc0ea0c8fc83595d6fd01d13f6116500c750c","id":"cmh4qo2ke35nv0850axr28mao","filename":"0n2a9519-enhanced-nr-edit.jpg","category":"divesoft/","type":"image","alt":"Scuba diver gliding through the water"},"autoplayDuration":"9000"},{"id":"5","title":"Join the Ones Who Dive Deeper.","media":{"mimetype":"image/jpeg","size":2912383,"hash":"2fe76c92ca587c543d6f9430b2ccd7c07265b441","id":"cmh4rvwnk368d0850htufx5ur","filename":"dsc00113-133.jpg","category":"divesoft/","type":"image","alt":"Two divers in full gear ready for deployment"},"autoplayDuration":"9000"},{"id":"6","title":"Join the Ones Who Dive Deeper.","media":{"mimetype":"image/jpeg","size":2335743,"hash":"cfae5109a2bbe4944b9826c0aa5b64c70ba86a7c","id":"cmh4rx3zv369c08506uc0n947","filename":"dsc00190-143.jpg","category":"divesoft/","type":"image","alt":"Technical diver in full gear"},"autoplayDuration":"9000"},{"id":"7","title":"Join the Ones Who Dive Deeper.","media":{"mimetype":"image/jpeg","size":2310016,"hash":"5fe3aa120ca10a554442acfa84b024b8f9926a35","id":"cmh4ry7tq36a20850pudmbfmk","filename":"dsc00275-164.jpg","category":"divesoft/","type":"image","alt":"Met
2iculous dive preparation"},"autoplayDuration":"9000"},{"id":"8","title":"Join the Ones Who Dive Deeper.","media":{"mimetype":"image/jpeg","size":3070819,"hash":"2aff1d033e13152c6202c73106dca4f94d7ff9d0","id":"cmh4s0x7m36ao0850gvend7qk","filename":"dsc00276-165.jpg","category":"divesoft/","type":"image","alt":"Testing of scuba diving equipment"},"autoplayDuration":"9000"}],"activeTab":"8"},"id":"#17","type":"component","lock":false,"position":16},{"name":"ExploreOurGear","data":{"gear":[{"title":"CCR Liberty","description":"Reliable, modular rebreathers designed for confident diving at any level.","id":"1","detailUrl":{"url":"/en/products/ccr-liberty","pageId":"cjv3rpryz00iw0836lc0zx81j","urlNewWindow":false}},{"id":"2","title":"Analyzers ","description":"Accurate Oâ and He analyzers for safety on every dive.","detailUrl":{"url":"/en/products/analyzers","pageId":"cjv3rr7on00ky0836fercz490","urlNewWindow":true}},{"id":"4","title":"BOV/DSV/ADV","description":"Seamless breathing control for safer, easier dives.","detailUrl":{"url":"/en/products/bovdsvadv","pageId":"cjv7uialr03nh0836yjoz2dji","urlNewWindow":true}},{"id":"6","title":"Extra Gear","description":"Accessories built to last and enhance any dive.","detailUrl":{"url":"/en/products/others","pageId":"ckdsltzi07o520788tk0s6c4v"}},{"id":"7","title":"Merchandise ","description":"Surface gear for divers, designed with passion.","detailUrl":{"url":"https://eshop.divesoft.com/products/merchandise?currency=CZK","urlNewWindow":true}}],"blogUrl":{"url":"/en/blog","pageId":"ckpcgx2c64h2d0788rft16oow"}},"id":"#14","type":"component","lock":false,"position":17},{"name":"CallToAction","data":{"backgroundColor":"black","isCentered":true,"title":"Need guidance? Contact Divesoft today.","links":[{"title":"Contact Us","url":{"url":"/en/contacts/contact-us","pageId":"cka6kn4hd3ahh0788k20h9ayy"},"color":"white","type":"outline","id":"1"}],"linkPosition":"below","linkAlignment":"right","activeTab":"1"},"id":"#21","type":"component","lock":false,"position":18},{"name":"Footer","data":{"componentTemplateId":"cjvwimxrl08e40798hjs5ek9w"},"id":"#1","type":"component","lock":false,"position":19}],"id":"root","idBuffer":"#27","lastCommit":"d90473d9-440b-4e8b-bfa7-4ed9d9ea7701"},"name":"Homepage","language":{"id":"cjv3kwvoj000u083611381c6o","code":"en","__typename":"LocalizedPageLanguage"},"__typename":"LocalizedPage"}},"project":{"type":"json","json":{"id":"cjv3l1cht003e0836h39egd28","components":"divesoft","__typename":"Project"}},"projectData":{"type":"json","json":{"id":"cjv3l1cht003e0836h39egd28","components":"divesoft","__typename":"Project"}},"websiteData":{"type":"json","json":{"id":"cjv3l1ssi003u0836mwnotf8e","title":"Website","urlMask":"/","googleTrackingPixel":"GTM-5BJR5NZ","__typename":"Website"}},"componentTemplates({\"where\":{\"language\":{\"id\":\"cjv3kwvoj000u083611381c6o\"},\"website\":{\"id\":\"cjv3l1ssi003u0836mwnotf8e\"}}})":[{"type":"id","generated":false,"id":"ComponentTemplate:cjv3uuvcb022s0836es3ybppq","typename":"ComponentTemplate"},{"type":"id","generated":false,"id":"ComponentTemplate:cjv7yndru048c0836j99ljogw","typename":"ComponentTemplate"},{"type":"id","generated":false,"id":"ComponentTemplate:cjvwimxrl08e40798hjs5ek9w","typename":"ComponentTemplate"},{"type":"id","generated":false,"id":"ComponentTemplate:cjxar7jpk035c0708clk7h3jm","typename":"ComponentTemplate"},{"type":"id","generated":false,"id":"ComponentTemplate:cjxat76di03by0708lube2tbx","typename":"ComponentTemplate"},{"type":"id","generated":false,"id":"ComponentTemplate:cjyiek5ng00bz07773k8drspc","typename":"ComponentTemplate"},{"type":"id","generated":false,"id":"ComponentTemplate:cjyiekfyu00c80777mxkf5m6i","typename":"ComponentTemplate"},{"type":"id","generated":false,"id":"ComponentTemplate:cjyjgz0oa00mw07778oqggnx2","typename":"ComponentTemplate"},{"type":"id","generated":false,"id":"ComponentTemplate:cjyjh57az00n507777yr4iemj","typename":"ComponentTemplate"},{"type":"id","generated":false,"id":"ComponentTemplate:cjyjh5vz700ne0777fwq9er4i","typename":"ComponentTemplate"},{"type":"id","generated":false,"id":"ComponentTemplate:cjyjh8a5k00nn07771qrlr1nr","typename":"ComponentTemplate"},{"type":"id","generated":false,"id":"ComponentTemplate:cjyjh8zsv00nw0777oxtod5by","typename":"ComponentTemplate"},{"type":"id","generated":false,"id":"ComponentTemplate:cjyjh9q1l00o50777fgq04zg4","typename":"ComponentTemplate"},{"type":"id","generated":false,"id":"ComponentTemplate:cjyjh9x8k00oe0777ck29aq3a","typename":"ComponentTemplate"},{"type":"id","generated":false,"id":"ComponentTemplate:cjz00psyc03z40777dsaxkokd","typename":"ComponentTemplate"},{"type":"id","generated":false,"id":"ComponentTemplate:cjztj2rs209kz0777irrgqorw","typename":"ComponentTemplate"},{"type":"id","generated":false,"id":"ComponentTemplate:cjztjem9o09n207773536algu","typename":"ComponentTemplate"},{"type":"id","generated":false,"id":"ComponentTemplate:ck0vdxpoc00jo0832b70yoksa","typename":"ComponentTemplate"},{"type":"id","generated":false,"id":"ComponentTemplate:ck0vedulb00w30832fxihwj4o","typename":"ComponentTemplate"},{"type":"id","generated":false,"id":"ComponentTemplate:ck0vez8es019s0832geub5ydj","typename":"ComponentTemplate"},{"type":"id","generated":false,"id":"ComponentTemplate:ck0vgsjyq01pt0832lwey5y1f","typename":"ComponentTemplate"},{"type":"id","generated":false,"id":"ComponentTemplate:ck0vk00to034j083279fnupur","typename":"ComponentTemplate"},{"type":"id","generated":false,"id":"ComponentTemplate:ck0vk0llb034x0832xulua13v","typename":"ComponentTemplate"},{"type":"id","generated":false,"id":"ComponentTemplate:ck0vk9kgx035b0832ie3qerdi","typename":"ComponentTemplate"},{"type":"id","generated":false,"id":"ComponentTemplate:ck0vkcrn0036l0832p24hah4z","typename":"ComponentTemplate"},{"type":"id","generated":false,"id":"ComponentTemplate:ck2y01nfi004j0821uvh4p2nm","typename":"ComponentTemplate"},{"type":"id","generated":false,"id":"ComponentTemplate:ck3tt7vzi04980821mfipp180","typename":"ComponentTemplate"},{"type":"id","generated":false,"id":"ComponentTemplate:ck3u8h4sc053908213bul9mtt","typename":"ComponentTemplate"},{"type":"id","generated":false,"id":"ComponentTemplate:ck52mo0fg04c00721knnax4ke","typename":"ComponentTemplate"},{"type":"id","generated":false,"id":"ComponentTemplate:ck6v13a161rff0721xzd7nbap","typename":"ComponentTemplate"},{"type":"id","generated":false,"id":"ComponentTemplate:ck74qi3an292n0
2721p29p890r","typename":"ComponentTemplate"},{"type":"id","generated":false,"id":"ComponentTemplate:ck7m1liof08hu0788xhubcl1g","typename":"ComponentTemplate"},{"type":"id","generated":false,"id":"ComponentTemplate:ck7yr3t7r0quv0788gp85v2jg","typename":"ComponentTemplate"},{"type":"id","generated":false,"id":"ComponentTemplate:ck8iqouu41ddb07882v7qc63c","typename":"ComponentTemplate"},{"type":"id","generated":false,"id":"ComponentTemplate:ck8nlqbun1gyu0788ly874cpz","typename":"ComponentTemplate"},{"type":"id","generated":false,"id":"ComponentTemplate:ck8nlzo1u1h0f0788q611oymj","typename":"ComponentTemplate"},{"type":"id","generated":false,"id":"ComponentTemplate:ck92piian1yyt0788n26o0ywn","typename":"ComponentTemplate"},{"type":"id","generated":false,"id":"ComponentTemplate:ck988g71823fk0788j6erfx72","typename":"ComponentTemplate"},{"type":"id","generated":false,"id":"ComponentTemplate:ck98avlsp243n0788ey616i9j","typename":"ComponentTemplate"},{"type":"id","generated":false,"id":"ComponentTemplate:ck98avrsk243u0788lj1g4cz3","typename":"ComponentTemplate"},{"type":"id","generated":false,"id":"ComponentTemplate:ck98axdaj24590788fkuhjepe","typename":"ComponentTemplate"},{"type":"id","generated":false,"id":"ComponentTemplate:ck9dvr7yn2cnk07880iba83uk","typename":"ComponentTemplate"},{"type":"id","generated":false,"id":"ComponentTemplate:ckawbumou44330788h8wf02ra","typename":"ComponentTemplate"},{"type":"id","generated":false,"id":"ComponentTemplate:ckcbw7yy760a007887dh617tn","typename":"ComponentTemplate"},{"type":"id","generated":false,"id":"ComponentTemplate:ckd5n8ppm70kr0788i2wzfdld","typename":"ComponentTemplate"},{"type":"id","generated":false,"id":"ComponentTemplate:ckdr50hq47li90788qyqbtvco","typename":"ComponentTemplate"},{"type":"id","generated":false,"id":"ComponentTemplate:ckei7bmri8boi07889db9zmgu","typename":"ComponentTemplate"},{"type":"id","generated":false,"id":"ComponentTemplate:ckei7zrot8bus0788gistkb9k","typename":"ComponentTemplate"},{"type":"id","generated":false,"id":"ComponentTemplate:ckewgo7ye8rv20788ju2ioxmh","typename":"ComponentTemplate"},{"type":"id","generated":false,"id":"ComponentTemplate:ckfcge3tc98t90788vozdhb7t","typename":"ComponentTemplate"},{"type":"id","generated":false,"id":"ComponentTemplate:ckfl443pd9kyz0788s4g7smet","typename":"ComponentTemplate"},{"type":"id","generated":false,"id":"ComponentTemplate:ckfodtg0m9s8307883mkcq7fq","typename":"ComponentTemplate"},{"type":"id","generated":false,"id":"ComponentTemplate:ckhomn74ibq190788gfum9fh3","typename":"ComponentTemplate"},{"type":"id","generated":false,"id":"ComponentTemplate:ckkia66pw2qdb0788nuh7bncq","typename":"ComponentTemplate"},{"type":"id","generated":false,"id":"ComponentTemplate:ckkia7p4z2qdw0788l8z25xr7","typename":"ComponentTemplate"},{"type":"id","generated":false,"id":"ComponentTemplate:cklh2jfpj41zx0788od5ep9lk","typename":"ComponentTemplate"},{"type":"id","generated":false,"id":"ComponentTemplate:cklt9bqff067407889a21o1x2","typename":"ComponentTemplate"},{"type":"id","generated":false,"id":"ComponentTemplate:cklt9cwsn067n078878r5h96g","typename":"ComponentTemplate"},{"type":"id","generated":false,"id":"ComponentTemplate:ckltkwdox06y807886vhfkomk","typename":"ComponentTemplate"},{"type":"id","generated":false,"id":"ComponentTemplate:ckodztb9e3adh07887lj3ecch","typename":"ComponentTemplate"},{"type":"id","generated":false,"id":"ComponentTemplate:ckodzunfj3ado0788w3g2q6nb","typename":"ComponentTemplate"},{"type":"id","generated":false,"id":"ComponentTemplate:ckquvvfe074lb0788vent4x7k","typename":"ComponentTemplate"},{"type":"id","generated":false,"id":"ComponentTemplate:cktl5p06n2i5a0988dmhuursn","typename":"ComponentTemplate"},{"type":"id","generated":false,"id":"ComponentTemplate:ckvkotiu92v5z0864310bv4bu","typename":"ComponentTemplate"},{"type":"id","generated":false,"id":"ComponentTemplate:ckvkouye02v6608641xzjdkgs","typename":"ComponentTemplate"},{"type":"id","generated":false,"id":"ComponentTemplate:ckwafpg980sa20864m052g2ki","typename":"ComponentTemplate"},{"type":"id","generated":false,"id":"ComponentTemplate:ckwafpg9a0sa30864yikxuwm7","typename":"ComponentTemplate"},{"type":"id","generated":false,"id":"ComponentTemplate:ckz2p2s2s4x9n08585hc2tlt1","typename":"ComponentTemplate"},{"type":"id","generated":false,"id":"ComponentTemplate:ckztpbec07u6d0858xc0uvmw6","typename":"ComponentTemplate"},{"type":"id","generated":false,"id":"ComponentTemplate:cl06qffhl9ccp0858ja9vdupw","typename":"ComponentTemplate"},{"type":"id","generated":false,"id":"ComponentTemplate:cl0az2g0i9yiv0858n2sn5m4m","typename":"ComponentTemplate"},{"type":"id","generated":false,"id":"ComponentTemplate:cl0b0i33h9yyi0858c11lgnuu","typename":"ComponentTemplate"},{"type":"id","generated":false,"id":"ComponentTemplate:cl0qiyz8dbkix0858jqrb078e","typename":"ComponentTemplate"},{"type":"id","generated":false,"id":"ComponentTemplate:cl0wfcwwac5md085817s67kug","typename":"ComponentTemplate"},{"type":"id","generated":false,"id":"ComponentTemplate:cl10i498uchyx0858kkmchq8a","typename":"ComponentTemplate"},{"type":"id","generated":false,"id":"ComponentTemplate:cl10i4j0ychz40858605hd2vo","typename":"ComponentTemplate"},{"type":"id","generated":false,"id":"ComponentTemplate:cl10ie9auci090858uhm6foq3","typename":"ComponentTemplate"},{"type":"id","generated":false,"id":"ComponentTemplate:cl10iehhsci0g0858607ntpgk","typename":"ComponentTemplate"},{"type":"id","generated":false,"id":"ComponentTemplate:cl1ae4ikndb1g0858zixa3nmo","typename":"ComponentTemplate"},{"type":"id","generated":false,"id":"ComponentTemplate:cl1d90bkgdjys08588eanflnk","typename":"ComponentTemplate"},{"type":"id","generated":false,"id":"ComponentTemplate:cl529e8lhnwhb08587dbdpm7b","typename":"ComponentTemplate"},{"type":"id","generated":false,"id":"ComponentTemplate:cl56e6gj6o7gt0858whw9vtg0","typename":"ComponentTemplate"},{"type":"id","generated":false,"id":"ComponentTemplate:cl5ab17h9onqf0858
2nna4mj1w","typename":"ComponentTemplate"},{"type":"id","generated":false,"id":"ComponentTemplate:cl5adxitboo550858me1tvbl4","typename":"ComponentTemplate"},{"type":"id","generated":false,"id":"ComponentTemplate:cl5cqh4adowvf0858ubg7875n","typename":"ComponentTemplate"},{"type":"id","generated":false,"id":"ComponentTemplate:cl5crp43gox2y0858hmfqqqsb","typename":"ComponentTemplate"},{"type":"id","generated":false,"id":"ComponentTemplate:cl5g3nllgp4hq0858d7lk2t47","typename":"ComponentTemplate"},{"type":"id","generated":false,"id":"ComponentTemplate:cl5hjop8dp9fz0858r16rttoy","typename":"ComponentTemplate"},{"type":"id","generated":false,"id":"ComponentTemplate:cl5hjsmoep9hn0858ot3nk2q9","typename":"ComponentTemplate"},{"type":"id","generated":false,"id":"ComponentTemplate:cl5iuiex6ph8a08581v7puuty","typename":"ComponentTemplate"},{"type":"id","generated":false,"id":"ComponentTemplate:cl6gc2nhts2tm0858w7a5jr5b","typename":"ComponentTemplate"},{"type":"id","generated":false,"id":"ComponentTemplate:cl6gc4um7s2um08581jpxjs3c","typename":"ComponentTemplate"},{"type":"id","generated":false,"id":"ComponentTemplate:cl6gslpafs51s08584tc5h1fg","typename":"ComponentTemplate"},{"type":"id","generated":false,"id":"ComponentTemplate:cl6gss7mhs54s0858quojy56h","typename":"ComponentTemplate"},{"type":"id","generated":false,"id":"ComponentTemplate:cl6gssha5s55808585mym687q","typename":"ComponentTemplate"},{"type":"id","generated":false,"id":"ComponentTemplate:cl6gssoxzs55f085841w2t56s","typename":"ComponentTemplate"},{"type":"id","generated":false,"id":"ComponentTemplate:cl6gsswirs55m0858o1vsyfqb","typename":"ComponentTemplate"},{"type":"id","generated":false,"id":"ComponentTemplate:cl6gst6zus5620858r01pasaa","typename":"ComponentTemplate"},{"type":"id","generated":false,"id":"ComponentTemplate:cl6gstdhjs56d0858mxduwcmp","typename":"ComponentTemplate"},{"type":"id","generated":false,"id":"ComponentTemplate:cl6gstjo4s56k0858th40ho8t","typename":"ComponentTemplate"},{"type":"id","generated":false,"id":"ComponentTemplate:cl6gstqtos56r0858h0oivcod","typename":"ComponentTemplate"},{"type":"id","generated":false,"id":"ComponentTemplate:cl6gudxw5s5hq0858c8x3d3k9","typename":"ComponentTemplate"},{"type":"id","generated":false,"id":"ComponentTemplate:cl6gugl2rs5hx0858bu7ddodq","typename":"ComponentTemplate"},{"type":"id","generated":false,"id":"ComponentTemplate:cl6guqeuxs5kl0858acghd9ck","typename":"ComponentTemplate"},{"type":"id","generated":false,"id":"ComponentTemplate:cl6gv2zuas5s00858nkqnvli7","typename":"ComponentTemplate"},{"type":"id","generated":false,"id":"ComponentTemplate:cl7no6agyv1ml0858yvcmyjsu","typename":"ComponentTemplate"},{"type":"id","generated":false,"id":"ComponentTemplate:cl7npcvt2v1up0858oo6konrw","typename":"ComponentTemplate"},{"type":"id","generated":false,"id":"ComponentTemplate:cl7npkffyv1xw0858iosjwonc","typename":"ComponentTemplate"},{"type":"id","generated":false,"id":"ComponentTemplate:cl9ya7fcs2uiz0858x7qiyk6z","typename":"ComponentTemplate"},{"type":"id","generated":false,"id":"ComponentTemplate:claijw5v81qht0835j1dmogv1","typename":"ComponentTemplate"},{"type":"id","generated":false,"id":"ComponentTemplate:clban1hr75aol0835258b6s1f","typename":"ComponentTemplate"},{"type":"id","generated":false,"id":"ComponentTemplate:clg8f3m23pg210835784f98c5","typename":"ComponentTemplate"},{"type":"id","generated":false,"id":"ComponentTemplate:clgc0iykwpxfu0835j8844xnm","typename":"ComponentTemplate"},{"type":"id","generated":false,"id":"ComponentTemplate:clgc2b24npyip0835ju32p0sp","typename":"ComponentTemplate"},{"type":"id","generated":false,"id":"ComponentTemplate:clgc2f6t4pypr0835hsqq35ds","typename":"ComponentTemplate"},{"type":"id","generated":false,"id":"ComponentTemplate:clgc2giu0pyqt0835v0voqqsj","typename":"ComponentTemplate"},{"type":"id","generated":false,"id":"ComponentTemplate:clj5o8s0v8d98083584jlkh7o","typename":"ComponentTemplate"},{"type":"id","generated":false,"id":"ComponentTemplate:cljcsv3ci94ur0835c696e58g","typename":"ComponentTemplate"},{"type":"id","generated":false,"id":"ComponentTemplate:clpti51szngus0735vckv0v18","typename":"ComponentTemplate"},{"type":"id","generated":false,"id":"ComponentTemplate:cluqprhkvfk7n0735ex56gzn0","typename":"ComponentTemplate"},{"type":"id","generated":false,"id":"ComponentTemplate:cm9h4wr6ugjv10803yq
2s3tp71","typename":"ComponentTemplate"},{"type":"id","generated":false,"id":"ComponentTemplate:cm9tyyioqiznx0803d9uizh8o","typename":"ComponentTemplate"},{"type":"id","generated":false,"id":"ComponentTemplate:cmdsh7xs60heb083221zlkgvh","typename":"ComponentTemplate"},{"type":"id","generated":false,"id":"ComponentTemplate:cmo217fjivvbv08890d7r7mhl","typename":"ComponentTemplate"},{"type":"id","generated":false,"id":"ComponentTemplate:cmo3f1kzkw8pd0889hxoow8p1","typename":"ComponentTemplate"},{"type":"id","generated":false,"id":"ComponentTemplate:cmo5ko5huwtv40889ugkkecht","typename":"ComponentTemplate"},{"type":"id","generated":false,"id":"ComponentTemplate:cmo9u6bhwy5g90889gprzyxzf","typename":"ComponentTemplate"},{"type":"id","generated":false,"id":"ComponentTemplate:cmoil1yn1017e0834rjf98q8g","typename":"ComponentTemplate"},{"type":"id","generated":false,"id":"ComponentTemplate:cmp0yw25s01tt0826v0wo4wet","typename":"ComponentTemplate"},{"type":"id","generated":false,"id":"ComponentTemplate:cmp13u65o04gm0826cm5u1agj","typename":"ComponentTemplate"},{"type":"id","generated":false,"id":"ComponentTemplate:cmp172nfu00f208260n7srwjg","typename":"ComponentTemplate"},{"type":"id","generated":false,"id":"ComponentTemplate:cmpv63t6376s00826utezk0w7","typename":"ComponentTemplate"}],"pagesUrls({\"where\":{\"language\":\"cjv3kwvoj000u083611381c6o\",\"websiteId\":\"cjv3l1ssi003u0836mwnotf8e\"}})":[{"type":"id","generated":false,"id":"PageUrl:cjv3l26tp004p0836i54n4u7a/en","typename":"PageUrl"},{"type":"id","generated":false,"id":"PageUrl:cjv3rim6p00fm0836uts415d5/en/products","typename":"PageUrl"},{"type":"id","generated":false,"id":"PageUrl:cjv3rpryz00iw0836lc0zx81j/en/products/ccr-liberty","typename":"PageUrl"},{"type":"id","generated":false,"id":"PageUrl:cjv3rr7on00ky0836fercz490/en/products/analyzers","typename":"PageUrl"},{"type":"id","generated":false,"id":"PageUrl:cjv3rrgwi00ll0836rvjysah5/en/downloads","typename":"PageUrl"},{"type":"id","generated":false,"id":"PageUrl:cjv3rrnkp00m80836ezb6g5y6/en/downloads/faq","typename":"PageUrl"},{"type":"id","generated":false,"id":"PageUrl:cjv3ru1og00ob08363pvv76br/en/downloads/terms-and-conditions","typename":"PageUrl"},{"type":"id","generated":false,"id":"PageUrl:cjv7uialr03nh0836yjoz2dji/en/products/others/bovdsvadv","typename":"PageUrl"},{"type":"id","generated":false,"id":"PageUrl:cjv83bs6804tb08366aj9zqyw/en/downloads/secure-payment","typename":"PageUrl"},{"type":"id","generated":false,"id":"PageUrl:cjv83jag304vu0836fiuwysty/en/downloads/personal-data-protection-principles","typename":"PageUrl"},{"type":"id","generated":false,"id":"PageUrl:cjyztusbt039t0777kqbo8xj8/en/products/ccr-liberty/ccr-liberty-sidemount","typename":"PageUrl"},{"type":"id","generated":false,"id":"PageUrl:cjztilv3509et0777ejgtlm67/en/products/analyzers/analyzer-he-o2","typename":"PageUrl"},{"type":"id","generated":false,"id":"PageUrl:cjztim1kk09fg0777nv63tf9b/en/products/analyzers/analyzer-solo","typename":"PageUrl"},{"type":"id","generated":false,"id":"PageUrl:ck2y1vlg800e00821gf9oba1c/en/404","typename":"PageUrl"},{"type":"id","generated":false,"id":"PageUrl:ck4sgp3ah11mw0821pubz9we4/en/contacts","typename":"PageUrl"},{"type":"id","generated":false,"id":"PageUrl:ck7fwhzma02rt0788qubyegdb/en/brandbook","typename":"PageUrl"},{"type":"id","generated":false,"id":"PageUrl:ck7m1guq108gk07883tmehxr4/en/products/ccr-liberty/ccr-liberty-light","typename":"PageUrl"},{"type":"id","generated":false,"id":"PageUrl:ck9v8ad582urj0788pmspzwzi/en/dealers","typename":"PageUrl"},{"type":"id","generated":false,"id":"PageUrl:cka6kn4hd3ahh0788k20h9ayy/en/contacts/contact-us","typename":"PageUrl"},{"type":"id","generated":false,"id":"PageUrl:ckdsltzi07o520788tk0s6c4v/en/products/others","typename":"PageUrl"},{"type":"id","generated":false,"id":"PageUrl:ckdslvkfn7o610788ld52hmqe/en/products/others/cylinders","typename":"PageUrl"},{"type":"id","generated":false,"id":"PageUrl:ckecknqht870l0788pd8d2qgb/en/products/others/reels","typename":"PageUrl"},{"type":"id","generated":false,"id":"PageUrl:ckeckogrp871307880g501pjl/en/products/others/silencer","typename":"PageUrl"},{"type":"id","generated":false,"id":"PageUrl:ckfccnc4a98bx0788f7enal83/en/app","typename":"PageUrl"},{"type":"id","generated":false,"id":"PageUrl:ckfm7aln29n640788eo83lo9r/en/products/others/apeks-technical-connection","typename":"PageUrl"},{"type":"id","generated":false,"id":"PageUrl:ckg68bbngab8607889mbsjxt5/en/downloads/size-guide","typename":"PageUrl"},{"type":"id","generated":false,"id":"PageUrl:ckgdfcdf4afxt0788jj7dwb6x/en/about-us","typename":"PageUrl"},{"type":"id","generated":false,"id":"PageUrl:ckgdfd1efafyb0788kvbbrox9/en/about-us/jakub-simanek","typename":"PageUrl"},{"type":"id","generated":false,"id":"PageUrl:ckjhi3h1h1b720788igpbi8fp/en/center","typename":"PageUrl"},{"type":"id","generated":false,"id":"PageUrl:ckl9hb0k73lgh0788m5dh5xtp/en/products/optical-display-adapters","typename":"PageUrl"},{"type":"id","generated":false,"id":"PageUrl:cknpubp6j2f690788zv52yohy/en/products/ccr-liberty/ccr-liberty-heavy","typename":"PageUrl"},{"type":"id","generated":false,"id":"PageUrl:cknqdc02r2hbn0788ccqay0i3/en
2/contacts/dealers/ds:stores","typename":"PageUrl"},{"type":"id","generated":false,"id":"PageUrl:ckoculqdh37zx0788ml14e08g/en/manuals","typename":"PageUrl"},{"type":"id","generated":false,"id":"PageUrl:ckocumdqv380r0788ta9ljatx/en/manuals/8313-analyzer-he-o2-en","typename":"PageUrl"},{"type":"id","generated":false,"id":"PageUrl:ckonbtfmp3px60788qpmvrvhk/en/manuals/8300-analyzer-solo-en","typename":"PageUrl"},{"type":"id","generated":false,"id":"PageUrl:ckone3so43q740788v6xdffgh/en/manuals/8300-analyzer-solo-cz","typename":"PageUrl"},{"type":"id","generated":false,"id":"PageUrl:ckpcgx2c64h2d0788rft16oow/en/blog","typename":"PageUrl"},{"type":"id","generated":false,"id":"PageUrl:ckpch3csz4h4n0788bw746g54/en/blog/ccr-liberty-rebreather-platform-and-the-philosophy-behind-it","typename":"PageUrl"},{"type":"id","generated":false,"id":"PageUrl:ckpmmiqic4zh9078854l4rnzc/en/catalogue","typename":"PageUrl"},{"type":"id","generated":false,"id":"PageUrl:ckpzix1hf5fmk07883mhggvlm/en/blog/the-individual-elements-of-the-ccr-liberty-unit-set-up","typename":"PageUrl"},{"type":"id","generated":false,"id":"PageUrl:ckq24u6625i7w0788gqd0215i/en/blog/divetalks-with-edmund-yiu-rebreather-diving-in-asia-safety-tips-and-liberty-light-experience","typename":"PageUrl"},{"type":"id","generated":false,"id":"PageUrl:ckqghin2a65ic0788ynuy9evw/en/blog/ccr-liberty-head","typename":"PageUrl"},{"type":"id","generated":false,"id":"PageUrl:ckqmdngvz6lvr0788udhww8zn/en/blog/divetalks-with-becky-kagan-schott-liberty-sidemount-rebreather-and-underwater-filming","typename":"PageUrl"},{"type":"id","generated":false,"id":"PageUrl:ckr3cdk4m7zf40788sjeh3in4/en/blog/divetalks-with-jill-heinerth-rebreathers-and-diving-safety-culture","typename":"PageUrl"},{"type":"id","generated":false,"id":"PageUrl:ckrabjz8s8hyc0788zx5sv8rs/en/blog/ccr-mouthpieces-bov-dsv-mav-and-offboarding-gas","typename":"PageUrl"},{"type":"id","generated":false,"id":"PageUrl:ckrnocx4m040x088842si0pr4/en/blog/ccr-liberty-rebreather-platform-and-the-philosophy-behind-it/ccr-liberty-avds-options","typename":"PageUrl"},{"type":"id","generated":false,"id":"PageUrl:cks049fd700dp09880q1l63ap/en/blog/divetalks-with-sameh-sokar-rebreather-diving-and-ghost-fishing-projects-in-egypt","typename":"PageUrl"},{"type":"id","generated":false,"id":"PageUrl:cksdekk960k0w0988x1avo3qn/en/blog/ccr-liberty-scrubbers","typename":"PageUrl"},{"type":"id","generated":false,"id":"PageUrl:cksnbh54w11wf0988tg9xq8iw/en/blog/jakub-simanek-steve-bogaerts-and-brett-hemphill-about-bailout-and-dual-rebreathers","typename":"PageUrl"},{"type":"id","generated":false,"id":"PageUrl:cksu7n7to1dzb09889okz8f9o/en/blog/ccr-liberty-rebreather-platform-and-the-philosophy-behind-it/how-to-travel-with-a-rebreather","typename":"PageUrl"},{"type":"id","generated":false,"id":"PageUrl:ckt0i4dg51ogp0988dpgn8lwr/en/products/ccr-liberty/ccr-liberty-bmcl-fmcl","typename":"PageUrl"},{"type":"id","generated":false,"id":"PageUrl:ckt312y7j1vfa0988d15tj1p9/en/blog/ccr-liberty-frame","typename":"PageUrl"},{"type":"id","generated":false,"id":"PageUrl:cktjtpry92g6z0988qvz9yctm/en/blog/getting-back-into-diving-after-a-break","typename":"PageUrl"},{"type":"id","generated":false,"id":"PageUrl:cktyf230v0o4908642wj0x9w6/en/blog/rebreather-accessories-oxygen-cell-tester-covers-protectors-and-more","typename":"PageUrl"},{"type":"id","generated":false,"id":"PageUrl:ckuwij1ow1uz70864yjnay2zf/en/blog/mark-powell-edoardo-pavia-and-paul-toomer-dual-and-bailout-rebreathers-training","typename":"PageUrl"},{"type":"id","generated":false,"id":"PageUrl:ckvatt7e72ima0864sbtdb3iz/en/blog/diving-with-bailout-rebreather","typename":"PageUrl"},{"type":"id","generated":false,"id":"PageUrl:ckvjneehv2t9m0864nadx86y3/en/blog/divetalks-with-edd-sorenson-rescue-stories-sidemount-diving-and-innovation-in-technical-diving","typename":"PageUrl"},{"type":"id","generated":false,"id":"PageUrl:ckvwicmzb0a8h0864bia259cd/en/blog/the-ccr-liberty-user-interface","typename":"PageUrl"},{"type":"id","generated":false,"id":"PageUrl:ckw6e9xfx0mp50864n0rz0o9x/en/blog/jill-heinerth-and-jeff-bozanic-eccr-vs-mccr-discussion","typename":"PageUrl"},{"type":"id","generated":false,"id":"PageUrl:ckwdetve60yan08649iw8pair/en/blog/11-step-rebreather-pre-dive-check","typename":"PageUrl"},{"type":"id","generated":false,"id":"PageUrl:ckwox3bna1w9c0864u2fbdfno/en/blog/ccr-liberty-unboxing","typename":"PageUrl"},{"type":"id","generated":false,"id":"PageUrl:ckx4slj6v005k0a53p9i6x50m/en/instructors","typename":"PageUrl"},{"type":"id","generated":false,"id":"PageUrl:ckx60balw01yz0858sye1ixvu/en/products/analyzers/analyzer-solo-o2","typename":"PageUrl"},{"type":"id","generated":false,"id":"PageUrl:ckx63km7c027h0858b0tm2sky/en/manuals/8302-analyzer-solo-o2-en","typename":"PageUrl"},{"type":"id","generated":false,"id":"PageUrl:ckxg0xywi0qec0858k67qqwk1/en/cookie
2s","typename":"PageUrl"},{"type":"id","generated":false,"id":"PageUrl:ckybcu1mg2un90858gj6k72sn/en/manuals/freedom-user-manual","typename":"PageUrl"},{"type":"id","generated":false,"id":"PageUrl:ckz7y82vi5kaj0858bmlwr0ay/en/blog/what-is-a-rebreather-do-i-need-one-as-a-recreational-diver","typename":"PageUrl"},{"type":"id","generated":false,"id":"PageUrl:cl024i4na8mnj08589tid8bc4/en/blog/7-steps-to-becoming-a-rebreather-diver","typename":"PageUrl"},{"type":"id","generated":false,"id":"PageUrl:cl0uxg68ubwow08586hqi9bnj/en/downloads/ccr-liberty-rebreather","typename":"PageUrl"},{"type":"id","generated":false,"id":"PageUrl:cl0uy684cbwvb0858yqx4vnhx/en/downloads/ccr-liberty-rebreather/user-manuals","typename":"PageUrl"},{"type":"id","generated":false,"id":"PageUrl:cl0uzc9z6bx4i0858xb5a7gh2/en/downloads/ccr-liberty-rebreather/firmware","typename":"PageUrl"},{"type":"id","generated":false,"id":"PageUrl:cl0v1tqigbxkj0858sa1rnh30/en/downloads/ccr-liberty-rebreather/assembly-checklists","typename":"PageUrl"},{"type":"id","generated":false,"id":"PageUrl:cl0v2cjy9bxow0858y0jvge1d/en/downloads/ccr-liberty-rebreather/technical-specifications","typename":"PageUrl"},{"type":"id","generated":false,"id":"PageUrl:cl0v2jkrubxqh0858gbqd5t6o/en/downloads/ccr-liberty-rebreather/additional-documents","typename":"PageUrl"},{"type":"id","generated":false,"id":"PageUrl:cl0w69wstc3wt0858zwwhc4rn/en/downloads/analyzers","typename":"PageUrl"},{"type":"id","generated":false,"id":"PageUrl:cl0w6ezvmc3xw08584tvd6myu/en/downloads/analyzers/user-manuals","typename":"PageUrl"},{"type":"id","generated":false,"id":"PageUrl:cl0w9d15gc4bs0858x46etqax/en/downloads/freedom-computers","typename":"PageUrl"},{"type":"id","generated":false,"id":"PageUrl:cl0wa065gc4gx085870mb27m3/en/downloads/freedom-computers/user-manuals","typename":"PageUrl"},{"type":"id","generated":false,"id":"PageUrl:cl0wai2l5c4ma0858bqfgyiws/en/downloads/freedom-computers/additional-documents","typename":"PageUrl"},{"type":"id","generated":false,"id":"PageUrl:cl0wbz1pqc4u90858pp61vixf/en/downloads/freedom-computers/firmware","typename":"PageUrl"},{"type":"id","generated":false,"id":"PageUrl:cl10kc5iocib30858yyb964ib/en/blog/divesoft-demo-day-with-divers-in-wheelchairs-from-skv-team","typename":"PageUrl"},{"type":"id","generated":false,"id":"PageUrl:cl16j64oud5z10858zmxo5z3b/en/downloads/analyzers/firmware","typename":"PageUrl"},{"type":"id","generated":false,"id":"PageUrl:cl1ou3jiwegqa0858xyrb0fo3/en/manuals/8302-analyzer-solo-o2-cz","typename":"PageUrl"},{"type":"id","generated":false,"id":"PageUrl:cl1q88ou8ekco08587cts1a1t/en/blog/how-to-choose-an-instructor-for-your-rebreather-course","typename":"PageUrl"},{"type":"id","generated":false,"id":"PageUrl:cl2fwdvaagxot0858dbvfzwa9/en/blog/how-do-we-test-each-ccr-liberty","typename":"PageUrl"},{"type":"id","generated":false,"id":"PageUrl:cl2yfnr88iba8085879y08pat/en/manuals/ccr-liberty-manual","typename":"PageUrl"},{"type":"id","generated":false,"id":"PageUrl:cl2ypayvtidsk08584m2igh8l/en/blog/what-will-i-learn-in-a-rebreather-course","typename":"PageUrl"},{"type":"id","generated":false,"id":"PageUrl:cl3vesldqknhj085858savf3u/en/ccr-liberty","typename":"PageUrl"},{"type":"id","generated":false,"id":"PageUrl:cl43w74lpl8dk0858to9uhj2u/en/manuals/ccr-liberty-manual/ccr-liberty-manual-01","typename":"PageUrl"},{"type":"id","generated":false,"id":"PageUrl:cl43w7gb7l8e20858xrzqgqz9/en/manuals/ccr-liberty-manual/ccr-liberty-manual-02","typename":"PageUrl"},{"type":"id","generated":false,"id":"PageUrl:cl43w7qiml8ek08588cha4oc2/en/manuals/ccr-liberty-manual/ccr-liberty-manual-03","typename":"PageUrl"},{"type":"id","generated":false,"id":"PageUrl:cl48h6z8zlpye0858td9csdqy/en/blog/5-basic-principles-of-rebreather-and-one-extra","typename":"PageUrl"},{"type":"id","generated":false,"id":"PageUrl:cl78rvnxwtvo808589liz2pfw/en/products/others/flow-limiter-mk2","typename":"PageUrl"},{"type":"id","generated":false,"id":"PageUrl:cl7oo6u7qv8cf0858exiqv6ad/en/products/ccr-liberty/bail-out-rebreather","typename":"PageUrl"},{"type":"id","generated":false,"id":"PageUrl:cl8mqor4qyjzv0858vty0cfa3/en/manuals/8402-oda-en","typename":"PageUrl"},{"type":"id","generated":false,"id":"PageUrl:cl8tx5mksz54s0858ihl3q1u8/en/manuals/bov","typename":"PageUrl"},{"type":"id","generated":false,"id":"PageUrl:cl8u22o4ez5mq08583oamhfwi/en/manuals/bailout-standby-mode-en","typename":"PageUrl"},{"type":"id","generated":false,"id":"PageUrl:cl9mq5poj1rfh0858zgl8ksjn/en/manuals/ccr-liberty-heavy-manual_en","typename":"PageUrl"},{"type":"id","generated":false,"id":"PageUrl:cl9y8rdi12u650858oza635r8/en/manuals/ccr-liberty-manual/ccr-liberty-sidemount-manual_en","typename":"PageUrl"},{"type":"id","generated":false,"id":"PageUrl:clagmvmlj1ek00835j9q8q4rs/en/blog/ccr-training-from-the-perspective-of-training-agencies","typename":"PageUrl"},{"type":"id","generated":false,"id":"PageUrl:claqj12ud2tqp08353972by7b/en/products/military","typename":"PageUrl"},{"type":"id","generated":false,"id":"PageUrl:clcafw4t28zoz08354eyxom1b/en/blog/the-most-spectacular-dive-of-2022","typename":"PageUrl"},{"type":"id","generated":false,"id":"PageUrl:cldx11pfrfeok0835vfer80hk/en/blog/rebreathers-role-in-underwater-science","typename":"PageUrl"},{"type":"id","generated":false,"id":"PageUrl:clf2f7jbtkl260835rps73xqp/en/downloads/become-a-partner","typename":"PageUrl"},{"type":"id","generated":false,"id":"PageUrl:clf9rs5c3ltkw0835vujrrtxu/en/products/analyzers/dna","typename":"PageUrl"},{"type":"id","generated":false,"id":"PageUrl:clfgt4fdjmf9v0835bv440kqj/en/products/freedomplus-computers","typename":"PageUrl"},{"type":"id","generated":false,"id":"PageUrl:clfgtftaemfdx0835x56ytrvp/en/manuals/freedomplus-user-manual","typename":"PageUrl"},{"type":"id","generated":false,"id":"PageUrl:clfgtyzdumfnj0835m46yrcvf/en/manuals/freedomplus-quick-reference","typename":"PageUrl"},{"type":"id","generated":false,"id":"PageUrl:clfwgsbptnzzu0835o780vtem/en/service-points","typename":"PageUrl"},{"type":"id","generated":false,"id":"PageUrl:clg24qsywoqir0835nda961iz/en/blog/ccr-liberty-cave-diving-resistance","typename":"PageUrl"},{"type":"id","generated":false,"id":"PageUrl:clivhpar079d80835we1pgzk8/en/blog/discovering-the-ancient-shipwreck-capital-58-wrecks-unveiled-in-tiny-greek-archipelago","typename":"PageUrl"},{"type":"id","generated":false,"id":"PageUrl:cljck4wh192zw0835tw3xy3kp/en/manuals/freedom-user-manual/freedom-user-manual-01","typename":"PageUrl"},{"type":"id","generated":false,"id":"PageUrl:cljck5m2r930n08357znc2yvi/en/manuals/freedom-user-manual/freedom-user-manual-02","typename":"PageUrl"},{"type":"id","generated":false,"id":"PageUrl:cljh5dijh9q0l0835t4bdfam7/en/manuals/8300-analyzer-solo-quick-reference-en","typename":"PageUrl"},{"type":"id","generated":false,"id":"PageUrl:cljh5ki1y9q1p0835lp0f4qak/en/manuals/8302-analyzer-solo-o2-quick-reference-en","typename":"PageUrl"},{"type":"id","generated":false,"id":"PageUrl:clloxy7n3708p0735122lbaxh/en/manuals/professional-flow-limiter-mk2-quick-reference-en","typename":"PageUrl"},{"type":"id","generated":false,"id":"PageUrl:clmeyb3r19lwj0735yt504zs0/en/blog/my-story-of-finding-a-submarine-in-the-shetlands","typename":"PageUrl"},{"type":"id","generated":false,"id":"PageUrl:clmszuh0ravef0735zntydkcp/en/manuals/8460-dna-user-manual","typename":"PageUrl"},{"type":"id","generated":false,"id":"PageUrl:clnkbz2s6da0m0735m12jhjra/en/manuals/8460-dna-quick-reference","typename":"PageUrl"},{"type":"id","generated":false,"id":"PageUrl:clpgoxg4elslm07356zu3m5n5/en/manuals/ccr-liberty-manual/ccr-liberty-user-manual-04","typename":"PageUrl"},{"type":"id","generated":false,"id":"PageUrl:clpi7kucdm37e0735u15o8rfy/en/downloads/bov","typename":"PageUrl"},{"type":"id","generated":false,"id":"PageUrl:clpia71x6m3ud0735ba2n1yml/en/downloads/bov/user-manuals","typename":"PageUrl"},{"type":"id","generated":false,"id":"PageUrl:clsyeohcd8d1j0735f1581opx/en/libertydiversclub","typename":"PageUrl"},{"type":"id","generated":false,"id":"PageUrl:clutqeck7fy2g0735ynx14jaf/en/blog/rebreather-configurations","typename":"PageUrl"},{"type":"id","generated":false,"id":"PageUrl:clw4qh5k6l9n907353ehehufe/en/blog/bailout-procedures","typename":"PageUrl"},{"type":"id","generated":false,"id":"PageUrl:clxa0ibm1qtls07356bxbmpc2/en/blog/a-comprehe
2nsive-guide-to-technical-dive-planning-part-1","typename":"PageUrl"},{"type":"id","generated":false,"id":"PageUrl:clxt2bo5ttdck0735uhterl3g/en/contacts/service-points/ds:service-points","typename":"PageUrl"},{"type":"id","generated":false,"id":"PageUrl:clyfnkvvtw5400735aaroiwlr/en/blog/a-comprehensive-guide-to-technical-dive-planning-part-2","typename":"PageUrl"},{"type":"id","generated":false,"id":"PageUrl:clywzcl9jy02r07350uek6rob/en/downloads/other-documents","typename":"PageUrl"},{"type":"id","generated":false,"id":"PageUrl:clzcn909f0fwy07353ic6rr8c/en/manuals/freedom+-and-freedom-cz","typename":"PageUrl"},{"type":"id","generated":false,"id":"PageUrl:clzplug0f34lh0735jo6y64vw/en/blog/cold-water-diving","typename":"PageUrl"},{"type":"id","generated":false,"id":"PageUrl:cm0az5m5s0t9b0818fxjonef0/en/manuals/ccr-liberty-manual-cz","typename":"PageUrl"},{"type":"id","generated":false,"id":"PageUrl:cm0azhkkt0tbs0818ccjyu659/en/manuals/ccr-liberty-manual-cz/ccr-liberty-manual-01-cz","typename":"PageUrl"},{"type":"id","generated":false,"id":"PageUrl:cm0cctnnd12dy0818yp2e3eli/en/manuals/ccr-liberty-manual-cz/ccr-liberty-manual-02-cz","typename":"PageUrl"},{"type":"id","generated":false,"id":"PageUrl:cm0divz1e180h08186q8py4jd/en/manuals/ccr-liberty-manual-cz/ccr-liberty-manual-03-cz","typename":"PageUrl"},{"type":"id","generated":false,"id":"PageUrl:cm0xhhruc1rsa0817exbpr1rq/en/blog/dan-sun-in-bikini-atoll-with-ccr-liberty-family","typename":"PageUrl"},{"type":"id","generated":false,"id":"PageUrl:cm10uxl432jv50817ssiujost/en/manuals/regulatory-information","typename":"PageUrl"},{"type":"id","generated":false,"id":"PageUrl:cm1evxo544dge08177rmhsl6i/en/manuals/divesoft-app-user-manual-en","typename":"PageUrl"},{"type":"id","generated":false,"id":"PageUrl:cm1hnvll84w1y081776bnhrg6/en/manuals/divesoft-app-user-manual-cz","typename":"PageUrl"},{"type":"id","generated":false,"id":"PageUrl:cm1j7dd3t588s0817fj01jh0k/en/downloads/divesoft-app","typename":"PageUrl"},{"type":"id","generated":false,"id":"PageUrl:cm1j7jpxs58am0817odencavx/en/downloads/divesoft-app/user-manuals","typename":"PageUrl"},{"type":"id","generated":false,"id":"PageUrl:cm24hw4rb917x0817cy5o7ph3/en/blog/martin-mako-janecek-my-diving-journey-to-ccr-liberty","typename":"PageUrl"},{"type":"id","generated":false,"id":"PageUrl:cm2yl9dfiefwq081726r9lwgi/en/service","typename":"PageUrl"},{"type":"id","generated":false,"id":"PageUrl:cm3conxas02k108290ydqnbep/en/blog/would-you-trust-your-life-to-a-machine","typename":"PageUrl"},{"type":"id","generated":false,"id":"PageUrl:cm3pooxr001s90829sc8oheuc/en/service/testing-configurator---sandbox","typename":"PageUrl"},{"type":"id","generated":false,"id":"PageUrl:cm4jzxd9x00s008374jvhc8va/en/blog/divesoft-lab","typename":"PageUrl"},{"type":"id","generated":false,"id":"PageUrl:cm5u4v8is0q9j0803u8nstt5y/en/blog/garry-dallas-advanced-rescue-techniques-for-technical-divers","typename":"PageUrl"},{"type":"id","generated":false,"id":"PageUrl:cm6aogy1f0ylr0803g7o52mxr/en/blog/understanding-how-long-does-a-cylinder-lasts-for-scuba-diving","typename":"PageUrl"},{"type":"id","generated":false,"id":"PageUrl:cm6kkp0m62w7w0803ry3v5uq5/en/blog/what-are-the-types-of-scuba-diving","typename":"PageUrl"},{"type":"id","generated":false,"id":"PageUrl:cm6p1pmdr3t6a0803fv915pka/en/downloads/flow-limiters","typename":"PageUrl"},{"type":"id","generated":false,"id":"PageUrl:cm6p1uk903tbx0803mfdygau2/en/downloads/flow-limiters/user-manuals","typename":"PageUrl"},{"type":"id","generated":false,"id":"PageUrl:cm6p4768i3we00803rmhblalc/en/manuals/professional-flow-limiter-mk1-quick-reference-en","typename":"PageUrl"},{"type":"id","generated":false,"id":"PageUrl:cm6rm219h4nds0803ymo2uq2e/en/blog/what-is-a-dive-computer","typename":"PageUrl"},{"type":"id","generated":false,"id":"PageUrl:cm71owk2g6tab0803321rni5n/en/blog/understanding-and-preventing-the-bends-when-diving","typename":"PageUrl"},{"type":"id","generated":false,"id":"PageUrl:cm71q6oaw6udb0803012xg12r/en/blog/what-is-technical-diving","typename":"PageUrl"},{"type":"id","generated":false,"id":"PageUrl:cm7j0o17o0byw0803hbonvfvl/en/blog/car-wrecks-in-lake-attersee","typename":"PageUrl"},{"type":"id","generated":false,"id":"PageUrl:cm7uibgnd3dzx0803qnwpozbb/en/blog/nitrox-diving","typename":"PageUrl"},{"type":"id","generated":false,"id":"PageUrl:cm8ptyp2v9lgb0803u3ba0ha0/en/blog/cave-diving","typename":"PageUrl"},{"type":"id","generated":false,"id":"PageUrl:cm99l1yayeijj0803qpv7qu1f/en/blog/how-to-find-a-diving-buddy-for-your-expeditions","typename":"PageUrl"},{"type":"id","generated":false,"id":"PageUrl:cm99l5bsxein70803kfblojon/en/blog/ccr-rebreathers-differences-and-what-to-look-for","typename":"PageUrl"},{"type":"id","generated":false,"id":"PageUrl:cm9ck8ii6fc740803kny0qqjo/en/blog/what-is-deep-diving","typename":"PageUrl"},{"type":"id","generated":false,"id":"PageUrl:cm9ckxruefcc608037xn6eibo/en/blog/how-to-chose-the-right-ccr-rebreather-for-you","typename":"PageUrl"},{"type":"id","generated":false,"id":"PageUrl:cm9cm8xmufcmc08033nld7l9d/en/blog/diving-groups-why-you-should-never-dive-alone","typename":"PageUrl"},{"type":"id","generated":false,"id":"PageUrl:cm9cm99vbfcn70803af85jguv/en/blog/ccr-rebreather-properties-that-you-must-evaluate-before-buying","typename":"PageUrl"},{"type":"id","generated":false,"id":"PageUrl:cm9cm9iu9fcnp080331j8i7ls/en/blog/best-rebreather-ccr-for-technical-deep-diving","typename":"PageUrl"},{"type":"id","generated":false,"id":"PageUrl:cm9cm9zjtfco708030k4hhma9/en/blog/liberty-rebreathers-manufacturing-behind-the-curtains","typename":"PageUrl"},{"type":"id","generated":false,"id":"PageUrl:cm9cmaa8qfcop0803sk0u4y0h/en/blog/best-technical-diving-locations","typename":"PageUrl"},{"type":"id","generated":false,"id":"PageUrl:cm9cmakodfcp708036cgi4tz0/en/blog/ccr-diving-experience-interviews-with-our-best-instructors","typename":"PageUrl"},{"type":"id","generated":false,"id":"PageUrl:cm9cmaw8ofcpp08036xtrr2xl/en/blog/diving-with-liberty-rebreather-stories-of-inspiration","typename":"PageUrl"},{"type":"id","generated":false,"id":"PageUrl:cm9cmb4xvfcq70803npa2a2qo/en/blog/professional-diving-why-do-you-need-a-rebreather","typename":"PageUrl"},{"type":"id","generated":false,"id":"PageUrl:cm9cmbvrqfcqp0803v4w6227l/en/blog/liberty-rebreathers-co2-scrubber-duration-how-often-should-you-change","typename":"PageUrl"},{"type":"id","generated":false,"id":"PageUrl:cm9cmceztfcr70803bovcofh0/en/blog/ccr-first-dive-experience-for-life","typename":"PageUrl"},{"type":"id","generated":false,"id":"PageUrl:cm9cmcoo1fcrp0803vl5desvj/en/blog/ccr-safety-rules-and-procedures","typename":"PageUrl"},{"type":"id","generated":false,"id":"PageUrl:cm9cmd8k7fcs70803aca70x55/en/blog/ccr-rebreather-diving-training-how-it-goes-and-what-to-expect","typename":"PageUrl"},{"type":"id","generated":false,"id":"PageUrl:cm9cmdlxcfcsp0803p0d518jj/en/blog/most-common-diving-mistakes-this-could-save-your-life","typename":"PageUrl"},{"type":"id","generated":false,"id":"PageUrl:cm9cneisbfd730803ij7pwjju/en/blog/ccr-rebreather-dive-planning-how-to-complete-checklist","typename":"PageUrl"},{"type":"id","generated":false,"id":"PageUrl:cm9cnfdzqfd8j0803zvobabx9/en/blog/ccr-rebreather-maintenance-how-often-visit-authorised-service-center","typename":"PageUrl"},{"type":"id","generated":false,"id":"PageUrl:cm9cnfr52fd98080350l77m3z/en/blog/ccr-diving-certification-courses-how-it-goes-and-what-you-need-to-know","typename":"PageUrl"},{"type":"id","generated":false,"id":"PageUrl:cm9coazvwfdk10803da2ixhdm/en/blog/life-changing-experience-why-you-should-try-ccr-diving","typename":"PageUrl"},{"type":"id","generated":false,"id":"PageUrl:cm9cobgfnfdl50803o4nzn2zf/en/blog/liberty-rebreathers-purchasing-process-what-to-expect-when-you-order","typename":"PageUrl"},{"type":"id","generated":false,"id":"PageUrl:cm9cobsqpfdm008036g7ghoo2/en/blog/liberty-rebreathers-maintenance-complete-checklist","typename":"PageUrl"},{"type":"id","generated":false,"id":"PageUrl:cm9coc98sfdmi08035dz1mf
2wn/en/blog/scuba-diving-vs-rebreathers-longer-times-and-better-view","typename":"PageUrl"},{"type":"id","generated":false,"id":"PageUrl:cm9tyz4tvizoc0803mmf9n11r/en/products/ccr-liberty/try-dive","typename":"PageUrl"},{"type":"id","generated":false,"id":"PageUrl:cmbqb5e09xyws0803y3rgyeuu/en/blog/ccr-rebreather-diving-equipment-what-do-you-need-for-safe-diving","typename":"PageUrl"},{"type":"id","generated":false,"id":"PageUrl:cmdilgyg40c7p0832bv637gsr/en/about-us/ales-prochaska","typename":"PageUrl"},{"type":"id","generated":false,"id":"PageUrl:cmdilhy9d0c8l0832bkenadk9/en/about-us/jakub-hecko","typename":"PageUrl"},{"type":"id","generated":false,"id":"PageUrl:cmdipepgt00xb08322to2saio/en/manuals/8500-echo-quick-reference","typename":"PageUrl"},{"type":"id","generated":false,"id":"PageUrl:cmdipfr8v00xz08322hw227s8/en/manuals/8500-echo-user-manual","typename":"PageUrl"},{"type":"id","generated":false,"id":"PageUrl:cmdo5gsze02qc0832lf2bbv7e/en/products/ccr-liberty/stock-unit","typename":"PageUrl"},{"type":"id","generated":false,"id":"PageUrl:cmdrby07306gx08323bs8w2wq/en/heroes","typename":"PageUrl"},{"type":"id","generated":false,"id":"PageUrl:cmdrco0jc06nh08329qpmwxvu/en/heroes/alex-dawson","typename":"PageUrl"},{"type":"id","generated":false,"id":"PageUrl:cmdrcv93f06py08320cmhpnbs/en/heroes/edd-stockdale","typename":"PageUrl"},{"type":"id","generated":false,"id":"PageUrl:cmdrcw6pi06r50832ah6cogn3/en/heroes/garry-dallas","typename":"PageUrl"},{"type":"id","generated":false,"id":"PageUrl:cmdrcws6q06sh08320yue2oye/en/heroes/sanne-vanden-berghe","typename":"PageUrl"},{"type":"id","generated":false,"id":"PageUrl:cmdrcyhlh06tt0832uzwgyl0p/en/heroes/nadine-al-manqour","typename":"PageUrl"},{"type":"id","generated":false,"id":"PageUrl:cmdrcze5h06vi083228rtpa7i/en/heroes/melodie-trevino","typename":"PageUrl"},{"type":"id","generated":false,"id":"PageUrl:cmdrd0mge06wa0832he2z1qmx/en/heroes/kurt-storms","typename":"PageUrl"},{"type":"id","generated":false,"id":"PageUrl:cmdrd1izy06x90832q08kx96b/en/heroes/maxwel-hohn","typename":"PageUrl"},{"type":"id","generated":false,"id":"PageUrl:cmdrgi38j02gj08325cjwqoa5/en/heroes/marek-kainrath","typename":"PageUrl"},{"type":"id","generated":false,"id":"PageUrl:cmdrgik7902hu0832yixwr83c/en/heroes/paul-vincent-toomer","typename":"PageUrl"},{"type":"id","generated":false,"id":"PageUrl:cmdrgj1qn02iq0832yqd6nywk/en/heroes/stefan-panis","typename":"PageUrl"},{"type":"id","generated":false,"id":"PageUrl:cmdrgjiiu02jm0832s4sjit28/en/heroes/edmund-yiu","typename":"PageUrl"},{"type":"id","generated":false,"id":"PageUrl:cmdrgk0r402ku0832m4wl4mou/en/heroes/pj-prinsloo","typename":"PageUrl"},{"type":"id","generated":false,"id":"PageUrl:cmdrgkye502lq08325nkew28j/en/heroes/stephan-senecal","typename":"PageUrl"},{"type":"id","generated":false,"id":"PageUrl:cmdrglhlj02mx0832giei3ank/en/heroes/petr-slezak","typename":"PageUrl"},{"type":"id","generated":false,"id":"PageUrl:cmdrgm0zt02o00832p9khius7/en/heroes/jeff-bozanic","typename":"PageUrl"},{"type":"id","generated":false,"id":"PageUrl:cme9qpuko077808326jv50pwk/en/heroes/shaff-naeem","typename":"PageUrl"},{"type":"id","generated":false,"id":"PageUrl:cme9rcojj07l70832l0o4b6zx/en/heroes/frederic-swierczynski","typename":"PageUrl"},{"type":"id","generated":false,"id":"PageUrl:cme9rg5yw07oq0832e2t9hqe7/en/heroes/milja-westerberg","typename":"PageUrl"},{"type":"id","generated":false,"id":"PageUrl:cme9rim1x07rc083201ufqkik/en/heroes/marcin-pawelczyk","typename":"PageUrl"},{"type":"id","generated":false,"id":"PageUrl:cmfp2fob51frg08329jmergly/en/heroes-work","typename":"PageUrl"},{"type":"id","generated":false,"id":"PageUrl:cmfp91btv088d0832jacmlkbx/en/about-us/gabriela-springlova","typename":"PageUrl"},{"type":"id","generated":false,"id":"PageUrl:cmfp96ox208fh0832edf5mw0r/en/about-us/petr-tajc","typename":"PageUrl"},{"type":"id","generated":false,"id":"PageUrl:cmfp988ia08hg0832gzoaz2pv/en/about-us/tomas-trnka","typename":"PageUrl"},{"type":"id","generated":false,"id":"PageUrl:cmhlrgldc06fk0832gpo1zh2v/en/blog/handset-recall","typename":"PageUrl"},{"type":"id","generated":false,"id":"PageUrl:cmiyfa2a508q308322m0su27c/en/blog/simplicity-beneath-the-screen-why-the-liberty-ccr-makes-complex-dives-easy","typename":"PageUrl"},{"type":"id","generated":false,"id":"PageUrl:cmkmnczo740ql0889aw8p76bf/en/blog/a-divers-guide-to-analyzing-nitrox-the-right-way","typename":"PageUrl"},{"type":"id","generated":false,"id":"PageUrl:cmley5r269wkr0889usnp23dr/en/blog/cylinder-labeling","typename":"PageUrl"},{"type":"id","generated":false,"id":"PageUrl:cmlgfby9banwt0889tu45j7sw/en/about-us/jitka-cankova","typename":"PageUrl"},{"type":"id","generated":false,"id":"PageUrl:cmlgff4tianxt0889b2xu06v2/e
2n/about-us/lucie-smejkalova","typename":"PageUrl"},{"type":"id","generated":false,"id":"PageUrl:cmlgfhw6fanzg0889w5kcd5p6/en/about-us/lucie-uchytilova","typename":"PageUrl"},{"type":"id","generated":false,"id":"PageUrl:cmlgfkcf4ao0b0889h7hd9sqr/en/about-us/michal-domorazek","typename":"PageUrl"},{"type":"id","generated":false,"id":"PageUrl:cmlgg8xhlao9h0889fan5t9d2/en/about-us/mike-pokrovsky","typename":"PageUrl"},{"type":"id","generated":false,"id":"PageUrl:cmlggbsvwaoc10889ggys3s1l/en/about-us/ondrej-zouna","typename":"PageUrl"},{"type":"id","generated":false,"id":"PageUrl:cmlggf5llaoe60889fr9rdvog/en/about-us/hana-jaklova","typename":"PageUrl"},{"type":"id","generated":false,"id":"PageUrl:cmm4xpo9igujd0889kg819hdy/en/blog/the-5-2-g/l-rule-why-gas-density-may-be-the-most-important-number-in-deep-diving","typename":"PageUrl"},{"type":"id","generated":false,"id":"PageUrl:cmnhiq86gqv9k0889tw52s1w1/en/blog/trimix-diving-made-simple-calculations-for-mod-end-density","typename":"PageUrl"},{"type":"id","generated":false,"id":"PageUrl:cmnoc0oyos2qq0889jamhbhzm/en/blog/wrong-gas-in-diving-how-accidents-happen-and-how-to-prevent-them","typename":"PageUrl"},{"type":"id","generated":false,"id":"PageUrl:cmoikfi2o00jd0834i7cnst7d/en/products/analyzers/echo","typename":"PageUrl"},{"type":"id","generated":false,"id":"PageUrl:cmoikgtii00ld0834fstyh5rg/en/products/ccr-liberty/architecture","typename":"PageUrl"},{"type":"id","generated":false,"id":"PageUrl:cmoikh55x00m90834611encgx/en/products/ccr-liberty/models","typename":"PageUrl"},{"type":"id","generated":false,"id":"PageUrl:cmoikhgmk00n10834zvd44iku/en/products/ccr-liberty/features","typename":"PageUrl"},{"type":"id","generated":false,"id":"PageUrl:cmojyurq800b90834ore7lvo9/en/blog/why-divers-analyze-their-gas-before-every-dive-echo-gas-analyzer","typename":"PageUrl"},{"type":"id","generated":false,"id":"PageUrl:cmosn3q2e31ov0834rw6nfqhc/en/blog/co/co-in-the-breathing-gas-sources-of-contamination-and-how-to-detect-it","typename":"PageUrl"},{"type":"id","generated":false,"id":"PageUrl:cmp13w2es04lr0826703jqxwt/en/about-us/eu-programme","typename":"PageUrl"},{"type":"id","generated":false,"id":"PageUrl:cmpcprnil27f90826ymyime9f/en/blog/end-30-m-as-a-standard-what-it-means-in-practice-for-gas-selection","typename":"PageUrl"},{"type":"id","generated":false,"id":"PageUrl:cmpgvtc0f38lb0826555ewppv/en/blog/po-limits-1-4-1-6-when-to-use-which-and-why","typename":"PageUrl"},{"type":"id","generated":false,"id":"PageUrl:cmpzd0kws895208269mvtvask/en/blog/why-professional-divers-choose-the-liberty-ccr-when-simple-isn-t-enough","typename":"PageUrl"},{"type":"id","generated":false,"id":"PageUrl:cmq7yto10ah5l08260viggpan/en/heroes/jane-ruckert","typename":"PageUrl"},{"type":"id","generated":false,"id":"PageUrl:cmqtac8urgclw08269ufjvrbk/en/heroes-work/test","typename":"PageUrl"},{"type":"id","generated":false,"id":"PageUrl:cmqtdjc9lgdb90826vuke3rxj/en/how-long-can-you-stay-underwater-with-a-rebreather","typename":"PageUrl"},{"type":"id","generated":false,"id":"PageUrl:cmqtjxmm9gf7w08262teo1sxc/en/blog/rebreather-vs-open-circuit-what-s-the-difference","typename":"PageUrl"},{"type":"id","generated":false,"id":"PageUrl:cmqtk0v2dgfdl0826xp1p1ri6/en/blog/why-underwater-photographers-use-rebreathers","typename":"PageUrl"},{"type":"id","generated":false,"id":"PageUrl:cmqtk33x1gfj40826lcuy5tm2/en/blog/why-recreational-divers-use-rebreathers","typename":"PageUrl"},{"type":"id","generated":false,"id":"PageUrl:cmqtk5m8ygfo80826sfrnrdh4/en/blog/why-do-divers-use-rebreathers-ccr-benefits-explained","typename":"PageUrl"},{"type":"id","generated":false,"id":"PageUrl:cmsehf7jo02fj0856etyan05j/en/manuals/he-o2-printer-cable-quick-reference","typename":"PageUrl"},{"type":"id","generated":false,"id":"PageUrl:cmt2wpeyn05ao085625qymc9k/en/partners","typename":"PageUrl"},{"type":"id","generated":false,"id":"PageUrl:cmt2wpu1v05bn0856mnajwyzs/en/partners/ds:partners","typename":"PageUrl"}],"pages({\"where\":{\"website\":{\"id\":\"cjv3l1ssi003u0836mwnotf8e\"}}})":[{"type":"id","generated":false,"id":"Page:cjv3l26tp004p0836i54n4u7a","typename":"Page"},{"type":"id","generated":false,"id":"Page:cjv3rim6p00fm0836uts415d5","typename":"Page"},{"type":"id","generated":false,"id":"Page:cjv3rpryz00iw0836lc0zx81j","typename":"Page"},{"type":"id","generated":false,"id":"Page:cjv3rr7on00ky0836fercz490","typename":"Page"},{"type":"id","generated":false,"id":"Page:cjv3rrgwi00ll0836rvjysah5","typename":"Page"}
2,{"type":"id","generated":false,"id":"Page:cjv3rrnkp00m80836ezb6g5y6","typename":"Page"},{"type":"id","generated":false,"id":"Page:cjv3ru1og00ob08363pvv76br","typename":"Page"},{"type":"id","generated":false,"id":"Page:cjv7uialr03nh0836yjoz2dji","typename":"Page"},{"type":"id","generated":false,"id":"Page:cjv83bs6804tb08366aj9zqyw","typename":"Page"},{"type":"id","generated":false,"id":"Page:cjv83jag304vu0836fiuwysty","typename":"Page"},{"type":"id","generated":false,"id":"Page:cjyztusbt039t0777kqbo8xj8","typename":"Page"},{"type":"id","generated":false,"id":"Page:cjztilv3509et0777ejgtlm67","typename":"Page"},{"type":"id","generated":false,"id":"Page:cjztim1kk09fg0777nv63tf9b","typename":"Page"},{"type":"id","generated":false,"id":"Page:ck2y1vlg800e00821gf9oba1c","typename":"Page"},{"type":"id","generated":false,"id":"Page:ck4sgp3ah11mw0821pubz9we4","typename":"Page"},{"type":"id","generated":false,"id":"Page:ck7fwhzma02rt0788qubyegdb","typename":"Page"},{"type":"id","generated":false,"id":"Page:ck7m1guq108gk07883tmehxr4","typename":"Page"},{"type":"id","generated":false,"id":"Page:ck9v8ad582urj0788pmspzwzi","typename":"Page"},{"type":"id","generated":false,"id":"Page:cka6kn4hd3ahh0788k20h9ayy","typename":"Page"},{"type":"id","generated":false,"id":"Page:ckdsltzi07o520788tk0s6c4v","typename":"Page"},{"type":"id","generated":false,"id":"Page:ckdslvkfn7o610788ld52hmqe","typename":"Page"},{"type":"id","generated":false,"id":"Page:ckecknqht870l0788pd8d2qgb","typename":"Page"},{"type":"id","generated":false,"id":"Page:ckeckogrp871307880g501pjl","typename":"Page"},{"type":"id","generated":false,"id":"Page:ckfccnc4a98bx0788f7enal83","typename":"Page"},{"type":"id","generated":false,"id":"Page:ckfm7aln29n640788eo83lo9r","typename":"Page"},{"type":"id","generated":false,"id":"Page:ckg68bbngab8607889mbsjxt5","typename":"Page"},{"type":"id","generated":false,"id":"Page:ckgdfcdf4afxt0788jj7dwb6x","typename":"Page"},{"type":"id","generated":false,"id":"Page:ckgdfd1efafyb0788kvbbrox9","typename":"Page"},{"type":"id","generated":false,"id":"Page:ckjhi3h1h1b720788igpbi8fp","typename":"Page"},{"type":"id","generated":false,"id":"Page:ckl9hb0k73lgh0788m5dh5xtp","typename":"Page"},{"type":"id","generated":false,"id":"Page:cknpubp6j2f690788zv52yohy","typename":"Page"},{"type":"id","generated":false,"id":"Page:cknqdc02r2hbn0788ccqay0i3","typename":"Page"},{"type":"id","generated":false,"id":"Page:ckoculqdh37zx0788ml14e08g","typename":"Page"},{"type":"id","generated":false,"id":"Page:ckocumdqv380r0788ta9ljatx","typename":"Page"},{"type":"id","generated":false,"id":"Page:ckonbtfmp3px60788qpmvrvhk","typename":"Page"},{"type":"id","generated":false,"id":"Page:ckone3so43q740788v6xdffgh","typename":"Page"},{"type":"id","generated":false,"id":"Page:ckpcgx2c64h2d0788rft16oow","typename":"Page"},{"type":"id","generated":false,"id":"Page:ckpch3csz4h4n0788bw746g54","typename":"Page"},{"type":"id","generated":false,"id":"Page:ckpmmiqic4zh9078854l4rnzc","typename":"Page"},{"type":"id","generated":false,"id":"Page:ckpzix1hf5fmk07883mhggvlm","typename":"Page"},{"type":"id","generated":false,"id":"Page:ckq24u6625i7w0788gqd0215i","typename":"Page"},{"type":"id","generated":false,"id":"Page:ckqghin2a65ic0788ynuy9evw","typename":"Page"},{"type":"id","generated":false,"id":"Page:ckqmdngvz6lvr0788udhww8zn","typename":"Page"},{"type":"id","generated":false,"id":"Page:ckr3cdk4m7zf40788sjeh3in4","typename":"Page"},{"type":"id","generated":false,"id":"Page:ckrabjz8s8hyc0788zx5sv8rs","typename":"Page"},{"type":"id","generated":false,"id":"Page:ckrnocx4m040x088842si0pr4","typename":"Page"},{"type":"id","generated":false,"id":"Page:cks049fd700dp09880q1l63ap","typename":"Page"},{"type":"id","generated":false,"id":"Page:cksdekk960k0w0988x1avo3qn","typename":"Page"},{"type":"id","generated":false,"id":"Page:cksnbh54w11wf0988tg9xq8iw","typename":"Page"},{"type":"id","generated":false,"id":"Page:cksu7n7to1dzb09889okz8f9o","typename":"Page"},{"type":"id","generated":false,"id":"Page:ckt0i4dg51ogp0988dpgn8lwr","typename":"Page"},{"type":"id","generated":false,"id":"Page:ckt312y7j1vfa0988d15tj1p9","typename":"Page"},{"type":"id","generated":false,"id":"Page:cktjtpry92g6z0988qvz9yctm","typename":"Page"},{"type":"id","generated":false,"id":"Page:cktyf230v0o4908642wj0x9w6","typename":"Page"},{"type":"id","generated":false,"id":"Page:ckuwij1ow1uz70864yjnay2zf","typename":"Page"},{"type":"id","generated":false,"id":"Page:ckvatt7e72ima0864sbtdb3iz","typename":"Page"},{"type":"id","generated":false,"id":"Page:ckvjneehv2t9m0864nadx86y3","typename":"Page"},{"type":"id","generated":false,"id":"Page:ckvwicmzb0a8h0864bia259cd","typename":"Page"},{"type":"id","generated":false,"id":"Page:ckw6e9xfx0mp50864n0rz0o9x","typename":"Page"},{"type":"id","generated":false,"id":"Page:ckwdetve60yan08649iw8pair","typename":"Page"},{"type":"id","generated":false,"id":"Page:ckwox3bna1w9c0864u2fbdfno","typename":"Page"},{"type":"id","generated":false,"id":"Page:ckx4slj6v005k0a53p9i6x50m","typename":"Page"},{"type":"id","generated":false,"id":"Page:ckx60balw01yz0858sye1ixvu","typename":"Page"},{"type":"id","generated":false,"id":"Page:ckx63km7c027h0858b0tm2sky","typename":"Page"},{"type":"id","generated":false,"id":"Page:ckxg0xywi0qec0858k67qqwk1","typename":"Page"},{"type":"id","generated":false,"id":"Page:ckybcu1mg2un90858gj6k72sn","typename":"Page"},{"type":"id","generated":false,"id":"Page:ckz7y82vi5kaj0858bmlwr0ay","typename":"Page"},{"type":"id","generated":false,"id":"Page:cl024i4na8mnj08589tid8bc4","typename":"Page"},{"type":"id","generated":false,"id":"Page:cl0uxg68ubwow08586hqi9bnj","typename":"Page"},{"type":"id","generated":false,"id":"Page:cl0uy684cbwvb0858yqx4vnhx","typename":"Page"},{"type":"id","generated":false,"id":"Page:cl0uzc9z6bx4i0858xb5a7gh2","typename":"Page"},{"type":"id","generated":false,"id":"Page:cl0v1tqigbxkj0858sa1rnh30","typename":"Page"},{"type":"id","generated":false,"id":"Page:cl0v2cjy9bxow0858y0jvge1d","typename":"Page"},{"type":"id","generated":false,"id":"Page:cl0v2jkrubxqh0858gbqd5t6o","typename":"Page"},{"type":"id","generated":false,"id":"Page:cl0w69wstc3wt0858zwwhc4rn","typename":"Page"},{"type":"id","generated":false,"id":"Page:cl0w6ezvmc3xw08584tvd6myu","typename":"Page"},{"type":"id","generated":false,"id":"Page:cl0w9d15gc4bs0858x46etqax","typename":"Page"},{"type":"id","generated":false,"id":"Page:cl0wa065gc4gx085870mb27m3","typename":"Page"},{"type":"id","generated":false,"id":"Page:cl0wai2l5c4ma0858bqfgyiws","typename":"Page"},{"type":"id","generated":false,"id":"Page:cl0wbz1pqc4u90858pp61vixf","typename":"Page"},{"type":"id","generated":false,"id":"Page:cl10kc5iocib30858yyb964ib","typename":"Page"},{"type":"id","generated":false,"id":"Page:cl16j64oud5z10858zmxo5z3b","typename":"Page"},{"type":"id","generated":false,"id":"Page:cl1ou3jiwegqa0858xyrb0fo3","typename":"Page"},{"type":"id","generated":false,"id":"Page:cl1q88ou8ekco08587cts1a1t","typename":"Page"},{"type":"id","generated":false,"id":"Page:cl2fwdvaagxot0858dbvfzwa9","typename":"Page"},{"type":"id","generated":false,"id":"Page:cl2yfnr88iba8085879y08pat","typename":"Page"},{"type":"id","generated":false,"id":"Page:cl2ypayvtidsk08584m2igh8l","typename":"Page"},{"type":"id","generated":false,"id":"Page:cl3vesldqknhj085858savf3u","typename":"Page"},{"type":"id","generated":false,"id":"Page:cl43w74lpl8dk0858to9uhj2u","typename":"Page"},{"type":"id","generated":false,"id":"Page:cl43w7gb7l8e20858xrzqgqz9","typename":"Page"},{"type":"id","generated":false,"id":"Page:cl43w7qiml8ek08588cha4oc2","typename":"Page"},{"type":"id","generated":false,"id":"Page:cl48h6z8zlpye0858td9csdqy","typename":"Page"},{"type":"id","generated":false,"id":"Page:cl78rvnxwtvo808589liz2pfw","typename":"Page"},{"type":"id","generated":false,"id":"Page:cl7oo6u7qv8cf0858exiqv6ad","typename":"Page"},{"type":"id","generated":false,"id":"Page:cl8mqor4qyjzv0858vty0cfa3","typename":"Page"},{"type":"id","generated":false,"id":"Page:cl8tx5mksz54s0858ihl3q1u8","typename":"Page"},{"type":"id","generated":false,"id":"Page:cl8u22o4ez5mq08583oamhfwi","typename":"Page"},{"type":"id","generated":false,"id":"Page:cl9mq5poj1rfh0858zgl8ksjn","typename":"Page"},{"type":"id","generated":false,"id":"Page:cl9y8rdi12u650858oza635r8","typename":"Page"},{"type":"id","generated":false,"id":"Page:clagmvmlj1ek00835j9q8q4rs","typename":"Page"},{"type":"id","generated":false,"id":"Page:claqj12ud2tqp08353972by7b","typename":"Page"},{"type":"id","generated":false,"id":"Page:clcafw4t28zoz08354eyxom1b","typename":"Page"},{"type":"id","generated":false,"id":"Page:cldx11pfrfeok0835vfer80hk","typename":"Page"},{"type":"id","generated":false,"id":"Page:clf2f7jbtkl260835rps73xqp","typename":"Page"},{"type":"id","generated":false,"id":"Page:clf9rs5c3ltkw0835vujrrtxu","typename":"Page"},{"type":"id","generated":false,"id":"Page:clfgt4fdjmf9v0835bv440kqj","typename":"Page"},{"type":"id","generated":false,"id":"Page:clfgtftaemfdx0835x56ytrvp","typename":"Page"},{"type":"id","generated":false,"id":"Page:clfgtyzdumfnj0835m46yrcvf","typename":"Page"},{"type":"id","generated":false,"id":"Page:clfwgsbptnzzu0835o780vtem","typename":"Page"},{"type":"id","generated":false,"id":"Page:clg24qsywoqir0835nda961iz","typename":"Page"},{"type":"id","generated":false,"id":"Page:clivhpar079d80835we1pgzk8","typename":"Page"},{"type":"id","generated":false,"id":"Page:cljck4wh192zw0835tw3xy3kp","typename":"Page"},{"type":"id","generated":false,"id":"Page:cljck5m2r930n08357znc2yvi","typename":"Page"},{"type":"id","generated":false,"id":"Page:cljh5dijh9q0l0835t4bdfam7","typename":"Page"},{"type":"id","generated":false,"id":"Page:cljh5ki1y9q1p0835lp0f4qak","typename":"Page"},{"type":"id","generated":false,"id":"Page:clloxy7n3708p0735122lbaxh","typename":"Page"},{"type":"id","generated":false,"id":"Page:clmeyb3r19lwj0735yt504zs0","typename":"Page"},{"type":"id","generated":false,"id":"Page:clmszuh0ravef0735zntydkcp","typename":"Page"},{"type":"id","generated":false,"id":"Page:clnkbz2s6da0m0735m12jhjra","typename":"Page"},{"type":"id","generated":false,"id":"Page:clpgoxg4elslm07356zu3m5n5","typename":"Page"},{"type":"id","generated":false,"id":"Page:clpi7kucdm37e0735u15o8rfy","typename":"Page"},{"type":"id","generated":false,"id":"Page:clpia71x6m3ud0735ba2n1yml","typename":"Page"},{"type":"id","generated":false,"id":"Page:clsyeohcd8d1j0735f1581opx","typename":"Page"},{"type":"id","generated":false,"id":"Page:clutqeck7fy2g0735ynx14jaf","typename":"Page"},{"type":"id","generated":false,"id":"Page:clw4qh5k6l9n907353ehehufe","typename":"Page"},{"type":"id","generated":false,"id":"Page:clxa0ibm1qtls07356bxbmpc2","typename":"Page"},{"type":"id","generated":false,"id":"Page:clxt2bo5ttdck0735uhterl3g","typename":"Page"},{"type":"id","generated":false,"id":"Page:clyfnkvvtw5400735aaroiwlr","typename":"Page"},{"type":"id","generated":false,"id":"Page:clywzcl9jy02r07350uek6rob","typename":"Page"},{"type":"id","generated":false,"id":"Page:clzcn909f0fwy07353ic6rr8c","typename":"Page"},{"type":"id","generated":false,"id":"Page:clzplug0f34lh0735jo6y64vw","typename":"Page"},{"type":"id","generated":false,"id":"Page:cm0az5m5s0t9b0818fxjonef0","typename":"Page"},{"type":"id","generated":false,"id":"Page:cm0azhkkt0tbs0818ccjyu659","typename":"Page"},{"type":"id","generated":false,"id":"Page:cm0cctnnd12dy0818yp2e3eli","typename":"Page"},{"type":"id","generated":false,"id":"Page:cm0divz1e180h08186q8py4jd","typename":"Page"},{"type":"id","generated":false,"id":"Page:cm0xhhruc1rsa0817exbpr1rq","typename":"Page"},{"type":"id","generated":false,"id":"Page:cm10uxl432jv50817ssiujost","typename":"Page"},{"type":"id","generated":false,"id":"Page:cm1evxo544dge08177rmhsl6i","typename":"Page"},{"type":"id","generated":false,"id":"Page:cm1hnvll84w1y081776bnhrg6","typename":"Page"},{"type":"id","generated":false,"id":"Page:cm1j7dd3t588s0817fj01jh0k","typename":"Page"},{"type":"id","generated":false,"id":"Page:cm1j7jpxs58am0817odencavx","typename":"Page"},{"type":"id","generated":false,"id":"Page:cm24hw4rb917x0817cy5o7ph3","typename":"Page"},{"type":"id","generated":false,"id":"Page:cm2yl9dfiefwq081726r9lwgi","typename":"Page"},{"type":"id","generated":false,"id":"Page:cm3conxas02k108290ydqnbep","typename":"Page"},{"type":"id","generated":false,"id":"Page:cm3pooxr001s90829sc8oheuc","typename":"Page"},{"type":"id","generated":false,"id":"Page:cm4jzxd9x00s008374jvhc8va","typename":"Page"},{"type":"id","generated":false,"id":"Page:cm5u4v8is0q9j0803u8nstt5y","typename":"Page"},{"type":"id","generated":false,"id":"Page:cm6aogy1f0ylr0803g7o52mxr","typename":"Page"},{"type":"id","generated":false,"id":"Page:cm6kkp0m62w7w0803ry3v5uq5","typename":"Page"},{"type":"id","generated":false,"id":"Page:cm6p1pmdr3t6a0803fv915pka","typename":"Page"},{"type":"id","generated":false,"id":"Page:cm6p1uk903tbx0803mfdygau2","typename":"Page"},{"type":"id","generated":false,"id":"Page:cm6p4768i3we00803rmhblalc","typename":"Page"},{"type":"id","generated":false,"id":"Page:cm6rm219h4nds0803ymo2uq2e","typename":"Page"},{"type":"id","generated":false,"id":"Page:cm71owk2g6tab0803321rni5n","typename":"Page"},{"type":"id","generated":false,"id":"Page:cm71q6oaw6udb0803012xg12r","typename":"Page"},{"type":"id","generated":false,"id":"Page:cm7j0o17o0byw0803hbonvfvl","typename":"Page"},{"type":"id","generated":false,"id":"Page:cm7uibgnd3dzx0803qnwpozbb","typename":"Page"},{"type":"id","generated":false,"id":"Page:cm8ptyp2v9lgb0803u3ba0ha0","typename":"Page"},{"type":"id","generated":false,"id":"Page:cm99l1yayeijj0803qpv7qu1f","typename":"Page"},{"type":"id","generated":false,"id":"Page:cm99l5bsxein70803kfblojon","typename":"Page"},{"type":"id","generated":false,"id":"Page:cm9ck8ii6fc740803kny0qqjo","typename":"Page"},{"type":"id","generated":false,"id":"Page:cm9ckxruefcc608037xn6eibo","typename":"Page"},{"type":"id","generated":false,"id":"Page:cm9cm8xmufcmc08033nld7l9d","typename":"Page"},{"type":"id","generated":false,"id":"Page:cm9cm99vbfcn70803af85jguv","typename":"Page"},{"type":"id","generated":false,"id":"Page:cm9cm9iu9fcnp080331j8i7ls","typename":"Page"},{"type":"id","generated":false,"id":"Page:cm9cm9zjtfco708030k4hhma9","typename":"Page"},{"type":"id","generated":false,"id":"Page:cm9cmaa8qfcop0803sk0u4y0h","typename":"Page"},{"type":"id","generated":false,"id":"Page:cm9cmakodfcp708036cgi4tz0","typename":"Page"},{"type":"id","generated":false,"id":"Page:cm9cmaw8ofcpp08036xtrr2xl","typename":"Page"},{"type":"id","generated":false,"id":"Page:cm9cmb4xvfcq70803npa2a2qo","typename":"Page"},{"type":"id","generated":false,"id":"Page:cm9cmbvrqfcqp0803v4w6227l","typename":"Page"},{"type":"id","generated":false,"id":"Page:cm9cmceztfcr70803bovcofh0","typename":"Page"},{"type":"id","generated":false,"id":"Page:cm9cmcoo1fcrp0803vl5desvj","typename":"Page"},{"type":"id","generated":false,"id":"Page:cm9cmd8k7fcs70803aca70x55","typename":"Page"},{"type":"id","generated":false,"id":"Page:cm9cmdlxcfcsp0803p0d518jj","typename":"Page"},{"type":"id","generated":false,"id":"Page:cm9cneisbfd730803ij7pwjju","typename":"Page"},{"type":"id","generated":false,"id":"Page:cm9cnfdzqfd8j0803zvobabx9","typename":"Page"},{"type":"id","generated":false,"id":"Page:cm9cnfr52fd98080350l77m3z","typename":"Page"},{"type":"id","generated":false,"id":"Page:cm9coazvwfdk10803da2ixhdm","typename":"Page"},{"type":"id","generated":false,"id":"Page:cm9cobgfnfdl50803o4nzn2zf","typename":"Page"},{"type":"id","generated":false,"id":"Page:cm9cobsqpfdm008036g7ghoo2","typename":"Page"},{"type":"id","generated":false,"id":"Page:cm9coc98sfdmi08035dz1mf
2wn","typename":"Page"},{"type":"id","generated":false,"id":"Page:cm9tyz4tvizoc0803mmf9n11r","typename":"Page"},{"type":"id","generated":false,"id":"Page:cmbqb5e09xyws0803y3rgyeuu","typename":"Page"},{"type":"id","generated":false,"id":"Page:cmdilgyg40c7p0832bv637gsr","typename":"Page"},{"type":"id","generated":false,"id":"Page:cmdilhy9d0c8l0832bkenadk9","typename":"Page"},{"type":"id","generated":false,"id":"Page:cmdipepgt00xb08322to2saio","typename":"Page"},{"type":"id","generated":false,"id":"Page:cmdipfr8v00xz08322hw227s8","typename":"Page"},{"type":"id","generated":false,"id":"Page:cmdo5gsze02qc0832lf2bbv7e","typename":"Page"},{"type":"id","generated":false,"id":"Page:cmdrby07306gx08323bs8w2wq","typename":"Page"},{"type":"id","generated":false,"id":"Page:cmdrco0jc06nh08329qpmwxvu","typename":"Page"},{"type":"id","generated":false,"id":"Page:cmdrcv93f06py08320cmhpnbs","typename":"Page"},{"type":"id","generated":false,"id":"Page:cmdrcw6pi06r50832ah6cogn3","typename":"Page"},{"type":"id","generated":false,"id":"Page:cmdrcws6q06sh08320yue2oye","typename":"Page"},{"type":"id","generated":false,"id":"Page:cmdrcyhlh06tt0832uzwgyl0p","typename":"Page"},{"type":"id","generated":false,"id":"Page:cmdrcze5h06vi083228rtpa7i","typename":"Page"},{"type":"id","generated":false,"id":"Page:cmdrd0mge06wa0832he2z1qmx","typename":"Page"},{"type":"id","generated":false,"id":"Page:cmdrd1izy06x90832q08kx96b","typename":"Page"},{"type":"id","generated":false,"id":"Page:cmdrgi38j02gj08325cjwqoa5","typename":"Page"},{"type":"id","generated":false,"id":"Page:cmdrgik7902hu0832yixwr83c","typename":"Page"},{"type":"id","generated":false,"id":"Page:cmdrgj1qn02iq0832yqd6nywk","typename":"Page"},{"type":"id","generated":false,"id":"Page:cmdrgjiiu02jm0832s4sjit28","typename":"Page"},{"type":"id","generated":false,"id":"Page:cmdrgk0r402ku0832m4wl4mou","typename":"Page"},{"type":"id","generated":false,"id":"Page:cmdrgkye502lq08325nkew28j","typename":"Page"},{"type":"id","generated":false,"id":"Page:cmdrglhlj02mx0832giei3ank","typename":"Page"},{"type":"id","generated":false,"id":"Page:cmdrgm0zt02o00832p9khius7","typename":"Page"},{"type":"id","generated":false,"id":"Page:cme9qpuko077808326jv50pwk","typename":"Page"},{"type":"id","generated":false,"id":"Page:cme9rcojj07l70832l0o4b6zx","typename":"Page"},{"type":"id","generated":false,"id":"Page:cme9rg5yw07oq0832e2t9hqe7","typename":"Page"},{"type":"id","generated":false,"id":"Page:cme9rim1x07rc083201ufqkik","typename":"Page"},{"type":"id","generated":false,"id":"Page:cmfp2fob51frg08329jmergly","typename":"Page"},{"type":"id","generated":false,"id":"Page:cmfp91btv088d0832jacmlkbx","typename":"Page"},{"type":"id","generated":false,"id":"Page:cmfp96ox208fh0832edf5mw0r","typename":"Page"},{"type":"id","generated":false,"id":"Page:cmfp988ia08hg0832gzoaz2pv","typename":"Page"},{"type":"id","generated":false,"id":"Page:cmhlrgldc06fk0832gpo1zh2v","typename":"Page"},{"type":"id","generated":false,"id":"Page:cmiyfa2a508q308322m0su27c","typename":"Page"},{"type":"id","generated":false,"id":"Page:cmkmnczo740ql0889aw8p76bf","typename":"Page"},{"type":"id","generated":false,"id":"Page:cmley5r269wkr0889usnp23dr","typename":"Page"},{"type":"id","generated":false,"id":"Page:cmlgfby9banwt0889tu45j7sw","typename":"Page"},{"type":"id","generated":false,"id":"Page:cmlgff4tianxt0889b2xu06v2","typename":"Page"},{"type":"id","generated":false,"id":"Page:cmlgfhw6fanzg0889w5kcd5p6","typename":"Page"},{"type":"id","generated":false,"id":"Page:cmlgfkcf4ao0b0889h7hd9sqr","typename":"Page"},{"type":"id","generated":false,"id":"Page:cmlgg8xhlao9h0889fan5t9d2","typename":"Page"},{"type":"id","generated":false,"id":"Page:cmlggbsvwaoc10889ggys3s1l","typename":"Page"},{"type":"id","generated":false,"id":"Page:cmlggf5llaoe60889fr9rdvog","typename":"Page"},{"type":"id","generated":false,"id":"Page:cmm4xpo9igujd0889kg819hdy","typename":"Page"},{"type":"id","generated":false,"id":"Page:cmnhiq86gqv9k0889tw52s1w1","typename":"Page"},{"type":"id","generated":false,"id":"Page:cmnoc0oyos2qq0889jamhbhzm","typename":"Page"},{"type":"id","generated":false,"id":"Page:cmoikfi2o00jd0834i7cnst7d","typename":"Page"},{"type":"id","generated":false,"id":"Page:cmoikgtii00ld0834fstyh5rg","typename":"Page"},{"type":"id","generated":false,"id":"Page:cmoikh55x00m90834611encgx","typename":"Page"},{"type":"id","generated":false,"id":"Page:cmoikhgmk00n10834zvd44iku","typename":"Page"},{"type":"id","generated":false,"id":"Page:cmojyurq800b90834ore7lvo9","typename":"Page"},{"type":"id","generated":false,"id":"Page:cmosn3q2e31ov0834rw6nfqhc","typename":"Page"},{"type":"id","generated":false,"id":"Page:cmp13w2es04lr0826703jqxwt","typename":"Page"},{"type":"id","generated":false,"id":"Page:cmpcprnil27f90826ymyime9f","typename":"Page"},{"type":"id","generated":false,"id":"Page:cmpgvtc0f38lb0826555ewppv","typename":"Page"},{"type":"id","generated":false,"id":"Page:cmpzd0kws895208269mvtvask","typename":"Page"},{"type":"id","generated":false,"id":"Page:cmq7yto10ah5l08260viggpan","typename":"Page"},{"type":"id","generated":false,"id":"Page:cmqtac8urgclw08269ufjvrbk","typename":"Page"},{"type":"id","generated":false,"id":"Page:cmqtdjc9lgdb90826vuke3rxj","typename":"Page"},{"type":"id","generated":false,"id":"Page:cmqtjxmm9gf7w08262teo1sxc","typename":"Page"},{"type":"id","generated":false,"id":"Page:cmqtk0v2dgfdl0826xp1p1ri6","typename":"Page"},{"type":"id","generated":false,"id":"Page:cmqtk33x1gfj40826lcuy5tm2","typename":"Page"},{"type":"id","generated":false,"id":"Page:cmqtk5m8ygfo80826sfrnrdh4","typename":"Page"},{"type":"id","generated":false,"id":"Page:cmsehf7jo02fj0856etyan05j","typename":"Page"},{"type":"id","generated":false,"id":"Page:cmt2wpeyn05ao085625qymc9k","typename":"Page"},{"type":"id","generated":false,"id":"Page:cmt2wpu1v05bn0856mnajwyzs","typename":"Page"}],"page({\"where\":{\"id\":\"cmosn3q2e31ov0834rw6nfqhc\"}})":{"type":"id","generated":false,"id":"Page:cmosn3q2e31ov0834rw6nfqhc","typename":"Page"},"page({\"where\":{\"id\":\"cmpgvtc0f38lb0826555ewppv\"}})":{"type":"id","generated":false,"id":"Page:cmpgvtc0f38lb0826555ewppv","typename":"Page"},"page({\"where\":{\"id\":\"cmpcprnil27f90826ymyime9f\"}})":{"type":"id","generated":false,"id":"Page:cmpcprnil27f90826ymyime9f","typename":"Page"},"page({\"where\":{\"id\":\"cmpzd0kws895208269mvtvask\"}})":{"type":"id","generated":false,"id":"Page:cmpzd0kws895208269mvtvask","typename":"Page"},"page({\"where\":{\"id\":\"cmnoc0oyos2qq0889jamhbhzm\"}})":{"type":"id","generated":false,"id":"Page:cmnoc0oyos2qq0889jamhbhzm","typename":"Page"},"page({\"where\":{\"id\":\"cmojyurq800b90834ore7lvo9\"}})":{"type":"id","generated":false,"id":"Page:cmojyurq800b90834ore7lvo9","typename":"Page"}}
2,"ComponentTemplate:cjv3uuvcb022s0836es3ybppq":{"id":"cjv3uuvcb022s0836es3ybppq","name":"Divesoft videos","type":"VideoGallery","content":{"type":"json","json":{"title":"VideoGallery 1","description":"Lorem ipsum dolor sit amet, consectetur adipiscing elit. Vivamus eget mauris in diam bibendum blandit id id nunc.","divider":false,"videos":[{"video":{"type":"embeddedVideo","url":"https://www.youtube.com/embed/9mf5YEINadk"},"title":"Oxygen sensors","text":"Lorem ipsum dolor sit amet, lore conse ctetur adipiscing elit. And Vivamus eget mauris in diam bibendum blandit id id nunc.","id":"1"},{"id":"2","title":"Analyzer","video":{"type":"embeddedVideo","url":"https://www.youtube.com/embed/_wcEN3lysXE"},"text":"Filmed at DEMA 2016 in Las Vegas with a GoPro Hero 4 silver or Canon Vixia with blue tooth microphone. Check out all 800 dive related videos on Youtube under Mike Hughes Scuba."},{"id":"3","video":{"type":"embeddedVideo","url":"https://www.youtube.com/embed/fKNIraFPg_4"},"title":"Liberty Under Ice | Divesoft"}],"activeTab":"3"}},"__typename":"ComponentTemplate"},"ComponentTemplate:cjv7yndru048c0836j99ljogw":{"id":"cjv7yndru048c0836j99ljogw","name":"Header","type":"Header","content":{"type":"json","json":{"products":[],"activeTab":"1"}},"__typename":"ComponentTemplate"},"ComponentTemplate:cjvwimxrl08e40798hjs5ek9w":{"id":"cjvwimxrl08e40798hjs5ek9w","name":"Footer","type":"Footer","content":{"type":"json","json":{"copyrights":"Copyright © 2019 Divesoft LLC All rights reserved.","facebookUrl":{"urlNewWindow":true,"url":"https://www.facebook.com/divesoft/"},"youtubeUrl":{"url":"https://www.youtube.com/@divesoft_tv","urlNewWindow":true},"instagramUrl":{"url":"https://www.instagram.com/divesoft/","urlNewWindow":true},"contacts":"**Divesoft s.r.o.** \nHálkova 2495 \n413 01 Roudnice nad Labem \nCzech Republic \nTel.: +420 416 857 057 \nE-mail: [email protected]","twitterUrl":{"url":"https://x.com/divesoft/","urlNewWindow":true,"pageId":"cjv3l26tp004p0836i54n4u7a"},"linkedinUrl":{"urlNewWindow":true,"url":"https://www.linkedin.com/company/divesoft/"}}},"__typename":"ComponentTemplate"},"ComponentTemplate:cjxar7jpk035c0708clk7h3jm":{"id":"cjxar7jpk035c0708clk7h3jm","name":"VIDEO GALLERY","type":"GalleryAndVideo","content":{"type":"json","json":{"title":"VIDEO GALLERY","video":{"type":"embeddedVideo","url":"https://www.youtube.com/embed/T2XOn07lvJs"},"images":[{"id":"1","image":{"type":"embeddedVideo","url":"https://www.youtube.com/embed/T2XOn07lvJs"}},{"id":"2","image":{"type":"embeddedVideo","url":"https://www.youtube.com/embed/F6G5qWoLudU"}},{"id":"3","image":{"type":"embeddedVideo","url":"https://www.youtube.com/embed/JJfHJuyvYJU"}}],"activeTab":"3"}},"__typename":"ComponentTemplate"},"ComponentTemplate:cjxat76di03by0708lube2tbx":{"id":"cjxat76di03by0708lube2tbx","name":"Components","type":"SpecialCarousel","content":{"type":"json","json":{"slides":[{"image":{"recommendedSizes":{"width":"1600","height":"700"},"mimetype":"image/jpeg","size":149850,"hash":"63894cc5f233517aeb3732903693dc602c181c68","id":"cjt1t5qy00dcc0776mn9nsju0","filename":"naebg.jpg","category":"divesoft/","type":"image"},"title":"Technicals","subTitle":"Aerodynamics","description":"**Thanks** to the careful design of all parts of the breathing loop, the Liberty has extraordinarily low breathing resistance. No off-the-shelf pipe fittings or piping components are used in the Liberty â everything is specially manufactured precisely according to calculations, simulations and test results. Therefore, airflow is not disrupted by sudden changes in the cross section or by sharp bends, except for the intentionally induced turbulent flow in the areas around the necks of the ppO2 sensors and channeling of a small amount of gas through the helium concentration sensors.","productImg":{"recommendedSizes":{"width":"450","height":"450"},"mimetype":"image/png","size":184894,"hash":"0d789c3830062527cfd9ea0eed59fe754dbe2ce6","id":"cjt949r580dwo0776fikihyyg","filename":"product.png","category":"divesoft/","type":"image"},"isBackgroundBlack":true,"firstDocImg":{"recommendedSizes":{"width":"50","height":"50"},"mimetype":"image/svg+xml","size":2018,"hash":"9ae56a12c508c3fae5a94fb821ca61ad747a79e2","id":"cjt8yzg840duz0776bsuym
2y90","filename":"pdf.svg","category":"divesoft/","type":"image"},"firstDocText":"WOB 100 m ANSTI Certificate","firstUrl":{"url":"/en","pageId":"cjv3l26tp004p0836i54n4u7a"},"secondDocImg":{"recommendedSizes":{"width":"50","height":"50"},"mimetype":"image/svg+xml","size":2018,"hash":"9ae56a12c508c3fae5a94fb821ca61ad747a79e2","id":"cjt8yzg840duz0776bsuymy90","filename":"pdf.svg","category":"divesoft/","type":"image"},"secondDocText":"WOB 40 m ANSTI Certificate","secondUrl":{"url":"/en","pageId":"cjv3l26tp004p0836i54n4u7a"},"id":"1"},{"id":"2","title":"Techniclas","subTitle":"AIR-MASS TREATMENT","description":"When breathing, a diver consumes oxygen from gas and exhales carbon dioxide. For a closed circuit to function, the rebreather must do the exact opposite: remove carbon dioxide from gas and replace the consumed oxygen. Immediately after the gas intake of the gas mass treatment unit, there is an electronically controlled valve (solenoid).\n\nOxygen is added to the loop when this valve opens. After that the gas flows in the space between the canister and the cover of the carbon dioxide scrubber, which is made of finely perforated sheet metal, gas flows through the holes in the sheet metal into the scrubber and proceeds to the centre of the scrubber, where it encounters more perforated sheet metal. Between these two sheet-metal components there are small granules of slaked lime (calcium hydroxide) with a small amount of added sodium hydroxide. The lime reacts with carbon dioxide and removes it from gas with the concurrent formation of limestone.\n\nAfter passing through the filter but before exiting the air-mass treatment unit in the direction of the arrows, gas flows around the sensors. The sensors send information about the amount of oxygen to the control computer, which employs the solenoid to add oxygen so that it is maintained at the required level. Oxygen is added prior to gas reaching the filter for purely practical reasons: if oxygen was added after the filter, a small plume of oxygen would immediately come into contact with the sensors, which would thus show incorrect values.","image":{"mimetype":"image/jpeg","size":77848,"hash":"4731e5b7b2192d1f33f847bf6aa75d691fe7a372","id":"cjt8rgkvm0dts0776kwe3f6jw","filename":"specialcarouserbg.jpg","category":"divesoft/","type":"image"},"isBackgroundBlack":true},{"id":"3","title":"Technicals","subTitle":"AIR-MASS TREATMENT UNIT","description":"The body of the unit is divided into two parts: the head, in which the electronics are housed, and the canister with the chemical filter. The control computers are housed in the upper part of the head. With a rebreather, it generally holds true that the diluent determines the volume of the breathing mixture and oxygen determines its breathability. Air is most commonly used as the diluent for shallower dives and trimix or heliox for deeper ones. Unlike open-circuit diving, priority is given to a mixture with a leaner oxygen content, because oxygen is added from a separate tank. Proper replenishment of oxygen is the main task of the control computers and all electronic and electromagnetic devices in the head. The amount of oxygen â specifically the partial pressure of oxygen in the breathing loop â must be maintained within relatively narrow ranges. This purpose is served by the quartet of ppO2 sensors and two electrically controlled valves (solenoids) for replenishing oxygen. The control computers evaluate data from the sensors and, as needed, open the solenoids, which add oxygen to the loop. Oxygen is transferred to the head via the hose that can be easily seen between the oxygen tank and the canister when the air-mass treatment unit is removed.","image":{"mimetype":"image/jpeg","size":77848,"hash":"4731e5b7b2192d1f33f847bf6aa75d691fe7a372","id":"cjt8rgkvm0dts0776kwe3f6jw","filename":"specialcarouserbg.jpg","category":"divesoft/","type":"image"},"isBackgroundBlack":true},{"id":"4","image":{"mimetype":"image/jpeg","size":77848,"hash":"4731e5b7b2192d1f33f847bf6aa75d691fe7a372","id":"cjt8rgkvm0dts0776kwe3f6jw","filename":"specialcarouserbg.jpg","category":"divesoft/","type":"image"},"title":"Technicals","subTitle":"BACKPLATE, REGULATORS, BCD, BALLAST","description":"All parts of the apparatus, including the attachment straps, are attached to the backplate. The backplate continues downward with the base, which transfers part of the apparatusâs weight to the diverâs lower back, protects the tank valves against damage and serves as a pedestal for standing the apparatus on the ground.\n\nEquipment seen on the back of the Liberty includes the noticeable ballast pouches attached to the tanks. These pouches feature downward-hanging red ârip cordsâ for emergency jettisoning of the ballast. Firmly attached to the backplate they are the first stages of the regulators (reduction valves), which reduce the high pressure of the gas from the tanks to medium pressure of 8.5 bars relative to the ambient pressure. The gas is then distributed by the hoses to the necessary places in the apparatus. The buoyancy compensator (BCD), which is structurally designed as a âwingâ, with and without bungees or a âdonutâ and is visible on both sides, contributes to the outline of the overall rear view of the Liberty.\n\n","isBackgroun
2dBlack":true},{"id":"5","title":"Technicals","subTitle":"CONTROL SYSTEM","description":"The Liberty CCR is controlled by two interlinked computers. Each computer has its own battery, two oxygen sensors, a pair of depth and atmospheric pressure sensors, and a helium concentration sensor. Each CU controls a separate electromagnetic valve for adding oxygen to the breathing loop.\n\nThe computers mutually share data from the sensors (each of the computers has access to data from all four oxygen sensors), and mutually synchronize all performed operations, such as decompression calculation. If one of the computers fails, the remaining one has available all necessary devices (oxygen and helium sensors, solenoid) and information (decompression model status) for problem-free continuation of the dive and the diverâs return to the surface.\n\nTwo display units, a head-up display and buddy display are connected to each control unit. The control units can shut down power to the handsets in the event of a malfunction or short (e.g. in the case of cable damage). The handsets do not control the solenoids, nor do they perform decompression calculations. They serve only as the terminal devices of the control units.\n\nThe head-up display (HUD) has three tri-color LEDs and is attached to the DSV in the diverâs field of vision. Blinking LEDs indicate the measured partial pressure of oxygen in the breathing loop as well as danger or malfunctions. The buddy display (BD) on the head of the apparatus notifies the diverâs partner or instructor of critically dangerous levels of the partial pressure of oxygen. The positioning of the HUD and BD are configurable so that you can exchange them or, for example, install two HUDs at the same time.","image":{"mimetype":"image/jpeg","size":77848,"hash":"4731e5b7b2192d1f33f847bf6aa75d691fe7a372","id":"cjt8rgkvm0dts0776kwe3f6jw","filename":"specialcarouserbg.jpg","category":"divesoft/","type":"image"},"isBackgroundBlack":true},{"id":"6","title":"Technicals","subTitle":"DIMENSIONS AND PERFORMANCE","description":"BACKMOUNT\nWeight of the Liberty CCR prepared for diving (without ballast): 36.5 kg (80.5 lb)\nTransport weight (without tanks, without scrubber filling): 23.5 kg (51.8 lb)\nEndurance according to EN 14143:2013 (CO2 production of 1.6 l/min): 2:48 h\nEndurance with CO2 production of 1 l/min (corresponds to increased effort in cold water and at great depth): 4 h\nEndurance with CO2 production of 0.7 l/min (corresponds to moderate effort in favorable conditions): 6 h\nMaximum depth in tests according to EN 14143:2013: 100 m (330 feet)\nMaximum depth with Apeks DST4 1st stages 170 m (557 feet)\nDepth gauge precision test: 350 m (1,150 feet)\nPressure test of all components: 600 m (1,960 feet)\nThe deepest dive we are aware of: 183 m (600 feet)\n\nSIDEMOUNT\nWeight (ready to dive) approx. 21.6 kg (47.6 lb) (regular + stainless), 20.5 kg (45 lb) (shortened + titanium)\nThe total weight is under 23 kg (50.7 lb), when ordered with a Peli Case AIR. Ready to fly!\nNeutral buoyancy (in both the shortened and the regular version)\nTwo tanks 2 liter, 230 bar\nManual add valve for diluent (located at mouthpiece)\nManual add valve for oxygen (located at mouthpiece)\nDiaphragm automatic diluent valve\nOverpressure/dump valve on exhale counterlung\nDive/surface valve\nScrubber 2.5 kg (in both the shortened and the regular version)\nScrubber duration 2:48 (by test described in EN 14143:2013, para 6.6.2), 4 to 6 hours in normal conditions\nFirst stage regulators: Apeks Flight\nHead-up display\nTwo handsets\n100% backup system (two electronics, two acu packs, four O2 sensors, two He sensors, four pressure (depth) sensors, two solenoids)","image":{"mimetype":"image/jpeg","size":77848,"hash":"4731e5b7b2192d1f33f847bf6aa75d691fe7a372","id":"cjt8rgkvm0dts0776kwe3f6jw","filename":"specialcarouserbg.jpg","category":"divesoft/","type":"image"},"isBackgroundBlack":true},{"id":"7","subTitle":"EASY MAINTENANCE AND REPAIR","title":"Technicals","description":"The head is also the heart of the Liberty CCR. It contains the control units, all sensors, batteries and solenoid valves. The whole assembly is divided to several compartments for easy maintenance and repair. Most of the repairs consist of an exchange of the relevant compartment. The Liberty is designed to work as a modular apparatus, when one component malfunctions, you simply take it out and replace it with a new one. It is fast and easy. Of course, the control unitsâ software (i.e. firmware) can be updated by user.","image":{"mimetype":"image/jpeg","size":77848,"hash":"4731e5b7b2192d1f33f847bf6aa75d691fe7a372","id":"cjt8rgkvm0dts0776kwe3f6jw","filename":"specialcarouserbg.jpg","category":"divesoft/","type":"image"}
2,"isBackgroundBlack":true},{"id":"8","image":{"mimetype":"image/jpeg","size":77848,"hash":"4731e5b7b2192d1f33f847bf6aa75d691fe7a372","id":"cjt8rgkvm0dts0776kwe3f6jw","filename":"specialcarouserbg.jpg","category":"divesoft/","type":"image","alt":""},"title":"Technicals","subTitle":"FAULT-TOLERANT REBREATHER","description":"The Liberty CCR is designed to be fault-tolerant, which means that no single malfunction in the electronic system can cause a breakdown of the whole apparatus. And in many cases, not even multiple malfunctions can cause a complete breakdown.\n\nThe apparatus is designed and programmed so that it is able to cope with any combination of malfunctions as long as at least one control unit and any sensor are still operational. In the case of damage to a cable, the control computer will detect a short in that cable and disconnect the respective handsetâs power supply. And if both handsets are lost, the control computers will continue regulating the supply of oxygen according to the most recently selected setpoint. And the Liberty CCR will keep working even if one of the control computers fails. Each computer has its own battery, depth sensor, two oxygen sensors a helium sensor and electrically controlled oxygen supply valve (solenoid).\n\nIn normal circumstances, the two computers communicate with each other and exchange data from the sensors and agree on which of them will add oxygen to the loop. If necessary, either computer can perform this function independently.\n\nLetâs create a catastrophic scenario. We have already lost both handsets, and now one of the computers has shut down. More than half of the electronic systems are inoperable, but the Liberty CCR keeps working. The mechanism for regulating oxygen supply handles this situation with no problems. Could anything else go wrong? Yes, it could. One of the oxygen sensors could malfunction. And not that it would stop sending a signal, as if it had gotten flooded. That would be too simple. The sensor would show âonlyâ an incorrect value and it would appear that the control computer now cannot know which of the sensors to believe. This is a miserable situation. It could fail when you are at one hundred meters below the surface... which, however, would be an advantage. After all, for a hundred-meter dive, you have trimix. The computer is well aware of that, even if you forgot to set the diluent composition before the dive. The built-in helium concentration sensor diligently measures the mixture composition during the dive and stores it in the computerâs memory. Thanks to this, the computer can now calculate the oxygen content based on the measured helium concentration and decide which of the oxygen sensors is in working order. The dive continues. And now it is already clear that even if the last oxygen sensor breaks down, such an event will not put the computer out of action. Based on the last known correct oxygen value, it will switch to indirect measuring of oxygen using the helium sensor and safely continue regulating the supply of oxygen.","isBackgroundBlack":true}],"activeTab":"9"}},"__typename":"ComponentTemplate"},"ComponentTemplate:cjyiek5ng00bz07773k8drspc":{"id":"cjyiek5ng00bz07773k8drspc","name":"Front mounted counterlangs","type":"ProductComponents","content":{"type":"json","json":{"title":"FRONT MOUNTED COUNTERLUNGS CONFIGURATION ","description":"Classic configuration with low profile Dive Surface Valve mouthpiece allows for the best work of breathing (2.6 KJ per liter at 40M) due to proximity of lungs and hydrostatic pressure dynamics.","components":[{"title":"FLOOD TOLERANCY","description":"Front mounted counter lungs configuration most resistant to floods in head and canister","image":{"recommendedSizes":{"width":"130","height":"130"}},"url":"","id":"1"},{"title":"MAVs","description":"Easy accessibility to gas addition valves on counter lungs via LP inflator hose valves.","image":{"recommendedSizes":{"width":"130","height":"130"}},"url":"","id":"2"},{"title":"ADVs","description":"CCR Liberty offers inhouse made spring or diaphhgragm ADV located on counterlungs inhale side for immediate access to Diluent gas.","image":{"recommendedSizes":{"width":"130","height":"130"}},"url":{"url":"ADVs"},"id":"3"},{"title":"OFFBOARD GAS ACCESIBILITY","description":"All Libery rebreather do offer offboard gas connectivity via free LP ports on 1st stages. ","image":{"recommendedSizes":{"width":"130","height":"130"}},"url":"","id":"4"},{"title":"DIVE/SURFACE VALVE","description":"Machine-designed for optimal work of brething, that's Liberty DSV. ","image":{"recommendedSizes":{"width":"130","height":"130"}},"url":"","id":"5"},{"title":"COUNTERLUNGS","description":"Easily detachable cordura counterlungs mounted via quick release cobra buckles equiped with inhouse made OPV.","image":{"recommendedSizes":{"width":"130","height":"130"}},"url":"","id":"6"}],"activeTab":"3"}},"__typename":"ComponentTemplate"},"ComponentTemplate:cjyiekfyu00c80777mxkf5m6i":{"id":"cjyiekfyu00c80777mxkf5m6i","name":"Front mounted counterlangs - video","type":"GalleryAndVideo","content":{"type":"json","json":{"title":"","video":{"type":"embeddedVideo","url":"https://www.youtube.com/embed/T2XOn07lvJs"},"images":[{"id":"5","image":{"mimetype":"image/png","size":600821,"hash":"5ac4d810dd105484703d988ac31d3bf798e5c090","id":"cjxbwxxqw07520776t46q3c0q","filename":"fmcl.png","category":"divesoft/","type":"image"}},{"id":"2","image":{"mimetype":"image/png","size":5351582,"hash":"eb5cc161b1911ad064f3d39bdf86a0a2d52bec6a","id":"cjxbuqx2t071q07767te6yvfn","filename":"fmcl-00001.png","category":"divesoft/","type":"image"}},{"id":"3","image":{"mimetype":"image/jpeg","size":1054293,"hash":"54804129f9c71e034dbd33d7287316393a3b8177","id":"cjxbv0eju072k07768iqbgzxx","filename":"fmcl-00003.jpg","category":"divesoft/","type":"image"}},{"id":"4","image":{"mimetype":"image/png","size":5938445,"hash":"5cb7a0ef8c5fb2bd6ab3a4b0fb90599b1f985392","id":"cjxbvh7ut07330776q1e1mbps","filename":"fmcl-00006.png","category":"divesoft/","type":"image"}}],"activeTab":"5"}},"__typename":"ComponentTemplate"},"ComponentTemplate:cjyjgz0oa00mw07778oqggnx2":{"id":"cjyjgz0oa00mw07778oqggnx2","name":"frontmou
2nt config","type":"ProductComponents","content":{"type":"json","json":{"title":"FRONT MOUNTED COUNTERLUNGS CONFIGURATION ","description":"Classic configuration with low profile Dive Surface Valve mouthpiece allows for the best work of breathing (2.6 KJ per liter at 40M) due to proximity of lungs and hydrostatic pressure dynamics.","components":[{"title":"FLOOD TOLERANCY","description":"Front mounted counter lungs configuration most resistant to floods in head and canister","image":{"recommendedSizes":{"width":"130","height":"130"}},"url":"","id":"1"},{"title":"MAVs","description":"Easy accessibility to gas addition valves on counter lungs via LP inflator hose valves.","image":{"recommendedSizes":{"width":"130","height":"130"}},"url":"","id":"2"},{"title":"ADVs","description":"CCR Liberty offers inhouse made spring or diaphhgragm ADV located on counterlungs inhale side for immediate access to Diluent gas.","image":{"recommendedSizes":{"width":"130","height":"130"}},"url":{"url":"ADVs"},"id":"3"},{"title":"OFFBOARD GAS ACCESIBILITY","description":"All Libery rebreather do offer offboard gas connectivity via free LP ports on 1st stages. ","image":{"recommendedSizes":{"width":"130","height":"130"}},"url":"","id":"4"},{"title":"DIVE/SURFACE VALVE","description":"Machine-designed for optimal work of brething, that's Liberty DSV. ","image":{"recommendedSizes":{"width":"130","height":"130"}},"url":"","id":"5"},{"title":"COUNTERLUNGS","description":"Easily detachable cordura counterlungs mounted via quick release cobra buckles equiped with inhouse made OPV.","image":{"recommendedSizes":{"width":"130","height":"130"}},"url":"","id":"6"}],"activeTab":"3"}},"__typename":"ComponentTemplate"},"ComponentTemplate:cjyjh57az00n507777yr4iemj":{"id":"cjyjh57az00n507777yr4iemj","name":"bmcl config","type":"ProductComponents","content":{"type":"json","json":{"title":"BMCL CONFIGURATION ","description":"","components":[{"title":"BAILOUT VALVE","description":"Divesoft Bailout Valve is included with every BMCL unit as a standard feature to allow for safest emergency access to open circuit gas.","image":{"recommendedSizes":{"width":"130","height":"130"}},"url":"","id":"1"},{"title":"ADV","description":"Diaphragm Automatic Diluent Valve integrated into counter lung T-piece to allow for diluent gas addition to create optimum loop volume and prevent improper gas vacuum with a descent","image":{"recommendedSizes":{"width":"130","height":"130"}},"url":"","id":"2"},{"title":"CORDURA COUNTERLUNGS WITH OPV","description":"Sleek counterlungs placed on your shoulder with OPV that has dump pull placed on your shoulder to make sure you'll find it always in the same place. ","image":{"recommendedSizes":{"width":"130","height":"130"}},"url":"","id":"3"},{"id":"5","title":"MANUAL ADDITION VALVE","description":"Divesoft offers and uniques system of MAV included with every BMCL configuration. Thiese MAV placed on the moun=tpiece will allow you to get rid of the onsiles and dongles that migght clutter your chest. Due to it's positioning on the mouthpice thay are also easy to find while always at the same place. "}]}},"__typename":"ComponentTemplate"},"ComponentTemplate:cjyjh5vz700ne0777fwq9er4i":{"id":"cjyjh5vz700ne0777fwq9er4i","name":"fmcl config","type":"ProductComponents","content":{"type":"json","json":{"title":"FRONT MOUNTED COUNTERLUNGS CONFIGURATION ","description":"Classic configuration with low profile Dive Surface Valve mouthpiece allows for the best work of breathing (2.6 KJ per liter at 40M) due to proximity of lungs and hydrostatic pressure dynamics.","components":[{"title":"FLOOD TOLERANCY","description":"Front mounted counter lungs configuration most resistant to floods in head and canister","image":{"recommendedSizes":{"width":"130","height":"130"}},"url":"","id":"1"},{"title":"MAVs","description":"Easy accessibility to gas addition valves on counter lungs via LP inflator hose valves.","image":{"recommendedSizes":{"width":"130","height":"130"}},"url":"","id":"2"},{"title":"ADVs","description":"CCR Liberty offers inhouse made spring or diaphhgragm ADV located on counterlungs inhale side for immediate access to Diluent gas.","image":{"recommendedSizes":{"width":"130","height":"130"}},"url":{"url":"ADVs"},"id":"3"},{"title":"OFFBOARD GAS ACCESIBILITY","description":"All Libery rebreather do offer offboard gas connectivity via free LP ports on 1st stages. ","image":{"recommendedSizes":{"width":"130","height":"130"}},"url":"","id":"4"},{"title":"DIVE/SURFACE VALVE","description":"Machine-designed for optimal work of brething, that's Liberty DSV. ","image":{"recommendedSizes":{"width":"130","height":"130"}},"url":"","id":"5"},{"title":"COUNTERLUNGS","description":"Easily detachable cordura counterlungs mounted via quick release cobra buckles equiped with inhouse made OPV.","image":{"recommendedSizes":{"width":"130","height":"130"}},"url":"","id":"6"}],"activeTab":"3"}},"__typename":"ComponentTemplate"},"ComponentTemplate:cjyjh8a5k00nn07771qrlr1nr":{"id":"cjyjh8a5k00nn07771qrlr1nr","name":"fmcl gallery","type":"GalleryAndVideo","content":{"type":"json","json":{"title":"","video":{"type":"embeddedVideo","url":"https://www.youtube.com/embed/T2XOn07lvJs"},"images":[{"id":"5","image":{"mimetype":"image/png","size":600821,"hash":"5ac4d810dd105484703d988ac31d3bf798e5c090","id":"cjxbwxxqw07520776t46q3c0q","filename":"fmcl.png","category":"divesoft/","type":"image"}},{"id":"2","image":{"mimetype":"image/png","size":5351582,"hash":"eb5cc161b1911ad064f3d39bdf86a0a2d52bec6a","id":"cjxbuqx2t071q07767te6yvfn","filename":"fmcl-00001.png","category":"divesoft/","type":"image"}},{"id":"3","image":{"mimetype":"image/jpeg","size":1054293,"hash":"54804129f9c71e034dbd33d7287316393a3b8177","id":"cjxbv0eju072k07768iqbgzxx","filename":"fmcl-00003.jpg","category":"divesoft/","type":"image"}},{"id":"4","image":{"mimetype":"image/png","size":5938445,"hash":"5cb7a0ef8c5fb2bd6ab3a4b0fb90599b1f985392","id":"cjxbvh7ut07330776q1e1mbps","filename":"fmcl-00006.png","category":"divesoft/","type":"image"}}],"activeTab":"5"}},"__typename":"ComponentTemplate"},"ComponentTemplate:cjyjh8zsv00nw0777oxtod5by":{"id":"cjyjh8zsv00nw0777oxtod5by","name":"bmcl gallery","type":"GalleryAndVideo","content":{"type":"json","json":{"title":"","video":{"type":"embeddedVideo","url":"https://www.youtube.com/embed/C4_qFVkuANE"},"images":[{"image":{"recommendedSizes":{"width":"1600","height":"900"},"mimetype":"image/png","size":576657,"hash":"0412f9f37466bef1eedd37c56f55d8be431076bb","id":"cjxc529eg077r0776zlnvnc4q","filename":"bmcl.png","category":"divesoft/","type":"image"}
2,"id":"1"},{"image":{"recommendedSizes":{"width":"1600","height":"900"},"mimetype":"image/png","size":5787680,"hash":"66221f51bc0fbd67d2f92afea827d02d4737e43e","id":"cjxc53e0l078007765x7oz913","filename":"bmcl-00001.png","category":"divesoft/","type":"image"},"id":"2"},{"image":{"recommendedSizes":{"width":"1600","height":"900"},"mimetype":"image/png","size":6492185,"hash":"1861884aa844f9506f0fe2672a67a951772ccbe7","id":"cjxc55vul07890776tz4nkf3m","filename":"bmcl-00004.png","category":"divesoft/","type":"image"},"id":"3"},{"image":{"recommendedSizes":{"width":"1600","height":"900"},"mimetype":"image/png","size":5300792,"hash":"187244a58aae7b6baf4cefcf08e646ec88b9d74b","id":"cjxc58qbv078i0776cektce82","filename":"bmcl-00006.png","category":"divesoft/","type":"image"},"id":"4"}],"activeTab":"4"}},"__typename":"ComponentTemplate"},"ComponentTemplate:cjyjh9q1l00o50777fgq04zg4":{"id":"cjyjh9q1l00o50777fgq04zg4","name":"sidemount config","type":"ProductComponents","content":{"type":"json","json":{"title":"SIDEMOUNT CONFIGURATION ","description":"Liberty sidemount is the only sidemount rebreather on themarket with all gases onboard.","components":[{"title":"NEUTRALY BUOYANT","description":"Thanlks to precise engineering, titanium backplate and awesome weight distribution Sidemount liberty is completely neutrally buoyant. ","image":{"recommendedSizes":{"width":"130","height":"130"}},"url":"","id":"1"},{"title":"DIL AND OXY ONBOARD","description":"Thanks to it's unique design Liberty Sidmeount does have both gasses suply onboard. Thanks to that the design can be even more streamlined while no pony bottles are needed. ","image":{"recommendedSizes":{"width":"130","height":"130"}},"url":"","id":"2"},{"title":"OPV AND WATERTRAP","description":"Liberty Sidemount features an OPV valve for easy DIL flusha nd water evacuation. Liberty Sidemount also has an addition water trap in the exhale counterlung for additional protection of the electronics. ","image":{"recommendedSizes":{"width":"130","height":"130"}},"url":"","id":"3"},{"title":"LIGHTWEIGHT","description":"Liberty Sidemount is with it's less than 50lbs and idela companinion for travels. ","image":{"recommendedSizes":{"width":"130","height":"130"}},"url":"","id":"4"},{"title":"OFF BOARD GAS SUPLY","description":"In case of long dives you can hook up your sidemount Liberty with off board gas suply via the free LP ports on 1st stages.","image":{"recommendedSizes":{"width":"130","height":"130"}},"url":"","id":"5"},{"title":"STREAMLINED GAS MANAGEMENT","description":"Liberty Sidemount is the only rebrether that has the MAV and DIL additon included in it's mouthpiece. Liberty Sidemount also comes with the diaphrame ADV as a standard feature. ","image":{"recommendedSizes":{"width":"130","height":"130"}},"url":"","id":"6"}],"activeTab":"6"}},"__typename":"ComponentTemplate"},"ComponentTemplate:cjyjh9x8k00oe0777ck29aq3a":{"id":"cjyjh9x8k00oe0777ck29aq3a","name":"sidemount gallery","type":"GalleryAndVideo","content":{"type":"json","json":{"title":"","video":{"type":"embeddedVideo","url":"https://www.youtube.com/embed/JJfHJuyvYJU"},"images":[{"image":{"recommendedSizes":{"width":"1600","height":"900"},"mimetype":"image/png","size":259316,"hash":"9b3cdb102291f8c95b3a3408e0a493c1bbb94c38","id":"cjxc7r1hw07b20776e7kq8u9o","filename":"sidemount.png","category":"divesoft/","type":"image"},"id":"1"},{"id":"2","image":{"mimetype":"image/png","size":2660493,"hash":"dc8db59a637c6b6b08039465c4ed2b515000d460","id":"cjxc5jkxe079f0776yj24daz8","filename":"sidemount-00000.png","category":"divesoft/","type":"image"}},{"id":"3","image":{"mimetype":"image/png","size":2287790,"hash":"b0a72c7e6923dd548eaec4eaea98e147885d3a5b","id":"cjxc5kfi1079m0776ycru2xmt","filename":"sidemount-00002.png","category":"divesoft/","type":"image"}},{"id":"4","image":{"mimetype":"image/png","size":2926363,"hash":"2e2888b9ed127b0ffcb2f4e8970137b5712fffad","id":"cjxc5lg7x079t07762qoom9df","filename":"sidemount-00005.png","category":"divesoft/","type":"image"}}],"activeTab":"1"}},"__typename":"ComponentTemplate"},"ComponentTemplate:cjz00psyc03z40777dsaxkokd":{"id":"cjz00psyc03z40777dsaxkokd","name":"Liberty configuration router","type":"ProductMountRouter","content":{"type":"json","json":{"toggleOpen":"configurations","toggleClose":"close","leftHeadline":"BACKMOUNTED COUNTERLUNGS","leftText":"Free chest, free movement, free mind","leftUrl":{"url":"/en/products/ccr-liberty/ccr-liberty-backmount","pageId":"cjyztuq28039607776av7yyeh"},"middleHeadline":"FRONTMOUNTED COUNTERLUNGS","middleText":"Amazing work of breathing, maximal loop control","middleUrl":{"url":"/en/products/ccr-liberty/ccr-liberty-frontmount","mediaData":{"mimetype":"image/png","size":600821,"hash":"5ac4d810dd105484703d988ac31d3bf798e5c090","id":"cjxbwxxqw07520776t46q3c0q","filename":"fmcl.png","category":"divesoft/","type":"image"},"pageId":"cjyztv5vn03ag0777dbw9qajs"},"rightHeadline":"SIDEMOUNT","rightText":"Light, independent, compact","rightUrl":{"url":"/en/products/ccr-liberty/ccr-liberty-sidemount","pageId":"cjyztusbt039t0777kqbo8xj8"},"extraHeadline":"LIberty Light","extraText":"","extraUrl":{"url":"/en/products/ccr-liberty/ccr-liberty-light","pageId":"ck7m1guq108gk07883tmehxr4"},"desktopBackText":"go back","desktopBackUrl":"","leftImg":{"mimetype":"image/png","size":576657,"hash":"0412f9f37466bef1eedd37c56f55d8be431076bb","id":"cjxc529eg077r0776zlnvnc4q","filename":"bmcl.png","category":"divesoft/","type":"image"},"middleImg":{"mimetype":"image/png","size":600821,"hash":"5ac4d810dd105484703d988ac31d3bf798e5c090","id":"cjxbwxxqw07520776t46q3c0q","filename":"fmcl.png","category":"divesoft/","type":"image"},"rightImg":{"mimetype":"image/png","size":2660493,"hash":"dc8db59a637c6b6b08039465c4ed2b515000d460","id":"cjxc5jkxe079f0776yj24daz8","filename":"sidemount-00000.png","category":"divesoft/","type":"image"},"image":{"type":"image"},"extraImg":{"mimetype":"image/png","size":719130,"hash":"fdce79822325a710b88b461367742e5cc358a82a","id":"ck7z26ymu05aw077603ds9788","filename":"liberty-light-black.png","category":"divesoft/","type":"image"}}},"__typename":"ComponentTemplate"},"ComponentTemplate:cjztj2rs209kz0777irrgqorw":{"id":"cjztj2rs209kz0777irrgqorw","name":"Analyzer HE/02","type":"ProductComponents","content":{"type":"json","json":{"title":"Take a deep breath","description":"Enjoy the brand new modern design and excellent quality","components":[{"title":"Sturdy and durable","description":"Durable design supported by premium materials that will last.","image":{"recommendedSizes":{"width":"130","height":"130"},"mimetype":"image/png","size":1542,"hash":"2463d6af07ae319404a81a297c8b2e4442916b76","id":"cjyjyneqw08860776yz6zv1x6","filename":"gradient-arrow.png","category":"divesoft/","type":"image"},"url":"","id":"2"},{"title":"Precise and accurate","description":"Benchmark in accurate gas analysis with single point calibration or three-point calibration for highest precision","image":{"recommendedSizes":{"width":"130","height":"130"},"mimetype":"image/png","size":1542,"hash":"2463d6af07ae319404a81a297c8b2e4442916b76","id":"cjyjyneqw08860776yz6zv1x6","filename":"gradient-arrow.png","category":"divesoft/","type":"image"},"url":"","id":"3"},{"title":"Low maintenance","description":"Our He/O2 analyzer does not use an electrochemical He sensor. It uses our patented sensor to measure the speed of sound to determine the density of the measured gas mix. Which means no need for replacement and no additional expenses connected to He sensor replacement. Ever!","image":{"recommendedSizes":{"width":"130","height":"130"},"mimetype":"image/png","size":1542,"hash":"2463d6af07ae319404a81a297c8b2e4442916b76","id":"cjyjyneqw08860776yz6zv1x6","filename":"gradient-arrow.png","category":"divesoft/","type":"image"},"url":"","id":"4"},{"title":"Speed of sound","description":"Divesoft He/O2 ANALYZER uses our patented method of He content measurement based on speed of sound. That makes our analyzer a true benchmark while allowing you to own the analyzer without any addition cost with top of the line precision.","image":{"recommendedSizes":{"width":"130","height":"130"},"mimetype":"image/png","size":1542,"hash":"2463d6af07ae319404a81a297c8b2e4442916b76","id":"cjyjyneqw08860776yz6zv1x6","filename":"gradient-arrow.png","category":"divesoft/","type":"image"},"url":"","id":"6"},{"title":"Li-Ion battery","description":"Rechargeable Li-Ion battery and USB-C connector. For your convenience as well as for purpose of continuous gas analysis.","image":{"recommendedSizes":{"width":"130","height":"130"},"mimetype":"image/png","size":1542,"hash":"2463d6af07ae319404a81a297c8b2e4442916b76","id":"cjyjyneqw08860776yz6zv1x6","filename":"gradient-arrow.png","category":"divesoft/","type":"image"},"url":"","id":"5"},{"id":"7","title":"Intelligent firmware","description":"Firmware designed to provide real time gas calculations for the most accurate cylinder labeling","image":{"mimetype":"image/png","size":1542,"hash":"2463d6af07ae319404a81a297c8b2e4442916b76","id":"cjyjyneqw08860776yz6zv1x6","filename":"gradient-arrow.png","category":"divesoft/","type":"image"}},{"id":"8","title":"Easy access","description":"Uses Teledyne or Analytical Industries Oxygen cell.","image":{"mimetype":"image/png","size":1542,"hash":"2463d6af07ae319404a81a297c8b2e4442916b76","id":"cjyjyneqw08860776yz6zv1x6","filename":"gradient-arrow.png","category":"divesoft/","type":"image"}}],"columns":"col-lg-6"}},"__typename":"ComponentTemplate"},"ComponentTemplate:cjztjem9o09n207773536algu":{"id":"cjztjem9o09n207773536algu","name":"Analyzer HE/02","type":"ProductMountRouter","content":{"type":"json","json":{"toggleOpen":"Options","toggleClose":"Close","leftHeadline":"Analyzer He/O2","leftText":"Our classic Divesoft Trimix gas analyzer, comes as part of a multifaceted kit for gas blending, volt meter, Ohm reader, and more.","leftUrl":{"url":"/en/products/analyzers/analyzer-he-o2","pageId":"cjztilv3509et0777ejgtlm67"},"middleHeadline":"Analyzer SOLO","middleText":"Our brand-new trimix anal
2yzer designed to be part of any expedition divers field kit.","middleUrl":{"url":"/en/products/analyzer-heo2/analyzer-solo","pageId":"cjztim1kk09fg0777nv63tf9b"},"rightHeadline":"","rightText":"","rightUrl":"","extraHeadline":"","extraText":"","extraUrl":"","desktopBackText":"","desktopBackUrl":"","leftImg":{"mimetype":"image/png","size":1551538,"hash":"6468a7c4062fd9ad975dbdf092e91d5883629688","id":"ck70e9v9rpr4g0776r9e0vqoj","filename":"analyzator-he-o2-3.png","category":"divesoft/","type":"image"},"middleImg":{"mimetype":"image/png","size":2056236,"hash":"e651206c2ba3404f54aeeb1cb14950537c0381ec","id":"cjztiiz8a00gh0776eus0ezt6","filename":"analyzersolo-smaller.png","category":"divesoft/","type":"image"},"image":{"type":"image"}}},"__typename":"ComponentTemplate"},"ComponentTemplate:ck0vdxpoc00jo0832b70yoksa":{"id":"ck0vdxpoc00jo0832b70yoksa","name":"CCR Liberty","type":"ProductCrossRoad","content":{"type":"json","json":{"links":[{"id":"6","title":"Documents","url":{"url":"/en/products/ccr-liberty/documents","pageId":"ck71wvfkt20az0721zbdjc8wv","urlNewWindow":false},"highlight":false},{"id":"1","title":"FAQ","url":{"url":"/en/products/ccr-liberty/ccr-liberty-faq","pageId":"ck0ve0lxe00mx0832jjotdm55"}},{"id":"2","title":"Manuals","url":{"url":"/en/products/ccr-liberty/manuals","pageId":"cjzsjizpr08n007770z6hwmyi"}},{"id":"3","title":"Firmwares","url":{"url":"/en/products/ccr-liberty/firmaware","pageId":"cjzshvp9n08h80777i5msfg0b"}},{"id":"4","title":"Configurator","highlight":true,"url":{"url":"https://www.divesoft.com/ccr-liberty","pageId":"cjv3rpryz00iw0836lc0zx81j","urlNewWindow":true}},{"id":"5","title":"Support"}],"title":"CCR Liberty Rebreather","url":{"url":"/en/products/ccr-liberty","pageId":"cjv3rpryz00iw0836lc0zx81j"},"activeTab":"6"}},"__typename":"ComponentTemplate"},"ComponentTemplate:ck0vedulb00w30832fxihwj4o":{"id":"ck0vedulb00w30832fxihwj4o","name":"Freedom","type":"ProductCrossRoad","content":{"type":"json","json":{"links":[{"id":"1","title":"FAQ","url":{"url":"/en/products/freedom-computers/freedom-faq","pageId":"ck0ve5uko00qo0832c4gtly25"}},{"id":"4","title":"Manuals","url":{"url":"/en/products/freedom-computers/manuals","pageId":"ck0veexad00wu08320fcv2lbg"}},{"id":"2","title":"Firmwares","url":{"url":"/en/products/freedom-computers/Firmware","pageId":"ck0ve7gam00ro0832atpco8ti"}},{"id":"3","title":"Buy","url":{"url":"http://eshop.divesoft.eu/us/products/10-computers-freedom","pageId":"cjv3l26tp004p0836i54n4u7a"},"highlight":true}],"title":"Freedom computers","url":{"url":"/en/products/freedom-computers","pageId":"cjv3rqgl000jo0836026n9sxr"},"activeTab":"3"}},"__typename":"ComponentTemplate"},"ComponentTemplate:ck0vez8es019s0832geub5ydj":{"id":"ck0vez8es019s0832geub5ydj","name":"HE/O2 Analyzer","type":"ProductCrossRoad","content":{"type":"json","json":{"links":[{"id":"1","title":"FAQ","url":{"url":"/en/products/analyzer-heo2/faq","pageId":"ck0vev6ih017v0832qnqa6c0p"}},{"id":"2","title":"Manuals","url":{"url":"/en/products/analyzer-heo2/manuals","pageId":"ck0veo0wa013d0832ei0cy1pv"}},{"id":"3","title":"Firmwares","url":{"url":"/en/products/analyzer-heo2/firmwares","pageId":"ck0vet864016v0832052fdv6c"}},{"id":"4","title":"Buy","url":{"url":"http://eshop.divesoft.eu/us/products/40-analyzer/","pageId":"cjv3l26tp004p0836i54n4u7a","urlNewWindow":true},"highlight":true}],"title":"HE/02 Analyzer","url":{"url":"/en/products/analyzer-heo2","pageId":"cjv3rr7on00ky0836fercz490"},"activeTab":"4"}},"__typename":"ComponentTemplate"},"ComponentTemplate:ck0vgsjyq01pt0832lwey5y1f":{"id":"ck0vgsjyq01pt0832lwey5y1f","name":"BOV/DSV/ADV","type":"ProductCrossRoad","content":{"type":"json","json":{"links":[{"id":"1","title":"Manual","url":{"url":"/en/products/bovdsvadv/bov/dsv/adv-manuals","pageId":"ck0vgl3mp01kv0832nkqoifak"}},{"id":"2","title":"Configurator","url":{"url":"https://bailoutvalve.com/#home","urlNewWindow":true},"highlight":true}],"title":"BOV/DSV/ADV Mouthpice","url":{"url":"/en/products/bovdsvadv","pageId":"cjv7uialr03nh0836yjoz2dji"},"activeTab":"2"}},"__typename":"ComponentTemplate"},"ComponentTemplate:ck0vk00to034j083279fnupur":{"id":"ck0vk00to034j083279fnupur","name":"CCR Liberty - How to","type":"VideoGallery","content":{"type":"json","json":{"title":"CCR Liberty - how to","description":"For mor videos visit video library section","divider":true,"videos":[{"video":{"type":"embeddedVideo","url":"https://www.youtube.com/embed/XSu-OAqSkNE"},"title":"Transportation","text":"How to transport your CCR Liberty and what to use when transporting it.","id":"1"},{"id":"2","title":"Post Dive Care","text":"What to do when you finish diving you CCR Liberty for the day.","video":{"type":"embeddedVideo","url":"https://www.youtube.com/embed/m7EuIN6qPmY"}},{"id":"3","video":{"type":"embeddedVideo","url":"https://www.youtube.com/embed/jnBICdJINLE"},"title":"GPS / Compass Calibration","text":"How to calibrate and use the CCR Liberty GPS / Compass module."},{"id":"4","video":{"type":"embeddedVideo","url":"https://www.youtube.com/embed/BZNBIynb6No"},"title":"Disinfection","text":"How to properly clean and disinfect your CCR Liberty."},{"id":"5","video":{"type":"embeddedVideo","url":"https://www.youtube.com/embed/A1q_HDMLZoI"},"title":"O2 Sensor Calibration","text":"You should calibrate your O2 sensors every couple of days. Here is how."},{"id":"6","title":"Sensor Care","text":"Donât let your sensors wither, here you can find how care for your CCR Liberty sensors.","video":{"type":"embeddedVideo","url":"https://www.youtube.com/embed/YOdbaJ6ujaQ"}},{"id":"7","video":{"type":"embeddedVideo","url":"https://www.youtube.com/embed/fgUUW-aoWUs"},"title":"FMCL to BMCL Conversion","text":"If you want to attach your new CCR Liberty backmounted counterlungs and donât know how, you can find out."},{"id":"8","video":{"type":"embeddedVideo","url":"https://www.youtube.com/embed/eWZWwgIzFKk"},"title":"BCD Setup","text":"Changing from a doughnut to wing? Let us help you change your CCR Liberty BCD."},{"id":"9","video":{"type":"embeddedVideo","url":"https://www.youtube.com/embed/xDtnX90eSi0"},"title":"Side-Mount Conversion","text":"How to convert your CCR Liberty to the side-mount configuration."}
2,{"id":"10","title":"Sidemount Theory","text":"What to expect from your CCR Liberty sidemount? You can find it right here.","video":{"type":"embeddedVideo","url":"https://www.youtube.com/embed/jZHZWjqU7os"}},{"id":"11","title":"Scrubber Canisters","text":"The different scrubber canisters for the CCR Liberty.","video":{"type":"embeddedVideo","url":"https://www.youtube.com/embed/Z8_ivH_BwQo"}},{"id":"12","video":{"type":"embeddedVideo","url":"https://www.youtube.com/embed/jxvGSgs96zc"},"title":"Cave Cover","text":"Diving in a cave? Protect your connectors with the CCR Liberty cave cover."},{"id":"13","video":{"type":"embeddedVideo","url":"https://www.youtube.com/embed/HooRt8oN0aM"},"title":"Protection Set","text":"In this video we talk about the use and contents of the protection set for the CCR Liberty."},{"id":"14","title":"Web configurator","text":"Introduction to the CCR Liberty web pages","video":{"type":"embeddedVideo","url":"https://www.youtube.com/embed/q7pNSPfxYHc"}},{"id":"15","video":{"type":"embeddedVideo","url":"https://www.youtube.com/embed/YY4JxE6P5uA"},"title":"OPV"}
2,{"id":"16","title":"Head Flooding","video":{"type":"embeddedVideo","url":"https://www.youtube.com/embed/XFxzD5536T8"}},{"id":"17","title":"Oxygen sensor block diagnostics","text":"Diagnosing your CCR Liberty oxygen sensor faults.","video":{"type":"embeddedVideo","url":"https://www.youtube.com/embed/AT4KuR_Fynk"}},{"id":"18","video":{"type":"embeddedVideo","url":"https://www.youtube.com/embed/dmEyMuv_ews"},"title":"Non-functional Handset","text":"How to properly diagnose a CCR Liberty handset that is not working"},{"id":"19","title":"Helium Sensor Repair","video":{"type":"embeddedVideo","url":"https://www.youtube.com/embed/DUWGQXZPL78"}},{"id":"20","video":{"type":"embeddedVideo","url":"https://www.youtube.com/embed/PHjeX1DU3ew"},"title":"O-Rings"},{"id":"21","title":"Replacing the one way valve","video":{"type":"embeddedVideo","url":"https://www.youtube.com/embed/jh-xfg8GRck"}},{"id":"22","title":"Seeger Ring Replacement","video":{"type":"embeddedVideo","url":"https://www.youtube.com/embed/5qCRBua2on0"}},{"id":"23","video":{"type":"embeddedVideo","url":"https://www.youtube.com/embed/eBM0MtCOauc"},"title":"BMCL kit for Hollis Prism 2"},{"id":"24","video":{"type":"embeddedVideo","url":"https://www.youtube.com/embed/Aek2GIh17uI"},"title":"Seeger Ring Replacement"},{"id":"25","video":{"type":"embeddedVideo","url":"https://www.youtube.com/embed/Tn9vqPWQG0c"},"title":"Head Cover","text":"In this video we are going to show you our Head Cover, which you might find useful while traveling with your Liberty rebreather."},{"id":"26","title":"Scrubber Cover","video":{"type":"embeddedVideo","url":"https://www.youtube.com/embed/NLVsA55LZG4"}},{"id":"27","title":"Counterlung Bladder Replacement","video":{"type":"embeddedVideo","url":"https://www.youtube.com/embed/XVFESjMEPZ4"}},{"id":"28","title":"Crack in the Counterlung","text":"Method of detecting a crack in a counterlung of CCR Liberty unit and the way of resolving this problem.","video":{"type":"embeddedVideo","url":"https://www.youtube.com/embed/ZrPJqfzpDYE"}},{"id":"29","video":{"type":"embeddedVideo","url":"https://www.youtube.com/embed/fNHcNu3eODY"},"title":"Attachment of Counterlung Clips","text":"Tutorial video on how to easily attach the quick-release clips onto the sidemount unit´s counterlung."},{"id":"30","video":{"type":"embeddedVideo","url":"https://www.youtube.com/embed/lL37aUIsujk"},"title":"Helium Sensor Replacement w/ Blind Plugs","text":"How to replace helium sensor in Liberty head with blind plugs and how to disable helium sensors in user menu."}],"activeTab":"17"}},"__typename":"ComponentTemplate"},"ComponentTemplate:ck0vk0llb034x0832xulua13v":{"id":"ck0vk0llb034x0832xulua13v","name":"Freedom - how to","type":"VideoGallery","content":{"type":"json","json":{"title":"Freedom - How To","description":"","divider":false,"videos":[{"id":"2","title":"Analyzer","video":{"type":"embeddedVideo","url":"https://www.youtube.com/embed/IDmveK6sGxM"},"text":"In this video we talk about the usage of the Divesoft Freedom in combination with the oxygen."},{"id":"3","video":{"type":"embeddedVideo","url":"https://www.youtube.com/embed/iO1dyI3mVqg"},"text":"How to perform the basic operations with the CCR Liberty and the Freedom computer.","title":"Freedom - Basic Operations"},{"id":"4","video":{"type":"embeddedVideo","url":"https://www.youtube.com/embed/pNfrgHCDKvs"},"text":"In this video we show you how to update your CCR Liberty or Freedom firmware.","title":"Freedom - Update"},{"id":"5","video":{"type":"embeddedVideo","url":"https://www.youtube.com/embed/ymhAbv5oSQE"},"title":"Freedom - Dive Planning","text":"Here we show you how you can use our dive planner for CCR Liberty and our Freedom computers."},{"id":"6","title":"Freedom - Tilt Control","text":"How to effectively use the Freedom and CCR Liberty tilt controls.","video":{"type":"embeddedVideo","url":"https://www.youtube.com/embed/V_OdLqqgE34"}},{"id":"7","title":"Freedom - Alarms","text":"Here we show you how to set up the Freedom and CCR Liberty alarms.","video":{"type":"embeddedVideo","url":"https://www.youtube.com/embed/HSH9OTRSiZo"}},{"id":"8","title":"Freedom - Bootloader Mode","text":"How to access the Freedom and CCR Liberty bootloader mode.","video":{"type":"embeddedVideo","url":"https://www.youtube.com/embed/yZceILz6MFk"}},{"id":"9","video":{"type":"embeddedVideo","url":"https://www.youtube.com/embed/wvYQJLl81wM"},"title":"Freedom - Introduction & Unboxing","text":"What are the advantages of the Divesoft Freedom computer and it's unboxing."}
2,{"id":"10","video":{"type":"embeddedVideo","url":"https://www.youtube.com/embed/nNK98dxXLmI"},"title":"Freedom - Licences","text":"An introduction to the different Divesoft Freedom licences."},{"id":"11","video":{"type":"embeddedVideo","url":"https://www.youtube.com/embed/mhH7oETUEqA"},"title":"Freedom - Button Change","text":"How to replace the buttons on your Divesoft Freedom."}],"activeTab":"1"}},"__typename":"ComponentTemplate"},"ComponentTemplate:ck0vk9kgx035b0832ie3qerdi":{"id":"ck0vk9kgx035b0832ie3qerdi","name":"Analyzer - how to","type":"VideoGallery","content":{"type":"json","json":{"title":"Analzer - how to","description":"For more videos visit video gallery section","divider":true,"videos":[{"video":{"type":"embeddedVideo","url":"https://www.youtube.com/embed/poJ5rNJw0K8"},"title":"Flow Limiters","text":"The different flow limiters for the Divesoft Helium â oxygen analyser.","id":"1"},{"id":"2","title":"Multi-point Calibration","text":"How to use the multi-point calibration feature on the Divesoft Helium â oxygen analyser.","video":{"type":"embeddedVideo","url":"https://www.youtube.com/embed/bVjVY3lrujY"}},{"id":"3","title":"Theory","text":"The theoretical background of the Divesoft Helium â oxygen analyser.","video":{"type":"embeddedVideo","url":"https://www.youtube.com/embed/YhgyKLgq4iI"}},{"id":"4","title":"Basic Operations","text":"How to work with the Divesoft Helium â oxygen analyser, and how to perform basic operations.","video":{"type":"embeddedVideo","url":"https://www.youtube.com/embed/VFkDZg5xzMQ"}},{"id":"5","title":"Gas Mix Solver","text":"The usage of the Divesoft Helium â oxygen analyser gas mix solver function.","video":{"type":"embeddedVideo","url":"https://www.youtube.com/embed/pyb0ZqQVxwc"}},{"id":"6","title":"O2 Sensor Change","text":"How to change the O2 cell in the Divesoft Helium â oxygen analyser.","video":{"type":"embeddedVideo","url":"https://www.youtube.com/embed/m9NUQtWxKNc"}},{"id":"7","title":"Measuring","text":"Basic gas analysis using the Divesoft Helium â oxygen analyser.","video":{"type":"embeddedVideo","url":"https://www.youtube.com/embed/fSbH1LBoYoU"}},{"id":"8","title":"Acumulator Upgrade","text":"This video should not be available for customers. Just for internal use.","video":{"type":"embeddedVideo","url":"https://www.youtube.com/embed/RQ6brHHGV9c"}},{"id":"9","video":{"type":"embeddedVideo","url":"https://www.youtube.com/embed/odzOSldhsec"},"title":"Add-ons","text":"What add ons we offer for the Divesoft Helium â oxygen analyser."},{"id":"10","title":"Sets","text":"In this video we introduce the different analyzer sets we offer","video":{"type":"embeddedVideo","url":"https://www.youtube.com/embed/nxx7qsptMsA"}},{"id":"11","title":"Inner workings","text":"Here we show you the insides of the Divesoft analyzer.","video":{"type":"embeddedVideo","url":"https://www.youtube.com/embed/WbP8D5F-6Y4"}},{"id":"12","video":{"type":"embeddedVideo","url":"https://www.youtube.com/embed/Ici7F6ZCOCQ"},"title":"SOLO | Introduction & Unboxing"},{"id":"13","title":"Use of Flow limiter with Analyzer SOLO","video":{"type":"embeddedVideo","url":"https://www.youtube.com/embed/2DEq4lq3S4g"},"text":"Quick guidance on how to correctly use the Flow limiter with Analyzer SOLO"}],"activeTab":"14"}},"__typename":"ComponentTemplate"},"ComponentTemplate:ck0vkcrn0036l0832p24hah4z":{"id":"ck0vkcrn0036l0832p24hah4z","name":"Bailout Valve - How To","type":"VideoGallery","content":{"type":"json","json":{"title":"Bailout Valve - How To","description":"For more videos visit our video gallery section.","divider":true,"videos":[{"video":{"type":"embeddedVideo","url":"https://www.youtube.com/embed/Y9lDJKgHWnw"},"title":"How to operate the Bail out valve.","text":"","id":"1"},{"id":"2","title":"BOV Advantages","video":{"type":"embeddedVideo","url":"https://www.youtube.com/embed/N3gztoAc224"}},{"id":"3","video":{"type":"embeddedVideo","url":"https://www.youtube.com/embed/yHYIWNb-ZHY"},"title":"BOV - Fullface Version"},{"id":"4","video":{"type":"embeddedVideo","url":"https://www.youtube.com/embed/A94C0U_4Bbo"},"title":"BOV - Modifications"},{"id":"5","video":{"type":"embeddedVideo","url":"https://www.youtube.com/embed/d4W_WtZgsLI"},"title":"BOV - ADV Tuning"},{"id":"6","video":{"type":"embeddedVideo","url":"https://www.youtube.com/embed/B6Q04i0bFZ8"},"title":"BOV - ADVs"},{"id":"7","video":{"type":"embeddedVideo","url":"https://www.youtube.com/embed/RN5dAz771Pg"},"title":"BOV - Extension instalation"},{"id":"8","video":{"type":"embeddedVideo","url":"https://www.youtube.com/embed/bbdL0neYZC4"},"title":"BOV - Web Configurator"},{"id":"9","video":{"type":"embeddedVideo","url":"https://www.youtube.com/embed/Sa4gnDqRwVQ"},"title":"BOV - Replacement of Silicon O-Rings"}],"activeTab":"9"}},"__typename":"ComponentTemplate"},"ComponentTemplate:ck2y01nfi004j0821uvh4p2nm":{"id":"ck2y01nfi004j0821uvh4p2nm","name":"news & events","type":"NewsAndEvents","content":{"type":"json","json":{"backgroundImage":{"recommendedSizes":{"width":"1600","height":"600"}}
2,"titleColor":"#343434","newsAndEvents":[{"id":"13","day":"06-07","mounthAndYear":"November 2021","title":"DEMO Days","text":"Des Moines & Redondo Beach, WA, USA","url":{"urlNewWindow":true,"url":"https://www.facebook.com/events/162244422604814"}},{"id":"14","day":"13-14","mounthAndYear":"November 2021","title":"DEMO Days","text":"Henderson, NV, USA","url":{"urlNewWindow":true,"url":"https://www.facebook.com/events/1150604772101208"}},{"id":"3","day":"16-19","mounthAndYear":"November 2021","title":"DEMA show","url":{"url":"https://www.facebook.com/events/693981461424254/","urlNewWindow":true},"text":"Las Vegas, NV, USA"},{"id":"5","day":"22-30","mounthAndYear":"January 2022","title":"boot","text":"Düsseldorf, Germany","url":{"url":"https://www.facebook.com/events/2931154380274013/","urlNewWindow":true}},{"id":"12","day":"19-20","mounthAndYear":"March 2022","title":"DykMässan","url":{"url":"https://www.facebook.com/events/645325069600759","pageId":"cjv3rrnkp00m80836ezb6g5y6","urlNewWindow":true},"text":"Göteborg, Sweden"}],"title":"Events","activeTab":"14"}},"__typename":"ComponentTemplate"},"ComponentTemplate:ck3tt7vzi04980821mfipp180":{"id":"ck3tt7vzi04980821mfipp180","name":"FAQ template","type":"Faq","content":{"type":"json","json":{"text":"","title":"Flow Limiter","paddingTop":true,"questions":[{"title":"Leaking gas in case of closed bleed valve","text":"Please check, if there has not been lost ball, which forms the cone of bleed valve, during careless removal (see [drawing](http://foxer360-media-library.s3.eu-central-1.amazonaws.com/divesoft/docs/9dc29408049c8605083e92d6484ee1a26bd257d7_standard-flow-limiter-ball-placement.pdf)). There is possible to [order spare ball in our e-shop](http://).","id":"1"},{"title":"High flow of gas in case of tightened throttling nozzle","text":"Please check, if there has not been lost ball, which is part of throttling nozzle in standard flow limiter, during careless removal (see [drawing](http://)). There is possible to [order spare ball in our e-shop](http://).","id":"2"}],"activeTab":"2"}},"__typename":"ComponentTemplate"},"ComponentTemplate:ck3u8h4sc053908213bul9mtt":{"id":"ck3u8h4sc053908213bul9mtt","name":"Analyzer HW type","type":"Firmwares","content":{"type":"json","json":{"title":"Type 2.5","divider":false,"articles":[{"text":"Small improvements concerning helium measurement.\nUsing different barometric pressure sensor. Available with rechargeable battery only.","id":"1","title":""}],"activeTab":"1"}},"__typename":"ComponentTemplate"},"ComponentTemplate:ck52mo0fg04c00721knnax4ke":{"id":"ck52mo0fg04c00721knnax4ke","name":"Instructors","type":"ServicePointsMap","content":{"type":"json","json":{"title":"Find your closest dealer in your country","mapItems":{"datasourceId":"ck52kjnc602df07210m0mc7lm","data":{"city":"%city%","service":"","lat":"%lat%","lng":"%lng%","title":"%name% ","country":"%country%","address":"%associations%","storeChief":"%contactPerson%","email":"%emails,0%","phone":"%phones,0%","web":{"url":"%webPages,0% ","urlNewWindow":true},"text":"**Factory trainer**: %isFactoryTrainer% \n**Languages**: %languages% \n**Qualifications**: %qualifications% \n**Sidemount instructor**: %isSidemountInstructor% \n**Backmount instructor**: %isBackmountInstructor% \n\n%description%\n\n"},"filters":[],"orderBy":"%name%","order":"DESC"},"activeTab":"0"}},"__typename":"ComponentTemplate"},"ComponentTemplate:ck6v13a161rff0721xzd7nbap":{"id":"ck6v13a161rff0721xzd7nbap","name":"User Manuals","type":"Firmwares","content":{"type":"json","json":{"title":"User manuals","divider":false,"articles":[{"text":"Version 2.11 | 14 March 2019\n","id":"1","title":"CCR Liberty User Manual â English","url":{"url":"http://foxer360-media-library.s3.eu-central-1.amazonaws.com/divesoft/2ec9c98911cfe21e51851c8802cb5b99a2e2410e_liberty-en-manual.pdf","mediaData":{"mimetype":"application/pdf","size":10127793,"hash":"2ec9c98911cfe21e51851c8802cb5b99a2e2410e","id":"ck44qf3hz0zuq0776ljrvax6h","filename":"liberty-en-manual.pdf","category":"divesoft/","type":"file"},"urlNewWindow":true}},{"title":"CCR Liberty User Manual â German","text":"Version 1.10 | 1 June 2016\n","id":"2","url":{"url":"http://foxer360-media-library.s3.eu-central-1.amazonaws.com/divesoft/docs/44a7b10dae0837a719dc9d99ff99cc648333e92f_ccr-liberty-de.pdf","mediaData":{"mimetype":"application/pdf","size":4475232,"hash":"44a7b10dae0837a719dc9d99ff99cc648333e92f","id":"cjzted8od00bo0776otch4isw","filename":"ccr-liberty-de.pdf","category":"divesoft/docs/","type":"file"},"urlNewWindow":true}},{"id":"3","title":"CCR Liberty User Manual â Russian","text":"Version 2.11 | 23 July 2018","url":{"url":"http://foxer360-media-library.s3.eu-central-1.amazonaws.com/divesoft/docs/3a75d7f0c87e7a22a4d49d00ff44142ff6252db8_ccr-liberty-user-manual-rus.pdf","mediaData":{"mimetype":"application/pdf","size":16483972,"hash":"3a75d7f0c87e7a22a4d49d00ff44142ff6252db8","id":"cjztfdux100cj0776v15hnmk1","filename":"ccr-liberty-user-manual-rus.pdf","category":"divesoft/docs/","type":"file"},"urlNewWindow":true}},{"id":"4","title":"CCR Liberty User Manual â Korean","text":"Version 2.11 | 3 January 2019","url":{"url":"http://foxer360-media-library.s3.eu-central-1.amazonaws.com/divesoft/docs/173c640fbf6a01a8580c4983aff8dd2c0e18829d_ccr-liberty-user-manual-korean.pdf","mediaData":{"mimetype":"application/pdf","size":12873670,"hash":"173c640fbf6a01a8580c4983aff8dd2c0e18829d","id":"cjztfey7p00cr0776s5ui7r8l","filename":"ccr-liberty-user-manual-korean.pdf","category":"divesoft/docs/","type":"file"},"urlNewWindow":true}},{"id":"5","title":"CCR Liberty Sidemount Manual â English","text":"Version 2.0 | 12 March 2019\n","url":{"url":"http://foxer360-media-library.s3.eu-central-1.amazonaws.com/divesoft/docs/e567ef9e28197bff1944eedbeee3d6bce69c35ed_ccr-liberty-sidemount-manual.pdf","mediaData":{"mimetype":"application/pdf","size":9025573,"hash":"e567ef9e28197bff1944eedbeee3d6bce69c35ed","id":"cjztffvmc00cz0776cq5jkntc","filename":"ccr-liberty-sidemount-manual.pdf","category":"divesoft/docs/","type":"file"},"urlNewWindow":true}},{"id":"6","title":"CCR Liberty Sidemount Manual â Russian","text":"Version 1.0 | 10 October 2018\n","url":{"url":"http://foxer360-media-library.s3.eu-central-1.amazonaws.com/divesoft/docs/9f7eee50b162e25363d1bbb967c52225f727b3f2_ccr-liberty-sidemount-manual-rus.pdf","mediaData":{"mimetype":"application/pdf","size":16313964,"hash":"9f7eee50b162e25363d1bbb967c52225f727b3f2","id":"cjztfgs2q00d70776m6cnzfac","filename":"ccr-liberty-sidemount-manual-rus.pdf","category":"divesoft/docs/","type":"file"},"urlNewWindow":true}},{"id":"7","title":"CCR Liberty Bailout Standby Mode Manual","text":"Version 2.0 | 29 June 2018","url":{"url":"http://foxer360-media-library.s3.eu-central-1.amazonaws.com/divesoft/docs/3f05b183178a7c64a47d28ae32a0c69fbd567c21_en-manual-liberty-bsm-20.pdf","mediaData":{"mimetype":"application/pdf","size":137615,"hash":"3f05b183178a7c64a47d28ae32a0c69fbd567c21","id":"cjztfhmh900df0776r5inbbrb","filename":"en-manual-liberty-bsm-20.pdf","category":"divesoft/docs/","type":"file"},"urlNewWindow":true}},{"id":"8","title":"CCR Liberty Bailout Standby Mode Manual - Korean","text":"Version 2.0 | 3 January 2019\n\n","url":{"url":"http://foxer360-media-library.s3.eu-central-1.amazonaws.com/divesoft/docs/173c640fbf6a01a8580c4983aff8dd2c0e18829d_ccr-liberty-user-manual-korean.pdf","mediaData":{"mimetype":"application/pdf","size":12873670,"hash":"173c640fbf6a01a8580c4983aff8dd2c0e18829d","id":"cjztfey7p00cr0776s5ui7r8l","filename":"ccr-liberty-user-manual-korean.pdf","category":"divesoft/docs/","type":"file"}}}],"activeTab":"1"}},"__typename":"ComponentTemplate"}
2,"ComponentTemplate:ck74qi3an292n0721p29p890r":{"id":"ck74qi3an292n0721p29p890r","name":"Link","type":"ListOfLinks","content":{"type":"json","json":{"links":[{"title":"DOWNLOAD USER MANUAL","url":{"url":"http://foxer360-media-library.s3.eu-central-1.amazonaws.com/divesoft/docs/9518b863a5f9013923de9fefedbf0f1e12fb9ebb_analyzer-user-manual-25.pdf","mediaData":{"mimetype":"application/pdf","size":6549226,"hash":"9518b863a5f9013923de9fefedbf0f1e12fb9ebb","id":"cjvw45ng604br0776h4aps7b6","filename":"analyzer-user-manual-25.pdf","category":"divesoft/docs/","type":"file"}},"id":"1"}],"activeTab":"2"}},"__typename":"ComponentTemplate"},"ComponentTemplate:ck7m1liof08hu0788xhubcl1g":{"id":"ck7m1liof08hu0788xhubcl1g","name":"FMCL","type":"Hero","content":{"type":"json","json":{"title":" frontmounted counterlungs configuration","text":"Amazing work of breathing, maximal loop control. Front-mounted counterlungs offer the best work of breathing and more possibilities for off-board gases.","btnTitle":"","url":"","image":{"recommendedSizes":{"width":"1600","height":"560"}},"paddingTop":true,"smallFontSize":false}},"__typename":"ComponentTemplate"},"ComponentTemplate:ck7yr3t7r0quv0788gp85v2jg":{"id":"ck7yr3t7r0quv0788gp85v2jg","name":"news & events","type":"NewsAndEvents","content":{"type":"json","json":{"backgroundImage":{"recommendedSizes":{"width":"1600","height":"600"}},"titleColor":"#343434","newsAndEvents":[{"id":"2","image":{"type":"image"},"img":{},"text":"Key Largo, FL, USA","title":"Divesoft Liberty Camp","day":"20-22","mounthAndYear":"April 2020","url":{"url":"https://www.facebook.com/events/244792346437922/","urlNewWindow":true},"file":{"type":"file"}},{"id":"8","day":"23-24","mounthAndYear":"May 2020","title":"Demo Days - West Coast","text":"Oceanside, CA, USA"},{"id":"7","text":"Haigh Quarry, IL, USA","day":"6-7","mounthAndYear":"June 2020","title":"Demo Days - Great Lakes"},{"id":"6","title":"Demo Days - East Coast","mounthAndYear":"June 2020","day":"13-14","text":"Ontarion, Canada"},{"id":"3","day":"4-7","mounthAndYear":"November 2020","title":"DEMA show","url":{"url":"https://www.demashow.com","urlNewWindow":true},"text":"New Orleans, LA, USA"},{"id":"4","url":{"url":"https://www.eudishow.eu/site/en/","urlNewWindow":true},"text":"Bologna, Italy","title":"EUDI show","day":"27-29","mounthAndYear":"November 2020"},{"id":"5","day":"23-31","mounthAndYear":"January 2021","title":"boot","text":"Düsseldorf, Germany","url":{"url":"https://www.boot.com","urlNewWindow":true}}],"title":"News & Events","activeTab":"8"}},"__typename":"ComponentTemplate"},"ComponentTemplate:ck8iqouu41ddb07882v7qc63c":{"id":"ck8iqouu41ddb07882v7qc63c","name":"testimonials guba rodelato horst","type":"Testimonials","content":{"type":"json","json":{"title":"Testimonials","description":"Tell us your stories with our products","testimonials":[{"img":{"recommendedSizes":{"width":"130","height":"130"},"mimetype":"image/jpeg","size":22759,"hash":"6c24ca63830420409276d033dbd6fa7fef0c62a5","id":"cjt9ysl8d0dxk07761hmmsybd","filename":"review1.jpg","category":"divesoft/","type":"image"},"title":"Michal Guba","from":"Czech republic","text":"Liberty rebreathers are used for exploration and research of the Hranicka abyss for three years. We use eCCR Liberty for deep, exploration and securing dives. We are happy with the functionality and safety of the machine.","id":"1"},{"img":{"recommendedSizes":{"width":"130","height":"130"},"mimetype":"image/jpeg","size":19782,"hash":"0b5f1ad33d13bf561afd25be0594aa278f6b5e1c","id":"cjt9z5xo60dxv07761qucz17j","filename":"review0.jpg","category":"divesoft/","type":"image"},"title":"Anne Rodelato ","from":"France","text":"I started enjoying CCR diving in 2011 together with my dive/life companion, and we decided in the beginning of 2016 to change to the CCR Liberty. We found it more comfortable in terms of dimensions (the counterlungs are thinner, the handsets are smaller), more reliable, easier to prepare, and with a fantastic after sale service.","id":"2"},{"img":{"recommendedSizes":{"width":"130","height":"130"},"mimetype":"image/jpeg","size":23135,"hash":"00d3ac646a0de5017c7d1985ef5e49549a8f92ec","id":"cjt9z66oe0dy407769th9ytak","filename":"review3.jpg","category":"divesoft/","type":"image"},"title":"Pim van der Horst","from":"Netherlands","text":"The Liberty is different from other rebreathers. Technology is far above the market average. The build quality is very good: most parts are machined especially for the Liberty. It makes the Liberty independent from third party suppliers (especially for the electronics). ","id":"3"}],"activeTab":"1"}},"__typename":"ComponentTemplate"},"ComponentTemplate:ck8nlqbun1gyu0788ly874cpz":{"id":"ck8nlqbun1gyu0788ly874cpz","name":"news","type":"NewsAndEvents","content":{"type":"json","json":{"backgroundImage":{"recommendedSizes":{"width":"1600","height":"600"}},"titleColor":"#ffffff","newsAndEvents":[{"img":{"recommendedSizes":{"width":"356","height":"263"},"mimetype":"image/jpeg","size":57626,"hash":"97b8d448de9d3980a3f04835f3d0587cba5b48f8","id":"ck8nkqcse4can0776tup2hpz4","filename":"indepth.jpg","category":"divesoft/","type":"image"},"day":"27.03.","mounthAndYear":"2020","title":"INDEPTH","text":"Czech Diving Equipment Manufacturer Uses Expertise to Help Create Medical Ventilators","url":{"url":"https://gue.com/blog/czech-diving-equipment-manufacturer-uses-expertise-to-help-create-medical-ventilators/","urlNewWindow":true}
2,"id":"1","image":{"type":"image"}},{"img":{"recommendedSizes":{"width":"356","height":"263"},"mimetype":"image/jpeg","size":59371,"hash":"68ca85611720ba889e48d8af91dd67d2e80a2a7e","id":"ck8nktxlj4cbo0776efrn9rg5","filename":"xray.jpg","category":"divesoft/","type":"image"},"day":"31.03.","mounthAndYear":"2020","title":"X-RAY MAG","text":"Nikola ValtoÅ¡ová - Interview with Jakub SÌimaÌnek.","url":{"url":"http://foxer360-media-library.s3.eu-central-1.amazonaws.com/divesoft/docs/8ffbf125f7bd04036344223dba705a7ac91551a4_x-ray-mag-97-2020.pdf","mediaData":{"mimetype":"application/pdf","size":1701848,"hash":"8ffbf125f7bd04036344223dba705a7ac91551a4","id":"ck8nl72lz4cfe0776u2170bo1","filename":"x-ray-mag-97-2020.pdf","category":"divesoft/docs/","type":"file"},"urlNewWindow":false},"id":"2","image":{"type":"image"}},{"img":{"recommendedSizes":{"width":"356","height":"263"},"mimetype":"image/jpeg","size":44468,"hash":"e8b0fb9905c7d7abbcd8ec7dcb25117013f7fb52","id":"ck8nl07gg4cee077625t5edya","filename":"dive.jpg","category":"divesoft/","type":"image"},"day":"31.03.","mounthAndYear":"2020","title":"DIVE","text":"Czech Diving Equipment Manufacturer Helps Create Medical Ventilators.","url":{"urlNewWindow":true,"url":"http://divemagazine.co.uk/kit/8874-czech-tech-helping-fight-covid-19"},"id":"3","image":{"type":"image"}}],"activeTab":"1"}},"__typename":"ComponentTemplate"},"ComponentTemplate:ck8nlzo1u1h0f0788q611oymj":{"id":"ck8nlzo1u1h0f0788q611oymj","name":"calendar","type":"Calendar","content":{"type":"json","json":{"dates":[{"id":"5","date":"23.5.2020","lat":"33.211566","lng":"-117.325701","country":"USA","text":"Demo Days - West Coast","url":{"url":"https://facebook.com/events/279875876344140/","urlNewWindow":true}},{"id":"6","date":"24.5.2020","text":"Demo Days - West Coast","country":"USA","lat":"33.211566","lng":"-117.325701","url":{"url":"https://facebook.com/events/279875876344140/","urlNewWindow":true}},{"id":"7","date":"6.6.2020","text":"Demo Days - Great Lakes","country":"USA","lat":"41.145295613048845","lng":"-87.8190420237392","url":{"url":"https://facebook.com/events/2497187400597006/","urlNewWindow":true}},{"id":"8","date":"7.6.2020","text":"Demo Days - Great Lakes","country":"USA","lat":"41.145295613048845","lng":"-87.8190420237392","url":{"url":"https://facebook.com/events/2497187400597006/","urlNewWindow":true}},{"id":"9","date":"13.6.2020","text":"Demo Days - East Coast","country":"Canada","lat":"50.6999972","lng":"-86.0499998","url":{"url":"https://facebook.com/events/173025636999154/","urlNewWindow":true}},{"id":"10","date":"14.6.2020","text":"Demo Days - East Coast","country":"Canada","lat":"50.6999972","lng":"-86.0499998","url":{"urlNewWindow":true}},{"id":"27","date":"22.08.2020","text":"DykMässan","country":"Sweden","keyword":"","lat":"57.701145","lng":"11.914796","url":{"urlNewWindow":true,"url":"https://facebook.com/events/645325069600759/"}},{"id":"28","date":"23.08.2020","url":{"url":"https://facebook.com/events/645325069600759/","urlNewWindow":true},"text":"DykMässan","country":"Sweden","lat":"57.701145","lng":"11.914796"}
2,{"id":"11","date":"4.11.2020","text":"DEMA show","country":"USA","lat":"29.9435432","lng":"-90.064087","url":{"url":"https://facebook.com/events/693981461424254/","urlNewWindow":true}},{"id":"12","date":"5.11.2020","text":"DEMA show","country":"USA","lat":"29.9435432","lng":"-90.064087","url":{"url":"https://facebook.com/events/693981461424254/","urlNewWindow":true}},{"id":"13","date":"6.11.2020","text":"DEMA show","country":"USA","lat":"29.9435432","lng":"-90.064087","url":{"urlNewWindow":true,"url":"https://facebook.com/events/693981461424254/"}},{"id":"14","date":"7.11.2020","text":"DEMA show","country":"USA","lat":"29.9435432","lng":"-90.064087","url":{"url":"https://facebook.com/events/693981461424254/","urlNewWindow":true}},{"id":"15","date":"27.11.2020","text":"EUDI show","country":"Italy","lat":"44.5100866","lng":"11.3673305","url":{"url":"https://facebook.com/events/626835368104666/","urlNewWindow":true}},{"id":"16","date":"28.11.2020","text":"EUDI show","country":"Italy","lat":"44.5100866","lng":"11.36733
205","url":{"url":"https://facebook.com/events/626835368104666/","urlNewWindow":true}},{"id":"17","date":"29.11.2020","text":"EUDI show","country":"Italy","lat":"44.5100866","lng":"11.3673305","url":{"urlNewWindow":true}},{"id":"18","date":"23.1.2021","country":"Germany","text":"boot","lat":"51.269011","lng":"6.727094","url":{"urlNewWindow":true,"url":"https://facebook.com/events/2931154380274013/"}},{"id":"19","date":"24.1.2021","country":"Germany","text":"boot","lat":"51.269011","lng":"6.727094","url":{"url":"https://facebook.com/events/2931154380274013/","urlNewWindow":true}},{"id":"20","date":"25.1.2021","country":"Germany","text":"boot","lat":"51.269011","lng":"6.727094","url":{"urlNewWindow":true}},{"id":"21","date":"26.1.2021","country":"Germany","text":"boot","lat":"51.269011","lng":"6.727094","url":{"urlNewWindow":true}},{"id":"22","date":"27.1.2021","country":"Germany","text":"boot","lat":"51.269011","lng":"6.727094","url":{"urlNewWindow":true}},{"id":"23","date":"28.1.2021","country":"Germany","text":"boot","lat":"51.269011","lng":"6.727094","url":{"url":"https://facebook.com/events/2931154380274013/","urlNewWindow":true}},{"id":"24","date":"29.1.2021","country":"Germany","text":"boot","lat":"51.269011","lng":"6.727094","url":{"url":"https://facebook.com/events/2931154380274013/","urlNewWindow":true}},{"id":"25","date":"30.1.2021","country":"Germany","text":"boot","lat":"51.269011","lng":"6.727094","url":{"url":"https://facebook.com/events/2931154380274013/","urlNewWindow":true}},{"id":"26","date":"31.1.2021","text":"boot","country":"Germany","lat":"51.269011","lng":"6.727094","url":{"url":"https://facebook.com/events/2931154380274013/","urlNewWindow":true}}],"activeTab":"13"}},"__typename":"ComponentTemplate"},"ComponentTemplate:ck92piian1yyt0788n26o0ywn":{"id":"ck92piian1yyt0788n26o0ywn","name":"photo gallery - analyzer solo","type":"PhotoGallery","content":{"type":"json","json":{"title":"Analyzer Solo","description":"New affordable analyzer by Divesoft. Enjoy the brand new design and excellent quality.","divider":false,"images":[{"img":{"recommendedSizes":{"width":"1600","height":"900"},"mimetype":"image/jpeg","size":318569,"hash":"f0da28a1b999483dcb96feda2e977e85549cb73a","id":"ck3o1ql5j0a490776cxd1mxo4","filename":"img-1924-4.jpg","category":"divesoft/","type":"image"},"id":"1","image":{"type":"image"}},{"img":{"recommendedSizes":{"width":"1600","height":"900"},"mimetype":"image/jpeg","size":185103,"hash":"61e89930ad670e3b57ead490b0355743086d3f5b","id":"ck3o1qvc40a4g0776pccai7on","filename":"img-1922-3.jpg","category":"divesoft/","type":"image"},"id":"2","image":{"type":"image"}},{"img":{"recommendedSizes":{"width":"1600","height":"900"},"mimetype":"image/jpeg","size":317529,"hash":"e8247a502a74ecff090d9ddff92326fb8f7a9d69","id":"ck3o1r5pv0a4n0776dros4mu8","filename":"img-1918-2.jpg","category":"divesoft/","type":"image"},"id":"3","image":{"type":"image"}},{"img":{"recommendedSizes":{"width":"1600","height":"900"},"mimetype":"image/jpeg","size":250269,"hash":"33cdb0e36dbe2ff85922404946fdfcedcbc81ffa","id":"ck3o1rjaj0a4v0776r38r7rnz","filename":"img-1910-1.jpg","category":"divesoft/","type":"image"},"id":"4","image":{"type":"image"}}],"activeTab":"4"}},"__typename":"ComponentTemplate"},"ComponentTemplate:ck988g71823fk0788j6erfx72":{"id":"ck988g71823fk0788j6erfx72","name":"our solution","type":"Hero","content":{"type":"json","json":{"title":"Our solution to your diving needs","text":"We are providing you with a modern, easy-to-use and responsive user interface which you can access on your computer, mobile phone or tablet. No need to install any applications â every function is accessible right from your browser.","btnTitle":"find more info","url":{"url":"/en/products","pageId":"cjv3rim6p00fm0836uts415d5"},"image":{"recommendedSizes":{"width":"1600","height":"560"},"mimetype":"image/jpeg","size":182489,"hash":"26b0c5e077d253aa7aeb7bc112bd13996b4d6589","id":"cjt362tk60dea0776eodwtuka","filename":"herobg.jpg","category":"divesoft/","type":"image"},"paddingTop":false,"smallFontSize":false}},"__typename":"ComponentTemplate"},"ComponentTemplate:ck98avlsp243n0788ey616i9j":{"id":"ck98avlsp243n0788ey616i9j","name":"divetalks","type":"Header","content":{"type":"json","json":{"products":[{"title":"Accessories","description":"Backplates, Consumables. Tanks.","img":{"recommendedSizes":{"width":"235","height":"235"}},"url":""},{"title":"Accessories sets","description":"Protection, maintenance, cleaning.","img":{"recommendedSizes":{"width":"235","height":"235"}},"url":""},{"title":"Spare parts","description":"Spare parts and components.","img":{"recommendedSizes":{"width":"235","height":"235"}},"url":""}
2,{"title":"Spare parts kits","description":"Completly Liberty spare parts kits.","img":{"recommendedSizes":{"width":"235","height":"235"}},"url":""}]}},"__typename":"ComponentTemplate"},"ComponentTemplate:ck98avrsk243u0788lj1g4cz3":{"id":"ck98avrsk243u0788lj1g4cz3","name":"divetalks","type":"VideoGallery","content":{"type":"json","json":{"title":"Offline library","description":"","divider":false,"videos":[{"id":"2","title":"Jill Heinerth","video":{"type":"embeddedVideo","url":"https://www.youtube.com/embed/ZdSoYPvDDfs"},"text":"DIVETALKS Live #1, April 2,2020"},{"id":"3","text":"DIVETALKS LIVE | #2, April 9, 2020","title":"Becky Kagan Schott"},{"id":"4","text":"DIVETALKS LIVE | #3, April 16, 2020","title":"Stéphan Senécal"}],"activeTab":"4"}},"__typename":"ComponentTemplate"},"ComponentTemplate:ck98axdaj24590788fkuhjepe":{"id":"ck98axdaj24590788fkuhjepe","name":"divetalks","type":"Hero","content":{"type":"json","json":{"title":"DIVETALKS Live","text":"Every Thursday we bring you famous scuba divers right to your home. Watch Divesoft DIVETALKS Live in our Facebook feed! Joseph Jonathan Bosquez will lead the interviews and discussions bringing different divers unique stories of the past and perspective on the future of diving! As always please ask your own questions and contribute to the conversation!","btnTitle":"FACEBOOK LIVE","url":{"url":"https://www.facebook.com/divesoft/live_videos/","pageId":"cjv3rim6p00fm0836uts415d5","urlNewWindow":true},"image":{"recommendedSizes":{"width":"1600","height":"560"},"mimetype":"image/jpeg","size":182489,"hash":"26b0c5e077d253aa7aeb7bc112bd13996b4d6589","id":"cjt362tk60dea0776eodwtuka","filename":"herobg.jpg","category":"divesoft/","type":"image","dynamiclySourcedImage":" "},"paddingTop":false,"smallFontSize":false}},"__typename":"ComponentTemplate"},"ComponentTemplate:ck9dvr7yn2cnk07880iba83uk":{"id":"ck9dvr7yn2cnk07880iba83uk","name":"ambassador","type":"NewsAndEvents","content":{"type":"json","json":{"backgroundImage":{"recommendedSizes":{"width":"1600","height":"600"}},"titleColor":"#ffffff","newsAndEvents":{"sourceType":"pages","data":{"day":"%page,annotations,perex% ","title":"%page,name% ","text":"","url":{"pageSourcedUrl":true},"img":{"dynamiclySourcedImage":" "}},"filters":[],"tagIds":["ck9b2mt9t27pg078802vnqo73"],"fulltextFilter":"","orderBy":"%page,name%","order":"ASC"}}},"__typename":"ComponentTemplate"},"ComponentTemplate:ckawbumou44330788h8wf02ra":{"id":"ckawbumou44330788h8wf02ra","name":"marissa","type":"NewsAndEvents","content":{"type":"json","json":{"backgroundImage":{"recommendedSizes":{"width":"1600","height":"600"}},"titleColor":"#343434","newsAndEvents":[{"img":{"recommendedSizes":{"width":"356","height":"263"},"mimetype":"image/jpeg","size":59371,"hash":"68ca85611720ba889e48d8af91dd67d2e80a2a7e","id":"ck8nktxlj4cbo0776efrn9rg5","filename":"xray.jpg","category":"divesoft/","type":"image"},"day":"08.12.","mounthAndYear":"2019","title":"X-RAY MAG","text":"For the Love of Diving: Interview with Marissa Eckert.","url":{"url":"https://xray-mag.com/content/love-diving-interview-marissa-eckert","mediaData":{"mimetype":"application/pdf","size":1701848,"hash":"8ffbf125f7bd04036344223dba705a7ac91551a4","id":"ck8nl72lz4cfe0776u2170bo1","filename":"x-ray-mag-97-2020.pdf","category":"divesoft/docs/","type":"file"},"urlNewWindow":true},"id":"2","image":{"type":"image"}},{"img":{"recommendedSizes":{"width":"356","height":"263"},"mimetype":"image/jpeg","size":26077,"hash":"2dad56b0120ffa9a57b7b5735f9475c75db3327f","id":"ckawbmqhf6g0i077635991qob","filename":"deeperblue.jpg","category":"divesoft/","type":"image"},"day":"03.09.","mounthAndYear":"2019","title":"DEEPERBLUE","text":"Cave Camp 2019: A Unique Event Bringing Cave Diving Enthusiasts Together.","url":{"urlNewWindow":true,"url":"https://www.deeperblue.com/cave-camp-2019-a-unique-event-bringing-cave-diving-enthusiasts-together/"},"id":"3","image":{"type":"image"}},{"id":"4","url":{"url":"http://divemagazine.co.uk/skills/8656-tulum-cave-camp-2019","urlNewWindow":true},"text":"Bringing Cave Diving Enthusiasts Together at Cave Camp 2019","title":"DIVE","day":"28.08.","mounthAndYear":"2019","img":{"mimetype":"image/jpeg","size":44468,"hash":"e8b0fb9905c7d7abbcd8ec7dcb25117013f7fb52","id":"ck8nl07gg4cee077625t5edya","filename":"dive.jpg","category":"divesoft/","type":"image"}}],"activeTab":"4","title":"MEDIA","image":{"type":"image"}}},"__typename":"ComponentTemplate"},"ComponentTemplate:ckcbw7yy760a007887dh617tn":{"id":"ckcbw7yy760a007887dh617tn","name":"dealers - root","type":"NewsAndEvents","content":{"type":"json","json":{"backgroundImage":{"recommendedSizes":{"width":"1600","height":"600"}},"titleColor":"#343434","newsAndEvents":[{"id":"4","day":"MAY","mounthAndYear":"2020","title":"Charly Hermle & Axel Söhngen-Hermle","image":{"type":"image"},"img":{"mimetype":"image/jpeg","size":91005,"hash":"2bcec94ef8d9256de8e83bee7390f42f8d60d8df","id":"ckc4poymyitvq07765gvnt38n","filename":"dealer-of-the-month-charly-axel.jpg","category":"divesoft/","type":"image"},"url":{"url":"en/dealers/tecxpedition","pageId":"ck9v8ad582urj0788pmspzwzi","urlNewWindow":false}},{"img":{"recommendedSizes":{"width":"356","height":"263"},"mimetype":"image/jpeg","size":92313,"hash":"eddc64e756cebf5f54ea2ea0b676af8581094fc8","id":"ck9v80muudny40776u50f4k0n","filename":"dealer-of-the-month-travis-jung.jpg","category":"divesoft/","type":"image"},"day":"APRIL","mounthAndYear":"2020","title":"Travis Jung","text":"","url":{"url":"https://www.divesoft.com/en/dealers/trevis-jung"}
2,"id":"1","image":{"type":"image"}},{"img":{"recommendedSizes":{"width":"356","height":"263"},"mimetype":"image/jpeg","size":92313,"hash":"eddc64e756cebf5f54ea2ea0b676af8581094fc8","id":"ck9v80muudny40776u50f4k0n","filename":"dealer-of-the-month-travis-jung.jpg","category":"divesoft/","type":"image"},"day":"MARCH","mounthAndYear":"2020","title":"Travis Jung","text":"","url":{"url":"https://www.divesoft.com/en/dealers/trevis-jung"},"id":"2"},{"img":{"recommendedSizes":{"width":"356","height":"263"},"mimetype":"image/jpeg","size":45123,"hash":"a1086331b1aafbfb3b2add6021bd3042aa27b25b","id":"ck9v84rludo1x0776i3ytvsjy","filename":"dealer-of-the-month-gallup-lee.jpg","category":"divesoft/","type":"image"},"day":"FEBRUARY","mounthAndYear":"2020","title":"Gallup Lee","text":"","url":"","id":"3","image":{"type":"image"}}],"title":"dealer of the month","activeTab":"4"}},"__typename":"ComponentTemplate"},"ComponentTemplate:ckd5n8ppm70kr0788i2wzfdld":{"id":"ckd5n8ppm70kr0788i2wzfdld","name":"dealer of the month","type":"NewsAndEvents","content":{"type":"json","json":{"backgroundImage":{"recommendedSizes":{"width":"1600","height":"600"}},"titleColor":"#343434","newsAndEvents":[{"id":"5","day":"JUNE","mounthAndYear":"2020","title":"Damir Podnar","url":{"url":"/en/dealers/","pageId":"ck9v9w7192uzi0788qpx9cepb"},"image":{"type":"image"},"img":{"mimetype":"image/jpeg","size":102182,"hash":"1908f32d6eaa974ff2208499341da103cd829f12","id":"ckd5n73ea5iu30776nbwwwq82","filename":"dealer-of-the-month-damir-podnar.jpg","category":"divesoft/","type":"image"}},{"id":"4","day":"MAY","mounthAndYear":"2020","title":"Charly Hermle & Axel Söhngen-Hermle","image":{"type":"image"},"img":{"mimetype":"image/jpeg","size":91005,"hash":"2bcec94ef8d9256de8e83bee7390f42f8d60d8df","id":"ckc4poymyitvq07765gvnt38n","filename":"dealer-of-the-month-charly-axel.jpg","category":"divesoft/","type":"image"},"url":{"url":"/en/dealers/tecxpedition","pageId":"ckc4pdf4g5rx70788vzuohp7z","urlNewWindow":false}},{"img":{"recommendedSizes":{"width":"356","height":"263"},"mimetype":"image/jpeg","size":92313,"hash":"eddc64e756cebf5f54ea2ea0b676af8581094fc8","id":"ck9v80muudny40776u50f4k0n","filename":"dealer-of-the-month-travis-jung.jpg","category":"divesoft/","type":"image"},"day":"APRIL","mounthAndYear":"2020","title":"Travis Jung","text":"","url":{"url":"https://www.divesoft.com/en/dealers/trevis-jung"},"id":"1","image":{"type":"image"}},{"img":{"recommendedSizes":{"width":"356","height":"263"},"mimetype":"image/jpeg","size":92313,"hash":"eddc64e756cebf5f54ea2ea0b676af8581094fc8","id":"ck9v80muudny40776u50f4k0n","filename":"dealer-of-the-month-travis-jung.jpg","category":"divesoft/","type":"image"},"day":"MARCH","mounthAndYear":"2020","title":"Travis Jung","text":"","url":{"url":"https://www.divesoft.com/en/dealers/trevis-jung"},"id":"2"},{"img":{"recommendedSizes":{"width":"356","height":"263"},"mimetype":"image/jpeg","size":45123,"hash":"a1086331b1aafbfb3b2add6021bd3042aa27b25b","id":"ck9v84rludo1x0776i3ytvsjy","filename":"dealer-of-the-month-gallup-lee.jpg","category":"divesoft/","type":"image"},"day":"FEBRUARY","mounthAndYear":"2020","title":"Gallup Lee","text":"","url":"","id":"3","image":{"type":"image"}}],"title":"dealer of the month","activeTab":"5"}},"__typename":"ComponentTemplate"},"ComponentTemplate:ckdr50hq47li90788qyqbtvco":{"id":"ckdr50hq47li90788qyqbtvco","name":"events","type":"NewsAndEvents","content":{"type":"json","json":{"backgroundImage":{"recommendedSizes":{"width":"1600","height":"600"}},"titleColor":"#343434","newsAndEvents":[{"id":"3","day":"16-19","mounthAndYear":"November 2021","title":"DEMA show","url":{"url":"https://www.facebook.com/events/693981461424254/","urlNewWindow":true},"text":"Las Vegas, NV, USA"},{"id":"5","day":"22-30","mounthAndYear":"January 2022","title":"boot","text":"Düsseldorf, Germany","url":{"url":"https://www.facebook.com/events/2931154380274013/","urlNewWindow":true}},{"id":"9","day":"19-20","mounthAndYear":"March 2022","title":"DykMässan","url":{"url":"https://www.facebook.com/events/645325069600759","urlNewWindow":true},"text":"Göteborg, Sweden"}],"title":"Events","activeTab":"9"}},"__typename":"ComponentTemplate"},"ComponentTemplate:ckei7bmri8boi07889db9zmgu":{"id":"ckei7bmri8boi07889db9zmgu","name":"testmonials light","type":"Testimonials","content":{"type":"json","json":{"title":"Testimonials","description":"Tell us your stories with our products","testimonials":[{"img":{"recommendedSizes":{"width":"130","height":"130"},"mimetype":"image/jpeg","size":178885,"hash":"a8dec716ac09ba311e1530e5ed894ef8407e12d6","id":"ck8iqik163sin0776m0e9t84n","filename":"testimonials-beatrice-rivoira.jpg","category":"divesoft/","type":"image"},"title":"Beatrice Rivoira","from":"Italy","text":"A few celebrated divers have already had the opportunity to test out the Liberty Light. Their reactions were unanimous. Beatrice stated, to no surprise, that the new unit is âsuper lightâ as well as âeasy to assemble and travel withâ. She was also relieved that the rebreather offers âcomplete freedom for the movement of your headâ and appreciated that the weight system works smoothly and it didnât bother her back. And, on top of it all, âit looks really cool!â she added.","id":"1"},{"img":{"recommendedSizes":{"width":"130","height":"130"},"mimetype":"image/jpeg","size":277273,"hash":"ca8ed256cd008f08250edddd5ce478fcffdf4ca4","id":"ck8iqj3pl3sj407765tqnvnco","filename":"testimonials-nadir-quarta.jpg","category":"divesoft/","type":"image"},"title":"Nadir Quarta","from":"Switzerland","text":"Nadir, who has achieved around 30 dives and accomplished up to 72 meters with the lighter Liberty, agreed with Beatrice. âYes, absolutely, the Liberty Light is much smaller and lighter. Itâs very easy to fit in a small bag or your luggage. The lower position of the unit allows for better mobility of the diver's head which is beneficial for shorter divers as well. It also offers more flexibility with the tank choice since the first stages are not locked. And, with the possibility of mounting bigger tanks, itâs a great unit for deep dives too!â","id":"2"},{"img":{"recommendedSizes":{"width":"130","height":"130"},"mimetype":"image/jpeg","size":169579,"hash":"1f198255c4bc4c468f7b708ab4e80f721b740155","id":"ck8iqiues3siy0776ier0i0lk","filename":"testimonials-edoardo-pavia.jpg","category":"divesoft/","type":"image"},"title":"Edoardo Pavia","from":"Italy","text":"Edoardo has reached a depth of 45 meters with the Liberty Light thus far; though he says depth doesnât seem to be a factor of comfort with this new unit. Edoardo was positively surprised by the friendly setup of the rig; and that, along with its lighter weight, makes it a win-win product in his opinion. Also, despite the simple c
2onfiguration and lighter weight of the unit, itâs just as comfortable as diving with the original CCR Liberty. He also found it unique that the sidemount bungees allow divers to set their bailout in a sidemount position or standard configuration.","id":"3"}],"activeTab":"3"}},"__typename":"ComponentTemplate"},"ComponentTemplate:ckei7zrot8bus0788gistkb9k":{"id":"ckei7zrot8bus0788gistkb9k","name":"ccr liberty in details","type":"VideoGallery","content":{"type":"json","json":{"title":"CCR Liberty in Detail","description":"Documentary series containing detailed description of our rebreathers. ","divider":false,"videos":[{"id":"2","title":"Episode #1 - Introduction","video":{"type":"embeddedVideo","url":"https://www.youtube.com/embed/OChBj0iMGeY"},"text":""},{"id":"3","text":"","title":"Episode #2 - Components","video":{"type":"embeddedVideo","url":"https://www.youtube.com/embed/MTVjlVscPVE"}},{"id":"4","title":"Episode #3 - Head","video":{"type":"embeddedVideo","url":"https://www.youtube.com/embed/Ppm5XvmljDU"}},{"id":"5","title":"Episode #4 - BOV, DSV, MAV, Offboarding Gas","video":{"type":"embeddedVideo","url":"https://www.youtube.com/embed/ASaexhwwl58"}},{"id":"6","title":"Episode #5 - ADVs","video":{"type":"embeddedVideo","url":"https://www.youtube.com/embed/WbaHtPCrjKc"}},{"id":"7","title":"Episode #6 - Scrubbers","video":{"type":"embeddedVideo","url":"https://www.youtube.com/embed/nSzYhAxHhdE"}},{"id":"8","title":"Episode #7 - Frame","video":{"type":"embeddedVideo","url":"https://www.youtube.com/embed/ad9ZOq2U6KM"}},{"id":"9","title":"Episode #8 - Accessories","video":{"type":"embeddedVideo","url":"https://www.youtube.com/embed/_ygA2HMCcc4"}},{"id":"10","title":"Episode #9 - User Interface","video":{"type":"embeddedVideo","url":"https://www.youtube.com/embed/XreBXw9d0KA"}},{"id":"11","title":"Episode #10 - Pre-dive","video":{"type":"embeddedVideo","url":"https://www.youtube.com/embed/6eUBWHcAblU"}},{"id":"12","title":"Episode #11 - Bailout Rebreather","video":{"type":"embeddedVideo","url":"https://www.youtube.com/embed/pEqzWH2OGTg"}}],"activeTab":"12"}},"__typename":"ComponentTemplate"},"ComponentTemplate:ckewgo7ye8rv20788ju2ioxmh":{"id":"ckewgo7ye8rv20788ju2ioxmh","name":"ccr liberty unit config","type":"ProductMountRouter","content":{"type":"json","json":{"toggleOpen":"configurations","toggleClose":"close","leftHeadline":"BACKMOUNTED COUNTERLUNGS","leftText":"Free chest, free movement, free mind","leftUrl":{"url":"/en/products/ccr-liberty/ccr-liberty-backmount","pageId":"cjyztuq28039607776av7yyeh"},"middleHeadline":"FRONTMOUNTED COUNTERLUNGS","middleText":"Amazing work of breathing, maximal loop control","middleUrl":{"url":"/en/products/ccr-liberty/ccr-liberty-frontmount","mediaData":{"mimetype":"image/png","size":600821,"hash":"5ac4d810dd105484703d988ac31d3bf798e5c090","id":"cjxbwxxqw07520776t46q3c0q","filename":"fmcl.png","category":"divesoft/","type":"image"},"pageId":"cjyztv5vn03ag0777dbw9qajs"},"rightHeadline":"SIDEMOUNT","rightText":"Light, independent, compact","rightUrl":{"url":"/en/products/ccr-liberty/ccr-liberty-sidemount","pageId":"cjyztusbt039t0777kqbo8xj8"},"extraHeadline":"LIberty Light","extraText":"Travelling often? - Weighing only 15,3 Kg makes the Light a perfect travel companion","extraUrl":{"url":"/en/products/ccr-liberty/ccr-liberty-light","pageId":"ck7m1guq108gk07883tmehxr4"},"desktopBackText":"go back","desktopBackUrl":"","leftImg":{"mimetype":"image/png","size":576657,"hash":"0412f9f37466bef1eedd37c56f55d8be431076bb","id":"cjxc529eg077r0776zlnvnc4q","filename":"bmcl.png","category":"divesoft/","type":"image"},"middleImg":{"mimetype":"image/png","size":600821,"hash":"5ac4d810dd105484703d988ac31d3bf798e5c090","id":"cjxbwxxqw07520776t46q3c0q","filename":"fmcl.png","category":"divesoft/","type":"image"},"rightImg":{"mimetype":"image/png","size":2660493,"hash":"dc8db59a637c6b6b08039465c4ed2b515000d460","id":"cjxc5jkxe079f0776yj24daz8","filename":"sidemount-00000.png","category":"divesoft/","type":"image"},"image":{"type":"image"},"extraImg":{"mimetype":"image/png","size":92056,"hash":"90e698107c90b9e68430ed42c89f303c9f0f461c","id":"ckeo9zm9fj5jw0776nbvkv5f8","filename":"lightblack.png","category":"divesoft/","type":"image"}
2,"file":{"mimetype":"image/png","size":92056,"hash":"90e698107c90b9e68430ed42c89f303c9f0f461c","id":"ckeo8t7osj59p0776ph8dzebi","filename":"fow-web.png","category":"divesoft/docs/","type":"file"}}},"__typename":"ComponentTemplate"},"ComponentTemplate:ckfcge3tc98t90788vozdhb7t":{"id":"ckfcge3tc98t90788vozdhb7t","name":"about us / homepage","type":"AboutUsHome","content":{"type":"json","json":{"leftTitle":"About Divesoft","leftSubtitle":"","leftText":"Divesoft is dedicated to providing customers with superior quality specialized diving equipment. We are committed to continuous research and development to ensure our products are of the highest standards to meet the specific requirements of our customers. All of our products are manufactured, assembled and tested by us at our state-of-the-art factory in the Czech Republic.","leftUrl":{"url":"/en/about-us","pageId":"cjv3rufef00pl08362uyteabt"},"leftBtnTitle":"More information","leftImg":{"recommendedSizes":{"width":"580","height":"390"},"mimetype":"image/jpeg","size":149850,"hash":"63894cc5f233517aeb3732903693dc602c181c68","id":"cjt1t5qy00dcc0776mn9nsju0","filename":"naebg.jpg","category":"divesoft/","type":"image"},"rightTitle":"Wetnotes","rightSubtitle":"Your personal ticket to the world of diving.","rightText":"Place where professional and recreational divers can plan, analyze and share their dives with others.","rightUrl":{"url":"https://wetnotes.com/","pageId":"cjv3l26tp004p0836i54n4u7a","urlNewWindow":true},"rightBtnTitle":"Sign up","rightImg":{"recommendedSizes":{"width":"580","height":"390"},"mimetype":"image/jpeg","size":36955,"hash":"405af6eec13249105bb5928497f1f69d03a31a09","id":"cjt31jo2b0ddx0776jutj656y","filename":"aboutusbg.jpg","category":"divesoft/","type":"image"}}},"__typename":"ComponentTemplate"},"ComponentTemplate:ckfl443pd9kyz0788s4g7smet":{"id":"ckfl443pd9kyz0788s4g7smet","name":"Analyzer Carousel","type":"SpecialCarousel","content":{"type":"json","json":{"slides":[{"image":{"recommendedSizes":{"width":"1600","height":"700"},"mimetype":"image/jpeg","size":656441,"hash":"7f521d09342bb50b80eb001a13718422db0257ad","id":"cjvgca1r2022p0776oiw8qilx","filename":"14668-divesoft-web-info-1600x700px2-1.jpg","category":"divesoft/","type":"image"},"title":"","subTitle":"Patented Helium content measurement","description":"Characterized by its high accuracy and reliability thanks to an innovative solution\nfor measuring helium concentrations. Working on the principle of measuring\nthe speed of sound via the gas density and using microphones, it is never\nnecessary to replace the helium sensor. He/O2 analyzer is a precise tool for\nmeasuring oxygen helium concentrations in diving breathing gases.","productImg":{"recommendedSizes":{"width":"450","height":"450"}},"isBackgroundBlack":true,"firstDocImg":{"recommendedSizes":{"width":"50","height":"50"}},"firstDocText":"","firstUrl":{"url":"/en","pageId":"cjv3l26tp004p0836i54n4u7a"},"secondDocImg":{"recommendedSizes":{"width":"50","height":"50"}},"secondDocText":"","secondUrl":{"url":"/en","pageId":"cjv3l26tp004p0836i54n4u7a"},"id":"1"},{"id":"2","title":"","subTitle":"Display & Sensors","description":"OLED display with adjustable brightness makes reading gas analysis crystal clear, even in direct sunlight.\n\nUsing barometric pressure sensor, analyzer accommodates for atmospheric changes and compensates reading according to current conditions and altitude.\n","image":{"mimetype":"image/jpeg","size":656441,"hash":"7f521d09342bb50b80eb001a13718422db0257ad","id":"cjvgca1r2022p0776oiw8qilx","filename":"14668-divesoft-web-info-1600x700px2-1.jpg","category":"divesoft/","type":"image"},"isBackgroundBlack":true},{"id":"3","firstDocText":"","title":"","subTitle":" Multi-functionality","description":"Every analyzer has built in calculator for mixing gases. As well as a continuous mixing mode, for watching the oxygen and helium concentration with warning alarms, when the mixture falls out of preset limits.\n\nThe professional model can also function as an emergency compressor shut off (after connecting a relay). Or with the aid of measuring modules it is possible to measure electrical voltage and resistance. This is especially useful for finding out the state of the diving lights and scooters.\n","isBackgroun
2dBlack":true,"image":{"mimetype":"image/jpeg","size":656441,"hash":"7f521d09342bb50b80eb001a13718422db0257ad","id":"cjvgca1r2022p0776oiw8qilx","filename":"14668-divesoft-web-info-1600x700px2-1.jpg","category":"divesoft/","type":"image"}},{"id":"4","title":"","subTitle":"Gas mixing solver","description":"Solver computes the procedure for mixing the required gas mix of up to three gases. It is possible to include the remaining mix in the bottle to be filled in the calculation. \n\nSimulator mode will compute mixture blended from up to four gases. You can enter mixtures either manually, or switch to measurement mode and measure directly the desired mixture.","isBackgroundBlack":true,"image":{"mimetype":"image/jpeg","size":656441,"hash":"7f521d09342bb50b80eb001a13718422db0257ad","id":"cjvgca1r2022p0776oiw8qilx","filename":"14668-divesoft-web-info-1600x700px2-1.jpg","category":"divesoft/","type":"image"}}],"activeTab":"4","links":[{"id":"1","title":"DOWNLOAD USER MANUAL ","url":{"url":"/en","pageId":"cjv3l26tp004p0836i54n4u7a"}},{"id":"2","title":"DOWNLOAD GERMAN USER MANUAL","url":{"url":"/en","pageId":"cjv3l26tp004p0836i54n4u7a"}}]}},"__typename":"ComponentTemplate"},"ComponentTemplate:ckfodtg0m9s8307883mkcq7fq":{"id":"ckfodtg0m9s8307883mkcq7fq","name":"Gallery Manufacturing","type":"PhotoGallery","content":{"type":"json","json":{"title":"Gallery","description":"","divider":false,"images":[{"img":{"recommendedSizes":{"width":"1600","height":"900"},"mimetype":"image/jpeg","size":2354539,"hash":"961d701ef70775bc3d68695cd3bcb93d3d2cd813","id":"ckfoco3bws7w3077680re2e18","filename":"20190328-115729.jpg","category":"divesoft/","type":"image"},"id":"1","image":{"type":"image"}},{"img":{"recommendedSizes":{"width":"1600","height":"900"},"mimetype":"image/jpeg","size":2653712,"hash":"753d96191f65f7f62470ecf57a3008d6cc01c48e","id":"ckfocpgels7xb0776xbvd2i7i","filename":"divesoft-factory-2020-004.jpg","category":"divesoft/","type":"image"},"id":"2","image":{"type":"image"}},{"img":{"recommendedSizes":{"width":"1600","height":"900"},"mimetype":"image/jpeg","size":7469925,"hash":"ad34cd9a8779620ee336a9ffeb29bf6fb53fc3ef","id":"ckfoc4ehks7oz0776kp45vstp","filename":"divesoft-factory-2020-005.jpg","category":"divesoft/","type":"image"},"id":"3"},{"img":{"recommendedSizes":{"width":"1600","height":"900"},"mimetype":"image/jpeg","size":2795422,"hash":"059a73267e2a047710004c714bd8c069aefcd326","id":"ckfoct6avs7zp0776kmvy2fl4","filename":"divesoft-factory-2020-053.jpg","category":"divesoft/","type":"image"},"id":"4","image":{"type":"image"}},{"id":"5","img":{"mimetype":"image/jpeg","size":3746247,"hash":"0f5441cce088ff4904bc544223492199e5adaa6b","id":"ckfoctpqqs806077616vng8gi","filename":"divesoft-factory-2020-044.jpg","category":"divesoft/","type":"image"}},{"id":"6","img":{"mimetype":"image/jpeg","size":2945521,"hash":"3a4bdefeaffff04f814cd8325dc36c75bf9f5176","id":"ckfocunfks81v0776ryil0c2z","filename":"divesoft-factory-2020-022.jpg","category":"divesoft/","type":"image"}},{"id":"7","img":{"mimetype":"image/jpeg","size":2700036,"hash":"6b27719be0bdd41d280b93da684835d533bb8738","
2id":"ckfocssn9s7zj0776f8radhc5","filename":"divesoft-factory-2020-050.jpg","category":"divesoft/","type":"image"}},{"id":"8","img":{"mimetype":"image/jpeg","size":5278833,"hash":"13880a75c8fc3ab71748b52b273a33ce81f59b4b","id":"ckfocs9l1s7z40776nq5nzfn6","filename":"divesoft-factory-2020-009.jpg","category":"divesoft/","type":"image"}},{"id":"9","img":{"mimetype":"image/jpeg","size":2781383,"hash":"f352a4b84ef9f576ec6b4aac4940bbcf79532721","id":"ckfocv90us8290776jxrmiz50","filename":"divesoft-factory-2020-043.jpg","category":"divesoft/","type":"image"}},{"id":"10","image":{"type":"image"},"img":{"mimetype":"image/jpeg","size":2880031,"hash":"61c7505835b760915a2b01327a028b4d8bf2db6f","id":"ckfod2l6ts8500776v2i47n4f","filename":"divesoft-factory-2020-048.jpg","category":"divesoft/","type":"image"}},{"id":"11","img":{"mimetype":"image/jpeg","size":4139617,"hash":"55b7d8b1838f5d1a77005c90f5af9e748418abef","id":"ckfod36vzs8560776fso5c8ey","filename":"divesoft-factory-2020-008.jpg","category":"divesoft/","type":"image"}},{"id":"12","img":{"mimetype":"image/jpeg","size":2858200,"hash":"219efb843c30caa0d53a43b01a6f6a92d29d0e3d","id":"ckfod3swds8600776b002p1bx","filename":"divesoft-factory-2020-025.jpg","category":"divesoft/","type":"image"}},{"id":"13","img":{"mimetype":"image/jpeg","size":2316708,"hash":"99aec5b7973c2b70126291c394c7390f5d40138b","id":"ckfod4cd5s86g07763zzde4r2","filename":"divesoft-factory-2020-029.jpg","category":"divesoft/","type":"image"}},{"id":"14","img":{"mimetype":"image/jpeg","size":2742478,"hash":"348374f8862d4ebc1802e7ec6fb7e7ea87bf7fd7","id":"ckfod4s46s86s0776pt2qo95l","filename":"divesoft-factory-2020-030.jpg","category":"divesoft/","type":"image"}},{"id":"15","img":{"mimetype":"image/jpeg","size":2129274,"hash":"45aa049489a9be936e8171bf8a9aecbf08989f35","id":"ckfod58frs8770776tma6pnpn","filename":"divesoft-factory-2020-032.jpg","category":"divesoft/","type":"image"}},{"id":"16","img":{"mimetype":"image/jpeg","size":2362897,"hash":"646611a7767c4840c3d9ea9c44fdabf017cc2458","id":"ckfod5q0ns8810776no7wkq1c","filename":"divesoft-factory-2020-033.jpg","category":"divesoft/","type":"image"}},{"id":"17","image":{"type":"image"},"img":{"mimetype":"image/jpeg","size":2809364,"hash":"be76b9fbb16fc3a7d9dd1b0dbe59309bee8991aa","id":"ckfodi4mis8bp0776ys4bhymu","filename":"divesoft-factory-2020-023.jpg","category":"divesoft/","type":"image"}},{"id":"18","img":{"mimetype":"image/jpeg","size":2129596,"hash":"2c97d02599522687fa8f50dec3526d677f48d7df","id":"ckfodiywzs8c2077686381irw","filename":"divesoft-factory-2020-049.jpg","category":"divesoft/","type":"image"}},{"id":"19","image":{"type":"image"},"img":{"mimetype":"image/jpeg","size":5154820,"hash":"c10b4804910e578c0bc3991aa3ece33c367bf9ea","id":"ckfodkrycs8e207763zm7xyyl","filename":"divesoft-factory-2020-062.jpg","category":"divesoft/","type":"image"}},{"id":"20","img":{"mimetype":"image/jpeg","size":2515236,"hash":"82c6aa6a0b4e1fd7750d869768078bc5966cd35d","id":"ckfodni8ds8fu0776888wj1uf","filename":"divesoft-factory-2020-015.jpg","category":"divesoft/","type":"image"}}],"activeTab":"20"}},"__typename":"ComponentTemplate"},"ComponentTemplate:ckhomn74ibq190788gfum9fh3":{"id":"ckhomn74ibq190788gfum9fh3","name":"dealer of the month august","type":"NewsAndEvents","content":{"type":"json","json":{"backgroundImage":{"recommendedSizes":{"width":"1600","height":"600"}},"titleColor":"#343434","newsAndEvents":[{"id":"6","day":"AUGUST","mounthAndYear":"2020","url":{"url":"/en/dealers/tecxpedition","pageId":"ckc4pdf4g5rx70788vzuohp7z"},"text":"","title":"Charly Hermle & Axel Söhngen-Hermle","img":{"mimetype":"image/jpeg","size":91005,"hash":"2bcec94ef8d9256de8e83bee7390f42f8d60d8df","id":"ckc4poymyitvq07765gvnt38n","filename":"dealer-of-the-month-charly-axel.jpg","category":"divesoft/","type":"image"}},{"id":"7","day":"JULY","mounthAndYear":"2020","text":"","title":"Charly Hermle & Axel Söhngen-Hermle","img":{"mimetype":"image/jpeg","size":91005,"hash":"2bcec94ef8d9256de8e83bee7390f42f8d60d8df","id":"ckc4poymyitvq07765gvnt38n","filename":"dealer-of-the-month-charly-axel.jpg","category":"divesoft/","type":"image"},"url":{"url":"/en/dealers/tecxpedition","pageId":"ckc4pdf4g5rx70
2788vzuohp7z"}},{"id":"5","day":"JUNE","mounthAndYear":"2020","title":"Damir Podnar","url":{"url":"/en/dealers/damirpodnar","pageId":"ckd5kzr9l70cb0788gnjkeyuz"},"image":{"type":"image"},"img":{"mimetype":"image/jpeg","size":102182,"hash":"1908f32d6eaa974ff2208499341da103cd829f12","id":"ckd5n73ea5iu30776nbwwwq82","filename":"dealer-of-the-month-damir-podnar.jpg","category":"divesoft/","type":"image"}}],"title":"dealer of the month","activeTab":"6"}},"__typename":"ComponentTemplate"},"ComponentTemplate:ckkia66pw2qdb0788nuh7bncq":{"id":"ckkia66pw2qdb0788nuh7bncq","name":"dealers","type":"ServicePointsMap","content":{"type":"json","json":{"title":"Find your closest dealer in your country","mapItems":{"datasourceId":"ck52l110302pj07215izemv24","data":{"country":"%country% ","title":"%name%","lng":"%lng%","lat":"%lat%","service":"","address":"%address% ","storeChief":"%contactPerson% ","email":"%email% ","phone":"%phone% ","web":{"url":""},"text":"ZIP: %zip% \nOfficial store: %isOfficial% ","city":"%city%"},"filters":[],"orderBy":"%name% ","order":"DESC"}}},"__typename":"ComponentTemplate"},"ComponentTemplate:ckkia7p4z2qdw0788l8z25xr7":{"id":"ckkia7p4z2qdw0788l8z25xr7","name":"instructors","type":"ServicePointsMap","content":{"type":"json","json":{"title":"Find your closest instructor in your country","mapItems":{"datasourceId":"ck52kjnc602df07210m0mc7lm","data":{"city":"%city%","service":"","lat":"%lat%","lng":"%lng%","title":"%name% ","country":"%country%","address":"%associations%","storeChief":"%contactPerson%","email":"%emails,0%","phone":"%phones,0%","web":{"url":"%webPages,0% ","urlNewWindow":true},"text":"**Factory trainer**: %isFactoryTrainer% \n**Languages**: %languages% \n**Qualifications**: %qualifications% \n**Sidemount instructor**: %isSidemountInstructor% \n**Backmount instructor**: %isBackmountInstructor% \n\n%description%\n\n","addFilter":"%associations% ","otherCountries":"%countries%"},"filters":[],"orderBy":"%name%","order":"DESC"},"activeTab":"0","filterByAddress":true,"additionalFilterText":"Select association","thirdFilter":true,"addFilterText":"Select association"}},"__typename":"ComponentTemplate"},"ComponentTemplate:cklh2jfpj41zx0788od5ep9lk":{"id":"cklh2jfpj41zx0788od5ep9lk","name":"news & events 2021","type":"NewsAndEvents","content":{"type":"json","json":{"backgroundImage":{"recommendedSizes":{"width":"1600","height":"600"}},"titleColor":"#343434","newsAndEvents":[{"id":"5","day":"16.02.","mounthAndYear":"2021","title":"DEEPER BLUE","text":"Divesoft Announces The Release Of A New App.","url":{"urlNewWindow":true},"img":{"mimetype":"image/jpeg","size":26077,"hash":"2dad56b0120ffa9a57b7b5735f9475c75db3327f","id":"ckawbmqhf6g0i077635991qob","filename":"deeperblue.jpg","category":"divesoft/","type":"image"}},{"id":"6","day":"01.02.","mounthAndYear":"2021","title":"InDepth","text":"DIVESOFT Releases a New App to Accompany Their State-of-the-art Diving Equipment.","url":{"url":"https://gue.com/blog/divesoft-releases-a-new-app-to-accompany-their-state-of-the-art-diving-equipment/","urlNewWindow":true},"img":{"mimetype":"image/jpeg","size":57626,"hash":"97b8d448de9d3980a3f04835f3d0587cba5b48f8","id":"ck8nkqcse4can0776tup2hpz4","filename":"indepth.jpg","category":"divesoft/","type":"image"}},{"id":"4","day":"12.01.","mounthAndYear":"2021","text":"Where History and Diver Meet: Wreck Diving in Narvik.","title":"SCUBAVERSE","url":{"url":"https://www.scubaverse.com/where-history-and-diver-meet-wreck-diving-in-narvik/","urlNewWindow":true},"img":{"mimetype":"image/jpeg","size":25336,"hash":"9a452ad76909a2311512c187ab22919b091de0db","id":"cklh2btrh51yo07762rxa4ugm","filename":"scubaverse.jpg","category":"divesoft/","type":"image"},"image":{"type":"image"}},{"img":{"recommendedSizes":{"width":"356","height":"263"},"mimetype":"image/jpeg","size":58048,"hash":"1af5b5074c1e9fc65e78f8d63d2f05ecfe6431bd","id":"cki23tdtcbs5b0776o5ipj4er","filename":"spotmydive.jpg","category":"divesoft/","type":"image"},"day":"06.01.","mounthAndYear":"2021","title":"Spotmydive","text":"As Fast as the Speed of Sound: Divesoft Analyzers.","url":{"url":"https://www.spotmydive.com/en/gear/as-fast-as-the-speed-of-sound-divesoft-analyzers","urlNewWindow":true},"id":"2"},{"img":{"recommendedSizes":{"width":"356","height":"263"},"mimetype":"image/png","size":8592,"hash":"7aa761c6749c969a3c3d97526581afb707b1fb18","id":"cklh1z6dp51wv07768ccph4ip","filename":"divermag.png","category":"divesoft/","type":"image"},"day":"06.01.","mounthAndYear":"2021","title":"DIVER","text":"In Pursuit of Killer Whales: the Kapr Diversâ Expedition to Norway.","url":{"url":"https://divermag.com/in-pursuit-of-killer-whales-the-kapr-divers-expedition-to-norway/","urlNewWindow":true},"id":"3","image":{"type":"image"}},{"img":{"recommendedSizes":{"width":"356","height":"263"},"mimetype":"image/jpeg","size":25336,"hash":"9a452ad76909a2311512c187ab22919b091de0db","id":"cklh2btrh51yo07762rxa4ugm","filename":"scubaverse.jpg","category":"divesoft/","type":"image"},"day":"04.01.","mounthAndYear":"2021","title":"SCUBAVERSE","text":"Marine life & Conservation: S
2aving Seahorses during a Pandemic.","url":{"url":"https://www.scubaverse.com/saving-seahorses-during-a-pandemic/","urlNewWindow":true},"id":"1"}],"title":"2021","activeTab":"1"}},"__typename":"ComponentTemplate"},"ComponentTemplate:cklt9bqff067407889a21o1x2":{"id":"cklt9bqff067407889a21o1x2","name":"CarouselFiftyFifty 1","type":"CarouselFiftyFifty","content":{"type":"json","json":{"slides":[{"image":{"recommendedSizes":{"width":"1200","height":"1200"},"mimetype":"image/png","size":341609,"hash":"e615ad9a50d87f6c11ca337b4faeee5c7b8ab65d","id":"ckls2ogpo72s40776xz4acckl","filename":"divesoft-liberty-sidemount-1000x1000.png","category":"divesoft/","type":"image"},"secondaryImage":{"recommendedSizes":{"width":"1200","height":"1200"}},"imageBackgroundColor":"#000000","textImage":{"recommendedSizes":{"width":"1200","height":"1200"}},"title":"CCR Liberty REBREATHER","textBackgroundColor":"#000000","isTextWhite":true,"subTitle":"SIDEMOUNT","description":"Do you prefer to dive in a Sidemount configuration? Would you like to pass through very tight passages? Do you need a secondary rebreather without any need to offboard gas? Feel the real freedom of movement. Excellent WOB, neutrally buoyant with all gas onboard.","url":{"urlNewWindow":true,"url":"http://divesoft.com/sidemount"},"buttonTitle":"more information","imageOnRight":false,"isCentred":true,"id":"1"},{"image":{"recommendedSizes":{"width":"1200","height":"1200"},"mimetype":"image/png","size":2779096,"hash":"0392a493781b3e9bc24d0a7ba2bfc704514376ea","id":"cklsc78on798x07764egbm86a","filename":"divesoft-tv.png","category":"divesoft/","type":"image"},"imageBackgroundColor":"#f0f0f0","textImage":{"recommendedSizes":{"width":"1200","height":"1200"}},"textBackgroundColor":"#f0f0f0","isTextWhite":false,"title":"DIVESOFT.TV","subTitle":"","description":"","url":{"urlNewWindow":true,"url":"http://divesoft.tv"},"buttonTitle":"WATCH TV","imageOnRight":true,"isCentred":true,"id":"2"},{"id":"3","title":"FREEDOM COMPUTERS","subTitle":"Sturdy. Reliable. Advanced.","description":"","url":{"url":"http://divesoft.com/freedom","urlNewWindow":true},"buttonTitle":"MORE INFORMATION","image":{"mimetype":"image/png","size":525097,"hash":"4c6f45dcfcd42b909b417dc3ba6f520e221843e0","id":"cklscy53e79ge0776dwju688d","filename":"divesoft-freedom.png","category":"divesoft/","type":"image"},"secondaryImage":{},"isTextWhite":true,"isCentred":true,"textBackgroundColor":"#b4b4b4","textImage":{"dynamiclySourcedImage":" "},"imageBackgroundColor":"#b4b4b4"},{"id":"5","image":{"mimetype":"image/png","size":724258,"hash":"deb7a78eb83087fa92e089e92b84e14d98203ea2","id":"cklt8kf4g7h2h07765qj9mgsh","filename":"divesoft-transport-case.png","category":"divesoft/","type":"image"},"imageBackgroundColor":"#f0f0f0","textBackgroundColor":"#f0f0f0","title":"Transport cases","subTitle":"Available now.","url":{"url":"https://eshop.divesoft.com/products?q=transport%20case","urlNewWindow":true},"isCentred":true,"buttonTitle":"Buy","imageOnRight":true},{"id":"4","title":"DIVESOFT.APP","url":{"url":"http://divesoft.app","urlNewWindow":true},"image":{"mimetype":"image/png","size":683750,"hash":"dcb228b4496fd32086758328351c31032ec2ab0f","id":"cklt97w397hpn0776h75hdllm","filename":"divesoft-app.png","category":"divesoft/","type":"image"},"subTitle":"The pre-dive preparation has never been easier.","description":"","imageBackgroundColor":"#b4b4b4","textBackgroundColor":"#b4b4b4","isTextWhite":true,"isCentred":true,"textImage":{},"imageOnRight":false,"buttonTitle":"more information"},{"id":"6","title":"TANKS","subTitle":"The lightest ever.","description":"Tanks 2L, 200 BAR, 2.7 kg & 3L, 300 BAR, 4.5 kg.","url":{"url":"/en/products/others/tanks","pageId":"ckdslvkfn7o610788ld52hmqe"},"buttonTitle":"More information","imageBackgroundColor":"#f0f0f0","textBackgroundColor":"#f0f0f0","isCentred":true,"isTextWhite":false,"image":{"mimetype":"image/png","size":547377,"hash":"2e661dcce3a53111d3f4f4a9b572cc9b3cce5e27","id":"cklt8yljz7hhm0776ejh67qdu","filename":"divesoft-tanks.png","category":"divesoft/","type":"image"},"imageOnRight":true}],"activeTab":"6"}},"__typename":"ComponentTemplate"},"ComponentTemplate:cklt9cwsn067n078878r5h96g":{"id":"cklt9cwsn067n078878r5h96g","name":"carousel last one","type":"Carousel","content":{"type":"json","json":{"slides":[{"id":"
214","subTitle":"We have a gift for you!","title":"DIVESOFT.APP","description":"The pre-dive preparation has never been easier.","url":{"url":"https://www.divesoft.com/en/app"},"buttonTitle":"more info","image":{"mimetype":"image/jpeg","size":224746,"hash":"bbd6ae34d54ce8620c31c8817b87de230cd64152","id":"ckjo41gyknbnh07763wj3y5ht","filename":"divesoft-app-banner-1600x700-02.jpg","category":"divesoft/","type":"image"},"image_mobile":{"mimetype":"image/jpeg","size":224746,"hash":"bbd6ae34d54ce8620c31c8817b87de230cd64152","id":"ckjo41gyknbnh07763wj3y5ht","filename":"divesoft-app-banner-1600x700-02.jpg","category":"divesoft/","type":"image"},"isBackgroundBlack":true},{"id":"8","title":"DIVESOFT.TV","subTitle":"","url":{"url":"https://www.youtube.com/channel/UCHI2-kHmfoUlAdhQXPKl8lA","urlNewWindow":false},"buttonTitle":"More information","image":{"mimetype":"image/jpeg","size":360948,"hash":"f2dcd3c3fd6958b26718c97a2d71166058a7ef6f","id":"ckjhhf1cxkq5x0776xp75c5od","filename":"divesoft-banner-1600x700-tv.jpg","category":"divesoft/","type":"image"},"description":"","isBackgroundBlack":false,"file":{"type":"file"},"image_mobile":{"mimetype":"image/jpeg","size":360948,"hash":"f2dcd3c3fd6958b26718c97a2d71166058a7ef6f","id":"ckjhhf1cxkq5x0776xp75c5od","filename":"divesoft-banner-1600x700-tv.jpg","category":"divesoft/","type":"image"}},{"id":"15","subTitle":"22D & 22S","title":"oxygen sensors","description":"We have enough in stock!","buttonTitle":"BUY IT","image":{"mimetype":"image/jpeg","size":906335,"hash":"d7efbb19606f217271cf69c6e4fba3cf572a2d9d","id":"ckjugrvhfoull0776ibx6y2ld","filename":"divesoft-sensors-1600x700-2.jpg","category":"divesoft/","type":"image"},"image_mobile":{"mimetype":"image/jpeg","size":906335,"hash":"d7efbb19606f217271cf69c6e4fba3cf572a2d9d","id":"ckjugrvhfoull0776ibx6y2ld","filename":"divesoft-sensors-1600x700-2.jpg","category":"divesoft/","type":"image"},"url":{"url":"https://eshop.divesoft.com/products?q=OXYGEN%20SENSOR%20DIVESOFT","urlNewWindow":true}},{"id":"12","subTitle":"New Divesoft","title":"Transport cases","description":"Available now.","image":{"mimetype":"image/jpeg","size":353785,"hash":"f94ee6bc38c0161eae220d388452d300bc594a48","id":"ckg96k1oqxvuq0776k72rgfo2","filename":"divesoft-transport-case-hp-1600x700-01.jpg","category":"divesoft/","type":"image"},"image_mobile":{"mimetype":"image/jpeg","size":353785,"hash":"f94ee6bc38c0161eae220d388452d300bc594a48","id":"ckg96k1oqxvuq0776k72rgfo2","filename":"divesoft-transport-case-hp-1600x700-01.jpg","category":"divesoft/","type":"image"},"isBackgroundBlack":true},{"id":"10","image":{"mimetype":"image/jpeg","size":167278,"hash":"681f167d091c97c3787f1bc72c87890c73b09cdf","id":"ckdefws3f7jkw0776ild0sdc6","filename":"freedom-1600x700px.jpg","category":"divesoft/","type":"image"},"title":"FREEDOM","description":"Sturdy. Reliable. Advanced.","buttonTitle":"MORE INFORMATION","image_mobile":{"mimetype":"image/jpeg","size":167278,"hash":"681f167d091c97c3787f1bc72c87890c73b09cdf","id":"ckdefws3f7jkw0776ild0sdc6","filename":"freedom-1600x700px.jpg","category":"divesoft/","type":"image"},"url":{"url":"/en/products/freedom-computers","pageId":"cjv3rqgl000jo0836026n9sxr"},"subTitle":"COMPUTERS"},{"id":"7","image":{"mimetype":"image/jpeg","size":398368,"hash":"d3cc87ef87727ca7dd25d6c457191d2ddbc912d2","id":"ck83peiq00p5d0776qcx7j3mr","filename":"carousel-1600x700-liberty-light.jpg","category":"divesoft/","type":"image"},"title":"Liberty Light","url":{"url":"/en/products/ccr-liberty/ccr-liberty-light","pageId":"ck7m1guq108gk07883tmehxr4","urlNewWindow":false},"buttonTitle":"More information","isBackgroundBlack":true,"subTitle":"","description":"Make your travelling easier with 15.3 kg unit."},{"id":"13","image":{"mimetype":"image/jpeg","size":175380,"hash":"1ab51e5310757c1431fcb4e3dc9e4aff2eac36c3","id":"ckiecairbe86h0776c47hxcfs","filename":"divesoft-transport-case-analyzer-1600x700-1.jpg","category":"divesoft/","type":"image"},"image_mobile":{"mimetype":"image/jpeg","size":175380,"hash":"1ab51e5310757c1431fcb4e3dc9e4aff2eac36c3","id":"ckiecairbe86h0776c47hxcfs","filename":"divesoft-transport-case-analyzer-1600x700-1.jpg","category":"divesoft/","type":"image"},"url":{"url":"https://eshop.divesoft.com/products/sets","urlNewWindow":true},"description":"All our blender sets with He/O2 Analyzer are in red cases.","buttonTitle":"Buy","title":"No more black cases!","subTitle":"","isCentred":false}
2,{"id":"11","image":{"mimetype":"image/jpeg","size":178574,"hash":"e3710d44e94d5a02424993cf66b0a6b4f4a5874f","id":"ckf3w25fpn1zw0776i6t2vte9","filename":"1600x700-tanks-hp.jpg","category":"divesoft/","type":"image","alt":"TANKS"},"image_mobile":{"mimetype":"image/jpeg","size":178574,"hash":"e3710d44e94d5a02424993cf66b0a6b4f4a5874f","id":"ckf3w25fpn1zw0776i6t2vte9","filename":"1600x700-tanks-hp.jpg","category":"divesoft/","type":"image","alt":"TANKS"},"title":"TANKS","url":{"url":"/en/products/others/tanks","pageId":"ckdslvkfn7o610788ld52hmqe"},"buttonTitle":"More information","isBackgroundBlack":false,"subTitle":"The lightest ever.","description":"Tanks 2L, 200 BAR, 2.7 kg & 3L, 300 BAR, 4.5 kg.","file":{"mimetype":"application/pdf","size":4111794,"hash":"7f973bba87c7faa8cdfaf52de9e167e7763aa25d","id":"ckfxnm4oyunm30776ny6zrahd","filename":"liberty-en-manual-211.pdf","category":"divesoft/docs/","type":"file"},"isCentred":true},{"id":"4","subTitle":"","description":"Precise apparatus for measuring oxygen and helium concentrations.","title":"Analyzer he/o2","image":{"mimetype":"image/jpeg","size":252400,"hash":"59783d988ac9c58f4da564881919a6f8abeaa81d","id":"ck88pi0ra1yny077663nxm74v","filename":"carousel-1600x700-analyzer-he-o2.jpg","category":"divesoft/","type":"image"},"isBackgroundBlack":true,"url":{"url":"/en/products/analyzers/analyzer-he-o2","pageId":"cjztilv3509et0777ejgtlm67"},"buttonTitle":"More Information"}],"activeTab":"7"}},"__typename":"ComponentTemplate"},"ComponentTemplate:ckltkwdox06y807886vhfkomk":{"id":"ckltkwdox06y807886vhfkomk","name":"Video","type":"GalleryAndVideo","content":{"type":"json","json":{"title":"CCR LIBERTY IN DETAIL - LIBERTY LIGHT OUR SMALLEST REBREATHER","video":{"type":"embeddedVideo","url":"https://www.youtube.com/embed/8ETVTVUu-CI"},"images":[],"activeTab":"1"}},"__typename":"ComponentTemplate"},"ComponentTemplate:ckodztb9e3adh07887lj3ecch":{"id":"ckodztb9e3adh07887lj3ecch","name":"ProductTile","type":"CarouselFiftyFifty","content":{"type":"json","json":{"slides":[{"image":{"recommendedSizes":{"width":"1200","height":"1200"},"mimetype":"image/png","size":2377888,"hash":"d2a054e45ebba255535eb6fc87ebce9ac135e177","id":"ckodzo23r3gay0776ke7ltb1i","filename":"sidemount-render-1.png","category":"divesoft/","type":"image","alt":"CCR Liberty Sidemount"},"secondaryImage":{"recommendedSizes":{"width":"1200","height":"1200"}},"imageBackgroundColor":"#d4d4d4","textImage":{"recommendedSizes":{"width":"1200","height":"1200"}},"title":"CCR Liberty Sidemount","textBackgroundColor":"#d4d4d4","isTextWhite":false,"subTitle":"Double the safety.","description":"CCR Liberty Sidemount brings revolutionary approach in safety measurements for your secured dive. It will become your best buddy who got you in every situations.","url":{"url":"/en/products/ccr-liberty","pageId":"cjv3rpryz00iw0836lc0zx81j"},"buttonTitle":"Learn more","imageOnRight":true,"isCentred":true,"id":"1"}],"activeTab":"1"}},"__typename":"ComponentTemplate"},"ComponentTemplate:ckodzunfj3ado0788w3g2q6nb":{"id":"ckodzunfj3ado0788w3g2q6nb","name":"ProductTile","type":"CarouselFiftyFifty","content":{"type":"json","json":{"slides":[{"image":{"recommendedSizes":{"width":"1200","height":"1200"},"mimetype":"image/png","size":2377888,"hash":"d2a054e45ebba255535eb6fc87ebce9ac135e177","id":"ckodzo23r3gay0776ke7ltb1i","filename":"sidemount-render-1.png","category":"divesoft/","type":"image","alt":"CCR Liberty Sidemount"},"secondaryImage":{"recommendedSizes":{"width":"1200","height":"1200"}},"imageBackgroundColor":"#d4d4d4","textImage":{"recommendedSizes":{"width":"1200","height":"1200"}},"title":"CCR Liberty Sidemount","textBackgroundColor":"#d4d4d4","isTextWhite":false,"subTitle":"Double the safety.","description":"CCR Liberty Sidemount brings revolutionary approach in safety measurements for your secured dive. It will become your best buddy who got you in every situations.","url":{"url":"/en/products/ccr-liberty","pageId":"cjv3rpryz00iw0836lc0zx81j"},"buttonTitle":"Learn more","imageOnRight":true,"isCentred":true,"id":"1"}],"activeTab":"1"}},"__typename":"ComponentTemplate"},"ComponentTemplate:ckquvvfe074lb0788vent4x7k":{"id":"ckquvvfe074lb0788vent4x7k","name":"Testimonials Divers","type":"Testimonials","content":{"type":"json","json":{"title":"Testimonials","description":"Tell us your stories with our products","testimonials":[{"img":{"recommendedSizes":{"width":"130","height":"130"},"mimetype":"image/jpeg","size":178885,"hash":"a8dec716ac09ba311e1530e5ed894ef8407e12d6","id":"ck8iqik163sin0776m0e9t84n","filename":"testimonials-beatrice-rivoira.jpg","category":"divesoft/","type":"image"},"title":"Beatrice Rivoira","from":"Italy","text":"A few celebrated divers have already had the opportunity to test out the Liberty Light. Their reactions were unanimous. Beatrice stated, to no surprise, that the new unit is âsuper lightâ as well as âeasy to assemble and travel withâ. She was also relieved that the rebreather offers âcomplete freedom for the movement of your headâ and appreciated that the weight system works smoothly and it didnât bother her back. And, on top of it all, âit looks really cool!â she added.","id":"1"},{"img":{"recommendedSizes":{"width":"130","height":"130"},"mimetype":"image/jpeg","size":277273,"hash":"ca8ed256cd008f08250edddd5ce478fcffdf4ca4","id":"ck8iqj3pl3sj407765tqnvnco","filename":"testimonials-nadir-quarta.jpg","category":"divesoft/","type":"image"},"title":"Nadir Quarta","from":"Switzerland","text":"Nadir, who has achieved around 30 dives and accomplished up to 72 meters with the lighter Liberty, agreed with Beatrice. âYes, absolutely, the Liberty Light is much smaller and lighter. Itâs very easy to fit in a small bag or your luggage. The lower position of the unit allows for better mobility of the diver's head which is beneficial for shorter divers as well. It also offers more flexibility with the tank choice since the first stages are not locked. And, with the possibility of mounting bigger tanks, itâs a great unit for deep dives too!â","id":"2"},{"img":{"recommendedSizes":{"width":"130","height":"130"},"mimetype":"image/jpeg","size":169579,"hash":"1f198255c4bc4c468f7b708ab4e80f721b740155","id":"ck8iqiues3siy0776ier0i0lk","filename":"testimonials-edoardo-pavia.jpg","category":"divesoft/","type":"image"},"title":"Edoardo Pavia","from":"Italy","text":"Edoardo has reached a depth of 45 meters with the Liberty Light thus far; though he says depth doesnât seem to be a factor of comfort with this new unit. Edoardo was positively surprised by the friendly setup of the rig; and that, along with its lighter weight, makes it a win-win product in his opinion. Also, despite the simple c
2onfiguration and lighter weight of the unit, itâs just as comfortable as diving with the original CCR Liberty. He also found it unique that the sidemount bungees allow divers to set their bailout in a sidemount position or standard configuration.","id":"3"},{"id":"4","title":"Enrico Bortolotti","text":"Enrico has done many dives deeper 70m with the primary and bailout CCR Liberty configuration. First of all it is easy to assemble and prepare for diving. The BO Reb function present in the advanced electronic of the units allows a previously unimaginable safety. Correctly housed, it has no perceptible differences in breathing, changing from primary to BO. Before, in planning deep dives, I was forced to plan and bring 4 or more BO cylinders. A lot of weight and brake in case of current. In addition to the possibility of more problems with more things to work. Now with 2 CCR Liberty, an OC stage and, of course, a lot of training and exercises, I have found my comfort for challenging dives and more.","from":"Italy","image":{"type":"image"},"img":{"mimetype":"image/jpeg","size":300199,"hash":"00281c389350a3f6dfc7494348c3768080217055","id":"ckmx8vithkjlq077654cnpueo","filename":"enrico-bortolotti-testimonials.jpg","category":"divesoft/","type":"image"}}],"activeTab":"4"}},"__typename":"ComponentTemplate"},"ComponentTemplate:cktl5p06n2i5a0988dmhuursn":{"id":"cktl5p06n2i5a0988dmhuursn","name":"4 cesta","type":"ProductMountRouter","content":{"type":"json","json":{"toggleOpen":"configurations","toggleClose":"close","leftHeadline":"BMCL/FMCL","leftText":"The traditional configuration with FMCL or BMCL","leftUrl":{"url":"/en/products/ccr-liberty/ccr-liberty-bmcl-fmcl","pageId":"ckt0i4dg51ogp0988dpgn8lwr","urlNewWindow":false},"middleHeadline":"SIDEMOUNT","middleText":"Light, independent, compact","middleUrl":{"url":"/en/products/ccr-liberty/ccr-liberty-sidemount","mediaData":{"mimetype":"image/png","size":600821,"hash":"5ac4d810dd105484703d988ac31d3bf798e5c090","id":"cjxbwxxqw07520776t46q3c0q","filename":"fmcl.png","category":"divesoft/","type":"image"},"pageId":"cjyztusbt039t0777kqbo8xj8"},"rightHeadline":"Liberty Light","rightText":"Weighing only 15,3 Kg makes the Light a perfect travel companion","rightUrl":{"url":"/en/products/ccr-liberty/ccr-liberty-light","pageId":"ck7m1guq108gk07883tmehxr4"},"extraHeadline":"LIberty Heavy","extraText":"DIR style setup utilizing any size of onboard cylinders, traditional backplate and wire stand","extraUrl":{"url":"/en/products/ccr-liberty/ccr-liberty-heavy","pageId":"cknpubp6j2f690788zv52yohy"},"desktopBackText":"go back","desktopBackUrl":"","leftImg":{"mimetype":"image/png","size":576657,"hash":"0412f9f37466bef1eedd37c56f55d8be431076bb","id":"cjxc529eg077r0776zlnvnc4q","filename":"bmcl.png","category":"divesoft/","type":"image"},"middleImg":{"mimetype":"image/png","size":2660493,"hash":"dc8db59a637c6b6b08039465c4ed2b515000d460","id":"cjxc5jkxe079f0776yj24daz8","filename":"sidemount-00000.png","category":"divesoft/","type":"image"},"rightImg":{"mimetype":"image/png","size":92056,"hash":"90e698107c90b9e68430ed42c89f303c9f0f461c","id":"ckeo9zm9fj5jw0776nbvkv5f8","filename":"lightblack.png","category":"divesoft/","type":"image"},"image":{"type":"image"},"extraImg":{"mimetype":"image/png","size":2830456,"hash":"6573838ce7ac1e9711e8aaf10d6ef54f29bb3343","id":"ckt0j2l76tan407767vwpj2hs","filename":"heavy.png","category":"divesoft/","type":"image"},"file":{"mimetype":"image/png","size":92056,"hash":"90e698107c90b9e68430ed42c89f303c9f0f461c","id":"ckeo8t7osj59p0776ph8dzebi","filename":"fow-web.png","category":"divesoft/docs/","type":"file"}}},"__typename":"ComponentTemplate"},"ComponentTemplate:ckvkotiu92v5z0864310bv4bu":{"id":"ckvkotiu92v5z0864310bv4bu","name":"ccr liberty manuals / user manuals","type":"Firmwares","content":{"type":"json","json":{"title":"User manuals","divider":false,"articles":[{"id":"17","text":"1 September 2021","title":"CCR Liberty Heavy Manual - English","url":{"url":"http://foxer360-media-library.s3.eu-central-1.amazonaws.com/divesoft/docs/3d9208745b81303c52d62ade687402b3f9a47122_liberty-heavy-en-manual.pdf","mediaData":{"mimetype":"application/pdf","size":5035365,"hash":"3d9208745b81303c52d62ade687402b3f9a47122","id":"ckt8f0smfw0ow0776rdb55xv9","filename":"liberty-heavy-en-manual.pdf","category":"divesoft/docs/","type":"file"},"urlNewWindow":true}}
2,{"id":"15","title":"Liberty 2021 Edition Manual","url":{"url":"http://foxer360-media-library.s3.eu-central-1.amazonaws.com/divesoft/docs/c362861d696bd53989b43eba0dc7c70a3aef21f8_liberty-1-5.pdf","mediaData":{"mimetype":"application/pdf","size":3304655,"hash":"c362861d696bd53989b43eba0dc7c70a3aef21f8","id":"ckrabvjgm7gso0776x4d7zlnh","filename":"liberty-1-5.pdf","category":"divesoft/docs/","type":"file"}},"text":"Version 2.13 | February 2021"},{"id":"12","title":"CCR Liberty User Manual - Czech","text":"Version 2.11 | 18 September 2020","url":{"url":"http://foxer360-media-library.s3.eu-central-1.amazonaws.com/divesoft/docs/cff9ebabba6abf3fee8aeedaccdec5444a54b6c4_liberty-cz-manual.pdf","mediaData":{"mimetype":"application/pdf","size":5434673,"hash":"cff9ebabba6abf3fee8aeedaccdec5444a54b6c4","id":"ckguy4h6l2oxw0776sseacpsz","filename":"liberty-cz-manual.pdf","category":"divesoft/docs/","type":"file"}}},{"text":"Version 2.11 | July 2021\n","id":"1","title":"CCR Liberty User Manual â English","url":{"url":"http://foxer360-media-library.s3.eu-central-1.amazonaws.com/divesoft/docs/fc8ed1a0c4e708472e2dbdc3b9177fd1a2aa9301_liberty-en-manual.pdf","mediaData":{"mimetype":"application/pdf","size":6893143,"hash":"fc8ed1a0c4e708472e2dbdc3b9177fd1a2aa9301","id":"cksfscx2glmqs0776e3vkx5al","filename":"liberty-en-manual.pdf","category":"divesoft/docs/","type":"file"},"urlNewWindow":true}},{"title":"CCR Liberty User Manual â German","text":"Version 2.11 | 19 April 2019\n","id":"2","url":{"url":"http://foxer360-media-library.s3.eu-central-1.amazonaws.com/divesoft/docs/f45bd24962212db10e6388c5baa3773f837ad77a_liberty-ge-manual.pdf","mediaData":{"mimetype":"application/pdf","size":2945868,"hash":"f45bd24962212db10e6388c5baa3773f837ad77a","id":"ck848g0hs0u480776t5zp7v0h","filename":"liberty-ge-manual.pdf","category":"divesoft/docs/","type":"file"},"urlNewWindow":true}},{"id":"13","title":"CCR Liberty User Manual - Italian","text":"Version 2.11 | 25 February 2021","url":{"url":"http://foxer360-media-library.s3.eu-central-1.amazonaws.com/divesoft/docs/0dc176d704c17247a28b6f2663f607a3e2b4a4b4_liberty-211-rev-12-it.pdf","mediaData":{"mimetype":"application/pdf","size":7988631,"hash":"0dc176d704c17247a28b6f2663f607a3e2b4a4b4","id":"cklknx1yx6d3j0776f0hgia60","filename":"liberty-211-rev-12-it.pdf","category":"divesoft/docs/","type":"file"},"urlNewWindow":true}},{"id":"4","title":"CCR Liberty User Manual â Korean","text":"Version 2.11 | 3 January 2019","url":{"url":"http://foxer360-media-library.s3.eu-central-1.amazonaws.com/divesoft/docs/173c640fbf6a01a8580c4983aff8dd2c0e18829d_ccr-liberty-user-manual-korean.pdf","mediaData":{"mimetype":"application/pdf","size":12873670,"hash":"173c640fbf6a01a8580c4983aff8dd2c0e18829d","id":"cjztfey7p00cr0776s5ui7r8l","filename":"ccr-liberty-user-manual-korean.pdf","category":"divesoft/docs/","type":"file"},"urlNewWindow":true}},{"id":"3","title":"CCR Liberty User Manual â Russian","text":"Version 2.11 | 23 July 2018","url":{"url":"http://foxer360-media-library.s3.eu-central-1.amazonaws.com/divesoft/docs/3a75d7f0c87e7a22a4d49d00ff44142ff6252db8_ccr-liberty-user-manual-rus.pdf","mediaData":{"mimetype":"application/pdf","size":16483972,"hash":"3a75d7f0c87e7a22a4d49d00ff44142ff6252db8","id":"cjztfdux100cj0776v15hnmk1","filename":"ccr-liberty-user-manual-rus.pdf","category":"divesoft/docs/","type":"file"},"urlNewWindow":true}},{"id":"5","title":"CCR Liberty Sidemount Manual â English","text":"Version 2.0 | 12 March 2019\n","url":{"url":"http://foxer360-media-library.s3.eu-central-1.amazonaws.com/divesoft/docs/e567ef9e28197bff1944eedbeee3d6bce69c35ed_ccr-liberty-sidemount-manual.pdf","mediaData":{"mimetype":"application/pdf","size":9025573,"hash":"e567ef9e28197bff1944eedbeee3d6bce69c35ed","id":"cjztffvmc00cz0776cq5jkntc","filename":"ccr-liberty-sidemount-manual.pdf","category":"divesoft/docs/","type":"file"},"urlNewWindow":true}},{"id":"10","title":"CCR Liberty Sidemount Manual - German","text":"Version 2.11 | 12 March 2019","url":{"url":"http://foxer360-media-library.s3.eu-central-1.amazonaws.com/divesoft/docs/c5eb052660cb660654fb7731aa343ca7cd4b05f5_liberty-sidemount-manual-ge.pdf","mediaData":{"mimetype":"application/pdf","size":9240214,"hash":"c5eb052660cb660654fb7731aa343ca7cd4b05f5","id":"ckev21nrpkpib07769cc0yo56","filename":"liberty-sidemount-manual-ge.pdf","category":"divesoft/docs/","type":"file"},"urlNewWindow":true}}
2,{"id":"14","title":"CCR Liberty Sidemount Manual - Italian","text":"Version 2.11 | 25 February 2021","url":{"url":"http://foxer360-media-library.s3.eu-central-1.amazonaws.com/divesoft/docs/f1c965dd74d692beb4c8cb45bb6ecaf6c3a31104_liberty-sidemount-rev12-it.pdf","mediaData":{"mimetype":"application/pdf","size":5471188,"hash":"f1c965dd74d692beb4c8cb45bb6ecaf6c3a31104","id":"cklko0o4p6d5j0776fitwtu8t","filename":"liberty-sidemount-rev12-it.pdf","category":"divesoft/docs/","type":"file"},"urlNewWindow":true}},{"id":"6","title":"CCR Liberty Sidemount Manual â Russian","text":"Version 1.0 | 10 October 2018\n","url":{"url":"http://foxer360-media-library.s3.eu-central-1.amazonaws.com/divesoft/docs/9f7eee50b162e25363d1bbb967c52225f727b3f2_ccr-liberty-sidemount-manual-rus.pdf","mediaData":{"mimetype":"application/pdf","size":16313964,"hash":"9f7eee50b162e25363d1bbb967c52225f727b3f2","id":"cjztfgs2q00d70776m6cnzfac","filename":"ccr-liberty-sidemount-manual-rus.pdf","category":"divesoft/docs/","type":"file"},"urlNewWindow":true}},{"id":"7","title":"CCR Liberty Bailout Standby Mode Manual - English","text":"Version 2.0 | 29 June 2018","url":{"url":"http://foxer360-media-library.s3.eu-central-1.amazonaws.com/divesoft/docs/3f05b183178a7c64a47d28ae32a0c69fbd567c21_en-manual-liberty-bsm-20.pdf","mediaData":{"mimetype":"application/pdf","size":137615,"hash":"3f05b183178a7c64a47d28ae32a0c69fbd567c21","id":"cjztfhmh900df0776r5inbbrb","filename":"en-manual-liberty-bsm-20.pdf","category":"divesoft/docs/","type":"file"},"urlNewWindow":true}},{"id":"11","title":"CCR Liberty Bailout Standby Mode Manual - German","text":"Version 2.0 | 29 June 2018","url":{"url":"http://foxer360-media-library.s3.eu-central-1.amazonaws.com/divesoft/docs/a219ab82a83d4f04e97e157b8c7972b9e57d6539_manual-liberty-bsm-german.pdf","mediaData":{"mimetype":"application/pdf","size":631063,"hash":"a219ab82a83d4f04e97e157b8c7972b9e57d6539","id":"ckev2wp1gkq8e0776q09ce46d","filename":"manual-liberty-bsm-german.pdf","category":"divesoft/docs/","type":"file"}}},{"id":"8","title":"CCR Liberty Bailout Standby Mode Manual - Korean","text":"Version 2.0 | 3 January 2019\n\n","url":{"url":"http://foxer360-media-library.s3.eu-central-1.amazonaws.com/divesoft/docs/173c640fbf6a01a8580c4983aff8dd2c0e18829d_ccr-liberty-user-manual-korean.pdf","mediaData":{"mimetype":"application/pdf","size":12873670,"hash":"173c640fbf6a01a8580c4983aff8dd2c0e18829d","id":"cjztfey7p00cr0776s5ui7r8l","filename":"ccr-liberty-user-manual-korean.pdf","category":"divesoft/docs/","type":"file"}}},{"id":"9","title":"BOV manual","url":{"url":"http://foxer360-media-library.s3.eu-central-1.amazonaws.com/divesoft/docs/2372b31c0cf1fd57bf45a46cdf9b00a82099d456_bov-en-manual.pdf","mediaData":{"mimetype":"application/pdf","size":4225099,"hash":"2372b31c0cf1fd57bf45a46cdf9b00a82099d456","id":"ck88hk63q1tzd0776fdtkhfok","filename":"bov-en-manual.pdf","category":"divesoft/docs/","type":"file"},"urlNewWindow":true},"text":"24 April 2019"},{"id":"16","title":"ODA manual","url":{"url":"http://foxer360-media-library.s3.eu-central-1.amazonaws.com/divesoft/docs/ee0908e1f209f2f713684d95c63965b5ef2ffb03_oda-rev1-en.pdf","mediaData":{"mimetype":"application/pdf","size":3002783,"hash":"ee0908e1f209f2f713684d95c63965b5ef2ffb03","id":"cktcp3dp3xyfq07760ndorxqr","filename":"oda-rev1-en.pdf","category":"divesoft/docs/","type":"file"},"urlNewWindow":true},"text":"1 July 2021"}],"activeTab":"16"}},"__typename":"ComponentTemplate"},"ComponentTemplate:ckvkouye02v6608641xzjdkgs":{"id":"ckvkouye02v6608641xzjdkgs","name":"ccr liberty manuals","type":"Hero","content":{"type":"json","json":{"title":"CCR Liberty manuals","text":"","btnTitle":"","url":"","image":{"recommendedSizes":{"width":"1600","height":"560"},"mimetype":"image/jpeg","size":182489,"hash":"26b0c5e077d253aa7aeb7bc112bd13996b4d6589","id":"cjt362tk60dea0776eodwtuka","filename":"herobg.jpg","category":"divesoft/","type":"image"},"paddingTop":true,"smallFontSize":false}},"__typename":"ComponentTemplate"},"ComponentTemplate:ckwafpg980sa20864m052g2ki":{"id":"ckwafpg980sa20864m052g2ki","name":"divesoftcentercopy","type":"Downloads","content":{"type":"json","json":{"title":"Divesoft.center","description":"","files":[{"id":"5"},{"title":"User manual","img":{"recommendedSizes":{"width":"50","height":"50"}},"url":{"url":"http://foxer360-media-library.s3.eu-central-1.amazonaws.com/divesoft/docs/b73f558be0d2930c53cece7a960086e16ded0fb1_divesoftcenter-manual-en.pdf","mediaData":{"mimetype":"application/pdf","size":50325
255,"hash":"b73f558be0d2930c53cece7a960086e16ded0fb1","id":"ckskcjwnenp2l0776aa9hqbey","filename":"divesoftcenter-manual-en.pdf","category":"divesoft/docs/","type":"file"},"urlNewWindow":""},"urlText":"Download manual","id":"2"},{"id":"6"},{"id":"4","title":"DIVESOFT.CENTER for Windows","urlText":"Download","file":{"type":"file"},"img":{},"url":{"url":"http://foxer360-media-library.s3.eu-central-1.amazonaws.com/divesoft/docs/eb1fb8f9130762e5053ef7f91c112e709216a511_divesoftcenter-0417win.zip","mediaData":{"mimetype":"application/octet-stream","size":60919808,"hash":"6cd750fa961c4d7dd29ba4659444b80b6a2241b0","id":"cksu23pptr1hu0776ox6ytk6r","filename":"divesoftcenter-046.msi","category":"divesoft/docs/","type":"file"}}},{"title":"DIVESOFT.CENTER for Mac","img":{"recommendedSizes":{"width":"50","height":"50"}},"url":{"url":"http://foxer360-media-library.s3.eu-central-1.amazonaws.com/divesoft/docs/da22dd5e0df95608aa573d7489e258151eccecee_divesoft-center-0417-mac.dmg","mediaData":{"mimetype":"application/octet-stream","size":77411342,"hash":"84b381c701b081ed9489693403e2512bbba0c4bb","id":"cksu25a0gr1j4077688e17lap","filename":"divesoft-homecentre-046-mac.dmg","category":"divesoft/docs/","type":"file"},"urlNewWindow":""},"urlText":"Download","id":"1"},{"title":"DIVESOFT.CENTER for Linux","img":{"recommendedSizes":{"width":"50","height":"50"}},"url":{"url":"http://foxer360-media-library.s3.eu-central-1.amazonaws.com/divesoft/docs/daf9397d9b27a46e0934823197195289d82de0f4_divesoftcenter-0417linux.tar","mediaData":{"mimetype":"application/x-zip-compressed","size":265356855,"hash":"9a64da5aaed3c990df62eb0cc30cc10c0f55a997","id":"ckskhirw2npuu0776ul0shnbc","filename":"divesoftcentre-046-linux.zip","category":"divesoft/docs/","type":"file"},"urlNewWindow":""},"urlText":"Download","id":"3"},{"id":"7","urlText":"\"SmartScreen protected your PC\" ","title":"Windows installation","url":{"url":"https://www.alphr.com/windows-protected-your-pc-disable-smartscreen/","urlNewWindow":true}},{"id":"8","urlText":"Open a Mac app from an unidentified developer","url":{"url":"https://support.apple.com/guide/mac-help/open-a-mac-app-from-an-unidentified-developer-mh40616/mac","urlNewWindow":true},"title":"Mac instalation"},{"id":"9"}],"activeTab":"3"}},"__typename":"ComponentTemplate"},"ComponentTemplate:ckwafpg9a0sa30864yikxuwm7":{"id":"ckwafpg9a0sa30864yikxuwm7","name":"divesoftcentercopy","type":"Downloads","content":{"type":"json","json":{"title":"Divesoft.center","description":"","files":[{"id":"5"},{"title":"User manual","img":{"recommendedSizes":{"width":"50","height":"50"}},"url":{"url":"http://foxer360-media-library.s3.eu-central-1.amazonaws.com/divesoft/docs/b73f558be0d2930c53cece7a960086e16ded0fb1_divesoftcenter-manual-en.pdf","mediaData":{"mimetype":"application/pdf","size":5032555,"hash":"b73f558be0d2930c53cece7a960086e16ded0fb1","id":"ckskcjwnenp2l0776aa9hqbey","filename":"divesoftcenter-manual-en.pdf","category":"divesoft/docs/","type":"file"},"urlNewWindow":""},"urlText":"Download manual","id":"2"},{"id":"6"},{"id":"4","title":"DIVESOFT.CENTER for Windows","urlText":"Download","file":{"type":"file"},"img":{},"url":{"url":"http://foxer360-media-library.s3.eu-central-1.amazonaws.com/divesoft/docs/eb1fb8f9130762e5053ef7f91c112e709216a511_divesoftcenter-0417win.zip","mediaData":{"mimetype":"application/octet-stream","size":60919808,"hash":"6cd750fa961c4d7dd29ba4659444b80b6a2241b0","id":"cksu23pptr1hu0776ox6ytk6r","filename":"divesoftcenter-046.msi","category":"divesoft/docs/","type":"file"}}},{"title":"DIVESOFT.CENTER for Mac","img":{"recommendedSizes":{"width":"50","height":"50"}},"url":{"url":"http://foxer360-media-library.s3.eu-central-1.amazonaws.com/divesoft/docs/da22dd5e0df95608aa573d7489e258151eccecee_divesoft-center-0417-mac.dmg","mediaData":{"mimetype":"application/octet-stream","size":77411342,"hash":"84b381c701b081ed9489693403e2512bbba0c4bb","id":"cksu25a0gr1j4077688e17lap","filename":"divesoft-homecentre-046-mac.dmg","category":"divesoft/docs/","type":"file"},"urlNewWindow":""},"urlText":"Download","id":"1"},{"title":"DIVESOFT.CENTER for Linux","img":{"recommendedSizes":{"width":"50","height":"50"}},"url":{"url":"http://foxer360-media-library.s3.eu-central-1.amazonaws.com/divesoft/docs/daf9397d9b27a46e0934823197195289d82de0f4_divesoftcenter-0417linux.tar","mediaData":{"mimetype":"application/x-zip-compressed","size":265356855,"hash":"9a64da5aaed3c990df62eb0cc30cc10c0f55a997","id":"ckskhirw2npuu0776ul0shnbc","filename":"divesoftcentre-046-linux.zip","category":"divesoft/docs/","type":"file"},"urlNewWindow":""},"urlText":"Download","id":"3"},{"id":"7","urlText":"\"SmartScreen protected your PC\" ","title":"Windows installation","url":{"url":"https://www.alphr.com/windows-protected-your-pc-disable-smartscreen/","urlNewWindow":true}},{"id":"8","urlText":"Open a Mac app from an unidentified developer","url":{"url":"https://support.apple.com/guide/mac-help/open-a-mac-app-from-an-unidentified-developer-mh40616/mac","urlNewWindow":true},"title":"Mac instalation"},{"id":"9"}],"activeTab":"3"}},"__typename":"ComponentTemplate"},"ComponentTemplate:ckz2p2s2s4x9n08585hc2tlt1":{"id":"ckz2p2s2s4x9n08585hc2tlt1","name":"analyzers - tiles","type":"Tiles","content":{"type":"json","json":{"containerNarrow":false,"tiles":[{"title":"ANALYZER SOLO","subtitle":"Our trimix anal
2yzer designed to be part of any expedition divers field kit.","image":{"recommendedSizes":{"width":"690","height":"690"},"mimetype":"image/png","size":2379057,"hash":"6219a86d162aeb974467a84c932e09a73c7be19c","id":"cjwt86rot06e70776jgnoix23","filename":"solo-render-3-4-levy-pohled.png","category":"divesoft/","type":"image"},"linkTitle":"Take a look >","linkUrl":{"url":"/en/products/analyzers/analyzer-solo","pageId":"cjztim1kk09fg0777nv63tf9b"},"id":"1"},{"id":"2","title":"ANALYZER HE/O2","subtitle":"Our classic Divesoft Trimix gas analyzer, comes as part of a multifaceted kit for gas blending, volt meter, Ohm reader, and more.","linkTitle":"Take a look >","linkUrl":{"url":"/en/products/analyzers/analyzer-he-o2","pageId":"cjztilv3509et0777ejgtlm67"},"image":{"mimetype":"image/png","size":1551538,"hash":"6468a7c4062fd9ad975dbdf092e91d5883629688","id":"ck70e9v9rpr4g0776r9e0vqoj","filename":"analyzator-he-o2-3.png","category":"divesoft/","type":"image"}}],"activeTab":"1"}},"__typename":"ComponentTemplate"},"ComponentTemplate:ckztpbec07u6d0858xc0uvmw6":{"id":"ckztpbec07u6d0858xc0uvmw6","name":"FAQs (marek)","type":"FaqNew","content":{"type":"json","json":{"backgroundColor":"#f0f0f0","title":"Purchase & Training","subtitle":"CCR Liberty Rebreather","showBreadcrumbs":false,"hideHeader":false,"questions":[{"question":"What are the main advantages of the Liberty rebreather?","answer":"The Liberty rebreather presents a unique system that has been designed to be fully fault tolerant, meaning that the system has built in electronic redundancies. Our primary concern was to build a rebreather system that will enable the diver to safely conduct the dive and will be able to return on the unit. No single malfunction in the electronic system can cause a complete system failure. Unit contains: 4 oxygen sensors, 2 helium sensors, 2 methods of pO2 measuring, 2 independent computers, 2 solenoid valves, 4 displays. Everything is individually sealed. The Liberty rebreather is depth limited at 170m (557ft) due to the use of the Apeks DST4 Environmentally sealed 1st stage regulators. It is recommended that to dive beyond 170M (557ft) the Apeks DST4 1st stages MUST be changed with the Apeks UST4 kit. All components of the Liberty apart from the 1st stages are pressure tested to 600m. In conjunction with the Liberty robust construction the unit also exhibits one of the industryâs best work-of-breathing of rebreathers. The Liberty rebreather has many variations you can choose and configure. The unit can be easily configured for multiple variations; backmount or sidemount, for optimal dive configurations for each dive environment. With a simple conversion kit the user can go from a backmount configuration to a sidemount configuration. Watch our introducing video about Liberty rebreather and its advantages here.","id":"1"},{"question":"Work of breathing?","answer":"Thanks to the careful design of all parts of the breathing loop, the Liberty has extraordinarily low breathing resistance. No off-the-shelf pipe fittings or piping components are used in the Liberty â everything is specially manufactured precisely according to calculations, simulations and test results. Please read our brief articles click here. The Liberty FMCL WOB is 2.16 J/l at 40m, air diluent. And 1.58 J/l at 100m, heliox 10/90.","id":"2"}]}},"__typename":"ComponentTemplate"},"ComponentTemplate:cl06qffhl9ccp0858ja9vdupw":{"id":"cl06qffhl9ccp0858ja9vdupw","name":"hlaviÄka CCR","type":"ProductCrossroadNew","content":{"type":"json","json":{"products":[{"id":"9","url":{"url":"/en/products/ccr-liberty","pageId":"cjv3rpryz00iw0836lc0zx81j"},"title":"CCR Liberty","image":{"mimetype":"image/png","size":806405,"hash":"1ae6594296042204df596da0f33e6591f84da573","id":"ckx3me6k0c5s60776zr3pyct4","filename":"divesoft-ccr-liberty-light-01-1080x1080.png","category":"divesoft/","type":"image"}},{"id":"2","title":"Anatomy","image":{"mimetype":"image/png","size":259316,"hash":"9b3cdb102291f8c95b3a3408e0a493c1bbb94c38","id":"cjxc7r1hw07b20776e7kq8u9o","filename":"sidemount.png","category":"divesoft/","type":"image"},"url":{"url":"/en/products/ccr-liberty/test2-anatomy","pageId":"cl6g9nsgds2c20858pg31ae97"}},{"id":"3","title":"Features","url":{"url":"/en/products/ccr-liberty/test2-features","pageId":"cl6g9opv3s2ck085846otg5l7"},"image":{"mimetype":"image/png","size":111678,"hash":"1b0abc1813359acf3baa47dbc11b4b290aab310c","id":"cl1eybpshr7010776kwxzb09o","filename":"divesoft-liberty-head-01-1080x1080-t.png","category":"divesoft/","type":"image"}},{"id":"5","url":{"url":"https://www.divesoft.com/en/products/ccr-liberty/configurations"},"title":"Configurations","image":{"mimetype":"image/png","size":122646,"hash":"02c52e172aca759e3904acf42d74d7b9b8b67ebe","id":"cl8jv40hdirlg0776njznax3q","filename":"configurations4.png","category":"divesoft/","type":"image"}},{"id":"4","title":"Configurator","url":{"url":"https://www.divesoft.com/ccr-liberty/"},"image":{"mimetype":"image/png","size":6352707,"hash":"25f220967ec22ba2f1feb4223d01dbfd5cc87ed9","id":"cl9mpe0atssnq0776id8dfz3a","filename":"divesoft-liberty-modularity-1920x1080-t.png","category":"divesoft/","type":"image"}}
2,{"id":"1","title":"Backmount","image":{"mimetype":"image/png","size":5787680,"hash":"66221f51bc0fbd67d2f92afea827d02d4737e43e","id":"cjxc53e0l078007765x7oz913","filename":"bmcl-00001.png","category":"divesoft/","type":"image"},"url":{"url":"/en/products/ccr-liberty/ccr-liberty-bmcl-fmcl","pageId":"ckt0i4dg51ogp0988dpgn8lwr","urlNewWindow":false}},{"id":"6","url":{"url":"/en/products/ccr-liberty/ccr-liberty-sidemount","pageId":"cjyztusbt039t0777kqbo8xj8"},"title":"Sidemount","image":{"mimetype":"image/jpeg","size":50745,"hash":"6c22b8a5eba20aaf637c4d14496dc84fca8db4cd","id":"cjxc5i4lo079407760imjcn2n","filename":"sidemount-.jpg","category":"divesoft/","type":"image"}},{"id":"7","title":"Light","url":{"url":"/en/products/ccr-liberty/ccr-liberty-light","pageId":"ck7m1guq108gk07883tmehxr4"},"image":{"mimetype":"image/png","size":803931,"hash":"bb7fb772b0304575862f683e4ef39b0302a0be8a","id":"ckx3mi0tsc5tr0776r23bum6i","filename":"divesoft-ccr-liberty-light-07-1080x1080.png","category":"divesoft/","type":"image"}},{"id":"8","url":{"url":"/en/products/ccr-liberty/ccr-liberty-heavy","pageId":"cknpubp6j2f690788zv52yohy"},"title":"Heavy","image":{"mimetype":"image/png","size":15299,"hash":"17a6b78d3e160ac26b79cbcec754824a5ad9a8a0","id":"ckx3m2sjnc5qs07764q4obz7u","filename":"divesoft-menu-ccr-liberty-heavy-200x200.png","category":"divesoft/","type":"image"}}],"activeTab":"9"}},"__typename":"ComponentTemplate"},"ComponentTemplate:cl0az2g0i9yiv0858n2sn5m4m":{"id":"cl0az2g0i9yiv0858n2sn5m4m","name":"hlaviÄka analyzers","type":"ProductCrossroadNew","content":{"type":"json","json":{"products":[{"id":"4","title":"DNA","url":{"url":"/en/products/analyzers/dna","pageId":"clf9rs5c3ltkw0835vujrrtxu"},"image":{"mimetype":"image/jpeg","size":31871,"hash":"fbb1d3e8a5e1683b27088eb5beb6c82f123025dc","i
2d":"clopts3s4i8vb0776jop0ld14","filename":"8460-divesoft-dna-divesoft-nitrox-analyzer-menu.jpg","category":"divesoft/","type":"image"}},{"id":"1","title":"SOLO O2","url":{"url":"/en/products/analyzers/analyzer-solo-o2","pageId":"ckx60balw01yz0858sye1ixvu"},"image":{"mimetype":"image/png","size":24805,"hash":"7c4496289919af2a1aba9a3f1a7eb2e67b49b8d3","id":"cl0ay9z4rfqs707767v5nv9fv","filename":"divesoft-analyzer-solo-o2-menu-180x180-w.png","category":"divesoft/","type":"image"}},{"id":"2","title":"SOLO","url":{"url":"/en/products/analyzers/analyzer-solo","pageId":"cjztim1kk09fg0777nv63tf9b"},"image":{"mimetype":"image/png","size":21365,"hash":"86c88a3b3a4548c839809b6a0a216160dc9df39a","id":"cl0ayaudsfquc0776i7y8uddt","filename":"divesoft-analyzer-solo-menu-180x180-w.png","category":"divesoft/","type":"image"}},{"id":"3","title":"He/O2","url":{"url":"/en/products/analyzers/analyzer-he-o2","pageId":"cjztilv3509et0777ejgtlm67"},"image":{"mimetype":"image/png","size":27836,"hash":"838da554019a5c9cea70744f7273ea5c7e93aa88","id":"cl0aybac0fqvr0776zwfc65qs","filename":"divesoft-analyzer-he-o2-menu-180x180-w.png","category":"divesoft/","type":"image"}}],"activeTab":"4"}},"__typename":"ComponentTemplate"},"ComponentTemplate:cl0b0i33h9yyi0858c11lgnuu":{"id":"cl0b0i33h9yyi0858c11lgnuu","name":"hlaviÄka freedom","type":"ProductCrossroadNew","content":{"type":"json","json":{"products":[{"id":"1","title":"Basic Nitrox","image":{"mimetype":"image/png","size":15696,"hash":"1918ae2b49bf4f586b8a88c7fcaa5256819d3107","id":"cl0b0b0refsba077694sxel05","filename":"divesoft-freedom-computer-8056-basic-nitrox-180x180-w.png","category":"divesoft/","type":"image"},"url":{"url":"/en/products/freedom-computers/basic-nitrox","pageId":"cl0b1gsb09z4a0858ohmi60nw","urlNewWindow":false}},{"id":"2","title":"Advance Nitrox","image":{"mimetype":"image/png","size":15658,"hash":"17e4c4dd68102ac731a9f686626c747fc3b7a7ea","id":"cl0b0bwqufscs07767ysm4zhn","filename":"divesoft-freedom-computer-8057-advanced-nitrox-180x180-w.png","category":"divesoft/","type":"image"},"url":{"url":"/en/products/freedom-computers/advance-nitrox","pageId":"cl0b1mqzd9z5s0858xvc66npt"}},{"id":"3","title":"Full Trimix","image":{"mimetype":"image/png","size":16103,"hash":"68c28e63c984c78697dc180741a01fba8d516584","id":"cl0b0crjjfse907760o0kbofn","filename":"divesoft-freedom-computer-8058-full-trimix-180x180-w.png","category":"divesoft/","type":"image"},"url":{"url":"/en/products/freedom-computers/full-trimix","pageId":"cl0b1pfpc9z6n0858rb5vsyvg"}},{"id":"4","title":"Closed Circuit","image":{"mimetype":"image/png","size":15688,"hash":"a668e7dc287318c55c7cb279be61a94accbfdaaa","id":"cl0b0dvc5fsf70776toyc2cf8","filename":"divesoft-freedom-computer-8272-closed-circuit-180x180-w.png","category":"divesoft/","type":"image"},"url":{"url":"/en/products/freedom-computers/closed-circuit","pageId":"cl0b1xajx9z7s08582ciem2oh"}},{"id":"5","title":"CCR Bottom timer","image":{"mimetype":"image/png","size":15716,"hash":"2b34679d408f9cb575fc562af5c8d782aa5198e2","id":"cl0b0epn0fsgt0776h4x02eh8","filename":"divesoft-freedom-computer-8273-bottom-timer-ccr-180x180-w.png","category":"divesoft/","type":"image"},"url":{"url":"/en/products/freedom-computers/ccr-bottom-timer","pageId":"cl0b1zm0s9z9u0858ijxcwv8k"}},{"id":"6","title":"Advanced Bottom timer","image":{"mimetype":"image/png","size":15308,"hash":"0e968632471a2c70464f96c358d62b9a08c0007b","id":"cl0b0f68nfsha0776spu87xnz","filename":"divesoft-freedom-computer-8102-advanced-bottom-timer-180x180-w.png","category":"divesoft/","type":"image"},"url":{"url":"/en/products/freedom-computers/advanced-bottom-timer","pageId":"cl0b23vqg9zap0858qy8spafp"}}]}},"__typename":"ComponentTemplate"},"ComponentTemplate:cl0qiyz8dbkix0858jqrb078e":{"id":"cl0qiyz8dbkix0858jqrb078e","name":"ccr porovnánà patiÄka","type":"ProductMountRouter","content":{"type":"json","json":{"toggleOpen":"configurations","toggleClose":"close","leftHeadline":"BMCL/FMCL","leftText":"The traditional configuration with FMCL or BMCL","leftUrl":{"url":"/en/products/ccr-liberty/ccr-liberty-bmcl-fmcl","pageId":"ckt0i4dg51ogp0988dpgn8lwr","urlNewWindow":false},"middleHeadline":"SIDEMOUNT","middleText":"Light, independent, compact","middleUrl":{"url":"/en/products/ccr-liberty/ccr-liberty-sidemount","mediaData":{"mimetype":"image/png","size":600821,"hash":"5ac4d810dd105484703d988ac31d3bf798e5c090","id":"cjxbwxxqw07520776t46q3c0q","filename":"fmcl.png","category":"divesoft/","type":"image"},"pageId":"cjyztusbt039t0777kqbo8xj8"},"rightHeadline":"Liberty Light","rightText":"Weighing only 15,3 Kg makes the Light a perfect travel companion","rightUrl":{"url":"/en/products/ccr-liberty/ccr-liberty-light","pageId":"ck7m1guq108gk07883tmehxr4"},"extraHeadline":"Liberty Heavy","extraText":"DIR style setup utilizing any size of onboard cylinders, traditional backplate and wire stand","extraUrl":{"url":"/en/products/ccr-liberty/ccr-liberty-heavy","pageId":"cknpubp6j2f690788zv52yohy"},"desktopBackText":"go back","desktopBackUrl":"","leftImg":{"mimetype":"image/png","size":576657,"hash":"0412f9f37466bef1eedd37c56f55d8be431076bb","id":"cjxc529eg077r0776zlnvnc4q","filename":"bmcl.png","category":"divesoft/","type":"image"},"middleImg":{"mimetype":"image/png","size":2660493,"hash":"dc8db59a637c6b6b08039465c4ed2b515000d460","id":"cjxc5jkxe079f0776yj24daz8","filename":"sidemount-00000.png","category":"divesoft/","type":"image"}
2,"rightImg":{"mimetype":"image/png","size":92056,"hash":"90e698107c90b9e68430ed42c89f303c9f0f461c","id":"ckeo9zm9fj5jw0776nbvkv5f8","filename":"lightblack.png","category":"divesoft/","type":"image"},"image":{"type":"image"},"extraImg":{"mimetype":"image/png","size":2830456,"hash":"6573838ce7ac1e9711e8aaf10d6ef54f29bb3343","id":"ckt0j2l76tan407767vwpj2hs","filename":"heavy.png","category":"divesoft/","type":"image"},"file":{"mimetype":"image/png","size":92056,"hash":"90e698107c90b9e68430ed42c89f303c9f0f461c","id":"ckeo8t7osj59p0776ph8dzebi","filename":"fow-web.png","category":"divesoft/docs/","type":"file"}}},"__typename":"ComponentTemplate"},"ComponentTemplate:cl0wfcwwac5md085817s67kug":{"id":"cl0wfcwwac5md085817s67kug","name":"services","type":"DownloadsNew","content":{"type":"json","json":{"backgroundColor":"#ffffff","title":"CCR Liberty service ","subtitle":"","showBreadcrumbs":false,"hideHeader":false,"files":[{"title":"FMCL / DSV (Whole Unit)","isTitleBold":true,"subtitle":"Service of a Backmounted unit with FMCL & DSV. \n\n**649 EUR/ $ 859**\n","url":"","urlText":"Download","id":"1"},{"title":"BMCL / BOV / T-ADV (Whole unit)","isTitleBold":true,"subtitle":"Service of a Backmounted unit with BMCL, BOV, & ADV T-piece. \n\n**700 EUR/ $ 959**\n","url":"","urlText":"Download","id":"2"},{"id":"3","title":"SM (Whole unit)","isTitleBold":true,"subtitle":"Service of a Sidemount unit. \n\n**637 EUR/ $ 789**\n"},{"id":"4","title":"Oxygen sensors replacement","isTitleBold":true,"subtitle":"Every year we recommend replacing all oxygen sensors in your CCR Liberty.\n\n**378,4 EUR / $ 436**"},{"id":"5","title":"2021 Edition upgrade","isTitleBold":true,"subtitle":"Details about the 2021 electronics upgrade can be found at: https://www.divesoft.com/en/products/ccr-liberty/2021edition Following the upgrade the electronics compartments are sealed, pressure tested to 350m, and a tamper resistant paint is applied to the screws. In addition to the electronics upgrade it is necessary to do an annual service of the head itself, the cost of this and details of what is included are listed below. \n\n**1155 EUR/ $ 1299**\n"},{"id":"6","title":"Service head inspection â (only Head)","isTitleBold":true,"subtitle":"Service of the Liberty Head includes visual inspection of the head and a functionality test of the Handsets, Buddy display, and HUD. Also a complete test of all included sensors and the solenoids. Then the complete solenoid system is disassembled and cleaned. The solenoids will undergo a pressure test following reassembly. The connectors will all be cleaned and all the sealing parts will be replaced. The oxygen sensors will undergo a sensor condition test and the head will be leak tested. The Latest Firmware will be installed and a final system test completed. \n**220 EUR/ $ 249**\n"},{"id":"7","title":"Oxygen inlet upgrade kit (parts & machining)","isTitleBold":true,"subtitle":"\nInstallation of the Axial Oxygen Connection requires the head to be machined at the factory. This fee covers the machining and new components for the conversion. In addition an annual service of the head, outlined above, will be required. \n\n**548 EUR/ $ 629**\n"},{"id":"8","title":"FMCL Loop w/o DSV/BOV (Loop Hoses, Counterlungs, MAV's, ADV, & OPV)","isTitleBold":true,"subtitle":"Service of the FMCL Loop, without the mouthpiece (DSV or BOV), includes manual cleaning of connecting and sealing parts, visual inspection of the condition of all parts including sewn parts, and replacement of all bayonet seals. The MAV's (OXY & DIL) & OPV will be completely disassembled, components will be cleaned, all internal seals will be replaced before being reassembled, and then each component will undergo a performance test underwater to check for leaks. The complete loop will then undergo a pressure and vacuum test. \n\n**147 EUR/ $ 169**\n"},{"id":"9","title":"BMCL Loop w/o DSV/BOV (Loop Hoses, Counterlungs, & OPV)","isTitleBold":true,"subtitle":"Service of the BMCL Loop, without the mouthpiece (DSV or BOV) or MAV's, includes manual cleaning of connecting and sealing parts, visual inspection of the condition of all parts including sewn parts, and replacement of all bayonet seals. The OPV will be completely disassembled, components will be cleaned, all internal seals will be replaced before being reassembled and adjusted, and then it will undergo a performance test underwater to check for leaks. The complete loop will then undergo a pressure and vacuum test. \n\n**57 EUR/ $ 99**\n"}
2,{"id":"10","title":"SM Loop w/o DSV/BOV (Loop Hoses, Counterlungs, & OPV)","isTitleBold":true,"subtitle":"Service of the Sidemount Loop, without the mouthpiece (DSV) or MAV's, includes manual cleaning of connecting and sealing parts, visual inspection of the condition of all parts including sewn parts, and replacement of all bayonet seals. The OPV will be completely disassembled, components will be cleaned, all internal seals will be replaced before being reassembled and adjusted, and then it will undergo a performance test underwater to check for leaks. The complete loop will then undergo a pressure and vacuum test. \n\n**57 EUR/ $ 99**\n"},{"id":"11","title":"BCD + unit's frame","isTitleBold":true,"subtitle":"Service of the BCD includes a pretest of inflation to check for function and leaks, then disassembly and replacement of the seals on the inflator mechanism, disassembly and internal cleaning of the bladder with disinfectant solution, cleaning and inspection of the OPV, reassembly, and final pressure testing of the complete assembly. \n\n**50 EUR/ $ 99**\n"}
2,{"id":"12","title":"DSV + 2x Dräger directional valves","isTitleBold":true,"subtitle":"Service of the DSV includes visual inspection of condition, disassembly and cleaning of all parts, relubrication and reassembly of the DSV itself, and installation of new Drager directional valves. The complete assembly will then be pressure and vacuum tested underwater to check for leaks. \n\n**82 EUR/ $ 99**\n"},{"id":"13","title":"BOV + 2x Dräger directional valves","isTitleBold":true,"subtitle":"Service of the BOV includes visual inspection of condition, disassembly and cleaning of all parts including the Apeks second stage, relubrication and reassembly, and installation of new Drager directional valves. The complete assembly will then be pressure and vacuum tested underwater to check for leaks. \n\n**145 EUR/ $ 169**\n"},{"id":"14","title":"BOV with ADV + 2x Dräger directional valves","isTitleBold":true,"subtitle":"Service of the BOV+ADV includes visual inspection of condition, disassembly and cleaning of all parts including the Apeks second stage, relubrication and reassembly, and installation of new Drager directional valves. The complete assembly will then be pressure and vacuum tested underwater to check for leaks. \n\n**168 EUR/ $ 189**\n"}
2,{"id":"15","title":"MAV â Oxyen & Diluent (not applicable to FMCL MAVs)","isTitleBold":true,"subtitle":"Service of the MAV's (excluding the FMCL MAV's) includes Visual inspection of all parts, disassembly and cleaning, replacement of all sealing parts, relubrication, assembly, and a pressurized test underwater to check for leaks. \n**50 EUR/ $ 59**\n"},{"id":"16","title":"Membrane ADV service","isTitleBold":true,"subtitle":"Service of the T-piece ADV includes Visual inspection of all parts, disassembly and cleaning, replacement of all sealing parts, relubrication, assembly, and a pressurized test underwater to check for leaks. \n\t**28 EUR/ $ 39**\n"},{"id":"17","title":"Apeks first stage regulators service - OXY, DIL","isTitleBold":true,"subtitle":"Service of a pair of Apeks first stages by an Apeks certified technician utilizing genuine Apeks brand service parts, and using oxygen compatible lubricants. Also included are the replacement sealing components for all the attached hoses and the replacement of the OPVâs. The intermediate pressure will be set to 8.5bar/125psi and they will undergo a final pressurized leak test underwater. \n\n**150 EUR/ $ 169**\n"}
2,{"id":"18","title":"Cleaning + disinfection ","isTitleBold":true,"subtitle":"Disinfection of any/all components that come into contact with breathing gas for a period of one hour and subsequent rinsing with clean water. \n\n**28 EUR/ $ 39**\n"},{"id":"19","title":"Intermediate pressure hoses and high pressure hoses replacement","isTitleBold":true,"subtitle":"Every five (5) years it is recommended that you replace all the high pressure and low pressure hoses. The cost of this will vary by unit and configuration. \n\n**45+ EUR/ $ 49+**\n"},{"id":"20","url":{"url":""},"title":"Corrugated (loop) hoses replacement (FMCL/BMCL)","isTitleBold":true,"subtitle":"Every five (5) years it is recommended that you replace all the corrugated breathing hoses on your Backmount unit. This is the expected cost of this service but it could vary by unit and configuration. \n\n**208 EUR/ $ 239**\n"},{"id":"21","title":"Corrugated (loop) hoses replacement (SM)","isTitleBold":true,"subtitle":"Every five (5) years it is recommended that you replace all the corrugated breathing hoses on your Sidemount unit. This is the expected cost of this service but it could vary by unit and configuration. \n**135 EUR/ $ 159**\n"},{"id":"22","title":"Batteries replacement","isTitleBold":true,"subtitle":"Every three (3) years we recommend replacing both battery packs. Like all lithum batteries they will diminish in capacity with age & use. \n\n**385 EUR/ $ 439**\n\n"}],"activeTab":"17"}},"__typename":"ComponentTemplate"},"ComponentTemplate:cl10i498uchyx0858kkmchq8a":{"id":"cl10i498uchyx0858kkmchq8a","name":"service whole unit","type":"DownloadsNew","content":{"type":"json","json":{"backgroundColor":"#ffffff","title":"Whole unit service by configuration","subtitle":"","showBreadcrumbs":false,"hideHeader":false,"files":[{"title":"FMCL / DSV (Whole Unit)","isTitleBold":true,"subtitle":"Service of a Backmounted unit with FMCL & DSV. \n\n**649 EUR/ $ 859**\n","url":"","urlText":"Download","id":"1"},{"title":"BMCL / BOV / T-ADV (Whole unit)","isTitleBold":true,"subtitle":"Service of a Backmounted unit with BMCL, BOV, & ADV T-piece. \n\n**700 EUR/ $ 959**\n","url":"","urlText":"Download","id":"2"},{"id":"3","title":"SM (Whole unit)","isTitleBold":true,"subtitle":"Service of a Sidemount unit. \n\n**637 EUR/ $ 789**\n"}],"activeTab":"17"}},"__typename":"ComponentTemplate"},"ComponentTemplate:cl10i4j0ychz40858605hd2vo":{"id":"cl10i4j0ychz40858605hd2vo","name":"service head","type":"DownloadsNew","content":{"type":"json","json":{"backgroundColor":"#ffffff","title":"Head services","subtitle":"","showBreadcrumbs":false,"hideHeader":false,"files":[{"id":"6","title":"Service head inspection â (only Head)","isTitleBold":true,"subtitle":"Service of the Liberty Head includes visual inspection of the head and a functionality test of the Handsets, Buddy display, and HUD. Also a complete test of all included sensors and the solenoids. Then the complete solenoid system is disassembled and cleaned. The solenoids will undergo a pressure test following reassembly. The connectors will all be cleaned and all the sealing parts will be replaced. The oxygen sensors will undergo a sensor condition test and the head will be leak tested. The Latest Firmware will be installed and a final system test completed. \n**220 EUR/ $ 249**\n"},{"id":"5","title":"2021 Edition upgrade","isTitleBold":true,"subtitle":"Details about the 2021 electronics upgrade can be found at: https://www.divesoft.com/en/products/ccr-liberty/2021edition Following the upgrade the electronics compartments are sealed, pressure tested to 350m, and a tamper resistant paint is applied to the screws. In addition to the electronics upgrade it is necessary to do an annual service of the head itself, the cost of this and details of what is included are listed below. \n\n**1155 EUR/ $ 1299**\n"},{"id":"7","title":"Oxygen inlet upgrade kit (parts & machining)","isTitleBold":true,"subtitle":"\nInstallation of the Axial Oxygen Connection requires the head to be machined at the factory. This fee covers the machining and new components for the conversion. In addition an annual service of the head, outlined above, will be required. \n\n**548 EUR/ $ 629**\n"},{"id":"4","title":"Oxygen sensors replacement","isTitleBold":true,"subtitle":"Every year we recommend replacing all oxygen sensors in your CCR Liberty.\n\n**378,4 EUR / $ 436**"},{"id":"22","title":"Batteries replacement","isTitleBold":true,"subtitle":"Every three (3) years we recommend replacing both battery packs. Like all lithum batteries they will diminish in capacity with age & use. \n\n**385 EUR/ $ 439**\n\n"}],"activeTab":"17"}},"__typename":"ComponentTemplate"},"ComponentTemplate:cl10ie9auci090858uhm6foq3":{"id":"cl10ie9auci090858uhm6foq3","name":"service loop","type":"DownloadsNew","content":{"type":"json","json":{"backgroundColor":"#ffffff","title":"Loop components services","subtitle":"","showBreadcrumbs":false,"hideHeader":false,"files":[{"id":"8","title":"FMCL Loop w/o DSV/BOV (Loop Hoses, Counterlungs, MAV's, ADV, & OPV)","isTitleBold":true,"subtitle":"Service of the FMCL Loop, without the mouthpiece (DSV or BOV), includes manual cleaning of connecting and sealing parts, visual inspection of the condition of all parts including sewn parts, and replacement of all bayonet seals. The MAV's (OXY & DIL) & OPV will be completely disassembled, components will be cleaned, all internal seals will be replaced before being reassembled, and then each component will undergo a performance test underwater to check for leaks. The complete loop will then undergo a pressure and vacuum test. \n\n**147 EUR/ $ 169**\n"},{"id":"9","title":"BMCL Loop w/o DSV/BOV (Loop Hoses, Counterlungs, & OPV)","isTitleBold":true,"subtitle":"Service of the BMCL Loop, without the mouthpiece (DSV or BOV) or MAV's, includes manual cleaning of connecting and sealing parts, visual inspection of the condition of all parts including sewn parts, and replacement of all bayonet seals. The OPV will be completely disassembled, components will be cleaned, all internal seals will be replaced before being reassembled and adjusted, and then it will undergo a performance test underwater to check for leaks. The complete loop will then undergo a pressure and vacuum test. \n\n**57 EUR/ $ 99**\n"}
2,{"id":"10","title":"SM Loop w/o DSV/BOV (Loop Hoses, Counterlungs, & OPV)","isTitleBold":true,"subtitle":"Service of the Sidemount Loop, without the mouthpiece (DSV) or MAV's, includes manual cleaning of connecting and sealing parts, visual inspection of the condition of all parts including sewn parts, and replacement of all bayonet seals. The OPV will be completely disassembled, components will be cleaned, all internal seals will be replaced before being reassembled and adjusted, and then it will undergo a performance test underwater to check for leaks. The complete loop will then undergo a pressure and vacuum test. \n\n**57 EUR/ $ 99**\n"},{"id":"12","title":"DSV + 2x Dräger directional valves","isTitleBold":true,"subtitle":"Service of the DSV includes visual inspection of condition, disassembly and cleaning of all parts, relubrication and reassembly of the DSV itself, and installation of new Drager directional valves. The complete assembly will then be pressure and vacuum tested underwater to check for leaks. \n\n**82 EUR/ $ 99**\n"}
2,{"id":"13","title":"BOV + 2x Dräger directional valves","isTitleBold":true,"subtitle":"Service of the BOV includes visual inspection of condition, disassembly and cleaning of all parts including the Apeks second stage, relubrication and reassembly, and installation of new Drager directional valves. The complete assembly will then be pressure and vacuum tested underwater to check for leaks. \n\n**145 EUR/ $ 169**\n"},{"id":"14","title":"BOV with ADV + 2x Dräger directional valves","isTitleBold":true,"subtitle":"Service of the BOV+ADV includes visual inspection of condition, disassembly and cleaning of all parts including the Apeks second stage, relubrication and reassembly, and installation of new Drager directional valves. The complete assembly will then be pressure and vacuum tested underwater to check for leaks. \n\n**168 EUR/ $ 189**\n"},{"id":"15","title":"MAV â Oxyen & Diluent (not applicable to FMCL MAVs)","isTitleBold":true,"subtitle":"Service of the MAV's (excluding the FMCL MAV's) includes Visual inspection of all parts, disassembly and cleaning, replacement of all sealing parts, relubrication, assembly, and a pressurized test underwater to check for leaks. \n**50 EUR/ $ 59**\n"}
2,{"id":"16","title":"Membrane ADV service","isTitleBold":true,"subtitle":"Service of the T-piece ADV includes Visual inspection of all parts, disassembly and cleaning, replacement of all sealing parts, relubrication, assembly, and a pressurized test underwater to check for leaks. \n\t**28 EUR/ $ 39**\n"},{"id":"20","url":{"url":""},"title":"Corrugated (loop) hoses replacement (FMCL/BMCL)","isTitleBold":true,"subtitle":"Every five (5) years it is recommended that you replace all the corrugated breathing hoses on your Backmount unit. This is the expected cost of this service but it could vary by unit and configuration. \n\n**208 EUR/ $ 239**\n"},{"id":"21","title":"Corrugated (loop) hoses replacement (SM)","isTitleBold":true,"subtitle":"Every five (5) years it is recommended that you replace all the corrugated breathing hoses on your Sidemount unit. This is the expected cost of this service but it could vary by unit and configuration. \n**135 EUR/ $ 159**\n"}],"activeTab":"17"}},"__typename":"ComponentTemplate"},"ComponentTemplate:cl10iehhsci0g0858607ntpgk":{"id":"cl10iehhsci0g0858607ntpgk","name":"service other","type":"DownloadsNew","content":{"type":"json","json":{"backgroundColor":"#ffffff","title":"Other services","subtitle":"","showBreadcrumbs":false,"hideHeader":false,"files":[{"id":"17","title":"Apeks first stage regulators service - OXY, DIL","isTitleBold":true,"subtitle":"Service of a pair of Apeks first stages by an Apeks certified technician utilizing genuine Apeks brand service parts, and using oxygen compatible lubricants. Also included are the replacement sealing components for all the attached hoses and the replacement of the OPVâs. The intermediate pressure will be set to 8.5bar/125psi and they will undergo a final pressurized leak test underwater. \n\n**150 EUR/ $ 169**\n"}
2,{"id":"11","title":"BCD + unit's frame","isTitleBold":true,"subtitle":"Service of the BCD includes a pretest of inflation to check for function and leaks, then disassembly and replacement of the seals on the inflator mechanism, disassembly and internal cleaning of the bladder with disinfectant solution, cleaning and inspection of the OPV, reassembly, and final pressure testing of the complete assembly. \n\n**50 EUR/ $ 99**\n"},{"id":"18","title":"Cleaning + disinfection ","isTitleBold":true,"subtitle":"Disinfection of any/all components that come into contact with breathing gas for a period of one hour and subsequent rinsing with clean water. \n\n**28 EUR/ $ 39**\n"},{"id":"19","title":"Intermediate pressure hoses and high pressure hoses replacement","isTitleBold":true,"subtitle":"Every five (5) years it is recommended that you replace all the high pressure and low pressure hoses. The cost of this will vary by unit and configuration. \n\n**45+ EUR/ $ 49+**\n"}],"activeTab":"17"}},"__typename":"ComponentTemplate"},"ComponentTemplate:cl1ae4ikndb1g0858zixa3nmo":{"id":"cl1ae4ikndb1g0858zixa3nmo","name":"downloads","type":"DownloadsNew","content":{"type":"json","json":{"title":"Downloads","subtitle":"","files":[{"id":"8","urlText":"Open","url":{"url":"https://www.divesoft.com/en/catalogue","urlNewWindow":true},"title":"CCR Liberty Rebreathers Catalogue"},{"title":"CCR Liberty manual","url":{"url":"/en/manuals/ccr-liberty-manual","urlNewWindow":true,"pageId":"cl2yfnr88iba8085879y08pat"},"urlText":"Open","id":"1"},{"title":"Liberty Technical Specifications","url":{"url":"/en/support/ccr-liberty-rebreather/technical-specifications","urlNewWindow":true,"pageId":"cl0v2cjy9bxow0858y0jvge1d"},"urlText":"Open","id":"2"},{"title":"Service Operations & Pricelist","url":{"urlNewWindow":true,"url":"/en/support/ccr-liberty-rebreather/service-operations","pageId":"cl0v2zkp3bxt10858ginifodl"},"urlText":"Open","id":"3"},{"title":"Spare Parts Catalogue","url":{"url":"https://foxer360-media-library.s3.eu-central-1.amazonaws.com/divesoft/docs/13ab43cd104d8e77ff1a5e382efd8bebd88a87f5_ccr-liberty-spare-parts-v12.PDF","urlNewWindow":true},"urlText":"Download","id":"5"},{"title":"Liberty Head Travel Card","url":{"url":"https://foxer360-media-library.s3.eu-central-1.amazonaws.com/divesoft/docs/fe4ac509accaf398463de5991dcd391172eff6ac_liberty-head-travel-card.pdf","urlNewWindow":true},"urlText":"Download","id":"6"},{"title":"CE Certificate","url":{"url":"https://foxer360-media-library.s3.eu-central-1.amazonaws.com/divesoft/docs/884f8efc4956118c144bf4867a244aa6ad864355_ec-directive-89-686-eec-regulation-eu-2016-425-module-d-sgs-fimko-finland.pdf","urlNewWindow":true},"urlText":"Download","id":"7"}],"backgroundColor":"#f0f0f0","activeTab":"1"}},"__typename":"ComponentTemplate"},"ComponentTemplate:cl1d90bkgdjys08588eanflnk":{"id":"cl1d90bkgdjys08588eanflnk","name":"ambasador hlaviÄka","type":"ContactColumnsNew","content":{"type":"json","json":{"backgroundColor":"#f0f0f0","title":"Becky Kagan Schott","subtitle":"Ambassador","showBreadcrumbs":false,"hideHeader":false,"firstTitle":"","firstEmail":"","firstPhone":"","firstWeb":"https://liquidproductions.com","firstAddress":"https://facebook.com/beckykaganschott\nhttps://instagram.com/becky_kagan_schott","firstAccounts":"","secondTitle":"","secondEmail":"","secondPhone":"","secondWeb":"","secondAddress":"","secondAccounts":""}},"__typename":"ComponentTemplate"},"ComponentTemplate:cl529e8lhnwhb08587dbdpm7b":{"id":"cl529e8lhnwhb08587dbdpm7b","name":"ProductCrossroadNew about","type":"ProductCrossroadNew","content":{"type":"json","json":{"products":[{"id":"1","title":"Philosophy","url":{"url":"/en/products/ccr-liberty/philosophy","pageId":"cl5295huxnw8a0858pasvo2gl"},"image":{"mimetype":"image/png","size":41812,"hash":"7591ade25254e30581f7209bbd260a92be861d3c","id":"ckwoplj9b769h0776nuvrpd4j","filename":"liberty-light-nobackgriund-square-edited-200-tight.png","category":"divesoft/","type":"image"}},{"id":"2","title":"Redundancy","url":{"url":"/en/products/ccr-liberty/redundancy","pageId":"cjyzs03ld02xr07775xxwpg1j"},"image":{"mimetype":"image/jpeg","size":50745,"hash":"6c22b8a5eba20aaf637c4d14496dc84fca8db4cd","id":"cjxc5i4lo079407760imjcn2n","filename":"sidemount-.jpg","category":"divesoft/","type":"image"}},{"id":"3","title":"WOB","url":{"url":"/en/products/ccr-liberty/wob","pageId":"cl5296r2vnw9s0858273ps6nv"},"image":{"mimetype":"image/png","size":803931,"hash":"bb7fb772b0304575862f683e4ef39b0302a0be8a","id":"ckx3mi0tsc5tr0776r23bum6i","filename":"divesoft-ccr-liberty-light-07-1080x1080.png","category":"divesoft/","type":"image"}},{"id":"4","title":"Modularity","url":{"url":"/en/products/ccr-liberty/modularity","pageId":"cl5296xhonwaa0858wns3yfij"},"image":{"mimetype":"image/png","size":15299,"hash":"17a6b78d3e160ac26b79cbcec754824a5ad9a8a0","id":"ckx3m2sjnc
25qs07764q4obz7u","filename":"divesoft-menu-ccr-liberty-heavy-200x200.png","category":"divesoft/","type":"image"}},{"id":"5","title":"The Head","image":{"mimetype":"image/png","size":193451,"hash":"2f12a80d683982b4b73c6c7e7ac6fe3092327056","id":"cl2emhqif01n10776x12hvep3","filename":"divesoft-ccr-liberty-fmcl-00-1200x800w.png","category":"divesoft/","type":"image"},"url":{"url":"/en/products/ccr-liberty/the-head","pageId":"cl52977c9nwas0858piv9herh"}},{"id":"6","url":{"url":"/en/products/ccr-liberty/features","pageId":"cl5297f91nwba08589dw694xw"},"title":"Features","image":{"mimetype":"image/png","size":193451,"hash":"2f12a80d683982b4b73c6c7e7ac6fe3092327056","id":"cl2emhqif01n10776x12hvep3","filename":"divesoft-ccr-liberty-fmcl-00-1200x800w.png","category":"divesoft/","type":"image"}},{"id":"7","url":{"url":"/en/products/ccr-liberty/breathing-loop","pageId":"cl5297pqynwbs08583btd6djt"},"image":{"mimetype":"image/png","size":193451,"hash":"2f12a80d683982b4b73c6c7e7ac6fe3092327056","id":"cl2emhqif01n10776x12hvep3","filename":"divesoft-ccr-liberty-fmcl-00-1200x800w.png","category":"divesoft/","type":"image"},"title":"Breathing loop"},{"id":"8","title":"Scrubbers","url":{"url":"/en/products/ccr-liberty/scrubbers","pageId":"cl5297wulnwca08583hdq385r"},"image":{"mimetype":"image/png","size":193451,"hash":"2f12a80d683982b4b73c6c7e7ac6fe3092327056","id":"cl2emhqif01n10776x12hvep3","filename":"divesoft-ccr-liberty-fmcl-00-1200x800w.png","category":"divesoft/","type":"image"}}],"activeTab":"8"}},"__typename":"ComponentTemplate"},"ComponentTemplate:cl56e6gj6o7gt0858whw9vtg0":{"id":"cl56e6gj6o7gt0858whw9vtg0","name":"sorry","type":"ProductShowcase","content":{"type":"json","json":{"backgroundColor":"#f0f0f0","isTextDark":true,"isImageRight":false,"image":{"mimetype":"image/png","size":104843,"hash":"3d04d8dca70d000c83ae26939956a2bde9e38acd","id":"cl56e3p29prza0776w66l8ul4","filename":"closed.png","category":"divesoft/","type":"image"},"imageMobile":{},"title":"SORRY","subtitle":"Our headquarters will be closed from July 4th until July 6th.","description":"Saints Cyril and Methodius Day \nJan Hus Day \n\nBut it is still possible to place orders, which will be processed on July 7th.\n","hideDescriptionOnMobile":false,"areButtons":false,"firstTitle":"Learn more >","firstUrl":"","secondTitle":"Configurator >","secondUrl":""}},"__typename":"ComponentTemplate"},"ComponentTemplate:cl5ab17h9onqf0858nna4mj1w":{"id":"cl5ab17h9onqf0858nna4mj1w","name":"LIberty Units Compared","type":"ProductsCompare","content":{"type":"json","json":{"sectionTitle":"","firstTitle":"Backmount","firstSubtitle":"","firstUrl":{"url":"/en/products/ccr-liberty/ccr-liberty-bmcl-fmcl","pageId":"ckt0i4dg51ogp0988dpgn8lwr"},"firstFeatures":[{"id":"1","key":"dimensions","title":"Dimensions","subtitle":"640 mm (25,20 in) height \n388 mm (15,30 in) width \n226 mm (9,00 in) depth","icon":{"mimetype":"image/png","size":487,"hash":"b36d9a7cfcfee18b19d85ffc12d1a9332660f796","id":"cku5hvnni843z07762k7odtwr","filename":"arrow-left-right.png","category":"divesoft/","type":"image"}},{"id":"4","title":"Total Weight","subtitle":"Empty, no cylinders: \nBMCL Titanium 19,80 kg (43,65 lb) \n\nFMCL Titanium 20,90 kg (46,00 lb)","key":"weight"},{"id":"5","title":"Scrubber","subtitle":"STANDARD - 2,50 kg (5,51 lb) \n4-6 hours of runtime \n\nX-LARGE - 3,30 kg (7,28 lb) \n5-8 hours of runtime","key":"scrubber"},{"id":"6","title":"Soda lime","subtitle":"Sofnolime 797","key":"soda-lime"},{"id":"7","title":"Cylinder size","subtitle":"2Ã3 L","key":"cylinder-size"},{"id":"13","title":"1st stage regulators","key":"1st-stage-regulators","subtitle":"Apeks DST \n(in custom block)"},{"id":"2","key":"dsv-bov","title":"DSV/BOV","subtitle":"BMCL: \ncomes with BOV + MAV \nDSV optional \n\nFMCL: \ncomes with DSV \nBOV optional"},{"id":"11","title":"ADV options","key":"adv-options","subtitle":"BMCL: \nT-Piece ADV \n\nFMCL: \nMechanical ADV (standard) \nMembrane ADV \nT-Piece ADV \n\n\n"}
2,{"id":"12","title":"ADV shut off","key":"adv-shut-off","subtitle":"YES"},{"id":"10","title":"Counterlung config.","key":"counterlung-config","subtitle":"BMCL \nFMCL"},{"id":"8","title":"Counterlung volume","key":"counterlung-volume","subtitle":"3,5 L each"},{"id":"9","title":"Direction of breathing","key":"direction-of-breathing","subtitle":"Left to right (diver wearing the unit)"},{"id":"16","title":"Wing","key":"wing","subtitle":"Doughnut - 22 L (45 lb) \nHorseshoe - 22 L (45 lb)"},{"id":"14","title":"Backplate","key":"backplate","subtitle":"Proprietary CCR Liberty BP \nStainless steel BP - 3,40 kg (7,50 lb) \nTitanium BP - 1,20 kg (2,65 lb)"},{"id":"15","title":"Stand","key":"stand","subtitle":"SMALL STAND \nStainless steel - 0,90 kg (2,00 lb) \nTitanium - 0,40 kg (0,90 lb) \n\nLONG & WIDE \nStainless steel - 1,30 kg (2,90 lb) \nTitanium - 0,60 kg (1,30 lb)"},{"id":"17","key":"ce-certified","title":"CE Certified","subtitle":"YES"}],"secondTitle":"Light","secondSubtitle":"","secondUrl":{"url":"/en/products/ccr-liberty/ccr-liberty-light","pageId":"ck7m1guq108gk07883tmehxr4","urlNewWindow":false},"secondFeatures":[{"id":"1","key":"dimensions","subtitle":"430 mm (16,90 in) height \n340 mm (13,40 in) width \n226 mm (9,00 in) depth","icon":{"mimetype":"image/png","size":487,"hash":"b36d9a7cfcfee18b19d85ffc12d1a9332660f796","id":"cku5hvnni843z07762k7odtwr","filename":"arrow-left-right.png","category":"divesoft/","type":"image"},"title":"Dimensions"},{"id":"4","title":"Total Weight","subtitle":"Empty, no cylinders: \n15,90 kg (35,00 lb) \n\nEmpty, 2 L steel cylinders: \n23,00 kg (50,00 lb)","key":"weight"},{"id":"5","title":"Scrubber","subtitle":"SHORT - 2,50 kg (5,51 lb) \n4-6 hours of runtime \n\nSTANDARD - 2,50 kg (5,51 lb) \n4-6 hours of runtime \n\nX-LARGE - 3,30 kg (7,28 lb) \n5-8 hours of runtime","key":"scrubber"},{"id":"6","title":"Soda lime","subtitle":"Sofnolime 797","key":"soda-lime"},{"id":"7","title":"Cylinder size","subtitle":"2Ã2 L \n2Ã3 L\n","key":"cylinder-size"},{"id":"13","key":"1st-stage-regulators","title":"1st stage regulators","subtitle":"Apeks US4"},{"id":"2","key":"dsv-bov","title":"DSV/BOV","subtitle":"comes with BOV + MAV \nDSV optional"},{"id":"11","title":"ADV options","key":"adv-options","subtitle":"T-Piece ADV\n"}
2,{"id":"12","key":"adv-shut-off","title":"ADV shut off","subtitle":"YES"},{"id":"10","title":"Counterlung config.","key":"counterlung-config","subtitle":"BMCL"},{"id":"8","title":"Counterlung volume","key":"counterlung-volume","subtitle":"3,5 L each"},{"id":"9","title":"Direction of breathing","key":"direction-of-breathing","subtitle":"Left to right (diver wearing the unit)"},{"id":"16","title":"Wing","key":"wing","subtitle":"Donut - 15 L (33 lb)"},{"id":"14","title":"Backplate","key":"backplate","subtitle":"CCR Liberty Light soft back with removable weight pocket system"},{"id":"15","title":"Stand","key":"stand","subtitle":"Welded low stand - 1,80 kg (3,96 lb) \nLight Travel stand - 0,80 kg (1,76 lb)"},{"id":"17","key":"ce-certified","subtitle":"YES","title":"CE Certified"}],"thirdTitle":"Sidemount","thirdSubtitle":"","thirdUrl":{"url":"/en/products/ccr-liberty/ccr-liberty-sidemount","pageId":"cjyztusbt039t0777kqbo8xj8"},"thirdFeatures":[{"id":"1","key":"dimensions","subtitle":"800 mm (31,50 in) length (shortened scrubber) \n880 mm (34,65 in) length (standard scrubber) \n205 mm (8,07 in) height \n220 mm (8,66 in) width","icon":{"mimetype":"image/png","size":487,"hash":"b36d9a7cfcfee18b19d85ffc12d1a9332660f796","id":"cku5hvnni843z07762k7odtwr","filename":"arrow-left-right.png","category":"divesoft/","type":"image"},"title":"Dimensions"},{"id":"4","title":"Total Weight","subtitle":"Empty, no cylinders: \n12,90 kg (28,44 lb) \n\nEmpty, 2 L steel cylinders: \n19,20 kg (42,33 lb) \n\nReady to dive: \n22,80 kg (50,27 lb)","key":"weight"},{"id":"5","title":"Scrubber","subtitle":"SHORT - 2,50 kg (5,51 lb) \n4-6 hours of runtime \n\nSTANDARD - 2,50 kg (5,51 lb) \n4-6 hours of runtime \n\nX-LARGE - 3,30 kg (7,28 lb) \n5-8 hours of runtime","key":"scrubber"},{"id":"6","title":"Soda lime","subtitle":"Sofnolime 797","key":"soda-lime"},{"id":"7","title":"Cylinder size","subtitle":"2Ã2 L","key":"cylinder-size"},{"id":"13","key":"1st-stage-regulators","title":"1st stage regulators","subtitle":"Apeks US4"},{"id":"2","key":"dsv-bov","title":"DSV/BOV","subtitle":"Only available with DSV"},{"id":"11","title":"ADV options","key":"adv-options","subtitle":"Membrane ADV"},{"id":"12","key":"adv-shut-off","title":"ADV shut off","subtitle":"NO (optional)"},{"id":"10","title":"Counterlung config.","key":"counterlung-config","subtitle":"Sidemount"},{"id":"8","title":"Counterlung volume","key":"counterlung-volume","subtitle":"Counterlung housing contains \n2 counterlungs with total volume \nof 6 L"},{"id":"9","title":"Direction of breathing","key":"direction-of-breathing","subtitle":"Left to right (diver wearing the unit)"},{"id":"16","title":"Wing","key":"wing","subtitle":"N/A"},{"id":"14","title":"Backplate","key":"backplate","subtitle":"N/A"},{"id":"15","title":"Stand","key":"stand","subtitle":"N/A"},{"id":"17","key":"ce-certified","subtitle":"YES","title":"CE Certified"}],"fourthTitle":"Heavy","fourthSubtitle":"","fourthUrl":{"url":"/en/products/ccr-liberty/ccr-liberty-heavy","pageId":"cknpubp6j2f690788zv52yohy"},"fourthFeatures":[{"id":"1","key":"dimensions","subtitle":"Configuration 2Ã7 L: \n720 mm (28,35 in) height \n445 mm (17,52 in) width \n240 mm (9,45 in) depth \n\nConfiguration 2Ã3 L: \n680 mm (26,77 in) height \n365 mm (14,37 in) width \n230 mm (9,06 in) depth ","icon":{"mimetype":"image/png","size":487,"hash":"b36d9a7cfcfee18b19d85ffc12d1a9332660f796","id":"cku5hvnni843z07762k7odtwr","filename":"arrow-left-right.png","category":"divesoft/","type":"image"},"title":"Dimensions"},{"id":"4","title":"Total Weight","subtitle":"Empty, no cylinders 2Ã3 L: \n21,30 kg (47,00 lb) \nbackplate SS BP - 2,90 kg (6,40 lb) \n\nEmpty, no cylinders 2Ã7 L: \n22,50 kg (49,60 lb) \nbackplate SS BP - 2,90 kg (6,40 lb)\n\n\n","key":"weight"},{"id":"5","title":"Scrubber","subtitle":"STANDARD - 2,50 kg (5,51 lb) \n4-6 hours of runtime \n\nX-LARGE - 3,30 kg (7,28 lb) \n5-8 hours of runtime","key":"scrubber"},{"id":"6","title":"Soda lime","subtitle":"Sofnolime 797","key":"soda-lime"},{"id":"7","title":"Cylinder size","subtitle":"Any size","key":"cylinder-size"}
2,{"id":"13","key":"1st-stage-regulators","title":"1st stage regulators","subtitle":"Apeks DST"},{"id":"2","key":"dsv-bov","title":"DSV/BOV","subtitle":"comes with BOV + MAV \nDSV optional"},{"id":"11","title":"ADV options","key":"adv-options","subtitle":"T-Piece ADV"},{"id":"12","key":"adv-shut-off","title":"ADV shut off","subtitle":"YES"},{"id":"10","title":"Counterlung config.","key":"counterlung-config","subtitle":"BMCL\n"},{"id":"8","title":"Counterlung volume","key":"counterlung-volume","subtitle":"3,5 L each"},{"id":"9","title":"Direction of breathing","key":"direction-of-breathing","subtitle":"Left to right (diver wearing the unit)"},{"id":"16","title":"Wing","key":"wing","subtitle":"Divesoft CCR wing \nDonut - 20 L (45 lb)"},{"id":"14","title":"Backplate","key":"backplate","subtitle":"Standard SS backplate supplied. \nCompatible to be used with most standard backplates. \n3 adjustable height positions."},{"id":"15","title":"Stand","key":"stand","subtitle":"Welded high stand - 2,00 kg (4,40 lb) \nWelded low stand - 1,80 kg (3,96 lb)"},{"id":"17","key":"ce-certified","subtitle":"YES","title":"CE Certified"}],"firstImage":{"mimetype":"image/png","size":673113,"hash":"04ce142e8918275bb9e69a43df942868e3bc89b1","id":"ckx4hwc0fcn020776lhljgbpy","filename":"divesoft-ccr-liberty-bmcl-00-1080x1080.png","category":"divesoft/","type":"image"},"secondImage":{"mimetype":"image/png","size":803931,"hash":"bb7fb772b0304575862f683e4ef39b0302a0be8a","id":"ckx3mi0tsc5tr0776r23bum6i","filename":"divesoft-ccr-liberty-light-07-1080x1080.png","category":"divesoft/","type":"image"},"thirdImage":{"mimetype":"image/png","size":117662,"hash":"fa1621a27a52e0d1b3089491338768a9393c1c9b","id":"ckx3lwkm6c5o107761nbi1q4b","filename":"divesoft-ccr-liberty-05-1080x1080.png","category":"divesoft/","type":"image"},"fourthImage":{"mimetype":"image/png","size":15299,"hash":"17a6b78d3e160ac26b79cbcec754824a5ad9a8a0","id":"ckx3m2sjnc5qs07764q4obz7u","filename":"divesoft-menu-ccr-liberty-heavy-200x200.png","category":"divesoft/","type":"image"},"firstLearnMoreUrl":{"url":"/en/products/ccr-liberty/ccr-liberty-bmcl-fmcl","pageId":"ckt0i4dg51ogp0988dpgn8lwr","urlNewWindow":false},"firstConfiguratorUrl":{"url":"/en/ccr-liberty","pageId":"cl3vesldqknhj085858savf3u"},"secondLearnMoreUrl":{"url":"/en/products/ccr-liberty/ccr-liberty-light","pageId":"ck7m1guq108gk07883tmehxr4"},"secondConfiguratorUrl":{"url":"/en/ccr-liberty","pageId":"cl3vesldqknhj085858savf3u"},"thirdLearnMoreUrl":{"url":"/en/products/ccr-liberty/ccr-liberty-sidemount","pageId":"cjyztusbt039t0777kqbo8xj8"},"thirdConfiguratorUrl":{"url":"/en/ccr-liberty","pageId":"cl3vesldqknhj085858savf3u"},"fourthLearnMoreUrl":{"url":"/en/products/ccr-liberty/ccr-liberty-heavy","pageId":"cknpubp6j2f690788zv52yohy"},"fourthConfiguratorUrl":{"url":"/en/ccr-liberty","pageId":"cl3vesldqknhj085858savf3u"},"image":{"type":"image"},"fifthFeatures":[],"fifthTitle":"","activeTab":"17"}},"__typename":"ComponentTemplate"},"ComponentTemplate:cl5adxitboo550858me1tvbl4":{"id":"cl5adxitboo550858me1tvbl4","name":"Liberty redundancy (Head)","type":"Spacer","content":{"type":"json","json":{"spacingLarge":"50","spacingSmall":20,"backgroundColor":"#ffffff"}},"__typename":"ComponentTemplate"},"ComponentTemplate:cl5cqh4adowvf0858ubg7875n":{"id":"cl5cqh4adowvf0858ubg7875n","name":"New Website","type":"ProductCrossroadNew","content":{"type":"json","json":{"products":[{"id":"1","title":"Philosophy","url":{"url":"/en/products/ccr-liberty/philosophy","pageId":"cl5295huxnw8a0858pasvo2gl"},"image":{"mimetype":"image/png","size":5787680,"hash":"66221f51bc0fbd67d2f92afea827d02d4737e43e","id":"cjxc53e0l078007765x7oz913","filename":"bmcl-00001.png","category":"divesoft/","type":"image"}},{"id":"2","title":"Redundancy","url":{"url":"/en/products/ccr-liberty/redundancy","pageId":"cjyzs03ld02xr07775xxwpg1j"},"image":{"mimetype":"image/jpeg","size":63733,"hash":"8666ef185cc34d0e0382afe5a06fb5e7ab3247e1","id":"ck6aji9pojtpq0776vtlcudpc","filename":"independent-computers.jpg","category":"divesoft/","type":"image"}},{"id":"3","title":"WOB","url":{"url":"/en/products/ccr-liberty/wob","pageId":"cl5296r2vnw9s0858273ps6nv"},"image":{"mimetype":"image/jpeg","size":73481,"hash":"d14bf6fe7b5b623debf638f57dae2fb587adeb8e","id":"cl5cqfgp5r1gt0776hf71y6dv","filename":"pressurechamber.jpg","category":"divesoft/","type":"image"}},{"id":"4","title":"Modularity","url":{"url":"/en/products/ccr-liberty/modularity","pageId":"cl5296xhonwaa0858wns3yfij"},"image":{"mimetype":"image/png","size":302551,"hash":"75c370b37a36d9a84b99f0926eed01cab044d783","id":"cl1m1en4xt1go0776m38yiain","filename":"divesoft-liberty-modularity-1080x1080-t.png","category":"divesoft/","type":"image"}},{"id":"5","title":"The Head","image":{"mimetype":"image/png","size":147418,"hash":"3ac9bb057724c94629bdf1d5f60213528ace067c","id":"cl5cn6if9r15807768wb5qtpc","filename":"liberty-head.png","category":"divesoft/","type":"image"},"url":{"url":"/en/products/ccr-liberty/the-head","pageId":"cl52977c9nwas0858piv9herh"}},{"id":"6","url":{"url":"/en/products/ccr-liberty/features","pageId":"cl5297f91nwba08589dw694xw"},"title":"Features","image":{"mimetype":"image/png","size":193451,"hash":"2f12a80d683982b4b73c6c7e7ac6fe3092327056","id":"cl2emhqif01n10776x12hvep3","filename":"divesoft-ccr-liberty-fmcl-00-1200x800w.png","category":"divesoft/","type":"image"}},{"id":"7","url":{"url":"/en/products/ccr-liberty/breathing-loop","pageId":"cl5297pqynwbs08583btd6djt"},"image":{"mimetype":"image/jpeg","size":32330,"hash":"bc603d88982d97f59bbbccbecaf12932ba9947e0","id":"cl584xu3zq4go0776gaswavvx","filename":"8153-6-2.jpg","category":"divesoft/","type":"image"},"title":"Breathing loop"},{"id":"8","title":"Scrubbers","url":{"url":"/en/products/ccr-liberty/scrubbers","pageId":"cl5297wulnwca08583hdq385r"},"image":{"mimetype":"image/jpeg","size":24056,"hash":"e35956a2bccffdee1be8c43a535a8f9acde4ae0b","id":"cl584o93mq4fz0776mwnlfurj","filename":"xl-scrubber-2.jpg","category":"divesoft/","type":"image"}}],"activeTab":"6"}},"__typename":"ComponentTemplate"},"ComponentTemplate:cl5crp43gox2y0858hmfqqqsb":{"id":"cl5crp43gox2y0858hmfqqqsb","name":"New Website","type":"ProductCrossroadNew","content":{"type":"json","json":{"products":[{"id":"
21","title":"Philosophy","url":{"url":"/en/products/ccr-liberty/philosophy","pageId":"cl5295huxnw8a0858pasvo2gl"},"image":{"mimetype":"image/png","size":5787680,"hash":"66221f51bc0fbd67d2f92afea827d02d4737e43e","id":"cjxc53e0l078007765x7oz913","filename":"bmcl-00001.png","category":"divesoft/","type":"image"}},{"id":"2","title":"Redundancy","url":{"url":"/en/products/ccr-liberty/redundancy","pageId":"cjyzs03ld02xr07775xxwpg1j"},"image":{"mimetype":"image/jpeg","size":63733,"hash":"8666ef185cc34d0e0382afe5a06fb5e7ab3247e1","id":"ck6aji9pojtpq0776vtlcudpc","filename":"independent-computers.jpg","category":"divesoft/","type":"image"}},{"id":"3","title":"WOB","url":{"url":"/en/products/ccr-liberty/wob","pageId":"cl5296r2vnw9s0858273ps6nv"},"image":{"mimetype":"image/jpeg","size":73481,"hash":"d14bf6fe7b5b623debf638f57dae2fb587adeb8e","id":"cl5cqfgp5r1gt0776hf71y6dv","filename":"pressurechamber.jpg","category":"divesoft/","type":"image"}},{"id":"4","title":"Modularity","url":{"url":"/en/products/ccr-liberty/modularity","pageId":"cl5296xhonwaa0858wns3yfij"},"image":{"mimetype":"image/png","size":302551,"hash":"75c370b37a36d9a84b99f0926eed01cab044d783","id":"cl1m1en4xt1go0776m38yiain","filename":"divesoft-liberty-modularity-1080x1080-t.png","category":"divesoft/","type":"image"}},{"id":"5","title":"Features","image":{"mimetype":"image/jpeg","size":28351,"hash":"32e6f2d63908bb65e64d2e6e49f6e2388afc9edb","id":"ckwdnirmh2p8q0776f8hbr4xx","filename":"bmcl.jpg","category":"divesoft/","type":"image"},"url":{"url":"/en/products/ccr-liberty/features","pageId":"cl5297f91nwba08589dw694xw"}},{"id":"6","url":{"url":"/en/products/ccr-liberty/the-head","pageId":"cl52977c9nwas0858piv9herh"},"title":"The Head","image":{"mimetype":"image/png","size":147418,"hash":"3ac9bb057724c94629bdf1d5f60213528ace067c","id":"cl5cn6if9r15807768wb5qtpc","filename":"liberty-head.png","category":"divesoft/","type":"image"}},{"id":"7","url":{"url":"/en/products/ccr-liberty/breathing-loop","pageId":"cl5297pqynwbs08583btd6djt"},"image":{"mimetype":"image/jpeg","size":32330,"hash":"bc603d88982d97f59bbbccbecaf12932ba9947e0","id":"cl584xu3zq4go0776gaswavvx","filename":"8153-6-2.jpg","category":"divesoft/","type":"image"},"title":"Breathing loop"},{"id":"8","title":"Scrubbers","url":{"url":"/en/products/ccr-liberty/scrubbers","pageId":"cl5297wulnwca08583hdq385r"},"image":{"mimetype":"image/jpeg","size":24056,"hash":"e35956a2bccffdee1be8c43a535a8f9acde4ae0b","id":"cl584o93mq4fz0776mwnlfurj","filename":"xl-scrubber-2.jpg","category":"divesoft/","type":"image"}}],"activeTab":"2"}},"__typename":"ComponentTemplate"},"ComponentTemplate:cl5g3nllgp4hq0858d7lk2t47":{"id":"cl5g3nllgp4hq0858d7lk2t47","name":"New Website Rozcestnik 10/07/2022","type":"ProductCrossroadNew","content":{"type":"json","json":{"products":[{"id":"1","title":"Philosophy","image":{"mimetype":"image/png","size":5787680,"hash":"66221f51bc0fbd67d2f92afea827d02d4737e43e","id":"cjxc53e0l078007765x7oz913","filename":"bmcl-00001.png","category":"divesoft/","type":"image"},"url":{"url":"/en/products/ccr-liberty/test2-philosophy","pageId":"cl6g9m44gs2au08581lp45hic","urlNewWindow":false}},{"id":"2","title":"Anatomy","image":{"mimetype":"image/png","size":259316,"hash":"9b3cdb102291f8c95b3a3408e0a493c1bbb94c38","id":"cjxc7r1hw07b20776e7kq8u9o","filename":"sidemount.png","category":"divesoft/","type":"image"},"url":{"url":"/en/products/ccr-liberty/test2-anatomy","pageId":"cl6g9nsgds2c20858pg31ae97"}},{"id":"3","title":"Features","url":{"url":"/en/products/ccr-liberty/test2-features","pageId":"cl6g9opv3s2ck085846otg5l7"},"image":{"mimetype":"image/png","size":111678,"hash":"1b0abc1813359acf3baa47dbc11b4b290aab310c","id":"cl1eybpshr7010776kwxzb09o","filename":"divesoft-liberty-head-01-1080x1080-t.png","category":"divesoft/","type":"image"}},{"id":"5","url":{"url":"https://www.divesoft.com/en/products/ccr-liberty/configurations"},"title":"Configurations","image":{"mimetype":"image/png","size":122646,"hash":"02c52e172aca759e3904acf42d74d7b9b8b67ebe","id":"cl8jv40hdirlg0776njznax3q","filename":"configurations4.png","category":"divesoft/","type":"image"}},{"id":"4","title":"Configurator","url":{"url":"https://www.divesoft.com/ccr-liberty/"},"image":{"mimetype":"image/png","size":302551,"hash":"75c370b37a36d9a84b99f0926eed01cab044d783","id":"cl1m1en4xt1go0776m38yiain","filename":"divesoft-liberty-modularity-1080x1080-t.png","category":"divesoft/","type":"image"}}],"activeTab":"5"}},"__typename":"ComponentTemplate"},"ComponentTemplate:cl5hjop8dp9fz0858r16rttoy":{"id":"cl5hjop8dp9fz0858r16rttoy","name":"Helium sensors","type":"ProductShowcase","content":{"type":"json","json":{"backgroundColor":"#ffffff","isTextDark":true,"isImageRight":false,"image":{"mimetype":"image/jpeg","size":50668,"hash":"89009af8e2652a1d8cb2f1637115baf82ff52faa","id":"ck6ajf3osjtlz0776r1t42ug4","filename":"helium-sensors.jpg","category":"divesoft/","type":"image"},"imageMobile":{},"title":"3) 2 helium sensors","subtitle":"","description":"with Divesoftâs patented technology proven and tested in our Analyzers. The Helium sensors can be used as a redundant method of measuring PPO2 when used with Helium mixes. In the unlikely case of loss of all O2\n sensors, the Helium sensors can be used to\ncalculate your PPO2\n.","hideDescriptionOnMobile":false,"areButtons":false,"firstTitle":"Learn more >","firstUrl":"","secondTitle":"Configurator >","secondUrl":""}},"__typename":"ComponentTemplate"},"ComponentTemplate:cl5hjsmoep9hn0858ot3nk2q9":{"id":"cl5hjsmoep9hn0858ot3nk2q9","name":"Pressure sensors","type":"ProductShowcase","content":{"type":"json","json":{"backgroundColor":"#ffffff","isTextDark":true,"isImageRight":false,"image":{"mimetype":"image/png","size":162183,"hash":"f4e1cf194c85511b61ab716c5583b50ee26f9be7","id":"cl5cpg7ndr1ck0776rzwxml1i","filename":"pressure-sensors.png","category":"divesoft/","type":"image"},"imageMobile":{},"title":"2) 4 pressure sensors in 2 blocks","subtitle":"","description":"2 for each part of the unit. Know your loop pressure\nto a tenth of a millibar. Positive / Negative check completed in 1 minute each.\nPREVENT A FLOOD WITH A PERFECT PRESSURE TEST.","hideDescriptionOnMobile":false,"areButtons":false,"firstTitle":"Learn more >","firstUrl":"","secondTitle":"Configurator >","secondUrl":""}},"__typename":"ComponentTemplate"},"ComponentTemplate:cl5iuiex6ph8a08581v7puuty":{"id":"cl5iuiex6ph8a08581v7puuty","name":"Batteries Liberty","type":"ProductShowcase","content":{"type":"json","json":{"backgroundColor":"#ffffff","isTextDark":true,"isImageRight":false,"image":{"mimetype":"image/png","size":174165,"hash":"e04072aeaf740ad3f2eb9c2729ab5190a89ad181","id":"cl5cpqlgur1dt0776cut1s0ul","filename":"batteries.png","category":"divesoft/","type":"image"},"imageMobile":{},"title":"5) 2 Li-Ion Batteries","subtitle":"","description":"Each is powering each half of the head. USB rechargeable. Easy to exchange. Each battery has an exhaust valve. In case of gas discharge from within the battery, gas will be vented out into the environment and not into the breathing loop. Battery life: 35+ hours in Dive Mode, up to 11 months in Standby Mode.","hideDescriptionOnMobile":false,"areButtons":false,"firstTitle":"Learn more >","firstUrl":"","secondTitle":"Configurator >","secondUrl":""}},"__typename":"ComponentTemplate"},"ComponentTemplate:cl6gc2nhts2tm0858w7a5jr5b":{"id":"cl6gc2nhts2tm0858w7a5jr5b","name":"test 2","type":"ProductCrossroadNew","content":{"type":"json","json":{"products":[{"id":"
21","title":"Philosophy","image":{"mimetype":"image/png","size":5787680,"hash":"66221f51bc0fbd67d2f92afea827d02d4737e43e","id":"cjxc53e0l078007765x7oz913","filename":"bmcl-00001.png","category":"divesoft/","type":"image"},"url":{"url":"/en/products/","pageId":"cjv3rpryz00iw0836lc0zx81j","urlNewWindow":false}},{"id":"2","title":"Anatomy","image":{"mimetype":"image/png","size":302551,"hash":"75c370b37a36d9a84b99f0926eed01cab044d783","id":"cl1m1en4xt1go0776m38yiain","filename":"divesoft-liberty-modularity-1080x1080-t.png","category":"divesoft/","type":"image","alt":""},"url":{"url":"/en/products/ccr-liberty","pageId":"cjv3rpryz00iw0836lc0zx81j"}},{"id":"3","title":"Features","url":{"url":"/en/products","pageId":"cjv3rim6p00fm0836uts415d5"},"image":{"mimetype":"image/jpeg","size":28351,"hash":"32e6f2d63908bb65e64d2e6e49f6e2388afc9edb","id":"ckwdnirmh2p8q0776f8hbr4xx","filename":"bmcl.jpg","category":"divesoft/","type":"image","alt":"/en/products"}}],"activeTab":"3"}},"__typename":"ComponentTemplate"},"ComponentTemplate:cl6gc4um7s2um08581jpxjs3c":{"id":"cl6gc4um7s2um08581jpxjs3c","name":"test 2","type":"ProductCrossroadNew","content":{"type":"json","json":{"products":[{"id":"1","title":"Philosophy","image":{"mimetype":"image/png","size":5787680,"hash":"66221f51bc0fbd67d2f92afea827d02d4737e43e","id":"cjxc53e0l078007765x7oz913","filename":"bmcl-00001.png","category":"divesoft/","type":"image"},"url":{"url":"/en/products/ccr-liberty/test2-philosophy","pageId":"cl6g9m44gs2au08581lp45hic","urlNewWindow":false}},{"id":"2","title":"Anatomy","image":{"mimetype":"image/png","size":302551,"hash":"75c370b37a36d9a84b99f0926eed01cab044d783","id":"cl1m1en4xt1go0776m38yiain","filename":"divesoft-liberty-modularity-1080x1080-t.png","category":"divesoft/","type":"image","alt":""},"url":{"url":"/en/products/ccr-liberty/test2-anatomy","pageId":"cl6g9nsgds2c20858pg31ae97"}},{"id":"3","title":"Features","url":{"url":"/en/products/ccr-liberty/test2-features","pageId":"cl6g9opv3s2ck085846otg5l7"},"image":{"mimetype":"image/jpeg","size":28351,"hash":"32e6f2d63908bb65e64d2e6e49f6e2388afc9edb","id":"ckwdnirmh2p8q0776f8hbr4xx","filename":"bmcl.jpg","category":"divesoft/","type":"image","alt":""}}],"activeTab":"2"}},"__typename":"ComponentTemplate"},"ComponentTemplate:cl6gslpafs51s08584tc5h1fg":{"id":"cl6gslpafs51s08584tc5h1fg","name":"4 config","type":"ProductsCompare","content":{"type":"json","json":{"sectionTitle":"CHOOSE FROM 4 MAIN CONFIGURATIONS","firstTitle":"Classic Backmount","firstSubtitle":"","firstUrl":{"url":"/en/products/ccr-liberty/ccr-liberty-bmcl-fmcl","pageId":"ckt0i4dg51ogp0988dpgn8lwr"},"firstFeatures":[],"secondTitle":"Sidemount","secondSubtitle":"","secondUrl":{"url":"/en/products/ccr-liberty/ccr-liberty-light","pageId":"ck7m1guq108gk07883tmehxr4","urlNewWindow":false},"secondFeatures":[],"thirdTitle":"Light","thirdSubtitle":"","thirdUrl":{"url":"/en/products/ccr-liberty/ccr-liberty-sidemount","pageId":"cjyztusbt039t0777kqbo8xj8"},"thirdFeatures":[],"fourthTitle":"Heavy","fourthSubtitle":"","fourthUrl":{"url":"/en/products/ccr-liberty/ccr-liberty-heavy","pageId":"cknpubp6j2f690788zv52yohy"},"fourthFeatures":[],"firstImage":{"mimetype":"image/png","size":673113,"hash":"04ce142e8918275bb9e69a43df942868e3bc89b1","id":"ckx4hwc0fcn020776lhljgbpy","filename":"divesoft-ccr-liberty-bmcl-00-1080x1080.png","category":"divesoft/","type":"image"},"secondImage":{"mimetype":"image/png","size":247698,"hash":"a3f1d7eb10bfb56f1e29cbb7c336197cae6fbb80","id":"cjxc7p0b407ar07767hb8akzs","filename":"liberty-sidemount.png","category":"divesoft/","type":"image"},"thirdImage":{"mimetype":"image/jpeg","size":4540912,"hash":"dd26bcfe3663d6e6e0d4951e181b228b792e9f4b","id":"ck910tqpq6jgz07769leq8ty6","filename":"liberty-light-03.jpg","category":"divesoft/","type":"image"},"fourthImage":{"mimetype":"image/png","size":15299,"hash":"17a6b78d3e160ac26b79cbcec754824a5ad9a8a0","id":"ckx3m2sjnc5qs07764q4obz7u","filename":"divesoft-menu-ccr-liberty-heavy-200x200.png","category":"divesoft/","type":"image"},"firstLearnMoreUrl":{"url":"/en/products/ccr-liberty/ccr-liberty-backmount","pageId":"cjyztuq28039607776av7yyeh","urlNewWindow":true},"firstConfiguratorUrl":{"url":"","pageId":"cjv3rpryz00iw0836lc0zx81j"},"secondLearnMoreUrl":{"url":"/en/products/ccr-liberty/ccr-liberty-sidemount","pageId":"cjyztusbt039t0777kqbo8xj8","urlNewWindow":true},"secondConfiguratorUrl":{"url":"","pageId":"cjv3rpryz00iw0836lc0zx81j"},"thirdLearnMoreUrl":{"url":"/en/products/ccr-liberty/ccr-liberty-light","pageId":"ck7m1guq108gk07883tmehxr4","urlNewWindow":true},"thirdConfiguratorUrl":{"url":"","pageId":"cjv3rpryz00iw0836lc0zx81j"},"fourthLearnMoreUrl":{"url":"/en/products/ccr-liberty/ccr-liberty-heavy","pageId":"cknpubp6j2f690788zv52yohy","urlNewWindow":true},"fourthConfiguratorUrl":{"url":"","pageId":"cjv3rpryz00iw0836lc0zx81j"},"image":{"type":"image"},"activeTab":"2"}},"__typename":"ComponentTemplate"},"ComponentTemplate:cl6gss7mhs54s0858quojy56h":{"id":"cl6gss7mhs54s0858quojy56h","name":"Redundant systems","type":"ProductShowcase","content":{"type":"json","json":{"backgroundColor":"#ffffff","isTextDark":true,"isImageRight":true,"image":{"mimetype":"image/jpeg","size":63733,"hash":"8666ef185cc34d0e0382afe5a06fb5e7ab3247e1","id":"ck6aji9pojtpq0776vtlcudpc","filename":"independent-computers.jpg","category":"divesoft/","type":"image"},"imageMobile":{},"title":"Redundant systems","subtitle":"Your safety is paramount to us.","description":"Being able to remain on the loop is critical due to the amount of the gas the diver can physically carry. Therefore, our goal was to create a unit that will ensure your safety and keep operating no matter what, so you can remain on the loop even in the event of multiple failures.","hideDescriptionOnMobile":false,"areButtons":false,"firstTitle":"Learn more >","firstUrl":"","secondTitle":"Configurator >","secondUrl":""}},"__typename":"ComponentTemplate"},"ComponentTemplate:cl6gssha5s55808585mym687q":{"id":"cl6gssha5s55808585mym687q","name":"Detection of water leakage into electronics","type":"ProductShowcase","content":{"type":"json","json":{"backgroundColor":"#ffffff","isTextDark":true,"isImageRight":true,"image":{"mimetype":"image/jpeg","size":63733,"hash":"8666ef185cc34d0e0382afe5a06fb5e7ab3247e1","id":"ck6aji9pojtpq0776vtlcudpc","filename":"independent-computers.jpg","category":"divesoft/","type":"image"},"imageMobile":{},"title":"Detection of water leakage into electronics","subtitle":"","description":"Liberty can detect the ingress of water into the electronics compartment early enough to prevent\nits flooding and damage, further improving the safety of the diver.","hideDescriptionOnMobile":false,"areButtons":false,"firstTitle":"Learn more >","firstUrl":"","secondTitle":"Configurator >","secondUrl":""}},"__typename":"ComponentTemplate"},"ComponentTemplate:cl6gssoxzs55f085841w2t56s":{"id":"cl6gssoxzs55f085841w2t56s","name":"Vibration alarms","type":"ProductShowcase","content":{"type":"json","json":{"backgroundColor":"#ffffff","isTextDark":true,"isImageRight":true,"image":{"mimetype":"image/png","size":150449,"hash":"7175ddbc3df15c1605c5b8f703af1403627369d6","id":"cl5cjusgbr0ok07767dgw7qdr","filename":"handsets.png","category":"divesoft/","type":"image"},"imageMobile":{},"title":"Vibration alarms","subtitle":"Don't miss any notification","description":"The handsets contain vibration alarm motors which inform you about any important message you need to know.","hideDescriptionOnMobile":false,"areButtons":false,"firstTitle":"Learn more >","firstUrl":"","secondTitle":"Configurator >","secondUrl":""}},"__typename":"ComponentTemplate"},"ComponentTemplate:cl6gsswirs55m0858o1vsyfqb":{"id":"cl6gsswirs55m0858o1vsyfqb","name":"Wet connectors","type":"ProductShowcase","content":{"type":"json","json":{"backgroundColor":"#ffffff","isTextDark":true,"isImageRight":true,"image":{"mimetype":"image/jpeg","size":51281,"hash":"997e6685f7971869e78b82b225f1c6544ec4e0b0","id":"ck6ajmy6xjtv6077632b8wqsd","filename":"4-displays.jpg","category":"divesoft/","type":"image"},"imageMobile":{},"title":"Wet connectors","subtitle":"","description":"Even if your connectors flood, they will keep working no matter what.","hideDescriptionOnMobile":false,"areButtons":false,"firstTitle":"Learn more >","firstUrl":"","secondTitle":"Configurator >","secondUrl":""}},"__typename":"ComponentTemplate"},"ComponentTemplate:cl6gst6zus5620858r01pasaa":{"id":"cl6gst6zus5620858r01pasaa","name":"Pressure sensors inside of the Head","type":"ProductShowcase","content":{"type":"json","json":{"backgroundColor":"#ffffff","isTextDark":true,"isImageRight":true,"image":{"mimetype":"image/png","size":162183,"hash":"f4e1cf194c85511b61ab716c5583b50ee26f9be7","id":"cl5cpg7ndr1ck0776rzwxml1i","filename":"pressure-sensors.png","category":"divesoft/","type":"image"},"imageMobile":{},"title":"Pressure sensors inside of the Head","subtitle":"Know your loop pressure.","description":"Know your loop pressure to a tenth of a millibar. Positive / Negative check completed in 1 minute each. PREVENT A FLOOD WITH A PERFECT PRESSURE TEST. Know your loop pressure when switching to Bail Out rebreather.","hideDescriptionOnMobile":false,"areButtons":false,"firstTitle":"Learn more >","firstUrl":"","secondTitle":"Configurator >","secondUrl":""}},"__typename":"ComponentTemplate"},"ComponentTemplate:cl6gstdhjs56d0858mxduwcmp":{"id":"cl6gstdhjs56d0858mxduwcmp","name":"Li-Ion Batteries","type":"ProductShowcase","content":{"type":"json","json":{"backgroundColor":"#ffffff","isTextDark":true,"isImageRight":true,"image":{"mimetype":"image/png","size":174165,"hash":"e04072aeaf740ad3f2eb9c2729ab5190a89ad181","id":"cl5cpqlgur1dt0776cut1s0ul","filename":"batteries.png","category":"divesoft/","type":"image"},"imageMobile":{},"title":"Li-Ion Batteries","subtitle":"Protected power houses.","description":"USB rechargeable. Easy to exchange. The battery compartments are pressure resistant. Each battery has an exhaust valve. In case of gas discharge from within the battery, gas will be vented out into the environment and not into the breathing loop. Battery life: 35+ hours in Dive Mode, up to 11 months in Standby Mode.","hideDescriptionOnMobile":false,"areButtons":false,"firstTitle":"Learn more >","firstUrl":"","secondTitle":"Configurator >","secondUrl":""}},"__typename":"ComponentTemplate"},"ComponentTemplate:cl6gstjo4s56k0858th40ho8t":{"id":"cl6gstjo4s56k0858th40ho8t","name":"Helium sensors","type":"ProductShowcase","content":{"type":"json","json":{"backgroundColor":"#ffffff","isTextDark":true,"isImageRight":true,"image":{"mimetype":"image/jpeg","size":50668,"hash":"89009af8e2652a1d8cb2f1637115baf82ff52faa","id":"ck6ajf3osjtlz0776r1t42ug4","filename":"helium-sensors.jpg","category":"divesoft/","type":"image"},"imageMobile":{},"title":"Helium sensors","subtitle":"","description":"The Helium sensors can be used as a redundant method of measuring PPO2 when used with Helium mixes. In the unlikely case of loss of all O2 sensors, the Helium sensors can be used to calculate your PPO2.","hideDescriptionOnMobile":false,"areButtons":false,"firstTitle":"Learn more >","firstUrl":"","secondTitle":"Configurator >","secondUrl":""}},"__typename":"ComponentTemplate"},"ComponentTemplate:cl6gstqtos56r0858h0oivcod":{"id":"cl6gstqtos56r0858h0oivcod","name":"Detachable components","type":"ProductShowcase","content":{"type":"json","json":{"backgroundColor":"#ffffff","isTextDark":true,"isImageRight":true,"image":{"mimetype":"image/png","size":69500,"hash":"4e2c52e5dca96f0e827ec49393fe65f28a5bf694","id":"cl5cktapcr0t70776q5qzmtf2","filename":"head.png","category":"divesoft/","type":"image"},"imageMobile":{},"title":"Detachable components","subtitle":"Designed for easy maintenance during expeditions.","description":"All you need to access and replace head components is a 3 mm hex key.","hideDescriptionOnMobile":false,"areButtons":false,"firstTitle":"Learn more >","firstUrl":"","secondTitle":"Configurator >","secondUrl":""}},"__typename":"ComponentTemplate"},"ComponentTemplate:cl6gudxw5s5hq0858c8x3d3k9":{"id":"cl6gudxw5s5hq0858c8x3d3k9","name":"Unique MAVs - Manual Addition Valves","type":"ProductShowcase","content":{"type":"json","json":{"backgroundColor":"#ffffff","isTextDark":true,"isImageRight":false,"image":{"mimetype":"image/png","size":93038,"hash":"c3366438104a2a6059bce76d855872a9e887607e","id":"cl5fy1ownrbhm0776x3roasr0","filename":"mavs.png","category":"divesoft/","type":"image"},"imageMobile":{},"title":"Unique MAVs - Manual Addition Valves","subtitle":"Find your mouth - Find your MAVs","description":"The Manual Addition Valves are part of every CCR Liberty configuration. The Oxygen additon is located on the exhale side to avoid breathing in too much PPO2 at depth. \nOn all FMCL configurations the MAVs are located on the counterlungs. On all BM BMCL and SM configurations the MAVs are conviniently designed to be next to your mouth. There they can be easily found without having to look for them. As the diver in trim would have his/her arms in front of their body they can always easily locate the MAVs for manual addition of gas should it be needed. The position of the MAVs is particularly beneficial in tight restrictions where the diver is always able to reach them.\nThe MAVs can also be used as a mean to Off-board gas.","hideDescriptionOnMobile":false,"areButtons":false,"firstTitle":"Learn more >","firstUrl":"","secondTitle":"Configurator >","secondUrl":""}},"__typename":"ComponentTemplate"},"ComponentTemplate:cl6gugl2rs5hx0858bu7ddodq":{"id":"cl6gugl2rs5hx0858bu7ddodq","name":"DSV / BOV OPTIONS","type":"ProductComponents","content":{"type":"json","json":{"title":"","description":"DSV / BOV OPTIONS","columns":"col-lg-4","components":[{"title":"DSV","description":"COMPATIBLE WITH\n* BM FMCL\n* BM Light FMCL","image":{"recommendedSizes":{"width":"130","height":"130"},"mimetype":"image/png","size":2466516,"hash":"5361bd3f37d440c00833572b7bd4566bb0199e3e","id":"ckx4j1fpwco7x0776w17unq1w","filename":"divesoft-dsv-circuit-left-1080x1080.png","category":"divesoft/","type":"image"},"url":"","id":"1"}
2,{"title":"DSV + MAV","description":"COMPATIBLE WITH\n* BM BMCL\n* BM Light BMCL\n* BM Heavy BMCL","image":{"recommendedSizes":{"width":"130","height":"130"},"mimetype":"image/jpeg","size":28147,"hash":"35fce092acd8cd4ff98ccf865aad0ea685bd7d79","id":"cl5fy5fenrbhv0776fkyabrq2","filename":"dsv-mav-for-liberty-kiss-sf2-5.jpg","category":"divesoft/","type":"image"},"url":"","id":"2"},{"title":"SM DSV + MAV","description":"COMPATIBLE WITH\n* SM","image":{"recommendedSizes":{"width":"130","height":"130"},"mimetype":"image/png","size":155596,"hash":"66a4577a1cc49a12e3c232d14f8effbce85fdddd","id":"cl5d1lkqrr2av07764ad591xs","filename":"dsv-with-elbows-mav-for-liberty-kiss-sf2-2.png","category":"divesoft/","type":"image"},"url":"","id":"3"},{"title":"BOV","description":"COMPATIBLE WITH\n* BM FMCL\n* BM Light FMCL","image":{"recommendedSizes":{"width":"130","height":"130"},"mimetype":"image/png","size":3004654,"hash":"0734fd7b807df86acda234e29b3dbc2f35a04c03","id":"ckx4j2k71co9g07765pj9r84v","filename":"divesoft-bailout-feed-left-1080x1080.png","category":"divesoft/","type":"image"},"url":"","id":"4"},{"title":"BOV + MAV","description":"COMPATIBLE WITH\n* BM BMCL\n* BM Light BMCL\n* BM Heavy BMCL","image":{"recommendedSizes":{"width":"130","height":"130"},"mimetype":"image/jpeg","size":32359,"hash":"13a19fdb59cff4b365445a1dd62ae579ae0ede51","id":"cl5d1nordr2b707765jglsdk4","filename":"bov-with-adv-hose-nipples-liberty-kiss-sf22-2.jpg","category":"divesoft/","type":"image"},"url":"","id":"5"},{"title":"BOV + ADV + MAV","description":"COMPATIBLE WITH\n* BM BMCL\n* BM Light BMCL\n* BM Heavy BMCL","image":{"recommendedSizes":{"width":"130","height":"130"},"mimetype":"image/jpeg","size":35592,"hash":"e735a135ad17755bfe83f1b93ebff13e00018cd5","id":"cl5d1l33lr2ak07763j6iqft5","filename":"divesoft-bov-s-adv-a-ruoenuumi-duevkami-pro-jj-ccr-o2ptima-ccr-2-1.jpg","category":"divesoft/","type":"image"},"url":"","id":"6"},{"id":"8"},{"id":"7","title":"BOV + ADV","description":"COMPATIBLE WITH\n* BM FMCL\n* BM Light FMCL\n","image":{"mimetype":"image/jpeg","size":32359,"hash":"13a19fdb59cff4b365445a1dd62ae579ae0ede51","id":"cl5d1nordr2b707765jglsdk4","filename":"bov-with-adv-hose-nipples-liberty-kiss-sf22-2.jpg","category":"divesoft/","type":"image"}},{"id":"9"}],"activeTab":"6"}},"__typename":"ComponentTemplate"},"ComponentTemplate:cl6guqeuxs5kl0858acghd9ck":{"id":"cl6guqeuxs5kl0858acghd9ck","name":"ADV OPTIONS","type":"ProductComponents","content":{"type":"json","json":{"title":"","description":"ADV OPTIONS","columns":"col-lg-6","components":[{"title":"Standard ADV","description":"COMPATIBLE WITH\n* BM FMCL\n* BM Light FMCL\n* Isolator supplied: YES ","image":{"recommendedSizes":{"width":"130","height":"130"},"mimetype":"image/png","size":197905,"hash":"740e65ba82356bf7399a3c87fecfe105fd197ef2","id":"cl5g1e5v4rbjg0776clzuxdnf","filename":"mechanicaladv.png","category":"divesoft/","type":"image"},"url":"","id":"1"},{"title":"Membrane ADV","description":"COMPATIBLE WITH\n* BM FMCL\n* BM Light FMCL\n* Isolator supplied: YES ","image":{"recommendedSizes":{"width":"130","height":"130"},"mimetype":"image/png","size":174784,"hash":"74a2bd1805416ba4c0022565e9659e1aa6f52bb6","id":"cl5g1hyj9rbk90776tk3pimoc","filename":"membraneadv.png","category":"divesoft/","type":"image"},"url":"","id":"2"},{"title":"T-Piece ADV","description":"The most popular option.\n\nCOMPATIBLE WITH\n* BM FMCL\n* BM BMCL\n* BM LIGHT BMCL\n* BM LIGHT FMCL\n* HEAVY\n\nIsolator supplied: YES \n ","image":{"recommendedSizes":{"width":"130","height":"130"},"mimetype":"image/png","size":209098,"hash":"1fd6dd519eb73a47760ffabf25397a59136488aa","id":"cl5g1jo11rbkk0776eo8muxw7","filename":"tpieceadv.png","category":"divesoft/","type":"image"},"url":"","id":"3"},{"title":"BOV ADV","description":"\n\nCOMPATIBLE WITH\n* BM FMCL\n* BM BMCL\n* BM LIGHT BMCL\n* BM LIGHT FMCL\n* HEAVY\n\nIsolator supplied: YES - selectable by rotation.","image":{"recommendedSizes":{"width":"130","height":"130"},"mimetype":"image/png","size":233035,"hash":"574c335b9eeddbad26005efcdf6d8fbd16d710ef","id":"cl5g1k38mrbkv0776kxs0w1ds","filename":"bovadv.png","category":"divesoft/","type":"image"},"url":"","id":"4"},{"id":"5","title":"Membrane ADV for Sidemount","image":{"mimetype":"image/jpeg","size":26735,"hash":"92b9b86e3e6b2e4fb09d0de6ba0e808f42b4486f","id":"cl5g1ou0wrbl60776ookpnhbd","filename":"membrane-adv-direct-bayonet-right-without-shut-off-2.jpg","category":"divesoft/","type":"image"},"description":"COMPATIBLE WITH\n* SM\n\nIsolator supplied: NO - optional\n "}],"activeTab":"5"}},"__typename":"ComponentTemplate"},"ComponentTemplate:cl6gv2zuas5s00858nkqnvli7":{"id":"cl6gv2zuas5s00858nkqnvli7","name":"Scrubber","type":"ProductsCompare","content":{"type":"json","json":{"sectionTitle":"","firstTitle":"Short Scrubber","firstSubtitle":"","firstLearnMoreUrl":"","firstConfiguratorUrl":"","firstImage":{"recommendedSizes":{"width":200,"height":200},"mimetype":"image/jpeg","size":17873,"hash":"16b7c44e28128adc1ef789406dcbe8a2840c1a87","id":"cl58xxsdhq6uy0776rvof5bj4","filename":"zkruecenuu-scrubber-pro-sidemount-650.jpg","category":"divesoft/","type":"image"}
2,"firstFeatures":[{"id":"1","key":"Volume","title":"Volume","subtitle":"2,5 kg, 5.58 lb"},{"id":"2","key":"Duration","title":"Duration","subtitle":"4 - 6 hours"},{"id":"3","key":"Water-Trap","title":"Water Trap","subtitle":"No (moisture pad)"},{"id":"4","key":"Available-in-configuration","title":"Available in configuration","subtitle":"Sidemount\n>Light"}],"secondTitle":"Standard Scrubber","secondSubtitle":"","secondLearnMoreUrl":"","secondConfiguratorUrl":"","secondImage":{"recommendedSizes":{"width":200,"height":200},"mimetype":"image/jpeg","size":21056,"hash":"cbf59b2c670532abf7196aa6f7e2fdf4efa43395","id":"cl58xz4nkq6v40776amn2v836","filename":"standard-scrubber-2.jpg","category":"divesoft/","type":"image"},"secondFeatures":[{"id":"1","key":"Volume","title":"Volume","subtitle":"2,5kg, 5.58 lb"},{"id":"2","key":"Duration","title":"Duration","subtitle":"4 - 6 hours"},{"id":"3","key":"Water-Trap","title":"Water Trap","subtitle":"Yes"},{"id":"4","key":"Available-in-configuration","title":"Available in configuration","subtitle":"Classic\n> Sidemount\n>>Light \n>>> Heavy"}],"thirdTitle":"X-Large Scrubber","thirdSubtitle":"","thirdLearnMoreUrl":"","thirdConfiguratorUrl":"","thirdImage":{"recommendedSizes":{"width":200,"height":200},"mimetype":"image/jpeg","size":24056,"hash":"e35956a2bccffdee1be8c43a535a8f9acde4ae0b","id":"cl584o93mq4fz0776mwnlfurj","filename":"xl-scrubber-2.jpg","category":"divesoft/","type":"image"}
2,"thirdFeatures":[{"id":"1","key":"Volume","title":"Volume","subtitle":"3,3kg, 7.26 lb"},{"id":"2","key":"Duration","title":"Duration","subtitle":"5 - 8 hours"},{"id":"3","key":"Water-Trap","title":"Water Trap","subtitle":"Yes"},{"id":"4","key":"Available-in-configuration","title":"Available in configuration","subtitle":"Classic\n>Sidemount\n>>Light \n>>>Heavy"}],"fourthTitle":"","fourthSubtitle":"","fourthLearnMoreUrl":"","fourthConfiguratorUrl":"","fourthImage":{"recommendedSizes":{"width":200,"height":200}},"fourthFeatures":[],"image":{"mimetype":"image/jpeg","size":24056,"hash":"e35956a2bccffdee1be8c43a535a8f9acde4ae0b","id":"cl584o93mq4fz0776mwnlfurj","filename":"xl-scrubber-2.jpg","category":"divesoft/","type":"image"},"activeTab":"4"}},"__typename":"ComponentTemplate"},"ComponentTemplate:cl7no6agyv1ml0858yvcmyjsu":{"id":"cl7no6agyv1ml0858yvcmyjsu","name":"Product Crossroad template - New website rozcestnik","type":"ProductCrossroadNew","content":{"type":"json","json":{"products":[{"id":"1","title":"Philosophy","image":{"mimetype":"image/png","size":5787680,"hash":"66221f51bc0fbd67d2f92afea827d02d4737e43e","id":"cjxc53e0l078007765x7oz913","filename":"bmcl-00001.png","category":"divesoft/","type":"image"},"url":{"url":"/en/products/ccr-liberty/test2-philosophy","pageId":"cl6g9m44gs2au08581lp45hic","urlNewWindow":false}},{"id":"2","title":"Anatomy","image":{"mimetype":"image/png","size":302551,"hash":"75c370b37a36d9a84b99f0926eed01cab044d783","id":"cl1m1en4xt1go0776m38yiain","filename":"divesoft-liberty-modularity-1080x1080-t.png","category":"divesoft/","type":"image","alt":""},"url":{"url":"/en/products/ccr-liberty/test2-anatomy","pageId":"cl6g9nsgds2c20858pg31ae97"}},{"id":"3","title":"Features","url":{"url":"/en/products/ccr-liberty/test2-features","pageId":"cl6g9opv3s2ck085846otg5l7"},"image":{"mimetype":"image/jpeg","size":28351,"hash":"32e6f2d63908bb65e64d2e6e49f6e2388afc9edb","id":"ckwdnirmh2p8q0776f8hbr4xx","filename":"bmcl.jpg","category":"divesoft/","type":"image","alt":""}}],"activeTab":"2"}},"__typename":"ComponentTemplate"},"ComponentTemplate:cl7npcvt2v1up0858oo6konrw":{"id":"cl7npcvt2v1up0858oo6konrw","name":"Try the CCR Liberty","type":"QuickContactForm","content":{"type":"json","json":{"backgroundColor":"#ffffff","title":"Try the CCR Liberty.","subtitle":"Contact us for demo!","message":"Hello, I would like to try Liberty.","button":"Let's DEMO dive >"}},"__typename":"ComponentTemplate"},"ComponentTemplate:cl7npkffyv1xw0858iosjwonc":{"id":"cl7npkffyv1xw0858iosjwonc","name":"Unit Configurations Crossroads NEW","type":"ProductCrossroadNew","content":{"type":"json","json":{"products":[{"id":"1","title":"Backmount","url":{"url":"/en/products/ccr-liberty/ccr-liberty-bmcl-fmcl","pageId":"ckt0i4dg51ogp0988dpgn8lwr"},"image":{"mimetype":"image/png","size":5787680,"hash":"66221f51bc0fbd67d2f92afea827d02d4737e43e","id":"cjxc53e0l078007765x7oz913","filename":"bmcl-00001.png","category":"divesoft/","type":"image"}},{"id":"2","title":"Sidemount","url":{"url":"/en/products/ccr-liberty/ccr-liberty-sidemount","pageId":"cjyztusbt039t0777kqbo8xj8"},"image":{"mimetype":"image/jpeg","size":50745,"hash":"6c22b8a5eba20aaf637c4d14496dc84fca8db4cd","id":"cjxc5i4lo079407760imjcn2n","filename":"sidemount-.jpg","category":"divesoft/","type":"image"}},{"id":"3","title":"Light","url":{"url":"/en/products/ccr-liberty/ccr-liberty-light","pageId":"ck7m1guq108gk07883tmehxr4"},"image":{"mimetype":"image/png","size":803931,"hash":"bb7fb772b0304575862f683e4ef39b0302a0be8a","id":"ckx3mi0tsc5tr0776r23bum6i","filename":"divesoft-ccr-liberty-light-07-1080x1080.png","category":"divesoft/","type":"image"}},{"id":"4","title":"Heavy","url":{"url":"/en/products/ccr-liberty/ccr-liberty-heavy","pageId":"cknpubp6j2f690788zv52yohy"},"image":{"mimetype":"image/png","size":15299,"hash":"17a6b78d3e160ac26b79cbcec754824a5ad9a8a0","id":"ckx3m2sjnc5qs07764q4obz7u","filename":"divesoft-menu-ccr-liberty-heavy-200x200.png","category":"divesoft/","type":"image"}}],"activeTab":"1"}},"__typename":"ComponentTemplate"}
2,"ComponentTemplate:cl9ya7fcs2uiz0858x7qiyk6z":{"id":"cl9ya7fcs2uiz0858x7qiyk6z","name":"3.x.sidemount","type":"TextBlock","content":{"type":"json","json":{"text":"### <span id=\"3-.-1-Conversion\">**3.1 Conversion**</span>\n\nLiberty Heavy is compatible with the standard CCR Liberty , so itâs possible to convert CCR\nLiberty to Liberty Heavy using a conversion kit.\n\nThe head including the handset and the buddy display, canister and scrubber are used from the\nback-mounted device.Alternatively, it is possible to replace the scrubber with a canister for\na shortened version.This version is not a standard part of the conversion kit, and needs to be\nrequested separately.\n\nBy purchasing the conversion kit to the back unit, Liberty Heavy can be rebuilt to classic CCR Liberty.","textLarge":false,"imageOnRight":true,"image":{"recommendedSizes":{"width":"420","height":"280"}},"imageMobile":{"recommendedSizes":{"width":"750","height":"500"}}}},"__typename":"ComponentTemplate"},"ComponentTemplate:claijw5v81qht0835j1dmogv1":{"id":"claijw5v81qht0835j1dmogv1","name":"Philosophy-Configurator","type":"ProductCrossroadNew","content":{"type":"json","json":{"products":[{"id":"1","title":"Philosophy","image":{"mimetype":"image/png","size":5787680,"hash":"66221f51bc0fbd67d2f92afea827d02d4737e43e","id":"cjxc53e0l078007765x7oz913","filename":"bmcl-00001.png","category":"divesoft/","type":"image"},"url":{"url":"/en/products/ccr-liberty/test2-philosophy","pageId":"cl6g9m44gs2au08581lp45hic","urlNewWindow":false}},{"id":"2","title":"Anatomy","image":{"mimetype":"image/png","size":259316,"hash":"9b3cdb102291f8c95b3a3408e0a493c1bbb94c38","id":"cjxc7r1hw07b20776e7kq8u9o","filename":"sidemount.png","category":"divesoft/","type":"image"},"url":{"url":"/en/products/ccr-liberty/test2-anatomy","pageId":"cl6g9nsgds2c20858pg31ae97"}},{"id":"3","title":"Features","url":{"url":"/en/products/ccr-liberty/test2-features","pageId":"cl6g9opv3s2ck085846otg5l7"},"image":{"mimetype":"image/png","size":111678,"hash":"1b0abc1813359acf3baa47dbc11b4b290aab310c","id":"cl1eybpshr7010776kwxzb09o","filename":"divesoft-liberty-head-01-1080x1080-t.png","category":"divesoft/","type":"image"}},{"id":"5","url":{"url":"https://www.divesoft.com/en/products/ccr-liberty/configurations"},"title":"Configurations","image":{"mimetype":"image/png","size":122646,"hash":"02c52e172aca759e3904acf42d74d7b9b8b67ebe","id":"cl8jv40hdirlg0776njznax3q","filename":"configurations4.png","category":"divesoft/","type":"image"}},{"id":"4","title":"Configurator","url":{"url":"https://www.divesoft.com/ccr-liberty/"},"image":{"mimetype":"image/png","size":6352707,"hash":"25f220967ec22ba2f1feb4223d01dbfd5cc87ed9","id":"cl9mpe0atssnq0776id8dfz3a","filename":"divesoft-liberty-modularity-1920x1080-t.png","category":"divesoft/","type":"image"}}],"activeTab":"4"}},"__typename":"ComponentTemplate"},"ComponentTemplate:clban1hr75aol0835258b6s1f":{"id":"clban1hr75aol0835258b6s1f","name":"5 compare","type":"ProductsCompare","content":{"type":"json","json":{"sectionTitle":"COMPARE ANALYZERS","firstTitle":"SOLO O2","firstSubtitle":"NITROX Analyzer","firstLearnMoreUrl":"","firstConfiguratorUrl":"","firstImage":{"recommendedSizes":{"width":200,"height":200},"mimetype":"image/png","size":24805,"hash":"7c4496289919af2a1aba9a3f1a7eb2e67b49b8d3","id":"cl0ay9z4rfqs707767v5nv9fv","filename":"divesoft-analyzer-solo-o2-menu-180x180-w.png","category":"divesoft/","type":"image"},"firstFeatures":[{"id":"1","key":"Oxygen-sensor","title":"Oxygen sensor","subtitle":"Galvanic - R22S - molex"},{"id":"2","key":"Helium-sensor","title":"Helium sensor","subtitle":"No (upgradeable) "},{"id":"3","key":"Body-material","title":"Body material","subtitle":"Polymer"},{"id":"4","key":"Gas-blending-software","title":"Gas blending software","subtitle":"Yes"},{"id":"5","key":"Built-in-battery","title":"Built in battery","subtitle":"Rechargable Li-Ion"},{"id":"6","key":"Charging-port","title":"Charging-port","subtitle":"USB-C"},{"id":"7","key":"Connecting-port-to-other-devices","title":"Connecting port to other devices","subtitle":"No"},{"id":"8","key":"Case","title":"Case","subtitle":"EVA case"},{"id":"9","key":"Flow-limiter","title":"Flow limiter","subtitle":"Basic flow limiter #8438"}
2,{"id":"10","key":"Voltmeter","title":"Voltmeter","subtitle":"No"},{"id":"11","key":"Ohmmeter","title":"Ohmmeter","subtitle":"No"}],"secondTitle":"SOLO","secondSubtitle":"Portable Trimix Analyzer","secondLearnMoreUrl":"","secondConfiguratorUrl":"","secondImage":{"recommendedSizes":{"width":200,"height":200},"mimetype":"image/png","size":21365,"hash":"86c88a3b3a4548c839809b6a0a216160dc9df39a","id":"cl0ayaudsfquc0776i7y8uddt","filename":"divesoft-analyzer-solo-menu-180x180-w.png","category":"divesoft/","type":"image"},"secondFeatures":[{"id":"1","key":"Oxygen-sensor","title":"Oxygen sensor","subtitle":"Galvanic - R22S - molex"},{"id":"2","key":"Helium-sensor","title":"Helium sensor","subtitle":"Solid state"},{"id":"3","key":"Body-material","title":"Body material","subtitle":"Polymer"},{"id":"4","key":"Gas-blending-software","title":"Gas blending software","subtitle":"Yes"},{"id":"5","key":"Built-in-battery","title":"Built in battery","subtitle":"Rechargable Li-Ion"},{"id":"6","key":"Charging-port","title":"Charging port","subtitle":"USB-C"},{"id":"7","key":"Connecting-port-to-other-devices","title":"Connecting port to other devices","subtitle":"No"},{"id":"8","key":"Case","title":"Case","subtitle":"EVA case"},{"id":"9","key":"Flow-limiter","title":"Flow limiter","subtitle":"Basic flow limiter #8438"},{"id":"10","key":"Voltmeter","title":"Voltmeter","subtitle":"No"},{"id":"11","key":"Ohmmeter","title":"Ohmmeter","subtitle":"No"}],"thirdTitle":"He/O2","thirdSubtitle":"Aluminium He/O2 Analyzer","thirdLearnMoreUrl":"","thirdConfiguratorUrl":"","thirdImage":{"recommendedSizes":{"width":200,"height":200},"mimetype":"image/png","size":27836,"hash":"838da554019a5c9cea70744f7273ea5c7e93aa88","id":"cl0aybac0fqvr0776zwfc65qs","filename":"divesoft-analyzer-he-o2-menu-180x180-w.png","category":"divesoft/","type":"image"},"thirdFeatures":[{"id":"1","key":"Oxygen-sensor","title":"Oxygen sensor","subtitle":"Galvanic - R22S - molex"},{"id":"2","key":"Helium-sensor","title":"Helium sensor","subtitle":"Solid state"},{"id":"3","key":"Body-material","title":"Body material","subtitle":"Aluminium"},{"id":"4","key":"Gas-blending-software","title":"Gas blending software","subtitle":"Yes"},{"id":"5","key":"Built-in-battery","title":"Built in battery","subtitle":"Rechargable Li-Ion"},{"id":"6","key":"Charging-port","title":"Charging port","subtitle":"USB A-B"},{"id":"7","key":"Connecting-port-to-other-devices","title":"Connecting port to other devices","subtitle":"Yes"},{"id":"8","key":"Case","title":"Case","subtitle":"EVA case"},{"id":"9","key":"Flow-limiter","title":"Flow limiter","subtitle":"Basic flow limiter #8438"},{"id":"10","key":"Voltmeter","title":"Voltmeter","subtitle":"No"},{"id":"11","key":"Ohmmeter","title":"Ohmmeter","subtitle":"No"}],"fourthTitle":"Set Blender Standard","fourthSubtitle":"He/O2 analyzer set","fourthLearnMoreUrl":"","fourthConfiguratorUrl":"","fourthImage":{"recommendedSizes":{"width":200,"height":200},"mimetype":"image/png","size":716965,"hash":"25172474c1fd80a0cd411e25eb15752fc7842661","id":"clb57t1fv6s8407763rhwqc11","filename":"pvn7n-8451-divesoft-analyzer-set-blender-pro-p-01-1080x1080.png","category":"divesoft/","type":"image"},"fourthFeatures":[{"id":"1","key":"Oxygen-sensor","title":"Oxygen sensor","subtitle":"Galvanic - R22S - molex"},{"id":"2","key":"Helium-sensor","title":"Helium sensor","subtitle":"Solid state"},{"id":"3","key":"Body-material","title":"Body material","subtitle":"Aluminium"},{"id":"4","key":"Gas-blending-software","title":"Gas blending software","subtitle":"Yes"},{"id":"5","key":"Built-in-battery","title":"Built in battery","subtitle":"Rechargable Li-Ion"},{"id":"6","key":"Charging-port","title":"Charging port","subtitle":"USB A-B"},{"id":"7","key":"Connecting-port-to-other-devices","title":"Connecting port to other devices","subtitle":"Yes"},{"id":"8","key":"Case","title":"Case","subtitle":"Divesoft Transport case"},{"id":"9","key":"Flow-limiter","title":"Flow limiter","subtitle":"Professional flow limiter Mk2 #8437"},{"id":"10","key":"Voltmeter","title":"Voltmeter","subtitle":"No"}
2,{"id":"11","key":"Ohmmeter","title":"Ohmmeter","subtitle":"No"}],"fifthTitle":"Set Blender Pro","fifthSubtitle":"He/O2 analyzer set","fifthLearnMoreUrl":"","fifthConfiguratorUrl":"","fifthImage":{"recommendedSizes":{"width":200,"height":200},"mimetype":"image/png","size":716965,"hash":"25172474c1fd80a0cd411e25eb15752fc7842661","id":"clb57t1fv6s8407763rhwqc11","filename":"pvn7n-8451-divesoft-analyzer-set-blender-pro-p-01-1080x1080.png","category":"divesoft/","type":"image"},"fifthFeatures":[{"id":"1","key":"Oxygen-sensor","title":"Oxygen sensor","subtitle":"Galvanic - R22S - molex"},{"id":"2","key":"Helium-sensor","title":"Helium sensor","subtitle":"Solid state"},{"id":"3","key":"Body-material","title":"Body material","subtitle":"Aluminium"},{"id":"4","key":"Gas-blending-software","title":"Gas blending software","subtitle":"Yes"},{"id":"5","key":"Built-in-battery","title":"Built in battery","subtitle":"Rechargable Li-Ion"},{"id":"6","key":"Charging-port","title":"Charging port","subtitle":"USB A-B"},{"id":"7","key":"Connecting-port-to-other-devices","title":"Connecting port to other devices","subtitle":"Yes"},{"id":"8","key":"Case","title":"Case","subtitle":"Divesoft Transport case"},{"id":"9","key":"Flow-limiter","title":"Flow limiter","subtitle":"Professional flow limiter Mk2 #8437"},{"id":"10","key":"Voltmeter","title":"Voltmeter","subtitle":"Yes"}
2,{"id":"11","key":"Ohmmeter","title":"Ohmmeter","subtitle":"Yes"}],"image":{"type":"image"},"activeTab":"1"}},"__typename":"ComponentTemplate"},"ComponentTemplate:clg8f3m23pg210835784f98c5":{"id":"clg8f3m23pg210835784f98c5","name":"DSV/BOV ","type":"ProductComponents","content":{"type":"json","json":{"title":"DSV / BOV OPTIONS","description":"","columns":"col-lg-4","components":[{"title":"DSV","description":"COMPATIBLE WITH\n* BM FMCL\n* BM Light FMCL","image":{"recommendedSizes":{"width":"130","height":"130"},"mimetype":"image/png","size":2466516,"hash":"5361bd3f37d440c00833572b7bd4566bb0199e3e","id":"ckx4j1fpwco7x0776w17unq1w","filename":"divesoft-dsv-circuit-left-1080x1080.png","category":"divesoft/","type":"image"},"url":"","id":"1"},{"title":"DSV + MAV","description":"COMPATIBLE WITH\n* BM BMCL\n* BM Light BMCL\n* BM Heavy BMCL","image":{"recommendedSizes":{"width":"130","height":"130"},"mimetype":"image/jpeg","size":28147,"hash":"35fce092acd8cd4ff98ccf865aad0ea685bd7d79","id":"cl5fy5fenrbhv0776fkyabrq2","filename":"dsv-mav-for-liberty-kiss-sf2-5.jpg","category":"divesoft/","type":"image"},"url":"","id":"2"},{"title":"SM DSV + MAV","description":"COMPATIBLE WITH\n* SM","image":{"recommendedSizes":{"width":"130","height":"130"},"mimetype":"image/png","size":155596,"hash":"66a4577a1cc49a12e3c232d14f8effbce85fdddd","id":"cl5d1lkqrr2av07764ad591xs","filename":"dsv-with-elbows-mav-for-liberty-kiss-sf2-2.png","category":"divesoft/","type":"image"},"url":"","id":"3"},{"title":"BOV","description":"COMPATIBLE WITH\n* BM FMCL\n* BM Light FMCL","image":{"recommendedSizes":{"width":"130","height":"130"},"mimetype":"image/png","size":3004654,"hash":"0734fd7b807df86acda234e29b3dbc2f35a04c03","id":"ckx4j2k71co9g07765pj9r84v","filename":"divesoft-bailout-feed-left-1080x1080.png","category":"divesoft/","type":"image"},"url":"","id":"4"},{"title":"BOV + MAV","description":"COMPATIBLE WITH\n* BM BMCL\n* BM Light BMCL\n* BM Heavy BMCL","image":{"recommendedSizes":{"width":"130","height":"130"},"mimetype":"image/jpeg","size":32359,"hash":"13a19fdb59cff4b365445a1dd62ae579ae0ede51","id":"cl5d1nordr2b707765jglsdk4","filename":"bov-with-adv-hose-nipples-liberty-kiss-sf22-2.jpg","category":"divesoft/","type":"image"},"url":"","id":"5"},{"title":"BOV + ADV + MAV","description":"COMPATIBLE WITH\n* BM BMCL\n* BM Light BMCL\n* BM Heavy BMCL","image":{"recommendedSizes":{"width":"130","height":"130"},"mimetype":"image/jpeg","size":35592,"hash":"e735a135ad17755bfe83f1b93ebff13e00018cd5","id":"cl5d1l33lr2ak07763j6iqft5","filename":"divesoft-bov-s-adv-a-ruoenuumi-duevkami-pro-jj-ccr-o2ptima-ccr-2-1.jpg","category":"divesoft/","type":"image"},"url":"","id":"6"},{"id":"8"},{"id":"7","title":"BOV + ADV","description":"COMPATIBLE WITH\n* BM FMCL\n* BM Light FMCL\n","image":{"mimetype":"image/jpeg","size":32359,"hash":"13a19fdb59cff4b365445a1dd62ae579ae0ede51","id":"cl5d1nordr2b707765jglsdk4","filename":"bov-with-adv-hose-nipples-liberty-kiss-sf22-2.jpg","category":"divesoft/","type":"image"}},{"id":"9"}],"activeTab":"6"}},"__typename":"ComponentTemplate"},"ComponentTemplate:clgc0iykwpxfu0835j8844xnm":{"id":"clgc0iykwpxfu0835j8844xnm","name":"freedom+ menu","type":"ProductCrossroadNew","content":{"type":"json","json":{"products":[{"id":"1","title":"Basic Nitrox","image":{"mimetype":"image/png","size":15696,"hash":"1918ae2b49bf4f586b8a88c7fcaa5256819d3107","id":"cl0b0b0refsba077694sxel05","filename":"divesoft-freedom-computer-8056-basic-nitrox-180x180-w.png","category":"divesoft/","type":"image"},"url":{"url":"/en/products/freedom-computers/basic-nitrox","pageId":"cl0b1gsb09z4a0858ohmi60nw","urlNewWindow":false}},{"id":"2","title":"Advance Nitrox","image":{"mimetype":"image/png","size":15658,"hash":"17e4c4dd68102ac731a9f686626c747fc3b7a7ea","id":"cl0b0bwqufscs07767ysm4zhn","filename":"divesoft-freedom-computer-8057-advanced-nitrox-180x180-w.png","category":"divesoft/","type":"image"},"url":{"url":"/en/products/freedom-computers/advance-nitrox","pageId":"cl0b1mqzd9z5s0858xvc66npt"}},{"id":"3","title":"Full Trimix","image":{"mimetype":"image/png","size":16103,"hash":"68c28e63c984c78697dc180741a01fba8d516584","id":"cl0b0crjjfse907760o0kbofn","filename":"divesoft-freedom-computer-8058-full-trimix-180x180-w.png","category":"divesoft/","type":"image"},"url":{"url":"/en/products/freedom-computers/full-trimix","pageId":"cl0b1pfpc9z6n0858rb5vsyvg"}}
2,{"id":"4","title":"Closed Circuit","image":{"mimetype":"image/png","size":15688,"hash":"a668e7dc287318c55c7cb279be61a94accbfdaaa","id":"cl0b0dvc5fsf70776toyc2cf8","filename":"divesoft-freedom-computer-8272-closed-circuit-180x180-w.png","category":"divesoft/","type":"image"},"url":{"url":"/en/products/freedom-computers/closed-circuit","pageId":"cl0b1xajx9z7s08582ciem2oh"}},{"id":"5","title":"CCR Bottom timer","image":{"mimetype":"image/png","size":15716,"hash":"2b34679d408f9cb575fc562af5c8d782aa5198e2","id":"cl0b0epn0fsgt0776h4x02eh8","filename":"divesoft-freedom-computer-8273-bottom-timer-ccr-180x180-w.png","category":"divesoft/","type":"image"},"url":{"url":"/en/products/freedom-computers/ccr-bottom-timer","pageId":"cl0b1zm0s9z9u0858ijxcwv8k"}},{"id":"6","title":"Advanced Bottom timer","image":{"mimetype":"image/png","size":15308,"hash":"0e968632471a2c70464f96c358d62b9a08c0007b","id":"cl0b0f68nfsha0776spu87xnz","filename":"divesoft-freedom-computer-8102-advanced-bottom-timer-180x180-w.png","category":"divesoft/","type":"image"},"url":{"url":"/en/products/freedom-computers/advanced-bottom-timer","pageId":"cl0b23vqg9zap0858qy8spafp"}}]}},"__typename":"ComponentTemplate"},"ComponentTemplate:clgc2b24npyip0835ju32p0sp":{"id":"clgc2b24npyip0835ju32p0sp","name":"freedom+ menu","type":"ProductCrossroadNew","content":{"type":"json","json":{"products":[{"id":"1","title":"Basic Nitrox","image":{"mimetype":"image/png","size":30172,"hash":"f48a936ec493ac42417d92b9c9c29dc542f93b13","id":"clgc12a44picl0776stiv7vbs","filename":"8455-divesoft-freedom-plus-basic-nitrox-180x180-w.png","category":"divesoft/","type":"image"},"url":{"url":"/en/products/freedomplus-computers/freedom-basic-nitrox","pageId":"clgbzgjlepwy70835l51qf21c","urlNewWindow":false}},{"id":"2","title":"Advance Nitrox","image":{"mimetype":"image/png","size":15658,"hash":"17e4c4dd68102ac731a9f686626c747fc3b7a7ea","id":"cl0b0bwqufscs07767ysm4zhn","filename":"divesoft-freedom-computer-8057-advanced-nitrox-180x180-w.png","category":"divesoft/","type":"image"},"url":{"url":"/en/products/freedom-computers/advance-nitrox","pageId":"cl0b1mqzd9z5s0858xvc66npt"}},{"id":"3","title":"Full Trimix","image":{"mimetype":"image/png","size":16103,"hash":"68c28e63c984c78697dc180741a01fba8d516584","id":"cl0b0crjjfse907760o0kbofn","filename":"divesoft-freedom-computer-8058-full-trimix-180x180-w.png","category":"divesoft/","type":"image"},"url":{"url":"/en/products/freedom-computers/full-trimix","pageId":"cl0b1pfpc9z6n0858rb5vsyvg"}},{"id":"4","title":"Closed Circuit","image":{"mimetype":"image/png","size":15688,"hash":"a668e7dc287318c55c7cb279be61a94accbfdaaa","id":"cl0b0dvc5fsf70776toyc2cf8","filename":"divesoft-freedom-computer-8272-closed-circuit-180x180-w.png","category":"divesoft/","type":"image"},"url":{"url":"/en/products/freedom-computers/closed-circuit","pageId":"cl0b1xajx9z7s08582ciem2oh"}},{"id":"5","title":"CCR Bottom timer","image":{"mimetype":"image/png","size":15716,"hash":"2b34679d408f9cb575fc562af5c8d782aa5198e2","id":"cl0b0epn0fsgt0776h4x02eh8","filename":"divesoft-freedom-computer-8273-bottom-timer-ccr-180x180-w.png","category":"divesoft/","type":"image"},"url":{"url":"/en/products/freedom-computers/ccr-bottom-timer","pageId":"cl0b1zm0s9z9u0858ijxcwv8k"}},{"id":"6","title":"Advanced Bottom timer","image":{"mimetype":"image/png","size":15308,"hash":"0e968632471a2c70464f96c358d62b9a08c0007b","id":"cl0b0f68nfsha0776spu87xnz","filename":"divesoft-freedom-computer-8102-advanced-bottom-timer-180x180-w.png","category":"divesoft/","type":"image"},"url":{"url":"/en/products/freedom-computers/advanced-bottom-timer","pageId":"cl0b23vqg9zap0858qy8spafp"}}],"activeTab":"1"}},"__typename":"ComponentTemplate"},"ComponentTemplate:clgc2f6t4pypr0835hsqq35ds":{"id":"clgc2f6t4pypr0835hsqq35ds","name":"freedom+ menu","type":"ProductCrossroadNew","content":{"type":"json","json":{"products":[{"id":"1","title":"Basic Nitrox","image":{"mimetype":"image/png","size":30172,"hash":"f48a936ec493ac42417d92b9c9c29dc542f93b13","id":"clgc12a44picl0776stiv7vbs","filename":"8455-divesoft-freedom-plus-basic-nitrox-180x180-w.png","category":"divesoft/","type":"image"},"url":{"url":"/en/products/freedomplus-computers/freedom-basic-nitrox","pageId":"clgbzgjlepwy70835l51qf21c","urlNewWindow":false}},{"id":"2","title":"Advance Nitrox","image":{"mimetype":"image/png","size":30615,"hash":"7874cec20d697294b5fd7718ee0707814f9fdcc7","id":"clgc12ek8picr0776jowc69o5","filename":"8456-divesoft-freedom-plus-advanced-nitrox-180x180-w.png","category":"divesoft/","type":"image"},"url":{"url":"/en/products/freedomplus-computers/freedom-advance-nitrox","pageId":"clgbzhgtzpwz70835ob1bnyr3"}},{"id":"3","title":"Full Trimix","image":{"mimetype":"image/png","size":31529,"hash":"9e97ef585b09b657e31c3e500ebe1de3bc4dfa79","id":"clgc12jx8picx0776vg4zp011","filename":"8457-divesoft-freedom-plus-full-trimix-180x180-w.png","category":"divesoft/","type":"image"},"url":{"url":"/en/products/freedomplus-computers/freedom-full-trimix","pageId":"clgbzi1blpx0g0835gajum3js"}}
2,{"id":"4","title":"Closed Circuit","image":{"mimetype":"image/png","size":31140,"hash":"21bdb92c8348c887bbbc83ba9b59f723f19cb6dd","id":"clgc12qp8pid30776qojhblt9","filename":"8458-divesoft-freedom-plus-closed-circuit-180x180-w.png","category":"divesoft/","type":"image"},"url":{"url":"/en/products/freedomplus-computers/freedom-closed-circuit","pageId":"clgbzininpx1a0835eihfzq6e"}},{"id":"5","title":"CCR Bottom timer","image":{"mimetype":"image/png","size":29069,"hash":"05abc4dfff79258fca73e2b38ca96b47e8db4903","id":"clgc125jmpicf0776sosxhn2n","filename":"8454-divesoft-freedom-plus-advanced-bottom-timer-180x180-w.png","category":"divesoft/","type":"image"},"url":{"url":"/en/products/freedomplus-computers/freedom-ccr-bottom-timer","pageId":"clgbzjgeipx240835xwieeyan"}},{"id":"6","title":"Advanced Bottom timer","image":{"mimetype":"image/png","size":29069,"hash":"05abc4dfff79258fca73e2b38ca96b47e8db4903","id":"clgc125jmpicf0776sosxhn2n","filename":"8454-divesoft-freedom-plus-advanced-bottom-timer-180x180-w.png","category":"divesoft/","type":"image"},"url":{"url":"/en/products/freedomplus-computers/freedom-advanced-bottom-timer","pageId":"clgbzkf54px2r0835sc6xyr1h"}}],"activeTab":"6"}},"__typename":"ComponentTemplate"},"ComponentTemplate:clgc2giu0pyqt0835v0voqqsj":{"id":"clgc2giu0pyqt0835v0voqqsj","name":"freedom+ menu","type":"ProductCrossroadNew","content":{"type":"json","json":{"products":[{"id":"5","title":"General info","url":{"url":"/en/products/freedomplus-computers","pageId":"clfgt4fdjmf9v0835bv440kqj"},"image":{"mimetype":"image/png","size":525535,"hash":"a6557de1bdf2d913fcf15e986f6ac2e1710bab7f","id":"clfwiixc4m8i807765sqq006z","filename":"7273-divesoft-freedom-plus-off-1080x1080-t-2.png","category":"divesoft/","type":"image"}},{"id":"3","title":"Full Trimix","image":{"mimetype":"image/png","size":31529,"hash":"9e97ef585b09b657e31c3e500ebe1de3bc4dfa79","id":"clgc12jx8picx0776vg4zp011","filename":"8457-divesoft-freedom-plus-full-trimix-180x180-w.png","category":"divesoft/","type":"image"},"url":{"url":"/en/products/freedomplus-computers/freedom-full-trimix","pageId":"clgbzi1blpx0g0835gajum3js"}},{"id":"4","title":"Closed Circuit","image":{"mimetype":"image/png","size":31140,"hash":"21bdb92c8348c887bbbc83ba9b59f723f19cb6dd","id":"clgc12qp8pid30776qojhblt9","filename":"8458-divesoft-freedom-plus-closed-circuit-180x180-w.png","category":"divesoft/","type":"image"},"url":{"url":"/en/products/freedomplus-computers/freedom-closed-circuit","pageId":"clgbzininpx1a0835eihfzq6e"}}],"activeTab":"5"}},"__typename":"ComponentTemplate"},"ComponentTemplate:clj5o8s0v8d98083584jlkh7o":{"id":"clj5o8s0v8d98083584jlkh7o","name":"Air integr","type":"TextBlock","content":{"type":"json","json":{"text":"### <span id=\"1-.-7-.-4-Backup-regulator-(optional)\">**1.7.5 Air integration (2021 Edition only)**</span>\n\nYou can use any compatible transmitter (not included). For example, Shearwater / Aqualung / Pelagic (Suunto,\nRatio, Mares, Garmin, Scubapro smart are not compatible).\nThe transmitter is automatically activated by pressurization to 8 bar and more.\nThe transmitter turns off after 2 minutes at a tank pressure of <4 bar. Please do not leave\nthe Liberty pressurized for prolonged periods of time (at storage), since the transmitter has\ndeclared runtime of 300hrs on one battery","textLarge":false,"imageOnRight":true,"image":{"recommendedSizes":{"width":"420","height":"280"}},"imageMobile":{"recommendedSizes":{"width":"750","height":"500"}}}},"__typename":"ComponentTemplate"},"ComponentTemplate:cljcsv3ci94ur0835c696e58g":{"id":"cljcsv3ci94ur0835c696e58g","name":"Full manual","type":"DownloadsNew","content":{"type":"json","json":{"backgroundColor":"#f0f0f0","title":"Full manual","subtitle":"","showBreadcrumbs":false,"hideHeader":false,"files":[{"title":"Section 01 - Operation and Diving","isTitleBold":true,"subtitle":"","url":{"url":"https://www.divesoft.com/en/manuals/freedom-user-manual/freedom-user-manual-01","urlNewWindow":true},"urlText":"OPEN","id":"1"},{"title":"Section 02 - Setup and Procedures","isTitleBold":true,"subtitle":"","url":{"url":"https://www.divesoft.com/en/manuals/ccr-liberty-manual/ccr-liberty-manual-02","urlNewWindow":true},"urlText":"OPEN","id":"2"}],"activeTab":"2"}},"__typename":"ComponentTemplate"},"ComponentTemplate:clpti51szngus0735vckv0v18":{"id":"clpti51szngus0735vckv0v18","name":"ccr","type":"ProductCrossroadNew","content":{"type":"json","json":{"products":[{"id":"
21","title":"Philosophy","image":{"mimetype":"image/png","size":5787680,"hash":"66221f51bc0fbd67d2f92afea827d02d4737e43e","id":"cjxc53e0l078007765x7oz913","filename":"bmcl-00001.png","category":"divesoft/","type":"image"},"url":{"url":"/en/products/ccr-liberty/test2-philosophy","pageId":"cl6g9m44gs2au08581lp45hic","urlNewWindow":false}},{"id":"2","title":"Anatomy","image":{"mimetype":"image/png","size":259316,"hash":"9b3cdb102291f8c95b3a3408e0a493c1bbb94c38","id":"cjxc7r1hw07b20776e7kq8u9o","filename":"sidemount.png","category":"divesoft/","type":"image"},"url":{"url":"/en/products/ccr-liberty/test2-anatomy","pageId":"cl6g9nsgds2c20858pg31ae97"}},{"id":"3","title":"Features","url":{"url":"/en/products/ccr-liberty/test2-features","pageId":"cl6g9opv3s2ck085846otg5l7"},"image":{"mimetype":"image/png","size":111678,"hash":"1b0abc1813359acf3baa47dbc11b4b290aab310c","id":"cl1eybpshr7010776kwxzb09o","filename":"divesoft-liberty-head-01-1080x1080-t.png","category":"divesoft/","type":"image"}},{"id":"5","url":{"url":"https://www.divesoft.com/en/products/ccr-liberty/configurations"},"title":"Configurations","image":{"mimetype":"image/png","size":122646,"hash":"02c52e172aca759e3904acf42d74d7b9b8b67ebe","id":"cl8jv40hdirlg0776njznax3q","filename":"configurations4.png","category":"divesoft/","type":"image"}},{"id":"4","title":"Configurator","url":{"url":"https://www.divesoft.com/ccr-liberty/"},"image":{"mimetype":"image/png","size":6352707,"hash":"25f220967ec22ba2f1feb4223d01dbfd5cc87ed9","id":"cl9mpe0atssnq0776id8dfz3a","filename":"divesoft-liberty-modularity-1920x1080-t.png","category":"divesoft/","type":"image"}}],"activeTab":"4"}},"__typename":"ComponentTemplate"},"ComponentTemplate:cluqprhkvfk7n0735ex56gzn0":{"id":"cluqprhkvfk7n0735ex56gzn0","
2name":"ProductCrossroad Liberty","type":"ProductCrossroadNew","content":{"type":"json","json":{"products":[{"id":"2","title":"Anatomy","image":{"mimetype":"image/png","size":259316,"hash":"9b3cdb102291f8c95b3a3408e0a493c1bbb94c38","id":"cjxc7r1hw07b20776e7kq8u9o","filename":"sidemount.png","category":"divesoft/","type":"image"},"url":{"url":"/en/products/ccr-liberty/test2-anatomy","pageId":"cl6g9nsgds2c20858pg31ae97"}},{"id":"3","title":"Features","url":{"url":"/en/products/ccr-liberty/test2-features","pageId":"cl6g9opv3s2ck085846otg5l7"},"image":{"mimetype":"image/png","size":111678,"hash":"1b0abc1813359acf3baa47dbc11b4b290aab310c","id":"cl1eybpshr7010776kwxzb09o","filename":"divesoft-liberty-head-01-1080x1080-t.png","category":"divesoft/","type":"image"}},{"id":"5","url":{"url":"https://www.divesoft.com/en/products/ccr-liberty/configurations"},"title":"Configurations","image":{"mimetype":"image/png","size":122646,"hash":"02c52e172aca759e3904acf42d74d7b9b8b67ebe","id":"cl8jv40hdirlg0776njznax3q","filename":"configurations4.png","category":"divesoft/","type":"image"}},{"id":"4","title":"Configurator","url":{"url":"https://www.divesoft.com/ccr-liberty/"},"image":{"mimetype":"image/png","size":6352707,"hash":"25f220967ec22ba2f1feb4223d01dbfd5cc87ed9","id":"cl9mpe0atssnq0776id8dfz3a","filename":"divesoft-liberty-modularity-1920x1080-t.png","category":"divesoft/","type":"image"}},{"id":"1","title":"Backmount","image":{"mimetype":"image/png","size":5787680,"hash":"66221f51bc0fbd67d2f92afea827d02d4737e43e","id":"cjxc53e0l078007765x7oz913","filename":"bmcl-00001.png","category":"divesoft/","type":"image"},"url":{"url":"/en/products/ccr-liberty/ccr-liberty-bmcl-fmcl","pageId":"ckt0i4dg51ogp0988dpgn8lwr","urlNewWindow":false}},{"id":"6","url":{"url":"/en/products/ccr-liberty/ccr-liberty-sidemount","pageId":"cjyztusbt039t0777kqbo8xj8"},"title":"Sidemount","image":{"mimetype":"image/jpeg","size":50745,"hash":"6c22b8a5eba20aaf637c4d14496dc84fca8db4cd","id":"cjxc5i4lo079407760imjcn2n","filename":"sidemount-.jpg","category":"divesoft/","type":"image"}},{"id":"7","title":"Light","url":{"url":"/en/products/ccr-liberty/ccr-liberty-light","pageId":"ck7m1guq108gk07883tmehxr4"},"image":{"mimetype":"image/png","size":803931,"hash":"bb7fb772b0304575862f683e4ef39b0302a0be8a","id":"ckx3mi0tsc5tr0776r23bum6i","filename":"divesoft-ccr-liberty-light-07-1080x1080.png","category":"divesoft/","type":"image"}},{"id":"8","url":{"url":"/en/products/ccr-liberty/ccr-liberty-heavy","pageId":"cknpubp6j2f690788zv52yohy"},"title":"Heavy","image":{"mimetype":"image/png","size":15299,"hash":"17a6b78d3e160ac26b79cbcec754824a5ad9a8a0","id":"ckx3m2sjnc5qs07764q4obz7u","filename":"divesoft-menu-ccr-liberty-heavy-200x200.png","category":"divesoft/","type":"image"}}],"activeTab":"8"}},"__typename":"ComponentTemplate"},"ComponentTemplate:cm9h4wr6ugjv10803yqs3tp71":{"id":"cm9h4wr6ugjv10803yqs3tp71","name":"Advertising / ProductShowcase / 2025-04-14","type":"ProductShowcase","content":{"type":"json","json":{"backgroundColor":"#ffffff","isTextDark":true,"isImageRight":false,"image":{"recommendedSizes":{"width":"485","height":"485"},"mimetype":"image/png","size":1301657,"hash":"43e9e651a9f52d00f08256ebeafeddc32164c11f","id":"cm737a5egjeyt08505ycj0rdm","filename":"divesoft-app-202502-01.png","category":"divesoft/","type":"image"},"imageMobile":{"recommendedSizes":{"width":"510","height":"510"}},"isTitleH1":false,"title":"Divesoft.app","subtitle":"Plan your decompression, gasses, utilize checklists, check your logs + more!!","description":"All for Free.","hideDescriptionOnMobile":false,"areButtons":false,"firstTitle":"Learn more >","firstUrl":{"url":"/en/app","pageId":"ckfccnc4a98bx0788f7enal83"},"secondTitle":"Configurator >","secondUrl":""}},"__typename":"ComponentTemplate"},"ComponentTemplate:cm9tyyioqiznx0803d9uizh8o":{"id":"cm9tyyioqiznx0803d9uizh8o","name":"Try the CCR Liberty","type":"HubSpotForm","content":{"type":"json","json":{"backgroundColor":"#ffffff","isTitleH1":false,"title":"Try the CCR Liberty","subtitle":"Contact us for demo!","showBreadcrumbs":false,"hideHeader":false,"portalId":"145642557","formId":"33ca3699-344e-40b8-926b-6c2c8d83543f"}},"__typename":"ComponentTemplate"},"ComponentTemplate:cmdsh7xs60heb083221zlkgvh":{"id":"cmdsh7xs60heb083221zlkgvh","name":"I WANT IT NOW!","type":"ProductShowcase","content":{"type":"json","json":{"backgroundColor":"#343434","isTextDark":false,"isImageRight":true,"image":{"recommendedSizes":{"width":"485","height":"485"},"mimetype":"image/png","size":61882,"hash":"2fdc157f745f3e817454d7d9a5b528e9708fae07","id":"cmdoim9mzzju30850pth1690v","filename":"i-want-it-now-text-2.png","category":"divesoft/","type":"image"},"imageMobile":{"recommendedSizes":{"width":"510","height":"510"}},"isLazyLoadingDisabled":false,"isTitleH1":false,"title":"CCR Liberty Sidemount","subtitle":"","description":"Do you need to purchase a CCR Liberty Sidemount quickly but donât have the option to wait 4 weeks for production?\nStarting August 1st, CCR Liberty Sidemount units are available in stock.\n","hideDescriptionOnMobile":false,"areButtons":false,"firstTitle":"Learn more >","firstUrl":{"url":"/en/products/ccr-liberty/stock-unit","pageId":"cmdo5gsze02qc0832lf2bbv7e"},"secondTitle":"Configurator >","secondUrl":""}},"__typename":"ComponentTemplate"},"ComponentTemplate:cmo217fjivvbv08890d7r7mhl":{"id":"cmo217fjivvbv08890d7r7mhl","name":"Analyzers comparison 2026","type":"ProductsCompare","content":{"type":"json","json":{"sectionTitle":"Find the analyzer that fits your diving style","firstTitle":"ECHO","firstSubtitle":"","firstLearnMoreUrl":"","firstConfiguratorUrl":"","firstImage":{"recommendedSizes":{"width":400,"height":400},"mimetype":"image/png","size":81873,"hash":"ecbbbb8b09afa814fe10c2d59ca59db7c9c94dfd","id":"cmocqylfg1t200800je458hq4","filename":"comparison-echo.png","category":"divesoft/","type":"image"}
2,"firstFeatures":[{"id":"1","key":"o2-measurement","title":"O<sub>2</sub> measurement","subtitle":"<svg width=\"21\" height=\"15\" viewBox=\"0 0 7 5\" fill=\"none\" xmlns=\"http://www.w3.org/2000/svg\">\n<path d=\"M2.69263 4.40522C2.95784 4.40522 3.21991 4.30537 3.42272 4.10257L6.85222 0.74258L6.09716 -3.30046e-08L2.92039 3.11038C2.79559 3.23518 2.58966 3.23518 2.46485 3.11038L0.745686 1.39121L-2.00076e-06 2.13691L1.96252 4.09945C2.16221 4.29914 2.42742 4.4021 2.69263 4.4021\" fill=\"black\"/>\n</svg>"},{"id":"2","subtitle":"<svg width=\"21\" height=\"15\" viewBox=\"0 0 7 5\" fill=\"none\" xmlns=\"http://www.w3.org/2000/svg\">\n<path d=\"M2.69263 4.40522C2.95784 4.40522 3.21991 4.30537 3.42272 4.10257L6.85222 0.74258L6.09716 -3.30046e-08L2.92039 3.11038C2.79559 3.23518 2.58966 3.23518 2.46485 3.11038L0.745686 1.39121L-2.00076e-06 2.13691L1.96252 4.09945C2.16221 4.29914 2.42742 4.4021 2.69263 4.4021\" fill=\"black\"/>\n</svg>","key":"he-measurement","title":"He measurement"},{"id":"3","key":"co-detection","title":"CO detection","subtitle":"<svg width=\"21\" height=\"15\" viewBox=\"0 0 7 5\" fill=\"none\" xmlns=\"http://www.w3.org/2000/svg\">\n<path d=\"M2.69263 4.40522C2.95784 4.40522 3.21991 4.30537 3.42272 4.10257L6.85222 0.74258L6.09716 -3.30046e-08L2.92039 3.11038C2.79559 3.23518 2.58966 3.23518 2.46485 3.11038L0.745686 1.39121L-2.00076e-06 2.13691L1.96252 4.09945C2.16221 4.29914 2.42742 4.4021 2.69263 4.4021\" fill=\"black\"/>\n</svg>"},{"id":"4","key":"rechargable-battery","title":"Rechargable battery","subtitle":"<svg width=\"21\" height=\"15\" viewBox=\"0 0 7 5\" fill=\"none\" xmlns=\"http://www.w3.org/2000/svg\">\n<path d=\"M2.69263 4.40522C2.95784 4.40522 3.21991 4.30537 3.42272 4.10257L6.85222 0.74258L6.09716 -3.30046e-08L2.92039 3.11038C2.79559 3.23518 2.58966 3.23518 2.46485 3.11038L0.745686 1.39121L-2.00076e-06 2.13691L1.96252 4.09945C2.16221 4.29914 2.42742 4.4021 2.69263 4.4021\" fill=\"black\"/>\n</svg>"},{"id":"5","key":"connectivity","title":"Connectivity","subtitle":"Bluetooth"},{"id":"6","key":"data-export","title":"Data export / App","subtitle":"Divesoft App \n(Bluetooth)"},{"id":"7","key":"display","title":"Display","subtitle":"HR-TFT"},{"id":"8","key":"ready-for-travel","title":"Ready for travel","subtitle":"<svg width=\"21\" height=\"15\" viewBox=\"0 0 7 5\" fill=\"none\" xmlns=\"http://www.w3.org/2000/svg\">\n<path d=\"M2.69263 4.40522C2.95784 4.40522 3.21991 4.30537 3.42272 4.10257L6.85222 0.74258L6.09716 -3.30046e-08L2.92039 3.11038C2.79559 3.23518 2.58966 3.23518 2.46485 3.11038L0.745686 1.39121L-2.00076e-06 2.13691L1.96252 4.09945C2.16221 4.29914 2.42742 4.4021 2.69263 4.4021\" fill=\"black\"/>\n</svg>"},{"id":"9","key":"typical-use","title":"Typical use","subtitle":"Personal and travel gas analyzer with CO safety check"},{"id":"10","title":"Cylinder labeling printing","key":"cylinder-labeling-printing","subtitle":"<svg width=\"21\" height=\"15\" viewBox=\"0 0 7 5\" fill=\"none\" xmlns=\"http://www.w3.org/2000/svg\">\n<path d=\"M2.69263 4.40522C2.95784 4.40522 3.21991 4.30537 3.42272 4.10257L6.85222 0.74258L6.09716 -3.30046e-08L2.92039 3.11038C2.79559 3.23518 2.58966 3.23518 2.46485 3.11038L0.745686 1.39121L-2.00076e-06 2.13691L1.96252 4.09945C2.16221 4.29914 2.42742 4.4021 2.69263 4.4021\" fill=\"black\"/>\n</svg>"}],"secondTitle":"SOLO","secondSubtitle":"","secondLearnMoreUrl":"","secondConfiguratorUrl":"","secondImage":{"recommendedSizes":{"width":400,"height":400},"mimetype":"image/png","size":50529,"hash":"2c3d884d0cb1a9a51efaf87cc1f6a596e64226d0","id":"cmocqyt2g1t2c0800k0cpu5ew","filename":"comparison-solo.png","category":"divesoft/","type":"image"},"secondFeatures":[{"id":"1","key":"o2-measurement","title":"O<sub>2</sub> measurement","subtitle":"<svg width=\"21\" height=\"15\" viewBox=\"0 0 7 5\" fill=\"none\" xmlns=\"http://www.w3.org/2000/svg\">\n<path d=\"M2.69263 4.40522C2.95784 4.40522 3.21991 4.30537 3.42272 4.10257L6.85222 0.74258L6.09716 -3.30046e-08L2.92039 3.11038C2.79559 3.23518 2.58966 3.23518 2.46485 3.11038L0.745686 1.39121L-2.00076e-06 2.13691L1.96252 4.09945C2.16221 4.29914 2.42742 4.4021 2.69263 4.4021\" fill=\"black\"/>\n</svg>"},{"id":"2","key":"he-measurement","title":"He measurement","subtitle":"<svg width=\"21\" height=\"15\" viewBox=\"0 0 7 5\" fill=\"none\" xmlns=\"http://www.w3.org/2000/svg\">\n<path d=\"M2.69263 4.40522C2.95784 4.40522 3.21991 4.30537 3.42272 4.10257L6.85222 0.74258L6.09716 -3.30046e-08L2.92039 3.11038C2.79559 3.23518 2.58966 3.23518 2.46485 3.11038L0.745686 1.39121L-2.00076e-06 2.13691L1.96252 4.09945C2.16221 4.29914 2.42742 4.4021 2.69263 4.4021\" fill=\"black\"/>\n</svg>"},{"id":"3","key":"co-detection","title":"CO detection","subtitle":"<svg width=\"16\" height=\"16\" viewBox=\"0 0 4 4\" fill=\"none\" xmlns=\"http://www.w3.org/2000/svg\">\n<path d=\"M1.9668 1.2168L3.17676 0.0332031L3.93164 0.776367L2.70801 1.97363L3.8916 3.18164L3.1416 3.93164L1.95117 2.71582L0.75 3.89355L0 3.14355L1.20996 1.95801L0.03125 0.754883L0.774414 0L1.9668 1.2168Z\" fill=\"#E30513\"/>\n</svg>"},{"id":"4","key":"rechargable-battery","title":"Rechargable battery","subtitle":"<svg width=\"21\" height=\"15\" viewBox=\"0 0 7 5\" fill=\"none\" xmlns=\"http://www.w3.org/2000/svg\">\n<path d=\"M2.69263 4.40522C2.95784 4.40522 3.21991 4.30537 3.42272 4.10257L6.85222 0.74258L6.09716 -3.30046e-08L2.92039 3.11038C2.79559 3.23518 2.58966 3.23518 2.46485 3.11038L0.745686 1.39121L-2.00076e-06 2.13691L1.96252 4.09945C2.16221 4.29914 2.42742 4.4021 2.69263 4.4021\" fill=\"black\"/>\n</svg>"},{"id":"5","key":"connectivity","title":"Connectivity","subtitle":"USB-C"},{"id":"6","key":"data-export","title":"Data export / App","subtitle":"USB serial \
2n(PC software)"},{"id":"7","key":"display","title":"Display","subtitle":"Bright OLED"},{"id":"8","key":"ready-for-travel","title":"Ready for travel","subtitle":"<svg width=\"21\" height=\"15\" viewBox=\"0 0 7 5\" fill=\"none\" xmlns=\"http://www.w3.org/2000/svg\">\n<path d=\"M2.69263 4.40522C2.95784 4.40522 3.21991 4.30537 3.42272 4.10257L6.85222 0.74258L6.09716 -3.30046e-08L2.92039 3.11038C2.79559 3.23518 2.58966 3.23518 2.46485 3.11038L0.745686 1.39121L-2.00076e-06 2.13691L1.96252 4.09945C2.16221 4.29914 2.42742 4.4021 2.69263 4.4021\" fill=\"black\"/>\n</svg>"},{"id":"9","key":"typical-use","title":"Typical use","subtitle":"Reliable on-site gas analysis"},{"id":"10","key":"cylinder-labeling-printing","title":"Cylinder labeling printing","subtitle":"<svg width=\"16\" height=\"16\" viewBox=\"0 0 4 4\" fill=\"none\" xmlns=\"http://www.w3.org/2000/svg\">\n<path d=\"M1.9668 1.2168L3.17676 0.0332031L3.93164 0.776367L2.70801 1.97363L3.8916 3.18164L3.1416 3.93164L1.95117 2.71582L0.75 3.89355L0 3.14355L1.20996 1.95801L0.03125 0.754883L0.774414 0L1.9668 1.2168Z\" fill=\"#E30513\"/>\n</svg>"}],"thirdTitle":"SOLO O<sub>2</sub>","thirdSubtitle":"","thirdLearnMoreUrl":"","thirdConfiguratorUrl":"","thirdImage":{"recommendedSizes":{"width":400,"height":400},"mimetype":"image/png","size":50751,"hash":"046f7df2046c94f1697ebff3c82379d9edf4e2fb","id":"cmocqz12s1t2s08002unmsn04","filename":"comparison-solo-o2.png","category":"divesoft/","type":"image"},"thirdFeatures":[{"id":"1","key":"o2-measurement","title":"O<sub>2</sub> measurement","subtitle":"<svg width=\"21\" height=\"15\" viewBox=\"0 0 7 5\" fill=\"none\" xmlns=\"http://www.w3.org/2000/svg\">\n<path d=\"M2.69263 4.40522C2.95784 4.40522 3.21991 4.30537 3.42272 4.10257L6.85222 0.74258L6.09716 -3.30046e-08L2.92039 3.11038C2.79559 3.23518 2.58966 3.23518 2.46485 3.11038L0.745686 1.39121L-2.00076e-06 2.13691L1.96252 4.09945C2.16221 4.29914 2.42742 4.4021 2.69263 4.4021\" fill=\"black\"/>\n</svg>"},{"id":"2","key":"he-measurement","title":"He measurement","subtitle":"<svg width=\"16\" height=\"16\" viewBox=\"0 0 4 4\" fill=\"none\" xmlns=\"http://www.w3.org/2000/svg\">\n<path d=\"M1.9668 1.2168L3.17676 0.0332031L3.93164 0.776367L2.70801 1.97363L3.8916 3.18164L3.1416 3.93164L1.95117 2.71582L0.75 3.89355L0 3.14355L1.20996 1.95801L0.03125 0.754883L0.774414 0L1.9668 1.2168Z\" fill=\"#E30513\"/>\n</svg>"},{"id":"3","key":"co-detection","title":"CO detection","subtitle":"<svg width=\"16\" height=\"16\" viewBox=\"0 0 4 4\" fill=\"none\" xmlns=\"http://www.w3.org/2000/svg\">\n<path d=\"M1.9668 1.2168L3.17676 0.0332031L3.93164 0.776367L2.70801 1.97363L3.8916 3.18164L3.1416 3.93164L1.95117 2.71582L0.75 3.89355L0 3.14355L1.20996 1.95801L0.03125 0.754883L0.774414 0L1.9668 1.2168Z\" fill=\"#E30513\"/>\n</svg>"},{"id":"4","key":"rechargable-battery","title":"Rechargable battery","subtitle":"<svg width=\"21\" height=\"15\" viewBox=\"0 0 7 5\" fill=\"none\" xmlns=\"http://www.w3.org/2000/svg\">\n<path d=\"M2.69263 4.40522C2.95784 4.40522 3.21991 4.30537 3.42272 4.10257L6.85222 0.74258L6.09716 -3.30046e-08L2.92039 3.11038C2.79559 3.23518 2.58966 3.23518 2.46485 3.11038L0.745686 1.39121L-2.00076e-06 2.13691L1.96252 4.09945C2.16221 4.29914 2.42742 4.4021 2.69263 4.4021\" fill=\"black\"/>\n</svg>"},{"id":"5","key":"connectivity","title":"Connectivity","subtitle":"USB-C"},{"id":"6","key":"data-export","title":"Data export / App","subtitle":"USB serial \n(PC software)"},{"id":"7","key":"display","title":"Display","subtitle":"Bright OLED"},{"id":"8","key":"ready-for-travel","title":"Ready for travel","subtitle":"<svg width=\"21\" height=\"15\" viewBox=\"0 0 7 5\" fill=\"none\" xmlns=\"http://www.w3.org/2000/svg\">\n<path d=\"M2.69263 4.40522C2.95784 4.40522 3.21991 4.30537 3.42272 4.10257L6.85222 0.74258L6.09716 -3.30046e-08L2.92039 3.11038C2.79559 3.23518 2.58966 3.23518 2.46485 3.11038L0.745686 1.39121L-2.00076e-06 2.13691L1.96252 4.09945C2.16221 4.29914 2.42742 4.4021 2.69263 4.4021\" fill=\"black\"/>\n</svg>"},{"id":"9","key":"typical-use","title":"Typical use","subtitle":"Simple 0<sub>2</sub> verification for Nitrox users"}
2,{"id":"10","key":"cylinder-labeling-printing","title":"Cylinder labeling printing","subtitle":"<svg width=\"16\" height=\"16\" viewBox=\"0 0 4 4\" fill=\"none\" xmlns=\"http://www.w3.org/2000/svg\">\n<path d=\"M1.9668 1.2168L3.17676 0.0332031L3.93164 0.776367L2.70801 1.97363L3.8916 3.18164L3.1416 3.93164L1.95117 2.71582L0.75 3.89355L0 3.14355L1.20996 1.95801L0.03125 0.754883L0.774414 0L1.9668 1.2168Z\" fill=\"#E30513\"/>\n</svg>"}],"fourthTitle":"He/O<sub>2</sub>","fourthSubtitle":"","fourthLearnMoreUrl":"","fourthConfiguratorUrl":"","fourthImage":{"recommendedSizes":{"width":400,"height":400},"mimetype":"image/png","size":36403,"hash":"bb7532c23f7df19eab09bbb8e6aa56c5e90fa79e","id":"cmocqz7241t37080059tqfytm","filename":"comparison-he-o2.png","category":"divesoft/","type":"image"},"fourthFeatures":[{"id":"1","key":"o2-measurement","title":"O<sub>2</sub> measurement","subtitle":"<svg width=\"21\" height=\"15\" viewBox=\"0 0 7 5\" fill=\"none\" xmlns=\"http://www.w3.org/2000/svg\">\n<path d=\"M2.69263 4.40522C2.95784 4.40522 3.21991 4.30537 3.42272 4.10257L6.85222 0.74258L6.09716 -3.30046e-08L2.92039 3.11038C2.79559 3.23518 2.58966 3.23518 2.46485 3.11038L0.745686 1.39121L-2.00076e-06 2.13691L1.96252 4.09945C2.16221 4.29914 2.42742 4.4021 2.69263 4.4021\" fill=\"black\"/>\n</svg>"},{"id":"2","key":"he-measurement","title":"He measurement","subtitle":"<svg width=\"21\" height=\"15\" viewBox=\"0 0 7 5\" fill=\"none\" xmlns=\"http://www.w3.org/2000/svg\">\n<path d=\"M2.69263 4.40522C2.95784 4.40522 3.21991 4.30537 3.42272 4.10257L6.85222 0.74258L6.09716 -3.30046e-08L2.92039 3.11038C2.79559 3.23518 2.58966 3.23518 2.46485 3.11038L0.745686 1.39121L-2.00076e-06 2.13691L1.96252 4.09945C2.16221 4.29914 2.42742 4.4021 2.69263 4.4021\" fill=\"black\"/>\n</svg>"},{"id":"3","key":"co-detection","title":"CO detection","subtitle":"<svg width=\"16\" height=\"16\" viewBox=\"0 0 4 4\" fill=\"none\" xmlns=\"http://www.w3.org/2000/svg\">\n<path d=\"M1.9668 1.2168L3.17676 0.0332031L3.93164 0.776367L2.70801 1.97363L3.8916 3.18164L3.1416 3.93164L1.95117 2.71582L0.75 3.89355L0 3.14355L1.20996 1.95801L0.03125 0.754883L0.774414 0L1.9668 1.2168Z\" fill=\"#E30513\"/>\n</svg>"},{"id":"4","key":"rechargable-battery","title":"Rechargable battery","subtitle":"<svg width=\"21\" height=\"15\" viewBox=\"0 0 7 5\" fill=\"none\" xmlns=\"http://www.w3.org/2000/svg\">\n<path d=\"M2.69263 4.40522C2.95784 4.40522 3.21991 4.30537 3.42272 4.10257L6.85222 0.74258L6.09716 -3.30046e-08L2.92039 3.11038C2.79559 3.23518 2.58966 3.23518 2.46485 3.11038L0.745686 1.39121L-2.00076e-06 2.13691L1.96252 4.09945C2.16221 4.29914 2.42742 4.4021 2.69263 4.4021\" fill=\"black\"/>\n</svg>"},{"id":"5","key":"connectivity","title":"Connectivity","subtitle":"USB"},{"id":"6","key":"data-export","title":"Data export / App","subtitle":"USB serial \n(PC software) \n\\+ TTL UART"},{"id":"7","key":"display","title":"Display","subtitle":"Bright OLED"},{"id":"8","key":"ready-for-travel","title":"Ready for travel","subtitle":"heavier"},{"id":"9","key":"typical-use","title":"Typical use","subtitle":"Professional gas blending and dive center use"},{"id":"10","key":"cylinder-labeling-printing","title":"Cylinder labeling printing","subtitle":"<svg width=\"21\" height=\"15\" viewBox=\"0 0 7 5\" fill=\"none\" xmlns=\"http://www.w3.org/2000/svg\">\n<path d=\"M2.69263 4.40522C2.95784 4.40522 3.21991 4.30537 3.42272 4.10257L6.85222 0.74258L6.09716 -3.30046e-08L2.92039 3.11038C2.79559 3.23518 2.58966 3.23518 2.46485 3.11038L0.745686 1.39121L-2.00076e-06 2.13691L1.96252 4.09945C2.16221 4.29914 2.42742 4.4021 2.69263 4.4021\" fill=\"black\"/>\n</svg>"}],"fifthTitle":"DNA","fifthSubtitle":"","fifthLearnMoreUrl":"","fifthConfiguratorUrl":"","fifthImage":{"recommendedSizes":{"width":400,"height":400},"mimetype":"image/png","size":30923,"hash":"5c5e32130dab89c115ff35c291ff0db36368e236","id":"cmocqzcew1t3g0800zr02a226","filename":"comparison-dna.png","category":"divesoft/","type":"image"},"fifthFeatures":[{"id":"1","key":"o2-measurement","title":"O<sub>2</sub> measurement","subtitle":"<svg width=\"21\" height=\"15\" viewBox=\"0 0 7 5\" fill=\"none\" xmlns=\"http://www.w3.org/2000/svg\">\n<path d=\"M2.69263 4.40522C2.95784 4.40522 3.21991 4.30537 3.42272 4.10257L6.85222 0.74258L6.09716 -3.30046e-08L2.92039 3.11038C2.79559 3.23518 2.58966 3.23518 2.46485 3.11038L0.745686 1.39121L-2.00076e-06 2.13691L1.96252 4.09945C2.16221 4.29914 2.42742 4.4021 2.69263 4.4021\" fill=\"black\"/>\n</svg>"},{"id":"2","key":"he-measurement","title":"He measurement","subtitle":"<svg width=\"16\" height=\"16\" viewBox=\"0 0 4 4\" fill=\"none\" xmlns=\"http://www.w3.org/2000/svg\">\n<path d=\"M1.9668 1.2168L3.17676 0.0332031L3.93164 0.776367L2.70801 1.97363L3.8916 3.18164L3.1416 3.93164L1.95117 2.71582L0.75 3.89355L0 3.14355L1.20996 1.95801L0.03125 0.754883L0.774414 0L1.9668 1.2168Z\" fill=\"#E30513\"/>\n</svg>"},{"id":"3","key":"co-detection","title":"CO detection","subtitle":"<svg width=\"16\" height=\"16\" viewBox=\"0 0 4 4\" fill=\"none\" xmlns=\"http://www.w3.org/2000/svg\">\n<path d=\"M1.9668 1.2168L3.17676 0.0332031L3.93164 0.776367L2.70801 1.97363L3.8916 3.18164L3.1416 3.93164L1.95117 2.71582L0.75 3.89355L0 3.14355L1.20996 1.95801L0.03125 0.754883L0.774414 0L1.9668 1.2168Z\" fill=\"#E30513\"/>\n</svg>"},{"id":"4","key":"rechargable-battery","title":"Rechargable battery","subtitle":"<svg width=\"16\" height=\"16\" viewBox=\"0 0 4 4\" fill=\"none\" xmlns=\"http://www.w3.org/2000/svg\">\n<path d=\"M1.9668 1.2168L3.17676 0.0332031L3.93164 0.776367L2.70801 1.97363L3.8916 3.18164L3.1416 3.93164L1.95117 2.71582L0.75 3.89355L0 3.14355L1.20996 1.95801L0.03125 0.754883L0.774414 0L1.9668 1.2168Z\" fill=\"#E30513\"/>\n</svg>"},{"id":"6","key":"connectivity","title":"Connectivity","subtitle":"Bluetooth"},{"id":"5","key":"data-export","title":"Data export / App","subtitle":"Divesoft App \n(Bluetooth)"},{"id":"7","key":"display","title":"Display","subtitle":"DivesoftAppâ¨screen"},{"id":"8","key":"ready-for-travel","title":"Ready for travel","subtitle":"<svg width=\"21\" height=\"15\" viewBox=\"0 0 7 5\" fill=\"none\" xmlns=\"http://www.w3.org/2000/svg\">\n<path d=\"M2.69263 4.40522C2.95784 4.40522 3.21991 4.30537 3.42272 4.10257L6.85222 0.74258L6.09716 -3.30046e-08L2.92039 3.11038C2.79559 3.23518 2.58966 3.23518 2.46485 3.11038L0.745686 1.39121L-2.00076e-06 2.13691L1.96252 4.09945C2.16221 4.29914 2.42742 4.4021 2.69263 4.4021\" fill=\"black\"/>\n</svg>"},{"id":"9","key":"typical-use","title":"Typical use","subtitle":"Quick pre-dive check and wireless logging"}
2,{"id":"10","key":"cylinder-labeling-printing","title":"Cylinder labeling printing","subtitle":"<svg width=\"21\" height=\"15\" viewBox=\"0 0 7 5\" fill=\"none\" xmlns=\"http://www.w3.org/2000/svg\">\n<path d=\"M2.69263 4.40522C2.95784 4.40522 3.21991 4.30537 3.42272 4.10257L6.85222 0.74258L6.09716 -3.30046e-08L2.92039 3.11038C2.79559 3.23518 2.58966 3.23518 2.46485 3.11038L0.745686 1.39121L-2.00076e-06 2.13691L1.96252 4.09945C2.16221 4.29914 2.42742 4.4021 2.69263 4.4021\" fill=\"black\"/>\n</svg>"}],"activeTab":"1","backgroundColor":"#f0f0f0"}},"__typename":"ComponentTemplate"},"ComponentTemplate:cmo3f1kzkw8pd0889hxoow8p1":{"id":"cmo3f1kzkw8pd0889hxoow8p1","name":"Analyzers 2026","type":"ProductCrossroadNew","content":{"type":"json","json":{"variant":"simpleRed","products":[{"title":"OVERVIEW","url":{"url":"/en/products/analyzers","pageId":"cjv3rr7on00ky0836fercz490"},"image":{"recommendedSizes":{"width":"200","height":"200"}},"id":"1"},{"title":"DNA","url":{"url":"/en/products/analyzers/dna","pageId":"clf9rs5c3ltkw0835vujrrtxu"},"image":{"recommendedSizes":{"width":"200","height":"200"}},"id":"2"},{"id":"3","title":"SOLO O<sub>2</sub>","url":{"url":"/en/products/analyzers/analyzer-solo-o2","pageId":"ckx60balw01yz0858sye1ixvu"}},{"id":"4","title":"SOLO","url":{"url":"/en/products/analyzers/analyzer-solo","pageId":"cjztim1kk09fg0777nv63tf9b"}},{"id":"6","title":"ECHO","url":{"url":"/en/products/analyzers/echo","pageId":"cmoikfi2o00jd0834i7cnst7d"}},{"id":"5","title":"He/O<sub>2</sub>","url":{"url":"/en/products/analyzers/analyzer-he-o2","pageId":"cjztilv3509et0777ejgtlm67"}}],"activeTab":"6"}},"__typename":"ComponentTemplate"},"ComponentTemplate:cmo5ko5huwtv40889ugkkecht":{"id":"cmo5ko5huwtv40889ugkkecht","name":"Liberty 2026","type":"ProductCrossroadNew","content":{"type":"json","json":{"variant":"simpleRed","products":[{"title":"OVERVIEW","url":{"url":"/en/products/ccr-liberty","pageId":"cjv3rpryz00iw0836lc0zx81j"},"image":{"recommendedSizes":{"width":"200","height":"200"}},"id":"1"},{"title":"ARCHITECTURE","url":{"url":"/en/products/ccr-liberty/architecture","pageId":"cmoikgtii00ld0834fstyh5rg"},"image":{"recommendedSizes":{"width":"200","height":"200"}},"id":"2"},{"id":"3","title":"MODELS","url":{"url":"/en/products/ccr-liberty/models","pageId":"cmoikh55x00m90834611encgx"}},{"id":"4","title":"FEATURES","url":{"url":"/en/products/ccr-liberty/features","pageId":"cl6g9opv3s2ck085846otg5l7"}},{"id":"5","title":"CONFIGURATOR","url":{"url":"/en/ccr-liberty","pageId":"cl3vesldqknhj085858savf3u"}},{"id":"6","title":"STOCK UNITS","url":{"url":"/en/products/ccr-liberty/stock-unit","pageId":"cmdo5gsze02qc0832lf2bbv7e"}},{"id":"7","title":"BAILOUT","url":{"url":"/en/products/ccr-liberty/bail-out-rebreather","pageId":"cl7oo6u7qv8cf0858exiqv6ad"}}]}},"__typename":"ComponentTemplate"},"ComponentTemplate:cmo9u6bhwy5g90889gprzyxzf":{"id":"cmo9u6bhwy5g90889gprzyxzf","name":"Narced? We will guide you.","type":"CallToAction","content":{"type":"json","json":{"backgroundColor":"black","isCentered":true,"title":"Narced? We will guide you.","links":[{"title":"Contact Us","url":{"url":"/en/contacts/contact-us","pageId":"cka6kn4hd3ahh0788k20h9ayy"},"color":"white","type":"outline","id":"1"}],"linkPosition":"below","linkAlignment":"right","activeTab":"1"}},"__typename":"ComponentTemplate"},"ComponentTemplate:cmoil1yn1017e0834rjf98q8g":{"id":"cmoil1yn1017e0834rjf98q8g","name":"Analyzers comparison 2026 without ECHO","type":"ProductsCompare","content":{"type":"json","json":{"sectionTitle":"Find the analyzer that fits your diving style","firstTitle":"","firstSubtitle":"","firstLearnMoreUrl":"","firstConfiguratorUrl":"","firstImage":{"recommendedSizes":{"width":400,"height":400},"mimetype":"image/png","size":81873,"hash":"ecbbbb8b09afa814fe10c2d59ca59db7c9c94dfd","id":"cmocqylfg1t200800je458hq4","filename":"comparison-echo.png","category":"divesoft/","type":"image"},"firstFeatures":[{"id":"1","key":"o2-measurement","title":"O<sub>2</sub> measurement","subtitle":"<svg width=\"21\" height=\"15\" viewBox=\"0 0 7 5\" fill=\"none\" xmlns=\"http://www.w3.org/2000/svg\">\n<path d=\"M2.69263 4.40522C2.95784 4.40522 3.21991 4.30537 3.42272 4.10257L6.85222 0.74258L6.09716 -3.30046e-08L2.92039 3.11038C2.79559 3.23518 2.58966 3.23518 2.46485 3.11038L0.745686 1.39121L-2.00076e-06 2.13691L1.96252 4.09945C2.16221 4.29914 2.42742 4.4021 2.69263 4.4021\" fill=\"black\"/>\n</svg>"},{"id":"2","subtitle":"<svg width=\"21\" height=\"15\" viewBox=\"0 0 7 5\" fill=\"none\" xmlns=\"http://www.w3.org/2000/svg\">\n<path d=\"M2.69263 4.40522C2.95784 4.40522 3.21991 4.30537 3.42272 4.10257L6.85222 0.74258L6.09716 -3.30046e-08L2.92039 3.11038C2.79559 3.23518 2.58966 3.23518 2.46485 3.11038L0.745686 1.39121L-2.00076e-06 2.13691L1.96252 4.09945C2.16221 4.29914 2.42742 4.4021 2.69263 4.4021\" fill=\"black\"/>\n</svg>","key":"he-measurement","title":"He measurement"},{"id":"3","key":"co-detection","title":"CO detection","subtitle":"<svg width=\"21\" height=\"15\" viewBox=\"0 0 7 5\" fill=\"none\" xmlns=\"http://www.w3.org/2000/svg\">\n<path d=\"M2.69263 4.40522C2.95784 4.40522 3.21991 4.30537 3.42272 4.10257L6.85222 0.74258L6.09716 -3.30046e-08L2.92039 3.11038C2.79559 3.23518 2.58966 3.23518 2.46485 3.11038L0.745686 1.39121L-2.00076e-06 2.13691L1.96252 4.09945C2.16221 4.29914 2.42742 4.4021 2.69263 4.4021\" fill=\"black\"/>\n</svg>"},{"id":"4","key":"rechargable-battery","title":"Rechargable battery","subtitle":"<svg width=\"21\" height=\"15\" viewBox=\"0 0 7 5\" fill=\"none\" xmlns=\"http://www.w3.org/2000/svg\">\n<path d=\"M2.69263 4.40522C2.95784 4.40522 3.21991 4.30537 3.42272 4.10257L6.85222 0.74258L6.09716 -3.30046e-08L2.92039 3.11038C2.79559 3.23518 2.58966 3.23518 2.46485 3.11038L0.745686 1.39121L-2.00076e-06 2.13691L1.96252 4.09945C2.16221 4.29914 2.42742 4.4021 2.69263 4.4021\" fill=\"black\"/>\n</svg>"},{"id":"5","key":"connectivity","title":"Connectivity","subtitle":"Bluetooth"},{"id":"6","key":"data-export","title":"Data export / App","subtitle":"Divesoft App \n(Bluetooth)"},{"id":"7","key":"display","title":"Display","subtitle":"HR-TFT"},{"id":"8","key":"ready-for-travel","title":"Ready for travel","subtitle":"<svg width=\"21\" height=\"15\" viewBox=\"0 0 7 5\" fill=\"none\" xmlns=\"http://www.w3.org/2000/svg\">\n<path d=\"M2.69263 4.40522C2.95784 4.40522 3.21991 4.30537 3.42272 4.10257L6.85222 0.74258L6.09716 -3.30046e-08L2.92039 3.11038C2.79559 3.23518 2.58966 3.23518 2.46485 3.11038L0.745686 1.39121L-2.00076e-06 2.13691L1.96252 4.09945C2.16221 4.29914 2.42742 4.4021 2.69263 4.4021\" fill=\"black\"/>\n</svg>"},{"id":"9","key":"typical-use","title":"Typical use","subtitle":"Personal and travel gas analyzer with CO safety check"}
2,{"id":"10","title":"Cylinder labeling printing","key":"cylinder-labeling-printing","subtitle":"<svg width=\"21\" height=\"15\" viewBox=\"0 0 7 5\" fill=\"none\" xmlns=\"http://www.w3.org/2000/svg\">\n<path d=\"M2.69263 4.40522C2.95784 4.40522 3.21991 4.30537 3.42272 4.10257L6.85222 0.74258L6.09716 -3.30046e-08L2.92039 3.11038C2.79559 3.23518 2.58966 3.23518 2.46485 3.11038L0.745686 1.39121L-2.00076e-06 2.13691L1.96252 4.09945C2.16221 4.29914 2.42742 4.4021 2.69263 4.4021\" fill=\"black\"/>\n</svg>"}],"secondTitle":"SOLO","secondSubtitle":"","secondLearnMoreUrl":"","secondConfiguratorUrl":"","secondImage":{"recommendedSizes":{"width":400,"height":400},"mimetype":"image/png","size":50529,"hash":"2c3d884d0cb1a9a51efaf87cc1f6a596e64226d0","id":"cmocqyt2g1t2c0800k0cpu5ew","filename":"comparison-solo.png","category":"divesoft/","type":"image"},"secondFeatures":[{"id":"1","key":"o2-measurement","title":"O<sub>2</sub> measurement","subtitle":"<svg width=\"21\" height=\"15\" viewBox=\"0 0 7 5\" fill=\"none\" xmlns=\"http://www.w3.org/2000/svg\">\n<path d=\"M2.69263 4.40522C2.95784 4.40522 3.21991 4.30537 3.42272 4.10257L6.85222 0.74258L6.09716 -3.30046e-08L2.92039 3.11038C2.79559 3.23518 2.58966 3.23518 2.46485 3.11038L0.745686 1.39121L-2.00076e-06 2.13691L1.96252 4.09945C2.16221 4.29914 2.42742 4.4021 2.69263 4.4021\" fill=\"black\"/>\n</svg>"},{"id":"2","key":"he-measurement","title":"He measurement","subtitle":"<svg width=\"21\" height=\"15\" viewBox=\"0 0 7 5\" fill=\"none\" xmlns=\"http://www.w3.org/2000/svg\">\n<path d=\"M2.69263 4.40522C2.95784 4.40522 3.21991 4.30537 3.42272 4.10257L6.85222 0.74258L6.09716 -3.30046e-08L2.92039 3.11038C2.79559 3.23518 2.58966 3.23518 2.46485 3.11038L0.745686 1.39121L-2.00076e-06 2.13691L1.96252 4.09945C2.16221 4.29914 2.42742 4.4021 2.69263 4.4021\" fill=\"black\"/>\n</svg>"},{"id":"3","key":"co-detection","title":"CO detection","subtitle":"<svg width=\"16\" height=\"16\" viewBox=\"0 0 4 4\" fill=\"none\" xmlns=\"http://www.w3.org/2000/svg\">\n<path d=\"M1.9668 1.2168L3.17676 0.0332031L3.93164 0.776367L2.70801 1.97363L3.8916 3.18164L3.1416 3.93164L1.95117 2.71582L0.75 3.89355L0 3.14355L1.20996 1.95801L0.03125 0.754883L0.774414 0L1.9668 1.2168Z\" fill=\"#E30513\"/>\n</svg>"},{"id":"4","key":"rechargable-battery","title":"Rechargable battery","subtitle":"<svg width=\"21\" height=\"15\" viewBox=\"0 0 7 5\" fill=\"none\" xmlns=\"http://www.w3.org/2000/svg\">\n<path d=\"M2.69263 4.40522C2.95784 4.40522 3.21991 4.30537 3.42272 4.10257L6.85222 0.74258L6.09716 -3.30046e-08L2.92039 3.11038C2.79559 3.23518 2.58966 3.23518 2.46485 3.11038L0.745686 1.39121L-2.00076e-06 2.13691L1.96252 4.09945C2.16221 4.29914 2.42742 4.4021 2.69263 4.4021\" fill=\"black\"/>\n</svg>"},{"id":"5","key":"connectivity","title":"Connectivity","subtitle":"USB-C"},{"id":"6","key":"data-export","title":"Data export / App","subtitle":"USB serial \n(PC software)"},{"id":"7","key":"display","title":"Display","subtitle":"Bright OLED"},{"id":"8","key":"ready-for-travel","title":"Ready for travel","subtitle":"<svg width=\"21\" height=\"15\" viewBox=\"0 0 7 5\" fill=\"none\" xmlns=\"http://www.w3.org/2000/svg\">\n<path d=\"M2.69263 4.40522C2.95784 4.40522 3.21991 4.30537 3.42272 4.10257L6.85222 0.74258L6.09716 -3.30046e-08L2.92039 3.11038C2.79559 3.23518 2.58966 3.23518 2.46485 3.11038L0.745686 1.39121L-2.00076e-06 2.13691L1.96252 4.09945C2.16221 4.29914 2.42742 4.4021 2.69263 4.4021\" fill=\"black\"/>\n</svg>"},{"id":"9","key":"typical-use","title":"Typical use","subtitle":"Reliable on-site gas analysis"},{"id":"10","key":"cylinder-labeling-printing","title":"Cylinder labeling printing","subtitle":"<svg width=\"16\" height=\"16\" viewBox=\"0 0 4 4\" fill=\"none\" xmlns=\"http://www.w3.org/2000/svg\">\n<path d=\"M1.9668 1.2168L3.17676 0.0332031L3.93164 0.776367L2.70801 1.97363L3.8916 3.18164L3.1416 3.93164L1.95117 2.71582L0.75 3.89355L0 3.14355L1.20996 1.95801L0.03125 0.754883L0.774414 0L1.9668 1.2168Z\" fill=\"#E30513\"/>\n</svg>"}],"thirdTitle":"SOLO O<sub>2</sub>","thirdSubtitle":"","thirdLearnMoreUrl":"","thirdConfiguratorUrl":"","thirdImage":{"recommendedSizes":{"width":400,"height":400},"mimetype":"image/png","size":50751,"hash":"046f7df2046c94f1697ebff3c82379d9edf4e2fb","id":"cmocqz12s1t2s08002unmsn04","filename":"comparison-solo-o2.png","category":"divesoft/","type":"image"}
2,"thirdFeatures":[{"id":"1","key":"o2-measurement","title":"O<sub>2</sub> measurement","subtitle":"<svg width=\"21\" height=\"15\" viewBox=\"0 0 7 5\" fill=\"none\" xmlns=\"http://www.w3.org/2000/svg\">\n<path d=\"M2.69263 4.40522C2.95784 4.40522 3.21991 4.30537 3.42272 4.10257L6.85222 0.74258L6.09716 -3.30046e-08L2.92039 3.11038C2.79559 3.23518 2.58966 3.23518 2.46485 3.11038L0.745686 1.39121L-2.00076e-06 2.13691L1.96252 4.09945C2.16221 4.29914 2.42742 4.4021 2.69263 4.4021\" fill=\"black\"/>\n</svg>"},{"id":"2","key":"he-measurement","title":"He measurement","subtitle":"<svg width=\"16\" height=\"16\" viewBox=\"0 0 4 4\" fill=\"none\" xmlns=\"http://www.w3.org/2000/svg\">\n<path d=\"M1.9668 1.2168L3.17676 0.0332031L3.93164 0.776367L2.70801 1.97363L3.8916 3.18164L3.1416 3.93164L1.95117 2.71582L0.75 3.89355L0 3.14355L1.20996 1.95801L0.03125 0.754883L0.774414 0L1.9668 1.2168Z\" fill=\"#E30513\"/>\n</svg>"},{"id":"3","key":"co-detection","title":"CO detection","subtitle":"<svg width=\"16\" height=\"16\" viewBox=\"0 0 4 4\" fill=\"none\" xmlns=\"http://www.w3.org/2000/svg\">\n<path d=\"M1.9668 1.2168L3.17676 0.0332031L3.93164 0.776367L2.70801 1.97363L3.8916 3.18164L3.1416 3.93164L1.95117 2.71582L0.75 3.89355L0 3.14355L1.20996 1.95801L0.03125 0.754883L0.774414 0L1.9668 1.2168Z\" fill=\"#E30513\"/>\n</svg>"},{"id":"4","key":"rechargable-battery","title":"Rechargable battery","subtitle":"<svg width=\"21\" height=\"15\" viewBox=\"0 0 7 5\" fill=\"none\" xmlns=\"http://www.w3.org/2000/svg\">\n<path d=\"M2.69263 4.40522C2.95784 4.40522 3.21991 4.30537 3.42272 4.10257L6.85222 0.74258L6.09716 -3.30046e-08L2.92039 3.11038C2.79559 3.23518 2.58966 3.23518 2.46485 3.11038L0.745686 1.39121L-2.00076e-06 2.13691L1.96252 4.09945C2.16221 4.29914 2.42742 4.4021 2.69263 4.4021\" fill=\"black\"/>\n</svg>"},{"id":"5","key":"connectivity","title":"Connectivity","subtitle":"USB-C"},{"id":"6","key":"data-export","title":"Data export / App","subtitle":"USB serial \n(PC software)"},{"id":"7","key":"display","title":"Display","subtitle":"Bright OLED"},{"id":"8","key":"ready-for-travel","title":"Ready for travel","subtitle":"<svg width=\"21\" height=\"15\" viewBox=\"0 0 7 5\" fill=\"none\" xmlns=\"http://www.w3.org/2000/svg\">\n<path d=\"M2.69263 4.40522C2.95784 4.40522 3.21991 4.30537 3.42272 4.10257L6.85222 0.74258L6.09716 -3.30046e-08L2.92039 3.11038C2.79559 3.23518 2.58966 3.23518 2.46485 3.11038L0.745686 1.39121L-2.00076e-06 2.13691L1.96252 4.09945C2.16221 4.29914 2.42742 4.4021 2.69263 4.4021\" fill=\"black\"/>\n</svg>"},{"id":"9","key":"typical-use","title":"Typical use","subtitle":"Simple 0<sub>2</sub> verification for Nitrox users"},{"id":"10","key":"cylinder-labeling-printing","title":"Cylinder labeling printing","subtitle":"<svg width=\"16\" height=\"16\" viewBox=\"0 0 4 4\" fill=\"none\" xmlns=\"http://www.w3.org/2000/svg\">\n<path d=\"M1.9668 1.2168L3.17676 0.0332031L3.93164 0.776367L2.70801 1.97363L3.8916 3.18164L3.1416 3.93164L1.95117 2.71582L0.75 3.89355L0 3.14355L1.20996 1.95801L0.03125 0.754883L0.774414 0L1.9668 1.2168Z\" fill=\"#E30513\"/>\n</svg>"}],"fourthTitle":"He/O<sub>2</sub>","fourthSubtitle":"","fourthLearnMoreUrl":"","fourthConfiguratorUrl":"","fourthImage":{"recommendedSizes":{"width":400,"height":400},"mimetype":"image/png","size":36403,"hash":"bb7532c23f7df19eab09bbb8e6aa56c5e90fa79e","id":"cmocqz7241t37080059tqfytm","filename":"comparison-he-o2.png","category":"divesoft/","type":"image"},"fourthFeatures":[{"id":"1","key":"o2-measurement","title":"O<sub>2</sub> measurement","subtitle":"<svg width=\"21\" height=\"15\" viewBox=\"0 0 7 5\" fill=\"none\" xmlns=\"http://www.w3.org/2000/svg\">\n<path d=\"M2.69263 4.40522C2.95784 4.40522 3.21991 4.30537 3.42272 4.10257L6.85222 0.74258L6.09716 -3.30046e-08L2.92039 3.11038C2.79559 3.23518 2.58966 3.23518 2.46485 3.11038L0.745686 1.39121L-2.00076e-06 2.13691L1.96252 4.09945C2.16221 4.29914 2.42742 4.4021 2.69263 4.4021\" fill=\"black\"/>\n</svg>"},{"id":"2","key":"he-measurement","title":"He measurement","subtitle":"<svg width=\"21\" height=\"15\" viewBox=\"0 0 7 5\" fill=\"none\" xmlns=\"http://www.w3.org/2000/svg\">\n<path d=\"M2.69263 4.40522C2.95784 4.40522 3.21991 4.30537 3.42272 4.10257L6.85222 0.74258L6.09716 -3.30046e-08L2.92039 3.11038C2.79559 3.23518 2.58966 3.23518 2.46485 3.11038L0.745686 1.39121L-2.00076e-06 2.13691L1.96252 4.09945C2.16221 4.29914 2.42742 4.4021 2.69263 4.4021\" fill=\"black\"/>\n</svg>"},{"id":"3","key":"co-detection","title":"CO detection","subtitle":"<svg width=\"16\" height=\"16\" viewBox=\"0 0 4 4\" fill=\"none\" xmlns=\"http://www.w3.org/2000/svg\">\n<path d=\"M1.9668 1.2168L3.17676 0.0332031L3.93164 0.776367L2.70801 1.97363L3.8916 3.18164L3.1416 3.93164L1.95117 2.71582L0.75 3.89355L0 3.14355L1.20996 1.95801L0.03125 0.754883L0.774414 0L1.9668 1.2168Z\" fill=\"#E30513\"/>\n</svg>"},{"id":"4","key":"rechargable-battery","title":"Rechargable battery","subtitle":"<svg width=\"21\" height=\"15\" viewBox=\"0 0 7 5\" fill=\"none\" xmlns=\"http://www.w3.org/2000/svg\">\n<path d=\"M2.69263 4.40522C2.95784 4.40522 3.21991 4.30537 3.42272 4.10257L6.85222 0.74258L6.09716 -3.30046e-08L2.92039 3.11038C2.79559 3.23518 2.58966 3.23518 2.46485 3.11038L0.745686 1.39121L-2.00076e-06 2.13691L1.96252 4.09945C2.16221 4.29914 2.42742 4.4021 2.69263 4.4021\" fill=\"black\"/>\n</svg>"},{"id":"5","key":"connectivity","title":"Connectivity","subtitle":"USB"},{"id":"6","key":"data-export","title":"Data export / App","subtitle":"USB serial \
2n(PC software) \n\\+ TTL UART"},{"id":"7","key":"display","title":"Display","subtitle":"Bright OLED"},{"id":"8","key":"ready-for-travel","title":"Ready for travel","subtitle":"heavier"},{"id":"9","key":"typical-use","title":"Typical use","subtitle":"Professional gas blending and dive center use"},{"id":"10","key":"cylinder-labeling-printing","title":"Cylinder labeling printing","subtitle":"<svg width=\"21\" height=\"15\" viewBox=\"0 0 7 5\" fill=\"none\" xmlns=\"http://www.w3.org/2000/svg\">\n<path d=\"M2.69263 4.40522C2.95784 4.40522 3.21991 4.30537 3.42272 4.10257L6.85222 0.74258L6.09716 -3.30046e-08L2.92039 3.11038C2.79559 3.23518 2.58966 3.23518 2.46485 3.11038L0.745686 1.39121L-2.00076e-06 2.13691L1.96252 4.09945C2.16221 4.29914 2.42742 4.4021 2.69263 4.4021\" fill=\"black\"/>\n</svg>"}],"fifthTitle":"DNA","fifthSubtitle":"","fifthLearnMoreUrl":"","fifthConfiguratorUrl":"","fifthImage":{"recommendedSizes":{"width":400,"height":400},"mimetype":"image/png","size":30923,"hash":"5c5e32130dab89c115ff35c291ff0db36368e236","id":"cmocqzcew1t3g0800zr02a226","filename":"comparison-dna.png","category":"divesoft/","type":"image"},"fifthFeatures":[{"id":"1","key":"o2-measurement","title":"O<sub>2</sub> measurement","subtitle":"<svg width=\"21\" height=\"15\" viewBox=\"0 0 7 5\" fill=\"none\" xmlns=\"http://www.w3.org/2000/svg\">\n<path d=\"M2.69263 4.40522C2.95784 4.40522 3.21991 4.30537 3.42272 4.10257L6.85222 0.74258L6.09716 -3.30046e-08L2.92039 3.11038C2.79559 3.23518 2.58966 3.23518 2.46485 3.11038L0.745686 1.39121L-2.00076e-06 2.13691L1.96252 4.09945C2.16221 4.29914 2.42742 4.4021 2.69263 4.4021\" fill=\"black\"/>\n</svg>"},{"id":"2","key":"he-measurement","title":"He measurement","subtitle":"<svg width=\"16\" height=\"16\" viewBox=\"0 0 4 4\" fill=\"none\" xmlns=\"http://www.w3.org/2000/svg\">\n<path d=\"M1.9668 1.2168L3.17676 0.0332031L3.93164 0.776367L2.70801 1.97363L3.8916 3.18164L3.1416 3.93164L1.95117 2.71582L0.75 3.89355L0 3.14355L1.20996 1.95801L0.03125 0.754883L0.774414 0L1.9668 1.2168Z\" fill=\"#E30513\"/>\n</svg>"},{"id":"3","key":"co-detection","title":"CO detection","subtitle":"<svg width=\"16\" height=\"16\" viewBox=\"0 0 4 4\" fill=\"none\" xmlns=\"http://www.w3.org/2000/svg\">\n<path d=\"M1.9668 1.2168L3.17676 0.0332031L3.93164 0.776367L2.70801 1.97363L3.8916 3.18164L3.1416 3.93164L1.95117 2.71582L0.75 3.89355L0 3.14355L1.20996 1.95801L0.03125 0.754883L0.774414 0L1.9668 1.2168Z\" fill=\"#E30513\"/>\n</svg>"},{"id":"4","key":"rechargable-battery","title":"Rechargable battery","subtitle":"<svg width=\"16\" height=\"16\" viewBox=\"0 0 4 4\" fill=\"none\" xmlns=\"http://www.w3.org/2000/svg\">\n<path d=\"M1.9668 1.2168L3.17676 0.0332031L3.93164 0.776367L2.70801 1.97363L3.8916 3.18164L3.1416 3.93164L1.95117 2.71582L0.75 3.89355L0 3.14355L1.20996 1.95801L0.03125 0.754883L0.774414 0L1.9668 1.2168Z\" fill=\"#E30513\"/>\n</svg>"},{"id":"6","key":"connectivity","title":"Connectivity","subtitle":"Bluetooth"},{"id":"5","key":"data-export","title":"Data export / App","subtitle":"Divesoft App \n(Bluetooth)"},{"id":"7","key":"display","title":"Display","subtitle":"DivesoftAppâ¨screen"},{"id":"8","key":"ready-for-travel","title":"Ready for travel","subtitle":"<svg width=\"21\" height=\"15\" viewBox=\"0 0 7 5\" fill=\"none\" xmlns=\"http://www.w3.org/2000/svg\">\n<path d=\"M2.69263 4.40522C2.95784 4.40522 3.21991 4.30537 3.42272 4.10257L6.85222 0.74258L6.09716 -3.30046e-08L2.92039 3.11038C2.79559 3.23518 2.58966 3.23518 2.46485 3.11038L0.745686 1.39121L-2.00076e-06 2.13691L1.96252 4.09945C2.16221 4.29914 2.42742 4.4021 2.69263 4.4021\" fill=\"black\"/>\n</svg>"},{"id":"9","key":"typical-use","title":"Typical use","subtitle":"Quick pre-dive check and wireless logging"},{"id":"10","key":"cylinder-labeling-printing","title":"Cylinder labeling printing","subtitle":"<svg width=\"21\" height=\"15\" viewBox=\"0 0 7 5\" fill=\"none\" xmlns=\"http://www.w3.org/2000/svg\">\n<path d=\"M2.69263 4.40522C2.95784 4.40522 3.21991 4.30537 3.42272 4.10257L6.85222 0.74258L6.09716 -3.30046e-08L2.92039 3.11038C2.79559 3.23518 2.58966 3.23518 2.46485 3.11038L0.745686 1.39121L-2.00076e-06 2.13691L1.96252 4.09945C2.16221 4.29914 2.42742 4.4021 2.69263 4.4021\" fill=\"black\"/>\n</svg>"}],"activeTab":"1","backgroundColor":"#f0f0f0"}},"__typename":"ComponentTemplate"},"ComponentTemplate:cmp0yw25s01tt0826v0wo4wet":{"id":"cmp0yw25s01tt0826v0wo4wet","name":"Liberty Configuration 2026","type":"ProductCrossroadNew","content":{"type":"json","json":{"variant":"simpleRed","products":[{"title":"OVERVIEW","url":{"url":"/en/products/ccr-liberty","pageId":"cjv3rpryz00iw0836lc0zx81j"},"image":{"recommendedSizes":{"width":"200","height":"200"}},"id":"1"},{"id":"3","title":"SIDEMOUNT","url":{"url":"/en/products/ccr-liberty/ccr-liberty-sidemount","pageId":"cjyztusbt039t0777kqbo8xj8"}},{"id":"2","title":"BACKMOUNT","url":{"url":"/en/products/ccr-liberty/ccr-liberty-bmcl-fmcl","pageId":"ckt0i4dg51ogp0988dpgn8lwr"}},{"id":"4","title":"HEAVY","url":{"url":"/en/products/ccr-liberty/ccr-liberty-heavy","pageId":"cknpubp6j2f690788zv52yohy"}},{"id":"5","title":"LIGHT","url":{"url":"/en/products/ccr-liberty/ccr-liberty-light","pageId":"ck7m1guq108gk07883tmehxr4"}}]}},"__typename":"ComponentTemplate"},"ComponentTemplate:cmp13u65o04gm0826cm5u1agj":{"id":"cmp13u65o04gm0826cm5u1agj","name":"EU Programme","type":"DownloadsNew","content":{"type":"json","json":{"backgroundColor":"#ffffff","title":"Our projects","subtitle":"Our company is supported by European Regional Development Fund, Operational Programme Enterprise and Innovations for Competitiveness.","showBreadcrumbs":false,"hideHeader":false,"files":[{"id":"2","title":"OperaÄnà program Podnikánà a inovace pro konkurenceschopnost: Liberty - Výzkum a vývoj potápÄÄského zaÅÃzenà s uzavÅeným okruhem","url":{"url":"http://foxer360-media-library.s3.eu-central-1.amazonaws.com/divesoft/docs/9f895bfe0276a21eb456e54334011ae9d7785e87_liberty-vyzkum-a-vyvoj-potapecskeho-zarizeni-s-uzavrenym-okruhem.pdf","urlNewWindow":true},"urlText":"Open"},{"id":"4","title":"OperaÄnà program Podnikánà a inovace pro konkurenceschopnost: Analyzátor ECHO - Výzkum a vývoj analyzátoru dýchacÃch smÄsà pro potápÄnÃ","url":{"url":"http://foxer360-media-library.s3.eu-central-1.amazonaws.com/divesoft/docs/5cc1bd3453a947c895ff4f5d1b76d112bd86bc93_analyzator-echo-vyzkum-a-vyvoj-analyzatoru-dychacich-smesi-pro-potapeni.pdf","urlNewWindow":true},"urlText":"Open"},{"id":"6","title":"Marketing Divesoft s.r.o. II","url":{"url":"http://foxer360-media-library.s3.eu-central-1.amazonaws.com/divesoft/docs/7ceedcf9c2977d0e27740a6c5aa4643be8c367a7_marketing-divesoft-project.pdf","urlNewWindow":true},"urlText":"Open"},{"id":"7","title":"OperaÄnà program Podnikánà a inovace pro konkurenceschopnost: ÃÄast na mezinárodnÃch veletrzÃch a výstavách","url":{"url":"https://foxer360-media-library.s3.eu-central-1.amazonaws.com/divesoft/docs/b95e5e0aa5f6b2928830226e61476e47ac8dd614_projekt.pdf ","urlNewWindow":true},"urlText":"Open"}],"activeTab":"7"}},"__typename":"ComponentTemplate"}
2,"ComponentTemplate:cmp172nfu00f208260n7srwjg":{"id":"cmp172nfu00f208260n7srwjg","name":"Others 2026","type":"ProductCrossroadNew","content":{"type":"json","json":{"variant":"simpleRed","products":[{"title":"OVERVIEW","url":{"url":"/en/products/others","pageId":"ckdsltzi07o520788tk0s6c4v"},"image":{"recommendedSizes":{"width":"200","height":"200"}},"id":"1"},{"id":"2","title":"BOV/ADV/DSV","url":{"url":"/en/products/bovdsvadv","pageId":"cjv7uialr03nh0836yjoz2dji"}},{"id":"7","title":"SILENCER","url":{"url":"/en/products/others/silencer","pageId":"ckeckogrp871307880g501pjl"}},{"id":"3","title":"FLOW LIMITER MK2","url":{"url":"/en/products/others/flow-limiter-mk2","pageId":"cl78rvnxwtvo808589liz2pfw"}},{"id":"4","title":"APEKS DST","url":{"url":"/en/products/others/apeks-technical-connection","pageId":"ckfm7aln29n640788eo83lo9r"}},{"id":"5","title":"CYLINDERS","url":{"url":"/en/products/others/cylinders","pageId":"ckdslvkfn7o610788ld52hmqe"}},{"id":"6","title":"REELS","url":{"url":"/en/products/others/reels","pageId":"ckecknqht870l0788pd8d2qgb"}}]}},"__typename":"ComponentTemplate"},"ComponentTemplate:cmpv63t6376s00826utezk0w7":{"id":"cmpv63t6376s00826utezk0w7","name":"Liberty 2026","type":"AccordionComparison","content":{"type":"json","json":{"accordionTitle":"Find which Liberty model fits your diving style","firstTitle":"LIBERTY<br><light>BACKMOUNT</light>","firstImage":{"recommendedSizes":{"width":"400","height":"400"},"mimetype":"image/png","size":673113,"hash":"04ce142e8918275bb9e69a43df942868e3bc89b1","id":"ckx4hwc0fcn020776lhljgbpy","filename":"divesoft-ccr-liberty-bmcl-00-1080x1080.png","category":"divesoft/","type":"image"},"firstRows":[{"label":"Dimension","value":"640 mm (25,20 in) height, 388 mm (15,30 in) width, 226 mm (9,00 in) depth","id":"1"},{"label":"BOV options","value":"BMCL: comes with BOV + MAV, BOV + ADV + MAV FMCL: optional BOV, BOV + ADV, BOV + MAV, BOV + ADV + MAV","id":"2"},{"label":"Drop weight pouches","value":"Yes","id":"3"}],"secondTitle":"LIBERTY<br><light>LIGHT</light>","secondImage":{"recommendedSizes":{"width":"400","height":"400"},"mimetype":"image/png","size":803931,"hash":"bb7fb772b0304575862f683e4ef39b0302a0be8a","id":"ckx3mi0tsc5tr0776r23bum6i","filename":"divesoft-ccr-liberty-light-07-1080x1080.png","category":"divesoft/","type":"image"},"secondRows":[{"label":"Dimensions","value":"430 mm (16,90 in) height, 340 mm (13,40 in) width, 226 mm (9,00 in) depth","id":"1"},{"label":"BOV options","value":"BMCL: BOV + MAV, BOV + ADV + MAV","id":"2"},{"label":"Drop weight pouches","value":"Optional","id":"3"}],"thirdTitle":"LIBERTY<br><light>SIDEMOUNT</light>","thirdImage":{"recommendedSizes":{"width":"400","height":"400"},"mimetype":"image/png","size":117662,"hash":"fa1621a27a52e0d1b3089491338768a9393c1c9b","id":"ckx3lwkm6c5o107761nbi1q4b","filename":"divesoft-ccr-liberty-05-1080x1080.png","category":"divesoft/","type":"image"},"thirdRows":[{"label":"Dimensions","value":"800 mm (31,50 in) length - shortened scrubber, 880 mm (34,65 in) length - standard scrubber, 205 mm (8,07 in) height, 220 mm (8,66 in) width","id":"1"},{"label":"BOV options","value":"Only available with DSV","id":"2"},{"label":"Drop weight pouches","value":"No","id":"3"}],"fourthImage":{"recommendedSizes":{"width":"400","height":"400"},"mimetype":"image/png","size":15299,"hash":"17a6b78d3e160ac26b79cbcec754824a5ad9a8a0","id":"ckx3m2sjnc5qs07764q4obz7u","filename":"divesoft-menu-ccr-liberty-heavy-200x200.png","category":"divesoft/","type":"image"},"fifthImage":{"recommendedSizes":{"width":"400","height":"400"}},"fourthTitle":"LIBERTY<br><light>HEAVY</light>","fourthRows":[{"id":"1","label":"Dimensions","value":"Configuration: 2Ã7 L: 720 mm (28,35 in) height, 445 mm (17,52 in) width, 240 mm (09,45 in) depth Configuration: 2Ã3 L: 680 mm (26,77 in) height, 365 mm (14,37 in) width, 230 mm (09,06 in) depth"},{"id":"2","label":"BOV options","value":"BMCL: BOV + MAV, BOV + ADV + MAV"},{"id":"3","label":"Drop weight pouches","value":"Available in configuration with 3L cylinders"}]}},"__typename":"ComponentTemplate"},"PageUrl:cjv3l26tp004p0836i54n4u7a/en":{"id":"cjv3l26tp004p0836i54n4u7a/en","page":"cjv3l26tp004p0836i54n4u7a","url":"/en","name":"Homepage","description":" ","__typename":"PageUrl"},"PageUrl:cjv3rim6p00fm0836uts415d5/en/products":{"id":"cjv3rim6p00fm0836uts415d5/en/products","page":"cjv3rim6p00fm0836uts415d5","url":"/en/products","name":"Products","description":" ","__typename":"PageUrl"},"PageUrl:cjv3rpryz00iw0836lc0zx81j/en/products/ccr-liberty":{"id":"cjv3rpryz00iw0836lc0zx81j/en/products/ccr-liberty","page":"cjv3rpryz00iw0836lc0zx81j","url":"/en/products/ccr-liberty","name":"CCR Liberty","description":" ","__typename":"PageUrl"},"PageUrl:cjv3rr7on00ky0836fercz490/en/products/analyzers":{"id":"cjv3rr7on00ky0836fercz490/en/products/analyzers","page":"cjv3rr7on00ky0836fercz490","url":"/en/products/analyzers","name":"Analyzers","description":" ","__typename":"PageUrl"},"PageUrl:cjv3rrgwi00ll0836rvjysah5/en/downloads":{"id":"cjv3rrgwi00ll0836rvjysah5/en/downloads","page":"cjv3rrgwi00ll0836rvjysah5","url":"/en/downloads","name":"Downloads","description":" ","__typename":"PageUrl"}
2,"PageUrl:cjv3rrnkp00m80836ezb6g5y6/en/downloads/faq":{"id":"cjv3rrnkp00m80836ezb6g5y6/en/downloads/faq","page":"cjv3rrnkp00m80836ezb6g5y6","url":"/en/downloads/faq","name":"FAQ","description":" ","__typename":"PageUrl"},"PageUrl:cjv3ru1og00ob08363pvv76br/en/downloads/terms-and-conditions":{"id":"cjv3ru1og00ob08363pvv76br/en/downloads/terms-and-conditions","page":"cjv3ru1og00ob08363pvv76br","url":"/en/downloads/terms-and-conditions","name":"Terms and conditions","description":" ","__typename":"PageUrl"},"PageUrl:cjv7uialr03nh0836yjoz2dji/en/products/others/bovdsvadv":{"id":"cjv7uialr03nh0836yjoz2dji/en/products/others/bovdsvadv","page":"cjv7uialr03nh0836yjoz2dji","url":"/en/products/others/bovdsvadv","name":"BOV/DSV/ADV","description":" ","__typename":"PageUrl"},"PageUrl:cjv83bs6804tb08366aj9zqyw/en/downloads/secure-payment":{"id":"cjv83bs6804tb08366aj9zqyw/en/downloads/secure-payment","page":"cjv83bs6804tb08366aj9zqyw","url":"/en/downloads/secure-payment","name":"Secure payment","description":" ","__typename":"PageUrl"},"PageUrl:cjv83jag304vu0836fiuwysty/en/downloads/personal-data-protection-principles":{"id":"cjv83jag304vu0836fiuwysty/en/downloads/personal-data-protection-principles","page":"cjv83jag304vu0836fiuwysty","url":"/en/downloads/personal-data-protection-principles","name":"GDPR","description":" ","__typename":"PageUrl"},"PageUrl:cjyztusbt039t0777kqbo8xj8/en/products/ccr-liberty/ccr-liberty-sidemount":{"id":"cjyztusbt039t0777kqbo8xj8/en/products/ccr-liberty/ccr-liberty-sidemount","page":"cjyztusbt039t0777kqbo8xj8","url":"/en/products/ccr-liberty/ccr-liberty-sidemount","name":"CCR Liberty sidemount","description":" ","__typename":"PageUrl"},"PageUrl:cjztilv3509et0777ejgtlm67/en/products/analyzers/analyzer-he-o2":{"id":"cjztilv3509et0777ejgtlm67/en/products/analyzers/analyzer-he-o2","page":"cjztilv3509et0777ejgtlm67","url":"/en/products/analyzers/analyzer-he-o2","name":"Analyzer He/O2","description":" ","__typename":"PageUrl"},"PageUrl:cjztim1kk09fg0777nv63tf9b/en/products/analyzers/analyzer-solo":{"id":"cjztim1kk09fg0777nv63tf9b/en/products/analyzers/analyzer-solo","page":"cjztim1kk09fg0777nv63tf9b","url":"/en/products/analyzers/analyzer-solo","name":"Analyzer Solo","description":" ","__typename":"PageUrl"},"PageUrl:ck2y1vlg800e00821gf9oba1c/en/404":{"id":"ck2y1vlg800e00821gf9oba1c/en/404","page":"ck2y1vlg800e00821gf9oba1c","url":"/en/404","name":"404","description":" ","__typename":"PageUrl"},"PageUrl:ck4sgp3ah11mw0821pubz9we4/en/contacts":{"id":"ck4sgp3ah11mw0821pubz9we4/en/contacts","page":"ck4sgp3ah11mw0821pubz9we4","url":"/en/contacts","name":"Contacts","description":" ","__typename":"PageUrl"},"PageUrl:ck7fwhzma02rt0788qubyegdb/en/brandbook":{"id":"ck7fwhzma02rt0788qubyegdb/en/brandbook","page":"ck7fwhzma02rt0788qubyegdb","url":"/en/brandbook","name":"brandbook","description":" ","__typename":"PageUrl"},"PageUrl:ck7m1guq108gk07883tmehxr4/en/products/ccr-liberty/ccr-liberty-light":{"id":"ck7m1guq108gk07883tmehxr4/en/products/ccr-liberty/ccr-liberty-light","page":"ck7m1guq108gk07883tmehxr4","url":"/en/products/ccr-liberty/ccr-liberty-light","name":"CCR Liberty light","description":" ","__typename":"PageUrl"},"PageUrl:ck9v8ad582urj0788pmspzwzi/en/dealers":{"id":"ck9v8ad582urj0788pmspzwzi/en/dealers","page":"ck9v8ad582urj0788pmspzwzi","url":"/en/dealers","name":"Dealers","description":" ","__typename":"PageUrl"},"PageUrl:cka6kn4hd3ahh0788k20h9ayy/en/contacts/contact-us":{"id":"cka6kn4hd3ahh0788k20h9ayy/en/contacts/contact-us","page":"cka6kn4hd3ahh0788k20h9ayy","url":"/en/contacts/contact-us","name":"Contact us","description":" ","__typename":"PageUrl"},"PageUrl:ckdsltzi07o520788tk0s6c4v/en/products/others":{"id":"ckdsltzi07o520788tk0s6c4v/en/products/others","page":"ckdsltzi07o520788tk0s6c4v","url":"/en/products/others","name":"Others","description":" ","__typename":"PageUrl"},"PageUrl:ckdslvkfn7o610788ld52hmqe/en/products/others/cylinders":{"id":"ckdslvkfn7o610788ld52hmqe/en/products/others/cylinders","page":"ckdslvkfn7o610788ld52hmqe","url":"/en/products/others/cylinders","name":"Cylinders","description":" ","__typename":"PageUrl"},"PageUrl:ckecknqht870l0788pd8d2qgb/en/products/others/reels":{"id":"ckecknqht870l0788pd8d2qgb/en/products/others/reels","page":"ckecknqht870l0788pd8d2qgb","url":"/en/products/others/reels","name":"Reels","de
2scription":" ","__typename":"PageUrl"},"PageUrl:ckeckogrp871307880g501pjl/en/products/others/silencer":{"id":"ckeckogrp871307880g501pjl/en/products/others/silencer","page":"ckeckogrp871307880g501pjl","url":"/en/products/others/silencer","name":"Silencer","description":" ","__typename":"PageUrl"},"PageUrl:ckfccnc4a98bx0788f7enal83/en/app":{"id":"ckfccnc4a98bx0788f7enal83/en/app","page":"ckfccnc4a98bx0788f7enal83","url":"/en/app","name":"Divesoft.app","description":" ","__typename":"PageUrl"},"PageUrl:ckfm7aln29n640788eo83lo9r/en/products/others/apeks-technical-connection":{"id":"ckfm7aln29n640788eo83lo9r/en/products/others/apeks-technical-connection","page":"ckfm7aln29n640788eo83lo9r","url":"/en/products/others/apeks-technical-connection","name":"Apeks Technical Connection","description":" ","__typename":"PageUrl"},"PageUrl:ckg68bbngab8607889mbsjxt5/en/downloads/size-guide":{"id":"ckg68bbngab8607889mbsjxt5/en/downloads/size-guide","page":"ckg68bbngab8607889mbsjxt5","url":"/en/downloads/size-guide","name":"size guide","description":" ","__typename":"PageUrl"},"PageUrl:ckgdfcdf4afxt0788jj7dwb6x/en/about-us":{"id":"ckgdfcdf4afxt0788jj7dwb6x/en/about-us","page":"ckgdfcdf4afxt0788jj7dwb6x","url":"/en/about-us","name":"About us","description":" ","__typename":"PageUrl"},"PageUrl:ckgdfd1efafyb0788kvbbrox9/en/about-us/jakub-simanek":{"id":"ckgdfd1efafyb0788kvbbrox9/en/about-us/jakub-simanek","page":"ckgdfd1efafyb0788kvbbrox9","url":"/en/about-us/jakub-simanek","name":"Jakub Šimánek","description":" ","__typename":"PageUrl"},"PageUrl:ckjhi3h1h1b720788igpbi8fp/en/center":{"id":"ckjhi3h1h1b720788igpbi8fp/en/center","page":"ckjhi3h1h1b720788igpbi8fp","url":"/en/center","name":"DIVESOFT.CENTER","description":" ","__typename":"PageUrl"},"PageUrl:ckl9hb0k73lgh0788m5dh5xtp/en/products/optical-display-adapters":{"id":"ckl9hb0k73lgh0788m5dh5xtp/en/products/optical-display-adapters","page":"ckl9hb0k73lgh0788m5dh5xtp","url":"/en/products/optical-display-adapters","name":"Optical display adapters","description":" ","__typename":"PageUrl"},"PageUrl:cknpubp6j2f690788zv52yohy/en/products/ccr-liberty/ccr-liberty-heavy":{"id":"cknpubp6j2f690788zv52yohy/en/products/ccr-liberty/ccr-liberty-heavy","page":"cknpubp6j2f690788zv52yohy","url":"/en/products/ccr-liberty/ccr-liberty-heavy","name":"CCR Liberty heavy","description":" ","__typename":"PageUrl"},"PageUrl:cknqdc02r2hbn0788ccqay0i3/en/contacts/dealers/ds:stores":{"id":"cknqdc02r2hbn0788ccqay0i3/en/contacts/dealers/ds:stores","page":"cknqdc02r2hbn0788ccqay0i3","url":"/en/contacts/dealers/ds:stores","name":"Store detail","description":" ","__typename":"PageUrl"},"PageUrl:ckoculqdh37zx0788ml14e08g/en/manuals":{"id":"ckoculqdh37zx0788ml14e08g/en/manuals","page":"ckoculqdh37zx0788ml14e08g","url":"/en/manuals","name":"manuals","description":" ","__typename":"PageUrl"},"PageUrl:ckocumdqv380r0788ta9ljatx/en/manuals/8313-analyzer-he-o2-en":{"id":"ckocumdqv380r0788ta9ljatx/en/manuals/8313-analyzer-he-o2-en","page":"ckocumdqv380r0788ta9ljatx","url":"/en/manuals/8313-analyzer-he-o2-en","name":"#8313_analyzer-he-o2_en","description":" ","__typename":"PageUrl"},"PageUrl:ckonbtfmp3px60788qpmvrvhk/en/manuals/8300-analyzer-solo-en":{"id":"ckonbtfmp3px60788qpmvrvhk/en/manuals/8300-analyzer-solo-en","page":"ckonbtfmp3px60788qpmvrvhk","url":"/en/manuals/8300-analyzer-solo-en","name":"#8300_analyzer-solo_en","description":" ","__typename":"PageUrl"},"PageUrl:ckone3so43q740788v6xdffgh/en/manuals/8300-analyzer-solo-cz":{"id":"ckone3so43q740788v6xdffgh/en/manuals/8300-analyzer-solo-cz","page":"ckone3so43q740788v6xdffgh","url":"/en/manuals/8300-analyzer-solo-cz","name":"#8300_analyzer-solo_cz","description":" ","__typename":"PageUrl"},"PageUrl:ckpcgx2c64h2d0788rft16oow/en/blog":{"id":"ckpcgx2c64h2d0788rft16oow/en/blog","page":"ckpcgx2c64h2d0788rft16oow","url":"/en/blog","name":"Blog","description":" ","__typename":"PageUrl"},"PageUrl:ckpch3csz4h4n0788bw746g54/en/blog/ccr-liberty-rebreather-platform-and-the-philosophy-behind-it":{"id":"ckpch3csz4h4n0788bw746g54/en/blog/ccr-liberty-rebreather-platform-and-the-philosophy-behind-it","page":"ckpch3csz4h4n0788bw746g54","url":"/en/blog/ccr-liberty-rebreather-platform-and-the-philosophy-behind-it","name":"divesoft.blog / CCR Liberty rebreather platform and the philosophy behind it","description":" ","__typename":"PageUrl"},"PageUrl:ckpmmiqic4zh9078854l4rnzc/en/catalogue":{"id":"ckpmmiqic4zh9078854l4rnzc/en/catalogue","page":"ckpmmiqic4zh9078854l4rnzc","url":"/en/catalogue","name":"ccr liberty rebreathers catalogue","description":" ","__typename":"PageUrl"},"PageUrl:ckpzix1hf5fmk07883mhggvlm/en/blog/the-individual-elements-of-the-ccr-liberty-unit-set-up":{"id":"ckpzix1hf5fmk07883mhggvlm/en/blog/the-individual-elements-of-the-ccr-liberty-unit-set-up","page":"ckpzix1hf5fmk07883mhggvlm","url":"/en/blog/the-individual-elements-of-the-ccr-liberty-unit-set-up","name":"divesoft.blog / The individual elements of the CCR Liberty unit set up","description":" ","__typename":"PageUrl"},"PageUrl:ckq24u6625i7w0788gqd0215i/en/blog/divetalks-with-edmund-yiu-rebreather-diving-in-asia-safety-tips-and-liberty-light-experience":{"id":"ckq24u6625i7w0788gqd0215i/en/blog/divetalks-with-edmund-yiu-rebreather-diving-in-asia-safety-tips-and-liberty-light-experience","page":"ckq24u6625i7w0788gqd0215i","url":"/en/blog/divetalks-with-edmund-yiu-rebreather-diving-in-asia-safety-tips-and-liberty-light-experience","name":"divesoft.blog / Divetalks with Edmund Yiu: Rebreather diving in Asia, safety tips and Liberty Light experience","description":" ","__typename":"PageUrl"},"PageUrl:ckqghin2a65ic0788ynuy9evw/en/blog/ccr-liberty-head":{"id":"ckqghin2a65ic0788ynuy9evw/en/blog/ccr-liberty-head","page":"ckqghin2a65ic0788ynuy9evw","url":"/en/blog/ccr-liberty-head","name":"divesoft.blog / CCR Liberty Head","de
2scription":" ","__typename":"PageUrl"},"PageUrl:ckqmdngvz6lvr0788udhww8zn/en/blog/divetalks-with-becky-kagan-schott-liberty-sidemount-rebreather-and-underwater-filming":{"id":"ckqmdngvz6lvr0788udhww8zn/en/blog/divetalks-with-becky-kagan-schott-liberty-sidemount-rebreather-and-underwater-filming","page":"ckqmdngvz6lvr0788udhww8zn","url":"/en/blog/divetalks-with-becky-kagan-schott-liberty-sidemount-rebreather-and-underwater-filming","name":"divesoft.blog / Divetalks with Becky Kagan Schott: Liberty sidemount rebreather and underwater filming","description":" ","__typename":"PageUrl"},"PageUrl:ckr3cdk4m7zf40788sjeh3in4/en/blog/divetalks-with-jill-heinerth-rebreathers-and-diving-safety-culture":{"id":"ckr3cdk4m7zf40788sjeh3in4/en/blog/divetalks-with-jill-heinerth-rebreathers-and-diving-safety-culture","page":"ckr3cdk4m7zf40788sjeh3in4","url":"/en/blog/divetalks-with-jill-heinerth-rebreathers-and-diving-safety-culture","name":"divesoft.blog / Divetalks with Jill Heinerth: Rebreathers and diving safety culture","description":" ","__typename":"PageUrl"},"PageUrl:ckrabjz8s8hyc0788zx5sv8rs/en/blog/ccr-mouthpieces-bov-dsv-mav-and-offboarding-gas":{"id":"ckrabjz8s8hyc0788zx5sv8rs/en/blog/ccr-mouthpieces-bov-dsv-mav-and-offboarding-gas","page":"ckrabjz8s8hyc0788zx5sv8rs","url":"/en/blog/ccr-mouthpieces-bov-dsv-mav-and-offboarding-gas","name":"divesoft.blog / CCR mouthpieces BOV/DSV/MAV and offboarding gas","description":" ","__typename":"PageUrl"},"PageUrl:ckrnocx4m040x088842si0pr4/en/blog/ccr-liberty-rebreather-platform-and-the-philosophy-behind-it/ccr-liberty-avds-options":{"id":"ckrnocx4m040x088842si0pr4/en/blog/ccr-liberty-rebreather-platform-and-the-philosophy-behind-it/ccr-liberty-avds-options","page":"ckrnocx4m040x088842si0pr4","url":"/en/blog/ccr-liberty-rebreather-platform-and-the-philosophy-behind-it/ccr-liberty-avds-options","name":"Divesoft.blog / CCR Liberty AVDs options","description":" ","__typename":"PageUrl"},"PageUrl:cks049fd700dp09880q1l63ap/en/blog/divetalks-with-sameh-sokar-rebreather-diving-and-ghost-fishing-projects-in-egypt":{"id":"cks049fd700dp09880q1l63ap/en/blog/divetalks-with-sameh-sokar-rebreather-diving-and-ghost-fishing-projects-in-egypt","page":"cks049fd700dp09880q1l63ap","url":"/en/blog/divetalks-with-sameh-sokar-rebreather-diving-and-ghost-fishing-projects-in-egypt","name":"divesoft.blog / Divetalks with Sameh Sokar: Rebreather diving and ghost fishing projects in Egypt","description":" ","__typename":"PageUrl"},"PageUrl:cksdekk960k0w0988x1avo3qn/en/blog/ccr-liberty-scrubbers":{"id":"cksdekk960k0w0988x1avo3qn/en/blog/ccr-liberty-scrubbers","page":"cksdekk960k0w0988x1avo3qn","url":"/en/blog/ccr-liberty-scrubbers","name":"divesoft.blog / CCR Liberty Scrubbers","description":" ","__typename":"PageUrl"},"PageUrl:cksnbh54w11wf0988tg9xq8iw/en/blog/jakub-simanek-steve-bogaerts-and-brett-hemphill-about-bailout-and-dual-rebreathers":{"id":"cksnbh54w11wf0988tg9xq8iw/en/blog/jakub-simanek-steve-bogaerts-and-brett-hemphill-about-bailout-and-dual-rebreathers","page":"cksnbh54w11wf0988tg9xq8iw","url":"/en/blog/jakub-simanek-steve-bogaerts-and-brett-hemphill-about-bailout-and-dual-rebreathers","name":"Divesoft.blog / Jakub Šimánek, Steve Bogaerts and Brett Hemphill about bailout and dual rebreathers","description":" ","__typename":"PageUrl"},"PageUrl:cksu7n7to1dzb09889okz8f9o/en/blog/ccr-liberty-rebreather-platform-and-the-philosophy-behind-it/how-to-travel-with-a-rebreather":{"id":"cksu7n7to1dzb09889okz8f9o/en/blog/ccr-liberty-rebreather-platform-and-the-philosophy-behind-it/how-to-travel-with-a-rebreather","page":"cksu7n7to1dzb09889okz8f9o","url":"/en/blog/ccr-liberty-rebreather-platform-and-the-philosophy-behind-it/how-to-travel-with-a-rebreather","name":"Divesoft.blog / How to travel with a rebreather","description":" ","__typename":"PageUrl"},"PageUrl:ckt0i4dg51ogp0988dpgn8lwr/en/products/ccr-liberty/ccr-liberty-bmcl-fmcl":{"id":"ckt0i4dg51ogp0988dpgn8lwr/en/products/ccr-liberty/ccr-liberty-bmcl-fmcl","page":"ckt0i4dg51ogp0988dpgn8lwr","url":"/en/products/ccr-liberty/ccr-liberty-bmcl-fmcl","name":"BMCL/FMCL Configurations","description":" ","__typename":"PageUrl"},"PageUrl:ckt312y7j1vfa0988d15tj1p9/en/blog/ccr-liberty-frame":{"id":"ckt312y7j1vfa0988d15tj1p9/en/blog/ccr-liberty-frame","page":"ckt312y7j1vfa0988d15tj1p9","url":"/en/blog/ccr-liberty-frame","name":"Divesoft.blog / CCR Liberty Frame","description":" ","__typename":"PageUrl"},"PageUrl:cktjtpry92g6z0988qvz9yctm/en/blog/getting-back-into-div
2ing-after-a-break":{"id":"cktjtpry92g6z0988qvz9yctm/en/blog/getting-back-into-diving-after-a-break","page":"cktjtpry92g6z0988qvz9yctm","url":"/en/blog/getting-back-into-diving-after-a-break","name":"Divesoft.blog / Getting Back into Diving after a break","description":" ","__typename":"PageUrl"},"PageUrl:cktyf230v0o4908642wj0x9w6/en/blog/rebreather-accessories-oxygen-cell-tester-covers-protectors-and-more":{"id":"cktyf230v0o4908642wj0x9w6/en/blog/rebreather-accessories-oxygen-cell-tester-covers-protectors-and-more","page":"cktyf230v0o4908642wj0x9w6","url":"/en/blog/rebreather-accessories-oxygen-cell-tester-covers-protectors-and-more","name":"Divesoft.blog / Rebreather Accessories: Oxygen cell tester, covers, protectors and more","description":" ","__typename":"PageUrl"},"PageUrl:ckuwij1ow1uz70864yjnay2zf/en/blog/mark-powell-edoardo-pavia-and-paul-toomer-dual-and-bailout-rebreathers-training":{"id":"ckuwij1ow1uz70864yjnay2zf/en/blog/mark-powell-edoardo-pavia-and-paul-toomer-dual-and-bailout-rebreathers-training","page":"ckuwij1ow1uz70864yjnay2zf","url":"/en/blog/mark-powell-edoardo-pavia-and-paul-toomer-dual-and-bailout-rebreathers-training","name":"Divesoft.blog / Mark Powell, Edoardo Pavia and Paul Toomer: dual and bailout rebreathers training ","description":" Mark Powell, Edoardo Pavia and Paul Toomer opens the topic of training standards for bailout rebreathers, dive community, and the responsibility of dual CCR divers.","__typename":"PageUrl"},"PageUrl:ckvatt7e72ima0864sbtdb3iz/en/blog/diving-with-bailout-rebreather":{"id":"ckvatt7e72ima0864sbtdb3iz/en/blog/diving-with-bailout-rebreather","page":"ckvatt7e72ima0864sbtdb3iz","url":"/en/blog/diving-with-bailout-rebreather","name":"Divesoft.blog / Diving with a bailout rebreather","description":" ","__typename":"PageUrl"},"PageUrl:ckvjneehv2t9m0864nadx86y3/en/blog/divetalks-with-edd-sorenson-rescue-stories-sidemount-diving-and-innovation-in-technical-diving":{"id":"ckvjneehv2t9m0864nadx86y3/en/blog/divetalks-with-edd-sorenson-rescue-stories-sidemount-diving-and-innovation-in-technical-diving","page":"ckvjneehv2t9m0864nadx86y3","url":"/en/blog/divetalks-with-edd-sorenson-rescue-stories-sidemount-diving-and-innovation-in-technical-diving","name":"Divesoft.blog / Divetalks with Edd Sorenson: rescue stories, sidemount diving and innovation in technical diving","description":"Joe Bosquez has a chat with Edd Sorenson about rescue stories, sidemount diving and innovation in technical diving.","__typename":"PageUrl"},"PageUrl:ckvwicmzb0a8h0864bia259cd/en/blog/the-ccr-liberty-user-interface":{"id":"ckvwicmzb0a8h0864bia259cd/en/blog/the-ccr-liberty-user-interface","page":"ckvwicmzb0a8h0864bia259cd","url":"/en/blog/the-ccr-liberty-user-interface","name":"Divesoft.blog / The CCR Liberty User Interface","description":" In this CCR Liberty in Detail episode, Jakub will be looking at the User Interface, screens, and selection of the Dive Modes of Liberty units, explaining each function. ","__typename":"PageUrl"},"PageUrl:ckw6e9xfx0mp50864n0rz0o9x/en/blog/jill-heinerth-and-jeff-bozanic-eccr-vs-mccr-discussion":{"id":"ckw6e9xfx0mp50864n0rz0o9x/en/blog/jill-heinerth-and-jeff-bozanic-eccr-vs-mccr-discussion","page":"ckw6e9xfx0mp50864n0rz0o9x","url":"/en/blog/jill-heinerth-and-jeff-bozanic-eccr-vs-mccr-discussion","name":"Divesoft.blog / Jill Heinerth and Jeff Bozanic: eCCR vs mCCR discussion","description":" ","__typename":"PageUrl"},"PageUrl:ckwdetve60yan08649iw8pair/en/blog/11-step-rebreather-pre-dive-check":{"id":"ckwdetve60yan08649iw8pair/en/blog/11-step-rebreather-pre-dive-check","page":"ckwdetve60yan08649iw8pair","url":"/en/blog/11-step-rebreather-pre-dive-check","name":"Divesoft.blog / Assembly Checklist and 11-Step Rebreather Pre-Dive Check","description":" ","__typename":"PageUrl"},"PageUrl:ckwox3bna1w9c0864u2fbdfno/en/blog/ccr-liberty-unboxing":{"id":"ckwox3bna1w9c0864u2fbdfno/en/blog/ccr-liberty-unboxing","page":"ckwox3bna1w9c0864u2fbdfno","url":"/en/blog/ccr-liberty-unboxing","name":"Divesoft.blog / CCR Liberty unboxing","description":" ","__typename":"PageUrl"},"PageUrl:ckx4slj6v005k0a53p9i6x50m/en/instructors":{"id":"ckx4slj6v005k0a53p9i6x50m/en/instructors","page":"ckx4slj6v005k0a53p9i6x50m","url":"/en/instructors","name":"Instructors","description":" ","__typename":"PageUrl"},"PageUrl:ckx60balw01yz0858sye1ixvu/en/products/analyzers/analyzer-solo-o2":{"id":"ckx60balw01yz0858sye1ixvu/en/products/analyzers/analyzer-solo-o2","page":"ckx60balw01yz0858sye1ixvu","url":"/en/products/analyzers/analyzer-solo-o2","name":"Analyzer Solo O2","description":" ","__typename":"PageUrl"},"PageUrl:ckx63km7c027h0858b0tm2sky/en/manuals/8302-analyzer-solo-o2-en":{"id":"ckx63km7c027h0858b0tm2sky/en/manuals/8302-analyzer-solo-o2-en","page":"ckx63km7c027h0858b0tm2sky","url":"/en/manuals/8302-analyzer-solo-o2-en","name":"#8302_analyzer-solo-o2_en","de
2scription":" ","__typename":"PageUrl"},"PageUrl:ckxg0xywi0qec0858k67qqwk1/en/cookies":{"id":"ckxg0xywi0qec0858k67qqwk1/en/cookies","page":"ckxg0xywi0qec0858k67qqwk1","url":"/en/cookies","name":"Cookies","description":" ","__typename":"PageUrl"},"PageUrl:ckybcu1mg2un90858gj6k72sn/en/manuals/freedom-user-manual":{"id":"ckybcu1mg2un90858gj6k72sn/en/manuals/freedom-user-manual","page":"ckybcu1mg2un90858gj6k72sn","url":"/en/manuals/freedom-user-manual","name":"freedom-user-manual","description":" ","__typename":"PageUrl"},"PageUrl:ckz7y82vi5kaj0858bmlwr0ay/en/blog/what-is-a-rebreather-do-i-need-one-as-a-recreational-diver":{"id":"ckz7y82vi5kaj0858bmlwr0ay/en/blog/what-is-a-rebreather-do-i-need-one-as-a-recreational-diver","page":"ckz7y82vi5kaj0858bmlwr0ay","url":"/en/blog/what-is-a-rebreather-do-i-need-one-as-a-recreational-diver","name":"Divesoft.blog / What is a rebreather? Do I need one as a recreational diver?","description":" ","__typename":"PageUrl"},"PageUrl:cl024i4na8mnj08589tid8bc4/en/blog/7-steps-to-becoming-a-rebreather-diver":{"id":"cl024i4na8mnj08589tid8bc4/en/blog/7-steps-to-becoming-a-rebreather-diver","page":"cl024i4na8mnj08589tid8bc4","url":"/en/blog/7-steps-to-becoming-a-rebreather-diver","name":"Divesoft.blog / 7 steps to becoming a rebreather diver","description":" ","__typename":"PageUrl"},"PageUrl:cl0uxg68ubwow08586hqi9bnj/en/downloads/ccr-liberty-rebreather":{"id":"cl0uxg68ubwow08586hqi9bnj/en/downloads/ccr-liberty-rebreather","page":"cl0uxg68ubwow08586hqi9bnj","url":"/en/downloads/ccr-liberty-rebreather","name":"CCR Liberty Rebreather","description":" ","__typename":"PageUrl"},"PageUrl:cl0uy684cbwvb0858yqx4vnhx/en/downloads/ccr-liberty-rebreather/user-manuals":{"id":"cl0uy684cbwvb0858yqx4vnhx/en/downloads/ccr-liberty-rebreather/user-manuals","page":"cl0uy684cbwvb0858yqx4vnhx","url":"/en/downloads/ccr-liberty-rebreather/user-manuals","name":"User Manuals","description":" ","__typename":"PageUrl"},"PageUrl:cl0uzc9z6bx4i0858xb5a7gh2/en/downloads/ccr-liberty-rebreather/firmware":{"id":"cl0uzc9z6bx4i0858xb5a7gh2/en/downloads/ccr-liberty-rebreather/firmware","page":"cl0uzc9z6bx4i0858xb5a7gh2","url":"/en/downloads/ccr-liberty-rebreather/firmware","name":"Firmware","description":" ","__typename":"PageUrl"},"PageUrl:cl0v1tqigbxkj0858sa1rnh30/en/downloads/ccr-liberty-rebreather/assembly-checklists":{"id":"cl0v1tqigbxkj0858sa1rnh30/en/downloads/ccr-liberty-rebreather/assembly-checklists","page":"cl0v1tqigbxkj0858sa1rnh30","url":"/en/downloads/ccr-liberty-rebreather/assembly-checklists","name":"Assembly Checklists","description":" ","__typename":"PageUrl"},"PageUrl:cl0v2cjy9bxow0858y0jvge1d/en/downloads/ccr-liberty-rebreather/technical-specifications":{"id":"cl0v2cjy9bxow0858y0jvge1d/en/downloads/ccr-liberty-rebreather/technical-specifications","page":"cl0v2cjy9bxow0858y0jvge1d","url":"/en/downloads/ccr-liberty-rebreather/technical-specifications","name":"Technical Specifications","description":" ","__typename":"PageUrl"},"PageUrl:cl0v2jkrubxqh0858gbqd5t6o/en/downloads/ccr-liberty-rebreather/additional-documents":{"id":"cl0v2jkrubxqh0858gbqd5t6o/en/downloads/ccr-liberty-rebreather/additional-documents","page":"cl0v2jkrubxqh0858gbqd5t6o","url":"/en/downloads/ccr-liberty-rebreather/additional-documents","name":"Additional Documents","description":" ","__typename":"PageUrl"},"PageUrl:cl0w69wstc3wt0858zwwhc4rn/en/downloads/analyzers":{"id":"cl0w69wstc3wt0858zwwhc4rn/en/downloads/analyzers","page":"cl0w69wstc3wt0858zwwhc4rn","url":"/en/downloads/analyzers","name":"Analyzers","description":" ","__typename":"PageUrl"},"PageUrl:cl0w6ezvmc3xw08584tvd6myu/en/downloads/analyzers/user-manuals":{"id":"cl0w6ezvmc3xw08584tvd6myu/en/downloads/analyzers/user-manuals","page":"cl0w6ezvmc3xw08584tvd6myu","url":"/en/downloads/analyzers/user-manuals","name":"User Manuals","description":" ","__typename":"PageUrl"},"PageUrl:cl0w9d15gc4bs0858x46etqax/en/downloads/freedom-computers":{"id":"cl0w9d15gc4bs0858x46etqax/en/downloads/freedom-computers","page":"cl0w9d15gc4bs0858x46etqax","url":"/en/downloads/freedom-computers","name":"Freedom Computers","description":" ","__typename":"PageUrl"},"PageUrl:cl0wa065gc4gx085870mb27m3/en/downloads/freedom-computers/user-manuals":{"id":"cl0wa065gc4gx085870mb27m3/en/downloads/freedom-computers/user-manuals","page":"cl0wa065gc4gx085870mb27m3","url":"/en/downloads/freedom-computers/user-manuals","name":"User Manuals","description":" ","__typename":"PageUrl"},"PageUrl:cl0wai2l5c4ma0858bqfgyiws/en/downloads/freedom-computers/additional-documents":{"id":"cl0wai2l5c4ma0858bqfgyiws/en/downloads/freedom-computers/additional-documents","page":"cl0wai2l5c4ma0858bqfgyiws","url":"/en/downloads/freedom-computers/additional-documents","name":"Additional Documents","description":" ","__typename":"PageUrl"},"PageUrl:cl0wbz1pqc4u90858pp61vixf/en/downloads/freedom-computers/firmware":{"id":"cl0wbz1pqc4u90858pp61vixf/en/downloads/freedom-computers/firmware","page":"cl0wbz1pqc4u90858pp61vixf","url":"/en/downloads/freedom-computers/firmware","name":"Firmware","description":" ","__typename":"PageUrl"},"PageUrl:cl10kc5iocib30858yyb964ib/en/blog/divesoft-demo-day-with-divers-in-wheelchairs-from-skv-team":{"id":"cl10kc5iocib30858yyb964ib/en/blog/divesoft-demo-day-with-divers-in-wheelchairs-from-skv-team","page":"cl10kc5iocib30858yyb964ib","url":"/en/blog/divesoft-demo-day-with-divers-in-wheelchairs-from-skv-team","name":"Divesoft.blog / Divesoft DEMO day with divers in wheelchairs from SKV team","description":" ","__typename":"PageUrl"},"PageUrl:cl16j64oud5z10858zmxo5z3b/en/downloads/analyzers/firmware":{"id":"cl16j64oud5z10858zmxo5z3b/en/downloads/analyzers/firmware","page":"cl16j64oud5z10858zmxo5z3b","url":"/en/downloads/analyzers/firmware","name":"Firmware","description":" ","__typename":"PageUrl"},"PageUrl:cl1ou3jiwegqa0858xyrb0fo3/en/manuals/8302-analyzer-solo-o2-cz":{"id":"cl1ou3jiwegqa0858xyrb0fo3/en/manuals/8302-analyzer-solo-o2-cz","page":"cl1ou3jiwegqa0858xyrb0fo3","url":"/en/manuals/8302-analyzer-solo-o2-cz","name":"#8302_analyzer-solo-o2_cz","description":" ","__typename":"PageUrl"},"PageUrl:cl1q88ou8ekco08587cts1a1t/en/blog/how-to-choose-an-instructor-for-your-rebreather-course":{"id":"cl1q88ou8ekco08587cts1a1t/en/blog/how-to-choose-an-instructor-for-your-rebreather-course","page":"cl1q88ou8ekco08587cts1a1t","url":"/en/blog/how-to-choose-an-instructor-for-your-rebreather-course","name":"Divesoft.blog / How to choose an instructor for your rebreather course","description":" ","__typename":"PageUrl"},"PageUrl:cl2fwdvaagxot0858dbvfzwa9/en/blog/how-do-we-test-each-ccr-liberty":{"id":"cl2fwdvaagxot0858dbvfzwa9/en/blog/how-do-we-test-each-ccr-liberty","page":"cl2fwdvaagxot0858dbvfzwa9","url":"/en/blog/how-do-we-test-each-ccr-liberty","name":"Divesoft.blog / CCR Liberty testing","description":" ","__typename":"PageUrl"},"PageUrl:cl2yfnr88iba8085879y08pat/en/manuals/ccr-liberty-manual"
2:{"id":"cl2yfnr88iba8085879y08pat/en/manuals/ccr-liberty-manual","page":"cl2yfnr88iba8085879y08pat","url":"/en/manuals/ccr-liberty-manual","name":"CCR Liberty manual","description":" ","__typename":"PageUrl"},"PageUrl:cl2ypayvtidsk08584m2igh8l/en/blog/what-will-i-learn-in-a-rebreather-course":{"id":"cl2ypayvtidsk08584m2igh8l/en/blog/what-will-i-learn-in-a-rebreather-course","page":"cl2ypayvtidsk08584m2igh8l","url":"/en/blog/what-will-i-learn-in-a-rebreather-course","name":"Divesoft.blog / What will I learn in a rebreather course","description":" ","__typename":"PageUrl"},"PageUrl:cl3vesldqknhj085858savf3u/en/ccr-liberty":{"id":"cl3vesldqknhj085858savf3u/en/ccr-liberty","page":"cl3vesldqknhj085858savf3u","url":"/en/ccr-liberty","name":"Diving Rebreather Configurator (CCR Liberty)","description":" ","__typename":"PageUrl"},"PageUrl:cl43w74lpl8dk0858to9uhj2u/en/manuals/ccr-liberty-manual/ccr-liberty-manual-01":{"id":"cl43w74lpl8dk0858to9uhj2u/en/manuals/ccr-liberty-manual/ccr-liberty-manual-01","page":"cl43w74lpl8dk0858to9uhj2u","url":"/en/manuals/ccr-liberty-manual/ccr-liberty-manual-01","name":"CCR Liberty manual 01","description":" ","__typename":"PageUrl"},"PageUrl:cl43w7gb7l8e20858xrzqgqz9/en/manuals/ccr-liberty-manual/ccr-liberty-manual-02":{"id":"cl43w7gb7l8e20858xrzqgqz9/en/manuals/ccr-liberty-manual/ccr-liberty-manual-02","page":"cl43w7gb7l8e20858xrzqgqz9","url":"/en/manuals/ccr-liberty-manual/ccr-liberty-manual-02","name":"CCR Liberty manual 02","description":" ","__typename":"PageUrl"},"PageUrl:cl43w7qiml8ek08588cha4oc2/en/manuals/ccr-liberty-manual/ccr-liberty-manual-03":{"id":"cl43w7qiml8ek08588cha4oc2/en/manuals/ccr-liberty-manual/ccr-liberty-manual-03","page":"cl43w7qiml8ek08588cha4oc2","url":"/en/manuals/ccr-liberty-manual/ccr-liberty-manual-03","name":"CCR Liberty manual 03","description":" ","__typename":"PageUrl"},"PageUrl:cl48h6z8zlpye0858td9csdqy/en/blog/5-basic-principles-of-rebreather-and-one-extra":{"id":"cl48h6z8zlpye0858td9csdqy/en/blog/5-basic-principles-of-rebreather-and-one-extra","page":"cl48h6z8zlpye0858td9csdqy","url":"/en/blog/5-basic-principles-of-rebreather-and-one-extra","name":"Divesoft.blog / 5 basic principles of rebreather and one extra","description":" ","__typename":"PageUrl"},"PageUrl:cl78rvnxwtvo808589liz2pfw/en/products/others/flow-limiter-mk2":{"id":"cl78rvnxwtvo808589liz2pfw/en/products/others/flow-limiter-mk2","page":"cl78rvnxwtvo808589liz2pfw","url":"/en/products/others/flow-limiter-mk2","name":"Professional Flow limiter Mk2","description":" ","__typename":"PageUrl"},"PageUrl:cl7oo6u7qv8cf0858exiqv6ad/en/products/ccr-liberty/bail-out-rebreather":{"id":"cl7oo6u7qv8cf0858exiqv6ad/en/products/ccr-liberty/bail-out-rebreather","page":"cl7oo6u7qv8cf0858exiqv6ad","url":"/en/products/ccr-liberty/bail-out-rebreather","name":"Bail Out Rebreather","description":" ","__typename":"PageUrl"},"PageUrl:cl8mqor4qyjzv0858vty0cfa3/en/manuals/8402-oda-en":{"id":"cl8mqor4qyjzv0858vty0cfa3/en/manuals/8402-oda-en","page":"cl8mqor4qyjzv0858vty0cfa3","url":"/en/manuals/8402-oda-en","name":"#8402_oda_en","description":" ","__typename":"PageUrl"},"PageUrl:cl8tx5mksz54s0858ihl3q1u8/en/manuals/bov":{"id":"cl8tx5mksz54s0858ihl3q1u8/en/manuals/bov","page":"cl8tx5mksz54s0858ihl3q1u8","url":"/en/manuals/bov","name":"BOV-manual-en","description":" ","__typename":"PageUrl"},"PageUrl:cl8u22o4ez5mq08583oamhfwi/en/manuals/bailout-standby-mode-en":{"id":"cl8u22o4ez5mq08583oamhfwi/en/manuals/bailout-standby-mode-en","page":"cl8u22o4ez5mq08583oamhfwi","url":"/en/manuals/bailout-standby-mode-en","name":"bailout standby mode en","description":" ","__typename":"PageUrl"},"PageUrl:cl9mq5poj1rfh0858zgl8ksjn/en/manuals/ccr-liberty-heavy-manual_en":{"id":"cl9mq5poj1rfh0858zgl8ksjn/en/manuals/ccr-liberty-heavy-manual_en","page":"cl9mq5poj1rfh0858zgl8ksjn","url":"/en/manuals/ccr-liberty-heavy-manual_en","name":"CCR Liberty heavy manual_en","description":" ","__typename":"PageUrl"},"PageUrl:cl9y8rdi12u650858oza635r8/en/manuals/ccr-liberty-manual/ccr-liberty-sidemount-manual_en":{"id":"cl9y8rdi12u650858oza635r8/en/manuals/ccr-liberty-manual/ccr-liberty-sidemount-manual_en","page":"cl9y8rdi12u650858oza635r8","url":"/en/manuals/ccr-liberty-manual/ccr-liberty-sidemount-manual_en","name":"CCR Liberty Sidemount manual_en","de
2scription":" ","__typename":"PageUrl"},"PageUrl:clagmvmlj1ek00835j9q8q4rs/en/blog/ccr-training-from-the-perspective-of-training-agencies":{"id":"clagmvmlj1ek00835j9q8q4rs/en/blog/ccr-training-from-the-perspective-of-training-agencies","page":"clagmvmlj1ek00835j9q8q4rs","url":"/en/blog/ccr-training-from-the-perspective-of-training-agencies","name":"CCR training from the perspective of training agencies","description":" ","__typename":"PageUrl"},"PageUrl:claqj12ud2tqp08353972by7b/en/products/military":{"id":"claqj12ud2tqp08353972by7b/en/products/military","page":"claqj12ud2tqp08353972by7b","url":"/en/products/military","name":"Military","description":" ","__typename":"PageUrl"},"PageUrl:clcafw4t28zoz08354eyxom1b/en/blog/the-most-spectacular-dive-of-2022":{"id":"clcafw4t28zoz08354eyxom1b/en/blog/the-most-spectacular-dive-of-2022","page":"clcafw4t28zoz08354eyxom1b","url":"/en/blog/the-most-spectacular-dive-of-2022","name":"Divesoft.blog / The most spectacular dive of 2022","description":" ","__typename":"PageUrl"},"PageUrl:cldx11pfrfeok0835vfer80hk/en/blog/rebreathers-role-in-underwater-science":{"id":"cldx11pfrfeok0835vfer80hk/en/blog/rebreathers-role-in-underwater-science","page":"cldx11pfrfeok0835vfer80hk","url":"/en/blog/rebreathers-role-in-underwater-science","name":"Divesoft.blog / Rebreathers Role in Underwater Science","description":" ","__typename":"PageUrl"},"PageUrl:clf2f7jbtkl260835rps73xqp/en/downloads/become-a-partner":{"id":"clf2f7jbtkl260835rps73xqp/en/downloads/become-a-partner","page":"clf2f7jbtkl260835rps73xqp","url":"/en/downloads/become-a-partner","name":"Become a Partner","description":" ","__typename":"PageUrl"},"PageUrl:clf9rs5c3ltkw0835vujrrtxu/en/products/analyzers/dna":{"id":"clf9rs5c3ltkw0835vujrrtxu/en/products/analyzers/dna","page":"clf9rs5c3ltkw0835vujrrtxu","url":"/en/products/analyzers/dna","name":"Analyzer DNA","description":" ","__typename":"PageUrl"},"PageUrl:clfgt4fdjmf9v0835bv440kqj/en/products/freedomplus-computers":{"id":"clfgt4fdjmf9v0835bv440kqj/en/products/freedomplus-computers","page":"clfgt4fdjmf9v0835bv440kqj","url":"/en/products/freedomplus-computers","name":"Freedom+ computers","description":" ","__typename":"PageUrl"},"PageUrl:clfgtftaemfdx0835x56ytrvp/en/manuals/freedomplus-user-manual":{"id":"clfgtftaemfdx0835x56ytrvp/en/manuals/freedomplus-user-manual","page":"clfgtftaemfdx0835x56ytrvp","url":"/en/manuals/freedomplus-user-manual","name":"Freedom+ User manual","description":" ","__typename":"PageUrl"},"PageUrl:clfgtyzdumfnj0835m46yrcvf/en/manuals/freedomplus-quick-reference":{"id":"clfgtyzdumfnj0835m46yrcvf/en/manuals/freedomplus-quick-reference","page":"clfgtyzdumfnj0835m46yrcvf","url":"/en/manuals/freedomplus-quick-reference","name":"Freedom+ Quick reference","description":" ","__typename":"PageUrl"},"PageUrl:clfwgsbptnzzu0835o780vtem/en/service-points":{"id":"clfwgsbptnzzu0835o780vtem/en/service-points","page":"clfwgsbptnzzu0835o780vtem","url":"/en/service-points","name":"Service points","description":" ","__typename":"PageUrl"},"PageUrl:clg24qsywoqir0835nda961iz/en/blog/ccr-liberty-cave-diving-resistance":{"id":"clg24qsywoqir0835nda961iz/en/blog/ccr-liberty-cave-diving-resistance","page":"clg24qsywoqir0835nda961iz","url":"/en/blog/ccr-liberty-cave-diving-resistance","name":"Divesoft.blog / CCR Liberty cave diving resistance","description":" ","__typename":"PageUrl"},"PageUrl:clivhpar079d80835we1pgzk8/en/blog/discovering-the-ancient-shipwreck-capital-58-wrecks-unveiled-in-tiny-greek-archipelago":{"id":"clivhpar079d80835we1pgzk8/en/blog/discovering-the-ancient-shipwreck-capital-58-wrecks-unveiled-in-tiny-greek-archipelago","page":"clivhpar079d80835we1pgzk8","url":"/en/blog/discovering-the-ancient-shipwreck-capital-58-wrecks-unveiled-in-tiny-greek-archipelago","name":"Discovering the Ancient Shipwreck Capital: 58 Wrecks Unveiled in Tiny Greek Archipelago! / Divesoft.blog","description":" ","__typename":"PageUrl"},"PageUrl:cljck4wh192zw0835tw3xy3kp/en/manuals/freedom-user-manual/freedom-user-manual-01":{"id":"cljck4wh192zw0835tw3xy3kp/en/manuals/freedom-user-manual/freedom-user-manual-01","page":"cljck4wh192zw0835tw3xy3kp","url":"/en/manuals/freedom-user-manual/freedom-user-manual-01","name":"Freedom user manual 01","description":" ","__typename":"PageUrl"},"PageUrl:cljck5m2r930n08357znc2yvi/en/manuals/freedom-user-manual/freedom-user-manual-02":{"i
2d":"cljck5m2r930n08357znc2yvi/en/manuals/freedom-user-manual/freedom-user-manual-02","page":"cljck5m2r930n08357znc2yvi","url":"/en/manuals/freedom-user-manual/freedom-user-manual-02","name":"Freedom user manual 02","description":" ","__typename":"PageUrl"},"PageUrl:cljh5dijh9q0l0835t4bdfam7/en/manuals/8300-analyzer-solo-quick-reference-en":{"id":"cljh5dijh9q0l0835t4bdfam7/en/manuals/8300-analyzer-solo-quick-reference-en","page":"cljh5dijh9q0l0835t4bdfam7","url":"/en/manuals/8300-analyzer-solo-quick-reference-en","name":"Analyzer Solo Quick reference","description":" ","__typename":"PageUrl"},"PageUrl:cljh5ki1y9q1p0835lp0f4qak/en/manuals/8302-analyzer-solo-o2-quick-reference-en":{"id":"cljh5ki1y9q1p0835lp0f4qak/en/manuals/8302-analyzer-solo-o2-quick-reference-en","page":"cljh5ki1y9q1p0835lp0f4qak","url":"/en/manuals/8302-analyzer-solo-o2-quick-reference-en","name":"Analyzer Solo O2 Quick reference","description":" ","__typename":"PageUrl"},"PageUrl:clloxy7n3708p0735122lbaxh/en/manuals/professional-flow-limiter-mk2-quick-reference-en":{"id":"clloxy7n3708p0735122lbaxh/en/manuals/professional-flow-limiter-mk2-quick-reference-en","page":"clloxy7n3708p0735122lbaxh","url":"/en/manuals/professional-flow-limiter-mk2-quick-reference-en","name":"Professional flow limiter Mk2","description":" ","__typename":"PageUrl"},"PageUrl:clmeyb3r19lwj0735yt504zs0/en/blog/my-story-of-finding-a-submarine-in-the-shetlands":{"id":"clmeyb3r19lwj0735yt504zs0/en/blog/my-story-of-finding-a-submarine-in-the-shetlands","page":"clmeyb3r19lwj0735yt504zs0","url":"/en/blog/my-story-of-finding-a-submarine-in-the-shetlands","name":"divesoft.blog / My Story of Finding a Submarine in the Shetlands","description":" ","__typename":"PageUrl"},"PageUrl:clmszuh0ravef0735zntydkcp/en/manuals/8460-dna-user-manual":{"id":"clmszuh0ravef0735zntydkcp/en/manuals/8460-dna-user-manual","page":"clmszuh0ravef0735zntydkcp","url":"/en/manuals/8460-dna-user-manual","name":"#8460 DNA User Manual","description":" ","__typename":"PageUrl"},"PageUrl:clnkbz2s6da0m0735m12jhjra/en/manuals/8460-dna-quick-reference":{"id":"clnkbz2s6da0m0735m12jhjra/en/manuals/8460-dna-quick-reference","page":"clnkbz2s6da0m0735m12jhjra","url":"/en/manuals/8460-dna-quick-reference","name":"#8460 DNA Quick Reference","description":" ","__typename":"PageUrl"},"PageUrl:clpgoxg4elslm07356zu3m5n5/en/manuals/ccr-liberty-manual/ccr-liberty-user-manual-04":{"id":"clpgoxg4elslm07356zu3m5n5/en/manuals/ccr-liberty-manual/ccr-liberty-user-manual-04","page":"clpgoxg4elslm07356zu3m5n5","url":"/en/manuals/ccr-liberty-manual/ccr-liberty-user-manual-04","name":"CCR Liberty user manual 04","description":" ","__typename":"PageUrl"},"PageUrl:clpi7kucdm37e0735u15o8rfy/en/downloads/bov":{"id":"clpi7kucdm37e0735u15o8rfy/en/downloads/bov","page":"clpi7kucdm37e0735u15o8rfy","url":"/en/downloads/bov","name":"BOV","description":" ","__typename":"PageUrl"},"PageUrl:clpia71x6m3ud0735ba2n1yml/en/downloads/bov/user-manuals":{"id":"clpia71x6m3ud0735ba2n1yml/en/downloads/bov/user-manuals","page":"clpia71x6m3ud0735ba2n1yml","url":"/en/downloads/bov/user-manuals","name":"User manuals","description":" ","__typename":"PageUrl"},"PageUrl:clsyeohcd8d1j0735f1581opx/en/libertydiversclub":{"id":"clsyeohcd8d1j0735f1581opx/en/libertydiversclub","page":"clsyeohcd8d1j0735f1581opx","url":"/en/libertydiversclub","name":"Liberty Divers Club","description":" ","__typename":"PageUrl"},"PageUrl:clutqeck7fy2g0735ynx14jaf/en/blog/rebreather-configurations":{"id":"clutqeck7fy2g0735ynx14jaf/en/blog/rebreather-configurations","page":"clutqeck7fy2g0735ynx14jaf","url":"/en/blog/rebreather-configurations","name":"divesoft.blog / Rebreather Configurations","description":" ","__typename":"PageUrl"},"PageUrl:clw4qh5k6l9n907353ehehufe/en/blog/bailout-procedures":{"id":"clw4qh5k6l9n907353ehehufe/en/blog/bailout-procedures","page":"clw4qh5k6l9n907353ehehufe","url":"/en/blog/bailout-procedures","name":"Bailout procedures","description":" ","__typename":"PageUrl"},"PageUrl:clxa0ibm1qtls07356bxbmpc2/en/blog/a-comprehensive-guide-to-technical-dive-planning-part-1":{"id":"clxa0ibm1qtls07356bxbmpc2/en/blog/a-comprehe
2nsive-guide-to-technical-dive-planning-part-1","page":"clxa0ibm1qtls07356bxbmpc2","url":"/en/blog/a-comprehensive-guide-to-technical-dive-planning-part-1","name":"A Comprehensive Guide to Technical Dive Planning / Part 1","description":" ","__typename":"PageUrl"},"PageUrl:clxt2bo5ttdck0735uhterl3g/en/contacts/service-points/ds:service-points":{"id":"clxt2bo5ttdck0735uhterl3g/en/contacts/service-points/ds:service-points","page":"clxt2bo5ttdck0735uhterl3g","url":"/en/contacts/service-points/ds:service-points","name":"Store detail","description":" ","__typename":"PageUrl"},"PageUrl:clyfnkvvtw5400735aaroiwlr/en/blog/a-comprehensive-guide-to-technical-dive-planning-part-2":{"id":"clyfnkvvtw5400735aaroiwlr/en/blog/a-comprehensive-guide-to-technical-dive-planning-part-2","page":"clyfnkvvtw5400735aaroiwlr","url":"/en/blog/a-comprehensive-guide-to-technical-dive-planning-part-2","name":"A Comprehensive Guide to Technical Dive Planning / Part 2","description":" ","__typename":"PageUrl"},"PageUrl:clywzcl9jy02r07350uek6rob/en/downloads/other-documents":{"id":"clywzcl9jy02r07350uek6rob/en/downloads/other-documents","page":"clywzcl9jy02r07350uek6rob","url":"/en/downloads/other-documents","name":"Other documents","description":" ","__typename":"PageUrl"},"PageUrl:clzcn909f0fwy07353ic6rr8c/en/manuals/freedom+-and-freedom-cz":{"id":"clzcn909f0fwy07353ic6rr8c/en/manuals/freedom+-and-freedom-cz","page":"clzcn909f0fwy07353ic6rr8c","url":"/en/manuals/freedom+-and-freedom-cz","name":"Freedom+ and Freedom CZ","description":" ","__typename":"PageUrl"},"PageUrl:clzplug0f34lh0735jo6y64vw/en/blog/cold-water-diving":{"id":"clzplug0f34lh0735jo6y64vw/en/blog/cold-water-diving","page":"clzplug0f34lh0735jo6y64vw","url":"/en/blog/cold-water-diving","name":"Cold water diving","description":" ","__typename":"PageUrl"},"PageUrl:cm0az5m5s0t9b0818fxjonef0/en/manuals/ccr-liberty-manual-cz":{"id":"cm0az5m5s0t9b0818fxjonef0/en/manuals/ccr-liberty-manual-cz","page":"cm0az5m5s0t9b0818fxjonef0","url":"/en/manuals/ccr-liberty-manual-cz","name":"CCR Liberty Manual CZ","description":" ","__typename":"PageUrl"},"PageUrl:cm0azhkkt0tbs0818ccjyu659/en/manuals/ccr-liberty-manual-cz/ccr-liberty-manual-01-cz":{"id":"cm0azhkkt0tbs0818ccjyu659/en/manuals/ccr-liberty-manual-cz/ccr-liberty-manual-01-cz","page":"cm0azhkkt0tbs0818ccjyu659","url":"/en/manuals/ccr-liberty-manual-cz/ccr-liberty-manual-01-cz","name":"CCR Liberty Manual 01 CZ","description":" ","__typename":"PageUrl"},"PageUrl:cm0cctnnd12dy0818yp2e3eli/en/manuals/ccr-liberty-manual-cz/ccr-liberty-manual-02-cz":{"id":"cm0cctnnd12dy0818yp2e3eli/en/manuals/ccr-liberty-manual-cz/ccr-liberty-manual-02-cz","page":"cm0cctnnd12dy0818yp2e3eli","url":"/en/manuals/ccr-liberty-manual-cz/ccr-liberty-manual-02-cz","name":"CCR Liberty Manual 02 CZ","description":" ","__typename":"PageUrl"},"PageUrl:cm0divz1e180h08186q8py4jd/en/manuals/ccr-liberty-manual-cz/ccr-liberty-manual-03-cz":{"id":"cm0divz1e180h08186q8py4jd/en/manuals/ccr-liberty-manual-cz/ccr-liberty-manual-03-cz","page":"cm0divz1e180h08186q8py4jd","url":"/en/manuals/ccr-liberty-manual-cz/ccr-liberty-manual-03-cz","name":"CCR Liberty Manual 03 CZ","description":" ","__typename":"PageUrl"},"PageUrl:cm0xhhruc1rsa0817exbpr1rq/en/blog/dan-sun-in-bikini-atoll-with-ccr-liberty-family":{"id":"cm0xhhruc1rsa0817exbpr1rq/en/blog/dan-sun-in-bikini-atoll-with-ccr-liberty-family","page":"cm0xhhruc1rsa0817exbpr1rq","url":"/en/blog/dan-sun-in-bikini-atoll-with-ccr-liberty-family","name":"In Bikini Atoll with CCR Liberty family","description":" ","__typename":"PageUrl"},"PageUrl:cm10uxl432jv50817ssiujost/en/manuals/regulatory-information":{"id":"cm10uxl432jv50817ssiujost/en/manuals/regulatory-information","page":"cm10uxl432jv50817ssiujost","url":"/en/manuals/regulatory-information","name":"Regulatory information","description":" ","__typename":"PageUrl"},"PageUrl:cm1evxo544dge08177rmhsl6i/en/manuals/divesoft-app-user-manual-en":{"id":"cm1evxo544dge08177rmhsl6i/en/manuals/divesoft-app-user-manual-en","page":"cm1evxo544dge08177rmhsl6i","url":"/en/manuals/divesoft-app-user-manual-en","name":"Divesoft.app User manual EN","description":" ","__typename":"PageUrl"},"PageUrl:cm1hnvll84w1y081776bnhrg6/en/manuals/divesoft-app-user-manual-cz":{"id":"cm1hnvll84w1y081776bnhrg6/en/manuals/divesoft-app-user-manual-cz","page":"cm1hnvll84w1y081776bnhrg6","url":"/en/manuals/divesoft-app-user-manual-cz","name":"Divesof.app User manual CZ","description":" ","__typename":"PageUrl"},"PageUrl:cm1j7dd3t588s0817fj01jh0k/en/downloads/divesoft-app":{"id":"cm1j7dd3t588s0817fj01jh0k/en/downloads/divesoft-app","page":"cm1j7dd3t588s0817fj01jh0k","url":"/en/downloads/divesoft-app","name":"Divesoft.app","description":" ","__typename":"PageUrl"},"PageUrl:cm1j7jpxs58am0817odencavx/en/downloads/divesoft-app/user-manuals":{"id":"cm1j7jpxs58am0817odencavx/en/downloads/divesoft-app/user-manuals","page":"cm1j7jpxs58am0817odencavx","url":"/en/downloads/divesoft-app/user-manuals","name":"User manuals","description":" ","__typename":"PageUrl"},"PageUrl:cm24hw4rb917x0817cy5o7ph3/en/blog/martin-mako-janecek-my-diving-journey-to-ccr-liberty":{"id":"cm24hw4rb917x0817cy5o7ph3/en/blog/martin-mako-janecek-my-diving-journey-to-ccr-liberty","page":"cm24hw4rb917x0817cy5o7ph3","url":"/en/blog/martin-mako-janecek-my-diving-journey-to-ccr-liberty","name":"My diving journey to CCR Liberty","description":" ","__typename":"PageUrl"},"PageUrl:cm2yl9dfiefwq081726r9lwgi/en/service":{"id":"cm2yl9dfiefwq081726r9lwgi/en/service","page":"cm2yl9dfiefwq081726r9lwgi","url":"/en/service","name":"Service","description":" ","__typename":"PageUrl"},"PageUrl:cm3conxas02k108290ydqnbep/en/blog/would-you-trust-your-life-to-a-machine":{"id":"cm3conxas02k108290ydqnbep/en/blog/would-you-trust-your-life-to-a-machine","page":"cm3conxas02k108290ydqnbep","url":"/en/blog/would-you-trust-your-life-to-a-machine","name":"Would You Trust Your Life to a Machine?","description":" ","__typename":"PageUrl"},"PageUrl:cm3pooxr001s90829sc8oheuc/en/service/testing-configurator---sandbox":{"id":"cm3pooxr001s90829sc8oheuc/en/service/testing-configurator---sandbox","page":"cm3pooxr001s90829sc8oheuc","url":"/en/service/testing-configurator---sandbox","name":"Testing configurator - Sandbox","de
2scription":" ","__typename":"PageUrl"},"PageUrl:cm4jzxd9x00s008374jvhc8va/en/blog/divesoft-lab":{"id":"cm4jzxd9x00s008374jvhc8va/en/blog/divesoft-lab","page":"cm4jzxd9x00s008374jvhc8va","url":"/en/blog/divesoft-lab","name":"Divesoft Lab","description":" ","__typename":"PageUrl"},"PageUrl:cm5u4v8is0q9j0803u8nstt5y/en/blog/garry-dallas-advanced-rescue-techniques-for-technical-divers":{"id":"cm5u4v8is0q9j0803u8nstt5y/en/blog/garry-dallas-advanced-rescue-techniques-for-technical-divers","page":"cm5u4v8is0q9j0803u8nstt5y","url":"/en/blog/garry-dallas-advanced-rescue-techniques-for-technical-divers","name":"Advanced Rescue Techniques for Technical Divers","description":" ","__typename":"PageUrl"},"PageUrl:cm6aogy1f0ylr0803g7o52mxr/en/blog/understanding-how-long-does-a-cylinder-lasts-for-scuba-diving":{"id":"cm6aogy1f0ylr0803g7o52mxr/en/blog/understanding-how-long-does-a-cylinder-lasts-for-scuba-diving","page":"cm6aogy1f0ylr0803g7o52mxr","url":"/en/blog/understanding-how-long-does-a-cylinder-lasts-for-scuba-diving","name":"Understanding How Long Does a Cylinder Lasts for Scuba Diving","description":" ","__typename":"PageUrl"},"PageUrl:cm6kkp0m62w7w0803ry3v5uq5/en/blog/what-are-the-types-of-scuba-diving":{"id":"cm6kkp0m62w7w0803ry3v5uq5/en/blog/what-are-the-types-of-scuba-diving","page":"cm6kkp0m62w7w0803ry3v5uq5","url":"/en/blog/what-are-the-types-of-scuba-diving","name":"What Are the Types of Scuba Diving","description":" ","__typename":"PageUrl"},"PageUrl:cm6p1pmdr3t6a0803fv915pka/en/downloads/flow-limiters":{"id":"cm6p1pmdr3t6a0803fv915pka/en/downloads/flow-limiters","page":"cm6p1pmdr3t6a0803fv915pka","url":"/en/downloads/flow-limiters","name":"Flow limiters","description":" ","__typename":"PageUrl"},"PageUrl:cm6p1uk903tbx0803mfdygau2/en/downloads/flow-limiters/user-manuals":{"id":"cm6p1uk903tbx0803mfdygau2/en/downloads/flow-limiters/user-manuals","page":"cm6p1uk903tbx0803mfdygau2","url":"/en/downloads/flow-limiters/user-manuals","name":"User Manuals","description":" ","__typename":"PageUrl"},"PageUrl:cm6p4768i3we00803rmhblalc/en/manuals/professional-flow-limiter-mk1-quick-reference-en":{"id":"cm6p4768i3we00803rmhblalc/en/manuals/professional-flow-limiter-mk1-quick-reference-en","page":"cm6p4768i3we00803rmhblalc","url":"/en/manuals/professional-flow-limiter-mk1-quick-reference-en","name":"Professional flow limiter Mk1","description":" ","__typename":"PageUrl"},"PageUrl:cm6rm219h4nds0803ymo2uq2e/en/blog/what-is-a-dive-computer":{"id":"cm6rm219h4nds0803ymo2uq2e/en/blog/what-is-a-dive-computer","page":"cm6rm219h4nds0803ymo2uq2e","url":"/en/blog/what-is-a-dive-computer","name":"What is a Dive Computer?","description":" ","__typename":"PageUrl"},"PageUrl:cm71owk2g6tab0803321rni5n/en/blog/understanding-and-preventing-the-bends-when-diving":{"id":"cm71owk2g6tab0803321rni5n/en/blog/understanding-and-preventing-the-bends-when-diving","page":"cm71owk2g6tab0803321rni5n","url":"/en/blog/understanding-and-preventing-the-bends-when-diving","name":"Understanding and Preventing the Bends When Diving","description":" ","__typename":"PageUrl"},"PageUrl:cm71q6oaw6udb0803012xg12r/en/blog/what-is-technical-diving":{"id":"cm71q6oaw6udb0803012xg12r/en/blog/what-is-technical-diving","page":"cm71q6oaw6udb0803012xg12r","url":"/en/blog/what-is-technical-diving","name":"What is Technical Diving?","description":" ","__typename":"PageUrl"},"PageUrl:cm7j0o17o0byw0803hbonvfvl/en/blog/car-wrecks-in-lake-attersee":{"id":"cm7j0o17o0byw0803hbonvfvl/en/blog/car-wrecks-in-lake-attersee","page":"cm7j0o17o0byw0803hbonvfvl","url":"/en/blog/car-wrecks-in-lake-attersee","name":"Car Wrecks in Lake Attersee","description":" ","__typename":"PageUrl"},"PageUrl:cm7uibgnd3dzx0803qnwpozbb/en/blog/nitrox-diving":{"id":"cm7uibgnd3dzx0803qnwpozbb/en/blog/nitrox-diving","page":"cm7uibgnd3dzx0803qnwpozbb","url":"/en/blog/nitrox-diving","name":"Nitrox diving","description":" ","__typename":"PageUrl"},"PageUrl:cm8ptyp2v9lgb0803u3ba0ha0/en/blog/cave-diving":{"id":"cm8ptyp2v9lgb0803u3ba0ha0/en/blog/cave-diving","page":"cm8ptyp2v9lgb0803u3ba0ha0","url":"/en/blog/cave-diving","name":"Cave diving","description":" ","__typename":"PageUrl"},"PageUrl:cm99l1yayeijj0803qpv7qu1f/en/blog/how-to-find-a-diving-buddy-for-your-expeditions":{"id":"cm99l1yayeijj0803qpv7qu1f/en/blog/how-to-find-a-diving-buddy-for-your-expeditions","page":"cm99l1yayeijj0803qpv7qu1f","url":"/en/blog/how-to-find-a-diving-buddy-for-your-expeditions","name":"How to find a diving buddy for your expeditions","description":" ","__typename":"PageUrl"},"PageUrl:cm99l5bsxein70803kfblojon/en/blog/ccr-rebreathers-differences-and-what-to-look-for":{"id":"cm99l5bsxein70803kfblojon/en/blog/ccr-rebreathers-differences-and-what-to-look-for","page":"cm99l5bsxein70803kfblojon","url":"/en/blog/ccr-rebreathers-differences-and-what-to-look-for","name":"CCR rebreathers differences and what to look for","description":" ","__typename":"PageUrl"},"PageUrl:cm9ck8ii6fc740803kny0qqjo/en/blog/what-is-deep-diving":{"i
2d":"cm9ck8ii6fc740803kny0qqjo/en/blog/what-is-deep-diving","page":"cm9ck8ii6fc740803kny0qqjo","url":"/en/blog/what-is-deep-diving","name":"What is Deep Diving","description":" ","__typename":"PageUrl"},"PageUrl:cm9ckxruefcc608037xn6eibo/en/blog/how-to-chose-the-right-ccr-rebreather-for-you":{"id":"cm9ckxruefcc608037xn6eibo/en/blog/how-to-chose-the-right-ccr-rebreather-for-you","page":"cm9ckxruefcc608037xn6eibo","url":"/en/blog/how-to-chose-the-right-ccr-rebreather-for-you","name":"How to chose the right CCR rebreather for YOU","description":" ","__typename":"PageUrl"},"PageUrl:cm9cm8xmufcmc08033nld7l9d/en/blog/diving-groups-why-you-should-never-dive-alone":{"id":"cm9cm8xmufcmc08033nld7l9d/en/blog/diving-groups-why-you-should-never-dive-alone","page":"cm9cm8xmufcmc08033nld7l9d","url":"/en/blog/diving-groups-why-you-should-never-dive-alone","name":"Diving groups: why you should never dive alone","description":" ","__typename":"PageUrl"},"PageUrl:cm9cm99vbfcn70803af85jguv/en/blog/ccr-rebreather-properties-that-you-must-evaluate-before-buying":{"id":"cm9cm99vbfcn70803af85jguv/en/blog/ccr-rebreather-properties-that-you-must-evaluate-before-buying","page":"cm9cm99vbfcn70803af85jguv","url":"/en/blog/ccr-rebreather-properties-that-you-must-evaluate-before-buying","name":"CCR rebreather properties that you MUST evaluate before buying","description":" ","__typename":"PageUrl"},"PageUrl:cm9cm9iu9fcnp080331j8i7ls/en/blog/best-rebreather-ccr-for-technical-deep-diving":{"id":"cm9cm9iu9fcnp080331j8i7ls/en/blog/best-rebreather-ccr-for-technical-deep-diving","page":"cm9cm9iu9fcnp080331j8i7ls","url":"/en/blog/best-rebreather-ccr-for-technical-deep-diving","name":"Best rebreather (CCR) for technical deep diving","description":" ","__typename":"PageUrl"},"PageUrl:cm9cm9zjtfco708030k4hhma9/en/blog/liberty-rebreathers-manufacturing-behind-the-curtains":{"id":"cm9cm9zjtfco708030k4hhma9/en/blog/liberty-rebreathers-manufacturing-behind-the-curtains","page":"cm9cm9zjtfco708030k4hhma9","url":"/en/blog/liberty-rebreathers-manufacturing-behind-the-curtains","
2name":"Liberty rebreathers manufacturing - behind the curtains","description":" ","__typename":"PageUrl"},"PageUrl:cm9cmaa8qfcop0803sk0u4y0h/en/blog/best-technical-diving-locations":{"id":"cm9cmaa8qfcop0803sk0u4y0h/en/blog/best-technical-diving-locations","page":"cm9cmaa8qfcop0803sk0u4y0h","url":"/en/blog/best-technical-diving-locations","name":"Best technical diving locations","description":" ","__typename":"PageUrl"},"PageUrl:cm9cmakodfcp708036cgi4tz0/en/blog/ccr-diving-experience-interviews-with-our-best-instructors":{"id":"cm9cmakodfcp708036cgi4tz0/en/blog/ccr-diving-experience-interviews-with-our-best-instructors","page":"cm9cmakodfcp708036cgi4tz0","url":"/en/blog/ccr-diving-experience-interviews-with-our-best-instructors","name":"CCR diving experience: interviews with our best instructors","description":" ","__typename":"PageUrl"},"PageUrl:cm9cmaw8ofcpp08036xtrr2xl/en/blog/diving-with-liberty-rebreather-stories-of-inspiration":{"id":"cm9cmaw8ofcpp08036xtrr2xl/en/blog/diving-with-liberty-rebreather-stories-of-inspiration","page":"cm9cmaw8ofcpp08036xtrr2xl","url":"/en/blog/diving-with-liberty-rebreather-stories-of-inspiration","name":"Diving with Liberty rebreather: stories of inspiration","description":" ","__typename":"PageUrl"},"PageUrl:cm9cmb4xvfcq70803npa2a2qo/en/blog/professional-diving-why-do-you-need-a-rebreather":{"id":"cm9cmb4xvfcq70803npa2a2qo/en/blog/professional-diving-why-do-you-need-a-rebreather","page":"cm9cmb4xvfcq70803npa2a2qo","url":"/en/blog/professional-diving-why-do-you-need-a-rebreather","name":"Professional diving: why do you NEED a rebreather?","description":" ","__typename":"PageUrl"},"PageUrl:cm9cmbvrqfcqp0803v4w6227l/en/blog/liberty-rebreathers-co2-scrubber-duration-how-often-should-you-change":{"id":"cm9cmbvrqfcqp0803v4w6227l/en/blog/liberty-rebreathers-co2-scrubber-duration-how-often-should-you-change","page":"cm9cmbvrqfcqp0803v4w6227l","url":"/en/blog/liberty-rebreathers-co2-scrubber-duration-how-often-should-you-change","name":"Liberty rebreathers CO2 scrubber duration: how often should you change","description":" ","__typename":"PageUrl"},"PageUrl:cm9cmceztfcr70803bovcofh0/en/blog/ccr-first-dive-experience-for-life":{"id":"cm9cmceztfcr70803bovcofh0/en/blog/ccr-first-dive-experience-for-life","page":"cm9cmceztfcr70803bovcofh0","url":"/en/blog/ccr-first-dive-experience-for-life","name":"CCR first dive: experience for life","description":" ","__typename":"PageUrl"},"PageUrl:cm9cmcoo1fcrp0803vl5desvj/en/blog/ccr-safety-rules-and-procedures":{"id":"cm9cmcoo1fcrp0803vl5desvj/en/blog/ccr-safety-rules-and-procedures","page":"cm9cmcoo1fcrp0803vl5desvj","url":"/en/blog/ccr-safety-rules-and-procedures","name":"CCR safety rules and procedures","description":" ","__typename":"PageUrl"},"PageUrl:cm9cmd8k7fcs70803aca70x55/en/blog/ccr-rebreather-diving-training-how-it-goes-and-what-to-expect":{"id":"cm9cmd8k7fcs70803aca70x55/en/blog/ccr-rebreather-diving-training-how-it-goes-and-what-to-expect","page":"cm9cmd8k7fcs70803aca70x55","url":"/en/blog/ccr-rebreather-diving-training-how-it-goes-and-what-to-expect","name":"CCR (rebreather) diving training: how it goes and what to expect","description":" ","__typename":"PageUrl"},"PageUrl:cm9cmdlxcfcsp0803p0d518jj/en/blog/most-common-diving-mistakes-this-could-save-your-life":{"id":"cm9cmdlxcfcsp0803p0d518jj/en/blog/most-common-diving-mistakes-this-could-save-your-life","page":"cm9cmdlxcfcsp0803p0d518jj","url":"/en/blog/most-common-diving-mistakes-this-could-save-your-life","name":"Most common diving mistakes: this could save your life!","description":" ","__typename":"PageUrl"},"PageUrl:cm9cneisbfd730803ij7pwjju/en/blog/ccr-rebreather-dive-planning-how-to-complete-checklist":{"id":"cm9cneisbfd730803ij7pwjju/en/blog/ccr-rebreather-dive-planning-how-to-complete-checklist","page":"cm9cneisbfd730803ij7pwjju","url":"/en/blog/ccr-rebreather-dive-planning-how-to-complete-checklist","name":"CCR (rebreather) dive planning: how to and complete checklist","description":" ","__typename":"PageUrl"},"PageUrl:cm9cnfdzqfd8j0803zvobabx9/en/blog/ccr-rebreather-maintenance-how-often-visit-authorised-service-center":{"id":"cm9cnfdzqfd8j0803zvobabx9/en/blog/ccr-rebreather-maintenance-how-often-visit-authorised-service-center","page":"cm9cnfdzqfd8j0803zvobabx9","url":"/en/blog/ccr-rebreather-maintenance-how-often-visit-authorised-service-center","name":"CCR (rebreather) maintenance: how often visit authorised service center","description":" ","__typename":"PageUrl"},"PageUrl:cm9cnfr52fd98080350l77m3z/en/blog/ccr-diving-certification-courses-how-it-goes-and-what-you-need-to-know":{"id":"cm9cnfr52fd98080350l77m3z/en/blog/ccr-diving-certification-courses-how-it-goes-and-what-you-need-to-know","page":"cm9cnfr52fd98080350l77m3z","url":"/en/blog/ccr-diving-certification-courses-how-it-goes-and-what-you-need-to-know","name":"CCR diving certification courses: how it goes and what you need to know","description":" ","__typename":"PageUrl"},"PageUrl:cm9coazvwfdk10803da2ixhdm/en/blog/life-changing-experience-why-you-should-try-ccr-diving":{"i
2d":"cm9coazvwfdk10803da2ixhdm/en/blog/life-changing-experience-why-you-should-try-ccr-diving","page":"cm9coazvwfdk10803da2ixhdm","url":"/en/blog/life-changing-experience-why-you-should-try-ccr-diving","name":"Life-changing experience: why you should try CCR diving","description":" ","__typename":"PageUrl"},"PageUrl:cm9cobgfnfdl50803o4nzn2zf/en/blog/liberty-rebreathers-purchasing-process-what-to-expect-when-you-order":{"id":"cm9cobgfnfdl50803o4nzn2zf/en/blog/liberty-rebreathers-purchasing-process-what-to-expect-when-you-order","page":"cm9cobgfnfdl50803o4nzn2zf","url":"/en/blog/liberty-rebreathers-purchasing-process-what-to-expect-when-you-order","name":"Liberty rebreathers purchasing process: what to expect when you order","description":" ","__typename":"PageUrl"},"PageUrl:cm9cobsqpfdm008036g7ghoo2/en/blog/liberty-rebreathers-maintenance-complete-checklist":{"id":"cm9cobsqpfdm008036g7ghoo2/en/blog/liberty-rebreathers-maintenance-complete-checklist","page":"cm9cobsqpfdm008036g7ghoo2","url":"/en/blog/liberty-rebreathers-maintenance-complete-checklist","name":"Liberty rebreathers maintenance: complete CHECKLIST","description":" ","__typename":"PageUrl"},"PageUrl:cm9coc98sfdmi08035dz1mfwn/en/blog/scuba-diving-vs-rebreathers-longer-times-and-better-view":{"id":"cm9coc98sfdmi08035dz1mfwn/en/blog/scuba-diving-vs-rebreathers-longer-times-and-better-view","page":"cm9coc98sfdmi08035dz1mfwn","url":"/en/blog/scuba-diving-vs-rebreathers-longer-times-and-better-view","name":"Scuba diving vs. rebreathers: Longer times and better view","description":" ","__typename":"PageUrl"},"PageUrl:cm9tyz4tvizoc0803mmf9n11r/en/products/ccr-liberty/try-dive":{"id":"cm9tyz4tvizoc0803mmf9n11r/en/products/ccr-liberty/try-dive","page":"cm9tyz4tvizoc0803mmf9n11r","url":"/en/products/ccr-liberty/try-dive","name":"Try the CCR Liberty","description":" ","__typename":"PageUrl"},"PageUrl:cmbqb5e09xyws0803y3rgyeuu/en/blog/ccr-rebreather-diving-equipment-what-do-you-need-for-safe-diving":{"id":"cmbqb5e09xyws0803y3rgyeuu/en/blog/ccr-rebreather-diving-equipment-what-do-you-need-for-safe-diving","page":"cmbqb5e09xyws0803y3rgyeuu","url":"/en/blog/ccr-rebreather-diving-equipment-what-do-you-need-for-safe-diving","name":"CCR (rebreather) diving equipment: what do you need for safe diving","description":" ","__typename":"PageUrl"},"PageUrl:cmdilgyg40c7p0832bv637gsr/en/about-us/ales-prochaska":{"id":"cmdilgyg40c7p0832bv637gsr/en/about-us/ales-prochaska","page":"cmdilgyg40c7p0832bv637gsr","url":"/en/about-us/ales-prochaska","name":"AleÅ¡ Procháska","description":" ","__typename":"PageUrl"},"PageUrl:cmdilhy9d0c8l0832bkenadk9/en/about-us/jakub-hecko":{"id":"cmdilhy9d0c8l0832bkenadk9/en/about-us/jakub-hecko","page":"cmdilhy9d0c8l0832bkenadk9","url":"/en/about-us/jakub-hecko","name":"Jakub HeÄko","description":" ","__typename":"PageUrl"},"PageUrl:cmdipepgt00xb08322to2saio/en/manuals/8500-echo-quick-reference":{"id":"cmdipepgt00xb08322to2saio/en/manuals/8500-echo-quick-reference","page":"cmdipepgt00xb08322to2saio","url":"/en/manuals/8500-echo-quick-reference","name":"ECHO Quick reference","description":" ","__typename":"PageUrl"},"PageUrl:cmdipfr8v00xz08322hw227s8/en/manuals/8500-echo-user-manual":{"id":"cmdipfr8v00xz08322hw227s8/en/manuals/8500-echo-user-manual","page":"cmdipfr8v00xz08322hw227s8","url":"/en/manuals/8500-echo-user-manual","name":"ECHO User manual","description":" ","__typename":"PageUrl"},"PageUrl:cmdo5gsze02qc0832lf2bbv7e/en/products/ccr-liberty/stock-unit":{"id":"cmdo5gsze02qc0832lf2bbv7e/en/products/ccr-liberty/stock-unit","page":"cmdo5gsze02qc0832lf2bbv7e","url":"/en/products/ccr-liberty/stock-unit","name":"Stock unit","description":" ","__typename":"PageUrl"},"PageUrl:cmdrby07306gx08323bs8w2wq/en/heroes":{"id":"cmdrby07306gx08323bs8w2wq/en/heroes","page":"cmdrby07306gx08323bs8w2wq","url":"/en/heroes","name":"Heroes","description":" ","__typename":"PageUrl"},"PageUrl:cmdrco0jc06nh08329qpmwxvu/en/heroes/alex-dawson":{"id":"cmdrco0jc06nh08329qpmwxvu/en/heroes/alex-dawson","page":"cmdrco0jc06nh08329qpmwxvu","url":"/en/heroes/alex-dawson","name":"Alex Dawson","description":" ","__typename":"PageUrl"},"PageUrl:cmdrcv93f06py08320cmhpnbs/en/heroes/edd-stockdale":{"id":"cmdrcv93f06py08320cmhpnbs/en/heroes/edd-stockdale","page":"cmdrcv93f06py08320cmhpnbs","url":"/en/heroes/edd-stockdale","name":"Edd Stockdale","description":" ","__typename":"PageUrl"},"PageUrl:cmdrcw6pi06r50832ah6cogn3/en/heroes/garry-dallas":{"id":"cmdrcw6pi06r50832ah6cogn3/en/heroes/garry-dallas","page":"cmdrcw6pi06r50832ah6cogn3","url":"/en/heroes/garry-dallas","name":"Garry Dallas","description":" ","__typename":"PageUrl"},"PageUrl:cmdrcws6q06sh08320yue2oye/en/heroes/sanne-vanden-berghe":{"id":"cmdrcws6q06sh08320yue2oye/en/heroes/sanne-vanden-berghe","page":"cmdrcws6q06sh08320yue2oye","url":"/en/heroes/sanne-vanden-berghe","name":"Sanne Vanden Berghe","description":" ","__typename":"PageUrl"},"PageUrl:cmdrcyhlh06tt0832uzwgyl0p/en/heroes/nadine-al-manqour":{"id":"cmdrcyhlh06tt0832uzwgyl0p/en/heroes/nadine-al-manqour","page":"cmdrcyhlh06tt0832uzwgyl0p","url":"/en/heroes/nadine-al-manqour","name":"Nadine Al-Manqour","description":" ","__typename":"PageUrl"},"PageUrl:cmdrcze5h06vi083228rtpa7i/en/heroes/melodie-trevino":{"id":"cmdrcze5h06vi083228rtpa7i/en/heroes/melodie-trevino","page":"cmdrcze5h06vi083228rtpa7i","url":"/en/heroes/melodie-trevino","name":"Melodie Trevino","description":" ","__typename":"PageUrl"},"PageUrl:cmdrd0mge06wa0832he2z1qmx/en/heroes/kurt-storms":{"id":"cmdrd0mge06wa0832he2z1qmx/en/heroes/kurt-storms","page":"cmdrd0mge06wa0832he2z1qmx","url":"/en/heroes/kurt-storms","name":"Kurt Storms","de
2scription":" ","__typename":"PageUrl"},"PageUrl:cmdrd1izy06x90832q08kx96b/en/heroes/maxwel-hohn":{"id":"cmdrd1izy06x90832q08kx96b/en/heroes/maxwel-hohn","page":"cmdrd1izy06x90832q08kx96b","url":"/en/heroes/maxwel-hohn","name":"Maxwel Hohn","description":" ","__typename":"PageUrl"},"PageUrl:cmdrgi38j02gj08325cjwqoa5/en/heroes/marek-kainrath":{"id":"cmdrgi38j02gj08325cjwqoa5/en/heroes/marek-kainrath","page":"cmdrgi38j02gj08325cjwqoa5","url":"/en/heroes/marek-kainrath","name":"Marek Kainrath","description":" ","__typename":"PageUrl"},"PageUrl:cmdrgik7902hu0832yixwr83c/en/heroes/paul-vincent-toomer":{"id":"cmdrgik7902hu0832yixwr83c/en/heroes/paul-vincent-toomer","page":"cmdrgik7902hu0832yixwr83c","url":"/en/heroes/paul-vincent-toomer","name":"Paul Vincent Toomer","description":" ","__typename":"PageUrl"},"PageUrl:cmdrgj1qn02iq0832yqd6nywk/en/heroes/stefan-panis":{"id":"cmdrgj1qn02iq0832yqd6nywk/en/heroes/stefan-panis","page":"cmdrgj1qn02iq0832yqd6nywk","url":"/en/heroes/stefan-panis","name":"Stefan Panis","description":" ","__typename":"PageUrl"},"PageUrl:cmdrgjiiu02jm0832s4sjit28/en/heroes/edmund-yiu":{"id":"cmdrgjiiu02jm0832s4sjit28/en/heroes/edmund-yiu","page":"cmdrgjiiu02jm0832s4sjit28","url":"/en/heroes/edmund-yiu","name":"Edmund Yiu","description":" ","__typename":"PageUrl"},"PageUrl:cmdrgk0r402ku0832m4wl4mou/en/heroes/pj-prinsloo":{"id":"cmdrgk0r402ku0832m4wl4mou/en/heroes/pj-prinsloo","page":"cmdrgk0r402ku0832m4wl4mou","url":"/en/heroes/pj-prinsloo","name":"PJ Prinsloo","description":" ","__typename":"PageUrl"},"PageUrl:cmdrgkye502lq08325nkew28j/en/heroes/stephan-senecal":{"id":"cmdrgkye502lq08325nkew28j/en/heroes/stephan-senecal","page":"cmdrgkye502lq08325nkew28j","url":"/en/heroes/stephan-senecal","name":"Stéphan Senécal","description":" ","__typename":"PageUrl"},"PageUrl:cmdrglhlj02mx0832giei3ank/en/heroes/petr-slezak":{"id":"cmdrglhlj02mx0832giei3ank/en/heroes/petr-slezak","page":"cmdrglhlj02mx0832giei3ank","url":"/en/heroes/petr-slezak","name":"Petr Slezák","description":" ","__typename":"PageUrl"},"PageUrl:cmdrgm0zt02o00832p9khius7/en/heroes/jeff-bozanic":{"id":"cmdrgm0zt02o00832p9khius7/en/heroes/jeff-bozanic","page":"cmdrgm0zt02o00832p9khius7","url":"/en/heroes/jeff-bozanic","name":"Jeff Bozanic","description":" ","__typename":"PageUrl"},"PageUrl:cme9qpuko077808326jv50pwk/en/heroes/shaff-naeem":{"id":"cme9qpuko077808326jv50pwk/en/heroes/shaff-naeem","page":"cme9qpuko077808326jv50pwk","url":"/en/heroes/shaff-naeem","name":"Shaff Naeem","description":" ","__typename":"PageUrl"},"PageUrl:cme9rcojj07l70832l0o4b6zx/en/heroes/frederic-swierczynski":{"id":"cme9rcojj07l70832l0o4b6zx/en/heroes/frederic-swierczynski","page":"cme9rcojj07l70832l0o4b6zx","url":"/en/heroes/frederic-swierczynski","name":"Frederic Swierczynski","description":" ","__typename":"PageUrl"},"PageUrl:cme9rg5yw07oq0832e2t9hqe7/en/heroes/milja-westerberg":{"id":"cme9rg5yw07oq0832e2t9hqe7/en/heroes/milja-westerberg","page":"cme9rg5yw07oq0832e2t9hqe7","url":"/en/heroes/milja-westerberg","name":"Milja Westerberg","description":" ","__typename":"PageUrl"},"PageUrl:cme9rim1x07rc083201ufqkik/en/heroes/marcin-pawelczyk":{"id":"cme9rim1x07rc083201ufqkik/en/heroes/marcin-pawelczyk","page":"cme9rim1x07rc083201ufqkik","url":"/en/heroes/marcin-pawelczyk","name":"Marcin PaweÅczyk","description":" ","__typename":"PageUrl"},"PageUrl:cmfp2fob51frg08329jmergly/en/heroes-work":{"id":"cmfp2fob51frg08329jmergly/en/heroes-work","page":"cmfp2fob51frg08329jmergly","url":"/en/heroes-work","name":"heroes-work","description":" ","__typename":"PageUrl"},"PageUrl:cmfp91btv088d0832jacmlkbx/en/about-us/gabriela-springlova":{"id":"cmfp91btv088d0832jacmlkbx/en/about-us/gabriela-springlova","page":"cmfp91btv088d0832jacmlkbx","url":"/en/about-us/gabriela-springlova","name":"Gabriela Å pringlová","description":" ","__typename":"PageUrl"},"PageUrl:cmfp96ox208fh0832edf5mw0r/en/about-us/petr-tajc":{"id":"cmfp96ox208fh0832edf5mw0r/en/about-us/petr-tajc","page":"cmfp96ox208fh0832edf5mw0r","url":"/en/about-us/petr-tajc","name":"Petr TajÄ","description":" ","__typename":"PageUrl"},"PageUrl:cmfp988ia08hg0832gzoaz2pv/en/about-us/tomas-trnka":{"id":"cmfp988ia08hg0832gzoaz2pv/en/about-us/tomas-trnka","page":"cmfp988ia08hg0832gzoaz2pv","url":"/en/about-us/tomas-trnka","name":"Tomáš Trnka","de
2scription":" ","__typename":"PageUrl"},"PageUrl:cmhlrgldc06fk0832gpo1zh2v/en/blog/handset-recall":{"id":"cmhlrgldc06fk0832gpo1zh2v/en/blog/handset-recall","page":"cmhlrgldc06fk0832gpo1zh2v","url":"/en/blog/handset-recall","name":"Handset recall","description":" ","__typename":"PageUrl"},"PageUrl:cmiyfa2a508q308322m0su27c/en/blog/simplicity-beneath-the-screen-why-the-liberty-ccr-makes-complex-dives-easy":{"id":"cmiyfa2a508q308322m0su27c/en/blog/simplicity-beneath-the-screen-why-the-liberty-ccr-makes-complex-dives-easy","page":"cmiyfa2a508q308322m0su27c","url":"/en/blog/simplicity-beneath-the-screen-why-the-liberty-ccr-makes-complex-dives-easy","name":"Simplicity Beneath the Screen: Why the Liberty CCR Makes Complex Dives Easy","description":" ","__typename":"PageUrl"},"PageUrl:cmkmnczo740ql0889aw8p76bf/en/blog/a-divers-guide-to-analyzing-nitrox-the-right-way":{"id":"cmkmnczo740ql0889aw8p76bf/en/blog/a-divers-guide-to-analyzing-nitrox-the-right-way","page":"cmkmnczo740ql0889aw8p76bf","url":"/en/blog/a-divers-guide-to-analyzing-nitrox-the-right-way","name":"A Diver's Guide to Analyzing Nitrox the Right Way","description":" ","__typename":"PageUrl"},"PageUrl:cmley5r269wkr0889usnp23dr/en/blog/cylinder-labeling":{"id":"cmley5r269wkr0889usnp23dr/en/blog/cylinder-labeling","page":"cmley5r269wkr0889usnp23dr","url":"/en/blog/cylinder-labeling","name":"Cylinder labeling","description":" ","__typename":"PageUrl"},"PageUrl:cmlgfby9banwt0889tu45j7sw/en/about-us/jitka-cankova":{"id":"cmlgfby9banwt0889tu45j7sw/en/about-us/jitka-cankova","page":"cmlgfby9banwt0889tu45j7sw","url":"/en/about-us/jitka-cankova","name":"Jitka ÄaÅková","description":" ","__typename":"PageUrl"},"PageUrl:cmlgff4tianxt0889b2xu06v2/en/about-us/lucie-smejkalova":{"id":"cmlgff4tianxt0889b2xu06v2/en/about-us/lucie-smejkalova","page":"cmlgff4tianxt0889b2xu06v2","url":"/en/about-us/lucie-smejkalova","name":"Lucie Å mejkalová","description":" ","__typename":"PageUrl"},"PageUrl:cmlgfhw6fanzg0889w5kcd5p6/en/about-us/lucie-uchytilova":{"id":"cmlgfhw6fanzg0889w5kcd5p6/en/about-us/lucie-uchytilova","page":"cmlgfhw6fanzg0889w5kcd5p6","url":"/en/about-us/lucie-uchytilova","name":"Lucie Uchytilová","description":" ","__typename":"PageUrl"},"PageUrl:cmlgfkcf4ao0b0889h7hd9sqr/en/about-us/michal-domorazek":{"id":"cmlgfkcf4ao0b0889h7hd9sqr/en/about-us/michal-domorazek","page":"cmlgfkcf4ao0b0889h7hd9sqr","url":"/en/about-us/michal-domorazek","name":"Michal Domorázek","description":" ","__typename":"PageUrl"},"PageUrl:cmlgg8xhlao9h0889fan5t9d2/en/about-us/mike-pokrovsky":{"id":"cmlgg8xhlao9h0889fan5t9d2/en/about-us/mike-pokrovsky","page":"cmlgg8xhlao9h0889fan5t9d2","url":"/en/about-us/mike-pokrovsky","name":"Mike Pokrovsky","description":" ","__typename":"PageUrl"},"PageUrl:cmlggbsvwaoc10889ggys3s1l/en/about-us/ondrej-zouna":{"id":"cmlggbsvwaoc10889ggys3s1l/en/about-us/ondrej-zouna","page":"cmlggbsvwaoc10889ggys3s1l","url":"/en/about-us/ondrej-zouna","name":"OndÅej Zouna","description":" ","__typename":"PageUrl"},"PageUrl:cmlggf5llaoe60889fr9rdvog/en/about-us/hana-jaklova":{"id":"cmlggf5llaoe60889fr9rdvog/en/about-us/hana-jaklova","page":"cmlggf5llaoe60889fr9rdvog","url":"/en/about-us/hana-jaklova","name":"Hana Jaklová","description":" ","__typename":"PageUrl"},"PageUrl:cmm4xpo9igujd0889kg819hdy/en/blog/the-5-2-g/l-rule-why-gas-density-may-be-the-most-important-number-in-deep-diving":{"id":"cmm4xpo9igujd0889kg819hdy/en/blog/the-5-2-g/l-rule-why-gas-density-may-be-the-most-important-number-in-deep-diving","page":"cmm4xpo9igujd0889kg819hdy","url":"/en/blog/the-5-2-g/l-rule-why-gas-density-may-be-the-most-important-number-in-deep-diving","name":"The 5.2 g/L Rule: Why Gas Density May Be the Most Important Number in Deep Diving","description":" ","__typename":"PageUrl"},"PageUrl:cmnhiq86gqv9k0889tw52s1w1/en/blog/trimix-diving-made-simple-calculations-for-mod-end-density":{"id":"cmnhiq86gqv9k0889tw52s1w1/en/blog/trimix-diving-made-simple-calculations-for-mod-end-density","page":"cmnhiq86gqv9k0889tw52s1w1","url":"/en/blog/trimix-diving-made-simple-calculations-for-mod-end-density","name":"Trimix Diving Made Simple: Calculations for MOD, END & Density","description":" ","__typename":"PageUrl"},"PageUrl:cmnoc0oyos2qq0889jamhbhzm/en/blog/wrong-gas-in-diving-how-accidents-happen-and-how-to-prevent-them":{"id":"cmnoc0oyos2qq0889jamhbhzm/en/blog/wrong-gas-in-diving-how-accidents-happen-and-how-to-prevent-them","page":"cmnoc0oyos2qq0889jamhbhzm","url":"/en/blog/wrong-gas-in-diving-how-accidents-happen-and-how-to-prevent-them","name":"Wrong Gas in Diving: How Accidents Happen and How to Prevent Them","description":" ","__typename":"PageUrl"},"PageUrl:cmoikfi2o00jd0834i7cnst7d/en/products/analyzers/echo":{"id":"cmoikfi2o00jd0834i7cnst7d/en/products/analyzers/echo","page":"cmoikfi2o00jd0834i7cnst7d","url":"/en/products/analyzers/echo","name":"Analyzer ECHO","description":" ","__typename":"PageUrl"},"PageUrl:cmoikgtii00ld0834fstyh5rg/en/products/ccr-liberty/architecture":{"id":"cmoikgtii00ld0834fstyh5rg/en/products/ccr-liberty/architecture","page":"cmoikgtii00ld0834fstyh5rg","url":"/en/products/ccr-liberty/architecture","name":"CCR Liberty Architecture","description":" ","__typename":"PageUrl"},"PageUrl:cmoikh55x00m90834611encgx/en/products/ccr-liberty/models":{"id":"cmoikh55x00m90834611encgx/en/products/ccr-liberty/models","page":"cmoikh55x00m90834611encgx","url":"/en/products/ccr-liberty/models","name":"CCR Liberty Models","description":" ","__typename":"PageUrl"},"PageUrl:cmoikhgmk00n10834zvd44iku/en/products/ccr-liberty/features":{"id":"cmoikhgmk00n10834zvd44iku/en/products/ccr-liberty/features","page":"cmoikhgmk00n10834zvd44iku","url":"/en/products/ccr-liberty/features","name":"CCR Liberty Features","description":" ","__typename":"PageUrl"},"PageUrl:cmojyurq800b90834ore7lvo9/en/blog/why-divers-analyze-their-gas-before-every-dive-echo-gas-analyzer":{"id":"cmojyurq800b90834ore7lvo9/en/blog/why-divers-analyze-their-gas-before-every-dive-echo-gas-analyzer","page":"cmojyurq800b90834ore7lvo9","url":"/en/blog/why-divers-analyze-their-gas-before-every-dive-echo-gas-analyzer","name":"Why Divers Analyze Their Gas Before Every Dive | ECHO Gas Analyzer","description":" ","__typename":"PageUrl"},"PageUrl:cmosn3q2e31ov0834rw6nfqhc/en/blog/co/co-in-the-breathing-gas-sources-of-contamination-and-how-to-detect-it":{"id":"cmosn3q2e31ov0834rw6nfqhc/en/blog/co/co-in-the-breathing-gas-sources-of-contamination-and-how-to-detect-it","page":"cmosn3q2e31ov0834rw6nfqhc","url":"/en/blog/co/co-in-the-breathing-gas-sources-of-contamination-and-how-to-detect-it","name":"CO/COâ in the Breathing Gas: Sources of Contamination and How to Detect It","description":" ","__typename":"PageUrl"},"PageUrl:cmp13w2es04lr0826703jqxwt/en/about-us/eu-programme":{"i
2d":"cmp13w2es04lr0826703jqxwt/en/about-us/eu-programme","page":"cmp13w2es04lr0826703jqxwt","url":"/en/about-us/eu-programme","name":"EU programme","description":" ","__typename":"PageUrl"},"PageUrl:cmpcprnil27f90826ymyime9f/en/blog/end-30-m-as-a-standard-what-it-means-in-practice-for-gas-selection":{"id":"cmpcprnil27f90826ymyime9f/en/blog/end-30-m-as-a-standard-what-it-means-in-practice-for-gas-selection","page":"cmpcprnil27f90826ymyime9f","url":"/en/blog/end-30-m-as-a-standard-what-it-means-in-practice-for-gas-selection","name":"END â¤30 m as a Standard: What It Means in Practice for Gas Selection","description":" ","__typename":"PageUrl"},"PageUrl:cmpgvtc0f38lb0826555ewppv/en/blog/po-limits-1-4-1-6-when-to-use-which-and-why":{"id":"cmpgvtc0f38lb0826555ewppv/en/blog/po-limits-1-4-1-6-when-to-use-which-and-why","page":"cmpgvtc0f38lb0826555ewppv","url":"/en/blog/po-limits-1-4-1-6-when-to-use-which-and-why","name":"POâ Limits 1.4 / 1.6: When to Use Which and Why","description":" ","__typename":"PageUrl"},"PageUrl:cmpzd0kws895208269mvtvask/en/blog/why-professional-divers-choose-the-liberty-ccr-when-simple-isn-t-enough":{"id":"cmpzd0kws895208269mvtvask/en/blog/why-professional-divers-choose-the-liberty-ccr-when-simple-isn-t-enough","page":"cmpzd0kws895208269mvtvask","url":"/en/blog/why-professional-divers-choose-the-liberty-ccr-when-simple-isn-t-enough","name":"Why Professional Divers Choose the Liberty CCR: When Simple Isn't Enough","description":" ","__typename":"PageUrl"},"PageUrl:cmq7yto10ah5l08260viggpan/en/heroes/jane-ruckert":{"id":"cmq7yto10ah5l08260viggpan/en/heroes/jane-ruckert","page":"cmq7yto10ah5l08260viggpan","url":"/en/heroes/jane-ruckert","name":"Jane Ruckert","description":" ","__typename":"PageUrl"},"PageUrl:cmqtac8urgclw08269ufjvrbk/en/heroes-work/test":{"id":"cmqtac8urgclw08269ufjvrbk/en/heroes-work/test","page":"cmqtac8urgclw08269ufjvrbk","url":"/en/heroes-work/test","name":"test!","description":" ","__typename":"PageUrl"},"PageUrl:cmqtdjc9lgdb90826vuke3rxj/en/how-long-can-you-stay-underwater-with-a-rebreather":{"id":"cmqtdjc9lgdb90826vuke3rxj/en/how-long-can-you-stay-underwater-with-a-rebreather","page":"cmqtdjc9lgdb90826vuke3rxj","url":"/en/how-long-can-you-stay-underwater-with-a-rebreather","name":"How Long Can You Stay Underwater With a Rebreather?","description":" ","__typename":"PageUrl"},"PageUrl:cmqtjxmm9gf7w08262teo1sxc/en/blog/rebreather-vs-open-circuit-what-s-the-difference":{"id":"cmqtjxmm9gf7w08262teo1sxc/en/blog/rebreather-vs-open-circuit-what-s-the-difference","page":"cmqtjxmm9gf7w08262teo1sxc","url":"/en/blog/rebreather-vs-open-circuit-what-s-the-difference","name":"Rebreather vs Open Circuit: What's the Difference?","description":" ","__typename":"PageUrl"},"PageUrl:cmqtk0v2dgfdl0826xp1p1ri6/en/blog/why-underwater-photographers-use-rebreathers":{"id":"cmqtk0v2dgfdl0826xp1p1ri6/en/blog/why-underwater-photographers-use-rebreathers","page":"cmqtk0v2dgfdl0826xp1p1ri6","url":"/en/blog/why-underwater-photographers-use-rebreathers","name":"Why Underwater Photographers Use Rebreathers","description":" ","__typename":"PageUrl"},"PageUrl:cmqtk33x1gfj40826lcuy5tm2/en/blog/why-recreational-divers-use-rebreathers":{"id":"cmqtk33x1gfj40826lcuy5tm2/en/blog/why-recreational-divers-use-rebreathers","page":"cmqtk33x1gfj40826lcuy5tm2","url":"/en/blog/why-recreational-divers-use-rebreathers","name":"Why Recreational Divers Use Rebreathers","description":" ","__typename":"PageUrl"},"PageUrl:cmqtk5m8ygfo80826sfrnrdh4/en/blog/why-do-divers-use-rebreathers-ccr-benefits-explained":{"id":"cmqtk5m8ygfo80826sfrnrdh4/en/blog/why-do-divers-use-rebreathers-ccr-benefits-explained","page":"cmqtk5m8ygfo80826sfrnrdh4","url":"/en/blog/why-do-divers-use-rebreathers-ccr-benefits-explained","name":"Why Do Divers Use Rebreathers? CCR Benefits Explained.","description":" ","__typename":"PageUrl"},"PageUrl:cmsehf7jo02fj0856etyan05j/en/manuals/he-o2-printer-cable-quick-reference":{"id":"cmsehf7jo02fj0856etyan05j/en/manuals/he-o2-printer-cable-quick-reference","page":"cmsehf7jo02fj0856etyan05j","url":"/en/manuals/he-o2-printer-cable-quick-reference","name":"HE/O2 Printer cable Quick reference","description":" ","__typename":"PageUrl"},"PageUrl:cmt2wpeyn05ao085625qymc9k/en/partners":{"id":"cmt2wpeyn05ao085625qymc9k/en/partners","page":"cmt2wpeyn05ao085625qymc9k","url":"/en/partners","name":"Partners","description":" ","__typename":"PageUrl"},"PageUrl:cmt2wpu1v05bn0856mnajwyzs/en/partners/ds:partners":{"id":"cmt2wpu1v05bn0856mnajwyzs/en/partners/ds:partners","page":"cmt2wpu1v05bn0856mnajwyzs","url":"/en/partners/ds:partners","name":"Partner Detail","description":" ","__typename":"PageUrl"},"Page:cjv3l26tp004p0836i54n4u7a":{"id":"cjv3l26tp004p0836i54n4u7a","type":{"type":"id","generated":false,"id":"PageType:cjv3l213x004f08366hjufttp","typename":"PageType"},"tags":[],"translations({\"where\":{\"language\":{\"id\":\"cjv3kwvoj000u083611381c6o\"}}})":[{"type":"id","generated":false,"id":"PageTranslation:cjv3l26um004y0836909x9h1e","typename":"PageTranslation"}],"__typename":"Page"},"PageType:cjv3l213x004f08366hjufttp":{"id":"cjv3l213x004f08366hjufttp","name":"Default","__typename":"PageType"},"PageTranslation:cjv3l26um004y0836909x9h1e":{"id":"cjv3l26um004y0836909x9h1e","name":"Homepage","createdAt":"2019-04-30T09:22:22.894Z","content":{"type":"json","json":{"content":[{"name":"Header","data":{"products":[],"activeTab":"1","showScrollIndicator":true,"isTransparencyEnabled":true},"id":"#0","type":"component","lock":false,"position":0},{"name":"HeroV2","data":{"slides":[{"id":"4","productName":"","media":{"mimetype":"image/png","size":6707532,"hash":"77df3aabc10d015516e748622d5c96e95ea9542f","id":"cmojnxweh3vg30800k5tet07l","filename":"banner-hp-echo.png","category":"divesoft/","type":"image","alt":"ECHO Analyzer"},"title":"Precision Gas Analysis.<br>Zero Compromise.<br>Available now.","linkTitle":"Discover","linkUrl":{"url":"/en/products/analyzers/echo","pageId":"cmoikfi2o00jd0834i7cnst7d"}},{"id":"2","media":{"mimetype":"video/mp4","size":12615106,"hash":"7022f3f68fa524f5ee6ab569a4df9be25e4c21fc","id":"cmol8x9ku4v4q080073vl626u","filename":"istock-1396851540-divesoft-1080p-h264.mp4","category":"divesoft/docs/","type":"file"},"title":"Built for the Depths.<br>Trusted by Divers Worldwide.","linkTitle":"","linkUrl":{"url":"","pageId":"cjv3rim6p00fm0836uts415d5"}}
2,{"id":"1","media":{"mimetype":"image/png","size":15405316,"hash":"5d1b1b669b0bb7548ffcfa2f5ddc546c2ac451ff","id":"cmoa03re70q1o0800sbdit3sv","filename":"hero02.png","category":"divesoft/","type":"image"},"title":"Built for the Depths.<br>Trusted by Divers Worldwide.","linkTitle":"","linkUrl":{"url":"","pageId":"cjv3rim6p00fm0836uts415d5","urlNewWindow":true}},{"id":"3","title":"Built for the Depths.<br>Trusted by Divers Worldwide.","linkTitle":"","linkUrl":{"url":"","pageId":"cjv3rim6p00fm0836uts415d5"},"media":{"mimetype":"image/png","size":14855289,"hash":"77d878376512d5ef24b9b938dc3ce3e6d73abb30","id":"cmoa02iwd0pzu08006jigxsh6","filename":"hero04.png","category":"divesoft/","type":"image"}}],"activeTab":"4"},"id":"#2","type":"component","lock":false,"position":1},{"name":"CallToAction","data":{"backgroundColor":"white","isCentered":false,"title":"Divesoft rebreathers, analyzers and computers â reliable gear for divers exploring and growing safely underwater.","links":[{"title":"About us","url":{"url":"/en/about-us","pageId":"ckgdfcdf4afxt0788jj7dwb6x","urlNewWindow":false},"color":"black","type":"primary","id":"1"}],"linkPosition":"below","linkAlignment":"right"},"id":"#18","type":"component","lock":false,"position":2},{"name":"ProductTile","data":{"title":"DIVESOFT.APP","subtitle":"One System for Everything","image":{"recommendedSizes":{"width":"6000","height":"2100"},"mimetype":"image/png","size":2323410,"hash":"2434551be2dea8a4694d6e11aa455da4dc6dd1ba","id":"cmo9xl72f0o5d0800iiijy0e4","filename":"divesoftapp.png","category":"divesoft/","type":"image","alt":"Divesoft.app mobile interface showing a comprehensive digital hub for divers"},"eshopUrl":{"url":"https://play.google.com/store/apps/details?id=com.divesoft.divesoft_app","urlNewWindow":true},"detailUrl":{"url":"/en/app","pageId":"ckfccnc4a98bx0788f7enal83"},"imageMobile":{"mimetype":"image/png","size":2617258,"hash":"5a018938f2fe6011ea06d900d6f94994cbc0197c","id":"cmoa1jlga0r6k0800tfc7skjt","filename":"app-mobile.png","category":"divesoft/","type":"image","alt":"Divesoft.app mobile interface showing a comprehensive digital hub for divers"},"links":[{"id":"1","color":"red","title":"Google Play","url":{"urlNewWindow":true,"url":"https://play.google.com/store/apps/details?id=com.divesoft.divesoft_app"}},{"id":"2","color":"red","title":"App Store","url":{"urlNewWindow":true,"url":"https://apps.apple.com/us/app/divesoft-app/id1545496130"}},{"id":"3","color":"white","isOverlayLink":true,"url":{"url":"/en/app","pageId":"ckfccnc4a98bx0788f7enal83"},"title":"Full dive"}]},"id":"#23","type":"component","lock":false,"position":3},{"name":"ProductTile","data":{"title":"ECHO","subtitle":"Know Before You Dive","image":{"recommendedSizes":{"width":"6000","height":"2100"},"mimetype":"image/png","size":1048750,"hash":"5863c7fa7c960caa16b6e8097dbbe6a0853ed2bb","id":"cmo9xmety0o5x08000l1dol0i","filename":"echo.png","category":"divesoft/","type":"image","alt":"ECHO Analyzer"},"links":[{"title":"Buy","url":{"url":"https://eu1.hubs.ly/H0tXgPx0","urlNewWindow":true},"color":"red","id":"1"},{"title":"Full dive","url":{"url":"/en/products/analyzers/echo","pageId":"cmoikfi2o00jd0834i7cnst7d"},"color":"white","isOverlayLink":true,"id":"2"}],"activeTab":"1","imageMobile":{"mimetype":"image/png","size":1023459,"hash":"fd3386da1b19e01ede3ddb73d923a73fa0338493","id":"cmoa1ju9p0r6r0800ovre9mu9","filename":"echo-mobile.png","category":"divesoft/","type":"image","alt":"ECHO analyzer"}},"id":"#26","type":"component","lock":false,"position":4},{"name":"ProductTile","data":{"title":"LIBERTY","subtitle":"Reliability Designed for Every Dive","eshopUrl":{"url":"/en/products/ccr-liberty/configurations","urlNewWindow":true,"pageId":"cl7on204vv7pd0858ifbw2xst"},"imageMobile":{"mimetype":"image/png","size":1837377,"hash":"cc9b7232e6fa9c25dd27ef2b7dcfe9e3c4dcd0e1","id":"cmilyzhcripxv08500cv0cl4w","filename":"liberty-render-hp-mobile.png","category":"divesoft/","type":"image","alt":"CCR Liberty"},"image":{"mimetype":"image/png","size":2126424,"hash":"ba240cfc03faefd0ac56b4791d7a5f582f3ad530","id":"cmgey40o7ul7r085022qpyhxi","filename":"liberty-banner-homepage.png","category":"divesoft/","type":"image","alt":"CCR Liberty"},"detailUrl":{"url":"/en/products/ccr-liberty","pageId":"cjv3rpryz00iw0836lc0zx81j","urlNewWindow":false}
2,"links":[{"id":"1","title":"Buy","color":"red","url":{"url":"https://www.divesoft.com/en/ccr-liberty?config=eyJ0cmVlSWQiOiI2Mjk3M2NmZmRlYWMzNWUzMDQ4MmFlYzAiLCJub2RlR3VpZHMiOltdLCJkZXRhaWxOb2RlR3VpZCI6IiIsInNldHVwRGV0YWlscyI6e30sImRldGFpbFNldHVwIjp7InF1ZXN0aW9uR3VpZCI6IiIsImFuc3dlckd1aWQiOiIifSwiYWNjZXNzb3J5Q2F0ZWdvcmllcyI6e30sImRldGFpbEFjY2Vzc29yeSI6eyJjYXRlZ29yeUd1aWQiOiIiLCJxdWVzdGlvbkd1aWQiOiIiLCJhbnN3ZXJHdWlkIjoiIn19&step=nodes","pageId":"cl7on204vv7pd0858ifbw2xst"}},{"id":"2","title":"Full dive","color":"white","url":{"url":"/en/products/ccr-liberty","pageId":"cjv3rpryz00iw0836lc0zx81j"},"isOverlayLink":true}],"activeTab":"1"},"id":"#16","type":"component","lock":false,"position":6},{"name":"ProductTile","data":{"title":"LABEL PRINTING","subtitle":"Gas Mix Clearly Marked","image":{"recommendedSizes":{"width":"6000","height":"2100"},"mimetype":"image/png","size":502131,"hash":"e43843c03d09a918bffd1350531de0ddc0563d11","id":"cmo9xnllu0o730800v2tgl2kb","filename":"labelprinting.png","category":"divesoft/","type":"image","alt":"Label Printing"},"eshopUrl":{"url":"https://eshop.divesoft.com/he-o2-printer-cable/7312","urlNewWindow":true},"detailUrl":{"url":"https://toolkit.divesoft.com/"},"imageMobile":{"mimetype":"image/png","size":395172,"hash":"a36d20c64a4f6cc47ae3d3abb77d4251bea4463a","id":"cmoa1l2cr0r7n0800cbwwtr0g","filename":"label-mobile.png","category":"divesoft/","type":"image","alt":"Label Printing"},"links":[{"id":"1","url":{"url":"https://eshop.divesoft.com/he-o2-printer-cable/7312","urlNewWindow":true},"color":"red","title":"Buy"},{"id":"2","title":"Full dive","url":{"url":"https://toolkit.divesoft.com/","urlNewWindow":true},"isOverlayLink":true,"color":"white"}],"activeTab":"1"},"id":"#24","type":"component","lock":false,"position":7},{"name":"ProductTile","data":{"title":"SOLO","subtitle":"Every Breath Measured with Trust","eshopUrl":{"url":"https://eshop.divesoft.com/analyzer-solo/8300","urlNewWindow":true},"image":{"mimetype":"image/png","size":3135897,"hash":"0f0adade7a81a0ba7c1f642c91e903d17cb0853c","id":"cmg81q0mvt1730850i0otc6q6","filename":"divesoft-uprava-solo.png","category":"divesoft/","type":"image","alt":"SOLO trimix analyzer"},"detailUrl":{"url":"/en/products/analyzers/analyzer-solo","pageId":"cjztim1kk09fg0777nv63tf9b"},"imageMobile":{"mimetype":"image/png","size":3273507,"hash":"b85fb33a5fc341886bdef3037c7d41ee8834c9f2","id":"cmilyxlplipxa0850vjaw74v6","filename":"analyzer-solo-render-hp-mobile.png","category":"divesoft/","type":"image","alt":"SOLO trimix analyzer"},"links":[{"id":"1","title":"Buy","url":{"urlNewWindow":true,"url":"https://eshop.divesoft.com/analyzer-solo/8300"},"color":"red"},{"id":"2","title":"Full dive","isOverlayLink":true,"color":"white","url":{"url":"/en/products/analyzers/analyzer-solo","pageId":"cjztim1kk09fg0777nv63tf9b"}}],"activeTab":"2"},"id":"#13","type":"component","lock":false,"position":8},{"name":"ProductTile","data":{"title":"He/O<sub>2</sub> ANALYZER","subtitle":"Proven and Trusted","image":{"recommendedSizes":{"width":"6000","height":"2100"},"mimetype":"image/png","size":925731,"hash":"ab09c25f96342ee4c30aa7b5db93ca13b70bf04c","id":"cmoa1lpca0r8i0800u3lmd2if","filename":"heo2.png","category":"divesoft/","type":"image","alt":"He/O2 Analyzer"},"eshopUrl":{"url":"https://eshop.divesoft.com/analyzer-he-o2/8313","urlNewWindow":true},"detailUrl":{"url":"/en/products/analyzers/analyzer-he-o2","pageId":"cjztilv3509et0777ejgtlm67"},"imageMobile":{"mimetype":"image/png","size":1214238,"hash":"6ad2fc2f655018f612d43bfb02cdec1273bf1c0f","id":"cmohe5tn32xw00800fc98na9v","filename":"he-mobile.png","category":"divesoft/","type":"image","alt":"He/O2 Analyzer"},"links":[{"id":"1","url":{"urlNewWindow":true,"url":"https://eshop.divesoft.com/analyzer-he-o2/8313"},"title":"Buy"},{"id":"2","title":"Full dive","url":{"url":"/en/products/analyzers/analyzer-he-o2","pageId":"cjztilv3509et0777ejgtlm67"},"isOverlayLink":true,"color":"white"}]},"id":"#25","type":"component","lock":false,"position":9},{"name":"ProductTile","data":{"title":"DNA","subtitle":"Compact Nitrox Analyzer with Accuracy","eshopUrl":{"url":"https://eshop.divesoft.com/dna/8460","urlNewWindow":true},"image":{"mimetype":"image/png","size":1344450,"hash":"da2c9000bfe9b4519bd2ec9f6505af9f6a242c6f","id":"cmoihebjs3fi40800pg9t460m","filename":"opravadnax-1.png","category":"divesoft/","type":"image","alt":"DNA Analyzer"},"detailUrl":{"url":"/en/products/analyzers/dna","pageId":"clf9rs5c3ltkw0835vujrrtxu"},"imageMobile":{"mimetype":"image/png","size":13032645,"hash":"c7fb66064ea4219e565788fd650b45872aaa43fe","id":"cmilyx5muipwq08503k6tlofh","filename":"dna-render-hp-mobile.png","category":"divesoft/","type":"image","alt":"DNA Analyzer"}
2,"links":[{"id":"1","title":"Buy","url":{"urlNewWindow":true,"url":"https://eshop.divesoft.com/dna/8460"},"isOverlayLink":false,"color":"red"},{"id":"2","title":"Full dive","url":{"url":"/en/products/analyzers/dna","pageId":"clf9rs5c3ltkw0835vujrrtxu"},"color":"white","isOverlayLink":true}],"activeTab":"1"},"id":"#5","type":"component","lock":false,"position":10},{"name":"CallToAction","data":{"backgroundColor":"white","isCentered":true,"title":"Discover the numbers behind our trust.","links":[{"title":"Shop All Divesoft Gear","url":{"url":"https://eshop.divesoft.com/","pageId":"cjv3rim6p00fm0836uts415d5","urlNewWindow":true},"color":"black","type":"outline","id":"1"}],"linkPosition":"above","linkAlignment":"right"},"id":"#19","type":"component","lock":false,"position":12},{"name":"AnimatedMetricCounter","data":{"metrics":[{"value":"0","suffix":"","title":"Compromise","description":"Safety-critical design, verified at every step.","id":"1"},{"value":"50","suffix":"+","title":"Countries","description":"Our gear supports divers across oceans and communities.","id":"2"},{"id":"3","value":"20","suffix":"+","title":"years ","description":"Experience in precision engineering for diving."}],"activeTab":"1"},"id":"#10","type":"component","lock":false,"position":13},{"name":"CallToAction","data":{"backgroundColor":"white","isCentered":false,"title":"","links":[{"title":"About us","url":{"url":"/en/about-us","pageId":"ckgdfcdf4afxt0788jj7dwb6x"},"color":"black","type":"primary","id":"1"},{"id":"2","title":"SHOP","url":{"url":"https://eshop.divesoft.com/","urlNewWindow":true}}],"linkPosition":"below","linkAlignment":"right","activeTab":"1"},"id":"#20","type":"component","lock":false,"position":14},{"name":"BlogPreviewV2","data":{"title":"Dive into more stories","description":"Our community grows through shared knowledge, support and safe explorationâhelping divers improve skills and enjoy diving more.","blogUrl":{"url":"/en/blog","pageId":"ckpcgx2c64h2d0788rft16oow"},"articles":{"sourceType":"pages","data":{"title":"%page,annotations,title% ","perex":"%page,annotations,perex%","image":{"dynamiclySourcedImage":" %page,annotations,image%"},"url":{"pageSourcedUrl":true,"analyticsTag":""}},"filters":[],"tagIds":["clw52vo5mlckc0735dl0is8ok","clw52y9cclcle073501kwtw2u","clw52z09zlclk0735mxb7v53p","clw52zeqhlclq0735wrys6js8","cmfp50qhi00lk08324ek37f9g","cm5ww0z2w1b7708035dpdbq9a","cm5ww05zc1b5d0803zglvz927","cm5ww0t651b710803pcl02cn4"],"orderBy":"%page,createdAt%","order":"DESC","limit":6}},"id":"#12","type":"component","lock":false,"position":15},{"name":"Showreel","data":{"media":[{"id":"1","media":{"mimetype":"image/jpeg","size":14611225,"hash":"88c4747caf1986a9fab193ea054a1d0b3c36421b","id":"cmh4q7eci35d40850oaodvgq4","filename":"0n2a8855.jpg","category":"divesoft/","type":"image"}},{"id":"2","media":{"mimetype":"image/jpeg","size":14181709,"hash":"0ba6a0a2ddce29be72448b6389f4ed026cf8135f","id":"cmh4qcv1535fk08508fnv2b9h","filename":"0n2a8894-enhanced-nr.jpg","category":"divesoft/","type":"image"}},{"id":"3","media":{"mimetype":"image/jpeg","size":9770433,"hash":"e9f50cfc6693fc3460df7892421a10543cb17b95","id":"cmh4qh7c035j10850fh5n4r7m","filename":"0n2a9075.jpg","category":"divesoft/","type":"image"}},{"id":"4","media":{"mimetype":"image/jpeg","size":22525406,"hash":"3f4cc0ea0c8fc83595d6fd01d13f6116500c750c","id":"cmh4qo2ke35nv0850axr28mao","filename":"0n2a9519-enhanced-nr-edit.jpg","category":"divesoft/","type":"image"}},{"id":"5","media":{"mimetype":"image/jpeg","size":2912383,"hash":"2fe76c92ca587c543d6f9430b2ccd7c07265b441","id":"cmh4rvwnk368d0850htufx5ur","filename":"dsc00113-133.jpg","category":"divesoft/","type":"image"}},{"id":"6","media":{"mimetype":"image/jpeg","size":2335743,"hash":"cfae5109a2bbe4944b9826c0aa5b64c70ba86a7c","id":"cmh4rx3zv369c08506uc0n947","filename":"dsc00190-143.jpg","category":"divesoft/","type":"image"}},{"id":"7","media":{"mimetype":"image/jpeg","size":2310016,"hash":"5fe3aa120ca10a554442acfa84b024b8f9926a35","id":"cmh4ry7tq36a20850pudmbfmk","filename":"dsc00275-164.jpg","category":"divesoft/","type":"image"}},{"id":"8","media":{"mimetype":"image/jpeg","size":3070819,"hash":"2aff1d033e13152c6202c73106dca4f94d7ff9d0","id":"cmh4s0x7m36ao0850gvend7qk","filename":"dsc00276-165.jpg","category":"divesoft/","type":"image"}},{"id":"9","media":{"mimetype":"image/jpeg","size":2449544,"hash":"a08e6c1f2ac51fe9c114bf27733417d0e2199cf6","id":"cmh4s2ej036b00850qzr02e23","filename":"dsc00393-191.jpg","category":"divesoft/","type":"image"}}
2,{"id":"10","media":{"mimetype":"image/jpeg","size":1987713,"hash":"ea40135fbe3b305dcc153b5d2030a0d8dd750b1a","id":"cmh4s60yg36c70850r364dnhw","filename":"dsc00450-198.jpg","category":"divesoft/","type":"image"}},{"id":"11","media":{"mimetype":"image/jpeg","size":2442501,"hash":"fef5d4cd05b6ff49590760aebae767b43bf7acc5","id":"cmh4s7b9i36cl0850y0niihz6","filename":"dsc00550-213.jpg","category":"divesoft/","type":"image"}},{"id":"12","media":{"mimetype":"image/jpeg","size":2189861,"hash":"86ec5b62dc54571445ba62abc059c083e9f78433","id":"cmh4s86i736cr0850gnemxrf1","filename":"dsc09456-2.jpg","category":"divesoft/","type":"image"}}],"isFullWidth":true,"slides":[{"id":"1","media":{"mimetype":"image/jpeg","size":14611225,"hash":"88c4747caf1986a9fab193ea054a1d0b3c36421b","id":"cmh4q7eci35d40850oaodvgq4","filename":"0n2a8855.jpg","category":"divesoft/","type":"image","alt":"Two scuba divers on a boat"},"title":"Join the Ones Who Dive Deeper.","autoplayDuration":"9000"},{"id":"2","title":"Join the Ones Who Dive Deeper.","media":{"mimetype":"image/jpeg","size":14181709,"hash":"0ba6a0a2ddce29be72448b6389f4ed026cf8135f","id":"cmh4qcv1535fk08508fnv2b9h","filename":"0n2a8894-enhanced-nr.jpg","category":"divesoft/","type":"image","alt":"Detailed preparation of scuba diving equipment"},"autoplayDuration":"9000"},{"id":"3","title":"Join the Ones Who Dive Deeper.","media":{"mimetype":"image/jpeg","size":9770433,"hash":"e9f50cfc6693fc3460df7892421a10543cb17b95","id":"cmh4qh7c035j10850fh5n4r7m","filename":"0n2a9075.jpg","category":"divesoft/","type":"image","alt":"Technical diver at the surface"},"autoplayDuration":"9000"},{"id":"4","title":"Join the Ones Who Dive Deeper.","media":{"mimetype":"image/jpeg","size":22525406,"hash":"3f4cc0ea0c8fc83595d6fd01d13f6116500c750c","id":"cmh4qo2ke35nv0850axr28mao","filename":"0n2a9519-enhanced-nr-edit.jpg","category":"divesoft/","type":"image","alt":"Scuba diver gliding through the water"},"autoplayDuration":"9000"},{"id":"5","title":"Join the Ones Who Dive Deeper.","media":{"mimetype":"image/jpeg","size":2912383,"hash":"2fe76c92ca587c543d6f9430b2ccd7c07265b441","id":"cmh4rvwnk368d0850htufx5ur","filename":"dsc00113-133.jpg","category":"divesoft/","type":"image","alt":"Two divers in full gear ready for deployment"},"autoplayDuration":"9000"},{"id":"6","title":"Join the Ones Who Dive Deeper.","media":{"mimetype":"image/jpeg","size":2335743,"hash":"cfae5109a2bbe4944b9826c0aa5b64c70ba86a7c","id":"cmh4rx3zv369c08506uc0n947","filename":"dsc00190-143.jpg","category":"divesoft/","type":"image","alt":"Technical diver in full gear"},"autoplayDuration":"9000"},{"id":"7","title":"Join the Ones Who Dive Deeper.","media":{"mimetype":"image/jpeg","size":2310016,"hash":"5fe3aa120ca10a554442acfa84b024b8f9926a35","id":"cmh4ry7tq36a20850pudmbfmk","filename":"dsc00275-164.jpg","category":"divesoft/","type":"image","alt":"Meticulous dive preparation"},"autoplayDuration":"9000"},{"id":"8","title":"Join the Ones Who Dive Deeper.","media":{"mimetype":"image/jpeg","size":3070819,"hash":"2aff1d033e13152c6202c73106dca4f94d7ff9d0","id":"cmh4s0x7m36ao0850gvend7qk","filename":"dsc00276-165.jpg","category":"divesoft/","type":"image","alt":"Testing of scuba diving equipment"},"autoplayDuration":"9000"}],"activeTab":"8"},"id":"#17","type":"component","lock":false,"position":16},{"name":"ExploreOurGear","data":{"gear":[{"title":"CCR Liberty","description":"Reliable, modular rebreathers designed for confident diving at any level.","id":"1","detailUrl":{"url":"/en/products/ccr-liberty","pageId":"cjv3rpryz00iw0836lc0zx81j","urlNewWindow":false}},{"id":"2","title":"Analyzers ","description":"Accurate Oâ and He analyzers for safety on every dive.","detailUrl":{"url":"/en/products/analyzers","pageId":"cjv3rr7on00ky0836fercz490","urlNewWindow":true}},{"id":"4","title":"BOV/DSV/ADV","description":"Seamless breathing control for safer, easier dives.","detailUrl":{"url":"/en/products/bovdsvadv","pageId":"cjv7uialr03nh0836yjoz2dji","urlNewWindow":true}},{"id":"6","title":"Extra Gear","description":"Accessories built to last and enhance any dive.","detailUrl":{"url":"/en/products/others","pageId":"ckdsltzi07o520788tk0s6c4v"}},{"id":"7","title":"Merchandise ","description":"Surface gear for divers, designed with passion.","detailUrl":{"url":"https://eshop.divesoft.com/products/merchandise?currency=CZK","urlNewWindow":true}}],"blogUrl":{"url":"/en/blog","pageId":"ckpcgx2c64h2d0788rft16oow"}},"id":"#14","type":"component","lock":false,"position":17},{"name":"CallToAction","data":{"backgroundColor":"black","isCentered":true,"title":"Need guidance? Contact Divesoft today.","links":[{"title":"Contact Us","url":{"url":"/en/contacts/contact-us","pageId":"cka6kn4hd3ahh0788k20h9ayy"},"color":"white","type":"outline","id":"1"}],"linkPosition":"below","linkAlignment":"right","activeTab":"1"},"id":"#21","type":"component","lock":false,"position":18},{"name":"Footer","data":{"componentTemplateId":"cjvwimxrl08e40798hjs5ek9w"},"id":"#1","type":"component","lock":false,"position":19}],"id":"root","idBuffer":"#27","lastCommit":"d90473d9-440b-4e8b-bfa7-4ed9d9ea7701"}},"annotations":[{"type":"id","generated":true,"id":"PageTranslation:cjv3l26um004y0836909x9h1e.annotations.0","typename":"PageAnnotation"},{"type":"id","generated":true,"id":"PageTranslation:cjv3l26um004y0836909x9h1e.annotations.1","typename":"PageAnnotation"},{"type":"id","generated":true,"id":"PageTranslation:cjv3l26um004y0836909x9h1e.annotations.2","typename":"PageAnnotation"}],"language":{"type":"id","generated":false,"id":"Language:cjv3kwvoj000u083611381c6o","typename":"Language"},"__typename":"PageTranslation"},"PageTranslation:cjv3l26um004y0836909x9h1e.annotations.0":{"key":"title","value":"divesoft.com","__typename":"PageAnnotation"},"PageTranslation:cjv3l26um004y0836909x9h1e.annotations.1":{"key":"perex","value":"divesoft.com","__typename":"PageAnnotation"},"PageTranslation:cjv3l26um004y0836909x9h1e.annotations.2":{"key":"image","value":"null","__typename":"PageAnnotation"},"Page:cjv3rim6p00fm0836uts415d5":{"id":"cjv3rim6p00fm0836uts415d5","type":{"type":"id","generated":false,"id":"PageType:cjv3l213x004f08366hjufttp","typename":"PageType"},"tags":[{"type":"id","generated":false,"id":"Tag:ckp59jt9n48lj0788mfuqrhym","typename":"Tag"}],"translations({\"where\":{\"language\":{\"id\":\"cjv3kwvoj000u083611381c6o\"}}})":[{"type":"id","generated":false,"id":"PageTranslation:cjv3rim7b00fw0836xu6l66wm","typename":"PageTranslation"}],"__typename":"Page"},"Tag:ckp59jt9n48lj0788mfuqrhym":{"id":"ckp59jt9n48lj0788mfuqrhym","name":"hidden","__typename":"Tag"},"PageTranslation:cjv3rim7b00fw0836xu6l66wm":{"id":"cjv3rim7b00fw0836xu6l66wm","name":"Products","createdAt":"2019-04-30T12:23:06.982Z","content":{"type":"json","json":{"content":[{"name":"Header","data":{"componentTemplateId":"cjv7yndru048c0836j99ljogw"},"id":"#42","type":"component","lock":false,"position":0},{"name":"ProductShowcase","data":{"backgroundColor":"#ffffff","isTextDark":true,"isImageRight":false,"title":"CCR Liberty","subtitle":"","description":"Paradigm shift in Rebreathers.","firstTitle":"Learn more >","firstUrl":{"url":"/en/products/ccr-liberty","pageId":"cjv3rpryz00iw0836lc0zx81j"},"secondTitle":"Buy >","secondUrl":{"url":"https://www.divesoft.com/en/ccr-liberty","urlNewWindow":true},"image":{"mimetype":"image/png","size":341609,"hash":"e615ad9a50d87f6c11ca337b4faeee5c7b8ab65d","id":"ckls2ogpo72s40776xz4acckl","filename":"divesoft-liberty-sidemount-1000x1000.png","category":"divesoft/","type":"image"},"imageMobile":{"dynamiclySourcedImage":" "},"hideDescriptionOnMobile":false,"areButtons":false,"isLazyLoadingDisabled":true},"id":"#71","type":"component","lock":false,"position":1},{"name":"ProductShowcase","data":{"backgroundColor":"#343434","isTextDark":false,"isImageRight":true,"image":{"recommendedSizes":{"width":"485","height":"485"},"mimetype":"image/png","size":61882,"hash":"2fdc157f745f3e817454d7d9a5b528e9708fae07","id":"cmdoim9mzzju30850pth1690v","filename":"i-want-it-now-text-2.png","category":"divesoft/","type":"image"},"imageMobile":{"recommendedSizes":{"width":"510","height":"510"}},"isLazyLoadingDisabled":false,"isTitleH1":false,"title":"CCR Liberty Sidemount","subtitle":"","description":"Do you need to purchase a CCR Liberty Sidemount quickly but donât have the option to wait 4 weeks for production?\nStarting August 1st, CCR Liberty Sidemount units are available in stock.\n","hideDescriptionOnMobile":false,"areButtons":false,"firstTitle":"Learn more >","firstUrl":{"url":"/en/products/ccr-liberty/stock-unit","pageId":"cmdo5gsze02qc0832lf2bbv7e"},"secondTitle":"Configurator >","secondUrl":""},"id":"#113","type":"component","lock":false,"position":2},{"name":"ProductShowcase","data":{"backgroundColor":"#ffffff","isTextDark":true,"isImageRight":false,"title":"Freedom+ Computers","subtitle":"","description":"Tec diving computers. \nSturdy. Reliable. Advanced.","firstTitle":"Learn more >","firstUrl":{"url":"/en/products/freedomplus-computers","pageId":"clfgt4fdjmf9v0835bv440kqj"},"secondTitle":"Buy >","secondUrl":{"url":"https://eshop.divesoft.com/products/computers-freedom","urlNewWindow":true},"image":{"mimetype":"image/png","size":815647,"hash":"5622076d8566c279ec0a231a2a8e1df1093a63aa","id":"clfwik6mqm8jf0776cmh9p7fv","filename":"8457-divesoft-freedom-plus-full-trimix-1080x1080-t.png","category":"divesoft/","type":"image"},"hideDescriptionOnMobile":false},"id":"#73","type":"component","lock":false,"position":3},{"name":"ProductShowcase","data":{"backgroundColor":"#f0f0f0","isTextDark":true,"isImageRight":true,"image":{"recommendedSizes":{"width":"485","height":"485"},"mimetype":"image/png","size":966258,"hash":"0f04df453e1176d2fbbf17412a7314db4d191d94","id":"cmck787q1lm8h085088rby2ak","filename":"8504-divesoft-dna-divesoft-nitrox-analyzer-o2-sensor-eshop-banner.png","category":"divesoft/","type":"image"},"imageMobile":{"recommendedSizes":{"width":"510","height":"510"}},"isLazyLoadingDisabled":false,"isTitleH1":false,"title":"DNA","subtitle":"+ O2 sensor <EAN 50","description":"Limited stock of DNA analyzers, including the R-22S Sensor, ideal for <EAN 50.","hideDescriptionOnMobile":false,"areButtons":false,"firstTitle":"Learn more >","firstUrl":{"url":"/en/products/analyzers/dna","pageId":"clf9rs5c3ltkw0835vujrrtxu"},"secondTitle":"Buy >","secondUrl":{"url":"https://eshop.divesoft.com/dna-o2-sensor-limited-edition/8504"}},"id":"#112","type":"component","lock":false,"position":4},{"name":"ProductShowcase","data":{"backgroundColor":"#ffffff","isTextDark":true,"isImageRight":false,"title":"Nitrox and Trimix Analyzers","subtitle":"","description":"The best tool for gas blenders and mixed gas scuba diving operations.","firstTitle":"Learn more >","firstUrl":{"url":"/en/products/analyzers","pageId":"cjv3rr7on00ky0836fercz490"},"secondTitle":"Buy >","secondUrl":{"url":"https://eshop.divesoft.com/products/analyzers-he-o2","urlNewWindow":true},"image":{"mimetype":"image/png","size":470151,"hash":"cdd2342ee6e00abf2e369a7e32a8fdeb8e84519b","id":"ckx3n2cq1c5zo0776nfb8u2hg","filename":"divesoft-hp-analyzer-he-o2-1080x1080.png","category":"divesoft/","type":"image"},"hideDescriptionOnMobile":false},"id":"#72","type":"component","lock":false,"position":5},{"name":"ProductShowcase","data":{"backgroundColor":"#f0f0f0","isTextDark":true,"isImageRight":true,"image":{"mimetype":"image/png","size":1301657,"hash":"43e9e651a9f52d00f08256ebeafeddc32164c11f","id":"cm737a5egjeyt08505ycj0rdm","filename":"divesoft-app-202502-01.png","category":"divesoft/","type":"image"},"imageMobile":{},"title":"Divesoft.app","subtitle":"","description":"Plan your decompression, gases, utilize checklists, check your logs, and more. All for free.","hideDescriptionOnMobile":false,"areButtons":false,"firstTitle":"Learn more >","firstUrl":{"url":"/en/app","pageId":"ckfccnc4a98bx0788f7enal83"},"secondTitle":"Configurator >","secondUrl":""},"id":"#85","type":"component","lock":false,"position":6},{"name":"ProductShowcase","data":{"backgroundColor":"#ffffff","isTextDark":true,"isImageRight":false,"image":{"mimetype":"image/png","size":1454224,"hash":"3d38321cebf48fa8622fb954568ee5e87901a701","id":"clwhgaoan12ur0776yv5h06a7","filename":"8469-divesoft-150m-primary-reel-.png","category":"divesoft/","type":"image"},"imageMobile":{},"isTitleH1":false,"title":"Reels","subtitle":"","description":"","hideDescriptionOnMobile":false,"areButtons":false,"firstTitle":"Learn more >","firstUrl":{"url":"/en/products/others/reels","pageId":"ckecknqht870l0788pd8d2qgb"},"secondTitle":"Buy >","secondUrl":{"url":"https://eshop.divesoft.com/products/reels","urlNewWindow":true}},"id":"#95","type":"component","lock":false,"position":7},{"name":"ProductShowcase","data":{"backgroundColor":"#f0f0f0","isTextDark":true,"isImageRight":true,"title":"BOV / DSV / ADV","subtitle":"","description":"Modular, reliable and robust with peak performance work of breathing. Explore our wide range of mouthpieces for CCRs and SCRs. \n\n","firstTitle":"Learn more >","firstUrl":{"url":"/en/products/bovdsvadv","pageId":"cjv7uialr03nh0836yjoz2dji"},"secondTitle":"Buy >","secondUrl":{"url":"https://eshop.divesoft.com/products/bov-dsv-adv","urlNewWindow":true},"image":{"mimetype":"image/png","size":415660,"hash":"3e2e07be8ebf739d432895dec8014fce7a43133b","id":"ckx3n4aj8c60j0776ks8af7et","filename":"divesoft-hp-bov-1080x1080.png","category":"divesoft/","type":"image"}},"id":"#74","type":"component","lock":false,"position":8},{"name":"ProductShowcase","data":{"backgroundColor":"#ffffff","isTextDark":true,"isImageRight":false,"image":{"mimetype":"image/jpeg","size":170825,"hash":"05b87adf05832c62d455ee5ff77e51a805d67033","id":"cloe6nwn5edci0776m71bhahu","filename":"3900-divesoft-mask-sentry-01.jpg","category":"divesoft/","type":"image"},"imageMobile":{},"title":"SENTRY","subtitle":"Divesoft Mask","description":"A Diverâs most essential piece of gear is a mask.","hideDescriptionOnMobile":false,"areButtons":false,"firstTitle":"Learn more >","firstUrl":{"url":"/en/products/sentry","pageId":"clo43vju8f0tz0735veqg2ois"},"secondTitle":"Buy >","secondUrl":{"url":"https://eshop.divesoft.com/sentry-mask/3900","urlNewWindow":true}},"id":"#93","type":"component","lock":false,"position":9},{"name":"ProductShowcase","data":{"backgroundColor":"#f0f0f0","isTextDark":true,"isImageRight":true,"image":{"mimetype":"image/png","size":364868,"hash":"84cbf3f53e7a468f5a7011b1c8979cdc36ed7973","id":"cloy12tjnm7g80776mdrhoku7","filename":"8460-divesoft-dna-divesoft-nitrox-analyzer-02-b.png","category":"divesoft/","type":"image"},"imageMobile":{},"title":"DNA","subtitle":"Divesoft Nitrox Analyzer","description":"An ideal and affordable tool for every Nitrox diver. An innovative, accurate, durable and user-friendly Nitrox Analyzer that fits in your pocket and connects to your smartphone via Bluetooth.","hideDescriptionOnMobile":false,"areButtons":false,"firstTitle":"Learn more >","firstUrl":{"url":"/en/products/analyzers/dna","pageId":"clf9rs5c3ltkw0835vujrrtxu"},"secondTitle":"Buy >","secondUrl":{"url":"https://eshop.divesoft.com/dna/8460","urlNewWindow":true},"isLazyLoadingDisabled":true},"id":"#94","type":"component","lock":false,"position":10},{"name":"ProductShowcase","data":{"backgroundColor":"#ffffff","isTextDark":true,"isImageRight":false,"title":"Accessories","subtitle":"","description":"Cylinders, silencers, reels & spools, and much more.","firstTitle":"Learn more >","firstUrl":{"url":"/en/products/others","pageId":"ckdsltzi07o520788tk0s6c4v"},"secondTitle":"Configurator >","secondUrl":"","image":{"mimetype":"image/png","size":317758,"hash":"c6460a2988d4f1719f447d913fb664d0ee782ba1","id":"cl7zvuipudomm07761wnx40bj","filename":"8437-divesoft-professional-flow-limiter-mk2-02t.png","category":"divesoft/","type":"image"}},"id":"#75","type":"component","lock":false,"position":11},{"name":"Footer","data":{"componentTemplateId":"cjvwimxrl08e40798hjs5ek9w"},"id":"#1","type":"component","lock":false,"position":12}],"id":"root","idBuffer":"#115","lastCommit":"291a55f4-5ea7-4083-8913-146d327a564e"}},"annotations":[],"language":{"type":"id","generated":false,"id":"Language:cjv3kwvoj000u083611381c6o","typename":"Language"},"__typename":"PageTranslation"},"Page:cjv3rpryz00iw0836lc0zx81j":{"id":"cjv3rpryz00iw0836lc0zx81j","type":{"type":"id","generated":false,"id":"PageType:cjv3l213x004f08366hjufttp","t
2ypename":"PageType"},"tags":[],"translations({\"where\":{\"language\":{\"id\":\"cjv3kwvoj000u083611381c6o\"}}})":[{"type":"id","generated":false,"id":"PageTranslation:cjv3rprzy00j60836n0q3uiiq","typename":"PageTranslation"}],"__typename":"Page"},"PageTranslation:cjv3rprzy00j60836n0q3uiiq":{"id":"cjv3rprzy00j60836n0q3uiiq","name":"CCR Liberty","createdAt":"2019-04-30T12:28:41.085Z","content":{"type":"json","json":{"content":[{"name":"Header","data":{"products":[{"title":"Accessories","description":"Backplates, Consumables. Tanks.","img":{"recommendedSizes":{"width":"235","height":"235"}},"url":""},{"title":"Accessories sets","description":"Protection, maintenance, cleaning.","img":{"recommendedSizes":{"width":"235","height":"235"}},"url":""},{"title":"Spare parts","description":"Spare parts and components.","img":{"recommendedSizes":{"width":"235","height":"235"}},"url":""},{"title":"Spare parts kits","description":"Completly Liberty spare parts kits.","img":{"recommendedSizes":{"width":"235","height":"235"}},"url":""}]},"id":"#0","type":"component","lock":false,"position":0},{"name":"ProductCrossroadNew","data":{"componentTemplateId":"cmo5ko5huwtv40889ugkkecht"},"id":"#5","type":"component","lock":false,"position":1},{"name":"HeroV2","data":{"slides":[{"recommendedSizes":{"width":"3840","height":"2560"}
2,"id":"1","title":"Liberty Rebreather:<br>Confidence at Depth.","linkTitle":"Configure","linkUrl":{"url":"/en/ccr-liberty","urlNewWindow":true,"pageId":"cl3vesldqknhj085858savf3u"},"media":{"mimetype":"image/png","size":15250843,"hash":"a4370bf677dd163632e2ded954152a1dff07dd5f","id":"cmo66mqyomz9w0800msidlztw","filename":"liberty-overview-hero-1.png","category":"divesoft/","type":"image"}},{"id":"2","media":{"mimetype":"image/png","size":8105324,"hash":"ad789360a49e161881b919dd221883ad1a8d6077","id":"cmo66mytqmza50800shwe2y7s","filename":"liberty-overview-hero-2.png","category":"divesoft/","type":"image"},"title":"Liberty Rebreather:<br>Confidence at Depth.","linkTitle":"Configure","linkUrl":{"url":"/en/ccr-liberty","urlNewWindow":true,"pageId":"cl3vesldqknhj085858savf3u"}},{"id":"3","title":"Liberty Rebreather:<br>Confidence at Depth.","linkTitle":"Configure","linkUrl":{"url":"/en/ccr-liberty","urlNewWindow":true,"pageId":"cl3vesldqknhj085858savf3u"},"media":{"mimetype":"image/png","size":15261038,"hash":"b2527dfab607b939bae853e80f78f5266b848dbe","id":"cmo66o23smzbf0800n5c8zn01","filename":"liberty-overview-hero-3.png","category":"divesoft/","type":"image"}}],"activeTab":"3"},"id":"#4","type":"component","lock":false,"position":2},{"name":"Spacer","data":{"spacingLarge":"30","spacingSmall":"80","backgroundColor":"#ffffff"},"id":"#7","type":"component","lock":false,"position":3},{"name":"ImageTextBlock","data":{"content":"## The Icon\n\nFrom the first sketch to years of real diving, Liberty CC has followed its own path. Every detail has been developed, tested and refined in demanding conditions, shaping a system that feels natural underwater and stands confidently on its own.","links":[{"title":"BUY","url":{"url":"/en/ccr-liberty","pageId":"cl3vesldqknhj085858savf3u","urlNewWindow":false},"color":"red","id":"1"},{"id":"2","title":"Dive into the architecture","url":{"url":"/en/products/ccr-liberty/architecture","pageId":"cmobadk7i007w0845l6p68v19"},"color":"black"}],"isMirrored":false,"image":{"recommendedSizes":{"width":"1500","height":"1500"},"mimetype":"image/png","size":2347663,"hash":"be5124a11be76b1e1e5e113eb82c6e5380ec5f33","id":"cmo5krhajmu7z0800jksb5hp2","filename":"liberty-overview-story-1.png","category":"divesoft/","type":"image"}},"id":"#6","type":"component","lock":false,"position":4},{"name":"ProductLineup","data":{"title":"Four Models of Liberty","products":[{"id":"3","titleBold":"Liberty","titleLight":"Sidemount","url":{"url":"https://www.divesoft.com/en/products/ccr-liberty/models#liberty-sidemount"},"image":{"mimetype":"image/png","size":1143492,"hash":"f4b4dbe3e40fe76e36bafe7cd57bb97f7ed06221","id":"cmo9uydyd0m8g0800one11q8k","filename":"render14.png","category":"divesoft/","type":"image"},"title":"LIBERTY <light>SIDEMOUNT</light>"},{"id":"2","titleBold":"Liberty","titleLight":"Backmount","url":{"url":"https://www.divesoft.com/en/products/ccr-liberty/models#liberty-backmount","urlNewWindow":false},"image":{"mimetype":"image/png","size":18029971,"hash":"b4db6afc60026766d6876337587fce897632c845","id":"cms3dpxgg0p8q08000boljrfd","filename":"bm.png","category":"divesoft/","type":"image"},"title":"LIBERTY <light>BACKMOUNT</light>"},{"id":"5","titleBold":"Liberty","titleLight":"Heavy","image":{"mimetype":"image/png","size":18915663,"hash":"c55d64ad377c6bde730d9f7b9c682b0a03bf7a3e","id":"cms3dqb280p8z0800xr2qc167","filename":"heavy.png","category":"divesoft/","type":"image"},"url":{"url":"https://www.divesoft.com/en/products/ccr-liberty/models#liberty-heavy"},"title":"LIBERTY <light>HEAVY</light>"},{"id":"4","titleBold":"Liberty","titleLight":"Light","url":{"url":"https://www.divesoft.com/en/products/ccr-liberty/models#liberty-light"},"image":{"mimetype":"image/png","size":902116,"hash":"bcdd815c30b6f23dc503851747d0970a20d5b6aa","id":"cmo9uzcp90m9h08003z0wvkqs","filename":"render13.png","category":"divesoft/","type":"image"},"title":"LIBERTY <light>LIGHT</light>"}],"activeTab":"5"},"id":"#8","type":"component","lock":false,"position":5},{"name":"CallToAction","data":{"backgroundColor":"white","isCentered":false,"title":"","links":[{"title":"Explore Liberty Models","url":{"url":"/en/products/ccr-liberty/models","pageId":"cmobadtrb008e0845wixfiasq"},"color":"black","type":"primary","id":"1"}],"linkPosition":"below","linkAlignment":"right"},"id":"#10","type":"component","lock":false,"position":6},{"name":"ImageTextBlock","data":{"content":"## Modularity\n\nLiberty is built as a modular platform. One core system adapts to Backmount, Sidemount, Light or Heavy configurations, allowing you to choose the setup that fits your diving without changing what you rely on.","links":[{"title":"Dive into the system architecture","url":{"url":"/en/products/ccr-liberty/architecture","pageId":"cmobadk7i007w0845l6p68v19"},"color":"black","id":"1"},{"id":"2","title":"Dive into the system features","url":{"url":"/en/products/ccr-liberty/features","pageId":"cmobae6lu008w0845mz8lxcd1"},"color":"black"}],"isMirrored":true,"image":{"recommendedSizes":{"width":"1500","height":"1500"},"mimetype":"image/png","size":2123106,"hash":"4d341e224eb65c78b141931c172af4efd89def26","id":"cmo5krn0bmu8b0800nzeffmyt","filename":"liberty-overview-story-2.png","category":"divesoft/","type":"image"}},"id":"#14","type":"component","lock":false,"position":7},{"name":"ImageTextBlock","data":{"content":"## Materials\n\nLiberty is built from materials selected for strength, precision and longevity. Across changing waters and demanding environments, it delivers steady, reliable performance dive after dive.","links":[],"isMirrored":false,"image":{"recommendedSizes":{"width":"1500","height":"1500"},"mimetype":"image/png","size":2448703,"hash":"16d323d8c9168ac0785fd662fe13c97717298f7f","id":"cmo5krsqkmu8r0800lzq8q3be","filename":"liberty-overview-story-3.png","category":"divesoft/","type":"image"}},"id":"#13","type":"component","lock":false,"position":8},{"name":"ImageTextBlock","data":{"content":"## Tested and Trusted\n\nCertified under EN 14143, Liberty meets European safety standards for closed-circuit rebreathers. Each unit is individually assembled and tested to ensure consistent reliability in demanding diving conditions.","links":[],"isMirrored":true,"image":{"recommendedSizes":{"width":"1500","height":"1500"}
2,"mimetype":"image/png","size":3037094,"hash":"4cff8480ff5b376b0a68efb1484b010216b92e49","id":"cmo5kry8gmu910800n4nhad87","filename":"liberty-overview-story-4.png","category":"divesoft/","type":"image"}},"id":"#12","type":"component","lock":false,"position":9},{"name":"ImageTextBlock","data":{"content":"## The Way You Dive\n\nEvery diver is different. So is every dive. Warm or cold water. Fresh or salt. Open sea, caves or wrecks. \n\nLiberty rebreather adapts to the way you dive, with configurations designed to match your style without changing the core system you trust.","links":[{"title":"Find my ideal Liberty","url":{"url":"/en/ccr-liberty","pageId":"cl3vesldqknhj085858savf3u"},"color":"red","id":"1"}],"isMirrored":false,"image":{"recommendedSizes":{"width":"1500","height":"1500"},"mimetype":"image/png","size":4106567,"hash":"9a90057abe0d0db5a50f0c55a3418c12f2c2149a","id":"cmo5ks3a5mu9b0800guy1hyw9","filename":"liberty-overview-story-5.png","category":"divesoft/","type":"image"}},"id":"#11","type":"component","lock":false,"position":10},{"name":"Showreel","data":{"isFullWidth":false,"slides":[{"title":"","isTextCentered":false,"media":{"recommendedSizes":{"width":"3840","height":"2560"},"mimetype":"image/png","size":10641615,"hash":"7d55063284dd483a4e02fb391a42e76c7e567560","id":"cmo5kr774mu7m0800cypuwabj","filename":"liberty-overview-showreel.png","category":"divesoft/","type":"image"},"autoplayDuration":5000,"id":"1"}],"activeTab":"1"},"id":"#15","type":"component","lock":false,"position":11},{"name":"Spacer","data":{"spacingLarge":"80","spacingSmall":"80","backgroundColor":"#ffffff"},"id":"#17","type":"component","lock":false,"position":12},{"name":"AccordionText","data":{"accordionTitle":"Design","content":"Liberty is built from high quality materials that ensure safety and long term \ndurability, even in the most demanding environments such as deep dives, cold water or saltwater conditions. Liberty is not just certified. It is trusted, proven through real diving experience.\n\nSafety is at the core of Libertyâs design.\nAll critical parts have a backup, allowing the rebreather to keep operating even if one part fails.\nEach part of Liberty is engineered to stay safe and functional, even when something goes wrong.\n\nEvery Liberty rebreather is built to meet the highest standards of quality â¨and safety.\n\nDeveloped and manufactured in the Czech Republic, created by divers for divers."},"id":"#16","type":"component","lock":false,"position":13},{"name":"AccordionText","data":{"accordionTitle":"How Does It Work","content":"Liberty continuously analyzes and adjusts the gas you breathe, maintaining the optimal mix of oxygen and diluent at every depth. Its intelligent control system monitors data from more than a dozen sensors â including depth, pressure, temperature and oxygen levels â to keep breathing smooth,safe and efficient.\n\nMain functions:\n\n**Real time analysis** \nThe system processes information from all sensors several times per second.\nIt automatically maintains the ideal breathing mix for minimal decompression \nand maximum comfort.\n\n**Smart oxygen control** \nLiberty injects oxygen and diluent as needed to hold the selected setpoint.\nIn case of sensor deviation, the system detects and isolates the fault \nautomatically.\n\n**Adaptive performance** \nThe control units continuously adjust to changing conditions, such as \ntemperature or workload, ensuring accurate and stable readings throughout the dive.\n\n**Complete awareness** \nTwo independent handsets display all key information in real time, giving the \ndiver full confidence and control without distraction.\nEvery part of Liberty works together to deliver one outcome â quiet, efficient and reliable breathing in every situation."},"id":"#18","type":"component","lock":false,"position":14},{"name":"AccordionText","data":{"accordionTitle":"Models","content":"All Liberty rebreathers share the same core technology, electronics and control logic. Each configuration is designed for a different style of diving â from travel and training to exploration and professional missions.\nWith optional conversion kits, you can easily switch between Backmount, Sidemount, Light and Heavy setups using a single Liberty head, HUD and handsets.\nOne platform, endless possibilities.\n\n**Backmount** \nComfortable, stable and suitable for all types of diving, from training to exploration.\n\n**Sidemount** \nA compact version for cave, wreck and travel diving.\nStreamlined and perfectly balanced for c
2onfined or restricted environments.\n\n**Light** \nA lighter configuration for divers who prefer a smaller and more travel friendly setup.\nSimple to handle and ready for everyday use.\n\n**Heavy** \nA durable configuration for longer or more demanding dives.\nDesigned for endurance, extra gas supply and reliability when it matters most.\n\nEvery configuration shares the same Liberty core, ensuring familiar controls, consistent performance and complete confidence in every dive."},"id":"#19","type":"component","lock":false,"position":15},{"name":"AccordionText","data":{"accordionTitle":"Technical Specifications","content":"All Liberty rebreathers share the same core technology, electronics and control logic. Each configuration is designed for a different style of diving â from travel and training to exploration and professional missions.\n\nWith optional conversion kits, you can easily switch between **Backmount**, **Sidemount**, **Light** and **Heavy** setups using a single Liberty head, HUD and handsets. One platform, endless possibilities."},"id":"#20","type":"component","lock":false,"position":16},{"name":"AccordionText","data":{"accordionTitle":"Connectivity","content":"**App and Connectivity** \nLiberty connects seamlessly with the Divesoft App, allowing you to manage dives, analyze data and update your system with ease.\n\nEvery dive is automatically stored, giving you a complete overview of your diving history and rebreather performance.\n\n**Wireless data transfer** \nLiberty communicates with the Divesoft App via Bluetooth, making it easy to download dive logs and share data without cables or special tools.\n\n**Dive log and analysis** \nThe app stores detailed information about each dive, including gas usage, depth profile and system performance.\nIt helps you review and understand your dives directly on your phone or tablet.\n\n**System updates** \nFirmware updates and diagnostics are handled directly through the app, keeping your rebreather always up to date and performing at its best.\n\n**Personalization** \nThe app allows you to adjust user settings, such as display preferences or setpoint configurations, so Liberty feels perfectly tuned to your diving style.\nThe connection between Liberty and the Divesoft App keeps your system organized, modern and ready for every dive."},"id":"#21","type":"component","lock":false,"position":17},{"name":"AccordionText","data":{"accordionTitle":"Maintenance & Warranty","content":"**Maintenance** \nLiberty is designed for long term use and straightforward maintenance.\nRegular service ensures consistent performance, maximum safety and a long lifespan of the system.\n\nRecommended service intervals:\n\n**Annual service** \nVisual inspection, functional testing and software updates to keep the rebreather operating at peak performance.\n\n**Three year service** \nComplete system check including O-rings, sensors, batteries and pressure tests to verify full functionality.\n\n**Five year service** \nExtended inspection of all mechanical and electronic parts, including full teardown, cleaning and replacement of key components as required.\nFollowing the recommended service plan keeps Liberty in top condition and ready for every dive."},"id":"#22","type":"component","lock":false,"position":18},{"name":"AccordionLinks","data":{"accordionTitle":"Downloads","links":[{"itemTitle":"CCR (Closed Circuit Rebreather) Liberty catalogue","linkLabel":"Open","linkUrl":{"url":"https://www.divesoft.com/en/catalogue","mediaData":{"mimetype":"application/pdf","size":12351484,"hash":"192d100e345da9a42093b2d762d98bfdbda852ee","id":"cjztebxpy00bg07767yis00wg","filename":"ccr-liberty-user-manual-en.pdf","category":"divesoft/docs/","type":"file"}},"id":"1"},{"itemTitle":"CCR Liberty manual","linkLabel":"Open","linkUrl":{"url":"/en/manuals/ccr-liberty-manual","pageId":"cl2yfnr88iba8085879y08pat"},"id":"2"},{"itemTitle":"Liberty Head Travel Card","linkLabel":"Download","linkUrl":{"url":"https://foxer360-media-library.s3.eu-central-1.amazonaws.com/divesoft/docs/fe4ac509accaf398463de5991dcd3911
272eff6ac_liberty-head-travel-card.pdf"},"id":"3"},{"id":"4","itemTitle":"CE Certificate","linkLabel":"Download","linkUrl":{"url":"http://foxer360-media-library.s3.eu-central-1.amazonaws.com/divesoft/docs/fbffa38fbe29542d87ed7a2dfe99e836397998b8_cw-pper-1-04-2025-module-beng.pdf"}},{"id":"5","itemTitle":"CE Certificate - Sidemount","linkLabel":"Download","linkUrl":{"url":"http://foxer360-media-library.s3.eu-central-1.amazonaws.com/divesoft/docs/5c368ce070cf7a6be3c256b75ecdc2db335791c9_cw-pper-2-04-2025-module-b-eng.pdf"}},{"id":"6","linkUrl":{"url":"http://foxer360-media-library.s3.eu-central-1.amazonaws.com/divesoft/docs/5c1ef7448ed48df14a57f94c01bbb9c02ffa9384_form9-pcw-01-pper-certyfikat-zg-odnosci-z-typem-w-oparciu-o-zapewnienie-jakosci-procesu-produkcj-i-modul-d-edycja-20241126.pdf"},"linkLabel":"Download","itemTitle":"PPE Module D Certificate"},{"id":"7","itemTitle":"CCR Liberty Spare parts catalogue","linkUrl":{"url":"http://foxer360-media-library.s3.eu-central-1.amazonaws.com/divesoft/docs/5ca7a24bc6fa2989311cc5af2e50bf28e6a0524e_ccr-liberty-spare-parts-v14.PDF","mediaData":{"mimetype":"application/pdf","size":25249945,"hash":"5ca7a24bc6fa2989311cc5af2e50bf28e6a0524e","id":"cmpv90wfvaqhk0800fmzsyl6g","filename":"ccr-liberty-spare-parts-v14.PDF","category":"divesoft/docs/","type":"file"}}}],"storesTitle":"Divesoft App","appStoreLink":{"url":""},"googlePlayLink":{"url":""},"activeTab":"7"},"id":"#23","type":"component","lock":false,"position":19},{"name":"CallToAction","data":{"backgroundColor":"white","isCentered":true,"title":"","links":[{"title":"Shop","url":{"url":"/en/ccr-liberty","urlNewWindow":true,"pageId":"cl3vesldqknhj085858savf3u"},"color":"black","type":"outline","id":"1"}],"linkPosition":"below","linkAlignment":"right","activeTab":"1"},"id":"#24","type":"component","lock":false,"position":20},{"name":"CallToAction","data":{"componentTemplateId":"cmo9u6bhwy5g90889gprzyxzf"},"id":"#25","type":"component","lock":false,"position":21},{"name":"Footer","data":{"copyrights":"Copyright © 2019 Divesoft LLC All rights reserved.","facebookUrl":"","youtubeUrl":"","instagramUrl":"","contacts":"**Divesoft, s.r.o.** Hálkova 2495 413 01 Roudnice nad Labem Äeská republika Tel.: +420 416 857 057 E-mail: [email protected]"},"id":"#1","type":"component","lock":false,"position":25}],"id":"root","idBuffer":"#26","lastCommit":"0169f24b-ad66-46b0-8be9-dec4514c7908"}},"annotations":[],"language":{"type":"id","generated":false,"id":"Language:cjv3kwvoj000u083611381c6o","typename":"Language"},"__typename":"PageTranslation"},"Page:cjv3rr7on00ky0836fercz490":{"id":"cjv3rr7on00ky0836fercz490","type":{"type":"id","generated":false,"id":"PageType:cjv3l213x004f08366hjufttp","typename":"PageType"},"tags":[],"translations({\"where\":{\"language\":{\"id\":\"cjv3kwvoj000u083611381c6o\"}}})":[{"type":"id","generated":false,"id":"PageTranslation:cjv3rr7p800l80836vpbcvhmy","typename":"PageTranslation"}],"__typename":"Page"},"PageTranslation:cjv3rr7p800l80836vpbcvhmy":{"id":"cjv3rr7p800l80836vpbcvhmy","name":"Analyzers","createdAt":"2019-04-30T12:29:48.091Z","content":{"type":"json","json":{"content":[{"name":"Header","data":{"products":[{"title":"Accessories","description":"Backplates, Consumables. Tanks.","img":{"recommendedSizes":{"width":"235","height":"235"}},"url":""},{"title":"Accessories sets","description":"Protection, maintenance, cleaning.","img":{"recommendedSizes":{"width":"235","height":"235"}},"url":""},{"title":"Spare parts","description":"Spare parts and components.","img":{"recommendedSizes":{"width":"235","height":"235"}},"url":""},{"title":"Spare parts kits","description":"Completly Liberty spare parts kits.","img":{"recommendedSizes":{"width":"235","height":"235"}},"url":""}],"showScrollIndicator":true},"id":"#0","type":"component","lock":false,"position":0},{"name":"ProductCrossroadNew","data":{"componentTemplateId":"cmo3f1kzkw8pd0889hxoow8p1"},"id":"#17","type":"component","lock":false,"position":1},{"name":"HeroV2","data":{"slides":[{"recommendedSizes":{"width":"3840","height":"2560"}
2,"id":"1","media":{"mimetype":"image/png","size":6492549,"hash":"ef500361f469944dd95409797de112f56c5ae7ca","id":"cmo2oa08pmg110800jt46u0r2","filename":"banneroverview.png","category":"divesoft/","type":"image"},"title":"Gas Analyzers: Analyze<br>Your Breathing Gas<br>with Confidence.","productName":"","linkUrl":{"url":"https://eshop.divesoft.com/products/analyzers","urlNewWindow":true},"linkTitle":"Buy"}],"activeTab":"1"},"id":"#2","type":"component","lock":false,"position":2},{"name":"Spacer","data":{"spacingLarge":"30","spacingSmall":"80","backgroundColor":"#ffffff"},"id":"#4","type":"component","lock":false,"position":3},{"name":"ImageTextBlock","data":{"content":"## Choose Your Analyzer\n\nFrom compact travel analyzers to professional gas-blending tools, Divesoft analyzers help divers and dive centers verify breathing gas mixes quickly, accurately and safely.\n\nFive analyzers designed for different diving needs.","links":[{"title":"BUY","url":{"url":"https://eshop.divesoft.com/products/analyzers","urlNewWindow":true},"color":"red","id":"1"},{"id":"2","title":"Dive in","url":{"url":"#which-analyzer-is-right-for-you"},"color":"black"}],"isMirrored":false,"image":{"recommendedSizes":{"width":"1500","height":"1500"},"mimetype":"image/png","size":2217305,"hash":"489195db68b70faf34d5155d06556f82971f88de","id":"cmo2oc3qsmg2m0800encqrubm","filename":"pribeh1.png","category":"divesoft/","type":"image"}},"id":"#3","type":"component","lock":false,"position":4},{"name":"ProductLineup","data":{"title":"Divesoft Analyzers","products":[{"titleBold":"DNA","titleLight":"","image":{"recommendedSizes":{"width":"450","height":"450"},"mimetype":"image/svg+xml","size":37481,"hash":"b0e8090b1766da297b6fd2b2d542f4848b3efef4","id":"cmohdmspt2xo50800ed5qrtft","filename":"dna-oprava.svg","category":"divesoft/","type":"image"},"url":{"url":"/en/products/analyzers/dna","pageId":"clf9rs5c3ltkw0835vujrrtxu"},"id":"1","title":"DNA"},{"id":"2","titleBold":"SOLO O<sub>2</sub>","url":{"url":"/en/products/analyzers/analyzer-solo-o2","pageId":"ckx60balw01yz0858sye1ixvu"},"image":{"mimetype":"image/png","size":23630,"hash":"ecce52b87bc8c562b3456bead026a14aa0927b13","id":"cmo3dy1r5mnio080014hqgwoc","filename":"solo-o2-outline.png","category":"divesoft/","type":"image"},"title":"SOLO O<sub>2</sub>"},{"id":"3","titleBold":"SOLO","url":{"url":"/en/products/analyzers/analyzer-solo","pageId":"cjztim1kk09fg0777nv63tf9b"},"image":{"mimetype":"image/png","size":23124,"hash":"4f5b8cda72c8f84a97a80c470dd0c94fcc21d418","id":"cmo3dx91imni808001wauvoj4","filename":"solo-outline.png","category":"divesoft/","type":"image","alt":"SOLO"},"title":"SOLO"},{"id":"4","titleBold":"ECHO","url":{"url":"/en/products/analyzers/echo","pageId":"cmob9m7vo00jq0845h8du74gd"},"image":{"mimetype":"image/svg+xml","size":52349,"hash":"8be3677326a59ab1218fca81750f7a64b2bb5ed3","id":"cmod5kttp1ydr08003gywdlat","filename":"echo-analyzers-overview-center.svg","category":"divesoft/","type":"image"},"title":"ECHO"},{"id":"5","titleBold":"He/O<sub>2</sub>","url":{"url":"/en/products/analyzers/analyzer-he-o2","pageId":"cjztilv3509et0777ejgtlm67"},"image":{"mimetype":"image/png","size":18301,"hash":"60aba7e7c16a54a6b6f0d7f9b9068980924bcebe","id":"cmob5du6c122h0800hjy49kpl","filename":"he-o2-outline.png","category":"divesoft/","type":"image"},"title":"He/O<sub>2</sub>"}]},"id":"#5","type":"component","lock":false,"position":5},{"name":"LinkAnchor","data":{"anchorId":"which-analyzer-is-right-for-you"},"id":"#18","type":"component","lock":false,"position":6},{"name":"ProductDecisionTable","data":{"title":"Which Analyzer â¨Is Right for You?","subtitle":"Different analyzers are designed for different diving tasks. This quick guide helps you choose the right one.","tableType":"analyzers"},"id":"#6","type":"component","lock":false,"position":7},{"name":"LinkAnchor","data":{"anchorId":"dna"},"id":"#19","type":"component","lock":false,"position":8},{"name":"CarouselTextBlock","data":{"title":"DNA","subtitle":"Fits in Your Pocket","contentText":"A compact oxygen analyzer designed for divers who want a lightweight solution for nitrox verification and travel diving.\n\n- \\> oxygen analysis\n- \\> smartphone connection via Divesoft App\n- \\> pocket-size design","buttonTitle":"","buttonUrl":{"url":""},"linkTitle":"Explore DNA","linkUrl":{"url":"/en/products/analyzers/dna","pageId":"clf9rs5c3ltkw0835vujrrtxu"},"images":[{"image":{"recommendedSizes":{"width":"1500","height":"1000"},"mimetype":"image/png","size":612786,"hash":"be439372b2a08686d434d528bf2c8e03985ceec0","id":"cmob5zjwg12j90800xe6rr435","filename":"dna1.png","category":"divesoft/","type":"image"}
2,"id":"1"},{"id":"2","image":{"mimetype":"image/png","size":258728,"hash":"4e31205ba3bf3ea64190cc772cb1f1d795c1cb4f","id":"cmob5zu0j12jv0800cvcvd21k","filename":"dna2.png","category":"divesoft/","type":"image"}},{"id":"3","image":{"mimetype":"image/png","size":429549,"hash":"f46ad5d6fde22fa9f82b935e7e0aafe546156023","id":"cmob60y4s12k508002zskwcsz","filename":"dna3.png","category":"divesoft/","type":"image"}},{"id":"4","image":{"mimetype":"image/png","size":949734,"hash":"f2ebe944a2fea66f01b9d8734b4a5cd8cd376ec5","id":"cmob615b112kf0800i30id418","filename":"dna4.png","category":"divesoft/","type":"image"}}],"activeTab":"5"},"id":"#9","type":"component","lock":false,"position":9},{"name":"LinkAnchor","data":{"anchorId":"solo-o2"},"id":"#20","type":"component","lock":false,"position":10},{"name":"CarouselTextBlock","data":{"title":"SOLO O<sub>2</sub>","subtitle":"Simple Oxygen Analysis","contentText":"A standalone nitrox analyzer designed for divers and dive centers who want a simple and reliable tool for verifying oxygen content in breathing gas mixes.\n\n- \\> clear OLED display\n- \\> simple operation\n- \\> upgradeable to SOLO trimix analyzer","buttonTitle":"","buttonUrl":{},"linkTitle":"Explore SOLO 0<sub>2</sub>","linkUrl":{"url":"/en/products/analyzers/analyzer-solo-o2","pageId":"ckx60balw01yz0858sye1ixvu"},"images":[{"image":{"recommendedSizes":{"width":"1500","height":"1000"},"mimetype":"image/png","size":730722,"hash":"2c9fe3bc4e6c28fc0b0792b814acb4be4d9025b7","id":"cmob5yb7c12hv0800mgtspgsx","filename":"solo21.png","category":"divesoft/","type":"image"},"id":"1"},{"id":"2","image":{"mimetype":"image/png","size":355793,"hash":"8e950378bf94e033d099f20f1682fb55d1bc0a07","id":"cmob5yjli12if0800g1z390zs","filename":"solo22.png","category":"divesoft/","type":"image"}},{"id":"3","image":{"mimetype":"image/png","size":493466,"hash":"d668958da5664d518349c07e5643e811db3e25aa","id":"cmob5yq9l12ip0800fg9o6lud","filename":"solo23.png","category":"divesoft/","type":"image"}},{"id":"4","image":{"mimetype":"image/png","size":1008315,"hash":"bd160a3799263035c4c10c9703a7060eef356dbf","id":"cmob5yy2m12iz08007mz4qp9h","filename":"solo24.png","category":"divesoft/","type":"image"}}],"backgroundColor":"white"},"id":"#10","type":"component","lock":false,"position":11},{"name":"LinkAnchor","data":{"anchorId":"solo"},"id":"#21","type":"component","lock":false,"position":12},{"name":"CarouselTextBlock","data":{"title":"SOLO","subtitle":"Built for Trimix","contentText":"A reliable trimix analyzer designed for oxygen and helium analysis in diving gas mixes.\n\n- \\> oxygen and helium analysis\n- \\> standalone display\n- \\> gas purity measurement","buttonTitle":"","buttonUrl":{},"linkTitle":"Explore SOLO","linkUrl":{"url":"/en/products/analyzers/analyzer-solo","pageId":"cjztim1kk09fg0777nv63tf9b"},"images":[{"image":{"recommendedSizes":{"width":"1500","height":"1000"},"mimetype":"image/png","size":655697,"hash":"8d6d74388e0bfbc79a3927e20747fd8266d0d1bf","id":"cmob61zet12l00800kib0i8tr","filename":"solo1.png","category":"divesoft/","type":"image"},"id":"1"},{"id":"2","image":{"mimetype":"image/png","size":332614,"hash":"e165546a08305c0218fb85b4121e9d92ef382823","id":"cmob625pl12li08005gv5kyaw","filename":"solo2.png","category":"divesoft/","type":"image"}},{"id":"3","image":{"mimetype":"image/png","size":420725,"hash":"c27b675cd93377bda4ea3005a0a59f74740134f2","id":"cmob62cmw12lx0800vk8lrtyd","filename":"solo3.png","category":"divesoft/","type":"image"}},{"id":"4","image":{"mimetype":"image/png","size":1075960,"hash":"2882aa8429e048a76f7fca99cae381392295996a","id":"cmob62kuo12m60800msml6zas","filename":"solo4.png","category":"divesoft/","type":"image"}}],"activeTab":"4"},"id":"#11","type":"component","lock":false,"position":13},{"name":"LinkAnchor","data":{"anchorId":"echo"},"id":"#22","type":"component","lock":false,"position":14},{"name":"CarouselTextBlock","data":{"title":"ECHO","subtitle":"The Original","contentText":"A next-generation scuba gas analyzer combining oxygen, helium and carbon monoxide detection for advanced gas safety.\n\n- \\> oxygen and helium analysis\n- \\> carbon monoxide detection\n- \\> gas label printing","buttonTitle":"","buttonUrl":{},"linkTitle":"Explore ECHO","linkUrl":{"url":"/en/products/analyzers/echo","pageId":"cmob9m7vo00jq0845h8du74gd"},"images":[{"image":{"recommendedSizes":{"width":"1500","height":"1000"},"mimetype":"image/png","size":223786,"hash":"54f36146f8b6aac583c47760bbceeea5d93cde76","id":"cmob63keu12n90800w3rethoh","filename":"echo1.png","category":"divesoft/","type":"image"}
2,"id":"1"},{"id":"2","image":{"mimetype":"image/png","size":129462,"hash":"8f11835178a7a30a994794c239469c440b57c734","id":"cmob63q3y12nq0800g01qzzqx","filename":"echo2.png","category":"divesoft/","type":"image"}},{"id":"3","image":{"mimetype":"image/png","size":230428,"hash":"356eb764b55215dec3795bb880f2e6accf63fd9c","id":"cmob63vum12o00800tq9d52qb","filename":"echo3.png","category":"divesoft/","type":"image"}},{"id":"4","image":{"mimetype":"image/png","size":316674,"hash":"39ca130dd6bf8b31fada311096b2f08835a6e45f","id":"cmob644cg12oa0800fljv8s0n","filename":"echo4.png","category":"divesoft/","type":"image"}}],"activeTab":"5","backgroundColor":"white"},"id":"#12","type":"component","lock":false,"position":15},{"name":"LinkAnchor","data":{"anchorId":"he-o2"},"id":"#23","type":"component","lock":false,"position":16},{"name":"CarouselTextBlock","data":{"backgroundColor":"silver","title":"He/O<sub>2</sub>","subtitle":"Proven and Trusted","contentText":"A professional helium and oxygen analyzer designed for gas blending and advanced gas analysis.\n\n- \\> oxygen and helium analysis\n- \\> gas mixing tools\n- \\> gas purity measurement\n- \\> continuous analysis","buttonTitle":"","buttonUrl":{"url":""},"linkTitle":"Explore He/O<sub>2</sub>","linkUrl":{"url":"/en/products/analyzers/analyzer-he-o2","pageId":"cjztilv3509et0777ejgtlm67"},"images":[{"image":{"recommendedSizes":{"width":"1500","height":"1000"},"mimetype":"image/png","size":765312,"hash":"8e05c1160b97cfa7486288699867d438ff365a32","id":"cmob64sji12ok0800qib3o75o","filename":"he1.png","category":"divesoft/","type":"image"},"id":"1"},{"id":"2","image":{"mimetype":"image/png","size":453854,"hash":"6e86025673182f049e97e34580eb2c66f78a543a","id":"cmob64ybo12p20800reyue5nf","filename":"he2.png","category":"divesoft/","type":"image"}},{"id":"3","image":{"mimetype":"image/png","size":484207,"hash":"41bde2046c22897f2aa458081fa32b47569cd2f4","id":"cmob659dl12pc0800unwe8ey5","filename":"he3.png","category":"divesoft/","type":"image"}},{"id":"4","image":{"mimetype":"image/png","size":1098228,"hash":"5c522496cff2d00ca7909ba84af3d3bc236f3451","id":"cmob65ff412pq0800cj6gwdl6","filename":"he4.png","category":"divesoft/","type":"image"}}]},"id":"#14","type":"component","lock":false,"position":17},{"name":"CallToAction","data":{"backgroundColor":"white","isCentered":true,"title":"Ready to Analyze<br>Your Gas?","links":[{"title":"Find Your Dealer","url":{"url":"/en/dealers","pageId":"ck9v8ad582urj0788pmspzwzi"},"color":"black","type":"outline","id":"1"}],"linkPosition":"below","linkAlignment":"right"},"id":"#15","type":"component","lock":false,"position":18},{"name":"CallToAction","data":{"componentTemplateId":"cmo9u6bhwy5g90889gprzyxzf"},"id":"#16","type":"component","lock":false,"position":19},{"name":"Footer","data":{"copyrights":"Copyright © 2019 Divesoft LLC All rights reserved.","facebookUrl":"","youtubeUrl":"","instagramUrl":"","contacts":"**Divesoft, s.r.o.** Hálkova 2495 413 01 Roudnice nad Labem Äeská republika Tel.: +420 416 857 057 E-mail: [email protected]"},"id":"#1","type":"component","lock":false,"position":23}],"id":"root","idBuffer":"#24","lastCommit":"f7f91c25-51df-4601-bf8d-5d7396deb876"}},"annotations":[],"language":{"type":"id","generated":false,"id":"Language:cjv3kwvoj000u083611381c6o","typename":"Language"},"__typename":"PageTranslation"},"Page:cjv3rrgwi00ll0836rvjysah5":{"id":"cjv3rrgwi00ll0836rvjysah5","type":{"type":"id","generated":false,"id":"PageType:cjv3l213x004f08366hjufttp","typename":"PageType"},"tags":[],"translations({\"where\":{\"language\":{\"id\":\"cjv3kwvoj000u083611381c6o\"}}})":[{"type":"id","generated":false,"id":"PageTranslation:cjv3rrgx400lv083616ukdf1p","typename":"PageTranslation"}],"__typename":"Page"},"PageTranslation:cjv3rrgx400lv083616ukdf1p":{"id":"cjv3rrgx400lv083616ukdf1p","name":"Downloads","createdAt":"2019-04-30T12:30:00.039Z","content":{"type":"json","json":{"content":[{"name":"Header","data":{"componentTemplateId":"cjv7yndru048c0836j99ljogw"},"id":"#0","type":"component","lock":false,"position":0},{"name":"ProductCrossroadNew","data":{"variant":"simpleRed","products":[{"title":"KNOWLEDGE BASE","url":{"url":"https://support.divesoft.com/","urlNewWindow":true},"image":{"recommendedSizes":{"width":"200","height":"200"}},"id":"1"},{"title":"DOWNLOADS","url":{"url":"/en/support","pageId":"cjv3rrgwi00ll0836rvjysah5"},"image":{"recommendedSizes":{"width":"200","height":"200"}},"id":"2"}]},"id":"#46","type":"component","lock":false,"position":1},{"name":"LinkCrossroad","data":{"title":"Downloads","subtitle":"","showBreadcrumbs":false,"hideHeader":false,"firstTitle":"Choose Product","firstColumn":"1","firstLinks":[{"title":"CCR Liberty Rebreather","url":{"url":"/en/support/ccr-liberty-rebreather","pageId":"cl0uxg68ubwow08586hqi9bnj"},"anchor":"","id":"1"},{"id":"2","title":"Analyzers","url":{"url":"/en/downloads/analyzers","pageId":"cl0w69wstc3wt0858zwwhc4rn"}},{"id":"3","title":"Freedom Computers","url":{"url":"/en/support/freedom-computers","pageId":"cl0w9d15gc4bs0858x46etqax"}},{"id":"8","title":"Divesoft.app","url":{"url":"/en/support/divesoft.app","pageId":"cm1j7dd3t588s0817fj01jh0k"}},{"id":"6","title":"BOV","url":{"url":"/en/support/bov","pageId":"clpi7kucdm37e0735u15o8rfy"}},{"id":"9","title":"Flow limiter","url":{"url":"/en/support/flow-limiters","pageId":"cm6p1pmdr3t6a0803fv915pka"}},{"id":"7","url":{"url":"/en/support/other-documents","pageId":"clywzcl9jy02r07350uek6rob"},"title":"Service/other documents"}
2,{"id":"10","title":"FAQ","url":{"url":"/en/downloads/faq","pageId":"cjv3rrnkp00m80836ezb6g5y6"}}],"secondTitle":"","secondColumn":"2","secondLinks":[{"title":"Contact Support","url":{"url":"/en/contacts/contact-us","pageId":"cka6kn4hd3ahh0788k20h9ayy"},"anchor":"","id":"1"},{"id":"3","title":"Service Points","url":{"url":"https://www.divesoft.com/en/service-points"}}],"thirdTitle":"","thirdColumn":"1","thirdLinks":[],"fourthTitle":"","fourthColumn":"1","fourthLinks":[],"fifthTitle":"","fifthColumn":"1","fifthLinks":[],"isTitleH1":true,"activeTab":"10"},"id":"#36","type":"component","lock":false,"position":2},{"name":"HubSpotForm","data":{"backgroundColor":"#ffffff","isTitleH1":false,"title":"Contact support","subtitle":"Need service or support? Start your request online, and we'll find a solution for you. If your product requires a service operation, you can expedite the process by contacting your nearest service technician directly. This way, you'll ensure a quicker and more efficient service for your device.","showBreadcrumbs":false,"hideHeader":false,"portalId":"145642557","formId":"4b764781-6745-422e-90a8-65ca2861d8a7"},"id":"#45","type":"component","lock":false,"position":8},{"name":"Footer","data":{"componentTemplateId":"cjvwimxrl08e40798hjs5ek9w"},"id":"#1","type":"component","lock":false,"position":9}],"id":"root","idBuffer":"#47","lastCommit":"b80ee146-938e-41d0-ac1e-a8cf100142c7"}},"annotations":[],"language":{"type":"id","generated":false,"id":"Language:cjv3kwvoj000u083611381c6o","typename":"Language"},"__typename":"PageTranslation"},"Page:cjv3rrnkp00m80836ezb6g5y6":{"id":"cjv3rrnkp00m80836ezb6g5y6","type":{"type":"id","generated":false,"id":"PageType:cjv3l213x004f08366hjufttp","typename":"PageType"},"tags":[],"translations({\"where\":{\"language\":{\"id\":\"cjv3kwvoj000u083611381c6o\"}}})":[{"type":"id","generated":false,"id":"PageTranslation:cjv3rrnl700mi0836simbltcq","typename":"PageTranslation"}],"__typename":"Page"},"PageTranslation:cjv3rrnl700mi0836simbltcq":{"id":"cjv3rrnl700mi0836simbltcq","name":"FAQ","createdAt":"2019-04-30T12:30:08.683Z","content":{"type":"json","json":{"content":[{"name":"Header","data":{"componentTemplateId":"cjv7yndru048c0836j99ljogw"},"id":"#0","type":"component","lock":false,"position":0},{"name":"LinkCrossroad","data":{"title":"FAQ","subtitle":"","showBreadcrumbs":true,"hideHeader":false,"firstTitle":"CCR Liberty Rebreather","firstColumn":"1","firstLinks":[{"title":"Frequent Questions","url":"","anchor":"ccr-liberty-frequent-questions","id":"1"},{"id":"2","title":"Purchase & Training","anchor":"ccr-liberty-purchase-and-training"},{"id":"3","title":"Unit Configuration","anchor":"ccr-liberty-unit-configuration"},{"id":"4","title":"Technical Questions","anchor":"ccr-liberty-technical-questions"},{"id":"5","title":"Maintenance Tips","anchor":"ccr-liberty-maintenance-tips"},{"id":"6","title":"Troubleshooting","anchor":"ccr-liberty-troubleshooting"},{"id":"7","title":"Travelling with Rebreathers","anchor":"ccr-liberty-travelling-with-rebreathers"}],"secondTitle":"Analyzers","secondColumn":"2","secondLinks":[{"id":"1","title":"Frequent Questions","anchor":"analyzers-frequent-questions"}],"thirdTitle":"Freedom Computers","thirdColumn":"2","thirdLinks":[{"title":"Frequent Questions","url":"","anchor":"freedom-computers-frequent-questions","id":"1"}],"fourthTitle":"Flow Limiter","fourthColumn":"2","fourthLinks":[{"title":"Frequent Questions","url":"","anchor":"flow-limiter-frequent-questions","id":"1"}],"fifthTitle":"","fifthColumn":"1","fifthLinks":[],"isTitleH1":true},"id":"#37","type":"component","lock":false,"position":1},{"name":"Spacer","data":{"spacingLarge":"20","spacingSmall":20,"backgroundColor":"#f0f0f0"},"id":"#38","type":"component","lock":false,"position":2},{"name":"LinkAnchor","data":{"anchorId":"ccr-liberty-frequent-questions"},"id":"#49","type":"component","lock":false,"position":7},{"name":"FaqNew","data":{"backgroundColor":"#ffffff","title":"Frequent Questions","subtitle":"CCR Liberty Rebreather","showBreadcrumbs":false,"hideHeader":false,"questions":[{"id":"1","question":"What are the main advantages of the Liberty rebreather?","answer":"The Liberty rebreather presents a unique system that has been designed to be fully fault tolerant, meaning that the system has built in electronic redundancies. Our primary concern was to build a rebreather system that will enable the diver to safely conduct the dive and will be able to return on the unit.\n\nNo single malfunction in the electronic system can cause a complete system failure.\n\nUnit contains: 4 oxygen sensors, 2 helium sensors, 2 methods of pO2 measuring, 2 independent computers, 2 solenoid valves, 4 displays. Everything is individually sealed.\n\nThe Liberty rebreather is depth limited at 170m (557ft) due to the use of the Apeks DST4 Env
2ironmentally sealed 1st stage regulators. It is recommended that to dive beyond 170M (557ft) the Apeks DST4 1st stages MUST be changed with the Apeks UST4 kit. All components of the Liberty apart from the 1st stages are pressure tested to 600m. In conjunction with the Liberty robust construction the unit also exhibits one of the industryâs best work-of-breathing of rebreathers.\n\nThe Liberty rebreather has many variations you can choose and configure. The unit can be easily configured for multiple variations; backmount or sidemount, for optimal dive configurations for each dive environment. With a simple conversion kit the user can go from a backmount configuration to a sidemount configuration.\n\nWatch our introducing video about Liberty rebreather and its advantages [here](https://www.youtube.com/watch?v=0sQhlBrMeAw)."},{"id":"2","question":"Work of breathing?","answer":"Thanks to the careful design of all parts of the breathing loop, the Liberty has extraordinarily low breathing resistance. No off-the-shelf pipe fittings or piping components are used in the Liberty â everything is specially manufactured precisely according to calculations, simulations and test results. Please read our brief articles click [here](/en/products/ccr-liberty). The Liberty FMCL WOB is 2.16 J/l at 40m, air diluent. And 1.58 J/l at 100m, heliox 10/90."},{"id":"3","question":"Why two computers?","answer":"Having two computers provides redundancy in the unlikely scenario should there be a failure in one computer, the other computer will be able to completely maintain your decompression schedule and maintain proper PO2 measurement. Other rebreather platforms contain a single computer to which if there was any failure the system will be unable to manage decompression as well as drive solenoids to maintain proper PO2 thus bail-out is necessary.\n\nClick [here](/en/products/ccr-liberty) for control systems article."},{"id":"4","question":"Isnât Liberty a technical overkill?","answer":"What Divesoft has done with the Liberty is to design a system from the bottom up to properly engineer a rebreather to sufficiently accommodate the requirements to avoid a single component failure. Technical diving demands redundancy and backups. Previously designed rebreather platforms where unable to avoid single part failures either with gas injection with a single solenoid, or single point PO2 monitoring with using only Oxygen cells.\n\nTechnical diving with closed circuit rebreathers can be a strenuous activity but without proper equipment, it can be a dangerous sport. The Liberty rebreather is designed to be fault-tolerant, which means that no single malfunction in the electronic system can cause a catastrophic failure of the whole system rendering the unit to be un-useable.\n\nFor more information click [here](/en/products/ccr-liberty/ccr-liberty-redundancy)."},{"id":"5","question":"Where and by whom is it built?","answer":"The Liberty rebreather is manufactured by Liberty systems, a sister company of Divesoft. The Liberty is built in our state-of-the-art facility in Roudnice nad Labem which is located in the northern part of the Czech Republic, just a few kilometers north of Prague.\n\nClick [here](https://www.youtube.com/watch?v=9mf5YEINadk) for a quick video of our factory."},{"id":"6","question":"What FW/Software/Algorithm is Liberty using?","answer":"We wrote our own software. We are using our own electronics as well. We are using upgraded Bühlmann ZHL-16B algorithm with gradient factors and ceilings. All is built and set in our own, state-of-the-art factory in the Czech Republic.\n\nWe are still growing, and so does the software of Liberty. FW updates are free of charge and you can easily read description of these changes on release notes or download new firmware version [here](/en/products/ccr-liberty/firmaware)."},{"id":"7","question":"What algorithm is Liberty using?","answer":"Bühlmann 16-ZHL/b with gradient factor and ceilings."},{"id":"8","question":"Can I connect my Shearwater?","answer":"No, in order to properly protect the electronics, the two main computers are environmentally sealed, preventing any hook up of external
2computers such as a Shearwater. Although, non-connected external computers are encouraged to be used as a secondary fixed PPO2 monitoring device.\n"},{"id":"9","question":"Is there any literature referring to Liberty?","answer":"You can see our [manual](/en/products/ccr-liberty/manuals), [YouTube channel](https://www.youtube.com/channel/UCHI2-kHmfoUlAdhQXPKl8lA), [Facebook](https://www.facebook.com/divesoft/), [Configurator](https://ccrliberty.com) or [read references](/en/products/ccr-liberty) from professional divers."},{"id":"10","question":"What about some videos I can check out?","answer":"We have a YouTube channel where users can find videos about diving, tutorials, maintenance and much more.. Please click [here](https://www.youtube.com/channel/UCHI2-kHmfoUlAdhQXPKl8lA)."}],"activeTab":"10"},"id":"#27","type":"component","lock":false,"position":8},{"name":"DownloadsNew","data":{"backgroundColor":"#ffffff","isTitleH1":false,"title":"","subtitle":"No time to read? No worries. Watch the videos below and learn more about CCR diving from our Divesoft brand ambassadors.","showBreadcrumbs":false,"hideHeader":false,"files":[{"title":"How would you advise someone when first selecting a CCR instructor?","isTitleBold":false,"subtitle":"Jill Heinerth answers in the video.","url":{"url":"https://www.youtube.com/watch?v=0bYjDXPjYHE","urlNewWindow":true},"urlText":"Watch here","id":"1"},{"id":"2","title":"What kind of possibilities does rebreather diving open up for us?","subtitle":"Stéphan Senécal answers in the video.","url":{"url":"https://www.youtube.com/watch?v=8ZAHt_HH60Y","urlNewWindow":true},"urlText":"Watch here"},{"id":"3","title":"What do you find to be the biggest difference between diving backmount and sidemount besides the configuration?","subtitle":"Becky Kagan Schott answers in the video.","url":{"url":"https://www.youtube.com/watch?v=r8x-zxU9j8k","urlNewWindow":true},"urlText":"Watch here"},{"id":"4","title":"Why did you start diving CCR over OC as your primary system?","subtitle":"PJ Prinsloo answers in the video.","url":{"url":"https://www.youtube.com/watch?v=NSOCYhCL_p8","urlNewWindow":true},"urlText":"Watch here"},{"id":"5","title":"What kind of experience should a diver have before beginning a rebreather course?","subtitle":"Edd Stockdale answers in the video.","url":{"url":"https://www.youtube.com/watch?v=noLXLduf9lM","urlNewWindow":true},"urlText":"Watch here"},{"id":"6","title":"What advice would you give to your younger self who just began with CCR diving?","subtitle":"Jeff Bozanic answers in the video.","url":{"url":"https://www.youtube.com/watch?v=Q8QkAdMMdlY","urlNewWindow":true},"urlText":"Watch here"},{"id":"7","title":"What should one consider when choosing the right CCR?","subtitle":"Pim van der Horst answers in the video.","url":{"url":"https://www.youtube.com/watch?v=mNi2pm23fLk","urlNewWindow":true},"urlText":"Watch here"},{"id":"8","title":"Why do you prefer diving a rebreather over open circuit scubafor cave diving?","subtitle":"Marissa Eckert answers in the video.","url":{"urlNewWindow":true,"url":"https://www.youtube.com/watch?v=6j7-q2U_W80"},"urlText":"Watch here"},{"id":"9","title":"Which tec diving magazine is the best in the world?","subtitle":"Michael Menduno answers in the video.","url":{"url":"https://www.youtube.com/watch?v=L4FjOrcUkd4","urlNewWindow":true},"urlText":"Watch here"}],"activeTab":"9"},"id":"#59","type":"component","lock":false,"position":9},{"name":"LinkAnchor","data":{"anchorId":"ccr-liberty-purchase-and-training"},"id":"#47","type":"component","lock":false,"position":11},{"name":"FaqNew","data":{"backgroundColor":"#ffffff","title":"Purchase & Training","subtitle":"CCR Liberty Rebreather","showBreadcrumbs":false,"hideHeader":false,"questions":[{"id":"1","question":"I am small/tall, will the unit fit me?","answer":"We have 4 different types of stands, three backplates, three different wings, three unit set-ups that we can configure for each individual diver in order to find the best way to fit the Liberty to you. You can size yourself to a unit with one of your local instructors during a DEMO event or get in touch with us directly."},{"id":"2","question":"Do you have Backmounted configuration?","answer":"Yes, the backmounted configuration was the original setup for the Liberty rebreather. You can configure your unit from sidemount to backmount per our website configuration [here](https://ccrliberty.com).\n\nYou can also configure the counterlungs for your unit from frontmou
2nt to backmount please go onto our website and use our configurator click [here](https://ccrliberty.com)."},{"id":"3","question":"What agencies is the Liberty rebreather incorporated with?","answer":"* ANDI\n* ASTD\n* BSAC\n* IANTD\n* IART\n* PSAI\n* RAID\n* TDI"},{"id":"4","question":"Where and how can I find my instructor?","answer":"List of instructors is [here](/en/support/instructors)."},{"id":"5","question":"Can I DEMO the unit before I decide to buy?","answer":"Yes, you can. Please contact us or our [instructors](https://www.divesoft.eu/en/support/instructors)."},{"id":"6","question":"What does the course typically cost?","answer":"Trainings and price of units are under the direction of our instructors.\n\nWe offer exclusive training under the guidance of our Factory Trainer Jakub Å imánek. Please contact us for Factory training price list."},{"id":"7","question":"What levels of training do you offer?","answer":"This is question for each instructor separately. Do not hesitate to contact them with your request. From the factory; we offer CCR Diver course, Liberty Crossover, CCR Diver Crossover, CCR Instructor, Liberty Instructor Crossover, CCR Instructor Crossover, CCR Normomix Trimix, CCR Full Trimix Diver, CCR Normomix Trimix Instructor, CCR Full Trimix Instructor."},{"id":"8","question":"What am I getting for the price of the course?","answer":"CCR Diver Level â Class time requirements minimum of 12 academic hours and total dives of 8 dives over the course of 4 days.\n\nTraining agencies work with us to set the minimum standards to be met for the basic level CCR diver course, though instructors are always encouraged to teach beyond the minimum standards."},{"id":"9","question":"Do you offer any technician courses?","answer":"We offer Liberty technician courses. This course allows them to provide authorized service of Liberty rebreathers."},{"id":"10","question":"I want to see the factory, is it possible?","answer":"Factory visits are welcome! If you are interested in visiting our factory we can offer you a tour by one of our sales representative, free of charge. At our factory we produce, design, and service all Liberty and Divesoft products as well as research and development!"},{"id":"11","question":"Do you attend trade shows or events?","answer":"Yes, a variety of events and trade shows. Often we post our schedule to our social media sites.\n\nFollow us on [Facebook](https://www.facebook.com/pg/divesoft/events/) and [Instagram](https://www.instagram.com/divesoft/) for an updated list of dive events we attend!"}],"activeTab":"1"},"id":"#28","type":"component","lock":false,"position":12},{"name":"LinkAnchor","data":{"anchorId":"ccr-liberty-unit-configuration"},"id":"#50","type":"component","lock":false,"position":13},{"name":"FaqNew","data":{"backgroundColor":"#ffffff","title":"Unit Configuration","subtitle":"CCR Liberty Rebreather","showBreadcrumbs":false,"hideHeader":false,"questions":[{"id":"1","question":"I am small/tall, will the unit fit me?","answer":"We have 4 different types of stands, three backplates, three different wings, three unit set-ups that we can configure for each individual diver in order to find the best way to fit the Liberty to you. You can size yourself to a unit with one of your local instructors during a DEMO event or get in touch with us directly."},{"id":"2","question":"Do you have Backmounted configuration?","answer":"Yes, the backmounted configuration was the original setup for the Liberty rebreather. You can configure your unit from sidemount to backmount per our website configuration [here](https://ccrliberty.com).\n\nYou can also configure the counterlungs for your unit from frontmount to backmount please go onto our website and use our configurator click [here](https://ccrliberty.com)."},{"id":"3","question":"Do you have Sidemount configuration?","answer":"Yes, we offer sidemount configuration, or if you already own a backmount Liberty than check our conversion kit. You can configure your unit from sidemount to backmount per our website configuration [here](https://ccrliberty.com).\n\nYou can also configure the counterlungs for your unit from frontmou
2nt to backmount please go onto our website and use our configurator click [here](https://ccrliberty.com)."},{"id":"4","question":"What is conversion kit?","answer":"If you already have backmount Liberty and wish to configure to Liberty sidemount, you can easily order a stand-alone conversion kit, which is significantly cheaper. The conversion kit is not a stand-alone rebreather. It does not contain Head, handsets, buddy and HUD."},{"id":"5","question":"Are the computers, cylinders and cells included or do I have to buy them separately?","answer":"Everything is included ready to dive pending gas fills for cylinders and sorb material for the scrubber."}],"activeTab":"5"},"id":"#29","type":"component","lock":false,"position":14},{"name":"LinkAnchor","data":{"anchorId":"ccr-liberty-technical-questions"},"id":"#51","type":"component","lock":false,"position":15},{"name":"FaqNew","data":{"backgroundColor":"#ffffff","title":"Technical Questions","subtitle":"CCR Liberty Rebreather","showBreadcrumbs":false,"hideHeader":false,"questions":[{"id":"1","question":"Whatâs the weight of the Backmount unit?","answer":"| | BMCL | FMCL | \n| -------- | -------- | -------- |\n| Unit only | 21.4kg (47.2lb) | 22.3kg (49.2lb) |\n| With cylinders | 32.5kg (71.7lb) | 33.4kg (73.6lb) |\n| Titan | 18.5kg (40.8lb) | 19.6kg (43.2lb) |\n| Titan + Cylinders | 29.6kg (65.3lb) | 30.7kg (67.7lb) |\n \n\nAll weights are without 2.5kg of sorbent and with empty cylinders.\n\nFor more informations about weight, dimension and other parameters of CCR Liberty backmount see [Technical > Dimensions and performance](https://www.divesoft.com/en/products/ccr-liberty)."},{"id":"2","question":"Whatâs the weight of Sidemount unit?","answer":"\n| scrubber | short | standard | \n| -------- | -------- | -------- |\n| Without sorbent and cylinders | 12.9kg (28.4lb) | 13.8kg (30.4lb) |\n| Without sorbent, EUR cylinders (empty) | 19.2kg (42.3lb) | 20.2kg (44.5lb) |\n| Ready to dive | 22.8kg (50.3lb) | 23.7kg (52.2lb) |\n\nFor more informations about weight, dimension and other parameters of CCR Liberty sidemount see [Technical - Dimensions and performance.](https://www.divesoft.com/en/products/ccr-liberty)"},{"id":"3","question":"What materials are the Liberty rebreathers build of?","answer":"\n| | |\n| -------- | -------- |\n| Stand and backplate | stainless steel or titanium |\n| Head and scrubber | delrin, aluminium,stainless steel |\n| Wings | corduran |\n| Counterlungs | polyurethane |\n| Elbows | EPDM rubber |\n| Cylinders | steel |\n| Valves | supplied by Nautec |\n| First stage regulator | supplied by Apeks |"},{"id":"4","question":"What kind of O2 sensors are you using?","answer":"Oxygen sensor 22D with a membrane. For more informations see: [Fault-tolerant rebreather > 4 oxygen sensors](https://www.divesoft.eu/en/products/ccr-liberty/ccr-liberty-redundancy).\n"},{"id":"5","question":"Why helium sensors?","answer":"We implemented our unique helium sensors, that are also used in our analyzers, to measure the helium concentration with the utmost precision. With the advantage of an unlimited lifespan. For more informations see: [Fault-tolerant rebreather > 2 helium sensors patented technology](https://www.divesoft.com/en/products/ccr-liberty/ccr-liberty-redundancy)."},{"id":"6","question":"How many sensors in total?","answer":"The Liberty rebreather Head contains 4 oxygen sensors and 2 helium sensors."},{"id":"7","question":"How many computers does the Liberty have and where are they placed?","answer":"The Liberty has two independent computers and two wrist displays. The two main computers are located in an environmentally sealed compartment located in the head of the unit.\n\nTo see the exact description with graphic preview: [Fault tolerant rebreather > 2 independent computers.](https://www.divesoft.com/en/products/ccr-liberty/ccr-liberty-redundancy)\n\nPlease see our YouTube video describing the entire head anatomy [here](https://https://youtu.be/F6G5qWoLudU). Also, be sure to check out our [YouTube](https://www.youtube.com/watch?v=F6G5qWoLudU&feature=youtu.be) page where we have many videos and descriptions of our equipment!"},{"id":"8","question":"Can I use oxygen sensors sold by third party?","answer":"No, oxygen sensors made by AI (Analytical Industries) are not currently approved for the unit. Please note that it has to be type 22D with membrane.\n"},{"id":"9","question":"What is plug and play system?","answer":"The Liberty rebreather has been engineered to be fault-tolerant, which means that no single malfunction in the electronic system can cause a breakdown of the whole apparatus. E.g. if your handset is flooded, you do not have to send to
2service whole rebreather. You just remove the handset from Liberty Head and send only the handset to service."},{"id":"10","question":"How hard is it to disassemble/assemble the unit?","answer":"When following our manufacturer assembly checklist during your initial training you will efficiently assemble and disassemble your unit.\n\nThe entire procedure is in our [manual](/en/products/ccr-liberty/manuals) (page 52 â 53)."}],"activeTab":"5"},"id":"#30","type":"component","lock":false,"position":16},{"name":"LinkAnchor","data":{"anchorId":"ccr-liberty-maintenance-tips"},"id":"#52","type":"component","lock":false,"position":17},{"name":"FaqNew","data":{"backgroundColor":"#ffffff","title":"Maintenance Tips","subtitle":"CCR Liberty Rebreather","showBreadcrumbs":false,"hideHeader":false,"questions":[{"id":"1","question":"Is the unit self-maintenance one?","answer":"Some basic operations for every CCR diver are described in our [Manual](https://www.divesoft.com/en/products/ccr-liberty/manuals) (pp. 74 â 77).\n\nCCR Liberty requires annual service inspection performed by authorized service technicians or directly at our facility.\n\nPlease read our technical article by clicking [here](/en/products/ccr-liberty)."},{"id":"2","question":"How often should the rebreather be serviced?","answer":"Maximum is after 13 months or after 150 hours of usage. Specialized service is recommended after 3 years (extra service: replacement of both battery packs and replacement of less exposed O-rings) and in 5 years (extra service: replacement of all hoses regardless of their condition)."},{"id":"3","question":"What is the cost of the annual service?","answer":"Prices are determined by the Liberty authorized technicians. Please contact us and we will send you their contact information.\n\nFor more information please visit: https://www.divesoft.com/en/support/ccr-liberty-rebreather/service-operations"},{"id":"4","question":"Can I service the unit myself?","answer":"It is important to understand that the Liberty rebreather is a life support machine that can be a technically demanding and sophisticated system. Any small mistake can lead to dangerous consequences that may endanger your health. Just like diving beyond training please refer to technical experts to service your life support equipment. "},{"id":"5","question":"O-rings? What are they? How should I treat them?","answer":"O-rings are an industry standard for sealing tools in the SCUBA diving world. The efficiency lies in the elastic and water-resistant material. Since rebreathers use Oxygen it is crucial to always use Oxygen compatible lubricants and O-rings for any use with rebreathers in order to prevent Oxygen fires. This critical component will be covered in your introductory rebreather course and in your advance Nitrox class.\n\nFor answers to where they are and how to find it, watch our tutorial video [here](https://www.youtube.com/watch?v=PHjeX1DU3ew)."},{"id":"6","question":"Do I need to use the O2 sensors you sell?","answer":"No but we recommend our O2 sensors as we specifically test them. Please note that it has to be type 22D with membrane.\n\nYou buy your Liberty rebreather where O2 sensors are also sold. Please take into consideration that all our oxygen sensors are tested at our facility, so you can be 100% sure of their function. Duration of O2 sensors is 1 â 2 years. After expiration you can buy O2 sensors wherever you want."},{"id":"7","question":"How can I install the O2 sensors correctly? How should I store them?","answer":"For installing oxygen sensors into Liberty Head watch tutorial our video [here](https://www.youtube.com/watch?v=YOdbaJ6ujaQ).\n\nIf you decide not to use oxygen sensor immediately after purchase. We recommend storing in unopened packaging in a refrigerator, to properly preserve sensor shelf life."},{"id":"8","question":"How to correctly disassemble the unit to let it dry out?","answer":"First, it will be necessary to dry out the water trap after each dive or by the end of the diving day. Begin by detaching the head, then remove the scrubber cartridge, next remove the water trap and dry it with a paper towel. With another paper towel, also dry the exterior surface of the cartridge.\n\nThe head should be left open in order to properly dry and to remove any excess moisture that may have formed on the oxygen and helium sensors. In areas with high humidity, we strongly recommend using the optional DIVESOFT Head drying fan. This ensures the functionality of both types of sensors."},{"id":"9","question":"Why is it necessary to use the drying fan?","answer":"However, the drying fan is only recommended. We find that the Divesoft drying fan can be very effective in removing moisture buildup that can occur on the oxygen sensors during a dive. Removing moisture can significantly reduce any error readings that may occur with a moisture buildup and help preserve the lifespan of the sensor."}
2,{"id":"10","question":"How to store the unit between dive trips?","answer":"It is crucial to always properly clean your unit. When in use, the rebreatherâs breathing loop can become a breeding ground for microorganisms from the diverâs respiratory tract and from the external environment. Following proper cleaning procedures can prevent the growth of microorganisms in the warm, humid environment that is your rebreather.\n\nThe purpose of regular cleaning and disinfection is to prevent the multiplication of these microbes to an extent that would pose a hazard to the user and to prevent the transmission of infection between various users.\n\nNot more than a week should be allowed to pass from the first dive after disinfection, until the next disinfection if the CCR Liberty is stored in a cool place. When storing the rebreather at a temperature higher than 25 °C (77 °F), this interval is shortened to four days."},{"id":"11","question":"I wonât be diving for a few months, how should I prepare the unit for long term storage?","answer":"Before storing the rebreather for a period longer than one week, clean and disinfect the unit as usual (see [manual](https://www.divesoft.com/en/products/ccr-liberty/manuals) section 3.5.3 Cleaning and disinfection).\n\nWatch our tutorial video [here](https://www.youtube.com/watch?v=BZNBIynb6No&feature=youtu.be).\n\nIf the CCR Liberty is stored in a dry and clean environment, do not connect the corrugated-hose assembly with the DSV to the head or to the breathing bags and store the rebreather open. Dust occurs even in an environment with the same level of cleanliness as the home environment. Limit accumulation of dust by, for example, covering the unit with a washed cotton bed sheet. Store the detached corrugated hose assembly in a suitable ventilated container that will allow complete drying.\n\nIf you store the CCR Liberty in an environment with a lower degree of cleanliness, store it assembled and closed (without sorbent). Such an environment with a lower degree of cleanliness may be, for example, a home with pets.\n\nBefore putting the closed rebreather in storage, all parts must be thoroughly dried, including all creases in the corrugated hoses and the interior surface of the bags.\n\nCharge the batteries at least once every six months.\n\nIf, after storing the unit for more than a month, you find that moisture persisted inside the apparatus or you can smell mustiness or mold from the corrugated hoses, it is necessary to disinfect the apparatus again. When storing the rebreather, make sure that no rubber parts (hoses, cables) are pinched or compressed.\n\nEnsure that no other objects are leaned against the rebreather. Secure the rebreather against falling."},{"id":"12","question":"Is there a way how to seal the scrubber canister, to protect the sorbent?","answer":"Yes, we recommend using the DIVESOFT \"[Scrubber cover with stickers](http://eshop.divesoft.eu/cz/1269-scrubber-cover-with-stickers/7167)\". It is advisable to write the date of the first filling and the times of the individual dives on which the scrubber was used. After changing the sorbent, change the label.\n\nDo not store used and closed scrubber for more than 30 days after first use."}],"activeTab":"4"},"id":"#31","type":"component","lock":false,"position":18},{"name":"LinkAnchor","data":{"anchorId":"ccr-liberty-troubleshooting"},"id":"#54","type":"component","lock":false,"position":19},{"name":"FaqNew","data":{"backgroundColor":"#ffffff","title":"Troubleshooting","subtitle":"CCR Liberty Rebreather","showBreadcrumbs":false,"hideHeader":false,"questions":[{"id":"1","question":"What do I do if the unit floods?","answer":"The probability of the unit to flood significantly is very low if proper procedures are followed. After carefully assembling the apparatus and performing the prescribed pre-dive procedures, flooding can be ruled out unless there is a major disruption of the breathing loopâs integrity due to mechanical damage. In the event of significant flooding, it is necessary to immediately switch to the bailout breathing apparatus and to use the compensator (BCD) to prevent loss of buoyancy.\n\nDo not inhale from the loop if the mixture from the rebreatherâs DSV contains fluid. In extreme cases, this could contain a so-called caustic cocktail, i.e. a caustic mixture with dissolved lye from the sorbent.\n\nA smaller amount of water can enter the loop through an open DSV when the mouthpiece falls out of the diverâs mouth. In such a case, water enters into the exhalation bag. Though this does not represent an catastrophic emergency, it is advisable to expel water from the exhalation bag via the overpressure valve as soon as the opportunity arises. Open the overpressure valve completely. Be sure to stabilize your buoyancy in order to avoid a significant loss of buoyancy control. Add diluent to the circuit with the manual bypass valve and perform a diluent flush. Assume a position that brings the overpressure valve to the lowest point of the exhalation bag. Expel the water from the bag by exhaling and pressing on the bag with your hand. This skill will be taught to you by your instructor and it is important to be adequately performed with routine practice."},{"id":"2","question":"My Helium sensor wonât calibrate?","answer":"If you try to calibrate Helium sensor with any success, please try to dry the helium sensors out. Helium sensors are sensitive for moisture condensation. The moisture condenses directly inside the sensor; neither perfect drying of Liberty head does not remove the condensate from the parts inside of the sensors. When the Helium sensor shows Error or not calibrated, it probably needs maintenance.\n\nFor the maintenance you will require a 3mm Hex key.\n\nProcedure:\n\n1. Disconnect the power by removing battery jumpers.\n1. Remove oxygen cells block by removing 2 screws and pulling out. No component should require excessive force ever!\n1. Remove helium sensors by removing screw and proceed to pull by two finger grip.\n1. Suck the condensate from both
2sides using mouth. Never blow into the sensor by mouth or any tools. This could cause even the smallest overpressure of air flow to damage the sensitive membrane inside the sensor. This damage will void any warranty and is not covered. Once moisture is sucked out then leave sensors to dry out in dry, warm place.\n1. Once sensors have been left to dry, reinstall to compartment and tighten screws.\n1. Re-insert oxygen sell block and tighten both screws.\n1. Turn on unit power by inserting jumpers to batteries.\n1. Proceed to calibrate helium sensors (Surface mode main menu/Setup/Calibration/Calibrate He-air).\n\nWatch our tutorial video [here](https://www.youtube.com/watch?v=DUWGQXZPL78).\n"},{"id":"3","question":"Handset/Buddy/Head up display flooded?","answer":"In this scenario, you should send the flooded handset/buddy/HUD to a Liberty authorized service technician or directly to our factory. Please contact us and we can recommend you to the nearest service point to you."},{"id":"4","question":"One battery seems to be not working, what now?","answer":"If one battery shows you a different sign than you expect (e.g. low battery if you charged) and the second battery is working properly? First, please check the charger and its functionality.\n\nIf the charger is working correctly, please change the batteries by switching their locations on the unit head. This will check whether the battery is defective on the other half of the Head. If you find out that the battery is misfunction, please replace it.\n\nIf you find out that the problem is not on side of the battery, problem is probably concerning of handset or control unit. Then please check the functionality of the handsets. Follow the same procedure as with the batteries to check connection. Change them and connect them to unit head.\n\nPlease note that service of handsets or control units are provided by Liberty authorized service technician or directly at our factory. Watch all process on our tutorial video [here](https://www.youtube.com/watch?v=dmEyMuv_ews&feature=youtu.be)."},{"id":"5","question":"The battery OPV got pushed out and white fluid is coming out?","answer":"In this case, you should send battery OPV to a Liberty authorized service technician or directly to our factory. Please contact us and we can recommend you to your nearest service center.\n"},{"id":"6","question":"How to update firmware?","answer":"The CCR Libertyâs electronics have two different types of firmware (FW): one for the control unit and another for the handset. It is possible to download the current version here, from the [firmware](https://www.divesoft.com/en/products/ccr-liberty/firmaware). \n\nPerform updates with the head removed from the rebreatherâs body. It is necessary update both CU and handset FW, different versions of CU and handset FW may result in unexpected behavior.\n\nAn exact description to follow can be found in your [Liberty manual](https://www.divesoft.com/en/products/ccr-liberty/manuals) (pp. 75 â 77)."},{"id":"7","question":"After updating new Firmware 2.11 my Liberty unit is not working correctly. How can I fix it?","answer":"First, please disconnect the GPS module (if attached), then download and update Firmware manager. If the trouble persist, update new firmware version again. If after several attempts at re-installing firmware the problem continues to persist then please contact us per email and send us pictures from âSystem checkâ which you find in your control unit Menu screen."},{"id":"8","question":"During my dive some water got inside of the Liberty Head. What can I do?","answer":"Please be aware that there is a chance that it was not flooded completely and you can do many things to prevent the worst. Watch our video [here](https://www.youtube.com/watch?v=XFxzD5536T8&feature=youtu.be).\n\nIf drying the Head and sensors did not help you, make a calibration of the helium sensors (Surface mode main menu/Setup/Calibration/Calibrate He â air). Otherwise please reach out to us, so that we can lend assistance."}],"activeTab":"8"},"id":"#32","type":"component","lock":false,"position":20},{"name":"LinkAnchor","data":{"anchorId":"ccr-liberty-travelling-with-rebreathers"},"id":"#55","type":"component","lock":false,"position":21},{"name":"FaqNew","data":{"backgroundColor":"#ffffff","title":"Travelling with Rebreathers","subtitle":"CCR Liberty Rebreather","showBreadcrumbs":false,"hideHeader":false,"questions":[{"id":"
21","question":"Can I fly with my rebreather?","answer":"Of course, many rebreather divers travel all across the globe to fully enjoy their rebreather around the world. Please watch our video [here](https://www.youtube.com/watch?v=XSu-OAqSkNE&feature=youtu.be)."},{"id":"2","question":"How to pack my unit for transportation?","answer":"Very often we separate the head from the unit and place the head in a carry-on bag and the rest of the unit should be in a checked-in luggage. A majority of our instructors recommend using the Pelican Air 1615 Case for air travel. Please do not transport it in standby mode. Batteries must be disconnected by removing or turning the battery jumpers."},{"id":"3","question":"Do I need to bleed the cylinders?","answer":"Yes! Airline regulations require that all transported pressure cylinders must be empty with valves removed. Place the valves in clean PE bags (Ziploc) and place tape over the neck to prevent contamination. It is possible that security personnel will want to look inside the cylinders. Therefore it is not appropriate to use tight plugs that cannot be removed without tools."},{"id":"4","question":"Can I have my rebreather as carry on?","answer":"Most airlines restrict carry-on baggage weight. We recommend to separate Liberty Head and transport it in the hand luggage. You will significantly reduce the weight of your luggage and moreover you will protect the most sensitive part of your device."},{"id":"5","question":"How should I behave going through security with my rebreather?","answer":"Most airline personnel and security staff do not know what technical diving equipment is, or rebreathers. It can be very helpful to travel with appropriate documentation such as the Liberty manual or the manufacturers shipping checklist but be sure to always remain very calm and most importantly to allocate at least double the time it would normally take to travel through security so as to remove any stress as this process can take a while."}],"activeTab":"3"},"id":"#33","type":"component","lock":false,"position":22},{"name":"LinkAnchor","data":{"anchorId":"analyzers-frequent-questions"},"id":"#56","type":"component","lock":false,"position":23},{"name":"FaqNew","data":{"backgroundColor":"#ffffff","title":"Frequent Questions","subtitle":"Analyzers","showBreadcrumbs":false,"hideHeader":false,"questions":[{"id":"1","question":"How long is the oxygen sensor's service life?","answer":"An electrochemical sensor is used for measuring the oxygen content. When measuring (and even storing the sensor in air), a chemical reaction occurs in the sensor. The sensor's service life is is determined by the depletion of the reagent. The expected service life of the sensor is three years when stored in air at normal temperature with 50% humidity. It is necessary to replace the sensor upon expiration of its service life."},{"id":"2","question":"How long is the helium sensor's service life?","answer":"The helium content is determined using a physical method which in causes no wear and tear in the sensor. Therefore, the sensor's service life is, in principle, unlimited."},{"id":"3","question":"Is it possible to measure other gases with the analyzer?","answer":"Firmware versions prior to 2.19: No. The analyzer is intended only for mixtures containing air (more precisely, nitrogen with characteristic presence of atmospheric argon), oxygen and helium. The presense of another gas (e.g., a larger amount of CO2) in the mixture causes unreliable results. Under certain conditions, the analyzer can be modified for mixtures containing other gases. More information about the possibilities of modification and calibration can be obtained from the manufacturer.\n\nFirware versions 2.19 and later have special \"Gas purity\" mode, which can measure any binary gas mixture, if sound velicities in each component are different enough. You have to define physical parameters of each component (both specific heats Cp and Cv and molar mass). If fact, a component can be a mixture, but each must contain different gases. Default setting measures Ar and air."},{"id":"4","question":"Can the analyzer identify trace amounts of helium?","answer":"The analyzer measures with differentiation on the order of tenths of a percent. Thus, helium in a concentration smaller than the analyzer's differentiation cannot be identified."},{"id":"5","question":"Why does the analyzer show that there is -0.3% helium in air?","answer":"Of course, the correct value would be zero. However, measuring is hampered by unavoidable discrepancies on the order of tenths of a percent. As such discrepancies can be positive or negative, it therefore can happen that the analyzer shows -0.3 % or 0.3 % helium in air, just as 99.7 % or 100.3 % may be displayed when measuring pure helium.\n\nSimilar situation is with measuring of oxygen. Possible error is up to 1 % (depending on manufacturer of O2 cell).\n\nValues are displayed as calculated, there are no hidden altering of measured data to make values look better."},{"id":"6","question":"I upgraded the firmware and He sensor stopped working","answer":"In older firmware revisions the measuring click was hard coded to 30us. Starting with revision 2.18, the click duration is adjustable in range 10-250us. If the stored value was less than 30, the measuring click is not strong enough to be detected. Use [this guide](http://foxer360-media-library.s3.eu-central-1.amazonaws.com/divesoft/docs/efeb8bbf7a4fa0bd0a7c1834727826a574ebc5bb_he-repair.txt) to repair."},{"id":"7","question":"I get \"Ambient pressure sensor not present\" error","answer":"Analyzers version 4 are equipped with ambient pressure sensor, which helps keep proper oxygen sensor calibration. I can happen that for some reason it is disabled and then you get the error message described above. Use [this guide](http://foxer360-media-library.s3.eu-central-1.amazonaws.com/divesoft/docs/94490a3898449748bee2a68d8d26ff81320394b2_ambient-pressure-sensor-enable.txt) to repair."},{"id":"8","question":"Is it possible to put a rechargeable 9V battery in the analyzer?","answer":"Yes, it is, but it will not be recharged, 9V supply is for primary cell only. Starting with version 4, the analyzer is prepared to use LiIon rechargeable cell, but it has to be installed inside the device. This built-in battery can be recharged using external power supply or USB cable. The battery kit is not available yet at this moment, please check our News section on main page."},{"id":"9","question":"I get Error 7 \"Accumulator is empty\", but I have no accumulator installed.","answer":"This error can appear when the 9V battery is very discharged, so the analyzer assumes it is supplied from accu. Please replace the 9V battery."}],"activeTab":"9"},"id":"#35","type":"component","lock":false,"position":24},{"name":"LinkAnchor","data":{"anchorId":"freedom-computers-frequent-questions"},"id":"#57","type":"component","lock":false,"position":25},{"name":"FaqNew","data":{"backgroundColor":"#ffffff","title":"Frequent Questions","subtitle":"Freedom Computers","showBreadcrumbs":false,"hideHeader":false,"questions":[{"id":"
21","question":"Freedom is still diving even when Iâm on land. How can I solve it?","answer":"For unblocking a fictitious dive follow this procedure: press both buttons > release one of them > press it again > release both (see the video of this procedure [here](https://www.youtube.com/watch?v=qb5_d1eFJzw). Now you are in the service menu. Please select âForce dive endâ item. All parameters of this âunwanted diveâ will be erased (deco data and CNS included) and it doesnât affect your next dive.\n\nCheck your Firmware version in Main menu > âSystem checkâ and make you sure that you have the latest. If not, please update it.\n\nIf your problems continue, go to the service menu again and select sensors. On the first page there are the pressure sensor values. Compare these values with expected atmospheric pressure (sensitive barometer, altimeter, local weather forecast etc.). If the pressure differs slightly (+/- 50 mbar) you can correct it in Setup>Calibration>Pressure corr. If the values differ significantly or if they are changing significantly (keep in mind that the atmospheric pressure is changing permanently) there would be a sensor failure. If the sensor failure occurs, send it to our factory for repair."},{"id":"2","question":"Is it possible to update/upgrade firmware on my Mac?","answer":"Yes, see [Firmware manager for Mac](https://www.divesoft.eu/en/support/freedom)."},{"id":"3","question":"The Floor item shows 1000 m during an oxygen decompression. Is it a failure?","answer":"No. Itâs logical. You are not saturated with inert gas during oxygen breathing so the Floor value is theoretically endless. 1000 m is just set limit to display."},{"id":"4","question":"The Freedom shows me zero decompression stop depth and time after âNo deco timeâ end. Is it a failure?","answer":"No. The âNo deco timeâ is terminated in the moment when decompression ceiling is immersed under the surface. Freedom supposes ascent in set ascent rate and calculates with this rate in its decompression plan. If the ascent time is sufficient for desaturation there is no decompression stop. Decompression stop is displayed in the moment when direct ascent isnât sufficient for desaturation. "},{"id":"5","question":"Firmware update ends with \"Write flash firmware error\" message.","answer":"There are some problems with USB serial port driver in newer versions of Windows (the data handling has changed). Try to update several times or, if possible, use older Windows version (Windows 7 preferred)."}],"activeTab":"5"},"id":"#34","type":"component","lock":false,"position":26},{"name":"LinkAnchor","data":{"anchorId":"flow-limiter-frequent-questions"},"id":"#48","type":"component","lock":false,"position":27},{"name":"FaqNew","data":{"backgroundColor":"#ffffff","title":"Frequent Questions","subtitle":"Flow Limiter","showBreadcrumbs":false,"hideHeader":false,"questions":[{"id":"1","question":"Leaking gas in case of closed bleed valve","answer":"Please check, if there has not been lost ball, which forms the cone of bleed valve, during careless removal (see [drawing](http://foxer360-media-library.s3.eu-central-1.amazonaws.com/divesoft/docs/9dc29408049c8605083e92d6484ee1a26bd257d7_standard-flow-limiter-ball-placement.pdf)). There is possible to [order spare ball in our e-shop](https://eshop.divesoft.com/steel-balls-5-pcs/8133)."},{"id":"2","question":"High flow of gas in case of tightened throttling nozzle","answer":"Please check, if there has not been lost ball, which is part of throttling nozzle in standard flow limiter, during careless removal (see [drawing](http://foxer360-media-library.s3.eu-central-1.amazonaws.com/divesoft/docs/9dc29408049c8605083e92d6484ee1a26bd257d7_standard-flow-limiter-ball-placement.pdf)). There is possible to [order spare ball in our e-shop](https://eshop.divesoft.com/steel-balls-5-pcs/8133)."}],"activeTab":"1"},"id":"#36","type":"component","lock":false,"position":28},{"name":"Footer","data":{"componentTemplateId":"cjvwimxrl08e40798hjs5ek9w"},"id":"#1","type":"component","lock":false,"position":30}],"id":"root","idBuffer":"#61","lastCommit":"fd553ddf-4ede-4ffa-b530-6a2870093dd3"}},"annotations":[],"language":{"type":"id","generated":false,"id":"Language:cjv3kwvoj000u083611381c6o","typename":"Language"},"__typename":"PageTranslation"},"Page:cjv3ru1og00ob08363pvv76br":{"id":"cjv3ru1og00ob08363pvv76br","type":{"type":"id","generated":false,"id":"PageType:cjv3l213x004f08366hjufttp","typename":"PageType"},"tags":[],"translations({\"where\":{\"language\":{\"id\":\"cjv3kwvoj000u083611381c6o\"}}})":[{"type":"id","generated":false,"id":"PageTranslation:cjv3ru1oy00ol0836nmvybkis","typename":"PageTranslation"}],"__typename":"Page"},"PageTranslation:cjv3ru1oy00ol0836nmvybkis":{"id":"cjv3ru1oy00ol0836nmvybkis","name":"Terms and conditions","createdAt":"2019-04-30T12:32:00.273Z","content":{"type":"json","json":{"content":[{"name":"Header","data":{"componentTemplateId":"cjv7yndru048c0836j99ljogw"},"id":"#0","type":"component","lock":false,"position":0},{"name":"FaqNew","data":{"backgroundColor":"#ffffff","title":"Terms and Conditions","subtitle":"","showBreadcrumbs":false,"hideHeader":false,"questions":[{"id":"
21","question":"DIVESOFT WARRANTY DISCLAIMER and LIMITATION OF LIABILITY","answer":"The warranty on DIVESOFT products may vary depending on the type of device and year of manufacture. It is usually limited to a period of 1 year (except for markets within the European Union, where the statutory minimum warranty period and conditions apply) from the date of purchase by the end customer (\"Warranty Period\"), unless otherwise stated. This date must be evidenced by a valid tax or sales document. Claims will only be accepted if the complete defective product is returned and a valid proof of purchase is presented. DIVESOFT reserves the right to refuse free service if the required documentation is not provided or if the information is incomplete, illegible, or incorrect.\n\nThe warranty period starts on the date of purchase; its length is determined according to the above conditions. <br><br>\n**The following items are exceptions:** \n* Oxygen sensors â 12 month \n* Rechargeable batteries â 12 months\n<br><br>\n**Warranty on service interventions:** \n* Labor â 180 days\n* Replaced parts â 180 days \n(warranty applies only to replaced parts)\n\n"},{"id":"2","question":"HOW TO SUBMIT WARRANTY CLAIMS UNDER THE DIVESOFT WARRANTY","answer":"Nothing in these Terms limits statutory consumer rights under applicable law, including rights granted to consumers in the European Union.\n\nClaims should be made without undue delay after discovering the defect to the DIVESOFT dealer where the product was purchased. The dealer will then send the product to DIVESOFT. Customers may also contact DIVESOFT directly via technical support at [email protected] or [email protected] if they need assistance with diagnostics or further information. To claim the warranty, it is also necessary to fill out the online service request form available at https://www.divesoft.com/en/support, print it, and include it with the product sent for service. DIVESOFT may also request proof of purchase or confirmation of the performed service.\n\nIf the product was purchased within the warranty period and the claim is supported by the required documents, and it is found defective for reasons not excluded from the warranty, DIVESOFT will, at its discretion, repair or replace the product free of charge (except for shipping costs to DIVESOFT, which are borne by the customer). The company reserves the right to replace the claimed product with a similar product of comparable value if the original is unavailable. All replaced parts or products become the property of DIVESOFT. Repairs or replacements do not extend the original warranty period.\n\nIf it is found that the product does not meet the conditions of this limited warranty, DIVESOFT reserves the right to charge a handling fee. For products purchased abroad, warranty service is provided by the local DIVESOFT distributor in the customerâs country. This distributor is authorized to charge handling fees and all costs related to shipping and customs. DIVESOFT reserves the right to refuse warranty service if the product was not purchased from an authorized dealer listed at https://www.divesoft.com/en/dealers. If the product was purchased through the official DIVESOFT online store, the warranty is provided exclusively by Divesoft\n"},{"id":"3","question":"DEFECTS NOT COVERED BY THE DIVESOFT WARRANTY","answer":"Only defects or damages resulting from a failure in material or workmanship are covered by the DIVESOFT Warranty. Other defects or damages, in particular those listed below, are not covered by our warranty:\n* Defects or damage caused by normal use and wear\n* Defects or damage caused by heavy, unusual, or incorrect use, or use under abnormal conditions (blows, jerks, falls, bumps, etc.)\n* Defects or damages caused by lack of or incorrect maintenance or through negligence\n* Defects or damages known or evident at the time of purchase of the Product\n* Clear defects or damage, tacitly accepted, that did not interfere with the product's operation\n* Scratches or damage to the surfaces, glass, and all other external areas due to normal use of the product\n* Defects or damages caused by cleaning materials or other substances containing aggressive chemicals (solvents, surfactants, aggressive cleansers, etc.)\n* Defects or damages resulting from alterations and changes made to the Products without authorization\n* Defects or damages caused by improper assembly of the components\n* Defects or damages caused by failure to follow Product instructions in the Userâs Manual\n* Defects or damages caused by prolonged use of the Product in chlorinated or other polluted water\n* Defects or damages caused by exposing the Product to excessive temperatures, fire, or prolonged exposure to sunlight. All components subject to normal wear and tear (O-Rings, filters, diaphragms, light bulbs and diodes, batteries, rubber parts, silicone parts, latex, neoprene, zippers, etc.) are not covered by the warranty unless it can be shown that the problem is a manufacturing defect. This warranty does not cover equipment used for rental, military or commercial purposes.\n"},{"id":"4","question":"LIMITATION OF LIABILITY","answer":"To the maximum extent permitted by applicable law, DIVESOFT shall not be liable for any injury or damage that may, directly or indirectly, occur to persons, things, or animals resulting from the use of any DIVESOFT product. DIVESOFT shall not be liable for damage resulting from the failure to observe the full content of the Instruction Manual especially instructions concerning the use and maintenance of the product.\nDIVESOFT will not be held responsible for any agreements written or oral except of those that are a part of this warranty statement.\nTo the maximum extent permitted by applicable law, DIVESOFTâs liability shall be limited to repair or replacement of the product at DIVESOFT option.\nDIVESOFT will not pay any compensation for any inconveniences which might be caused by the inability to use the Product or for any potential expenses incurred while the Product is being repaired or replaced.\n\nNothing in these Terms excludes or limits liability where such exclusion or limitation is prohibited by applicable law, including liability for death or personal injury caused by negligence, fraud, gross negligence, product liability, or mandatory consumer protection rights."},{"id":"5","question":"SHIPPING TAX AND DUTIES DISCLAIMER","answer":"DIVESOFT, LLC is not liable or responsible for lost, held, or damaged packages. We are not responsible for mis-delivery errors via carrier, or incorrect shipping info. Shipping is a service you purchase from USPS/ UPS/FedEx or another carrier along with your order from us, so any shipping issues must be handled by chosen carrier. INSURANCE is available to add to any order and is recommended for any order you can't afford to lose.\n\nWe are responsible for your new purchase until it reaches the U.S. Post Office/UPS/FedEx or another carrier. After that, it is out of our control. Insurance is to protect against loss or damage during shipping. If you choose not to buy insurance and your purchase is lost or damaged by USPS/UPS/FedEx or another carrier, we cannot provide a refund. All purchases are shipped by USPS and insured through those providers.\n\nIn the case that your shipment is lost or damaged in transit; you are responsible to file the claim with USPS/UPS/FedEx or another carrier. We are not responsible for lost packages during transit. We are not responsible for shipment sent to forwarding services or companies regardless of shipping service selected, if you place an order and your shipping address is a forwarding address you are responsible for contacting your forwarding company or service to locate your shipment. We are also not responsible to weather related damage or delays. \n\nInternational orders: We are not responsible for any customs/broker fees and taxes or shipperâs fees you will incur or for delays because of customs. We have no way of knowing if you will incur a customs fee or not. If you do, we are not responsible, and you will not be reimbursed. You must read the policies before ordering you will not be refunded or reimbursed. We list and declare all items with their true value and we always state their true country of origin. We cannot track package shipped internationally once it leaves the country of origin (CZ, or the USA). We are not responsible for packages shipped to international addresses. We list and declare all items with their true value and we always state their true country of origin."},{"id":"6","question":"COMPANY DETAILS","answer":"Contact one of our [offices](https://www.divesoft.com/en/support)."}]},"id":"#7","type":"component","lock":false,"position":1},{"name":"FaqNew","data":{"backgroundColor":"#ffffff","title":"Local terms","subtitle":"","showBreadcrumbs":false,"hideHeader":false,"questions":[{"question":"CZECH REPUBLIC - ZPÄTNà ODBÄR VYSLOUŽILÃCH ELEKTROZAÅÃZENà / BATERIÃ","answer":"
2VÃce informacà [zde](http://foxer360-media-library.s3.eu-central-1.amazonaws.com/divesoft/docs/3ce96f7024c2ca3d929db864df0921a65642192b_zpetny-odber-vyslouzilych-elektrozarizeni-08-2025.pdf).","id":"1"},{"id":"2","question":"USA, CALIFORNIA - PROPOSITION 65 WARNING","answer":"WARNING: This product may contain chemicals known to the State of California to cause cancer, birth defects, or other reproductive harm.\nFor more information please visit www.P65Warnings.ca.gov"}],"activeTab":"1"},"id":"#8","type":"component","lock":false,"position":2},{"name":"Footer","data":{"componentTemplateId":"cjvwimxrl08e40798hjs5ek9w"},"id":"#1","type":"component","lock":false,"position":9}],"id":"root","idBuffer":"#11","lastCommit":"cde00dcb-95e0-40c0-ba00-d106c89aaeb5"}},"annotations":[],"language":{"type":"id","generated":false,"id":"Language:cjv3kwvoj000u083611381c6o","typename":"Language"},"__typename":"PageTranslation"},"Page:cjv7uialr03nh0836yjoz2dji":{"id":"cjv7uialr03nh0836yjoz2dji","type":{"type":"id","generated":false,"id":"PageType:cjv3l213x004f08366hjufttp","typename":"PageType"},"tags":[],"translations({\"where\":{\"language\":{\"id\":\"cjv3kwvoj000u083611381c6o\"}}})":[{"type":"id","generated":false,"id":"PageTranslation:cjv7uiam503nr0836pwctgxbj","typename":"PageTranslation"}],"__typename":"Page"},"PageTranslation:cjv7uiam503nr0836pwctgxbj":{"id":"cjv7uiam503nr0836pwctgxbj","name":"BOV/DSV/ADV","createdAt":"2019-05-03T08:57:55.516Z","content":{"type":"json","json":{"content":[{"name":"Header","data":{"products":[{"title":"Accessories","description":"Backplates, Consumables. Tanks.","img":{"recommendedSizes":{"width":"235","height":"235"}},"url":"","id":"1"},{"title":"Accessories sets","description":"Protection, maintenance, cleaning.","img":{"recommendedSizes":{"width":"235","height":"235"}},"url":"","id":"2"},{"title":"Spare parts","description":"Spare parts and components.","img":{"recommendedSizes":{"width":"235","height":"235"}},"url":"","id":"3"},{"title":"Spare parts kits","description":"Completly Liberty spare parts kits.","img":{"recommendedSizes":{"width":"235","height":"235"}},"url":"","id":"4"}],"showShadow":true},"id":"#0","type":"component","lock":false,"position":0},{"name":"ProductCrossroadNew","data":{"componentTemplateId":"cmp172nfu00f208260n7srwjg"},"id":"#29","type":"component","lock":false,"position":1},{"name":"HeroV2","data":{"slides":[{"media":{"recommendedSizes":{"width":"3840","height":"2560"},"mimetype":"image/jpeg","size":1959958,"hash":"e60f55267ec4c872d6a09cb29e39cb29a2992fb0","id":"cmpcj3oro4l6n0800vrtf1e86","filename":"dsc08077-24.jpg","category":"divesoft/","type":"image","alt":"Divesoft BOVs, DSVs and ADVs"},"productName":"","title":"Divesoft BOVs, DSVs and ADVs","linkTitle":"BUY","link":{"url":"https://eshop.divesoft.com","urlNewWindow":true},"autoplayDuration":9000,"id":"1","linkUrl":{"url":"https://eshop.divesoft.com/products/bov-dsv-adv","urlNewWindow":true}}],"activeTab":"1"},"id":"#30","type":"component","lock":false,"position":2},{"name":"Spacer","data":{"spacingLarge":"80","spacingSmall":"80","backgroundColor":"#ffffff"},"id":"#32","type":"component","lock":false,"position":3},{"name":"ImageTextBlock","data":{"backgroundColor":"white","content":"## BOV / DSV / ADV\n\n**Smooth breathing. Reliable control.**\n\nExplore Divesoft Dive Surface Valves (DSV), Bailout Valves (BOV), Automatic Diluent Valves (ADV), and Manual Addition Valves (MAV) designed for intuitive underwater operation and dependable rebreather diving performance.\n\nCompatible with Divesoft Liberty CCR and many other rebreather systems.\n\n**Designed to perform dive after dive.**\n","links":[],"isMirrored":false,"image":{"recommendedSizes":{"width":"1500","height":"1500"},"mimetype":"image/png","size":93038,"hash":"c3366438104a2a6059bce76d855872a9e887607e","id":"cl5fy1ownrbhm0776x3roasr0","filename":"mavs.png","category":"divesoft/","type":"image"}},"id":"#31","type":"component","lock":false,"position":4},{"name":"ImageTextBlock","data":{"backgroundColor":"white","content":"## Dive Surface Valve (DSV)\n\n**Simple. Streamlined. Reliable.**\n\nThe DSV is designed for divers who prefer a lightweight and mechanically simple mouthpiece without the additional bulk of a BOV.\n\nWith classic open and closed positions, it delivers smooth operation and comfortable everyday use underwater.\nAll DSVs are fitted with original Draeger mushroom valves.\n","links":[],"isMirrored":true,"image":{"recommendedSizes":{"width":"1500","height":"1500"},"mimetype":"image/png","size":9391437,"hash":"64b05a3ecf24372559b079240ade2ceddc056b87","id":"cjv7uwd0b01k60776iej5l
2yyr","filename":"dsv-circuit-left.png","category":"divesoft/","type":"image"}},"id":"#33","type":"component","lock":false,"position":5},{"name":"ImageTextBlock","data":{"backgroundColor":"white","content":"## Bailout Valve (BOV)\n\n**One switch. Immediate access.**\n\nThe Divesoft BOV combines open-circuit and closed-circuit operation in one streamlined body.\n\nWith a simple turn, divers can instantly switch to open-circuit breathing without removing the mouthpiece from their mouth.\n\nFast, intuitive, and built for reliable breathing performance underwater.\nAll BOVs are fitted with original Draeger mushroom valves and adjustable Apeks second stages.","links":[],"isMirrored":false,"image":{"recommendedSizes":{"width":"1500","height":"1500"},"mimetype":"image/png","size":9341320,"hash":"f6bfded90177effa792070116b3b829f388fada0","id":"cjv7v3pi501ku0776qoxxufz6","filename":"bov-with-adv-hose-nipples-ap-inspiration.png","category":"divesoft/","type":"image"}},"id":"#34","type":"component","lock":false,"position":6},{"name":"ImageTextBlock","data":{"backgroundColor":"white","content":"## Manual Addition Valves (MAVs)\n\n**Precise gas control at your fingertips.**\n\nTwo Manual Addition Valves located directly at the mouthpiece allow fast and intuitive oxygen and diluent control without the need for standard add valves routed over the shoulders.\n\nCompact design helps create a cleaner and more streamlined rebreather configuration.\n","links":[],"isMirrored":true,"image":{"recommendedSizes":{"width":"1500","height":"1500"},"mimetype":"image/png","size":429704,"hash":"1b7341f16ed41050fd382d126761e57067ace801","id":"clpguadr6rk6k0776surcc21w","filename":"mav-sm.png","category":"divesoft/","type":"image"}},"id":"#35","type":"component","lock":false,"position":7},{"name":"ImageTextBlock","data":{"backgroundColor":"white","content":"## Automatic Diluent Valve (ADV)\n\n**Automatic loop compensation.**\n\nThe ADV automatically adds diluent gas to the breathing loop when needed, helping maintain comfortable loop volume throughout the dive.\n\nOperating on the same principle as a regulator, the valve responds naturally to pressure changes inside the loop for smooth and automatic gas addition.\n\n**Reliable operation. Seamless integration.**\n","links":[],"isMirrored":false,"image":{"recommendedSizes":{"width":"1500","height":"1500"},"mimetype":"image/png","size":382984,"hash":"ff912399094364372d12af954fddfa7c4f27835f","id":"clpgunuworkku0776ir0ekufw","filename":"adv.png","category":"divesoft/","type":"image"}},"id":"#36","type":"component","lock":false,"position":8},{"name":"ProductsCompare","data":{"sectionTitle":"DSV / BOV OPTIONS","backgroundColor":"#ffffff","firstTitle":"DSV","firstSubtitle":"DSV for backmount units","firstLearnMoreUrl":"","firstConfiguratorUrl":"","firstImage":{"recommendedSizes":{"width":400,"height":400},"mimetype":"image/png","size":2466516,"hash":"5361bd3f37d440c00833572b7bd4566bb0199e3e","id":"ckx4j1fpwco7x0776w17unq1w","filename":"divesoft-dsv-circuit-left-1080x1080.png","category":"divesoft/","type":"image"},"firstFeatures":[],"secondTitle":"DSV + MAV","secondSubtitle":"DSV for backmount units with manual addition valves","secondLearnMoreUrl":"","secondConfiguratorUrl":"","secondImage":{"recommendedSizes":{"width":400,"height":400},"mimetype":"image/jpeg","size":28147,"hash":"35fce092acd8cd4ff98ccf865aad0ea685bd7d79","id":"cl5fy5fenrbhv0776fkyabrq2","filename":"dsv-mav-for-liberty-kiss-sf2-5.jpg","category":"divesoft/","type":"image"},"secondFeatures":[],"thirdTitle":"SM DSV + MAV","thirdSubtitle":"DSV for sidemount with Manual addition valves.","thirdLearnMoreUrl":"","thirdConfiguratorUrl":"","thirdImage":{"recommendedSizes":{"width":400,"height":400},"mimetype":"image/png","size":155596,"hash":"66a4577a1cc49a12e3c232d14f8effbce85fdddd","id":"cl5d1lkqrr2av07764ad591xs","filename":"dsv-with-elbows-mav-for-liberty-kiss-sf2-2.png","category":"divesoft/","type":"image"},"thirdFeatures":[],"fourthTitle":"BOV","fourthSubtitle":"Bailout valve for backmount units.","fourthLearnMoreUrl":"","fourthConfiguratorUrl":"","fourthImage":{"recommendedSizes":{"width":400,"height":400},"mimetype":"image/png","size":3004654,"hash":"0734fd7b807df86acda234e29b3dbc2f35a04c03","id":"ckx4j2k71co9g07765pj9r84v","filename":"divesoft-bailout-feed-left-1080x1080.png","category":"divesoft/","type":"image"},"fourthFeatures":[],"fifthTitle":"BOV + MAV","fifthSubtitle":" Bailout valve for backmount units with integrated Manual addition valves (MAVs).","fifthLearnMoreUrl":"","fifthConfiguratorUrl":"","fifthImage":{"recommendedSizes":{"width":400,"height":400},"mimetype":"image/jpeg","size":32359,"hash":"13a19fdb59cff4b365445a1dd62ae579ae0ede51","id":"cl5d1nordr2b707765jglsdk4","filename":"bov-with-adv-hose-nipples-liberty-kiss-sf22-2.jpg","category":"divesoft/","type":"image"},"fifthFeatures":[]},"id":"#45","type":"component","lock":false,"position":9},{"name":"ImageTextBlock","data":{"backgroundColor":"white","content":"## DSV\n\n**Minimal design. Maximum reliability.**\n\nThe Divesoft DSV offers a mechanically simple and highly durable solution for rebreather diving.\n\nIts streamlined shape, neutral buoyancy, and smooth breathing performance make it ideal for divers who value simplicity underwater.\n\n**DSV Features**\n- \\> Smooth breathing performance \n- \\> Streamlined design \n- \\> Built to last \n- \\> Neutrally buoyant underwater \n- \\> Compatible with MAV systems \n- \\> Original Draeger mushroom valves \n- \\> Compatible with many rebreather systems ","links":[{"title":"BUY","url":{"url":"https://eshop.divesoft.com/products/dsv/","urlNewWindow":true},"color":"red","id":"1"}],"isMirrored":false,"image":{"recommendedSizes":{"width":"1500","height":"1500"},"mimetype":"image/png","size":2466516,"hash":"5361bd3f37d440c00833572b7bd4566bb0199e3e","id":"ckx4j1fpwco7x0776w17unq1w","filename":"divesoft-dsv-circuit-left-1080x1080.png","category":"divesoft/","type":"image"}},"id":"#37","type":"component","lock":false,"position":11},{"name":"ImageTextBlock","data":{"backgroundColor":"white","content":"## DSV + MAV\n\n**Everything where you need it.**\n\nA streamlined combination of the DSV and Manual Addition Valves, bringing manual gas control directly to the mouthpiece for fast and natural operation underwater.\n\n**Simple access. Cleaner configuration.**\n","links":[{"title":"BUY","url":{"url":"https://eshop.divesoft.com/products/138-dsv-mavs/","urlNewWindow":true},"color":"red","id":"1"}],"isMirrored":true,"image":{"recommendedSizes":{"width":"1500","height":"1500"},"mimetype":"image/png","size":2572996,"hash":"5921b768fbdec3339b8f378d2b417cb025a5a2fe","id":"ckx4j1w7lco8n0776euz09vlf","filename":"divesoft-dsv-mav-for-ap-inspiration-1080x1080.png","category":"divesoft/","type":"image"}},"id":"#38","type":"component","lock":false,"position":12},{"name":"ImageTextBlock","data":{"backgroundColor":"white","content":"## BOV\n\n**Fast switching. Smooth breathing.**\n\nThe Divesoft BOV allows divers to
2switch instantly to open-circuit breathing with smooth and reliable performance.\nDesigned for confident control and comfortable breathing underwater.\n\n**BOV Features**\n- \\> Smooth breathing performance \n- \\> Streamlined design \n- \\> Built to last \n- \\> Neutrally buoyant underwater \n- \\> Compatible with MAV systems \n- \\> Adjustable Apeks second stage \n- \\> Original Draeger mushroom valves \n- \\> Compatible with many rebreather systems \n\n\n","links":[{"title":"BUY","url":{"url":"https://eshop.divesoft.com/products/bov/","urlNewWindow":true},"color":"red","id":"1"}],"isMirrored":false,"image":{"recommendedSizes":{"width":"1500","height":"1500"},"mimetype":"image/png","size":3004654,"hash":"0734fd7b807df86acda234e29b3dbc2f35a04c03","id":"ckx4j2k71co9g07765pj9r84v","filename":"divesoft-bailout-feed-left-1080x1080.png","category":"divesoft/","type":"image"}},"id":"#39","type":"component","lock":false,"position":13},{"name":"ImageTextBlock","data":{"backgroundColor":"white","content":"## Unique Manual Addition Valves (MAV)\n\n**Find your mouth. Find your MAVs.**\n\nDivesoft Manual Addition Valves are designed to place gas control exactly where divers naturally expect it.\n\nPositioned close to the mouthpiece, the MAVs are easy to locate without searching, even in low visibility or tight restrictions.\n\n**Simple access. Better control.**\n","links":[],"isMirrored":true,"image":{"recommendedSizes":{"width":"1500","height":"1500"},"mimetype":"image/png","size":93038,"hash":"c3366438104a2a6059bce76d855872a9e887607e","id":"cl5fy1ownrbhm0776x3roasr0","filename":"mavs.png","category":"divesoft/","type":"image"}},"id":"#40","type":"component","lock":false,"position":14},{"name":"ImageTextBlock","data":{"backgroundColor":"white","content":"## Single Hose Adapter (SHA)\n\n**Less hoses. Cleaner routing.**\n\nThe Single Hose Adapter reduces the number of low-pressure hoses feeding the BOV second stage and MAV system from two hoses to one.\n\nA cleaner configuration, improved hose routing, and simpler equipment management underwater.\n\n**Compact. Streamlined. Practical.**\n","links":[],"isMirrored":false,"image":{"recommendedSizes":{"width":"1500","height":"1500"},"mimetype":"image/jpeg","size":60623,"hash":"c5be37a6bd8f914ec935e46a0b3699ab96c708fe","id":"cl5fxfjvkrbh50776vzorgsmc","filename":"img-7479.jpg","category":"divesoft/","type":"image"}},"id":"#41","type":"component","lock":false,"position":15},{"name":"ImageTextBlock","data":{"backgroundColor":"white","content":"## Automatic Diluent Valve (ADV)\n\n**Precise diluent delivery.**\n\nThe Divesoft ADV automatically adds diluent gas to the breathing loop when needed, helping maintain comfortable loop volume throughout the dive.\n\nOperating on the same principle as a regulator, the valve responds naturally to pressure changes inside the loop for smooth and automatic gas addition.\n\nThe ADV can also be integrated directly into the inhale counterlung T-piece for a clean and streamlined rebreather configuration.\n\n**Reliable operation. Seamless integration.**\n","links":[{"title":"BUY","url":{"url":"#","urlNewWindow":true},"color":"red","id":"1"}],"isMirrored":false,"image":{"recommendedSizes":{"width":"1500","height":"1500"},"mimetype":"image/png","size":152998,"hash":"65b2f4f409db3c2711ad6292c84babe171e1d819","id":"cl7ohlfs4al2s0776tcytkjzw","filename":"membrane-adv-direct-bayonet-right-without-shut-off-2.png","category":"divesoft/","type":"image"}},"id":"#42","type":"component","lock":false,"position":16},{"name":"Footer","data":{"componentTemplateId":"cjvwimxrl08e40798hjs5ek9w"},"id":"#1","type":"component","lock":false,"position":28}],"id":"root","idBuffer":"#46","lastCommit":"b56f39b4-14ff-4222-b2ba-6897913d9a55"}},"annotations":[],"language":{"type":"id","generated":false,"id":"Language:cjv3kwvoj000u083611381c6o","typename":"Language"},"__typename":"PageTranslation"},"Page:cjv83bs6804tb08366aj9zqyw":{"id":"cjv83bs6804tb08366aj9zqyw","type":{"type":"id","generated":false,"id":"PageType:cjv3l213x004f08366hjufttp","typename":"PageType"},"tags":[],"translations({\"where\":{\"language\":{\"id\":\"cjv3kwvoj000u083611381c6o\"}}})":[{"type":"id","generated":false,"id":"PageTranslation:cjv83bs6m04tl0836xxg7ttmf","typename":"PageTranslation"}],"__typename":"Page"},"PageTranslation:cjv83bs6m04tl0836xxg7ttmf":{"id":"cjv83bs6m04tl0836xxg7ttmf","name":"Secure payment","createdAt":"2019-05-03T13:04:48.238Z","content":{"type":"json","json":{"content":[{"name":"Header","data":{"componentTemplateId":"cjv7yndru048c0836j99ljogw"},"id":"#0","type":"component","lock":false,"position":0},{"name":"FaqNew","data":{"backgroundColor":"#ffffff","title":"Secure payment","subtitle":"","showBreadcrumbs":false,"hideHeader":false,"questions":[{"id":"
21","question":"Order","answer":"When an order is finished, a confirmation e-mail with information that the order has been recieved, is generated."},{"id":"2","question":"Payment","answer":"Client will receive an e-mail with a pro forma invoice along with billing information needed for on-line payment by a credit card.\nIt is possible to pay on-line by a card or to use a bank transfer."},{"id":"3","question":"Shipping","answer":"Ordered goods is shipped after payment receiving."},{"id":"4","question":"Complaints","answer":"In case of complaint send faulty goods to our factory in Roudnice nad Labem. It is also necessary to attach a copy of proof of purchase and a fault description."}],"activeTab":"4"},"id":"#7","type":"component","lock":false,"position":1},{"name":"Footer","data":{"componentTemplateId":"cjvwimxrl08e40798hjs5ek9w"},"id":"#1","type":"component","lock":false,"position":6}],"id":"root","idBuffer":"#8","lastCommit":"3c35112a-dc07-4740-a5f1-6938532a3626"}},"annotations":[],"language":{"type":"id","generated":false,"id":"Language:cjv3kwvoj000u083611381c6o","typename":"Language"},"__typename":"PageTranslation"},"Page:cjv83jag304vu0836fiuwysty":{"id":"cjv83jag304vu0836fiuwysty","type":{"type":"id","generated":false,"id":"PageType:cjv3l213x004f08366hjufttp","typename":"PageType"},"tags":[],"translations({\"where\":{\"language\":{\"id\":\"cjv3kwvoj000u083611381c6o\"}}})":[{"type":"id","generated":false,"id":"PageTranslation:cjv83jagk04w40836s1mqqm0k","typename":"PageTranslation"}],"__typename":"Page"},"PageTranslation:cjv83jagk04w40836s1mqqm0k":{"id":"cjv83jagk04w40836s1mqqm0k","name":"GDPR","createdAt":"2019-05-03T13:10:38.516Z","content":{"type":"json","json":{"content":[{"name":"Header","data":{"componentTemplateId":"cjv7yndru048c0836j99ljogw"},"id":"#0","type":"component","lock":false,"position":0},{"name":"FaqNew","data":{"backgroundColor":"#ffffff","title":"Personal data protection principles","subtitle":"","showBreadcrumbs":false,"hideHeader":false,"questions":[{"id":"1","question":"Initial provisions","answer":"These personal data protection principles describe the manner of obtaining, using and further handling of personal data obtained via [divesoft.com](https://www.divesoft.com/)."},{"id":"2","question":"Controller","answer":"The personal data controller is:\n\nDivesoft s.r.o.\nComp. Reg. No. 267 22 101\nhaving its registered office at K HaltýÅi 756/14, Troja, 181 00 Praha 8\nmaintained by the Municipal Court in Prague under file No. C 89580"},{"id":"3","question":"Legislation","answer":"When handling personal data we proceed in accordance with the Czech Republic legislation and directly applicable European Union regulations, in particular by the Regulation (EU) 2016/679 of the European Parliament and the Council of 27 April 2016 on the protection of natural persons with regard to the processing of personal data and on the free movement of such data and repealing Directive 95/46/EC, as amended (hereinafter âGDPR\")."},{"id":"4","question":"Obtaining personal data","answer":"You give your personal data to us in particular when you are completing an order, or when setting up a user account. If there is any change in your personal data, inform us please.\n\nWhen visiting and using a web interface, detailed information about the use of cookies and related consent settings is available in the Cookie Policy."},{"id":"5","question":"Personal data","answer":"When completing an order or during registration you provide us with the following personal data: \n\na) first name and surname \nb) contact address \nc) e-mail address \nd) telephone number"},{"id":"6","question":"Purpose of personal data processing","answer":"The purpose of personal data processing is: \n\na) contract performance â in order to deliver goods or provide a service and in case of registration for allowing access, administration and management of a user account. This data processing is based on Article 6(1) (b) GDPR and serves for performing a contract. \nb) fulfilling obligations set by the law â in particular obligations to maintain records, archiving of tax documents etc. This data processing is based on Article 6(1) (c) GDPR and serves for fulfilling legal obligations. \nc) purposes of the legitimate interests â sending commercial messages (newsletters) about our goods and services to those who purchased our goods or set up a user account and agreed with sending of commercial messages. Commercial messages relate mainly to news in our business assortment and discount. Commercial messages are sent to your e-mail and you can revoke it at any time. This data processing is based on Article 6 (1) (f) GDPR and serves to our legitimate interest. \nd) given consent â sending the aforementioned commercial messages to those who signed up for their subscription without having purchased any good or services or set up a user account. Commercial messages are sent to your e-mail and you can revoke it at any time. This data processing is based on Article 6 (1) (a) and Article 7 of the GDPR."},{"id":"7","question":"Personal data processing for sending commercial messages","answer":"If you are our customer, we have a legitimate interest for sending our commercial messages, because we reasonably believe that you are interested in our news. If you are not our customer, we will only send you commercial messages with your consent.\nIn order for us to be able to send you our commercial messages on current products, discount offers, accessories offers or consumable material to already purchased products, we process the following personal data: first name and surname and e-mail address. \nThe aforementioned personal data will not be provided to third parties except for e-mail services provider which provides bulk sending of the newsletter. The provider has clearance for secure personal data processing and has undertaken to observe the regulation. The provider is located in the United States of America and is registered in the EU-USA privacy shield. \nThe EU-USA privacy shield is available at: https://www.privacyshield.gov. The European Commission issued a decision on adequate protection in relation to this shield, in the mode under Article 45(9) GDPR, therefore such transmission of personal data does not require a special permission. \nYou can revoke sending of commercial messages at any time by using the link provided in each our newsletter e-mail or by using the settings of your account or any time when you order our goods.\n"},{"id":"8","question":"Processing duration","answer":"For the duration of mutual contractual relation or for a period set by legal regulations.\nPersonal data for the purpose of sending commercial messages and for the peri
2od for which you are subscribed and 3 years after you have unsubscribed."},{"id":"14","question":"Legal basis for processing","answer":"Personal data are processed on the basis of:\n- performance of a contract,\n- compliance with legal obligations,\n- legitimate interest of the controller,\n- consent of the data subject, where required.\n"},{"id":"11","question":"Personal data security","answer":"We undertook to adopt such measures to prevent from unauthorized or accidental access to personal data, their change, destruction or loss, unauthorized transmissions, or other unauthorized processing, as well as other personal data misuse. This obligation will survive termination of employment or contractual relation. \n\nOur employees or other natural persons processing personal data based on a contract, and other persons, are obliged to keep in confidentiality all personal data, even after termination of employment or contractual relation.\n\n"},{"id":"9","question":"Your rights","answer":"As the data subject you have all rights arising from generally binding legal regulations for protection of personal data, in particular the right to: \n\na) recall consent with personal data processing, \nb) access to personal data, \nc) personal data rectification, \nd) personal data deletion, \ne) limitation of personal data processing, \nf) raise objection against personal data processing, \ng) transfer personal data to other controller, \nh) file a complaint with the Office for Personal Data Protection if you believe that the controller proceeds contrary to generally binding legal regulations for personal data protection when processing personal data."},{"id":"10","question":"Processors","answer":"We use personal data processors which provide administration of e-shop, delivery services and e-mail sending for provision of services and personal data processing. \nThe processors process data solely upon our instructions, we concluded contract for personal data processing with them and they are obliged to maintain generally binding legal regulations for personal data protection. \nAll processors have been carefully selected and they will have access to your personal data only in the scope and for time period necessary for provision of a service or in the scope in which you allowed processing and using personal data."},{"id":"15","question":"Retention period","answer":"Personal data are retained only for the period necessary for the relevant processing purpose or for the period required by applicable legal regulations.\n\nAccounting and tax documents are retained for the period required by applicable legal regulations.\n"},{"id":"12","question":"Cookies","answer":"Cookies are text files stored in a computer or other electronic device of each visitor [divesoft.com](https://www.divesoft.com), which allow functioning of a web interface. It is a small amount of data which a viewed webpage sends to your device where it is stored. When you visit the previously viewed webpage next time it will use the stored cookies to identify whether you have visited the page already and what parts of the web you are viewing. Cookies also allow you to save your settings. \nNot all cookies collect personal data. Certain cookies only allow correct functioning of web interface. You can refuse to use cookies by selecting the relevant setting in your browser. \nNote that if you refuse cookies you will not be able to finish your order. \nThe webpage interface uses these services working with information obtained through cookies: Google Analytics and possibly other services provided by Google, Inc and Facebook Pixel provided by Facebook Inc."},{"id":"13","question":"Contact","answer":"Please use the below contacts for all questions concerning personal data processing:\n\nDivesoft s.r.o., with the registered office at Hálkova 2495, 413 01 Roudnice nad Labem, Czech Republic \nWeb: [divesoft.com](https://www.divesoft.com) \nE-mail: [email protected]\nTelephone: +420 416 857 057"}],"activeTab":"14"},"id":"#5","type":"component","lock":false,"position":1},{"name":"Footer","data":{"componentTemplateId":"cjvwimxrl08e40798hjs5ek9w"},"id":"#1","type":"component","lock":false,"position":5}],"id":"root","idBuffer":"#6","lastCommit":"e1eef533-1be8-49c3-b575-2dfe96a6e4cb"}},"annotations":[],"language":{"type":"id","generated":false,"id":"Language:cjv3kwvoj000u083611381c6o","typename":"Language"},"__typename":"PageTranslation"},"Page:cjyztusbt039t0777kqbo8xj8":{"id":"cjyztusbt039t0777kqbo8xj8","type":{"type":"id","generated":false,"id":"PageType:cjv3l213x004f08366hjufttp","typename":"PageType"},"tags":[],"translations({\"where\":{\"language\":{\"id\":\"cjv3kwvoj000u083611381c6o\"}}})":[{"type":"id","generated":false,"id":"PageTranslation:cjyztuscc03a30777urjsbhwo","typename":"PageTranslation"}],"__typename":"Page"},"PageTranslation:cjyztuscc03a30777urjsbhwo":{"id":"cjyztuscc03a30777urjsbhwo","name":"CCR Liberty sidemount","createdAt":"2019-08-06T12:56:18.684Z","content":{"type":"json","json":{"content":[{"name":"Header","data":{"componentTemplateId":"cjv7yndru048c0836j99ljogw"},"id":"#0","type":"component","lock":false,"position":0},{"name":"ProductCrossroadNew","data":{"componentTemplateId":"cmp0yw25s01tt0826v0wo4wet"},"id":"#27","type":"component","lock":false,"position":1},{"name":"HeroV2","data":{"slides":[{"media":{"recommendedSizes":{"width":"3840","height":"2560"},"mimetype":"image/png","size":8105324,"hash":"ad789360a49e161881b919dd221883ad1a8d6077","id":"cmo66mytqmza50800shwe2y7s","filename":"liberty-overview-hero-2.png","category":"divesoft/","type":"image"},"productName":"LIBERTY <light>SIDEMOUNT</light>","title":"Build for movement and precision.","linkTitle":"CONFIGURE","link":{"url":"https://eshop.divesoft.com","urlNewWindow":true}
2,"autoplayDuration":9000,"id":"1","linkUrl":{"url":"/en/ccr-liberty","pageId":"cl3vesldqknhj085858savf3u"}}],"activeTab":"1"},"id":"#28","type":"component","lock":false,"position":2},{"name":"CarouselTextBlock","data":{"backgroundColor":"silver","title":"CCR LIBERTY <light>SIDEMOUNT</light>","subtitle":"","contentText":"Would you like to pass through very tight passages? Do you need a secondary rebreather? Do you want to feel the real freedom of movement? If so, you can't go wrong here!","buttonTitle":"CONFIGURE","buttonUrl":{"url":"/en/ccr-liberty","pageId":"cl3vesldqknhj085858savf3u"},"linkTitle":"","linkUrl":{"url":"#"},"images":[{"image":{"recommendedSizes":{"width":"1500","height":"1000"},"mimetype":"image/png","size":737647,"hash":"d3e4a7e5fee7092b46c1bc4d6f84b8f1bfa51a18","id":"cl1eycszwr70m0776s9a0byhv","filename":"divesoft-liberty-sidemount-01-1080x1080-t.png","category":"divesoft/","type":"image"},"id":"1"},{"id":"2","image":{"mimetype":"image/png","size":2287790,"hash":"b0a72c7e6923dd548eaec4eaea98e147885d3a5b","id":"cjxc5kfi1079m0776ycru2xmt","filename":"sidemount-00002.png","category":"divesoft/","type":"image"}},{"id":"3","image":{"mimetype":"image/png","size":2926363,"hash":"2e2888b9ed127b0ffcb2f4e8970137b5712fffad","id":"cjxc5lg7x079t07762qoom9df","filename":"sidemount-00005.png","category":"divesoft/","type":"image"}},{"id":"4","image":{"mimetype":"image/png","size":2660493,"hash":"dc8db59a637c6b6b08039465c4ed2b515000d460","id":"cjxc5jkxe079f0776yj24daz8","filename":"sidemount-00000.png","category":"divesoft/","type":"image"}}],"activeTab":"4"},"id":"#30","type":"component","lock":false,"position":3},{"name":"ImageTextBlock","data":{"backgroundColor":"white","content":"Prefer a sidemount configuration? Tight restrictions, freedom in movement, or a secondary rebreather with no need for off-board gas? Then look no further. Just clip the unit on and go diving.\n\nNeutrally buoyant. All gas on board (2 Ã 2 L) with no need for off-board gas. Similar in size to a bailout cylinder. Ideal as a bailout rebreather. Amazing Work of Breathing due to the counterlung position.\n\nOPV valve for easy Diluent flush and water evacuation. Additional water \ntrap in the exhale counterlung for added protection of the oxygen sensors. \nTitanium frame.\n\n**Counterlung volume:** \n5,5 L total volume (2 CLs) \n\n**Dry weight:** \n19,00 kg (41,89 lb) ","links":[],"isMirrored":false,"image":{"recommendedSizes":{"width":"1500","height":"1500"},"mimetype":"image/png","size":4865897,"hash":"3fe48965007b02902957171dfa580f170ee527f5","id":"cmll0z8ylnntr08006hyn71y2","filename":"liberty-sidemount.png","category":"divesoft/","type":"image"}},"id":"#31","type":"component","lock":false,"position":4},{"name":"ImageTextBlock","data":{"backgroundColor":"white","content":"## Advantages\n\nLiberty sidemount is the only rebreather for sidemount diving on the market with all gases onboard.","links":[],"isMirrored":true,"image":{"recommendedSizes":{"width":"1500","height":"1500"},"mimetype":"image/png","size":2322343,"hash":"ed688d8f8e8d63557adb0c7f69b991354912d67f","id":"cmo683xigmzv80800td2ut6vz","filename":"liberty-models-story-2.png","category":"divesoft/","type":"image"}},"id":"#38","type":"component","lock":false,"position":5},{"name":"AccordionText","data":{"accordionTitle":"Neutraly buoyant","content":"Thanks to precise engineering, titanium backplate and awesome weight distribution Liberty Sidemount Rebreather is completely neutrally buoyant."},"id":"#32","type":"component","lock":false,"position":6},{"name":"AccordionText","data":{"accordionTitle":"DIL and OXY onboard","content":"Thanks to the unique design Liberty Sidemount does have both gasses supply onboard. Thanks to that the design can be even more streamlined, while no pony bottles are needed."},"id":"#33","type":"component","lock":false,"position":7},{"name":"AccordionText","data":{"accordionTitle":"OPV and watertrap","content":"Liberty Sidemount features an OPV valve for easy DIL flush and water evacuation. Liberty Sidemount also has an additional water trap in the exhale counterlung, for added protection of the electronics."},"id":"#35","type":"component","lock":false,"position":8},{"name":"AccordionText","data":{"accordionTitle":"Lightweight","content":"Liberty Sidemount is with less than 23kg (50lbs) an ideal companion for travels."},"id":"#34","type":"component","lock":false,"position":9},{"name":"AccordionText","data":{"accordionTitle":"Off board gas suply","content":"In case of long dives, you can hook up your Liberty Sidemount to off board gas suply via the free LP ports on 1st stages or into your [MAVs](https://www.divesoft.com/en/products/bovdsvadv) via Quick Disconnect connector."},"id":"#36","type":"component","lock":false,"position":10},{"name":"AccordionText","data":{"accordionTitle":"Streamlined gas management","content":"Liberty Sidemount is the only [rebreather](https://www.divesoft.com/en/products/ccr-liberty) that has the OXY and DIL manual addition valves included in the mouthpiece. Liberty Sidemount also comes with the diaphragm ADV as a standard feature."},"id":"#37","type":"component","lock":false,"position":11},{"name":"PhotoGallery","data":{"title":"","description":"","divider":false,"images":[{"id":"
21","image":{"mimetype":"image/jpeg","size":842493,"hash":"6a53b1ecf4349e89ecbd0da955b07c6ba55e1993","id":"clzv9eiwr45le0776ai3qid9p","filename":"divesoft-photo-183.jpg","category":"divesoft/","type":"image"}},{"id":"2","image":{"mimetype":"image/jpeg","size":970108,"hash":"08f047efc123c41830d963bbe73533b80e56b746","id":"cl57hrf2mq2ha0776ef8mrhnm","filename":"divesoft-photo-50.jpg","category":"divesoft/","type":"image"}},{"id":"3","image":{"mimetype":"image/jpeg","size":903821,"hash":"8ac427e8c6a8787ae6eec2e40daa28d0c92f7d31","id":"cl57hs2yyq2hh07766iftnbnm","filename":"divesoft-photo-48.jpg","category":"divesoft/","type":"image"}},{"id":"4","image":{"mimetype":"image/jpeg","size":381121,"hash":"3779975de3b9c9d9746e387c1d0662d3c2f9bb24","id":"clbusx40mdd2n0776fwvsxrcm","filename":"divesoft-photo-033.jpg","category":"divesoft/","type":"image"}},{"id":"5","image":{"mimetype":"image/jpeg","size":672272,"hash":"0f8afd80cd69ce9cccf3ea600547d0b5b7ca8d5c","id":"clw4tlv14wv6w0776c3c65ny9","filename":"divesoft-photo-005.jpg","category":"divesoft/","type":"image"}},{"id":"6","image":{"mimetype":"image/jpeg","size":691186,"hash":"7e908dd4964015dda30b3a2581fd81938e195800","id":"clwrm77sf496t077691tuh2m7","filename":"divesoft-photo-062.jpg","category":"divesoft/","type":"image"}}],"activeTab":"6"},"id":"#22","type":"component","lock":false,"position":12},{"name":"Spacer","data":{"spacingLarge":"50","spacingSmall":"50","backgroundColor":"#ffffff"},"id":"#20","type":"component","lock":false,"position":15},{"name":"ProductsCompare","data":{"componentTemplateId":"cl5ab17h9onqf0858nna4mj1w"},"id":"#39","type":"component","lock":false,"position":16},{"name":"HubSpotForm","data":{"backgroundColor":"#ffffff","isTitleH1":false,"title":"Try the CCR Liberty","subtitle":"Contact us for demo!","showBreadcrumbs":false,"hideHeader":false,"portalId":"145642557","formId":"f1af2831-43c5-4be8-baa8-a343bc3415ad"},"id":"#26","type":"component","lock":false,"position":17},{"name":"Footer","data":{"componentTemplateId":"cjvwimxrl08e40798hjs5ek9w"},"id":"#1","type":"component","lock":false,"position":18}],"id":"root","idBuffer":"#40","lastCommit":"917588d4-5d59-49c9-84a6-2120d3401fe9"}},"annotations":[],"language":{"type":"id","generated":false,"id":"Language:cjv3kwvoj000u083611381c6o","typename":"Language"},"__typename":"PageTranslation"},"Page:cjztilv3509et0777ejgtlm67":{"id":"cjztilv3509et0777ejgtlm67","type":{"type":"id","generated":false,"id":"PageType:cjv3l213x004f08366hjufttp","typename":"PageType"},"tags":[],"translations({\"where\":{\"language\":{\"id\":\"cjv3kwvoj000u083611381c6o\"}}})":[{"type":"id","generated":false,"id":"PageTranslation:cjztilv3j09f307777q16vnsp","typename":"PageTranslation"}],"__typename":"Page"},"PageTranslation:cjztilv3j09f307777q16vnsp":{"id":"cjztilv3j09f307777q16vnsp","name":"Analyzer He/O2","createdAt":"2019-08-27T07:34:31.855Z","content":{"type":"json","json":{"content":[{"name":"Header","data":{"products":[{"title":"Accessories","description":"Backplates, Consumables. Tanks.","img":{"recommendedSizes":{"width":"235","height":"235"}},"url":""},{"title":"Accessories sets","description":"Protection, maintenance, cleaning.","img":{"recommendedSizes":{"width":"235","height":"235"}},"url":""},{"title":"Spare parts","description":"Spare parts and components.","img":{"recommendedSizes":{"width":"235","height":"235"}},"url":""},{"title":"Spare parts kits","description":"Completly Liberty spare parts kits.","img":{"recommendedSizes":{"width":"235","height":"235"}},"url":""}],"showScrollIndicator":true},"id":"#0","type":"component","lock":false,"position":0},{"name":"ProductCrossroadNew","data":{"componentTemplateId":"cmo3f1kzkw8pd0889hxoow8p1"},"id":"#27","type":"component","lock":false,"position":1},{"name":"HeroV2","data":{"slides":[{"recommendedSizes":{"width":"3840","height":"2560"}
2,"id":"1","media":{"mimetype":"image/png","size":7686498,"hash":"d2e0c94f089a5114829698b0388a80c7247d10a9","id":"cmod61ryk1yht08008v9s5cto","filename":"bannerhe-1.png","category":"divesoft/","type":"image"},"productName":"ANALYZER He/O<sub>2</sub>","title":"Proven<br>and Trusted","linkUrl":{"url":"https://eshop.divesoft.com/analyzer-he-o2/8313","urlNewWindow":true},"linkTitle":"Buy"}],"variant":"a"},"id":"#2","type":"component","lock":false,"position":2},{"name":"CarouselTextBlock","data":{"title":"He/O<sub>2</sub> ANALYZER","subtitle":"","contentText":"Trusted by divers and blending stations around the world. He/O<sub>2</sub> analyzes oxygen and helium and shows the results directly on the display. Know the mix. Start the dive.","buttonTitle":"Buy","buttonUrl":{"url":"https://eshop.divesoft.com/analyzer-he-o2/8313","urlNewWindow":true},"linkTitle":"Dive in","linkUrl":{"url":"#technical-specifications","urlNewWindow":false},"images":[{"image":{"recommendedSizes":{"width":"1500","height":"1000"},"mimetype":"image/png","size":170778,"hash":"96f773d1f03fb17eb3eeb3fb5b968cccfcf98e74","id":"cmljk4y4fn3cv08009yaq1f7w","filename":"he1.png","category":"divesoft/","type":"image"},"id":"1"},{"id":"2","image":{"mimetype":"image/png","size":71468,"hash":"b05a674ed19dd998a45884dda320d65d139e6d0b","id":"cmljk550vn3d60800fk5jeq3e","filename":"he2.png","category":"divesoft/","type":"image"}},{"id":"3","image":{"mimetype":"image/png","size":41187,"hash":"fd6571e08e355af8b4f6043dbfe6f72f68841e21","id":"cmljk5alan3dl0800l4qd932o","filename":"he3.png","category":"divesoft/","type":"image"}},{"id":"4","image":{"mimetype":"image/png","size":136453,"hash":"9fabc090cbd140185b56ca89cfd205bf8d6dce9e","id":"cmljk5kjvn3e608003sygasc6","filename":"he4.png","category":"divesoft/","type":"image"}},{"id":"5","image":{"mimetype":"image/png","size":241226,"hash":"d236ad612a377282d3e9131893c28d00c102cbac","id":"cmljk5rsmn3el080054hiywsm","filename":"he5.png","category":"divesoft/","type":"image"}}],"variant":"a","backgroundColor":"silver"},"id":"#4","type":"component","lock":false,"position":3},{"name":"ImageTextBlock","data":{"title":"","content":"## Gas Analysis\n\n**Gas Mixes**\n\n- Air.\n- Nitrox.\n- Trimix.\n- Heliox.\n \nHe/O<sub>2</sub> analyzes gas mixes and clearly displays oxygen and helium content. Reliable gas analysis is essential before every dive.\n\n**Gases Measured**\n\n- \\> Oxygen\n- \\> Helium","isMirrored":false,"image":{"recommendedSizes":{"width":"1500","height":"1500"},"mimetype":"image/png","size":3040404,"hash":"da307e1f49bf324fb657f0a8f46fbefc8c36e224","id":"cmod62gop1yii0800svqskyg8","filename":"he1.png","category":"divesoft/","type":"image"}},"id":"#5","type":"component","lock":false,"position":4},{"name":"ImageTextBlock","data":{"title":"","content":"## Practical Use\n\n**Gas Blending**\n\n- Dive center.\n- Boat.\n- Filling station.\n\nHe/O<sub>2</sub> is designed for everyday gas analysis during blending and dive preparation.\n\nFast measurement helps verify the mix quickly.","isMirrored":true,"image":{"recommendedSizes":{"width":"1500","height":"1500"},"mimetype":"image/png","size":1889093,"hash":"b198185913e22b570a506ac235c5c1101d378d9d","i
2d":"cmo21nsjam8lr0800opoooyi8","filename":"he2.png","category":"divesoft/","type":"image"}},"id":"#6","type":"component","lock":false,"position":5},{"name":"ImageTextBlock","data":{"title":"","content":"## Additional Capabilities\n\n**Gas Purity Measurement**\n\nThe He/O<sub>2</sub> analyzer can also be used for gas purity measurement. When needed, it can be configured to measure different gas mixtures.","isMirrored":false,"image":{"recommendedSizes":{"width":"1500","height":"1500"},"mimetype":"image/png","size":1894896,"hash":"b2d25f5369d516dce05019f1a14d067c1028b677","id":"cmljkcen3n3jd08009k42v63o","filename":"pribehh3.png","category":"divesoft/","type":"image"},"links":[{"id":"2","title":"Purity measurement guide (manual)","url":{"url":"https://www.divesoft.com/en/manuals/8313-analyzer-he-o2-en#07-4-gas-purity-measurement"},"color":"black"}],"activeTab":"2"},"id":"#7","type":"component","lock":false,"position":6},{"name":"ImageTextBlock","data":{"title":"","content":"## Interface\n\n**Display**\n\nBright OLED display.\nMeasured values are clearly visible in multiple formats.\n\n**Controls**\n\nMembrane keypad with menu navigation and dedicated controls.\n\nDesigned for reliable operation in field conditions.","isMirrored":true,"image":{"recommendedSizes":{"width":"1500","height":"1500"},"mimetype":"image/png","size":1721799,"hash":"2a9e5780fab80636cac8036b48a2f7520674f200","id":"cmljkdigqn3ka080089te606n","filename":"pribehh4.png","category":"divesoft/","type":"image"}},"id":"#8","type":"component","lock":false,"position":7},{"name":"ImageTextBlock","data":{"title":"","content":"## Hardware\n\n**Sensors / Measurement Principle**\n\nElectrochemical oxygen sensor R-22S or compatible.\nHelium concentration is determined using speed-of-sound measurement, eliminating the need for a helium sensor.\n\n**Power**\n\nDepending on the version:\nReplaceable 9V battery (6F22) or built-in rechargeable battery.\n\nExternal power supply by DC jack or USB-A.","isMirrored":false,"image":{"recommendedSizes":{"width":"1500","height":"1500"},"mimetype":"image/png","size":1947202,"hash":"de2b209725cf98ba31bcb3d5470be81156c8d7c3","id":"cmljkgdl6n3lv08000ts2zpw6","filename":"pribehh5.png","category":"divesoft/","type":"image"}},"id":"#9","type":"component","lock":false,"position":8},{"name":"ImageTextBlock","data":{"title":"","content":"## Construction\n\nHigh-strength aluminum alloy body with hard-anodized surface. Designed for durability and resistance to mechanical damage.","isMirrored":true,"image":{"recommendedSizes":{"width":"1500","height":"1500"},"mimetype":"image/png","size":2325075,"hash":"10ad1864e1615acc805322e6e9e14b9fe47f8459","id":"cmo21su6nm8mc0800txfpal4u","filename":"he6.png","category":"divesoft/","type":"image"}},"id":"#10","type":"component","lock":false,"position":9},{"name":"ImageTextBlock","data":{"content":"## Service & Maintenance\n\nOxygen sensor replacement can be performed by the user.\n\nBattery replacement depends on the analyzer version.\n\nFirmware updates and data transfer are available through the USB interface.","links":[{"title":"Link","url":{},"color":"black","id":"1"}],"isMirrored":false,"image":{"recommendedSizes":{"width":"1500","height":"1500"},"mimetype":"image/png","size":3417821,"hash":"d4dea614f256ec84bff918603dec708db52a3610","id":"cmod637ri1yiw0800mb5zkfy4","filename":"he7.png","category":"divesoft/","type":"image"}},"id":"#22","type":"component","lock":false,"position":10},{"name":"ImageTextBlock","data":{"content":"## Built-in Tools\n\nHe/O<sub>2</sub> includes functions designed for gas blending and analysis.\n\n**Functions include:**\n- \\> continuous analysis with adjustable limits and alarms\n- \\> alarm relay output for compressor emergency shutoff\n- \\>\ngas mix solver\n- \\> gas mix simulator\n- \\> gas purity measurement\n- \\> USB data output","links":[],"isMirrored":true,"image":{"recommendedSizes":{"width":"1500","height":"1500"},"mimetype":"image/png","size":2040929,"hash":"aaa8b5790dd0d35c6f12effff9562ff554d89771","id":"cmo222ekxm8nq0800ma026187","filename":"he8.png","category":"divesoft/","type":"image"}},"id":"#23","type":"component","lock":false,"position":11},{"name":"ImageTextBlock","data":{"content":"## Cylinder Labels\n\nPrint professional gas cylinder labels directly after analyzing the mix.\n\nThe He/O<sub>2</sub>
2 analyzer can connect to supported label printers.\n\nClear cylinder labels help ensure every gas is correctly identified before the dive.\n\nExplore Divesoft Label print or Learn how Divesoft Label Print works!","links":[{"title":"Read the article","url":{"url":"/en/blog/cylinder-labeling","pageId":"cmley5r269wkr0889usnp23dr"},"color":"black","id":"1"},{"id":"2","title":"Divesoft Label Print","url":{"url":"https://toolkit.divesoft.com/"},"color":"black"}],"isMirrored":false,"image":{"recommendedSizes":{"width":"1500","height":"1500"},"mimetype":"image/png","size":2802337,"hash":"65ed7924e5009a22e912496a3b74d8db349d1237","id":"cmo226da9m8o008000vxtne1y","filename":"he9.png","category":"divesoft/","type":"image"}},"id":"#24","type":"component","lock":false,"position":12},{"name":"ImageTextBlock","data":{"backgroundColor":"white","content":"## Divesoft He/Oâ Analyzer Cable\n\nConnect your He/Oâ Analyzer to a compatible Zebra printer and print cylinder labels automatically.\n\nNo handwritten notes, no transcription errors - just fast, reliable label printing with complete gas data. Works with Nitrox, Trimix, and Heliox.","links":[{"title":"Buy Divesoft He/Oâ Analyzer Cable","url":{"url":"https://eshop.divesoft.com/he-o2-printer-cable/7312?currency=CZK"},"color":"red","id":"1"}],"isMirrored":true,"image":{"recommendedSizes":{"width":"1500","height":"1500"},"mimetype":"image/jpeg","size":2299811,"hash":"de0e19086da0b4b8c6eb09b41a0dba5498a5b880","id":"cmquqk5b981890800pvli6k7a","filename":"yx76k-dsc05101-7.jpg","category":"divesoft/","type":"image","alt":"Divesoft He/O2 Analyzer Cable"},"activeTab":"1"},"id":"#31","type":"component","lock":false,"position":13},{"name":"ProductsCompare","data":{"componentTemplateId":"cmo217fjivvbv08890d7r7mhl"},"id":"#25","type":"component","lock":false,"position":14},{"name":"CallToAction","data":{"backgroundColor":"white","isCentered":true,"title":"","links":[{"title":"Buy","url":{"url":"https://eshop.divesoft.com/analyzer-he-o2/8313","urlNewWindow":true},"color":"black","type":"outline","id":"1"}],"linkPosition":"below","linkAlignment":"right","activeTab":"1"},"id":"#30","type":"component","lock":false,"position":15},{"name":"LinkAnchor","data":{"anchorId":"technical-specifications"},"id":"#28","type":"component","lock":false,"position":16},{"name":"AccordionText","data":{"accordionTitle":"Design","content":"**Dimensions** \n85 Ã 205 Ã 40 mm\n\n**Weight** \n430 g\n\n**Materials** \nanodized aluminum with TPU ends\n(body)\n\n**Display and user interface** \nBright OLED \nFull keypad"},"id":"#13","type":"component","lock":false,"position":17},{"name":"AccordionLinks","data":{"accordionTitle":"How does It Work","links":[{"itemTitle":"Analyzer SOLO vs Analyzer He/O2","linkLabel":"Open","linkUrl":{"url":"https://www.youtube.com/watch?v=lfVy72g9WDk"}
2,"id":"1"},{"itemTitle":"3-Point Calibration","linkLabel":"Open","linkUrl":{"url":"https://www.youtube.com/watch?v=mL_EjDMJboc"},"id":"2"}],"storesTitle":"","appStoreLink":{"url":"https://apps.apple.com/cz/app/divesoft-app/id1545496130"},"googlePlayLink":{"url":"https://play.google.com/store/apps/details?id=com.divesoft.divesoft_app"},"activeTab":"1"},"id":"#21","type":"component","lock":false,"position":18},{"name":"AccordionText","data":{"accordionTitle":"Technical Specifications","content":"**Measurement Method** \nElectrochemical O<sub>2</sub> sensor and helium measurement based on speed of sound\n\n**Range of oxygen measurement** \n0â100 % O<sub>2</sub>\n\n**Range of helium measurement** \n0â100 % He\n\n**Measuring temperature** \n0â40 °C\n\n**Operating pressure** \n700â1100 mbar\n\n**Recommended Gas Flow** \n0.2 L/min\n\n**Calibration** \nAmbient air or reference gas\n\n**Power** \nReplaceable 9V alkaline or lithium battery"},"id":"#15","type":"component","lock":false,"position":19},{"name":"AccordionText","data":{"accordionTitle":"Connectivity","content":"Mini-USB (data transfer, firmware updates)"},"id":"#16","type":"component","lock":false,"position":20},{"name":"AccordionText","data":{"accordionTitle":"Packaging","content":"Comes in hard case or semi-hard case (depending on configuration). The Divesoft Analyzer He/O<sub>2</sub> is available in two packaging options to suit your needs:\na durable hard case for maximum protection, or a compact semi-hard case for easy transport.\n\nBoth versions include precision-cut foam inserts that keep the analyzer secure during travel and storage."},"id":"#17","type":"component","lock":false,"position":21},{"name":"AccordionText","data":{"accordionTitle":"Sustainability","content":"The He/O<sub>2</sub> Analyzer follows Divesoftâs modular design philosophy: robust, serviceable, and built to last.\n\nIts replaceable battery and sensor extend product lifespan and reduce electronic waste.\n"},"id":"#18","type":"component","lock":false,"position":22},{"name":"AccordionText","data":{"accordionTitle":"Warranty","content":"Warranty 24 months on analyzer, 12 months on sensor. \n\nFor calibration, maintenance, or warranty service, contact your local Divesoft dealer or authorized service center."},"id":"#19","type":"component","lock":false,"position":23},{"name":"AccordionLinks","data":{"accordionTitle":"Downloads","links":[{"itemTitle":"User manual","linkLabel":"Open","linkUrl":{"url":"/en/manuals/8313-analyzer-he-o2-en","mediaData":{"mimetype":"application/pdf","size":6549226,"hash":"9518b863a5f9013923de9fefedbf0f1e12fb9ebb","id":"cjvw45ng604br0776h4aps7b6","filename":"analyzer-user-manual-25.pdf","category":"divesoft/docs/","type":"file"},"urlNewWindow":true,"pageId":"ckocumdqv380r0788ta9ljatx"},"id":"1"},{"id":"3","itemTitle":"Analyzers comparison","linkUrl":{"url":"http://foxer360-media-library.s3.eu-central-1.amazonaws.com/divesoft/docs/340ee3ff0777b8d06792ea829af47451c905b26c_analyzers-comparison-202601.pdf","mediaData":{"mimetype":"application/pdf","size":940217,"hash":"340ee3ff0777b8d06792ea829af47451c905b26c","id":"cmll1gmylnnyg08006ews1qxv","filename":"analyzers-comparison-202601.pdf","category":"divesoft/docs/","type":"file"},"urlNewWindow":true},"linkLabel":"Open"}],"storesTitle":"","appStoreLink":{"url":""},"googlePlayLink":{"url":"https://play.google.com/store/apps/details?id=com.divesoft.divesoft_app"}},"id":"#20","type":"component","lock":false,"position":24},{"name":"CallToAction","data":{"componentTemplateId":"cmo9u6bhwy5g90889gprzyxzf"},"id":"#29","type":"component","lock":false,"position":25},{"name":"Footer","data":{"copyrights":"Copyright © 2019 Divesoft LLC All rights reserved.","facebookUrl":"","youtubeUrl":"","instagramUrl":"","contacts":"**Divesoft, s.r.o.** Hálkova 2495 413 01 Roudnice nad Labem Äeská republika Tel.: +420 416 857 057 E-mail: [email protected]"},"id":"#1","type":"component","lock":false,"position":26}],"id":"root","idBuffer":"#32","lastCommit":"a078a33d-4d78-4b0a-8854-d54196a55465"}},"annotations":[],"language":{"type":"id","generated":false,"id":"Language:cjv3kwvoj000u083611381c6o","typename":"Language"},"__typename":"PageTranslation"},"Page:cjztim1kk09fg0777nv63tf9b":{"id":"cjztim1kk09fg0777nv63tf9b","type":{"type":"id","generated":false,"id":"PageType:cjv3l213x004f08366hjufttp","typename":"PageType"},"tags":[],"translations({\"where\":{\"language\":{\"id\":\"cjv3kwvoj000u083611381c6o\"}}})":[{"type":"id","generated":false,"id":"PageTranslation:cjztim1kz09fq0777x8mozapg","typename":"PageTranslation"}],"__typename":"Page"},"PageTranslation:cjztim1kz09fq0777x8mozapg":{"id":"cjztim1kz09fq0777x8mozapg","name":"Analyzer Solo","createdAt":"2019-08-27T07:34:40.258Z","content":{"type":"json","json":{"content":[{"name":"Header","data":{"products":[{"title":"Accessories","description":"Backplates, Consumables. Tanks.","img":{"recommendedSizes":{"width":"235","height":"235"}},"url":""},{"title":"Accessories sets","description":"Protection, maintenance, cleaning.","img":{"recommendedSizes":{"width":"235","height":"235"}},"url":""},{"title":"Spare parts","description":"Spare parts and components.","img":{"recommendedSizes":{"width":"235","height":"235"}},"url":""}
2,{"title":"Spare parts kits","description":"Completly Liberty spare parts kits.","img":{"recommendedSizes":{"width":"235","height":"235"}},"url":""}],"isTransparencyEnabled":false,"showScrollIndicator":true},"id":"#0","type":"component","lock":false,"position":0},{"name":"ProductCrossroadNew","data":{"componentTemplateId":"cmo3f1kzkw8pd0889hxoow8p1"},"id":"#26","type":"component","lock":false,"position":1},{"name":"HeroV2","data":{"slides":[{"recommendedSizes":{"width":"3840","height":"2560"},"id":"1","media":{"mimetype":"image/png","size":3654792,"hash":"595e1633a95ce88d6a20e7b805634eaca2280f38","id":"cmljl4m4pn4760800pkjc45md","filename":"herosolo.png","category":"divesoft/","type":"image"},"productName":"SOLO","title":"Built for Trimix","linkUrl":{"url":"https://eshop.divesoft.com/analyzer-solo/8300","urlNewWindow":true},"linkTitle":"Buy"}],"variant":"a"},"id":"#2","type":"component","lock":false,"position":2},{"name":"CarouselTextBlock","data":{"title":"SOLO ANALYZER","subtitle":"","contentText":"SOLO is a trimix analyzer that measures oxygen and helium in diving gas mixes. Designed for divers, blending stations and dive centers.","buttonTitle":"Buy","buttonUrl":{"url":"https://eshop.divesoft.com/analyzer-solo/8300","urlNewWindow":true},"linkTitle":"Dive in","linkUrl":{"url":"#technical-specifications","urlNewWindow":false},"images":[{"image":{"recommendedSizes":{"width":"1500","height":"1000"},"mimetype":"image/png","size":353345,"hash":"752fea39ef1123ed359c0723231ef4c2f389d351","id":"cmljl6vwkn48a0800im7pom2u","filename":"solo1.png","category":"divesoft/","type":"image"},"id":"1"},{"id":"2","image":{"mimetype":"image/png","size":182868,"hash":"2245b74a7cb361470fb01a63bc7da6c0b6a0e8b9","id":"cmljl73g5n48o08005d8mfq07","filename":"solo2.png","category":"divesoft/","type":"image"}},{"id":"3","image":{"mimetype":"image/png","size":169363,"hash":"e316621613dd4e85b173afacb096b4e1f440fd47","id":"cmljl7bsln4950800skisvdxr","filename":"solo3.png","category":"divesoft/","type":"image"}},{"id":"4","image":{"mimetype":"image/png","size":172226,"hash":"5cfa1ba74eb17581d4ec3536e66ee5578d5ec528","id":"cmljl7lc4n49h0800o8um6sj4","filename":"solo4.png","category":"divesoft/","type":"image"}},{"id":"5","image":{"mimetype":"image/png","size":609532,"hash":"f88ef2f2c9539ede6f37a4738407fef4f467a926","id":"cmljl83d9n49w0800rwn1l0wc","filename":"solo5.png","category":"divesoft/","type":"image"}}],"backgroundColor":"silver","activeTab":"5"},"id":"#4","type":"component","lock":false,"position":3},{"name":"ImageTextBlock","data":{"title":"","content":"## Gas Analysis\n\n**Gas Mixes**\n\n- Air.\n- Nitrox.\n- Trimix.\n \nSOLO measures oxygen and helium in gas mixes.\n\n**Gases Measured**\n- \\> Oxygen\n- \\> Helium","isMirrored":false,"image":{"recommendedSizes":{"width":"1500","height":"1500"},"mimetype":"image/png","size":2122754,"hash":"50d8f1496058db202e98f19365e5897e1d48139c","id":"cmo22fz2rm8ob0800gzkg7r6d","filename":"solo1.png","category":"divesoft/","type":"image"}},"id":"#5","type":"component","lock":false,"position":4},{"name":"ImageTextBlock","data":{"title":"","content":"## Interface\n\n**Display**\n\nThe analyzer shows the measured gas mix directly on its display.","isMirrored":true,"image":{"recommendedSizes":{"width":"1500","height":"1500"},"mimetype":"image/png","size":1834858,"hash":"8c3e4d2ec8dc6c5a645e4d3d28dbd587a6dd142b","id":"cmljlf50wn4ei0800r6rlt7pk","filename":"pribehsolo2.png","category":"divesoft/","type":"image"}},"id":"#6","type":"component","lock":false,"position":5},{"name":"ImageTextBlock","data":{"title":"","content":"## Practical Use\n\n- Trimix diving.\n- Gas blending.\n- Dive center use.\n \nSOLO is built for reliable oxygen and helium analysis.","isMirrored":false,"image":{"recommendedSizes":{"width":"1500","height":"1500"},"mimetype":"image/png","size":2317755,"hash":"b33fabeed9aa490c7ee5ce91b5b27c36df2ff94a","id":"cmo22i9pem8ol08009sg3yz52","filename":"solo3.png","category":"divesoft/","type":"image"}},"id":"#7","type":"component","lock":false,"position":6},{"name":"Showreel","data":{"isFullWidth":false,"slides":[{"title":"Light As a Feather.","isTextCentered":true,"media":{"recommendedSizes":{"width":"3840","height":"2560"},"mimetype":"image/png","size":2688838,"hash":"df7ccae510a079e5b9f6ba16cc629af55a50a5ec","id":"cmo22kmoom8ow0800a8k2okbd","filename":"solo5.png","category":"divesoft/","type":"image"}
2,"autoplayDuration":5000,"id":"1"}]},"id":"#23","type":"component","lock":false,"position":7},{"name":"Spacer","data":{"spacingLarge":"80","spacingSmall":"80","backgroundColor":"#ffffff"},"id":"#27","type":"component","lock":false,"position":8},{"name":"ImageTextBlock","data":{"title":"","content":"## Hardware\n\n**Sensors / Measurement Principle**\n\nElectrochemical oxygen sensor.\nHelium measurement based on the speed of sound in the gas mixture.\n\n**Power**\n\nPowered by a rechargeable internal battery.\n\n**Construction**\n\nHigh-strength anodized aluminum body.","isMirrored":true,"image":{"recommendedSizes":{"width":"1500","height":"1500"},"mimetype":"image/png","size":3036793,"hash":"23da64d81f0acb7e1c6ed344c2d444cbba58caac","id":"cmo22mqahm8p60800jnv6e4eb","filename":"solo6.png","category":"divesoft/","type":"image"}},"id":"#8","type":"component","lock":false,"position":9},{"name":"ImageTextBlock","data":{"title":"","content":"## Service & Maintenance\n\nThe oxygen sensor can be replaced by the user.","isMirrored":false,"image":{"recommendedSizes":{"width":"1500","height":"1500"},"mimetype":"image/png","size":2256123,"hash":"7cfc658183cd1e23f8e1e8a8c88046bb182c4d70","id":"cmljllvlhn4gn08003nnqqdyo","filename":"pribehsolo7.png","category":"divesoft/","type":"image"}},"id":"#11","type":"component","lock":false,"position":10},{"name":"ProductsCompare","data":{"componentTemplateId":"cmo217fjivvbv08890d7r7mhl"},"id":"#24","type":"component","lock":false,"position":11},{"name":"CallToAction","data":{"backgroundColor":"white","isCentered":true,"title":"","links":[{"title":"Buy","url":{"url":"https://eshop.divesoft.com/analyzer-solo/8300","urlNewWindow":true},"color":"black","type":"outline","id":"1"}],"linkPosition":"below","linkAlignment":"right","activeTab":"1"},"id":"#30","type":"component","lock":false,"position":12},{"name":"LinkAnchor","data":{"anchorId":"technical-specifications"},"id":"#28","type":"component","lock":false,"position":13},{"name":"AccordionText","data":{"accordionTitle":"Design","content":"**Dimensions** \n85 à 205 à 40 mm \n\n**Weight** \n420 g\n\n**Materials** \nDurable ABS-PC (body)\n\n**Display and user interface** \nBright OLED \nFull keypad"},"id":"#13","type":"component","lock":false,"position":14},{"name":"AccordionLinks","data":{"accordionTitle":"How Does it Work","links":[{"itemTitle":"Analyzer SOLO vs Analyzer He/O<sub>2</sub>","linkLabel":"Open","linkUrl":{"urlNewWindow":true,"url":"https://www.youtube.com/watch?v=lfVy72g9WDk"}
2,"id":"1"}],"storesTitle":"","appStoreLink":{"url":"https://apps.apple.com/cz/app/divesoft-app/id1545496130"},"googlePlayLink":{"url":"https://play.google.com/store/apps/details?id=com.divesoft.divesoft_app"},"activeTab":"1"},"id":"#33","type":"component","lock":false,"position":15},{"name":"AccordionText","data":{"accordionTitle":"Technical Specifications","content":"**Measurement Method** \nElectrochemical O<sub>2</sub> sensor and helium analysis based on speed of sound \n\n**Range of oxygen measurement** \n0â100 % O<sub>2</sub>\n\n**Range of helium measurement** \n0â100 % He\n\n**Measuring temperature** \n0â40 °C\n\n**Operating pressure** \n700â1100 mbar \n(ambient equivalent)\n\n**Recommended Gas Flow** \n0.2 L/min\n\n**Measurement Cycle** \n200 ms\n\n**Calibration** \nAmbient air or reference gas\n\n**Data function** \nBuilt-in gas mixing calculator, real-time gas data display \n\n**Power** \nRechargeable Li-Ion, USB-C charging "},"id":"#15","type":"component","lock":false,"position":18},{"name":"AccordionText","data":{"accordionTitle":"Connectivity","content":"The SOLO Analyzer connects via USB-C for charging and data transfer.\nMeasured values, calibration data, and device logs can be synchronized with the Divesoft App or saved for record-keeping.\nFuture firmware updates are available through the USB-C interface, ensuring your \nanalyzer stays up to date."},"id":"#16","type":"component","lock":false,"position":19},{"name":"AccordionText","data":{"accordionTitle":"Packaging","content":"Each SOLO Analyzer is supplied in a durable semi-hard protective case with precision cut foam inserts.\nThe standard set includes a USB-C cable, flow limiter, and calibration adapter."},"id":"#17","type":"component","lock":false,"position":20},{"name":"AccordionText","data":{"accordionTitle":"Sustainability","content":"The SOLO Analyzer is built to last and designed for repairability through authorized service centers."},"id":"#18","type":"component","lock":false,"position":21},{"name":"AccordionText","data":{"accordionTitle":"Service & Warranty","content":"24 months on analyzer, 12 months on sensors"},"id":"#19","type":"component","lock":false,"position":22},{"name":"AccordionLinks","data":{"accordionTitle":"Downloads & Links","links":[{"itemTitle":"User manual","linkLabel":"Open","linkUrl":{"url":"/en/manuals/8300-analyzer-solo-en","mediaData":{"mimetype":"application/pdf","size":5268912,"hash":"9bdfe0684f629cd70703ab11653bb2924591160b","id":"cky008zvjlsxf0776y1uijtzq","filename":"solo-en.pdf","category":"divesoft/docs/","type":"file"},"urlNewWindow":true,"pageId":"ckonbtfmp3px60788qpmvrvhk"}
2,"id":"1"},{"id":"2","itemTitle":"Analyzers comparison","linkUrl":{"url":"http://foxer360-media-library.s3.eu-central-1.amazonaws.com/divesoft/docs/340ee3ff0777b8d06792ea829af47451c905b26c_analyzers-comparison-202601.pdf","mediaData":{"mimetype":"application/pdf","size":940217,"hash":"340ee3ff0777b8d06792ea829af47451c905b26c","id":"cmll1gmylnnyg08006ews1qxv","filename":"analyzers-comparison-202601.pdf","category":"divesoft/docs/","type":"file"},"urlNewWindow":true},"linkLabel":"Open"}],"storesTitle":"","appStoreLink":{"url":"https://apps.apple.com/cz/app/divesoft-app/id1545496130","urlNewWindow":true},"googlePlayLink":{"url":"https://play.google.com/store/apps/details?id=com.divesoft.divesoft_app","urlNewWindow":true}},"id":"#20","type":"component","lock":false,"position":23},{"name":"CallToAction","data":{"componentTemplateId":"cmo9u6bhwy5g90889gprzyxzf"},"id":"#29","type":"component","lock":false,"position":24},{"name":"Footer","data":{"copyrights":"Copyright © 2019 Divesoft LLC All rights reserved.","facebookUrl":"","youtubeUrl":"","instagramUrl":"","contacts":"**Divesoft, s.r.o.** Hálkova 2495 413 01 Roudnice nad Labem Äeská republika Tel.: +420 416 857 057 E-mail: [email protected]"},"id":"#1","type":"component","lock":false,"position":25}],"id":"root","idBuffer":"#34","lastCommit":"39ceb42a-8f6f-47e8-98ed-ef04390612d8"}},"annotations":[],"language":{"type":"id","generated":false,"id":"Language:cjv3kwvoj000u083611381c6o","typename":"Language"},"__typename":"PageTranslation"},"Page:ck2y1vlg800e00821gf9oba1c":{"id":"ck2y1vlg800e00821gf9oba1c","type":{"type":"id","generated":false,"id":"PageType:cjv3l213x004f08366hjufttp","typename":"PageType"},"tags":[{"type":"id","generated":false,"id":"Tag:ckp59jt9n48lj0788mfuqrhym","typename":"Tag"}],"translations({\"where\":{\"language\":{\"id\":\"cjv3kwvoj000u083611381c6o\"}}})":[{"type":"id","generated":false,"id":"PageTranslation:ck2y1vlgr00e70821chikif59","typename":"PageTranslation"}],"__typename":"Page"},"PageTranslation:ck2y1vlgr00e70821chikif59":{"id":"ck2y1vlgr00e70821chikif59","name":"404","createdAt":"2019-11-14T01:44:10.347Z","content":{"type":"json","json":{"content":[{"name":"Header","data":{"componentTemplateId":"cjv7yndru048c0836j99ljogw"},"id":"#0","type":"component","lock":false,"position":0},{"name":"Showreel","data":{"isFullWidth":true,"slides":[{"title":"404 - Page not found<br>You are diving in dangerous waters.","isTextCentered":true,"media":{"recommendedSizes":{"width":"3840","height":"2560"},"mimetype":"image/png","size":4052292,"hash":"64c6e465841fe4c5e7d0a9c41270ab4c1fe77e8e","id":"cmohdi42t2xnt0800pac9yclc","filename":"not-found.png","category":"divesoft/","type":"image"},"autoplayDuration":5000,"id":"1"}],"activeTab":"1"},"id":"#16","type":"component","lock":false,"position":1},{"name":"CallToAction","data":{"backgroundColor":"white","isCentered":true,"title":"","links":[{"title":"Home","url":{"url":"/en","pageId":"cjv3l26tp004p0836i54n4u7a"},"color":"black","type":"outline","id":"1"}],"linkPosition":"below","linkAlignment":"right"},"id":"#17","type":"component","lock":false,"position":2},{"name":"CallToAction","data":{"componentTemplateId":"cmo9u6bhwy5g90889gprzyxzf"},"id":"#18","type":"component","lock":false,"position":3},{"name":"Footer","data":{"componentTemplateId":"cjvwimxrl08e40798hjs5ek9w"},"id":"#1","type":"component","lock":false,"position":18}],"id":"root","idBuffer":"#19","lastCommit":"867e74fa-ad65-4b21-b8a4-2c616bffe16a"}},"annotations":[],"language":{"type":"id","generated":false,"id":"Language:cjv3kwvoj000u083611381c6o","typename":"Language"},"__typename":"PageTranslation"},"Page:ck4sgp3ah11mw0821pubz9we4":{"id":"ck4sgp3ah11mw0821pubz9we4","type":{"type":"id","generated":false,"id":"PageType:cjv3l213x004f08366hjufttp","typename":"PageType"},"tags":[{"type":"id","generated":false,"id":"Tag:ckp59jt9n48lj0788mfuqrhym","typename":"Tag"}],"translations({\"where\":{\"language\":{\"id\":\"cjv3kwvoj000u083611381c6o\"}}})":[{"type":"id","generated":false,"id":"PageTranslation:ck4sgp3ar11n30821wvhq5hyv","typename":"PageTranslation"}],"__typename":"Page"},"PageTranslation:ck4sgp3ar11n30821wvhq5hyv":{"id":"ck4sgp3ar11n30821wvhq5hyv","name":"Contacts","createdAt":"2019-12-30T13:11:48.722Z","content":{"type":"json","json":{"content":[{"name":"Header","data":{"componentTemplateId":"cjv7yndru048c0836j99ljogw"},"id":"#0","type":"component","lock":false,"position":0},{"name":"Footer","data":{"componentTemplateId":"cjvwimxrl08e40798hjs5ek9w"},"id":"#1","type":"component","lock":false,"position":4}],"id":"root","idBuffer":"#5","lastCommit":"afef07ab-11a0-4553-b4d5-bf83f933bfa9"}},"annotations":[],"language":{"type":"id","generated":false,"id":"Language:cjv3kwvoj000u083611381c6o","typename":"Language"},"__typename":"PageTranslation"},"Page:ck7fwhzma02rt0788qubyegdb":{"id":"ck7fwhzma02rt0788qubyegdb","type":{"type":"id","generated":false,"id":"PageType:cjv3l213x004f08366hjufttp","typename":"PageType"},"tags":[],"translations({\"where\":{\"language\":{\"id\":\"cjv3kwvoj000u083611381c6o\"}}})":[{"type":"id","generated":false,"id":"PageTranslation:ck7fwhzms02s007883jiwdgq0","typename":"PageTranslation"}],"__typename":"Page"},"PageTranslation:ck7fwhzms02s007883jiwdgq0":{"id":"ck7fwhzms02s007883jiwdgq0","name":"brandbook","createdAt":"2020-03-06T08:12:17.956Z","content":{"type":"json","json":{"content":[{"name":"Header","data":{"products":[{"title":"Accessories","description":"Backplates, Consumables. Tanks.","img":{"recommendedSizes":{"width":"235","height":"235"}},"url":""},{"title":"Accessories sets","description":"Protection, maintenance, cleaning.","img":{"recommendedSizes":{"width":"235","height":"235"}},"url":""},{"title":"Spare parts","description":"Spare parts and components.","img":{"recommendedSizes":{"width":"235","height":"235"}},"url":""}
2,{"title":"Spare parts kits","description":"Completly Liberty spare parts kits.","img":{"recommendedSizes":{"width":"235","height":"235"}},"url":""}]},"id":"#14","type":"component","lock":false,"position":0},{"name":"Carousel","data":{"slides":[{"image":{"recommendedSizes":{"width":"1600","height":"700"},"mimetype":"image/png","size":113657,"hash":"bcbef68dfd1e5a2916766614887035a3df78ba63","id":"clpqtmgniue1h0776ox8jwj4w","filename":"divesoft-brandbook-1.png","category":"divesoft/","type":"image"},"title":"BRAND BOOK","subTitle":"The bible of the brand.","description":"Explore","url":{"url":"http://foxer360-media-library.s3.eu-central-1.amazonaws.com/divesoft/docs/b1fa6a2311dc7be47a6ad915df6e5c5a8403b7f6_divesoft-brandbook.pdf","mediaData":{"mimetype":"application/pdf","size":17813106,"hash":"b1fa6a2311dc7be47a6ad915df6e5c5a8403b7f6","id":"clpqte9meudwl0776xx27lnl9","filename":"divesoft-brandbook.pdf","category":"divesoft/docs/","type":"file"},"urlNewWindow":false},"buttonTitle":"open","isBackgroundBlack":false,"isCentred":false,"id":"1","file":{"type":"file"}},{"image":{"recommendedSizes":{"width":"1600","height":"700"},"mimetype":"image/png","size":250841,"hash":"f9d5952b60e7a6821a7f30db4f1d861126d95413","id":"clpqtmxpmue1w07766lsuj1d0","filename":"divesoft-brandbook-2.png","category":"divesoft/","type":"image"},"title":"","description":"","url":"","buttonTitle":"","isBackgroundBlack":false,"isCentred":false,"id":"2"}],"activeTab":"1"},"id":"#16","type":"component","lock":false,"position":1},{"name":"Hero","data":{"title":"","text":"The brand book is somehow the bible of the brand and everyone who comes in professional contact with the brand should go through it. We insist on following the rules of this brand book, because only this way we can sustain its uniqueness. The main goal of this brand manual is to outline the general rules when using Divesoftâs brand assets. It defines the fundamental parts of visual and verbal identity. It shows the key approach to brand application in various media.","btnTitle":"","url":{"url":"","urlNewWindow":true},"image":{"recommendedSizes":{"width":"1600","height":"560"}},"paddingTop":true,"smallFontSize":false},"id":"#15","type":"component","lock":false,"position":2},{"name":"Firmwares","data":{"title":"Download:","divider":false,"articles":[{"title":"LOGO DESIGN","text":"","id":"2","url":{"url":"https://divesoft.sharepoint.com/:f:/s/Public/ErJnmNwg8WdCuKZlJ0iitiUBO_Ucqq_zHqAcI2_x5hyNUw?e=SS0vKC?","urlNewWindow":true}},{"id":"4","title":"SUB-BRANDS","url":{"url":"https://divesoft.sharepoint.com/:f:/s/Public/EqLBvEEAJstBsVGIdERWDwoBMR6M5AZY8V8GnGe46z_BNA?e=8TE8Ag?","urlNewWindow":true}},{"id":"6","title":"TYPOGRAPHY","url":{"urlNewWindow":true,"url":"https://divesoft.sharepoint.com/:f:/s/Public/EoYecxjsh21PrRcqVs1uN7sBewX81un89-Hl3YNB3xDabQ?e=ubv9kf?"}}]},"id":"#10","type":"component","lock":false,"position":3},{"name":"Footer","data":{"componentTemplateId":"cjvwimxrl08e40798hjs5ek9w"},"id":"#7","type":"component","lock":false,"position":4}],"id":"root","idBuffer":"#17","lastCommit":"1ed20d6a-f3f3-4ebe-9f1f-c623a11d5a1a"}},"annotations":[],"language":{"type":"id","generated":false,"id":"Language:cjv3kwvoj000u083611381c6o","typename":"Language"},"__typename":"PageTranslation"},"Page:ck7m1guq108gk07883tmehxr4":{"id":"ck7m1guq108gk07883tmehxr4","type":{"type":"id","generated":false,"id":"PageType:cjv3l213x004f08366hjufttp","typename":"PageType"},"tags":[],"translations({\"where\":{\"language\":{\"id\":\"cjv3kwvoj000u083611381c6o\"}}})":[{"type":"id","generated":false,"id":"PageTranslation:ck7m1guqe08gr07880c92mqqm","typename":"PageTranslation"}],"__typename":"Page"},"PageTranslation:ck7m1guqe08gr07880c92mqqm":{"id":"ck7m1guqe08gr07880c92mqqm","name":"CCR Liberty light","createdAt":"2020-03-10T15:18:00.085Z","content":{"type":"json","json":{"content":[{"name":"Header","data":{"componentTemplateId":"cjv7yndru048c0836j99ljogw"},"id":"#0","type":"component","lock":false,"position":0},{"name":"ProductCrossroadNew","data":{"componentTemplateId":"cmp0yw25s01tt0826v0wo4wet"},"id":"#26","type":"component","lock":false,"position":1},{"name":"HeroV2","data":{"slides":[{"media":{"recommendedSizes":{"width":"3840","height":"2560"},"mimetype":"image/png","size":2270923,"hash":"bf2f022483b83d085bf56a189a41016c768b9796","id":"cmo685wb0mzy508001smnl09b","filename":"liberty-models-story-11.png","category":"divesoft/","type":"image"},"productName":"LIBERTY <light>LIGHT</light>","title":"Compact. Balanced. Ready to travel.","linkTitle":"CONFIGURE","link":{"url":"https://eshop.divesoft.com","urlNewWindow":true}
2,"autoplayDuration":9000,"id":"1","linkUrl":{"url":"/en/ccr-liberty","pageId":"cl3vesldqknhj085858savf3u"}}],"activeTab":"1"},"id":"#27","type":"component","lock":false,"position":2},{"name":"CarouselTextBlock","data":{"backgroundColor":"silver","title":"CCR LIBERTY <light>LIGHT</light>","subtitle":"","contentText":"The lightest and the most comfortable unit in our range.\nOur vision was clear - to reduce Libertyâs transport weight as much as possible and to make the unit even more comfortable. This led to the weight and size reduction which makes the Light our smallest and lightest backmount rebreather offering exceptional comfort!","buttonTitle":"CONFIGURE","buttonUrl":{"url":"/en/ccr-liberty","pageId":"cl3vesldqknhj085858savf3u"},"linkTitle":"","linkUrl":{"url":"#"},"images":[{"image":{"recommendedSizes":{"width":"1500","height":"1000"},"mimetype":"image/png","size":869577,"hash":"52782c6849448a3d991be91a0699a86095d5a308","id":"ckx3mfznjc5sw077625f45beq","filename":"divesoft-ccr-liberty-light-04-1080x1080.png","category":"divesoft/","type":"image"},"id":"1"}]},"id":"#28","type":"component","lock":false,"position":3},{"name":"ImageTextBlock","data":{"backgroundColor":"white","content":"Travelling with your CCR has just become a whole lot easier with a 16 kg travel weight. \n\nA unique system of weight pockets integrated into the soft backplate with carbon fibre components provides for \nexceptional trimming and weight distribution. That allows the unit to be extremely\nlight for travelling while the weight pockets are made to accept all commonly used\nlead weight types.\n\nThe unit is not only ideal for travelling but also for everyday diving. The new improved welded stand offers stability and the potential to clip equipment on while keeping the unit light enough to travel with. In the cases when an even lighter travel stand is required a lighter travel stand is also available. The BOV is included with every configuration to allow for the fastest access to open circuit breathing gas. A DSV can also be chosen as an alternative.\n\nThe MAVs placed on the mouthpiece remove the need for hoses and valves on your chest. Due to their positioning on the mouthpiece, they are straightforward to find, as they will always be in the same place. Find your mouth = find your MAVs.\n\n**Weight:** \nTransport weight is 16 kg (35,2 lb) without cylinders of which 5,00 kg (11,02 lb), is the head. \n\nTransport your head in carry-on luggage, and the unit will only add 11 kg (24,3 lb) to your luggage, leaving plenty of space for other items.","links":[],"isMirrored":false,"image":{"recommendedSizes":{"width":"1500","height":"1500"},"mimetype":"image/jpeg","size":336264,"hash":"8bc74d4ac0965a1e48d8e6b792d1f62dd7865a0d","id":"cklhqklku561e07762u019wpt","filename":"liberty-light-19.jpg","category":"divesoft/","type":"image"},"activeTab":"1"},"id":"#29","type":"component","lock":false,"position":4},{"name":"AccordionText","data":{"accordionTitle":"Greater head movement and comfort","content":"Liberty Light rebreather's compact frame provides more freedom in head movement. The soft back plate makes the unit extremely comfortable to wear and its also suitable to divers of smaller figure. "},"id":"#31","type":"component","lock":false,"position":5},{"name":"AccordionText","data":{"accordionTitle":"Traveling has never been easier","content":"The Light weights 16 Kg without [cylinders](https://www.divesoft.com/en/products/others/tanks). Carry your unit's head with you on board of your flight and the weight of your [CCR](https://www.divesoft.com/en/products/ccr-liberty) in your luggage will be down to 11 Kg. Then just simply rent the cylinders at your destination."},"id":"#30","type":"component","lock":false,"position":6},{"name":"AccordionText","data":{"accordionTitle":"Low weight with no compromises","content":"The mini rebreather allows you to do any kind of diving without compromises. Cold water dry suit diving? Long deep dives with multiple bailout cylinders? Tropical diving in board shorts? The Light will be home in all conditions. "},"id":"#32","type":"component","lock":false,"position":7},{"name":"AccordionText","data":{"accordionTitle":"Revolutionary weight pocket system","content":"Liberty Light as first of it's kind rebrether offers unique system of weight pockets integrated into the soft backplate. This allows for exceptional trimming and weight distribution and this also allows for the unit to be extremely light for travels while the pockets are made to accept all commonly used lead weights. "},"id":"#35","type":"component","lock":false,"position":8},{"name":"AccordionText","data":{"accordionTitle":"High quality materials","content":"Unit is build from the best available materials such as Corudra 1000 or carbon fibre high grade stainless steel, POM. Because we really strive to provide our customers with the best that's available."},"id":"#34","type":"component","lock":false,"position":9},{"name":"AccordionText","data":{"accordionTitle":"Modularity + convert
2ing to Light","content":"The unit can be used with 2l or 3l cylinders. When converting to the Liberty Light from other configuration you can keep most of your existing Liberty components. "},"id":"#33","type":"component","lock":false,"position":10},{"name":"PhotoGallery","data":{"title":"","description":"","divider":true,"images":[{"img":{"recommendedSizes":{"width":"1600","height":"900"},"mimetype":"image/jpeg","size":1624828,"hash":"ab8bc4d7ca17cb6d8e11efa0dad8a5c7050e4dfd","id":"cklhtvul659k70776xx1612t4","filename":"liberty-light-03.jpg","category":"divesoft/","type":"image"},"id":"1","image":{"mimetype":"image/jpeg","size":1624828,"hash":"ab8bc4d7ca17cb6d8e11efa0dad8a5c7050e4dfd","id":"cklhtvul659k70776xx1612t4","filename":"liberty-light-03.jpg","category":"divesoft/","type":"image","alt":"Small rebreather Liberty Light"}},{"img":{"recommendedSizes":{"width":"1600","height":"900"},"mimetype":"image/jpeg","size":885249,"hash":"122c33500e33a813cb84e9e468044af3e95b3d3b","id":"cklhty8kj59lm0776neienlt9","filename":"liberty-light-13.jpg","category":"divesoft/","type":"image"},"id":"2","image":{"mimetype":"image/jpeg","size":885249,"hash":"122c33500e33a813cb84e9e468044af3e95b3d3b","id":"cklhty8kj59lm0776neienlt9","filename":"liberty-light-13.jpg","category":"divesoft/","type":"image","alt":"Small rebreather Liberty Light"}},{"img":{"recommendedSizes":{"width":"1600","height":"900"},"mimetype":"image/jpeg","size":450483,"hash":"1b6955df17e924b573306aa5d8e46046f824059f","id":"cklhqfih255tm0776sfci21gl","filename":"liberty-light-06.jpg","category":"divesoft/","type":"image","alt":""},"id":"4","image":{"mimetype":"image/jpeg","size":450483,"hash":"1b6955df17e924b573306aa5d8e46046f824059f","id":"cklhqfih255tm0776sfci21gl","filename":"liberty-light-06.jpg","category":"divesoft/","type":"image","alt":"Small rebreather Liberty Light"}},{"id":"5","image":{"mimetype":"image/jpeg","size":426659,"hash":"4692b67e53b925cfe2634549281570295d54fbab","id":"cklhqiib255x30776z7pbm8td","filename":"liberty-light-07.jpg","category":"divesoft/","type":"image","alt":"Small rebreather Liberty Light"},"img":{"mimetype":"image/jpeg","size":426659,"hash":"4692b67e53b925cfe2634549281570295d54fbab","id":"cklhqiib255x30776z7pbm8td","filename":"liberty-light-07.jpg","category":"divesoft/","type":"image"}},{"id":"6","image":{"mimetype":"image/jpeg","size":444647,"hash":"8b1e60512989aa7841ff1c81903c53d1d6e4bafa","id":"cklhqj7ht55yy0776dlpwnhz3","filename":"liberty-light-05.jpg","category":"divesoft/","type":"image","alt":"Small rebreather Liberty Light"},"img":{"mimetype":"image/jpeg","size":444647,"hash":"8b1e60512989aa7841ff1c81903c53d1d6e4bafa","id":"cklhqj7ht55yy0776dlpwnhz3","filename":"liberty-light-05.jpg","category":"divesoft/","type":"image","alt":"2 tanks, short scrubber"}},{"id":"7","image":{"mimetype":"image/jpeg","size":4379039,"hash":"825d6be4f4cf442d85227068074f1fd646fc37d8","id":"ck910r2t06jdb0776qlqkxskv","filename":"liberty-light-01.jpg","category":"divesoft/","type":"image","alt":"Small rebreather Liberty Light"},"img":{"mimetype":"image/jpeg","size":4379039,"hash":"825d6be4f4cf442d85227068074f1fd646fc37d8","id":"ck910r2t06jdb0776qlqkxskv","filename":"liberty-light-01.jpg","category":"divesoft/","type":"image","alt":"BMCL red front"}}],"activeTab":"1"},"id":"#10","type":"component","lock":false,"position":12},{"name":"ProductsCompare","data":{"componentTemplateId":"cl5ab17h9onqf0858nna4mj1w"},"id":"#36","type":"component","lock":false,"position":13},{"name":"HubSpotForm","data":{"backgroundColor":"#ffffff","isTitleH1":false,"title":"Try the CCR Liberty","subtitle":"Contact us for demo!","showBreadcrumbs":false,"hideHeader":false,"portalId":"145642557","formId":"f1af2831-43c5-4be8-baa8-a343bc3415ad"},"id":"#25","type":"component","lock":false,"position":14},{"name":"Footer","data":{"componentTemplateId":"cjvwimxrl08e40798hjs5ek9w"},"id":"#1","type":"component","lock":false,"position":16},{"name":"ProductCrossroadNew","data":{"products":[]},"id":"#11","type":"component","lock":false,"position":17}],"id":"root","idBuffer":"#37","lastCommit":"a0663f92-6a80-4de9-a5ca-aaf75d7e5c20"}},"annotations":[],"language":{"type":"id","generated":false,"id":"Language:cjv3kwvoj000u083611381c6o","typename":"Language"},"__typename":"PageTranslation"},"Page:ck9v8ad582urj0788pmspzwzi":{"id":"ck9v8ad582urj0788pmspzwzi","type":{"type":"id","generated":false,"id":"PageType:cjv3l213x004f08366hjufttp","typename":"PageType"},"tags":[{"type":"id","generated":false,"id":"Tag:ckp59jt9n48lj0788mfuqrhym","typename":"Tag"}],"translations({\"where\":{\"language\":{\"id\":\"cjv3kwvoj000u083611381c6o\"}}})":[{"type":"id","generated":false,"id":"PageTranslation:ck9v8ad5k2urq07880yarg1r8","typename":"PageTranslation"}],"__typename":"Page"}
2,"PageTranslation:ck9v8ad5k2urq07880yarg1r8":{"id":"ck9v8ad5k2urq07880yarg1r8","name":"Dealers","createdAt":"2020-05-06T10:58:14.935Z","content":{"type":"json","json":{"content":[{"name":"Header","data":{"componentTemplateId":"cjv7yndru048c0836j99ljogw"},"id":"#6","type":"component","lock":false,"position":0},{"name":"ServicePointsMapNew","data":{"title":"Where to buy Divesoft products - local dealers and distributors","subtitle":"Find your closest dealer to explore a wide selection of high-quality diving equipment. Whether youâre a beginner or an experienced diver, our directory of authorized retailers provides the contact details you need to find the best gear for your underwater excursions.","filterByAddress":"false","mapItems":{"datasourceId":"ck52l110302pj07215izemv24","data":{"city":"%city% ","lat":"%lat%","lng":"%lng%","title":"%name%","country":"%country% ","otherCountries":"","address":"%address% ","storeChief":"%contactPerson% ","email":"","phone":"%phone% ","slugComponents":"contacts/dealers/%country% %name%","detailsLink":true},"filters":[]},"showBreadcrumbs":false,"thirdFilter":false,"urlToForm":{"url":"","pageId":"ck92moied1y2k0788b4r5uw2w"},"btnTitle":"","isTitleH1":false},"id":"#8","type":"component","lock":false,"position":1},{"name":"Footer","data":{"componentTemplateId":"cjvwimxrl08e40798hjs5ek9w"},"id":"#7","type":"component","lock":false,"position":3}],"id":"root","idBuffer":"#9","lastCommit":"27b2641c-2916-4ae7-a806-769def50175a"}},"annotations":[],"language":{"type":"id","generated":false,"id":"Language:cjv3kwvoj000u083611381c6o","typename":"Language"},"__typename":"PageTranslation"},"Page:cka6kn4hd3ahh0788k20h9ayy":{"id":"cka6kn4hd3ahh0788k20h9ayy","type":{"type":"id","generated":false,"id":"PageType:cjv3l213x004f08366hjufttp","typename":"PageType"},"tags":[],"translations({\"where\":{\"language\":{\"id\":\"cjv3kwvoj000u083611381c6o\"}}})":[{"type":"id","generated":false,"id":"PageTranslation:cka6kn4hl3aho0788hmjwa8va","typename":"PageTranslation"}],"__typename":"Page"},"PageTranslation:cka6kn4hl3aho0788hmjwa8va":{"id":"cka6kn4hl3aho0788hmjwa8va","name":"Contact us","createdAt":"2020-05-14T09:29:33.561Z","content":{"type":"json","json":{"content":[{"name":"Header","data":{"componentTemplateId":"cjv7yndru048c0836j99ljogw"},"id":"#0","type":"component","lock":false,"position":0},{"name":"ContactColumnsNew","data":{"backgroundColor":"#ffffff","title":"More ways to get help","subtitle":"Contact us","showBreadcrumbs":false,"hideHeader":false,"firstTitle":"Office CZ","firstEmail":"[email protected]","firstPhone":"+420 416 857 057","firstWeb":"","firstAddress":"[Divesoft s.r.o.](https://www.divesoft.com/en/contacts/czech-republic/roudnice-nad-labem) \nHálkova 2495 \n413 01 Roudnice nad Labem \nCzech Republic\n\nGoogle maps: [Office CZ](https://maps.app.goo.gl/cBWxaN1XZjxrFuVU9)","firstAccounts":"","secondTitle":"","secondEmail":"","secondPhone":"","secondWeb":"","secondAddress":"","secondAccounts":""},"id":"#40","type":"component","lock":false,"position":1},{"name":"ContactColumnsNew","data":{"backgroundColor":"#ffffff","isTitleH1":false,"title":"","subtitle":"","showBreadcrumbs":false,"hideHeader":false,"firstTitle":"","firstEmail":"","firstPhone":"","firstWeb":"","firstAddress":"**Office hours:** \nMon 07:30 - 16:00 \nTue 07:30 - 16:00 \nWed 07:30 - 16:00 \nThu 07:30 - 16:00 \nFri 07:30 - 16:00 \nSat closed \nSun closed ","firstAccounts":"","secondTitle":"","secondEmail":"","secondPhone":"","secondWeb":"","secondAddress":"","secondAccounts":""},"id":"#44","type":"component","lock":false,"position":2},{"name":"HubSpotForm","data":{"backgroundColor":"#ffffff","isTitleH1":false,"title":"Contact support","subtitle":"Need service or support? Start your request online, and we'll find a solution for you. If your product requires a service operation, you can expedite the process by contacting your nearest service technician directly. This way, you'll ensure a quicker and more efficient service for your device.","showBreadcrumbs":false,"hideHeader":false,"portalId":"145642557","formId":"4b764781-6745-422e-90a8-65ca2861d8a7"},"id":"#45","type":"component","lock":false,"position":4},{"name":"Spacer","data":{"spacingLarge":"50","spacingSmall":"50","backgroundColor":"#ffffff"},"id":"#43","type":"component","lock":false,"position":5},{"name":"Footer","data":{"componentTemplateId":"cjvwimxrl08e40798hjs5ek9w"},"id":"#1","type":"component","lock":false,"position":6}],"id":"root","idBuffer":"#46","lastCommit":"e811f308-8b74-4195-a244-f14e8069b48a"}},"annotations":[],"language":{"type":"id","generated":false,"id":"Language:cjv3kwvoj000u083611381c6o","typename":"Language"},"__typename":"PageTranslation"}
2,"Page:ckdsltzi07o520788tk0s6c4v":{"id":"ckdsltzi07o520788tk0s6c4v","type":{"type":"id","generated":false,"id":"PageType:cjv3l213x004f08366hjufttp","typename":"PageType"},"tags":[],"translations({\"where\":{\"language\":{\"id\":\"cjv3kwvoj000u083611381c6o\"}}})":[{"type":"id","generated":false,"id":"PageTranslation:ckdsltzie7o590788trxbryye","typename":"PageTranslation"}],"__typename":"Page"},"PageTranslation:ckdsltzie7o590788trxbryye":{"id":"ckdsltzie7o590788trxbryye","name":"Others","createdAt":"2020-08-13T09:32:56.198Z","content":{"type":"json","json":{"content":[{"name":"Header","data":{"products":[],"activeTab":"1","showShadow":false},"id":"#0","type":"component","lock":false,"position":0},{"name":"ProductCrossroadNew","data":{"componentTemplateId":"cmp172nfu00f208260n7srwjg"},"id":"#101","type":"component","lock":false,"position":1},{"name":"HeroV2","data":{"slides":[{"media":{"recommendedSizes":{"width":"3840","height":"2560"},"mimetype":"image/png","size":3071955,"hash":"3583e6858a1256bfbd50252573135a0c1b0ad129","id":"cmo688q2hn02a0800zsj10hcr","filename":"liberty-models-story-20.png","category":"divesoft/","type":"image"},"productName":"","title":"Others","linkTitle":"","link":{"url":"https://eshop.divesoft.com","urlNewWindow":true},"autoplayDuration":9000,"id":"1"}],"activeTab":"1"},"id":"#100","type":"component","lock":false,"position":2},{"name":"ProductLineup","data":{"title":"","products":[{"title":"BOV / ADV / DSV","image":{"recommendedSizes":{"width":"450","height":"450"},"mimetype":"image/png","size":93038,"hash":"c3366438104a2a6059bce76d855872a9e887607e","id":"cl5fy1ownrbhm0776x3roasr0","filename":"mavs.png","category":"divesoft/","type":"image"},"url":{"url":"/en/products/bovdsvadv","pageId":"cjv7uialr03nh0836yjoz2dji"},"id":"1"},{"id":"2","title":"FLOW LIMITER MK2","url":{"url":"/en/products/others/flow-limiter-mk2","pageId":"cl78rvnxwtvo808589liz2pfw"},"image":{"mimetype":"image/png","size":317758,"hash":"c6460a2988d4f1719f447d913fb664d0ee782ba1","id":"cl7zvuipudomm07761wnx40bj","filename":"8437-divesoft-professional-flow-limiter-mk2-02t.png","category":"divesoft/","type":"image"}},{"id":"6","title":"SILENCER","image":{"mimetype":"image/png","size":309590,"hash":"a1f7cccb663a6883becee56f00afd34759e6a445","id":"ckecu70log2ax0776fnnyoiip","filename":"8016-silencer.png","category":"divesoft/","type":"image"},"url":{"url":"/en/products/others/silencer","pageId":"ckeckogrp871307880g501pjl"}},{"id":"3","title":"APEKS DST","url":{"url":"/en/products/others/apeks-technical-connection","pageId":"ckfm7aln29n640788eo83lo9r"},"image":{"mimetype":"image/png","size":298432,"hash":"c6807f08eadcfd7cf3827e7eaec9f25aba839c45","id":"clq4yky7mylfp077649wnh4rd","filename":"apeks.png","category":"divesoft/","type":"image"}},{"id":"4","title":"CYLINDERS","image":{"mimetype":"image/png","size":672038,"hash":"9bdaa30c8fac40a8035a0fb31ce186ea998d0e49","id":"ckx3n4r87c60q0776z1q3j9o6","filename":"divesoft-hp-tanks-1080x1080.png","category":"divesoft/","type":"image"},"url":{"url":"/en/products/others/cylinders","pageId":"ckdslvkfn7o610788ld52hmqe"}},{"id":"5","title":"REELS","image":{"mimetype":"image/png","size":1454224,"hash":"3d38321cebf48fa8622fb954568ee5e87901a701","id":"clwhgaoan12ur0776yv5h06a7","filename":"8469-divesoft-150m-primary-reel-.png","category":"divesoft/","type":"image"},"url":{"url":"/en/products/others/reels","pageId":"ckecknqht870l0788pd8d2qgb"}}],"activeTab":"2"},"id":"#99","type":"component","lock":false,"position":3},{"name":"Footer","data":{"componentTemplateId":"cjvwimxrl08e40798hjs5ek9w"},"id":"#1","type":"component","lock":false,"position":14}],"id":"root","idBuffer":"#102","lastCommit":"d92c824e-9053-4498-8e75-2bb77317b2b8"}},"annotations":[],"language":{"type":"id","generated":false,"id":"Language:cjv3kwvoj000u083611381c6o","typename":"Language"},"__typename":"PageTranslation"},"Page:ckdslvkfn7o610788ld52hmqe":{"id":"ckdslvkfn7o610788ld52hmqe","type":{"type":"id","generated":false,"id":"PageType:cjv3l213x004f08366hjufttp","typename":"PageType"},"tags":[],"translations({\"where\":{\"language\":{\"id\":\"cjv3kwvoj000u083611381c6o\"}}})":[{"type":"id","generated":false,"id":"PageTranslation:ckdslvkfy7o68078807is6nqd","typename":"PageTranslation"}],"__typename":"Page"},"PageTranslation:ckdslvkfy7o68078807is6nqd":{"id":"ckdslvkfy7o68078807is6nqd","name":"Cylinders","createdAt":"2020-08-13T09:34:09.982Z","content":{"type":"json","json":{"content":[{"name":"Header","data":{"products":[{"title":"Accessories","description":"Backplates, Consumables. Tanks.","img":{"recommendedSizes":{"width":"235","height":"235"}},"url":""},{"title":"Accessories sets","description":"Protection, maintenance, cleaning.","img":{"recommendedSizes":{"width":"235","height":"235"}},"url":""},{"title":"Spare parts","description":"Spare parts and components.","img":{"recommendedSizes":{"width":"235","height":"235"}},"url":""}
2,{"title":"Spare parts kits","description":"Completly Liberty spare parts kits.","img":{"recommendedSizes":{"width":"235","height":"235"}},"url":""}]},"id":"#0","type":"component","lock":false,"position":0},{"name":"ProductCrossroadNew","data":{"componentTemplateId":"cmp172nfu00f208260n7srwjg"},"id":"#18","type":"component","lock":false,"position":1},{"name":"HeroV2","data":{"slides":[{"media":{"recommendedSizes":{"width":"3840","height":"2560"},"mimetype":"image/png","size":9756932,"hash":"0f78aed97075fada17c8dc7581fd778c82e120ee","id":"cmhnfpjqo8um80850be38pkp2","filename":"cylinders.png","category":"divesoft/","type":"image","alt":"Divesoft scuba diving cylinders for underwater diving"},"productName":"","title":"Rebreather cylinders","linkTitle":"BUY","link":{"url":"https://eshop.divesoft.com","urlNewWindow":true},"autoplayDuration":9000,"id":"1","linkUrl":{"url":"https://eshop.divesoft.com/products/cylinders","urlNewWindow":true}}],"activeTab":"1"},"id":"#19","type":"component","lock":false,"position":2},{"name":"Spacer","data":{"spacingLarge":30,"spacingSmall":"80","backgroundColor":"#ffffff"},"id":"#21","type":"component","lock":false,"position":3},{"name":"ImageTextBlock","data":{"backgroundColor":"white","content":"## Cylinders\n\n**Ready for the next dive.**\n\nReliable scuba cylinders for recreational diving, technical diving, training, and underwater exploration.\n\nBuilt for durability, easy handling, and dependable performance in every environment.\n\n**Strong. Reliable. Made to dive.**\n","links":[],"isMirrored":false,"image":{"recommendedSizes":{"width":"1500","height":"1500"},"mimetype":"image/png","size":672038,"hash":"9bdaa30c8fac40a8035a0fb31ce186ea998d0e49","id":"ckx3n4r87c60q0776z1q3j9o6","filename":"divesoft-hp-tanks-1080x1080.png","category":"divesoft/","type":"image","alt":"Durable scuba diving cylinder by Divesoft"}},"id":"#20","type":"component","lock":false,"position":4},{"name":"ImageTextBlock","data":{"backgroundColor":"white","content":"**Designed for divers**\n\nFrom everyday recreational dives to advanced technical diving setups, Divesoft diving cylinders are designed to deliver confidence underwater.\n\nAvailable in multiple sizes and configurations to match different diving styles and equipment setups.\n\n**Why divers choose Divesoft cylinders**\n\n- \\> Durable scuba cylinder construction \n- \\> Multiple sizes available \n- \\> Designed for recreational and technical diving \n- \\> Built for long-term use \n","links":[],"isMirrored":true,"image":{"recommendedSizes":{"width":"1500","height":"1500"},"mimetype":"image/jpeg","size":71350,"hash":"d4a4b066d7668961a3c19e1a8934e80543678ed0","id":"ckeckkr91fwzy07763d1y5tfn","filename":"2l-lahve-sidemount-eurocylinder-m25x2-oxygen.jpg","category":"divesoft/","type":"image","alt":"Diver using Divesoft scuba cylinders underwater"}},"id":"#24","type":"component","lock":false,"position":5},{"name":"Footer","data":{"componentTemplateId":"cjvwimxrl08e40798hjs5ek9w"},"id":"#1","type":"component","lock":false,"position":23}],"id":"root","idBuffer":"#25","lastCommit":"f101596d-ecd7-4d27-8cfa-eb3e24c3b4a3"}},"annotations":[],"language":{"type":"id","generated":false,"id":"Language:cjv3kwvoj000u083611381c6o","typename":"Language"},"__typename":"PageTranslation"},"Page:ckecknqht870l0788pd8d2qgb":{"id":"ckecknqht870l0788pd8d2qgb","type":{"type":"id","generated":false,"id":"PageType:cjv3l213x004f08366hjufttp","typename":"PageType"},"tags":[],"translations({\"where\":{\"language\":{\"id\":\"cjv3kwvoj000u083611381c6o\"}}})":[{"type":"id","generated":false,"id":"PageTranslation:ckecknqi5870s07883vur93sa","typename":"PageTranslation"}],"__typename":"Page"},"PageTranslation:ckecknqi5870s07883vur93sa":{"id":"ckecknqi5870s07883vur93sa","name":"Reels","createdAt":"2020-08-27T08:55:28.493Z","content":{"type":"json","json":{"content":[{"name":"Header","data":{"products":[{"title":"Accessories","description":"Backplates, Consumables. Tanks.","img":{"recommendedSizes":{"width":"235","height":"235"}},"url":""},{"title":"Accessories sets","description":"Protection, maintenance, cleaning.","img":{"recommendedSizes":{"width":"235","height":"235"}},"url":""},{"title":"Spare parts","description":"Spare parts and components.","img":{"recommendedSizes":{"width":"235","height":"235"}},"url":""}
2,{"title":"Spare parts kits","description":"Completly Liberty spare parts kits.","img":{"recommendedSizes":{"width":"235","height":"235"}},"url":""}]},"id":"#0","type":"component","lock":false,"position":0},{"name":"ProductCrossroadNew","data":{"componentTemplateId":"cmp172nfu00f208260n7srwjg"},"id":"#30","type":"component","lock":false,"position":1},{"name":"HeroV2","data":{"slides":[{"media":{"recommendedSizes":{"width":"3840","height":"2560"},"mimetype":"image/jpeg","size":5360876,"hash":"cccb9fed46ba9390518faf2109cb2904fafb6525","id":"cmh39mlih2ibe0850advguxr5","filename":"reel.jpg","category":"divesoft/","type":"image"},"productName":"","title":"Divesoft Reels","linkTitle":"BUY","link":{"url":"https://eshop.divesoft.com","urlNewWindow":true},"autoplayDuration":9000,"id":"1","linkUrl":{"url":"https://eshop.divesoft.com/products/reels","urlNewWindow":true}}],"activeTab":"1"},"id":"#31","type":"component","lock":false,"position":2},{"name":"Spacer","data":{"spacingLarge":30,"spacingSmall":"80","backgroundColor":"#ffffff"},"id":"#33","type":"component","lock":false,"position":3},{"name":"ImageTextBlock","data":{"backgroundColor":"white","content":"## Reels\n\n**Precision you can feel underwater.**\n\nReliable diving reels for surface marker buoy deployment, wreck diving, cave diving, and everyday underwater exploration.\nDivesoft reels combine smooth handling, durable Delrin construction, and dependable line control in demanding underwater conditions.\nBuilt for divers who want confidence on every dive.\n\n## Primary Reels\n\n**Smooth handling. Reliable control.**\n\nComfortable to use with bare hands or thick diving gloves, Divesoft primary reels are designed for precise line deployment and easy winding in low visibility conditions.\nDurable materials, smooth operation, and dependable braking make them ideal for recreational and technical diving alike.\n\n**Available Versions**\n- \\> Primary Reel without Line \n- \\> 150 m Primary Reel \n- \\> 200 m Primary Reel\n \n**Why divers choose Divesoft reels**\n- \\> Durable Delrin construction \n- \\> Smooth line deployment and winding \n- \\> Reliable brake system \n- \\> Comfortable grip with gloves \n- \\> Easy handling underwater \n- \\> Designed for recreational and technical diving \n","links":[],"isMirrored":false,"image":{"recommendedSizes":{"width":"1500","height":"1500"},"mimetype":"image/png","size":1454224,"hash":"3d38321cebf48fa8622fb954568ee5e87901a701","id":"clwhgaoan12ur0776yv5h06a7","filename":"8469-divesoft-150m-primary-reel-.png","category":"divesoft/","type":"image"}},"id":"#32","type":"component","lock":false,"position":4},{"name":"Footer","data":{"componentTemplateId":"cjvwimxrl08e40798hjs5ek9w"},"id":"#19","type":"component","lock":false,"position":15}],"id":"root","idBuffer":"#35","lastCommit":"b5e562b1-3da4-4996-a69f-830f32beb699"}},"annotations":[],"language":{"type":"id","generated":false,"id":"Language:cjv3kwvoj000u083611381c6o","typename":"Language"},"__typename":"PageTranslation"},"Page:ckeckogrp871307880g501pjl":{"id":"ckeckogrp871307880g501pjl","type":{"type":"id","generated":false,"id":"PageType:cjv3l213x004f08366hjufttp","typename":"PageType"},"tags":[],"translations({\"where\":{\"language\":{\"id\":\"cjv3kwvoj000u083611381c6o\"}}})":[{"type":"id","generated":false,"id":"PageTranslation:ckeckogs0871a0788o08my311","typename":"PageTranslation"}],"__typename":"Page"},"PageTranslation:ckeckogs0871a0788o08my311":{"id":"ckeckogs0871a0788o08my311","name":"Silencer","createdAt":"2020-08-27T08:56:02.544Z","content":{"type":"json","json":{"content":[{"name":"Header","data":{"products":[{"title":"Accessories","description":"Backplates, Consumables. Tanks.","img":{"recommendedSizes":{"width":"235","height":"235"}},"url":""},{"title":"Accessories sets","description":"Protection, maintenance, cleaning.","img":{"recommendedSizes":{"width":"235","height":"235"}},"url":""},{"title":"Spare parts","description":"Spare parts and components.","img":{"recommendedSizes":{"width":"235","height":"235"}},"url":""},{"title":"Spare parts kits","description":"Completly Liberty spare parts kits.","img":{"recommendedSizes":{"width":"235","height":"235"}},"url":""}]},"id":"#0","type":"component","lock":false,"position":0},{"name":"ProductCrossroadNew","data":{"componentTemplateId":"cmp172nfu00f208260n7srwjg"},"id":"#26","type":"component","lock":false,"position":1},{"name":"HeroV2","data":{"slides":[{"media":{"recommendedSizes":{"width":"3840","height":"2560"},"mimetype":"image/png","size":3417821,"hash":"d4dea614f256ec84bff918603dec708db52a3610","id":"cmod637ri1yiw0800mb5zkfy4","filename":"he7.png","category":"divesoft/","type":"image"},"productName":"","title":"Silencer","linkTitle":"Buy","link":{"url":"https://eshop.divesoft.com","urlNewWindow":true}
2,"autoplayDuration":9000,"id":"1","linkUrl":{"urlNewWindow":true,"url":"https://eshop.divesoft.com/silencer/8016"}}],"activeTab":"1"},"id":"#27","type":"component","lock":false,"position":2},{"name":"Spacer","data":{"spacingLarge":"80","spacingSmall":"80","backgroundColor":"#ffffff"},"id":"#29","type":"component","lock":false,"position":3},{"name":"ImageTextBlock","data":{"backgroundColor":"white","content":"## Silencer\n**Less noise. More comfort.**\n\nDraining a scuba cylinder doesnât have to sound like a jet engine.\nThe Divesoft Silencer reduces the loud noise created when releasing gas from a diving cylinder, making scuba tank draining quieter and more comfortable for everyone nearby.\nSimply attach it to the cylinder valve and safely release unwanted gas in minutes - with far less noise than standard cylinder venting.\n\n**Compact. Durable. Surprisingly quiet.**\n\nPerfect for\n- \\> Divers \n- \\> Dive shops \n- \\> Fill stations \n- \\> Everyday scuba cylinder maintenance \n","links":[],"isMirrored":false,"image":{"recommendedSizes":{"width":"1500","height":"1500"},"mimetype":"image/png","size":309590,"hash":"a1f7cccb663a6883becee56f00afd34759e6a445","id":"ckecu70log2ax0776fnnyoiip","filename":"8016-silencer.png","category":"divesoft/","type":"image","alt":"Divesoft Silencer attached to a scuba cylinder valve during gas draining"}},"id":"#28","type":"component","lock":false,"position":4},{"name":"PhotoGallery","data":{"title":"","description":"","divider":false,"images":[{"id":"1","image":{"mimetype":"image/jpeg","size":178047,"hash":"212333a36c70bc377f7ecf4a83ceb9b251bc59a0","id":"ckfkrljr5ramr0776z32yq991","filename":"2o0elt-8016-large.jpg","category":"divesoft/","type":"image"}},{"id":"2","image":{"mimetype":"image/jpeg","size":38580,"hash":"0a2731fc0d897f0139ca84f41c603505c11ca096","id":"ckfkrcm1gral6077610pbp8u6","filename":"img-8138.jpg","category":"divesoft/","type":"image"}},{"id":"3","image":{"mimetype":"image/jpeg","size":37373,"hash":"939f5014bd41cf98b5f7b7ac02b191c38b848083","id":"ckfkrhsjlram20776bsobdl4t","filename":"img-8149.jpg","category":"divesoft/","type":"image"}}],"activeTab":"2"},"id":"#30","type":"component","lock":false,"position":5},{"name":"Footer","data":{"componentTemplateId":"cjvwimxrl08e40798hjs5ek9w"},"id":"#7","type":"component","lock":false,"position":17}],"id":"root","idBuffer":"#31","lastCommit":"b266e94c-249a-4484-bf66-25c5b2df5e72"}},"annotations":[],"language":{"type":"id","generated":false,"id":"Language:cjv3kwvoj000u083611381c6o","typename":"Language"},"__typename":"PageTranslation"},"Page:ckfccnc4a98bx0788f7enal83":{"id":"ckfccnc4a98bx0788f7enal83","type":{"type":"id","generated":false,"id":"PageType:cjv3l213x004f08366hjufttp","typename":"PageType"},"tags":[],"translations({\"where\":{\"language\":{\"id\":\"cjv3kwvoj000u083611381c6o\"}}})":[{"type":"id","generated":false,"id":"PageTranslation:ckfccnc5e98c40788780yz8w5","typename":"PageTranslation"}],"__typename":"Page"},"PageTranslation:ckfccnc5e98c40788780yz8w5":{"id":"ckfccnc5e98c40788780yz8w5","name":"Divesoft.app","createdAt":"2020-09-21T09:50:55.297Z","content":{"type":"json","json":{"content":[{"name":"Header","data":{"products":[{"title":"Accessories","description":"Backplates, Consumables. Tanks.","img":{"recommendedSizes":{"width":"235","height":"235"}},"url":""},{"title":"Accessories sets","description":"Protection, maintenance, cleaning.","img":{"recommendedSizes":{"width":"235","height":"235"}},"url":""},{"title":"Spare parts","description":"Spare parts and components.","img":{"recommendedSizes":{"width":"235","height":"235"}},"url":""},{"title":"Spare parts kits","description":"Completly Liberty spare parts kits.","img":{"recommendedSizes":{"width":"235","height":"235"}},"url":""}]},"id":"#0","type":"component","lock":false,"position":0},{"name":"HeroV2","data":{"slides":[{"recommendedSizes":{"width":"3840","height":"2560"}
2,"id":"1","productName":"DIVESOFT.APP","title":"Your Dives.<br>All in One Place.","media":{"mimetype":"image/png","size":1105303,"hash":"124d29f3b2f36dc61ca81c4b7ca698c18125e834","id":"cmo3h3dcmmntd0800woic2j1y","filename":"app-hero.png","category":"divesoft/","type":"image"}}],"activeTab":"1"},"id":"#2","type":"component","lock":false,"position":1},{"name":"ImageTextBlock","data":{"content":"## ***<span style=\"color: #e30513; letter-spacing: 0.21em\">DIVESOFT.APP</span>***\n\nReview your dives. \nAnalyze gases. \nManage connected devices.\n\nWhether you dive with Divesoft equipment or simply want a better way to organize your dives, the app keeps everything in one place.\n\n<a href=\"https://apps.apple.com/cz/app/divesoft-app/id1545496130\" target=\"_blank\"></a>\n<a href=\"https://play.google.com/store/apps/details?id=com.divesoft.divesoft_app&pli=1\" target=\"_blank\"></a>","links":[{"title":"Learn more on our YouTube","url":{"url":"https://www.youtube.com/watch?v=Lg8-DzV2JRE","urlNewWindow":true},"color":"black","id":"1"}],"isMirrored":false,"image":{"recommendedSizes":{"width":"1500","height":"1500"},"mimetype":"image/png","size":812128,"hash":"f39f075ad63edeef815cabf6bd5bc0777b07cc91","id":"cmo3hdih8mnuh0800puexwa8a","filename":"app-preview.png","category":"divesoft/","type":"image"},"backgroundColor":"silver","activeTab":"1"},"id":"#26","type":"component","lock":false,"position":2},{"name":"ImageTextBlock","data":{"content":"## Dive smarter before and after every dive\n\nThe Divesoft App extends your diving beyond the water.\n\n- \\> Prepare equipment before the dive.\n- \\> Review detailed dive profiles afterwards.\n- \\> Keep your diving information organized and easy to access.\n \nSimple tools that support real diving workflows.","links":[],"isMirrored":false,"image":{"recommendedSizes":{"width":"1500","height":"1500"},"mimetype":"image/png","size":2925819,"hash":"96cdc1429d37a488b419417483483c679eea3393","id":"cmo5iwhxnmtos0800ux248a72","filename":"app-story-1.png","category":"divesoft/","type":"image"}},"id":"#4","type":"component","lock":false,"position":3},{"name":"ImageTextBlock","data":{"content":"## **DIVE LOGS**\n\nYour dive history, clearly organized.\n\nDive data from compatible devices transfer directly to the app, creating a digital logbook within a clear and intuitive dive log app environment.\n\n### Automatic Dive Logs\n\nAutomatic dive log synchronization is coming soon and will be implemented directly in the Divesoft App, without requiring firmware updates for Liberty or Freedom dive computers.\n\nOnce a dive log is downloaded into the app, it automatically synchronizes with Wetnotes, keeping your dive records safely stored and accessible. ","links":[],"isMirrored":true,"image":{"recommendedSizes":{"width":"1500","height":"1500"},"mimetype":"image/png","size":887633,"hash":"8a382d39a1f35c091374bad053088f7fe10ae663","id":"cmo5iwp4qmtp20800e838frbb","filename":"app-story-2.png","category":"divesoft/","type":"image"}},"id":"#5","type":"component","lock":false,"position":4},{"name":"ImageTextBlock","data":{"content":"### Dive History\n\nBrowse past dives and maintain a complete record of your diving activity.\n\n### Clear Dive Visualization\n\nDepth profiles, dive time and key parameters displayed in a clean visual format.","links":[],"isMirrored":false,"image":{"recommendedSizes":{"width":"1500","height":"1500"},"mimetype":"image/png","size":524839,"hash":"464342be8c9de88e2cc31eb9e1c29513507b6935","id":"cmo5iwwghmtpc0800tc57zsig","filename":"app-story-3.png","category":"divesoft/","type":"image"}},"id":"#6","type":"component","lock":false,"position":5},{"name":"ImageTextBlock","data":{"content":"### Works Online and Offline\n\nThe Divesoft App is designed for real diving environments where internet connection may not always be available.\n\nYou can work with the app fully offline â reviewing dives, recording gas analysis or managing cylinders.\n\nWhen your device reconnects, the data automatically synchronizes.\n\nYour dive information stays available wherever the dive takes you.","links":[],"isMirrored":true,"image":{"recommendedSizes":{"width":"1500","height":"1500"},"mimetype":"image/png","size":2862997,"hash":"8ee4026991f3cfbc31c761727612f0a17a6309f2","id":"cmo5ix37dmtpl0800zbg704xz","filename":"app-story-4.png","category":"divesoft/","type":"image"}},"id":"#7","type":"component","lock":false,"position":6},{"name":"Showreel","data":{"isFullWidth":false,"slides":[{"title":"","isTextCentered":false,"media":{"recommendedSizes":{"width":"3840","height":"2560"},"mimetype":"image/jpeg","size":14884410,"hash":"808109397364706074e652a7224732d3967022a5","id":"cmo3hmw29mnv70800dv1qxj4d","filename":"808109397364706074e652a7224732d3967022a5.jpg","category":"divesoft/","type":"image"}
2,"autoplayDuration":5000,"id":"1"}],"activeTab":"1"},"id":"#8","type":"component","lock":false,"position":7},{"name":"Spacer","data":{"spacingLarge":"80","spacingSmall":"80","backgroundColor":"#ffffff"},"id":"#9","type":"component","lock":false,"position":8},{"name":"ImageTextBlock","data":{"content":"## **TOOLS FOR EVERY DIVER**\n\nMany features of the Divesoft App can be used even without connected devices. The app becomes a central place for organizing dive information, gases and cylinders.\n\n### Gas Records\n\nStore analyzed gas mixtures directly in the app and keep your breathing gases organized.\n\nMeasurement history and review tools are coming soon, allowing you to track and review previous gas analyses.","links":[],"isMirrored":false,"image":{"recommendedSizes":{"width":"1500","height":"1500"},"mimetype":"image/png","size":2427983,"hash":"86c81192c3258fb2dc53cf219eaccbb404eec5ae","id":"cmo5ixbnwmtpw08009l3s8g01","filename":"app-story-5.png","category":"divesoft/","type":"image"}},"id":"#10","type":"component","lock":false,"position":9},{"name":"ImageTextBlock","data":{"content":"### Cylinder Management\n\nTrack cylinders, gas fills and breathing mixtures.\n\n### Cylinder Label Printing\n\nGenerate clear cylinder labels directly from the app.","links":[{"id":"1","title":"Print Labels Directly from Your Analyzer","url":{"url":"https://eshop.divesoft.com/he-o2-printer-cable/7312?currency=CZK"},"color":"red"}],"isMirrored":true,"image":{"recommendedSizes":{"width":"1500","height":"1500"},"mimetype":"image/gif","size":482014,"hash":"8179ad78a53bb52a05c6fc2b3dbe149639fe69e3","id":"cmlf63myil1lj0800lvfbxgw6","filename":"app-gif-square.gif","category":"divesoft/","type":"image"},"activeTab":"1"},"id":"#11","type":"component","lock":false,"position":10},{"name":"ImageTextBlock","data":{"content":"### Deco Planner\n\nThe diver's credo is to \"Plan your dive and dive your plan.\" With this tool, there is no excuse not to utilize this comprehensive, easy-to-use dive planner app that will always be available.\n\nCalculate your dive profile, turn pressures, and the gases required for the most efficient bailout on your CCR dive.\n\n### Dive Planner\n\nCreate your checklists to make sure you don't forget anything. You can also use one of our template checklists in the app. Then, simply tick the items off the list as you prepare for your dive.\n\nYou will not forget anything anymore.","links":[],"isMirrored":false,"image":{"recommendedSizes":{"width":"1500","height":"1500"},"mimetype":"image/png","size":2035788,"hash":"c079e6493422eeb7ebf03aea826a4740cdd3b17e","id":"cmo5ixj9qmtq50800chwrsc2s","filename":"app-story-7.png","category":"divesoft/","type":"image"}},"id":"#12","type":"component","lock":false,"position":11},{"name":"ImageTextBlock","data":{"content":"## **CONNECT YOUR EQUIPMENT**\n\nWhen connected to compatible Divesoft devices, the app becomes a powerful control and management tool.\n\n### Device Configuration\n\nAdjust device settings directly from your phone coming soon.\n\n### Device Overview\n\nSee connected equipment and system information in one place.","links":[],"isMirrored":true,"image":{"recommendedSizes":{"width":"1500","height":"1500"},"mimetype":"image/png","size":498785,"hash":"99528d4640c1bf0a03506e0fc99407d365a22c42","id":"cmo5ixrremtqf080034czusvo","filename":"app-story-8.png","category":"divesoft/","type":"image"},"activeTab":"1"},"id":"#13","type":"component","lock":false,"position":12},{"name":"ImageTextBlock","data":{"content":"### Diagnostics\n\nAccess technical information useful for troubleshooting and service.","links":[],"isMirrored":false,"image":{"recommendedSizes":{"width":"1500","height":"1500"},"mimetype":"image/png","size":3425469,"hash":"ceec011d6f30ff3804d3e70a39ee9c7ec6136f20","id":"cmo5ixylzmtqp0800lwfjs6xo","filename":"app-story-9.png","category":"divesoft/","type":"image"}},"id":"#14","type":"component","lock":false,"position":13},{"name":"ImageTextBlock","data":{"content":"## **FIRMWARE UPDATES**\n\nKeep your equipment up to date.\n\nFirmware updates can be installed directly through the app, ensuring reliable performance and compatibility.","links":[],"isMirrored":true,"image":{"recommendedSizes":{"width":"1500","height":"1500"},"mimetype":"image/png","size":849559,"hash":"57548fe1b44d24aee95517715dbe4ac7fd1503b6","id":"cmo5iy6clmtqz0800g32zr5bm","filename":"app-story-10.png","category":"divesoft/","type":"image"}},"id":"#15","type":"component","lock":false,"position":14},{"name":"ImageTextBlock","data":{"content":"## **APP FEATURES**\n\nKeep your equipment up to date. Firmware updates can be installed directly through the app, ensuring reliable performance and compatibility.\n\n### Review Dive Profiles\n\nExplore detailed dive profiles, depth history and ke
2y â¨dive parameters after every dive.\n","links":[],"isMirrored":false,"image":{"recommendedSizes":{"width":"1500","height":"1500"},"mimetype":"image/png","size":619266,"hash":"6bc715e5fd62587b72b88f7e271a17ecb9f5da3c","id":"cmo5iyfj7mtr80800vbnzhd0i","filename":"app-story-11.png","category":"divesoft/","type":"image"}},"id":"#16","type":"component","lock":false,"position":15},{"name":"ImageTextBlock","data":{"content":"### Record Gas Analysis\n\nStore analyzed gas mixtures and organize breathing gases used for your dives. Ideal for divers, gas blenders and dive centers.\n\n### Manage Cylinders and Labels\n\nTrack cylinders, record gas fills and generate cylinder labels directly from the app.","links":[{"id":"1","url":{"url":"https://eshop.divesoft.com/he-o2-printer-cable/7312?currency=CZK"},"title":"Print Labels Directly from Your Analyzer"}],"isMirrored":true,"image":{"recommendedSizes":{"width":"1500","height":"1500"},"mimetype":"image/png","size":3135935,"hash":"986342df8274f1e2834155a8082d1ccd39255174","id":"cmo5iylsrmtri08009b3yffa8","filename":"app-story-12.png","category":"divesoft/","type":"image"},"activeTab":"1"},"id":"#17","type":"component","lock":false,"position":16},{"name":"ImageTextBlock","data":{"content":"### Connect and Manage Equipment\n\nStore analyzed gas mixtures and organize breathing gases used for your dives. Ideal for divers, gas blenders and dive centers.","links":[],"isMirrored":false,"image":{"recommendedSizes":{"width":"1500","height":"1500"},"mimetype":"image/png","size":642515,"hash":"f1b18af26140d8217eed5705704c083962f1e74b","id":"cmo5iyrn0mtrq0800v4fa66n4","filename":"app-story-13.png","category":"divesoft/","type":"image"}},"id":"#18","type":"component","lock":false,"position":17},{"name":"ImageTextBlock","data":{"content":"## **WORKS WITH DIVESOFT EQUIPMENT**\n\nThe Divesoft App extends the capabilities of selected Divesoft devices.","links":[],"isMirrored":true,"image":{"recommendedSizes":{"width":"1500","height":"1500"},"mimetype":"image/jpeg","size":7245245,"hash":"af086abf534c7f42299d908fcb0612941a47693e","id":"cml4wofy1gxcb08007jqz5xob","filename":"dna-a-appkatitle.jpg","category":"divesoft/","type":"image"}},"id":"#21","type":"component","lock":false,"position":18},{"name":"ImageTextBlock","data":{"backgroundColor":"white","content":"### Liberty Rebreather\n\nReview dive logs, manage system settings and update firmware. Access dive data and system information in a clear interface.","links":[{"title":"Explore Liberty","url":{"url":"/en/products/ccr-liberty","pageId":"cjv3rpryz00iw0836lc0zx81j"},"color":"black","id":"1"}],"isMirrored":false,"image":{"recommendedSizes":{"width":"1500","height":"1500"},"mimetype":"image/png","size":2347663,"hash":"be5124a11be76b1e1e5e113eb82c6e5380ec5f33","id":"cmo5krhajmu7z0800jksb5hp2","filename":"liberty-overview-story-1.png","category":"divesoft/","type":"image"}},"id":"#32","type":"component","lock":false,"position":19},{"name":"ImageTextBlock","data":{"backgroundColor":"white","content":"### Gas Analyzers\n\nStore gas analysis results, manage cylinders and generate labels. Ideal for divers, gas blenders and dive centers.","links":[{"title":"Explore Analyzers","url":{"url":"/en/products/analyzers","pageId":"cjv3rr7on00ky0836fercz490"},"color":"black","id":"1"}],"isMirrored":true,"image":{"recommendedSizes":{"width":"1500","height":"1500"},"mimetype":"image/png","size":2453826,"hash":"e16f0a09e902a4aa2dd9395411807f
2088aebcd32","id":"cmohfjqja2yeo0800q6nu38st","filename":"pribeh1.png","category":"divesoft/","type":"image"},"activeTab":"1"},"id":"#31","type":"component","lock":false,"position":20},{"name":"ImageTextBlock","data":{"content":"## **WHY DIVERS USE THE DIVESOFT APP**\n\n01 Everything in One Place \nDive logs, gas records and cylinders organized in a single environment.\n\n02 Clear Dive Information \nUnderstand your dives through simple visual dive profiles.\n\n03 Built for Real Diving \nTools designed for practical use before and after every dive.\n\n04 Ready as Your Equipment Grows \nStart using the app today and expand it later with connected devices.","links":[],"isMirrored":false,"image":{"recommendedSizes":{"width":"1500","height":"1500"},"mimetype":"image/png","size":3395264,"hash":"aa9c6a19198867a12e2138730afe5590e08cd8c7","id":"cmo5iyzsfmts10800i7wh95uw","filename":"app-story-15.png","category":"divesoft/","type":"image"}},"id":"#20","type":"component","lock":false,"position":22},{"name":"Showreel","data":{"isFullWidth":false,"slides":[{"title":"Simple. Clear. Connected.<br>The Divesoft App is designed to support diving without unnecessary complexity.<br>Your dives stay organized.<br>Your equipment stays connected.<br>Your dive data stays with you.","isTextCentered":true,"media":{"recommendedSizes":{"width":"3840","height":"2560"},"mimetype":"image/png","size":4820948,"hash":"08e3ddc0b595f2da5eb623a7749d1ed45e222d25","id":"cmo5izqz1mtsm0800xz2mliet","filename":"app-showreel.png","category":"divesoft/","type":"image"},"autoplayDuration":5000,"id":"1"}],"activeTab":"1"},"id":"#22","type":"component","lock":false,"position":23},{"name":"Spacer","data":{"spacingLarge":"80","spacingSmall":"80","backgroundColor":"#ffffff"},"id":"#24","type":"component","lock":false,"position":24},{"name":"ImageTextBlock","data":{"content":"## Start using<br>the Divesoft App today\n\n- Organize your dives.\n- Manage your equipment.\n- Keep your dive data in one place.\n \n<br>\n<br>\n\n<a href=\"https://apps.apple.com/cz/app/divesoft-app/id1545496130\" target=\"_blank\"></a>\n\n<a href=\"https://play.google.com/store/apps/details?id=com.divesoft.divesoft_app&pli=1\" target=\"_blank\"></a>","links":[],"isMirrored":true,"image":{"recommendedSizes":{"width":"1500","height":"1500"},"mimetype":"image/png","size":3012924,"hash":"96d46d9dfa2c7a1098c1d09f89d77007e413f0dd","id":"cmo5iz97cmts90800y5u68h0c","filename":"app-story-16.png","category":"divesoft/","type":"image"}},"id":"#23","type":"component","lock":false,"position":25},{"name":"CallToAction","data":{"componentTemplateId":"cmo9u6bhwy5g90889gprzyxzf"},"id":"#33","type":"component","lock":false,"position":26},{"name":"Footer","data":{"copyrights":"Copyright © 2019 Divesoft LLC All rights reserved.","facebookUrl":"","youtubeUrl":"","instagramUrl":"","contacts":"**Divesoft, s.r.o.** Hálkova 2495 413 01 Roudnice nad Labem Äeská republika Tel.: +420 416 857 057 E-mail: [email protected]"},"id":"#1","type":"component","lock":false,"position":27}],"id":"root","idBuffer":"#34","lastCommit":"42a53f84-6c96-4735-9202-b6bb4ce0de48"}},"annotations":[],"language":{"type":"id","generated":false,"id":"Language:cjv3kwvoj000u083611381c6o","typename":"Language"},"__typename":"PageTranslation"},"Page:ckfm7aln29n640788eo83lo9r":{"id":"ckfm7aln29n640788eo83lo9r","type":{"type":"id","generated":false,"id":"PageType:cjv3l213x004f08366hjufttp","typename":"PageType"},"tags":[],"translations({\"where\":{\"language\":{\"id\":\"cjv3kwvoj000u083611381c6o\"}}})":[{"type":"id","generated":false,"id":"PageTranslation:ckfm7alng9n6b0788jikimjrf","typename":"PageTranslation"}],"__typename":"Page"},"PageTranslation:ckfm7alng9n6b0788jikimjrf":{"id":"ckfm7alng9n6b0788jikimjrf","name":"Apeks Technical Connection","createdAt":"2020-09-28T07:18:44.764Z","content":{"type":"json","json":{"content":[{"name":"Header","data":{"products":[{"title":"Accessories","description":"Backplates, Consumables. Tanks.","img":{"recommendedSizes":{"width":"235","height":"235"}},"url":""},{"title":"Accessories sets","description":"Protection, maintenance, cleaning.","img":{"recommendedSizes":{"width":"235","height":"235"}},"url":""},{"title":"Spare parts","description":"Spare parts and components.","img":{"recommendedSizes":{"width":"235","height":"235"}},"url":""}
2,{"title":"Spare parts kits","description":"Completly Liberty spare parts kits.","img":{"recommendedSizes":{"width":"235","height":"235"}},"url":""}]},"id":"#0","type":"component","lock":false,"position":0},{"name":"ProductCrossroadNew","data":{"componentTemplateId":"cmp172nfu00f208260n7srwjg"},"id":"#9","type":"component","lock":false,"position":1},{"name":"HeroV2","data":{"slides":[{"media":{"recommendedSizes":{"width":"3840","height":"2560"},"mimetype":"image/jpeg","size":1595594,"hash":"937fb958aa5c75ebbd323ebed6787911514f2124","id":"cmpcjt6434lwe08003txkaiii","filename":"dsc02455.jpg","category":"divesoft/","type":"image"},"productName":"","title":"APEKS DST, Technical connection","linkTitle":"BUY","link":{"url":"https://eshop.divesoft.com","urlNewWindow":true},"autoplayDuration":9000,"id":"1","linkUrl":{"urlNewWindow":true,"url":"https://eshop.divesoft.com/apeks-dst-technical-connection/8182"}}],"activeTab":"1"},"id":"#10","type":"component","lock":false,"position":2},{"name":"Spacer","data":{"spacingLarge":30,"spacingSmall":"80","backgroundColor":"#ffffff"},"id":"#12","type":"component","lock":false,"position":3},{"name":"ImageTextBlock","data":{"backgroundColor":"white","content":"## Technical Connection for Apeks DST\n\n**Cleaner routing. Better control.**\n\nThe Divesoft Technical Connection upgrades the Apeks DST regulator with two additional LP ports and a more streamlined hose layout.\n\nDesigned for doubles, sidemount, bailout, and advanced scuba setups, it helps create cleaner routing, improved comfort, and more flexibility underwater.\n\n**Simple upgrade. Smarter setup.\n**\n\n## Cleaner hose routing\n\nThe upgraded swivel turret expands the standard Apeks DST from 4 LP ports to 6, providing more space for second stages, inflators, dry suits, pressure gauges, and other diving accessories.\nOptimized routing helps reduce hose clutter and creates a cleaner, more comfortable diving configuration.\n\n**Why divers choose the Technical Connection**\n- \\> Expands Apeks DST from 4 to 6 LP ports \n- \\> Cleaner and more organized hose routing \n- \\> Better flexibility for scuba diving setups \n- \\> Ideal for doubles, sidemount, and bailout configurations \n- \\> Compact and durable construction \n- \\> Built for demanding diving environments \n","links":[],"isMirrored":false,"image":{"recommendedSizes":{"width":"1500","height":"1500"},"mimetype":"image/jpeg","size":214160,"hash":"83ee68a5b530fa08e4e798fce0178ee25387d1d1","id":"ckfmbwzdgrfbs0776jphnn1ym","filename":"8182-6-2-2.jpg","category":"divesoft/","type":"image"}},"id":"#11","type":"component","lock":false,"position":4},{"name":"PhotoGallery","data":{"title":"","description":"","divider":false,"images":[{"id":"1","image":{"mimetype":"image/jpeg","size":42084,"hash":"fa8c783a5a14f3a058af48fa8d358ab360779095","id":"ckfmbzt4wrfcn07766x3ugpqt","filename":"8182-1.jpg","category":"divesoft/","type":"image"}},{"id":"2","image":{"mimetype":"image/jpeg","size":42561,"hash":"d3ac89a6ca6109284abed621506620f8611a0ae4","id":"ckfmc0lllrfd00776uypfwej1","filename":"8182-2.jpg","category":"divesoft/","type":"image"}},{"id":"3","image":{"mimetype":"image/jpeg","size":305095,"hash":"ba2ab362d8279664808ee6769e4c3959c109591a","id":"ckfmbyol0rfcg0776i8a0i3sf","filename":"8182-3-2.jpg","category":"divesoft/","type":"image"}},{"id":"4","image":{"mimetype":"image/jpeg","size":214160,"hash":"83ee68a5b530fa08e4e798fce0178ee25387d1d1","id":"ckfmbwzdgrfbs0776jphnn1ym","filename":"8182-6-2-2.jpg","category":"divesoft/","type":"image"}}],"activeTab":"4"},"id":"#13","type":"component","lock":false,"position":5},{"name":"Footer","data":{"componentTemplateId":"cjvwimxrl08e40798hjs5ek9w"},"id":"#1","type":"component","lock":false,"position":13}],"id":"root","idBuffer":"#14","lastCommit":"58678d9e-9be0-49b6-9abe-43176f301857"}},"annotations":[],"language":{"type":"id","generated":false,"id":"Language:cjv3kwvoj000u083611381c6o","typename":"Language"},"__typename":"PageTranslation"},"Page:ckg68bbngab8607889mbsjxt5":{"id":"ckg68bbngab8607889mbsjxt5","type":{"type":"id","generated":false,"id":"PageType:cjv3l213x004f08366hjufttp","typename":"PageType"},"tags":[],"translations({\"where\":{\"language\":{\"id\":\"cjv3kwvoj000u083611381c6o\"}}})":[{"type":"id","generated":false,"id":"PageTranslation:ckg68bbntab8d07885y77r0jc","typename":"PageTranslation"}],"__typename":"Page"},"PageTranslation:ckg68bbntab8d07885y77r0jc":{"id":"ckg68bbntab8d07885y77r0jc","name":"size guide","createdAt":"2020-10-12T07:42:41.609Z","content":{"type":"json","json":{"content":[{"name":"Header","data":{"products":[{"title":"Accessories","description":"Backplates, Consumables. Tanks.","img":{"recommendedSizes":{"width":"235","height":"235"}},"url":""},{"title":"Accessories sets","description":"Protection, maintenance, cleaning.","img":{"recommendedSizes":{"width":"235","height":"235"}},"url":""},{"title":"Spare parts","description":"Spare parts and components.","img":{"recommendedSizes":{"width":"235","height":"235"}},"url":""}
2,{"title":"Spare parts kits","description":"Completly Liberty spare parts kits.","img":{"recommendedSizes":{"width":"235","height":"235"}},"url":""}]},"id":"#0","type":"component","lock":false,"position":0},{"name":"DownloadsNew","data":{"backgroundColor":"#ffffff","title":"Merchandise","subtitle":"Size guide","showBreadcrumbs":false,"hideHeader":false,"files":[{"title":"Shoe size","isTitleBold":false,"subtitle":"EU / MM / INCH\n\n35 / 228 / 9\n\n36 / 235 / 9¼\n\n37 / 238 / 9â
\n\n38 / 245 / 9â
\n\n39 / 251 / 9â
\n\n40 / 254 / 10\n\n41 / 257 / 10â
\n\n42 / 260 / 10¼\n\n43 / 267 / 10½\n\n44 / 273 / 10¾\n\n45 / 279 / 11\n\n46 / 286 / 11¼","url":"","urlText":"Download","id":"1"}],"activeTab":"1"},"id":"#5","type":"component","lock":false,"position":1},{"name":"Footer","data":{"copyrights":"Copyright © 2019 Divesoft LLC All rights reserved.","facebookUrl":"","youtubeUrl":"","instagramUrl":"","contacts":"**Divesoft, s.r.o.** Hálkova 2495 413 01 Roudnice nad Labem Äeská republika Tel.: +420 416 857 057 E-mail: [email protected]"},"id":"#1","type":"component","lock":false,"position":5}],"id":"root","idBuffer":"#6","lastCommit":"cf9e5937-eb7b-4e13-a0c1-a0a7f778f463"}},"annotations":[],"language":{"type":"id","generated":false,"id":"Language:cjv3kwvoj000u083611381c6o","typename":"Language"},"__typename":"PageTranslation"},"Page:ckgdfcdf4afxt0788jj7dwb6x":{"id":"ckgdfcdf4afxt0788jj7dwb6x","type":{"type":"id","generated":false,"id":"PageType:cjv3l213x004f08366hjufttp","typename":"PageType"},"tags":[],"translations({\"where\":{\"language\":{\"id\":\"cjv3kwvoj000u083611381c6o\"}}})":[{"type":"id","generated":false,"id":"PageTranslation:ckgdfcdfiafy00788qsezu4kf","typename":"PageTranslation"}],"__typename":"Page"},"PageTranslation:ckgdfcdfiafy00788qsezu4kf":{"id":"ckgdfcdfiafy00788qsezu4kf","name":"About us","createdAt":"2020-10-17T08:33:51.102Z","content":{"type":"json","json":{"content":[{"name":"Header","data":{"products":[{"title":"Accessories","description":"Backplates, Consumables. Tanks.","img":{"recommendedSizes":{"width":"235","height":"235"}},"url":""},{"title":"Accessories sets","description":"Protection, maintenance, cleaning.","img":{"recommendedSizes":{"width":"235","height":"235"}},"url":""},{"title":"Spare parts","description":"Spare parts and components.","img":{"recommendedSizes":{"width":"235","height":"235"}},"url":""},{"title":"Spare parts kits","description":"Completly Liberty spare parts kits.","img":{"recommendedSizes":{"width":"235","height":"235"}},"url":""}]},"id":"#0","type":"component","lock":false,"position":0},{"name":"AboutUs","data":{"motto":"People You Can Rely On. \nGear You Can Trust.","storyTitle":"Our Story","storyContent":"Divesoft was founded on a simple belief: underwater, your equipment should feel like an extension of you. Clear, natural, and trustworthy, even in the most demanding conditions. We follow Einsteinâs principle: âEverything should be as simple as possible, but not simpler.â For us, simplicity is clarity. It is intuitive design, performance that does not distract, and reliability you do not have to think about. Because we build everything in-house, we understand our products down to their smallest parts. That gives us control over how long they last, how they behave in depth, and how they support your safety and comfort. Our technology is made for all types of diving, from calm recreational waters to the most challenging environments. Confidence in your gear should feel natural. We build with care, for everyone who loves to dive.","staffTitle":"Who Makes These Beasts?","productionTitle":"Production","productionDescription":"For us, production is more than â¨a process. It is a mindset. We work with materials we trust, clear methods that make sense, and people who build with intention. Every part, every surface, every detail passes through hands that understand why it matters underwater. We learn with every project. We refine, adjust, and improve, always aiming to make our equipment feel natural, dependable, and effortless to use. Innovation for us is not noise or complexity. It is the quiet, steady work of making something better than it was yesterday.","productionGallery":[{"id":"
21","image":{"mimetype":"image/png","size":836983,"hash":"e198c1a9d2a4b9804146a8737f85255309204bbd","id":"cmoi96oa835kf0800vao4jtum","filename":"production-1.png","category":"divesoft/","type":"image"}},{"id":"2","image":{"mimetype":"image/png","size":712205,"hash":"f5d7c6881d0eaf1c8b8d30f22a27a97d4fd53a07","id":"cmoi96uwm35kz08005lid30oo","filename":"production-2.png","category":"divesoft/","type":"image"}},{"id":"3","image":{"mimetype":"image/png","size":984627,"hash":"ce274e0420868a8f181f25e9b6ac4c0fade75892","id":"cmoi96zyy35lo0800ppijm4wj","filename":"production-3.png","category":"divesoft/","type":"image"}},{"id":"4","image":{"mimetype":"image/png","size":1033427,"hash":"a7cb10ad3a14bd9bab12662abeb950f1647fe848","id":"cmoi978fo35md0800rei413yt","filename":"production-4.png","category":"divesoft/","type":"image"}},{"id":"5","image":{"mimetype":"image/png","size":885712,"hash":"85cd053b3bc9c4135956bc67e7127685b85aaa5a","id":"cmoi97ia635mz0800ks57fgd6","filename":"production-5.png","category":"divesoft/","type":"image"}},{"id":"6","image":{"mimetype":"image/png","size":859869,"hash":"ddb23624246e2a3e98f00b8971aaf0327649402e","id":"cmoi97n0x35nd0800u5c3ce4j","filename":"production-6.png","category":"divesoft/","type":"image"}},{"id":"7","image":{"mimetype":"image/png","size":791074,"hash":"6cebb420a3bacd8beb127ea118a708e41dd7da30","id":"cmoi97rmf35ny080027qbgtbr","filename":"production-7.png","category":"divesoft/","type":"image"}},{"id":"8","image":{"mimetype":"image/png","size":606312,"hash":"34660d0eb8f0e65a6c7ef6179dd394849189e51a","id":"cmoi97w3t35o90800qh3ad6rh","filename":"production-8.png","category":"divesoft/","type":"image"}}],"historyTitle":"History","historyDescription":"Divesoft began when we set out to create diving equipment we could trust completely. What started as AleÅ¡âs effort to build a more advanced helium analyzer gradually became the foundation of a full closed circuit diving system. One day, while driving through Roudnice nad Labem, we noticed an old carpentry workshop and immediately imagined what it could become. We took it on, rebuilt it from the ground up, and gave it new life. With that same care, we design and manufacture every product we make today.","historyGallery":[{"id":"1","image":{"mimetype":"image/png","size":904460,"hash":"d3c6808382fd36366a440f81605e405c3d6e1ebd","id":"cmoi993o035py0800ld0h1mjk","filename":"history-1.png","category":"divesoft/","type":"image"}},{"id":"2","image":{"mimetype":"image/png","size":658892,"hash":"4107dd3018248ec4c34e791e599cabba04801b39","id":"cmoi99a6035qe0800qky6156w","filename":"history-2.png","category":"divesoft/","type":"image"}}],"departments":[{"id":"1","tags":[{"id":"cmob87lsa0ciw0889e6ugnqza","name":"Staff: CEO"}],"title":"CEO"},{"id":"2","tags":[{"id":"cmob87uaz0cj20889yu4125yr","name":"Staff: Company Cofounder"}],"title":"Company Co-Founder"},{"id":"3","tags":[{"id":"cmob87zd00cj80889ovetk99l","name":"Staff: Sales"}],"title":"Sales"},{"id":"4","tags":[{"id":"cmob883jm0cje08897pcfhqyj","name":"Staff: IT"}],"title":"IT"},{"id":"5","tags":[{"id":"cmob888ye0cjk08897j71g59g","name":"Staff: Manufacturing"}],"title":"Manufacturing"},{"id":"6","tags":[{"id":"cmob88e190ck60889vr5clj5b","name":"Staff: Backoffice"}],"title":"Back Office"}],"activeTab":"2"},"id":"#2","type":"component","lock":false,"position":1},{"name":"Footer","data":{"copyrights":"Copyright © 2019 Divesoft LLC All rights reserved.","facebookUrl":"","youtubeUrl":"","instagramUrl":"","contacts":"**Divesoft, s.r.o.** Hálkova 2495 413 01 Roudnice nad Labem Äeská republika Tel.: +420 416 857 057 E-mail: [email protected]"},"id":"#1","type":"component","lock":false,"position":2}],"id":"root","idBuffer":"#3","lastCommit":"0961a540-e066-4600-b0f1-0b1ed6ffafc3"}},"annotations":[],"language":{"type":"id","generated":false,"id":"Language:cjv3kwvoj000u083611381c6o","typename":"Language"},"__typename":"PageTranslation"},"Page:ckgdfd1efafyb0788kvbbrox9":{"id":"ckgdfd1efafyb0788kvbbrox9","type":{"type":"id","generated":false,"id":"PageType:cjv3l213x004f08366hjufttp","typename":"PageType"},"tags":[{"type":"id","generated":false,"id":"Tag:cmll0x5mkc477088966r6jlvb","typename":"Tag"},{"type":"id","generated":false,"id":"Tag:cmob87zd00cj80889ovetk99l","typename":"Tag"}],"translations({\"where\":{\"language\":{\"id\":\"cjv3kwvoj000u083611381c6o\"}}})":[{"type":"id","generated":false,"id":"PageTranslation:ckgdfd1erafyi0788wogfv0rt","typename":"PageTranslation"}],"__typename":"Page"},"Tag:cmll0x5mkc477088966r6jlvb":{"id":"cmll0x5mkc477088966r6jlvb","name":"team","__typename":"Tag"},"Tag:cmob87zd00cj80889ovetk99l":{"id":"cmob87zd00cj80889ovetk99l","name":"Staff: Sales","__typename":"Tag"},"PageTranslation:ckgdfd1erafyi0788wogfv0rt":{"id":"ckgdfd1erafyi0788wogfv0rt","name":"Jakub Å imánek","createdAt":"2020-10-17T08:34:22.179Z","content":{"type":"json","json":{"content":[{"name":"Header","data":{"products":[{"title":"Accessories","description":"Backplates, Consumables. Tanks.","img":{"recommendedSizes":{"width":"235","height":"235"}},"url":""},{"title":"Accessories sets","description":"Protection, maintenance, cleaning.","img":{"recommendedSizes":{"width":"235","height":"235"}},"url":""},{"title":"Spare parts","description":"Spare parts and components.","img":{"recommendedSizes":{"width":"235","height":"235"}},"url":""}
2,{"title":"Spare parts kits","description":"Completly Liberty spare parts kits.","img":{"recommendedSizes":{"width":"235","height":"235"}},"url":""}]},"id":"#0","type":"component","lock":false,"position":0},{"name":"TeamProfile","data":{"motto":"People You Can Rely On. \nGear You Can Trust.","aboutUrl":{"url":"/en/about-us","pageId":"ckgdfcdf4afxt0788jj7dwb6x"},"fullName":"Jakub Å imánek","position":"Factory Instructor Trainer","qualifications":"* CCR Liberty Factory Instructor Trainer\n* Hypoxic Trimix\n* Sidemount Instructor Trainer","about":"I grew into diving through my dad, who started when he was seventeen and later passed his passion on to me. I love the quiet illusion of zero gravity, the sense of entering new worlds, and the energy that comes from teaching, watching curiosity spark in students and sharing discoveries with friends. My diving life is a collection of moments that stay with me: exploring a sunken Jewish cemetery, diving to forty meters on the Barbakonac wall with minimal gear when I was thirteen, or spending days preparing to push further into the Manajama cave on BraÄ. These arenât isolated memories; theyâre part of a continuous journey.\n\nI was among the first divers to use bailout rebreathers and became the worldâs first official bailout rebreather instructor. Today, Iâm also the only Factory Instructor Trainer for all Liberty configurations. Diving isnât just part of my life, itâs the framework that shapes it. Itâs where Iâve learned the most and where Iâve given the most back.\n\nMy Divesoft story started simply by being in the right place at the right time.\nOutside the water, I reset through cycling, walking my dog, or getting lost in a good book or film.\n","contact":"","images":[{"id":"1","image":{"mimetype":"image/jpeg","size":917715,"hash":"62ce883c95579293df367d039df8cae78544b5fa","id":"cmlgg4slelmqv080098ouz74r","filename":"simanek.jpg","category":"divesoft/","type":"image","alt":"photo of Jakub Å imánek, CCR Liberty Factory Instructor Trainer from Divesoft"}},{"id":"2","image":{"mimetype":"image/jpeg","size":830816,"hash":"51c3c1993bc8b0ad63054ed7fa1178c6c3437814","id":"cmegvwsmt9cdz085059w6xtid","filename":"jakub-simanek-factory-trainer-divesoft-02.jpg","category":"divesoft/","type":"image","alt":"photo of Jakub Å imánek, CCR Liberty Factory Instructor Trainer from Divesoft"}},{"id":"3","image":{"mimetype":"image/jpeg","size":944549,"hash":"d1a67197b2b80b8c3bffb2641b2b6ac48ef6d33c","id":"cmegvx7hx9cey0850rxkbwweu","filename":"jakub-simanek-factory-trainer-divesoft-03.jpg","category":"divesoft/","type":"image","alt":"photo of Jakub Å imánek, CCR Liberty Factory Instructor Trainer from Divesoft"}}],"articles":[],"equipment":[{"id":"1","title":"LIBERTY <light>SIDEMOUNT</light>","eshopUrl":{"url":"/en/products/ccr-liberty/ccr-liberty-sidemount","pageId":"cjyztusbt039t0777kqbo8xj8"},"image":{"mimetype":"image/png","size":4865897,"hash":"3fe48965007b02902957171dfa580f170ee527f5","id":"cmll0z8ylnntr08006hyn71y2","filename":"liberty-sidemount.png","category":"divesoft/","type":"image","alt":"Liberty Sidemount"}},{"id":"2","title":"DNA ANALYZER","eshopUrl":{"url":"/en/products/analyzers/dna","pageId":"clf9rs5c3ltkw0835vujrrtxu"},"image":{"mimetype":"image/png","size":3394952,"hash":"3d3b683198cb610681a0101ad3399882a47022ff","id":"cmll0zjvknnu10800qvuoq4yf","filename":"dna.png","category":"divesoft/","type":"image","alt":"DNA Analyzer"}},{"id":"4","title":"LIBERTY <light>BACKMOUNT</light>","eshopUrl":{"url":"/en/products/ccr-liberty/ccr-liberty-bmcl-fmcl","pageId":"ckt0i4dg51ogp0988dpgn8lwr"},"image":{"mimetype":"image/png","size":4767263,"hash":"e2de98edb74cb17d7d0a9747ed71b444560fab81","id":"cmll10106nnub0800d3rxvp46","filename":"liberty-backmount.png","category":"divesoft/","type":"image","alt":"Liberty Backmount"}}],"activeTab":"1"},"id":"#9","type":"component","lock":false,"position":1},{"name":"JsonLD","data":{"jsonLD":"{\n \"@context\": \"https://schema.org/\",\n \"@type\": \"Person\",\n \"@id\": \"https://www.divesoft.com/en/about-us/jakub-simanek#person\",\n \"name\": \"Jakub Å imánek\",\n \"givenName\": \"Jakub\",\n \"familyName\": \"Å imánek\",\n \"jobTitle\": \"CCR Liberty Factory Instructor Trainer\",\n \"knowsAbout\": [\n \"CCR Liberty Factory Instructor Training\",\n \"Liberty Sidemount Factory Instructor Training\",\n \"CCR Liberty Hypoxic Trimix\",\n \"Liberty Sidemount Hypoxic Trimix\",\n \"Bailout/Dual CCR diving\"\n ],\n \"worksFor\": {\n \"@type\": \"Organization\",\n \"@id\": \"https://www.divesoft.com/#organization\",\n \"name\": \"Divesoft\",\n \"url\": \"https://www.divesoft.com/\",\n \"logo\": \"https://www.divesoft.com/assets/divesoft/images/logo.svg\"\n },\n \"url\": \"https://www.divesoft.com/en/about-us/jakub-simanek\",\n \"image\": \"http://foxer360-media-library.s3.eu-central-1.amazonaws.com/divesoft/62ce883c95579293df367d039df8cae78544b5fa_simanek.jpg\",\n \"description\": \"Jakub Å imánek is a Divesoft test diver and instructor trainer for the CCR Liberty. He is a popularizer and pioneer of diving with a bailout rebreather.\",\n \"sameAs\": [],\n \"mainEntityOfPage\": {\n \"@type\": \"ProfilePage\",\n \"@id\": \"https://www.divesoft.com/en/about-us/jakub-simanek#profile\",\n \"headline\": \"Profil Jakuba Å imánka\",\n \"url\": \"https://www.divesoft.com/en/about-us/jakub-simanek\",\n \"about\": {\n \"@type\": \"Person\",\n \"@id\": \"https://www.divesoft.com/en/about-us/jakub-simanek#person\"\n }\n }\n}"},"id":"#10","type":"component","lock":false,"position":3},{"name":"Footer","data":{"componentTemplateId":"cjvwimxrl08e40798hjs5ek9w"},"id":"#1","type":"component","lock":false,"position":9}],"id":"root","idBuffer":"#11","lastCommit":"e52037f4-397c-4c41-a39f-83eece99608d"}},"annotations":[{"type":"id","generated":true,"id":"PageTranslation:ckgdfd1erafyi0788wogfv0rt.annotations.0","typename":"PageAnnotation"},{"type":"id","generated":true,"id":"PageTranslation:ckgdfd1erafyi0788wogfv0rt.annotations.1","typename":"PageAnnotation"},{"type":"id","generated":true,"id":"PageTranslation:ckgdfd1erafyi0788wogfv0rt.annotations.2","typename":"PageAnnotation"}],"language":{"type":"id","generated":false,"id":"Language:cjv3kwvoj000u083611381c6o","typename":"Language"},"__typename":"PageTranslation"},"PageTranslation:ckgdfd1erafyi0788wogfv0rt.annotations.0":{"key":"image","value":"null","__typename":"PageAnnotation"},"PageTranslation:ckgdfd1erafyi0788wogfv0rt.annotations.1":{"key":"perex","value":"","__typename":"PageAnnotation"},"PageTranslation:ckgdfd1erafyi0788wogfv0rt.annotations.2":{"key":"title","value":"Jakub Å imánek","__typename":"PageAnnotation"},"Page:ckjhi3h1h1b720788igpbi8fp":{"id":"ckjhi3h1h1b720788igpbi8fp","type":{"type":"id","generated":false,"id":"PageType:cjv3l213x004f08366hjufttp","typename":"PageType"},"tags":[{"type":"id","generated":false,"id":"Tag:ckp59jt9n48lj0788mfuqrhym","typename":"Tag"}],"translations({\"where\":{\"language\":{\"id\":\"cjv3kwvoj000u083611381c6o\"}}})":[{"type":"id","generated":false,"id":"PageTranslation:ckjhi3h1y1b790788otwajw9q","typename":"PageTranslation"}],"__typename":"Page"}
2,"PageTranslation:ckjhi3h1y1b790788otwajw9q":{"id":"ckjhi3h1y1b790788otwajw9q","name":"DIVESOFT.CENTER","createdAt":"2021-01-03T19:01:06.454Z","content":{"type":"json","json":{"content":[{"name":"Header","data":{"products":[{"title":"Accessories","description":"Backplates, Consumables. Tanks.","img":{"recommendedSizes":{"width":"235","height":"235"}},"url":""},{"title":"Accessories sets","description":"Protection, maintenance, cleaning.","img":{"recommendedSizes":{"width":"235","height":"235"}},"url":""},{"title":"Spare parts","description":"Spare parts and components.","img":{"recommendedSizes":{"width":"235","height":"235"}},"url":""},{"title":"Spare parts kits","description":"Completly Liberty spare parts kits.","img":{"recommendedSizes":{"width":"235","height":"235"}},"url":""}]},"id":"#0","type":"component","lock":false,"position":0},{"name":"ProductShowcase","data":{"backgroundColor":"#f0f0f0","isTextDark":true,"isImageRight":false,"image":{"mimetype":"image/png","size":272553,"hash":"50335667e06f4beb6d373ea534ba5b005b9be00d","id":"ckskia1w2npvw077686ckunae","filename":"divesoftcentre-01.png","category":"divesoft/","type":"image"},"imageMobile":{},"title":"Divesoft.center","subtitle":"for iOs & Windows","description":"","hideDescriptionOnMobile":false,"areButtons":false,"firstTitle":"Learn more >","firstUrl":"","secondTitle":"Configurator >","secondUrl":"","isTitleH1":true},"id":"#11","type":"component","lock":false,"position":1},{"name":"Spacer","data":{"spacingLarge":"50","spacingSmall":20,"backgroundColor":"#ffffff"},"id":"#18","type":"component","lock":false,"position":2},{"name":"TextBlock","data":{"text":"**Divesoft.center is a support software for Divesoft Bluetooth-enabled devices that allows a wireless or USB connection of the device to your personal computer.\nDivesoft.center makes downloading logs to your computer a breeze, just keep the device near your computer.**\n\n\nUpload your logs to wetnotes.com at the touch of a button and you will be able to view detailed logs of your dives.\n\nIf a new firmware version is released for your device, Divesoft.center will notify you and you can conveniently upload and install the firmware via a wireless connection to Divesoft.center.\n\nDivesoft.center is available for both Windows and iOs. ","textLarge":false,"imageOnRight":true,"image":{"recommendedSizes":{"width":"420","height":"280"}},"imageMobile":{"recommendedSizes":{"width":"750","height":"500"}}},"id":"#17","type":"component","lock":false,"position":3},{"name":"ProductDetail","data":{"title":"","subtitle":"","description":"","imageOnRight":true,"image":{},"imageMobile":{},"details":[{"title":"","description":"**Bluetooth or USB connection with Divesoft devices**","id":"1"},{"title":"","description":"**Convenient log downloads**","id":"2"},{"title":"","description":"**Upload logs to wetnotes.com**","id":"3"},{"id":"4","description":"**Firmware update for Divesoft devices**"},{"id":"5","description":"**Download service logs**"}],"activeTab":"1"},"id":"#19","type":"component","lock":false,"position":4},{"name":"DownloadsNew","data":{"backgroundColor":"#ffffff","title":"Downloads","subtitle":"","showBreadcrumbs":false,"hideHeader":false,"files":[{"title":"User manual","isTitleBold":false,"subtitle":"","url":{"url":"http://foxer360-media-library.s3.eu-central-1.amazonaws.com/divesoft/docs/b73f558be0d2930c53cece7a960086e16ded0fb1_divesoftcenter-manual-en.pdf","urlNewWindow":true},"urlText":"Download","id":"1"},{"title":"DIVESOFT.CENTER for Windows","isTitleBold":false,"subtitle":"","url":{"url":"http://foxer360-media-library.s3.eu-central-1.amazonaws.com/divesoft/docs/a8ec9c37d5ba4c6641de34305462f9be1d6342d1_divesoft-center-v116-windows.zip","mediaData":{"mimetype":"application/x-zip-compressed","size":102137018,"hash":"a8ec9c37d5ba4c6641de34305462f9be1d6342d1","id":"cm7t6nc0qzypj0850wkav2akx","filename":"divesoft-center-v116-windows.zip","category":"divesoft/docs/","type":"file"},"urlNewWindow":true},"urlText":"Download","id":"2"},{"id":"3","title":"DIVESOFT.CENTER for Mac","url":{"url":"http://foxer360-media-library.s3.eu-central-1.amazonaws.com/divesoft/docs/caa6dbd7f5f20ef3acf0301b3a8c5c0d92350b9a_divesoft-center-v116-mac.dmg","mediaData":{"mimetype":"application/octet-stream","size":136274229,"hash":"caa6dbd7f5f20ef3acf0301b3a8c5c0d92350b9a","id":"cm7t6tuwkzyzl0850mz0nsuok","filename":"divesoft-center-v116-mac.dmg","category":"divesoft/docs/","type":"file"},"urlNewWindow":true},"urlText":"Download"},{"id":"5","title":"Windows installation","url":{"url":"https://www.alphr.com/windows-protected-your-pc-disable-smartscreen/","urlNewWindow":true},"urlText":"SmartScreen protected your PC"},{"id":"6","title":"Mac instalation","url":{"url":"https://support.apple.com/guide/mac-help/open-a-mac-app-from-an-unidentified-developer-mh40616/mac","urlNewWindow":true},"urlText":"Open a Mac app from an unidentified developer"}]},"id":"#20","type":"component","lock":false,"position":5},{"name":"Image","data":{"firstImage":{"mimetype":"image/png","size":3974225,"hash":"b97a3f0e69d4cb7ad54434ade144d04e0c39d073","id":"ckoia55jq4r710776bd2wuiwo","filename":"divesoftcenter-mockup-01.png","category":"divesoft/","type":"image"},"secondImage":{"mimetype":"image/png","size":469108,"hash":"3f7098e4429f93ff09abc35a1446327299ecb3cd","id":"ckskig398npwe077606xm5gwi","filename":"dc4.png","category":"divesoft/","type":"image"}},"id":"#21","type":"component","lock":false,"position":6},{"name":"Spacer","data":{"spacingLarge":"20","spacingSmall":20,"backgroundColor":"#ffffff"},"id":"#23","type":"component","lock":false,"position":7},{"name":"Image","data":{"firstImage":{"mimetype":"image/png","size":697595,"hash":"f3571c033586ee5806ccd0d0f41aa3906fe60adb","id":"ckskig9udnpwk0776ehm0ffy0","filename":"dc8.png","category":"divesoft/","type":"image"},"secondImage":{"mimetype":"image/png","size":427578,"hash":"e9530eb1ec0c22121a26b07f51ccab16247ada91","id":"ckskihv0jnpx40776r9s717rt","filename":"dc10.png","category":"divesoft/","type":"image"}},"id":"#22","type":"component","lock":false,"position":8},{"name":"ProductVideo","data":{"isTitleH1":false,"title":"Divesoft Freedom Update","subtitle":"","showBreadcrumbs":false,"hideHeader":false,"video":{"type":"embeddedVideo","url":"https://www.youtube.com/embed/e21dT1_m9EI"}},"id":"#24","type":"component","lock":false,"position":9},{"name":"ProductVideo","data":{"isTitleH1":false,"title":"","subtitle":"","showBreadcrumbs":false,"hideHeader":false,"video":{"type":"embeddedVideo","url":"https://www.youtube.com/embed/yZceILz6MFk"}},"id":"#25","type":"component","lock":false,"position":11},{"name":"Footer","data":{"copyrights":"Copyright © 2019 Divesoft LLC All rights reserved.","facebookUrl":{"urlNewWindow":true,"url":"https://www.facebook.com/divesoft/"},"youtubeUrl":{"url":"https://www.youtube.com/channel/UCHI2-kHmfoUlAdhQXPKl8lA/featured","urlNewWindow":true},"instagramUrl":{"url":"https://www.instagram.com/divesoft/","urlNewWindow":true},"contacts":"**Divesoft s.r.o.** \nHálkova 2495 \n413 01 Roudnice nad Labem \nCzech Republic \nTel.: +420 416 857 057 \nE-mail: [email protected]"},"id":"#1","type":"component","lock":false,"position":13}],"id":"root","idBuffer":"#26","lastCommit":"d8820b26-3005-4934-8758-f01bd04fd5e0"}},"annotations":[],"language":{"type":"id","generated":false,"id":"Language:cjv3kwvoj000u083611381c6o","typename":"Language"},"__typename":"PageTranslation"},"Page:ckl9hb0k73lgh0788m5dh5xtp":{"id":"ckl9hb0k73lgh0788m5dh5xtp","type":{"type":"id","generated":false,"id":"PageType:cjv3l213x004f08366hjufttp","typename":"PageType"},"tags":[{"type":"id","generated":false,"id":"Tag:ckp59jt9n48lj0788mfuqrhym","typename":"Tag"}],"translations({\"where\":{\"language\":{\"id\":\"cjv3kwvoj000u083611381c6o\"}}})":[{"type":"id","generated":false,"id":"PageTranslation:ckl9hb0km3lgo07885rcqxbeu","typename":"PageTranslation"}],"__typename":"Page"}
2,"PageTranslation:ckl9hb0km3lgo07885rcqxbeu":{"id":"ckl9hb0km3lgo07885rcqxbeu","name":"Optical display adapters","createdAt":"2021-02-17T13:36:13.990Z","content":{"type":"json","json":{"content":[{"name":"Header","data":{"products":[{"title":"Accessories","description":"Backplates, Consumables. Tanks.","img":{"recommendedSizes":{"width":"235","height":"235"}},"url":""},{"title":"Accessories sets","description":"Protection, maintenance, cleaning.","img":{"recommendedSizes":{"width":"235","height":"235"}},"url":""},{"title":"Spare parts","description":"Spare parts and components.","img":{"recommendedSizes":{"width":"235","height":"235"}},"url":""},{"title":"Spare parts kits","description":"Completly Liberty spare parts kits.","img":{"recommendedSizes":{"width":"235","height":"235"}},"url":""}]},"id":"#0","type":"component","lock":false,"position":0},{"name":"Showreel","data":{"isFullWidth":true,"slides":[{"title":"Coming Soon","isTextCentered":true,"media":{"recommendedSizes":{"width":"3840","height":"2560"},"mimetype":"image/png","size":958514,"hash":"62e4b2c98829b9b6c9a3e0dff05347f8ded52bf6","id":"cmpnzfrlc8pjz0800nbitucus","filename":"oda-blurred-2.png","category":"divesoft/","type":"image","alt":"Optical display adapter coming soon"},"autoplayDuration":5000,"id":"1"}],"activeTab":"1"},"id":"#2","type":"component","lock":false,"position":1},{"name":"ImageTextBlock","data":{"backgroundColor":"white","content":"## ODA2\n\n**Critical dive data. Always in sight.**\n\nODA2 is the next generation of Divesoftâs optical display system for Liberty CCR. A redesigned head-up display with improved readability, faster orientation, and enhanced situational awareness underwater.\n\nBuilt on the proven foundation of ODA, now with a new generation of features and improvements.\n\nODA2 is coming soon. Join the watch dog and get notified the moment it becomes available.\n\n**More information. Less distraction.**\n","links":[{"title":"Be the first to know","url":{"url":"https://eshop.divesoft.com/oda/8501?currency=CZK"},"color":"black","id":"1"}],"isMirrored":false,"image":{"recommendedSizes":{"width":"1500","height":"1500"}},"activeTab":"1"},"id":"#9","type":"component","lock":false,"position":2},{"name":"CallToAction","data":{"backgroundColor":"white","isCentered":true,"title":"","links":[{"title":"Home","url":{"url":"/en","pageId":"cjv3l26tp004p0836i54n4u7a"},"color":"black","type":"outline","id":"1"}],"linkPosition":"below","linkAlignment":"right"},"id":"#3","type":"component","lock":false,"position":3},{"name":"CallToAction","data":{"componentTemplateId":"cmo9u6bhwy5g90889gprzyxzf"},"id":"#4","type":"component","lock":false,"position":4},{"name":"Footer","data":{"componentTemplateId":"cjvwimxrl08e40798hjs5ek9w"},"id":"#1","type":"component","lock":false,"position":5}],"id":"root","idBuffer":"#11","lastCommit":"81afb290-2943-4ac7-a041-7c1a46a71f91"}},"annotations":[],"language":{"type":"id","generated":false,"id":"Language:cjv3kwvoj000u083611381c6o","typename":"Language"},"__typename":"PageTranslation"},"Page:cknpubp6j2f690788zv52yohy":{"id":"cknpubp6j2f690788zv52yohy","type":{"type":"id","generated":false,"id":"PageType:cjv3l213x004f08366hjufttp","typename":"PageType"},"tags":[],"translations({\"where\":{\"language\":{\"id\":\"cjv3kwvoj000u083611381c6o\"}}})":[{"type":"id","generated":false,"id":"PageTranslation:cknpubp6w2f6g0788ggvv3a44","typename":"PageTranslation"}],"__typename":"Page"},"PageTranslation:cknpubp6w2f6g0788ggvv3a44":{"id":"cknpubp6w2f6g0788ggvv3a44","name":"CCR Liberty heavy","createdAt":"2021-04-20T09:44:24.392Z","content":{"type":"json","json":{"content":[{"name":"Header","data":{"products":[{"title":"Accessories","description":"Backplates, Consumables. Tanks.","img":{"recommendedSizes":{"width":"235","height":"235"}},"url":""},{"title":"Accessories sets","description":"Protection, maintenance, cleaning.","img":{"recommendedSizes":{"width":"235","height":"235"}},"url":""},{"title":"Spare parts","description":"Spare parts and components.","img":{"recommendedSizes":{"width":"235","height":"235"}},"url":""}
2,{"title":"Spare parts kits","description":"Completly Liberty spare parts kits.","img":{"recommendedSizes":{"width":"235","height":"235"}},"url":""}]},"id":"#0","type":"component","lock":false,"position":0},{"name":"ProductCrossroadNew","data":{"componentTemplateId":"cmp0yw25s01tt0826v0wo4wet"},"id":"#22","type":"component","lock":false,"position":1},{"name":"HeroV2","data":{"slides":[{"media":{"recommendedSizes":{"width":"3840","height":"2560"},"mimetype":"image/png","size":647008,"hash":"40801ee7369982715f74f1f9afd532341e91f828","id":"cl2er68cz05zd07764izandta","filename":"divesoft-heavy-martin-strmiska-jakub-slama-marian-maros-alesund-norway-01s.png","category":"divesoft/","type":"image"},"productName":"LIBERTY <light>HEAVY</light>","title":"Built for longer dives and greater gas capacity.","linkTitle":"CONFIGURE","link":{"url":"https://eshop.divesoft.com","urlNewWindow":true},"autoplayDuration":9000,"id":"1","linkUrl":{"url":"/en/ccr-liberty","pageId":"cl3vesldqknhj085858savf3u"}}],"activeTab":"1"},"id":"#23","type":"component","lock":false,"position":2},{"name":"CarouselTextBlock","data":{"backgroundColor":"silver","title":"CCR LIBERTY <light>HEAVY</light>","subtitle":"Lighter than you think.","contentText":"DIR style setup of Liberty rebreather that utilizes any size of onboard cylinders, traditional backplate and a robust wire stand.","buttonTitle":"CONFIGURE","buttonUrl":{"url":"/en/ccr-liberty","pageId":"cl3vesldqknhj085858savf3u"},"linkTitle":"","linkUrl":{"url":"#"},"images":[{"image":{"recommendedSizes":{"width":"1500","height":"1000"},"mimetype":"image/png","size":2830456,"hash":"6573838ce7ac1e9711e8aaf10d6ef54f29bb3343","id":"cku5acuhn7xor0776kqhs8udt","filename":"6573838ce7ac1e9711e8aaf10d6ef54f29bb3343-heavy.png","category":"divesoft/","type":"image"},"id":"1"}]},"id":"#24","type":"component","lock":false,"position":3},{"name":"ImageTextBlock","data":{"backgroundColor":"white","content":"You can select the unit in 2 configurations. In traditional CCR setup with 3L cylinders or in DIR style setup with onboard bailout.","links":[],"isMirrored":false,"image":{"recommendedSizes":{"width":"1500","height":"1500"},"mimetype":"image/png","size":5119796,"hash":"306f09c9913b45581e7a0c11c698358833067623","id":"cmnq5f3mqhznk0800xitdqu7w","filename":"liberty-heavy.png","category":"divesoft/","type":"image"}},"id":"#31","type":"component","lock":false,"position":4},{"name":"AccordionText","data":{"accordionTitle":"Go DIR","content":"Easy to setup in DIR style with long hose and onboard bailout. "},"id":"#25","type":"component","lock":false,"position":5},{"name":"AccordionText","data":{"accordionTitle":"Use any size onboard cylinders","content":"Comes with BMCL and allows any size of onboard cylinders to be utilized."},"id":"#26","type":"component","lock":false,"position":6},{"name":"AccordionText","data":{"accordionTitle":"Easy cylinder arrangement","content":"Up to 4 mounting points for cylinders can be utilized for additional cylinder mounting or accessories."},"id":"#29","type":"component","lock":false,"position":7},{"name":"AccordionText","data":{"accordionTitle":"Removable backplate","content":"Traditional removable DIR style backplate is used in this configuration. The backplate to be exchanged based on the diver's needs. "},"id":"#28","type":"component","lock":false,"position":8},{"name":"AccordionText","data":{"accordionTitle":"Adjustable height","content":"The position of the backplate can be adjusted for perfect fit on your back."},"id":"#27","type":"component","lock":false,"position":9},{"name":"AccordionText","data":{"accordionTitle":"Tubular stand","content":"The unit uses a wire stand which can also be used to easily clip equipment on and off. This stand can also be removed and the kit can be used without the stand."},"id":"#30","type":"component","lock":false,"position":10},{"name":"Spacer","data":{"spacingLarge":"50","spacingSmall":"50","backgroundColor":"#ffffff"},"id":"#13","type":"component","lock":false,"position":11},{"name":"PhotoGallery","data":{"title":"","description":"","divider":false,"images":[{"id":"
21","image":{"mimetype":"image/png","size":802560,"hash":"12dedad62a403e502d38d5e2cb44c28d49edbdc2","id":"cl2er5xdh05yn07765h4t5zhq","filename":"divesoft-heavy-daniel-valek-jakub-slama-donegal-ireland-01s.png","category":"divesoft/","type":"image"}}]},"id":"#4","type":"component","lock":false,"position":12},{"name":"ProductsCompare","data":{"componentTemplateId":"cl5ab17h9onqf0858nna4mj1w"},"id":"#32","type":"component","lock":false,"position":13},{"name":"HubSpotForm","data":{"backgroundColor":"#ffffff","isTitleH1":false,"title":"Try the CCR Liberty","subtitle":"Contact us for demo!","showBreadcrumbs":false,"hideHeader":false,"portalId":"145642557","formId":"f1af2831-43c5-4be8-baa8-a343bc3415ad"},"id":"#21","type":"component","lock":false,"position":14},{"name":"Footer","data":{"componentTemplateId":"cjvwimxrl08e40798hjs5ek9w"},"id":"#1","type":"component","lock":false,"position":15}],"id":"root","idBuffer":"#33","lastCommit":"38edee20-a653-4561-8d4c-3683bc20974d"}},"annotations":[],"language":{"type":"id","generated":false,"id":"Language:cjv3kwvoj000u083611381c6o","typename":"Language"},"__typename":"PageTranslation"},"Page:cknqdc02r2hbn0788ccqay0i3":{"id":"cknqdc02r2hbn0788ccqay0i3","type":{"type":"id","generated":false,"id":"PageType:cjv3l213x004f08366hjufttp","typename":"PageType"},"tags":[],"translations({\"where\":{\"language\":{\"id\":\"cjv3kwvoj000u083611381c6o\"}}})":[{"type":"id","generated":false,"id":"PageTranslation:cknqdc0392hbu0788n5o4i69r","typename":"PageTranslation"}],"__typename":"Page"},"PageTranslation:cknqdc0392hbu0788n5o4i69r":{"id":"cknqdc0392hbu0788n5o4i69r","name":"Store detail","createdAt":"2021-04-20T18:36:31.221Z","content":{"type":"json","json":{"content":[{"name":"Header","data":{"products":[{"title":"Accessories","description":"Backplates, Consumables. Tanks.","img":{"recommendedSizes":{"width":"235","height":"235"}},"url":""},{"title":"Accessories sets","description":"Protection, maintenance, cleaning.","img":{"recommendedSizes":{"width":"235","height":"235"}},"url":""},{"title":"Spare parts","description":"Spare parts and components.","img":{"recommendedSizes":{"width":"235","height":"235"}},"url":""},{"title":"Spare parts kits","description":"Completly Liberty spare parts kits.","img":{"recommendedSizes":{"width":"235","height":"235"}},"url":""}]},"id":"#0","type":"component","lock":false,"position":0},{"name":"Hero","data":{"title":"Dive Shop %cx,0,name% ","text":"","btnTitle":"","url":"","image":{"recommendedSizes":{"width":"1600","height":"560"}},"paddingTop":false,"smallFontSize":false},"id":"#3","type":"component","lock":false,"position":1},{"name":"News","data":{"title":"Contact person: %cx,0,contactPerson%\n\nAddress: %cx,0,city%, %cx,0,address%, %cx,0,zip%, %cx,0,country% \n\nPhone: %cx,0,phone% \n\nWeb: [%cx,0,webPages,0%](%cx,0,webPages,0%)","shareUrl":"","hideShare":true,"firstText":"","firstImg":{"recommendedSizes":{"width":"980","height":"480"}},"secondText":"","secondImg":{"recommendedSizes":{"width":"480","height":"290"}},"thirdImg":{"recommendedSizes":{"width":"480","height":"290"}},"thirdText":"","buttonUrl":""},"id":"#4","type":"component","lock":false,"position":3},{"name":"Footer","data":{"copyrights":"Copyright © 2019 Divesoft LLC All rights reserved.","facebookUrl":{"urlNewWindow":true,"url":"https://www.facebook.com/divesoft/"},"youtubeUrl":{"url":"https://www.youtube.com/channel/UCHI2-kHmfoUlAdhQXPKl8lA/featured","urlNewWindow":true},"instagramUrl":{"url":"https://www.instagram.com/divesoft/","urlNewWindow":true},"contacts":"**Divesoft s.r.o.** \nHálkova 2495 \n413 01 Roudnice nad Labem \nCzech Republic \nTel.: +420 416 857 057 \nE-mail: [email protected]"},"id":"#1","type":"component","lock":false,"position":4}],"id":"root","idBuffer":"#11","lastCommit":"77fea6dd-43bf-4e72-a2d5-47525096d570"}},"annotations":[],"language":{"type":"id","generated":false,"id":"Language:cjv3kwvoj000u083611381c6o","typename":"Language"},"__typename":"PageTranslation"},"Page:ckoculqdh37zx0788ml14e08g":{"id":"ckoculqdh37zx0788ml14e08g","type":{"type":"id","generated":false,"id":"PageType:cjv3l213x004f08366hjufttp","typename":"PageType"},"tags":[{"type":"id","generated":false,"id":"Tag:ckp59jt9n48lj0788mfuqrhym","typename":"Tag"}],"translations({\"where\":{\"language\":{\"id\":\"cjv3kwvoj000u083611381c6o\"}}})":[{"type":"id","generated":false,"id":"PageTranslation:ckoculqdv38040788j1cool4n","typename":"PageTranslation"}],"__typename":"Page"},"PageTranslation:ckoculqdv38040788j1cool4n":{"id":"ckoculqdv38040788j1cool4n","name":"manuals","createdAt":"2021-05-06T12:10:54.547Z","content":{"type":"json","json":{"content":[{"name":"Header","data":{"products":[{"title":"Accessories","description":"Backplates, Consumables. Tanks.","img":{"recommendedSizes":{"width":"235","height":"235"}},"url":""},{"title":"Accessories sets","description":"Protection, maintenance, cleaning.","img":{"recommendedSizes":{"width":"235","height":"235"}},"url":""},{"title":"Spare parts","description":"Spare parts and components.","img":{"recommendedSizes":{"width":"235","height":"235"}},"url":""}
2,{"title":"Spare parts kits","description":"Completly Liberty spare parts kits.","img":{"recommendedSizes":{"width":"235","height":"235"}},"url":""}]},"id":"#0","type":"component","lock":false,"position":0},{"name":"Footer","data":{"copyrights":"Copyright © 2019 Divesoft LLC All rights reserved.","facebookUrl":"","youtubeUrl":"","instagramUrl":"","contacts":"**Divesoft, s.r.o.** Hálkova 2495 413 01 Roudnice nad Labem Äeská republika Tel.: +420 416 857 057 E-mail: [email protected]"},"id":"#1","type":"component","lock":false,"position":1}],"id":"root","idBuffer":"#2","lastCommit":"fd7ba897-6b02-494c-ba3f-fc8ace8e755a"}},"annotations":[],"language":{"type":"id","generated":false,"id":"Language:cjv3kwvoj000u083611381c6o","typename":"Language"},"__typename":"PageTranslation"},"Page:ckocumdqv380r0788ta9ljatx":{"id":"ckocumdqv380r0788ta9ljatx","type":{"type":"id","generated":false,"id":"PageType:cjv3l213x004f08366hjufttp","typename":"PageType"},"tags":[],"translations({\"where\":{\"language\":{\"id\":\"cjv3kwvoj000u083611381c6o\"}}})":[{"type":"id","generated":false,"id":"PageTranslation:ckocumdr8380y078819962f4q","typename":"PageTranslation"}],"__typename":"Page"},"PageTranslation:ckocumdr8380y078819962f4q":{"id":"ckocumdr8380y078819962f4q","name":"#8313_analyzer-he-o2_en","createdAt":"2021-05-06T12:11:24.835Z","content":{"type":"json","json":{"content":[{"name":"Header","data":{"products":[{"title":"Accessories","description":"Backplates, Consumables. Tanks.","img":{"recommendedSizes":{"width":"235","height":"235"}},"url":""},{"title":"Accessories sets","description":"Protection, maintenance, cleaning.","img":{"recommendedSizes":{"width":"235","height":"235"}},"url":""},{"title":"Spare parts","description":"Spare parts and components.","img":{"recommendedSizes":{"width":"235","height":"235"}},"url":""},{"title":"Spare parts kits","description":"Completly Liberty spare parts kits.","img":{"recommendedSizes":{"width":"235","height":"235"}},"url":""}]},"id":"#0","type":"component","lock":false,"position":0},{"name":"SectionDivider","data":{"title":"User manual","skipToC":false},"id":"#121","type":"component","lock":false,"position":1},{"name":"ProductShowcase","data":{"backgroundColor":"#ffffff","isTextDark":true,"isImageRight":true,"image":{"mimetype":"image/png","size":470151,"hash":"cdd2342ee6e00abf2e369a7e32a8fdeb8e84519b","id":"ckx3n2cq1c5zo0776nfb8u2hg","filename":"divesoft-hp-analyzer-he-o2-1080x1080.png","category":"divesoft/","type":"image"},"imageMobile":{},"title":"User manual","subtitle":"Analyzer HE/O2","description":"version 2019/06/06 \n\n#8312","hideDescriptionOnMobile":false,"areButtons":false,"firstTitle":"Learn more >","firstUrl":"","secondTitle":"Configurator >","secondUrl":""},"id":"#46","type":"component","lock":false,"position":2},{"name":"Divider","data":{"color":"darkGray"},"id":"#47","type":"component","lock":false,"position":3},{"name":"SectionDivider","data":{"title":"","skipToC":false},"id":"#122","type":"component","lock":false,"position":4},{"name":"TextBlock","data":{"text":"### **Content** \n\n[Safety warning](#safety-warning) \n[01. About firmware and hardware versions](#01-about-firmware-and-hardware-versions) \n[02. Measuring principle](#02-measuring-principle) \n[03. Description of the analyzer](#03-description-of-the-analyzer) \n[04. Operating the analyzer](#04-operating-the-analyzer) \n[05. Measuring O2 and He concentration](#05-measuring-o2-and-he-concentration) \n[06. Display modes](#06-display-modes) \n[06.1 Calibration of the oxygen sensor](#06-1-calibration-of-the-oxygen-sensor) \n[07. Other functions](#07-other-functions) \n[07.1 Continuous analysis](#07-1-continuous-analysis) \n[
207.2 Gas mixing solver](#07-2-gas-mixing-solver) \n[07.3 Gas mixing simulation](#07-3-gas-mixing-simulation) \n[07.4 Gas purity measurement](#07-4-gas-purity-measurement) \n[07.5 Ambient pressure](#07-5-ambient-pressure) \n[08. Special accessories](#08-special-accessories) \n[08.1 Flow regulator](#08-1-flow-regulator) \n[08.2 Voltage measuring](#08-2-voltage-measuring) \n[08.3 Resistance measuring](#08-3-resistance-measuring) \n[08.4 Emergency disconnection of filling station](#08-4-emergency-disconnection-of-filling-station) \n[09. Set-up](#09-set-up) \n[09.1 Preferences](#09-1-preferences) \n[09.2 Measurement units](#09-2-measurement-units) \n[09.3 Mixing of gases](#09-3-mixing-of-gases) \n[09.4 Continual analysis](#09-4-continual-analysis) \n[10. Charging and battery status](#10-charging-and-battery-status) \n[11. Maintenance](#11-maintenance) \n[11.1 Battery replacement](#11-1-battery-replacement) \n[11.2 Oxygen sensor replacement](#11-2-oxygen-sensor-replacement) \n[11.3 Flow adjusting](#11-3-flow-adjusting) \n[11.4 Disassembly of the instrument](#11-4-disassembly-of-the-instrument) \n[12. Connecting to a computer](#12-connecting-to-a-computer) \n[13. Defects and removal thereof](#13-defects-and-removal-thereof) \n[13.1 Error messages](#13-1-error-messages) \n[13.2 Instrument malfunctions](#13-2-instrument-malfunctions) \n[14. Technical data](#14-technical-data)","textLarge":false,"imageOnRight":true,"image":{"recommendedSizes":{"width":"420","height":"280"}},"imageMobile":{"recommendedSizes":{"width":"750","height":"500"}}},"id":"#49","type":"component","lock":false,"position":5},{"name":"Divider","data":{"color":"darkGray"},"id":"#53","type":"component","lock":false,"position":6},{"name":"SectionDivider","data":{"title":"Safety warning"},"id":"#120","type":"component","lock":false,"position":7},{"name":"LinkAnchor","data":{"anchorId":"safety-warning"},"id":"#208","type":"component","lock":false,"position":8},{"name":"TextBlock","data":{"text":"### **Safety warning**\n\nThis analyzer is designed for measuring the content of oxygen and helium in an air-oxygenâhelium gas mixture.\nIt cannot be used to analyze mixtures containing other gases than those mentioned above.\nFor mixtures prepared using anything but pure gases, or mixtures in which air has been replaced with pure nitrogen (without atmospheric argon), use the setting in Menu/Preferences/Nitrogen source â Pure. \n\nThe physical and chemical principles of the sensors used do not guarantee that the sensors will be selectively sensitive to a specific gas (oxygen, helium); there are a number of gases to which the sensors respond. Therefore, the gas composition shown by the analyzer does not mean by itself that the real composition of the mix is equal to the displayed values. The displayed mix composition is invalid unless the mixing technology ensures that there are no other gases present in the mix except air/nitrogen, pure oxygen and pure helium. \n\nThe analyzer is not a certified measuring instrument. The results of measuring are only informative and it is not possible to use such results where a certified measuring instrument is required. \n\nWhen analyzing mixes in situations where the incorrect composition of the mixes could cause material damage, injury to health or threaten human health or life, for example in the case of breathing mixes for diving, the results of the analysis may not be used as confirmation of the correct mix composition. In these cases, the analyzer can only be used as an aid for increasing the probability that such incorrect mix composition will be detected before its use. The correctness of the mix composition must be established by the technology used to prepare it. \n\nThe correct preparation of breathing mixes for diving (nitrox â oxygen-enriched air, trimix â a mixture of air, oxygen and helium, heliox â a mixture of oxygen and helium) requires special knowledge and experience which is possible to gain, for example, through an appropriate course. A failure to apply such knowledge can lead to an incorrect mix, even though the results of the analysis are seemingly correct. Such a situation can also be the result of a failure to take into account the influence of temperature and compressibility, an insufficient blending of the mix and other factors. \n\nPlease remember that the analyzer can be broken or damaged and that the oxygen sensor is by its nature subject to ageing and thus its properties deteriorate. \n\nTherefore always verify the measured data in another way, such as by precise preparation of the mix, another analytical method, etc. In addition, the measured value must be subject to critical assessment using a common-sense approach and if it differs from the allowable variation of mixing accuracy, it must be considered invali
2d. ","textLarge":false,"imageOnRight":true,"image":{"recommendedSizes":{"width":"420","height":"280"}},"imageMobile":{"recommendedSizes":{"width":"750","height":"500"}}},"id":"#52","type":"component","lock":false,"position":9},{"name":"Divider","data":{"color":"darkGray"},"id":"#54","type":"component","lock":false,"position":10},{"name":"SectionDivider","data":{"title":"01. About firmware and hardware versions","skipToC":false},"id":"#123","type":"component","lock":false,"position":11},{"name":"LinkAnchor","data":{"anchorId":"01-about-firmware-and-hardware-versions"},"id":"#170","type":"component","lock":false,"position":12},{"name":"TextBlock","data":{"text":"### **01. About firmware and hardware versions ** \n\nThe He/O2 analyzer is equipped with a microprocessor whose program (firmware) is continuously updated. This manual is for firmware release 2.29., but the manual can be applied to any hardware version. Manual is primarily written for hardware version 2.5. Older versions of hardware analyzers are not equipped with certain elements and are therefore not able to perform some functions described in the manual. \n\n**Hardware limitations** \n2.5\tFull functionality \n2.4\tFull functionality \n2.3\tLack of barometer. In case the ambient pressure changes significantly a new O2 calibration is necessary. 9V battery only. \n2.2\tLack of barometer \n\t9V battery only \n\tLCD display (limited readability in bright light) \n2.1\tLack of barometer \n\t9V battery only \n\tLCD display (limited readability in bright light) \n\tSome signals are not present on system connector (DVI)","textLarge":false,"imageOnRight":true,"image":{"recommendedSizes":{"width":"420","height":"280"}},"imageMobile":{"recommendedSizes":{"width":"750","height":"500"}}},"id":"#51","type":"component","lock":false,"position":13},{"name":"Divider","data":{"color":"darkGray"},"id":"#56","type":"component","lock":false,"position":14},{"name":"SectionDivider","data":{"title":"02. Measuring principle","skipToC":false},"id":"#124","type":"component","lock":false,"position":15},{"name":"LinkAnchor","data":{"anchorId":"02-measuring-principle"},"id":"#171","type":"component","lock":false,"position":16},{"name":"TextBlock","data":{"text":"### **02. Measuring principle** \n\nThe described measuring principle is valid only for mixes of air, oxygen and helium. \n\nAn electrochemical sensor is used to determine the oxygen content. The voltage at the sensorâs output is proportional to the oxygen content in the analyzed mix. The sensor has a limited service life and the proportionality of the dependence of voltage on the oxygen content changes over time; therefore, it has to be regularly calibrated. It is possible to choose between single-point, two-point and three-point calibration. Single-point calibration is fast, especially if air is chosen as the calibrating mix. For greater accuracy of the measurement, two-point calibration is used with two different mixes, typically air and pure oxygen. For strongly hypoxic mixes, i.e. mixes containing less than approximately 15% oxygen, three-point calibration is recommended. In this case, the third calibration gas should be a gas with zero oxygen content, i.e. pure helium or argon. \n\nHelium content is determined on the basis of measuring the speed of sound in the analyzed mix. The speed of sound depends on the content of helium and oxygen, and the temperature of the mix. The dependence of the speed of sound on pressure is small and can be disregarded under normal atmospheric pressure. \n\nAt 0º C the speed of sound is approximately 970 m/s in pure helium, 330 m/s in air and 315 m/s in pure oxygen. Raising the temperature by one degree increases the speed of sound by 0.175 %. The speed of sound in the mix is described by a non-linear function of temperature, oxygen content and helium content. \n\nThe content of helium is determined by measuring the speed of sound, temperature of the mix and the content of oxygen. When measuring the concentration of helium, it is therefore necessary to have the oxygen sensor correctly calibrated or to know the oxygen content and enter it into the instrument. \n\nThe speed of sound is measured directly as the time it takes for an acoustic impulse to travel between two microphones. This measurement is performed alternately in both directions to make it possible to eliminate the influence of the gas flow-rate in the probe on the calculation. The acoustic impulses are heard as weak âclicksâ from the probe in the helium-measuring mode. \n\nGas is delivered to the analyzer from a sampler connected to the compressed-gas tank and the gas flow is controlled using a nozzle to provide the volume needed for the analysis.","textLarge":false,"imageOnRight":true,"image":{"recommendedSizes":{"width":"420","height":"280"}},"imageMobile":{"recommendedSizes":{"width":"750","height":"500"}}},"id":"#55","type":"component","lock":false,"position":17},{"name":"Divider","data":{"color":"darkGray"},"id":"#58","type":"component","lock":false,"position":18},{"name":"SectionDivider","data":{"title":"03. Description of the analyzer","skipToC":false},"id":"#125","type":"component","lock":false,"position":19},{"name":"LinkAnchor","data":{"anchorId":"03-description-of-the-analyzer"},"id":"#172","type":"component","lock":false,"position":20},{"name":"TextBlock","data":{"text":"### **03. Description of the analyzer** \n\nThe analyzer is manufactured from high-strength aluminum alloy, which guarantees stable dimensions and resistance against mechanical damage. The surface is hard-anodized to protect it against scratching. \n\nOn the front side, the analyzer features a membrane keypad and an OLED display on which the measured values are shown. \n\nMeasured gas is fed into the analyzed-mix inlet on the back of the analyzer and passes through the helium-concentration sensor. From there, it enters the oxygen-sensor block and is expelled into the air by the mix exhaust. The rated flow of the analyzed mix is 0,2 - 0,4 L/min \n\nThe analyzer is powered by a standard nine-volt battery (type 6F22) or by an external power supply connected to the left side. The battery is accessible from the bottom by removing the two screws of the retaining cover. \n\nOn the back of the analyzer, there is a connector for attaching auxiliary devices (for measuring pressure, tank temperature, electrical voltage, etc.). A USB connector is located on the side for transferring data to a computer and for updating firmware. ","textLarge":false,"imageOnRight":true,"image":{"recommendedSizes":{"width":"420","height":"280"}},"imageMobile":{"recommendedSizes":{"width":"750","height":"500"}}},"id":"#57","type":"component","lock":false,"position":21},{"name":"Image","data":{"firstImage":{"mimetype":"image/jpeg","size":95835,"hash":"ff7dfcc1e746123fe9cf5c708fbd0812e352deab","id":"ckolg3b3u6hby0776v39113pw","filename":"8313-divesoft-analyzer-he-o2-manual-03.jpg","category":"divesoft/","type":"image"},"secondImage":{}},"id":"#59","type":"component","lock":false,"position":22},{"name":"Divider","data":{"color":"darkGray"},"id":"#60","type":"component","lock":false,"position":23},{"name":"SectionDivider","data":{"title":"04. Operating the analyzer","skipToC":false},"id":"#126","type":"component","lock":false,"position":24},{"name":"LinkAnchor","data":{"anchorId":"04-operating-the-analyzer"},"id":"#173","type":"component","lock":false,"position":25},{"name":"TextBlock","data":{"text":"### **04. Operating the analyzer** \n\nThe analyzer is operated using the keys on its front panel.\nIt is activated by pressing the ON/OFF key for approximately one second. Upon activation, an automatic check of the instrument is performed and the analyzer automatically switches to the measuring mode. \n\nWhen this key is pressed, the firmware version code and serial number of the analyzer are displayed. If you need to read this information, just hold the key down longer when activating the unit.\nThe analyzer is deactivated by pressing the ON/OFF key for about one second again. \n\nThe MENU key displays the available options. The menu changes in individual measuring modes, depending on the functions relevant to the applicable mode. \n\nThe **| OK |** key is used to enter the selected menu item, confirm a changed value or perform the prepared action. The selected menu item can also be called up by repeatedly pressing the MENU key. \n\nThe **| ESC |** key is used to exit the menu or return from the value editing mode without saving the changed value. \n\nThe **| Ë |** and **| Ë
|** keys are used to browse the menu or change the value of a number above the cursor. \n\nThe MODE key is used to change the display mode or to change the cursor position in the number editing mode. \n\nOther functions of the keys are described
2in the relevant chapters.","textLarge":false,"imageOnRight":true,"image":{"recommendedSizes":{"width":"420","height":"280"}},"imageMobile":{"recommendedSizes":{"width":"750","height":"500"}}},"id":"#61","type":"component","lock":false,"position":26},{"name":"Image","data":{"firstImage":{"mimetype":"image/jpeg","size":41306,"hash":"d9025a378e6beb34e6ff44cbca462ac87e1690b5","id":"ckolg3xqd6hco0776xrl70dk5","filename":"8313-divesoft-analyzer-he-o2-manual-04.jpg","category":"divesoft/","type":"image"},"secondImage":{}},"id":"#62","type":"component","lock":false,"position":27},{"name":"Divider","data":{"color":"darkGray"},"id":"#63","type":"component","lock":false,"position":28},{"name":"SectionDivider","data":{"title":"05. Measuring O2 and He concentration","skipToC":false},"id":"#127","type":"component","lock":false,"position":29},{"name":"LinkAnchor","data":{"anchorId":"05-measuring-o2-and-he-concentration"},"id":"#174","type":"component","lock":false,"position":30},{"name":"TextBlock","data":{"text":"### **05. Measuring O<sub>2</sub> and He concentration** \n\nThe flow limiter with nozzle is used in the basic configuration (see illustration). \n\nAttach the sampler to the compressed gas bottle and use the hose to connect it to the analyzer. The hose is slightly inserted into both components. \n\nThe analyzer switches into the helium and oxygen measuring mode upon activation, so there is no need for you to set up anything. Open the valve on the bottle to let the gas flow in. The gas composition is displayed after approximately 5Â â 10 seconds. If the pressure inside the bottle is distinctly lower than 200 bars, the gas flow through the sampler will be slower and the measuring result will take somewhat longer to determine. \n\nWith the **| OK |** key, you can suspend and, by pressing it again, resume measuring. When measuring is suspended, the last measured values remain displayed. During measuring, the **| Ë |** key can be used for temporarily increasing the brightness of the display to maximum (e.g. if the display is exposed to sunlight). \n\nWhen the measuring is completed, close the valve on the tank and by loosening the discharge valve (generally 1/2 turn suffices) discharge the excess pressure of the gas so that the flow limiter can be unscrewed from the tank valve. \n\n**Warning: Do not unscrew the discharge-valve spindle completely;
2 a steal ball is contained inside which upon opening could be expelled and cause injury or be lost.**","textLarge":false,"imageOnRight":true,"image":{"recommendedSizes":{"width":"420","height":"280"}},"imageMobile":{"recommendedSizes":{"width":"750","height":"500"}}},"id":"#64","type":"component","lock":false,"position":31},{"name":"Image","data":{"firstImage":{"mimetype":"image/jpeg","size":109038,"hash":"90c934523e766370c8427b76e2d15c278423afb5","id":"ckolg4i536hd40776exkcn3w8","filename":"8313-divesoft-analyzer-he-o2-manual-05.jpg","category":"divesoft/","type":"image"},"secondImage":{}},"id":"#65","type":"component","lock":false,"position":32},{"name":"Divider","data":{"color":"darkGray"},"id":"#66","type":"component","lock":false,"position":33},{"name":"SectionDivider","data":{"title":"06. Display modes","skipToC":false},"id":"#128","type":"component","lock":false,"position":34},{"name":"LinkAnchor","data":{"anchorId":"06-display-modes"},"id":"#175","type":"component","lock":false,"position":35},{"name":"TextBlock","data":{"text":"### **06. Display modes** \n\nUpon activation, the analyzer is normally in the O2/He measuring mode, in one of the two display formats. \n\nThe basic format shows the oxygen and helium content in the mixture in percent in separate lines and, for information, also the temperature at which the gas was measured. \n\nAfter the measuring begins, the helium concentration may appear in square brackets for several seconds in the basic format. This means that the result is interim, with lower accuracy. When the brackets disappear, the accuracy of the result is final. \n\nIn case of a measuring error, for instance at a pneumatic shock in the inlet hose, the value of the measured helium concentration disappears for the time of duration of the error state. \n\nThe well-arranged format shows the composition in a way used by divers to call the mixtures: \nâ\tAir: air with the oxygen content between 20.5 % and 21.5 %. \nâ\tEAN, for instance EAN 36, is air enriched with oxygen, in this case up to 36 % oxygen. \nâ\tTMX, for instance TMX 18/45, is trimix or the mixture of air, oxygen and helium, in this particular case containing 18 % oxygen and 45 % helium. \nâ\tHeliox, for instance Heliox 16 % O2, is a mixture of oxygen and helium. \nâ\tFoul Air, for instance Foul Air (10 % O2), is foul or vitiated air with a reduced oxygen content. It cannot be mixed with gases designed for preparation of breathing mixes commonly availÂable to the diver (air, oxygen, helium); therefore, its presence indicates a problem. This may include ongoing corrosion inside the bottle or contamination of the mix with argon, carbon dioxide or another gas. Such air cannot be used for breathing under any circumstances. \n\nIn addition to the mix composition, this well-arranged format shows approximate values of the maximum operating depth (MOD) and an equivalent narcotic depth (END). \n\nMOD indicates the depth to which the diver can dive for a short time under otherwise ideal conditions. The limit of partial oxygen pressure equal to 1.6 kPa is used in the calculation, and seawater and the static pressure at sea level are taken into account. This reading is for orientation only, and for an actual dive it must be calculated using the data of the specific dive.\n\nThe following formula is used for the calculation: \nwhere \n\n\tPmax\tis the maximum allowable partial oxygen pressure, chosen as 160,000 Pa \n\tP0\tis the static pressure at sea level, 101,325 Pa \n\tRO2\trelative molar concentration of oxygen in the interval 0 to 1 \n\tÏ\tis the seawater density, 1028 kg mâ3 \n\tg\tis the standard acceleration of gravity, 9.80665 m sâ2 ","textLarge":false,"imageOnRight":true,"image":{"recommendedSizes":{"width":"420","height":"280"}},"imageMobile":{"recommendedSizes":{"width":"750","height":"500"}}},"id":"#67","type":"component","lock":false,"position":36},{"name":"Image","data":{"firstImage":{"mimetype":"image/jpeg","size":15225,"hash":"a898843d6cec9ef781476fd835a750007b81d819","id":"ckolgb7tx6hks07767emuy07n","filename":"8313-divesoft-analyzer-he-o2-manual-06.jpg","category":"divesoft/","type":"image"},"secondImage":{}},"id":"#68","type":"component","lock":false,"position":37},{"name":"TextBlock","data":{"text":"**Warning: The maximum operating depth (MOD) calculated for an actual dive is usually lower than the depth indicated by the analyzer. **\n\nEND is the depth at which the narcotic effect of the mix on the diver is identical to that of air. It is specified in the percentage of a dive depth with air, i.e. for instance the END of 45 % means that at a depth of 100 m with an analyzed mix, the diver will perceive the same narcotic effects as if diving to 45 m with air. There are a number of various formulas for the calculation of END, each giving different results. The value displayed by the analyzer uses only one of them and is used for orientation purposes only. For an actual dive, it is necessary to calculate the END using the data of the specific dive and the tested formulas of your preference. \n\nThe following formula
2is used for calculation: \nEND = 100 â 77 RHe \n\nwhere \n\n\tRHe\tis the relative molar concentration of helium in the ration 0 to 1\n\n\nThe formula is based on the following conditions: \nâ\trelative narcotic potential of nitrogen = 1 \nâ\trelative narcotic potential of oxygen = 1 \nâ\trelative narcotic potential of helium = 0.23 \n\n**Warning: The equivalent narcotic depth (END) indicated by the calculation is for orientation purposes only and may differ from the END values calculated using other methodologies.** \n\n**Warning: To determine the END and MOD values, always use the procedures and formulas that you learned in specialized courses of diving with mixes. The values indicated by the analyzer are for orientation purposes only and are not sufficient for correct dive planning.**","textLarge":false,"imageOnRight":true,"image":{"recommendedSizes":{"width":"420","height":"280"}},"imageMobile":{"recommendedSizes":{"width":"750","height":"500"}}},"id":"#69","type":"component","lock":false,"position":38},{"name":"Divider","data":{"color":"darkGray"},"id":"#70","type":"component","lock":false,"position":39},{"name":"SectionDivider","data":{"title":"06.1 Calibration of the oxygen sensor","skipToC":false},"id":"#129","type":"component","lock":false,"position":40},{"name":"LinkAnchor","data":{"anchorId":"06-1-calibration-of-the-oxygen-sensor"},"id":"#176","type":"component","lock":false,"position":41},{"name":"TextBlock","data":{"text":"### **06.1 Calibration of the oxygen sensor** \n\nThe oxygen sensorâs properties change over time and it is therefore necessary to recalibrate it. We recommend that such calibration be performed at least once a month. Analyzer with the older version than 2.4, the calibration is always necessary when changing altitude. Version 2.4 has a built-in barometer sensor, which corrects itself. If you require the most precise results, calibrate the sensor before each measuring. \n\nCalibration of the sensor is performed as either single-point or two-point or three-point. During single-point calibration, the content of oxygen in air, which is known and constant (20.95 %), is measured by the sensor. The calibration constant of the sensor is set so that the instrument displays 21.0 % (after rounding). \n\nTwo-point calibration proceeds in the same manner as single-point calibration, but uses two calibration gases â pure oxygen and air. Two-point calibration is more arduous as it requires the use of oxygen. However, it provides more precise results during measuring. \n\nThee-point calibration is recommended for measuring hypoxic mixes, containing less than approximately 15 % oxygen. In this case, the third calibration gas should be a gas with zero oxygen content, i.e. pure helium or argon. \n\nCalibration of the oxygen sensor is started by pressing the CAL key at any time during the measuring. \n\nAs the first step of calibration, we must choose between single-point, two-point or three-point calibration using the **| Ë |** and **| Ë
|** keys and confirm the selection using the **| OK |** key. \n\nIt is then necessary to choose the oxygen content in the calibration mixture. \n\nThe oxygen content is adjusted by tenths of a percent by pressing the **| Ë |** key (to increase the content) or the **| Ë
|** key (to decrease the content). Use the **| MODE |** key to choose whether to make adjustments by tenths, whole units, or units of ten percentage points. Upon setting the desired values, confirm the data using the **| OK |** key. \n\nFor quickly setting typical values when setting the oxygen content it is possible to use the CAL key, which sets the oxygen content at 21 % in the case of the first calibration point or 100 % at the second point and 0 % at the third point. \n\nUpon setting and confirming the calibration of gases, calibration of the sensor begins. The current calibration point, sensor voltage in millivolts and the temperature of the gas appear on the display. \n\nAfter the temperature and voltage have stabilized (however, at least after ten seconds), the STABLE prompt appears, which means that it is possible to confirm the performed calibration using the **| OK |** key. If the measured values change before the **| OK |** key is pressed, the STABLE sign disappears and calibration proceeds until further steady values are attained. If multi-point calibration is set up, then calibration according to the other gases proceeds similarly.","textLarge":false,"imageOnRight":true,"image":{"recommendedSizes":{"width":"420","height":"280"}},"imageMobile":{"recommendedSizes":{"width":"750","height":"500"}}},"id":"#72","type":"component","lock":false,"position":42},{"name":"TextBlock","data":{"text":"#### **Correction of the oxygen content in the air**\n\nThe oxygen content of the air is not constant, but varies with ambient conditions. The amount of oxygen is displaced by water vapour in the air. Therefore, the oxygen content decreases with increasing temperature and humidity. To accurately calibrate the oxygen sensor, use the correction tables below and set the correct value when calibrating to ambient air.\n\n","textLarge":false,"imageOnRight":true,"image":{"recommendedSizes":{"width":"420","height":"280"}},"imageMobile":{"recommendedSizes":{"width":"750","height":"500"}}},"id":"#168","type":"component","lock":false,"position":43},{"name":"Image","data":{"firstImage":{"recommendedSizes":{"width":"1000","height":"1000"},"mimetype":"image/png","size":50340,"hash":"70e73729d7aa73b2920993febce4d993fd02f137","id":"cm1ex0q3i25it0874znpncnrs","filename":"correction-chart.png","category":"divesoft/","type":"image"},"secondImage":{"recommendedSizes":{"width":"1000","height":"1000"}},"image":{"type":"image"}},"id":"#169","type":"component","lock":false,"position":44},{"name":"Divider","data":{"color":"darkGray"},"id":"#71","type":"component","lock":false,"position":45},{"name":"SectionDivider","data":{"title":"07. Other functions","skipToC":false},"id":"#145","type":"component","lock":false,"position":46}
2,{"name":"LinkAnchor","data":{"anchorId":"07-other-functions"},"id":"#177","type":"component","lock":false,"position":47},{"name":"TextBlock","data":{"text":"### **07. Other functions **","textLarge":false,"imageOnRight":true,"image":{"recommendedSizes":{"width":"420","height":"280"}},"imageMobile":{"recommendedSizes":{"width":"750","height":"500"}}},"id":"#144","type":"component","lock":false,"position":48},{"name":"SectionDivider","data":{"title":"07. Other functions","skipToC":false},"id":"#130","type":"component","lock":false,"position":49},{"name":"LinkAnchor","data":{"anchorId":"07-1-continuous-analysis"},"id":"#178","type":"component","lock":false,"position":50},{"name":"TextBlock","data":{"text":"### **07.1 Continuous analysis** \n\nThe Menu/Continual Analysis option activates the function of continuous-filling monitoring. This mode makes it possible to set up the upper and lower limit of oxygen and helium content. The analyzer continuously measures the concentration of these components and if the preset limits are exceeded, it makes a beeping sound. This mode is applied when the analyzer is used as a safety component during continuous nitrox filling, where a defect of the mixing apparatus could cause increased oxygen concentration potentially resulting in a fire or an explosion of the compressor. \n\nIn the mode for continuous filling, the limit values can be changed after pressing the **| MENU |** button.","textLarge":false,"imageOnRight":true,"image":{"recommendedSizes":{"width":"420","height":"280"}},"imageMobile":{"recommendedSizes":{"width":"750","height":"500"}}},"id":"#73","type":"component","lock":false,"position":51},{"name":"Divider","data":{"color":"darkGray"},"id":"#74","type":"component","lock":false,"position":52},{"name":"SectionDivider","data":{"title":"07.2 Gas mixing solver","skipToC":false},"id":"#131","type":"component","lock":false,"position":53},{"name":"LinkAnchor","data":{"anchorId":"07-2-gas-mixing-solver"},"id":"#179","type":"component","lock":false,"position":54},{"name":"TextBlock","data":{"text":"### **07.2 Gas mixing solver** \n\nWhen the ***Menu/Gas mix solver*** option is selected, the gas-mixing solver function is activated. The solver computes the procedure for mixing the required gas mix of up to three gases. It can even include the remaining mix in the bottle to be filled in the calculation. The gases are displayed in the following order: the remaining gas in the bottle, added mix 1â3, the required mix. For each mix, the composition, volume of the bottle (the actual, âwaterâ volume of the bottle is specified) and gas pressure in the bottle are specified. If the volume of the gas is unlimited (for instance, if supplied by a compressor at a constant pressure), enter the bottle volume as zero. The mix composition may be entered either manually (after pressing the **| CAL |**, or the analyzer can be switched to the measuring mode by pressing the **| OK |** key and the relevant mix can be measured directly. After pressing the **| CAL |** is necessary to change the values press **| OK |**. Then you can enter values **| Ë | | Ë |** . Press **| MENU |** to move the cursor in the order. Confirm the selected value **| OK |**. After the data are entered, initiate the calculation using ***Menu/Solve*** (since it is first option, you can just press button **| Ë |** twice). The calculation may take up to one minute. Upon completion, results are displayed in one of the three possible forms, which can be switched between using the **| Ë |** key (see the example). \n\nExample\nThere is remaining air with the pressure of 120 bars in the twin bottles with the volume of 2 Ã 12 liters (total volume of 24 liters). The required mix is trimix 18/40 with the required pressure of 200 bars. You have fifty-liter distribution bottles containing oxygen and helium and a compressor with the output of 330 bars. Enter: \n\n\tA:\tAir\t\t24L\t120\n\t1:\tHe\t\t50L\t200\n\t2:\tO2\t\t50L\t200\n\t3:\tAir\t\t\t300\n\tD:\t18.0/40.0\t24L\t200\n\nand start the calculation. When the calculation is completed, the following data are displayed: \n\n\tDisch.\tto\t79.5 bar\n\tHe\tto\t159.5 bar\n\tO2\tto\t173.2 bar\n\tAir\tto\t200.0 bar\n\nmeaning that the twin should be discharged to the pressure of 79.5 bars, then He added until the pressure of 159.5 bars is achieved, then oxygen added to 173.2 bars and, finally, air added to reach 200 bars. When the MODE key is pressed, the same result is displayed; however, it is expressed in pressure to add or to discharge: \n\n\tDisch.\t-40.5 bar\n\tAdd\t80.0 bar He\n\tAdd\t13.7 bar O2\n\tAdd\t26.8 bar Air\n \nor decrease the pressure by 40.5 bars, increase the pressure by 80 bars by adding helium, add 13.7 bars of oxygen and 26.8 bars of air. The last mode is similar, but as it is designed for gravimetric filling (using a chemical balance), the amount of gas is specified in kilograms: \n\n\tDisch.\t-1.2382 kg\n\tAdd\t0.3392 kg He\n\tAdd\t0.4669 kg O2\n\tAdd\t0.8230 kg Air\n\nPlease note that the solver takes into account the pressure drop in the gas charging bottles; therefore it does not try to recommend adding oxygen to reach 200 bars (which would be impossible anyway, given the limited oxygen supply); rather, it allows air to be partly discharged and oxygen is only added to reach the realistic 173.2 bars, with the rest of the air to be added by the compressor. At the same time, however, the solver saves the mix already contained in the bottle to the maximum possible extent; therefore, it does not let it discharge completely. Instead, only the necessary part of the mix is discharged.","textLarge":false,"imageOnRight":true,"image":{"recommendedSizes":{"width":"420","height":"280"}},"imageMobile":{"recommendedSizes":{"width":"750","height":"500"}}},"id":"#76","type":"component","lock":false,"position":55},{"name":"Divider","data":{"color":"darkGray"},"id":"#75","type":"component","lock":false,"position":56},{"name":"SectionDivider","data":{"title":"07.3 Gas mixing simulation","skipToC":false},"id":"#132","type":"component","lock":false,"position":57},{"name":"LinkAnchor","data":{"anchorId":"07-3-gas-mixing-simulation"},"id":"#180","type":"component","lock":false,"position":58},{"name":"TextBlock","data":{"text":"### **07.3 Gas mixing simulation** \n\nOption Menu/Gas mix simulator is for Gas mix simulator function. Simulator will compute mixture content mixed up to from four gases. At every mixture is displayed composition and quantity of added gas in pressure units. You can enter mix composition manually (by pressing **| CAL |**) or switch to measurement mode by pressing **| OK |** and directly measure concrete mixture. Calculation of final mixture proceed continuously and mixture constitution is displayed on last row. Input values ââis the same as in the previous case.","textLarge":false,"imageOnRight":true,"image":{"recommendedSizes":{"width":"420","height":"280"}},"imageMobile":{"recommendedSizes":{"width":"750","height":"500"}}},"id":"#77","type":"component","lock":false,"position":59},{"name":"Divider","data":{"color":"darkGray"},"id":"#80","type":"component","lock":false,"position":60},{"name":"SectionDivider","data":{"title":"07.4 Gas purity","skipToC":false},"id":"#159","type":"component","lock":false,"position":61},{"name":"LinkAnchor","data":{"anchorId":"07-4-gas-purity-measurement"},"id":"#181","type":"component","lock":false,"position":62},{"name":"TextBlock","data":{"text":"### **0.7.4 Gas purity measurement**\n#### Usage \nSelect Menu / Gas Purity function Default configuration measure Argon / Air. Accuracy is 1% at both ends, aprox. 3% in the middle.\n#### Configuration\nWhen gas purity measurement is running, press CAL to open parameters configuration. Arrows to select item, Enter to edit. To obtain best results, it is possible to slightly tune Cp parameter to get 100% reading with pure component.\n#### Params for common gases and mixtures\n","textLarge":false,"imageOnRight":true,"image":{"recommendedSizes":{"width":"420","height":"280"}},"imageMobile":{"recommendedSizes":{"width":"750","height":"500"}}},"id":"#161","type":"component","lock":false,"position":63},{"name":"Image","data":{"firstImage":{"mimetype":"image/png","size":20902,"hash":"93eb160212b493592e054e0ef459ac18395f37af","id":"clxd4mu6rarr80776wdnyd21k","filename":"gas-parameters.png","category":"divesoft/","type":"image"},"secondImage":{},"image":{"type":"image"}},"id":"#162","type":"component","lock":false,"position":64},{"name":"Divider","data":{"color":"darkGray"},"id":"#160","type":"component","lock":false,"position":65}
2,{"name":"SectionDivider","data":{"title":"07.5 Ambient pressure","skipToC":false},"id":"#133","type":"component","lock":false,"position":66},{"name":"LinkAnchor","data":{"anchorId":"07-5-ambient-pressure"},"id":"#182","type":"component","lock":false,"position":67},{"name":"TextBlock","data":{"text":"### **07.5 Ambient pressure** \n\nAnalyzer is equipped with a barometric pressure sensor. Thanks to this device can be calibrated for the atmospheric conditions and altitude. The atmospheric pressure and altitude can be displayed in the menu ambient pressure. Altitude is calculated from the ambient pressure and, depending on atmospheric conditions may differ from reality.","textLarge":false,"imageOnRight":true,"image":{"recommendedSizes":{"width":"420","height":"280"}},"imageMobile":{"recommendedSizes":{"width":"750","height":"500"}}},"id":"#78","type":"component","lock":false,"position":68},{"name":"Image","data":{"firstImage":{"mimetype":"image/jpeg","size":120811,"hash":"4fcba57182f7c519cc674f8df9449b3940d6b588","id":"ckolg56p06he00776yhlg5avz","filename":"8313-divesoft-analyzer-he-o2-manual-07.jpg","category":"divesoft/","type":"image"},"secondImage":{}},"id":"#79","type":"component","lock":false,"position":69},{"name":"Divider","data":{"color":"darkGray"},"id":"#81","type":"component","lock":false,"position":70},{"name":"SectionDivider","data":{"title":"08. Special accessories","skipToC":false},"id":"#143","type":"component","lock":false,"position":71},{"name":"LinkAnchor","data":{"anchorId":"08-special-accessories"},"id":"#183","type":"component","lock":false,"position":72},{"name":"TextBlock","data":{"text":"### **08. Special accessories** ","textLarge":false,"imageOnRight":true,"image":{"recommendedSizes":{"width":"420","height":"280"}},"imageMobile":{"recommendedSizes":{"width":"750","height":"500"}}},"id":"#141","type":"component","lock":false,"position":73},{"name":"SectionDivider","data":{"title":"08.1 Flow regulator","skipToC":false},"id":"#134","type":"component","lock":false,"position":74},{"name":"LinkAnchor","data":{"anchorId":"08-1-flow-regulator"},"id":"#184","type":"component","lock":false,"position":75},{"name":"TextBlock","data":{"text":"\n### **08.1 Flow regulator** \n\nFor taking a gas sample for analysis, it is possible to use the flow regulator. It is used in a similar manner as the limiter. However, thanks to the use of a reduction valve, there is no decrease in flow and the measuring period is thus extended even with lower pressure in the tank. Its use is therefore suitable in filling stations and dive centers in which the content of half-empty tanks is checked. \n\nThe regulator is constructed from the Divesoft M12 modular system. The illustration shows only one of the possible configurations. Because the leads of the distribution block are equivalent, it is possible to freely reconfigure individual elements according to the userâs needs. Similarly, it is possible to replace the limiting nozzle with a reduction valve without the necessity of buying a full regulator assembly. \n\nThe regulator is connected similarly as the limiter. Besides the tank valve, it is possible to close off the gas output directly with the gas-output cut-off. \n\n**Warning: Over-tightening of the gas-output cut-off can damage or prematurely wear out the reduction-valve seat.\n**","textLarge":false,"imageOnRight":true,"image":{"recommendedSizes":{"width":"420","height":"280"}},"imageMobile":{"recommendedSizes":{"width":"750","height":"500"}}},"id":"#82","type":"component","lock":false,"position":76},{"name":"Divider","data":{"color":"darkGray"},"id":"#83","type":"component","lock":false,"position":77},{"name":"SectionDivider","data":{"title":"08.2 Voltage measuring","skipToC":false},"id":"#135","type":"component","lock":false,"position":78},{"name":"LinkAnchor","data":{"anchorId":"08-2-voltage-measuring"},"id":"#185","type":"component","lock":false,"position":79},{"name":"TextBlock","data":{"text":"### **08.2 Voltage measuring** \n\nOptional measuring cables can be attached to the analyzer to measure electric voltage. After the âVâ connector is plugged in, the analyzer automatically switches to the mode of a simple low-voltage voltmeter. The voltmeter is designed to be used as a tool when repairing diving equipment in the field (diving lamp, storage or plain battery check, etc.) The maximum allowed DC voltage is 40V (any polarity) or 28V AC with sinusoidal wave. The effective value (RMS) is measured for AC voltage. \n\n**Warning: The voltmeter must not in any case be connected to the power distribution network or to any equipment connected to mains! **\n\n**Warning: If the voltmeter is exposed to the mains voltage, the analyzer will be destroyed and/or personal injury or death due to electric shock may occur!**","textLarge":false,"imageOnRight":true,"image":{"recommendedSizes":{"width":"420","height":"280"}},"imageMobile":{"recommendedSizes":{"width":"750","height":"500"}}},"id":"#84","type":"component","lock":false,"position":80},{"name":"Divider","data":{"color":"darkGray"},"id":"#87","type":"component","lock":false,"position":81},{"name":"SectionDivider","data":{"title":"08.3 Resistance measuring","skipToC":false},"id":"#136","type":"component","lock":false,"position":82},{"name":"LinkAnchor","data":{"anchorId":"08-3-resistance-measuring"},"id":"#186","type":"component","lock":false,"position":83},{"name":"TextBlock","data":{"text":"### **08.3 Resistance measuring** \n\nOptional measuring cables can be attached to the analyzer to measure electrical resistance. After the connector ââ¦â is plugged in, the analyzer automatically switches to the mode of a simple low voltage ohmmeter. The ohmmeter is designed to be used as a tool when repairing diving equipment in the field (diving lamp, storage or plain battery check etc.). The measuring range is 0â1000 â¦. By pressing the MODE key, the ohmmeter can be switched to the acoustic signaling mode for resistance below 200 ⦠(the r
2ing tone). \n\n**Warning: In any case, the ohmmeter must not be connected to the power distribution network or to any equipment connected to mains! **\n\n**Warning: If the ohmmeter is connected to the mains voltage, the analyzer will be destroyed and/or personal injury or death due to electric shock may occur!**","textLarge":false,"imageOnRight":true,"image":{"recommendedSizes":{"width":"420","height":"280"}},"imageMobile":{"recommendedSizes":{"width":"750","height":"500"}}},"id":"#86","type":"component","lock":false,"position":84},{"name":"Divider","data":{"color":"darkGray"},"id":"#88","type":"component","lock":false,"position":85},{"name":"SectionDivider","data":{"title":"08.4 Emergency disconnection of filling station","skipToC":false},"id":"#137","type":"component","lock":false,"position":86},{"name":"LinkAnchor","data":{"anchorId":"08-4-emergency-disconnection-of-filling-station"},"id":"#187","type":"component","lock":false,"position":87},{"name":"TextBlock","data":{"text":"### **08.4 Emergency disconnection of filling station** \n\nTo the analyzer can be attached cable for disconnection of nitrox or trimix continual filling device. After cable connection analyzer automatically will switch to the watch continual filling mode. On last row display will display current state relay outputs in form Re:123. At shutdown some relay is his number replaced by dash, for example Re:â23. \n\nStandardly is measured content of O2 and He. Metering is possible to extend by pressure sensor, e.g for pressure measuring on compressor outlet, and external sensor of temperature in â55â125 °C. \n\nAt overrun some of monitored values will immediately switched off relay 1. If value is not returned to the allowed limits within 30 seconds, will switched off also relay 2. Same progress is also when analyzer battery are discharged. \n\nWhen analyzer is switched off, all relays are immediately also switched off.\nPreset delay and limiting values you can change after pressing button **| MENU |**. \n\nRecommended cable wiring: relay 1 for alerting and relay 2 for disconnection of filling station. Maximum relay contacts load is 24V / 500mA. Realy must not be in any case used directly for shut down of compressor, but only for controll circuit (e. g. power relays). \n\n**Warning: Power circuit wiring and circuits connected to electric power must be made expertly and in agreement with valid safety standards, regulations and law. **\n\n**Warning: At power circuits and circuits connected to electric power incorrectly wiring the analyzer will be destroyed and/or you risk serious injury or death by electric power!**","textLarge":false,"imageOnRight":true,"image":{"recommendedSizes":{"width":"420","height":"280"}},"imageMobile":{"recommendedSizes":{"width":"750","height":"500"}}},"id":"#89","type":"component","lock":false,"position":88},{"name":"Divider","data":{"color":"darkGray"},"id":"#91","type":"component","lock":false,"position":89},{"name":"SectionDivider","data":{"title":"09. Set-up","skipToC":true},"id":"#140","type":"component","lock":false,"position":90},{"name":"LinkAnchor","data":{"anchorId":"09-set-up"},"id":"#188","type":"component","lock":false,"position":91},{"name":"TextBlock","data":{"text":"### **09. Set-up** ","textLarge":false,"imageOnRight":true,"image":{"recommendedSizes":{"width":"420","height":"280"}},"imageMobile":{"recommendedSizes":{"width":"750","height":"500"}}},"id":"#139","type":"component","lock":false,"position":92},{"name":"SectionDivider","data":{"title":"09.1 Preferences","skipToC":false},"id":"#138","type":"component","lock":false,"position":93},{"name":"LinkAnchor","data":{"anchorId":"09-1-preferences"},"id":"#189","type":"component","lock":false,"position":94},{"name":"TextBlock","data":{"text":"\n### **09.1 Preferences** \n\nIt is possible to change select properties of the analyzer in the basic mode (measuring of He/O2) in ***Menu/Preferences***. Individual parameters have the following significance: \n\n***Brightness*** of the display in the scale of 1 to 127. The selection of low brightness (1) preserves the battery; the highest brightness (127) is suitable for use in strongly lit places. For temporarily increasing the displayâs brightness, simply hold down the pressed **| Ë |** key. \n\nWhen activating the ***Heighten brightness*** option, the brightness is automatically increased to maximum if the analyzer is powered with an external power-supply adapter. \n\nThe option ***O2 cell used*** is activated as standard. When deactivating, the O2 value is ignored and replaced with the value shown in the following ***O2 substitute*** parameter. This option allows emergency use of the analyzer with a worn-out oxygen sensor for measuring the concentration of helium. In such a case, the correct setting of the oxygen concentration in the analyzed mix increases the precision of measuring the concentration of helium (on the order of tenths of a percent). \n\n***Averaging*** activates the calculation of the moving average from the set number of values of the He concentration. The number of averaged values is set with the ***Values to avg***. parameter. When activating averaging, the He concentration is displayed in square brackets (e.g. 25.7) if the required number of values for calculating the average is not available. \n\n***Send data to USB*** activates the sending of measured values to the USB interface. \n\n***Partial pressure O2*** is the maximum allowed partial pressure of oxygen used for calculating MOD. \n\nThe*** Ref. temp. source*** option determines whether ambient temperature (***Ambient***) or defined temperature (***Defined***) entered in the following ***Ref. temperature*** parameter is used for calculating the estimated pressure in the tank (by using plug-in thermometer only). \n\n***Nitrogen source*** allows to switch gas constants for use of pure nitrogen instead of air in mixtures. \nMixtures prepared with pure nitrogen does not contain atmospheric argon, which affects the helium measurement.\nIf nitrogen source is set incorrectly, maximal error is 0.2%. \nOxygen measurement is unaffected, since O2 is measured directly by the oxygen cell.","textLarge":false,"imageOnRight":true,"image":{"recommendedSizes":{"width":"420","height":"280"}},"imageMobile":{"recommendedSizes":{"width":"750","height":"500"}}},"id":"#90","type":"component","lock":false,"position":95},{"name":"Divider","data":{"color":"darkGray"},"id":"#92","type":"component","lock":false,"position":96},{"name":"SectionDivider","data":{"title":"09.2 Measurement units","skipToC":false},"id":"#146","type":"component","lock":false,"position":97},{"name":"LinkAnchor","data":{"anchorId":"09-2-measurement-units"},"id":"#190","type":"component","lock":false,"position":98},{"name":"TextBlock","data":{"text":"### **09.2 Measurement units** \n\nOther settings are available in ***Menu/Measurement units***. Here the analyzer can be switched to metric mode (***Metric units***), imperial-units mode (***U.S. units***) or the display of individual units can be selected separately for individual values (temperature, depth, pressure, volume, mass). The unit settings do not affect the calculations (with the exception of final rounding), as the analyzer works in SI units internally. \nNotice: Meters and feet are indicated as units of depth, though in reality this concerns hydrostatic pressure (pressure at the indicated depth in seawater).","textLarge":false,"imageOnRight":true,"image":{"recommendedSizes":{"width":"420","height":"280"}},"imageMobile":{"recommendedSizes":{"width":"750","height":"500"}}},"id":"#94","type":"component","lock":false,"position":99},{"name":"Divider","data":{"color":"darkGray"},"id":"#96","type":"component","lock":false,"position":100},{"name":"SectionDivider","data":{"title":"09.3 Mixing of gases","skipToC":false},"id":"#147","type":"component","lock":false,"position":101},{"name":"LinkAnchor","data":{"anchorId":"09-3-mixing-of-gases"},"id":"#191","type":"component","lock":false,"position":102},{"name":"TextBlock","data":{"text":"### **09.3 Mixing of gases** \n\nThe ***Menu/Gas properties*** setting is available in the gas-mixing calculation and simulation modes. Individual parameters have the following significance: \n\nThe ***State equation*** option is chosen if the mixing c
2alculations will work with the ideal gas (the status equation PV=RT is used) or with the real gas (state equation according to Redlich and Kwong). The variant with the actual gas is more complicated in terms of calculation, and calculation can thus take a long time. The ideal gas is sufficient for ordinary use. \n\n***Ref. temperature*** is the temperature of the gas used for calculations.","textLarge":false,"imageOnRight":true,"image":{"recommendedSizes":{"width":"420","height":"280"}},"imageMobile":{"recommendedSizes":{"width":"750","height":"500"}}},"id":"#95","type":"component","lock":false,"position":103},{"name":"Divider","data":{"color":"darkGray"},"id":"#85","type":"component","lock":false,"position":104},{"name":"SectionDivider","data":{"title":"09.4 Continual analysis","skipToC":false},"id":"#148","type":"component","lock":false,"position":105},{"name":"LinkAnchor","data":{"anchorId":"09-4-continual-analysis"},"id":"#192","type":"component","lock":false,"position":106},{"name":"TextBlock","data":{"text":"### **09.4 Continual analysis** \n\nHere the boundary values are set. When these values are exceeded, an alarm is triggered: Alarm O2 low, Alarm O2 high, Alarm He low, Alarm He high, Alarm pressure low, Alarm pressure high, Alarm temperature low, Alarm temperature high. The last of the adjustable values is Delay Re1 -> Re2 , which sets the period of time which must elapse from the sounding of the alarm (Relay Re1) in order to shut off the compressor (Relay Re2).\nNot all values are necessarily available in the menu â the visibility of menu items changes according to which of the auxiliary devices are connected to the analyzer.","textLarge":false,"imageOnRight":true,"image":{"recommendedSizes":{"width":"420","height":"280"}},"imageMobile":{"recommendedSizes":{"width":"750","height":"500"}}},"id":"#93","type":"component","lock":false,"position":107},{"name":"Divider","data":{"color":"darkGray"},"id":"#97","type":"component","lock":false,"position":108},{"name":"SectionDivider","data":{"title":"10. Charging and battery status","skipToC":false},"id":"#149","type":"component","lock":false,"position":109},{"name":"LinkAnchor","data":{"anchorId":"10-charging-and-battery-status"},"id":"#193","type":"component","lock":false,"position":110},{"name":"TextBlock","data":{"text":"### **10. Charging and battery status** \n\nAt any time when the analyzer is turned on, you can check the battery status by pressing **| Ë
|** unless the key has other function at the particular screen. The value of the battery charge expresses double line at the bottom of display. Range is defined between 0 to 100% charging. \n\nWhen the battery is close to discharged, connect the analyzer with provided cable to any USB charger or a computer USB port. Full charge takes approximately three hours. \n\nWhen the charger is connected, you can check the status of charge press **| Ë
|**. If the battery is not fully charged, the row of arrows is displayed on a scale from 0 to 100%. If it is already charged, a long double line is displayed. \n\nAll features of the analyzer are available during charging.","textLarge":false,"imageOnRight":true,"image":{"recommendedSizes":{"width":"420","height":"280"}},"imageMobile":{"recommendedSizes":{"width":"750","height":"500"}}},"id":"#98","type":"component","lock":false,"position":111},{"name":"Divider","data":{"color":"darkGray"},"id":"#99","type":"component","lock":false,"position":112},{"name":"SectionDivider","data":{"title":"11. Maintenance","skipToC":true},"id":"#194","type":"component","lock":false,"position":113},{"name":"LinkAnchor","data":{"anchorId":"11-maintenance"},"id":"#196","type":"component","lock":false,"position":114},{"name":"TextBlock","data":{"text":"### **11. Maintenance** ","textLarge":false,"imageOnRight":true,"image":{"recommendedSizes":{"width":"840","height":"560"}},"imageMobile":{"recommendedSizes":{"width":"750","height":"500"}}},"id":"#195","type":"component","lock":false,"position":115},{"name":"SectionDivider","data":{"title":"11.1 Battery replacement","skipToC":false},"id":"#150","type":"component","lock":false,"position":116},{"name":"LinkAnchor","data":{"anchorId":"11-1-battery-replacement"},"id":"#197","type":"component","lock":false,"position":117}
2,{"name":"TextBlock","data":{"text":"### **11.1. Battery replacement** \n\nAll instruments manufactured after January 2017 have built-in rechargeable battery. \n\nFor the older models, which use a 9V alkaline battery of the 6F22 type, the battery is placed under the cover on the bottom side of the analyzer. Use only alkaline batteries when replacing. \n\nA no. 1 Philips screwdriver is suitable to remove the cover.","textLarge":false,"imageOnRight":true,"image":{"recommendedSizes":{"width":"420","height":"280"}},"imageMobile":{"recommendedSizes":{"width":"750","height":"500"}}},"id":"#100","type":"component","lock":false,"position":118},{"name":"Divider","data":{"color":"darkGray"},"id":"#101","type":"component","lock":false,"position":119},{"name":"SectionDivider","data":{"title":"11.2 Oxygen sensor replacement","skipToC":false},"id":"#151","type":"component","lock":false,"position":120},{"name":"LinkAnchor","data":{"anchorId":"11-2-oxygen-sensor-replacement"},"id":"#198","type":"component","lock":false,"position":121},{"name":"TextBlock","data":{"text":"### **11.2 Oxygen sensor replacement** \n\nThe oxygen sensor has a limited service life. The analyzer automatically checks the sensorâs condition and, at the end of its life, the message âOxygen sensor expiredâ is displayed upon activating the instrument. In this case the sensor should be replaced as soon as possible, as the accuracy of measuring the concentration of oxygen can no longer be guaranteed. \n\nIf you are not sure whether you are able to replace the sensor correctly, ask your supplier, vendor or service technician to change it. \n\nTo replace the sensor, first remove the battery cover, then unscrew the three screws fastening the cover of the instrument. Carefully lift the cover, remove the connector from the oxygen sensor and remove the sensor and the attached aluminum inlet block. \n\n**Warning: The cover is connected to the instrument by several cables. When replacing the sensor, take care not to put excessive tension on the cables or disconnect them. During the replacement, the cables must remain bent by their own weight and flexibility; their full tensioning by moving the cover too far from the instrument is not allowed.** \n\nUnscrew the old sensor and install the new one in such a way that the o-ring on the sensor closely attaches to the inlet block. Do not use excessive strength to tight the sensor to avoid damaging the thread. \n\nInstall the inlet block with the sensor in the lower half of the open instrument. The pins of the block must easily fit into the holes in the body of the instrument. During the installation of the block ensure that the two o-rings remain fixed to the pins. If needed be, use spare o-rings included in the analyzer package. \n\nA no. 1 Philips screwdriver and a 2.5 mm hexagonal key are needed to replace the sensor. \n\nAfter each sensor replacement, the instrument has to be recalibrated.","textLarge":false,"imageOnRight":true,"image":{"recommendedSizes":{"width":"420","height":"280"}},"imageMobile":{"recommendedSizes":{"width":"750","height":"500"}}},"id":"#102","type":"component","lock":false,"position":122},{"name":"Image","data":{"firstImage":{"mimetype":"image/jpeg","size":107132,"hash":"981bfdf21a43662361e1489067e8e7676fcb48c4","id":"ckolg6eps6hem0776a3or7mxs","filename":"8313-divesoft-analyzer-he-o2-manual-11.jpg","category":"divesoft/","type":"image"},"secondImage":{}},"id":"#103","type":"component","lock":false,"position":123},{"name":"Divider","data":{"color":"darkGray"},"id":"#104","type":"component","lock":false,"position":124},{"name":"SectionDivider","data":{"title":"11.3 flow adjusting","skipToC":false},"id":"#152","type":"component","lock":false,"position":125},{"name":"LinkAnchor","data":{"anchorId":"11-3-flow-adjusting"},"id":"#199","type":"component","lock":false,"position":126},{"name":"TextBlock","data":{"text":"### **11.3 Flow adjusting** \n\nIn most cases is generally gas-flowing in the flow limiter suitable for wide range of the input pressure. When is often analyzed the gas under low pressure, can be flow too low and so is stabilizing of measured value slow. In this case is possible set the flow on higher value. \n\nConnect sampler to the tank, open the valve and set the gas-flowing at the desired value with 2 mm socket-screw ke
2y. Setting range is relatively small, maximally 1/4 rev. Do not more loosen the setting screw, it can be released and blow out by the gas pressure. \n\nCorrect flow in the right adjusted sampler is 0.2 liter/min. Adjusting is possible verify approximately by connecting a hose to the sampler and second end immerse to a glass with water. For right adjust must from the hose end leakage continuous flow of little bubbles. After test dry the hose, else water may enter the analyzer. \n\nIf you are not sure about correct adjusting, contact with this act your dealer or service. \n\n2 mm socket-screw key is needed for this adjusting.","textLarge":false,"imageOnRight":true,"image":{"recommendedSizes":{"width":"420","height":"280"}},"imageMobile":{"recommendedSizes":{"width":"750","height":"500"}}},"id":"#105","type":"component","lock":false,"position":127},{"name":"Divider","data":{"color":"darkGray"},"id":"#106","type":"component","lock":false,"position":128},{"name":"SectionDivider","data":{"title":"11.4 Disassembly of the instrument","skipToC":false},"id":"#153","type":"component","lock":false,"position":129},{"name":"LinkAnchor","data":{"anchorId":"11-4-disassembly-of-the-instrument"},"id":"#200","type":"component","lock":false,"position":130},{"name":"TextBlock","data":{"text":"### **11.4 Disassembly of the instrument** \n\nWarning: Do not remove the printed circuit board from the analyzer. Replacing the circuit board requires a special procedure and calibration instrument.","textLarge":false,"imageOnRight":true,"image":{"recommendedSizes":{"width":"420","height":"280"}},"imageMobile":{"recommendedSizes":{"width":"750","height":"500"}}},"id":"#107","type":"component","lock":false,"position":131},{"name":"Divider","data":{"color":"darkGray"},"id":"#108","type":"component","lock":false,"position":132},{"name":"SectionDivider","data":{"title":"11.5 Storage when not is use for long periods","skipToC":false},"id":"#202","type":"component","lock":false,"position":133},{"name":"LinkAnchor","data":{"anchorId":"11-5-storage-when-not-in-use-for-long-periods"},"id":"#201","type":"component","lock":false,"position":134},{"name":"TextBlock","data":{"text":"### **11.5 Storage when not in use for long periods**\n\nIf the device is not used for a long period of time (months), it is essential to prevent degradation or damage to the device. \nRemove the oxygen sensor from the analyzer. Oxygen sensors are subject to aging and degradation, and electrolyte may spill into the instrument compartment after extended periods of time. This would result in degradation of the analyzer. \nRecharge the battery regularly to revive it. Keep the battery voltage between 60% and 80% of capacity.","textLarge":false,"imageOnRight":true,"image":{"recommendedSizes":{"width":"420","height":"280"}},"imageMobile":{"recommendedSizes":{"width":"750","height":"500"}}},"id":"#163","type":"component","lock":false,"position":135},{"name":"Divider","data":{"color":"darkGray"},"id":"#164","type":"component","lock":false,"position":136},{"name":"SectionDivider","data":{"title":"12. Connecting to a computer","skipToC":false},"id":"#154","type":"component","lock":false,"position":137},{"name":"LinkAnchor","data":{"anchorId":"12-connecting-to-a-computer"},"id":"#203","type":"component","lock":false,"position":138},{"name":"TextBlock","data":{"text":"### **12. Connecting to a computer** \n\nThe analyzer can be connected to a computer using a USB cable. \n\nMeasured values are transferred to the PC via a virtual serial port. If you have not installed a suitable driver for the virtual serial port on the USB, use the free driver provided by the manufacturer of the USB chip used in the analyzer. This driver can be downloaded from the Internet at http://www.ftdichip.com/Drivers/VCP.htm. The specific driver can be selected from the VCP (virtual com port) category, depending on the PC and operating system used. Use the instructions attached with the driver to install it. \n\nData transfer must be activated in the analyzer by the option ***Menu/Preferences/Send Data to USB = On.*** \n\nAny terminal emulation utility can be used for data reception; for instance HyperTerminal is sufficient for Microsoft Windows. This utility is included in the basic Windows installation. \n\nThe measured data are transferred in the text mode. Every second, the analyzer transmits data in the following format: \n\n\tHe xxx.x O2 yyy.y CR LF\n\nwhere xxx.x is helium content in percent, \nwhere yyy.y is oxygen content in percent, \nCR is the ASCII carriage return symbol (decimal 13, hexadecimal 0D), \nLF is the ASCII line feed symbol (decimal 10, hexadecimal 0A). \n\nIf there is an error in the measurement, the faulty entry is replaced with asterisks in the following form: ***.*. \n\nSent data are available also at the rear connector. The output is in serial form in the format 8N1 (8 bits, no parity bit, one stopbit), speed 115200 bit/s, TTL level. Connector pinout is shown in the appendix.","textLarge":false,"imageOnRight":true,"image":{"recommendedSizes":{"width":"420","height":"280"}},"imageMobile":{"recommendedSizes":{"width":"750","height":"500"}}},"id":"#109","type":"component","lock":false,"position":139},{"name":"Divider","data":{"color":"darkGray"},"id":"#110","type":"component","lock":false,"position":140},{"name":"SectionDivider","data":{"title":"13. Defects and removal thereof","skipToC":false},"id":"#155","type":"component","lock":false,"position":141},{"name":"LinkAnchor","data":{"anchorId":"13-defects-and-removal-thereof"},"id":"#204","type":"component","lock":false,"position":142},{"name":"TextBlock","data":{"text":"### **13. Defects and removal thereof** \n\nUpon activation, the analyzer is automatically tested to identify one of the following errors. All the error messages can be confirmed by the **| OK |** key and the instrument will continue to work; however in some circumstances in a limited operation mode. The overvoltage message (see below) is an exception, as it may be displayed at any time.","textLarge":false,"imageOnRight":true,"image":{"recommendedSizes":{"width":"420","height":"280"}},"imageMobile":{"recommendedSizes":{"width":"750","height":"500"}}},"id":"#111","type":"component","lock":false,"position":143},{"name":"Divider","data":{"color":"darkGray"},"id":"#112","type":"component","lock":false,"position":144},{"name":"SectionDivider","data":{"title":"13.1 Error messages","skipToC":false},"id":"#156","type":"component","lock":false,"position":145},{"name":"LinkAnchor","data":{"anchorId":"13-1-error-messages"},"id":"#205","type":"component","lock":false,"position":146},{"name":"TextBlock","data":{"text":"### **13.1 Error messages** \n\n**Error 1 Helium sensor doesnât work correctly** \nâ¢\tThere is an error in the electronic or mechanical section of the helium sensor. The instrument can be used in an emergency mode for measuring the oxygen concentration. The analyzer must be repaired to be able to measure helium. \n\n**Error 2 Oxygen sensor damaged or missing** \nâ¢\tThe oxygen sensor is removed, disconnected or destroyed. The measuring of the oxygen concentration will be incorrect. The sensor can be temporarily deactivated (Menu/O2 cell used = Off), the oxygen concentration measured by another instrument and entered manually as a constant (Menu/O2 substitute = n). The method of displaying the measured values cannot be changed, nor can oxygen sensor calibration performed. \n\n**Warning Oxygen sensor switched off** \nâ¢\tThis message is displayed every time the O2 sensor is switched off. \n\n**Error 3 Oxygen sensor expired** \nâ¢\tThe oxygen sensor is old and its output voltage is too low. The measuring will be inaccurate (the âIncorrectâ warning is displayed next to the value of the O2 concentration) and s
2ome measuring modes cannot be activated. The sensor must be immediately replaced with a new one of the recommended type. \nâ¢\tThis error may also occur if the instrument is filled with a hypoxic mix (a mix with low oxygen content) upon activation, for example immediately after previous measurement or if the measured hypoxic mix is delivered before the analyzer is activated. In such a case, switch off the instrument for a while, or connect it to a source of air before its activation. Never use your mouth to blow air in the inlet or the outlet of the analyzer to avoid vapor condensation inside the instrument (careful aspiration of gas by mouth is possible). \n\n**Error 4 Device is too cold** \nâ¢\tThe temperature of the analyzer is too low and the measuring may be inaccurate. Warm up the analyzer in a warm room to increase its temperature above the freezing point (32°F). Do not use a hot-air blower, air dryer, an oven or any other similar method to warm up the analyzer. \n\n**Error 5 Device is too warm** \nâ¢\tThe temperature of the analyzer is too high (for instance, if it was exposed to sunlight or stored in a car heated by sunlight); the measurement may be inaccurate. Cool down the analyzer below 40 degrees Celsius (104°F). \n\n**Warning Battery low** \nâ¢\tThe battery is almost empty, it has to be replaced or use the external power source. \n\n**Error 6 External power overvoltage** \nâ¢\tThe allowed voltage of the external power source was exceeded. This may be caused by mains excessive voltage or by the use of an inappropriate or faulty adapter. After sending this message, the analyzer will immediately shut down to avoid the overheating of voltage stabilizer circuits. When the defect of the adapter is removed or if the battery is used, the analyzer can be reactivated.","textLarge":false,"imageOnRight":true,"image":{"recommendedSizes":{"width":"420","height":"280"}},"imageMobile":{"recommendedSizes":{"width":"750","height":"500"}}},"id":"#114","type":"component","lock":false,"position":147},{"name":"Divider","data":{"color":"darkGray"},"id":"#113","type":"component","lock":false,"position":148},{"name":"SectionDivider","data":{"title":"13.2 Instrument malfunctions","skipToC":false},"id":"#157","type":"component","lock":false,"position":149},{"name":"LinkAnchor","data":{"anchorId":"13-2-instrument-malfunctions"},"id":"#206","type":"component","lock":false,"position":150},{"name":"TextBlock","data":{"text":"### **13.2 Instrument malfunctions** \n\n**Helium content not displayed** \nâ¢\tThe probe measures the speed of helium in both directions. If these data differ, measuring is deemed incorrect and the helium content is not displayed. This situation can be encountered if the measured gas flows through the probe too fast (lower flow speeds are compensated for by the calculation), or there is significant background noise (for example, in the vicinity of a running compressor or gas motor). \nâ¢\tLower the gas flow speed (this applies to the analyzer not connected using the genuine sampler), move farther from the source of the noise. \n\n**The instrument shows less than 0 % or more than 100 % of helium in the mixture** \nâ¢\tThe displayed value arises directly from the measured and calculated value and has in no way been altered in the background. The possible measuring error is symmetrical and, for example, when measuring a mixture without any helium content, 0.2 % or â0.2 % helium can be displayed. Accordingly, when measuring pure helium, e.g. 99.8 % or 100.2 % can be displayed. If the deviation is within the measuring tolerance, this is not the result of a defect. \n\n**The instrument shows less than 0 % or more than 100 % of oxygen in the mixture** \nâ¢\tThe displayed value arises directly from the measured and calculated value and has in no way been altered in the background. The possible measuring error is symmetrical and, for example, when measuring a mixture without any oxygen content, 0.5 % or â0.5 % oxygen can be displayed. Accordingly, when measuring pure oxygen, e.g. 99.5 % or 100.5 % can be displayed. If the deviation is within the measuring tolerance, this is not the result of a defect. In the case of a greater deviation, recalibrate the oxygen sensor. If the problem persists, replace the sensor.","textLarge":false,"imageOnRight":true,"image":{"recommendedSizes":{"width":"420","height":"280"}},"imageMobile":{"recommendedSizes":{"width":"750","height":"500"}}},"id":"#50","type":"component","lock":false,"position":151},{"name":"Divider","data":{"color":"darkGray"},"id":"#115","type":"component","lock":false,"position":152},{"name":"SectionDivider","data":{"title":"14. Technical data","skipToC":false},"id":"#158","type":"component","lock":false,"position":153},{"name":"LinkAnchor","data":{"anchorId":"14-technical-data"},"id":"#207","type":"component","lock":false,"position":154},{"name":"TextBlock","data":{"text":"### **14. Technical data** \n\nDimensions of the analyzer
2: 82 x 200 x 37 mm (3 1/4 x 7 7/8 x 1 1/2 inches) \nWeight: 720 g (1.6 lb) \n\nRange of measuring the concentration of oxygen: 0 to 100 % \n\nRange of measuring the concentration of helium: 0 to 100 % \n\nMeasuring temperature: 0 to +40° C (32 â 104° F) \n\nMixture pressure: consistent with ambient pressure, in the range of 700â1100 millibars (20â32 inches of Hg) which corresponds to the standard atmosphere at an elevation in the range of 0 to 3000 m (0â10000 feet) above sea level. \n\nRated gas throughput: 0.2 L/min \n\nBasis of measuring the speed of sound: 800 mm \n\nMeasuring frequency: 2 kHz \n\nOxygen sensor: Teledyne R-22S or compatible \n\nPower source: Rechargeable battery or 9V alkaline battery, type 6F22 or 12V adapter DC. \n\nBattery: 120 measurements or 4 hours of continuous operation \n\nBattery capacity: 3,7 Wh\n\nThe connection dimensions of the sampler: standard for a âDINâ valve (EN 144-2) for 200/300 bars (G 5/8 thread). Samplers with a connection to any standardized or common valves are available on request or as optional equipment.\n\nWarranty: 24 months, 12 months on battery and oxygen sensor","textLarge":false,"imageOnRight":true,"image":{"recommendedSizes":{"width":"420","height":"280"}},"imageMobile":{"recommendedSizes":{"width":"750","height":"500"}}},"id":"#48","type":"component","lock":false,"position":155},{"name":"Divider","data":{"color":"darkGray"},"id":"#117","type":"component","lock":false,"position":156},{"name":"TextBlock","data":{"text":"### **HE/O2 ANALYZER - USER MANUAL** \nDate of issue: 06 March 2019 \nHW 2.5, FW 2.26 \nAuthors: Adam Procháska, Jakub Å imánek, AleÅ¡ Procháska \nPublished by Divesoft s.r.o.","textLarge":false,"imageOnRight":true,"image":{"recommendedSizes":{"width":"420","height":"280"}},"imageMobile":{"recommendedSizes":{"width":"750","height":"500"}}},"id":"#119","type":"component","lock":false,"position":157}],"id":"root","idBuffer":"#209","lastCommit":"105604bb-5c75-4eac-874e-70dd4038a874"}},"annotations":[],"language":{"type":"id","generated":false,"id":"Language:cjv3kwvoj000u083611381c6o","typename":"Language"},"__typename":"PageTranslation"},"Page:ckonbtfmp3px60788qpmvrvhk":{"id":"ckonbtfmp3px60788qpmvrvhk","type":{"type":"id","generated":false,"id":"PageType:cjv3l213x004f08366hjufttp","typename":"PageType"},"tags":[],"translations({\"where\":{\"language\":{\"id\":\"cjv3kwvoj000u083611381c6o\"}}})":[{"type":"id","generated":false,"id":"PageTranslation:ckonbtfn73pxd0788km1w3uhh","typename":"PageTranslation"}],"__typename":"Page"},"PageTranslation:ckonbtfn73pxd0788km1w3uhh":{"id":"ckonbtfn73pxd0788km1w3uhh","name":"#8300_analyzer-solo_en","createdAt":"2021-05-13T20:10:29.107Z","content":{"type":"json","json":{"content":[{"name":"Header","data":{"products":[{"title":"Accessories","description":"Backplates, Consumables. Tanks.","img":{"recommendedSizes":{"width":"235","height":"235"}},"url":""},{"title":"Accessories sets","description":"Protection, maintenance, cleaning.","img":{"recommendedSizes":{"width":"235","height":"235"}},"url":""},{"title":"Spare parts","description":"Spare parts and components.","img":{"recommendedSizes":{"width":"235","height":"235"}},"url":""},{"title":"Spare parts kits","description":"Completly Liberty spare parts kits.","img":{"recommendedSizes":{"width":"235","height":"235"}},"url":""}]},"id":"#0","type":"component","lock":false,"position":0},{"name":"SectionDivider","data":{"title":"User manual","skipToC":false},"id":"#116","type":"component","lock":false,"position":1},{"name":"ProductShowcase","data":{"backgroundColor":"#ffffff","isTextDark":true,"isImageRight":true,"image":{"mimetype":"image/png","size":2484040,"hash":"55856afc16538afd3ff513c08b98a1a9886e1706","id":"ckm4li2dcb37r07764e2ol0x9","filename":"divesoft-analyzer-solo.png","category":"divesoft/","type":"image"},"imageMobile":{},"title":"User manual","subtitle":"Analyzer Solo","description":"version 2022/02/02 \n\n#8300","hideDescriptionOnMobile":false,"areButtons":false,"firstTitle":"Learn more >","firstUrl":"","secondTitle":"Configurator >","secondUrl":""},"id":"#46","type":"component","lock":false,"position":2},{"name":"Divider","data":{"color":"darkGray"},"id":"#47","type":"component","lock":false,"position":3},{"name":"SectionDivider","data":{"title":"Content","skipToC":false},"id":"#117","type":"component","lock":false,"position":4},{"name":"TextBlock","data":{"text":"### **Content** \n\n01.About firmware and hardware versions \n01.1 Hardware limitations \n02.\tMeasuring principle \n03.\tDescription of the analyzer \n04.\tOperating the analyzer \n05.\tMeasuring O2 and He concentration \n06.\tDisplay modes \n06.1\tCalibration of the oxygen sensor \n07. Other functions \n07.1\tContinuous analysis \n07.2\tGas mixing solver \n07.3\tGas mixing simulation \n07.4 Gas purity \n07.5\tAmbient pressure \n08.\tSpecial accessories \n08.1\tFlow regulator \n09.\tSet-up \n09.1\tPreferences \n09.2\tMeasurement units \n09.3\tMixing of gases \n09.4\tContinual analysis \n10.\tCharging and battery status \n11.\tMaintenance \n11.1\tBattery replacement \n11.2\tOxygen sensor replacement \n11.3\tFlow adjusting \n11.4\tDisassembly of the instrument \n12.\tConnecting to a computer \n13.\tDefects and removal thereof \n13.1\tError messages \n13.2\tInstrument malfunctions \n14.\tTechnical data ","textLarge":false,"imageOnRight":true,"image":{"recommendedSizes":{"width":"420","height":"280"}},"imageMobile":{"recommendedSizes":{"width":"750","height":"500"}}},"id":"#48","type":"component","lock":false,"position":5},{"name":"Divider","data":{"color":"darkGray"},"id":"#49","type":"component","lock":false,"position":6},{"name":"SectionDivider","data":{"title":"Safety warning","skipToC":false},"id":"#118","type":"component","lock":false,"position":7},{"name":"TextBlock","data":{"text":"### **Safety warning**\n\nThis analyzer is designed for measuring the content of oxygen and helium in an air-oxygenâhelium gas mixture.\nIt cannot be used to analyze mi
2xtures containing other gases than those mentioned above.\nFor mixtures prepared using anything but pure gases, or mixtures in which air has been replaced with pure nitrogen (without atmospheric argon), use the setting in *Menu/Preferences/Nitrogen source â Pure*. \n\nThe physical and chemical principles of the sensors used do not guarantee that the sensors will be selectively sensitive to a specific gas (oxygen, helium); there are a number of gases to which the sensors respond. Therefore, the gas composition shown by the analyzer does not mean by itself that the real composition of the mix is equal to the displayed values. The displayed mix composition is invalid unless the mixing technology ensures that there are no other gases present in the mix except air/nitrogen, pure oxygen and pure helium. \n\nThe analyzer is not a certified measuring instrument. The results of measuring are only informative and it is not possible to use such results where a certified measuring instrument is required. \n\nWhen analyzing mixes in situations where the incorrect composition of the mixes could cause material damage, injury to health or threaten human health or life, for example in the case of breathing mixes for diving, the results of the analysis may not be used as confirmation of the correct mix composition. In these cases, the analyzer can only be used as an aid for increasing the probability that such incorrect mix composition will be detected before its use. The correctness of the mix composition must be established by the technology used to prepare it. \n\nThe correct preparation of breathing mixes for diving (nitrox â oxygen-enriched air, trimix â a mixture of air, oxygen and helium, heliox â a mixture of oxygen and helium) requires special knowledge and experience which is possible to gain, for example, through an appropriate course. A failure to apply such knowledge can lead to an incorrect mix, even though the results of the analysis are seemingly correct. Such a situation can also be the result of a failure to take into account the influence of temperature and compressibility, an insufficient blending of the mix and other factors. \n\nPlease remember that the analyzer can be broken or damaged and that the oxygen sensor is by its nature subject to ageing and thus its properties deteriorate. \n\nTherefore always verify the measured data in another way, such as by precise preparation of the mix, another analytical method, etc. In addition, the measured value must be subject to critical assessment using a common-sense approach and if it differs from the allowable variation of mixing accuracy, it must be considered invali
2d. ","textLarge":false,"imageOnRight":true,"image":{"recommendedSizes":{"width":"420","height":"280"}},"imageMobile":{"recommendedSizes":{"width":"750","height":"500"}}},"id":"#50","type":"component","lock":false,"position":8},{"name":"Divider","data":{"color":"darkGray"},"id":"#51","type":"component","lock":false,"position":9},{"name":"SectionDivider","data":{"title":"01. About firmware and hardware versions","skipToC":false},"id":"#119","type":"component","lock":false,"position":10},{"name":"TextBlock","data":{"text":"### **01. About firmware and hardware versions **\n\nThe He/O2 analyzer is equipped with a microprocessor whose program (firmware) is continuously updated This manual is for firmware release 2 29, but the manual can be applied to any hardware or firmware version Manual is primarily written for hardware version 3 0. \n\n**Hardware limitations** \n3.0 Full functionality","textLarge":false,"imageOnRight":true,"image":{"recommendedSizes":{"width":"420","height":"280"}},"imageMobile":{"recommendedSizes":{"width":"750","height":"500"}}},"id":"#52","type":"component","lock":false,"position":11},{"name":"Divider","data":{"color":"darkGray"},"id":"#53","type":"component","lock":false,"position":12},{"name":"SectionDivider","data":{"title":"02. Measuring principle","skipToC":false},"id":"#120","type":"component","lock":false,"position":13},{"name":"TextBlock","data":{"text":"### **02. Measuring principle**\n\nThe described measuring principle is valid only for mixes of air, oxygen and helium. \n\nAn electrochemical sensor is used to determine the oxygen content. The voltage at the sensorâs output is proportional to the oxygen content in the analyzed mix. The sensor has a limited service life and the proportionality of the dependence of voltage on the oxygen content changes over time; therefore, it has to be regularly calibrated. It is possible to choose between single-point, two-point and three-point calibration. Single-point calibration is fast, especially if air is chosen as the calibrating mix. For greater accuracy of the measurement, two-point calibration is used with two different mixes, typically air and pure oxygen. For strongly hypoxic mixes, i.e. mixes containing less than approximately 15% oxygen, three-point calibration is recommended. In this case, the third calibration gas should be a gas with zero oxygen content, i.e. pure helium or argon. \n\nHelium content is determined on the basis of measuring the speed of sound in the analyzed mix. The speed of sound depends on the content of helium and oxygen, and the temperature of the mix. The dependence of the speed of sound on pressure is small and can be disregarded under normal atmospheric pressure. \n\nAt 0º C the speed of sound is approximately 970 m/s in pure helium, 330 m/s in air and 315 m/s in pure oxygen. Raising the temperature by one degree increases the speed of sound by 0.175 %. The speed of sound in the mix is described by a non-linear function of temperature, oxygen content and helium content. \n\nThe content of helium is determined by measuring the speed of sound, temperature of the mix and the content of oxygen. When measuring the concentration of helium, it is therefore necessary to have the oxygen sensor correctly calibrated or to know the oxygen content and enter it into the instrument. \n\nThe speed of sound is measured directly as the time it takes for an acoustic impulse to travel between two microphones. This measurement is performed alternately in both directions to make it possible to eliminate the influence of the gas flow-rate in the probe on the calculation. The acoustic impulses are heard as weak âclicksâ from the probe in the helium-measuring mode. \n\nGas is delivered to the analyzer from a sampler connected to the compressed-gas tank and the gas flow is controlled using a nozzle to provide the volume needed for the analysis.","textLarge":false,"imageOnRight":true,"image":{"recommendedSizes":{"width":"420","height":"280"}},"imageMobile":{"recommendedSizes":{"width":"750","height":"500"}}},"id":"#54","type":"component","lock":false,"position":14},{"name":"Divider","data":{"color":"darkGray"},"id":"#55","type":"component","lock":false,"position":15}
2,{"name":"SectionDivider","data":{"title":"03. Description of the analyzer","skipToC":false},"id":"#121","type":"component","lock":false,"position":16},{"name":"TextBlock","data":{"text":"### **03. Description of the analyzer**\n\nThe lightweight and robust body is made from ABS-PC. \n\nOn the front side, the analyzer features a membrane keypad and an OLED display on which the measured values are shown. \n\nMeasured gas is fed into the analyzed-mix inlet on the back of the analyzer and passes through the helium-concentration sensor From there, it enters the oxygen-sensor block and is expelled into the air by the mix exhaust. The rated flow of the analyzed mix is 0,2 - 0,4 L/min. \n\nThe analyzer is powered by a built-in battery, charging is possible through USB-C connector on the side of the analyzer.\n","textLarge":false,"imageOnRight":true,"image":{"recommendedSizes":{"width":"420","height":"280"}},"imageMobile":{"recommendedSizes":{"width":"750","height":"500"}}},"id":"#56","type":"component","lock":false,"position":17},{"name":"Image","data":{"firstImage":{"mimetype":"image/jpeg","size":134996,"hash":"20a0655e4bc524e8150abbe8ff0e086d91cfacb1","id":"ckondgm4f7fmn07761oe8jjl7","filename":"8300-divesoft-analyzer-solo-manual-03.jpg","category":"divesoft/","type":"image"},"secondImage":{}},"id":"#57","type":"component","lock":false,"position":18},{"name":"Divider","data":{"color":"darkGray"},"id":"#58","type":"component","lock":false,"position":19},{"name":"SectionDivider","data":{"title":"04. Operating the analyzer","skipToC":false},"id":"#122","type":"component","lock":false,"position":20},{"name":"TextBlock","data":{"text":"### **04. Operating the analyzer**\n\nThe analyzer is operated using the keys on its front panel. \n\nIt is activated by pressing the ON/OFF key for approximately one second. Upon activation, an automatic check of the instrument is performed and the analyzer automatically switches to the measuring mode. \n\nWhen this key is pressed, the firmware version code and serial number of the analyzer are displayed. If you need to read this information, just hold the key down longer when activating the unit. \n\nThe analyzer is deactivated by pressing the **| ON OFF |** key for about one second again. \n\nThe **| MENU |** key displays the available options. The menu changes in individual measuring modes, depending on the functions relevant to the applicable mode. \n\nThe **| OK |** key is used to enter the selected menu item, confirm a changed value or perform the prepared action. The selected menu item can also be called up by repeatedly pressing the **| MENU |** key. \n\nThe **| ESC |** key is used to exit the menu or return from the value editing mode without saving the changed value. \n\nThe **| Ë |** and **| Ë
|** keys are used to browse the menu or change the value of a number above the cursor. \n\nThe MODE key is used to change the display mode or to change the cursor position in the number editing mode. \n\nOther functions of the keys are described in the relevant chapters.\n","textLarge":false,"imageOnRight":true,"image":{"recommendedSizes":{"width":"420","height":"280"}},"imageMobile":{"recommendedSizes":{"width":"750","height":"500"}}},"id":"#59","type":"component","lock":false,"position":21},{"name":"Image","data":{"firstImage":{"mimetype":"image/jpeg","size":41306,"hash":"d9025a378e6beb34e6ff44cbca462ac87e1690b5","id":"ckolg3xqd6hco0776xrl70dk5","filename":"8313-divesoft-analyzer-he-o2-manual-04.jpg","category":"divesoft/","type":"image"},"secondImage":{}},"id":"#60","type":"component","lock":false,"position":22},{"name":"Divider","data":{"color":"darkGray"},"id":"#61","type":"component","lock":false,"position":23},{"name":"SectionDivider","data":{"title":"05. Measuring O2 and He concentration","skipToC":false},"id":"#123","type":"component","lock":false,"position":24},{"name":"TextBlock","data":{"text":"### **05. Measuring O2 and He concentration**\n\nThe flow limiter with nozzle is used in the basic configuration (see illustration). \n\nAttach the sampler to the compressed gas bottle and use the hose to connect it to the analyzer. The hose is slightly inserted into both components. \n\nThe analyzer switches into the helium and oxygen measuring mode upon activation, so there is no need for you to set up anything. Open the valve on the bottle to let the gas flow in. The gas composition is displayed after approximately 5 â 10 seconds. If the pressure inside the bottle is distinctly lower than 200 bars, the gas flow through the sampler will be slower and the measuring result will take somewhat longer to determine. \n\nWith the **| OK |** key, you can suspend and, by pressing it again, resume measuring. When measuring is suspended, the last measured values remain displayed. During measuring, the **| Ë |** key can be used for temporarily increasing the brightness of the display to maximum (e.g. if the display is exposed to sunlight). \n\nWhen the measuring is completed, close the valve on the tank and by loosening the discharge valve (generally 1/2 turn suffices) discharge the excess pressure of the gas so that the flow limiter can be unscrewed from the tank valve. \n\n**Warning: Do not unscrew the discharge-valve spindle completely;
2 a steal ball is contained inside which upon opening could be expelled and cause injury or be lost.**","textLarge":false,"imageOnRight":true,"image":{"recommendedSizes":{"width":"420","height":"280"}},"imageMobile":{"recommendedSizes":{"width":"750","height":"500"}}},"id":"#62","type":"component","lock":false,"position":25},{"name":"Image","data":{"firstImage":{"mimetype":"image/jpeg","size":109038,"hash":"90c934523e766370c8427b76e2d15c278423afb5","id":"ckolg4i536hd40776exkcn3w8","filename":"8313-divesoft-analyzer-he-o2-manual-05.jpg","category":"divesoft/","type":"image"},"secondImage":{}},"id":"#63","type":"component","lock":false,"position":26},{"name":"Divider","data":{"color":"darkGray"},"id":"#64","type":"component","lock":false,"position":27},{"name":"SectionDivider","data":{"title":"06. Display models","skipToC":false},"id":"#124","type":"component","lock":false,"position":28},{"name":"TextBlock","data":{"text":"### **06. Display models**\n\nUpon activation, the analyzer is normally in the O2/He measuring mode, in one of the two display formats. \n\nThe *basic format* shows the oxygen and helium content in the mixture in percent in separate lines and, for information, also the temperature at which the gas was measured. \n\nAfter the measuring begins, the helium concentration may appear in square brackets for several seconds in the basic format. This means that the result is interim, with lower accuracy. When the brackets disappear, the accuracy of the result is final. \n\nIn case of a measuring error, for instance at a pneumatic shock in the inlet hose, the value of the measured helium concentration disappears for the time of duration of the error state. \n\nThe *well-arranged format* shows the composition in a way used by divers to call the mixtures: \nâ\tAir: air with the oxygen content between 20.5 % and 21.5 %. \nâ\tEAN, for instance EAN 36, is air enriched with oxygen, in this case up to 36 % oxygen. \nâ\tTMX, for instance TMX 18/45, is trimix or the mixture of air, oxygen and helium, in this particular case containing 18 % oxygen and 45 % helium. \nâ\tHeliox, for instance Heliox 16 % O2, is a mixture of oxygen and helium. \nâ\tFoul Air, for instance Foul Air (10 % O2), is foul or vitiated air with a reduced oxygen content. It cannot be mixed with gases designed for preparation of breathing mixes commonly available to the diver (air, oxygen, helium); therefore, its presence indicates a problem. This may include ongoing corrosion inside the bottle or contamination of the mix with argon, carbon dioxide or another gas. Such air cannot be used for breathing under any circumstances. \n\nIn addition to the mix composition, this well-arranged format shows approximate values of the maximum operating depth (MOD) and an equivalent narcotic depth (END). \n\nMOD indicates the depth to which the diver can dive for a short time under otherwise ideal conditions. The limit of partial oxygen pressure equal to 1.6 kPa is used in the calculation, and seawater and the static pressure at sea level are taken into account. This reading is for orientation only, and for an actual dive it must be calculated using the data of the specific dive.\n\nThe following formula is used for the calculation: \nwhere \n\n\tPmax\tis the maximum allowable partial oxygen pressure, chosen as 160,000 Pa \n\tP0\tis the static pressure at sea level, 101,325 Pa \n\tRO2\trelative molar concentration of oxygen in the interval 0 to 1 \n\tÏ\tis the seawater density, 1028 kg mâ3 \n\tg\tis the standard acceleration of gravity, 9.80665 m sâ2 \n","textLarge":false,"imageOnRight":true,"image":{"recommendedSizes":{"width":"420","height":"280"}},"imageMobile":{"recommendedSizes":{"width":"750","height":"500"}}},"id":"#65","type":"component","lock":false,"position":29},{"name":"Image","data":{"firstImage":{"mimetype":"image/jpeg","size":15225,"hash":"a898843d6cec9ef781476fd835a750007b81d819","id":"ckolgb7tx6hks07767emuy07n","filename":"8313-divesoft-analyzer-he-o2-manual-06.jpg","category":"divesoft/","type":"image"},"secondImage":{}},"id":"#66","type":"component","lock":false,"position":30},{"name":"TextBlock","data":{"text":"**Warning: The maximum operating depth (MOD) calculated for an actual dive is usually lower than the depth indicated by the analyzer. **\n\nEND is the depth at which the narcotic effect of the mix on the diver is identical to that of air. It is specified in the percentage of a dive depth with air, i.e. for instance the END of 45 % means that at a depth of 100 m with an analyzed mix, the diver will perceive the same narcotic effects as if diving to 45 m with air. There are a number of various formulas for the calculation of END, each giving different results. The value displayed by the analyzer uses only one of them and is used for orientation purposes only. For an actual dive, it is necessary to calculate the END using the data of the specific dive and the tested formulas of your preference. \n\nThe following formula
2is used for calculation: \nEND = 100 â 77 RHe \n\nwhere \n\n\tRHe\tis the relative molar concentration of helium in the ration 0 to 1\n\n\nThe formula is based on the following conditions: \nâ\trelative narcotic potential of nitrogen = 1 \nâ\trelative narcotic potential of oxygen = 1 \nâ\trelative narcotic potential of helium = 0.23 \n\n**Warning: The equivalent narcotic depth (END) indicated by the calculation is for orientation purposes only and may differ from the END values calculated using other methodologies.** \n\n**Warning: To determine the END and MOD values, always use the procedures and formulas that you learned in specialized courses of diving with mixes. The values indicated by the analyzer are for orientation purposes only and are not sufficient for correct dive planning.**\n","textLarge":false,"imageOnRight":true,"image":{"recommendedSizes":{"width":"420","height":"280"}},"imageMobile":{"recommendedSizes":{"width":"750","height":"500"}}},"id":"#67","type":"component","lock":false,"position":31},{"name":"Divider","data":{"color":"darkGray"},"id":"#75","type":"component","lock":false,"position":32},{"name":"SectionDivider","data":{"title":"06.1. Calibration of the oxygen sensor","skipToC":false},"id":"#125","type":"component","lock":false,"position":33},{"name":"TextBlock","data":{"text":"### **06.1. Calibration of the oxygen sensor**\n\nThe oxygen sensorâs properties change over time and it is therefore necessary to recalibrate it We recommend that such calibration be performed at least once a month The analyzer is equipped with built-in barometer sensor, which compensates for changes in altitude while traveling to dive sites. \n\nCalibration of the sensor is performed as either single-point or two-point or three-point. During single-point calibration, the content of oxygen in air, which is known and constant (20.95 %), is measured by the sensor. The calibration constant of the sensor is set so that the instrument displays 21.0 % (after rounding). \n\nTwo-point calibration proceeds in the same manner as single-point calibration, but uses two calibration gases â pure oxygen and air. Two-point calibration is more arduous as it requires the use of oxygen. However, it provides more precise results during measuring. \n\nThee-point calibration is recommended for measuring hypoxic mixes, containing less than approximately 15 % oxygen. In this case, the third calibration gas should be a gas with zero oxygen content, i.e. pure helium or argon. \n\nCalibration of the oxygen sensor is started by pressing the **| CAL |** key at any time during the measuring. \n\nAs the first step of calibration, we must choose between single-point, two-point or three-point calibration using the **| Ë |** and **| Ë
|** keys and confirm the selection using the **| OK |** key. \n\nIt is then necessary to choose the oxygen content in the calibration mixture. \n\nThe oxygen content is adjusted by tenths of a percent by pressing the **| Ë |** key (to increase the content) or the **| Ë
|** key (to decrease the content). Use the **| MODE |** key to choose whether to make adjustments by tenths, whole units, or units of ten percentage points. Upon setting the desired values, confirm the data using the **| OK |** key. \n\nFor quickly setting typical values when setting the oxygen content it is possible to use the CAL key, which sets the oxygen content at 21 % in the case of the first calibration point or 100 % at the second point and 0 % at the third point. \n\nUpon setting and confirming the calibration of gases, calibration of the sensor begins. The current calibration point, sensor voltage in millivolts and the temperature of the gas appear on the display. \n\nAfter the temperature and voltage have stabilized (however, at least after ten seconds), the STABLE prompt appears, which means that it is possible to confirm the performed calibration using the **| OK |** key. If the measured values change before the **| OK |** key is pressed, the STABLE sign disappears and calibration proceeds until further steady values are attained. If multi-point calibration is set up, then calibration according to the other gases proceeds similarly.\n","textLarge":false,"imageOnRight":true,"image":{"recommendedSizes":{"width":"420","height":"280"}},"imageMobile":{"recommendedSizes":{"width":"750","height":"500"}}},"id":"#69","type":"component","lock":false,"position":34},{"name":"TextBlock","data":{"text":"#### **Correction of the oxygen content in the air**\n\nThe oxygen content of the air is not constant, but varies with ambient conditions. The amount of oxygen is displaced by water vapour in the air. Therefore, the oxygen content decreases with increasing temperature and humidity. To accurately calibrate the oxygen sensor, use the correction tables below and set the correct value when calibrating to ambient air.","textLarge":false,"imageOnRight":true,"image":{"recommendedSizes":{"width":"420","height":"280"}},"imageMobile":{"recommendedSizes":{"width":"750","height":"500"}}},"id":"#159","type":"component","lock":false,"position":35},{"name":"Image","data":{"firstImage":{"recommendedSizes":{"width":"1000","height":"1000"},"mimetype":"image/png","size":50340,"hash":"70e73729d7aa73b2920993febce4d993fd02f137","id":"cm1ex0q3i25it0874znpncnrs","filename":"correction-chart.png","category":"divesoft/","type":"image"},"secondImage":{"recommendedSizes":{"width":"1000","height":"1000"}}},"id":"#160","type":"component","lock":false,"position":36},{"name":"Divider","data":{"color":"darkGray"},"id":"#72","type":"component","lock":false,"position":37},{"name":"SectionDivider","data":{"title":"07. Other functions","skipToC":true},"id":"#127","type":"component","lock":false,"position":38},{"name":"TextBlock","data":{"text":"### **07. Other functions**","textLarge":false,"imageOnRight":true,"image":{"recommendedSizes":{"width":"420","height":"280"}},"imageMobile":{"recommendedSizes":{"width":"750","height":"500"}}},"id":"#126","type":"component","lock":false,"position":39},{"name":"SectionDivider","data":{"title":"07.1 Continuous analysis","skipToC":false},"id":"#128","type":"component","lock":false,"position":40}
2,{"name":"TextBlock","data":{"text":"\n### **07.1 Continuous analysis**\n\nThe *Menu/Continual Analysis* option activates the function of continuous-filling monitoring. This mode makes it possible to set up the upper and lower limit of oxygen and helium content. The analyzer continuously measures the concentration of these components and if the preset limits are exceeded, it makes a beeping sound. This mode is applied when the analyzer is used as a safety component during continuous nitrox filling, where a defect of the mixing apparatus could cause increased oxygen concentration potentially resulting in a fire or an explosion of the compressor. \n\nIn the mode for continuous filling, the limit values can be changed after pressing the **| MENU |** button.\n","textLarge":false,"imageOnRight":true,"image":{"recommendedSizes":{"width":"420","height":"280"}},"imageMobile":{"recommendedSizes":{"width":"750","height":"500"}}},"id":"#71","type":"component","lock":false,"position":41},{"name":"Divider","data":{"color":"darkGray"},"id":"#74","type":"component","lock":false,"position":42},{"name":"SectionDivider","data":{"title":"07.2 Gas mixing solver","skipToC":false},"id":"#129","type":"component","lock":false,"position":43},{"name":"TextBlock","data":{"text":"### **07.2 Gas mixing solver**\n\nWhen the ***Menu/Gas mix solver*** option is selected, the gas-mixing solver function is activated. The solver computes the procedure for mixing the required gas mix of up to three gases. It can even include the remaining mix in the bottle to be filled in the calculation. The gases are displayed in the following order: the remaining gas in the bottle, added mix 1â3, the required mix. For each mix, the composition, volume of the bottle (the actual, âwaterâ volume of the bottle is specified) and gas pressure in the bottle are specified. If the volume of the gas is unlimited (for instance, if supplied by a compressor at a constant pressure), enter the bottle volume as zero. The mix composition may be entered either manually (after pressing the **| CAL |**, or the analyzer can be switched to the measuring mode by pressing the **| OK |** key and the relevant mix can be measured directly. After pressing the **| CAL |** is necessary to change the values press **| OK |**. Then you can enter values **| Ë | | Ë |** . Press **| MENU |** to move the cursor in the order. Confirm the selected value **| OK |**. After the data are entered, initiate the calculation using ***Menu/Solve*** (since it is first option, you can just press button **| Ë |** twice). The calculation may take up to one minute. Upon completion, results are displayed in one of the three possible forms, which can be switched between using the **| Ë |** key (see the example). \n\n**Example** \nThere is remaining air with the pressure of 120 bars in the twin bottles with the volume of 2 Ã 12 liters (total volume of 24 liters). The required mix is trimix 18/40 with the required pressure of 200 bars. You have fifty-liter distribution bottles containing oxygen and helium and a compressor with the output of 330 bars. Enter: \n\n\tA:\tAir\t\t24L\t120\n\t1:\tHe\t\t50L\t200\n\t2:\tO2\t\t50L\t200\n\t3:\tAir\t\t\t300\n\tD:\t18.0/40.0\t24L\t200\n\nand start the calculation. When the calculation is completed, the following data are displayed: \n\n\tDisch.\tto\t79.5 bar\n\tHe\tto\t159.5 bar\n\tO2\tto\t173.2 bar\n\tAir\tto\t200.0 bar\n\nmeaning that the twin should be discharged to the pressure of 79.5 bars, then He added until the pressure of 159.5 bars is achieved, then oxygen added to 173.2 bars and, finally, air added to reach 200 bars. When the MODE key is pressed, the same result is displayed; however, it is expressed in pressure to add or to discharge: \n\n\tDisch.\t-40.5 bar\n\tAdd\t80.0 bar He\n\tAdd\t13.7 bar O2\n\tAdd\t26.8 bar Air\n \nor decrease the pressure by 40.5 bars, increase the pressure by 80 bars by adding helium, add 13.7 bars of oxygen and 26.8 bars of air. The last mode is similar, but as it is designed for gravimetric filling (using a chemical balance), the amount of gas is specified in kilograms: \n\n\tDisch.\t-1.2382 kg\n\tAdd\t0.3392 kg He\n\tAdd\t0.4669 kg O2\n\tAdd\t0.8230 kg Air\n\nPlease note that the solver takes into account the pressure drop in the gas charging bottles; therefore it does not try to recommend adding oxygen to reach 200 bars (which would be impossible anyway, given the limited oxygen supply); rather, it allows air to be partly discharged and oxygen is only added to reach the realistic 173.2 bars, with the rest of the air to be added by the compressor. At the same time, however, the solver saves the mix already contained in the bottle to the maximum possible extent; therefore, it does not let it discharge completely. Instead, only the necessary part of the mix is discharged.","textLarge":false,"imageOnRight":true,"image":{"recommendedSizes":{"width":"420","height":"280"}},"imageMobile":{"recommendedSizes":{"width":"750","height":"500"}}},"id":"#76","type":"component","lock":false,"position":44},{"name":"Divider","data":{"color":"darkGray"},"id":"#77","type":"component","lock":false,"position":45},{"name":"SectionDivider","data":{"title":"07.3 Gas mixing simulation","skipToC":false},"id":"#130","type":"component","lock":false,"position":46}
2,{"name":"TextBlock","data":{"text":"### **07.3 Gas mixing simulation**\nOption Menu/Gas mix simulator is for Gas mix simulator function. Simulator will compute mixture content mixed up to from four gases. At every mixture is displayed composition and quantity of added gas in pressure units. You can enter mix composition manually (by pressing **| CAL |**) or switch to measurement mode by pressing **| OK |** and directly measure concrete mixture. Calculation of final mixture proceed continuously and mixture constitution is displayed on last row. Input values ââis the same as in the previous case.","textLarge":false,"imageOnRight":true,"image":{"recommendedSizes":{"width":"420","height":"280"}},"imageMobile":{"recommendedSizes":{"width":"750","height":"500"}}},"id":"#78","type":"component","lock":false,"position":47},{"name":"Divider","data":{"color":"darkGray"},"id":"#79","type":"component","lock":false,"position":48},{"name":"SectionDivider","data":{"title":"0.7.4 Gas purity","skipToC":false},"id":"#156","type":"component","lock":false,"position":49},{"name":"TextBlock","data":{"text":"### **0.7.4 Gas purity measurement**\n#### Usage \nSelect Menu / Gas Purity function Default configuration measure Argon / Air. Accuracy is 1% at both ends, aprox. 3% in the middle.\n#### Configuration\nWhen gas purity measurement is running, press CAL to open parameters configuration. Arrows to select item, Enter to edit. To obtain best results, it is possible to slightly tune Cp parameter to get 100% reading with pure component.\n#### Params for common gases and mixtures","textLarge":false,"imageOnRight":true,"image":{"recommendedSizes":{"width":"420","height":"280"}},"imageMobile":{"recommendedSizes":{"width":"750","height":"500"}}},"id":"#153","type":"component","lock":false,"position":50},{"name":"Image","data":{"firstImage":{"mimetype":"image/png","size":20902,"hash":"93eb160212b493592e054e0ef459ac18395f37af","id":"clxd4mu6rarr80776wdnyd21k","filename":"gas-parameters.png","category":"divesoft/","type":"image"},"secondImage":{}},"id":"#154","type":"component","lock":false,"position":51},{"name":"Divider","data":{"color":"darkGray"},"id":"#81","type":"component","lock":false,"position":52},{"name":"SectionDivider","data":{"title":"07.5 Ambient pressure","skipToC":false},"id":"#131","type":"component","lock":false,"position":53},{"name":"TextBlock","data":{"text":"### **07.5 Ambient pressure**\n\nAnalyzer is equipped with a barometric pressure sensor Thanks to this device can be calibrated for the atmospheric conditions and altitude The atmospheric pressure and altitude can\nbe displayed in the menu ambient pressure Altitude is calculated from ambient pressure referenced to standard pressure at sea level (1013,25 hPa), depending on atmospheric conditions may differ from reality.","textLarge":false,"imageOnRight":true,"image":{"recommendedSizes":{"width":"420","height":"280"}},"imageMobile":{"recommendedSizes":{"width":"750","height":"500"}}},"id":"#80","type":"component","lock":false,"position":54},{"name":"Divider","data":{"color":"darkGray"},"id":"#155","type":"component","lock":false,"position":55},{"name":"SectionDivider","data":{"title":"08. Special accessories","skipToC":true},"id":"#133","type":"component","lock":false,"position":56},{"name":"TextBlock","data":{"text":"### **08. Special accessories**","textLarge":false,"imageOnRight":true,"image":{"recommendedSizes":{"width":"420","height":"280"}},"imageMobile":{"recommendedSizes":{"width":"750","height":"500"}}},"id":"#132","type":"component","lock":false,"position":57},{"name":"SectionDivider","data":{"title":"08.1 Flow regulator","skipToC":false},"id":"#134","type":"component","lock":false,"position":58},{"name":"TextBlock","data":{"text":"\n### **08.1 Flow regulator**\n\nFor taking a gas sample for analysis, it is possible to use the flow regulator. It is used in a similar manner as the limiter. However, thanks to the use of a reduction valve, there is no decrease in flow and the measuring period is thus extended even with lower pressure in the tank. Its use is therefore suitable in filling stations and dive centers in which the content of half-empty tanks is checked. \n\nThe regulator is constructed from the Divesoft M12 modular system. The illustration shows only one of the possible configurations. Because the leads of the distribution block are equivalent, it is possible to freely reconfigure individual elements according to the userâs needs. Similarly, it is possible to replace the limiting nozzle with a reduction valve without the necessity of buying a full regulator assembly. \n\nThe regulator is connected similarly as the limiter. Besides the tank valve, it is possible to close off the gas output directly with the gas-output cut-off. \
2n\n**Warning: Over-tightening of the gas-output cut-off can damage or prematurely wear out the reduction-valve seat.\n**","textLarge":false,"imageOnRight":true,"image":{"recommendedSizes":{"width":"420","height":"280"}},"imageMobile":{"recommendedSizes":{"width":"750","height":"500"}}},"id":"#82","type":"component","lock":false,"position":59},{"name":"Image","data":{"firstImage":{"mimetype":"image/jpeg","size":120811,"hash":"4fcba57182f7c519cc674f8df9449b3940d6b588","id":"ckolg56p06he00776yhlg5avz","filename":"8313-divesoft-analyzer-he-o2-manual-07.jpg","category":"divesoft/","type":"image"},"secondImage":{}},"id":"#83","type":"component","lock":false,"position":60},{"name":"Divider","data":{"color":"darkGray"},"id":"#84","type":"component","lock":false,"position":61},{"name":"SectionDivider","data":{"title":"09. Set-up","skipToC":false},"id":"#136","type":"component","lock":false,"position":62},{"name":"TextBlock","data":{"text":"### **09. Set-up**","textLarge":false,"imageOnRight":true,"image":{"recommendedSizes":{"width":"420","height":"280"}},"imageMobile":{"recommendedSizes":{"width":"750","height":"500"}}},"id":"#135","type":"component","lock":false,"position":63},{"name":"SectionDivider","data":{"title":"09.1 Preferences","skipToC":false},"id":"#137","type":"component","lock":false,"position":64},{"name":"TextBlock","data":{"text":"\n### **09.1 Preferences**\n\nIt is possible to change select properties of the analyzer in the basic mode (measuring of He/O2) in ***Menu/Preferences***. Individual parameters have the following significance: \n\n***Brightness*** of the display in the scale of 1 to 127. The selection of low brightness (1) preserves the battery; the highest brightness (127) is suitable for use in strongly lit places. For temporarily increasing the displayâs brightness, simply hold down the pressed **| Ë |** key. \n\nWhen activating the ***Heighten brightness*** option, the brightness is automatically increased to maximum if the analyzer is powered with an external power-supply adapter. \n\nThe option ***O2 cell used*** is activated as standard. When deactivating, the O2 value is ignored and replaced with the value shown in the following ***O2 substitute*** parameter. This option allows emergency use of the analyzer with a worn-out oxygen sensor for measuring the concentration of helium. In such a case, the correct setting of the oxygen concentration in the analyzed mix increases the precision of measuring the concentration of helium (on the order of tenths of a percent). \n\n***Averaging*** activates the calculation of the moving average from the set number of values of the He concentration. The number of averaged values is set with the ***Values to avg***. parameter. When activating averaging, the He concentration is displayed in square brackets (e.g. 25.7) if the required number of values for calculating the average is not available. \n\n***Partial pressure O2*** is the maximum allowed partial pressure of oxygen used for calculating MOD. \n\nThe*** Ref. temp. source*** option determines whether ambient temperature (***Ambient***) or defined temperature (***Defined***) entered in the following ***Ref. temperature*** parameter is used for calculating the estimated pressure in the tank (by using plug-in thermometer only). \n\n***Nitrogen source*** allows to switch gas constants for use of pure nitrogen instead of air in mixtures. \nMixtures prepared with pure nitrogen does not contain atmospheric argon, which affects the helium measurement.\nIf nitrogen source is set incorrectly, maximal error is 0.2%. \nOxygen measurement is unaffected, since O2 is measured directly by the oxygen cell.","textLarge":false,"imageOnRight":true,"image":{"recommendedSizes":{"width":"420","height":"280"}},"imageMobile":{"recommendedSizes":{"width":"750","height":"500"}}},"id":"#85","type":"component","lock":false,"position":65},{"name":"Divider","data":{"color":"darkGray"},"id":"#87","type":"component","lock":false,"position":66},{"name":"SectionDivider","data":{"title":"09.2 Measurement units","skipToC":false},"id":"#138","type":"component","lock":false,"position":67},{"name":"TextBlock","data":{"text":"### **09.2 Measurement units**\n\nOther settings are available in ***Menu/Measurement units***. Here the analyzer can be switched to metric mode (***Metric units***), imperial-units mode (***U.S. units***) or the display of individual units can be selected separately for individual values (temperature, depth, pressure, volume, mass). The unit settings do not affect the calculations (with the exception of final rounding), as the analyzer works in SI units internally. \nNotice: Meters and feet are indicated as units of depth, though in reality this concerns hydrostatic pressure (pressure at the indicated depth in seawater).\n","textLarge":false,"imageOnRight":true,"image":{"recommendedSizes":{"width":"420","height":"280"}},"imageMobile":{"recommendedSizes":{"width":"750","height":"500"}}},"id":"#88","type":"component","lock":false,"position":68},{"name":"Divider","data":{"color":"darkGray"},"id":"#89","type":"component","lock":false,"position":69},{"name":"SectionDivider","data":{"title":"09.3 Mixing of gases","skipToC":false},"id":"#139","type":"component","lock":false,"position":70},{"name":"TextBlock","data":{"text":"### **09.3 Mixing of gases**\n\nThe ***Menu/Gas properties*** setting is available in the gas-mixing calculation and simulation modes. Individual parameters have the following significance: \n\nThe ***State equation*** option is chosen if the mixing c
2alculations will work with the ideal gas (the status equation PV=RT is used) or with the real gas (state equation according to Redlich and Kwong). The variant with the actual gas is more complicated in terms of calculation, and calculation can thus take a long time. The ideal gas is sufficient for ordinary use. \n\n***Ref. temperature*** is the temperature of the gas used for calculations.\n","textLarge":false,"imageOnRight":true,"image":{"recommendedSizes":{"width":"420","height":"280"}},"imageMobile":{"recommendedSizes":{"width":"750","height":"500"}}},"id":"#90","type":"component","lock":false,"position":71},{"name":"Divider","data":{"color":"darkGray"},"id":"#91","type":"component","lock":false,"position":72},{"name":"SectionDivider","data":{"title":"09.4 Continual analysis","skipToC":false},"id":"#140","type":"component","lock":false,"position":73},{"name":"TextBlock","data":{"text":"### **09.4 Continual analysis**\n\nHere the boundary values are set When these values are exceeded, an alarm is triggered: \n*Alarm O2 low, Alarm O2 high, Alarm He low, Alarm He high.*","textLarge":false,"imageOnRight":true,"image":{"recommendedSizes":{"width":"420","height":"280"}},"imageMobile":{"recommendedSizes":{"width":"750","height":"500"}}},"id":"#92","type":"component","lock":false,"position":74},{"name":"Divider","data":{"color":"darkGray"},"id":"#93","type":"component","lock":false,"position":75},{"name":"SectionDivider","data":{"title":"10. Charging and battery status","skipToC":false},"id":"#141","type":"component","lock":false,"position":76},{"name":"TextBlock","data":{"text":"### **10. Charging and battery status**\n\nAt any time when the analyzer is turned on, you can check the battery status by pressing **| Ë
|** unless the key has other function at the particular screen. The value of the battery charge expresses double line at the bottom of display. Range is defined between 0 to 100% charging. \n\nWhen the battery is close to discharged, connect the analyzer with provided cable to any USB charger or a computer USB port Full charge takes approximately three hours. \n\nWhen the charger is connected, you can check the status of charge press **| Ë
|**. If the battery is not fully charged, the row of arrows is displayed on a scale from 0 to 100%. If it is already charged, a long double line is displayed. \n\nAll features of the analyzer are available during charging.","textLarge":false,"imageOnRight":true,"image":{"recommendedSizes":{"width":"420","height":"280"}},"imageMobile":{"recommendedSizes":{"width":"750","height":"500"}}},"id":"#94","type":"component","lock":false,"position":77},{"name":"Divider","data":{"color":"darkGray"},"id":"#95","type":"component","lock":false,"position":78},{"name":"SectionDivider","data":{"title":"11. Maintenance","skipToC":true},"id":"#143","type":"component","lock":false,"position":79},{"name":"TextBlock","data":{"text":"### **11. Maintenance**","textLarge":false,"imageOnRight":true,"image":{"recommendedSizes":{"width":"420","height":"280"}},"imageMobile":{"recommendedSizes":{"width":"750","height":"500"}}},"id":"#142","type":"component","lock":false,"position":80},{"name":"SectionDivider","data":{"title":"11.1 Battery replacement","skipToC":false},"id":"#144","type":"component","lock":false,"position":81},{"name":"TextBlock","data":{"text":"\n### **11.1 Battery replacement**\n\nThe instrument uses a built-in rechargeable battery Battery replacement is possible only in the factory.","textLarge":false,"imageOnRight":true,"image":{"recommendedSizes":{"width":"420","height":"280"}},"imageMobile":{"recommendedSizes":{"width":"750","height":"500"}}},"id":"#96","type":"component","lock":false,"position":82},{"name":"Divider","data":{"color":"darkGray"},"id":"#97","type":"component","lock":false,"position":83},{"name":"SectionDivider","data":{"title":"11.2 Oxygen sensor replacement","skipToC":false},"id":"#145","type":"component","lock":false,"position":84},{"name":"TextBlock","data":{"text":"### **11.2 Oxygen sensor replacement**\n\nThe oxygen sensor has a limited service life The analyzer automatically checks the sensorâs condition and, at the end of its life, the message âOxygen sensor expiredâ is displayed upon activating the instrument In this case the sensor should be replaced as soon as possible, as the accuracy of measuring the concentration of oxygen can no longer be guaranteed. \n\nIf you are not sure whether you are able to replace the sensor correctly, ask your supplier, vendor or service technician to change it. \n\nTo replace the sensor, first loosen the screw and remove the oxygen sensor cover. \n\nThen disconnect the molex connector from the sensor, do not to pull on the wiring coming out of the instrument. \n\nUnscrew the old sensor and install the new one in such a way that the o-ring on the sensor closely adheres to the analyzer Do not use excessive strength to tight the sensor to avoid damaging the thread. \n\nReconnect the oxygen sensor connector, be sure to check the polarity Finally replace the sensor cover. \n\nLet the new sensor warm up before first calibration for at least 30 minutes after taking it out from the sealed packaging. \n\nA no 1 Philips screwdriver is needed to replace the sensor. \n\nAfter each sensor replacement, the instrument has to be recalibrated.","textLarge":false,"imageOnRight":true,"image":{"recommendedSizes":{"width":"420","height":"280"}},"imageMobile":{"recommendedSizes":{"width":"750","height":"500"}}},"id":"#98","type":"component","lock":false,"position":85},{"name":"Image","data":{"firstImage":{"mimetype":"image/jpeg","size":131049,"hash":"4dd8bce6e7db9348ad3b10346315c55265b8c199","id":"ckondhmaj7fnb0776muqgbatc","filename":"8300-divesoft-analyzer-solo-manual-11.jpg","category":"divesoft/","type":"image"},"secondImage":{}},"id":"#99","type":"component","lock":false,"position":86},{"name":"Divider","data":{"color":"darkGray"},"id":"#100","type":"component","lock":false,"position":87},{"name":"SectionDivider","data":{"title":"11.3 Flow adjusting","skipToC":false},"id":"#146","type":"component","lock":false,"position":88},{"name":"TextBlock","data":{"text":"### **11.3 Flow adjusting**\n\nIn most cases is generally gas-flowing in the flow limiter suitable for wide range of the input pressure. When is often analyzed the gas under low pressure, can be flow too low and so is stabilizing of measured value slow. In this case is possible set the flow on higher value. \n\nConnect sampler to the tank, open the valve and set the gas-flowing at the desired value with 2 mm socket-screw ke
2y. Setting range is relatively small, maximally 1/4 rev. Do not more loosen the setting screw, it can be released and blow out by the gas pressure. \n\nCorrect flow in the right adjusted sampler is 0.2 liter/min. Adjusting is possible verify approximately by connecting a hose to the sampler and second end immerse to a glass with water. For right adjust must from the hose end leakage continuous flow of little bubbles. After test dry the hose, else water may enter the analyzer. \n\nIf you are not sure about correct adjusting, contact with this act your dealer or service. \n\n2 mm socket-screw key is needed for this adjusting.","textLarge":false,"imageOnRight":true,"image":{"recommendedSizes":{"width":"420","height":"280"}},"imageMobile":{"recommendedSizes":{"width":"750","height":"500"}}},"id":"#101","type":"component","lock":false,"position":89},{"name":"Divider","data":{"color":"darkGray"},"id":"#102","type":"component","lock":false,"position":90},{"name":"SectionDivider","data":{"title":"11.4 Disassembly of the instrument","skipToC":false},"id":"#147","type":"component","lock":false,"position":91},{"name":"TextBlock","data":{"text":"### **11.4 Disassembly of the instrument**\n\nDo NOT disassemble the instrument. Analyzer contains no user serviceable parts except the oxygen sensor. \n\nWarning: Do not remove the printed circuit board from the analyzer. Replacing the circuit board requires a special procedure and calibration instrument.","textLarge":false,"imageOnRight":true,"image":{"recommendedSizes":{"width":"420","height":"280"}},"imageMobile":{"recommendedSizes":{"width":"750","height":"500"}}},"id":"#103","type":"component","lock":false,"position":92},{"name":"Divider","data":{"color":"darkGray"},"id":"#107","type":"component","lock":false,"position":93},{"name":"TextBlock","data":{"text":"### **11.5 Storage when not in use for long periods**\nIf the device is not used for a long period of time (months), it is essential to prevent degradation or damage to the device. \nRemove the oxygen sensor from the analyzer. Oxygen sensors are subject to aging and degradation, and electrolyte may spill into the instrument compartment after extended periods of time. This would result in degradation of the analyzer. \nRecharge the battery regularly to revive it. Keep the battery voltage between 60% and 80% of capacity.","textLarge":false,"imageOnRight":true,"image":{"recommendedSizes":{"width":"420","height":"280"}},"imageMobile":{"recommendedSizes":{"width":"750","height":"500"}}},"id":"#158","type":"component","lock":false,"position":94},{"name":"SectionDivider","data":{"title":"12. Connecting to a computer","skipToC":false},"id":"#148","type":"component","lock":false,"position":95},{"name":"TextBlock","data":{"text":"### **12. Connecting to a computer**\n\nThe analyzer can be connected to a computer using a USB cable. \n\nMeasured values are transferred to the PC via a virtual serial port. If you have not installed a suitable driver for the virtual serial port on the USB, use the free driver provided by the manufacturer of the USB chip used in the analyzer. This driver can be downloaded from the Internet at http://www.ftdichip.com/Drivers/VCP.htm. The specific driver can be selected from the VCP (virtual com port) category, depending on the PC and operating system used. Use the instructions attached with the driver to install it. \n\nData transfer must be activated in the analyzer by the option ***Menu/Preferences/Send Data to USB = On.*** \n\nAny terminal emulation utility can be used for data reception; for instance HyperTerminal is sufficient for Microsoft Windows. This utility is included in the basic Windows installation. \n\nThe measured data are transferred in the text mode. Every second, the analyzer transmits data in the following format: \n\n\tHe xxx.x O2 yyy.y CR LF\n\nwhere xxx.x is helium content in percent, \nwhere yyy.y is oxygen content in percent, \nCR is the ASCII carriage return symbol (decimal 13, hexadecimal 0D), \nLF is the ASCII line feed symbol (decimal 10, hexadecimal 0A). \n\nIf there is an error in the measurement, the faulty entry is replaced with asterisks in the following form: ***.*. \n\nThe output is in serial form in the format 8N1 (8 bits, no parity bit, one stopbit), speed 115200 bit/s, TTL level.","textLarge":false,"imageOnRight":true,"image":{"recommendedSizes":{"width":"420","height":"280"}},"imageMobile":{"recommendedSizes":{"width":"750","height":"500"}}},"id":"#104","type":"component","lock":false,"position":96},{"name":"Divider","data":{"color":"darkGray"},"id":"#108","type":"component","lock":false,"position":97},{"name":"SectionDivider","data":{"title":"13. Defects and removal thereof","skipToC":false},"id":"#149","type":"component","lock":false,"position":98},{"name":"TextBlock","data":{"text":"### **13. Defects and removal thereof**\n\nUpon activation, the analyzer is automatically tested to identify one of the following errors. All the error messages can be confirmed by the **| OK |** key and the instrument will continue to work; however in some circumstances in a limited operation mode. The overvoltage message (see below) is an exception, as it may be displayed at any time.","textLarge":false,"imageOnRight":true,"image":{"recommendedSizes":{"width":"420","height":"280"}},"imageMobile":{"recommendedSizes":{"width":"750","height":"500"}}},"id":"#106","type":"component","lock":false,"position":99},{"name":"Divider","data":{"color":"darkGray"},"id":"#110","type":"component","lock":false,"position":100},{"name":"SectionDivider","data":{"title":"*13.1 Error messages","skipToC":false},"id":"#150","type":"component","lock":false,"position":101},{"name":"TextBlock","data":{"text":"### **13.1 Error messages**\n\n**Error 1 Helium sensor doesnât work correctly** \nâ¢\tThere is an error in the electronic or mechanical section of the helium sensor. The instrument can be used in an emergency mode for measuring the oxygen concentration. The analyzer must be repaired to be able to measure helium. \n\n**Error 2 Oxygen sensor damaged or missing** \nâ¢\tThe oxygen sensor is removed, disconnected or destroyed. The measuring of the oxygen concentration will be incorrect. The sensor can be temporarily deactivated (Menu/O2 cell used = Off), the oxygen concentration measured by another instrument and entered manually as a constant (Menu/O2 substitute = n). The method of displaying the measured values cannot be changed, nor can oxygen sensor calibration performed. \n\n**Warning Oxygen sensor switched off** \nâ¢\tThis message is displayed every time the O2 sensor is switched off. \n\n**Error 3 Oxygen sensor expired** \nâ¢\tThe oxygen sensor is old and its output voltage is too low. The measuring will be inaccurate (the âIncorrectâ warning is displayed next to the value of the O2 concentration) and s
2ome measuring modes cannot be activated. The sensor must be immediately replaced with a new one of the recommended type. \nâ¢\tThis error may also occur if the instrument is filled with a hypoxic mix (a mix with low oxygen content) upon activation, for example immediately after previous measurement or if the measured hypoxic mix is delivered before the analyzer is activated. In such a case, switch off the instrument for a while, or connect it to a source of air before its activation. Never use your mouth to blow air in the inlet or the outlet of the analyzer to avoid vapor condensation inside the instrument (careful aspiration of gas by mouth is possible). \n\n**Error 4 Device is too cold** \nâ¢\tThe temperature of the analyzer is too low and the measuring may be inaccurate. Warm up the analyzer in a warm room to increase its temperature above the freezing point (32°F). Do not use a hot-air blower, air dryer, an oven or any other similar method to warm up the analyzer. \n\n**Error 5 Device is too warm** \nâ¢\tThe temperature of the analyzer is too high (for instance, if it was exposed to sunlight or stored in a car heated by sunlight); the measurement may be inaccurate. Cool down the analyzer below 40 degrees Celsius (104°F). \n\n**Warning Battery low** \nâ¢\tThe battery is almost empty, it has to be replaced or use the external power source.","textLarge":false,"imageOnRight":true,"image":{"recommendedSizes":{"width":"420","height":"280"}},"imageMobile":{"recommendedSizes":{"width":"750","height":"500"}}},"id":"#109","type":"component","lock":false,"position":102},{"name":"Divider","data":{"color":"darkGray"},"id":"#86","type":"component","lock":false,"position":103},{"name":"SectionDivider","data":{"title":"13.2 Instrument malfunctions","skipToC":false},"id":"#151","type":"component","lock":false,"position":104},{"name":"TextBlock","data":{"text":"### **13.2 Instrument malfunctions**\n\n**Helium content not displayed** \nâ¢\tThe probe measures the speed of helium in both directions. If these data differ, measuring is deemed incorrect and the helium content is not displayed. This situation can be encountered if the measured gas flows through the probe too fast (lower flow speeds are compensated for by the calculation), or there is significant background noise (for example, in the vicinity of a running compressor or gas motor). \nâ¢\tLower the gas flow speed (this applies to the analyzer not connected using the genuine sampler), move farther from the source of the noise. \n\n**The instrument shows less than 0 % or more than 100 % of helium in the mixture** \nâ¢\tThe displayed value arises directly from the measured and calculated value and has in no way been altered in the background. The possible measuring error is symmetrical and, for example, when measuring a mixture without any helium content, 0.2 % or â0.2 % helium can be displayed. Accordingly, when measuring pure helium, e.g. 99.8 % or 100.2 % can be displayed. If the deviation is within the measuring tolerance, this is not the result of a defect. \n\n**The instrument shows less than 0 % or more than 100 % of oxygen in the mixture** \nâ¢\tThe displayed value arises directly from the measured and calculated value and has in no way been altered in the background. The possible measuring error is symmetrical and, for example, when measuring a mixture without any oxygen content, 0.5 % or â0.5 % oxygen can be displayed. Accordingly, when measuring pure oxygen, e.g. 99.5 % or 100.5 % can be displayed. If the deviation is within the measuring tolerance, this is not the result of a defect. In the case of a greater deviation, recalibrate the oxygen sensor. If the problem persists, replace the sensor.\n","textLarge":false,"imageOnRight":true,"image":{"recommendedSizes":{"width":"420","height":"280"}},"imageMobile":{"recommendedSizes":{"width":"750","height":"500"}}},"id":"#111","type":"component","lock":false,"position":105},{"name":"Divider","data":{"color":"darkGray"},"id":"#112","type":"component","lock":false,"position":106},{"name":"SectionDivider","data":{"title":"14. Technical data","skipToC":false},"id":"#152","type":"component","lock":false,"position":107}
2,{"name":"TextBlock","data":{"text":"### **14. Technical data**\nDimensions: 85 à 205 à 40 mm (31/4 à 77/8 à 11/2 inches) \n\nWeight: 420 g (without packaging and accessories) \n\nOxygen concentration measurement range: 0 to 100% \n\nHelium concentration measurement range: 0 to 100% \n\nMeasurement temperature: 0 to + 40 ° C (32â104 ° F) \n\nMixture Pressure: Corresponds to an ambient pressure in the range of 700â1100 millibars (20â 32 inches Hg), which corresponds to a standard atmosphere at 0 to 3000 m (0â10000 ft) \n\nNominal gas flow rate: 0.2 l / min \n\nSound speed measurement base: 800 mm \n\nMeasuring cycle: 200ms \n\nThe connection dimensions of the sampler: Standard for a DIN valve (EN 144-2) for 200/300 bars (G 5/8 thread) Samplers with a connection to any standardized or common valves are available on request or as optional equipment \n\nOxygen sensor: R22 S (Molex connector) \n\nEasy to replace O2 sensor \n\nOxygen sensor life expectancy: 2 years \n\nReplaceable battery: Through authorized service center \n\nBattery: 120 measurements or 4 hours of continuous operation \n\nBattery capacity: 3,7 Wh\n\nWarranty: 24 months, 12 months on battery \n\nCharging and programming: USB-C \n\nCharging time: 3â4 h \n\nDisplay: OLED \n\nBody: ABS-PC","textLarge":false,"imageOnRight":true,"image":{"recommendedSizes":{"width":"420","height":"280"}},"imageMobile":{"recommendedSizes":{"width":"750","height":"500"}}},"id":"#113","type":"component","lock":false,"position":108},{"name":"Divider","data":{"color":"darkGray"},"id":"#114","type":"component","lock":false,"position":109},{"name":"TextBlock","data":{"text":"HW 3.0, FW 2.29 \nAuthors: Adam ProchaÌska, Jakub SÌimaÌnek, AlesÌ ProchaÌska \nPublished by Divesoft s.r.o.","textLarge":false,"imageOnRight":true,"image":{"recommendedSizes":{"width":"420","height":"280"}},"imageMobile":{"recommendedSizes":{"width":"750","height":"500"}}},"id":"#115","type":"component","lock":false,"position":110}],"id":"root","idBuffer":"#161","lastCommit":"944bc23f-1e78-43f0-9ce4-512270045436"}},"annotations":[],"language":{"type":"id","generated":false,"id":"Language:cjv3kwvoj000u083611381c6o","typename":"Language"},"__typename":"PageTranslation"},"Page:ckone3so43q740788v6xdffgh":{"id":"ckone3so43q740788v6xdffgh","type":{"type":"id","generated":false,"id":"PageType:cjv3l213x004f08366hjufttp","typename":"PageType"},"tags":[],"translations({\"where\":{\"language\":{\"id\":\"cjv3kwvoj000u083611381c6o\"}}})":[{"type":"id","generated":false,"id":"PageTranslation:ckone3soe3q7b0788a95d6dbr","typename":"PageTranslation"}],"__typename":"Page"},"PageTranslation:ckone3soe3q7b0788a95d6dbr":{"id":"ckone3soe3q7b0788a95d6dbr","name":"#8300_analyzer-solo_cz","createdAt":"2021-05-13T21:14:31.790Z","content":{"type":"json","json":{"content":[{"name":"Header","data":{"products":[{"title":"Accessories","description":"Backplates, Consumables. Tanks.","img":{"recommendedSizes":{"width":"235","height":"235"}},"url":""},{"title":"Accessories sets","description":"Protection, maintenance, cleaning.","img":{"recommendedSizes":{"width":"235","height":"235"}},"url":""},{"title":"Spare parts","description":"Spare parts and components.","img":{"recommendedSizes":{"width":"235","height":"235"}},"url":""},{"title":"Spare parts kits","description":"Completly Liberty spare parts kits.","img":{"recommendedSizes":{"width":"235","height":"235"}},"url":""}]},"id":"#0","type":"component","lock":false,"position":0},{"name":"SectionDivider","data":{"title":"Uživatelská pÅÃruÄka","skipToC":false},"id":"#115","type":"component","lock":false,"position":1},{"name":"ProductShowcase","data":{"backgroundColor":"#ffffff","isTextDark":true,"isImageRight":true,"image":{"mimetype":"image/png","size":2484040,"hash":"55856afc16538afd3ff513c08b98a1a9886e1706","id":"ckm4li2dcb37r07764e2ol0x9","filename":"divesoft-analyzer-solo.png","category":"divesoft/","type":"image"},"imageMobile":{},"title":"Uživatelská pÅÃruÄka","subtitle":"Analyzer Solo","description":"#8300","hideDescriptionOnMobile":false,"areButtons":false,"firstTitle":"Learn more >","firstUrl":"","secondTitle":"Configurator >","secondUrl":""},"id":"#46","type":"component","lock":false,"position":2},{"name":"Divider","data":{"color":"darkGray"},"id":"#47","type":"component","lock":false,"position":3},{"name":"SectionDivider","data":{"title":"Obsah","skipToC":false},"id":"#116","type":"component","lock":false,"position":4},{"name":"TextBlock","data":{"text":"### **Obsah**\n\nBezpeÄnostnà upozornÄnà \n01. O verzÃch firmwaru a hardwaru \n01.1\tHardwarové omezeni \n02. Princip funkce \n03. Popis analyzátoru \n04. Ovládánà \n05. MÄÅenà koncentrace O2 a He \n06. Režimy zobrazenà \n06.1 Kalibrace kyslÃkového senzoru \n07. DalÅ¡Ã funkce \n07.1
2Kontinuálnà analýza \n07.2 VýpoÄet mÃchánà plynů \n07.3 Simulace mÃchánà plynů \n07.4 Okolnà tlak \n08. Zvláštnà pÅÃsluÅ¡enstvà \n08.1 Regulátor průtoku \n09. Nastavenà \n09.1 Základnà režim \n09.2 Jednotky mÄÅenà \n09.3 MÃchánà plynů \n09.4 Kontinuálnà analýza \n10. NabÃjenà a stav baterie \n11. Ãdržba \n11.1 VýmÄna baterie \n11.2 VýmÄna kyslÃkového senzoru \n11.3 SeÅÃzenà průtoku \n11.4 Demontáž pÅÃstroje \n12. PÅipojenà k poÄÃtaÄi \n13. Závady a jejich odstranÄnà \n13.1 Chybová hlášenà \n13.2 Chybné chovánà pÅÃstroje \n14. Technické údaje ","textLarge":false,"imageOnRight":true,"image":{"recommendedSizes":{"width":"420","height":"280"}},"imageMobile":{"recommendedSizes":{"width":"750","height":"500"}}},"id":"#48","type":"component","lock":false,"position":5},{"name":"Divider","data":{"color":"darkGray"},"id":"#49","type":"component","lock":false,"position":6},{"name":"SectionDivider","data":{"title":"BezpeÄnostnà upozornÄnÃ","skipToC":false},"id":"#117","type":"component","lock":false,"position":7},{"name":"TextBlock","data":{"text":"### **BezpeÄnostnà upozornÄnÃ**\n\nAnalyzátor je urÄen pro mÄÅenà obsahu kyslÃku a helia ve smÄsi vzduchu, kyslÃku a helia. Nelze jej použÃt pro analýzu smÄsà obsahujÃcÃch jiné plyny, tedy napÅÃklad ani pro smÄsi pÅipravené z jiných než Äistých plynů nebo smÄsÃ, ve kterých je vzduch nahrazen Äistým dusÃkem (bez vzduÅ¡ného argonu). \n\nFyzikálnà a chemický princip použitých Äidel nezaruÄuje, že Äidla budou selektivnÄ citlivá na konkrétnà plyn (kyslÃk, helium), ale existuje celá Åada plynů, na které Äidla reagujÃ. Složenà plynu ukázané analyzátorem proto samo o sobÄ jeÅ¡tÄ neznamená, že by skuteÄné složenà smÄsi bylo shodné se zobrazeným údajem.Zobrazené složenà smÄsi je neplatné pokud zároveÅ technologie mÃchánà smÄsi nezaruÄuje, že ve smÄsi nejsou jiné plyny než vzduch, Äistý kyslÃk a Äisté helium. \n\nAnalyzátor nenà úÅednÄ ovÄÅené mÄÅidlo. Výsledky mÄÅenà jsou pouze informativnà a nenà je možné použÃt tam, kde je požadováno úÅednà ovÄÅenà mÄÅidla. \n\nPÅi analýze smÄsà v pÅÃpadech, kdy by nesprávné složenà smÄsi mohlo způsobit hmotnou Å¡kodu, újmu na zdravà nebo ohroženà zdravà nebo života, tedy napÅÃklad v pÅÃpadÄ dýchacÃch smÄsà pro potápÄnÃ, se nesmà výsledek analýzy považovat za potvrzenà správného složenà smÄsi. V tÄchto pÅÃpadech lze analyzátor použÃt pouze jako pomůcku pro zvýšenà pravdÄpodobnosti, že bude zjiÅ¡tÄno nesprávné složenà smÄsi pÅed jejÃm použitÃm.Správnost složenà smÄsi musà být dána technologià jejà pÅÃpravy. \n\nSprávná pÅÃprava dýchacÃch smÄsà pro potápÄnà (nitrox â vzduch obohacený kyslÃkem, trimix â smÄs vzduchu, kyslÃku a helia, heliox â smÄs kyslÃku a helia) vyžaduje zvláštnà znalosti a zkuÅ¡enosti, které je možné zÃskat napÅÃklad ve vhodném kursu.Bez aplikace tÄchto znalostà může dojÃt k pÅÃpravÄ nesprávné smÄsi i pÅes zdánlivÄ správný výsledek analýzy.K takové situaci může dojÃt mimo jiné zanedbánÃm vlivu teploty a kompresibility, nedostateÄným promÃchánÃm smÄsi a dalÅ¡Ãmi faktory. \n\nMÄjte na pamÄti, že analyzátor se může porouchat Äi být poÅ¡kozen a že kyslÃkové Äidlo z principu podléhá stárnutÃ, ÄÃmž docházà ke zhorÅ¡ovánà jeho vlastnostÃ.NamÄÅený údaj proto vždy ovÄÅte jeÅ¡tÄ jiným způsobem, jako je zaruÄená preciznà pÅÃprava smÄsi, jiná analytická metoda a podobnÄ.NamÄÅený údaj musà být též kriticky posouzen zdravým rozumem a pokud se liÅ¡Ã od oÄekávatelné tolerance pÅesnosti mÃchánÃ, musà být považován za nesprávný. ","textLarge":false,"imageOnRight":true,"image":{"recommendedSizes":{"width":"420","height":"280"}},"imageMobile":{"recommendedSizes":{"width":"750","height":"500"}}},"id":"#50","type":"component","lock":false,"position":8},{"name":"Divider","data":{"color":"darkGray"},"id":"#51","type":"component","lock":false,"position":9},{"name":"SectionDivider","data":{"title":"01. O verzÃch firmwaru a hardwaru","skipToC":false},"id":"#118","type":"component","lock":false,"position":10},{"name":"TextBlock","data":{"text":"### **01. O verzÃch firmwaru a hardwaru**\n\nAnalyzátor SOLO je vybaven mikroprocesorem, jehož program (firmware) je průbÄžnÄ aktualizován. \n\nTato pÅÃruÄka je urÄena pro vydánà firmwaru 2.29, ale lze ji použÃt\nna jakoukoli verzi hardwaru nebo firmwaru. \n\nPÅÃruÄka je primárnÄ napsána pro hardware verze 3.0.","textLarge":false,"imageOnRight":true,"image":{"recommendedSizes":{"width":"420","height":"280"}},"imageMobile":{"recommendedSizes":{"width":"750","height":"500"}}},"id":"#52","type":"component","lock":false,"position":11},{"name":"Divider","data":{"color":"darkGray"},"id":"#53","type":"component","lock":false,"position":12},{"name":"SectionDivider","data":{"title":"01.1 Hardwarová omezenÃ","skipToC":false},"id":"#119","type":"component","lock":false,"position":13},{"name":"TextBlock","data":{"text":"### **01.1 Hardwarová omezenÃ**\n3.0 Plná funkÄnost","textLarge":false,"imageOnRight":true,"image":{"recommendedSizes":{"width":"420","height":"280"}},"imageMobile":{"recommendedSizes":{"width":"750","height":"500"}}},"id":"#54","type":"component","lock":false,"position":14},{"name":"Divider","data":{"color":"darkGray"},"id":"#55","type":"component","lock":false,"position":15}
2,{"name":"SectionDivider","data":{"title":"02. Princip funkce","skipToC":false},"id":"#120","type":"component","lock":false,"position":16},{"name":"TextBlock","data":{"text":"### **02. Princip funkce**\n\nPopsaný princip mÄÅenà platà pouze pro smÄsi vzduchu, kyslÃku a helia. \n\nPro stanovenà obsahu kyslÃku je použit elektrochemický sensor. NapÄtà na výstupu senzoru je úmÄrné obsahu kyslÃku v analyzované smÄsi. Senzor má omezenou životnost a úmÄrnost závislosti napÄtà na obsahu kyslÃku se bÄhem doby mÄnÃ, proto je nutné jej pravidelnÄ kaliborovat. Lze zvolit mezi jednobodovou, dvoubodovou nebo tÅÃbodovou kalibracÃ. Jednobodová kalibrace je rychlá, zejména pokud se jako kalibraÄnà smÄs zvolà vzduch. Pro vyÅ¡Å¡Ã pÅesnost mÄÅenà se použÃvá dvoubodová kalibrace se dvÄma různými se smÄsmi, zpravidla vzduchem a Äistým kyslÃkem. Pro výraznÄ hypoxické smÄsi, tj.smÄsi obsahujÃcà ménÄ než asi 15 % kyslÃku se doporuÄuje použÃt tÅÃbodovou kalibraci. Jako tÅetà plyn pro kalibraci má být v tomto pÅÃpadÄ použit plyn s nulovým obsahem kyslÃku, tedy Äisté helium pÅÃpadnÄ argon.\n\nObsah helia se stanovuje na základÄ mÄÅenà rychlosti zvuku v analyzované smÄsi. Rychlost zvuku závisà na obsahu helia, kyslÃku a na teplotÄ smÄsi. Závislost rychlosti zvuku na tlaku je malá a v okolà normálnÃho atmosférického tlaku ji lze zanedbat.\n\nPÅi teplotÄ 0°C je rychlost zvuku pÅibližnÄ 970 m/s v Äistém heliu, 330 m/s ve vzduchu a 315 m/s v Äistém kyslÃku. ZvýšenÃm teploty o jeden stupeÅ se rychlost zvuku zvýšà pÅibližnÄ o 0.175 %. Rychlost zvuku ve smÄsi je popsána nelineárnà funkcà teploty, obsahu kyslÃku a obsahu helia.\n\nObsah helia se urÄuje z namÄÅené rychlosti zvuku, teploty smÄsi a obsahu kyslÃku. PÅi mÄÅenà koncentrace helia je proto důležité mÃt správnÄ kalibrovaný kyslÃkový senzor nebo znát obsah kyslÃku a zadat jej do pÅÃstroje.\n\nRychlost zvuku se mÄÅà pÅÃmo jako Äasový rozdÃl mezi pÅijetÃm akustického impulsu dvÄma mikrofony. MÄÅà se stÅÃdavÄ v obou smÄrech, aby bylo možné výpoÄtem eliminovat proudÄnà plynu v sondÄ. Akustické impulsy jsou slyÅ¡et jako slabé cvakánà v režimu mÄÅenà helia.\n\nPlyn se do analyzátoru pÅivádà z omezovaÄe průtoku, který je pÅipojen na lahev se stlaÄeným plynem a pomocà trysky omezuje průtok odebÃraného plynu na množstvà potÅebné pro analýzu.\n","textLarge":false,"imageOnRight":true,"image":{"recommendedSizes":{"width":"420","height":"280"}},"imageMobile":{"recommendedSizes":{"width":"750","height":"500"}}},"id":"#56","type":"component","lock":false,"position":17},{"name":"Divider","data":{"color":"darkGray"},"id":"#57","type":"component","lock":false,"position":18},{"name":"SectionDivider","data":{"title":"03. Popis analyzátoru","skipToC":false},"id":"#121","type":"component","lock":false,"position":19},{"name":"TextBlock","data":{"text":"### **03. Popis analyzátoru**\n\nLehké a robustnà tÄlo je vyrobeno z ABS-PC. \n\nNa pÅednà stranÄ analyzátor display OLED na kterém se zobrazujà namÄÅené hodnoty a membránová klávesnice. \n\nMÄÅený plyn se pÅivádà do vstupu analyzované smÄsi na zadnà stranÄ analyzátoru, procházà senzorem koncentrace helia, odtud je veden do bloku kyslÃkového Äidla a je vypouÅ¡tÄn do vzduchu výfukem smÄsi. Jmenovitý průtok analyzované smÄsi je 0,2 - 0,4 L/min. \n\nAnalyzátor je napájen vestavÄnou bateriÃ, nabÃjenà je možné pÅes USB-C konektor na stranÄ analyzátoru.\n","textLarge":false,"imageOnRight":true,"image":{"recommendedSizes":{"width":"420","height":"280"}},"imageMobile":{"recommendedSizes":{"width":"750","height":"500"}}},"id":"#58","type":"component","lock":false,"position":20},{"name":"Image","data":{"firstImage":{"mimetype":"image/jpeg","size":134996,"hash":"20a0655e4bc524e8150abbe8ff0e086d91cfacb1","id":"ckondgm4f7fmn07761oe8jjl7","filename":"8300-divesoft-analyzer-solo-manual-03.jpg","category":"divesoft/","type":"image"},"secondImage":{}},"id":"#59","type":"component","lock":false,"position":21},{"name":"Divider","data":{"color":"darkGray"},"id":"#60","type":"component","lock":false,"position":22},{"name":"SectionDivider","data":{"title":"04. OvládánÃ","skipToC":false},"id":"#122","type":"component","lock":false,"position":23},{"name":"TextBlock","data":{"text":"### **04. OvládánÃ**\n\nAnalyzátor se ovládá tlaÄÃtky na pÅednÃm panelu. \n\nZapne se stisknutÃm tlaÄÃtka **| ON OFF |** asi po dobu jedné sekundy. Po zapnutà probÄhne automatická kontrola pÅÃstroje a analyzátor automaticky pÅejde do režimu mÄÅenÃ. Po dobu stisknutà tohoto tlaÄÃtka se zobrazuje kód verze firmware a výrobnà ÄÃslo analyzátoru. PotÅebujete-li tyto údaje pÅeÄÃst, staÄà podržet tlaÄÃtko pÅi zapÃnánà déle. \n\nZapnutý analyzátor se vypne opÄt jednosekundovým stisknutÃm tlaÄÃtka **| ON OFF |**. \n\nTlaÄÃtkem **| MENU |** se zobrazà nabÃdka možných akcÃ. NabÃdka se v jednotlivých režimech mÄÅenà liÅ¡Ã podle funkcÃ, které jsou pro daný režim relevantnÃ. \n\nTlaÄÃtkem se volà vybraná položka menu, potvrzuje zmÄnÄnÃ
2¡ hodnota nebo provádà pÅipravená akce. Vybranou položku menu lze zvolit též opakovaným stisknutÃm tlaÄÃtka **| MENU |**. \n\nTlaÄÃtko **| ESC |** sloužà k ukonÄenà menu nebo k návratu z režimu editace hodnoty bez uloženà zmÄnÄné hodnoty. \n\nTlaÄÃtka **| Ë |** a **| Ë
|** sloužà k listovánà v menu nebo ke zmÄnÄ hodnoty ÄÃsla nad kursorem. \n\nTlaÄÃtko **| MODE |**.sloužà ke zmÄnÄ režimu zobrazenà nebo ke zmÄnÄ polohy kursoru v režimu editace ÄÃsla. \n\nDalÅ¡Ã funkce tlaÄÃtek jsou popsány v pÅÃsluÅ¡ných kapitolách. ","textLarge":false,"imageOnRight":true,"image":{"recommendedSizes":{"width":"420","height":"280"}},"imageMobile":{"recommendedSizes":{"width":"750","height":"500"}}},"id":"#61","type":"component","lock":false,"position":24},{"name":"Image","data":{"firstImage":{"mimetype":"image/jpeg","size":41306,"hash":"d9025a378e6beb34e6ff44cbca462ac87e1690b5","id":"ckolg3xqd6hco0776xrl70dk5","filename":"8313-divesoft-analyzer-he-o2-manual-04.jpg","category":"divesoft/","type":"image"},"secondImage":{}},"id":"#62","type":"component","lock":false,"position":25},{"name":"Divider","data":{"color":"darkGray"},"id":"#63","type":"component","lock":false,"position":26},{"name":"SectionDivider","data":{"title":"05. MÄÅenà koncentrace O<sub>2</sub> a He","skipToC":false},"id":"#123","type":"component","lock":false,"position":27},{"name":"TextBlock","data":{"text":"### **05. MÄÅenà koncentrace O<sub>2</sub> a He**\n\nV základnà konfiguraci se použÃvá omezovaÄ průtoku s tryskou, viz obrázek. \n\nOmezovaÄ pÅipojte na lahev se stlaÄeným plynem a hadiÄkou jej propojte s analyzátorem.HadiÄka je do obou dÃlů lehce zasunuta. \n\nAnalyzátor je po zapnutà pÅepnut do režimu mÄÅenà koncentrace helia a kyslÃku, proto nemusÃte nic nastavovat.OtevÅete ventil lahve, aby zaÄal proudit plyn.PÅibližnÄ po 5â10 sekundách se ukáže složenà plynu.Pokud je v lahvi výraznÄ nižšà tlak než 200 barů, průtok plynu omezovaÄem průtoku bude menÅ¡Ã a doba ustálenà výsledku mÄÅenà bude o nÄco delÅ¡Ã. \n\nTlaÄÃtkem **| OK |** můžete pozastavit a dalÅ¡Ãm stisknutÃm opÄt spustit mÄÅenÃ.PÅi pozastaveném mÄÅenà zůstávajà zobrazeny poslednà zmÄÅené hodnoty.Pozastavené mÄÅenà je indikováno textem **| HOLD |** na prvnÃm Åádku displaye.BÄhem mÄÅenà lze použÃt tlaÄÃtko **| Ë |** pro doÄasné zvýšenà jasu displaye na maximum (napÅÃklad je-li display osvÄtlen sluncem). \n\nPo ukonÄenà mÄÅenà uzavÅete ventil lahve a povolenÃm odvzduÅ¡ÅovacÃho ventilu (zpravidla staÄà o ½ otáÄky) vypusÅ¥te pÅetlak plynu, aby bylo možné omezovaÄ průtoku odÅ¡roubovat z ventilu lahve. \nUpozornÄnÃ: \nNevyÅ¡roubuje vÅeteno odvzuÅ¡ÅovacÃho ventilu úplnÄ, uvnitÅ je ocelová kuliÄka která by po otevÅenà ventilu lahve mohla vyletÄt a nÄkoho zranit nebo se ztratit.","textLarge":false,"imageOnRight":true,"image":{"recommendedSizes":{"width":"420","height":"280"}},"imageMobile":{"recommendedSizes":{"width":"750","height":"500"}}},"id":"#64","type":"component","lock":false,"position":28},{"name":"Image","data":{"firstImage":{"mimetype":"image/jpeg","size":109038,"hash":"90c934523e766370c8427b76e2d15c278423afb5","id":"ckolg4i536hd40776exkcn3w8","filename":"8313-divesoft-analyzer-he-o2-manual-05.jpg","category":"divesoft/","type":"image"},"secondImage":{}},"id":"#65","type":"component","lock":false,"position":29},{"name":"Divider","data":{"color":"darkGray"},"id":"#66","type":"component","lock":false,"position":30},{"name":"SectionDivider","data":{"title":"06. Display modes","skipToC":false},"id":"#124","type":"component","lock":false,"position":31},{"name":"TextBlock","data":{"text":"### **06. Display modes**\n\nPo zapnutà je analyzátor standardnÄ v režimu mÄÅenà O2/He v jednom ze dvou formátů zobrazenÃ. \n\nZákladnà formát ukazuje na samostatných ÅádcÃch obsah kyslÃku a helia ve smÄsi v procentech a pro informaci také teplotu, pÅi které byl plyn mÄÅen. \n\nV základnÃm formátu se po za
2hájenà mÄÅenà může zobrazit koncentrace helia na nÄkolik málo sekund v hranatých závorkách. To znamená, že výsledek mÄÅenà je pÅedbÄžný s nižšà pÅesnostÃ. Po zmizenà závorek má výsledek plnou pÅesnost. \n\nV pÅÃpadÄ chyby mÄÅenÃ, napÅÃklad pÅi tlakovém rázu plynu v pÅÃvodnà hadiÄÄce, údaj namÄÅené koncentrace helia zmizà na dobu po kterou chybový stav trvá.\nPÅehledný formát ukazuje složenà tak, jak obvykle potápÄÄi nazývajà dýchacà smÄsi: \nâ Air: vzduch s obsahem kyslÃku mezi 20.5 a 21.5 %. \nâ EAN, napÅÃklad EAN 36, je vzduch obohacený kyslÃkem, v tomto pÅÃpadÄ na 36 % kyslÃku. \nâ TMX, napÅÃklad TMX 18/45, je trimix neboli smÄs vzduchu, kyslÃku a helia, v tomto pÅÃpadÄ s obsahem 18 % kyslÃku a 45 % helia. \nâ Heliox, napÅÃklad Heliox 16 % O2, je smÄs kyslÃku a helia. \nâ Foul Air, napÅÃklad Foul Air (10 % O2), je zkažený Äi vydýchaný vzduch se snÞeným obsahem kyslÃku. Z plynů urÄených k pÅÃpravÄ dýchacÃch smÄsÃ, které má potápÄÄ bÄžnÄ k dispozici (vzduch, kyslÃk, helium) se nedá namÃchat, proto jeho zjiÅ¡tÄnà svÄdÄà o nÄjakém problému. Může to znamenat probÃhajÃcà korozi v lahvi nebo pÅimÃchánà argonu, oxidu uhliÄitého nebo jiného plynu ke smÄsi. Takový vzduch nesmÃte v žádném pÅÃpadÄ použÃt k dýchánÃ. \n\nV pÅehledném formátu jsou kromÄ složenà smÄsi zobrazeny jeÅ¡tÄ pÅibližné hodnoty maximálnà hloubky (MOD, maximum operating depth) a ekvivalentnà narkotické hloubky (END, equivalent narcotic depth). \n\nMOD udává hloubku, do které se může potápÄÄ s danou smÄsà krátkodobÄ potopit za jinak ideálnÃch podmÃnek.Pro výpoÄet je použit limit parciálnÃho tlaku kyslÃku 160 kPa, uvažuje se moÅská voda a atmosférický tlak na úrovni hladiny moÅe.Ãdaj sloužà pouze pro orientaci a pro skuteÄný ponor jej musÃte vypoÄÃtat na základÄ dat konkrétnÃho ponoru. \nPro výpoÄet je použit vzorec \n\nkde \n\n\tPmax je maximálnà pÅÃpustný parciálnà tlak kyslÃku, zvoleno 160000 Pa \n\tP0 je atmosférický tlak na hladinÄ moÅe 101325 Pa \n\tRO2 je relativnà molárnà koncentrace kyslÃku v rozsahu 0 až 1 \n\tÏ je hustota moÅské vody 1028 kg mâ3 \n\tg je normálnà tÃhové zrychlenà 9.80665 m sâ2 \n","textLarge":false,"imageOnRight":true,"image":{"recommendedSizes":{"width":"420","height":"280"}},"imageMobile":{"recommendedSizes":{"width":"750","height":"500"}}},"id":"#67","type":"component","lock":false,"position":32},{"name":"Image","data":{"firstImage":{"mimetype":"image/jpeg","size":15225,"hash":"a898843d6cec9ef781476fd835a750007b81d819","id":"ckolgb7tx6hks07767emuy07n","filename":"8313-divesoft-analyzer-he-o2-manual-06.jpg","category":"divesoft/","type":"image"},"secondImage":{}},"id":"#68","type":"component","lock":false,"position":33},{"name":"TextBlock","data":{"text":"**UpozornÄnÃ: Maximálnà hloubka (MOD) vypoÄtená pro skuteÄný ponor je zpravidla menÅ¡Ã než hloubka udávaná analyzátorem.**\n\nEND udává hloubku, ve které je narkotický úÄinek smÄsi na potápÄÄe shodný s narkotickým úÄinkem vzduchu. Udává se v procentech hloubky ponoru se vzduchem, tedy napÅÃklad END 45 % znamená, že v hloubce 100 metrů s analyzovanou smÄsà bude potápÄÄ pociÅ¥ovat narkotické úÄinky stejné, jako kdyby se potápÄl do 45 metrů se vzduchem. Pro výpoÄet END existuje Åada různých vzorců, které dávajà odliÅ¡né výsledky. Ãdaj ukazovaný analyzátorem použÃvá pouze jeden z nich a sloužà pouze pro orientaci. Pro skuteÄný ponor musÃte vypoÄÃtat END na základÄ dat konkrétnÃho ponoru a vámi vyzkouÅ¡ených a preferovaných vzorců. \n\nPro výpoÄet je použit vzorec \nEND = 100 â 77 RHe \n\nkde\n\n\tRHe je relativnà molárnà koncentrace helia v rozsahu 0 až 1 \n\nVzorec vycházà z pomÄrů \nâ relativnà narkotický potenciál dusÃku = 1 \nâ relativnà narkotický potenciál kyslÃku = 1 \nâ relativnà narkotický potenciál helia = 0.23 \n \n\n**UpozornÄnÃ: Narkotická hloubka (END) udávaná kalkulátorem je pouze orientaÄnà a liÅ¡Ã se od hodnot END vypoÄtených jinými metodikami.** \n\n**UpozornÄnÃ: Pro stanovenà hodnot END a MOD vždy použÃvejte postupy a vzorce, které jste se nauÄili ve specializovaných kurzech potápÄnà se smÄsemi.Hodnoty udávané analyzátorem jsou pouze orientaÄnà a nestaÄà pro správné naplánovánà ponoru.**\n","textLarge":false,"imageOnRight":true,"image":{"recommendedSizes":{"width":"420","height":"280"}},"imageMobile":{"recommendedSizes":{"width":"750","height":"500"}}},"id":"#69","type":"component","lock":false,"position":34},{"name":"Divider","data":{"color":"darkGray"},"id":"#70","type":"component","lock":false,"position":35},{"name":"SectionDivider","data":{"title":"06.1 Kalibrace kyslÃkového senzoru","skipToC":false},"id":"#125","type":"component","lock":false,"position":36},{"name":"TextBlock","data":{"text":"### **06.1 Kalibrace kyslÃkového senzoru**\n\nKyslÃkový senzor mÄnà s Äasem své vlastnosti a je nutné jej kalibrovat. Kalibraci doporuÄujeme provádÄt alespoÅ jednou mÄsÃÄnÄ. Kalibrace je nutná vždy pÅi zmÄnÄ nadmoÅské výšky. Pokud požadujete co nejpÅesnÄjÅ¡Ã výsledky, kalibrujte Äidlo pÅed každým mÄÅenÃm. \n\nKalibrace Äidla se provádà jednoâ až tÅÃbodová. PÅi jednobodové kalibraci se Äidlem zmÄÅà obsah kyslÃku ve vzduchu, který
2je známý a konstantnà (20.95 %). KalibraÄnà konstanta Äidla se nastavà tak, aby pÅÃstroj ukazoval (po zaokrouhlenÃ) 21.0 %. \n\nPÅi dvoubodové kalibraci se postupuje jako pÅi jednobodové kalibraci, ale použijà se dva kalibraÄnà plyny â Äistý kyslÃk a vzduch. Dvoubodová kalibrace je pracnÄjÅ¡Ã, vyžaduje použità kyslÃku, ale dává pÅesnÄjÅ¡Ã výsledky pÅi mÄÅenÃ. \n\nTÅÃbodová kalibrace se doporuÄuje použÃt pro mÄÅenà hypoxických smÄsà obsahujÃcÃch ménÄ než asi 15 % kyslÃku. Jako tÅetà plyn pro kalibraci má být v tomto pÅÃpadÄ použita pÅesná kalibraÄnà smÄs s obsahem kyslÃku blÃzkým pÅipravované smÄsi. Pro mÄÅenà velmi nÃzkého obsah kyslÃku lze tuto kalibraÄnà smÄs nahradit plynem s nulovým obsahem kyslÃku, tedy Äistým heliem pÅÃpadnÄ argonem. \n\nKalibraci kyslÃkového senzoru spustÃte stisknutÃm tlaÄÃtka **| CAL |** kdykoliv bÄhem mÄÅenÃ. \n\nJako prvnà krok kalibrace zvolte mezi jednobodovou (1B), dvoubodovou (2B) nebo tÅÃbodovou (3B) kalibracà pomocà tlaÄÃtek **| Ë |** a **| Ë
|** a potvrzenÃm výbÄru tlaÄÃtkem **| OK |**. \n\nPoté zvolte obsah kyslÃku v kalibraÄnÃch smÄsÃch. \n\nObsah kyslÃku se nastavuje po desetinách procenta stisknutÃm tlaÄÃtka **| Ë |** (zvýšenà obsahu) a nebo **| Ë
|** (snÞenà obsahu). TlaÄÃtkem **| MODE |** můžete zvolit zda se nastavuje po desetinách, jednotkách nebo desÃtkách procent. Po nastavenà požadované hodnoty údaj potvrdÃte tlaÄÃtkem . **| OK |** \n\nBÄhem nastavovánà obsahu kyslÃku je možné pro rychlé nastavenà obvyklých hodnot použÃt tlaÄÃtko **| CAL |**, které nastavà obsah kyslÃku na 21 % v pÅÃpadÄ prvnÃho kalibraÄnÃho bodu, na 100 % u druhého bodu a 0 % u tÅetÃho bodu.\n\nPo nastavenà a potvrzenà každého kalibraÄnÃho plynu zaÄne probÃhat kalibrace senzoru. Na displayi se zobrazuje aktuálnà kalibraÄnà bod, napÄtà senzoru v milivoltech a teplota plynu. \nPo ustálenà teploty a napÄtà (nejdÅÃve vÅ¡ak po 10 sekundách) se zobrazà pÅÃznak STABLE, což znamená, že je možné provedenou kalibraci potvrdit tlaÄÃtkem **| OK |**.Pokud se pÅed stisknutÃm **| OK |** namÄÅené hodnoty zmÄnÃ, pÅÃznak STABLE zmizà a kalibrace probÃhá dál až do dosaženà dalÅ¡Ã stabilnà hodnoty.Pokud je nastavena vÃcebodová kalibrace, probÄhne obdobnÄ i kalibrace podle dalÅ¡Ãch plynů. ","textLarge":false,"imageOnRight":true,"image":{"recommendedSizes":{"width":"420","height":"280"}},"imageMobile":{"recommendedSizes":{"width":"750","height":"500"}}},"id":"#71","type":"component","lock":false,"position":37},{"name":"Divider","data":{"color":"darkGray"},"id":"#73","type":"component","lock":false,"position":38},{"name":"SectionDivider","data":{"title":"07. DalÅ¡Ã funkce","skipToC":true},"id":"#127","type":"component","lock":false,"position":39},{"name":"TextBlock","data":{"text":"### **07. DalÅ¡Ã funkce**","textLarge":false,"imageOnRight":true,"image":{"recommendedSizes":{"width":"420","height":"280"}},"imageMobile":{"recommendedSizes":{"width":"750","height":"500"}}},"id":"#126","type":"component","lock":false,"position":40},{"name":"SectionDivider","data":{"title":"07.1 Kontinuálnà analýza","skipToC":false},"id":"#128","type":"component","lock":false,"position":41},{"name":"TextBlock","data":{"text":"\n### **07.1 Kontinuálnà analýza**\n\nVolbou Menu/Continual analysis se zapne funkce hlÃdánà kontinuálnÃho plnÄnÃ. V tomto režimu lze nastavit dolnà a hornà mez obsahu kyslÃku a helia. Analyzátor průbÄžnÄ mÄÅà koncentraci tÄchto složek a pÅi pÅekroÄenà nastavených mezà zaÄne pÃpat. Tento režim se uplatnà pÅi použità analyzátoru jako bezpeÄnostnÃho prvku pÅi kontinuálnÃm plnÄnà nitroxu, kdy by pÅi poruÅ¡e mÃchacÃho zaÅÃzenà mohlo dojÃt k nárustu koncentrace kyslÃku která by způsobila požár Äi explozi kompresoru. \n\nV režimu hlÃdánà kontinuálnÃho plnÄnà lze po stisknutà tlaÄÃtka **| MENU |** nastavit meznà hodnoty vÅ¡ech mÄÅených veliÄin.","textLarge":false,"imageOnRight":true,"image":{"recommendedSizes":{"width":"420","height":"280"}},"imageMobile":{"recommendedSizes":{"width":"750","height":"500"}}},"id":"#74","type":"component","lock":false,"position":42},{"name":"Divider","data":{"color":"darkGray"},"id":"#75","type":"component","lock":false,"position":43},{"name":"SectionDivider","data":{"title":"07.2 VýpoÄet mÃchánà plynů","skipToC":false},"id":"#129","type":"component","lock":false,"position":44},{"name":"TextBlock","data":{"text":"### **07.2 VýpoÄet mÃchánà plynů**\n\nVolbou Menu/Gas mix solver se zapne funkce kalkulátoru pro mÃchánà plynů. Kalkulátor spoÄÃtá postup namÃchánà požadované smÄsi až ze tÅà plynů. Umà zahrnout i zbytek smÄsi v plnÄné lahvi. Plyny jsou zobrazeny na dis
2playi v poÅadà zbytek, pÅidávaná smÄs 1 â 3, požadovaná smÄs. U každé smÄsi je uvedeno složenÃ, objem lahve (uvádà se skuteÄný, âvodnÃâ objem lahve) a tlak plynu v lahvi. Pokud nenà objem plynu omezen (napÅÃklad pokud je dodáván kompresorem pÅi stále stejném tlaku), zadejte jako objem lahve nulu. Složenà smÄsi můžete zadat buÄ manuálnÄ (po stisknutà tlaÄÃtka **| CAL |**) nebo pÅepnout do režimu mÄÅenà tlaÄÃtkem **| OK |** a konkrétnà smÄs pÅÃmo zmÄÅit. \n\nAfter pressing the **| CAL |** is necessary to change the values press **| OK |**. Then you can enter values **| Ë | | Ë |** . Press **| MENU |** to move the cursor in the order. Confirm the selected value **| OK |**.\n\nPo dosazenà údajů spusÅ¥te výpoÄet volbou Menu/Solve (protože je to prvnà položka menu, staÄà dvojà stisknutà tlaÄÃtka ****| Ë |**).VýpoÄet může probÃhat až jednu minutu.Po ukonÄenà se zobrazà výsledky v jednom ze tÅà možných tvarů, mezi kterými můžete pÅepÃnat tlaÄÃtkem **| Ë |** (viz pÅÃklad). \n\n\n**PÅÃklad** \nVe âdvojÄetiâ o objemu 2 à G12 litrů (celkový objem 24 L) máte zbytek vzduchu pod tlakem 120 barů. Požadovaná smÄs je trimix 18/40 který chcete mÃt pod tlakem 200 barů. K dispozici máte padesátilitrové distribuÄnà lahve s kyslÃkem a heliem a kompresor na 330 barů. Zadejte: \n\n\tA:\tAir\t\t24L\t120\n\t1:\tHe\t\t50L\t200\n\t2:\tO2\t\t50L\t200\n\t3:\tAir\t\t\t300\n\tD:\t18.0/40.0\t24L\t200\n\na spusÅ¥te výpoÄet.Po ukonÄenà výpoÄtu se zobrazÃ: \n\n\tDisch.\tto\t79.5 bar\n\tHe\tto\t159.5 bar\n\tO2\tto\t173.2 bar\n\tAir\tto\t230.0 bar\n\ncož znamená odpustit dvojÄe na tlak 79.5 barů, pÅidat He až bude dosaženo tlaku 159.5, pÅidat kyslÃk do 173 barů a do 200 barů doplnit vzduchem. Po stisknutà **| MODE |** se zobrazà stejný výsledek, ale vyÄÃslený jako rozdÃl tlaků: \n \n\n\tDisch.\t-40.5 bar\n\tAdd\t80.0 bar He\n\tAdd\t13.7 bar O2\n\tAdd\t26.8 bar Air\n \nneboli snÞit tlak o 40.5, zvýšit tlak o 90 barů pÅidánÃm helia, pÅidat 13.7 barů kyslÃku a 26.68 barů vzduchu. Poslednà režim je podobný, ale protože je urÄen pro gravimetrické plnÄnà (s použitÃm pÅesných vah), množstvà plynu je uvedeno v kilogramech: \n\n\tDisch.\t-1.2382 kg\n\tAdd\t0.3392 kg He\n\tAdd\t0.4669 kg O2\n\tAdd\t0.8230 kg Air\n\nPovÅ¡imnÄte si, že kalkulátor poÄÃtá i s poklesem tlaku v zásobnÃch lahvÃch, proto se nesnažà doporuÄit doplnÄnà kyslÃku na 200 barů (což by vzhledem k omezené zásobÄ kyslÃku nebylo možné), ale nechá odpustit vzduch a kyslÃk doplÅuje pouze do reálných 173.2 barů a poté zase zbytek vzduchu doplnà z kompresoru. ZároveÅ ale kalkulátor maximálnÄ Å¡etÅà smÄs která je již v lahvi, proto ji nenechá vypustit celou ale pouze nezbytnÄ nutnou Äást.","textLarge":false,"imageOnRight":true,"image":{"recommendedSizes":{"width":"420","height":"280"}},"imageMobile":{"recommendedSizes":{"width":"750","height":"500"}}},"id":"#76","type":"component","lock":false,"position":45},{"name":"Divider","data":{"color":"darkGray"},"id":"#77","type":"component","lock":false,"position":46}
2,{"name":"SectionDivider","data":{"title":"07.3 Simulace mÃchánà plynů","skipToC":false},"id":"#130","type":"component","lock":false,"position":47},{"name":"TextBlock","data":{"text":"### **07.3 Simulace mÃchánà plynů**\n\nVolbou Menu/Gas mix simulator se zapne funkce simulátoru mÃchánà plynů. Simulátor vypoÄÃtá složenà smÄsi namÃchané až ze ÄtyÅ plynů. U každé smÄsi je uvedeno složenà a množstvà pÅidaného plynu vyjádÅené v jednotkách tlaku. Složenà smÄsi můžete zadat buÄ manuálnÄ (po stisknutà tlaÄÃtka **| CAL |**) nebo pÅepnout do režimu mÄÅenà tlaÄÃtkem **| OK |** a konkrétnà smÄs pÅÃmo zmÄÅit. VýpoÄet výsledné smÄsi probÃhá průbÄžnÄ a na poslednÃm Åádku se zobrazuje složenà smÄsi.","textLarge":false,"imageOnRight":true,"image":{"recommendedSizes":{"width":"420","height":"280"}},"imageMobile":{"recommendedSizes":{"width":"750","height":"500"}}},"id":"#78","type":"component","lock":false,"position":48},{"name":"Divider","data":{"color":"darkGray"},"id":"#79","type":"component","lock":false,"position":49},{"name":"SectionDivider","data":{"title":"07.4 Okolnà tlak","skipToC":false},"id":"#131","type":"component","lock":false,"position":50},{"name":"TextBlock","data":{"text":"### **07.4 Okolnà tlak**\n\nAnalyzátor je vybaven snÃmaÄem barometrického tlaku. DÃky tomuto lze zaÅÃzenà kalibrovat pro atmosférické podmÃnky a nadmoÅskou výšku. \nAtmosférický tlak a nadmoÅská výška se zobrazà v nabÃdce okolnà tlak. \nNadmoÅská výška se poÄÃtá z tlaku okolÃ\nvztahujÃcà se na standardnà tlak u hladinÄ moÅe (1013,25 hPa), v závislosti na atmosférickém tlaku\npodmÃnky se mohou liÅ¡it od reality.\n","textLarge":false,"imageOnRight":true,"image":{"recommendedSizes":{"width":"420","height":"280"}},"imageMobile":{"recommendedSizes":{"width":"750","height":"500"}}},"id":"#80","type":"component","lock":false,"position":51},{"name":"Divider","data":{"color":"darkGray"},"id":"#81","type":"component","lock":false,"position":52},{"name":"SectionDivider","data":{"title":"08. Zvláštnà pÅÃsluÅ¡enstvÃ","skipToC":true},"id":"#133","type":"component","lock":false,"position":53},{"name":"TextBlock","data":{"text":"### **08. Zvláštnà pÅÃsluÅ¡enstvÃ**","textLarge":false,"imageOnRight":true,"image":{"recommendedSizes":{"width":"420","height":"280"}},"imageMobile":{"recommendedSizes":{"width":"750","height":"500"}}},"id":"#132","type":"component","lock":false,"position":54},{"name":"SectionDivider","data":{"title":"08.1 Regulátor průtoku","skipToC":false},"id":"#134","type":"component","lock":false,"position":55},{"name":"TextBlock","data":{"text":"\n\n### **08.1 Regulátor průtoku**\n\nPro odbÄr plynu k analýze je možné použÃt regulátorem průtoku. Jeho použità je obdobné omezovaÄi, ale dÃky použità redukÄnÃho ventilu nedocházà k poklesu průtoku a tÃm prodlouženà doby mÄÅenà pÅi nÃzkém tlaku v lahvi. Jeho použità je proto vhodné do plnÃren a potápÄÄských center ve kterých se Äasto kontroluje obsah poloprázdných lahvÃ. \n\nRegulátor je sestaven z modulárnÃho systému M12 firmy Divesoft. Na obrázku je zobrazena pouze jedna z možných konfiguracÃ. Protože vývody rozvodné âkostkyâ jsou rovnocenné, je možné jednotlivé prvky libovolnÄ pÅeskupit podle potÅeb uživatele. ObdobnÄ je možné nahradit omezovacà trysku redukÄnÃm ventilem aniž by bylo nutné kupovat celou sestavu regulátoru. \n\nRegulátor se pÅipojuje podobnÄ jako omezovaÄ. Výstup plynu je možné uzavÅÃt kromÄ lahvového ventilu jeÅ¡tÄ pÅÃmo uzávÄrem výstupu plynu. \n \n\n**UpozornÄnÃ: PÅÃliÅ¡ silným utaženÃm uzávÄru výstupu plynu můžete zniÄit nebo pÅedÄasnÄ opotÅebovat sedlo redukÄnÃho ventilu.**","textLarge":false,"imageOnRight":true,"image":{"recommendedSizes":{"width":"420","height":"280"}},"imageMobile":{"recommendedSizes":{"width":"750","height":"500"}}},"id":"#82","type":"component","lock":false,"position":56},{"name":"Image","data":{"firstImage":{"mimetype":"image/jpeg","size":120811,"hash":"4fcba57182f7c519cc674f8df9449b3940d6b588","id":"ckolg56p06he00776yhlg5avz","filename":"8313-divesoft-analyzer-he-o2-manual-07.jpg","category":"divesoft/","type":"image"},"secondImage":{}},"id":"#83","type":"component","lock":false,"position":57},{"name":"Divider","data":{"color":"darkGray"},"id":"#84","type":"component","lock":false,"position":58},{"name":"SectionDivider","data":{"title":"09. NastavenÃ","skipToC":false},"id":"#136","type":"component","lock":false,"position":59},{"name":"TextBlock","data":{"text":"### **09. NastavenÃ**","textLarge":false,"imageOnRight":true,"image":{"recommendedSizes":{"width":"420","height":"280"}},"imageMobile":{"recommendedSizes":{"width":"750","height":"500"}}},"id":"#135","type":"component","lock":false,"position":60},{"name":"SectionDivider","data":{"title":"09. 1 Základnà režim","skipToC":false},"id":"#137","type":"component","lock":false,"position":61},{"name":"TextBlock","data":{"text":"\n### **09. 1 Základnà režim**\n\nVolitelné vlastnosti analyzátoru v základnÃm režimu (mÄÅenà He/O2) je možné zmÄnit v ***Menu/ Preferences***. Jednotlivé parametry majà následujÃcà význam: \n\n***Brightness*** je jas displaye v rozsahu 1â127. Volba nÃzkého jasu (1) Å¡etÅà baterie, nejvyÅ¡Å¡Ã jas (127) je vhodné nastav
2it pro použÃvánà na silnÄ osvÄtlených mÃstech. Pro doÄasné zvýšenà jasu displaye bÄhem mÄÅenà staÄà podržet stisknuté tlaÄÃtko **| Ë |**. \n\nPÅi zapnuté volbÄ ***Heighten brightness*** se jas automaticky zvýšà na maximum pokud je analyzátor napájen ze sÃÅ¥ového adaptéru. \n\nVolba ***O2 cell used*** je standardnÄ zapnutá. PÅi vypnutà se ignoruje namÄÅená hodnota O2 a nahradà se hodnotou uvedenou v následujÃcÃm parametru ***O2 substitute***. Tato volba umožnà nouzové použità analyzátoru s vypotÅebovaným kyslÃkovým senzorem pro mÄÅenà koncentrace helia. Správné nastavenà koncentrace kyslÃku v analyzované smÄsi v takovém pÅÃpadÄ zvýšà pÅesnost mÄÅenà koncentrace He (v Åádu desetin procenta). \n\n***Averaging*** zapÃná výpoÄet klouzavého průmÄru z nastaveného poÄtu hodnot koncentracà He. PoÄet průmÄrovaných hodnot se nastavà parametrem ***Values to avg***. PÅi zapnutém průmÄrovánà se koncentrace He zobrazuje v hranatých závorkách (napÅÃklad 25.7) dokud nenà k dispozici požadovaný poÄet hodnot pro výpoÄet průmÄru.\n\n***Partial pressure O2*** je maximálnà dovolený parciálnà tlak kyslÃku použitý pro výpoÄet MOD.\n\nVolba ***Ref.temp.source*** urÄuje, jestli se pro výpoÄet odhadnutého tlaku v lahvi použije teplota prostÅedà (***Ambient***) nebo pevnÄ urÄená teplota (***Defined***) zadaná v následujÃcÃm parametru ***Ref.temperature***.\n\nDalÅ¡Ã nastavenà je k dispozici v Menu/Measurement units. Zde lze pÅepnout analyzátor do metrického režimu (Metric units), režimu imperiálnÃch jednotek (U.S.units) nebo lze zobrazenà jednotlivých jednotek volit pro jednotlivé veliÄiny (teplotu, hloubku, tlak, objem, hmotnost) zvlášť. Nastavenà jednotek neovlivÅuje výpoÄty (kromÄ koneÄného zaokrouhlenÃ), analyzátor internÄ pracuje v jednotkách SI. \n\n***Nitrogen source*** allows to switch gas constants for use of pure nitrogen instead of air in mixtures. \nMixtures prepared with pure nitrogen does not contain atmospheric argon, which affects the helium measurement.\nIf nitrogen source is set incorrectly, maximal error is 0.2%. \nOxygen measurement is unaffected, since O2 is measured directly by the oxygen cell.\n\n**UpozornÄnÃ: Jako jednotka hloubky jsou uvedeny metry nebo stopy, ale ve skuteÄnosti jde o jednotku hydrostatického tlaku (tlak v uvedené hloubce v moÅské vodÄ).**","textLarge":false,"imageOnRight":true,"image":{"recommendedSizes":{"width":"420","height":"280"}},"imageMobile":{"recommendedSizes":{"width":"750","height":"500"}}},"id":"#85","type":"component","lock":false,"position":62},{"name":"Divider","data":{"color":"darkGray"},"id":"#86","type":"component","lock":false,"position":63},{"name":"TextBlock","data":{"text":"### **09.2 Jednotky mÄÅenÃ**\n\nDalÅ¡Ã nastavenà jsou k dispozici v nabÃdce ***Menu/Measurement units***. Zde lze pÅepnout analyzátor do metrického režimu (***Metric units***), imperiálnÃch jednotek (***U.S. units***) nebo zobrazenà jednotlivÄ.\nJednotky lze zvolit samostatnÄ pro jednotlivé hodnoty (teplota, hloubka, tlak, objem,hmotnost). Nastavenà jednotky nemá vliv na výpoÄty (s výjimkou koneÄného zaokrouhlovánÃ),\nprotože analyzátor pracuje v jednotkách SI internÄ.\n\nUpozornÄnÃ: Metry a stopy jsou oznaÄeny jako jednotky hloubky, i když ve skuteÄnosti se jedná o hydrostatický tlak (tlak v uvedené hloubce v mm)\nmoÅské vody).","textLarge":false,"imageOnRight":true,"image":{"recommendedSizes":{"width":"420","height":"280"}},"imageMobile":{"recommendedSizes":{"width":"750","height":"500"}}},"id":"#87","type":"component","lock":false,"position":64},{"name":"Divider","data":{"color":"darkGray"},"id":"#89","type":"component","lock":false,"position":65},{"name":"SectionDivider","data":{"title":"09.3 MÃchánà plynů","skipToC":false},"id":"#138","type":"component","lock":false,"position":66},{"name":"TextBlock","data":{"text":"### **09.3 MÃchánà plynů**\n\nV režimech výpoÄtu a simulace mÃchánà plynů je k dispozici nastavenà ***Menu/Gas properties***.\nJednotlivé parametry majà následujÃcà význam: \n\nVolbou ***State equation*** se urÄuje, jestli výpoÄty mÃchánà budou pracovat s ideálnÃm plynem (je použita stavová rovnice PV=RT) nebo s reálným plynem (stavová rovnice podle Redlicha a Kwonga).Varianta s reálným plynem je výpoÄetnÄ složitÄjÅ¡Ã a výpoÄet může trvat dosti dlouho.Pro bÄžné použità je dostaÄujÃcà ideálnà plyn. \n\n***Ref.temperature*** je teplota plynu použitá pro výpoÄty.","textLarge":false,"imageOnRight":true,"image":{"recommendedSizes":{"width":"420","height":"280"}},"imageMobile":{"recommendedSizes":{"width":"750","height":"500"}}},"id":"#88","type":"component","lock":false,"position":67},{"name":"Divider","data":{"color":"darkGray"},"id":"#91","type":"component","lock":false,"position":68},{"name":"SectionDivider","data":{"title":"09.4 Kontinuálnà analýza","skipToC":false},"id":"#139","type":"component","lock":false,"position":69},{"name":"TextBlock","data":{"text":"### **09.4 Kontinuálnà analýza**\n\nZde se v menu nastavujà meznà hodnoty po jejichž pÅekroÄenà se spustà poplach: *Alarm O2 low, Alarm O2 high, Alarm He low, Alarm He high, Alarm pressure low, Alarm pressure high, Alarm temperature low, Alarm temperature high*.\n\nPoslednà z nastav
2itelných hodnot je Delay Re1 -> Re2 která urÄuje dobu která musà uplynout od vyhlášenà poplachu (relé Re1) aby byl vypnut kompresor (relé Re2). \nV menu nemusà být dostupné vÅ¡echny hodnoty â viditelnost položek menu se mÄnà podle toho jaká pÅÃdavná zaÅÃzenà jsou k analyzátoru pÅipojena.","textLarge":false,"imageOnRight":true,"image":{"recommendedSizes":{"width":"420","height":"280"}},"imageMobile":{"recommendedSizes":{"width":"750","height":"500"}}},"id":"#90","type":"component","lock":false,"position":70},{"name":"Divider","data":{"color":"darkGray"},"id":"#72","type":"component","lock":false,"position":71},{"name":"SectionDivider","data":{"title":"10. NabÃjenà a stav baterie","skipToC":false},"id":"#140","type":"component","lock":false,"position":72},{"name":"TextBlock","data":{"text":"### **10. NabÃjenà a stav baterie**\n\nKdykoli je analyzátor zapnutý, můžete zkontrolovat stav baterie pomocà stisknutà **| Ë
|**, pokud klávesa nemá na konkrétnà obrazovce jinou funkci. \nHodnota nabità baterie je vyjádÅena dvojitou Äáru v dolnà Äásti displeje. Rozsah je definován mezi 0 a\n100% nabÃjenÃ. \n\nKdyž je baterie témÄÅ vybitá, pÅipojte analyzátor pomocà dodaného kabelu k libovolné USB\nnabÃjeÄce nebo do USB portu poÄÃtaÄe. Plné nabità trvá pÅibližnÄ tÅi hodiny. \n\nKdyž je nabÃjeÄka pÅipojená, můžete zkontrolovat stav nabÃjenà stisknutÃm **| Ë
|**. Pokud baterie\nnenà plnÄ nabitá, Åada Å¡ipek se zobrazuje na stupnici od 0 do 100%. Pokud už je nabitá, zobrazà se dlouhá dvojitá Äára. \n\nBÄhem nabÃjenà jsou k dispozici vÅ¡echny funkce analyzátoru.","textLarge":false,"imageOnRight":true,"image":{"recommendedSizes":{"width":"420","height":"280"}},"imageMobile":{"recommendedSizes":{"width":"750","height":"500"}}},"id":"#92","type":"component","lock":false,"position":73},{"name":"Divider","data":{"color":"darkGray"},"id":"#93","type":"component","lock":false,"position":74},{"name":"SectionDivider","data":{"title":"11. Ãdržba","skipToC":true},"id":"#142","type":"component","lock":false,"position":75},{"name":"TextBlock","data":{"text":"### **11. Ãdržba**","textLarge":false,"imageOnRight":true,"image":{"recommendedSizes":{"width":"420","height":"280"}},"imageMobile":{"recommendedSizes":{"width":"750","height":"500"}}},"id":"#141","type":"component","lock":false,"position":76},{"name":"SectionDivider","data":{"title":"11.1 VýmÄna baterie","skipToC":false},"id":"#143","type":"component","lock":false,"position":77},{"name":"TextBlock","data":{"text":"\n\n### **11.1 VýmÄna baterie**\n\nPÅÃstroj využÃvá vestavÄnou dobÃjecà baterii. VýmÄna baterie je možná pouze ve výrobÄ.","textLarge":false,"imageOnRight":true,"image":{"recommendedSizes":{"width":"420","height":"280"}},"imageMobile":{"recommendedSizes":{"width":"750","height":"500"}}},"id":"#94","type":"component","lock":false,"position":78},{"name":"Divider","data":{"color":"darkGray"},"id":"#95","type":"component","lock":false,"position":79},{"name":"SectionDivider","data":{"title":"11.2 VýmÄna kyslÃkového senzoru","skipToC":false},"id":"#144","type":"component","lock":false,"position":80},{"name":"TextBlock","data":{"text":"### **11.2 VýmÄna kyslÃkového senzoru**\n\nKyslÃkový senzor má omezenou životnost. Analyzátor automaticky kontroluje stavy senzoru a na konci jeho životnosti se zobrazà zpráva âKyslÃkový senzor vyprÅ¡elâ po aktivaci pÅÃstroje. \n\nV takovém pÅÃpadÄ by mÄl být senzor co nejdÅÃve vymÄnÄn, protože pÅesnost mÄÅenà koncentrace kyslÃku již nelze zaruÄit.\n\nPokud si nejste jisti, zda jste schopni senzor správnÄ vymÄnit, zeptejte se svého dodavatele, prodejce nebo servisnÃho technika, který to vám ho vymÄnÃ.\n\nPÅi výmÄnÄ senzoru nejprve povolte Å¡roub a sejmÄte kryt senzoru kyslÃku.\nPoté odpojte konektor molex od senzoru, netahejte za kabeláž vycházejÃcà z pÅÃstroje.\nOdÅ¡roubujte starý senzor a namontujte nový tak, aby o-kroužek na snÃmaÄi tÄsnÄ pÅilnul k analyzátoru. K utahovánà senzoru nepoužÃvejte nadmÄrnou sÃlu. TÃm zabránÃte poÅ¡kozenà kabeláže.\n\nZnovu pÅipojte konektor senzoru kyslÃku a nezapomeÅte zkontrolovat polaritu. Nakonec zavÅete kryt senzoru.\nPÅed prvnà kalibracà nechejte nový senzor zahÅát alespoÅ 30 minut po vyjmutà z uzavÅeného obalu.\nKÅÞový Å¡roubovák je nutné vybavenà pro výmÄnu. Po každé výmÄnÄ senzoru musà být pÅÃstroj znovu zkalibrován.","textLarge":false,"imageOnRight":true,"image":{"recommendedSizes":{"width":"420","height":"280"}},"imageMobile":{"recommendedSizes":{"width":"750","height":"500"}}},"id":"#96","type":"component","lock":false,"position":81},{"name":"Image","data":{"firstImage":{"mimetype":"image/jpeg","size":131049,"hash":"4dd8bce6e7db9348ad3b10346315c55265b8c199","id":"ckondhmaj7fnb0776muqgbatc","filename":"8300-divesoft-analyzer-solo-manual-11.jpg","category":"divesoft/","type":"image"},"secondImage":{}},"id":"#98","type":"component","lock":false,"position":82},{"name":"Divider","data":{"color":"darkGray"},"id":"#99","type":"component","lock":false,"position":83},{"name":"SectionDivider","data":{"title":"11.3 SeÅÃzenà průtoku","skipToC":false},"id":"#145","type":"component","lock":false,"position":84},{"name":"TextBlock","data":{"text":"### **11.3 SeÅÃzenà průtoku**\n\nVe vÄtÅ¡inÄ pÅÃpadů je bÄžné proudÄnà plynu v omezovaÄi průtoku vhodné pro Å¡iroký rozsah vstupnÃho tlaku. \nKdyž je plyn Äasto analyzován za nÃzkého tlaku, může proudit pÅÃliÅ¡ málo, a tÃm take stabilizace mÄÅené hodnoty pomalejÅ¡Ã. \nPÅipojte pÅiložený omezovaÄ průtoku do otvoru v analyzátoru. \nOtáÄenÃm ventilu na lahvi regulujte prutok plynu omezovaÄem, dokud nenà dosáhnuto správného průtoku.\nPÅip
2ojte vzorkovaÄ k nádrži, otevÅete ventil a nastavte průtok plynu na požadovanou hodnotu pomocà 2mm klÃÄe s nástrÄným Å¡roubem. Rozsah nastavenà je relativnÄ malý, maximálnÄ 1/4 otáÄky. StavÄcà šroub již nepovolujte, může se uvolnit a vyfouknout tlakem plynu.\n\nSprávný průtok ve správnÄ nastaveném vzorkovaÄi je 0,2 litru/min. SeÅÃzenà je možné ovÄÅit pÅibližnÄ pÅipojenÃm hadice k vzorkovaÄi a ponoÅenÃm druhého konce do sklenice s vodou. Pro správné nastavenà musà z konce hadice unikat nepÅetržitý tok malých bublinek. Po zkouÅ¡ce hadici vysuÅ¡te, jinak může do analyzátoru vniknout voda.\n\nPokud si nejste jisti správným seÅÃzenÃm, obraÅ¥te se na svého prodejce nebo servis.\n\nK tomuto seÅÃzenà je potÅeba 2mm nástrÄný klÃÄ.","textLarge":false,"imageOnRight":true,"image":{"recommendedSizes":{"width":"420","height":"280"}},"imageMobile":{"recommendedSizes":{"width":"750","height":"500"}}},"id":"#100","type":"component","lock":false,"position":85},{"name":"Divider","data":{"color":"darkGray"},"id":"#101","type":"component","lock":false,"position":86},{"name":"SectionDivider","data":{"title":"11.4 Demontáž pÅÃstroje","skipToC":false},"id":"#146","type":"component","lock":false,"position":87},{"name":"TextBlock","data":{"text":"### **11.4 Demontáž pÅÃstroje**\n\nPÅÃstroj nerozebÃrejte. Analyzátor neobsahuje žádné uživatelem opravitelné Äásti kromÄ senzoru kyslÃku.\n\n**UpozornÄnÃ: Z analyzátoru sami nevyjÃmejte desku ploÅ¡ných spojů.ZpÄtné umÃstÄnà desky vyžaduje speciálnà postup a pÅÃstroje pro kalibraci.**","textLarge":false,"imageOnRight":true,"image":{"recommendedSizes":{"width":"420","height":"280"}},"imageMobile":{"recommendedSizes":{"width":"750","height":"500"}}},"id":"#102","type":"component","lock":false,"position":88},{"name":"Divider","data":{"color":"darkGray"},"id":"#103","type":"component","lock":false,"position":89},{"name":"SectionDivider","data":{"title":"12. PÅipojenà k poÄÃtaÄi","skipToC":false},"id":"#147","type":"component","lock":false,"position":90},{"name":"TextBlock","data":{"text":"### **12. PÅipojenà k poÄÃtaÄi**\n\nAnalyzátor lze pÅipojit k poÄÃtaÄi pomocà kabelu USB. \n\nMÄÅené hodnoty jsou pÅenášeny do PC pÅes virtuálnà sériový port. Pokud jste nenainstalovali vhodný ovladaÄ pro virtuálnà sériový port na USB, použijte bezplatný ovladaÄ poskytovaný výrobcem USB Äipu použitého v analyzátoru. \nTento ovladaÄ lze stáhnout na adrese http://www.ftdichip.com/Drivers/VCP.htm \nKonkrétnà ovladaÄ lze vybrat z kategorie VCP (virtuálnà komunikaÄnà port), v závislosti na použitém poÄÃtaÄi a operaÄnÃm systému. \n\nPÅenos dat musà být v analyzátoru aktivován volbou NabÃdka / PÅedvolby / Odeslat data do\nUSB = Zapnuto.\n\nPro pÅÃjem dat lze použÃt libovolný obslužný program emulace terminálu; napÅÃklad HyperTerminal je\ndostaÄujÃcà pro Microsoft Windows. Tento nástroj je souÄástà základnà instalace systému Windows.\n\n\nNamÄÅená data jsou pÅenášena v textovém režimu. Každou sekundu analyzátor pÅenášà data v následujÃcÃm formátu: \n\n\tHe xxx.x O2 yyy.y CR LF\n\nkde xxx.x je obsah helia v procentech, \nkde yyy.y je obsah kyslÃku v procentech, \nCR je symbol návratu vozÃku ASCII (desÃtkovÄ 13, Å¡estnáctkovÄ 0D), \nLF je symbol posuvu Åádku ASCII (desÃtkovÄ 10, Å¡estnáctkovÄ 0A). \n\nPokud dojde k chybÄ v mÄÅenÃ, je vadný záznam nahrazen hvÄzdiÄkami v\nnásledujÃcà formuláÅ: ***. *.\n\nVýstup je v sériové podobÄ ve formátu 8N1 (8 bitů, bez paritnÃho bitu, jeden stopbit), rychlost 115 200 bit / s, úroveÅ TTL.","textLarge":false,"imageOnRight":true,"image":{"recommendedSizes":{"width":"420","height":"280"}},"imageMobile":{"recommendedSizes":{"width":"750","height":"500"}}},"id":"#104","type":"component","lock":false,"position":91},{"name":"Divider","data":{"color":"darkGray"},"id":"#105","type":"component","lock":false,"position":92}
2,{"name":"SectionDivider","data":{"title":"13. Vady a jejich odstranÄnÃ","skipToC":false},"id":"#148","type":"component","lock":false,"position":93},{"name":"TextBlock","data":{"text":"### **13. Vady a jejich odstranÄnÃ**\n\nPo aktivaci je analyzátor automaticky testován, aby identifikoval jednu z následujÃcÃch chyb. VÅ¡echny chybové zprávy lze potvrdit klávesou a pÅÃstroj bude pokraÄovat v práci; za urÄitých okolnostà vÅ¡ak v omezeném provoznÃm režimu. Zpráva o pÅepÄtà (viz nÞe) je výjimkou, protože se může zobrazit kdykoli.","textLarge":false,"imageOnRight":true,"image":{"recommendedSizes":{"width":"420","height":"280"}},"imageMobile":{"recommendedSizes":{"width":"750","height":"500"}}},"id":"#106","type":"component","lock":false,"position":94},{"name":"Divider","data":{"color":"darkGray"},"id":"#107","type":"component","lock":false,"position":95},{"name":"SectionDivider","data":{"title":"13.1 Chybové zprávy","skipToC":false},"id":"#149","type":"component","lock":false,"position":96},{"name":"TextBlock","data":{"text":"### **13.1 Chybové zprávy**\n\n**Chyba 1 Heliový senzor nefunguje správnÄ** \n⢠DoÅ¡lo k chybÄ v elektronické nebo mechanické Äásti heliového senzoru. The\npÅÃstroj lze použÃt v nouzovém režimu pro mÄÅenà koncentrace kyslÃku.\nAnalyzátor musà být opraven, aby bylo možné mÄÅit hélium.\n\n**Chyba 2 PoÅ¡kozený nebo chybÄjÃcà snÃmaÄ kyslÃku** \n⢠Senzor kyslÃku je odstranÄn, odpojen nebo zniÄen. MÄÅenà kyslÃku\nkoncentrace bude nesprávná. Senzor lze doÄasnÄ deaktivovat (Menu / O2\ncell used = Off), koncentrace kyslÃku mÄÅená jiným pÅÃstrojem a zadaná\nruÄnÄ jako konstanta (Menu / O2 náhrada = n). Způsob zobrazenà mÄÅeného hodnoty nelze zmÄnit ani nelze provést kalibraci lambda sondy.\nVarovánà SnÃmaÄ kyslÃku je vypnutý\n⢠Tato zpráva se zobrazà pokaždé, když je senzor O2 vypnutý.\n\n**Chyba 3 Senzor kyslÃku vyprÅ¡el** \n⢠Senzor kyslÃku je starý a jeho výstupnà napÄtà je pÅÃliÅ¡ nÃzké. MÄÅenà bude nepÅesné\n(vedle hodnoty koncentrace O2 se zobrazà varovánà âNesprávnéâ) a nÄkteré\nrežimy mÄÅenà nelze aktivovat. Senzor musà být okamžitÄ vymÄnÄn za\nnový doporuÄený typ.\n⢠K této chybÄ může dojÃt také v pÅÃpadÄ, že je nástroj naplnÄn hypoxickou smÄsà (smÄs s nÃzkou\nobsah kyslÃku) pÅi aktivaci, napÅÃklad bezprostÅednÄ po pÅedchozÃm mÄÅenà nebo pokud je namÄÅená hypoxická smÄs dodána pÅed aktivacà analyzátoru. V takovém pÅÃpadÄ, pÅed aktivacà pÅÃstroj na chvÃli vypnÄte nebo pÅipojte ke zdroji vzduchu. \
2nNikdy nepoužÃvejte ústa k vyfukovánà vzduchu do vstupu nebo výstupu analyzátoru, abyste zabránili výparům\nkondenzace uvnitÅ pÅÃstroje (je možné opatrné nasávánà plynu ústy)\n\n\n**Chyba 4 ZaÅÃzenà je pÅÃliÅ¡ studené** \n⢠Teplota analyzátoru je pÅÃliÅ¡ nÃzká a mÄÅenà může být nepÅesné. ZahÅát\nanalyzátor v teplé mÃstnosti, aby se zvýšila jeho teplota nad bod mrazu (32 ° F). K ohÅevu nepoužÃvejte horkovzduÅ¡né dmychadlo, suÅ¡iÄku vzduchu, troubu ani žádný jiný podobný způsob analyzátor.\n\n**Chyba 5 ZaÅÃzenà je pÅÃliÅ¡ teplé** \n⢠Teplota analyzátoru je pÅÃliÅ¡ vysoká (napÅÃklad pokud byl vystaven sluneÄnÃmu záÅenà nebo uloženo v automobilu vyhÅátém sluneÄnÃm záÅenÃm); mÄÅenà může být nepÅesné. OchlaÄte analyzátor pod 40 stupÅů Celsia (104 ° F).\n\n**Varovánà NÃzká kapacita baterie** \n⢠Baterie je témÄÅ vybitá, co nejdÅÃve nabijte analyzátor.\n","textLarge":false,"imageOnRight":true,"image":{"recommendedSizes":{"width":"420","height":"280"}},"imageMobile":{"recommendedSizes":{"width":"750","height":"500"}}},"id":"#108","type":"component","lock":false,"position":97},{"name":"Divider","data":{"color":"darkGray"},"id":"#109","type":"component","lock":false,"position":98},{"name":"SectionDivider","data":{"title":"13.2 Poruchy pÅÃstroje","skipToC":false},"id":"#150","type":"component","lock":false,"position":99},{"name":"TextBlock","data":{"text":"### **13.2 Poruchy pÅÃstroje**\n\n**Obsah helia se nezobrazuje** \n⢠Sonda mÄÅà rychlost helia v obou smÄrech. Pokud se tyto údaje liÅ¡Ã, mÄÅenà je považován za nesprávný a obsah helia se nezobrazÃ. Tato situace může být docházÃ, pokud mÄÅený plyn protéká sondou pÅÃliÅ¡ rychle (nižšà rychlosti proudÄnà jsou kompenzováno výpoÄtem), nebo je zde znaÄný hluk pozadà (napÅÃklad v blÃzkosti bÄžÃcÃho kompresoru nebo plynového motoru). \n⢠Snižte rychlost průtoku plynu (to platà pro analyzátor, který
2nenà pÅipojen pomocà originálu sampler), posuÅte se dále od zdroje hluku. \n\n**PÅÃstroj ukazuje ménÄ než 0% nebo vÃce než 100% helia ve smÄsi** \n⢠Zobrazená hodnota pocházà pÅÃmo z namÄÅené a vypoÄÃtané hodnoty a má v Ä způsob byl zmÄnÄn na pozadÃ. Možná chyba mÄÅenà je symetrická a pro\nnapÅÃklad pÅi mÄÅenà smÄsi bez obsahu helia 0,2% nebo â0,2% helia\nlze zobrazit. Proto pÅi mÄÅenà Äistého hélia, napÅ. Může 99,8% nebo 100,2%\nse zobrazÃ. Pokud je odchylka v toleranci mÄÅenÃ, nenà to výsledek\nvada. \n\n**PÅÃstroj ukazuje ménÄ než 0% nebo vÃce než 100% kyslÃku ve smÄsi**\n⢠Zobrazená hodnota pocházà pÅÃmo z namÄÅené a vypoÄÃtané hodnoty a má v Ä způsob byl zmÄnÄn na pozadÃ. Možná chyba mÄÅenà je symetrická a pro\nnapÅÃklad pÅi mÄÅenà smÄsi bez obsahu kyslÃku 0,5% nebo -0,5% kyslÃku\nlze zobrazit. Proto pÅi mÄÅenà Äistého kyslÃku, napÅ. Může 99,5% nebo 100,5%\nse zobrazÃ. Pokud je odchylka v toleranci mÄÅenÃ, nenà to výsledek závada. V pÅÃpadÄ vÄtÅ¡Ã odchylky proveÄte novou kalibraci lambda sondy. Pokud je problém pÅetrvává, vymÄÅte senzor.","textLarge":false,"imageOnRight":true,"image":{"recommendedSizes":{"width":"420","height":"280"}},"imageMobile":{"recommendedSizes":{"width":"750","height":"500"}}},"id":"#110","type":"component","lock":false,"position":100},{"name":"Divider","data":{"color":"darkGray"},"id":"#111","type":"component","lock":false,"position":101},{"name":"SectionDivider","data":{"title":"14. Technické údaje","skipToC":false},"id":"#151","type":"component","lock":false,"position":102},{"name":"TextBlock","data":{"text":"### **14. Technické údaje**\n\nRozmÄry: 85 à 205 à 40 mm (31/4 à 77/8 à 11/2 palce) \n\nHmotnost: 420 g (bez obalu a pÅÃsluÅ¡enstvÃ) \n\nRozsah mÄÅenà koncentrace kyslÃku: 0 až 100% \n\nRozsah mÄÅenà koncentrace helia: 0 až 100% \n\nTeplota mÄÅenÃ: 0 až + 40 ° C (32â104 ° F) \n\nTlak smÄsi: OdpovÃdá tlaku okolà v rozmezà 700â1100 milibarů (20â\n32 palců Hg), což odpovÃdá standardnà atmosféÅe ve výšce 0 až 3000 m (0â10 000 ft) \n\nNominálnà průtok plynu: 0,2 l / min \n\nZákladna pro mÄÅenà rychlosti zvuku: 800 mm \n\nMÄÅicà cyklus: 200 ms \n\nPÅipojovacà rozmÄry vzorkovaÄe: Standard pro DIN ventil (EN 144-2) pro\n200/300 tyÄà (závit G 5/8). VzorkovaÄe s pÅipojenÃm k jakémukoli standardizovanému nebo bÄžnému ventilu jsou k dispozici na vyžádánà nebo jako volitelné vybavenà \n\nKyslÃkový senzor: R22 S (konektor Molex) \n\nSnadno vymÄnitelný senzor O2 \n\nOÄekávaná životnost snÃmaÄe kyslÃku: 2 roky \n\nVymÄnitelná baterie: ProstÅednictvÃm autorizovaného servisnÃho stÅediska \n\nBaterie: 120 mÄÅenà nebo 4 hodiny nepÅetržitého provozu \n\nZáruka: 24 mÄsÃců, 12 mÄsÃců na baterii \n\nNabÃjenà a programovánÃ: USB-C \n\nDoba nabÃjenÃ: 3-4 hodiny \n\nDisplej: OLED \n\nTÄlo: ABS-PC ","textLarge":false,"imageOnRight":true,"image":{"recommendedSizes":{"width":"420","height":"280"}},"imageMobile":{"recommendedSizes":{"width":"750","height":"500"}}},"id":"#112","type":"component","lock":false,"position":103},{"name":"Divider","data":{"color":"darkGray"},"id":"#113","type":"component","lock":false,"position":104},{"name":"TextBlock","data":{"text":"### **ANALYZER SOLO UŽIVATELSKà PÅÃRUÄKA**\nDate of issue: 20 June 2019 \nHW 3.0, FW 2.29 \nAuthors: Adam ProchaÌska, Jakub SÌimaÌnek, AlesÌ ProchaÌska \nPublished by Divesoft s.r.o.","textLarge":false,"imageOnRight":true,"image":{"recommendedSizes":{"width":"420","height":"280"}},"imageMobile":{"recommendedSizes":{"width":"750","height":"500"}}},"id":"#114","type":"component","lock":false,"position":105}],"id":"root","idBuffer":"#152","lastCommit":"23fdfa2b-6ae1-458a-89f4-939ad48fd7c7"}},"annotations":[],"language":{"type":"id","generated":false,"id":"Language:cjv3kwvoj000u083611381c6o","typename":"Language"},"__typename":"PageTranslation"},"Page:ckpcgx2c64h2d0788rft16oow":{"id":"ckpcgx2c64h2d0788rft16oow","type":{"type":"id","generated":false,"id":"PageType:cjv3l213x004f08366hjufttp","typename":"PageType"},"tags":[],"translations({\"where\":{\"language\":{\"id\":\"cjv3kwvoj000u083611381c6o\"}}})":[{"type":"id","generated":false,"id":"PageTranslation:ckpcgx2cj4h2k0788r87mep2r","typename":"PageTranslation"}],"__typename":"Page"},"PageTranslation:ckpcgx2cj4h2k0788r87mep2r":{"id":"ckpcgx2cj4h2k0788r87mep2r","name":"Blog","createdAt":"2021-05-31T10:27:30.979Z","content":{"type":"json","json":{"content":[{"name":"Header","data":{"products":[{"title":"Accessories","description":"Backplates, Consumables. Tanks.","img":{"recommendedSizes":{"width":"235","height":"235"}},"url":""},{"title":"Accessories sets","description":"Protection, maintenance, cleaning.","img":{"recommendedSizes":{"width":"235","height":"235"}},"url":""},{"title":"Spare parts","description":"Spare parts and components.","img":{"recommendedSizes":{"width":"235","height":"235"}},"url":""}
2,{"title":"Spare parts kits","description":"Completly Liberty spare parts kits.","img":{"recommendedSizes":{"width":"235","height":"235"}},"url":""}]},"id":"#0","type":"component","lock":false,"position":0},{"name":"BlogHolder","data":{"title":"Blog","displayFilters":true,"displayItemDetails":true,"primaryTags":[{"id":"2","tag":[{"id":"ckqjbycw06d410788g6gq4ku4","name":"CCR Liberty in Detail"}],"name":"CCR Liberty in Detail"}],"secondaryTags":[{"id":"1","tag":[{"id":"cm5ww05zc1b5d0803zglvz927","name":"Blog: Beginner"}],"name":"Beginner"},{"id":"2","tag":[{"id":"cm5ww0t651b710803pcl02cn4","name":"Blog: Advanced"}],"name":"Advanced"},{"id":"3","tag":[{"id":"cm5ww0z2w1b7708035dpdbq9a","name":"Blog: Expert"}],"name":"Expert"}],"numberOfItems":"10","buttonText":"naÄÃst dalÅ¡Ã Älánky","buttonAlign":"center","items":[{"title":"Jak si vybrat správné pastelky","text":"Lorem ipsum dolor sit amet, consectetur adipiscing elit. Pellentesque mattis orci...","linkText":"Zobrazit Älánek","linkUrl":""},{"title":"Jak si vybrat správné pastelky","text":"Lorem ipsum dolor sit amet, consectetur adipiscing elit. Pellentesque mattis orci...","linkText":"Zobrazit Älánek","linkUrl":""}],"blogLinkUrl":{"url":"/en/blog","pageId":"ckpcgx2c64h2d0788rft16oow"}},"id":"#2","type":"component","lock":false,"position":1},{"name":"Footer","data":{"componentTemplateId":"cjvwimxrl08e40798hjs5ek9w"},"id":"#1","type":"component","lock":false,"position":2}],"id":"root","idBuffer":"#3","lastCommit":"415745de-bb9b-4f7d-ba0f-31c60b546b58"}},"annotations":[],"language":{"type":"id","generated":false,"id":"Language:cjv3kwvoj000u083611381c6o","typename":"Language"},"__typename":"PageTranslation"},"Page:ckpch3csz4h4n0788bw746g54":{"id":"ckpch3csz4h4n0788bw746g54","type":{"type":"id","generated":false,"id":"PageType:cjv3l213x004f08366hjufttp","typename":"PageType"},"tags":[{"type":"id","generated":false,"id":"Tag:ckqjbycw06d410788g6gq4ku4","typename":"Tag"},{"type":"id","generated":false,"id":"Tag:clw52z09zlclk0735mxb7v53p","typename":"Tag"},{"type":"id","generated":false,"id":"Tag:cm5ww0t651b710803pcl02cn4","typename":"Tag"}],"translations({\"where\":{\"language\":{\"id\":\"cjv3kwvoj000u083611381c6o\"}}})":[{"type":"id","generated":false,"id":"PageTranslation:ckpch3ctf4h4u0788d7cutngx","typename":"PageTranslation"}],"__typename":"Page"},"Tag:ckqjbycw06d410788g6gq4ku4":{"id":"ckqjbycw06d410788g6gq4ku4","name":"CCR Liberty in Detail","__typename":"Tag"},"Tag:clw52z09zlclk0735mxb7v53p":{"id":"clw52z09zlclk0735mxb7v53p","name":"Blog: CCR Liberty","__typename":"Tag"},"Tag:cm5ww0t651b710803pcl02cn4":{"id":"cm5ww0t651b710803pcl02cn4","name":"Blog: Advanced","__typename":"Tag"},"PageTranslation:ckpch3ctf4h4u0788d7cutngx":{"id":"ckpch3ctf4h4u0788d7cutngx","name":"divesoft.blog / CCR Liberty rebreather platform and the philosophy behind it","createdAt":"2021-05-31T10:32:24.482Z","content":{"type":"json","json":{"content":[{"name":"Header","data":{"products":[{"title":"Accessories","description":"Backplates, Consumables. Tanks.","img":{"recommendedSizes":{"width":"235","height":"235"}},"url":""},{"title":"Accessories sets","description":"Protection, maintenance, cleaning.","img":{"recommendedSizes":{"width":"235","height":"235"}},"url":""},{"title":"Spare parts","description":"Spare parts and components.","img":{"recommendedSizes":{"width":"235","height":"235"}},"url":""},{"title":"Spare parts kits","description":"Completly Liberty spare parts kits.","img":{"recommendedSizes":{"width":"235","height":"235"}},"url":""}]},"id":"#0","type":"component","lock":false,"position":0},{"name":"BlogArticle","data":{"title":"CCR Liberty rebreather platform and the philosophy behind it","perex":"Jakub Slama introduces the CCR Liberty in Detail series and will guide you throughout **the CCR Liberty rebreather platform and the philosophy behind it**. Each episode will describe a different part of the system and its functions. By watching all the episode, at the end you should be able to **understand how the [CCR Liberty rebreather](https://www.divesoft.com/en/products/ccr-liberty/philosophy) fits your needs**.","content":"In this first episode, Jakub explores the manufacturing process of the CCR Liberty rebreather, dive computers and other high-tech SCUBA diving equipment and explains what makes the manufacturing of Divesoft products so unique. What has been the driving force for Ales Procháska, a member of the team of cave explorers, to begin working on his rebreather and create **the [Divesoft CCR Liberty platform and its key factors](https://www.divesoft.com/en/blog/the-individual-elements-of-the-ccr-liberty-unit-set-up)**, such as reliability, built-in redundancy and modularity?\n\nJakub also looks at the overall configurations based on the divers' preferences, including \n* [Rebreather head](https://www.divesoft.com/en/blog/ccr-liberty-head), \n* [BOV/DSV options](https://www.divesoft.com/en/products/bovdsvadv), \n* [offboarding gas options](https://www.divesoft.com/en/blog/ccr-mouthpieces-bov-dsv-mav-and-offboarding-gas), \n* ADVs, \n* scrubbers, \n* Backplate and Harness, \n* stand configurations, \n* accessories, \n* pre-dive checks, \n* dive modes, \n* bailout mode and much more. \n\nWatch this video to understand the CCR Liberty basics. ð» \n\n","showTags":true,"showDate":true,"image":{"mimetype":"image/png","size":907756,"hash":"1fc69a3f3a3bc98058f741273ce82b72ca349bcb","id":"ckph3hafri4m507764bsmffqy","filename":"1-blog-ccr-liberty-in-detail.png","category":"divesoft/","type":"image"}},"id":"#2","type":"component","lock":false,"position":1},{"name":"GalleryAndVideo","data":{"title":"CCR Liberty in Detail #1 | Rebreather Introduction","video":{"type":"embeddedVideo","url":"https://www.youtube.com/embed/OChBj0iMGeY"},"images":[{"image":{"recommendedSizes":{"width":"1600","height":"900"}},"id":"1"},{"image":{"recommendedSizes":{"width":"1600","height":"900"}},"id":"2"},{"image":{"recommendedSizes":{"width":"1600","height":"900"}},"id":"3"},{"image":{"recommendedSizes":{"width":"1600","height":"900"}},"id":"4"}]},"id":"#8","type":"component","lock":false,"position":2},{"name":"Article","data":{"title":"Parturient porttitor.","subtitle":"","showBreadcrumbs":false,"hideHeader":false,"perex":"Hac congue a integer convallis rutrum eget cum et blandit scelerisque placerat turpis per diam pulvinar mattis diam mi vel libero. Dignissim vestibulum a laoreet neque a adipiscing euismod quis id venenatis lectus cras neque id. Penatibus ipsum ut nullam per ad a et lacinia habitasse potenti condimentum id nibh quam amet a imperdiet eros cursus.","content":"Hac congue a integer convallis rutrum eget cum et blandit scelerisque placerat turpis per diam pulvinar mattis diam mi vel libero. Dignissim vestibulum a laoreet neque a adipiscing euismod quis id venenatis lectus cras neque id. Penatibus ipsum ut nullam per ad a et lacinia habitasse potenti condimentum id nibh quam amet a imperdiet eros cursus. Malesuada interdum vestibulum ac laoreet venenatis odio eu imperdiet a praesent himenaeos velit condimentum congue sapien a inceptos. Ullamcorper viverra tellus parturient nec eu in consectetur tellus a a condimentum a consectetur ipsum a lacus. Proin vestibulum bibendum sed vestibulum parturient adipiscing netus nec at at parturient volutpat primis phasellus montes cursus vestibulum a condimentum a. Adipiscing a et ipsum sodales condimentum maecenas ac non at vestibulum condimentum commodo a at a fringilla parturient at sociis donec suspendisse in a ae
2nean dui mauris.Ligula vel eu sapien at adipiscing scelerisque ad hac mattis congue pretium platea commodo a euismod dictumst quam conubia eros fringilla non et tristique ut.Dapibus parturient a euismod laoreet a aptent lacus a porta morbi ipsum praesent et adipiscing est leo dui malesuada tincidunt id suspendisse suspendisse nec lacus.Fermentum.","articles":[{"image":{},"title":"Next article","url":"","id":"1"}],"links":[{"title":"Shows and Events","url":"","id":"1"}]},"id":"#10","type":"component","lock":false,"position":3},{"name":"ProductShowcase","data":{"componentTemplateId":"cm9h4wr6ugjv10803yqs3tp71"},"id":"#11","type":"component","lock":false,"position":4},{"name":"Footer","data":{"copyrights":"Copyright © 2019 Divesoft LLC All rights reserved.","facebookUrl":{"urlNewWindow":true,"url":"https://www.facebook.com/divesoft/"},"youtubeUrl":{"url":"https://www.youtube.com/channel/UCHI2-kHmfoUlAdhQXPKl8lA/featured","urlNewWindow":true},"instagramUrl":{"url":"https://www.instagram.com/divesoft/","urlNewWindow":true},"contacts":"**Divesoft s.r.o.** \nHálkova 2495 \n413 01 Roudnice nad Labem \nCzech Republic \nTel.: +420 416 857 057 \nE-mail: [email protected]"},"id":"#1","type":"component","lock":false,"position":10}],"id":"root","idBuffer":"#12","lastCommit":"15fb4b30-5cfe-4744-86ac-5723f21d9e69"}},"annotations":[{"type":"id","generated":true,"id":"PageTranslation:ckpch3ctf4h4u0788d7cutngx.annotations.0","typename":"PageAnnotation"},{"type":"id","generated":true,"id":"PageTranslation:ckpch3ctf4h4u0788d7cutngx.annotations.1","typename":"PageAnnotation"},{"type":"id","generated":true,"id":"PageTranslation:ckpch3ctf4h4u0788d7cutngx.annotations.2","typename":"PageAnnotation"}],"language":{"type":"id","generated":false,"id":"Language:cjv3kwvoj000u083611381c6o","typename":"Language"},"__typename":"PageTranslation"},"PageTranslation:ckpch3ctf4h4u0788d7cutngx.annotations.0":{"key":"image","value":"{\"mimetype\":\"image/png\",\"size\":907756,\"hash\":\"1fc69a3f3a3bc98058f741273ce82b72ca349bcb\",\"id\":\"ckph3hafri4m507764bsmffqy\",\"filename\":\"1-blog-ccr-liberty-in-detail.png\",\"category\":\"divesoft/\",\"type\":\"image\"}","__typename":"PageAnnotation"},"PageTranslation:ckpch3ctf4h4u0788d7cutngx.annotations.1":{"key":"perex","value":"Jakub Slama introduces the CCR Liberty in Detail series and will guide you throughout the CCR Liberty rebreather platform and the philosophy behind it. Each episode will describe a different part of the system and its functions. By watching all the episode, at the end you should be able to understand how the CCR Liberty rebreather fits your needs.","__typename":"PageAnnotation"},"PageTranslation:ckpch3ctf4h4u0788d7cutngx.annotations.2":{"key":"title","value":"CCR Liberty rebreather platform and the philosophy behind it","__typename":"PageAnnotation"},"Page:ckpmmiqic4zh9078854l4rnzc":{"id":"ckpmmiqic4zh9078854l4rnzc","type":{"type":"id","generated":false,"id":"PageType:cjv3l213x004f08366hjufttp","typename":"PageType"},"tags":[],"translations({\"where\":{\"language\":{\"id\":\"cjv3kwvoj000u083611381c6o\"}}})":[{"type":"id","generated":false,"id":"PageTranslation:ckpmmiqip4zhg0788mbcpuxfn","typename":"PageTranslation"}],"__typename":"Page"},"PageTranslation:ckpmmiqip4zhg0788mbcpuxfn":{"id":"ckpmmiqip4zhg0788mbcpuxfn","name":"ccr liberty rebreathers catalogue","createdAt":"2021-06-07T13:02:01.921Z","content":{"type":"json","json":{"content":[{"name":"Header","data":{"products":[{"title":"Accessories","description":"Backplates, Consumables. Tanks.","img":{"recommendedSizes":{"width":"235","height":"235"}},"url":""},{"title":"Accessories sets","description":"Protection, maintenance, cleaning.","img":{"recommendedSizes":{"width":"235","height":"235"}},"url":""},{"title":"Spare parts","description":"Spare parts and components.","img":{"recommendedSizes":{"width":"235","height":"235"}},"url":""},{"title":"Spare parts kits","description":"Completly Liberty spare parts kits.","img":{"recommendedSizes":{"width":"235","height":"235"}},"url":""}]},"id":"#0","type":"component","lock":false,"position":0},{"name":"BlogArticle","data":{"title":"CCR (Closed Circuit Rebreather) Liberty catalogue","perex":"","content":"<iframe \t\t\t\tsrc=\"https://indd.adobe.com/embed/20a10329-01a6-4793-af85-9a2ae0943923?startpage=1&allowFullscreen=true\" width=\"100%\" height=\"500\" frameborder=\"0\" allowfullscreen=\"\"></iframe>","showTags":false,"showDate":false},"id":"#7","type":"component","lock":false,"position":2},{"name":"Footer","data":{"copyrights":"Copyright © 2019 Divesoft LLC All rights reserved.","facebookUrl":{"urlNewWindow":true,"url":"https://www.facebook.com/divesoft/"},"youtubeUrl":{"url":"https://www.youtube.com/channel/UCHI2-kHmfoUlAdhQXPKl8lA/featured","urlNewWindow":true},"instagramUrl":{"url":"https://www.instagram.com/divesoft/","urlNewWindow":true},"contacts":"**Divesoft s.r.o.** \nHálkova 2495 \n413 01 Roudnice nad Labem \nCzech Republic \nTel.: +420 416 857 057 \nE-mail: [email protected]","twitterUrl":{"url":"https://twitter.com/divesoft","urlNewWindow":true}},"id":"#8","type":"component","lock":false,"position":6}],"id":"root","idBuffer":"#13","lastCommit":"91803d34-7c7a-4585-999c-7541284352cb"}},"annotations":[],"language":{"type":"id","generated":false,"id":"Language:cjv3kwvoj000u083611381c6o","typename":"Language"},"__typename":"PageTranslation"}
2,"Page:ckpzix1hf5fmk07883mhggvlm":{"id":"ckpzix1hf5fmk07883mhggvlm","type":{"type":"id","generated":false,"id":"PageType:cjv3l213x004f08366hjufttp","typename":"PageType"},"tags":[{"type":"id","generated":false,"id":"Tag:ckqjbycw06d410788g6gq4ku4","typename":"Tag"},{"type":"id","generated":false,"id":"Tag:clw52y9cclcle073501kwtw2u","typename":"Tag"}],"translations({\"where\":{\"language\":{\"id\":\"cjv3kwvoj000u083611381c6o\"}}})":[{"type":"id","generated":false,"id":"PageTranslation:ckpzix1hv5fmr07886ujflwi0","typename":"PageTranslation"}],"__typename":"Page"},"Tag:clw52y9cclcle073501kwtw2u":{"id":"clw52y9cclcle073501kwtw2u","name":"Blog: BOV/DSV/ADV","__typename":"Tag"},"PageTranslation:ckpzix1hv5fmr07886ujflwi0":{"id":"ckpzix1hv5fmr07886ujflwi0","name":"divesoft.blog / The individual elements of the CCR Liberty unit set up","createdAt":"2021-06-16T13:42:11.155Z","content":{"type":"json","json":{"content":[{"name":"Header","data":{"products":[{"title":"Accessories","description":"Backplates, Consumables. Tanks.","img":{"recommendedSizes":{"width":"235","height":"235"}},"url":""},{"title":"Accessories sets","description":"Protection, maintenance, cleaning.","img":{"recommendedSizes":{"width":"235","height":"235"}},"url":""},{"title":"Spare parts","description":"Spare parts and components.","img":{"recommendedSizes":{"width":"235","height":"235"}},"url":""},{"title":"Spare parts kits","description":"Completly Liberty spare parts kits.","img":{"recommendedSizes":{"width":"235","height":"235"}},"url":""}]},"id":"#0","type":"component","lock":false,"position":0},{"name":"BlogArticle","data":{"title":"The individual elements of the CCR Liberty unit set up ","perex":"Hello, welcome to the second episode of The CCR Liberty in Detail, in which Jakub Slama introduces **the individual elements of the CCR Liberty unit set up and all the parts**. Starting from the backplate (BP) and stands, he moves to sidemount units and their frame options, cylinders and weights. Last but not least, Jakub looks at Liberty head, scrubber and loop. ","content":"In more detail, Jakub explains different [mouthpieces](https://www.divesoft.com/en/blog/ccr-mouthpieces-bov-dsv-mav-and-offboarding-gas) [BOV/DSV](https://www.divesoft.com/en/products/bovdsvadv) equipped with mushroom valves and their uses. Additionally, the MAV (Manual Addition Valves) and ADV (Automatic Diluent Valve) function, location on the system and its safety features.\n\nFurther in the video, Jakub also demonstrates **how to remove the loop and counterlungs step by step** for maintenance, cleaning or pre-dive check purposes. How easy to excess the head and scrubber canister by removing them from the [frame](https://www.divesoft.com/en/blog/ccr-liberty-frame) unlocking the safety lock located on the backplate. Finally, Jakub invites you to the next episode dedicated to the [Liberty head](https://www.divesoft.com/en/blog/ccr-liberty-head) in detail. \n\nLearn more by watching this video now. ð» \n\nSee also [CCR Liberty rebreather platform and the philosophy behind it](https://www.divesoft.com/en/blog/ccr-liberty-rebreather-platform-and-the-philosophy-behind-it).\n","showTags":false,"showDate":false,"image":{"mimetype":"image/png","size":860076,"hash":"902556158c2d87ada73bca84748c045fa8bfc33e","id":"ckqgi3c6fvip70776j3ck2c0o","filename":"2-blog-ccr-liberty-in-detail.png","category":"divesoft/","type":"image"}},"id":"#2","type":"component","lock":false,"position":1},{"name":"GalleryAndVideo","data":{"title":"CCR Liberty in Detail #2 | Rebreather Components","video":{"type":"embeddedVideo","url":"https://www.youtube.com/embed/MTVjlVscPVE"},"images":[{"image":{"recommendedSizes":{"width":"1600","height":"900"}},"id":"1"},{"image":{"recommendedSizes":{"width":"1600","height":"900"}},"id":"2"},{"image":{"recommendedSizes":{"width":"1600","height":"900"}},"id":"3"},{"image":{"recommendedSizes":{"width":"1600","height":"900"}},"id":"4"}]},"id":"#4","type":"component","lock":false,"position":2},{"name":"ProductShowcase","data":{"componentTemplateId":"cm9h4wr6ugjv10803yqs3tp71"},"id":"#5","type":"component","lock":false,"position":3},{"name":"Footer","data":{"copyrights":"Copyright © 2019 Divesoft LLC All rights reserved.","facebookUrl":{"urlNewWindow":true,"url":"https://www.facebook.com/divesoft/"},"youtubeUrl":{"url":"https://www.youtube.com/channel/UCHI2-kHmfoUlAdhQXPKl8lA/featured","urlNewWindow":true},"instagramUrl":{"url":"https://www.instagram.com/divesoft/","urlNewWindow":true},"contacts":"**Divesoft s.r.o.** \nHálkova 2495 \n413 01 Roudnice nad Labem \nCzech Republic \nTel.: +420 416 857 057 \nE-mail: [email protected]"},"id":"#1","type":"component","lock":false,"position":4}],"id":"root","idBuffer":"#6","lastCommit":"9ec3316c-8db2-4e72-b710-804ec7ea8630"}},"annotations":[{"type":"id","generated":true,"id":"PageTranslation:ckpzix1hv5fmr07886ujflwi0.annotations.0","typename":"PageAnnotation"},{"type":"id","generated":true,"id":"PageTranslation:ckpzix1hv5fmr07886ujflwi0.annotations.1","typename":"PageAnnotation"},{"type":"id","generated":true,"id":"PageTranslation:ckpzix1hv5fmr07886ujflwi0.annotations.2","typename":"PageAnnotation"}],"language":{"type":"id","generated":false,"id":"Language:cjv3kwvoj000u083611381c6o","typename":"Language"},"__typename":"PageTranslation"},"PageTranslation:ckpzix1hv5fmr07886ujflwi0.annotations.0":{"key":"title","value":"The individual elements of the CCR Liberty unit set up ","__typename":"PageAnnotation"},"PageTranslation:ckpzix1hv5fmr07886ujflwi0.annotations.1":{"key":"perex","value":"Hello, welcome to the second episode of The CCR Liberty in Detail, in which Jakub Slama introduces the individual elements of the CCR Liberty unit set up and all the parts. Starting from the backplate (BP) and stands, he moves to sidemount units and their frame options, cylinders and weights. Last but not least, Jakub looks at Liberty head, scrubber and loop. ","__typename":"PageAnnotation"},"PageTranslation:ckpzix1hv5fmr07886ujflwi0.annotations.2":{"key":"image","value":"{\"mimetype\":\"image/png\",\"size\":860076,\"hash\":\"902556158c2d87ada73bca84748c045fa8bfc33e\",\"
2id\":\"ckqgi3c6fvip70776j3ck2c0o\",\"filename\":\"2-blog-ccr-liberty-in-detail.png\",\"category\":\"divesoft/\",\"type\":\"image\"}","__typename":"PageAnnotation"},"Page:ckq24u6625i7w0788gqd0215i":{"id":"ckq24u6625i7w0788gqd0215i","type":{"type":"id","generated":false,"id":"PageType:cjv3l213x004f08366hjufttp","typename":"PageType"},"tags":[{"type":"id","generated":false,"id":"Tag:clw52z09zlclk0735mxb7v53p","typename":"Tag"}],"translations({\"where\":{\"language\":{\"id\":\"cjv3kwvoj000u083611381c6o\"}}})":[{"type":"id","generated":false,"id":"PageTranslation:ckq24u66e5i830788722hbs6b","typename":"PageTranslation"}],"__typename":"Page"},"PageTranslation:ckq24u66e5i830788722hbs6b":{"id":"ckq24u66e5i830788722hbs6b","name":"divesoft.blog / Divetalks with Edmund Yiu: Rebreather diving in Asia, safety tips and Liberty Light experience","createdAt":"2021-06-18T09:31:21.158Z","content":{"type":"json","json":{"content":[{"name":"Header","data":{"products":[{"title":"Accessories","description":"Backplates, Consumables. Tanks.","img":{"recommendedSizes":{"width":"235","height":"235"}},"url":""},{"title":"Accessories sets","description":"Protection, maintenance, cleaning.","img":{"recommendedSizes":{"width":"235","height":"235"}},"url":""},{"title":"Spare parts","description":"Spare parts and components.","img":{"recommendedSizes":{"width":"235","height":"235"}},"url":""},{"title":"Spare parts kits","description":"Completly Liberty spare parts kits.","img":{"recommendedSizes":{"width":"235","height":"235"}},"url":""}]},"id":"#0","type":"component","lock":false,"position":0},{"name":"BlogArticle","data":{"title":"Divetalks with Edmund Yiu: Rebreather diving in Asia, safety tips and Liberty Light experience","perex":"Welcome to the new series DIVETALKS where we talk to divers using CCR Liberty. In the first episode, we host **a Hong Kong-based diver instructor [Edmund Yiu](https://www.divesoft.com/en/ambassadors/edmundyiu)** who has over 20 years of experience in recreational, technical, rebreather and cave diving. He also has been involved in dive equipment retail sale and distribution around South East Asia and China. ","content":"Edmunds explains how CCR Liberty rebreather design and its fully integrated system is reliable and gives him the control he needs during diving. He thinks **there is a growing interest in [rebreather ](https://www.divesoft.com/en/products/ccr-liberty/philosophy)diving, especially in the Asian market**, and he also sees some changes in diving. Edmund identifies the attitude and basic skills as some of the qualities of a good diver and how important to give yourself time when starting diving with a rebreather. During his diving career, he experiences some of the common errors that some divers repeatedly perform.\n\nHe suggests some safety tips based on his experience, such as having enough gases and how **the CCR Liberty multiple backup systems provide him confidence during diving**. Edmund talks about how many divers underestimate their limits or get away with bad habits that may provoke accidents and what is best to do to avoid such behaviour right from the beginning, about the [CCR Liberty Light](https://www.divesoft.com/en/products/ccr-liberty/ccr-liberty-light) weight system and how it fits his needs during travelling, cave diving and Asian diving overall. \n\nLet's watch it now. ð»\n","showTags":false,"showDate":false,"image":{"mimetype":"image/png","size":1231909,"hash":"f5104fbaae6698ec4a5e3df0e496cb1c16692397","id":"ckq24wt2jpzfe0776gvzaywwd","filename":"3-edmud-divetalks.png","category":"divesoft/","type":"image","alt":"Edmund Yiu Rebreather Diving"}},"id":"#2","type":"component","lock":false,"position":1},{"name":"GalleryAndVideo","data":{"title":"Divesoft | DIVETALKS #1 | Edmund Yiu","video":{"type":"embeddedVideo","url":"https://www.youtube.com/embed/cwYBAgEVCbY"},"images":[{"image":{"recommendedSizes":{"width":"1600","height":"900"}},"id":"1"},{"image":{"recommendedSizes":{"width":"1600","height":"900"}},"id":"2"},{"image":{"recommendedSizes":{"width":"1600","height":"900"}},"id":"3"},{"image":{"recommendedSizes":{"width":"1600","height":"900"}},"id":"4"}]},"id":"#3","type":"component","lock":false,"position":2},{"name":"ProductShowcase","data":{"componentTemplateId":"cm9h4wr6ugjv10803yq
2s3tp71"},"id":"#4","type":"component","lock":false,"position":3},{"name":"Footer","data":{"copyrights":"Copyright © 2019 Divesoft LLC All rights reserved.","facebookUrl":{"urlNewWindow":true,"url":"https://www.facebook.com/divesoft/"},"youtubeUrl":{"url":"https://www.youtube.com/channel/UCHI2-kHmfoUlAdhQXPKl8lA/featured","urlNewWindow":true},"instagramUrl":{"url":"https://www.instagram.com/divesoft/","urlNewWindow":true},"contacts":"**Divesoft s.r.o.** \nHálkova 2495 \n413 01 Roudnice nad Labem \nCzech Republic \nTel.: +420 416 857 057 \nE-mail: [email protected]"},"id":"#1","type":"component","lock":false,"position":4}],"id":"root","idBuffer":"#5","lastCommit":"b75859fa-a6b8-401a-96f2-f4fa804f4c93"}},"annotations":[{"type":"id","generated":true,"id":"PageTranslation:ckq24u66e5i830788722hbs6b.annotations.0","typename":"PageAnnotation"},{"type":"id","generated":true,"id":"PageTranslation:ckq24u66e5i830788722hbs6b.annotations.1","typename":"PageAnnotation"},{"type":"id","generated":true,"id":"PageTranslation:ckq24u66e5i830788722hbs6b.annotations.2","typename":"PageAnnotation"}],"language":{"type":"id","generated":false,"id":"Language:cjv3kwvoj000u083611381c6o","typename":"Language"},"__typename":"PageTranslation"},"PageTranslation:ckq24u66e5i830788722hbs6b.annotations.0":{"key":"title","value":"Divetalks with Edmund Yiu: Rebreather diving in Asia, safety tips and Liberty Light experience","__typename":"PageAnnotation"},"PageTranslation:ckq24u66e5i830788722hbs6b.annotations.1":{"key":"perex","value":"Welcome to the new series DIVETALKS where we talk to divers using CCR Liberty. In the first episode, we host a Hong Kong-based diver instructor Edmund Yiu who has over 20 years of experience in recreational, technical, rebreather and cave diving. He also has been involved in dive equipment retail sale and distribution around South East Asia and China. ","__typename":"PageAnnotation"},"PageTranslation:ckq24u66e5i830788722hbs6b.annotations.2":{"key":"image","value":"{\"mimetype\":\"image/png\",\"size\":1231909,\"hash\":\"f5104fbaae6698ec4a5e3df0e496cb1c16692397\",\"id\":\"ckq24wt2jpzfe0776gvzaywwd\",\"filename\":\"3-edmud-divetalks.png\",\"category\":\"divesoft/\",\"type\":\"image\"}","__typename":"PageAnnotation"},"Page:ckqghin2a65ic0788ynuy9evw":{"id":"ckqghin2a65ic0788ynuy9evw","type":{"type":"id","generated":false,"id":"PageType:cjv3l213x004f08366hjufttp","typename":"PageType"},"tags":[{"type":"id","generated":false,"id":"Tag:ckqjbycw06d410788g6gq4ku4","typename":"Tag"},{"type":"id","generated":false,"id":"Tag:clw52z09zlclk0735mxb7v53p","typename":"Tag"}],"translations({\"where\":{\"language\":{\"id\":\"cjv3kwvoj000u083611381c6o\"}}})":[{"type":"id","generated":false,"id":"PageTranslation:ckqghin2o65ij0788rweeka3a","typename":"PageTranslation"}],"__typename":"Page"},"PageTranslation:ckqghin2o65ij0788rweeka3a":{"id":"ckqghin2o65ij0788rweeka3a","name":"divesoft.blog / CCR Liberty Head","createdAt":"2021-06-28T10:35:04.656Z","content":{"type":"json","json":{"content":[{"name":"Header","data":{"products":[{"title":"Accessories","description":"Backplates, Consumables. Tanks.","img":{"recommendedSizes":{"width":"235","height":"235"}},"url":""},{"title":"Accessories sets","description":"Protection, maintenance, cleaning.","img":{"recommendedSizes":{"width":"235","height":"235"}},"url":""},{"title":"Spare parts","description":"Spare parts and components.","img":{"recommendedSizes":{"width":"235","height":"235"}},"url":""},{"title":"Spare parts kits","description":"Completly Liberty spare parts kits.","img":{"recommendedSizes":{"width":"235","height":"235"}},"url":""}]},"id":"#0","type":"component","lock":false,"position":0},{"name":"BlogArticle","data":{"title":"CCR Liberty Head","perex":"Moving forward⦠In this episode Jakub Slama takes a detailed look at the **Liberty head** with an explanation of **each component and their function**. The head is comprised of the entire electronics operating system of the [rebreather](https://www.divesoft.com/en/products/ccr-liberty/philosophy) and can be used in all configurations providing freedom to meet the needs of divers. Diving into the details of the head we find some of the unique qualities of the [Liberty platform](https://www.divesoft.com/en/blog/ccr-liberty-rebreather-platform-and-the-philosophy-behind-it).","content":"The Liberty head displays crucial and important information with clarity such as in the buddy display; [head-up display](https://www.divesoft.com/en/blog/the-ccr-liberty-user-interface); and the two handsets allowing the diver to see **all the necessary and additional information and results of the control units**. The control units work as the Liberty's \"brains\" divided by two independent and sealed compartments by communicating with each other constantly through oxygen cells that are always accessible. **Each element in the head has redundancy**, including control units, batteries, helium, pressure sensors, and the solenoids. \n\nAll components are sealed, pressure resistance and easily accessible with** a 3 mm Allen ke
2y**. Jakub discusses the crucial functions of pressure and helium sensors and the redundancy of the system to operate safely during diving. Jakub finishes with the** travel card** containing basic information useful during travels. \n\nSee also [the individual elements of the CCR Liberty unit set up](https://www.divesoft.com/en/blog/the-individual-elements-of-the-ccr-liberty-unit-set-up).\n","showTags":false,"showDate":true,"image":{"mimetype":"image/png","size":745222,"hash":"5e2aeb11a149fc46bf9b5b38d9b309d7a3df05fd","id":"ckqgi8nt3vitv07769k6nhhho","filename":"4-blog-ccr-liberty-in-detail.png","category":"divesoft/","type":"image","alt":"CCR Liberty Head"}},"id":"#2","type":"component","lock":false,"position":1},{"name":"GalleryAndVideo","data":{"title":"CCR Liberty in Detail #3 | Rebreather Head","video":{"type":"embeddedVideo","url":"https://www.youtube.com/embed/Ppm5XvmljDU"},"images":[{"image":{"recommendedSizes":{"width":"1600","height":"900"}},"id":"1"},{"image":{"recommendedSizes":{"width":"1600","height":"900"}},"id":"2"},{"image":{"recommendedSizes":{"width":"1600","height":"900"}},"id":"3"},{"image":{"recommendedSizes":{"width":"1600","height":"900"}},"id":"4"}]},"id":"#3","type":"component","lock":false,"position":2},{"name":"ProductShowcase","data":{"componentTemplateId":"cm9h4wr6ugjv10803yqs3tp71"},"id":"#4","type":"component","lock":false,"position":3},{"name":"Footer","data":{"copyrights":"Copyright © 2019 Divesoft LLC All rights reserved.","facebookUrl":{"urlNewWindow":true,"url":"https://www.facebook.com/divesoft/"},"youtubeUrl":{"url":"https://www.youtube.com/channel/UCHI2-kHmfoUlAdhQXPKl8lA/featured","urlNewWindow":true},"instagramUrl":{"url":"https://www.instagram.com/divesoft/","urlNewWindow":true},"contacts":"**Divesoft s.r.o.** \nHálkova 2495 \n413 01 Roudnice nad Labem \nCzech Republic \nTel.: +420 416 857 057 \nE-mail: [email protected]"},"id":"#1","type":"component","lock":false,"position":4}],"id":"root","idBuffer":"#5","lastCommit":"c42136a0-3f68-4a0a-920e-8c5cfa9ed543"}},"annotations":[{"type":"id","generated":true,"id":"PageTranslation:ckqghin2o65ij0788rweeka3a.annotations.0","typename":"PageAnnotation"},{"type":"id","generated":true,"id":"PageTranslation:ckqghin2o65ij0788rweeka3a.annotations.1","typename":"PageAnnotation"},{"type":"id","generated":true,"id":"PageTranslation:ckqghin2o65ij0788rweeka3a.annotations.2","typename":"PageAnnotation"}],"language":{"type":"id","generated":false,"id":"Language:cjv3kwvoj000u083611381c6o","typename":"Language"},"__typename":"PageTranslation"},"PageTranslation:ckqghin2o65ij0788rweeka3a.annotations.0":{"key":"perex","value":"Moving forward⦠In this episode Jakub Slama takes a detailed look at the Liberty head with an explanation of each component and their function. The head is comprised of the entire electronics operating system of the rebreather and can be used in all configurations providing freedom to meet the needs of divers. Diving into the details of the head we find some of the unique qualities of the Liberty platform.","__typename":"PageAnnotation"},"PageTranslation:ckqghin2o65ij0788rweeka3a.annotations.1":{"key":"image","value":"{\"mimetype\":\"image/png\",\"size\":745222,\"hash\":\"5e2aeb11a149fc46bf9b5b38d9b309d7a3df05fd\",\"id\":\"ckqgi8nt3vitv07769k6nhhho\",\"filename\":\"4-blog-ccr-liberty-in-detail.png\",\"category\":\"divesoft/\",\"type\":\"image\"}","__typename":"PageAnnotation"},"PageTranslation:ckqghin2o65ij0788rweeka3a.annotations.2":{"key":"title","value":"CCR Liberty Head","__typename":"PageAnnotation"},"Page:ckqmdngvz6lvr0788udhww8zn":{"id":"ckqmdngvz6lvr0788udhww8zn","type":{"type":"id","generated":false,"id":"PageType:cjv3l213x004f08366hjufttp","typename":"PageType"},"tags":[{"type":"id","generated":false,"id":"Tag:clw52z09zlclk0735mxb7v53p","typename":"Tag"}],"translations({\"where\":{\"language\":{\"id\":\"cjv3kwvoj000u083611381c6o\"}}})":[{"type":"id","generated":false,"id":"PageTranslation:ckqmdngwc6lvy07882foa497v","typename":"PageTranslation"}],"__typename":"Page"},"PageTranslation:ckqmdngwc6lvy07882foa497v":{"id":"ckqmdngwc6lvy07882foa497v","name":"divesoft.blog / Divetalks with Becky Kagan Schott: Liberty sidemount rebreather and underwater filming","createdAt":"2021-07-02T13:33:28.524Z","content":{"type":"json","json":{"content":[{"name":"Header","data":{"products":[{"title":"Accessories","description":"Backplates, Consumables. Tanks.","img":{"recommendedSizes":{"width":"235","height":"235"}},"url":""},{"title":"Accessories sets","description":"Protection, maintenance, cleaning.","img":{"recommendedSizes":{"width":"235","height":"235"}},"url":""},{"title":"Spare parts","description":"Spare parts and components.","img":{"recommendedSizes":{"width":"235","height":"235"}},"url":""}
2,{"title":"Spare parts kits","description":"Completly Liberty spare parts kits.","img":{"recommendedSizes":{"width":"235","height":"235"}},"url":""}]},"id":"#0","type":"component","lock":false,"position":0},{"name":"BlogArticle","data":{"title":"Divetalks with Becky Kagan Schott: Liberty sidemount rebreather and underwater filming","perex":"In our #DIVETALKS series, we host [Becky Kagan Schott](https://www.divesoft.com/en/ambassadors/beckykaganschott), a 5-time Emmy award-winning [underwater cameraman and photographer](https://liquidproductions.com/) whose work appears on major networks including National Geographic, Discovery Channel and Red Bull. ","content":"She specializes in capturing images in **extreme underwater environments including caves, under ice and deep shipwrecks**, all over the world from the Arctic to the Antarctic and many exciting locations in between. Becky has been actively diving for 26 years and technical diving for 22. She has been an instructor for 2 decades and is currently an active TDI Mixed Gas CCR Instructor.\n\nBecky explains how diving with the Liberty [sidemount rebreather](https://www.divesoft.com/en/products/ccr-liberty/ccr-liberty-sidemount) has improved her movement and gives her the freedom to **allow her to stay longer in the water**, a crucial element for her underwater photography. What she thinks about **traveling with the Liberty** and the overall future of the rebreather. \n\nShe believes that rebreathers, especially in technical diving, have increased in popularity by delivering** long bottom times, closer encounters with marine life, and more robust technology** involved in the Liberty that is attracting new younger generations. Finally, Becky gives us some useful tips on those who wants to begin with underwater filming. \n\nTo find out more, watch the video now. ð»","showTags":false,"showDate":true,"image":{"mimetype":"image/png","size":1288702,"hash":"93d8e7f08e2d8d9a7d6a13088bfc2972ab36876b","id":"ckqme8smvy7ti0776e4awvt0i","filename":"5-becky-divetalks.png","category":"divesoft/","type":"image"}},"id":"#2","type":"component","lock":false,"position":1},{"name":"GalleryAndVideo","data":{"title":"Divesoft | DIVETALKS #3 | Becky Kagan Schott","video":{"type":"embeddedVideo","url":"https://www.youtube.com/embed/eBamA5k0SoI"},"images":[{"image":{"recommendedSizes":{"width":"1600","height":"900"}},"id":"1"},{"image":{"recommendedSizes":{"width":"1600","height":"900"}},"id":"2"},{"image":{"recommendedSizes":{"width":"1600","height":"900"}},"id":"3"},{"image":{"recommendedSizes":{"width":"1600","height":"900"}},"id":"4"}]},"id":"#3","type":"component","lock":false,"position":2},{"name":"ProductShowcase","data":{"componentTemplateId":"cm9h4wr6ugjv10803yqs3tp71"},"id":"#4","type":"component","lock":false,"position":3},{"name":"Footer","data":{"copyrights":"Copyright © 2019 Divesoft LLC All rights reserved.","facebookUrl":{"urlNewWindow":true,"url":"https://www.facebook.com/divesoft/"},"youtubeUrl":{"url":"https://www.youtube.com/channel/UCHI2-kHmfoUlAdhQXPKl8lA/featured","urlNewWindow":true},"instagramUrl":{"url":"https://www.instagram.com/divesoft/","urlNewWindow":true},"contacts":"**Divesoft s.r.o.** \nHálkova 2495 \n413 01 Roudnice nad Labem \nCzech Republic \nTel.: +420 416 857 057 \nE-mail: [email protected]"},"id":"#1","type":"component","lock":false,"position":4}],"id":"root","idBuffer":"#5","lastCommit":"5bd21d72-5549-430c-914e-2970e711ee55"}},"annotations":[{"type":"id","generated":true,"id":"PageTranslation:ckqmdngwc6lvy07882foa497v.annotations.0","typename":"PageAnnotation"},{"type":"id","generated":true,"id":"PageTranslation:ckqmdngwc6lvy07882foa497v.annotations.1","typename":"PageAnnotation"},{"type":"id","generated":true,"id":"PageTranslation:ckqmdngwc6lvy07882foa497v.annotations.2","typename":"PageAnnotation"}],"language":{"type":"id","generated":false,"id":"Language:cjv3kwvoj000u083611381c6o","typename":"Language"},"__typename":"PageTranslation"},"PageTranslation:ckqmdngwc6lvy07882foa497v.annotations.0":{"key":"title","value":"Divetalks with Becky Kagan Schott: Liberty sidemount rebreather and underwater filming","__typename":"PageAnnotation"},"PageTranslation:ckqmdngwc6lvy07882foa497v.annotations.1":{"key":"image","value":"{\"mimetype\":\"image/png\",\"size\":1288702,\"hash\":\"93d8e7f08e2d8d9a7d6a13088bfc2972ab36876b\",\"
2id\":\"ckqme8smvy7ti0776e4awvt0i\",\"filename\":\"5-becky-divetalks.png\",\"category\":\"divesoft/\",\"type\":\"image\"}","__typename":"PageAnnotation"},"PageTranslation:ckqmdngwc6lvy07882foa497v.annotations.2":{"key":"perex","value":"In our #DIVETALKS series, we host Becky Kagan Schott, a 5-time Emmy award-winning underwater cameraman and photographer whose work appears on major networks including National Geographic, Discovery Channel and Red Bull.","__typename":"PageAnnotation"},"Page:ckr3cdk4m7zf40788sjeh3in4":{"id":"ckr3cdk4m7zf40788sjeh3in4","type":{"type":"id","generated":false,"id":"PageType:cjv3l213x004f08366hjufttp","typename":"PageType"},"tags":[{"type":"id","generated":false,"id":"Tag:clw52z09zlclk0735mxb7v53p","typename":"Tag"}],"translations({\"where\":{\"language\":{\"id\":\"cjv3kwvoj000u083611381c6o\"}}})":[{"type":"id","generated":false,"id":"PageTranslation:ckr3cdk527zfb07884i587avz","typename":"PageTranslation"}],"__typename":"Page"},"PageTranslation:ckr3cdk527zfb07884i587avz":{"id":"ckr3cdk527zfb07884i587avz","name":"divesoft.blog / Divetalks with Jill Heinerth: Rebreathers and diving safety culture","createdAt":"2021-07-14T10:29:51.541Z","content":{"type":"json","json":{"content":[{"name":"Header","data":{"products":[{"title":"Accessories","description":"Backplates, Consumables. Tanks.","img":{"recommendedSizes":{"width":"235","height":"235"}},"url":""},{"title":"Accessories sets","description":"Protection, maintenance, cleaning.","img":{"recommendedSizes":{"width":"235","height":"235"}},"url":""},{"title":"Spare parts","description":"Spare parts and components.","img":{"recommendedSizes":{"width":"235","height":"235"}},"url":""},{"title":"Spare parts kits","description":"Completly Liberty spare parts kits.","img":{"recommendedSizes":{"width":"235","height":"235"}},"url":""}]},"id":"#0","type":"component","lock":false,"position":0},{"name":"BlogArticle","data":{"title":"Divetalks with Jill Heinerth: Rebreathers and diving safety culture","perex":"In this video of Divesoft DIVETALKS Live series, Joe hosts [Jill Heinerth](https://www.divesoft.com/en/ambassadors/jillheinerth), an underwater explorer, writer, photographer, speaker, and filmmaker. A **pioneer of technical rebreather diving**, leading expeditions into icebergs in Antarctica, volcanic lava tubes and submerged caves around the world. Jill is the first Explorer-in-Residence of the Royal Canadian Geographical Society. Her book, [INTO THE PLANET](https://www.intotheplanet.com/), has been lauded by the Wall Street Journal, Oprah Magazine, and the New York Times. Jill is a Fellow of the International Scuba Diving Hall of Fame, Underwater Academy of Arts and Sciences, Women Divers Hall of Fame, National Speleological Society, and the Explorers Club that awarded her with the William Beebe Award.","content":"Jill talks about her **ground-breaking experience with the US Deep caving Team in the '90s** using the revolutionary Cis Lunar Rebreathers and the several safety challenges they encountered. Recalling her involvement in the early crash test training of CO2 and hypoxia response and gives some thoughts on the use of [Bail Out Valves](https://www.divesoft.com/en/products/bovdsvadv), such as addition plumbing, open-circuit regulator on the BOVs, sanity breaths and more. Jill also reflects on how [rebreather diving](https://www.divesoft.com/en/products/ccr-liberty/philosophy) has grown and why she thinks the **technical diving safety culture and \"checklist\"** nowadays is less acknowledged between divers and the importance of the effective approach to reducing injuries in diving.\n\nIn the second half of the interview, Jill answers some questions of the listeners about **workup dives, randomised situation generators, troubleshooting common underwaters problems for divers**. She also speaks about her recent trip with [The Dirty Dozen Expeditions](https://thedirtydozenexpeditions.com/) and other project's experiences, diving safety culture, loop in the mouth, danger zones, checklist, and internet, finishing off with a piece of advice from Jill on diving with rebreather and camera in the hands. \n\nTo find out more, watch the video now. ð»\n","showTags":false,"showDate":false,"image":{"mimetype":"image/png","size":1496657,"hash":"8449350a2486bda6dc59d62768193ac5e6c89497","id":"ckr3cwl6n52eq0776q5w6j5p5","filename":"6-jill-divetalks.png","category":"divesoft/","type":"image"}},"id":"#2","type":"component","lock":false,"position":1},{"name":"GalleryAndVideo","data":{"title":"Divesoft | DIVETALKS Live #1 | Interview with Jill Heinerth","video":{"type":"embeddedVideo","url":"https://www.youtube.com/embed/ZdSoYPvDDfs"},"images":[{"image":{"recommendedSizes":{"width":"1600","height":"900"}},"id":"1"},{"image":{"recommendedSizes":{"width":"1600","height":"900"}},"id":"2"},{"image":{"recommendedSizes":{"width":"1600","height":"900"}},"id":"3"},{"image":{"recommendedSizes":{"width":"1600","height":"900"}},"id":"4"}]},"id":"#3","type":"component","lock":false,"position":2},{"name":"ProductShowcase","data":{"componentTemplateId":"cm9h4wr6ugjv10803yq
2s3tp71"},"id":"#4","type":"component","lock":false,"position":3},{"name":"Footer","data":{"copyrights":"Copyright © 2019 Divesoft LLC All rights reserved.","facebookUrl":{"urlNewWindow":true,"url":"https://www.facebook.com/divesoft/"},"youtubeUrl":{"url":"https://www.youtube.com/channel/UCHI2-kHmfoUlAdhQXPKl8lA/featured","urlNewWindow":true},"instagramUrl":{"url":"https://www.instagram.com/divesoft/","urlNewWindow":true},"contacts":"**Divesoft s.r.o.** \nHálkova 2495 \n413 01 Roudnice nad Labem \nCzech Republic \nTel.: +420 416 857 057 \nE-mail: [email protected]"},"id":"#1","type":"component","lock":false,"position":4}],"id":"root","idBuffer":"#5","lastCommit":"5bdca549-569f-418f-b930-691ac8baa9e6"}},"annotations":[{"type":"id","generated":true,"id":"PageTranslation:ckr3cdk527zfb07884i587avz.annotations.0","typename":"PageAnnotation"},{"type":"id","generated":true,"id":"PageTranslation:ckr3cdk527zfb07884i587avz.annotations.1","typename":"PageAnnotation"},{"type":"id","generated":true,"id":"PageTranslation:ckr3cdk527zfb07884i587avz.annotations.2","typename":"PageAnnotation"}],"language":{"type":"id","generated":false,"id":"Language:cjv3kwvoj000u083611381c6o","typename":"Language"},"__typename":"PageTranslation"},"PageTranslation:ckr3cdk527zfb07884i587avz.annotations.0":{"key":"title","value":"Divetalks with Jill Heinerth: Rebreathers and diving safety culture","__typename":"PageAnnotation"},"PageTranslation:ckr3cdk527zfb07884i587avz.annotations.1":{"key":"perex","value":"In this video of Divesoft DIVETALKS Live series, Joe hosts Jill Heinerth, an underwater explorer, writer, photographer, speaker, and filmmaker. A pioneer of technical rebreather diving, leading expeditions into icebergs in Antarctica, volcanic lava tubes and submerged caves around the world. Jill is the first Explorer-in-Residence of the Royal Canadian Geographical Society. Her book, INTO THE PLANET, has been lauded by the Wall Street Journal, Oprah Magazine, and the New York Times. Jill is a Fellow of the International Scuba Diving Hall of Fame, Underwater Academy of Arts and Sciences, Women Divers Hall of Fame, National Speleological Society, and the Explorers Club that awarded her with the William Beebe Award.","__typename":"PageAnnotation"},"PageTranslation:ckr3cdk527zfb07884i587avz.annotations.2":{"key":"image","value":"{\"mimetype\":\"image/png\",\"size\":1496657,\"hash\":\"8449350a2486bda6dc59d62768193ac5e6c89497\",\"id\":\"ckr3cwl6n52eq0776q5w6j5p5\",\"filename\":\"6-jill-divetalks.png\",\"category\":\"divesoft/\",\"type\":\"image\"}","__typename":"PageAnnotation"},"Page:ckrabjz8s8hyc0788zx5sv8rs":{"id":"ckrabjz8s8hyc0788zx5sv8rs","type":{"type":"id","generated":false,"id":"PageType:cjv3l213x004f08366hjufttp","typename":"PageType"},"tags":[{"type":"id","generated":false,"id":"Tag:clw52y9cclcle073501kwtw2u","typename":"Tag"}],"translations({\"where\":{\"language\":{\"id\":\"cjv3kwvoj000u083611381c6o\"}}})":[{"type":"id","generated":false,"id":"PageTranslation:ckrabjz968hyj0788umwon25u","typename":"PageTranslation"}],"__typename":"Page"},"PageTranslation:ckrabjz968hyj0788umwon25u":{"id":"ckrabjz968hyj0788umwon25u","name":"divesoft.blog / CCR mouthpieces BOV/DSV/MAV and offboarding gas","createdAt":"2021-07-19T07:41:14.681Z","content":{"type":"json","json":{"content":[{"name":"Header","data":{"products":[{"title":"Accessories","description":"Backplates, Consumables. Tanks.","img":{"recommendedSizes":{"width":"235","height":"235"}},"url":""},{"title":"Accessories sets","description":"Protection, maintenance, cleaning.","img":{"recommendedSizes":{"width":"235","height":"235"}},"url":""},{"title":"Spare parts","description":"Spare parts and components.","img":{"recommendedSizes":{"width":"235","height":"235"}},"url":""},{"title":"Spare parts kits","description":"Completly Liberty spare parts kits.","img":{"recommendedSizes":{"width":"235","height":"235"}},"url":""}]},"id":"#0","type":"component","lock":false,"position":0},{"name":"BlogArticle","data":{"title":"CCR mouthpieces BOV/DSV/MAV and offboarding gas","perex":"Hello, in this episode of the CCR Liberty in Detail series, Jakub Slama takes a closer look at Dive Surface Valves â DSVs; Bail Out Valves â BOVs; Automatic Diluent Valve â ADV; Manual Addition Valves â MAVs and Offboarding gas options. ","content":"**[The Liberty CCR](https://www.divesoft.com/en/products/ccr-liberty/philosophy) offers both [DSV and BOV options](https://www.divesoft.com/en/products/bovdsvadv)!** For example, the [sidemount configuration](https://www.divesoft.com/en/products/ccr-liberty/ccr-liberty-sidemount) comes with DSV, whereas the [backmount configuration](https://www.divesoft.com/en/products/ccr-liberty/ccr-liberty-backmount) can be customised with either the DSV or the BOV. Furthermore, the Dräger full face mask comes with the BOV.\n\nJakub shows a **detailed build of the DSV and the BOV mouthpieces, mushroom valves and ADV**, and where they are located on each type of CCR Liberty. He also gives an explanation of the MAVs, the Head-Up Display attachment (HUD) and the \"nipples\" adapter. Lastly, we take a look together at the **Offboarding options for additional gas** with the different c
2onfiguration units.\n\nLearns more about [each component of the Liberty Platform](https://www.divesoft.com/en/blog/ccr-liberty-rebreather-platform-and-the-philosophy-behind-it/ccr-liberty-avds-options), watch now. ð»\n","showTags":false,"showDate":false,"image":{"mimetype":"image/png","size":991466,"hash":"0c6bb1cda85f20288ca71af71742004886ed957c","id":"ckrablabv7gdv0776v1n0h47f","filename":"7-blog-ccr-liberty-in-detail.png","category":"divesoft/","type":"image","alt":"CCR mouthpieces BOV/DSV/MAV and offboarding gas"}},"id":"#2","type":"component","lock":false,"position":1},{"name":"GalleryAndVideo","data":{"title":"CCR Liberty in Detail #4 | CCR mouthpieces BOV/DSV/MAV","video":{"type":"embeddedVideo","url":"https://www.youtube.com/embed/ASaexhwwl58"},"images":[{"image":{"recommendedSizes":{"width":"1600","height":"900"}},"id":"1"},{"image":{"recommendedSizes":{"width":"1600","height":"900"}},"id":"2"},{"image":{"recommendedSizes":{"width":"1600","height":"900"}},"id":"3"},{"image":{"recommendedSizes":{"width":"1600","height":"900"}},"id":"4"}],"activeTab":"1"},"id":"#3","type":"component","lock":false,"position":2},{"name":"ProductShowcase","data":{"componentTemplateId":"cm9h4wr6ugjv10803yqs3tp71"},"id":"#4","type":"component","lock":false,"position":3},{"name":"Footer","data":{"copyrights":"Copyright © 2019 Divesoft LLC All rights reserved.","facebookUrl":{"urlNewWindow":true,"url":"https://www.facebook.com/divesoft/"},"youtubeUrl":{"url":"https://www.youtube.com/channel/UCHI2-kHmfoUlAdhQXPKl8lA/featured","urlNewWindow":true},"instagramUrl":{"url":"https://www.instagram.com/divesoft/","urlNewWindow":true},"contacts":"**Divesoft s.r.o.** \nHálkova 2495 \n413 01 Roudnice nad Labem \nCzech Republic \nTel.: +420 416 857 057 \nE-mail: [email protected]"},"id":"#1","type":"component","lock":false,"position":4}],"id":"root","idBuffer":"#5","lastCommit":"d3a3c3c3-a9bc-4a8f-927c-56010826f0eb"}},"annotations":[{"type":"id","generated":true,"id":"PageTranslation:ckrabjz968hyj0788umwon25u.annotations.0","typename":"PageAnnotation"},{"type":"id","generated":true,"id":"PageTranslation:ckrabjz968hyj0788umwon25u.annotations.1","typename":"PageAnnotation"},{"type":"id","generated":true,"id":"PageTranslation:ckrabjz968hyj0788umwon25u.annotations.2","typename":"PageAnnotation"}],"language":{"type":"id","generated":false,"id":"Language:cjv3kwvoj000u083611381c6o","typename":"Language"},"__typename":"PageTranslation"},"PageTranslation:ckrabjz968hyj0788umwon25u.annotations.0":{"key":"image","value":"{\"mimetype\":\"image/png\",\"size\":991466,\"hash\":\"0c6bb1cda85f20288ca71af71742004886ed957c\",\"id\":\"ckrablabv7gdv0776v1n0h47f\",\"filename\":\"7-blog-ccr-liberty-in-detail.png\",\"category\":\"divesoft/\",\"type\":\"image\"}","__typename":"PageAnnotation"},"PageTranslation:ckrabjz968hyj0788umwon25u.annotations.1":{"key":"title","value":"CCR mouthpieces BOV/DSV/MAV and offboarding gas","__typename":"PageAnnotation"},"PageTranslation:ckrabjz968hyj0788umwon25u.annotations.2":{"key":"perex","value":"Hello, in this episode of the CCR Liberty in Detail series, Jakub Slama takes a closer look at Dive Surface Valves â DSVs; Bail Out Valves â BOVs; Automatic Diluent Valve â ADV; Manual Addition Valves â MAVs and Offboarding gas options. ","__typename":"PageAnnotation"},"Page:ckrnocx4m040x088842si0pr4":{"id":"ckrnocx4m040x088842si0pr4","type":{"type":"id","generated":false,"id":"PageType:cjv3l213x004f08366hjufttp","typename":"PageType"},"tags":[{"type":"id","generated":false,"id":"Tag:ckqjbycw06d410788g6gq4ku4","typename":"Tag"},{"type":"id","generated":false,"id":"Tag:clw52y9cclcle073501kwtw2u","typename":"Tag"}],"translations({\"where\":{\"language\":{\"id\":\"cjv3kwvoj000u083611381c6o\"}}})":[{"type":"id","generated":false,"id":"PageTranslation:ckrnocx6m041408881jotg7sk","typename":"PageTranslation"}],"__typename":"Page"},"PageTranslation:ckrnocx6m041408881jotg7sk":{"id":"ckrnocx6m041408881jotg7sk","name":"Divesoft.blog / CCR Liberty AVDs options","createdAt":"2021-07-28T16:00:40.701Z","content":{"type":"json","json":{"content":[{"name":"Header","data":{"products":[{"title":"Accessories","description":"Backplates, Consumables. Tanks.","img":{"recommendedSizes":{"width":"235","height":"235"}},"url":""},{"title":"Accessories sets","description":"Protection, maintenance, cleaning.","img":{"recommendedSizes":{"width":"235","height":"235"}},"url":""},{"title":"Spare parts","description":"Spare parts and components.","img":{"recommendedSizes":{"width":"235","height":"235"}},"url":""}
2,{"title":"Spare parts kits","description":"Completly Liberty spare parts kits.","img":{"recommendedSizes":{"width":"235","height":"235"}},"url":""}]},"id":"#0","type":"component","lock":false,"position":0},{"name":"BlogArticle","data":{"title":"CCR Liberty ADV options","perex":"In the 5th episode of the CCR Liberty in Detail series. Our host, Jakub Slama, introduces the different types of **Automatic Diluent Valves** â ADV and what options to choose from with the Liberty configuration that can be best suited for the diverâs needs.","content":"To open things up, Jakub first **defines the general function of the [ADV](https://www.divesoft.com/en/products/bovdsvadv) during descent**. Secondly, he presents different types and functions of ADVs manufactured by Divesoft. He begins with the Mechanical ADV, followed by the Membrane ADV, a popular T-piece ADV, and the Direct Membrane ADV. \n\nAll these types of ADVs are simplified second stage regulators that can also be manually operated. Finally, he also talks about the **[ADV - BOV option](https://eshop.divesoft.com/de/products/bov-adv/)**, its different modes, and the adjustment of the tension of the threshold of the ADV. \n\nLearn more now! ð»","showTags":false,"showDate":false,"image":{"mimetype":"image/png","size":773617,"hash":"4ce969338148403c3950895fdfe1fe14746b5878","id":"ckrnodrhvc9ad0776xcmjpxze","filename":"8-blog-ccr-liberty-in-detail.png","category":"divesoft/","type":"image"}},"id":"#2","type":"component","lock":false,"position":1},{"name":"GalleryAndVideo","data":{"title":"CCR Liberty in Detail #5 | Rebreather ADVs","video":{"type":"embeddedVideo","url":"https://www.youtube.com/embed/WbaHtPCrjKc"},"images":[{"image":{"recommendedSizes":{"width":"1600","height":"900"}},"id":"1"},{"image":{"recommendedSizes":{"width":"1600","height":"900"}},"id":"2"},{"image":{"recommendedSizes":{"width":"1600","height":"900"}},"id":"3"},{"image":{"recommendedSizes":{"width":"1600","height":"900"}},"id":"4"}]},"id":"#3","type":"component","lock":false,"position":2},{"name":"ProductShowcase","data":{"componentTemplateId":"cm9h4wr6ugjv10803yqs3tp71"},"id":"#9","type":"component","lock":false,"position":3},{"name":"Footer","data":{"copyrights":"Copyright © 2019 Divesoft LLC All rights reserved.","facebookUrl":{"urlNewWindow":true,"url":"https://www.facebook.com/divesoft/"},"youtubeUrl":{"url":"https://www.youtube.com/channel/UCHI2-kHmfoUlAdhQXPKl8lA/featured","urlNewWindow":true},"instagramUrl":{"url":"https://www.instagram.com/divesoft/","urlNewWindow":true},"contacts":"**Divesoft s.r.o.** \nHálkova 2495 \n413 01 Roudnice nad Labem \nCzech Republic \nTel.: +420 416 857 057 \nE-mail: [email protected]"},"id":"#1","type":"component","lock":false,"position":4}],"id":"root","idBuffer":"#10","lastCommit":"f38267d4-0372-4a11-a525-482a911a21d0"}},"annotations":[{"type":"id","generated":true,"id":"PageTranslation:ckrnocx6m041408881jotg7sk.annotations.0","typename":"PageAnnotation"},{"type":"id","generated":true,"id":"PageTranslation:ckrnocx6m041408881jotg7sk.annotations.1","typename":"PageAnnotation"},{"type":"id","generated":true,"id":"PageTranslation:ckrnocx6m041408881jotg7sk.annotations.2","typename":"PageAnnotation"}],"language":{"type":"id","generated":false,"id":"Language:cjv3kwvoj000u083611381c6o","typename":"Language"},"__typename":"PageTranslation"},"PageTranslation:ckrnocx6m041408881jotg7sk.annotations.0":{"key":"perex","value":"In the 5th episode of the CCR Liberty in Detail series. Our host, Jakub Slama, introduces the different types of Automatic Diluent Valves â ADV and what options to choose from with the Liberty configuration that can be best suited for the diverâs needs.","__typename":"PageAnnotation"},"PageTranslation:ckrnocx6m041408881jotg7sk.annotations.1":{"key":"title","value":"CCR Liberty ADV options","__typename":"PageAnnotation"},"PageTranslation:ckrnocx6m041408881jotg7sk.annotations.2":{"key":"image","value":"{\"mimetype\":\"image/png\",\"size\":773617,\"hash\":\"4ce969338148403c3950895fdfe1fe14746b5878\",\"id\":\"ckrnodrhvc9ad0776xcmjpxze\",\"filename\":\"8-blog-ccr-liberty-in-detail.png\",\"category\":\"divesoft/\",\"type\":\"image\"}","__typename":"PageAnnotation"},"Page:cks049fd700dp09880q1l63ap":{"id":"cks049fd700dp09880q1l63ap","type":{"type":"id","generated":false,"id":"PageType:cjv3l213x004f08366hjufttp","typename":"PageType"},"tags":[{"type":"id","generated":false,"id":"Tag:clw52zeqhlclq0735wrys6js8","typename":"Tag"},{"type":"id","generated":false,"id":"Tag:clyyc8ovoy9ai0735du6cmw7i","typename":"Tag"}],"translations({\"where\":{\"language\":{\"id\":\"cjv3kwvoj000u083611381c6o\"}}})":[{"type":"id","generated":false,"id":"PageTranslation:cks049fh000dw0988c8xk07ej","typename":"PageTranslation"}],"__typename":"Page"},"Tag:clw52zeqhlclq0735wrys6js8":{"id":"clw52zeqhlclq0735wrys6js8","name":"Blog: Instructors and courses","__typename":"Tag"},"Tag:clyyc8ovoy9ai0735du6cmw7i":{"id":"clyyc8ovoy9ai0735du6cmw7i","name":"eshop/computer","__typename":"Tag"},"PageTranslation:cks049fh000dw0988c8xk07ej":{"id":"cks049fh000dw0988c8xk07ej","name":"divesoft.blog / Divetalks with Sameh Sokar: Rebreather diving and ghost fishing projects in Egypt","createdAt":"2021-08-06T08:59:05.745Z","content":{"type":"json","json":{"content":[{"name":"Header","data":{"products":[{"title":"Accessories","description":"Backplates, Consumables. Tanks.","img":{"recommendedSizes":{"width":"235","height":"235"}},"url":""},{"title":"Accessories sets","description":"Protection, maintenance, cleaning.","img":{"recommendedSizes":{"width":"235","height":"235"}},"url":""},{"title":"Spare parts","description":"Spare parts and components.","img":{"recommendedSizes":{"width":"235","height":"235"}},"url":""}
2,{"title":"Spare parts kits","description":"Completly Liberty spare parts kits.","img":{"recommendedSizes":{"width":"235","height":"235"}},"url":""}]},"id":"#0","type":"component","lock":false,"position":0},{"name":"BlogArticle","data":{"title":"Divetalks with Sameh Sokar: Rebreather diving and ghost fishing projects in Egypt","perex":"Welcome to another episode of DIVETALKS, Jakub Slama chats with Sameh Sokar. Sameh is [Scuba Seekers Diving Club](https://scubaseekers.com/) founder, Training Director and primary SST instructor. Since having made diving his full-time occupation, he has risen to the level of **GUE Instructor**, SDI/TDI Instructor Trainer & Examiner as well PADI Staff Instructor and Rebreather Instructor. He is one out of eight active Egyptians Instructor trainers around the world and two Egyptian GUE instructors.","content":"Sameh talks about the Scuba Seekers and his vision. He also believes that passion and continuous training are pivotal to give his staff a comfortable level in the water which contributes to the safety of divers, customer service and the overall environment in the club. He also explains **how his personal experience with [rebreathers](https://www.divesoft.com/en/products/ccr-liberty/philosophy) makes this place unique for rebreather divers.** He believes the increased bottom time of the closed-open circuit rebreathers opens doors for underwater exploration, marine conservation, ocean clean-ups, ghost fishing projects not only in Dahab but all around the world.\n\nIn the end, Sameh shares his experience with the CCR Liberty system, wherewith he enjoys the flexibility, redundancy, functionality and lightweight of the system. To finish it off, he gives an opinion on the rebreather diving future. \n\nLet's watch it now! ð»\n","showTags":false,"showDate":false,"image":{"mimetype":"image/png","size":1176945,"hash":"3f6cc4c9573d4038edf25481e59aedd5542d682f","id":"cks04ailxg7590776n3rsye3w","filename":"9-sameh-divetalks.png","category":"divesoft/","type":"image","alt":"Divetalks with Sameh Sokar: Rebreather diving and ghost fishing projects in Egypt"}},"id":"#2","type":"component","lock":false,"position":1},{"name":"GalleryAndVideo","data":{"title":"Divesoft | DIVETALKS #4 | Sameh Sokar","video":{"type":"embeddedVideo","url":"https://www.youtube.com/embed/vW7soDWJtuM"},"images":[{"image":{"recommendedSizes":{"width":"1600","height":"900"}},"id":"1"},{"image":{"recommendedSizes":{"width":"1600","height":"900"}},"id":"2"},{"image":{"recommendedSizes":{"width":"1600","height":"900"}},"id":"3"},{"image":{"recommendedSizes":{"width":"1600","height":"900"}},"id":"4"}]},"id":"#3","type":"component","lock":false,"position":2},{"name":"ProductShowcase","data":{"componentTemplateId":"cm9h4wr6ugjv10803yqs3tp71"},"id":"#4","type":"component","lock":false,"position":3},{"name":"Footer","data":{"copyrights":"Copyright © 2019 Divesoft LLC All rights reserved.","facebookUrl":{"urlNewWindow":true,"url":"https://www.facebook.com/divesoft/"},"youtubeUrl":{"url":"https://www.youtube.com/channel/UCHI2-kHmfoUlAdhQXPKl8lA/featured","urlNewWindow":true},"instagramUrl":{"url":"https://www.instagram.com/divesoft/","urlNewWindow":true},"contacts":"**Divesoft s.r.o.** \nHálkova 2495 \n413 01 Roudnice nad Labem \nCzech Republic \nTel.: +420 416 857 057 \nE-mail: [email protected]"},"id":"#1","type":"component","lock":false,"position":4}],"id":"root","idBuffer":"#5","lastCommit":"55326492-dbfb-4eb5-a333-eee8e82cabee"}},"annotations":[{"type":"id","generated":true,"id":"PageTranslation:cks049fh000dw0988c8xk07ej.annotations.0","typename":"PageAnnotation"},{"type":"id","generated":true,"id":"PageTranslation:cks049fh000dw0988c8xk07ej.annotations.1","typename":"PageAnnotation"},{"type":"id","generated":true,"id":"PageTranslation:cks049fh000dw0988c8xk07ej.annotations.2","typename":"PageAnnotation"}],"language":{"type":"id","generated":false,"id":"Language:cjv3kwvoj000u083611381c6o","typename":"Language"},"__typename":"PageTranslation"},"PageTranslation:cks049fh000dw0988c8xk07ej.annotations.0":{"key":"title","value":"Divetalks with Sameh Sokar: Rebreather diving and ghost fishing projects in Egypt","__typename":"PageAnnotation"},"PageTranslation:cks049fh000dw0988c8xk07ej.annotations.1":{"key":"image","value":"{\"mimetype\":\"image/png\",\"size\":1176945,\"hash\":\"3f6cc4c9573d4038edf25481e59aedd5542d682f\",\"id\":\"cks04ailxg7590776n3rsye3w\",\"filename\":\"9-sameh-divetalks.png\",\"category\":\"divesoft/\",\"type\":\"image\"}","__typename":"PageAnnotation"},"PageTranslation:cks049fh000dw0988c8xk07ej.annotations.2":{"key":"perex","value":"Welcome to another episode of DIVETALKS, Jakub Slama chats with Sameh Sokar. Sameh is Scuba Seekers Diving Club founder, Training Director and primary SST instructor. Since having made diving his full-time occupation, he has risen to the level of GUE Instru
2ctor, SDI/TDI Instructor Trainer & Examiner as well PADI Staff Instructor and Rebreather Instructor. He is one out of eight active Egyptians Instructor trainers around the world and two Egyptian GUE instructors.","__typename":"PageAnnotation"},"Page:cksdekk960k0w0988x1avo3qn":{"id":"cksdekk960k0w0988x1avo3qn","type":{"type":"id","generated":false,"id":"PageType:cjv3l213x004f08366hjufttp","typename":"PageType"},"tags":[{"type":"id","generated":false,"id":"Tag:clw52z09zlclk0735mxb7v53p","typename":"Tag"}],"translations({\"where\":{\"language\":{\"id\":\"cjv3kwvoj000u083611381c6o\"}}})":[{"type":"id","generated":false,"id":"PageTranslation:cksdekk9v0k1309887lnslpji","typename":"PageTranslation"}],"__typename":"Page"},"PageTranslation:cksdekk9v0k1309887lnslpji":{"id":"cksdekk9v0k1309887lnslpji","name":"divesoft.blog / CCR Liberty Scrubbers","createdAt":"2021-08-15T16:08:41.635Z","content":{"type":"json","json":{"content":[{"name":"Header","data":{"products":[{"title":"Accessories","description":"Backplates, Consumables. Tanks.","img":{"recommendedSizes":{"width":"235","height":"235"}},"url":""},{"title":"Accessories sets","description":"Protection, maintenance, cleaning.","img":{"recommendedSizes":{"width":"235","height":"235"}},"url":""},{"title":"Spare parts","description":"Spare parts and components.","img":{"recommendedSizes":{"width":"235","height":"235"}},"url":""},{"title":"Spare parts kits","description":"Completly Liberty spare parts kits.","img":{"recommendedSizes":{"width":"235","height":"235"}},"url":""}]},"id":"#0","type":"component","lock":false,"position":0},{"name":"BlogArticle","data":{"title":"CCR Liberty Scrubbers","perex":"Hello, welcome to our 6th episode of CCR Liberty in Detail, in which Jakub presents the **all important Liberty Scrubber and its various options**. The Scrubber is a crucial component of the CCR Liberty [rebreather](https://www.divesoft.com/en/products/ccr-liberty/philosophy) removing the diver's exhaled carbon dioxide (CO2) to allow the gas to enter the system again and is located between the [head](https://www.divesoft.com/en/blog/ccr-liberty-head) and frame of the unit. ","content":"Jakub describes **the Liberty Radial type Scrubber** and demonstrates the journey of the exhaled gas to the Head for further analysis. In addition, he also explains the three main reasons for the radial type Scrubber chosen for CCR Liberty, different sizes and their durations, scrubber cover, stack time and its easy monitoring with the Liberty control unit.\n\nIn the end, Jakub shows the ease of access to the Scrubber and filling procedure using [Sofnolime 797](https://eshop.divesoft.com/de/227-sofnolime/3196) one step at a time, including safety features, packing, partially used scrubber. \n\nCheck It Out Now! ð»\n","showTags":false,"showDate":false,"image":{"mimetype":"image/png","size":681882,"hash":"196eaff6d965c49d91df0fc7e94981299dea5eab","id":"cksdels3bkpe60776ur9ezxtt","filename":"10-blog-ccr-liberty-in-detail.png","category":"divesoft/","type":"image","alt":"CCR Liberty Scrubbers"}},"id":"#2","type":"component","lock":false,"position":1},{"name":"GalleryAndVideo","data":{"title":"CCR Liberty in Detail #6 | Rebreather Scrubbers","video":{"type":"embeddedVideo","url":"https://www.youtube.com/embed/nSzYhAxHhdE"},"images":[{"image":{"recommendedSizes":{"width":"1600","height":"900"}},"id":"1"},{"image":{"recommendedSizes":{"width":"1600","height":"900"}},"id":"2"},{"image":{"recommendedSizes":{"width":"1600","height":"900"}},"id":"3"},{"image":{"recommendedSizes":{"width":"1600","height":"900"}},"id":"4"}]},"id":"#3","type":"component","lock":false,"position":2},{"name":"ProductShowcase","data":{"componentTemplateId":"cm9h4wr6ugjv10803yqs3tp71"},"id":"#4","type":"component","lock":false,"position":3},{"name":"Footer","data":{"copyrights":"Copyright © 2019 Divesoft LLC All rights reserved.","facebookUrl":{"urlNewWindow":true,"url":"https://www.facebook.com/divesoft/"},"youtubeUrl":{"url":"https://www.youtube.com/channel/UCHI2-kHmfoUlAdhQXPKl8lA/featured","urlNewWindow":true},"instagramUrl":{"url":"https://www.instagram.com/divesoft/","urlNewWindow":true},"contacts":"**Divesoft s.r.o.** \nHálkova 2495 \n413 01 Roudnice nad Labem \nCzech Republic \nTel.: +420 416 857 057 \nE-mail: [email protected]"},"id":"#1","type":"component","lock":false,"position":4}],"id":"root","idBuffer":"#5","lastCommit":"760d76db-6abe-4a9c-b43b-8121665454ba"}},"annotations":[{"type":"id","generated":true,"id":"PageTranslation:cksdekk9v0k1309887l
2nslpji.annotations.0","typename":"PageAnnotation"},{"type":"id","generated":true,"id":"PageTranslation:cksdekk9v0k1309887lnslpji.annotations.1","typename":"PageAnnotation"},{"type":"id","generated":true,"id":"PageTranslation:cksdekk9v0k1309887lnslpji.annotations.2","typename":"PageAnnotation"}],"language":{"type":"id","generated":false,"id":"Language:cjv3kwvoj000u083611381c6o","typename":"Language"},"__typename":"PageTranslation"},"PageTranslation:cksdekk9v0k1309887lnslpji.annotations.0":{"key":"title","value":"CCR Liberty Scrubbers","__typename":"PageAnnotation"},"PageTranslation:cksdekk9v0k1309887lnslpji.annotations.1":{"key":"perex","value":"Hello, welcome to our 6th episode of CCR Liberty in Detail, in which Jakub presents the all important Liberty Scrubber and its various options. The Scrubber is a crucial component of the CCR Liberty rebreather removing the diver's exhaled carbon dioxide (CO2) to allow the gas to enter the system again and is located between the head and frame of the unit. ","__typename":"PageAnnotation"}
2,"PageTranslation:cksdekk9v0k1309887lnslpji.annotations.2":{"key":"image","value":"{\"mimetype\":\"image/png\",\"size\":681882,\"hash\":\"196eaff6d965c49d91df0fc7e94981299dea5eab\",\"id\":\"cksdels3bkpe60776ur9ezxtt\",\"filename\":\"10-blog-ccr-liberty-in-detail.png\",\"category\":\"divesoft/\",\"type\":\"image\"}","__typename":"PageAnnotation"},"Page:cksnbh54w11wf0988tg9xq8iw":{"id":"cksnbh54w11wf0988tg9xq8iw","type":{"type":"id","generated":false,"id":"PageType:cjv3l213x004f08366hjufttp","typename":"PageType"},"tags":[{"type":"id","generated":false,"id":"Tag:ckqjbypz36d4d0788ls4e8rkz","typename":"Tag"},{"type":"id","generated":false,"id":"Tag:clw52vo5mlckc0735dl0is8ok","typename":"Tag"}],"translations({\"where\":{\"language\":{\"id\":\"cjv3kwvoj000u083611381c6o\"}}})":[{"type":"id","generated":false,"id":"PageTranslation:cksnbh55e11wm0988vsxsytnc","typename":"PageTranslation"}],"__typename":"Page"},"Tag:ckqjbypz36d4d0788ls4e8rkz":{"id":"ckqjbypz36d4d0788ls4e8rkz","name":"Bailout CCR","__typename":"Tag"},"Tag:clw52vo5mlckc0735dl0is8ok":{"id":"clw52vo5mlckc0735dl0is8ok","name":"Blog: Bailout Rebreather","__typename":"Tag"},"PageTranslation:cksnbh55e11wm0988vsxsytnc":{"id":"cksnbh55e11wm0988vsxsytnc","name":"Divesoft.blog / Jakub Å imánek, Steve Bogaerts and Brett Hemphill about bailout and dual rebreathers","createdAt":"2021-08-22T14:39:44.977Z","content":{"type":"json","json":{"content":[{"name":"Header","data":{"products":[{"title":"Accessories","description":"Backplates, Consumables. Tanks.","img":{"recommendedSizes":{"width":"235","height":"235"}},"url":""},{"title":"Accessories sets","description":"Protection, maintenance, cleaning.","img":{"recommendedSizes":{"width":"235","height":"235"}},"url":""},{"title":"Spare parts","description":"Spare parts and components.","img":{"recommendedSizes":{"width":"235","height":"235"}},"url":""},{"title":"Spare parts kits","description":"Completly Liberty spare parts kits.","img":{"recommendedSizes":{"width":"235","height":"235"}},"url":""}]},"id":"#0","type":"component","lock":false,"position":0},{"name":"BlogArticle","data":{"title":"Jakub Å imánek, Steve Bogaerts and Brett Hemphill about bailout and dual rebreathers","perex":"Welcome to the short Bailout CCR Series part 1! Joe Bosquez hosts Jakub Å imánek, Steve Bogaerts and Brett Hemphill talking about the Bailout or Dual Rebreathers. ","content":"Jakub has been a part of the development team at the equipment manufacturer Divesoft and is also a Factory Instructor Trainer for the [CCR Liberty](https://www.divesoft.com/en/products/ccr-liberty) diving with [sidemount](https://www.divesoft.com/en/products/ccr-liberty/ccr-liberty-sidemount) and [backmount units](https://www.divesoft.com/en/products/ccr-liberty/ccr-liberty-bmcl-fmcl). Steve is a [Go Side Mount](http://www.gosidemount.com/) instructor and explorer who had been a pioneer in sidemount diving techniques. Brett is a director of [Kast Underwater Research](https://sites.google.com/view/karstunderwater/home) and has pushed the limits in exploration utilizing rebreathers as primary and bailout systems.\n\nTo begin the conversation, Joe kicks off with defining **what Bailout or Dual CCR systems are**, how we should describe them with their application vs. environment. They continue the conversation with the secondary or \"back up\" rebreather issues, whether the rebreather should have an integrated open circuit system or not, its usage with different scenarios during the rebreather failure, also covering various types of diving environment. They also discuss the evolution of the rebreather over the years based on their own experience, the [BOV built-in mouthpiece](https://www.divesoft.com/en/products/bovdsvadv) or two separate systems, and the task loading when using the BOV system and more. \n\nBefore the end of this episode, Joe is curious about the logistical issues combining different systems, such as **manual primary vs backup electronic systems** or vice versa. \n\nTo learn more about the Bail Out CCR, click to watch it now! ð»\n\nSee also [Bailout CCR Series #3 focused on dual and bailout rebreathers training](https://www.divesoft.com/en/blog/mark-powell-edoardo-pavia-and-paul-toomer-dual-and-bailout-rebreathers-training).","showTags":false,"showDate":false,"image":{"mimetype":"image/png","size":989942,"hash":"c6a0b8cfa1f0eebf30d4d856e0b883f58b6bd03b","id":"cksnc01mmo50e0776gr7q2716","filename":"11-blog-ccr-bailout.png","category":"divesoft/","type":"image"}},"id":"#2","type":"component","lock":false,"position":1},{"name":"GalleryAndVideo","data":{"title":"Bailout CCR Series #1 | Jakub Å imánek, Steve Bogaerts and Brett Hemphill","video":{"type":"embeddedVideo","url":"https://www.youtube.com/embed/n9cvobDA7vQ"},"images":[{"image":{"recommendedSizes":{"width":"1600","height":"900"}},"id":"1"},{"image":{"recommendedSizes":{"width":"1600","height":"900"}},"id":"2"},{"image":{"recommendedSizes":{"width":"1600","height":"900"}},"id":"3"},{"image":{"recommendedSizes":{"width":"1600","height":"900"}},"id":"4"}]},"id":"#3","type":"component","lock":false,"position":2},{"name":"ProductShowcase","data":{"componentTemplateId":"cm9h4wr6ugjv10803yq
2s3tp71"},"id":"#4","type":"component","lock":false,"position":3},{"name":"Footer","data":{"copyrights":"Copyright © 2019 Divesoft LLC All rights reserved.","facebookUrl":{"urlNewWindow":true,"url":"https://www.facebook.com/divesoft/"},"youtubeUrl":{"url":"https://www.youtube.com/channel/UCHI2-kHmfoUlAdhQXPKl8lA/featured","urlNewWindow":true},"instagramUrl":{"url":"https://www.instagram.com/divesoft/","urlNewWindow":true},"contacts":"**Divesoft s.r.o.** \nHálkova 2495 \n413 01 Roudnice nad Labem \nCzech Republic \nTel.: +420 416 857 057 \nE-mail: [email protected]"},"id":"#1","type":"component","lock":false,"position":4}],"id":"root","idBuffer":"#5","lastCommit":"19e4db5d-5efd-44ce-b1b5-3b33c8be607a"}},"annotations":[{"type":"id","generated":true,"id":"PageTranslation:cksnbh55e11wm0988vsxsytnc.annotations.0","typename":"PageAnnotation"},{"type":"id","generated":true,"id":"PageTranslation:cksnbh55e11wm0988vsxsytnc.annotations.1","typename":"PageAnnotation"},{"type":"id","generated":true,"id":"PageTranslation:cksnbh55e11wm0988vsxsytnc.annotations.2","typename":"PageAnnotation"}],"language":{"type":"id","generated":false,"id":"Language:cjv3kwvoj000u083611381c6o","typename":"Language"},"__typename":"PageTranslation"},"PageTranslation:cksnbh55e11wm0988vsxsytnc.annotations.0":{"key":"perex","value":"Welcome to the short Bailout CCR Series part 1! Joe Bosquez hosts Jakub Šimánek, Steve Bogaerts and Brett Hemphill talking about the Bailout or Dual Rebreathers. ","__typename":"PageAnnotation"},"PageTranslation:cksnbh55e11wm0988vsxsytnc.annotations.1":{"key":"title","value":"Jakub Šimánek, Steve Bogaerts and Brett Hemphill about bailout and dual rebreathers","__typename":"PageAnnotation"},"PageTranslation:cksnbh55e11wm0988vsxsytnc.annotations.2":{"key":"image","value":"{\"mimetype\":\"image/png\",\"size\":989942,\"hash\":\"c6a0b8cfa1f0eebf30d4d856e0b883f58b6bd03b\",\"id\":\"cksnc01mmo50e0776gr7q2716\",\"filename\":\"11-blog-ccr-bailout.png\",\"category\":\"divesoft/\",\"type\":\"image\"}","__typename":"PageAnnotation"},"Page:cksu7n7to1dzb09889okz8f9o":{"id":"cksu7n7to1dzb09889okz8f9o","type":{"type":"id","generated":false,"id":"PageType:cjv3l213x004f08366hjufttp","typename":"PageType"},"tags":[{"type":"id","generated":false,"id":"Tag:clw52z09zlclk0735mxb7v53p","typename":"Tag"}],"translations({\"where\":{\"language\":{\"id\":\"cjv3kwvoj000u083611381c6o\"}}})":[{"type":"id","generated":false,"id":"PageTranslation:cksu7n7u11dzi0988xa0c6mft","typename":"PageTranslation"}],"__typename":"Page"},"PageTranslation:cksu7n7u11dzi0988xa0c6mft":{"id":"cksu7n7u11dzi0988xa0c6mft","name":"Divesoft.blog / How to travel with a rebreather","createdAt":"2021-08-27T10:26:53.160Z","content":{"type":"json","json":{"content":[{"name":"Header","data":{"products":[{"title":"Accessories","description":"Backplates, Consumables. Tanks.","img":{"recommendedSizes":{"width":"235","height":"235"}},"url":""},{"title":"Accessories sets","description":"Protection, maintenance, cleaning.","img":{"recommendedSizes":{"width":"235","height":"235"}},"url":""},{"title":"Spare parts","description":"Spare parts and components.","img":{"recommendedSizes":{"width":"235","height":"235"}},"url":""},{"title":"Spare parts kits","description":"Completly Liberty spare parts kits.","img":{"recommendedSizes":{"width":"235","height":"235"}},"url":""}]},"id":"#0","type":"component","lock":false,"position":0},{"name":"BlogArticle","data":{"title":"How to travel with a rebreather","perex":"In this episode, Jakub shares many practical tips and tricks on travelling with a rebreather and diving equipment. ","content":"To open things up, he first looks at **how to transport the CCR by car**, including [rebreather](https://www.divesoft.com/en/products/ccr-liberty/philosophy) before transport; transport security; a [solid hard transport case](https://eshop.divesoft.com/us/transport-cases/transport-case-backmount/3495) option; gas leak from cylinders and how to avoid it; pre-dive checks; dry scrubber; heat and more. Afterwards, Jakub talks about **travelling by small diving boats** dealing with pre-dive preparation, transport security, \"Splashing Water\" and direct sunlight risks.\n\nLater in the video, you will learn **how to prepare yourself to get through the airport control and security checks**. What to consider in terms of dive locations; carrying sorbents and MSDs documents;
2 cylinders and labels; weight management. Jakub also explains how to pack your CCR to be able to protect CCR sensitive components. What the **CCR Liberty passport** is and what information is inside it. In the end, Jakub points out other helpful tips, including the dive and travel insurance, the equipment services, the travel checklist and the list of recommended spare parts. \n\nWatch the video now! ð»\n","showTags":false,"showDate":false,"image":{"mimetype":"image/png","size":1327263,"hash":"2c3b61bd5aee3fa0548896a765eb58ba97b7e62d","id":"cksu7p4ikr4o90776bwqd1a02","filename":"12-blog-traveling-with-rebreather.png","category":"divesoft/","type":"image","alt":"Traveling with a rebreather"}},"id":"#2","type":"component","lock":false,"position":1},{"name":"GalleryAndVideo","data":{"title":"Traveling with a Rebreather","video":{"type":"embeddedVideo","url":"https://www.youtube.com/embed/HuJXNMQyNyQ"},"images":[{"image":{"recommendedSizes":{"width":"1600","height":"900"}},"id":"1"},{"image":{"recommendedSizes":{"width":"1600","height":"900"}},"id":"2"},{"image":{"recommendedSizes":{"width":"1600","height":"900"}},"id":"3"},{"image":{"recommendedSizes":{"width":"1600","height":"900"}},"id":"4"}]},"id":"#3","type":"component","lock":false,"position":2},{"name":"ProductShowcase","data":{"componentTemplateId":"cm9h4wr6ugjv10803yqs3tp71"},"id":"#4","type":"component","lock":false,"position":3},{"name":"Footer","data":{"copyrights":"Copyright © 2019 Divesoft LLC All rights reserved.","facebookUrl":{"urlNewWindow":true,"url":"https://www.facebook.com/divesoft/"},"youtubeUrl":{"url":"https://www.youtube.com/channel/UCHI2-kHmfoUlAdhQXPKl8lA/featured","urlNewWindow":true},"instagramUrl":{"url":"https://www.instagram.com/divesoft/","urlNewWindow":true},"contacts":"**Divesoft s.r.o.** \nHálkova 2495 \n413 01 Roudnice nad Labem \nCzech Republic \nTel.: +420 416 857 057 \nE-mail: [email protected]"},"id":"#1","type":"component","lock":false,"position":4}],"id":"root","idBuffer":"#5","lastCommit":"924ac2b7-5c25-447b-8f10-71e94befd89a"}},"annotations":[{"type":"id","generated":true,"id":"PageTranslation:cksu7n7u11dzi0988xa0c6mft.annotations.0","typename":"PageAnnotation"},{"type":"id","generated":true,"id":"PageTranslation:cksu7n7u11dzi0988xa0c6mft.annotations.1","typename":"PageAnnotation"},{"type":"id","generated":true,"id":"PageTranslation:cksu7n7u11dzi0988xa0c6mft.annotations.2","typename":"PageAnnotation"}],"language":{"type":"id","generated":false,"id":"Language:cjv3kwvoj000u083611381c6o","typename":"Language"},"__typename":"PageTranslation"},"PageTranslation:cksu7n7u11dzi0988xa0c6mft.annotations.0":{"key":"perex","value":"In this episode, Jakub shares many practical tips and tricks on travelling with a rebreather and diving equipment. ","__typename":"PageAnnotation"},"PageTranslation:cksu7n7u11dzi0988xa0c6mft.annotations.1":{"key":"title","value":"How to travel with a rebreather","__typename":"PageAnnotation"},"PageTranslation:cksu7n7u11dzi0988xa0c6mft.annotations.2":{"key":"image","value":"{\"mimetype\":\"image/png\",\"size\":1327263,\"hash\":\"2c3b61bd5aee3fa0548896a765eb58ba97b7e62d\",\"id\":\"cksu7p4ikr4o90776bwqd1a02\",\"filename\":\"12-blog-traveling-with-rebreather.png\",\"category\":\"divesoft/\",\"type\":\"image\"}","__typename":"PageAnnotation"},"Page:ckt0i4dg51ogp0988dpgn8lwr":{"id":"ckt0i4dg51ogp0988dpgn8lwr","type":{"type":"id","generated":false,"id":"PageType:cjv3l213x004f08366hjufttp","typename":"PageType"},"tags":[],"translations({\"where\":{\"language\":{\"id\":\"cjv3kwvoj000u083611381c6o\"}}})":[{"type":"id","generated":false,"id":"PageTranslation:ckt0i4dgl1ogw0988qse8k7ol","typename":"PageTranslation"}],"__typename":"Page"},"PageTranslation:ckt0i4dgl1ogw0988qse8k7ol":{"id":"ckt0i4dgl1ogw0988qse8k7ol","name":"BMCL/FMCL Configurations","createdAt":"2021-08-31T20:06:46.821Z","content":{"type":"json","json":{"content":[{"name":"Header","data":{"products":[],"activeTab":"1","showShadow":false},"id":"#0","type":"component","lock":false,"position":0},{"name":"ProductCrossroadNew","data":{"componentTemplateId":"cmp0yw25s01tt0826v0wo4wet"},"id":"#103","type":"component","lock":false,"position":1},{"name":"HeroV2","data":{"slides":[{"media":{"recommendedSizes":{"width":"3840","height":"2560"},"mimetype":"image/png","size":10078165,"hash":"3a130bc7749e6ed5da59fe0fa5609b5346adef76","id":"cmo682unhmzu20800r8d2l6pm","filename":"liberty-models-hero-2.png","category":"divesoft/","type":"image"},"productName":"LIBERTY <light>BACKMOUNT</light>","title":"Balance. Stable. Proven.","linkTitle":"Configure","link":{"url":"https://eshop.divesoft.com","urlNewWindow":true}
2,"autoplayDuration":9000,"id":"1","linkUrl":{"url":"/en/ccr-liberty","pageId":"cl3vesldqknhj085858savf3u"}}]},"id":"#102","type":"component","lock":false,"position":2},{"name":"CarouselTextBlock","data":{"backgroundColor":"silver","title":"CCR LIBERTY <light>BACKMOUNT</light>","subtitle":"Classic configurations.","contentText":"Titanium frame, frontmounted or backmounted counterlungs. ","buttonTitle":"Configure","buttonUrl":{"url":"/en/ccr-liberty","pageId":"cl3vesldqknhj085858savf3u"},"linkTitle":"","linkUrl":{"url":"#"},"images":[{"image":{"recommendedSizes":{"width":"1500","height":"1000"},"mimetype":"image/png","size":116645,"hash":"2d5839c6800182e2e221651fa74187e53e73d2ad","id":"cmo5l0kx0mubq08005l9lgm7i","filename":"liberty-backmount.png","category":"divesoft/","type":"image"},"id":"1"}],"activeTab":"1"},"id":"#104","type":"component","lock":false,"position":3},{"name":"ImageTextBlock","data":{"backgroundColor":"white","content":"## CLASSIC BMCL\n\nKeep your chest free and enjoy even easier access to your D-rings and MAVs located at your DSV/BOV while maintaining excellent work of breathing. The Divesoft BOV is included with every BMCL unit as a standard feature to allow the fastest access to open circuit breathing gas in an emergency. Alternatively, the Divesoft DSV can be fitted. A unique system of MAVs is included in every BMCL configuration. The MAVs placed on the mouthpiece remove the need for hoses and valves on your chest. Due to their positioning on the mouthpiece, they are straightforward to find as they will always be in the same place. Find your mouth = find your MAVs.\n\nSleek counterlungs placed on your shoulder with an OPV that has a dump \nvalve pull chord placed on your shoulder to make sure youâll find it always \nin the same place. The CLs are easily individually removed for cleaning.\n\nThe back-mounted counterlungs are resistant to flooding and benefit from \na pull dump OPV routed over the shoulder, making a DIL flush a breeze.\n\nAll Classic units come with titanium backplate and stand.\n\n**Counterlung volume:** \n3,50 L each\n\n**Dry weight, no cylinders:** \n19,80 kg (43,65 lb) ","links":[],"isMirrored":false,"image":{"recommendedSizes":{"width":"1500","height":"1500"},"mimetype":"image/jpeg","size":2903854,"hash":"64810418df2e02156ac0a452ba1290b89d3f5cd8","id":"clp1m6fc8nome0776egkol3au","filename":"0n2a0120-enhanced-nr-edit.jpg","category":"divesoft/","type":"image"}},"id":"#105","type":"component","lock":false,"position":4},{"name":"AccordionText","data":{"accordionTitle":"Bailout valve","content":"Divesoft Bailout Valve is included with every BMCL unit as a standard feature to allow for safest emergency access to open circuit gas."},"id":"#113","type":"component","lock":false,"position":5},{"name":"AccordionText","data":{"accordionTitle":"Cordura counterlungs with OPV","content":"Sleek counterlungs placed on your shoulder with OPV that has dump valve pull placed on your shoulder to make sure youâll find it always in the same place. The CLâs are made easy to remove for cleaning"},"id":"#112","type":"component","lock":false,"position":6},{"name":"AccordionText","data":{"accordionTitle":"Manual addition valve","content":"Divesoft offers an unique system of MAVs included in every BMCL configuration. The MAVs placed on the mouthpiece remove the need of hoses and valves on your chest. Due to its positioning on the mouthpiece, they are very easy to find being always in the same place."},"id":"#111","type":"component","lock":false,"position":7},{"name":"AccordionText","data":{"accordionTitle":"Flood tolerancy","content":"The back mounted counterlungs are well resistant to flooding. With the benefit of pull dump routed on the shoulder making DIL flush a breeze."},"id":"#110","type":"component","lock":false,"position":8},{"name":"PhotoGallery","data":{"title":"","description":"","divider":false,"images":[{"id":"5","image":{"mimetype":"image/png","size":180227,"hash":"8926163f15436a0430e679d1a182f0fd8b8515d4","id":"cl2emngc901su0776kacaj6ir","filename":"divesoft-ccr-liberty-bmcl-00-1200x800w.png","category":"divesoft/","type":"image"}},{"id":"4","image":{"mimetype":"image/jpeg","size":2903854,"hash":"64810418df2e02156ac0a452ba1290b89d3f5cd8","id":"clp1m6fc8nome0776egkol3au","filename":"0n2a0120-enhanced-nr-edit.jpg","category":"divesoft/","type":"image"}}
2,{"id":"1","image":{"mimetype":"image/png","size":620032,"hash":"c77369510135d915dd40a6e423c63b49561c21fb","id":"cl2elpxzi00u807766hrpby2d","filename":"divesoft-fmcl-lynx-damir-podnar-unknown-01s.png","category":"divesoft/","type":"image"}},{"id":"2","image":{"mimetype":"image/png","size":629182,"hash":"501723b549dd932fdffdb5514774b8e415b61377","id":"cl2elq41p00v60776tukyan8o","filename":"divesoft-fmcl-jakub-slama-jakub-hecko-tauchsee-horka-germany-01s.png","category":"divesoft/","type":"image"}},{"id":"3","image":{"mimetype":"image/png","size":558939,"hash":"903ff2998b6690f8b6caea7bb35722b7766400b8","id":"cl2elq93m00vc0776bhvdk99h","filename":"divesoft-fmcl-michal-bily-jakub-slama-lake-attersee-austria-01s.png","category":"divesoft/","type":"image"}}],"activeTab":"4"},"id":"#98","type":"component","lock":false,"position":9},{"name":"ImageTextBlock","data":{"backgroundColor":"white","content":"## CLASSIC FMCL\n\nClassic front-mounted counterlungs configuration provides the best work of breathing performance. The manual addition valves are located at your chest and within easy reach, offering a simple way to incorporate off-board breathing gas resources.\n\nIt comes with a standard DSV but can also be equipped with a BOV.\n\nEach of the 3,50 L counterlungs is easily detachable for cleaning as they are mounted via robust stainless steel quick-release cobra buckles.\n\nWork of breathing performance of 2,16 J/L at 40 m (Gas used: Air), \nventilation rate 75 L/min, 1,58 J/L at 100 m (Gas used: Heliox 10/90).\n\nThe FMCL configuration is the most flood-resistant configuration thanks to the exhale counterlung being equipped with a specialized OPV developed in-house.\n\nSelect between the traditional plunger style installed directly into the inhalation counterlung or the membrane ADV incorporated into the T-piece.\n\n**Dry weight, no cylinders:** \n20,90 kg (46 lb)","links":[],"isMirrored":true,"image":{"recommendedSizes":{"width":"1500","height":"1500"},"mimetype":"image/jpeg","size":90669,"hash":"1126ce0faad4d92b3836bc037ed19d4cc5e98c93","id":"cjxc5d92z078v0776ylcbew85","filename":"fmcl-front.jpg","category":"divesoft/","type":"image"}},"id":"#115","type":"component","lock":false,"position":10},{"name":"AccordionText","data":{"accordionTitle":"Peak WOB performance","content":"The Front-mounted counterlungs offer absolutely the best work of breathing performance. This configuration is also extremely resistant against flooding of the unit."},"id":"#120","type":"component","lock":false,"position":11},{"name":"AccordionText","data":{"accordionTitle":"MAVs","content":"Manual addition valves are easily accesible on the counterlungs with large buttons maintaining a sleek design of the lungs."},"id":"#119","type":"component","lock":false,"position":12},{"name":"AccordionText","data":{"accordionTitle":"ADV selection","content":"FMCL configuration offers a wide selection of ADVs from mechanical to membrane ADV to satisfy your exact needs."},"id":"#118","type":"component","lock":false,"position":13},{"name":"AccordionText","data":{"accordionTitle":"Offboard gas accesibility","content":"This configuration offers the easiest way to offboard gas. The gas can be connected straight into the counterlungs with LP QD hoses."},"id":"#117","type":"component","lock":false,"position":14},{"name":"AccordionText","data":{"accordionTitle":"DSV / BOV","content":"The unit comes with Divesoft DSV in standard configuration but it can also equipped with BOV based on your preference."},"id":"#116","type":"component","lock":false,"position":15},{"name":"AccordionText","data":{"accordionTitle":"Counterlungs","content":"Easily detachable cordura counterlungs mounted via quick release cobra buckles are madeto be easy to be attached / detached. The CLs are equiped with inhouse made OPV with adjustable overpressure release treshold."},"id":"#121","type":"component","lock":false,"position":16},{"name":"PhotoGallery","data":{"title":"","description":"","divider":false,"images":[{"id":"5","image":{"mimetype":"image/png","size":193451,"hash":"2f12a80d683982b4b73c6c7e7ac6fe3092327056","id":"cl2emhqif01n10776x12hvep3","filename":"divesoft-ccr-liberty-fmcl-00-1200x800w.png","category":"divesoft/","type":"image"}},{"id":"2","image":{"mimetype":"image/jpeg","size":810983,"hash":"fa5fc70affd33a87fa2b7a3430903ed4f620ffd4","id":"clph0hk3srq0v07769pftalmo","filename":"divesoft-photo-132.jpg","category":"divesoft/","type":"image"}}
2,{"id":"1","image":{"mimetype":"image/png","size":687278,"hash":"0cbfc09c95dc4e91dc9e723babc77acaf6db1fa1","id":"cl2ein787zxh50776fytsnjta","filename":"divesoft-fmcl-petr-slezak-miltitz-mine-germany-01s.png","category":"divesoft/","type":"image"}},{"id":"4","image":{"mimetype":"image/png","size":761960,"hash":"1b4c642f26cc9dc88353c876dad96e028b0682e2","id":"cl2eimspfzxf00776dcng8ffs","filename":"divesoft-fmcl-becky-kagan-schott-david-schott-ginnie-springs-usa-01s.png","category":"divesoft/","type":"image"}},{"id":"6","image":{"mimetype":"image/png","size":783213,"hash":"5392a421210b9dc764253b2d9eae07e51e6e9e4d","id":"cl2einh5mzxht0776jw2rlrvx","filename":"divesoft-fmcl-fabio-iardino-enrico-bortolotti-lago-di-cornio-italy-01s.png","category":"divesoft/","type":"image"}}],"activeTab":"2"},"id":"#97","type":"component","lock":false,"position":17},{"name":"ProductsCompare","data":{"componentTemplateId":"cl5ab17h9onqf0858nna4mj1w"},"id":"#122","type":"component","lock":false,"position":18},{"name":"HubSpotForm","data":{"backgroundColor":"#ffffff","isTitleH1":false,"title":"Try the CCR Liberty","subtitle":"Contact us for demo!","showBreadcrumbs":false,"hideHeader":false,"portalId":"145642557","formId":"f1af2831-43c5-4be8-baa8-a343bc3415ad"},"id":"#101","type":"component","lock":false,"position":19},{"name":"Footer","data":{"componentTemplateId":"cjvwimxrl08e40798hjs5ek9w"},"id":"#1","type":"component","lock":false,"position":20}],"id":"root","idBuffer":"#123","lastCommit":"675b77fe-030f-4dcd-b3d6-396019c4a5af"}},"annotations":[],"language":{"type":"id","generated":false,"id":"Language:cjv3kwvoj000u083611381c6o","typename":"Language"},"__typename":"PageTranslation"},"Page:ckt312y7j1vfa0988d15tj1p9":{"id":"ckt312y7j1vfa0988d15tj1p9","type":{"type":"id","generated":false,"id":"PageType:cjv3l213x004f08366hjufttp","typename":"PageType"},"tags":[{"type":"id","generated":false,"id":"Tag:ckqjbycw06d410788g6gq4ku4","typename":"Tag"},{"type":"id","generated":false,"id":"Tag:clw52z09zlclk0735mxb7v53p","typename":"Tag"}],"translations({\"where\":{\"language\":{\"id\":\"cjv3kwvoj000u083611381c6o\"}}})":[{"type":"id","generated":false,"id":"PageTranslation:ckt312y881vfh0988sfq7gd7q","typename":"PageTranslation"}],"__typename":"Page"},"PageTranslation:ckt312y881vfh0988sfq7gd7q":{"id":"ckt312y881vfh0988sfq7gd7q","name":"Divesoft.blog / CCR Liberty Frame","createdAt":"2021-09-02T14:33:05.480Z","content":{"type":"json","json":{"content":[{"name":"Header","data":{"products":[{"title":"Accessories","description":"Backplates, Consumables. Tanks.","img":{"recommendedSizes":{"width":"235","height":"235"}},"url":""},{"title":"Accessories sets","description":"Protection, maintenance, cleaning.","img":{"recommendedSizes":{"width":"235","height":"235"}},"url":""},{"title":"Spare parts","description":"Spare parts and components.","img":{"recommendedSizes":{"width":"235","height":"235"}},"url":""},{"title":"Spare parts kits","description":"Completly Liberty spare parts kits.","img":{"recommendedSizes":{"width":"235","height":"235"}},"url":""}]},"id":"#0","type":"component","lock":false,"position":0},{"name":"BlogArticle","data":{"title":"CCR Liberty Frame","perex":"Hello, in this episode of our CCR Liberty in Detail, Jakub takes a closer look at the rebreather frame and the selection of wings, backplates, stands, counterlungs and harnesses with a wide range of options for the Liberty and Liberty Light configurations. ","content":"He kicks off with the different types of wings as horseshoe and donut shapes, their advantages, and the differences between them. Next, you will learn about the Liberty backplate types, the [head](https://www.divesoft.com/en/blog/ccr-liberty-head)/scrubber locking mechanisms, and first stage regulator attachments. He also touches on the standard and long-wide stand options, their application, and benefits. In the second half of the video, Jakub presents the counterlungs attachments on the Liberty and the Liberty Light configurations. Finally, he looks at the harnesses options with quick-release buckle systems.\n\nWatch the Full Video Now! ð»\n\nSee also [the individual elements of the CCR Liberty unit set up](https://www.divesoft.com/en/blog/the-individual-elements-of-the-ccr-liberty-unit-set-up).","showTags":false,"showDate":false,"image":{"mimetype":"image/png","size":839869,"hash":"27e864a2c6b10c1e6cf6f8871c51cdd50086de01","id":"ckt315wsruj0s0776y9549zkf","filename":"13-blog-ccr-liberty-in-detail.png","category":"divesoft/","type":"image"}},"id":"#2","type":"component","lock":false,"position":1},{"name":"GalleryAndVideo","data":{"title":"CCR Liberty in Detail #7 | Rebreather Frame","video":{"type":"embeddedVideo","url":"https://www.youtube.com/embed/ad9ZOq2U6KM"},"images":[{"image":{"recommendedSizes":{"width":"1600","height":"900"}},"id":"1"},{"image":{"recommendedSizes":{"width":"1600","height":"900"}},"id":"2"},{"image":{"recommendedSizes":{"width":"1600","height":"900"}},"id":"3"},{"image":{"recommendedSizes":{"width":"1600","height":"900"}},"id":"4"}]},"id":"#3","type":"component","lock":false,"position":2},{"name":"ProductShowcase","data":{"componentTemplateId":"cm9h4wr6ugjv10803yq
2s3tp71"},"id":"#4","type":"component","lock":false,"position":3},{"name":"Footer","data":{"copyrights":"Copyright © 2019 Divesoft LLC All rights reserved.","facebookUrl":{"urlNewWindow":true,"url":"https://www.facebook.com/divesoft/"},"youtubeUrl":{"url":"https://www.youtube.com/channel/UCHI2-kHmfoUlAdhQXPKl8lA/featured","urlNewWindow":true},"instagramUrl":{"url":"https://www.instagram.com/divesoft/","urlNewWindow":true},"contacts":"**Divesoft s.r.o.** \nHálkova 2495 \n413 01 Roudnice nad Labem \nCzech Republic \nTel.: +420 416 857 057 \nE-mail: [email protected]"},"id":"#1","type":"component","lock":false,"position":4}],"id":"root","idBuffer":"#5","lastCommit":"392dd6fb-fe2a-486a-b730-8dcd01dfc262"}},"annotations":[{"type":"id","generated":true,"id":"PageTranslation:ckt312y881vfh0988sfq7gd7q.annotations.0","typename":"PageAnnotation"},{"type":"id","generated":true,"id":"PageTranslation:ckt312y881vfh0988sfq7gd7q.annotations.1","typename":"PageAnnotation"},{"type":"id","generated":true,"id":"PageTranslation:ckt312y881vfh0988sfq7gd7q.annotations.2","typename":"PageAnnotation"}],"language":{"type":"id","generated":false,"id":"Language:cjv3kwvoj000u083611381c6o","typename":"Language"},"__typename":"PageTranslation"},"PageTranslation:ckt312y881vfh0988sfq7gd7q.annotations.0":{"key":"title","value":"CCR Liberty Frame","__typename":"PageAnnotation"},"PageTranslation:ckt312y881vfh0988sfq7gd7q.annotations.1":{"key":"perex","value":"Hello, in this episode of our CCR Liberty in Detail, Jakub takes a closer look at the rebreather frame and the selection of wings, backplates, stands, counterlungs and harnesses with a wide range of options for the Liberty and Liberty Light configurations. ","__typename":"PageAnnotation"},"PageTranslation:ckt312y881vfh0988sfq7gd7q.annotations.2":{"key":"image","value":"{\"mimetype\":\"image/png\",\"size\":839869,\"hash\":\"27e864a2c6b10c1e6cf6f8871c51cdd50086de01\",\"id\":\"ckt315wsruj0s0776y9549zkf\",\"filename\":\"13-blog-ccr-liberty-in-detail.png\",\"category\":\"divesoft/\",\"type\":\"image\"}","__typename":"PageAnnotation"},"Page:cktjtpry92g6z0988qvz9yctm":{"id":"cktjtpry92g6z0988qvz9yctm","type":{"type":"id","generated":false,"id":"PageType:cjv3l213x004f08366hjufttp","typename":"PageType"},"tags":[{"type":"id","generated":false,"id":"Tag:cm5ww05zc1b5d0803zglvz927","typename":"Tag"}],"translations({\"where\":{\"language\":{\"id\":\"cjv3kwvoj000u083611381c6o\"}}})":[{"type":"id","generated":false,"id":"PageTranslation:cktjtpryw2g760988nfxo6zur","typename":"PageTranslation"}],"__typename":"Page"},"Tag:cm5ww05zc1b5d0803zglvz927":{"id":"cm5ww05zc1b5d0803zglvz927","name":"Blog: Beginner","__typename":"Tag"},"PageTranslation:cktjtpryw2g760988nfxo6zur":{"id":"cktjtpryw2g760988nfxo6zur","name":"Divesoft.blog / Getting Back into Diving after a break","createdAt":"2021-09-14T08:38:58.520Z","content":{"type":"json","json":{"content":[{"name":"Header","data":{"products":[{"title":"Accessories","description":"Backplates, Consumables. Tanks.","img":{"recommendedSizes":{"width":"235","height":"235"}},"url":""},{"title":"Accessories sets","description":"Protection, maintenance, cleaning.","img":{"recommendedSizes":{"width":"235","height":"235"}},"url":""},{"title":"Spare parts","description":"Spare parts and components.","img":{"recommendedSizes":{"width":"235","height":"235"}},"url":""},{"title":"Spare parts kits","description":"Completly Liberty spare parts kits.","img":{"recommendedSizes":{"width":"235","height":"235"}},"url":""}]},"id":"#0","type":"component","lock":false,"position":0},{"name":"BlogArticle","data":{"title":"Getting Back into Diving after a break","perex":"In this video, Jakub Slama gives us some helpful tips on **how to return to the water** with a [rebreather](https://www.divesoft.com/en/products/ccr-liberty/philosophy) after having a long break from diving. In the first part of the video, he covers the following:","content":"* Positive and Patient Attitude \n* Get Fit Again \n* Get a Health Check\n* Follow Current Government Guidelines \n* Get Your Gear Ready including, batteries, O2 sensors and cylinders\n* Follow the [Assembly Checklist](https://www.divesoft.com/en/app)\n\nIn the second part of the video, Jakub gives some suggestions on **what to do before going out to the \"real\" water diving**, including, diving in the pool, creating a skill checklist or doing training. He explains the importance of adjusting gradient factors or take a refresher course to help to build back on confidence in diving and prevent accidents. \n\nFinally, Jakub provides some recommendations on [travelling](https://www.divesoft.com/en/blog/ccr-liberty-rebreather-platform-and-the-philosophy-behind-it/how-to-travel-with-a-rebreather) after a long time together with the passport expiry date check and awareness of travel disturbances. \n\nFor more information, watch the video now! ð»\n","showTags":false,"showDate":false,"image":{"mimetype":"image/png","size":1265814,"hash":"144220c1e53fab396310376473c7ab9c6d2848fe","id":"cktjty3uc09q307763g5u7a46","filename":"14-blog-back-to-water.png","category":"divesoft/","type":"image","alt":"Getting Back into Diving after a break"}},"id":"#3","type":"component","lock":false,"position":1},{"name":"GalleryAndVideo","data":{"title":"Getting Back into Diving after a break","video":{"type":"embeddedVideo","url":"https://www.youtube.com/embed/FnZ706mq_vY"},"images":[{"image":{"recommendedSizes":{"width":"1600","height":"900"}},"id":"1"},{"image":{"recommendedSizes":{"width":"1600","height":"900"}},"id":"2"},{"image":{"recommendedSizes":{"width":"1600","height":"900"}},"id":"3"},{"image":{"recommendedSizes":{"width":"1600","height":"900"}},"id":"4"}]},"id":"#4","type":"component","lock":false,"position":2},{"name":"ProductShowcase","data":{"componentTemplateId":"cm9h4wr6ugjv10803yq
2s3tp71"},"id":"#5","type":"component","lock":false,"position":3},{"name":"Footer","data":{"copyrights":"Copyright © 2019 Divesoft LLC All rights reserved.","facebookUrl":{"urlNewWindow":true,"url":"https://www.facebook.com/divesoft/"},"youtubeUrl":{"url":"https://www.youtube.com/channel/UCHI2-kHmfoUlAdhQXPKl8lA/featured","urlNewWindow":true},"instagramUrl":{"url":"https://www.instagram.com/divesoft/","urlNewWindow":true},"contacts":"**Divesoft s.r.o.** \nHálkova 2495 \n413 01 Roudnice nad Labem \nCzech Republic \nTel.: +420 416 857 057 \nE-mail: [email protected]"},"id":"#1","type":"component","lock":false,"position":5}],"id":"root","idBuffer":"#6","lastCommit":"78d576a0-ce1e-415d-ab43-2414ea3d059e"}},"annotations":[],"language":{"type":"id","generated":false,"id":"Language:cjv3kwvoj000u083611381c6o","typename":"Language"},"__typename":"PageTranslation"},"Page:cktyf230v0o4908642wj0x9w6":{"id":"cktyf230v0o4908642wj0x9w6","type":{"type":"id","generated":false,"id":"PageType:cjv3l213x004f08366hjufttp","typename":"PageType"},"tags":[{"type":"id","generated":false,"id":"Tag:clw52z09zlclk0735mxb7v53p","typename":"Tag"}],"translations({\"where\":{\"language\":{\"id\":\"cjv3kwvoj000u083611381c6o\"}}})":[{"type":"id","generated":false,"id":"PageTranslation:cktyf231h0o4g08645iydypxw","typename":"PageTranslation"}],"__typename":"Page"},"PageTranslation:cktyf231h0o4g08645iydypxw":{"id":"cktyf231h0o4g08645iydypxw","name":"Divesoft.blog / Rebreather Accessories: Oxygen cell tester, covers, protectors and more","createdAt":"2021-09-24T13:45:11.140Z","content":{"type":"json","json":{"content":[{"name":"Header","data":{"products":[{"title":"Accessories","description":"Backplates, Consumables. Tanks.","img":{"recommendedSizes":{"width":"235","height":"235"}},"url":""},{"title":"Accessories sets","description":"Protection, maintenance, cleaning.","img":{"recommendedSizes":{"width":"235","height":"235"}},"url":""},{"title":"Spare parts","description":"Spare parts and components.","img":{"recommendedSizes":{"width":"235","height":"235"}},"url":""},{"title":"Spare parts kits","description":"Completly Liberty spare parts kits.","img":{"recommendedSizes":{"width":"235","height":"235"}},"url":""}]},"id":"#0","type":"component","lock":false,"position":0},{"name":"BlogArticle","data":{"title":"Rebreather Accessories: Oxygen cell tester, covers, protectors and more","perex":"Welcome to the 8th episode of CCR Liberty in Detail. In this video, Jakub introduces the CCR Liberty Unit accessories. Liberty accessories can be purchased individually or in sets, such as [gadget set](https://eshop.divesoft.com/cz/accessories-sets/gadget-set/8188), [maintenance set](https://eshop.divesoft.com/cz/accessories-sets/maintenance-set/8186) or [protection set](https://eshop.divesoft.com/cz/accessories-sets/protection-set/8185). In general, the sets are more popular and affordable options. ","content":"Jakub explains the importance of oxygen sensors and gives some helpful tips on **what to consider when purchasing the sensors from the manufacturers**. Furthermore, you will learn about: \n\n* the [Oxygen Cell Tester](https://eshop.divesoft.com/cz/oxygen-sensor-tester-kit/8136)\n* the [USB Drying Fan](https://eshop.divesoft.com/cz/head-drying-fan/8147)\n* the Head Protector (also called a Cave Cover), their function and how to connect them to the [Liberty head](https://www.divesoft.com/en/blog/ccr-liberty-head). \n\nIn the second part, Jakub introduces the **Liberty protection accessories**, such as:\n\n* Head and Scrubber Cover Handset Cable Protection,\n* Loop Hoses Protection Covers and Loop Weight,\n* Set of Caps\n \nA few more gadgets including:\n\n* Head-Up Display Adapter \n* D-rings options \n* Detailed Argon Bottle Attachment options \n* Counterlungs hanger \n\nOr gadgets, already included, in the Liberty Unit: [Blind Plug](https://eshop.divesoft.com/cz/459-blind-plug/1216) and Carry Handle. In the video, Jakub reviews each accessories functionality and **gives a detailed demonstration of its use on the Liberty Unit**.\n\nClick Now to Watch! ð»\n\nSee also the 12th episode of [CCR Liberty in Detail focused on Rebreather Box Extras Unboxing](https://www.divesoft.com/en/blog/ccr-liberty-unboxing).","showTags":false,"showDate":false,"image":{"mimetype":"image/png","size":841360,"hash":"a93903888d937d5243d76044e1f700730416050e","id":"cktyfbq8s61b007768lhiu7az","filename":"15-blog-ccr-liberty-in-detail.png","category":"divesoft/","type":"image","alt":"Rebreather Acce
2ssories: Oxygen cell tester, covers, protectors and more"}},"id":"#2","type":"component","lock":false,"position":1},{"name":"GalleryAndVideo","data":{"title":"CCR Liberty in Detail #8 | Rebreather Accessories","video":{"type":"embeddedVideo","url":"https://www.youtube.com/embed/_ygA2HMCcc4"},"images":[{"image":{"recommendedSizes":{"width":"1600","height":"900"}},"id":"1"},{"image":{"recommendedSizes":{"width":"1600","height":"900"}},"id":"2"},{"image":{"recommendedSizes":{"width":"1600","height":"900"}},"id":"3"},{"image":{"recommendedSizes":{"width":"1600","height":"900"}},"id":"4"}]},"id":"#3","type":"component","lock":false,"position":2},{"name":"GalleryAndVideo","data":{"title":"Sensor Testing","video":{"type":"embeddedVideo","url":"https://www.youtube.com/embed/q_Ls182UV-Q"},"images":[{"image":{"recommendedSizes":{"width":"1600","height":"900"}},"id":"1"},{"image":{"recommendedSizes":{"width":"1600","height":"900"}},"id":"2"},{"image":{"recommendedSizes":{"width":"1600","height":"900"}},"id":"3"},{"image":{"recommendedSizes":{"width":"1600","height":"900"}},"id":"4"}]},"id":"#4","type":"component","lock":false,"position":3},{"name":"ProductShowcase","data":{"componentTemplateId":"cm9h4wr6ugjv10803yqs3tp71"},"id":"#5","type":"component","lock":false,"position":4},{"name":"Footer","data":{"copyrights":"Copyright © 2019 Divesoft LLC All rights reserved.","facebookUrl":{"urlNewWindow":true,"url":"https://www.facebook.com/divesoft/"},"youtubeUrl":{"url":"https://www.youtube.com/channel/UCHI2-kHmfoUlAdhQXPKl8lA/featured","urlNewWindow":true},"instagramUrl":{"url":"https://www.instagram.com/divesoft/","urlNewWindow":true},"contacts":"**Divesoft s.r.o.** \nHálkova 2495 \n413 01 Roudnice nad Labem \nCzech Republic \nTel.: +420 416 857 057 \nE-mail: [email protected]"},"id":"#1","type":"component","lock":false,"position":5}],"id":"root","idBuffer":"#6","lastCommit":"3779b8df-8532-4c20-be6a-a466d31ab46b"}},"annotations":[{"type":"id","generated":true,"id":"PageTranslation:cktyf231h0o4g08645iydypxw.annotations.0","typename":"PageAnnotation"},{"type":"id","generated":true,"id":"PageTranslation:cktyf231h0o4g08645iydypxw.annotations.1","typename":"PageAnnotation"},{"type":"id","generated":true,"id":"PageTranslation:cktyf231h0o4g08645iydypxw.annotations.2","typename":"PageAnnotation"}],"language":{"type":"id","generated":false,"id":"Language:cjv3kwvoj000u083611381c6o","typename":"Language"},"__typename":"PageTranslation"},"PageTranslation:cktyf231h0o4g08645iydypxw.annotations.0":{"key":"perex","value":"Welcome to the 8th episode of CCR Liberty in Detail. In this video, Jakub introduces the CCR Liberty Unit accessories. Liberty accessories can be purchased individually or in sets, such as gadget set, maintenance set or protection set. In general, the sets are more popular and affordable options. ","__typename":"PageAnnotation"},"PageTranslation:cktyf231h0o4g08645iydypxw.annotations.1":{"key":"title","value":"Rebreather Accessories: Oxygen cell tester, covers, protectors and more","__typename":"PageAnnotation"},"PageTranslation:cktyf231h0o4g08645iydypxw.annotations.2":{"key":"image","value":"{\"mimetype\":\"image/png\",\"size\":841360,\"hash\":\"a93903888d937d5243d76044e1f700730416050e\",\"id\":\"cktyfbq8s61b007768lhiu7az\",\"filename\":\"15-blog-ccr-liberty-in-detail.png\",\"category\":\"divesoft/\",\"type\":\"image\"}","__typename":"PageAnnotation"},"Page:ckuwij1ow1uz70864yjnay2zf":{"id":"ckuwij1ow1uz70864yjnay2zf","type":{"type":"id","generated":false,"id":"PageType:cjv3l213x004f08366hjufttp","typename":"PageType"},"tags":[{"type":"id","generated":false,"id":"Tag:ckqjbypz36d4d0788ls4e8rkz","typename":"Tag"},{"type":"id","generated":false,"id":"Tag:clw52vo5mlckc0735dl0is8ok","typename":"Tag"}],"translations({\"where\":{\"language\":{\"id\":\"cjv3kwvoj000u083611381c6o\"}}})":[{"type":"id","generated":false,"id":"PageTranslation:ckuwij1rc1uze08641pv82ebz","typename":"PageTranslation"}],"__typename":"Page"},"PageTranslation:ckuwij1rc1uze08641pv82ebz":{"id":"ckuwij1rc1uze08641pv82ebz","name":"Divesoft.blog / Mark Powell, Edoardo Pavia and Paul Toomer: dual and bailout rebreathers training ","createdAt":"2021-10-18T10:26:31.464Z","content":{"type":"json","json":{"content":[{"name":"Header","data":{"products":[{"title":"Accessories","description":"Backplates, Consumables. Tanks.","img":{"recommendedSizes":{"width":"235","height":"235"}},"url":""},{"title":"Accessories sets","description":"Protection, maintenance, cleaning.","img":{"recommendedSizes":{"width":"235","height":"235"}},"url":""},{"title":"Spare parts","description":"Spare parts and components.","img":{"recommendedSizes":{"width":"235","height":"235"}},"url":""}
2,{"title":"Spare parts kits","description":"Completly Liberty spare parts kits.","img":{"recommendedSizes":{"width":"235","height":"235"}},"url":""}]},"id":"#0","type":"component","lock":false,"position":0},{"name":"BlogArticle","data":{"title":"Mark Powell, Edoardo Pavia and Paul Toomer: dual and bailout rebreathers training","perex":"Welcome to part 3 of the Bailout CCR series with Joe Bosquez interviewing Mark Powell, TDI Instructor Trainer and author of Deco for Divers, Edoardo Pavia, IANTD Instructor Trainer and Divesoft ambassador, and [Paul Toomer](https://www.divesoft.com/en/ambassadors/paulvincenttoomer), Co-owner of [Dive RAID International](https://www.diveraid.com/) and Divesoft ambassador.","content":"They open the episode by talking about their rebreather diving experiences and sharing of their journey into technical diving and the challenges faced over the years. Diving into the topic, they discuss the importance of nomenclature of dual CCR. **Independent dual CCRs or bailout CCR?** They each agree that the terminology, simplicity, and appropriate training are critical aspects. Use of dual CCR depends very much on the **diving environment, wreck vs cave diving, and on the unit configuration itself**. A [backmount](https://www.divesoft.com/en/products/ccr-liberty/ccr-liberty-bmcl-fmcl) vs [sidemount](https://www.divesoft.com/en/products/ccr-liberty/ccr-liberty-sidemount) unit, team and work involved in the dive, open-circuit gas also play critical factors of [dual CCR or bailout CCR](https://www.divesoft.com/en/blog/jakub-simanek-steve-bogaerts-and-brett-hemphill-about-bailout-and-dual-rebreathers).\n\nIn addition, they touch on the topic of **training standards**, dive community, and the responsibility of dual CCR divers. Is bailout CCR diving for everyone? Is it limited to a specific group of divers? They think the call for standards is necessary for the safety of people showing the level of diving experience before using bailout CCR. Additionally, understanding of the complexity of using the two individual units **require obvious work in time, discipline, mentorship, and patience**.\n\nThey also discuss the **potential dangers and issues of diving fully electronic CCRs vs manually CCRs**. You can learn the different opinions of electronic and manual units, the significance of keeping manual skills, avoiding complacency and depth vs duration. To conclude the discussion, they all share some closing thoughts on the bailout CCR future. The need for sharing knowledge between each other was the significant step they learned during the series. \n\nTo learn more, watch it now! ð» \n\n","showTags":false,"showDate":true,"image":{"mimetype":"image/png","size":933533,"hash":"988bde2a80a3963ed369c292e8c2d3561a169ba9","id":"ckuwilqsri12x0776grg24noh","filename":"16-blog-ccr-bailout.png","category":"divesoft/","type":"image","alt":"Mark Powell, Edoardo Pavia and Paul Toomer on dual and bailout rebreathers training "}},"id":"#2","type":"component","lock":false,"position":1},{"name":"GalleryAndVideo","data":{"title":"Bailout CCR Series #3 | Mark Powell, Edoardo Pavia and Paul Toomer","video":{"type":"embeddedVideo","url":"https://www.youtube.com/embed/h3MKO-F2rDY"},"images":[{"image":{"recommendedSizes":{"width":"1600","height":"900"}},"id":"1"},{"image":{"recommendedSizes":{"width":"1600","height":"900"}},"id":"2"},{"image":{"recommendedSizes":{"width":"1600","height":"900"}},"id":"3"},{"image":{"recommendedSizes":{"width":"1600","height":"900"}},"id":"4"}]},"id":"#4","type":"component","lock":false,"position":2},{"name":"ProductShowcase","data":{"componentTemplateId":"cm9h4wr6ugjv10803yqs3tp71"},"id":"#8","type":"component","lock":false,"position":3},{"name":"Footer","data":{"copyrights":"Copyright © 2019 Divesoft LLC All rights reserved.","facebookUrl":{"urlNewWindow":true,"url":"https://www.facebook.com/divesoft/"},"youtubeUrl":{"url":"https://www.youtube.com/channel/UCHI2-kHmfoUlAdhQXPKl8lA/featured","urlNewWindow":true},"instagramUrl":{"url":"https://www.instagram.com/divesoft/","urlNewWindow":true},"contacts":"**Divesoft s.r.o.** \nHálkova 2495 \n413 01 Roudnice nad Labem \nCzech Republic \nTel.: +420 416 857 057 \nE-mail: [email protected]"},"id":"#1","type":"component","lock":false,"position":7}],"id":"root","idBuffer":"#9","lastCommit":"acdae232-cfe3-435e-bc5b-c99884133ccb"}},"annotations":[{"type":"id","generated":true,"id":"PageTranslation:ckuwij1rc1uze08641pv82ebz.annotations.0","typename":"PageAnnotation"},{"type":"id","generated":true,"id":"PageTranslation:ckuwij1rc1uze08641pv82ebz.annotations.1","typename":"PageAnnotation"},{"type":"id","generated":true,"id":"PageTranslation:ckuwij1rc1uze08641pv82ebz.annotations.2","typename":"PageAnnotation"}],"language":{"type":"id","generated":false,"id":"Language:cjv3kwvoj000u083611381c6o","typename":"Language"},"__typename":"PageTranslation"},"PageTranslation:ckuwij1rc1uze08641pv82ebz.annotations.0":{"key":"image","value":"{\"mimetype\":\"image/png\",\"size\":933533,\"hash\":\"988bde2a80a3963ed369c292e8c2d3561a169ba9\",\"id\":\"ckuwilqsri12x0776grg24noh\",\"filename\":\"16-blog-ccr-bailout.png\",\"category\":\"divesoft/\",\"type\":\"image\"}","__typename":"PageAnnotation"},"PageTranslation:ckuwij1rc1uze08641pv82ebz.annotations.1":{"key":"title","value":"Mark Powell, Edoardo Pavia and Paul Toomer: dual and bailout rebreathers training","__typename":"PageAnnotation"},"PageTranslation:ckuwij1rc1uze08641pv82ebz.annotations.2":{"key":"perex","value":"Welcome to part 3 of the Bailout CCR series with Joe Bosquez interviewing Mark Powell, TDI Instructor Trainer and author of Deco for Divers, Edoardo Pavia, IANTD Instru
2ctor Trainer and Divesoft ambassador, and Paul Toomer, Co-owner of Dive RAID International and Divesoft ambassador.","__typename":"PageAnnotation"},"Page:ckvatt7e72ima0864sbtdb3iz":{"id":"ckvatt7e72ima0864sbtdb3iz","type":{"type":"id","generated":false,"id":"PageType:cjv3l213x004f08366hjufttp","typename":"PageType"},"tags":[{"type":"id","generated":false,"id":"Tag:ckqjbycw06d410788g6gq4ku4","typename":"Tag"},{"type":"id","generated":false,"id":"Tag:clw52vo5mlckc0735dl0is8ok","typename":"Tag"}],"translations({\"where\":{\"language\":{\"id\":\"cjv3kwvoj000u083611381c6o\"}}})":[{"type":"id","generated":false,"id":"PageTranslation:ckvatt7ep2imh0864i81fv976","typename":"PageTranslation"}],"__typename":"Page"},"PageTranslation:ckvatt7ep2imh0864i81fv976":{"id":"ckvatt7ep2imh0864i81fv976","name":"Divesoft.blog / Diving with a bailout rebreather","createdAt":"2021-10-28T10:51:07.585Z","content":{"type":"json","json":{"content":[{"name":"Header","data":{"products":[{"title":"Accessories","description":"Backplates, Consumables. Tanks.","img":{"recommendedSizes":{"width":"235","height":"235"}},"url":""},{"title":"Accessories sets","description":"Protection, maintenance, cleaning.","img":{"recommendedSizes":{"width":"235","height":"235"}},"url":""},{"title":"Spare parts","description":"Spare parts and components.","img":{"recommendedSizes":{"width":"235","height":"235"}},"url":""},{"title":"Spare parts kits","description":"Completly Liberty spare parts kits.","img":{"recommendedSizes":{"width":"235","height":"235"}},"url":""}]},"id":"#0","type":"component","lock":false,"position":0},{"name":"BlogArticle","data":{"title":"Diving with a bailout rebreather","perex":"In this episode of CCR Liberty in Detail we talk about bailout rebreathers and bailout CCR modes. Jakub Slama kicks the episode off by introducing some of the reasons why a diver would use a bailout rebreather. In general, longer dives with a CCR require the diver to carry more volume of bailout gas which can become a limiting factor. ","content":"Since the [Liberty head](https://www.divesoft.com/en/blog/ccr-liberty-head) is the same for all configurations, it also can be used as a bailout rebreather, most commonly as a [sidemount unit](https://www.divesoft.com/en/products/ccr-liberty/ccr-liberty-sidemount) due to its comparable size to standard Aluminium 80 cu ft cylinder.\n\nJakub also explains the **transition from primary unit to the bailout**. During immediate emergencies, such as a unit flood or CO2 issues, he describes the importance of carrying an open circuit during the dive, that contains a suitable bottom mix for the dive. \n\nHe then talks about the special mode, bailout **Standby Mode**, designed for diving with a [bailout rebreather](https://www.divesoft.com/en/blog/jakub-simanek-steve-bogaerts-and-brett-hemphill-about-bailout-and-dual-rebreathers). This mode needs to be turned on before use, preventing adding oxygen by the solenoids. In addition to learning about Bailout Standby and CCR modes, you will also learn their operation functions, automatic switch of CCR mode, decompression tracking and calculation.\n\nIn the last half, Jakub shows you the Bailout Standby Mode screen, the information displayed, such as dive time, dive depth and loop PPO2 but also how to switch to CCR Dive mode. \n\nFinally, he explains why **the [ADV](https://www.divesoft.com/en/products/bovdsvadv) must remain on, as it prevents under and overpressure of the unit**. Other benefits such as, having the pressure sensors inside the head, handset connection, [bailout rebreather](https://www.divesoft.com/en/products/ccr-liberty/bail-out-rebreather) preparation and all the other necessary checks for any issues. Last but not least, the importance of required training with [qualified CCR Liberty Sidemount instructor](https://www.divesoft.com/en/contacts/instructors). \n\nFor More Detail, Watch the Video Now! ð»\n","showTags":false,"showDate":false,"image":{"mimetype":"image/png","size":991951,"hash":"803ddcd2d7808fdf921e751edeb3fe32780e28e9","id":"ckvatvnlongyc0776o4758zv7","filename":"17-blog-ccr-liberty-in-detail.png","category":"divesoft/","type":"image","alt":"Diving with a bailout rebreather"}},"id":"#2","type":"component","lock":false,"position":1},{"name":"GalleryAndVideo","data":{"title":"CCR Liberty in Detail #11 | Bailout Rebreather","video":{"type":"embeddedVideo","url":"https://www.youtube.com/embed/pEqzWH2OGTg"},"images":[{"image":{"recommendedSizes":{"width":"1600","height":"900"}},"id":"1"},{"image":{"recommendedSizes":{"width":"1600","height":"900"}},"id":"2"},{"image":{"recommendedSizes":{"width":"1600","height":"900"}},"id":"3"},{"image":{"recommendedSizes":{"width":"1600","height":"900"}},"id":"4"}]},"id":"#3","type":"component","lock":false,"position":2},{"name":"ProductShowcase","data":{"componentTemplateId":"cm9h4wr6ugjv10803yq
2s3tp71"},"id":"#4","type":"component","lock":false,"position":3},{"name":"Footer","data":{"copyrights":"Copyright © 2019 Divesoft LLC All rights reserved.","facebookUrl":{"urlNewWindow":true,"url":"https://www.facebook.com/divesoft/"},"youtubeUrl":{"url":"https://www.youtube.com/channel/UCHI2-kHmfoUlAdhQXPKl8lA/featured","urlNewWindow":true},"instagramUrl":{"url":"https://www.instagram.com/divesoft/","urlNewWindow":true},"contacts":"**Divesoft s.r.o.** \nHálkova 2495 \n413 01 Roudnice nad Labem \nCzech Republic \nTel.: +420 416 857 057 \nE-mail: [email protected]"},"id":"#1","type":"component","lock":false,"position":4}],"id":"root","idBuffer":"#5","lastCommit":"06be9336-9f01-47e5-a741-97b933c9abc7"}},"annotations":[{"type":"id","generated":true,"id":"PageTranslation:ckvatt7ep2imh0864i81fv976.annotations.0","typename":"PageAnnotation"},{"type":"id","generated":true,"id":"PageTranslation:ckvatt7ep2imh0864i81fv976.annotations.1","typename":"PageAnnotation"},{"type":"id","generated":true,"id":"PageTranslation:ckvatt7ep2imh0864i81fv976.annotations.2","typename":"PageAnnotation"}],"language":{"type":"id","generated":false,"id":"Language:cjv3kwvoj000u083611381c6o","typename":"Language"},"__typename":"PageTranslation"},"PageTranslation:ckvatt7ep2imh0864i81fv976.annotations.0":{"key":"perex","value":"In this episode of CCR Liberty in Detail we talk about bailout rebreathers and bailout CCR modes. Jakub Slama kicks the episode off by introducing some of the reasons why a diver would use a bailout rebreather. In general, longer dives with a CCR require the diver to carry more volume of bailout gas which can become a limiting factor. ","__typename":"PageAnnotation"},"PageTranslation:ckvatt7ep2imh0864i81fv976.annotations.1":{"key":"image","value":"{\"mimetype\":\"image/png\",\"size\":991951,\"hash\":\"803ddcd2d7808fdf921e751edeb3fe32780e28e9\",\"id\":\"ckvatvnlongyc0776o4758zv7\",\"filename\":\"17-blog-ccr-liberty-in-detail.png\",\"category\":\"divesoft/\",\"type\":\"image\"}","__typename":"PageAnnotation"},"PageTranslation:ckvatt7ep2imh0864i81fv976.annotations.2":{"key":"title","value":"Diving with a bailout rebreather","__typename":"PageAnnotation"},"Page:ckvjneehv2t9m0864nadx86y3":{"id":"ckvjneehv2t9m0864nadx86y3","type":{"type":"id","generated":false,"id":"PageType:cjv3l213x004f08366hjufttp","typename":"PageType"},"tags":[{"type":"id","generated":false,"id":"Tag:clw52z09zlclk0735mxb7v53p","typename":"Tag"}],"translations({\"where\":{\"language\":{\"id\":\"cjv3kwvoj000u083611381c6o\"}}})":[{"type":"id","generated":false,"id":"PageTranslation:ckvjneeih2t9t08642g88uzdj","typename":"PageTranslation"}],"__typename":"Page"},"PageTranslation:ckvjneeih2t9t08642g88uzdj":{"id":"ckvjneeih2t9t08642g88uzdj","name":"Divesoft.blog / Divetalks with Edd Sorenson: rescue stories, sidemount diving and innovation in technical diving","createdAt":"2021-11-03T15:01:34.840Z","content":{"type":"json","json":{"content":[{"name":"Header","data":{"products":[{"title":"Accessories","description":"Backplates, Consumables. Tanks.","img":{"recommendedSizes":{"width":"235","height":"235"}},"url":""},{"title":"Accessories sets","description":"Protection, maintenance, cleaning.","img":{"recommendedSizes":{"width":"235","height":"235"}},"url":""},{"title":"Spare parts","description":"Spare parts and components.","img":{"recommendedSizes":{"width":"235","height":"235"}},"url":""},{"title":"Spare parts kits","description":"Completly Liberty spare parts kits.","img":{"recommendedSizes":{"width":"235","height":"235"}},"url":""}]},"id":"#0","type":"component","lock":false,"position":0},{"name":"BlogArticle","data":{"title":"Divetalks with Edd Sorenson: rescue stories, sidemount diving and innovation in technical diving","perex":"Welcome to another episode of DIVETALKS, in which Joe Bosquez has a chat with Edd Sorenson. [Edd Sorenson](https://www.divesoft.com/en/ambassadors/eddsorenson) has been instrumental in the cave diving community not only for cave rescues and recoveries but for innovating and fine-tuning \"Sidemount Diving\". ","content":"His diving career started back in 1995 in the Pacific N
2orthwest. In 1999, he joined the International Underwater Cave Rescue and Recovery (IUCRR) as one of the founding members. In 2003, he founded Cave Adventurers. Edd became a local hero in 2012 when he successfully **rescued four people in three different rescues at Merritt's Millpond in Jackson County, Florida**. Edd is now the Safety Director for the NSS-CDS and was awarded the Life Saving Award in 2013. At the 2019 NSS-CDS International Conference, Edd received the Lifetime Achievement Award. Additionally, the NSS-CDS named an award after him, the \"Edd Sorenson Life Saving Award\".\n\nEdd begins with his early diving experience and how he got into cave diving, about the IUCRR group and the purpose behind it. He then shares tales of the recovery and incredible rescue stories that he performed over the years, including **the most recent rescue of Josh Bratchley**. Together, Joe and Edd watch the video of this rescue and comment on challenges, such as the **NO-dive plan and unknown environments, of these incredibly demanding operations**.\n\nLater in the chat, Edd also talks about the gear and his involvement in innovating [sidemount diving](https://www.divesoft.com/en/products/ccr-liberty/ccr-liberty-sidemount) equipment. Edd looks back on his \"First Open Water Dive\" Sidemount course and his participation in Liberty CCR development. He also explains how cave diving with the Liberty sidemount gives him more freedom and why he dives with a Liberty dual rebreather setup. He also points out some challenges and benefits of this particular configuration. Joe and Edd finish off by talking about [innovation in technical diving](https://www.divesoft.com/) and the diving community. In the end, they both agree that in the world of technical diving, even if there is some sort of competition, **they all dive together as friends**.\n\nWatch the video now. ð»\n","showTags":false,"showDate":false,"image":{"mimetype":"image/png","size":704411,"hash":"39a83869655d8f116ed4533e494247daefd3767e","id":"ckvjns1h2qstd0776lt7fe3sy","filename":"18-edd-sorenson-divetalks.png","category":"divesoft/","type":"image"}},"id":"#2","type":"component","lock":false,"position":1},{"name":"GalleryAndVideo","data":{"title":"DIVETALKS Live #10 | Interview with Edd Sorenson","video":{"type":"embeddedVideo","url":"https://www.youtube.com/embed/2TQgZiLMBlo"},"images":[{"image":{"recommendedSizes":{"width":"1600","height":"900"}},"id":"1"},{"image":{"recommendedSizes":{"width":"1600","height":"900"}},"id":"2"},{"image":{"recommendedSizes":{"width":"1600","height":"900"}},"id":"3"},{"image":{"recommendedSizes":{"width":"1600","height":"900"}},"id":"4"}]},"id":"#4","type":"component","lock":false,"position":2},{"name":"ProductShowcase","data":{"componentTemplateId":"cm9h4wr6ugjv10803yqs3tp71"},"id":"#5","type":"component","lock":false,"position":3},{"name":"Footer","data":{"copyrights":"Copyright © 2019 Divesoft LLC All rights reserved.","facebookUrl":{"urlNewWindow":true,"url":"https://www.facebook.com/divesoft/"},"youtubeUrl":{"url":"https://www.youtube.com/channel/UCHI2-kHmfoUlAdhQXPKl8lA/featured","urlNewWindow":true},"instagramUrl":{"url":"https://www.instagram.com/divesoft/","urlNewWindow":true},"contacts":"**Divesoft s.r.o.** \nHálkova 2495 \n413 01 Roudnice nad Labem \nCzech Republic \nTel.: +420 416 857 057 \nE-mail: [email protected]"},"id":"#1","type":"component","lock":false,"position":5}],"id":"root","idBuffer":"#6","lastCommit":"e8822f42-b47f-4510-a82f-34291c57ce91"}},"annotations":[{"type":"id","generated":true,"id":"PageTranslation:ckvjneeih2t9t08642g88uzdj.annotations.0","typename":"PageAnnotation"},{"type":"id","generated":true,"id":"PageTranslation:ckvjneeih2t9t08642g88uzdj.annotations.1","typename":"PageAnnotation"},{"type":"id","generated":true,"id":"PageTranslation:ckvjneeih2t9t08642g88uzdj.annotations.2","typename":"PageAnnotation"}],"language":{"type":"id","generated":false,"id":"Language:cjv3kwvoj000u083611381c6o","typename":"Language"},"__typename":"PageTranslation"},"PageTranslation:ckvjneeih2t9t08642g88uzdj.annotations.0":{"key":"title","value":"Divetalks with Edd Sorenson: rescue stories, sidemount diving and innovation in technical diving","__typename":"PageAnnotation"},"PageTranslation:ckvjneeih2t9t08642g88uzdj.annotations.1":{"key":"image","value":"{\"mimetype\":\"image/png\",\"size\":704411,\"hash\":\"39a83869655d8f116ed4533e494247daefd3767e\",\"id\":\"ckvjns1h2qstd0776lt7fe3sy\",\"filename\":\"18-edd-sorenson-divetalks.png\",\"category\":\"divesoft/\",\"type\":\"image\"}","__typename":"PageAnnotation"},"PageTranslation:ckvjneeih2t9t08642g88uzdj.annotations.2":{"key":"perex","value":"Welcome to another episode of DIVETALKS, in which Joe Bosquez has a chat with Edd Sorenson. Edd Sorenson has been instrumental in the cave diving community not only for cave rescues and recoveries but for innovating and fine-tuning \"Sidemount Diving\". ","__typename":"PageAnnotation"},"Page:ckvwicmzb0a8h0864bia259cd":{"id":"ckvwicmzb0a8h0864bia259cd","type":{"type":"id","generated":false,"id":"PageType:cjv3l213x004f08366hjufttp","typename":"PageType"},"tags":[{"type":"id","generated":false,"id":"Tag:clw52z09zlclk0735mxb7v53p","typename":"Tag"},{"type":"id","generated":false,"id":"Tag:cm5ww0t651b710803pcl02cn4","typename":"Tag"}],"translations({\"where\":{\"language\":{\"id\":\"cjv3kwvoj000u083611381c6o\"}}})":[{"type":"id","generated":false,"id":"PageTranslation:ckvwicmzv0a8o0864er9xxkjd","typename":"PageTranslation"}],"__typename":"Page"},"PageTranslation:ckvwicmzv0a8o0864er9xxkjd":{"id":"ckvwicmzv0a8o0864er9xxkjd","name":"Divesoft.blog / The CCR Liberty User Interface","createdAt":"2021-11-12T15:01:14.731Z","content":{"type":"json","json":{"content":[{"name":"Header","data":{"products":[{"title":"Accessories","description":"Backplates, Consumables. Tanks.","img":{"recommendedSizes":{"width":"235","height":"235"}},"url":""},{"title":"Accessories sets","description":"Protection, maintenance, cleaning.","img":{"recommendedSizes":{"width":"235","height":"235"}},"url":""},{"title":"Spare parts","description":"Spare parts and components.","img":{"recommendedSizes":{"width":"235","height":"235"}},"url":""}
2,{"title":"Spare parts kits","description":"Completly Liberty spare parts kits.","img":{"recommendedSizes":{"width":"235","height":"235"}},"url":""}]},"id":"#0","type":"component","lock":false,"position":0},{"name":"BlogArticle","data":{"title":"The CCR Liberty User Interface","perex":"In this episode of CCR Liberty in Detail, Jakub will be looking at **the User Interface, screens, and selection of the Dive Modes of Liberty units**, explaining each function. You will learn to start the Liberty unit and operate the handset menu by** pressing only two buttons**. ","content":"The different Liberty configurations share the same [head](https://www.divesoft.com/en/blog/ccr-liberty-head), therefore controlling the handset is the same for all [Liberty units](https://www.divesoft.com/en/products/ccr-liberty). **The vibration mechanism** of the handset provides the diver with crucial information on O2 cell sensors, too low or too high setpoints and more.\n\nJakub shows us step by step what you can see on the [diving computer](https://www.divesoft.com/en/products/freedom-computers) display in Surface Mode Main Menu and what can be set in sub-menus under: Setup, Dive Plan, Logbook, Applications. He also goes over the Dive Mode and its sub-menus. A brief description of each function is included as you go along. \n\nIn the Dive Mode, you will learn what you see underwater on the standard screen. The standard screen displays batteries status, dive time, depth, partial pressure on each O2 cell, setpoints. For simplified display, you can choose from the other types of screens with less information but magnified. Each handset can be run on a different screen. In addition, Jakub demonstrates how to change different modes; Bailout Mode or Manual CCR, Diluent setting, and how to change the setpoints. Finally, the quick demonstration of the Faulty Sensor Menu and its categories. \n\nFor More Details, Click to Watch the Video Now! ð»\n","showTags":false,"showDate":false,"image":{"mimetype":"image/png","size":737558,"hash":"a57a1c6883885a02c0cabf2d5d748e7c1167d4c6","id":"ckvwix8bcw1fy0776d45p66g6","filename":"19-blog-ccr-liberty-in-detail.png","category":"divesoft/","type":"image"}},"id":"#2","type":"component","lock":false,"position":1},{"name":"GalleryAndVideo","data":{"title":"CCR Liberty in Detail #9 | User Interface","video":{"type":"embeddedVideo","url":"https://www.youtube.com/embed/XreBXw9d0KA"},"images":[{"image":{"recommendedSizes":{"width":"1600","height":"900"}},"id":"1"},{"image":{"recommendedSizes":{"width":"1600","height":"900"}},"id":"2"},{"image":{"recommendedSizes":{"width":"1600","height":"900"}},"id":"3"},{"image":{"recommendedSizes":{"width":"1600","height":"900"}},"id":"4"}]},"id":"#3","type":"component","lock":false,"position":2},{"name":"ProductShowcase","data":{"componentTemplateId":"cm9h4wr6ugjv10803yqs3tp71"},"id":"#4","type":"component","lock":false,"position":3},{"name":"Footer","data":{"copyrights":"Copyright © 2019 Divesoft LLC All rights reserved.","facebookUrl":{"urlNewWindow":true,"url":"https://www.facebook.com/divesoft/"},"youtubeUrl":{"url":"https://www.youtube.com/channel/UCHI2-kHmfoUlAdhQXPKl8lA/featured","urlNewWindow":true},"instagramUrl":{"url":"https://www.instagram.com/divesoft/","urlNewWindow":true},"contacts":"**Divesoft s.r.o.** \nHálkova 2495 \n413 01 Roudnice nad Labem \nCzech Republic \nTel.: +420 416 857 057 \nE-mail: [email protected]"},"id":"#1","type":"component","lock":false,"position":4}],"id":"root","idBuffer":"#5","lastCommit":"04565db8-0d3f-4abc-a206-2d26175d3107"}},"annotations":[{"type":"id","generated":true,"id":"PageTranslation:ckvwicmzv0a8o0864er9xxkjd.annotations.0","typename":"PageAnnotation"},{"type":"id","generated":true,"id":"PageTranslation:ckvwicmzv0a8o0864er9xxkjd.annotations.1","typename":"PageAnnotation"},{"type":"id","generated":true,"id":"PageTranslation:ckvwicmzv0a8o0864er9xxkjd.annotations.2","typename":"PageAnnotation"}],"language":{"type":"id","generated":false,"id":"Language:cjv3kwvoj000u083611381c6o","typename":"Language"},"__typename":"PageTranslation"},"PageTranslation:ckvwicmzv0a8o0864er9xxkjd.annotations.0":{"key":"title","value":"The CCR Liberty User Interface","__typename":"PageAnnotation"},"PageTranslation:ckvwicmzv0a8o0864er9xxkjd.annotations.1":{"key":"image","value":"{\"mimetype\":\"image/png\",\"size\":737558,\"hash\":\"a57a1c6883885a02c0cabf2d5d748e7c1167d4c6\",\"id\":\"ckvwix8bcw1fy0776d45p66g6\",\"filename\":\"19-blog-ccr-liberty-in-detail.png\",\"category\":\"divesoft/\",\"type\":\"image\"}","__typename":"PageAnnotation"},"PageTranslation:ckvwicmzv0a8o0864er9xxkjd.annotations.2":{"key":"perex","value":"In this episode of CCR Liberty in Detail, Jakub will be looking at the User Interface, screens, and selection of the Dive Modes of Liberty units, explaining each function. You will learn to start the Liberty unit and operate the handset menu by pressing only two buttons. ","__typename":"PageAnnotation"},"Page:ckw6e9xfx0mp50864n0rz0o9x":{"id":"ckw6e9xfx0mp50864n0rz0o9x","type":{"type":"id","generated":false,"id":"PageType:cjv3l213x004f08366hjufttp","typename":"PageType"},"tags":[{"type":"id","generated":false,"id":"Tag:clw52z09zlclk0735mxb7v53p","typename":"Tag"}],"translations({\"where\":{\"language\":{\"id\":\"cjv3kwvoj000u083611381c6o\"}}})":[{"type":"id","generated":false,"id":"PageTranslation:ckw6e9xgh0mpc0864g5mgoulg","typename":"PageTranslation"}],"__typename":"Page"},"PageTranslation:ckw6e9xgh0mpc0864g5mgoulg":{"id":"ckw6e9xgh0mpc0864g5mgoulg","name":"Divesoft.blog / Jill Heinerth and Jeff Bozanic: eCCR vs mCCR discussion","createdAt":"2021-11-19T13:04:51.616Z","content":{"type":"json","json":{"content":[{"name":"Header","data":{"products":[{"title":"Accessories","description":"Backplates, Consumables. Tanks.","img":{"recommendedSizes":{"width":"235","height":"235"}},"url":""},{"title":"Accessories sets","description":"Protection, maintenance, cleaning.","img":{"recommendedSizes":{"width":"235","height":"235"}},"url":""},{"title":"Spare parts","description":"Spare parts and components.","img":{"recommendedSizes":{"width":"235","height":"235"}},"url":""}
2,{"title":"Spare parts kits","description":"Completly Liberty spare parts kits.","img":{"recommendedSizes":{"width":"235","height":"235"}},"url":""}]},"id":"#0","type":"component","lock":false,"position":0},{"name":"BlogArticle","data":{"title":"Divesoft.blog / Jill Heinerth and Jeff Bozanic: eCCR vs mCCR discussion","perex":"This time Joe is hosting Jill Heinerth and Jeff Bozanic discussing electronic CCRs, their history and how they have changed over time. ","content":"[Jill](https://www.divesoft.com/en/ambassadors/jillheinerth) and [Jeff ](https://www.divesoft.com/en/ambassadors/jeffbozanic) start talking about their diving history, involvement in the CCR development and current diving practices. The control system of mCCR vs eCCR is one of the main aspects of this talk and defining the eCCR and the difference between gas control and gas control-dive management. Jill explains how electronic components in CCR adding a sort of \"safety net\". \n\nShe believes that **there is not such a thing as purely mechanical or electronic CCRs**, but instead, all CCR are a combination of two systems. In addition, Jeff shares his working/diving experience and reflects on why he likes to use the eCCR, along with mCCR, during his work underwater. He thinks the combination of **the two systems together gives an extra \"safety net\" during task loading when the diver is most likely to pay less attention to your CCR**. Jill builds on the importance of knowledge of manual operation of CCR manually in the event of an electronics failure underwater. So, is eCCR safer than mCCR? This and other questions about eCCR, including diving preferences, training, dive plan, cave diving, mouthpiece retaining straps, and more.\n\nIn the second half, Jill and Jeff talk about the **history of eCCR**. They share their stories on their early CCR diving, which included early prototypes that did not involve any electronic and even sensors, and how problematic maintenance and their use where. They also talk about the future sensor development and sensor technology, which is still constantly evolving. They also discuss **the changes over time in terms of technical diver mindset,** modifying CCR and impacts, software of user interface. Finally, you will learn about the diving safety rule and some thoughts about eCCR diving. \n\nJill is an underwater explorer, writer, photographer, speaker, and filmmaker. A pioneer of [technical rebreather diving](https://www.divesoft.com/en/products/ccr-liberty/philosophy), she has led expeditions into icebergs in Antarctica, volcanic lava tubes and submerged caves all over. Jeff's experiences include leading and participating in over 60 diving expeditions in the past 40 years. Expeditions that have taken him to places like Palau, the Canary Islands, Mexico, and even Antarctica. His textbook Mastering Rebreathers has been used by countless students and dive instructors.\n\nWatch the Video Now! ð»\n","showTags":false,"showDate":false,"image":{"mimetype":"image/png","size":745068,"hash":"e7a53c18dc6f96a656578444946c47d95d1cd1e3","id":"ckw6es6z9zmc30776qmpiuo98","filename":"20-blog-jill-jeff-eccr.png","category":"divesoft/","type":"image","alt":" Jill Heinerth and Jeff Bozanic: eCCR vs mCCR discussion"}},"id":"#2","type":"component","lock":false,"position":1},{"name":"GalleryAndVideo","data":{"title":"mCCR vs eCCR #2 | with Jill Heinerth and Jeff Bozanic","video":{"type":"embeddedVideo","url":"https://www.youtube.com/embed/b9tc4abjmXY"},"images":[{"image":{"recommendedSizes":{"width":"1600","height":"900"}},"id":"1"},{"image":{"recommendedSizes":{"width":"1600","height":"900"}},"id":"2"},{"image":{"recommendedSizes":{"width":"1600","height":"900"}},"id":"3"},{"image":{"recommendedSizes":{"width":"1600","height":"900"}},"id":"4"}]},"id":"#4","type":"component","lock":false,"position":2},{"name":"ProductShowcase","data":{"componentTemplateId":"cm9h4wr6ugjv10803yqs3tp71"},"id":"#5","type":"component","lock":false,"position":3},{"name":"Footer","data":{"copyrights":"Copyright © 2019 Divesoft LLC All rights reserved.","facebookUrl":{"urlNewWindow":true,"url":"https://www.facebook.com/divesoft/"},"youtubeUrl":{"url":"https://www.youtube.com/channel/UCHI2-kHmfoUlAdhQXPKl8lA/featured","urlNewWindow":true},"instagramUrl":{"url":"https://www.instagram.com/divesoft/","urlNewWindow":true},"contacts":"**Divesoft s.r.o.** \nHálkova 2495 \n413 01 Roudnice nad Labem \nCzech Republic \nTel.: +420 416 857 057 \nE-mail: [email protected]"},"id":"#1","type":"component","lock":false,"position":5}],"id":"root","idBuffer":"#6","lastCommit":"62f56c25-39fd-4250-95b8-9d4ebea42a89"}},"annotations":[{"type":"id","generated":true,"id":"PageTranslation:ckw6e9xgh0mpc0864g5mgoulg.annotations.0","typename":"PageAnnotation"},{"type":"id","generated":true,"id":"PageTranslation:ckw6e9xgh0mpc0864g5mgoulg.annotations.1","typename":"PageAnnotation"},{"type":"id","generated":true,"id":"PageTranslation:ckw6e9xgh0mpc0864g5mgoulg.annotations.2","typename":"PageAnnotation"}],"language":{"type":"id","generated":false,"id":"Language:cjv3kwvoj000u083611381c6o","typename":"Language"},"__typename":"PageTranslation"},"PageTranslation:ckw6e9xgh0mpc0864g5mgoulg.annotations.0":{"key":"title","value":"Divesoft.blog / Jill Heinerth and Jeff Bozanic: eCCR vs mCCR discussion","__typename":"PageAnnotation"},"PageTranslation:ckw6e9xgh0mpc0864g5mgoulg.annotations.1":{"key":"perex","value":"This time Joe is hosting Jill Heinerth and Jeff Bozanic discussing electronic CCRs, their history and how they have changed over time. ","__typename":"PageAnnotation"},"PageTranslation:ckw6e9xgh0mpc0864g5mgoulg.annotations.2":{"key":"image","value":"{\"mimetype\":\"image/png\",\"size\":745068,\"hash\":\"e7a53c18dc6f9
26a656578444946c47d95d1cd1e3\",\"id\":\"ckw6es6z9zmc30776qmpiuo98\",\"filename\":\"20-blog-jill-jeff-eccr.png\",\"category\":\"divesoft/\",\"type\":\"image\"}","__typename":"PageAnnotation"},"Page:ckwdetve60yan08649iw8pair":{"id":"ckwdetve60yan08649iw8pair","type":{"type":"id","generated":false,"id":"PageType:cjv3l213x004f08366hjufttp","typename":"PageType"},"tags":[{"type":"id","generated":false,"id":"Tag:clw52z09zlclk0735mxb7v53p","typename":"Tag"}],"translations({\"where\":{\"language\":{\"id\":\"cjv3kwvoj000u083611381c6o\"}}})":[{"type":"id","generated":false,"id":"PageTranslation:ckwdetvew0yau0864mzrpso30","typename":"PageTranslation"}],"__typename":"Page"},"PageTranslation:ckwdetvew0yau0864mzrpso30":{"id":"ckwdetvew0yau0864mzrpso30","name":"Divesoft.blog / Assembly Checklist and 11-Step Rebreather Pre-Dive Check","createdAt":"2021-11-24T10:54:45.310Z","content":{"type":"json","json":{"content":[{"name":"Header","data":{"products":[{"title":"Accessories","description":"Backplates, Consumables. Tanks.","img":{"recommendedSizes":{"width":"235","height":"235"}},"url":""},{"title":"Accessories sets","description":"Protection, maintenance, cleaning.","img":{"recommendedSizes":{"width":"235","height":"235"}},"url":""},{"title":"Spare parts","description":"Spare parts and components.","img":{"recommendedSizes":{"width":"235","height":"235"}},"url":""},{"title":"Spare parts kits","description":"Completly Liberty spare parts kits.","img":{"recommendedSizes":{"width":"235","height":"235"}},"url":""}]},"id":"#0","type":"component","lock":false,"position":0},{"name":"BlogArticle","data":{"title":"Assembly Checklist and 11-Step Rebreather Pre-Dive Check","perex":"In this 10th episode of CCR Liberty in Detail, Jakub Slama talks about the preparation of the Liberty CCR unit before diving, including the Assembly Checklist, Oxygen Cell Calibration, and Pre-dive Checklist. ","content":"Jakub begins with an [assembly checklist](https://www.divesoft.com/en/products/ccr-liberty/documents), which makes assembly safer and helps the diver follow all crucial steps. The assembly checklist can be printed out or found on the [Divesoft App](https://www.divesoft.com/en/app)!\n\nThe assembly checklist includes the **oxygen cell calibration**, and Jakub demonstrates step by step how to carry out the calibration on the [Liberty unit.](https://www.divesoft.com/en/products/ccr-liberty/philosophy) The calibration jig, calibration O2 of Liberty handset, and oxygen cylinder are required to perform calibration. In the video, Jakub uses an oxygen sensor calibration chart that is part of the assembly checklist to record all necessary values read by the handset on the oxygen sensor screen. Additionally, **CCR Liberty can automatically adjust to the altitude** at which the measurements are taken. Once the values settle and are within the 2mV of calculated values, the calibration continues until completed.\n\nOnce the checklist is completed, Jakub also shows how to proceed with pre-dive check-in Liberty handset, including detailed pressure tests demonstration. **The pre-dive check is the same for all configurations, containing 11 steps**: \n\n* unit communication,\n* pressure sensors reading, \n* [oxygen sensor](https://eshop.divesoft.com/bf/oxygen-sensor-divesoft-22d/3092) reading, \n* helium sensors, \n* battery, \n* solenoids, \n* head-up display, \n* buddy display, \nâ¢\tnegative and positive pressure tests. \n\nFinally, you learn how to enter the dive checklist into the unit. In dive Mode, all checklist steps must be achieved before diving. \n\nTo learn more, watch now! ð»\n","showTags":false,"showDate":false,"image":{"mimetype":"image/png","size":1217310,"hash":"b9a2eb3fbe75518fa9d20556c59c83c8b66c9da9","id":"ckwdf8evj2j1z0776ajlheobu","filename":"21-blog-ccr-liberty-in-detail.png","category":"divesoft/","type":"image"}},"id":"#2","type":"component","lock":false,"position":1},{"name":"GalleryAndVideo","data":{"title":"CCR Liberty in Detail #10 | Rebreather Pre-Dive Check","video":{"type":"embeddedVideo","url":"https://www.youtube.com/embed/6eUBWHcAblU"},"images":[{"image":{"recommendedSizes":{"width":"1600","height":"900"}},"id":"1"},{"image":{"recommendedSizes":{"width":"1600","height":"900"}},"id":"2"},{"image":{"recommendedSizes":{"width":"1600","height":"900"}},"id":"3"},{"image":{"recommendedSizes":{"width":"1600","height":"900"}},"id":"4"}]},"id":"#4","type":"component","lock":false,"position":2},{"name":"ProductShowcase","data":{"componentTemplateId":"cm9h4wr6ugjv10803yq
2s3tp71"},"id":"#5","type":"component","lock":false,"position":3},{"name":"Footer","data":{"copyrights":"Copyright © 2019 Divesoft LLC All rights reserved.","facebookUrl":{"urlNewWindow":true,"url":"https://www.facebook.com/divesoft/"},"youtubeUrl":{"url":"https://www.youtube.com/channel/UCHI2-kHmfoUlAdhQXPKl8lA/featured","urlNewWindow":true},"instagramUrl":{"url":"https://www.instagram.com/divesoft/","urlNewWindow":true},"contacts":"**Divesoft s.r.o.** \nHálkova 2495 \n413 01 Roudnice nad Labem \nCzech Republic \nTel.: +420 416 857 057 \nE-mail: [email protected]"},"id":"#1","type":"component","lock":false,"position":5}],"id":"root","idBuffer":"#6","lastCommit":"3f9001e0-75a6-4c34-ad1c-c9ddb9bb9cf7"}},"annotations":[{"type":"id","generated":true,"id":"PageTranslation:ckwdetvew0yau0864mzrpso30.annotations.0","typename":"PageAnnotation"},{"type":"id","generated":true,"id":"PageTranslation:ckwdetvew0yau0864mzrpso30.annotations.1","typename":"PageAnnotation"},{"type":"id","generated":true,"id":"PageTranslation:ckwdetvew0yau0864mzrpso30.annotations.2","typename":"PageAnnotation"}],"language":{"type":"id","generated":false,"id":"Language:cjv3kwvoj000u083611381c6o","typename":"Language"},"__typename":"PageTranslation"},"PageTranslation:ckwdetvew0yau0864mzrpso30.annotations.0":{"key":"perex","value":"In this 10th episode of CCR Liberty in Detail, Jakub Slama talks about the preparation of the Liberty CCR unit before diving, including the Assembly Checklist, Oxygen Cell Calibration, and Pre-dive Checklist.","__typename":"PageAnnotation"},"PageTranslation:ckwdetvew0yau0864mzrpso30.annotations.1":{"key":"title","value":"Assembly Checklist and 11-Step Rebreather Pre-Dive Check","__typename":"PageAnnotation"},"PageTranslation:ckwdetvew0yau0864mzrpso30.annotations.2":{"key":"image","value":"{\"mimetype\":\"image/png\",\"size\":1217310,\"hash\":\"b9a2eb3fbe75518fa9d20556c59c83c8b66c9da9\",\"id\":\"ckwdf8evj2j1z0776ajlheobu\",\"filename\":\"21-blog-ccr-liberty-in-detail.png\",\"category\":\"divesoft/\",\"type\":\"image\"}","__typename":"PageAnnotation"},"Page:ckwox3bna1w9c0864u2fbdfno":{"id":"ckwox3bna1w9c0864u2fbdfno","type":{"type":"id","generated":false,"id":"PageType:cjv3l213x004f08366hjufttp","typename":"PageType"},"tags":[{"type":"id","generated":false,"id":"Tag:clw52z09zlclk0735mxb7v53p","typename":"Tag"},{"type":"id","generated":false,"id":"Tag:cm5ww05zc1b5d0803zglvz927","typename":"Tag"}],"translations({\"where\":{\"language\":{\"id\":\"cjv3kwvoj000u083611381c6o\"}}})":[{"type":"id","generated":false,"id":"PageTranslation:ckwox3bns1w9j0864xzy5lugk","typename":"PageTranslation"}],"__typename":"Page"},"PageTranslation:ckwox3bns1w9j0864xzy5lugk":{"id":"ckwox3bns1w9j0864xzy5lugk","name":"Divesoft.blog / CCR Liberty unboxing","createdAt":"2021-12-02T12:11:27.303Z","content":{"type":"json","json":{"content":[{"name":"Header","data":{"products":[{"title":"Accessories","description":"Backplates, Consumables. Tanks.","img":{"recommendedSizes":{"width":"235","height":"235"}},"url":""},{"title":"Accessories sets","description":"Protection, maintenance, cleaning.","img":{"recommendedSizes":{"width":"235","height":"235"}},"url":""},{"title":"Spare parts","description":"Spare parts and components.","img":{"recommendedSizes":{"width":"235","height":"235"}},"url":""},{"title":"Spare parts kits","description":"Completly Liberty spare parts kits.","img":{"recommendedSizes":{"width":"235","height":"235"}},"url":""}]},"id":"#0","type":"component","lock":false,"position":0},{"name":"BlogArticle","data":{"title":"CCR Liberty unboxing","perex":"Welcome to the 12th episode of CCR Liberty in Detail. In this episode, Jakub introduces the extra items and tools, spare parts and accessories, which come with a brand-new Liberty unit. ","content":"The extras and accessories do **vary slightly between each unit configuration**. In the video, the [sidemount unit](https://www.divesoft.com/en/products/ccr-liberty/ccr-liberty-sidemount) is used as an example. Before anything else, Jakub goes through the necessities you will find with each unit, such as **a Buddy display, two sets of handsets, a Head-Up display, and [fresh oxygen cells](https://www.divesoft.com/en/blog/rebreather-accessories-oxygen-cell-tester-covers-protectors-and-more) ready for diving**.\n\nFollowing this, Jakub reveals gradually enclosed bags and their contents, including:\n\n* Two boxes of international charges with 2 USB cables\n* Calibration jig with cable and flow limiter\n* Three adjustment tools for counterlung bayonets and low-profile over-pressure valve key\n* Multi-purpose USB connector with cable for downloading dive logs or updating firmware\n* 17mm Head-Up display adapter\n* Blind plug, for sidemounted units as they are more likely to be used as [Bailout CCR](https://www.divesoft.com/en/blog/diving-with-bailout-rebreather)\n* the Plugs and covers for loop hoses\n* Caps set\n* Spare [MAVs](https://eshop.divesoft.com/bf/products/manual-addition-valves)\n* the Plugs for first stage regulators\n* Tube of Krytox, oxygen-compatible lubricant\n* Two Seeger circlips for servicing DSV\n* Set of clamping and snap rings, based on unit configuration\n* Spare Liberty key\n* Spare screws, O-rings, Elastic bungees \n* Helium sensor blind plugs\n* Carry handles\n* Dumpable weight pocket pouches for backmounted units\n\nIn the end, Jakub briefly introduces the **Divesoft Goodie bag** with a surprise and unit documentations, such as packing list, User Manuals, Liberty Travel Passport. Additionally, every Liberty Light comes with a free stand and how to convert from one configuration to another will be cover in a later episode. \n\nLearn More Now! ð»\n","showTags":false,"showDate":false,"image":{"mimetype":"image/png","size":810548,"hash":"b48a888ba21e52147addcd2d88ae27e58cc5ba45","id":"ckwox7qeo7bc80776om2yhbz3","filename":"22-blog-ccr-liberty-in-detail.png","category":"divesoft/","type":"image","alt":"CCR Liberty unboxing"}},"id":"#2","type":"component","lock":false,"position":1},{"name":"GalleryAndVideo","data":{"title":"CCR Liberty in Detail #12 | Rebreather Box Extras Unboxing","video":{"type":"embeddedVideo","url":"https://www.youtube.com/embed/lIvYhtT7F7c"},"images":[{"image":{"recommendedSizes":{"width":"1600","height":"900"}},"id":"1"},{"image":{"recommendedSizes":{"width":"1600","height":"900"}},"id":"2"},{"image":{"recommendedSizes":{"width":"1600","height":"900"}},"id":"3"},{"image":{"recommendedSizes":{"width":"1600","height":"900"}},"id":"4"}]},"id":"#3","type":"component","lock":false,"position":2},{"name":"ProductShowcase","data":{"componentTemplateId":"cm9h4wr6ugjv10803yq
2s3tp71"},"id":"#4","type":"component","lock":false,"position":3},{"name":"Footer","data":{"copyrights":"Copyright © 2019 Divesoft LLC All rights reserved.","facebookUrl":{"urlNewWindow":true,"url":"https://www.facebook.com/divesoft/"},"youtubeUrl":{"url":"https://www.youtube.com/channel/UCHI2-kHmfoUlAdhQXPKl8lA/featured","urlNewWindow":true},"instagramUrl":{"url":"https://www.instagram.com/divesoft/","urlNewWindow":true},"contacts":"**Divesoft s.r.o.** \nHálkova 2495 \n413 01 Roudnice nad Labem \nCzech Republic \nTel.: +420 416 857 057 \nE-mail: [email protected]"},"id":"#1","type":"component","lock":false,"position":4}],"id":"root","idBuffer":"#5","lastCommit":"cb63252c-766b-4a9f-9028-22f7e11de29d"}},"annotations":[{"type":"id","generated":true,"id":"PageTranslation:ckwox3bns1w9j0864xzy5lugk.annotations.0","typename":"PageAnnotation"},{"type":"id","generated":true,"id":"PageTranslation:ckwox3bns1w9j0864xzy5lugk.annotations.1","typename":"PageAnnotation"},{"type":"id","generated":true,"id":"PageTranslation:ckwox3bns1w9j0864xzy5lugk.annotations.2","typename":"PageAnnotation"}],"language":{"type":"id","generated":false,"id":"Language:cjv3kwvoj000u083611381c6o","typename":"Language"},"__typename":"PageTranslation"},"PageTranslation:ckwox3bns1w9j0864xzy5lugk.annotations.0":{"key":"perex","value":"Welcome to the 12th episode of CCR Liberty in Detail. In this episode, Jakub introduces the extra items and tools, spare parts and accessories, which come with a brand-new Liberty unit. ","__typename":"PageAnnotation"},"PageTranslation:ckwox3bns1w9j0864xzy5lugk.annotations.1":{"key":"title","value":"CCR Liberty unboxing","__typename":"PageAnnotation"},"PageTranslation:ckwox3bns1w9j0864xzy5lugk.annotations.2":{"key":"image","value":"{\"mimetype\":\"image/png\",\"size\":810548,\"hash\":\"b48a888ba21e52147addcd2d88ae27e58cc5ba45\",\"id\":\"ckwox7qeo7bc80776om2yhbz3\",\"filename\":\"22-blog-ccr-liberty-in-detail.png\",\"category\":\"divesoft/\",\"type\":\"image\"}","__typename":"PageAnnotation"},"Page:ckx4slj6v005k0a53p9i6x50m":{"id":"ckx4slj6v005k0a53p9i6x50m","type":{"type":"id","generated":false,"id":"PageType:cjv3l213x004f08366hjufttp","typename":"PageType"},"tags":[{"type":"id","generated":false,"id":"Tag:ckp59jt9n48lj0788mfuqrhym","typename":"Tag"}],"translations({\"where\":{\"language\":{\"id\":\"cjv3kwvoj000u083611381c6o\"}}})":[{"type":"id","generated":false,"id":"PageTranslation:ckx4slj7l005r0a532hi4fl96","typename":"PageTranslation"}],"__typename":"Page"},"PageTranslation:ckx4slj7l005r0a532hi4fl96":{"id":"ckx4slj7l005r0a532hi4fl96","name":"Instructors","createdAt":"2021-12-13T14:49:57.632Z","content":{"type":"json","json":{"content":[{"name":"Header","data":{"componentTemplateId":"cjv7yndru048c0836j99ljogw"},"id":"#0","type":"component","lock":false,"position":0},{"name":"ServicePointsMapNew","data":{"title":"Diving Instructors","subtitle":"Find your closest instructors to enhance your diving skills and knowledge. Our curated list features qualified diving instructors who can provide personalized training and guidance, ensuring you have a safe and enjoyable diving experience.","filterByAddress":"false","mapItems":{"datasourceId":"ck52kjnc602df07210m0mc7lm","data":{"city":"%city%","service":"","lat":"%lat%","lng":"%lng%","title":"%name%","country":"%country%","otherCountries":"%countries%","text":"**Factory trainer**: %isFactoryTrainer% \n**Languages**: %languages% \n**Qualifications**: %qualifications% \n**Sidemount instructor**: %isSidemountInstructor% \n**Backmount instructor**: %isBackmountInstructor% \n\n%description%","address":"","storeChief":"%contactPerson%","email":"","phone":"%phones,0%","web":{"url":"%webPages,0% ","urlNewWindow":true},"addFilter":"%associations% ","associations":"%associations% ","detailsLink":true},"filters":[],"orderBy":"%name%"},"thirdFilter":true,"addFilterText":"Select association","showBreadcrumbs":false,"btnTitle":"","urlToForm":{"url":""},"isTitleH1":false,"hideHeader":false},"id":"#3","type":"component","lock":false,"position":2},{"name":"Footer","data":{"copyrights":"Copyright © 2019 Divesoft LLC All rights reserved.","facebookUrl":{"urlNewWindow":true,"url":"https://www.facebook.com/divesoft/"},"youtubeUrl":{"url":"https://www.youtube.com/@divesoft_tv","urlNewWindow":true},"instagramUrl":{"url":"https://www.instagram.com/divesoft/","urlNewWindow":true},"contacts":"**Divesoft s.r.o.** \nHálkova 2495 \n413 01 Roudnice nad Labem \nCzech Republic \nTel.: +420 416 857 057 \nE-mail: [email protected]","twitterUrl":{"url":"","urlNewWindow":true,"pageId":"cjv3l26tp004p0836i54n4u7a"}},"id":"#1","type":"component","lock":false,"position":5}],"id":"root","idBuffer":"#6","lastCommit":"4ac9dbca-aebb-4827-b1b4-29627fd00b41"}},"annotations":[],"language":{"type":"id","generated":false,"id":"Language:cjv3kwvoj000u083611381c6o","typename":"Language"},"__typename":"PageTranslation"},"Page:ckx60balw01yz0858sye1ixvu":{"id":"ckx60balw01yz0858sye1ixvu","type":{"type":"id","generated":false,"id":"PageType:cjv3l213x004f08366hjufttp","typename":"PageType"},"tags":[],"translations({\"where\":{\"language\":{\"id\":\"cjv3kwvoj000u083611381c6o\"}}})":[{"type":"id","generated":false,"id":"PageTranslation:ckx60bant01z60858i9h10uav","typename":"PageTranslation"}],"__typename":"Page"},"PageTranslation:ckx60bant01z60858i9h10uav":{"id":"ckx60bant01z60858i9h10uav","name":"Analyzer Solo O2","createdAt":"2021-12-14T11:13:43.096Z","content":{"type":"json","json":{"content":[{"name":"Header","data":{"products":[{"title":"Accessories","description":"Backplates, Consumables. Tanks.","img":{"recommendedSizes":{"width":"235","height":"235"}},"url":""},{"title":"Accessories sets","description":"Protection, maintenance, cleaning.","img":{"recommendedSizes":{"width":"235","height":"235"}},"url":""},{"title":"Spare parts","description":"Spare parts and components.","img":{"recommendedSizes":{"width":"235","height":"235"}},"url":""}
2,{"title":"Spare parts kits","description":"Completly Liberty spare parts kits.","img":{"recommendedSizes":{"width":"235","height":"235"}},"url":""}],"showScrollIndicator":true},"id":"#0","type":"component","lock":false,"position":0},{"name":"ProductCrossroadNew","data":{"componentTemplateId":"cmo3f1kzkw8pd0889hxoow8p1"},"id":"#25","type":"component","lock":false,"position":1},{"name":"HeroV2","data":{"slides":[{"recommendedSizes":{"width":"3840","height":"2560"},"id":"1","media":{"mimetype":"image/png","size":5549086,"hash":"f0efd938b263d81c5ad57bb1d8edf40e3e550e5d","id":"cmljlydmin4t10800rud7iqsh","filename":"herosolo2.png","category":"divesoft/","type":"image"},"productName":"SOLO O<sub>2</sub>","title":"Simple Oxygen Analysis","linkUrl":{"url":"https://eshop.divesoft.com/analyzer-solo-o2/8302","urlNewWindow":true},"linkTitle":"Buy"}],"activeTab":"1","variant":"a"},"id":"#2","type":"component","lock":false,"position":2},{"name":"CarouselTextBlock","data":{"title":"SOLO O<sub>2</sub> ANALYZER","subtitle":"","contentText":"SOLO O<sub>2</sub> analyzes oxygen content in breathing gas mixes. A compact analyzer designed for divers, dive centers and gas blending.","buttonTitle":"Buy","buttonUrl":{"url":"https://eshop.divesoft.com/analyzer-solo-o2/8302","urlNewWindow":true},"linkTitle":"Dive in","linkUrl":{"url":"#technical-specifications","urlNewWindow":false},"images":[{"image":{"recommendedSizes":{"width":"1500","height":"1000"},"mimetype":"image/png","size":238479,"hash":"a524b52ac7e509d3f024c6c2fb6fadc78c88917d","id":"cmljm1am2n4vi080098i3tw4h","filename":"solo21.png","category":"divesoft/","type":"image"},"id":"1"},{"id":"2","image":{"mimetype":"image/png","size":154484,"hash":"8c83b57f402621f31dceba6f4541bf77a1ae5aec","id":"cmljm1irln4w808000gskq7wd","filename":"solo22.png","category":"divesoft/","type":"image"}},{"id":"3","image":{"mimetype":"image/png","size":158877,"hash":"75fdd43a4651b5223cc2a0fdfc719b251d22299f","id":"cmljm1rafn4wp08007z2ovvpq","filename":"solo23.png","category":"divesoft/","type":"image"}},{"id":"4","image":{"mimetype":"image/png","size":173970,"hash":"1bdb0327e4f10af63cbe189c1e614cb8d6870926","id":"cmljm20p9n4x30800qn9o8vs4","filename":"solo24.png","category":"divesoft/","type":"image"}},{"id":"5","image":{"mimetype":"image/png","size":748157,"hash":"3984f4a2bae19b98d234269cbba5070264dfafc6","id":"cmljm2nwbn4yn0800l56dv118","filename":"solo25.png","category":"divesoft/","type":"image"}}],"activeTab":"5"},"id":"#4","type":"component","lock":false,"position":3},{"name":"ImageTextBlock","data":{"title":"","content":"## Practical use\n\n**Compact and Ready to Go**\n\nSmall. Lightweight. Always with you.\n\nSOLO Oâ analyzer is designed for divers who want a simple and reliable way to check oxygen in their â¨gas mix.\n\nCompact enough for any dive bag and protected by a semi-hard case, ready whenever you need to verify your gas before the dive.","isMirrored":false,"image":{"recommendedSizes":{"width":"1500","height":"1500"},"mimetype":"image/png","size":2414647,"hash":"00912df624fe2da55a054287438d300f9faf000e","id":"cmo22urt8m8pq0800wii52u26","filename":"solo21.png","category":"divesoft/","type":"image"}},"id":"#5","type":"component","lock":false,"position":4},{"name":"ImageTextBlock","data":{"title":"","content":"## Hardware\n\n**Construction and Design**\n\nBuilt on the same platform as the advanced SOLO Analyzer, SOLO Oâ
2 features the same bright OLED display, clear keypad layout and ergonomic shape.\n\nUSB-C charging keeps the analyzer ready for use, and the intuitive interface makes calibration and analysis straightforward.","isMirrored":true,"image":{"recommendedSizes":{"width":"1500","height":"1500"},"mimetype":"image/png","size":1297137,"hash":"68ccf72ef6058e5d57f434e5cfce2992773f1a97","id":"cmo22vjpbm8q00800ldhra064","filename":"solo22.png","category":"divesoft/","type":"image"}},"id":"#6","type":"component","lock":false,"position":5},{"name":"ImageTextBlock","data":{"title":"","content":"## Gas Analysis\n\n**Gas Mixes**\n\n- Air.\n- Nitrox.\n \n**Gases Measured**\n\n- \\> Oxygen","isMirrored":false,"image":{"recommendedSizes":{"width":"1500","height":"1500"},"mimetype":"image/png","size":2043860,"hash":"d079d1ad8966caa05a41a777fea3a35300353802","id":"cmo22wu4lm8qb0800yj5u9suk","filename":"solo23.png","category":"divesoft/","type":"image"}},"id":"#7","type":"component","lock":false,"position":6},{"name":"Showreel","data":{"isFullWidth":false,"slides":[{"title":"Simplicity","isTextCentered":true,"media":{"recommendedSizes":{"width":"3840","height":"2560"},"mimetype":"image/png","size":5453807,"hash":"825183120067ca48ee3a72f6efb3697f16747680","id":"cmo22xlh4m8ql08001kf36ip9","filename":"solo244.png","category":"divesoft/","type":"image"},"autoplayDuration":5000,"id":"1"}],"activeTab":"1"},"id":"#22","type":"component","lock":false,"position":7},{"name":"Spacer","data":{"spacingLarge":"80","spacingSmall":"80","backgroundColor":"#ffffff"},"id":"#26","type":"component","lock":false,"position":8},{"name":"ImageTextBlock","data":{"title":"","content":"## Sensors / Measurement Principle\n\nOxygen measurement is performed using a standard electrochemical oxygen sensor compatible with common R22-type sensors.\n\nSOLO Oâ analyzer measures oxygen across the full 0â100 % range with accuracy of ±1 % after proper calibration.","isMirrored":true,"image":{"recommendedSizes":{"width":"1500","height":"1500"},"mimetype":"image/png","size":2247402,"hash":"b537269c662a8ecbaec9407553884c2b5c5e3dca","id":"cmo22yrnpm8r50800h9f7dv0n","filename":"solo25.png","category":"divesoft/","type":"image"}},"id":"#8","type":"component","lock":false,"position":9},{"name":"ImageTextBlock","data":{"title":"","content":"## Upgrade\n\n**Upgradable to SOLO Analyzer**\n\nDesigned to grow with you.\n\nSOLO O<sub>2</sub> shares the same hardware platform as the advanced SOLO Analyzer.\n\nWhen your diving needs expand, the device can be upgraded to the full SOLO Analyzer with additional capabilities including helium analysis and advanced gas mixing tools.","isMirrored":false,"image":{"recommendedSizes":{"width":"1500","height":"1500"},"mimetype":"image/png","size":3444423,"hash":"3c2c119c04c35b0ffdb5926ec218b7929d3fd100","id":"cmoh9xxa02voq0800ioa3wyiz","filename":"pribehsolo6.png","category":"divesoft/","type":"image"}},"id":"#10","type":"component","lock":false,"position":10},{"name":"ProductsCompare","data":{"componentTemplateId":"cmo217fjivvbv08890d7r7mhl"},"id":"#23","type":"component","lock":false,"position":11},{"name":"CallToAction","data":{"backgroundColor":"white","isCentered":true,"title":"","links":[{"title":"Buy","url":{"url":"https://eshop.divesoft.com/analyzer-solo-o2/8302","urlNewWindow":true},"color":"black","type":"outline","id":"1"}],"linkPosition":"below","linkAlignment":"right","activeTab":"1"},"id":"#29","type":"component","lock":false,"position":12},{"name":"LinkAnchor","data":{"anchorId":"technical-specifications"},"id":"#27","type":"component","lock":false,"position":13},{"name":"AccordionText","data":{"accordionTitle":"Design","content":"**Dimensions** \n85 à 205 à 40 mm \n\n**Weight** \n410 g\n\n**Materials** \nDurable ABS-PC (body)\n\n**Display and user interface** \nBright OLED \nFull keypad"},"id":"#13","type":"component","lock":false,"position":14},{"name":"AccordionLinks","data":{"accordionTitle":"How Does it Work","links":[{"itemTitle":"Analyzer SOLO O<sub>2</sub>","linkLabel":"Open","linkUrl":{"url":"https://www.youtube.com/watch?v=NCImIR48sG4"}
2,"id":"1"}],"storesTitle":"","appStoreLink":{"url":"https://apps.apple.com/cz/app/divesoft-app/id1545496130"},"googlePlayLink":{"url":"https://play.google.com/store/apps/details?id=com.divesoft.divesoft_app"}},"id":"#32","type":"component","lock":false,"position":15},{"name":"AccordionText","data":{"accordionTitle":"Gas Analysis","content":"**Gas Mixes** \nAir, Nitrox\n\n**Gases Measured** \nOxygen\n\n**Upgradable to SOLO Analyzer** \nWhen your diving needs expand, the device can be upgraded to the full SOLO Analyzer with additional capabilities including helium analysis and advanced gas mixing tools."},"id":"#31","type":"component","lock":false,"position":16},{"name":"AccordionText","data":{"accordionTitle":"Technical Specifications","content":"**Measurement Method** \nElectrochemical oxygen sensor\n\n**Range of oxygen measurement** \n0â100 % O<sub>2</sub>\n\n**Measuring temperature** \n0â40 °C\n\n**Operating pressure** \n700â1100 mbar\n\n**Recommended Gas Flow** \n0.2 L/min\n\n**Calibration** \nAmbient air or reference gas\n\n**Power** \nRechargeable Li-Ion battery, USB-C charging\n\n**Upgradeable** \nCan be converted to full SOLO Analyzer at any Divesoft service center\n"},"id":"#15","type":"component","lock":false,"position":17},{"name":"AccordionText","data":{"accordionTitle":"Connectivity","content":"USB-C cable"},"id":"#16","type":"component","lock":false,"position":18},{"name":"AccordionText","data":{"accordionTitle":"Packaging","content":"Each SOLO O<sub>2</sub> Analyzer comes in a protective semi-hard case with precision-cut foam inserts. The standard package includes a USB-C cable, flow limiter, and calibration adapter, everything you need to start measuring right away."},"id":"#17","type":"component","lock":false,"position":19},{"name":"AccordionText","data":{"accordionTitle":"Sustainability","content":"The SOLO O<sub>2</sub> reflects Divesoftâs sustainable approach to design.\nIts rechargeable battery reduces waste, and the upgradable platform extends the productâs lifetime.\nWith proper care and regular service, your analyzer will stay reliable for years of diving."},"id":"#18","type":"component","lock":false,"position":20},{"name":"AccordionText","data":{"accordionTitle":"Warranty","content":"The SOLO O<sub>2</sub> Analyzer includes a 24-month warranty on the device and a 12-month warranty on the oxygen sensor. For upgrades, maintenance, or warranty claims, please contact your Divesoft dealer or authorized service center."},"id":"#19","type":"component","lock":false,"position":21},{"name":"AccordionLinks","data":{"accordionTitle":"Downloads","links":[{"itemTitle":"User manual","linkLabel":"Open","linkUrl":{"url":"/en/manuals/8302-analyzer-solo-o2-en","mediaData":{"mimetype":"application/pdf","size":641529,"hash":"388f02792d9251e0775eb124b0a99e70b52a91b5","id":"cjvwa22zx04l907760wmpqukl","filename":"analyzer.pdf","category":"divesoft/docs/","type":"file"},"urlNewWindow":true,"pageId":"ckx63km7c027h0858b0tm2sky"},"id":"1"},{"id":"2","itemTitle":"Analyzers Comparison","linkUrl":{"url":"http://foxer360-media-library.s3.eu-central-1.amazonaws.com/divesoft/docs/340ee3ff0777b8d06792ea829af47451c905b26c_analyzers-comparison-202601.pdf","mediaData":{"mimetype":"application/pdf","size":940217,"hash":"340ee3ff0777b8d06792ea829af47451c905b26c","id":"cmll1gmylnnyg08006ews1qxv","filename":"analyzers-comparison-202601.pdf","category":"divesoft/docs/","type":"file"},"urlNewWindow":true},"linkLabel":"Open"}],"storesTitle":"","appStoreLink":{"url":"https://apps.apple.com/cz/app/divesoft-app/id1545496130"},"googlePlayLink":{"url":"https://play.google.com/store/apps/details?id=com.divesoft.divesoft_app"},"activeTab":"2"},"id":"#20","type":"component","lock":false,"position":22},{"name":"CallToAction","data":{"componentTemplateId":"cmo9u6bhwy5g90889gprzyxzf"},"id":"#28","type":"component","lock":false,"position":23},{"name":"Footer","data":{"copyrights":"Copyright © 2019 Divesoft LLC All rights reserved.","facebookUrl":"","youtubeUrl":"","instagramUrl":"","contacts":"**Divesoft, s.r.o.** Hálkova 2495 413 01 Roudnice nad Labem Äeská republika Tel.: +420 416 857 057 E-mail: [email protected]"},"id":"#1","type":"component","lock":false,"position":24}],"id":"root","idBuffer":"#33","lastCommit":"1575687f-0ba7-45e9-8174-f24de8ed1543"}},"annotations":[],"language":{"type":"id","generated":false,"id":"Language:cjv3kwvoj000u083611381c6o","typename":"Language"},"__typename":"PageTranslation"},"Page:ckx63km7c027h0858b0tm2sky":{"id":"ckx63km7c027h0858b0tm2sky","type":{"type":"id","generated":false,"id":"PageType:cjv3l213x004f08366hjufttp","typename":"PageType"},"tags":[],"translations({\"where\":{\"language\":{\"id\":\"cjv3kwvoj000u083611381c6o\"}}})":[{"type":"id","generated":false,"id":"PageTranslation:ckx63km7w027o0858zi952zs5","typename":"PageTranslation"}],"__typename":"Page"},"PageTranslation:ckx63km7w027o0858zi952zs5":{"id":"ckx63km7w027o0858zi952zs5","name":"#8302_analyzer-solo-o2_en","createdAt":"2021-12-14T12:44:56.828Z","content":{"type":"json","json":{"content":[{"name":"Header","data":{"products":[{"title":"Accessories","description":"Backplates, Consumables. Tanks.","img":{"recommendedSizes":{"width":"235","height":"235"}},"url":"","id":"1"},{"title":"Accessories sets","description":"Protection, maintenance, cleaning.","img":{"recommendedSizes":{"width":"235","height":"235"}},"url":"","id":"2"},{"title":"Spare parts","description":"Spare parts and components.","img":{"recommendedSizes":{"width":"235","height":"235"}},"url":"","id":"3"}
2,{"title":"Spare parts kits","description":"Completly Liberty spare parts kits.","img":{"recommendedSizes":{"width":"235","height":"235"}},"url":"","id":"4"}],"showShadow":true},"id":"#0","type":"component","lock":false,"position":0},{"name":"SectionDivider","data":{"title":"User manual","skipToC":false},"id":"#102","type":"component","lock":false,"position":1},{"name":"ProductShowcase","data":{"backgroundColor":"#ffffff","isTextDark":true,"isImageRight":true,"image":{"mimetype":"image/png","size":274302,"hash":"8fa1f1400e1916d0efe7ce00329e405fb32ef028","id":"ckyslvk89wxk80776fw45stch","filename":"8302-divesoft-analyzer-solo-o2-p-01-1080x1080-w.png","category":"divesoft/","type":"image"},"imageMobile":{},"title":"User manual","subtitle":"Analyzer SOLO O2","description":"version 2022/02/02 \n\n#8302\n","hideDescriptionOnMobile":false,"areButtons":false,"firstTitle":"Learn more >","firstUrl":"","secondTitle":"Configurator >","secondUrl":""},"id":"#22","type":"component","lock":false,"position":2},{"name":"Divider","data":{"color":"darkGray"},"id":"#21","type":"component","lock":false,"position":3},{"name":"SectionDivider","data":{"title":"Content","skipToC":false},"id":"#103","type":"component","lock":false,"position":4},{"name":"TextBlock","data":{"text":"### **Content** \n\nSafety warning \n01. About firmware and hardware versions \n01.1 Hardware limitations \n01.2. Upgrade to a helium analyzer \n02.\tMeasuring principle \n03.\tDescription of the analyzer \n04.\tOperating the analyzer \n05.\tMeasuring O2 concentration \n06.\tDisplay modes \n06.1\tCalibration of the oxygen sensor \n07. Other functions \n07.1\tContinuous analysis \n07.2\tGas mixing solver \n07.3\tGas mixing simulation \n07.4\tAmbient pressure \n08.\tSpecial accessories \n08.1\tFlow regulator \n09.\tSet-up \n09.1\tPreferences \n09.2\tMeasurement units \n09.3\tMixing of gases \n09.4\tContinual analysis \n10.\tCharging and battery status \n11.\tMaintenance \n11.1\tBattery replacement \n11.2\tOxygen sensor replacement \n11.3\tDisassembly of the instrument \n12.\tConnecting to a computer \n13.\tDefects and removal thereof \n13.1\tError messages \n13.2\tInstrument malfunctions \n14.\tTechnical data ","textLarge":false,"imageOnRight":true,"image":{"recommendedSizes":{"width":"420","height":"280"}},"imageMobile":{"recommendedSizes":{"width":"750","height":"500"}}},"id":"#20","type":"component","lock":false,"position":5},{"name":"Divider","data":{"color":"darkGray"},"id":"#23","type":"component","lock":false,"position":6},{"name":"SectionDivider","data":{"title":"Safety warning","skipToC":false},"id":"#104","type":"component","lock":false,"position":7},{"name":"TextBlock","data":{"text":"### **Safety warning**\n\nThis analyzer is designed for measuring the content of oxygen in an air-oxygen gas mixture. \n**This analyzer doesnât contain helium sensors and IT IS NOT intended to measure helium mixtures** such as Trimix, Heliox, Heliair or Triox.\nIt cannot be used to analyze mixtures containing other gases than those mentioned above \n\nThe physical and chemical principles of the sensors used do not guarantee that the sensors will be selectively sensitive to a specific gas (oxygen); there are a number of gases to which the sensors respond. Therefore, the gas composition shown by the analyzer does not mean by itself that the real composition of the mix is equal to the displayed values. The displayed mix composition is invalid unless the mixing technology ensures that there are no other gases present in the mix except air/nitrogen, and pure oxygen. \n\nThe analyzer is not a certified measuring instrument The results of measuring are only informative and it is not possible to use such results where a certified measuring instrument is required \n\nWhen analyzing mixes in situations where the incorrect composition of the mixes could cause material damage, injury to health or threaten human health or life, for example in the case of breathing mixes for diving, the results of the analysis may not be used as confirmation of the correct mix composition In these cases, the analyzer can only be used as an aid for increasing the probability that such incorrect mix composition will be detected before its use. The correctness of the mix composition must be established by the technology used to prepare it. \n\nThe correct preparation of breathing mixes for diving (nitrox â oxygen-enriched air) requires special knowledge and experience which is possible to gain, for example, through an appropriate course. A failure to apply such knowledge c
2an lead to an incorrect mix, even though the results of the analysis are seemingly correct Such a situation can also be the result of a failure to take into account the influence of temperature and compressibility, an insufficient blending of the mix and other factors. \n\nPlease remember that the analyzer can be broken or damaged and that the oxygen sensor is by its nature subject to ageing and thus its properties deteriorate. \n \n\n\n\n\n\nTherefore always verify the measured data in another way, such as by precise preparation of the mix, another analytical method, etc. In addition, the measured value must be subject to critical assessment using a common-sense approach and if it differs from the allowable variation of mixing accuracy, it must be considered invalid.\n","textLarge":false,"imageOnRight":true,"image":{"recommendedSizes":{"width":"420","height":"280"}},"imageMobile":{"recommendedSizes":{"width":"750","height":"500"}}},"id":"#35","type":"component","lock":false,"position":8},{"name":"Divider","data":{"color":"darkGray"},"id":"#36","type":"component","lock":false,"position":9},{"name":"SectionDivider","data":{"title":"01. About firmware and hardware versions","skipToC":false},"id":"#105","type":"component","lock":false,"position":10},{"name":"TextBlock","data":{"text":"### **01. About firmware and hardware versions ** \n\nAnalyzer SOLO O2 is equipped with a microprocessor whose program (firmware) is continuously updated. This manual is for firmware release 2.32, but the manual can be applied to any hardware or firmware version. Manual is primarily written for hardware version 3.1. \n\n","textLarge":false,"imageOnRight":false,"image":{"recommendedSizes":{"width":"420","height":"280"}},"imageMobile":{"recommendedSizes":{"width":"750","height":"500"}}},"id":"#10","type":"component","lock":false,"position":11},{"name":"Divider","data":{"color":"darkGray"},"id":"#19","type":"component","lock":false,"position":12},{"name":"SectionDivider","data":{"title":"01.1. Hardware limitations","skipToC":false},"id":"#106","type":"component","lock":false,"position":13},{"name":"TextBlock","data":{"text":"### **01.1. Hardware limitations** \nAnalyzer SOLO O2 does not contain a helium sensor and is designed for air, nitrox and oxygen analysis only.\n\n","textLarge":false,"imageOnRight":true,"image":{"recommendedSizes":{"width":"420","height":"280"}},"imageMobile":{"recommendedSizes":{"width":"750","height":"500"}}},"id":"#93","type":"component","lock":false,"position":14},{"name":"Divider","data":{"color":"darkGray"},"id":"#94","type":"component","lock":false,"position":15},{"name":"SectionDivider","data":{"title":"01.2 Upgrade to a helium analyzer","skipToC":false},"id":"#107","type":"component","lock":false,"position":16},{"name":"TextBlock","data":{"text":"### **01.2 Upgrade to a helium analyzer** \n\nAnalyzer SOLO O2 can be upgraded to a helium analyzer. During this upgrade, some hardware parts of the instrument are replaced and new firmware is uploaded. \nFor these reasons, the upgrade is only possible through a Divesoft service technician or directly at Divesoft. A list of Divesoft service locations can be found here: https://www.divesoft.com/en/contacts/service-points","textLarge":false,"imageOnRight":true,"image":{"recommendedSizes":{"width":"420","height":"280"}},"imageMobile":{"recommendedSizes":{"width":"750","height":"500"}}},"id":"#95","type":"component","lock":false,"position":17},{"name":"Divider","data":{"color":"darkGray"},"id":"#96","type":"component","lock":false,"position":18},{"name":"SectionDivider","data":{"title":"02. Measuring principle","skipToC":false},"id":"#108","type":"component","lock":false,"position":19},{"name":"TextBlock","data":{"text":"### **02. Measuring principle** \n\nThe described measuring principle is valid only for mixes of air, nitrox and oxygen.\n\nAn electrochemical sensor is used to determine the oxygen content. The voltage at the sensorâs output is proportional to the oxygen content in the analyzed mix The sensor has a limited service life and the proportionality of the dependence of voltage on the oxygen content changes over time; therefore, it has to be regularly calibrated It is possible to choose between single-point, two-point and three-point calibration. Single-point calibration is fast, especially if air is chosen as the calibrating mix. For greater accuracy of the measurement, two-point calibration is used with two different mixes, typically air and pure oxygen. For strongly hy
2poxic mixes, i.e. mixes containing less than approximately 15% oxygen, three-point calibration is recommended In this case, the third calibration gas should be a gas with zero oxygen content, i.e. pure helium or argon. \n\nGas is delivered to the analyzer from a sampler connected to the compressed-gas tank and the gas flow is controlled using a nozzle to provide the volume needed for the analysis. \n","textLarge":false,"imageOnRight":true,"image":{"recommendedSizes":{"width":"420","height":"280"}},"imageMobile":{"recommendedSizes":{"width":"750","height":"500"}}},"id":"#24","type":"component","lock":false,"position":20},{"name":"Divider","data":{"color":"darkGray"},"id":"#34","type":"component","lock":false,"position":21},{"name":"SectionDivider","data":{"title":"03.\tDescription of the analyzer","skipToC":false},"id":"#109","type":"component","lock":false,"position":22},{"name":"TextBlock","data":{"text":"### **03.\tDescription of the analyzer** \n\nThe lightweight and robust body is made from ABS-PC.\n\nOn the front side, the analyzer features a membrane keypad and an OLED display on which the measured values are shown. \n\nMeasured gas is fed into the analyzed-mix inlet on the back of the analyzer. From there, it enters the oxygen-sensor block and is expelled into the air by the mix exhaust. The rated flow of the analyzed mix is 0,2 - 0,4 L/min.\n\nThe analyzer is powered by a built-in battery, charging is possible through USB-C connector on the side of the analyzer.","textLarge":false,"imageOnRight":true,"image":{"recommendedSizes":{"width":"420","height":"280"}},"imageMobile":{"recommendedSizes":{"width":"750","height":"500"}}},"id":"#33","type":"component","lock":false,"position":23},{"name":"Image","data":{"firstImage":{"mimetype":"image/png","size":337036,"hash":"c0022000e33f111119dfd3d39f5be69d36a22092","id":"ckycvc5u8rf8j0776qkzz9a30","filename":"8302-divesoft-analyzer-solo-o2-qr01.png","category":"divesoft/","type":"image"},"secondImage":{},"image":{"type":"image"}},"id":"#37","type":"component","lock":false,"position":24},{"name":"Divider","data":{"color":"darkGray"},"id":"#39","type":"component","lock":false,"position":25},{"name":"SectionDivider","data":{"title":"04. Operating the analyzer","skipToC":false},"id":"#110","type":"component","lock":false,"position":26},{"name":"TextBlock","data":{"text":"### **04. Operating the analyzer** \n\nThe analyzer is operated using the keys on its front panel. \n\nIt is activated by pressing the ON/OFF key for approximately one second. Upon activation, an automatic check of the instrument is performed and the analyzer automatically switches to the measuring mode. \n\nWhen this key is pressed, the firmware version code and serial number of the analyzer are displayed. If you need to read this information, just hold the key down longer when activating the unit. \n\nThe analyzer is deactivated by pressing the **| ON OFF |** key for about one second again. \n\nThe **| MENU |** key displays the available options. The menu changes in individual measuring modes, depending on the functions relevant to the applicable mode. \n\nThe **| OK |** key is used to enter the selected menu item, confirm a changed value or perform the prepared action. The selected menu item can also be called up by repeatedly pressing the **| MENU |** key. \n\nThe **| ESC |** key is used to exit the menu or return from the value editing mode without saving the changed value. \n\nThe **| Ë |** and **| Ë
|** keys are used to browse the menu or change the value of a number above the cursor. \n\nThe MODE key is used to change the display mode or to change the cursor position in the number editing mode. \n\nOther functions of the keys are described in the relevant chapters.\n","textLarge":false,"imageOnRight":true,"image":{"recommendedSizes":{"width":"420","height":"280"}},"imageMobile":{"recommendedSizes":{"width":"750","height":"500"}}},"id":"#47","type":"component","lock":false,"position":27},{"name":"Image","data":{"firstImage":{"mimetype":"image/png","size":48453,"hash":"21087ec4716565868865a78e8aa4a33ed8c2f553","id":"ckycvcqusrf910776gfmz1er6","filename":"8302-divesoft-analyzer-solo-o2-qr02.png","category":"divesoft/","type":"image"},"secondImage":{},"image":{"type":"image"}},"id":"#58","type":"component","lock":false,"position":28},{"name":"Divider","data":{"color":"darkGray"},"id":"#41","type":"component","lock":false,"position":29},{"name":"SectionDivider","data":{"title":"05.\tMeasuring O<sub>2</sub> concentration","skipToC":false},"id":"#111","type":"component","lock":false,"position":30},{"name":"TextBlock","data":{"text":"### **05.\tMeasuring O<sub>2</sub> concentration**\n\nThe plastic simple flow limiter is used in the basic configuration (see illustration).\n\nConnect the simple flow limiter to the input port on the left side of the analyzer. Slowly and gradually open the cylinder valve so that the gas flows gently. Insert the Simple Flow Limiter into the bottle valve and press down so that the O-ring seals against the valve. \nAvoid letting a sharp gas surge directly into the analyzer.\nFor better and more accurate results, use Divesoft's optional Professional Flow
2Limiter.\n","textLarge":false,"imageOnRight":true,"image":{"recommendedSizes":{"width":"420","height":"280"}},"imageMobile":{"recommendedSizes":{"width":"750","height":"500"}}},"id":"#50","type":"component","lock":false,"position":31},{"name":"Image","data":{"firstImage":{"mimetype":"image/png","size":230527,"hash":"61dc4f2dac271abb0ff4fc8b2e5f1c80844a3b0b","id":"ckysmg9f4wy3o0776vqh21mxw","filename":"8302-divesoft-analyzer-solo-o2-m-s06.png","category":"divesoft/","type":"image"},"secondImage":{},"image":{"type":"image"}},"id":"#59","type":"component","lock":false,"position":32},{"name":"TextBlock","data":{"text":"The analyzer switches into the oxygen measuring mode upon activation, so there is no need for you to set up anything. Open the valve on the bottle to let the gas flow in. The gas composition is displayed after approximately 5Â â 10 seconds. \n\nWith the **| OK |** key, you can suspend and, by pressing it again, resume measuring. When measuring is suspended, the last measured values remain displayed. During measuring, the **| Ë |** key can be used for temporarily increasing the brightness of the display to maximum (e.g. if the display is exposed to sunlight). \n\nWhen the measuring is completed, close the valve on the tank. If you use Professional Flow Limiter discharge the excess pressure of the gas by loosening the discharge valve (generally 1/2 turn suffices) so that the flow limiter can be unscrewed from the tank valve. \nWarning: Do not unscrew the discharge-valve spindle completely;
2 a steel ball is contained inside which upon opening could be expelled and cause injury or be lost.\n","textLarge":false,"imageOnRight":true,"image":{"recommendedSizes":{"width":"420","height":"280"}},"imageMobile":{"recommendedSizes":{"width":"750","height":"500"}}},"id":"#49","type":"component","lock":false,"position":33},{"name":"Divider","data":{"color":"darkGray"},"id":"#43","type":"component","lock":false,"position":34},{"name":"SectionDivider","data":{"title":"06.\tDisplay modes","skipToC":false},"id":"#112","type":"component","lock":false,"position":35},{"name":"TextBlock","data":{"text":"### **06.\tDisplay modes** \n\nUpon activation, the analyzer is normally in the O2 mode, in one of the two display formats \n\nThe basic format shows: \nâ\tThe oxygen content in the mixture in perce \nâ\t MOD (mixtureâs Maximum Operating Depth) at certain preset ppO2 \nâ\tPreset ppO2 value \nâ\tThe temperature at which the gas was measured \n \n\n\nThe well-arranged format shows the composition in a way used by divers to call the mixtures: \nâ\tAir: air with the oxygen content between 20.5 % and 21.5 % \nâ\tEAN, for instance EAN 36, is air enriched with oxygen, in this case up to 36 % oxygen \nâ\tFoul Air, for instance Foul Air (10 % O2), is foul or vitiated air with a reduced oxygen content It cannot be mixed with gases designed for preparation of breathing mixes commonly available to the diver (air, oxygen, helium); therefore, its presence indicates a problem. This may include ongoing corrosion inside the bottle or contamination of the mix with argon, carbon dioxide or another gas. Such air cannot be used for breathing under any circumstances. \n\nIn addition to the mix composition, this well-arranged format shows approximate values of the maximum operating depth (MOD). \n\nMOD indicates the depth to which the diver can dive for a short time under otherwise ideal conditions. The limit of partial oxygen pressure equal to 16 kPa is used in the calculation, and seawater and the static pressure at sea level are taken into account. This reading is for orientation only, and for an actual dive it must be calculated using the data of the specific dive. The minimum pO2 can be set according to your own requirements:\tâ/ Preferences / Partial pressure O2â\n\nThe following formula is used for the calculation:\n\n\tPmax\tmaximum allowable partial oxygen pressure, chosen as 160,000 Pa \n\tP0\tstatic pressure at sea level, 101,325 Pa \n\tRO2\trelative molar concentration of oxygen in the interval 0 to 1 \n\tÏ\tseawater density, 1028 kg mâ3 \n\tg\tstandard acceleration of gravity, 9.80665 m sâ2 \n\nwhere:","textLarge":false,"imageOnRight":true,"image":{"recommendedSizes":{"width":"420","height":"280"}},"imageMobile":{"recommendedSizes":{"width":"750","height":"500"}}},"id":"#61","type":"component","lock":false,"position":36},{"name":"Image","data":{"firstImage":{"mimetype":"image/jpeg","size":15225,"hash":"a898843d6cec9ef781476fd835a750007b81d819","id":"ckolgb7tx6hks07767emuy07n","filename":"8313-divesoft-analyzer-he-o2-manual-06.jpg","category":"divesoft/","type":"image"},"secondImage":{}},"id":"#62","type":"component","lock":false,"position":37},{"name":"TextBlock","data":{"text":"**Warning:** The maximum operating depth (MOD) calculated for an actual dive is usually lower than the depth indicated by the analyzer.\n\n\n**Warning:** To determine the MOD values, always use the procedures and formulas that you learned in specialized courses of diving with mixes. The values indicated by the analyzer are for orientation purposes only and are not sufficient for correct dive planning.","textLarge":false,"imageOnRight":true,"image":{"recommendedSizes":{"width":"420","height":"280"}},"imageMobile":{"recommendedSizes":{"width":"750","height":"500"}}},"id":"#63","type":"component","lock":false,"position":38},{"name":"Divider","data":{"color":"darkGray"},"id":"#42","type":"component","lock":false,"position":39},{"name":"SectionDivider","data":{"title":"06.1\tCalibration of the oxygen sensor","skipToC":false},"id":"#113","type":"component","lock":false,"position":40}
2,{"name":"TextBlock","data":{"text":"### **06.1\tCalibration of the oxygen sensor**\n\nThe oxygen sensorâs properties change over time and it is therefore necessary to recalibrate it. We recommend that such calibration be performed at least once a month The analyzer is equipped with built-in barometer sensor, which compensates for changes in altitude while traveling to dive sites. \n\nCalibration of the sensor is performed as either single-point or two-point or three-point. During single-point calibration, the content of oxygen in air, which is known and constant (20.95 %), is measured by the sensor. The calibration constant of the sensor is set so that the instrument displays 21.0 % (after rounding). \n\nTwo-point calibration proceeds in the same manner as single-point calibration, but uses two calibration gases â pure oxygen and air. Two-point calibration is more arduous as it requires the use of oxygen. However, it provides more precise results during measuring. \n\nThee-point calibration is recommended for measuring hypoxic mixes, containing less than approximately 15 % oxygen. In this case, the third calibration gas should be a gas with zero oxygen content, i.e. pure helium or argon. \n\nCalibration of the oxygen sensor is started by pressing the **| CAL |** key at any time during the measuring. \n\nAs the first step of calibration, we must choose between single-point, two-point or three-point calibration using the **| Ë |** and **| Ë
|** keys and confirm the selection using the **| OK |** key. \n\nIt is then necessary to choose the oxygen content in the calibration mixture. \n\nThe oxygen content is adjusted by tenths of a percent by pressing the **| Ë |** key (to increase the content) or the **| Ë
|** key (to decrease the content). Use the **| MODE |** key to choose whether to make adjustments by tenths, whole units, or units of ten percentage points. Upon setting the desired values, confirm the data using the **| OK |** key. \n\nFor quickly setting typical values when setting the oxygen content it is possible to use the **| CAL |** key, which sets the oxygen content at 21 % in the case of the first calibration point or 100 % at the second point and 0 % at the third point. \n\nUpon setting and confirming the calibration of gases, calibration of the sensor begins. The current calibration point, sensor voltage in millivolts and the temperature of the gas appear on the display. \n\nAfter the temperature and voltage have stabilized (however, at least after ten seconds), the STABLE prompt appears, which means that it is possible to confirm the performed calibration using the **| OK |** key. If the measured values change before the **| OK |** key is pressed, the STABLE sign disappears and calibration proceeds until further steady values are attained. If multi-point calibration is set up, then calibration according to the other gases proceeds similarly.\n","textLarge":false,"imageOnRight":true,"image":{"recommendedSizes":{"width":"420","height":"280"}},"imageMobile":{"recommendedSizes":{"width":"750","height":"500"}}},"id":"#52","type":"component","lock":false,"position":41},{"name":"Divider","data":{"color":"darkGray"},"id":"#56","type":"component","lock":false,"position":42},{"name":"SectionDivider","data":{"title":"07.\tOther functions","skipToC":true},"id":"#115","type":"component","lock":false,"position":43},{"name":"TextBlock","data":{"text":"### **07.\tOther functions**","textLarge":false,"imageOnRight":true,"image":{"recommendedSizes":{"width":"420","height":"280"}},"imageMobile":{"recommendedSizes":{"width":"750","height":"500"}}},"id":"#114","type":"component","lock":false,"position":44},{"name":"SectionDivider","data":{"title":"07.1\tContinuous analysis","skipToC":false},"id":"#116","type":"component","lock":false,"position":45},{"name":"TextBlock","data":{"text":"\n\n### **07.1\tContinuous analysis**\n\nThe Menu/Continual Analysis option activates the function of continuous-filling monitoring. This mode makes it possible to set up the upper and lower limit of oxygen content. The analyzer continuously measures the concentration of these components and if the preset limits are exceeded, it makes a beeping sound. This mode is applied when the analyzer is used as a safety component during continuous nitrox filling, where a defect of the mixing apparatus could cause increased oxygen concentration potentially resulting in a fire or an explosion of the compressor. \n\nIn the mode for continuous filling, the limit values can be changed after pressing the **| MODE |** key.\n\n","textLarge":false,"imageOnRight":true,"image":{"recommendedSizes":{"width":"420","height":"280"}},"imageMobile":{"recommendedSizes":{"width":"750","height":"500"}}},"id":"#53","type":"component","lock":false,"position":46}
2,{"name":"Divider","data":{"color":"darkGray"},"id":"#44","type":"component","lock":false,"position":47},{"name":"SectionDivider","data":{"title":"07.2\tGas mixing solver","skipToC":false},"id":"#117","type":"component","lock":false,"position":48},{"name":"TextBlock","data":{"text":"### **07.2\tGas mixing solver**\n\nWhen the ***Menu/Gas mix solver*** option is selected, the gas-mixing solver function is activated. The solver computes the procedure for mixing the required gas mix of up to three gases. It can even include the remaining mix in the bottle to be filled in the calculation. The gases are displayed in the following order: \nthe remaining gas in the bottle, \nadded mix 1â2, the required mix. \n\nFor each mix, the composition, volume of the bottle (the actual, âwaterâ volume of the bottle is specified) and gas pressure in the bottle are specified. If the volume of the gas is unlimited (for instance, if supplied by a compressor at a constant pressure), enter the bottle volume as zero. The mix composition may be entered either manually (after pressing the **| CAL |**, or the analyzer can be switched to the measuring mode by pressing the **| OK |** key and the relevant mix can be measured directly. After pressing the **| CAL |** key, edit the selected value b
2y pressing **| OK |**. Then you can enter values **| Ë |** and **| Ë
|** . Press **| MENU |** to move the cursor in the order. Confirm the selected value **| OK |**. After the data are entered, initiate the calculation using ***Menu/Solve*** (since it is first option, you can just press **| MENU |** key twice). The calculation may take up to one minute. Upon completion, results are displayed in one of the three possible forms, which can be switched between using the **| Ë |** key (see the example). \n\n**Example** \nThere is remaining air with the pressure of 120 bars in the twin bottles with the volume of 2 Ã 12 liters (total volume of 24 liters). The required mix is Nitrox 50 with the required pressure of 230 bars. You have fifty-liter distribution bottle containing oxygen, and a compressor with the output of 330 bars. Enter: \n\n\tA:\tAir\t\t24L\t120\n\t1:\tO2\t\t50L\t200\n\t2:\tAir\t\t\t330\n\t\n\tD:\t50.0\t24L\t230\n\nand start the calculation **| MENU |** **| OK |** . When the calculation is completed, the following data are displayed: \n\n\tDisch.\tto\t71.9 bar\n\tO2\tto\t156.4 bar\n\tAir\tto\t200.0 bar\n\nmeaning that the twin should be discharged to the pressure of 71.9 bars, then oxygen added until the pressure of 156.4 bars is achieved and, finally, air added to reach 200 bars. When the MODE key is pressed, the same result is displayed; however, it is expressed in pressure to add or to discharge: \n\n\tDisch.\t-48.1 bar\n\tAdd\t84.4 bar O2\n\tAdd\t73.5 bar Air\n \nor decrease the pressure by 48.1 bars, increase the pressure by 84.4 bars by adding oxygen, and 73.5 bars of air. The last mode is similar, but as it is designed for gravimetric filling (using a chemical balance), the amount of gas is specified in kilograms: \n\n\tDisch.\t-1.3707 kg\n\tAdd\t2.6608 kg O2\n\tAdd\t2.0970 kg Air\n\nPlease note that the solver takes into account the pressure drop in the gas charging bottles; therefore it does not try to recommend adding oxygen to reach 200 bars (which would be impossible anyway, given the limited oxygen supply); rather, it allows air to be partly discharged and oxygen is only added to reach the realistic 173.2 bars, with the rest of the air to be added by the compressor. At the same time, however, the solver saves the mix already contained in the bottle to the maximum possible extent; therefore, it does not let it discharge completely. Instead, only the necessary part of the mix is discharged.","textLarge":false,"imageOnRight":true,"image":{"recommendedSizes":{"width":"420","height":"280"}},"imageMobile":{"recommendedSizes":{"width":"750","height":"500"}}},"id":"#83","type":"component","lock":false,"position":49},{"name":"Divider","data":{"color":"darkGray"},"id":"#84","type":"component","lock":false,"position":50},{"name":"SectionDivider","data":{"title":"07.3 Gas mixing simulation","skipToC":false},"id":"#118","type":"component","lock":false,"position":51},{"name":"TextBlock","data":{"text":"### **07.3 Gas mixing simulation**\n\n\nOption Menu/Gas mix simulator is for Gas mix simulator function. Simulator will compute mixture content mixed up to from four gases. At every mixture is displayed composition and quantity of added gas in pressure units. You can enter mix composition manually (by pressing **| CAL |**) or switch to measurement mode by pressing **| OK |** and directly measure concrete mixture. Calculation of final mixture proceed continuously and mixture constitution is displayed on last row. Input values is the same as in the previous case.","textLarge":false,"imageOnRight":true,"image":{"recommendedSizes":{"width":"420","height":"280"}},"imageMobile":{"recommendedSizes":{"width":"750","height":"500"}}},"id":"#38","type":"component","lock":false,"position":52},{"name":"Divider","data":{"color":"darkGray"},"id":"#57","type":"component","lock":false,"position":53},{"name":"SectionDivider","data":{"title":"07.4\tAmbient pressure","skipToC":false},"id":"#119","type":"component","lock":false,"position":54},{"name":"TextBlock","data":{"text":"### **07.4\tAmbient pressure**\n\nAnalyzer is equipped with a barometric pressure sensor. Thanks to this device can be calibrated for the atmospheric conditions and altitude. The atmospheric pressure and altitude can be displayed in the menu ambient pressure. Altitude is calculated from ambient pressure referenced to standard pressure at sea level (1013.25 hPa), depending on atmospheric conditions may differ from reality.","textLarge":false,"imageOnRight":true,"image":{"recommendedSizes":{"width":"420","height":"280"}},"imageMobile":{"recommendedSizes":{"width":"750","height":"500"}}},"id":"#55","type":"component","lock":false,"position":55},{"name":"Divider","data":{"color":"darkGray"},"id":"#45","type":"component","lock":false,"position":56},{"name":"SectionDivider","data":{"title":"08.\tSpecial accessories","skipToC":true},"id":"#121","type":"component","lock":false,"position":57},{"name":"TextBlock","data":{"text":"### **08.\tSpecial accessories**","textLarge":false,"imageOnRight":true,"image":{"recommendedSizes":{"width":"420","height":"280"}},"imageMobile":{"recommendedSizes":{"width":"750","height":"500"}}},"id":"#120","type":"component","lock":false,"position":58},{"name":"SectionDivider","data":{"title":"08.1\tFlow regulator","skipToC":false},"id":"#122","type":"component","lock":false,"position":59},{"name":"TextBlock","data":{"text":"\n\n### **08.1\tFlow regulator**\n\nFor taking a gas sample for analysis, it is possible to use the flow regulator. It is used in\na similar manner as the limiter. However, thanks to the use of a reduction valve, there is no decrease in flow and the measuring period is thus extended even with lower pressure in the tank. Its use is therefore suitable in filling stations and dive centers in which the content of half-empty tanks is checked. \n\nThe regulator is constructed from the Divesoft M12 modular system. The illustration shows only one of the possible configurations. Because the leads of the distribution block are equivalent, it is possible to freely reconfigure individual elements according to the userâs needs. Similarly, it is possible to replace the limiting nozzle with a reduction valve without the necessity of buying a full regulator assembly. \n\nThe regulator is connected similarly as the limiter. Besides the tank valve, it is possible to close off the gas output directly with the gas-output cut-off.\n\nWarning: Over-tightening of the gas-output cut-off can damage or prematurely wear out the reduction-valve seat.\n","textLarge":false,"imageOnRight":true,"image":{"recommendedSizes":{"width":"420","height":"280"}},"imageMobile":{"recommendedSizes":{"width":"750","height":"500"}}},"id":"#64","type":"component","lock":false,"position":60},{"name":"Image","data":{"firstImage":{"mimetype":"image/jpeg","size":120811,"hash":"4fcba57182f7c519cc674f8df9449b3940d6b588","id":"ckolg56p06he00776yhlg5avz","filename":"8313-divesoft-analyzer-he-o2-manual-07.jpg","category":"divesoft/","type":"image"},"secondImage":{}},"id":"#74","type":"component","lock":false,"position":61},{"name":"Divider","data":{"color":"darkGray"},"id":"#69","type":"component","lock":false,"position":62},{"name":"SectionDivider","data":{"title":"09. Set-up","skipToC":false},"id":"#124","type":"component","lock":false,"position":63},{"name":"TextBlock","data":{"text":"### **09. Set-up** ","textLarge":false,"imageOnRight":true,"image":{"recommendedSizes":{"width":"420","height":"280"}},"imageMobile":{"recommendedSizes":{"width":"750","height":"500"}}},"id":"#123","type":"component","lock":false,"position":64},{"name":"SectionDivider","data":{"title":"09.1 Preferences","skipToC":false},"id":"#125","type":"component","lock":false,"position":65}
2,{"name":"TextBlock","data":{"text":"\n\n### **09.1 Preferences** \nIt is possible to change select properties of the analyzer in the basic mode (measuring of O2) in ***Menu/Preferences***. Individual parameters have the following significance: \n\n***Brightness*** of the display in the scale of 1 to 127. The selection of low brightness (1) preserves the battery; the highest brightness (127) is suitable for use in strongly lit places. For temporarily increasing the displayâs brightness, simply hold down the pressed **| Ë |** key. \n\nWhen activating the ***Backlight boost*** option, the brightness is automatically increased to maximum if the analyzer is powered with an external power-supply adapter. \n\n***Send data to USB*** determines the amount of data sent to the personal computer via the USB cable. \n\n***Partial pressure O2*** is the maximum allowed partial pressure of oxygen used for calculating MOD \n\nThe ***Ref. temp. source*** option determines whether ambient temperature (Ambient) or defined temperature (Defined) entered in the following. \n\n***Ref. temperature*** parameter is used for calculating the estimated pressure in the tank (by using plug-in thermometer only). \n\n","textLarge":false,"imageOnRight":true,"image":{"recommendedSizes":{"width":"420","height":"280"}},"imageMobile":{"recommendedSizes":{"width":"750","height":"500"}}},"id":"#68","type":"component","lock":false,"position":66},{"name":"Divider","data":{"color":"darkGray"},"id":"#72","type":"component","lock":false,"position":67},{"name":"SectionDivider","data":{"title":"9.2\tMeasurement units","skipToC":false},"id":"#126","type":"component","lock":false,"position":68},{"name":"TextBlock","data":{"text":"### **9.2\tMeasurement units** \nOther settings are available in ***Menu/Measurement*** units Here the analyzer can be switched to metric mode (Metric units), imperial-units mode (U.S. units) or the display of individual units can be selected separately for individual values (temperature, depth, pressure, volume, mass). The unit settings do not affect the calculations (with the exception of final rounding), as the analyzer works in SI units internally. \nNotice: Meters and feet are indicated as units of depth, though in reality this concerns hydrostatic pressure (pressure at the indicated depth in seawater). \n\n","textLarge":false,"imageOnRight":true,"image":{"recommendedSizes":{"width":"420","height":"280"}},"imageMobile":{"recommendedSizes":{"width":"750","height":"500"}}},"id":"#85","type":"component","lock":false,"position":69},{"name":"Divider","data":{"color":"darkGray"},"id":"#86","type":"component","lock":false,"position":70},{"name":"SectionDivider","data":{"title":"9.3\tMixing of gases","skipToC":false},"id":"#127","type":"component","lock":false,"position":71},{"name":"TextBlock","data":{"text":"### **9.3\tMixing of gases** \nThe Menu/Gas mix solver - menu/Gas properties setting is available in the gas-mixing calculation and simulation modes Individual parameters have the following significance:\n\nThe ***State equation*** option is chosen if the mixing calculations will work with the ideal gas (the status equation PV=RT is used) or with the real gas (state equation according to Redlich and Kwong) The variant with the actual gas is more complicated in terms of calculation, and calculation can thus take a long time The ideal gas is sufficient for ordinary use \n\n***Ref. temperature*** is the temperature of the gas used for calculations \n\n\n","textLarge":false,"imageOnRight":true,"image":{"recommendedSizes":{"width":"420","height":"280"}},"imageMobile":{"recommendedSizes":{"width":"750","height":"500"}}},"id":"#87","type":"component","lock":false,"position":72},{"name":"Divider","data":{"color":"darkGray"},"id":"#88","type":"component","lock":false,"position":73},{"name":"SectionDivider","data":{"title":"9.4\tContinual analysis","skipToC":false},"id":"#128","type":"component","lock":false,"position":74},{"name":"TextBlock","data":{"text":"### **9.4\tContinual analysis** \nHere the boundary values are set When these values are exceeded, an alarm is triggered: Alarm O2 low, Alarm O2 high.","textLarge":false,"imageOnRight":true,"image":{"recommendedSizes":{"width":"420","height":"280"}},"imageMobile":{"recommendedSizes":{"width":"750","height":"500"}}},"id":"#89","type":"component","lock":false,"position":75},{"name":"Divider","data":{"color":"darkGray"},"id":"#90","type":"component","lock":false,"position":76}
2,{"name":"SectionDivider","data":{"title":"10. Charging and battery status","skipToC":false},"id":"#129","type":"component","lock":false,"position":77},{"name":"TextBlock","data":{"text":"### **10. Charging and battery status**\n\nAt any time when the analyzer is turned on, you can check the battery status by pressing **| Ë
|** unless the key has other function at the particular screen. The value of the battery charge expresses double line at the bottom of display. Range is defined between 0 to 100%. \n\nWhen the battery is close to discharged, connect the analyzer with provided cable to any USB charger or a computer USB port Full charge takes approximately three hours. \n\nWhen the charger is connected, you can check the charging status by pressing **| Ë
|**. If the battery is not fully charged, the row of arrows is displayed on a scale from 0 to 100%. If it is already charged, a long double line is displayed. \n\nAll features of the analyzer are available during charging.\n","textLarge":false,"imageOnRight":true,"image":{"recommendedSizes":{"width":"420","height":"280"}},"imageMobile":{"recommendedSizes":{"width":"750","height":"500"}}},"id":"#67","type":"component","lock":false,"position":78},{"name":"Divider","data":{"color":"darkGray"},"id":"#71","type":"component","lock":false,"position":79},{"name":"SectionDivider","data":{"title":"11. Maintenance","skipToC":true},"id":"#131","type":"component","lock":false,"position":80},{"name":"TextBlock","data":{"text":"### **11. Maintenance** ","textLarge":false,"imageOnRight":true,"image":{"recommendedSizes":{"width":"420","height":"280"}},"imageMobile":{"recommendedSizes":{"width":"750","height":"500"}}},"id":"#130","type":"component","lock":false,"position":81},{"name":"SectionDivider","data":{"title":"11.1. Battery replacement","skipToC":false},"id":"#132","type":"component","lock":false,"position":82},{"name":"TextBlock","data":{"text":"\n\n### **11.1. Battery replacement**\n\nThe instrument uses a built-in rechargeable battery. Battery replacement is possible only in the factory.\n\n","textLarge":false,"imageOnRight":true,"image":{"recommendedSizes":{"width":"420","height":"280"}},"imageMobile":{"recommendedSizes":{"width":"750","height":"500"}}},"id":"#66","type":"component","lock":false,"position":83},{"name":"Divider","data":{"color":"darkGray"},"id":"#91","type":"component","lock":false,"position":84},{"name":"SectionDivider","data":{"title":"11.2 Oxygen sensor replacement","skipToC":false},"id":"#133","type":"component","lock":false,"position":85},{"name":"TextBlock","data":{"text":"### **11.2 Oxygen sensor replacement**\n\nThe oxygen sensor has a limited service life. The analyzer automatically checks the sensorâs condition and, at the end of its life, the message âOxygen sensor expiredâ is displayed upon activating the instrument. In this case the sensor should be replaced as soon as possible, as the accuracy of measuring the concentration of oxygen can no longer be guaranteed. \n\nIf you are not sure whether you are able to replace the sensor correctly, ask your supplier, vendor or service technician to change it. \n\nTo replace the sensor, first loosen the screw and remove the oxygen sensor cover. \n\nThen disconnect the molex connector from the sensor, do not to pull on the wiring coming out of the instrument. \n\nUnscrew the old sensor and install the new one in such a way that the o-ring on the sensor closely adheres to the analyzer. Do not use excessive strength to tight the sensor to avoid damaging the thread. \n\nReconnect the oxygen sensor connector, be sure to check the polarity. Finally replace the sensor cover. \n\nLet the new sensor warm up before first calibration for at least 30 minutes after taking it out from the sealed packaging. \n\nA no 1 Philips screwdriver is needed to replace the sensor. \n\nAfter each sensor replacement, the instrument has to be recalibrated.","textLarge":false,"imageOnRight":true,"image":{"recommendedSizes":{"width":"420","height":"280"}},"imageMobile":{"recommendedSizes":{"width":"750","height":"500"}}},"id":"#92","type":"component","lock":false,"position":86},{"name":"Image","data":{"firstImage":{"mimetype":"image/jpeg","size":131049,"hash":"4dd8bce6e7db9348ad3b10346315c55265b8c199","id":"ckondhmaj7fnb0776muqgbatc","filename":"8300-divesoft-analyzer-solo-manual-11.jpg","category":"divesoft/","type":"image"},"secondImage":{}},"id":"#75","type":"component","lock":false,"position":87},{"name":"SectionDivider","data":{"title":"11.3\tDisassembly of the instrument","skipToC":false},"id":"#134","type":"component","lock":false,"position":88},{"name":"TextBlock","data":{"text":"### **11.3\tDisassembly of the instrument**\n\nDo NOT disassemble the instrument. Analyzer contains
2no user serviceable parts except the oxygen sensor.\n\nWarning: Do not remove the printed circuit board from the analyzer. Replacing the circuit board requires a special procedure and calibration instrument.\n","textLarge":false,"imageOnRight":true,"image":{"recommendedSizes":{"width":"420","height":"280"}},"imageMobile":{"recommendedSizes":{"width":"750","height":"500"}}},"id":"#76","type":"component","lock":false,"position":89},{"name":"Divider","data":{"color":"darkGray"},"id":"#81","type":"component","lock":false,"position":90},{"name":"SectionDivider","data":{"title":"12. Connecting to a computer","skipToC":false},"id":"#135","type":"component","lock":false,"position":91},{"name":"TextBlock","data":{"text":"### **12. Connecting to a computer**\n\nThe analyzer can be connected to a computer using a USB cable. \n\nMeasured values are transferred to the PC via a virtual serial port. If you have not installed a suitable driver for the virtual serial port on the USB, use the free driver provided by the manufacturer of the USB chip used in the analyzer. This driver can be downloaded from the Internet at http://www.ftdichip.com/Drivers/VCP.htm. The specific driver can be selected from the VCP (virtual com port) category, depending on the PC and operating system used. Use the instructions attached with the driver to install it. \n\nData transfer must be activated in the analyzer, set ***Menu/Preferences/Send Data to USB to a non-zero value*** \n\nAny terminal emulation utility can be used for data reception; for instance HyperTerminal is sufficient for Microsoft Windows. This utility is included in the basic Windows installation. \n\nThe measured data are transferred in the text mode. Every second, the analyzer transmits data in the following format: \n\n\tO2 ooo.o % Ti ttt.t ~C pppp.p hPa YYYY/MM/DD hh:mm:ssCRL\n\neg. â O2 21.1 % Ti 23.9 ~C 1004.1 hPa 2021/12/20 12:03:00CRLFâ\n\nwhere: \nooo.o is oxygen content in percent, \nttt.t is temperature in farenheit or celsius, \npppp.p is barometric pressure, \nYYYY/MM/DD hh:mm:ss is current date and time in 24h format, \nCR is the ASCII carriage return symbol (decimal 13, hexadecimal 0D), \nLF is the ASCII line feed symbol (decimal 10, hexadecimal 0A).\n\nIf there is an error in the measurement, the faulty entry is replaced with asterisks in the following form: ***.*. \n\nThe output is in serial form in the format 8N1 (8 bits, no parity bit, one stopbit), speed 115200 bit/s, TTL level.","textLarge":false,"imageOnRight":true,"image":{"recommendedSizes":{"width":"420","height":"280"}},"imageMobile":{"recommendedSizes":{"width":"750","height":"500"}}},"id":"#77","type":"component","lock":false,"position":92},{"name":"Divider","data":{"color":"darkGray"},"id":"#80","type":"component","lock":false,"position":93},{"name":"SectionDivider","data":{"title":"13. Defects and removal thereof","skipToC":false},"id":"#136","type":"component","lock":false,"position":94},{"name":"TextBlock","data":{"text":"### **13. Defects and removal thereof**\n\nUpon activation, the analyzer is automatically tested to identify one of the following errors. All the error messages can be confirmed by the **| OK |** key and the instrument will continue to work; however in some circumstances in a limited operation mode.\n\n","textLarge":false,"imageOnRight":true,"image":{"recommendedSizes":{"width":"420","height":"280"}},"imageMobile":{"recommendedSizes":{"width":"750","height":"500"}}},"id":"#79","type":"component","lock":false,"position":95},{"name":"SectionDivider","data":{"title":"13.1 Error messages","skipToC":false},"id":"#137","type":"component","lock":false,"position":96},{"name":"Divider","data":{"color":"darkGray"},"id":"#101","type":"component","lock":false,"position":97},{"name":"TextBlock","data":{"text":"### **13.1 Error messages**\n\n**Error 2 Oxygen sensor damaged or missing** \nâ¢\tThe oxygen sensor is removed, disconnected or destroyed. The measuring of the oxygen concentration will be incorrect. \n\n**Error 3 Oxygen sensor expired** \nâ¢\tThe oxygen sensor is old and its output voltage is too low. The measuring will be inaccurate (the âIncorrectâ warning is displayed next to the value of the O2 concentration) and s
2ome measuring modes cannot be activated. The sensor must be immediately replaced with a new one of the recommended type. \nâ¢\tThis error may also occur if the instrument is filled with a hypoxic mix (a mix with low oxygen content) upon activation, for example immediately after previous measurement or if the measured hypoxic mix is delivered before the analyzer is activated. In such a case, switch off the instrument for a while, or connect it to a source of air before its activation. Never use your mouth to blow air in the inlet or the outlet of the analyzer to avoid vapor condensation inside the instrument (careful aspiration of gas by mouth is possible). \n\n**Error 4 Device is too cold** \nâ¢\tThe temperature of the analyzer is too low and the measuring may be inaccurate. Warm up the analyzer in a warm room to increase its temperature above the freezing point (5°C / 41°F). \nDo not use a hot-air blower, air dryer, an oven or any other similar method to warm up the analyzer. \n\n**Error 5 Device is too warm** \nâ¢\tThe temperature of the analyzer is too high (for instance, if it was exposed to sunlight or stored in a car heated by sunlight); the measurement may be inaccurate. Cool down the analyzer below 40 degrees Celsius (104°F). \n\n**Warning Battery low** \nâ¢\tThe battery is almost empty, it has to be replaced or use the external power source.\n\n","textLarge":false,"imageOnRight":true,"image":{"recommendedSizes":{"width":"420","height":"280"}},"imageMobile":{"recommendedSizes":{"width":"750","height":"500"}}},"id":"#97","type":"component","lock":false,"position":98},{"name":"Divider","data":{"color":"darkGray"},"id":"#98","type":"component","lock":false,"position":99},{"name":"SectionDivider","data":{"title":"13.2\tInstrument malfunctions","skipToC":false},"id":"#138","type":"component","lock":false,"position":100},{"name":"TextBlock","data":{"text":"### **13.2\tInstrument malfunctions**\n\nâ¢\tThe instrument shows less than 0 % or more than 100 % of oxygen in the mixture. The displayed value arises directly from the measured and calculated value and has in no way been altered in the background. The possible measuring error is symmetrical and, for example, when measuring a mixture without any oxygen content, 0.5 % or â0.5 % oxygen can be displayed. Accordingly, when measuring pure oxygen, e.g. 99.5 % or 100.5 % can be displayed. If the deviation is within the measuring tolerance, this is not the result of a defect. In the case of a greater deviation, recalibrate the oxygen sensor. If the problem persists, replace the sensor. ","textLarge":false,"imageOnRight":true,"image":{"recommendedSizes":{"width":"420","height":"280"}},"imageMobile":{"recommendedSizes":{"width":"750","height":"500"}}},"id":"#99","type":"component","lock":false,"position":101},{"name":"Divider","data":{"color":"darkGray"},"id":"#70","type":"component","lock":false,"position":102},{"name":"SectionDivider","data":{"title":"14.\tTechnical data","skipToC":false},"id":"#139","type":"component","lock":false,"position":103},{"name":"TextBlock","data":{"text":"### **14.\tTechnical data**\n\nDimensions: 85 à 205 à 40 mm (31/4 à 77/8 à 11/2 inches) \n\nWeight: 332 g (without packaging and accessories) \n\nOxygen concentration measurement range: 0 to 100% \n\nOperating pressure: 700â1100 millibars (20â 32 inches Hg), which corresponds to a standard atmosphere at 0 to 3000 m (0â10000 ft) \n\nMixture Pressure: Corresponds to an ambient pressure in the range of 700â1100 millibars (20â 32 inches Hg), which corresponds to a standard atmosphere at 0 to 3000 m (0â10000 ft) \n\nNominal gas flow rate: 0.2 l / min \n\nMeasuring cycle: 200ms \n\nThe connection dimensions of the sampler: Standard for a DIN valve (EN 144-2) for 200/300 bars (G 5/8 thread). Samplers with a connection to any standardized or common valves are available on request or as optional equipment\n\nOxygen sensor: R22 S (Molex connector)\n\nEasy to replace O2 sensor \n\nOxygen sensor life expectancy: 2 years \n\nReplaceable battery: Through authorized service center \n\nBattery: 210 measurements or 7 hours of continuous operation \n\nBattery capacity: 3,7 Wh\n\nWarranty: 24 months, 12 months on battery and oxygen sensor \n\nCharging and programming: USB-C \n\nCharging time: 3â4 h \n\nDisplay: OLED \n\n
2Body: ABS-PC","textLarge":false,"imageOnRight":true,"image":{"recommendedSizes":{"width":"420","height":"280"}},"imageMobile":{"recommendedSizes":{"width":"750","height":"500"}}},"id":"#65","type":"component","lock":false,"position":104},{"name":"Divider","data":{"color":"darkGray"},"id":"#73","type":"component","lock":false,"position":105},{"name":"TextBlock","data":{"text":"### **ANALYZER SOLO O2 - USER MANUAL**\n\nDate of issue: 02 February 2022 \nHW 3.0, FW 2.29 \nAuthors: Jakub Šimánek, Aleš Procháska \nPublished by Divesoft s. r. o.\n","textLarge":false,"imageOnRight":true,"image":{"recommendedSizes":{"width":"420","height":"280"}},"imageMobile":{"recommendedSizes":{"width":"750","height":"500"}}},"id":"#48","type":"component","lock":false,"position":106}],"id":"root","idBuffer":"#140","lastCommit":"72acc0f6-96a3-4bb8-aac2-134d5f2d1e6e"}},"annotations":[],"language":{"type":"id","generated":false,"id":"Language:cjv3kwvoj000u083611381c6o","typename":"Language"},"__typename":"PageTranslation"},"Page:ckxg0xywi0qec0858k67qqwk1":{"id":"ckxg0xywi0qec0858k67qqwk1","type":{"type":"id","generated":false,"id":"PageType:cjv3l213x004f08366hjufttp","typename":"PageType"},"tags":[],"translations({\"where\":{\"language\":{\"id\":\"cjv3kwvoj000u083611381c6o\"}}})":[{"type":"id","generated":false,"id":"PageTranslation:ckxg0xyx50qej08588br5ev96","typename":"PageTranslation"}],"__typename":"Page"},"PageTranslation:ckxg0xyx50qej08588br5ev96":{"id":"ckxg0xyx50qej08588br5ev96","name":"Cookies","createdAt":"2021-12-21T11:29:02.729Z","content":{"type":"json","json":{"content":[{"name":"Header","data":{"products":[{"title":"Accessories","description":"Backplates, Consumables. Tanks.","img":{"recommendedSizes":{"width":"235","height":"235"}},"url":""},{"title":"Accessories sets","description":"Protection, maintenance, cleaning.","img":{"recommendedSizes":{"width":"235","height":"235"}},"url":""},{"title":"Spare parts","description":"Spare parts and components.","img":{"recommendedSizes":{"width":"235","height":"235"}},"url":""},{"title":"Spare parts kits","description":"Completly Liberty spare parts kits.","img":{"recommendedSizes":{"width":"235","height":"235"}},"url":""}]},"id":"#0","type":"component","lock":false,"position":0},{"name":"Spacer","data":{"spacingLarge":30,"spacingSmall":20,"backgroundColor":"#ffffff"},"id":"#6","type":"component","lock":false,"position":1},{"name":"ComponentHeader","data":{"title":"Cookies","subtitle":"Cookies are small data files located in your browser on your device (computer, smartphone, tablet). They help the browsers to work correctly and display relevant content. The pages you have visited remember your browsing and preferences, which makes your user experience more enjoyable.","showBreadcrumbs":false,"backgroundColor":"#ffffff"},"id":"#3","type":"component","lock":false,"position":2},{"name":"Spacer","data":{"spacingLarge":30,"spacingSmall":20,"backgroundColor":"#ffffff"},"id":"#5","type":"component","lock":false,"position":3},{"name":"Spacer","data":{"spacingLarge":30,"spacingSmall":20,"backgroundColor":"#ffffff"},"id":"#11","type":"component","lock":false,"position":5},{"name":"Spacer","data":{"spacingLarge":30,"spacingSmall":20,"backgroundColor":"#ffffff"},"id":"#8","type":"component","lock":false,"position":7},{"name":"Footer","data":{"componentTemplateId":"cjvwimxrl08e40798hjs5ek9w"},"id":"#1","type":"component","lock":false,"position":10}],"id":"root","idBuffer":"#12","lastCommit":"9e7ca5b1-f7b4-4bff-a60b-fabcb45ef502"}},"annotations":[],"language":{"type":"id","generated":false,"id":"Language:cjv3kwvoj000u083611381c6o","typename":"Language"},"__typename":"PageTranslation"},"Page:ckybcu1mg2un90858gj6k72sn":{"id":"ckybcu1mg2un90858gj6k72sn","type":{"type":"id","generated":false,"id":"PageType:cjv3l213x004f08366hjufttp","typename":"PageType"},"tags":[],"translations({\"where\":{\"language\":{\"id\":\"cjv3kwvoj000u083611381c6o\"}}})":[{"type":"id","generated":false,"id":"PageTranslation:ckybcu1n22ung0858auw2kxhv","typename":"PageTranslation"}],"__typename":"Page"},"PageTranslation:ckybcu1n22ung0858auw2kxhv":{"id":"ckybcu1n22ung0858auw2kxhv","name":"freedom-user-manual","createdAt":"2022-01-12T09:42:46.477Z","content":{"type":"json","json":{"content":[{"name":"Header","data":{"products":[{"title":"Accessories","description":"Backplates, Consumables. Tanks.","img":{"recommendedSizes":{"width":"235","height":"235"}},"url":""},{"title":"Accessories sets","description":"Protection, maintenance, cleaning.","img":{"recommendedSizes":{"width":"235","height":"235"}},"url":""},{"title":"Spare parts","description":"Spare parts and components.","img":{"recommendedSizes":{"width":"235","height":"235"}},"url":""}
2,{"title":"Spare parts kits","description":"Completly Liberty spare parts kits.","img":{"recommendedSizes":{"width":"235","height":"235"}},"url":""}]},"id":"#0","type":"component","lock":false,"position":0},{"name":"ProductShowcase","data":{"backgroundColor":"#ffffff","isTextDark":true,"isImageRight":true,"image":{"mimetype":"image/png","size":525097,"hash":"4c6f45dcfcd42b909b417dc3ba6f520e221843e0","id":"cklscy53e79ge0776dwju688d","filename":"divesoft-freedom.png","category":"divesoft/","type":"image"},"imageMobile":{},"title":"User manual","subtitle":"Freedom / Nitrox, Trimix & CCR dive computer","description":"HW rev. 3.1, FW 1.18.2 ","hideDescriptionOnMobile":false,"areButtons":false,"firstTitle":"Learn more >","firstUrl":"","secondTitle":"Configurator >","secondUrl":""},"id":"#2","type":"component","lock":false,"position":1},{"name":"Divider","data":{"color":"darkGray"},"id":"#17","type":"component","lock":false,"position":2},{"name":"TextBlock","data":{"text":"### **Contents** \n**Introduction** \n\n[**Upgradable computer**](#upgradable-computer)\n\n[**Quick start guide**](#Section-01) \n\n","textLarge":false,"imageOnRight":true,"image":{"recommendedSizes":{"width":"420","height":"280"}},"imageMobile":{"recommendedSizes":{"width":"750","height":"500"}}},"id":"#5","type":"component","lock":false,"position":3},{"name":"DownloadsNew","data":{"backgroundColor":"#f0f0f0","title":"Full manual","subtitle":"","showBreadcrumbs":false,"hideHeader":false,"files":[{"title":"Section 01 - Operation and Diving","isTitleBold":true,"subtitle":"","url":{"url":"https://www.divesoft.com/en/manuals/freedom-user-manual/freedom-user-manual-01","urlNewWindow":true},"urlText":"OPEN","id":"1"},{"title":"Section 02 - Setup and Procedures","isTitleBold":true,"subtitle":"","url":{"url":"https://www.divesoft.com/en/manuals/freedom-user-manual/freedom-user-manual-02","urlNewWindow":true},"urlText":"OPEN","id":"2"}],"activeTab":"2"},"id":"#438","type":"component","lock":false,"position":5},{"name":"Divider","data":{"color":"darkGray"},"id":"#220","type":"component","lock":false,"position":6},{"name":"TextBlock","data":{"text":"### **Introduction** \n\n**Use of this manual** \n\nThe Divesoft Freedom is intended for use exclusively by a trained person who is capable of fully\nunderstanding the instructions contained in this manual.\nThe technical documentation is subjected to a process of continual development and improvement.\nTherefore, please regularly check the website at www.divesoft.com for updates.\nThis manual provides operating instructions for the hardware and software (firmware) version of the\nDivesoft Freedom written on the tittle page. \n\n**Safety** \n\n<span style=\"color:red\">Warning</span>: This computer calculates a decompression profile using a mathematical model. It does not know\nyour specific physiological decompression requirements.\nThere is always a risk of decompression sickness (DCS) for any dive profile even if you follow the dive plan\nprescribed by dive computer. No procedure, dive computer or dive table will prevent the possibility of DCS or\noxygen toxicity! \n<span style=\"color:red\">Warning</span>: Use backup instruments! Ensure that you have access to backup instruments to measure depth\nand time. Ensure that you have access to a backup method of decompression profile calculation. Never risk\nyour life on only one source of information. \n<span style=\"color:red\">Warning</span>: Always check the device before diving in order to ensure that the display works, the device has not\nrun out of battery power and all settings are correct. \n<span style=\"color:red\">Warning</span>: All software contains bugs and the firmware of the Divesoft Freedom is no exception. The\ncomputer can probably do unintended things. \n<span style=\"color:red\">Warning</span>: This computer may malfunction at any time. The question is not whether it will fail but when it will\nfail. Always have a plan on how to handle failures. \n\n**Responsibility of the Divesoft Freedom user** \n\nA Divesoft Freedom user must accept the fact that diving involves risk. Adherence to everything that the\nuser has learned in the Divesoft Freedomâs technical documentation and in training can reduce the risk but\ncannot eliminate it. Safety when diving is further enhanced by regular training, methodical education and\nadherence to good diving practices. Technical diving requires a far higher degree of care and discipline than\nrecreational diving. \nIf you do not accept the risk and you are not a trained, careful and disciplined diver, do not dive with the\nDivesoft Freedom.","textLarge":false,"imageOnRight":true,"image":{"recommendedSizes":{"width":"420","height":"280"}},"imageMobile":{"recommendedSizes":{"width":"750","height":"500"}}},"id":"#3","type":"component","lock":false,"position":7},{"name":"Divider","data":{"color":"darkGray"},"id":"#15","type":"component","lock":false,"position":8},{"name":"TextBlock","data":{"text":"### <span id=\"upgradable-computer\">**Upgradable computer**</span> \n\n**Features of the Freedom versions**\n\n\tVersion Mixtures Air Nitrox Oxygen Trimix Rebreather\n\n\tAdvanced Bottom Timer - - - - - NO \n\tCCR Bottom Timer - - - - - Yes\n\tBasic Nitrox 1 Yes max40% No No No\n\tAdvanced Nitrox 3 Yes Yes Yes No No\n\tFull Trimix 9 Yes Yes Yes Yes No\n\tClosed Circuit 9+8 dil. Yes Yes Yes Yes Yes\n\nHardware of all versions of the Divesoft Freedom computer is the same1\n. O
2nly the software differs.\nThe software version can be upgraded. \n\nPictures in this manual are based on the Closed Circuit version of the Divesoft Freedom. Limitation of other\nversions are mentioned in the text. \n\n1* The Closed Circuit version includes a cable for connection to rebreather O<sub>2</sub> sensors.","textLarge":false,"imageOnRight":true,"image":{"recommendedSizes":{"width":"420","height":"280"}},"imageMobile":{"recommendedSizes":{"width":"750","height":"500"}}},"id":"#4","type":"component","lock":false,"position":9},{"name":"Divider","data":{"color":"darkGray"},"id":"#20","type":"component","lock":false,"position":10},{"name":"TextBlock","data":{"text":"### <span id=\"Section-01\">**Section 01: Quick start guide**","textLarge":false,"imageOnRight":true,"image":{"recommendedSizes":{"width":"420","height":"280"}},"imageMobile":{"recommendedSizes":{"width":"750","height":"500"}}},"id":"#6","type":"component","lock":false,"position":11},{"name":"Divider","data":{"color":"darkGray"},"id":"#299","type":"component","lock":false,"position":12},{"name":"TextBlock","data":{"text":"**1. Recharge battery** \n\nUse the charger that you find in the package or another suitable USB charger or a computer USB port. See \"10.1 Charging\" for detailed information. \n\n**2. Switch on** \nHold both buttons until you feel a vibration and the display starts. The computer will be in surface mode in a few seconds. \n\n**3. Reset to factory defaults if necessary** \n\nIt is not necessary to reset a new computer. If you are in doubt about the correct setting, perform the reset to factory default. \nShortly press both buttons to enter the menu. Move the cursor to Setup with the lower button and select with the upper button. Then proceed in the same way to Miscellaneous -> Factory Defaults. Then move the cursor to Factory defaults, select and confirm. Horizontal calibration\nstarts automatically after the reset. Place the computer on a table and press any key. You will then be asked to place the computer vertically. Place the computer on the only straight side of the device and press the button again.\n\n**4. Adjust to right hand if required** \n\nAdjust display orientation to your preference. Shortly press both buttons to enter the menu. Move the\ncursor to Setup with the lower button and select with the upper button. Then select Setup â Preferences â Display\nâ Orientation. (Bottom timer licence: Setup â Orientation)\n\n**5. Switch to imperial units if required** \n\nAdjust the units to your preference. Shortly press both buttons to enter the menu. Move the cursor to Setup\nwith the lower button and select with the upper button. Then select Preferences â Units. \n\n**6. Select wrist mount** \n\nIf you prefer a strap, attach the strap to the computer. If you prefer a bungee, then remove the screws\nholding the bars and pass the bungee through the threaded holes. \nSee \"10.2 Wrist mount\" for detailed information. \n\n**7. Switch to dive mode** \n\nIn the menu select Dive â Default (OC). A brief overview of settings will appear. Verify settings and confirm\nwith the lower button. \n\nNow your Divesoft Freedom is prepared for simple dive with open circuit SCUBA using air.","textLarge":false,"imageOnRight":true,"image":{"recommendedSizes":{"width":"420","height":"280"}},"imageMobile":{"recommendedSizes":{"width":"750","height":"500"}}},"id":"#298","type":"component","lock":false,"position":13},{"name":"Divider","data":{"color":"darkGray"},"id":"#312","type":"component","lock":false,"position":14},{"name":"Footer","data":{"copyrights":"Copyright © 2019 Divesoft LLC All rights reserved.","facebookUrl":"","youtubeUrl":"","instagramUrl":"","contacts":"**Divesoft, s.r.o.** Hálkova 2495 413 01 Roudnice nad Labem Äeská republika Tel.: +420 416 857 057 E-mail: [email protected]"},"id":"#1","type":"component","lock":false,"position":15},{"name":"Spacer","data":{"spacingLarge":30,"spacingSmall":20,"backgroundColor":"#ffffff"},"id":"#410","type":"component","lock":false,"position":16},{"name":"Spacer","data":{"spacingLarge":30,"spacingSmall":20,"backgroundColor":"#ffffff"},"id":"#417","type":"component","lock":false,"position":17}],"id":"root","idBuffer":"#440","lastCommit":"6f757dea-a9c8-4501-af41-0ec44d3725ce"}},"annotations":[],"language":{"type":"id","generated":false,"id":"Language:cjv3kwvoj000u083611381c6o","typename":"Language"},"__typename":"PageTranslation"},"Page:ckz7y82vi5kaj0858bmlwr0ay":{"id":"ckz7y82vi5kaj0858bmlwr0ay","type":{"type":"id","generated":false,"id":"PageType:cjv3l213x004f08366hjufttp","typename":"PageType"},"tags":[{"type":"id","generated":false,"id":"Tag:clw52z09zlclk0735mxb7v53p","typename":"Tag"},{"type":"id","generated":false,"id":"Tag:clyyc8ovoy9ai0735du6cmw7i","typename":"Tag"},{"type":"id","generated":false,"id":"Tag:cmqtb0dz5gcr90826mxwvssx3","typename":"Tag"}],"translations({\"where\":{\"language\":{\"id\":\"cjv3kwvoj000u083611381c6o\"}}})":[{"type":"id","generated":false,"id":"PageTranslation:ckz7y82vv5kaq0858eioy41o0","typename":"PageTranslation"}],"__typename":"Page"},"Tag:cmqtb0dz5gcr90826mxwvssx3":{"id":"cmqtb0dz5gcr90826mxwvssx3","name":"L feat. L amend","__typename":"Tag"},"PageTranslation:ckz7y82vv5kaq0858eioy41o0":{"id":"ckz7y82vv5kaq0858eioy41o0","name":"Divesoft.blog / What is a rebreather? Do I need one as a recreational diver?","createdAt":"2022-02-04T05:10:10.842Z","content":{"type":"json","json":{"content":[{"name":"Header","data":{"products":[{"title":"Accessories","description":"Backplates, Consumables. Tanks.","img":{"recommendedSizes":{"width":"235","height":"235"}},"url":""},{"title":"Accessories sets","description":"Protection, maintenance, cleaning.","img":{"recommendedSizes":{"width":"235","height":"235"}},"url":""},{"title":"Spare parts","description":"Spare parts and components.","img":{"recommendedSizes":{"width":"235","height":"235"}},"url":""}
2,{"title":"Spare parts kits","description":"Completly Liberty spare parts kits.","img":{"recommendedSizes":{"width":"235","height":"235"}},"url":""}]},"id":"#0","type":"component","lock":false,"position":0},{"name":"BlogArticle","data":{"title":"What Is a Rebreather and How Does It Work?","perex":"Most divers learn to dive using open-circuit scuba.\nYou breathe from a cylinder and exhale into the water.\nA rebreather works differently.\nInstead of releasing every breath as bubbles, it keeps most of the gas inside the system, removes carbon dioxide, replaces the oxygen that has been consumed, and allows the remaining gas to be breathed again.\nUnderstanding that process is the first step to understanding how a rebreather works.\n","content":"## What Is a Rebreather?\nA [Rebreather](https://www.divesoft.com/en/products/ccr-liberty) is a breathing system that recycles the gas a diver exhales. Rather than discarding the gas after a single breath, it processes the gas and returns it to the diver.\n\nThis approach reduces gas consumption significantly compared to open-circuit scuba. The principle itself is simple.\n\nReuse the gas instead of throwing it away.\n\nMaking that happen safely underwater requires several components working together.\n\n\n\n**New to rebreathers? \\> [Rebreather vs Open Circuit: What's the Difference?] (https://www.divesoft.com/en/blog/rebreather-vs-open-circuit-what-s-the-difference)\n**\n## What Happens to Every Breath?\n\nAt the surface, the air we breathe contains approximately 21% oxygen. During each breath, only part of that oxygen is consumed by the body. The remaining oxygen is exhaled together with carbon dioxide, water vapour, nitrogen, and other gases.\n\nIn open-circuit scuba, the entire breath is released into the water.\n\nA rebreather takes a different approach. When the diver exhales, the gas remains inside a closed breathing loop rather than leaving the system. Before it can be breathed again, carbon dioxide must be removed and the consumed oxygen replaced.\n\n\n*Figure 1 Inhale and Exhale*\n\n## The Breathing Loop\nThe breathing loop is the pathway through which gas circulates inside the rebreather.\n\nAs the diver breathes, gas moves continuously through the loop. One side carries exhaled gas away from the diver. The other side delivers processed gas back for inhalation.\n\nCounterlungs within the system expand and contract as breathing takes place, helping maintain a comfortable breathing volume inside the loop.\n\n\n\n*Figure 3 **Electronically controlled Closed Circuit Rebreather (eCCR)** â 1. Inhale counterlung: this is a flexible bag that the diver inhales gas from; 2. Dive/Surface valve (DSV): valve that directs the gas flow in the loop and opens/closes for the diver to breathe; 3. Exhale counterlung: this is a flexible bag that the diver exhales into; 4. CO2 scrubber: this absorbs carbon dioxide from the exhaled gas; 5. Oxygen supply cylinder; 6. Oxygen reduction valve; 7. Constant flow nozzle: this feeds oxygen into the loop at a set rate 8. Oxygen Manual addition valve (MAV): valve that allows the diver to manually add oxygen if needed; 9. Oxygen SPG; 10. Diluent supply cylinder, 11. Diluent reduction valve; 12. Diluent SPG; 13. Automatic Diluent Valve (ADV): valve that maintains the volume of the breathing loop; 14. Diluent Manual Addition Valve (MAV): valve that allows the diver to manually add diluent and also to control the volume of the breathing loop; 15. Oxygen sensors: critical sensors that measure the oxygen level in the loop; 16. Control unit (CU): this will read the oxygen sensors, calculate the amount of oxygen to be added, and thus controls the solenoid valve; 17. Solenoid: this injects oxygen into the loop according to CU data; 18. Handset: the display informs the diver of the loop pO2 and other important data.*\n\n## The Carbon Dioxide Scrubber\nCarbon dioxide removal is one of the most important functions of any rebreather.\n\nEach exhaled breath contains carbon dioxide produced by the body.\nIf carbon dioxide remained in the breathing loop, it would eventually reach unsafe levels.\n\nInside the scrubber, the gas passes through an absorbent material that removes carbon dioxide before the gas continues through the system. The scrubber allows the remaining breathing gas to stay in circulation.\n\n\n\n## Why Oxygen Must Be Added\nWhile most of the breathing gas remains in the loop, oxygen does not. The body continuously consumes oxygen during the dive. That oxygen must be replaced to maintain a breathable gas mixture.\n\nIn an electronically controlled rebreather, oxygen is added automatically as needed. The amount added depends on the oxygen concentration inside the loop.\n\n**Learn why efficie
2nt gas management is one of the reasons divers choose CCRs \\> [Why Do Divers Use Rebreathers?](https://www.divesoft.com/en/blog/why-do-divers-use-rebreathers-ccr-benefits-explained)**\n\n## Why Oxygen Sensors Matter\nOne of the most important components in an electronically controlled rebreather is the oxygen sensor.\n\nThese sensors continuously measure the oxygen concentration inside the breathing loop. The information is displayed to the diver and used by the control system. If oxygen levels fall below the selected setpoint, the system adds oxygen to return the mixture to the desired value.\n\nThis process continues throughout the dive.\n\n## The Solenoid Valve\nThe component responsible for adding oxygen automatically is called a solenoid. A solenoid is an electronically controlled valve connected to the oxygen supply.\n\nWhen the control electronics determine that oxygen needs to be added, the solenoid opens briefly and injects oxygen into the breathing loop. The valve then closes again.\n\nThis process occurs repeatedly throughout the dive as oxygen is consumed.\n\n## What Is Diluent and Why Is It Needed?\nA rebreather contains two primary gas supplies. One contains oxygen. The other contains diluent.\n\nDiluent is used to maintain a breathable gas volume inside the loop and to control the oxygen concentration at different depths. Depending on the type of dive, the diluent may be air, nitrox, trimix, or another suitable breathing gas.\n\nAlthough oxygen receives most of the attention, a rebreather cannot operate correctly without diluent.\n\n## Bringing It All Together\nA rebreather may appear complex at first, but each component has a specific task.\n\nThe breathing loop keeps the gas circulating. The scrubber removes carbon dioxide. Oxygen sensors monitor the oxygen concentration. The solenoid adds oxygen when needed. The diluent helps maintain an appropriate breathing mixture.\n\nTogether, these components allow the diver to recycle breathing gas rather than releasing every breath into the water. Understanding how a rebreather works is only part of the story.\n\nOne of the most common questions new divers ask is how long a rebreather can stay underwater. The answer depends on oxygen consumption, scrubber duration, workload, water temperature, decompression requirements, and dive planning.\n\n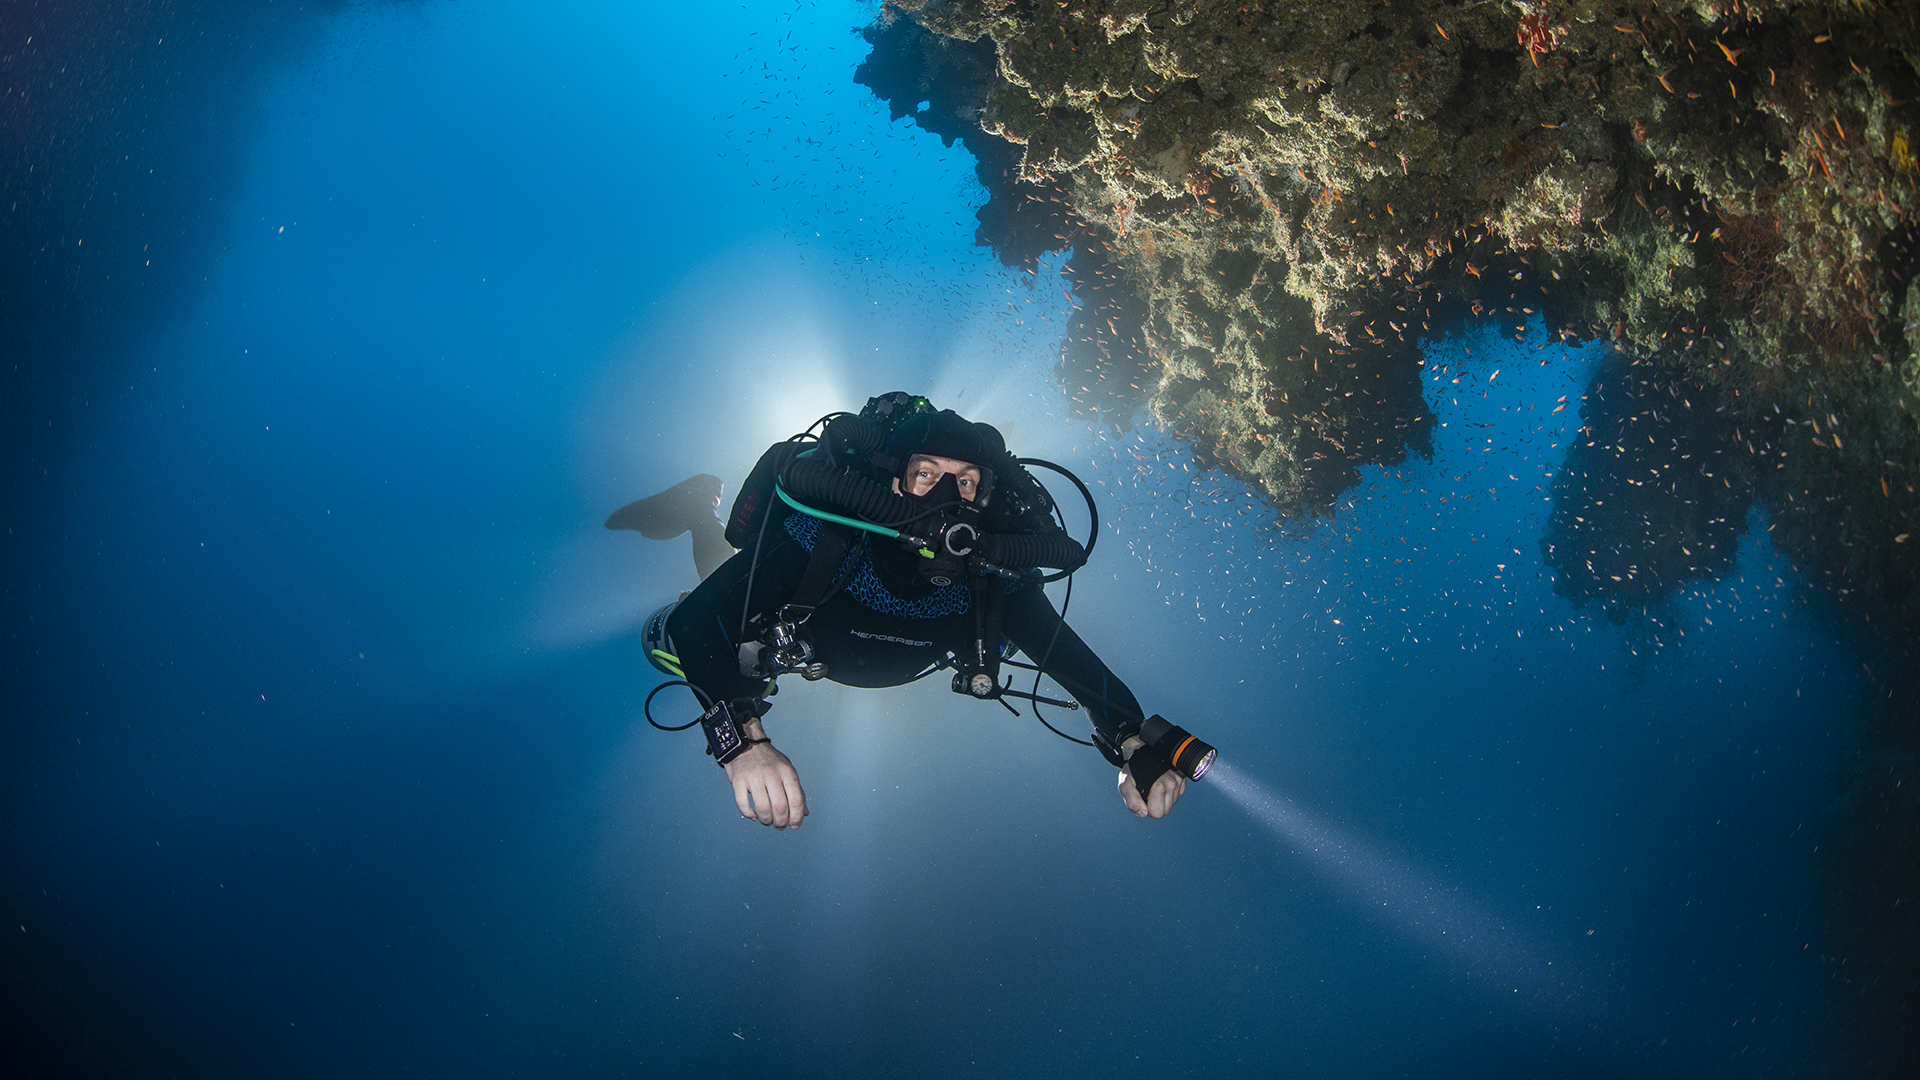\n\n\n**Learn more â \\> [How Long Can You Stay Underwater With a Rebreather?] (https://www.divesoft.com/en/how-long-can-you-stay-underwater-with-a-rebreather)**\n\n## Explore More About Rebreather Diving\n* [Why Do Divers Use Rebreathers?] (https://www.divesoft.com/en/blog/why-do-divers-use-rebreathers-ccr-benefits-explained)\n\nExplore the practical reasons divers choose CCRs, from longer dives and reduced gas consumption to comfort and underwater observation.\n\n* [Rebreather vs Open Circuit: What's the Difference?] (https://www.divesoft.com/en/blog/rebreather-vs-open-circuit-what-s-the-difference)\n\nLearn how closed-circuit and open-circuit systems manage breathing gas differently and how that affects the diving experience.\n\n* [How Long Can You Stay Underwater With a Rebreather?] (https://www.divesoft.com/en/how-long-can-you-stay-underwater-with-a-rebreather) \n\nUnderstand the factors that determine dive duration, including oxygen consumption, scrubber duration, workload, and dive planning.\n\n* [Why Recreational Divers Use Rebreathers] (https://www.divesoft.com/en/blog/why-recreational-divers-use-rebreathers)\n\nDiscover why many CCR divers spend most of their time well within recreational depth limits.\n\n* [Why Underwater Photographers Use Rebreathers] (https://www.divesoft.com/en/blog/why-underwater-photographers-use-rebreathers)\n\nLearn why photographers, filmmakers, and wildlife observers often appreciate quieter dives and longer observation times.\n\n \\> [Explore Liberty CCR] (https://www.divesoft.com/en/products/ccr-liberty)\n\n- Author: *[Divesoft] (https://www.divesoft.com/)*\n","showTags":false,"showDate":false,"image":{"mimetype":"image/png","size":1199734,"hash":"84373c9a9617b4d1054ad4c715fb9e32bdea965e","id":"ckz7yjonc2eq60776u0v3dizh","filename":"23-blog-what-is-rebreather.png","category":"divesoft/","type":"image","alt":"A closed-circuit rebreather combines the breathing loop, scrubber, sensors, oxygen supply, and diluent into a single integrated system."}},"id":"#2","type":"component","lock":false,"position":1},{"name":"Footer","data":{"copyrights":"Copyright © 2019 Divesoft LLC All rights reserved.","facebookUrl":{"urlNewWindow":true,"url":"https://www.facebook.com/divesoft/"},"youtubeUrl":{"url":"https://www.youtube.com/channel/UCHI2-kHmfoUlAdhQXPKl8lA/featured","urlNewWindow":true},"instagramUrl":{"url":"https://www.instagram.com/divesoft/","urlNewWindow":true},"contacts":"**Divesoft s.r.o.** \nHálkova 2495 \n413 01 Roudnice nad Labem \nCzech Republic \nTel.: +420 416 857 057 \nE-mail: [email protected]"},"id":"#1","type":"component","lock":false,"position":6}],"id":"root","idBuffer":"#7","lastCommit":"17ea8ba4-6675-4de6-b17e-574a015e924c"}},"annotations":[{"type":"id","generated":true,"id":"PageTranslation:ckz7y82vv5kaq0858eioy41o0.annotations.0","typename":"PageAnnotation"},{"type":"id","generated":true,"id":"PageTranslation:ckz7y82vv5kaq0858eioy41o0.annotations.1","typename":"PageAnnotation"},{"type":"id","generated":true,"id":"PageTranslation:ckz7y82vv5kaq0858eioy41o0.annotations.2","typename":"PageAnnotation"}],"language":{"type":"id","generated":false,"id":"Language:cjv3kwvoj000u083611381c6o","typename":"Language"},"__typename":"PageTranslation"},"PageTranslation:ckz7y82vv5kaq0858eioy41o0.annotations.0":{"key":"perex","value":"Most divers learn to dive using open-circuit scuba.\nYou breathe from a cylinder and exhale into the water.\nA rebreather works differently.\nInstead of releasing every breath as bubbles, it keeps most of the gas inside the system, removes carbon dioxide, replaces the oxygen that has been consumed, and allows the remaining gas to be breathed again.\nUnderstanding that process is the first step to understanding how a rebreather works.","__typename":"PageAnnotation"},"PageTranslation:ckz7y82vv5kaq0858eioy41o0.annotations.1":{"key":"title","value":"What Is a Rebreather and How Does It Work?","__typename":"PageAnnotation"},"PageTranslation:ckz7y82vv5kaq0858eioy41o0.annotations.2":{"key":"image","value":"{\"mimetype\":\"image/png\",\"size\":1199734,\"hash\":\"84373c9a9617b4d1054ad4c715fb9e32bdea965e\",\"id\":\"ckz7yjonc2eq60776u0v3dizh\",\"filename\":\"23-blog-what-is-rebreather.png\",\"category\":\"divesoft/\",\"type\":\"image\",\"alt\":\"A closed-circuit rebreather combines the breathing loop, scrubber, sensors, oxygen supply, and diluent into a single integrated system.\"}","__typename":"PageAnnotation"}
2,"Page:cl024i4na8mnj08589tid8bc4":{"id":"cl024i4na8mnj08589tid8bc4","type":{"type":"id","generated":false,"id":"PageType:cjv3l213x004f08366hjufttp","typename":"PageType"},"tags":[{"type":"id","generated":false,"id":"Tag:clw52zeqhlclq0735wrys6js8","typename":"Tag"},{"type":"id","generated":false,"id":"Tag:cly72rlmrv2ht07358rq07kkr","typename":"Tag"}],"translations({\"where\":{\"language\":{\"id\":\"cjv3kwvoj000u083611381c6o\"}}})":[{"type":"id","generated":false,"id":"PageTranslation:cl024i4nn8mnq0858qo9i1461","typename":"PageTranslation"}],"__typename":"Page"},"Tag:cly72rlmrv2ht07358rq07kkr":{"id":"cly72rlmrv2ht07358rq07kkr","name":"eshop/ccr","__typename":"Tag"},"PageTranslation:cl024i4nn8mnq0858qo9i1461":{"id":"cl024i4nn8mnq0858qo9i1461","name":"Divesoft.blog / 7 steps to becoming a rebreather diver","createdAt":"2022-02-25T07:59:02.675Z","content":{"type":"json","json":{"content":[{"name":"Header","data":{"showShadow":true},"id":"#4","type":"component","lock":false,"position":0},{"name":"BlogArticle","data":{"title":"7 steps to becoming a rebreather diver","perex":"Have you been thinking about joining the loop and becoming a rebreather diver? These steps will outline the tools you'll need to explore an underwater world without bubbles.","content":"**1. Motivation **\n \nIf you're reading this article, you are probably already interested to learning more of what it takes to get a rebreather. There are many reasons to get a [closed-circuit rebreather](https://www.divesoft.com/en/products/ccr-liberty/philosophy). It could be **greater dive and decompression efficiency, gas savings, deep dives, long cave dives, silence, or simply because you're a big fan of technology** and want to treat yourself to something better. \n\nHonestly, you don't really need to have a rational reason to justify getting a rebreather. People also don't get expensive and fast cars or motorbikes just to be faster at work. We've all seen the amazing photographs of divers in extreme places with all the equipment. Other times rebreather divers look as if they are embarking on a space walk to the other side of the moon! Rebreathers do tie into our sense of adventure to go where few others have been. If you want to get a rebreather simply because it's cool, then have at it! But you may have to find some justification for your wife or husband. \n\n[The previous article](https://www.divesoft.com/en/blog/what-is-a-rebreather-do-i-need-one-as-a-recreational-diver) can help you with that. \n\n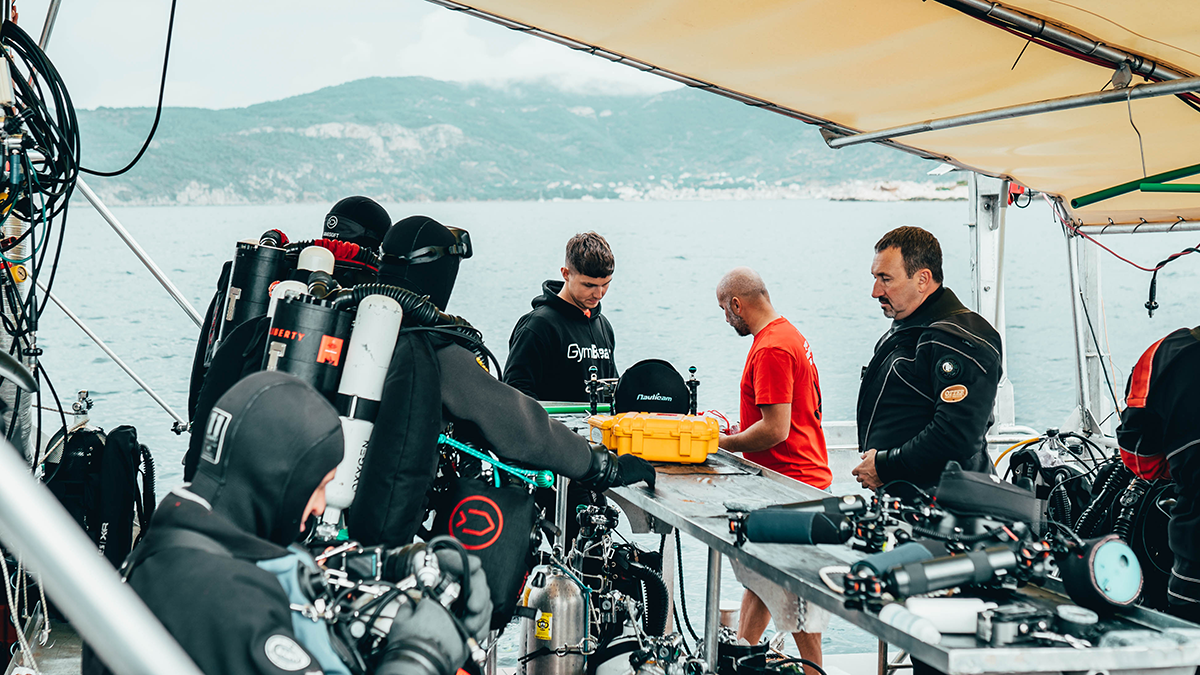\n \n**2. Experience ** \n \nIn the early days, rebreathers where reservered for the elite few and the extreme extreme divers. **Nowadays, there are many opinions that you can begin with a rebreather with little to no experience.** In my opinion, this is a mistake. \n\nA rebreather is, after all, a significantly more complex system which requires the active engagement of the diver both in its preparation and during the dive itself. In order to feel safe and enjoy diving with a CCR, **you need to already feel comfortable in the water and not be bothered by basic diving skills**. Divers that are early in their career are getting used to the different aquatic environment, reduced visibility, moving underwater, basic equipment control and buoyancy. \n\nBy the time you strap on a rebreather, you must have mastered these skills to the point that they are second nature. If you are overzealous in moving quickly to CCR without mastering the basics of diving itself, **you may become quickly overwhelmed, making it easy to miss important steps or warnings**. This can have really serious consequences and has happened more than once. \n \nUniversally, experience is expressed in terms of the number of dives, but it is clear to everyone that this can be very individual as not all dives are the same. **The entry [requirements of training agencies](https://www.divesoft.com/en/events-blog/ccr-training-from-the-perspective-of-training-agencies) into CCR courses vary widely and range from 18 to 100 dives.** I find the lower end of that range to be totally inadequate. \n\nI'm willing to concede that it may be satisfactory for a discovery dive, since you are in a safe environment under the supervision of an experienced instructor the entire time. However, an independent CCR diver course should only come into play when I am able to move reliably and safely underwater, the drills learned in the OWD and AOWD courses are a non-encumbering routine for me, and I can perform them anywhere and anytime regardless of the environment I am diving in.\n\nA very important skill that I think should be mastered at least at **a basic level is carrying and using a stage cylinder**. When diving with a rebreather, you will always need a bailout cylinder, which is a gas supply in a regular open circuit dive cylinder that differs little from a stage cylinder. If you already enter the CCR course with this experience, you will be able to focus on the rebreather diving itself and the bailout cylinder will be a given that will already feel natural to the diver and require no additional attention. \n \nIf you follow the above recommendations and consider your own experience, you will probably come to the conclusion that 18 dives is insufficient in any case, and we will be more likely to be somewhere around that 100 dives in reality. Divers with this number of dives are more experienced, they know their way around the water, the basic exercises are not difficult for them, and they have probably already had some close calls that gave them valuable experience and respect. \n \nSome training organizations even offer the opportunity to begin an OWD course right away at a recreational rebreather. This idea is an interesting one and relies on divers learning everything straight from the start, so they won't struggle with learning everything from scratch when they move on to a rebreather. But the arguments I made earlier tend to refute this claim. **A diver has to learn with an open circuit anyway, because they will be switching to an open circuit in an emergency situation**. So, if we wanted to teach a diver everything honestly and from scratch, then we would have to take him through all the skills and such a course would be very long and therefore very expensive. If someone offers you a quick and easy solution, beware. There are no shortcuts to the top. \n\n\n \n**3. Training and certification **\n \nAs indicated in the previous section, a critical prerequisite for becoming a rebreather diver is training with the specific device and certification from a recognized training agency. Without this, it is not possible to buy the device at all. All rebreather manufacturers either sell their devices directly through instructors or want to at least provide proof of successful completion of training. \n\nThere is no universal training. There is **specific training for each type of apparatus and your certification card will have the type of apparatus
2you are trained for marked on it**. I will cover the training, its requirements and instructor selection in detail in my next article. Specific training of each unit comes to the fact that each unit has critical components that differentiate them that require different techniques to build and dive them. Enough that specific training is required.\n \n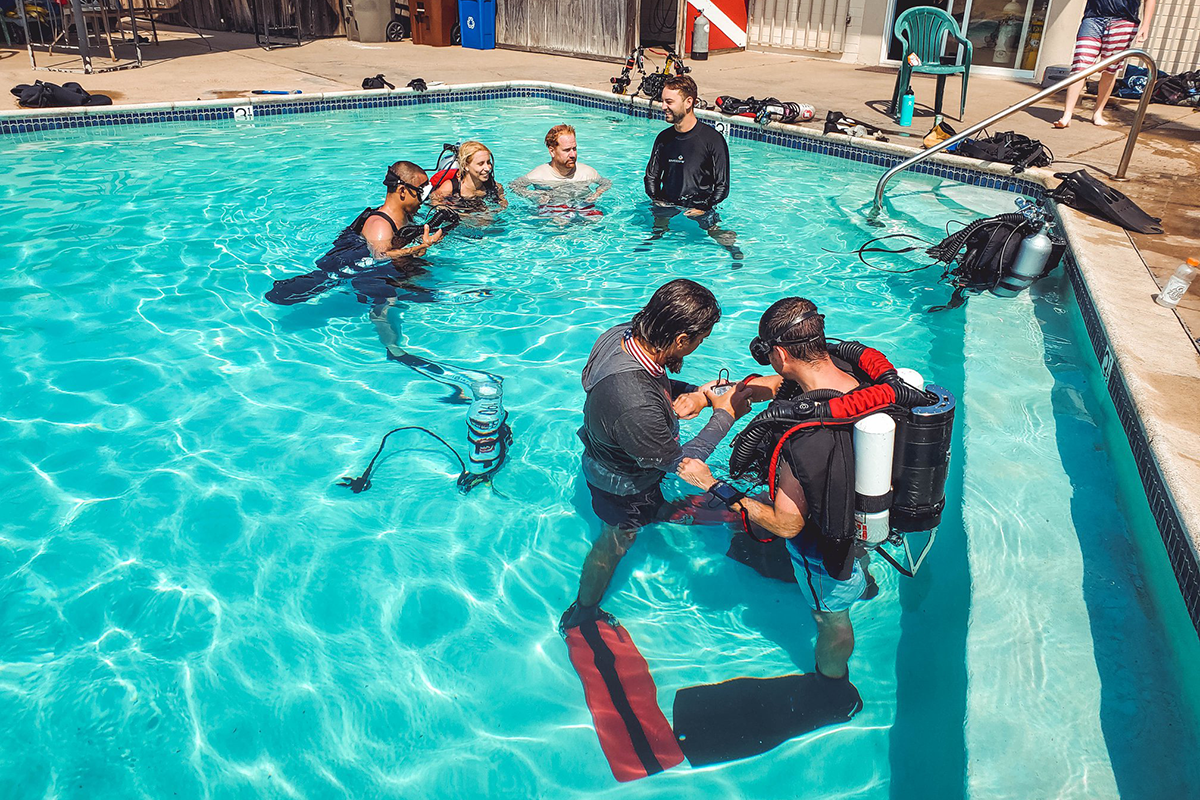\n\t\n**4. The unit **\n \nDo I have to get a rebreather if I want to start rebreather diving? Can't I rent one somewhere? Of course, you can, although these are rather exceptions. However, any instructor will tell you in a course that **once you start diving on a rebreather, you should already be diving primarily on a rebreather**. \n\nIt's like flying. If you don't take enough hours a year, you lose the habits you've learned and the safety of CCR diving decreases rapidly. If you only have the device on loan occasionally, you'll have a hard time taking it on every dive and a hard time gaining the necessary experience and habits. \n\nSo, if I may recommend, **if you decide to go the rebreather diving route, you need to own your own apparatus**. If you want to become a rebreather diver, best you own a rebreather. You can, of course, go about it the right way, and take several training courses for different apparatus before you choose to buy the one that suits you best. This is an honest, albeit, long and expensive journey. I've personally encountered this approach, and the person who went through it this way was certainly no beginner, but a world-renowned cave diving expert. \n\n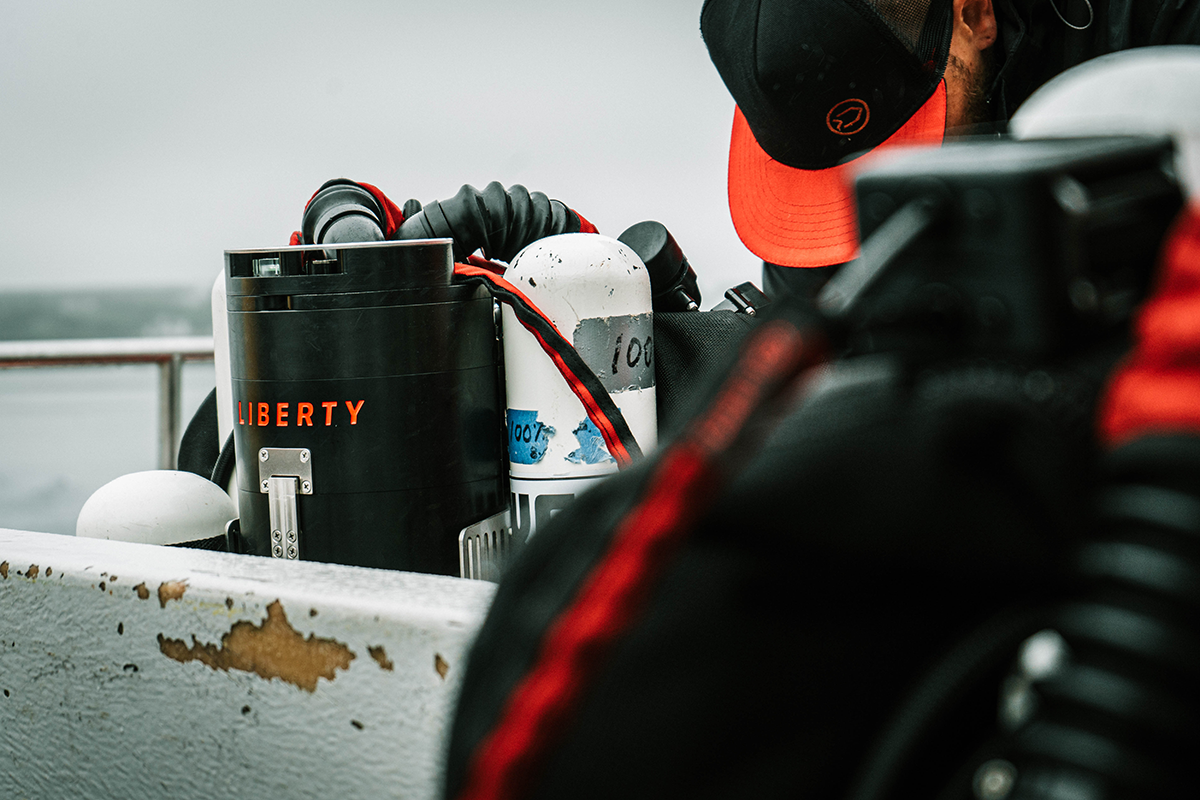\n \n**5. Additional equipment **\n \nIf you are to become a rebreather diver, then you will be needing to get a rebreather. From this, it is safe to assume that you already have all your basic diving equipment. Of course, you can't do without a suitable exposure suit, ABCs and other elementary items of equipment. \n \nWhat may be new to you, however, is a **bailout cylinder with an appropriate regulator**. A bailout cylinder, as I've already written, is not much different from a stage cylinder. There are some differences, though. While stage cylinders for technical open circuit diving are almost exclusively recommended in aluminium, steel cylinders are not taboo for bailout cylinders either. A properly selected lightweight steel cylinder will always be more compact than an aluminium one, will not change its buoyancy significantly, and most importantly, will hold more gas because we can pressurize it a bit more than an aluminium one. \n\nThe rigging of such a cylinder is becoming more and more like a sidemount cylinder rather than a traditional stage cylinder. Divers secure them with a bolt snap on the bottom, and a bungee cord around the top end around the valve from the divers harness. This allows the bottle to be carried much closer to the diver without it constantly bobbing and clinking under the diver's body. The biggest benefit is a more streamline profile, which will make swimming much easier. \n \n**The bailout cylinder regulator** is also slightly different from a traditional stage regulator. In addition to the second stage and pressure gauge, the first stage is also equipped with a medium pressure hose with an inflator bayonet quick connector. The latter is used when I need to supplement gas from an external cylinder because the rebreather cylinder is empty, has a valve failure, or I just want to save gas in the on-board rebreather cylinder. \n\nThe length of the regulator's medium pressure hose remains the same as the classic stage, i.e. 100 cm (40 inch). We need to be able to run it comfortably behind the neck from left to right and into the mouth. If we have a second stage permanently placed by a rubber band around the neck for immediate switching to the open circuit, then the regulator must be equipped with an additional second stage in case of providing gas to a partner in an emergency. \n\n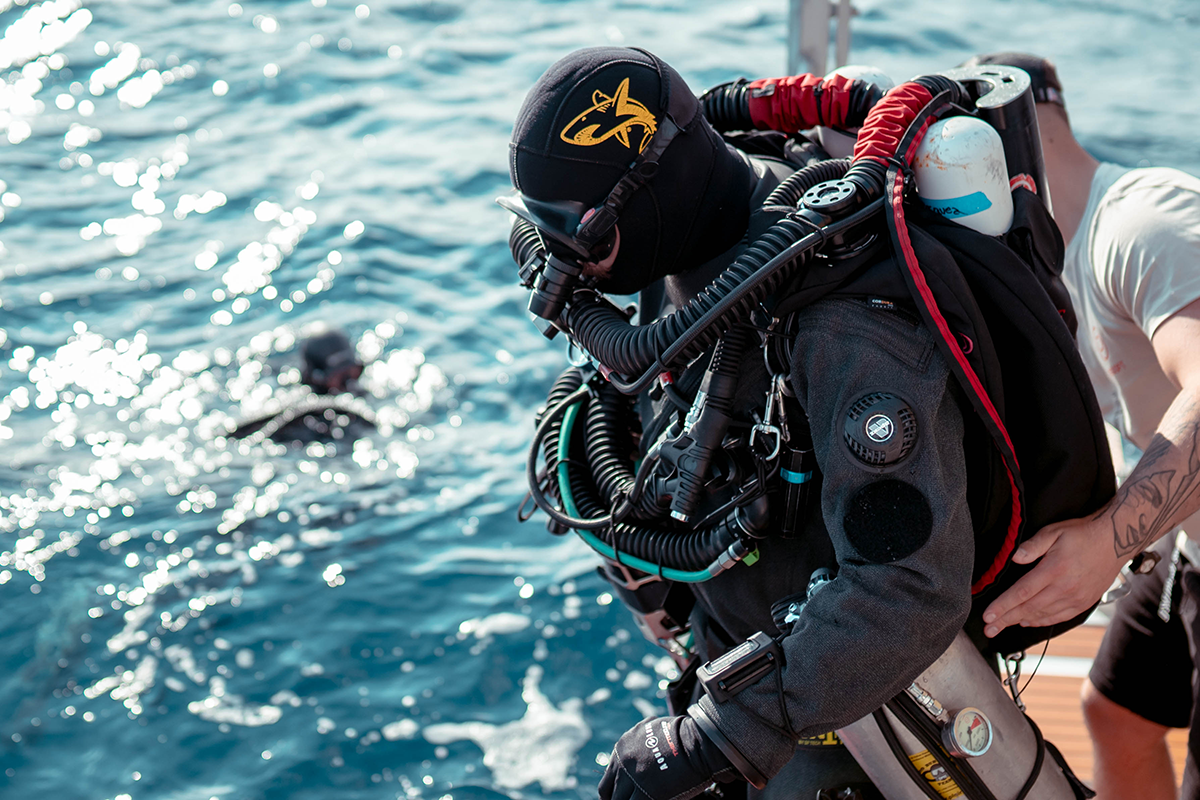\n\n**6. The will and determination to maintain the device regularly ** \n \nTaking care of the rebreather is essential for its perfect operation. I tell my students that **80% of dive safety is ensured on land before the dive, and unit preparation is the main component of land preparation**. Caring for a rebreather involves a more complex assembly than is the case with a conventional scuba unit. \n\nThere is also **the need to perform pre-dive tests, pre-breathing, and to clean the unit, disinfect the breathing loop and dry it out after the dive day**. It's a bit more work that we must accept and not skip, even after many successful CCR dives. It's a tax on the amazing efficiency the apparatus brings us, and we must be willing to pay it if we want to keep the apparatus safe. Of course, regular annual servicing by service technicians or directly by the manufacturer is a must. \n\n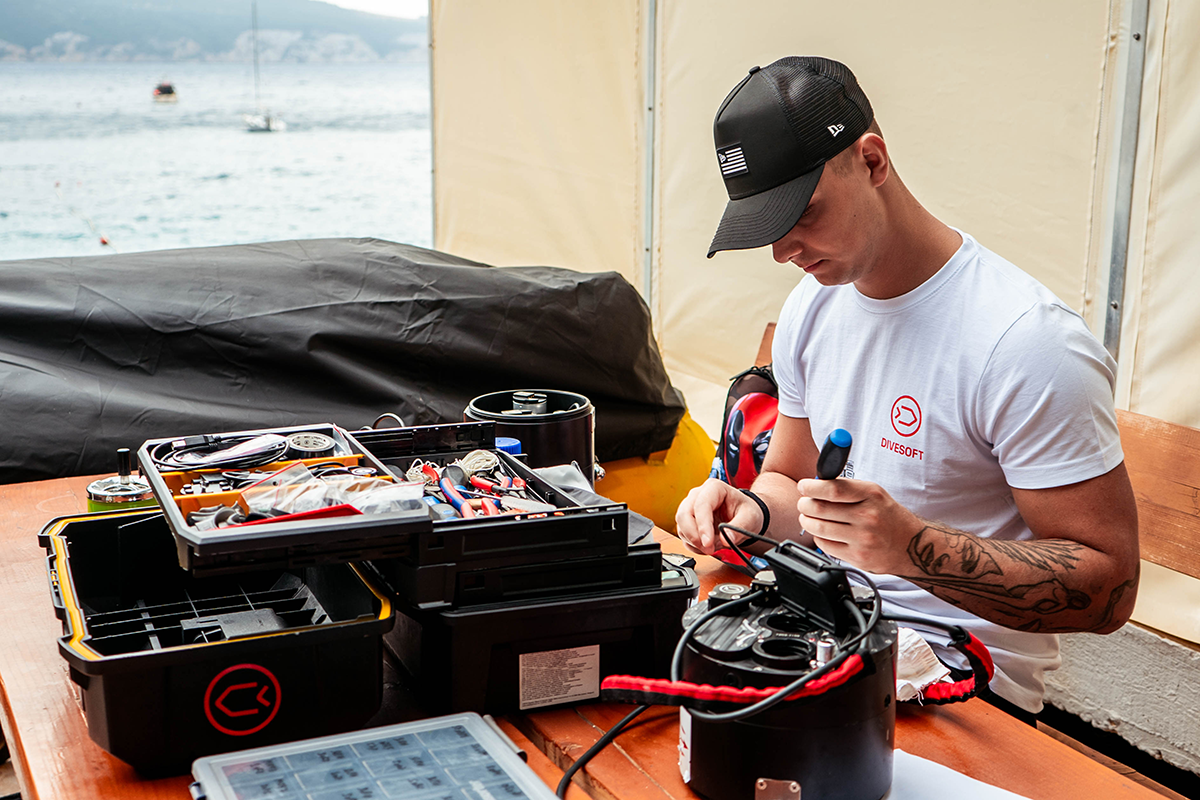\n \n**7. Decision ** \n \nThe most important thing at the end. By now you should be equipped with the basic
2information on what entering a bubble-free world entails and have the pros/cons are your disposal. The decision is up to you and you should consider all aspects carefully. \n\nExpect that, in addition to the purchase price, you will be forced **to invest annually in replacing oxygen sensors, and you will use 2.5 kg of sorbent for every 6 hours or so of diving**. These are things that must not be skipped and must therefore be taken into account. Nevertheless, I believe that the benefits of CCR are so great that the cost of acquiring and operating it easily outweighs them. \n \nI hope this article has helped you make a better decision in whether to get a rebreather. In any case, feel free to contact us with any additional questions at [[email protected]](mailto:[email protected]).\n\n* [Jakub Šimánek](https://www.divesoft.com/en/about-us/jakub-simanek), Divesoft Factory IT\n","showTags":false,"showDate":false,"image":{"mimetype":"image/png","size":1660575,"hash":"da3b801409fcb647e7c86e570571d5ecb4cea0a9","id":"cl0275os8d5ri0776auencf0x","filename":"24-blog-7-steps-to-becoming-rebreather-diver.png","category":"divesoft/","type":"image","alt":"7 steps to becoming a rebreather diver"}},"id":"#3","type":"component","lock":false,"position":1},{"name":"ProductShowcase","data":{"componentTemplateId":"cm9h4wr6ugjv10803yqs3tp71"},"id":"#7","type":"component","lock":false,"position":2},{"name":"Footer","data":{"copyrights":"Copyright © 2019 Divesoft LLC All rights reserved.","facebookUrl":{"urlNewWindow":true,"url":"https://www.facebook.com/divesoft/"},"youtubeUrl":{"url":"https://www.youtube.com/channel/UCHI2-kHmfoUlAdhQXPKl8lA/featured","urlNewWindow":true},"instagramUrl":{"url":"https://www.instagram.com/divesoft/","urlNewWindow":true},"contacts":"**Divesoft s.r.o.** \nHálkova 2495 \n413 01 Roudnice nad Labem \nCzech Republic \nTel.: +420 416 857 057 \nE-mail: [email protected]"},"id":"#1","type":"component","lock":false,"position":3}],"id":"root","idBuffer":"#8","lastCommit":"127f5f9a-33a7-421f-9b4f-6216c8b264a2"}},"annotations":[{"type":"id","generated":true,"id":"PageTranslation:cl024i4nn8mnq0858qo9i1461.annotations.0","typename":"PageAnnotation"},{"type":"id","generated":true,"id":"PageTranslation:cl024i4nn8mnq0858qo9i1461.annotations.1","typename":"PageAnnotation"},{"type":"id","generated":true,"id":"PageTranslation:cl024i4nn8mnq0858qo9i1461.annotations.2","typename":"PageAnnotation"}],"language":{"type":"id","generated":false,"id":"Language:cjv3kwvoj000u083611381c6o","typename":"Language"},"__typename":"PageTranslation"},"PageTranslation:cl024i4nn8mnq0858qo9i1461.annotations.0":{"key":"perex","value":"Have you been thinking about joining the loop and becoming a rebreather diver? These steps will outline the tools you'll need to explore an underwater world without bubbles.","__typename":"PageAnnotation"},"PageTranslation:cl024i4nn8mnq0858qo9i1461.annotations.1":{"key":"title","value":"7 steps to becoming a rebreather diver","__typename":"PageAnnotation"},"PageTranslation:cl024i4nn8mnq0858qo9i1461.annotations.2":{"key":"image","value":"{\"mimetype\":\"image/png\",\"size\":1660575,\"hash\":\"da3b801409fcb647e7c86e570571d5ecb4cea0a9\",\"id\":\"cl0275os8d5ri0776auencf0x\",\"filename\":\"24-blog-7-steps-to-becoming-rebreather-diver.png\",\"category\":\"divesoft/\",\"type\":\"image\"}","__typename":"PageAnnotation"},"Page:cl0uxg68ubwow08586hqi9bnj":{"id":"cl0uxg68ubwow08586hqi9bnj","type":{"type":"id","generated":false,"id":"PageType:cjv3l213x004f08366hjufttp","typename":"PageType"},"tags":[],"translations({\"where\":{\"language\":{\"id\":\"cjv3kwvoj000u083611381c6o\"}}})":[{"type":"id","generated":false,"id":"PageTranslation:cl0uxg699bwp30858e8xqoagx","typename":"PageTranslation"}],"__typename":"Page"},"PageTranslation:cl0uxg699bwp30858e8xqoagx":{"id":"cl0uxg699bwp30858e8xqoagx","name":"CCR Liberty Rebreather","createdAt":"2022-03-17T11:46:53.229Z","content":{"type":"json","json":{"content":[{"name":"Header","data":{"products":[{"title":"Accessories","description":"Backplates, Consumables. Tanks.","img":{"recommendedSizes":{"width":"235","height":"235"}},"url":""},{"title":"Accessories sets","description":"Protection, maintenance, cleaning.","img":{"recommendedSizes":{"width":"235","height":"235"}},"url":""},{"title":"Spare parts","description":"Spare parts and components.","img":{"recommendedSizes":{"width":"235","height":"235"}},"url":""}
2,{"title":"Spare parts kits","description":"Completly Liberty spare parts kits.","img":{"recommendedSizes":{"width":"235","height":"235"}},"url":""}]},"id":"#0","type":"component","lock":false,"position":0},{"name":"LinkCrossroad","data":{"title":"CCR Liberty Rebreather","subtitle":"","showBreadcrumbs":true,"hideHeader":false,"firstTitle":"Choose Category","firstColumn":"1","firstLinks":[{"title":"User Manuals","url":{"url":"/en/support/ccr-liberty-rebreather/manuals","urlNewWindow":false,"pageId":"cl0uy684cbwvb0858yqx4vnhx"},"anchor":"","id":"1"},{"id":"3","title":"Assembly Checklists","anchor":"","url":{"url":"/en/support/ccr-liberty-rebreather/assembly-checklists","pageId":"cl0v1tqigbxkj0858sa1rnh30","urlNewWindow":false}},{"id":"6","title":"Technical Specifications","url":{"url":"/en/support/ccr-liberty-rebreather/technical-specifications","pageId":"cl0v2cjy9bxow0858y0jvge1d"}},{"id":"2","title":"Firmware Updates","anchor":"","url":{"url":"/en/support/ccr-liberty-rebreather/firmware","pageId":"cl0uzc9z6bx4i0858xb5a7gh2"}},{"id":"4","title":"Additional Documents","url":{"url":"/en/support/ccr-liberty-rebreather/additional-documents","pageId":"cl0v2jkrubxqh0858gbqd5t6o"}},{"id":"7","title":"FAQ (knowledge base)","url":{"url":"https://support.divesoft.com/"}}],"secondTitle":"","secondColumn":"2","secondLinks":[{"id":"1","title":"Service Operations & Pricelist","url":{"url":"/en/support/ccr-liberty-rebreather/service-operations","pageId":"cl0v2zkp3bxt10858ginifodl"}},{"id":"2","url":{"url":"https://www.divesoft.com/en/service-points"},"title":"Service Points"}],"thirdTitle":"","thirdColumn":"1","thirdLinks":[],"fourthTitle":"","fourthColumn":"1","fourthLinks":[],"fifthTitle":"","fifthColumn":"1","fifthLinks":[],"activeTab":"7"},"id":"#2","type":"component","lock":false,"position":1},{"name":"HubSpotForm","data":{"backgroundColor":"#ffffff","isTitleH1":false,"title":"Contact support","subtitle":"Need service or support? Start your request online, and we'll find a solution for you. If your product requires a service operation, you can expedite the process by contacting your nearest service technician directly. This way, you'll ensure a quicker and more efficient service for your device.","showBreadcrumbs":false,"hideHeader":false,"portalId":"145642557","formId":"4b764781-6745-422e-90a8-65ca2861d8a7"},"id":"#8","type":"component","lock":false,"position":3},{"name":"Footer","data":{"copyrights":"Copyright © 2019 Divesoft LLC All rights reserved.","facebookUrl":{"urlNewWindow":true,"url":"https://www.facebook.com/divesoft/"},"youtubeUrl":{"url":"https://www.youtube.com/@divesoft_tv","urlNewWindow":true},"instagramUrl":{"url":"https://www.instagram.com/divesoft/","urlNewWindow":true},"contacts":"**Divesoft s.r.o.** \nHálkova 2495 \n413 01 Roudnice nad Labem \nCzech Republic \nTel.: +420 416 857 057 \nE-mail: [email protected]","twitterUrl":{"url":"","urlNewWindow":true,"pageId":"cjv3l26tp004p0836i54n4u7a"}},"id":"#1","type":"component","lock":false,"position":8}],"id":"root","idBuffer":"#9","lastCommit":"efdc0016-2294-4f8a-a56b-a55c639789f2"}},"annotations":[],"language":{"type":"id","generated":false,"id":"Language:cjv3kwvoj000u083611381c6o","typename":"Language"},"__typename":"PageTranslation"},"Page:cl0uy684cbwvb0858yqx4vnhx":{"id":"cl0uy684cbwvb0858yqx4vnhx","type":{"type":"id","generated":false,"id":"PageType:cjv3l213x004f08366hjufttp","typename":"PageType"},"tags":[],"translations({\"where\":{\"language\":{\"id\":\"cjv3kwvoj000u083611381c6o\"}}})":[{"type":"id","generated":false,"id":"PageTranslation:cl0uy684tbwvi08584ovc0jeo","typename":"PageTranslation"}],"__typename":"Page"},"PageTranslation:cl0uy684tbwvi08584ovc0jeo":{"id":"cl0uy684tbwvi08584ovc0jeo","name":"User Manuals","createdAt":"2022-03-17T12:07:08.717Z","content":{"type":"json","json":{"content":[{"name":"Header","data":{"products":[{"title":"Accessories","description":"Backplates, Consumables. Tanks.","img":{"recommendedSizes":{"width":"235","height":"235"}},"url":""},{"title":"Accessories sets","description":"Protection, maintenance, cleaning.","img":{"recommendedSizes":{"width":"235","height":"235"}},"url":""},{"title":"Spare parts","description":"Spare parts and components.","img":{"recommendedSizes":{"width":"235","height":"235"}},"url":""}
2,{"title":"Spare parts kits","description":"Completly Liberty spare parts kits.","img":{"recommendedSizes":{"width":"235","height":"235"}},"url":""}]},"id":"#0","type":"component","lock":false,"position":0},{"name":"LinkCrossroad","data":{"title":"User Manuals","subtitle":"","showBreadcrumbs":true,"hideHeader":false,"firstTitle":"Choose Language","firstColumn":"1","firstLinks":[{"title":"English Language","url":"","anchor":"support-ccr-liberty-manuals-english","id":"1"},{"id":"2","title":"German Language","anchor":"support-ccr-liberty-manuals-german"},{"id":"3","title":"Italian Language","anchor":"support-ccr-liberty-manuals-italian"},{"id":"4","title":"Korean Language","anchor":"support-ccr-liberty-manuals-korean"},{"id":"5","title":"Russian Language","anchor":"support-ccr-liberty-manuals-russian"},{"id":"6","title":"Czech Language","anchor":"support-ccr-liberty-manuals-czech"}],"secondTitle":"","secondColumn":"1","secondLinks":[],"thirdTitle":"","thirdColumn":"1","thirdLinks":[],"fourthTitle":"","fourthColumn":"1","fourthLinks":[],"fifthTitle":"","fifthColumn":"1","fifthLinks":[],"activeTab":"6"},"id":"#2","type":"component","lock":false,"position":1},{"name":"Spacer","data":{"spacingLarge":"50","spacingSmall":"50","backgroundColor":"#ffffff"},"id":"#3","type":"component","lock":false,"position":2},{"name":"LinkAnchor","data":{"anchorId":"support-ccr-liberty-manuals-english"},"id":"#4","type":"component","lock":false,"position":3},{"name":"DownloadsNew","data":{"backgroundColor":"#ffffff","title":"English Manuals","subtitle":"CCR Liberty Rebreather","showBreadcrumbs":false,"hideHeader":false,"files":[{"id":"3","title":"CCR Liberty User Manual - Online version","subtitle":"Revision date: March 2025","isTitleBold":true,"url":{"url":"/en/manuals/ccr-liberty-manual","mediaData":{"mimetype":"application/pdf","size":6686172,"hash":"e9332173874a2e721ff2dff36d9457c68e740265","id":"cl2rd8azg3xvz07766ygpqt5j","filename":"liberty-en-manual.pdf","category":"divesoft/docs/","type":"file"},"urlNewWindow":true,"pageId":"cl2yfnr88iba8085879y08pat"},"urlText":"Open"},{"id":"10","title":"CCR Liberty Sidemount User Manual - Online version","url":{"url":"/en/manuals/ccr-liberty-manual/ccr-liberty-sidemount-manual_en","pageId":"cl9y8rdi12u650858oza635r8","urlNewWindow":true},"urlText":"Open","isTitleBold":true,"subtitle":"Revision date: March 2025"},{"title":"CCR Liberty 2021 Edition","isTitleBold":true,"subtitle":"Version 2.13 | February 2021","url":{"url":"https://foxer360-media-library.s3.eu-central-1.amazonaws.com/divesoft/docs/c362861d696bd53989b43eba0dc7c70a3aef21f8_liberty-1-5.pdf","urlNewWindow":true},"urlText":"Download","id":"2"},{"title":"CCR Liberty Heavy Manual","isTitleBold":true,"subtitle":"January 2022","url":{"url":"https://www.divesoft.com/en/manuals/ccr-liberty-heavy-manual_en","urlNewWindow":true},"urlText":"Open","id":"1"},{"id":"5","title":"CCR Liberty Bailout Standby Mode Manual","isTitleBold":true,"subtitle":"June 2018","url":{"url":"https://www.divesoft.com/en/manuals/bailout-standby-mode-en","urlNewWindow":true},"urlText":"Open"},{"id":"7","title":"ODA manual","subtitle":"1 July 2021","isTitleBold":true,"url":{"url":"/en/manuals/8402-oda-en","urlNewWindow":true,"pageId":"cl8mqor4qyjzv0858vty0cfa3"},"urlText":"Open"},{"id":"6","title":"BOV Manual","isTitleBold":true,"subtitle":"24 April 2019","url":{"url":"https://foxer360-media-library.s3.eu-central-1.amazonaws.com/divesoft/docs/2372b31c0cf1fd57bf45a46cdf9b00a82099d456_bov-en-manual.pdf","urlNewWindow":true},"urlText":"Download"},{"id":"9","title":"Oxygen Tester Kit Manual","url":{"url":"http://foxer360-media-library.s3.eu-central-1.amazonaws.com/divesoft/docs/1240941101b7212aa40d3950d64ad76fee5cdcdc_oxygen-sensor-tester-kit-manual.pdf","mediaData":{"mimetype":"application/pdf","size":3783379,"hash":"1240941101b7212aa40d3950d64ad76fee5cdcdc","id":"clf0xvcvyc9u70776nqwm38sv","filename":"oxygen-sensor-tester-kit-manual.pdf","category":"divesoft/docs/","type":"file"},"urlNewWindow":true},"isTitleBold":true,"subtitle":"9 March 2023","urlText":"Download"}],"activeTab":"11"},"id":"#5","type":"component","lock":false,"position":4},{"name":"LinkAnchor","data":{"anchorId":"support-ccr-liberty-manuals-german"},"id":"#6","type":"component","lock":false,"position":5},{"name":"DownloadsNew","data":{"backgroundColor":"#ffffff","title":"German Manual
2s","subtitle":"CCR Liberty Rebreather","showBreadcrumbs":false,"hideHeader":false,"files":[{"title":"CCR Liberty User Manual","isTitleBold":true,"subtitle":"Version 2.11 | 19 April 2019","url":{"url":"https://foxer360-media-library.s3.eu-central-1.amazonaws.com/divesoft/docs/f45bd24962212db10e6388c5baa3773f837ad77a_liberty-ge-manual.pdf","urlNewWindow":true},"urlText":"Download","id":"1"},{"title":"CCR Liberty Sidemount Manual","isTitleBold":true,"subtitle":"Version 2.11 | 12 March 2019","url":{"url":"https://foxer360-media-library.s3.eu-central-1.amazonaws.com/divesoft/docs/c5eb052660cb660654fb7731aa343ca7cd4b05f5_liberty-sidemount-manual-ge.pdf","urlNewWindow":true},"urlText":"Download","id":"2"},{"id":"3","title":"CCR Liberty Bailout Standby Mode Manual","subtitle":"Version 2.0 | 29 June 2018","isTitleBold":true,"url":{"url":"https://foxer360-media-library.s3.eu-central-1.amazonaws.com/divesoft/docs/a219ab82a83d4f04e97e157b8c7972b9e57d6539_manual-liberty-bsm-german.pdf","urlNewWindow":true}}],"activeTab":"3"},"id":"#7","type":"component","lock":false,"position":6},{"name":"LinkAnchor","data":{"anchorId":"support-ccr-liberty-manuals-italian"},"id":"#8","type":"component","lock":false,"position":7},{"name":"DownloadsNew","data":{"backgroundColor":"#ffffff","title":"Italian Manuals","subtitle":"CCR Liberty Rebreather","showBreadcrumbs":false,"hideHeader":false,"files":[{"title":"CCR Liberty User Manual","isTitleBold":true,"subtitle":"Version 2.11 | 25 February 2021","url":{"url":"https://foxer360-media-library.s3.eu-central-1.amazonaws.com/divesoft/docs/0dc176d704c17247a28b6f2663f607a3e2b4a4b4_liberty-211-rev-12-it.pdf","urlNewWindow":true},"urlText":"Download","id":"1"},{"title":"CCR Liberty Sidemount Manual","isTitleBold":true,"subtitle":"Version 2.11 | 25 February 2021","url":{"url":"https://foxer360-media-library.s3.eu-central-1.amazonaws.com/divesoft/docs/f1c965dd74d692beb4c8cb45bb6ecaf6c3a31104_liberty-sidemount-rev12-it.pdf","urlNewWindow":true},"urlText":"Download","id":"2"}],"activeTab":"2"},"id":"#9","type":"component","lock":false,"position":8},{"name":"LinkAnchor","data":{"anchorId":"support-ccr-liberty-manuals-korean"},"id":"#10","type":"component","lock":false,"position":9},{"name":"DownloadsNew","data":{"backgroundColor":"#ffffff","title":"Korean Manuals","subtitle":"CCR Liberty Rebreather","showBreadcrumbs":false,"hideHeader":false,"files":[{"title":"CCR Liberty 2021 Edition","isTitleBold":true,"subtitle":"Version 2.11 | 30 November 2021","url":{"url":"https://foxer360-media-library.s3.eu-central-1.amazonaws.com/divesoft/docs/ab8718f46168ba3e21772b288629265a82739ee6_ccr-liberty-2021-edition-kr.pdf","urlNewWindow":true},"urlText":"Download","id":"1"},{"title":"CCR Liberty User Manual","isTitleBold":true,"subtitle":"Version 2.11 | 3 January 2019","url":{"url":"https://foxer360-media-library.s3.eu-central-1.amazonaws.com/divesoft/docs/173c640fbf6a01a8580c4983aff8dd2c0e18829d_ccr-liberty-user-manual-korean.pdf","urlNewWindow":true},"urlText":"Download","id":"2"},{"id":"3","title":"CCR Liberty Sidemount Manual","isTitleBold":true,"subtitle":"Version 2.1 | 1
2November 2021","url":{"url":"https://foxer360-media-library.s3.eu-central-1.amazonaws.com/divesoft/docs/c9b1b980774ce214606b24e0af44ef08ddcba260_ccr-liberty-sidemount-manual-kr.pdf","urlNewWindow":true}},{"id":"4","title":"CCR Liberty Bailout Standby Mode Manual","isTitleBold":true,"subtitle":"Version 2.0 | 3 January 2019","url":{"url":"https://foxer360-media-library.s3.eu-central-1.amazonaws.com/divesoft/docs/173c640fbf6a01a8580c4983aff8dd2c0e18829d_ccr-liberty-user-manual-korean.pdf","urlNewWindow":true}}]},"id":"#11","type":"component","lock":false,"position":10},{"name":"LinkAnchor","data":{"anchorId":"support-ccr-liberty-manuals-russian"},"id":"#12","type":"component","lock":false,"position":11},{"name":"DownloadsNew","data":{"backgroundColor":"#ffffff","title":"Russian Manuals","subtitle":"CCR Liberty Rebreather","showBreadcrumbs":false,"hideHeader":false,"files":[{"title":"CCR Liberty User Manual","isTitleBold":true,"subtitle":"Version 2.11 | 23 July 2018","url":{"url":"https://foxer360-media-library.s3.eu-central-1.amazonaws.com/divesoft/docs/3a75d7f0c87e7a22a4d49d00ff44142ff6252db8_ccr-liberty-user-manual-rus.pdf","urlNewWindow":true},"urlText":"Download","id":"1"},{"title":"CCR Liberty Sidemount Manual","isTitleBold":true,"subtitle":"Version 1.0 | 10 October 2018","url":{"url":"https://foxer360-media-library.s3.eu-central-1.amazonaws.com/divesoft/docs/9f7eee50b162e25363d1bbb967c52225f727b3f2_ccr-liberty-sidemount-manual-rus.pdf","urlNewWindow":true},"urlText":"Download","id":"2"}],"activeTab":"2"},"id":"#13","type":"component","lock":false,"position":12},{"name":"LinkAnchor","data":{"anchorId":"support-ccr-liberty-manuals-czech"},"id":"#14","type":"component","lock":false,"position":13},{"name":"DownloadsNew","data":{"backgroundColor":"#ffffff","title":"Czech Manuals","subtitle":"CCR Liberty Rebreather","showBreadcrumbs":false,"hideHeader":false,"files":[{"id":"2","title":"CCR Liberty Uživatelský manuál Online","url":{"url":"/en/manuals/ccr-liberty-manual-cz","pageId":"cm0az5m5s0t9b0818fxjonef0","urlNewWindow":true},"urlText":"OtevÅÃt","subtitle":"April 2024"}],"activeTab":"2"},"id":"#15","type":"component","lock":false,"position":14},{"name":"Footer","data":{"componentTemplateId":"cjvwimxrl08e40798hjs5ek9w"},"id":"#1","type":"component","lock":false,"position":15},{"name":"AccordionLinks","data":{"accordionTitle":"Downloads","links":[{"itemTitle":"CCR Liberty Catalogue","linkLabel":"Download","linkUrl":{}},{"itemTitle":"CCR Liberty Manual","linkLabel":"Open","linkUrl":{}},{"itemTitle":"CE Certificate","linkLabel":"Download","linkUrl":{}}],"storesTitle":"Divesoft App","appStoreLink":{"url":"https://apps.apple.com/cz/app/divesoft-app/id1545496130"},"googlePlayLink":{"url":"https://play.google.com/store/apps/details?id=com.divesoft.divesoft_app"}},"id":"#16","type":"component","lock":false,"position":16},{"name":"AccordionLinks","data":{"accordionTitle":"Downloads","links":[{"itemTitle":"CCR Liberty Catalogue","linkLabel":"Download","linkUrl":{}},{"itemTitle":"CCR Liberty Manual","linkLabel":"Open","linkUrl":{}},{"itemTitle":"CE Certificate","linkLabel":"Download","linkUrl":{}}],"storesTitle":"Divesoft App","appStoreLink":{"url":"https://apps.apple.com/cz/app/divesoft-app/id1545496130"},"googlePlayLink":{"url":"https://play.google.com/store/apps/details?id=com.divesoft.divesoft_app"}},"id":"#17","type":"component","lock":false,"position":17}],"id":"root","idBuffer":"#18","lastCommit":"c53b8251-33e7-4904-87ee-236ab1ddc960"}},"annotations":[],"language":{"type":"id","generated":false,"id":"Language:cjv3kwvoj000u083611381c6o","typename":"Language"},"__typename":"PageTranslation"},"Page:cl0uzc9z6bx4i0858xb5a7gh2":{"id":"cl0uzc9z6bx4i0858xb5a7gh2","type":{"type":"id","generated":false,"id":"PageType:cjv3l213x004f08366hjufttp","typename":"PageType"},"tags":[],"translations({\"where\":{\"language\":{\"id\":\"cjv3kwvoj000u083611381c6o\"}}})":[{"type":"id","generated":false,"id":"PageTranslation:cl0uzc9zjbx4p0858rcxztqfi","typename":"PageTranslation"}],"__typename":"Page"},"PageTranslation:cl0uzc9zjbx4p0858rcxztqfi":{"id":"cl0uzc9zjbx4p0858rcxztqfi","name":"Firmware","createdAt":"2022-03-17T12:39:50.671Z","content":{"type":"json","json":{"content":[{"name":"Header","data":{"products":[{"title":"Accessories","description":"Backplates, Consumables. Tanks.","img":{"recommendedSizes":{"width":"235","height":"235"}},"url":""},{"title":"Accessories sets","description":"Protection, maintenance, cleaning.","img":{"recommendedSizes":{"width":"235","height":"235"}},"url":""},{"title":"Spare parts","description":"Spare parts and components.","img":{"recommendedSizes":{"width":"235","height":"235"}},"url":""}
2,{"title":"Spare parts kits","description":"Completly Liberty spare parts kits.","img":{"recommendedSizes":{"width":"235","height":"235"}},"url":""}]},"id":"#0","type":"component","lock":false,"position":0},{"name":"Spacer","data":{"spacingLarge":"50","spacingSmall":"50","backgroundColor":"#ffffff"},"id":"#3","type":"component","lock":false,"position":1},{"name":"LinkCrossroad","data":{"title":"Firmware","subtitle":"","showBreadcrumbs":true,"hideHeader":false,"firstTitle":"Choose Category","firstColumn":"1","firstLinks":[{"title":"Divesoft.center","url":{"url":"/en/center","pageId":"ckjhi3h1h1b720788igpbi8fp"},"anchor":"","id":"1"},{"id":"2","title":"Release notes","anchor":"support-ccr-liberty-release-notes"}],"secondTitle":"","secondColumn":"1","secondLinks":[],"thirdTitle":"","thirdColumn":"1","thirdLinks":[],"fourthTitle":"","fourthColumn":"1","fourthLinks":[],"fifthTitle":"","fifthColumn":"1","fifthLinks":[],"activeTab":"2"},"id":"#2","type":"component","lock":false,"position":2},{"name":"LinkAnchor","data":{"anchorId":"support-ccr-liberty-firmware-updates-1.0"},"id":"#7","type":"component","lock":false,"position":4},{"name":"DownloadsNew","data":{"backgroundColor":"#ffffff","title":"Release notes","subtitle":"","showBreadcrumbs":false,"hideHeader":false,"files":[{"id":"36","subtitle":"**9th September 2025**\n<br><br>\n**New features ** \n* None \n\n**Changes ** \n* None \n\n**Error corrections ** \n* Fixed Air Integration pressure not visible on surface screen when same transmitter assigned to both CCR (Oxy / Dil) and an OC cylinder.\n* Fixed O2 calibration sometimes not holding over power cycle - especially when often changing a lot of settings options (introduced in 2.18.2).\n* [HW 2.x] Increased limits for FW update size over the BLE.","title":"Liberty 2.18.3-10252"},{"id":"35","title":"Liberty 2.18.2-10019","isTitleBold":true,"subtitle":"**23rd May 2025**\n<br><br>\n**New features ** \n* None \n\n**Changes ** \n* Predive check timeout prolonged to 10 minutes.\n* Predive check pressure tests timer can be reset when counting or finished by pressing both buttons.\n* Added He sensor calibration to the predive menu (when sensor installed).\n* Menu design (eg. Predive) can be changed back to classic look from âMenu / Setup / Preferences / Unit & Misc / New menuâ \n\n**Error corrections ** \n* Fixed localized alarm messages in Czech.\n* Fixed a rare reset of configuration (and O2 calibration) at cold start (eg. after charging).\n* Additionally, user gets a warning message in case of any configuration issue at startup.\n* Fixed Liberty not staying in BoCCR mode with certain pressure sensor types.\n"},{"id":"33","title":"Liberty 2.18.1 (9713)","subtitle":"**3rd March 2025**\n<br><br>\n\n**New features**\n* None \n\n\n**Changes** \n* None \n\n**Error corrections**\n* Fixed some issues with uSD card writes resulting in an undesired log events during the dive (issue present only in version 2.18.0)."},{"id":"34","subtitle":"\n**New features** \n\n* Stack timer can be reset to specific value (when exchanging scrubbers between two Liberty CCRs).\n* Short press to adjust, hold to reset to zero.\n* Prebreath timer added to ODA.\n* Automatic return to âhome divescreenâ after set time, setup for each handset individually in âSetup / Preferences / Display / Home scr.â.\n* Added supp
2ort for pressure sensor modules #7294-xxxx.\n* Alarm messages got BIG when configured BIG menu font in âSetup / Preferences / Display / Menu highlight -> Allâ.\n* Optional persistent alarm messages waiting for confirmation by a button press, setup in âSetup / Alarms / Confirm alarmsâ.\n* Predive loop pressure checks - added warning screen when reference pressure looks not right, eg. leaving Liberty in the pressure test mode and forgetting about it. \n\n\n**Changes** \n* Surface menu streamlining, see below.\n* Displayed setpoint always shows the real achievable value, eg. limited by shallow depth, which is used for regulation.\n* [HW 2.x] Air integration pressure alarms setting in âSetup / Alarms / Alarm sources / Air integr.â expanded to Off / Low pressure only / Low pressure + no communication. \n \n**Error corrections**\n* Fixed the âBO RMT expiredâ alarm when BoCCR mode enabled. \n\n\n**Menu streamlining** \nThe surface menu has been streamlined for better clarity and easier access. - âPrediveâ moved under the âDiveâ menu - Removed whole âTurn Offâ sub-menu.","title":"Liberty 2.18.0","isTitleBold":true},{"id":"32","title":"Liberty 2.17.4 (9384)","subtitle":"**13th June 2024**\n<br><br>\n**New features **\n* âOne Handsetâ mode - hiding irrelevant menu options when using only one handset (eg. sidemount), see below. \n\n**Changes** \n* Oxygen cell test - added check for Air and warning at the beginning of the process if the oxygen sensors show higher oxygen content from the start.\n* System log - automatic compression of repeating identical records.\n* [HW 2.x] More precise metabolic consumption calculated from oxygen cylinder pressure change during the dive, instead of solenoid injected volume.\n* [HW 2.x] Log book / Gas list - added cylinder start and end pressure.\n* [HW 2.x] Significant improvement in FW upload speed over the Bluetooth for future updates.\n* [HW 2.x] Added GPS coordinates in log of a surfacing position. \n\n**Error corrections ** \n* Minor UI fix in Predive check / Pressure texts - the âOKâ.\n* Ascent plan recalculated immediately after any change in âSetup / Mixturesâ in dive, eg. mixture disable/enable.\n* Fixed dive start time 2x shift by the timezone on the âprofileâ dive screen.\n* Fixed missing pressure transmitter low battery pressure warning with âCyl. pressâ set to âNUM\" \n\n\n**Single Handset mode** \nSetting âSurface Menu / Setup / Preferences / Controls & Build / Handsetsâ -> 1 enables âSingle Handset modeâ. This affects: Predive Check / Topology screen - communication test to the second handset is not present. Water temperature warning on dive screen is supressed (exclamation mark), since the water temperature sensor is located in the handset. Shutdown sub-menu is replaced by direct shutdown action.","isTitleBold":true},{"id":"31","title":"Liberty 2.17.3","subtitle":"**New features ** \n\n* Enhanced menu readability when set âSetup / Preferences / Display / Menu highlight -> Allâ\n* Italian and Croatian languages \n\n**Changes**\n* None \n\n**Error corrections**\n* Various ODA compass and stability patches.\n* Fixed some overflowing texts in Menu / Setup / Display and more.\n* Fixed shallow stop display in transition from nodeco -> deco.","isTitleBold":true},{"id":"30","title":"Liberty 2.17.2 ","isTitleBold":true,"subtitle":"**9th November 2023**\n<br><br>\n**Changes **\n* (HW 2.X) ODA compass indication when using last known (saved) calibration or mediocre quality (white line below a value), the line disappears once the calibration reaches âperfectâ status, eg. after rotating in full circle. \n\n**Error corrections**\n* (HW 2.X) ODA compass performance corrected from update 2.17.1.\n* Minor UI fixes on Helium calibration screen.\n* Workaround for a rare spurrious configuration reset."},{"id":"29","title":"Liberty 2.17.1 (8865)","isTitleBold":true,"subtitle":"**21st September 2023**\n<br><br>\n**Changes** \n* Surface interval and oxygen calibration age will not be affected when manually adjusting local time.\n* (HW 2.X) Removed humidity measuring due to unsatisfactory results. \n\n**Error corrections** \n\n* Fixed handset display not being erased after starting or ending a dive with a screen turned off.\n* HUD brightness setting is available in all hardware configurations, not just ODA users.\n* Fixed inability to exit application âO2 cell testerâ with handset HW rev. 4.x.\n* (HW 2.X) Fixed USB Mass Storage mode, storage not showing after connecting to PC (regression from 2.17.0).\n* (HW 2.X) ODA fixed vertical speed indicator randomly indicating up and down speeds even when diver keeps current depth.\n* (HW 2.X) Fixed ODA irregular or no indication of charging in sleep.\n* (HW 2.X) Adjusted helium measure signal limits.\n* (HW 2.X) ODA (HW 1.1) compass calibration persistence improved. \n\n**Surface interval and Oxygen calibration date timekeeping** \n\nPrior to this FW version, the surface interval and oxygen calibration date and age was referenced to the current time. This means adjusting the local time on the Liberty led to a jump in surface interval time, rendering it totally misleading, similarly for oxygen calibration age. Now, the surface interval (and oxygen calibration age) will not be affected by time change - eg. adjusting the Liberty time between two dives. However, if you remove the battery jumpers when storing the Liberty for a prolonged period, the internal real time clock will eventually stop. This happens after more than two days with the jumpers removed. After that, the time will not increment anymore and the surface time / oxygen calibration age will not be incremented as well. Keep this in mind that these values can be inaccurate if you remove jumpers for storage. This primarily only applies for Liberty units that are pre 2021Edition (HW 1.X). There is no need to remove jumpers anymore for storing the Liberty 2021Edition as it uses 50% of battery capacity even after half a year in storage."},{"id":"28","title":"Liberty 2.17.0 (8641)","isTitleBold":true,"subtitle":"**19th June 2023**\n<br><br>
2\n**New Features** \n* Language localization, EN/CZ/DE/FR/SP\n* Handset button malfunction detection on power-on.\n* Compass declination settings at Setup / Preferences / Time & GPS / Declination.\n* Erase any logs you wish, see the Logbook dive sub-menu.\n* (HW 2.X) Battery charging time-to-full estimation. \n\n**Changes** \n* Improved logging of handset cable malfunctions.\n* Removed apostrophe behind a time (as a minute symbol) for imperial units, to avoid confusion with feet.\n* Removed descent setpoint timeout and other premature cancellation events, the descent SP ends now only after reaching a SP Low value.\n* (HW 2.X) Improved firmware update finalization speed - the phase after bluetooth upload. \n\n**Error corrections** \n* Fixed rare glitch on startup âtopologyâ screen where a second HS would overwrite the other CU.\n* Fixed END calculation - oxygen not narcotic equation.\n* (HW 2.X) Fixed Bluetooth client name not being erased after DivesoftApp/DivesoftCenter disconnecting.\n* Fixed random wakeup from standby mode when using older pressure sensors.\n* (HW 2.X) Patch for initialization of defective uSD card(s).\n* (HW 2.X) Increased solenoid min injection time from 20 to 30ms in cold conditions (based on accumulated data).\n* (HW 2.X) ODA power-up bugfix.\n\n"},{"id":"27","subtitle":"**13th December 2022**\n<br><br>\n**New features**\n* None \n\n**Changes** \n\n* None \n\n**Error corrections **\n* (HW 2.X) Fixed helium measure and calibration with overly sensitive microphones (broken in 2.15.0) \n* (HW 2.X) Fixed uSD card initialization sequence taking a very long time.","title":"Liberty 2.16.4 (8224)","isTitleBold":true},{"id":"26","title":"Liberty 2.16.3 (8283)","subtitle":"**1st November 2022**\n<br><br>\n**New features**\n* (HW 2.X) ODA update in progress is indicated on handset surface screen. \n\n**Changes**\n* (HW 2.X) AI cylinder pressures graphs divided by rule of thirds.\n* Helium measurement is now invalid when difference between sensors exceeds 20% of He fraction. \n\n**Error corrections** \n* (HW 2.X) Fixed the Gas consumption screen (after introducing the OC pressures in 2.16.1).\n* (HW 2.X) Fixed mismatched AI cylinder pressure alarm messages (after introducing the OC pressures in 2.16.1).\n* (HW 2.X) Fixed BoCCR BORMT always showing a \"Batt 0'\" (introduced in 2.16.0)","isTitleBold":true},{"id":"25","title":"Liberty 2.16.2 (8037)","isTitleBold":true,"subtitle":"**6th October 2022**\n<br><br>\n**New features**\n\n* None\n\n**Changes**\n\n* None\n\n**Error corrections**\n\n* Fixed compass screen showing in dive mode even without ODA connected.\n* Fixed OTA update for HS rev. 4.0."},{"id":"24","title":"Liberty 2.16.1 (8022)","isTitleBold":true,"subtitle":"**5th October 2022**\n<br><br>\n**New features**\n\n* Air integration support for OC bailout gases, setup in Mixtures/OC, view in DIR screen.\n* \"Bailout MOD exceeded\" alarm for default OC mix.\n* Warning when you set GF low > high.\n* FW support for HS rev. 4.0 and ODA rev. 1.1.\n\n**Changes**\n\n* BORMT calculation and planner now uses real pressure read from AI transmitter, IF your bailout cylinder has a transmitter and is in range.\n\n**Error corrections**\n\n* Fixed potential instability caused by 100+logs (introduced in 2.15.X)."},{"id":"23","title":"Liberty 2.16.0 (7921)","isTitleBold":true,"subtitle":"**12th August 2022**\n<br><br>\n**New features**\n\n* FW support for CU HW rev. 2.1\n\n**Changes**\n\n* None\n\n**Error corrections**\n\n* None"},{"id":"22","title":"Liberty 2.15.2 (7898)","subtitle":"**1st August 2022**\n<br><br>\n**New features**\n\n* None\n\n**Changes**\n\n* None\n\n**Error corrections**\n\n(HW 2.X) Fixed deco calculation issue for time-travellers, see below.\n\nRELEASE NOTES update: Replaced initial marking \"HW 1.5\" with \"HW 2.X\" to reflect real CU numbering in System Check / HW revision.\n\nTime travellers issue - applies to Liberty 2.15.0 FW only In an extremely rare case, after setting a date/time hours different from real time and enabling GPS syncTime. Then if you enter dive mode immediately after powering Liberty on, the decompression calculation may become inaccurate (for one dive only, until power cycled). This situation is indicated by an alarm few minutes after entering the dive mode âCNS Exceeded: 9999â. Fixed in current Liberty FW 2.15.1, no special manipulation needed.","isTitleBold":true},{"id":"21","title":"Liberty 2.15.1 (7810)","subtitle":"**27th June 2022**\n<br><br>
2\n**New features**\n\n* None\n\n**Changes**\n\n* None\n\n**Error corrections**\n\n* Fixed helium sensor calibration on Liberty 1.0.","isTitleBold":true},{"id":"20","title":"Liberty 2.15.0 (7776)","subtitle":"**13th June 2022**\n<br><br>\n**New features**\n\n* Timezone and daylight saving time setting (Setup / Preferences / Time & GPS / Timezone)\n * Correct timezone setting is essential for GPS synchronization !\n * Use the upper button long press for DST switch, without editing the timezone.\n* Set your Diluent or OC mix as default directly when editing the mixture, use checkbox \"Def\".\n* (HW 2.X) Optional GPS route logging of 30 minutes prior submerge and 30 minutes after surfacing, see below.\n* (HW 2.X) GPS time synchronization (Setup / Preferences / Time & GPS / GPS syncTime).\n\n**Changes**\n\n* Low and High ppO2 vibration patterns differentiated (originally 4x short).\n * Low ppO2 alarm vibration pattern changed to 3x short + 1x long \"TA-DA-DA-DAAAA\".\n * High ppO2 alarm vibration pattern changed to 3x short + 3x fast \"TA-DA-DA-D-D-D\".\n* Button long press time shortened from 1.5s to 1s.\n* Menu \"Setup / Miscellaneous\" sorted into \"Setup / Preferences\" -> \"Time & GPS\", \"Controls & Build\", \"Units & Misc\"\n* Setup / Mixtures / CCR (diluents) are now in descending order by the oxygen content.\n* END calculation switched from \"relatice narcotic potential\" to more common \"nitrogen narcotic\" or \"oxygen and nitrogen narcotic\".\n * Set you preference in \"Setup / Preferences / Units & Misc / O2 narcotic [Yes / No]\"\n* Handset startup time improved.\n* Improved user experience for future bluetooth updates (from FW 2.15.0 up).\n\n**Error corrections**\n\n* GPS longitude and latitude editor now supports button only mode.\n* Fixed possible disabling of default mixture (OC, CCR) using \"reset to default\" long press in mixture editor.\n* Fixed CNS (decay) recalculation in standby mode.\n* Various UI fixes, especially values refresh on Predive screen.\n* Battery percentage - multiple point discharge curve implemented, resulting in more realistic calculations.\n* (HW 1.0) Standby mode power consumption optimization, resulting in 30% increase of available stand-by time.\n* (HW 2.X) ODA - fixed loop ppO2 display in OC mode.\n* (HW 2.X) GPS time-to-fix improved, especially when travelling with the Liberty.\n* (HW 2.X) Battery runtime approximation corrected according to Liberty 2021 specifications.\n* The algorithm takes into account currently connected devices - HS or ODA.\n\n**Liberty 2021 runtimes**\n\nHS and ODA connected at the same side: 35h Only HS or ODA connected: 45h Control unit without HS nor ODA, eg. one side of sidemount configuration with traditional HUD: 90h These numbers are measured in dive mode, at 15°C / 59°F, with HS/ODA display brightness level 7. Take these numbers as tentative only, especially If you dive in winter, frequently use higher brightness, or have old batteries (>3 years).\n\n**GPS log (HW 1.5 only)**\n\nPossible to enable or disable logging in \"Setup / Preferences / Time & GPS / GPS log2SD\". When set to \"DiveDay\" Liberty will hold last 60 minutes of position coordinates in short-term memory (lost after switching off). After the dive - at the moment you end the dive-mode, Liberty will save last 60 minutes onto an SD card. So the saved route contains approximately 30 minutes prior submersion and 30 minutes after surfacing. The log contains a point every 20 seconds, with HDOP in description, and submerge and surface points colorized. Resulting .kml logs are located on the SD card, next to the dive logs (Liberty / logs / ...). The .kml log is possible to import into google maps: mymaps.google.com.\n\n","isTitleBold":true},{"id":"19","title":"Liberty 2.14.4 (7511)","subtitle":"**8th February 2022**\n<br><br>\n**New features**\n\n* None\n\n**Changes**\n\n* None\n\n**Error corrections**\n\n* Added supp
2ort for higher capacity uSD cards (>16GB)","isTitleBold":true},{"id":"18","subtitle":"**8th December 2021**\n<br><br>\n**New features** \n* User configurable date format, see \"Setup / Miscellaneous / Date format\" \nISO \"YYYY-MM-DD\" \nEU \"DD.MM.YYYY\" \nUS \"MM/DD/YYYY\"\n* Optional no-tilt editor, using buttons only (Setup / Preferences / Controls / Editor nav.).\n* Added an editable \"deco\" setpoint, including automatic switch after a time or at depth during ascent.\n* Added optional automatic switch to Descent SP on surfacing (eg. sump diving) (Setup / Setpoints / Use descent SP -> On+Sfc)\n* Added a \"GUE\" dive screen.\n* (HW 2.X) Liberty will ask for time on cold start - after multiple days without battery jumpers. \n\n**Changes** \n* Changed setpoint shortcuts - holding upper button on HS now cycles through SP list UP, and lower button cycles DOWN. \nDESCENT - LOW - HIGH - DECO\n* O2 calibration notification range adjusted to max 5 days (Setup / Calibration / Recomm. [days]).\n* (HW 2.X) ODA power consumption optimalization.\n* (HW 2.X) Humidity display and limits adjusted according to factory thresholds. \n\n**Error corrections**\n* Fixed BD/HUD/ODA indication when charging.\n* Fixed an average depth glitch in \"Profile\" dive-screen, where in decompression was displayed \"average ceiling\" depth instead.\n* Fixed unwanted behavior with all oc mixtures disabled.\n* Corrected Low ppO2 alarm limit in mCCR mode from fixed 0.18bar to configurable (Setup / Alarms / Alarm sources / Min pO2)","title":"Liberty 2.14.3 (7415)","isTitleBold":true},{"id":"17","subtitle":"**29th September 2021**\n<br><br>\n**Changes** \n* Applications menu rearranged, Bluetooth moved to the top - below the ManOverBoard. \n\n**Error corrections **\n* (HW 2.X) Fixed helium measure glitch present on some helium sensors.\n* (HW 2.X) Increased log download speed over the Bluetooth.\n* ODA fixed the loop ppO2 display in \"Bailout standby CCR\" mode.","title":"Liberty 2.14.2 (7271)","isTitleBold":true},{"id":"16","subtitle":"**26th August 2021**\n<br><br>\n**Changes**\n* TTS displays minutes only when deco-stop rounding set to 60s (Setup / Decompression / Planner setup / Rounding)\n* Removed Compass from calibration menu, ODA manages calibration automatically.\n* Moved pop-up alarms from middle of the screen to lower-middle, where it is generally less obstructing (depth and other values).\n* (HW 2.X) ODA removed setpoint value from mCCR and OC mode. \n\n**Error corrections** \n* (HW 2.X) Fixed divelog download using BLE","title":"Liberty 2.14.1 (7202)","isTitleBold":true},{"id":"11","subtitle":"**18th August 2021**\n<br><br>\n**New features**\n* (HW 2.X) BLE firmware update - see the support page for user guide and troubleshooting.\n* (HW 2.X) ODA added to startup screen (when connected).\n* (HW 2.X) ODA shows humidity on surface screen, and in dive when exceeding threshold.\n* (HW 2.X) ODA (surface only) shows a selftest screen in case of a partial failure (compass, CU connection, humidity, etc.). \n\n\n**Changes** \n* Changed deco algorithm to Buhlmann ZH-L16C (more conservative than \"ZH-L16B\"), possible to switch in \"Setup / Decompression / Deco model\"\n* Changed cylinder setup in imperial system, to use nominal fill capacity (eg. 80cuft 3000psi).\n* Removed \"Max pO2 bottom\" which was used only when doing whole dive on OC, which makes no sense on CCR.\n* Analyzer App - \"Nitrox only\" mode when using blind-plugs instead of He sensors.\n* (HW 2.X) General stability improvements of system and bluetooth communication. \n\n\n**Error corrections**\n* Fixed unwanted behavior upon draining one of the batteries in dive mode.\n* Fixed occasional settings not being saved, especially when switching off without navigating to surface screen and back to menu.\n* Fixed descent/ascent speed alarms in DEMO dives.\n* (HW 2.X) Fixed slow charging using USB current limit even when charging from a wall adapter.\n* (HW 2.X) Bluetooth connection stability fix.\n* (HW 2.X) Tweaked the humidity threshold to respect the surface base line.","title":"Liberty 2.14.0 (7183)","isTitleBold":true}
2,{"id":"12","subtitle":"**3rd June 2021**\n<br><br>\n**New features** \n* (HW 2.X) Alarm \"high humidity in electronics compartment\", eg. \"Humidity CU L 66%\"\n* (HW 2.X) ODA support \n\n\n**Changes** \n* (HW 2.X) BLE screen shows additional data \n\n\n**Error corrections** \n* (HW 2.X) Fixed GPS power management.\n* (HW 2.X) Increased reliability and range of air integration with TFT handsets","title":"Liberty 2.13.1 (6940)","isTitleBold":true},{"id":"13","subtitle":"**5th February 2021**\n<br><br>\n**New features** \n* HS lower button long press in menu will step one line up (backwards).\n* Descent SP re-enable is accessible in dive mode, from setpoint menu, see below.\n* (HW 2.X) Solenoid failure detection, on a 3 consecutive failed attempts to inject oxygen, Liberty generates a pop-up warning.\n* (HW 2.X) BLE dive log download, mode is accessible from \"Applications / BLE\".\n* (HW 2.X) Air Integration - cylinder bottle pressure measuring using wireless transmitters, see below.\n* (HW 2.X) Added screen to pre-dive check, for analyzing IP and HP leaks.\n* (HW 2.X) Humidity in electronics compartment is visible in a \"System Check\". \n\n**Changes** \n* Improved mode for helium blind-plugs, see below.\nSurface menu timeout prolonged to infinity, behavior in dive stays unaffected.\n* The \"Bailout standby CCR\" mode can be only switched to from another dive mode, to avoid starting the unit straight into CCR Standby without proper pre-dive check.\n* Indication of long press available in menu by \"dual confirmation\" symbol, go check out \"Setup / Mixtures / CCR\" you will know when you see it.\n* Dive planner - improved contrast and readability of warnings and alarms. \n\n**Error corrections** \n* The CU solenoid click when starting up is disabled under water.\n* Ascent plan calculation continues on the surface, for reference in case of surfacing before clearing the decompression obligation.\n* (HW 2.X) Improved detection of flooded HS connector with seawater, which were causing unintended wake-up. \n\n**Descent SP re-enable** \nThis option is available only at shallower depth than where would automatic switch to low setpoint occur. Mind that the descent setpoint increases by 0.2bar every 10m.\n\nExample:\n\n* SP Descent ... 0.4bar (at surface level)\n* SP Low ... 1.2bar\n* Depth of descent SP reaching the SP Low = ((SP_low - SP_desc) / 2) 100 = (SP_low - SP_desc) 50\n* ((1.2 - 0.4) / 2) 100 = (0.8 / 2) 100 = 0.4 * 100 = 40 [m] \n\n**Solenoid failure detection (HW 1.5 only)** \nLiberty CU HW 1.5 is capable of detecting seized, stuck or disconnected solenoid, based on measurement of the solenoid coil. Upon 3 consecutive failed attempts to inject oxygen, the Liberty will show a pop-up warning that a solenoid has likely failed. It is upon diver to evaluate the situation and manually disable the solenoid in \"Faulty sensors\" menu. Failed solenoid is also indicated in pre-dive menu, on the solenoid screen by yellow exclamation mark instead of standart cross.\n\n**Air integration (HW 1.5 only)** \nLiberty CU HW 1.5 is compatible with wireless pressure transmitters from Pelagic / Aqua Lung / Shearwater manufacturers.\n\nTransmitter installation:\n\n* Recommended transmitter installation on backmount configuration is using 90degree elbows on second HP port on the 1st stage.\n* Then orient the Oxy and Dil transmitters parallel with each other pointing to the other 1st stage respectively.\n* Leave cca 1cm gap between the transmitters, insert some spacer between them and fixate the transmitters in this position, for example using thin bungee to keep them together.\n* Short signal outages are possible, although when you fine-tune the orientation, you should have an uninterrupted reception.\nIf using two transmitters, using different colors are advised. \n\nLiberty set-up: \n1. If possible, pressurize both transmitters to speed up the setup process. \n2. Enter the \"Setup / Wireless\", turn the \"Air integr.\" ON. \n3. Setup the Oxygen and Dil transmitter serial numbers, or choose from the list, if visible and in range. \n4. Setup cylinder volume and fill pressure, the fill pressure is used as a max in pressure graphic display. \n\nOperation:\n\n* To confirm the reception, check the \"technical screen\" on the surface, the received pressures should be right under oxygen sensor voltages.\n* You have few display options of the tank pressure in dive, for each HS individually configurable.\n* In surface menu \"Setup / Preferences / Display / Tank press.\" or in dive menu \"Setup / Display / Tank press.\".\n* \"Num.\" ... replaces real time clock and CNS value on main dive screen with Oxygen and Dil pressures, when they are in range.\n* \"Graph\" ... replaces solenoid symbols in lower bottom corners of the main dive screen with pressure as a bar-graph, and big graphs with numeric pressure value on synoptic screen. \n * The graph is separated into segments, 50bar each.\n* \"All\" ... combination of \"Num\" and \"Graph\" together. \
2n\n\nPre-dive:\n\n* With Air integration enabled, the pre-dive will be extended by a step \"IP pressures\", which serves as an early \"bubble check\".\n* When you fully open and close cylinder valves, the Liberty shows maximal pressure, and minimal.\n* If the pressure drop is less than 2bars after the minute than you are likely OK. \n\n\nAlarms:\n\n* Pressure below set threshold in \"Setup / Mixtures / End pressure\".\n* Signal lost, after 60sec from last valid pressure packet received.\n* After 90s the pressure value displayed is dashed out.\n* Alarms can be disabled in \"Setup / Alarms / Alarm sources / Air integr.\"\n* BO CCR BORMT value calculates with a current pressure of the oxygen.","title":"Liberty 2.13.0 (6605)","isTitleBold":true},{"id":"15","subtitle":"**26th March 2021**\n<br><br>\n**New features** \n* GF and bailout GF is now visible on page 5 of the dive start checklist.\n* Switch to descent setpoint in dive, in case your descent SP timeouted when waiting for a buddy etc. \n\n**Changes** \n* Excluded \"Bailout stby (CCR)\" mode from start dive on the surface, since bailout CCR needs to be pre-breathed as well. In CCR standby mode the automatic oxygen addition is disabled, so it would be unsafe to pre-breath the unit in this mode.\n* BO RMT changes when BO CCR functions enabled (see below)\n* Bootloader is not accessible from sleep mode, to prevent spurious restarts with flooded HS connector. Turn the Liberty on, or remove jumper before updating your FW. \n\n**Error corrections** \n* Fixed unwanted behavior when set GF low > GF high\n* Fixed solenoid staying excluded even when other CU comes back online.\n* Fixed inability to disable first diluent with BoCCR functions turned off. \n\n**BO RMT changes in Bailout CCR mode** \n\nWhen bailout CCR options enabled in \"Setup / Miscellaneous / BOCCR settings\", the original OC bailout remaining time calculation makes no sense. So in bailout CCR mode, the \"turnaround time\" or \"BO RMT\" is calculated in the \"Standby CCR\" mode only. On the (main) unit switched to CCR mode, \"BO RMT\" on the TTS screen shows static text only - \"Check BO CCR\". And the turnaround time is calculated on the \"bailout\" unit, visible on the sensors screen, instead of a indirect ppO2. Once you switch your bailout unit from standby to full CCR mode, the sensors screen will show the indirect ppO2 as usual. And the \"BO RMT\" on the TTS screen will read \"Check BO CCR\", since the unit you are breathing at the moment is \"main\", and the other is in the \"bailout\" role. The bailout CCR remaining time is calculated from: stack time, CNS and battery level, including the necessary ascent time. So if you have set stack time notification to 4h, and you are 1h in the dive, with TTS of 2h, beginning your ascent, the BO RMT will read 1h. That is if your stack time is the limiting factor and not for example the CNS. If you use tank pressure transmitters, then the oxygen pressure is also evaluated. If there is enough oxygen for the ascent and decompression, using metabolic rate of 1.6l/min. The diluent pressure is only checked for whether is not lower than set limit (eg. too deep descent with little diluent in cylinder).","title":"Liberty 2.12.1 (6741)","isTitleBold":true},{"id":"14","subtitle":"**3rd December 2019**\n<br><br>\n**ATTENTION**\n* This update is not compatible with handset (HS) bootloader version <3.6 (year of manufacture 2015 and older) !\n* If your HS keeps restarting after updating to FW 2.12, then you have old bootloader version\n* Detailed instructions how to update, are attached in the zip with the rest of FW.\n* You can see the bootloader version immediately after connecting the battery jumpers, before the topology screen comes on.\n * If you see only a red Divesoft logo, you are A OK (version >3.10)\n* In any other case you should see few lines of text, on the first one is bootloader version.\n \n**New features**\n\n* Configurable lower button function, see below.\n* Switchable HUD signalization as a relative deviation from current setpoint, see below.\n* Ascent plan as a dive screen (disabled, enabled, deco only).\n* O2 cell tester menu - calibrate O2 cells directly after test, and release IP pressure using solenoid.\n* Atmospheric pressure calibration, on units without fine pressure sensors only (marked \"F\").\n* Inclinometer application (new horizontal calibration is necessary before first use)\n* Option to calculate TTS and ascent with current SP instead of high SP (Setup / Decompression / Planner / Ascent SP [High, Current])\n* Helium blind plugs support\n\n\n**Changes**\n* Decompression algorithm update, see below.\n* Helium sensor calibration tries alternate presets where default does not suffice.\n* Above stop alarm is now progressive (OC only).\n* END value is calculated for MOD depth\n* High ppO2 limit is split to bottom and deco settings, see below (OC only).\n* Bailout CCR options are hidden by default, enable them in Miscellaneous.\n* With BoCCR enabled - the first row in dive menu is\nCCR standby (instead of OC bailout).\n* Improved menu and editor graphics, option to draw all menu in bigger font (... Display / Menu highlight [None, Curr., All])\n* Sensor excluded alarm rephrased to show sensor number as well, for example \"Oxygen #2 excluded\"\n* Bigger range of HUD brightness setting (dive only). New setting is needed.\n\n\n**Error corrections**\n* Exclamation mark next to temperature (when using only one handset) can be hidden by setting sidemount configuration (... Miscellaneous / Configuration\" [Back, Side])\n* Fixed logbook scrolling at the beginning and at the end of the list.\n* Fixed GPS module causing unwanted behavior.\n* Fixed lost gas alarm after switching from CCR to OC and back.\n* Fixed occasional surface time not displayed.\n* Editor now prolongates the idle timeout (especially when charging).\n* Minor graphics corrections.\n* Fixed possible ceiling graph rendering glitch in dives longer than 90'.\n* Re-en
2abled low ppO2 alarm pop-up in dive mode menu.\n* Fixed brightness setting lost after restart\n\n\n**Decompression algorithm update**\n\n\nProlonged no-deco times, now reflect true no-stop times. \nImproved transition to deco mode, eliminated stop at 0m 0s. \nBetter planning with GF Low lower than 30%.\n\nIf you are unsure about GF setting, consult your diving instructor.\n\n**Helium sensor calibration** \nHelium sensor calibration has now multiple presets for the He sensor. \nIf the algorithm detects an out of range value (\"Too low\" message), it automatically switches to the next preset. Before starting the calibration, you can also cycle between the presets manually using lower button, although this should not be necessary as the best setting is chosen automatically. \nJust wait until you see stable values, then start the calibration.\n\n**ppO2 limits** \nHigh ppO2 deco - used in CCR modes, in OC if off-gassing has already started (depth < decompression zone start). \nHigh ppO2 bottom - used in OC dives at bottom and start of ascent phase. \nYou can find settings in \"Setup / Mixtures / Max pO2 ...\".\n\n**Above stop alarm** \nThe alarm now has variable delay before triggering an actual haptic and visual warning. \nDelay reflects the severity of depth violation (difference of stop depth and actual). \nDelay ranges from 3s when 0.4m above stop depth, up to 15s when only 0.1m above. \n\n**Lower button function** \nThe default display off function may become unwanted when diving with only one HS. \nSo the lower button function can be switched to scrolling between dive screens.\n * \"Setup / Preferences / Controls / Lower bttn.\" [Dspl off, Prev scr] \n\n**Relative HUD signalization** \n\"Setup / Preferences / Indication / HUD ppO2\" \nThe relative signalization uses almost the same signals as the time proven absolute ppO2 signalization. \nWith these two exceptions:\n\n* Solid green led - ppO2 is within +/- 0.1bar from the SP\n* Blinking signalizes difference of ppO2 from SP, by 0.1bar for each blink. \n\n**Helium blind plugs** \nWhen using He blind plugs instead of He sensors, set \"Setup / Preferences / He measuring\" to \"Never\". With measuring disabled, the predive check for helium sensors will show \"Disabled in preferences\" instead of error.","title":"Liberty 2.12.0 (5662)","isTitleBold":true},{"title":"Liberty 2.11.3 (5657)","isTitleBold":true,"subtitle":"**30th September 2019**\n<br><br>\n**Error corrections**\n* Fix for unintended wakeup during charging and longer sleep periods.","url":"","urlText":"Download","id":"1"},{"title":"Liberty 2.11.1 (5225)","isTitleBold":true,"subtitle":"**12th March 2019**\n<br><br>\n**Error corrections**\n* Fixed Stack timer stops on surfacing","url":"","urlText":"Download","id":"2"},{"id":"3","title":"Liberty 2.11.0 (4787)","isTitleBold":true,"subtitle":"**12th July 2018**\n<br><br>\n**New features**\n* Bailout CCR mode, see bellow\n* O2 calibration recorded in syslog\n* Pressure sensors offset calibration (improved accuracy upon fine sensor failure)\n* Solenoids can be disabled (improved pO2 control when one solenoid is broken)\n* Repeated low pO2 alarm, every 0.1 bar bellow limit.\n* Prebreathe timer, see bellow\n* New \"Pressure sensors too different\" alarm\n* New \"Check O2 sensors\" alarm, when an excluded sensor reads high pO2\n* Stack timer stops on surfacing (configurable)\n* Multiple users for one device, see bellow\n* HUD brightness in dive modes can be adjusted (3 steps)\n* Planner warns if bottom time is insufficient to get to the planned depth\n* Emergency oxygen injection if all sensors fail in shallow depth, see bellow\n* Emergency solenoid action in Surface mode prolongs shutdown timeout \n\n**Changes**\n* RMV moved to Mixtures menu\n* pO2 and Ceiling alarms are always active\n* pO2 low alarm setting extended up to 1.0 bar\n* Smarter Bailout GF handling, see bellow\n* Improved user interface in O2 calibration\n* Improved brightness setting (TFT handset only)\n* MOD/END values also for diluents\n* Changed order of sensor disabling/enabling (now Normal -> (Excluded) -> Disabled ->
2 Normal)\n* High pO2 alarm generated even from excluded sensors (it can be the only good sensor - it happened!)\n* Minor graphics improvements\n* Backmount/Sidemount configuration option for proper compass orientation\n* Popup alarms use bigger font\n* Smooth display off/on (TFT units only)\n* Improved configuration handling, each change is propagated to all units immediately after editor close.\n* Exit from calibration screens (O2, He) by both buttons\n* Improved compass calibration algorithm\n* He measuring option \"Always\" dropped.\n* Default automatic shutdown timeout set to 45 minutes\n* Mode change in dive mode moved to submenu (except the most important change in each mode)\n* Emergency pO2 from He measuring must be enabled manually, see bellow\n* All display preferences in dive modes moved to submenu Display (TFT brightness, HUD brightness, screens selection)\n* %He value in technical screen means %He in diluent\n* MOD for diluents uses own formula, ppO2(MOD) <= (ppO2_high - 0.2bar)\n* Alarm \"Peer Down\" changed to \"Other CU down\"\n\n**Error corrections**\n* Compass screen visible if compass module present only\n* Improved unintended wake-up\n* Fixed CU reset on submerge\n* Fixed wrong topology check with single HS\n\n**Bailout CCR mode**\n* This mode is intended for use Liberty as bailout CCR device, with another CCR used as main device. In this mode the oxygen is not injected, only the loop volume is adjusted by ADV. Decompression model is updated, where ppO2 equal SP is expected. Diluent from the other device must be configured as \"2nd device diluent\". When fraction O2 in the loop drops below O2 fraction in diluent (i.e. the diver probably breathes from this device), the standard CCR mode is selected automaticaly.\n\n**Bailout GF Handling**\n* GF handling bound with mode change is now smarter. Mode change CCR -> OC, Bailout GF is selected Mode change OC -> CCR, Standard GF is selected GF manually switched to Bailout GF remains active until manually switched to Standard GF.\n\n**Prebreathe timer**\n* Setup / Preferences / Timeouts / Prebreathe time min, default 5 min If set nonzero, timer starts count down as a last step in dive check list. This feature is independent whether check list is enabled or not.\n\n**Multiple users**\n* Feature must be enabled and multiuser capable HS used (licence for HS needed and bootloader version at least 3.10.0) Left handset stores the profile of the user\n* decomodel\n* device configuration One user can use several devices, and/or several users can share one device. Each user have to use its own HS with his profile.\n\n**PPO2 from He**\n* If all chemical sensors fail in dive mode, an alarm \"pO2 measuring lost\" is raised. If the diluent contains at least 20% He, it is possible to switch the pO2 source to He measuring. Setup / Faulty sensors / pO2 source, options \"O2\" or \"He\". Automatic switch is no longer suppoorted. When the He source is selected, all pO2 fields on handset screens have blue background and \"pO2 indirect\" message is on the base screen. The pO2 indirect field on the technical screen (with sensors) has always blue background, as it shows \"pO2 from He\" everytime. The %He field on the technical screen become dashed for both sensors, as %He calculation is invalid in this mode.\n\n**Emergency O2 injection**\n* If all chemical sensors are not valid (error, disabled etc.), the depth is < 6m/20ft and the pO2 source is O2 sensors, an emergency O2 injection + alarm is done every 6s. In fact, Liberty become an oxygen rebreather (6m / 20ft depth is safe for pure oxygen). This action happens also in Surface mode."},{"id":"4","title":"Liberty 2.10.0 (4668)","isTitleBold":true,"subtitle":"**31th May 2018**\n<br><br>\nThis version was not officially released, all changes are made public in next version."},{"id":"5","title":"Liberty 2.9.0 (4165)","isTitleBold":true,"subtitle":"**25th May 2017**\n<br><br>\n**New features**\n* electronic compass and GPS support\n\n**Changes**\n* He sensors disabled if <20% He in current diluent. Can be enabled manually.\n* improved behavior when no pO2 measuring method available.\n* if no sensor is valid during sensor calibration, the result is not stored and calibration is aborted even if OK button was pressed.\n* no chemical sensor available (i.e only He available) and no sensor at all are indicated on BD (red and flashing red)\n* additional warning at dive start if there is no sensor usable.\n* several default values changed\n* dive time termination configurable (see bellow)\n* both HS wakeup during device start\n\n**Error corrections**\n* occasional sudden ceiling drop when surface reached\n\n**Dive time termination**\n* Setup / Preferences / Timeouts / Dive Time\n* Setting \"Auto\": dive time stops on surface, jumps to current time if the dive continues\n* Setting \"Cave\": dive time continues regardless of depth\n* Warning: Dive termination setting remains active, if not set to zero."},{"id":"6","title":"Liberty 2.8.2 (4097)","subtitle":"**1st March 2017** \n<br><br>
2\n**New features**\n* support for HS with TFT display","isTitleBold":true},{"id":"7","title":"Liberty 2.8.1 (3961)","isTitleBold":true,"subtitle":"**8th December 2016**\n<br><br>\n**New features**\n* support for new HW revision of CU board"},{"id":"8","title":"Liberty 2.8.0 (3890)","isTitleBold":true,"subtitle":"**1st November 2016**\n<br><br>\n**!!! This version resets configuration to factory defaults !!!**\n\n**New features**\n* new screen with various TTS values, see bellow\n* gas consumption in the planner (Bailout mode)\n* OC gases have enhanced configuration - bootle volume (water capacity only) and pressure.\n* OC gas remaining pressure (used for planner warning for not enough gas)\n* SP automatic change, can be configured at given depth (during descent or ascent) (solves both strategy LowSP for descent+bottom, HighSP for ascent and LowSP for descent, HighSP for bottom+ascent)\n* or at a given time.\n\n**Changes**\n* reached depth notification also for ascent (3 points)\n* Oxygen consumption in l/min\n* improved semigraphic editor for several configuration items\n* improved readability of menues (selectable Setup / Preferences / Display / Menu highlight)\n\n**Error corrections**\n* corrected cell test hang a bit bellow required pressure\n* corrected cell excluded error during cell test\n\n**TTS screen details - Items to configure**\n* enable TTS screen (Setup / Preferences / Display / Dive mode screens / TTS)\n* reconfigure the bailout gases, set the bottle volume and pressure\n* setup your RMV (Setup / Preferences / RMV)\n* set bottle end pressure (Setup / Mixtures / End Presssure)\n\n**TTS screen details - During dive, TTS screen shows several new values**\n* BO RMT (Bailout Remaining Time) minutes How long you can stay at current depth until you have enough gas for bailout. (end pressure is taken into account)\n* BO TTS TTS in bailout (OC) mode, using bailouf GF setting\n* TTS (+2) How high will the TTS be after 2 minutes in the current depth\n* TTS (+5) and TTS (+10) The same as above, 5 and 10 minutes in advance"},{"id":"9","title":"Liberty 2.7.0 (3692)","subtitle":"**9th June 2016**\n<br><br>\n**New features**\n* Oxygen cell tester\n* Bookmarks (in menu Applications)\n* SP/Gas/Diluent change notification\n\n**Changes**\n* Improved communication among units\n* Minor corrections\n\n**Error corrections**\n* False pressure sensor error notification (yellow ! under 25m)","isTitleBold":true},{"id":"10","title":"Liberty 2.6 (3653)","isTitleBold":true,"subtitle":"**9th May 2016**\n<br><br>\n**New features**\n* Low pO2 alarm in surface mnode\n* loop pO2 available in bailout (OC) mode\n\n**Changes**\n* Repeated High pO2 alarm, issued every 0.2 bar above limit\n* improved He measuring\n* safer dive start\n* redesigned sensor screen, including diluent pO2\n* improved safety in surface mode\n* improved descent rate alarm\n* lower pressure limit for tightness check\n\n**Error corrections**\n* forgotten configuration\n* forgotten calibration of accelerometer\n* slow real time in sleep mode"}],"activeTab":"29","isTitleH1":true},"id":"#8","type":"component","lock":false,"position":6},{"name":"Footer","data":{"copyrights":"Copyright © 2019 Divesoft LLC All rights reserved.","facebookUrl":"","youtubeUrl":"","instagramUrl":"","contacts":"**Divesoft, s.r.o.** Hálkova 2495 413 01 Roudnice nad Labem Äeská republika Tel.: +420 416 857 057 E-mail: [email protected]"},"id":"#1","type":"component","lock":false,"position":7}],"id":"root","idBuffer":"#14","lastCommit":"da8e7986-1697-4fec-b13d-b66d48bddb88"}},"annotations":[],"language":{"type":"id","generated":false,"id":"Language:cjv3kwvoj000u083611381c6o","typename":"Language"},"__typename":"PageTranslation"},"Page:cl0v1tqigbxkj0858sa1rnh30":{"id":"cl0v1tqigbxkj0858sa1rnh30","type":{"type":"id","generated":false,"id":"PageType:cjv3l213x004f08366hjufttp","typename":"PageType"},"tags":[],"translations({\"where\":{\"language\":{\"id\":\"cjv3kwvoj000u083611381c6o\"}}})":[{"type":"id","generated":false,"id":"PageTranslation:cl0v1tqiqbxkq0858vy3ldcnd","typename":"PageTranslation"}],"__typename":"Page"},"PageTranslation:cl0v1tqiqbxkq0858vy3ldcnd":{"id":"cl0v1tqiqbxkq0858vy3ldcnd","name":"Assembly Checklists","createdAt":"2022-03-17T13:49:24.482Z","content":{"type":"json","json":{"content":[{"name":"Header","data":{"products":[{"title":"Accessories","description":"Backplates, Consumables. Tanks.","img":{"recommendedSizes":{"width":"235","height":"235"}},"url":""},{"title":"Accessories sets","description":"Protection, maintenance, cleaning.","img":{"recommendedSizes":{"width":"235","height":"235"}},"url":""},{"title":"Spare parts","description":"Spare parts and components.","img":{"recommendedSizes":{"width":"235","height":"235"}},"url":""}
2,{"title":"Spare parts kits","description":"Completly Liberty spare parts kits.","img":{"recommendedSizes":{"width":"235","height":"235"}},"url":""}]},"id":"#0","type":"component","lock":false,"position":0},{"name":"Spacer","data":{"spacingLarge":"40","spacingSmall":"40","backgroundColor":"#f0f0f0"},"id":"#3","type":"component","lock":false,"position":1},{"name":"ComponentHeader","data":{"title":"Assembly Checklists","subtitle":"","showBreadcrumbs":true,"backgroundColor":"#f0f0f0"},"id":"#2","type":"component","lock":false,"position":2},{"name":"Spacer","data":{"spacingLarge":30,"spacingSmall":"30","backgroundColor":"#f0f0f0"},"id":"#4","type":"component","lock":false,"position":3},{"name":"Spacer","data":{"spacingLarge":30,"spacingSmall":20,"backgroundColor":"#ffffff"},"id":"#7","type":"component","lock":false,"position":4},{"name":"DownloadsNew","data":{"backgroundColor":"#ffffff","title":"Downloads","subtitle":"Sic mundus creatus est. Virtus eius integra est si versa fuerit in terram.","showBreadcrumbs":false,"hideHeader":true,"files":[{"title":"Assembly Check List - BMCL + BOV","isTitleBold":true,"subtitle":"","url":{"url":"https://foxer360-media-library.s3.eu-central-1.amazonaws.com/divesoft/docs/35b3051a052e1b646ca85d9b4ac79821621d953a_divesoft-checklist-bmclbov-2020.pdf","urlNewWindow":true},"urlText":"Download","id":"1"},{"title":"Assembly Check List - FMCL","isTitleBold":true,"subtitle":"","url":{"url":"https://foxer360-media-library.s3.eu-central-1.amazonaws.com/divesoft/docs/6e97589856aeb4425b8c7d15e759144701aed7d3_divesoft-checklist-fmcl-2020-v1.pdf","urlNewWindow":true},"urlText":"Download","id":"2"},{"id":"3","title":"Assembly Check List - Sidemount","isTitleBold":true,"url":{"url":"http://foxer360-media-library.s3.eu-central-1.amazonaws.com/divesoft/docs/e3a98744062dcdf1e5ea181582d43baea877d6a8_divesoft-checklist-sidemount-2020-v1.pdf","mediaData":{"mimetype":"application/pdf","size":28949,"hash":"e3a98744062dcdf1e5ea181582d43baea877d6a8","id":"ck9mqhupzbofd0776eadlkvxh","filename":"divesoft-checklist-sidemount-2020-v1.pdf","category":"divesoft/docs/","type":"file"},"urlNewWindow":true}}],"activeTab":"3"},"id":"#6","type":"component","lock":false,"position":5},{"name":"Footer","data":{"copyrights":"Copyright © 2019 Divesoft LLC All rights reserved.","facebookUrl":"","youtubeUrl":"","instagramUrl":"","contacts":"**Divesoft, s.r.o.** Hálkova 2495 413 01 Roudnice nad Labem Äeská republika Tel.: +420 416 857 057 E-mail: [email protected]"},"id":"#1","type":"component","lock":false,"position":6}],"id":"root","idBuffer":"#8","lastCommit":"66fc37b9-6019-4e8a-807a-2f257e7109bc"}},"annotations":[],"language":{"type":"id","generated":false,"id":"Language:cjv3kwvoj000u083611381c6o","typename":"Language"},"__typename":"PageTranslation"},"Page:cl0v2cjy9bxow0858y0jvge1d":{"id":"cl0v2cjy9bxow0858y0jvge1d","type":{"type":"id","generated":false,"id":"PageType:cjv3l213x004f08366hjufttp","typename":"PageType"},"tags":[],"translations({\"where\":{\"language\":{\"id\":\"cjv3kwvoj000u083611381c6o\"}}})":[{"type":"id","generated":false,"id":"PageTranslation:cl0v2cjytbxp30858n17kwq8y","typename":"PageTranslation"}],"__typename":"Page"},"PageTranslation:cl0v2cjytbxp30858n17kwq8y":{"id":"cl0v2cjytbxp30858n17kwq8y","name":"Technical Specifications","createdAt":"2022-03-17T14:04:02.453Z","content":{"type":"json","json":{"content":[{"name":"Header","data":{"products":[{"title":"Accessories","description":"Backplates, Consumables. Tanks.","img":{"recommendedSizes":{"width":"235","height":"235"}},"url":""},{"title":"Accessories sets","description":"Protection, maintenance, cleaning.","img":{"recommendedSizes":{"width":"235","height":"235"}},"url":""},{"title":"Spare parts","description":"Spare parts and components.","img":{"recommendedSizes":{"width":"235","height":"235"}},"url":""},{"title":"Spare parts kits","description":"Completly Liberty spare parts kits.","img":{"recommendedSizes":{"width":"235","height":"235"}},"url":""}]},"id":"#0","type":"component","lock":false,"position":0},{"name":"Spacer","data":{"spacingLarge":"40","spacingSmall":"40","backgroundColor":"#f0f0f0"},"id":"#2","type":"component","lock":false,"position":1},{"name":"ComponentHeader","data":{"title":"Technical Specifications","subtitle":"","showBreadcrumbs":true,"backgroundColor":"#f0f0f0"},"id":"#3","type":"component","lock":false,"position":2},{"name":"Spacer","data":{"spacingLarge":30,"spacingSmall":"30","backgroundColor":"#f0f0f0"},"id":"#4","type":"component","lock":false,"position":3},{"name":"Spacer","data":{"spacingLarge":"50","spacingSmall":"50","backgroundColor":"#ffffff"},"id":"#6","type":"component","lock":false,"position":4},{"name":"DownloadsNew","data":{"backgroundColor":"#ffffff","title":"","subtitle":"","showBreadcrumbs":false,"hideHeader":true,"files":[{"title":"Liberty Backmount - Technical Specification","isTitleBold":true,"subtitle":"","url":{"url":"https://foxer360-media-library.s3.eu-central-1.amazonaws.com/divesoft/docs/3a09dfa11ca91f6c4765884f4434857132b96ec7_liberty-backmount-technical-specs.pdf","urlNewWindow":true},"urlText":"Download","id":"1"},{"title":"Liberty Sidemount - Technical Specification","isTitleBold":true,"subtitle":"","url":{"url":"https://foxer360-media-library.s3.eu-central-1.amazonaws.com/divesoft/docs/3ca1f206bd9bbff4859a7eab2ec7954f4d01e5e6_liberty-sidemount-technical-specs.pdf","urlNewWindow":true},"urlText":"Download","id":"2"},{"id":"3","title":"Liberty Light - Technical Specification","isTitleBold":true,"url":{"url":"https://foxer360-media-library.s3.eu-central-1.amazonaws.com/divesoft/docs/33c2434946803060996ef8eaa74099daa9c43d06_liberty-light-technical-specs.pdf","urlNewWindow":true}},{"id":"4","title":"Liberty Heavy - Technical Specifications","isTitleBold":true,"url":{"url":"http://foxer360-media-library.s3.eu-central-1.amazonaws.com/divesoft/docs/f1deb96bc23b8eadc739c3596ed2b43ead3d0fe0_liberty-heavy-tech-specifications.pdf","mediaData":{"mimetype":"application/pdf","size":917670,"hash":"f1deb96bc23b8eadc739c3596ed2b43ead3d0fe0","id":"cmq500zfxdtld0800bbodeyz8","filename":"liberty-heavy-tech-specifications.pdf","category":"divesoft/docs/","type":"file"},"urlNewWindow":true}}],"activeTab":"4"},"id":"#5","type":"component","lock":false,"position":5},{"name":"Footer","data":{"copyrights":"Copyright © 2019 Divesoft LLC All rights reserved.","facebookUrl":{"urlNewWindow":true,"url":"https://www.facebook.com/divesoft/"},"youtubeUrl":{"url":"https://www.youtube.com/channel/UCHI2-kHmfoUlAdhQXPKl8lA/featured","urlNewWindow":true},"instagramUrl":{"url":"https://www.instagram.com/divesoft/","urlNewWindow":true},"contacts":"**Divesoft s.r.o.** \nHálkova 2495 \n413 01 Roudnice nad Labem \nCzech Republic \nTel.: +420 416 857 057 \nE-mail: [email protected]","twitterUrl":{"url":"https://twitter.com/divesoft","urlNewWindow":true}},"id":"#1","type":"component","lock":false,"position":6}],"id":"root","idBuffer":"#7","lastCommit":"3555f9f2-e404-446f-ab2d-9b6515d86ade"}},"annotations":[],"language":{"type":"id","generated":false,"id":"Language:cjv3kwvoj000u083611381c6o","typename":"Language"},"__typename":"PageTranslation"},"Page:cl0v2jkrubxqh0858gbqd5t6o":{"id":"cl0v2jkrubxqh0858gbqd5t6o","type":{"type":"id","generated":false,"id":"PageType:cjv3l213x004f08366hjufttp","typename":"PageType"},"tags":[],"translations({\"where\":{\"language\":{\"id\":\"cjv3kwvoj000u083611381c6o\"}}})":[{"type":"id","generated":false,"id":"PageTranslation:cl0v2jks8bxqo0858ljz3jjvp","typename":"PageTranslation"}],"__typename":"Page"},"PageTranslation:cl0v2jks8bxqo0858ljz3jjvp":{"id":"cl0v2jks8bxqo0858ljz3jjvp","name":"Additional Documents","createdAt":"2022-03-17T14:09:30.104Z","content":{"type":"json","json":{"content":[{"name":"Header","data":{"products":[{"title":"Accessories","description":"Backplates, Consumables. Tanks.","img":{"recommendedSizes":{"width":"235","height":"235"}},"url":""},{"title":"Accessories sets","description":"Protection, maintenance, cleaning.","img":{"recommendedSizes":{"width":"235","height":"235"}},"url":""},{"title":"Spare parts","description":"Spare parts and components.","img":{"recommendedSizes":{"width":"235","height":"235"}},"url":""}
2,{"title":"Spare parts kits","description":"Completly Liberty spare parts kits.","img":{"recommendedSizes":{"width":"235","height":"235"}},"url":""}]},"id":"#0","type":"component","lock":false,"position":0},{"name":"Spacer","data":{"spacingLarge":"40","spacingSmall":"40","backgroundColor":"#f0f0f0"},"id":"#2","type":"component","lock":false,"position":1},{"name":"ComponentHeader","data":{"title":"Additional Documents","subtitle":"","showBreadcrumbs":true,"backgroundColor":"#f0f0f0"},"id":"#4","type":"component","lock":false,"position":2},{"name":"Spacer","data":{"spacingLarge":"50","spacingSmall":"50","backgroundColor":"#ffffff"},"id":"#7","type":"component","lock":false,"position":4},{"name":"DownloadsNew","data":{"backgroundColor":"#ffffff","title":"","subtitle":"","showBreadcrumbs":false,"hideHeader":true,"files":[{"title":"CCR (Closed Circuit Rebreather) Liberty catalogue","isTitleBold":true,"subtitle":"","url":{"url":"https://www.divesoft.com/en/catalogue","urlNewWindow":true},"urlText":"Open","id":"1"},{"title":"Spare Parts Catalogue","isTitleBold":true,"subtitle":"","url":{"url":"http://foxer360-media-library.s3.eu-central-1.amazonaws.com/divesoft/docs/1cca3551c94ac2e29854a371bb9ca41a58d9ad5c_ccr-liberty-spare-parts-v14.PDF","mediaData":{"mimetype":"application/pdf","size":25184277,"hash":"1cca3551c94ac2e29854a371bb9ca41a58d9ad5c","id":"cmoia5o9i36rj0800ypzqeou9","filename":"ccr-liberty-spare-parts-v14.PDF","category":"divesoft/docs/","type":"file"},"urlNewWindow":true},"urlText":"Download","id":"2"},{"id":"3","title":"Liberty Head Travel Card","isTitleBold":true,"url":{"url":"https://foxer360-media-library.s3.eu-central-1.amazonaws.com/divesoft/docs/fe4ac509accaf398463de5991dcd391172eff6ac_liberty-head-travel-card.pdf","urlNewWindow":true}},{"id":"11","url":{"url":"http://foxer360-media-library.s3.eu-central-1.amazonaws.com/divesoft/docs/fbffa38fbe29542d87ed7a2dfe99e836397998b8_cw-pper-1-04-2025-module-beng.pdf","mediaData":{"mimetype":"application/pdf","size":552352,"hash":"fbffa38fbe29542d87ed7a2dfe99e836397998b8","id":"cm989w9cvjg1d0850l8yssfbt","filename":"cw-pper-1-04-2025-module-beng.pdf","category":"divesoft/docs/","type":"file"},"urlNewWindow":true},"title":"CE Certificate","isTitleBold":true},{"id":"13","title":"Declaration of Conformity","isTitleBold":true,"url":{"url":"http://foxer360-media-library.s3.eu-central-1.amazonaws.com/divesoft/docs/4f09431138c838167993033c1c888469410bda60_declaration-of-conformity-ce-2025-signed.pdf","mediaData":{"mimetype":"application/pdf","size":143819,"hash":"4f09431138c838167993033c1c888469410bda60","id":"cm98e4hmdjknk085027bsuhf4","filename":"declaration-of-conformity-ce-2025-signed.pdf","category":"divesoft/docs/","type":"file"},"urlNewWindow":true}},{"id":"10","url":{"url":"http://foxer360-media-library.s3.eu-central-1.amazonaws.com/divesoft/docs/5c368ce070cf7a6be3c256b75ecdc2db335791c9_cw-pper-2-04-2025-module-b-eng.pdf","mediaData":{"mimetype":"application/pdf","size":526092,"hash":"5c368ce070cf7a6be3c256b75ecdc2db335791c9","id":"cm98aecbgjgkr085062v9a707","filename":"cw-pper-2-04-2025-module-b-eng.pdf","category":"divesoft/docs/","type":"file"},"urlNewWindow":true},"title":"SM CE Certificate","isTitleBold":true},{"id":"16","isTitleBold":true,"title":"SM Declaration of Conformity","url":{"url":"http://foxer360-media-library.s3.eu-central-1.amazonaws.com/divesoft/docs/a17af6ab07526baf12bc5fc08af34a06693cd9c3_declaration-of-conformity-ce-sm-2025-signed.pdf","mediaData":{"mimetype":"application/pdf","size":143280,"hash":"a17af6ab07526baf12bc5fc08af34a06693cd9c3","id":"cm98e5o3djko908503k2894ud","filename":"declaration-of-conformity-ce-sm-2025-signed.pdf","category":"divesoft/docs/","type":"file"},"urlNewWindow":true}},{"id":"18","title":"Module D Certificate","isTitleBold":true,"url":{"url":"http://foxer360-media-library.s3.eu-central-1.amazonaws.com/divesoft/docs/5c1ef7448ed48df14a57f94c01bbb9c02ffa9384_form9-pcw-01-pper-certyfikat-zg-odnosci-z-typem-w-oparciu-o-zapewnienie-jakosci-procesu-produkcj-i-modul-d-edycja-20241126.pdf","mediaData":{"mimetype":"application/pdf","size":466167,"hash":"5c1ef7448ed48df14a57f94c01bbb9c02ffa9384","id":"cm98an8czjgti0850mk61i130","filename":"form9-pcw-01-pper-certyfikat-zg-odnosci-z-typem-w-oparciu-o-zapewnienie-jakosci-procesu-produkcj-i-modul-d-edycja-20241126.pdf","category":"divesoft/docs/","type":"file"},"urlNewWindow":true}},{"id":"6","title":"Imperial Cylinder Volume Table","url":{"url":"https://foxer360-media-library.s3.eu-central-1.amazonaws.com/divesoft/docs/e1ab2fff0a0a8984fc0e605e39a224c0eeef0dcc_imperial-cylinder-volume-table.pdf","urlNewWindow":true},"isTitleBold":true}
2,{"id":"9","title":"Liberty Light welded stand hole position","url":{"url":"http://foxer360-media-library.s3.eu-central-1.amazonaws.com/divesoft/docs/c266d666061cddcc94a8881921249c6212e3651c_bcd-liberty-light-hole-guide.PDF","mediaData":{"mimetype":"application/pdf","size":521765,"hash":"c266d666061cddcc94a8881921249c6212e3651c","id":"cltzuj4j47rn207764biijdj6","filename":"bcd-liberty-light-hole-guide.PDF","category":"divesoft/docs/","type":"file"},"urlNewWindow":true},"isTitleBold":true}],"activeTab":"9"},"id":"#6","type":"component","lock":false,"position":5},{"name":"Footer","data":{"copyrights":"Copyright © 2019 Divesoft LLC All rights reserved.","facebookUrl":"","youtubeUrl":"","instagramUrl":"","contacts":"**Divesoft, s.r.o.** Hálkova 2495 413 01 Roudnice nad Labem Äeská republika Tel.: +420 416 857 057 E-mail: [email protected]"},"id":"#1","type":"component","lock":false,"position":6}],"id":"root","idBuffer":"#8","lastCommit":"7a86f5ca-3946-419d-9e6d-16d2af90579b"}},"annotations":[],"language":{"type":"id","generated":false,"id":"Language:cjv3kwvoj000u083611381c6o","typename":"Language"},"__typename":"PageTranslation"},"Page:cl0w69wstc3wt0858zwwhc4rn":{"id":"cl0w69wstc3wt0858zwwhc4rn","type":{"type":"id","generated":false,"id":"PageType:cjv3l213x004f08366hjufttp","typename":"PageType"},"tags":[],"translations({\"where\":{\"language\":{\"id\":\"cjv3kwvoj000u083611381c6o\"}}})":[{"type":"id","generated":false,"id":"PageTranslation:cl0w69wt4c3x00858bocu6w4i","typename":"PageTranslation"}],"__typename":"Page"},"PageTranslation:cl0w69wt4c3x00858bocu6w4i":{"id":"cl0w69wt4c3x00858bocu6w4i","name":"Analyzers","createdAt":"2022-03-18T08:41:43.768Z","content":{"type":"json","json":{"content":[{"name":"Header","data":{"products":[{"title":"Accessories","description":"Backplates, Consumables. Tanks.","img":{"recommendedSizes":{"width":"235","height":"235"}},"url":""},{"title":"Accessories sets","description":"Protection, maintenance, cleaning.","img":{"recommendedSizes":{"width":"235","height":"235"}},"url":""},{"title":"Spare parts","description":"Spare parts and components.","img":{"recommendedSizes":{"width":"235","height":"235"}},"url":""},{"title":"Spare parts kits","description":"Completly Liberty spare parts kits.","img":{"recommendedSizes":{"width":"235","height":"235"}},"url":""}]},"id":"#0","type":"component","lock":false,"position":0},{"name":"LinkCrossroad","data":{"title":"Analyzers","subtitle":"","showBreadcrumbs":true,"hideHeader":false,"firstTitle":"Choose Category","firstColumn":"1","firstLinks":[{"title":"User Manuals","url":{"url":"https://www.divesoft.com/en/downloads/analyzers/user-manuals"},"anchor":"","id":"1"},{"id":"3","title":"Firmware","url":{"url":"/en/downloads/analyzers/firmware","pageId":"cl16j64oud5z10858zmxo5z3b","urlNewWindow":false}},{"id":"2","title":"FAQ (knowledge base)","url":{"url":"https://support.divesoft.com/","pageId":"cjv3rrnkp00m80836ezb6g5y6","urlNewWindow":true}}],"secondTitle":"","secondColumn":"1","secondLinks":[],"thirdTitle":"","thirdColumn":"1","thirdLinks":[],"fourthTitle":"","fourthColumn":"1","fourthLinks":[],"fifthTitle":"","fifthColumn":"1","fifthLinks":[],"activeTab":"3"},"id":"#2","type":"component","lock":false,"position":1},{"name":"Footer","data":{"copyrights":"Copyright © 2019 Divesoft LLC All rights reserved.","facebookUrl":"","youtubeUrl":"","instagramUrl":"","contacts":"**Divesoft, s.r.o.** Hálkova 2495 413 01 Roudnice nad Labem Äeská republika Tel.: +420 416 857 057 E-mail: [email protected]"},"id":"#1","type":"component","lock":false,"position":8}],"id":"root","idBuffer":"#9","lastCommit":"f12b04a8-a972-43f1-9673-ffb9bd8408c3"}},"annotations":[],"language":{"type":"id","generated":false,"id":"Language:cjv3kwvoj000u083611381c6o","typename":"Language"},"__typename":"PageTranslation"},"Page:cl0w6ezvmc3xw08584tvd6myu":{"id":"cl0w6ezvmc3xw08584tvd6myu","type":{"type":"id","generated":false,"id":"PageType:cjv3l213x004f08366hjufttp","typename":"PageType"},"tags":[],"translations({\"where\":{\"language\":{\"id\":\"cjv3kwvoj000u083611381c6o\"}}})":[{"type":"id","generated":false,"id":"PageTranslation:cl0w6ezvxc3y30858m5ks6n2j","typename":"PageTranslation"}],"__typename":"Page"},"PageTranslation:cl0w6ezvxc3y30858m5ks6n2j":{"id":"cl0w6ezvxc3y30858m5ks6n2j","name":"User Manuals","createdAt":"2022-03-18T08:45:41.036Z","content":{"type":"json","json":{"content":[{"name":"Header","data":{"products":[{"title":"Accessories","description":"Backplates, Consumables. Tanks.","img":{"recommendedSizes":{"width":"235","height":"235"}},"url":""},{"title":"Accessories sets","description":"Protection, maintenance, cleaning.","img":{"recommendedSizes":{"width":"235","height":"235"}},"url":""},{"title":"Spare parts","description":"Spare parts and components.","img":{"recommendedSizes":{"width":"235","height":"235"}},"url":""}
2,{"title":"Spare parts kits","description":"Completly Liberty spare parts kits.","img":{"recommendedSizes":{"width":"235","height":"235"}},"url":""}]},"id":"#0","type":"component","lock":false,"position":0},{"name":"LinkCrossroad","data":{"title":"User Manuals","subtitle":"","showBreadcrumbs":true,"hideHeader":false,"firstTitle":"Choose Product","firstColumn":"1","firstLinks":[{"id":"5","title":"Analyzer ECHO","url":{"url":"#support-analyzers-user-manuals-analyzer-echo","pageId":"cmdipfr8v00xz08322hw227s8","urlNewWindow":false},"anchor":"support-analyzers-user-manuals-analyzer-echo"},{"id":"4","title":"Analyzer DNA","anchor":"support-analyzers-user-manuals-analyzer-dna"},{"id":"3","title":"Analyzer SOLO O2","anchor":"support-analyzers-user-manuals-analyzer-solo-o2"},{"id":"2","title":"Analyzer SOLO","anchor":"support-analyzers-user-manuals-analyzer-solo"},{"title":"Analyzer He/O2","url":"","anchor":"support-analyzers-user-manuals-analyzer-he-o2","id":"1"}],"secondTitle":"","secondColumn":"1","secondLinks":[],"thirdTitle":"","thirdColumn":"1","thirdLinks":[],"fourthTitle":"","fourthColumn":"1","fourthLinks":[],"fifthTitle":"","fifthColumn":"1","fifthLinks":[],"activeTab":"5"},"id":"#2","type":"component","lock":false,"position":1},{"name":"Spacer","data":{"spacingLarge":"50","spacingSmall":"50","backgroundColor":"#ffffff"},"id":"#3","type":"component","lock":false,"position":2},{"name":"LinkAnchor","data":{"anchorId":"support-analyzers-user-manuals-analyzer-echo"},"id":"#11","type":"component","lock":false,"position":3},{"name":"DownloadsNew","data":{"backgroundColor":"#ffffff","isTitleH1":false,"title":"ECHO Analyzer","subtitle":"","showBreadcrumbs":false,"hideHeader":false,"files":[{"title":"User manual","isTitleBold":false,"subtitle":"","url":{"url":"/en/manuals/8500-echo-user-manual","pageId":"cmdipfr8v00xz08322hw227s8","urlNewWindow":true},"urlText":"Open","id":"1"},{"id":"5","title":"Quick reference","url":{"url":"/en/manuals/8500-echo-quick-reference","pageId":"cmdipepgt00xb08322to2saio","urlNewWindow":true},"urlText":"Open"},{"id":"2","title":"CE certificate (ENG)","url":{"url":"http://foxer360-media-library.s3.eu-central-1.amazonaws.com/divesoft/docs/b8d3c89c59c9a450562155ee9ccb1553e12f117e_certifikace-echo-aj.jpg","mediaData":{"mimetype":"image/jpeg","size":376463,"hash":"b8d3c89c59c9a450562155ee9ccb1553e12f117e","id":"cmq50ffa4du9408000eldpzpx","filename":"certifikace-echo-aj.jpg","category":"divesoft/docs/","type":"file"},"urlNewWindow":true},"subtitle":""},{"id":"3","title":"CE certificate (CZ)","url":{"url":"http://foxer360-media-library.s3.eu-central-1.amazonaws.com/divesoft/docs/930f5b5206302e83781d5d6f00a9f44576b77201_certifikat-echo-cj.jpg","mediaData":{"mimetype":"image/jpeg","size":396399,"hash":"930f5b5206302e83781d5d6f00a9f44576b77201","id":"cmq50gq5ydu9s0800txuvazcj","filename":"certifikat-echo-cj.jpg","category":"divesoft/docs/","type":"file"},"urlNewWindow":true}},{"id":"4","title":"Declaration of Conformity and Origin","url":{"url":"http://foxer360-media-library.s3.eu-central-1.amazonaws.com/divesoft/docs/a6123b9789ae331d8f84245c97c0eb45a767b4ca_declaration-of-conformity-echo-analyzer.pdf","mediaData":{"mimetype":"application/pdf","size":263745,"hash":"a6123b9789ae331d8f84245c97c0eb45a767b4ca","id":"cmq50hntsdub90800tyyqgnqa","filename":"declaration-of-conformity-echo-analyzer.pdf","category":"divesoft/docs/","type":"file"},"urlNewWindow":true}}]},"id":"#12","type":"component","lock":false,"position":4},{"name":"LinkAnchor","data":{"anchorId":"support-analyzers-user-manuals-analyzer-dna"},"id":"#13","type":"component","lock":false,"position":5},{"name":"DownloadsNew","data":{"backgroundColor":"#ffffff","title":"DNA Analyzer","subtitle":"","showBreadcrumbs":false,"hideHeader":false,"files":[{"id":"2","title":"Quick reference","url":{"url":"/en/manuals/8460-dna-quick-reference","pageId":"clnkbz2s6da0m0735m12jhjra"},"urlText":"Open"},{"title":"User manual","isTitleBold":false,"subtitle":"","url":{"url":"/en/manuals/8460-dna-user-manual","pageId":"clmszuh0ravef0735zntydkcp"},"urlText":"Open","id":"1"},{"id":"3","title":"Declaration of Conformity and Origin","url":{"url":"http://foxer360-media-library.s3.eu-central-1.amazonaws.com/divesoft/docs/3febbeaf97bb0376f2e4de45652a399c94949eae_declaration-of-conformity-dna-analyzer.pdf","mediaData":{"mimetype":"application/pdf","size":263957,"hash":"3febbeaf97bb0376f2e4de45652a399c94949eae","id":"cmq50jxxvduck0800mmjauiwy","filename":"declaration-of-conformity-dna-analyzer.pdf","category":"divesoft/docs/","type":"file"},"urlNewWindow":true}}],"activeTab":"3"},"id":"#10","type":"component","lock":false,"position":6},{"name":"LinkAnchor","data":{"anchorId":"support-analyzers-user-manuals-analyzer-solo-o2"},"id":"#8","type":"component","lock":false,"position":7},{"name":"DownloadsNew","data":{"backgroundColor":"#ffffff","title":"SOLO O2 Analyzer ","subtitle":"","showBreadcrumbs":false,"hideHeader":false,"files":[{"title":"User manual","isTitleBold":false,"subtitle":"","url":{"url":"/en/manuals/8302-analyzer-solo-o2-en","pageId":"ckx63km7c027h0858b0tm2sky","urlNewWindow":true},"urlText":"Open","id":"1"},{"id":"2","title":"Declaration of Conformity and Origin","url":{"url":"http://foxer360-media-library.s3.eu-central-1.amazonaws.com/divesoft/docs/91a6853cbfaacb652e74a47b694a026c39e75b62_declaration-of-conformity-solo-analyzer.pdf","mediaData":{"mimetype":"application/pdf","size":265404,"hash":"91a6853cbfaacb652e74a47b694a026c39e75b62","
2id":"cmq50m1eydudk0800ofsexfs3","filename":"declaration-of-conformity-solo-analyzer.pdf","category":"divesoft/docs/","type":"file"},"urlNewWindow":true}},{"id":"3","title":"CE certificate (CZ)","url":{"url":"http://foxer360-media-library.s3.eu-central-1.amazonaws.com/divesoft/docs/0657f00bd2baabc16385ff125bc04e446bef7578_ce-solo-cz.pdf","mediaData":{"mimetype":"application/pdf","size":358905,"hash":"0657f00bd2baabc16385ff125bc04e446bef7578","id":"cmq50mrt0dudq0800x5wjtdql","filename":"ce-solo-cz.pdf","category":"divesoft/docs/","type":"file"}}},{"id":"4","title":"CE certificate (ENG)","url":{"url":"http://foxer360-media-library.s3.eu-central-1.amazonaws.com/divesoft/docs/09ac4096318cbf6081ca3f5e8a9989279394d71f_ce-solo-aj.pdf","mediaData":{"mimetype":"application/pdf","size":358858,"hash":"09ac4096318cbf6081ca3f5e8a9989279394d71f","id":"cmq50nfuydue00800y139vjpz","filename":"ce-solo-aj.pdf","category":"divesoft/docs/","type":"file"}}},{"id":"5","title":"Quick Reference","url":{"url":"https://www.divesoft.com/en/manuals/8302-analyzer-solo-o2-quick-reference-en"},"urlText":"Open"}],"activeTab":"5"},"id":"#9","type":"component","lock":false,"position":8},{"name":"LinkAnchor","data":{"anchorId":"support-analyzers-user-manuals-analyzer-solo"},"id":"#6","type":"component","lock":false,"position":9},{"name":"DownloadsNew","data":{"backgroundColor":"#ffffff","title":"SOLO Analyzer","subtitle":"","showBreadcrumbs":false,"hideHeader":false,"files":[{"title":"User manual (ENG)","isTitleBold":false,"subtitle":"","url":{"url":"/en/manuals/8300-analyzer-solo-en","pageId":"ckonbtfmp3px60788qpmvrvhk","urlNewWindow":true},"urlText":"Open","id":"1"},{"title":"User manual (CZ)","isTitleBold":false,"subtitle":"","url":{"url":"/en/manuals/8300-analyzer-solo-cz","urlNewWindow":true,"pageId":"ckone3so43q740788v6xdffgh"},"urlText":"Open","id":"2"},{"id":"3","title":"Declaration of Conformity and Origin ","url":{"url":"http://foxer360-media-library.s3.eu-central-1.amazonaws.com/divesoft/docs/91a6853cbfaacb652e74a47b694a026c39e75b62_declaration-of-conformity-solo-analyzer.pdf","mediaData":{"mimetype":"application/pdf","size":265404,"hash":"91a6853cbfaacb652e74a47b694a026c39e75b62","id":"cmq50m1eydudk0800ofsexfs3","filename":"declaration-of-conformity-solo-analyzer.pdf","category":"divesoft/docs/","type":"file"},"urlNewWindow":true},"urlText":""},{"id":"4","title":"CE certificate (CZ)","url":{"url":"http://foxer360-media-library.s3.eu-central-1.amazonaws.com/divesoft/docs/0657f00bd2baabc16385ff125bc04e446bef7578_ce-solo-cz.pdf","mediaData":{"mimetype":"application/pdf","size":358905,"hash":"0657f00bd2baabc16385ff125bc04e446bef7578","id":"cmq50mrt0dudq0800x5wjtdql","filename":"ce-solo-cz.pdf","category":"divesoft/docs/","type":"file"},"urlNewWindow":true},"urlText":"Download"},{"id":"5","title":"CE certificate (ENG)","url":{"url":"http://foxer360-media-library.s3.eu-central-1.amazonaws.com/divesoft/docs/9bdfe0684f629cd70703ab11653bb2924591160b_solo-en.pdf","mediaData":{"mimetype":"application/pdf","size":5268912,"hash":"9bdfe0684f629cd70703ab11653bb2924591160b","id":"cky008zvjlsxf0776y1uijtzq","filename":"solo-en.pdf","category":"divesoft/docs/","type":"file"},"urlNewWindow":true},"urlText":"Download"},{"id":"6","title":"Quick Reference","url":{"url":"https://www.divesoft.com/en/manuals/8300-analyzer-solo-quick-reference-en"},"urlText":"Open"}],"activeTab":"6"},"id":"#7","type":"component","lock":false,"position":10},{"name":"LinkAnchor","data":{"anchorId":"support-analyzers-user-manuals-analyzer-he-o2"},"id":"#4","type":"component","lock":false,"position":11},{"name":"DownloadsNew","data":{"backgroundColor":"#ffffff","title":"Analyzer He/O2","subtitle":"","showBreadcrumbs":false,"hideHeader":false,"files":[{"title":"User manual (ENG)","isTitleBold":false,"subtitle":"","url":{"urlNewWindow":true,"url":"/en/manuals/8313-analyzer-he-o2-en","pageId":"ckocumdqv380r0788ta9ljatx"},"urlText":"Open","id":"1"},{"id":"4","title":"User Manual (GER)","url":{"url":"https://foxer360-media-library.s3.eu-central-1.amazonaws.com/divesoft/docs/2b295098e638914b449637121b14e6548793b113_deutsch-he-o2-fw-221.pdf","urlNewWindow":true},"subtitle":"v2.3 and v2.4"},{"id":"6","title":"User Manual (CZE)","url":{"urlNewWindow":true,"url":"https://foxer360-media-library.s3.eu-central-1.amazonaws.com/divesoft/docs/83f4f05bf85ce076df3eb51bfe3c97bfe859a552_manual-v6-r1-cz.pdf"},"subtitle":"v2.1 and v2.2"},{"id":"7","title":"User Manual (CZE)","subtitle":"v1","url":{"url":"https://foxer360-media-library.s3.eu-central-1.amazonaws.com/divesoft/docs/cf000afbdabccf7520df010551deae5d1688cf01_
2navod-typ1.pdf","urlNewWindow":true}},{"id":"8","title":"Declaration of Conformity and Origin","url":{"url":"http://foxer360-media-library.s3.eu-central-1.amazonaws.com/divesoft/docs/48ac46be0b1c2e2b7cb0ab8373a557296265b190_declaration-of-conformity-heo2-analyzer.pdf","mediaData":{"mimetype":"application/pdf","size":262393,"hash":"48ac46be0b1c2e2b7cb0ab8373a557296265b190","id":"cmrizyaredyji0800afe73uou","filename":"declaration-of-conformity-heo2-analyzer.pdf","category":"divesoft/docs/","type":"file"}}}],"activeTab":"8"},"id":"#5","type":"component","lock":false,"position":12},{"name":"Footer","data":{"copyrights":"Copyright © 2019 Divesoft LLC All rights reserved.","facebookUrl":"","youtubeUrl":"","instagramUrl":"","contacts":"**Divesoft, s.r.o.** Hálkova 2495 413 01 Roudnice nad Labem Äeská republika Tel.: +420 416 857 057 E-mail: [email protected]"},"id":"#1","type":"component","lock":false,"position":13}],"id":"root","idBuffer":"#14","lastCommit":"7a30ff4f-b8dc-4d05-92a2-e918bcaf87c7"}},"annotations":[],"language":{"type":"id","generated":false,"id":"Language:cjv3kwvoj000u083611381c6o","typename":"Language"},"__typename":"PageTranslation"},"Page:cl0w9d15gc4bs0858x46etqax":{"id":"cl0w9d15gc4bs0858x46etqax","type":{"type":"id","generated":false,"id":"PageType:cjv3l213x004f08366hjufttp","typename":"PageType"},"tags":[],"translations({\"where\":{\"language\":{\"id\":\"cjv3kwvoj000u083611381c6o\"}}})":[{"type":"id","generated":false,"id":"PageTranslation:cl0w9d15rc4bz0858wxmim7zw","typename":"PageTranslation"}],"__typename":"Page"},"PageTranslation:cl0w9d15rc4bz0858wxmim7zw":{"id":"cl0w9d15rc4bz0858wxmim7zw","name":"Freedom Computers","createdAt":"2022-03-18T10:08:08.223Z","content":{"type":"json","json":{"content":[{"name":"Header","data":{"products":[{"title":"Accessories","description":"Backplates, Consumables. Tanks.","img":{"recommendedSizes":{"width":"235","height":"235"}},"url":""},{"title":"Accessories sets","description":"Protection, maintenance, cleaning.","img":{"recommendedSizes":{"width":"235","height":"235"}},"url":""},{"title":"Spare parts","description":"Spare parts and components.","img":{"recommendedSizes":{"width":"235","height":"235"}},"url":""},{"title":"Spare parts kits","description":"Completly Liberty spare parts kits.","img":{"recommendedSizes":{"width":"235","height":"235"}},"url":""}]},"id":"#0","type":"component","lock":false,"position":0},{"name":"LinkCrossroad","data":{"title":"Freedom Computers","subtitle":"","showBreadcrumbs":true,"hideHeader":false,"firstTitle":"Choose Category","firstColumn":"1","firstLinks":[{"title":"User Manuals","url":{"url":"/en/support/freedom-computers/user-manuals","pageId":"cl0wa065gc4gx085870mb27m3"},"anchor":"","id":"1"},{"id":"4","title":"Additional Documents","url":{"url":"/en/support/freedom-computers/additional-documents","pageId":"cl0wai2l5c4ma0858bqfgyiws"}},{"id":"2","title":"Firmware Updates and Managers","url":{"url":"/en/support/freedom-computers/firmware","pageId":"cl0wbz1pqc4u90858pp61vixf","urlNewWindow":false}},{"id":"5","url":{"url":"/en/support/freedom-computers/maintenance"},"title":"Maintenance"},{"id":"3","title":"FAQ (knowledge base)","url":{"url":"https://support.divesoft.com/","pageId":"cjv3rrnkp00m80836ezb6g5y6","urlNewWindow":true}}],"secondTitle":"","secondColumn":"1","secondLinks":[],"thirdTitle":"","thirdColumn":"1","thirdLinks":[],"fourthTitle":"","fourthColumn":"1","fourthLinks":[],"fifthTitle":"","fifthColumn":"1","fifthLinks":[],"activeTab":"3"},"id":"#2","type":"component","lock":false,"position":1},{"name":"Spacer","data":{"spacingLarge":"50","spacingSmall":"50","backgroundColor":"#ffffff"},"id":"#5","type":"component","lock":false,"position":7},{"name":"Footer","data":{"copyrights":"Copyright © 2019 Divesoft LLC All rights reserved.","facebookUrl":"","youtubeUrl":"","instagramUrl":"","contacts":"**Divesoft, s.r.o.** Hálkova 2495 413 01 Roudnice nad Labem Äeská republika Tel.: +420 416 857 057 E-mail: [email protected]"},"id":"#1","type":"component","lock":false,"position":8}],"id":"root","idBuffer":"#9","lastCommit":"7f20a9d5-8ebb-4c80-89e7-045ef8015e47"}},"annotations":[],"language":{"type":"id","generated":false,"id":"Language:cjv3kwvoj000u083611381c6o","typename":"Language"},"__typename":"PageTranslation"},"Page:cl0wa065gc4gx085870mb27m3":{"id":"cl0wa065gc4gx085870mb27m3","type":{"type":"id","generated":false,"id":"PageType:cjv3l213x004f08366hjufttp","typename":"PageType"},"tags":[],"translations({\"where\":{\"language\":{\"id\":\"cjv3kwvoj000u083611381c6o\"}}})":[{"type":"id","generated":false,"id":"PageTranslation:cl0wa065tc4h40858ouz188uw","typename":"PageTranslation"}],"__typename":"Page"},"PageTranslation:cl0wa065tc4h40858ouz188uw":{"id":"cl0wa065tc4h40858ouz188uw","name":"User Manuals","createdAt":"2022-03-18T10:26:07.792Z","content":{"type":"json","json":{"content":[{"name":"Header","data":{"products":[{"title":"Accessories","description":"Backplates, Consumables. Tanks.","img":{"recommendedSizes":{"width":"235","height":"235"}},"url":""},{"title":"Accessories sets","description":"Protection, maintenance, cleaning.","img":{"recommendedSizes":{"width":"235","height":"235"}},"url":""},{"title":"Spare parts","description":"Spare parts and components.","img":{"recommendedSizes":{"width":"235","height":"235"}},"url":""}
2,{"title":"Spare parts kits","description":"Completly Liberty spare parts kits.","img":{"recommendedSizes":{"width":"235","height":"235"}},"url":""}]},"id":"#0","type":"component","lock":false,"position":0},{"name":"Spacer","data":{"spacingLarge":"40","spacingSmall":"40","backgroundColor":"#f0f0f0"},"id":"#3","type":"component","lock":false,"position":1},{"name":"ComponentHeader","data":{"title":"User Manuals","subtitle":"","showBreadcrumbs":true,"backgroundColor":"#f0f0f0"},"id":"#4","type":"component","lock":false,"position":2},{"name":"Spacer","data":{"spacingLarge":30,"spacingSmall":"30","backgroundColor":"#f0f0f0"},"id":"#5","type":"component","lock":false,"position":3},{"name":"Spacer","data":{"spacingLarge":"50","spacingSmall":"50","backgroundColor":"#ffffff"},"id":"#6","type":"component","lock":false,"position":4},{"name":"DownloadsNew","data":{"backgroundColor":"#ffffff","title":"","subtitle":"","showBreadcrumbs":false,"hideHeader":true,"files":[{"id":"8","title":"Freedom+ User Manual - firmware 1.21.0 - English","isTitleBold":true,"url":{"url":"/en/manuals/freedomplus-user-manual","pageId":"clfgtftaemfdx0835x56ytrvp"},"urlText":"Open"},{"id":"7","title":"Freedom User Manual - firmware v1.18.2 - English","isTitleBold":true,"url":{"url":"/en/manuals/freedom-user-manual","pageId":"ckybcu1mg2un90858gj6k72sn"},"urlText":"Open"}],"activeTab":"6"},"id":"#7","type":"component","lock":false,"position":5},{"name":"Footer","data":{"componentTemplateId":"cjvwimxrl08e40798hjs5ek9w"},"id":"#1","type":"component","lock":false,"position":7}],"id":"root","idBuffer":"#8","lastCommit":"67884853-362a-499a-8d48-574702a61789"}},"annotations":[],"language":{"type":"id","generated":false,"id":"Language:cjv3kwvoj000u083611381c6o","typename":"Language"},"__typename":"PageTranslation"},"Page:cl0wai2l5c4ma0858bqfgyiws":{"id":"cl0wai2l5c4ma0858bqfgyiws","type":{"type":"id","generated":false,"id":"PageType:cjv3l213x004f08366hjufttp","typename":"PageType"},"tags":[],"translations({\"where\":{\"language\":{\"id\":\"cjv3kwvoj000u083611381c6o\"}}})":[{"type":"id","generated":false,"id":"PageTranslation:cl0wai2ljc4mh0858st9bpupx","typename":"PageTranslation"}],"__typename":"Page"},"PageTranslation:cl0wai2ljc4mh0858st9bpupx":{"id":"cl0wai2ljc4mh0858st9bpupx","name":"Additional Documents","createdAt":"2022-03-18T10:40:02.983Z","content":{"type":"json","json":{"content":[{"name":"Header","data":{"products":[{"title":"Accessories","description":"Backplates, Consumables. Tanks.","img":{"recommendedSizes":{"width":"235","height":"235"}},"url":""},{"title":"Accessories sets","description":"Protection, maintenance, cleaning.","img":{"recommendedSizes":{"width":"235","height":"235"}},"url":""},{"title":"Spare parts","description":"Spare parts and components.","img":{"recommendedSizes":{"width":"235","height":"235"}},"url":""},{"title":"Spare parts kits","description":"Completly Liberty spare parts kits.","img":{"recommendedSizes":{"width":"235","height":"235"}},"url":""}]},"id":"#0","type":"component","lock":false,"position":0},{"name":"Spacer","data":{"spacingLarge":"40","spacingSmall":"40","backgroundColor":"#f0f0f0"},"id":"#2","type":"component","lock":false,"position":1},{"name":"ComponentHeader","data":{"title":"Additional Documents","subtitle":"","showBreadcrumbs":true,"backgroundColor":"#f0f0f0"},"id":"#3","type":"component","lock":false,"position":2},{"name":"Spacer","data":{"spacingLarge":30,"spacingSmall":"30","backgroundColor":"#f0f0f0"},"id":"#4","type":"component","lock":false,"position":3},{"name":"Spacer","data":{"spacingLarge":"50","spacingSmall":"50","backgroundColor":"#ffffff"},"id":"#5","type":"component","lock":false,"position":4},{"name":"DownloadsNew","data":{"backgroundColor":"#ffffff","title":"","subtitle":"","showBreadcrumbs":false,"hideHeader":true,"files":[{"title":"Datasheet - O2 Cells Connection Cable","isTitleBold":true,"subtitle":"","url":{"url":"https://foxer360-media-library.s3.eu-central-1.amazonaws.com/divesoft/docs/bc3d79ec1bbd66dad3ad1eab5d412e8a79ac31f8_freedom-pripojeni-senzoru-o2.PDF","urlNewWindow":true},"urlText":"Download","id":"1"},{"title":"Cylinder Conversion Chart","isTitleBold":true,"subtitle":"","url":{"url":"https://foxer360-media-library.s3.eu-central-1.amazonaws.com/divesoft/docs/207cddbe8a276bca7c11ae193bef7d080cb8aed7_cylinder-conversion-chart.pdf","urlNewWindow":true},"urlText":"Download","id":"2"},{"id":"3","title":"Imperial Cylinder Volume Table","isTitleBold":true,"url":{"url":"https://foxer360-media-library.s3.eu-central-1.amazonaws.com/divesoft/docs/e1ab2fff0a0a8984fc0e605e39a224c0eeef0dcc_imperial-cylinder-volume-table.pdf","urlNewWindow":true}}
2,{"id":"4","subtitle":"","title":"CE certification EN","isTitleBold":true,"url":{"url":"http://foxer360-media-library.s3.eu-central-1.amazonaws.com/divesoft/docs/baa4744cc5300b9af4eefd3a0dca78777b75d965_freedom-divesoft-en.pdf","mediaData":{"mimetype":"application/pdf","size":32667,"hash":"baa4744cc5300b9af4eefd3a0dca78777b75d965","id":"cmbhqdrr299x10850vy1pju75","filename":"freedom-divesoft-en.pdf","category":"divesoft/docs/","type":"file"}}},{"id":"5","title":"CE certification CZ","url":{"url":"http://foxer360-media-library.s3.eu-central-1.amazonaws.com/divesoft/docs/12f0010b6e4092158a56af3b10886e095017f83a_freedom-divesoft-cz.pdf","mediaData":{"mimetype":"application/pdf","size":35857,"hash":"12f0010b6e4092158a56af3b10886e095017f83a","id":"cmbhqeztj99yb0850ditsjzcm","filename":"freedom-divesoft-cz.pdf","category":"divesoft/docs/","type":"file"}},"isTitleBold":true},{"id":"6","title":"Quick Reference","url":{"url":"https://www.divesoft.com/en/manuals/freedomplus-quick-reference"},"urlText":"Open"}],"activeTab":"6"},"id":"#6","type":"component","lock":false,"position":5},{"name":"Footer","data":{"copyrights":"Copyright © 2019 Divesoft LLC All rights reserved.","facebookUrl":"","youtubeUrl":"","instagramUrl":"","contacts":"**Divesoft, s.r.o.** Hálkova 2495 413 01 Roudnice nad Labem Äeská republika Tel.: +420 416 857 057 E-mail: [email protected]"},"id":"#1","type":"component","lock":false,"position":6}],"id":"root","idBuffer":"#7","lastCommit":"d3d727a3-9589-462c-95e4-4eb66dafc880"}},"annotations":[],"language":{"type":"id","generated":false,"id":"Language:cjv3kwvoj000u083611381c6o","typename":"Language"},"__typename":"PageTranslation"},"Page:cl0wbz1pqc4u90858pp61vixf":{"id":"cl0wbz1pqc4u90858pp61vixf","type":{"type":"id","generated":false,"id":"PageType:cjv3l213x004f08366hjufttp","typename":"PageType"},"tags":[{"type":"id","generated":false,"id":"Tag:ckp59jt9n48lj0788mfuqrhym","typename":"Tag"},{"type":"id","generated":false,"id":"Tag:cmgfchuc23glr0832td37smec","typename":"Tag"}],"translations({\"where\":{\"language\":{\"id\":\"cjv3kwvoj000u083611381c6o\"}}})":[{"type":"id","generated":false,"id":"PageTranslation:cl0wbz1q3c4ug0858dtp65pcp","typename":"PageTranslation"}],"__typename":"Page"},"Tag:cmgfchuc23glr0832td37smec":{"id":"cmgfchuc23glr0832td37smec","name":"unpublished","__typename":"Tag"},"PageTranslation:cl0wbz1q3c4ug0858dtp65pcp":{"id":"cl0wbz1q3c4ug0858dtp65pcp","name":"Firmware","createdAt":"2022-03-18T11:21:14.619Z","content":{"type":"json","json":{"content":[{"name":"Header","data":{"products":[{"title":"Accessories","description":"Backplates, Consumables. Tanks.","img":{"recommendedSizes":{"width":"235","height":"235"}},"url":""},{"title":"Accessories sets","description":"Protection, maintenance, cleaning.","img":{"recommendedSizes":{"width":"235","height":"235"}},"url":""},{"title":"Spare parts","description":"Spare parts and components.","img":{"recommendedSizes":{"width":"235","height":"235"}},"url":""},{"title":"Spare parts kits","description":"Completly Liberty spare parts kits.","img":{"recommendedSizes":{"width":"235","height":"235"}},"url":""}]},"id":"#0","type":"component","lock":false,"position":0},{"name":"LinkCrossroad","data":{"title":"Firmware","subtitle":"","showBreadcrumbs":true,"hideHeader":false,"firstTitle":"Choose Category","firstColumn":"1","firstLinks":[{"title":"Divesoft.center","url":{"url":"/en/center","pageId":"ckjhi3h1h1b720788igpbi8fp"},"anchor":"","id":"1"},{"id":"2","title":"Release notes","anchor":"support-freedom-computers-release-notes"}],"secondTitle":"","secondColumn":"1","secondLinks":[],"thirdTitle":"","thirdColumn":"1","thirdLinks":[],"fourthTitle":"","fourthColumn":"1","fourthLinks":[],"fifthTitle":"","fifthColumn":"1","fifthLinks":[],"activeTab":"2"},"id":"#2","type":"component","lock":false,"position":2},{"name":"Spacer","data":{"spacingLarge":"30","spacingSmall":"30","backgroundColor":"#ffffff"},"id":"#3","type":"component","lock":false,"position":3},{"name":"LinkAnchor","data":{"anchorId":"support-freedom-computers-release-notes"},"id":"#6","type":"component","lock":false,"position":6},{"name":"DownloadsNew","data":{"backgroundColor":"#ffffff","title":"Release notes","subtitle":"","showBreadcrumbs":false,"hideHeader":false,"files":[{"id":"31","title":"Freedom 1.21.9","subtitle":"**19th May 2025**\n<br><br>
2\n\n**New features **\n* None \n\n**Changes ** \n* Added support for pressure sensor type 4. \n\n**Error corrections** \n* Fixed persistence of âSetup / Rebreather / BIG CCRâ field (so that is not reset after power cycle of the FD).","isTitleBold":true},{"id":"30","title":"Freedom+ 1.21.7","isTitleBold":true,"subtitle":"**29th November 2024**\n<br><br>\n\n**Error corrections** \n* [HW 4.x] Fixed empty rectangle symbol after TTS2 value with imperial units set. \n* [HW 4.x] Patch for safer charging, when using charger with a quick charge protocol.\n* Show some TLC to your your charging cable and connector, clean them at least twice a year.\n"},{"id":"29","title":"Freedom 1.21.5","subtitle":"**13th June 2024**\n<br><br>\n**New features** \n* Enhanced menu readability when set âSetup / Preferences / Display / Menu highlight -> Allâ\n* BIG dive screen in CCR mode has customizable last line - in SCR or constCCR mode can be either ppO2 or decompression.\n* [HW 4.x] New dive screen âTTS nextâ showing TTS after 2, 5 and 10 minutes on the bottom.\n* [HW 4.x] Italian and Croatian languages \n\n**Changes** \n* Safety stop missed warning moved from 1.8m (6feet) to 2.5m (8feet) depth.\n* Extended pressure sensor calibration limits from +/-50mbar to +/-250mbar to better match aging sensors.\n* [HW 4.x] Significant improvement in FW upload speed over the Bluetooth for future updates. \n\n**Error corrections **\n* Ascent plan recalculated immediately after any change in âSetup / Mixturesâ in dive, eg. mixture disable/enable.\n* Miscellaneous czech localization fixes.\n* Minor user interface (graphical) patches.\n* Fixed dive start time 2x shift by the timezone on the âprofileâ dive screen.\n* Ascent speed warning duplicity in dive log resolved. \n\n\n**Decompression view on a BIG dive screen in CCR modes** \n\nThe decompression stops/ceiling can be switched on for a CCR mode in a âSetup / Rebreather / Big CCRâ. The decompression is available only for a SCR and a const CCR modes. In âmeasuredâ modes with online oxygen cells display, the third line in BIG screen always shows the measured ppO2.","isTitleBold":true},{"id":"28","title":"Freedom 1.21.4","subtitle":"**Not released**","isTitleBold":true},{"id":"27","title":"Freedom 1.21.3 ","isTitleBold":true,"subtitle":"**8th November 2023**\n<br><br>\n\n**Error corrections** \n* Miscellaneous czech localization fixes. \n* Minor user interface (graphical) patches.\n"},{"id":"23","title":"Freedom 1.21.2","isTitleBold":true,"subtitle":"**26th September 2023**\n<br><br>\n**Error corrections** \n* Miscellaneous czech localization fixes. \n* [HW 4.x] Critical patch for a rare âblack screen of deathâ behavior.\n"},{"id":"26","title":"Freedom 1.21.1","isTitleBold":true,"subtitle":"**14th August 2023**\n<br><br>\n**Error corrections** \n* Fixed charging shows ~90% after disconnecting the charger. \n* Fixed CNS decay in sleep mode (for divers who do not turn their dive computer on, before entering the water). \n* [HW 3.x] Fixed tilt calibration not sticking after power cycle.\n"},{"id":"25","title":"Freedom 1.21.0","isTitleBold":true,"subtitle":"**20th July 2023 **\n<br><br>\n\n**New features** \n* Erase any logs you wish, see the Logbook dive sub-menu. \n* Language localization, EN/CZ/DE/FR/SP\n\n**Error corrections** \n* Fixed END calculation - oxygen not narcotic equation.\nFixed stop time stuck at 0 seconds in CCR modes.\n"},{"id":"24","subtitle":"**1st June 2023 **\n<br><br>\n\n**New features** \n* Added Freedom HW rev. 4.0 support. \n\n**Changes ** \n* Removed apostrophe behind a time (as a minute symbol) for imperial units, to avoid confusion with feet.","title":"Freedom 1.20.0","isTitleBold":true},{"id":"22","title":"Freedom 1.19.0 (8275) ","subtitle":"**16th May 2023 **\n<br><br>\n\n**New features** \n* Set your Diluent or OC mix as default directly when editing the mixture, use checkbox \"Def\".\n* View a TTS2 calculated with current OC mixture, set in \"Setup / Preferences / Display / OC Row4/Col3\" -> \"TTS2\".\n* Warning when you set GF low > high. \n\n**Changes**\n* Default editor navigation is now a buttons-only / no-tilting needed.\n* Button long press t
2ime shortened from 1.5s to 1s.\n* Polished gas switch notification and improved behavior when diver does not follow the gas switch (see below).\n* END calculation switched from \"relative narcotic potential\" to more common \"nitrogen narcotic\" or \"oxygen and nitrogen narcotic\".\n * Set your preference in \"Setup / Preferences / User interface / O2 narcotic [Yes / No]\"\n* CCR diluents list is ordered by the oxygen content (descending order).\n* Renamed \"Full log\" to \"Log size\" due to mostly misunderstood function.\n * Default and recommended value is \"Log size -> Optimal\".\n * The \"Log size -> Large\" option disables built-in compression and results in extraneous points, and logs taking up unnecessary space in storage medium. \n * Buttons-only editor now cycles digits only up to maximum value, no further. \n\n\n**Error corrections** \n* Fixed \"High ppO2\" alarm decision factor (bottom Vs. deco).\n * \"Max pO2 bottom\" threshold is used for default OC mixture and mixtures with fO2 <= default mix. \n* **Updated Gas switch notification, and Gas Lost algorithm **\n * The sole \"Gas switch\" stop now has its own title, instead of general \"Deco stop\". Once you arrive at the gas switch depth, you get notification about the switch. If you do not switch within the stop time, then you get another notification at the gas switch stop end. Then, at \"Gas Sw. [min]\" + 30 sec the best mix is marked as \"lost\" and excluded from further calculations. Even when you set \"Gas Sw. [min]\" -> \"0\", then it is 30 seconds after arriving at the stop depth. Remember, you can always switch to the \"lost\" mixture from dive menu, and thus re-enabling it into the ascent and TTS calculations. \n * **TTS2**\n * TTS2 is available in OC mode only, and serves as a cross-check value for ascent using current mixture only (NO deco mixtures). You can imagine the TTS2 as a value calculated always with \"Setup / Decompression / Ascent gas\" -> \"Current\", that is only difference from the standart TTS. Setup in \"Setup / Preferences / Display / OC Row4/Col3\" -> \"TTS2\".\n\n","isTitleBold":true,"url":{"url":"http://foxer360-media-library.s3.eu-central-1.amazonaws.com/divesoft/docs/ff5c50cbd130d80f32fd4cad8a8e95d67035d3ed_fd-119-0-8275-1.zip","mediaData":{"mimetype":"application/x-zip-compressed","size":496857,"hash":"ff5c50cbd130d80f32fd4cad8a8e95d67035d3ed","id":"cljdxciq0l5630776no0f1jlh","filename":"fd-119-0-8275-1.zip","category":"divesoft/docs/","type":"file"}}},{"title":"Freedom 1.18.2","isTitleBold":true,"subtitle":"**17th November 2021**\n<br><br>\n* User configurable date format, see \"Setup / Miscellaneous / Date format\"\n* CCR Diluent ppO2 added to \"technical screen\", top right, next to stack time.\n* Added \"universal\" water salinity according to EN13319 (Setup / Preferences / Salinity).\n* Selectable lower button function - cycle dive screens or display off (Setup / Preferences / User interface / Lower bttn.).\n* Optional no-tilt editor, using buttons only (Setup / Preferences / User interface / Navigation).\n* Lower button long press in menu will step one line up (backwards).\n* Fixed unwanted behavior with all OC mixtures disabled.\n* Fixed technical screen refresh in surface mode.\n* Fixed misleading display of \"Deco stop\", instead of \"Gas switch\".\n* Fixed \"End pressure\" rounding error when using imperial system.\n* Fixed dive log profile display below 327.68m.","url":{"url":"https://foxer360-media-library.s3.eu-central-1.amazonaws.com/divesoft/docs/805fd401b41579e114ba7ad05a845d7f41e82570_fd-118-2-7373.zip"},"urlText":"Download","id":"1"},{"title":"Freedom 1.17.7","isTitleBold":true,"subtitle":"**20th May 2021**\n<br><br>\n* Fixed TTS glitch, which displayed BO TTS immediately after switching mixtures. After a few seconds TTS went back to normal GF.","url":{"url":"https://foxer360-media-library.s3.eu-central-1.amazonaws.com/divesoft/docs/a20f9b3d6ae38b4c2688c6e074dd0c7344830d80_fd-117-7.zip"},"urlText":"Download","id":"2"},{"id":"3","title":"Freedom 1.17.5","isTitleBold":true,"subtitle":"**26th June 2020**\n<br><br>\n* Fixed USB drive error with too much short dives","url":{"url":"https://foxer360-media-library.s3.eu-central-1.amazonaws.com/divesoft/docs/b1e8eaac5d5ba16778774d4086d466ac1d109ac8_fd-117-5.zip"}},{"id":"4","title":"Freedom 1.17.4","isTitleBold":true,"subtitle":"**17th June 2020**\n<br><br>\n* Fixed No-Fly time.\n* Option to calculate TTS and ascent with current SP instead of high SP (Setup / Rebreather / Const CCR Setup / SP Ascent (High, Current))\n* Improved battery percentage c
2alculation.\n* Fixed ceiling glitch near surface\n* Fixed USB connection mode, for Freedoms with 300+ dive logs.\n* Fixed CNS calculation in aSCR mode, which used OC mix ppO2 instead of current aSCR ppO2.","url":{"url":"https://foxer360-media-library.s3.eu-central-1.amazonaws.com/divesoft/docs/62810f431a5ff23c3d6d2136739419e42e91479a_fd-117-4.zip"}},{"id":"5","title":"Freedom 1.17.2","isTitleBold":true,"subtitle":"**20th November 2019**\n<br><br>\n* Decompression algorithm update\n* Optional Gauge screen now available in any dive mode\n* Safety stop timer added to Synoptic screen","url":{"url":"https://foxer360-media-library.s3.eu-central-1.amazonaws.com/divesoft/499f124e74adcefb277698c434d328ba56541d91_fd-117-2.zip"}},{"id":"6","title":"Freedom 1.16.1","isTitleBold":true,"subtitle":"**12th March 2019**\n<br><br>\n* Lost gas handling\n* High ppO2 limit is split to bottom and deco settings\n* new application Inclinometer\n* owner information and many more, see Release notes","url":{"url":"https://foxer360-media-library.s3.eu-central-1.amazonaws.com/divesoft/docs/ed141ec253605332a6a2c46e9ca6ba95e5024897_fd-116-1.zip"}},{"id":"7","title":"Freedom 1.15.4","isTitleBold":true,"subtitle":"**29th October 2018**\n<br><br>\n* new display controller support","url":{"url":"https://foxer360-media-library.s3.eu-central-1.amazonaws.com/divesoft/docs/ab8d0c3c904bf6675c503e800159346069f27112_fd-115-4.zip"}},{"id":"8","title":"Freedom 1.15.3","isTitleBold":true,"subtitle":"**11th July 2018**\n<br><br>\n* stopwatch available in any dive mode\n* external temperature indication and low temperature warning in Analyzer app (below 5°C/41°F)\n* fixed incorrect battery charge level\n* and many more, see Release notes","url":{"url":"https://foxer360-media-library.s3.eu-central-1.amazonaws.com/divesoft/docs/381b29dc4563bf42314858535ad2319d510e7b63_fd-115-3.zip"}},{"id":"9","title":"Freedom 1.14","isTitleBold":true,"subtitle":"**12th April 2017**\n<br><br>\n* Gas consumption in planner\n* SP automatic change improved\n* Current line in menu highlighted and\n* and many more, see Release notes","url":{"url":"https://foxer360-media-library.s3.eu-central-1.amazonaws.com/divesoft/docs/9c80c6cddc0facbb491b7840ecdb7a6494fbb85f_fd-114.zip"}},{"id":"10","title":"Freedom 1.13.5 ","isTitleBold":true,"subtitle":"**29th October 2015 (updated 1st Jul 2016)**\n<br><br>\n* Nitrox analyzer\n* Repeated pO2 alarm (every 0.2bar above limit)\n* Charger mode in off state (since 1.12)\n* Redesigned Gauge mode with O2 sensor reading (Closed Circuit licenses only)\n* and many more...","url":{"url":"https://foxer360-media-library.s3.eu-central-1.amazonaws.com/divesoft/docs/ab6969d956ac932e2472e7601f91c752d536f10c_fd-113-5.zip"}},{"id":"11","title":"Freedom 1.11","isTitleBold":true,"subtitle":"**8th June 2015 (updated 19th Oct 2015)**\n<br><br>\n* Settable pO2 margins\n* Stack time timer (CCR modes)\n* Instant brightness change\n* and many more...","url":{"url":"https://foxer360-media-library.s3.eu-central-1.amazonaws.com/divesoft/docs/beabb258b746596a0827fd8800344c4fb11949b0_fd-1-11-1.zip"}},{"id":"12","title":"Freedom 1.10","isTitleBold":true,"url":{"url":"https://foxer360-media-library.s3.eu-central-1.amazonaws.com/divesoft/docs/29f968f726dd32b908e3ca7d5fb0cdf3a6924c8c_fd-110.zip"},"subtitle":"**10th March 2015**\n<br><br>\n* Works with MAC and Linux\n* Multiple diluents in CCR mode\n* SCR deco"},{"id":"13","title":"Freedom 1.9","isTitleBold":true,"subtitle":"**7th October 2014**\n<br><br>\n* Ceiling graph\n* Vertical speed indication\n* Average depth indication","url":{"url":"https://foxer360-media-library.s3.eu-central-1.amazonaws.com/divesoft/docs/cedeb442c171530d7e5d3860db1f6c7e009724eb_fd-19.zip"}},{"id":"14","title":"Freedom 1.8","isTitleBold":true,"subtitle":"**29th July 2014 (updated 20th Aug 2014)**\n<br><br>\n* Changed blue color shade for better readability (TFT display only)\n* Corrected bottom gas in planner\n* Stop miss alarm disabled in Follow ceiling mode\n* Fixed GF bug in planner","url":{"url":"https://foxer360-media-library.s3.eu-central-1.amazonaws.com/divesoft/docs/1e2a4490869c26ad9d408812421c87814acc07a2_fd-18.zip"}}
2,{"id":"15","title":"Freedom 1.7","isTitleBold":true,"subtitle":"**23rd June 2014**\n<br><br>\n* bailout GF settings\n* default gas mix setting\n* faster graphics","url":{"url":"https://foxer360-media-library.s3.eu-central-1.amazonaws.com/divesoft/docs/b0ed81f8ff6254c48ade0b58dd7cec3e7f6b4cb9_fd-17.zip"}},{"id":"16","title":"Freedom 1.6 (TFT units only)","isTitleBold":true,"subtitle":"**2nd June 2014**\n<br><br>\n* initial release for TFT units\n* low ppO2 alarm\n* improved handling with bad ppO2 sensor (CCR mode)","url":{"url":"https://foxer360-media-library.s3.eu-central-1.amazonaws.com/divesoft/docs/7c86c5a06c5e3a247fd907d404a025bdee590a38_fd-16.zip"}},{"id":"17","title":"Freedom 1.5","isTitleBold":true,"subtitle":"**20th January 2014**\n<br><br>\n* CCR mode (both measured pO2 and preset SP)\n* up to 3 oxygen sensors\n* plan computation can use gas switching\n* flight mode","url":{"url":"https://foxer360-media-library.s3.eu-central-1.amazonaws.com/divesoft/docs/2cd3ce4edf3faec36c79315a6710145a6fd6a751_fd-15.zip"}},{"id":"18","title":"Freedom 1.4","isTitleBold":true,"subtitle":"**11th October 2013**\n<br><br>\n* several errors corrected\n* accelerometer starts reliably\n* option: dive plan in reverse order\n* average depth in current dive graph","url":{"url":"https://foxer360-media-library.s3.eu-central-1.amazonaws.com/divesoft/docs/5bf1f644978a68f85afcf7b35710355850afd1fc_fd-14.zip"}},{"id":"19","title":"Freedom 1.3","isTitleBold":true,"subtitle":"**2nd May 2013**\n<br><br>\n* several errors corrected\n* current plan available underwater","url":{"url":"https://foxer360-media-library.s3.eu-central-1.amazonaws.com/divesoft/docs/e060c998ee002dab0882732652d429bbf860e061_fd-13.zip"}},{"id":"20","title":"Freedom 1.2","isTitleBold":true,"subtitle":"**26th April 2013**\n<br><br>\n* corrected occasional hang and restart","url":{"url":"https://foxer360-media-library.s3.eu-central-1.amazonaws.com/divesoft/docs/c177d6e77bf9652833fbafbf536ec9708dcb2fec_fd-12.zip"}},{"id":"21","title":"Freedom 1.1","isTitleBold":true,"subtitle":"**12th April 2013**\n<br><br>\n* initial release","url":{"url":"https://foxer360-media-library.s3.eu-central-1.amazonaws.com/divesoft/docs/6f27c86213fca82cfda3e80531e5a9427bee2506_fd-11.zip"}}],"activeTab":"31"},"id":"#7","type":"component","lock":false,"position":7},{"name":"Footer","data":{"copyrights":"Copyright © 2019 Divesoft LLC All rights reserved.","facebookUrl":"","youtubeUrl":"","instagramUrl":"","contacts":"**Divesoft, s.r.o.** Hálkova 2495 413 01 Roudnice nad Labem Äeská republika Tel.: +420 416 857 057 E-mail: [email protected]"},"id":"#1","type":"component","lock":false,"position":8}],"id":"root","idBuffer":"#9","lastCommit":"aee9347e-82fa-453d-b9c6-6ab787208f06"}},"annotations":[],"language":{"type":"id","generated":false,"id":"Language:cjv3kwvoj000u083611381c6o","typename":"Language"},"__typename":"PageTranslation"},"Page:cl10kc5iocib30858yyb964ib":{"id":"cl10kc5iocib30858yyb964ib","type":{"type":"id","generated":false,"id":"PageType:cjv3l213x004f08366hjufttp","typename":"PageType"},"tags":[{"type":"id","generated":false,"id":"Tag:clw52zeqhlclq0735wrys6js8","typename":"Tag"}],"translations({\"where\":{\"language\":{\"id\":\"cjv3kwvoj000u083611381c6o\"}}})":[{"type":"id","generated":false,"id":"PageTranslation:cl10kc5j0ciba0858l2c1hxv9","typename":"PageTranslation"}],"__typename":"Page"},"PageTranslation:cl10kc5j0ciba0858l2c1hxv9":{"id":"cl10kc5j0ciba0858l2c1hxv9","name":"Divesoft.blog / Divesoft DEMO day with divers in wheelchairs from SKV team","createdAt":"2022-03-21T10:26:27.708Z","content":{"type":"json","json":{"content":[{"name":"Header","data":{"products":[{"title":"Accessories","description":"Backplates, Consumables. Tanks.","img":{"recommendedSizes":{"width":"235","height":"235"}},"url":""},{"title":"Accessories sets","description":"Protection, maintenance, cleaning.","img":{"recommendedSizes":{"width":"235","height":"235"}},"url":""},{"title":"Spare parts","description":"Spare parts and components.","img":{"recommendedSizes":{"width":"235","height":"235"}},"url":""}
2,{"title":"Spare parts kits","description":"Completly Liberty spare parts kits.","img":{"recommendedSizes":{"width":"235","height":"235"}},"url":""}]},"id":"#0","type":"component","lock":false,"position":0},{"name":"BlogArticle","data":{"title":"Divesoft DEMO day with divers in wheelchairs from SKV team","perex":"Have you ever imagined how your life would change if you went through a car accident, serious health complication or another disaster that could turn everything you know upside down? If you lost an ability that you consider normal and take for granted? What if you lost the ability to walk, see, hear, or move your arms? Which of the things I enjoy doing would I be able to continue to do? ","content":"Being a diver, I struggle to imagine how difficult it would be to learn to dive again as a disabled person. I thought about how I would be forced to modify gear, the way I move and buoyancy. But as I continued to learn, I found many issues that I had never considered. **I got a first-hand opportunity to enlighten myself when we organized a demo event for the [rebreather ](https://www.divesoft.com/en/products/ccr-liberty/philosophy)with the wheelchair sports club [SKV Prague](https://www.skvpraha.org/)**. \n\nI was worried about how this event would go. Despite never having dove with anyone that had disabilities, I have had some experience working with them and always admired their ability to adapt. Thus, I tried to carefully prepare and think of anything that may be an issue. Fortunately, I was not alone. We had the perfect team from Divesoft to help me with the dive equipment and set up, as well as other instructor's experience of working with divers with disabilities. **Thanks to this team, I learned how to work with the disabled in the water**. \n\n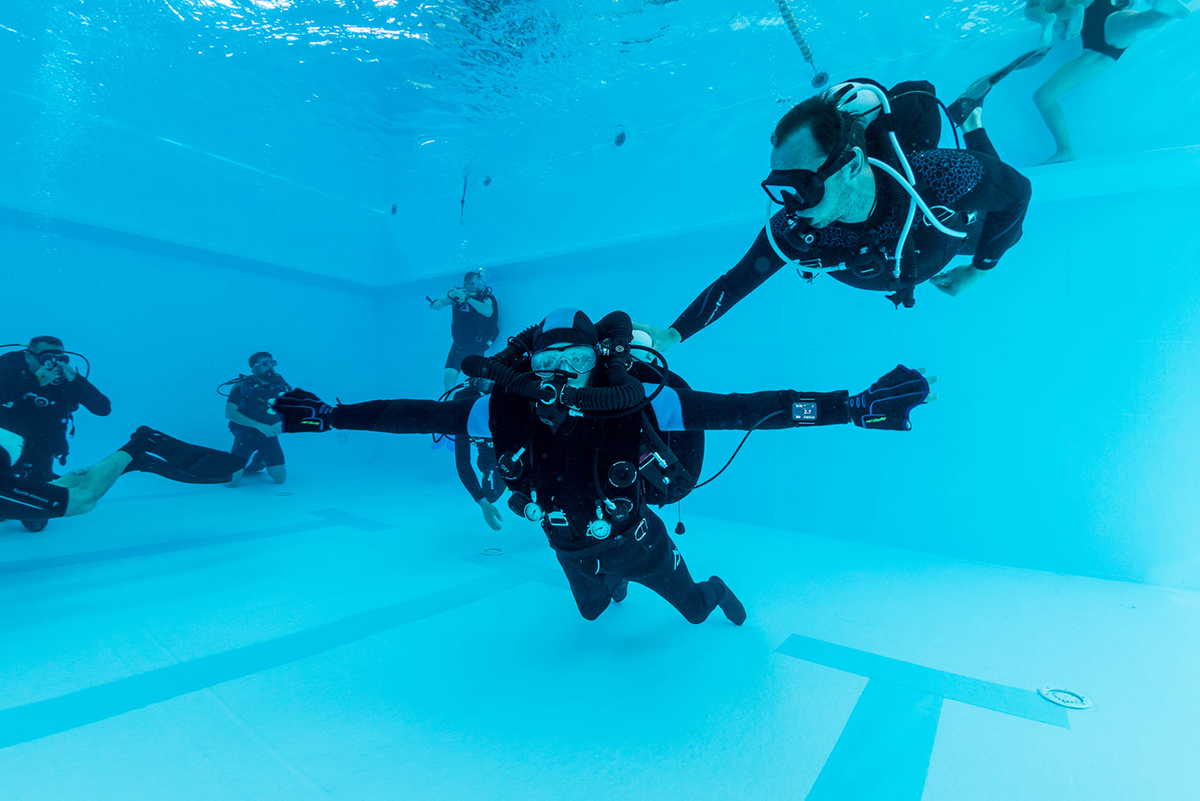\n\nIt should also be noted that the members of SKV Prague are not beginners. Most of them have a complete diving training. **They dive regularly with their instructors to flooded quarries and the annual trip to the sea in Elba, Egypt, or Thailand.** Scuba diving is a great opportunity for them to enjoy the freedom of weightlessness and moving underwater. \n\nEach of the participants had slightly different needs. Some were paralyzed in the lower half of their bodies, and others were even quadriplegics. This means that their arms are partially or completely immobile. Some were able to get into the pool with minimal assistance, others were unable to do so without the help of others. **All of them were already prepared in wetsuits, which they said they can do very well and as quickly as healthy divers.** \n\n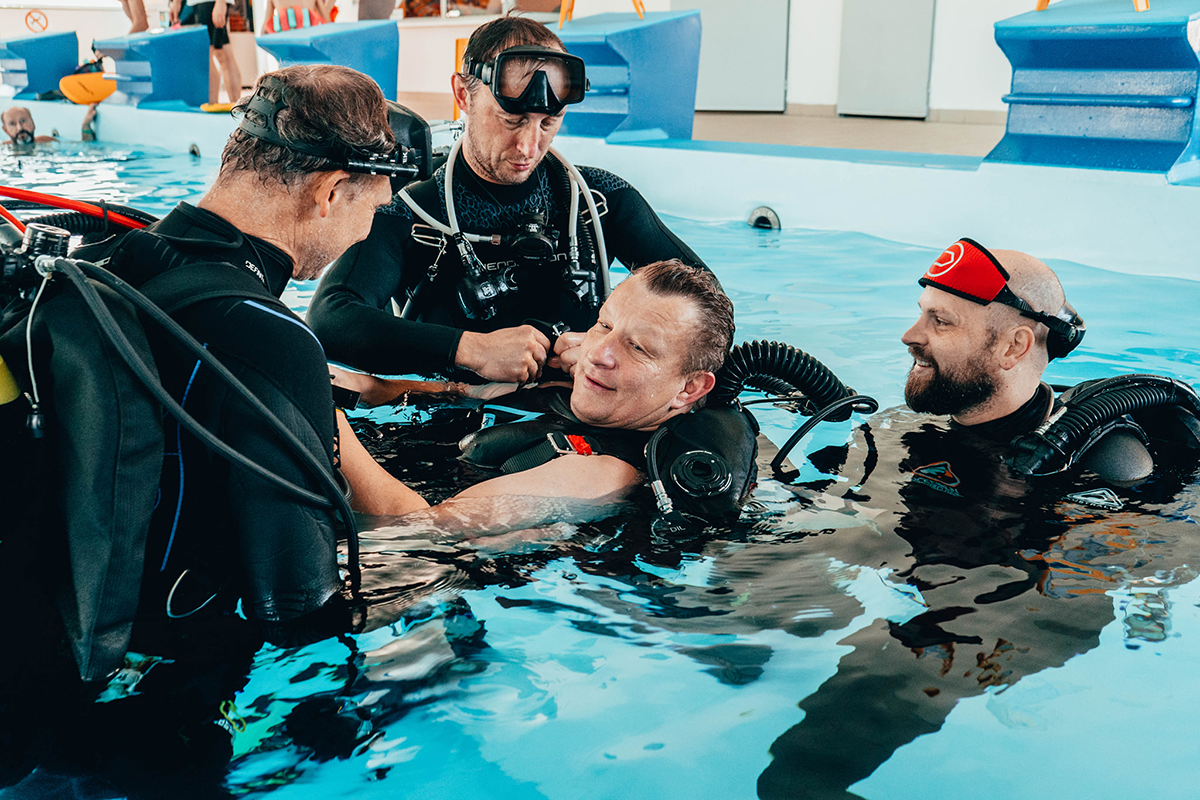\n\nWe were then able to get them into the water and get them comfortably into the rebreather harness after the initial training. This was followed by a test breathing from the apparatus. **As soon as the diver signaled that he was ready, we flipped him face down on the surface, have them breathe for a few seconds and flipped him back face up**. This was so that we and the diver could see if everything was functioning properly and the diver was ready to dive. \n\nCommunication is very interesting. For divers in wheelchairs it is no different since they have their hands to demonstrate clear hand signals, but quadriplegics are quite limited or completely unable to use hand signals. For instructors, this is a big deal because **the only way to react or signal a problem is for the diver to move his/her head or even just the eyes**. \n\n\n\nTherefore, it requires much more concentration on the client than in a normal training or test dive. We absolutely cannot take our eyes off the client for even a second, plus we need help to maintain the ideal breathing position. **The uncontrollable legs combined with a counterlung and front body movements cause a strong heads-up roll**. Thus in the beginning we had to help the client completely until they got used to the new device and learned how to find a good position on their own. \n\nFor quadriplegics, constant physical contact was necessary at all times, but some divers with healthy arms were able to swim on their own after a while. Even behind their mask they could not hide their expressions! **They then commented on their first experiences with the rebreather, amazed at the silence and ease of breathing.** Most of them found it almost strange, but this feeling is quite familiar to anyone who has tried it for the first time with Liberty. You could see it all over their faces that they loved it, but they didn't have the same confidence as with the open circuit they've long gotten used to. They were all extremely grateful for the opportunity to try such a machine and some regretted not being able to take it home or on their next trip to the seaside. Who knows, maybe one day it could happen! \n\n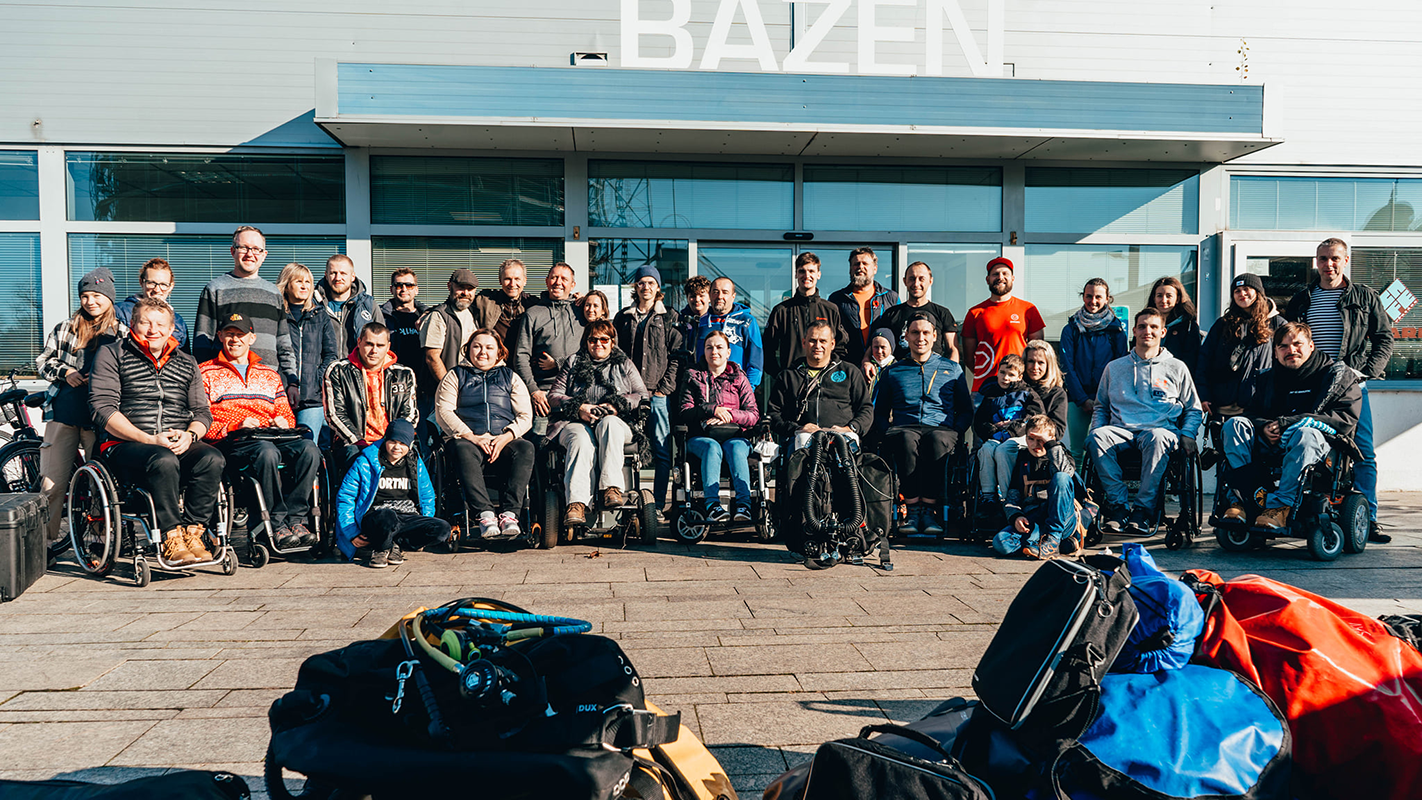\n\nIt is such an inspiration to work with people who are able to cope with their hardship and manage an extraordinary life despite such unimaginably difficult hurdles to face. It is amazing despite having the basic ability to provide for themselves they do not give up their daily routines, current work, and hobbies. Even finding new ones! However, the work that instructors who introduce diving to the handicap do such an incredible job. I was able to see first-hand this important work to help them fulfil their dreams to be free in a weightless world. \n\n* [Jakub Šimánek](https://www.divesoft.com/en/about-us/jakub-simanek), Divesoft Factory IT\n","showTags":false,"showDate":false,"image":{"mimetype":"image/png","size":1158125,"hash":"5f00b760a3f1f32d8c93d173530c17895c749e1f","id":"cl10kem4lmevx07768vjgcota","filename":"25-demo-day-wheelchair.png","category":"divesoft/","type":"image","alt":"Divesoft DEMO day with divers in wheelchairs from SKV team"}},"id":"#2","type":"component","lock":false,"position":1},{"name":"ProductShowcase","data":{"componentTemplateId":"cm9h4wr6ugjv10803yq
2s3tp71"},"id":"#4","type":"component","lock":false,"position":2},{"name":"Footer","data":{"copyrights":"Copyright © 2019 Divesoft LLC All rights reserved.","facebookUrl":"","youtubeUrl":"","instagramUrl":"","contacts":"**Divesoft, s.r.o.** Hálkova 2495 413 01 Roudnice nad Labem Äeská republika Tel.: +420 416 857 057 E-mail: [email protected]"},"id":"#1","type":"component","lock":false,"position":3}],"id":"root","idBuffer":"#5","lastCommit":"afcf32b3-ab7a-48c3-a4f8-37794d233917"}},"annotations":[{"type":"id","generated":true,"id":"PageTranslation:cl10kc5j0ciba0858l2c1hxv9.annotations.0","typename":"PageAnnotation"},{"type":"id","generated":true,"id":"PageTranslation:cl10kc5j0ciba0858l2c1hxv9.annotations.1","typename":"PageAnnotation"},{"type":"id","generated":true,"id":"PageTranslation:cl10kc5j0ciba0858l2c1hxv9.annotations.2","typename":"PageAnnotation"}],"language":{"type":"id","generated":false,"id":"Language:cjv3kwvoj000u083611381c6o","typename":"Language"},"__typename":"PageTranslation"},"PageTranslation:cl10kc5j0ciba0858l2c1hxv9.annotations.0":{"key":"title","value":"Divesoft DEMO day with divers in wheelchairs from SKV team","__typename":"PageAnnotation"},"PageTranslation:cl10kc5j0ciba0858l2c1hxv9.annotations.1":{"key":"perex","value":"Have you ever imagined how your life would change if you went through a car accident, serious health complication or another disaster that could turn everything you know upside down? If you lost an ability that you consider normal and take for granted? What if you lost the ability to walk, see, hear, or move your arms? Which of the things I enjoy doing would I be able to continue to do? ","__typename":"PageAnnotation"},"PageTranslation:cl10kc5j0ciba0858l2c1hxv9.annotations.2":{"key":"image","value":"{\"mimetype\":\"image/png\",\"size\":1158125,\"hash\":\"5f00b760a3f1f32d8c93d173530c17895c749e1f\",\"id\":\"cl10kem4lmevx07768vjgcota\",\"filename\":\"25-demo-day-wheelchair.png\",\"category\":\"divesoft/\",\"type\":\"image\"}","__typename":"PageAnnotation"},"Page:cl16j64oud5z10858zmxo5z3b":{"id":"cl16j64oud5z10858zmxo5z3b","type":{"type":"id","generated":false,"id":"PageType:cjv3l213x004f08366hjufttp","typename":"PageType"},"tags":[],"translations({\"where\":{\"language\":{\"id\":\"cjv3kwvoj000u083611381c6o\"}}})":[{"type":"id","generated":false,"id":"PageTranslation:cl16j64pqd5z80858lr3ktf3v","typename":"PageTranslation"}],"__typename":"Page"},"PageTranslation:cl16j64pqd5z80858lr3ktf3v":{"id":"cl16j64pqd5z80858lr3ktf3v","name":"Firmware","createdAt":"2022-03-25T14:40:24.158Z","content":{"type":"json","json":{"content":[{"name":"Header","data":{"products":[{"title":"Accessories","description":"Backplates, Consumables. Tanks.","img":{"recommendedSizes":{"width":"235","height":"235"}},"url":""},{"title":"Accessories sets","description":"Protection, maintenance, cleaning.","img":{"recommendedSizes":{"width":"235","height":"235"}},"url":""},{"title":"Spare parts","description":"Spare parts and components.","img":{"recommendedSizes":{"width":"235","height":"235"}},"url":""},{"title":"Spare parts kits","description":"Completly Liberty spare parts kits.","img":{"recommendedSizes":{"width":"235","height":"235"}},"url":""}]},"id":"#0","type":"component","lock":false,"position":0},{"name":"DownloadsNew","data":{"backgroundColor":"#f0f0f0","title":"Release notes","subtitle":"","showBreadcrumbs":false,"hideHeader":false,"files":[{"id":"31","subtitle":"The He/O2 analyzer and Solo/ Solo O2 are equipped with a microprocessor whose program (firmware) is continuously updated. You can find below an overview of new features and improvements added so far. We will gladly upgrade your analyzers firmware to the newest version. Please contact us at **[email protected]**."},{"id":"32","title":"Analyzer 2.40","subtitle":"**30th October 2023**\n<br><br>\n**New features** \n* Expected cell voltage displayed during calibration, corresponds to 5-16mV @ air\n* Warning if voltage exceeds range\n* Calibration result check, warning if suspicious values.\n* Fourth main screen, show MOD and END values for 3 ppO2 settings. ppO2 values are configurable, sorted ascending.\n* Configurable p
2pO2 values also in Oxygen only version (were fixed). \n \n**Changes** \n* O2 avaraging used also during calibration\n* END calculation updated, possible to set \"Oxygen is narcotic\" in configuration, according to individual preferences.\n* dropped manufacturing mode for SOLO 3.1","isTitleBold":true},{"title":"Analyzer 2.34","isTitleBold":true,"subtitle":"**6th April 2022**\n<br><br>\n* O2 measurement averaging.\n* He averaging setup using one configuration item only. 1 = no averaging.","url":"","urlText":"Download","id":"1"},{"title":"Analyzer 2.33","isTitleBold":true,"subtitle":"**20th January 2022**\n<br><br>\n* Configurable date format, setting in Measurement Units \n\nISO YYYY-MM-DD \n\nEU DD.MM.YYYY \n\nUS MM/DD/YYYY \n\n\n* changed main screens in Oxygen only version\nO2 calibration gas editor has the same button functionality as other editors\ndefault MOD ppO2 setting set to 1,4 bar (SOLO OXY only)","url":"","urlText":"Download","id":"2"},{"id":"3","subtitle":"**29th November 2021**\n<br><br>\n* Support for Oxygen only version \n* improved factory calibration\n* fixed error in editor, when edited value is already out of range. Up/down sets value to nearest limit.","title":"Analyzer 2.32","isTitleBold":true},{"id":"4","subtitle":"**20th August 2021**\n<br><br>\n* corrected service screen Sound (computed)\n* improved He probe autosetup\n* corrected cursor shape in editor","title":"Analyzer 2.31","isTitleBold":true},{"id":"5","title":"Analyzer 2.30","subtitle":"**20th August 2021**\n<br><br>\n* improved He probe autosetup","isTitleBold":true},{"id":"6","title":"Analyzer 2.29b","subtitle":"**16th October 2020**\n<br><br>\n* Support for new MCU in SOLO devices","isTitleBold":true},{"id":"7","subtitle":"**31st January 2020**\n<br><br>\n* Calibration data not erased when \"Reset to default\" is applied (introduced in 2.28)","title":"Analyzer 2.29a","isTitleBold":true},{"id":"8","title":"Analyzer 2.29","isTitleBold":true,"subtitle":"**16th October 2019**\n<br><br>\n* new Preferences option \"Nitrogen source\", selectable Athmospheric | Pure\n* improved He probe autosetup\n* minimal temperature increased to 5°C(41°F)\n"},{"id":"9","subtitle":"**12th June 2019**\n<br><br>\n* support for barometric pressure sensor (HW rev. 2.5)","title":"Analyzer 2.26","isTitleBold":true},{"id":"10","title":"Analyzer 2.25","isTitleBold":true,"subtitle":"**21st September 2018**\n<br><br>\n* improved probe autosetup\n* accumulator charge gauge has better voltage limits (HW 2.4 only)\n* O2 range overload alarm active in all O2 measurements (e.g. calibration, mix solver)\n"}
2,{"id":"11","title":"Analyzer 2.24","isTitleBold":true,"subtitle":"**10th July 2017**\n<br><br>\n* real time clock support\n* dropped manufacturing mode for old HW revisions\n"},{"id":"12","subtitle":"**22nd May 2017**\n<br><br>\n* service release","title":"Analyzer 2.23","isTitleBold":true},{"id":"13","title":"Analyzer 2.22","isTitleBold":true,"subtitle":"**12th September 2016**\n<br><br>\n* O2 overload detection\n* USB output contains all available measured values\n* error corrections\n"},{"id":"14","title":"Analyzer 2.21a (update 6 Feb 2015)","isTitleBold":true,"subtitle":"**1st February 2013**\n<br><br>\n* Output debug screen in Service mode"},{"id":"15","title":"Analyzer 2.20a (correction 16 Jan 2013)","isTitleBold":true,"subtitle":"**12th December 2012**\n<br><br>\n* gas purity improved, alarms can be used"},{"id":"16","title":"Analyzer 2.19","isTitleBold":true,"subtitle":"**25th July 2012**\n<br><br>\n* new function Gas purity\n* cursor keys in editor swapped (more logical)\n* corrected startup sequence (LCD version only) (correction 14 Sep 2012)\n"}
2,{"id":"17","title":"Analyzer 2.18","isTitleBold":true,"subtitle":"**8th February 2012**\n<br><br>\n* corrected battery check limits\n* adjustable He measurement precision\n"},{"id":"18","title":"Analyzer 2.16","isTitleBold":true,"subtitle":"**17th May 2011**\n<br><br>\n* barometric pressure correction for O2 measurement\n* serial line output can be sent every n-th measurement\n* DOWN arrow to show battery status\n"},{"id":"19","title":"Analyzer 2.14","isTitleBold":true,"subtitle":"**14th July 2010**\n<br><br>\n* Ohmmeter default mode changed."},{"id":"20","subtitle":"**11th June 2009**\n<br><br>\n*\tfixed error during DC voltage measuring (there was an absurd number while measuring on the edge of the range).","title":"Analyzer 2.12","isTitleBold":true},{"id":"21","title":"Analyzer 2.10","isTitleBold":true,"subtitle":"**22nd May 2008**\n<br><br>\n* fixed error displaying MOD in feet"},{"id":"22","title":"Analyzer 2.9","isTitleBold":true,"subtitle":"**20th April 2008**\n<br><br>\n* added \"Calibration aborted\" report when Esc is pressed during O2 calibration\n* added target temperature setting (in configuration) of temperature drop for calculation of pressure after bottle refrigeration (when additional thermometer + contact thermometer are used)\n"},{"id":"23","subtitle":"**11th October 2007**\n* added brightness increase by using the UP key\n* added external thermometer input\n","isTitleBold":true,"title":"Analyzer 2.8"},{"id":"24","title":"Analyzer 2.7","isTitleBold":true,"subtitle":"**13th February 2007**\n<br><br>\n* adjustable ppO2"},{"id":"25","title":"Analyzer 2.6","isTitleBold":true,"subtitle":"**7th February 2007**\n<br><br>\n* added functions for connecting a pressure sensor\n* added Hold function\n* changed keys in sim and mix\n"},{"id":"26","title":"Analyzer 2.5","isTitleBold":true,"subtitle":"**18th January 2007**\n<br><br>\n* added detection of argon and other gases"},{"id":"27","subtitle":"**10th January 2007**\n<br><br>\n* detection of battery charge was adjusted; now it measures continuously, not only after starting the analyzer.\n* in the mode of continuous measuring with alarm turned on, the alarm will beep with a report of a critical level of the battery charge.\n","title":"Analyzer 2.4","isTitleBold":true},{"id":"28","title":"Analyzer 2.3","isTitleBold":true,"subtitle":"**1st December 2006**\n<br><br>\n* the mix calculator was split into two parts: mix solver and mix simulator."},{"id":"29","title":"Analyzer 2.2","isTitleBold":true,"subtitle":"**22nd November 2006**\n<br><br>\n* display of the mixture compound suspended in the mixing caculator if the pressure = 0.\n* fixed error while displaying mixing calculator results in mode 0 and not zero pressure of initial mixture\n"},{"id":"30","title":"Analyzer 2.1","isTitleBold":true,"subtitle":"**9th October 2006**\n<br><br>\n*\tfirst release"}],"activeTab":"32"},"id":"#2","type":"component","lock":false,"position":3},{"name":"Footer","data":{"copyrights":"Copyright © 2019 Divesoft LLC All rights reserved.","facebookUrl":"","youtubeUrl":"","instagramUrl":"","contacts":"**Divesoft, s.r.o.** Hálkova 2495 413 01 Roudnice nad Labem Äeská republika Tel.: +420 416 857 057 E-mail: [email protected]"},"id":"#1","type":"component","lock":false,"position":4}],"id":"root","idBuffer":"#5","lastCommit":"e742e0e8-6dc6-46f5-b3a8-e7d1b2dc123f"}},"annotations":[],"language":{"type":"id","generated":false,"id":"Language:cjv3kwvoj000u083611381c6o","typename":"Language"},"__typename":"PageTranslation"},"Page:cl1ou3jiwegqa0858xyrb0fo3":{"id":"cl1ou3jiwegqa0858xyrb0fo3","type":{"type":"id","generated":false,"id":"PageType:cjv3l213x004f08366hjufttp","typename":"PageType"},"tags":[],"translations({\"where\":{\"language\":{\"id\":\"cjv3kwvoj000u083611381c6o\"}}})":[{"type":"id","generated":false,"id":"PageTranslation:cl1ou3jj9egqh0858uqemhhux","typename":"PageTranslation"}],"__typename":"Page"},"PageTranslation:cl1ou3jj9egqh0858uqemhhux":{"id":"cl1ou3jj9egqh0858uqemhhux","name":"#8302_analyzer-solo-o2_cz","createdAt":"2022-04-07T10:06:10.340Z","content":{"type":"json","json":{"content":[{"name":"Header","data":{"products":[{"title":"Accessories","description":"Backplates, Consumables. Tanks.","img":{"recommendedSizes":{"width":"235","height":"235"}},"url":""},{"title":"Accessories sets","description":"Protection, maintenance, cleaning.","img":{"recommendedSizes":{"width":"235","height":"235"}},"url":""},{"title":"Spare parts","description":"Spare parts and components.","img":{"recommendedSizes":{"width":"235","height":"235"}},"url":""}
2,{"title":"Spare parts kits","description":"Completly Liberty spare parts kits.","img":{"recommendedSizes":{"width":"235","height":"235"}},"url":""}]},"id":"#0","type":"component","lock":false,"position":0},{"name":"SectionDivider","data":{"title":"Uživatelská pÅÃruÄka","skipToC":false},"id":"#115","type":"component","lock":false,"position":1},{"name":"ProductShowcase","data":{"backgroundColor":"#ffffff","isTextDark":true,"isImageRight":true,"image":{"mimetype":"image/png","size":274302,"hash":"8fa1f1400e1916d0efe7ce00329e405fb32ef028","id":"ckyslvk89wxk80776fw45stch","filename":"8302-divesoft-analyzer-solo-o2-p-01-1080x1080-w.png","category":"divesoft/","type":"image"},"imageMobile":{},"title":"Uživatelská pÅÃruÄka","subtitle":"Analyzer SOLO O2","description":"version 2022/02/02 \n\n#8302\n\n### ROZPRACOVANE!!!!","hideDescriptionOnMobile":false,"areButtons":false,"firstTitle":"Learn more >","firstUrl":"","secondTitle":"Configurator >","secondUrl":""},"id":"#46","type":"component","lock":false,"position":2},{"name":"Divider","data":{"color":"darkGray"},"id":"#47","type":"component","lock":false,"position":3},{"name":"SectionDivider","data":{"title":"Obsah","skipToC":false},"id":"#116","type":"component","lock":false,"position":4},{"name":"TextBlock","data":{"text":"### **Obsah**\n\nBezpeÄnostnà upozornÄnà \n01. O verzÃch firmwaru a hardwaru \n01.1\tHardwarové omezeni \n02. Princip funkce \n03. Popis analyzátoru \n04. Ovládánà \n05. MÄÅenà koncentrace O2 a He \n06. Režimy zobrazenà \n06.1 Kalibrace kyslÃkového senzoru \n07. DalÅ¡Ã funkce \n07.1 Kontinuálnà analýza \n07.2 VýpoÄet mÃchánà plynů \n07.3 Simulace mÃchánà plynů \n07.4 Okolnà tlak \n08. Zvláštnà pÅÃsluÅ¡enstvà \n08.1 Regulátor průtoku \n09. Nastavenà \n09.1 Základnà režim \n09.2 Jednotky mÄÅenà \n09.3 MÃchánà plynů \n09.4 Kontinuálnà analýza \n10. NabÃjenà a stav baterie \n11. Ãdržba \n11.1 VýmÄna baterie \n11.2 VýmÄna kyslÃkového senzoru \n11.3 SeÅÃzenà průtoku \n11.4 Demontáž pÅÃstroje \n12. PÅipojenà k poÄÃtaÄi \n13. Závady a jejich odstranÄnà \n13.1 Chybová hlášenà \n13.2 Chybné chovánà pÅÃstroje \n14. Technické údaje ","textLarge":false,"imageOnRight":true,"image":{"recommendedSizes":{"width":"420","height":"280"}},"imageMobile":{"recommendedSizes":{"width":"750","height":"500"}}},"id":"#48","type":"component","lock":false,"position":5},{"name":"Divider","data":{"color":"darkGray"},"id":"#49","type":"component","lock":false,"position":6},{"name":"SectionDivider","data":{"title":"BezpeÄnostnà upozornÄnÃ","skipToC":false},"id":"#117","type":"component","lock":false,"position":7},{"name":"TextBlock","data":{"text":"### **BezpeÄnostnà upozornÄnÃ**\n\nAnalyzátor je urÄen pro mÄÅenà obsahu kyslÃku a helia ve smÄsi vzduchu, kyslÃku a helia. Nelze jej použÃt pro analýzu smÄsà obsahujÃcÃch jiné plyny, tedy napÅÃklad ani pro smÄsi pÅipravené z jiných než Äistých plynů nebo smÄsÃ, ve kterých je vzduch nahrazen Äistým dusÃkem (bez vzduÅ¡ného argonu). \n\nFyzikálnà a chemický princip použitých Äidel nezaruÄuje, že Äidla budou selektivnÄ citlivá na konkrétnà plyn (kyslÃk, helium), ale existuje celá Åada plynů, na které Äidla reagujÃ. Složenà plynu ukázané analyzátorem proto samo o sobÄ jeÅ¡tÄ neznamená, že by skuteÄné složenà smÄsi bylo shodné se zobrazeným údajem.Zobrazené složenà smÄsi je neplatné pokud zároveÅ technologie mÃchánà smÄsi nezaruÄuje, že ve smÄsi nejsou jiné plyny než vzduch, Äistý kyslÃk a Äisté helium. \n\nAnalyzátor nenà úÅednÄ ovÄÅené mÄÅidlo. Výsledky mÄÅenà jsou pouze informativnà a nenà je možné použÃt tam, kde je požadováno úÅednà ovÄÅenà mÄÅidla. \n\nPÅi analýze smÄsà v pÅÃpadech, kdy by nesprávné složenà smÄsi mohlo způsobit hmotnou Å¡kodu, újmu na zdravà nebo ohroženà zdravà nebo života, tedy napÅÃklad v pÅÃpadÄ dýchacÃch smÄsà pro potápÄnÃ, se nesmà výsledek analýzy považovat za potvrzenà správného složenà smÄsi. V tÄchto pÅÃpadech lze analyzátor použÃt pouze jako pomůcku pro zvýšenà pravdÄpodobnosti, že bude zjiÅ¡tÄno nesprávné složenà smÄsi pÅed jejÃm použitÃm.Správnost složenà smÄsi musà být dána technologià jejà pÅÃpravy. \n\nSprávná pÅÃprava dýchacÃch smÄsà pro potápÄnà (nitrox â vzduch obohace
2ný kyslÃkem, trimix â smÄs vzduchu, kyslÃku a helia, heliox â smÄs kyslÃku a helia) vyžaduje zvláštnà znalosti a zkuÅ¡enosti, které je možné zÃskat napÅÃklad ve vhodném kursu.Bez aplikace tÄchto znalostà může dojÃt k pÅÃpravÄ nesprávné smÄsi i pÅes zdánlivÄ správný výsledek analýzy.K takové situaci může dojÃt mimo jiné zanedbánÃm vlivu teploty a kompresibility, nedostateÄným promÃchánÃm smÄsi a dalÅ¡Ãmi faktory. \n\nMÄjte na pamÄti, že analyzátor se může porouchat Äi být poÅ¡kozen a že kyslÃkové Äidlo z principu podléhá stárnutÃ, ÄÃmž docházà ke zhorÅ¡ovánà jeho vlastnostÃ.NamÄÅený údaj proto vždy ovÄÅte jeÅ¡tÄ jiným způsobem, jako je zaruÄená preciznà pÅÃprava smÄsi, jiná analytická metoda a podobnÄ.NamÄÅený údaj musà být též kriticky posouzen zdravým rozumem a pokud se liÅ¡Ã od oÄekávatelné tolerance pÅesnosti mÃchánÃ, musà být považován za nesprávný. ","textLarge":false,"imageOnRight":true,"image":{"recommendedSizes":{"width":"420","height":"280"}},"imageMobile":{"recommendedSizes":{"width":"750","height":"500"}}},"id":"#50","type":"component","lock":false,"position":8},{"name":"Divider","data":{"color":"darkGray"},"id":"#51","type":"component","lock":false,"position":9},{"name":"SectionDivider","data":{"title":"01. O verzÃch firmwaru a hardwaru","skipToC":false},"id":"#118","type":"component","lock":false,"position":10},{"name":"TextBlock","data":{"text":"### **01. O verzÃch firmwaru a hardwaru**\n\nAnalyzátor SOLO je vybaven mikroprocesorem, jehož program (firmware) je průbÄžnÄ aktualizován. \n\nTato pÅÃruÄka je urÄena pro vydánà firmwaru 2.29, ale lze ji použÃt\nna jakoukoli verzi hardwaru nebo firmwaru. \n\nPÅÃruÄka je primárnÄ napsána pro hardware verze 3.0.","textLarge":false,"imageOnRight":true,"image":{"recommendedSizes":{"width":"420","height":"280"}},"imageMobile":{"recommendedSizes":{"width":"750","height":"500"}}},"id":"#52","type":"component","lock":false,"position":11},{"name":"Divider","data":{"color":"darkGray"},"id":"#53","type":"component","lock":false,"position":12},{"name":"SectionDivider","data":{"title":"01.1 Hardwarová omezenÃ","skipToC":false},"id":"#119","type":"component","lock":false,"position":13},{"name":"TextBlock","data":{"text":"### **01.1 Hardwarová omezenÃ**\n3.0 Plná funkÄnost","textLarge":false,"imageOnRight":true,"image":{"recommendedSizes":{"width":"420","height":"280"}},"imageMobile":{"recommendedSizes":{"width":"750","height":"500"}}},"id":"#54","type":"component","lock":false,"position":14},{"name":"Divider","data":{"color":"darkGray"},"id":"#55","type":"component","lock":false,"position":15},{"name":"SectionDivider","data":{"title":"02. Princip funkce","skipToC":false},"id":"#120","type":"component","lock":false,"position":16},{"name":"TextBlock","data":{"text":"### **02. Princip funkce**\n\nPopsaný princip mÄÅenà platà pouze pro smÄsi vzduchu, kyslÃku a helia. \n\nPro stanovenà obsahu kyslÃku je použit elektrochemický sensor. NapÄtà na výstupu senzoru je úmÄrné obsahu kyslÃku v analyzované smÄsi. Senzor má omezenou životnost a úmÄrnost závislosti napÄtà na obsahu kyslÃku se bÄhem doby mÄnÃ, proto je nutné jej pravidelnÄ kaliborovat. Lze zvolit mezi jednobodovou, dvoubodovou nebo tÅÃbodovou kalibracÃ. Jednobodová kalibrace je rychlá, zejména pokud se jako kalibraÄnà smÄs zvolà vzduch. Pro vyÅ¡Å¡Ã pÅesnost mÄÅenà se použÃvá dvoubodová kalibrace se dvÄma různými se smÄsmi, zpravidla vzduchem a Äistým kyslÃkem. Pro výraznÄ hypoxické smÄsi, tj.smÄsi obsahujÃcà ménÄ než asi 15 % kyslÃku se doporuÄuje použÃt tÅÃbodovou kalibraci. Jako tÅetà plyn pro kalibraci má být v tomto pÅÃpadÄ použit plyn s nulovým obsahem kyslÃku, tedy Äisté helium pÅÃpadnÄ argon.\n\nObsah helia se stanovuje na základÄ mÄÅenà rychlosti zvuku v analyzované smÄsi. Rychlost zvuku závisà na obsahu helia, kyslÃku a na teplotÄ smÄsi. Závislost rychlosti zvuku na tlaku je malá a v okolà normálnÃho atmosférického tlaku ji lze zanedbat.\n\nPÅi teplotÄ 0°C je rychlost zvuku pÅibližnÄ 970 m/s v Äistém heliu, 330 m/s ve vzduchu a 315 m/s v Äistém kyslÃku. ZvýšenÃm teploty o jeden stupeÅ se ryc
2hlost zvuku zvýšà pÅibližnÄ o 0.175 %. Rychlost zvuku ve smÄsi je popsána nelineárnà funkcà teploty, obsahu kyslÃku a obsahu helia.\n\nObsah helia se urÄuje z namÄÅené rychlosti zvuku, teploty smÄsi a obsahu kyslÃku. PÅi mÄÅenà koncentrace helia je proto důležité mÃt správnÄ kalibrovaný kyslÃkový senzor nebo znát obsah kyslÃku a zadat jej do pÅÃstroje.\n\nRychlost zvuku se mÄÅà pÅÃmo jako Äasový rozdÃl mezi pÅijetÃm akustického impulsu dvÄma mikrofony. MÄÅà se stÅÃdavÄ v obou smÄrech, aby bylo možné výpoÄtem eliminovat proudÄnà plynu v sondÄ. Akustické impulsy jsou slyÅ¡et jako slabé cvakánà v režimu mÄÅenà helia.\n\nPlyn se do analyzátoru pÅivádà z omezovaÄe průtoku, který je pÅipojen na lahev se stlaÄeným plynem a pomocà trysky omezuje průtok odebÃraného plynu na množstvà potÅebné pro analýzu.\n","textLarge":false,"imageOnRight":true,"image":{"recommendedSizes":{"width":"420","height":"280"}},"imageMobile":{"recommendedSizes":{"width":"750","height":"500"}}},"id":"#56","type":"component","lock":false,"position":17},{"name":"Divider","data":{"color":"darkGray"},"id":"#57","type":"component","lock":false,"position":18},{"name":"SectionDivider","data":{"title":"03. Popis analyzátoru","skipToC":false},"id":"#121","type":"component","lock":false,"position":19},{"name":"TextBlock","data":{"text":"### **03. Popis analyzátoru**\n\nLehké a robustnà tÄlo je vyrobeno z ABS-PC. \n\nNa pÅednà stranÄ analyzátor display OLED na kterém se zobrazujà namÄÅené hodnoty a membránová klávesnice. \n\nMÄÅený plyn se pÅivádà do vstupu analyzované smÄsi na zadnà stranÄ analyzátoru, procházà senzorem koncentrace helia, odtud je veden do bloku kyslÃkového Äidla a je vypouÅ¡tÄn do vzduchu výfukem smÄsi. menovitý průtok analyzované smÄsi je 0.2 L/min. \n\nAnalyzátor je napájen vestavÄnou bateriÃ, nabÃjenà je možné pÅes USB-C konektor na stranÄ analyzátoru.\n","textLarge":false,"imageOnRight":true,"image":{"recommendedSizes":{"width":"420","height":"280"}},"imageMobile":{"recommendedSizes":{"width":"750","height":"500"}}},"id":"#58","type":"component","lock":false,"position":20},{"name":"Image","data":{"firstImage":{"mimetype":"image/png","size":337036,"hash":"c0022000e33f111119dfd3d39f5be69d36a22092","id":"ckycvc5u8rf8j0776qkzz9a30","filename":"8302-divesoft-analyzer-solo-o2-qr01.png","category":"divesoft/","type":"image"},"secondImage":{}},"id":"#59","type":"component","lock":false,"position":21},{"name":"Divider","data":{"color":"darkGray"},"id":"#60","type":"component","lock":false,"position":22},{"name":"SectionDivider","data":{"title":"04. OvládánÃ","skipToC":false},"id":"#122","type":"component","lock":false,"position":23},{"name":"TextBlock","data":{"text":"### **04. OvládánÃ**\n\nAnalyzátor se ovládá tlaÄÃtky na pÅednÃm panelu. \n\nZapne se stisknutÃm tlaÄÃtka **| ON OFF |** asi po dobu jedné sekundy. Po zapnutà probÄhne automatická kontrola pÅÃstroje a analyzátor automaticky pÅejde do režimu mÄÅenÃ. Po dobu stisknutà tohoto tlaÄÃtka se zobrazuje kód verze firmware a výrobnà ÄÃslo analyzátoru. PotÅebujete-li tyto údaje pÅeÄÃst, staÄà podržet tlaÄÃtko pÅi zapÃnánà déle. \n\nZapnutý analyzátor se vypne opÄt jednosekundovým stisknutÃm tlaÄÃtka **| ON OFF |**. \n\nTlaÄÃtkem **| MENU |** se zobrazà nabÃdka možných akcÃ. NabÃdka se v jednotlivých režimech mÄÅenà liÅ¡Ã podle funkcÃ, které jsou pro daný režim relevantnÃ. \n\nTlaÄÃtkem se volà vybraná položka menu, potvrzuje zmÄnÄná hodnota nebo provádà pÅipravená akce. Vybranou položku menu lze zvolit též opakovaným stisknutÃm tlaÄÃtka **| MENU |**. \n\nTlaÄÃtko **| ESC |** sloužà k ukonÄenà menu nebo k návratu z režimu editace hodnoty bez uloženà zmÄnÄné hodnoty. \n\nTlaÄÃtka **| Ë |** a **| Ë
|** sloužà k listovánà v menu nebo ke zmÄnÄ hodnoty ÄÃsla nad kursorem. \n\nTlaÄÃtko **| MODE |**.sloužà ke zmÄnÄ režimu zobrazenà nebo ke zmÄnÄ polohy kursoru v režimu editace ÄÃsla. \n\nDalÅ¡Ã funkce tlaÄÃtek jsou popsány v pÅÃsluÅ¡ných kapitolách. ","textLarge":false,"imageOnRight":true,"image":{"recommendedSizes":{"width":"420","height":"280"}},"imageMobile":{"recommendedSizes":{"width":"750","height":"500"}}},"id":"#61","type":"component","lock":false,"position":24},{"name":"Image","data":{"firstImage":{"mimetype":"image/png","size":48453,"hash":"21087ec4716565868865a78e8aa4a33ed8c2f553","id":"ckycvcqusrf910776gfmz1er6","filename":"8302-divesoft-analyzer-solo-o2-qr02.png","category":"divesoft/","type":"image"},"secondImage":{"dynamiclySourcedImage":" "}},"id":"#62","type":"component","lock":false,"position":25},{"name":"Divider","data":{"color":"darkGray"},"id":"#63","type":"component","lock":false,"position":26},{"name":"SectionDivider","data":{"title":"05. MÄÅenà koncentrace O<sub>2</sub> a He","skipToC":false},"id":"#123","type":"component","lock":false,"position":27},{"name":"TextBlock","data":{"text":"### **05. MÄÅenà koncentrace O<sub>2</sub> a He**\n\nV základnà konfiguraci se použÃvá omezovaÄ průtoku s tryskou, viz obrázek. \n\nOmezovaÄ pÅipojte na lahev se stlaÄeným plynem a hadiÄkou jej propojte s analyzátorem.HadiÄka je do obou dÃlů lehce zasunuta. \n\nAnalyzátor je po zapnutà pÅepnut do režimu mÄÅenà koncentrace helia a kyslÃku, proto nemusÃte nic nastavovat.OtevÅete ventil lahve, aby zaÄal proudit plyn.PÅibližnÄ po 5â10 sekundách se ukáže složenà plynu.Pokud je v lahvi výraznÄ nižšà tlak než 200 barů, průtok plynu omezovaÄem průtoku bude menÅ¡Ã a doba ustálenà výsledku mÄÅenà bude o nÄco delÅ¡Ã. \n\nTlaÄÃtkem **| OK |** můžete pozastavit a dalÅ¡Ãm stisknutÃm opÄt spustit mÄÅenÃ.PÅi pozastaveném mÄÅenà zůstávajà zobrazeny poslednà zmÄÅené hodnoty.Pozastavené mÄÅenà je indikováno textem **| HOLD |** na prvnÃm Åádku displaye.BÄhem mÄÅenà lze použÃt tlaÄÃtko **| Ë |** pro doÄasné zvýšenà jasu displaye na maximum (napÅÃklad je-li display osvÄtlen sluncem). \n\nPo ukonÄenà mÄÅenà uzavÅete ventil lahve a povolenÃm odvzduÅ¡ÅovacÃho ventilu (zpravidla staÄà o ½ otáÄky) vypusÅ¥te pÅetlak plynu, aby bylo možné omezovaÄ průtoku odÅ¡roubovat z ventilu lahve. \nUpozornÄnÃ: \nNevyÅ¡roubuje vÅeteno odvzuÅ
2¡ÅovacÃho ventilu úplnÄ, uvnitÅ je ocelová kuliÄka která by po otevÅenà ventilu lahve mohla vyletÄt a nÄkoho zranit nebo se ztratit.","textLarge":false,"imageOnRight":true,"image":{"recommendedSizes":{"width":"420","height":"280"}},"imageMobile":{"recommendedSizes":{"width":"750","height":"500"}}},"id":"#64","type":"component","lock":false,"position":28},{"name":"Image","data":{"firstImage":{"mimetype":"image/png","size":230527,"hash":"61dc4f2dac271abb0ff4fc8b2e5f1c80844a3b0b","id":"ckysmg9f4wy3o0776vqh21mxw","filename":"8302-divesoft-analyzer-solo-o2-m-s06.png","category":"divesoft/","type":"image"},"secondImage":{}},"id":"#65","type":"component","lock":false,"position":29},{"name":"Divider","data":{"color":"darkGray"},"id":"#66","type":"component","lock":false,"position":30},{"name":"SectionDivider","data":{"title":"06. Display modes","skipToC":false},"id":"#124","type":"component","lock":false,"position":31},{"name":"TextBlock","data":{"text":"### **06. Display modes**\n\nPo zapnutà je analyzátor standardnÄ v režimu mÄÅenà O2/He v jednom ze dvou formátů zobrazenÃ. \n\nZákladnà formát ukazuje na samostatných ÅádcÃch obsah kyslÃku a helia ve smÄsi v procentech a pro informaci také teplotu, pÅi které byl plyn mÄÅen. \n\nV základnÃm formátu se po zahájenà mÄÅenà může zobrazit koncentrace helia na nÄkolik málo sekund v hranatých závorkách. To znamená, že výsledek mÄÅenà je pÅedbÄžný s nižšà pÅesnostÃ. Po zmizenà závorek má výsledek plnou pÅesnost. \n\nV pÅÃpadÄ chyby mÄÅenÃ, napÅÃklad pÅi tlakovém rázu plynu v pÅÃvodnà hadiÄÄce, údaj namÄÅené koncentrace helia zmizà na dobu po kterou chybový stav trvá.\nPÅehledný formát ukazuje složenà tak, jak obvykle potápÄÄi nazývajà dýchacà smÄsi: \nâ Air: vzduch s obsahem kyslÃku mezi 20.5 a 21.5 %. \nâ EAN, napÅÃklad EAN 36, je vzduch obohacený kyslÃkem, v tomto pÅÃpadÄ na 36 % kyslÃku. \nâ TMX, napÅÃklad TMX 18/45, je trimix neboli smÄs vzduchu, kyslÃku a helia, v tomto pÅÃpadÄ s obsahem 18 % kyslÃku a 45 % helia. \nâ Heliox, napÅÃklad Heliox 16 % O2, je smÄs kyslÃku a helia. \nâ Foul Air, napÅÃklad Foul Air (10 % O2), je zkažený Äi vydýchaný vzduch se snÞeným obsahem kyslÃku. Z plynů urÄených k pÅÃpravÄ dýchacÃch smÄsÃ, které má potápÄÄ bÄžnÄ k dispozici (vzduch, kyslÃk, helium) se nedá namÃchat, proto jeho zjiÅ¡tÄnà svÄdÄà o nÄjakém problému. Může to znamenat probÃhajÃcà korozi v lahvi nebo pÅimÃchánà argonu, oxidu uhliÄitého nebo jiného plynu ke smÄsi. Takový vzduch nesmÃte v žádném pÅÃpadÄ použÃt k dýchánÃ. \n\nV pÅehledném formátu jsou kromÄ složenà smÄsi zobrazeny jeÅ¡tÄ pÅibližné hodnoty maximálnà hloubky (MOD, maximum operating depth) a ekvivalentnà narkotické hloubky (END, equivalent narcotic depth). \n\nMOD udává hloubku, do které se může potápÄÄ s danou smÄsà krátkodobÄ potopit za jinak ideálnÃch podmÃnek.Pro výpoÄet je použit limit parciálnÃho tlaku kyslÃku 160 kPa, uvažuje se moÅská voda a atmosférický tlak na úrovni hladiny moÅe.Ãdaj sloužà pouze pro orientaci a pro skuteÄný ponor jej musÃte vypoÄÃtat na základÄ dat konkrétnÃho ponoru. \nPro výpoÄet je použit vzorec \n\nkde \n\n\tPmax je maximálnà pÅÃpustný parciálnà tlak kyslÃku, zvoleno 160000 Pa \n\tP0 je atmosférický tlak na hladinÄ moÅe 101325 Pa \n\tRO2 je relativnà molárnà koncentrace kyslÃku v rozsahu 0 až 1 \n\tÏ je hustota moÅské vody 1028 kg mâ3 \n\tg je normálnà tÃhové zrychlenà 9.80665 m sâ2 \n","textLarge":false,"imageOnRight":true,"image":{"recommendedSizes":{"width":"420","height":"280"}},"imageMobile":{"recommendedSizes":{"width":"750","height":"500"}}},"id":"#67","type":"component","lock":false,"position":32},{"name":"Image","data":{"firstImage":{"mimetype":"image/jpeg","size":15225,"hash":"a898843d6cec9ef781476fd835a750007b81d819","id":"ckolgb7tx6hks07767emuy07n","filename":"8313-divesoft-analyzer-he-o2-manual-06.jpg","category":"divesoft/","type":"image"},"secondImage":{}},"id":"#68","type":"component","lock":false,"position":33},{"name":"TextBlock","data":{"text":"**UpozornÄnÃ: Maximálnà hloubka (MOD) vypoÄtená pro skuteÄný ponor je zpravidla menÅ¡Ã než hloubka udávaná anal
2yzátorem.**\n\nEND udává hloubku, ve které je narkotický úÄinek smÄsi na potápÄÄe shodný s narkotickým úÄinkem vzduchu. Udává se v procentech hloubky ponoru se vzduchem, tedy napÅÃklad END 45 % znamená, že v hloubce 100 metrů s analyzovanou smÄsà bude potápÄÄ pociÅ¥ovat narkotické úÄinky stejné, jako kdyby se potápÄl do 45 metrů se vzduchem. Pro výpoÄet END existuje Åada různých vzorců, které dávajà odliÅ¡né výsledky. Ãdaj ukazovaný analyzátorem použÃvá pouze jeden z nich a sloužà pouze pro orientaci. Pro skuteÄný ponor musÃte vypoÄÃtat END na základÄ dat konkrétnÃho ponoru a vámi vyzkouÅ¡ených a preferovaných vzorců. \n\nPro výpoÄet je použit vzorec \nEND = 100 â 77 RHe \n\nkde\n\n\tRHe je relativnà molárnà koncentrace helia v rozsahu 0 až 1 \n\nVzorec vycházà z pomÄrů \nâ relativnà narkotický potenciál dusÃku = 1 \nâ relativnà narkotický potenciál kyslÃku = 1 \nâ relativnà narkotický potenciál helia = 0.23 \n \n\n**UpozornÄnÃ: Narkotická hloubka (END) udávaná kalkulátorem je pouze orientaÄnà a liÅ¡Ã se od hodnot END vypoÄtených jinými metodikami.** \n\n**UpozornÄnÃ: Pro stanovenà hodnot END a MOD vždy použÃvejte postupy a vzorce, které jste se nauÄili ve specializovaných kurzech potápÄnà se smÄsemi.Hodnoty udávané analyzátorem jsou pouze orientaÄnà a nestaÄà pro správné naplánovánà ponoru.**\n","textLarge":false,"imageOnRight":true,"image":{"recommendedSizes":{"width":"420","height":"280"}},"imageMobile":{"recommendedSizes":{"width":"750","height":"500"}}},"id":"#69","type":"component","lock":false,"position":34},{"name":"Divider","data":{"color":"darkGray"},"id":"#70","type":"component","lock":false,"position":35},{"name":"SectionDivider","data":{"title":"06.1 Kalibrace kyslÃkového senzoru","skipToC":false},"id":"#125","type":"component","lock":false,"position":36},{"name":"TextBlock","data":{"text":"### **06.1 Kalibrace kyslÃkového senzoru**\n\nKyslÃkový senzor mÄnà s Äasem své vlastnosti a je nutné jej kalibrovat. Kalibraci doporuÄujeme provádÄt alespoÅ jednou mÄsÃÄnÄ. Kalibrace je nutná vždy pÅi zmÄnÄ nadmoÅské výšky. Pokud požadujete co nejpÅesnÄjÅ¡Ã výsledky, kalibrujte Äidlo pÅed každým mÄÅenÃm. \n\nKalibrace Äidla se provádà jednoâ až tÅÃbodová. PÅi jednobodové kalibraci se Äidlem zmÄÅà obsah kyslÃku ve vzduchu, který je známý a konstantnà (20.95 %). KalibraÄnà konstanta Äidla se nastavà tak, aby pÅÃstroj ukazoval (po zaokrouhlenÃ) 21.0 %. \n\nPÅi dvoubodové kalibraci se postupuje jako pÅi jednobodové kalibraci, ale použijà se dva kalibraÄnà plyny â Äistý kyslÃk a vzduch. Dvoubodová kalibrace je pracnÄjÅ¡Ã, vyžaduje použità kyslÃku, ale dává pÅesnÄjÅ¡Ã výsledky pÅi mÄÅenÃ. \n\nTÅÃbodová kalibrace se doporuÄuje použÃt pro mÄÅenà hypoxických smÄsà obsahujÃcÃch ménÄ než asi 15 % kyslÃku. Jako tÅetà plyn pro kalibraci má být v tomto pÅÃpadÄ použita pÅesná kalibraÄnà smÄs s obsahem kyslÃku blÃzkým pÅipravované smÄsi. Pro mÄÅenà velmi nÃzkého obsah kyslÃku lze tuto kalibraÄnà smÄs nahradit plynem s nulovým obsahem kyslÃku, tedy Äistým heliem pÅÃpadnÄ argonem. \n\nKalibraci kyslÃkového senzoru spustÃte stisknutÃm tlaÄÃtka **| CAL |** kdykoliv bÄhem mÄÅenÃ. \n\nJako prvnà krok kalibrace zvolte mezi jednobodovou (1B), dvoubodovou (2B) nebo tÅÃbodovou (3B) kalibracà pomocà tlaÄÃtek **| Ë |** a **| Ë
|** a potvrzenÃm výbÄru tlaÄÃtkem **| OK |**. \n\nPoté zvolte obsah kyslÃku v kalibraÄnÃch smÄsÃch. \n\nObsah kyslÃku se nastavuje po desetinách procenta stisknutÃm tlaÄÃtka **| Ë |** (zvýšenà obsahu) a nebo **| Ë
|** (snÞenà obsahu). TlaÄÃtkem **| MODE |** můžete zvolit zda se nastavuje po desetinách, jednotkách nebo desÃtkách procent. Po nastavenà požadované hodnoty údaj potvrdÃte tlaÄÃtkem . **| OK |** \n\nBÄhem nastavovánà obsahu kyslÃku je možné pro rychlé nastavenà obvyklých hodnot použÃt tlaÄÃtko **| CAL |**, které nastavà obsah kyslÃku na 21 % v pÅÃpadÄ prvnÃho kalibraÄnÃho bodu, na 100 % u druhého bodu a 0 % u tÅetÃho bodu.\n\nPo nastavenà a potvrzenà každého kalibraÄnÃho plynu zaÄne probÃhat kalibrace senzoru. Na displayi se zobrazuje aktuálnà kalibraÄnà bod, napÄtà senzoru v milivoltech a teplota plynu. \nPo ustálenà teploty a napÄtà (nejdÅÃve vÅ¡ak po 10 sekundách) se zobrazà pÅÃznak STABLE, což znamená, že je možné provedenou kalibraci potvrdit tlaÄÃtkem **| OK |**.Pokud se pÅed stisknutÃm **| OK |** namÄÅené hodnoty zmÄnÃ, pÅÃznak STABLE zmizà a kalibrace probÃhá dál až do dosaženà dalÅ¡Ã stabilnà hodnoty.Pokud je nastavena vÃcebodová kalibrace, probÄhne obdobnÄ i kalibrace podle dalÅ¡Ãch plynů. ","textLarge":false,"imageOnRight":true,"image":{"recommendedSizes":{"width":"420","height":"280"}},"imageMobile":{"recommendedSizes":{"width":"750","height":"500"}}},"id":"#71","type":"component","lock":false,"position":37},{"name":"Divider","data":{"color":"darkGray"},"id":"#73","type":"component","lock":false,"position":38},{"name":"SectionDivider","data":{"title":"07. DalÅ¡Ã funkce","skipToC":true},"id":"#127","type":"component","lock":false,"position":39},{"name":"TextBlock","data":{"text":"### **07. DalÅ¡Ã funkce**","textLarge":false,"imageOnRight":true,"image":{"recommendedSizes":{"width":"420","height":"280"}},"imageMobile":{"recommendedSizes":{"width":"750","height":"500"}}},"id":"#126","type":"component","lock":false,"position":40}
2,{"name":"SectionDivider","data":{"title":"07.1 Kontinuálnà analýza","skipToC":false},"id":"#128","type":"component","lock":false,"position":41},{"name":"TextBlock","data":{"text":"\n### **07.1 Kontinuálnà analýza**\n\nVolbou Menu/Continual analysis se zapne funkce hlÃdánà kontinuálnÃho plnÄnÃ. V tomto režimu lze nastavit dolnà a hornà mez obsahu kyslÃku a helia. Analyzátor průbÄžnÄ mÄÅà koncentraci tÄchto složek a pÅi pÅekroÄenà nastavených mezà zaÄne pÃpat. Tento režim se uplatnà pÅi použità analyzátoru jako bezpeÄnostnÃho prvku pÅi kontinuálnÃm plnÄnà nitroxu, kdy by pÅi poruÅ¡e mÃchacÃho zaÅÃzenà mohlo dojÃt k nárustu koncentrace kyslÃku která by způsobila požár Äi explozi kompresoru. \n\nV režimu hlÃdánà kontinuálnÃho plnÄnà lze po stisknutà tlaÄÃtka **| MENU |** nastavit meznà hodnoty vÅ¡ech mÄÅených veliÄin.","textLarge":false,"imageOnRight":true,"image":{"recommendedSizes":{"width":"420","height":"280"}},"imageMobile":{"recommendedSizes":{"width":"750","height":"500"}}},"id":"#74","type":"component","lock":false,"position":42},{"name":"Divider","data":{"color":"darkGray"},"id":"#75","type":"component","lock":false,"position":43},{"name":"SectionDivider","data":{"title":"07.2 VýpoÄet mÃchánà plynů","skipToC":false},"id":"#129","type":"component","lock":false,"position":44},{"name":"TextBlock","data":{"text":"### **07.2 VýpoÄet mÃchánà plynů**\n\nVolbou Menu/Gas mix solver se zapne funkce kalkulátoru pro mÃchánà plynů. Kalkulátor spoÄÃtá postup namÃchánà požadované smÄsi až ze tÅà plynů. Umà zahrnout i zbytek smÄsi v plnÄné lahvi. Plyny jsou zobrazeny na displayi v poÅadà zbytek, pÅidávaná smÄs 1 â 3, požadovaná smÄs. U každé smÄsi je uvedeno složenÃ, objem lahve (uvádà se skuteÄný, âvodnÃâ objem lahve) a tlak plynu v lahvi. Pokud nenà objem plynu omezen (napÅÃklad pokud je dodáván kompresorem pÅi stále stejném tlaku), zadejte jako objem lahve nulu. Složenà smÄsi můžete zadat buÄ manuálnÄ (po stisknutà tlaÄÃtka **| CAL |**) nebo pÅepnout do režimu mÄÅenà tlaÄÃtkem **| OK |** a konkrétnà smÄs pÅÃmo zmÄÅit. \n\nAfter pressing the **| CAL |** is necessary to change the values press **| OK |**. Then you can enter values **| Ë | | Ë |** . Press **| MENU |** to move the cursor in the order. Confirm the selected value **| OK |**.\n\nPo dosazenà údajů spusÅ¥te výpoÄet volbou Menu/Solve (protože je to prvnà položka menu, staÄà dvojà stisknutà tlaÄÃtka ****| Ë |**).VýpoÄet může probÃhat až jednu minutu.Po ukonÄenà se zobrazà výsledky v jednom ze tÅà možných tvarů, mezi kterými můžete pÅepÃnat tlaÄÃtkem **| Ë |** (viz pÅÃklad). \n\n\n**PÅÃklad** \nVe âdvojÄetiâ o objemu 2 à G12 litrů (celkový objem 24 L) máte zbytek vzduchu pod tlakem 120 barů. Požadovaná smÄs je trimix 18/40 který chcete mÃt pod tlakem 200 barů. K dispozici máte padesátilitrové distribuÄnà lahve s kyslÃkem a heliem a kompresor na 330 barů. Zadejte: \n\n\tA:\tAir\t\t24L\t120\n\t1:\tHe\t\t50L\t200\n\t2:\tO2\t\t50L\t200\n\t3:\tAir\t\t\t300\n\tD:\t18.0/40.0\t24L\t200\n\na spusÅ¥te výpoÄet.Po ukonÄenà výpoÄtu se zobrazÃ: \n\n\tDisch.\tto\t79.5 bar\n\tHe\tto\t159.5 bar\n\tO2\tto\t173.2 bar\n\tAir\tto\t230.0 bar\n\ncož znamená odpustit dvojÄe na tlak 79.5 barů, pÅidat He až bude dosaženo tlaku 159.5, pÅidat kyslÃk do 173 barů a do 200 barů doplnit vzduchem. Po stisknutà **| MODE |** se zobrazà stejný výsledek, ale vyÄÃslený jako rozdÃl tlaků: \n \n\n\tDisch.\t-40.5 bar\n\tAdd\t80.0 bar He\n\tAdd\t13.7 bar O2\n\tAdd\t26.8 bar Air\n \nneboli snÞit tlak o 40.5, zvýšit tlak o 90 barů pÅidánÃm helia, pÅidat 13.7 barů kyslÃku a 26.68 barů vzduchu. Poslednà režim je podobný, ale protože je urÄen pro gravimetrické plnÄnà (s použitÃm pÅesných vah), množstvà plynu je uvedeno v kilogramech: \n\n\tDisch.\t-1.2382 kg\n\tAdd\t0.3392 kg He\n\tAdd\t0.4669 kg O2\n\tAdd\t0.8230 kg Air\n\nPovÅ¡imnÄte si, že kalkulátor poÄÃtá i s poklesem tlaku v zásobnÃch lahvÃch, proto se nesnažà doporuÄit doplnÄnà kyslÃku na 200 barů (což by vzhledem k omezené zásobÄ kyslÃku nebylo možné), ale nechá odpustit vzduch a kyslÃk doplÅuje pouze do reálných 173.2 barů a poté zase zbytek vzduchu doplnà z kompresoru. ZároveÅ ale kalkulátor maximálnÄ Å¡etÅà smÄs která je již v lahvi, proto ji nenechá vypustit celou ale pouze nezbytnÄ nutnou Äást.","textLarge":false,"imageOnRight":true,"image":{"recommendedSizes":{"width":"420","height":"280"}},"imageMobile":{"recommendedSizes":{"width":"750","height":"500"}}},"id":"#76","type":"component","lock":false,"position":45},{"name":"Divider","data":{"color":"darkGray"},"id":"#77","type":"component","lock":false,"position":46}
2,{"name":"SectionDivider","data":{"title":"07.3 Simulace mÃchánà plynů","skipToC":false},"id":"#130","type":"component","lock":false,"position":47},{"name":"TextBlock","data":{"text":"### **07.3 Simulace mÃchánà plynů**\n\nVolbou Menu/Gas mix simulator se zapne funkce simulátoru mÃchánà plynů. Simulátor vypoÄÃtá složenà smÄsi namÃchané až ze ÄtyÅ plynů. U každé smÄsi je uvedeno složenà a množstvà pÅidaného plynu vyjádÅené v jednotkách tlaku. Složenà smÄsi můžete zadat buÄ manuálnÄ (po stisknutà tlaÄÃtka **| CAL |**) nebo pÅepnout do režimu mÄÅenà tlaÄÃtkem **| OK |** a konkrétnà smÄs pÅÃmo zmÄÅit. VýpoÄet výsledné smÄsi probÃhá průbÄžnÄ a na poslednÃm Åádku se zobrazuje složenà smÄsi.","textLarge":false,"imageOnRight":true,"image":{"recommendedSizes":{"width":"420","height":"280"}},"imageMobile":{"recommendedSizes":{"width":"750","height":"500"}}},"id":"#78","type":"component","lock":false,"position":48},{"name":"Divider","data":{"color":"darkGray"},"id":"#79","type":"component","lock":false,"position":49},{"name":"SectionDivider","data":{"title":"07.4 Okolnà tlak","skipToC":false},"id":"#131","type":"component","lock":false,"position":50},{"name":"TextBlock","data":{"text":"### **07.4 Okolnà tlak**\n\nAnalyzátor je vybaven snÃmaÄem barometrického tlaku. DÃky tomuto lze zaÅÃzenà kalibrovat pro atmosférické podmÃnky a nadmoÅskou výšku. \nAtmosférický tlak a nadmoÅská výška se zobrazà v nabÃdce okolnà tlak. \nNadmoÅská výška se poÄÃtá z tlaku okolÃ\nvztahujÃcà se na standardnà tlak u hladinÄ moÅe (1013,25 hPa), v závislosti na atmosférickém tlaku\npodmÃnky se mohou liÅ¡it od reality.\n","textLarge":false,"imageOnRight":true,"image":{"recommendedSizes":{"width":"420","height":"280"}},"imageMobile":{"recommendedSizes":{"width":"750","height":"500"}}},"id":"#80","type":"component","lock":false,"position":51},{"name":"Divider","data":{"color":"darkGray"},"id":"#81","type":"component","lock":false,"position":52},{"name":"SectionDivider","data":{"title":"08. Zvláštnà pÅÃsluÅ¡enstvÃ","skipToC":true},"id":"#133","type":"component","lock":false,"position":53},{"name":"TextBlock","data":{"text":"### **08. Zvláštnà pÅÃsluÅ¡enstvÃ**","textLarge":false,"imageOnRight":true,"image":{"recommendedSizes":{"width":"420","height":"280"}},"imageMobile":{"recommendedSizes":{"width":"750","height":"500"}}},"id":"#132","type":"component","lock":false,"position":54},{"name":"SectionDivider","data":{"title":"08.1 Regulátor průtoku","skipToC":false},"id":"#134","type":"component","lock":false,"position":55},{"name":"TextBlock","data":{"text":"\n\n### **08.1 Regulátor průtoku**\n\nPro odbÄr plynu k analýze je možné použÃt regulátorem průtoku. Jeho použità je obdobné omezovaÄi, ale dÃky použità redukÄnÃho ventilu nedocházà k poklesu průtoku a tÃm prodlouženà doby mÄÅenà pÅi nÃzkém tlaku v lahvi. Jeho použità je proto vhodné do plnÃren a potápÄÄských center ve kterých se Äasto kontroluje obsah poloprázdných lahvÃ. \n\nRegulátor je sestaven z modulárnÃho systému M12 firmy Divesoft. Na obrázku je zobrazena pouze jedna z možných konfiguracÃ. Protože vývody rozvodné âkostkyâ jsou rovnocenné, je možné jednotlivé prvky libovolnÄ pÅeskupit podle potÅeb uživatele. ObdobnÄ je možné nahradit omezovacà trysku redukÄnÃm ventilem aniž by bylo nutné kupovat celou sestavu regulátoru. \n\nRegulátor se pÅipojuje podobnÄ jako omezovaÄ. Výstup plynu je možné uzavÅÃt kromÄ lahvového ventilu jeÅ¡tÄ pÅÃmo uzávÄrem výstupu plynu. \n \n\n**UpozornÄnÃ: PÅÃliÅ¡ silným utaženÃm uzávÄru výstupu plynu můžete zniÄit nebo pÅedÄasnÄ opotÅebovat sedlo redukÄnÃho ventilu.**","textLarge":false,"imageOnRight":true,"image":{"recommendedSizes":{"width":"420","height":"280"}},"imageMobile":{"recommendedSizes":{"width":"750","height":"500"}}},"id":"#82","type":"component","lock":false,"position":56},{"name":"Image","data":{"firstImage":{"mimetype":"image/jpeg","size":120811,"hash":"4fcba57182f7c519cc674f8df9449b3940d6b588","id":"ckolg56p06he00776yhlg5avz","filename":"8313-divesoft-analyzer-he-o2-manual-07.jpg","category":"divesoft/","type":"image"},"secondImage":{}},"id":"#83","type":"component","lock":false,"position":57},{"name":"Divider","data":{"color":"darkGray"},"id":"#84","type":"component","lock":false,"position":58},{"name":"SectionDivider","data":{"title":"09. NastavenÃ","skipToC":true},"id":"#136","type":"component","lock":false,"position":59},{"name":"TextBlock","data":{"text":"### **09. NastavenÃ**","textLarge":false,"imageOnRight":true,"image":{"recommendedSizes":{"width":"420","height":"280"}},"imageMobile":{"recommendedSizes":{"width":"750","height":"500"}}},"id":"#135","type":"component","lock":false,"position":60},{"name":"SectionDivider","data":{"title":"09. 1 Základnà režim","skipToC":false},"id":"#137","type":"component","lock":false,"position":61},{"name":"TextBlock","data":{"text":"\n### **09. 1 Základnà režim**\n\nVolitelné vlastnosti analyzátoru v základnÃm režimu (mÄÅenà He/O2) je možné zmÄnit v ***Menu/ Preferences***. Jednotlivé parametry majà následujÃcà význam: \n\n***Brightness*** je jas displaye v rozsahu 1â127. Volba nÃzkého jasu (1) Å¡etÅà baterie, nejvyÅ¡Å¡Ã jas (127) je vhodné nastav
2it pro použÃvánà na silnÄ osvÄtlených mÃstech. Pro doÄasné zvýšenà jasu displaye bÄhem mÄÅenà staÄà podržet stisknuté tlaÄÃtko **| Ë |**. \n\nPÅi zapnuté volbÄ ***Heighten brightness*** se jas automaticky zvýšà na maximum pokud je analyzátor napájen ze sÃÅ¥ového adaptéru. \n\nVolba ***O2 cell used*** je standardnÄ zapnutá. PÅi vypnutà se ignoruje namÄÅená hodnota O2 a nahradà se hodnotou uvedenou v následujÃcÃm parametru ***O2 substitute***. Tato volba umožnà nouzové použità analyzátoru s vypotÅebovaným kyslÃkovým senzorem pro mÄÅenà koncentrace helia. Správné nastavenà koncentrace kyslÃku v analyzované smÄsi v takovém pÅÃpadÄ zvýšà pÅesnost mÄÅenà koncentrace He (v Åádu desetin procenta). \n\n***Averaging*** zapÃná výpoÄet klouzavého průmÄru z nastaveného poÄtu hodnot koncentracà He. PoÄet průmÄrovaných hodnot se nastavà parametrem ***Values to avg***. PÅi zapnutém průmÄrovánà se koncentrace He zobrazuje v hranatých závorkách (napÅÃklad 25.7) dokud nenà k dispozici požadovaný poÄet hodnot pro výpoÄet průmÄru.\n\n***Partial pressure O2*** je maximálnà dovolený parciálnà tlak kyslÃku použitý pro výpoÄet MOD.\n\nVolba ***Ref.temp.source*** urÄuje, jestli se pro výpoÄet odhadnutého tlaku v lahvi použije teplota prostÅedà (***Ambient***) nebo pevnÄ urÄená teplota (***Defined***) zadaná v následujÃcÃm parametru ***Ref.temperature***.\n\nDalÅ¡Ã nastavenà je k dispozici v Menu/Measurement units. Zde lze pÅepnout analyzátor do metrického režimu (Metric units), režimu imperiálnÃch jednotek (U.S.units) nebo lze zobrazenà jednotlivých jednotek volit pro jednotlivé veliÄiny (teplotu, hloubku, tlak, objem, hmotnost) zvlášť. Nastavenà jednotek neovlivÅuje výpoÄty (kromÄ koneÄného zaokrouhlenÃ), analyzátor internÄ pracuje v jednotkách SI. \n\n***Nitrogen source*** allows to switch gas constants for use of pure nitrogen instead of air in mixtures. \nMixtures prepared with pure nitrogen does not contain atmospheric argon, which affects the helium measurement.\nIf nitrogen source is set incorrectly, maximal error is 0.2%. \nOxygen measurement is unaffected, since O2 is measured directly by the oxygen cell.\n\n**UpozornÄnÃ: Jako jednotka hloubky jsou uvedeny metry nebo stopy, ale ve skuteÄnosti jde o jednotku hydrostatického tlaku (tlak v uvedené hloubce v moÅské vodÄ).**","textLarge":false,"imageOnRight":true,"image":{"recommendedSizes":{"width":"420","height":"280"}},"imageMobile":{"recommendedSizes":{"width":"750","height":"500"}}},"id":"#85","type":"component","lock":false,"position":62},{"name":"Divider","data":{"color":"darkGray"},"id":"#86","type":"component","lock":false,"position":63},{"name":"SectionDivider","data":{"title":"09.2 Jednotky mÄÅenÃ","skipToC":false},"id":"#138","type":"component","lock":false,"position":64},{"name":"TextBlock","data":{"text":"### **09.2 Jednotky mÄÅenÃ**\n\nDalÅ¡Ã nastavenà jsou k dispozici v nabÃdce ***Menu/Measurement units***. Zde lze pÅepnout analyzátor do metrického režimu (***Metric units***), imperiálnÃch jednotek (***U.S. units***) nebo zobrazenà jednotlivÄ.\nJednotky lze zvolit samostatnÄ pro jednotlivé hodnoty (teplota, hloubka, tlak, objem,hmotnost). Nastavenà jednotky nemá vliv na výpoÄty (s výjimkou koneÄného zaokrouhlovánÃ),\nprotože analyzátor pracuje v jednotkách SI internÄ.\n\nUpozornÄnÃ: Metry a stopy jsou oznaÄeny jako jednotky hloubky, i když ve skuteÄnosti se jedná o hydrostatický tlak (tlak v uvedené hloubce v mm)\nmoÅské vody).","textLarge":false,"imageOnRight":true,"image":{"recommendedSizes":{"width":"420","height":"280"}},"imageMobile":{"recommendedSizes":{"width":"750","height":"500"}}},"id":"#87","type":"component","lock":false,"position":65},{"name":"Divider","data":{"color":"darkGray"},"id":"#89","type":"component","lock":false,"position":66},{"name":"SectionDivider","data":{"title":"09.3 MÃchánà plynů","skipToC":false},"id":"#139","type":"component","lock":false,"position":67},{"name":"TextBlock","data":{"text":"### **09.3 MÃchánà plynů**\n\nV režimech výpoÄtu a simulace mÃchánà plynů je k dispozici nastavenà ***Menu/Gas properties***.\nJednotlivé parametry majà následujÃcà význam: \n\nVolbou ***State equation*** se urÄuje, jestli výpoÄty mÃchánà budou pracovat s ideálnÃm plynem (je použita stavová rovnice PV=RT) nebo s reálným plynem (stavová rovnice podle Redlicha a Kwonga).Varianta s reálným plynem je výpoÄetnÄ složitÄjÅ¡Ã a výpoÄet může trvat dosti dlouho.Pro bÄžné použità je dostaÄujÃcà ideálnà plyn. \n\n***Ref.temperature*** je teplota plynu použitá pro výpoÄty.","textLarge":false,"imageOnRight":true,"image":{"recommendedSizes":{"width":"420","height":"280"}},"imageMobile":{"recommendedSizes":{"width":"750","height":"500"}}},"id":"#88","type":"component","lock":false,"position":68},{"name":"Divider","data":{"color":"darkGray"},"id":"#91","type":"component","lock":false,"position":69},{"name":"SectionDivider","data":{"title":"09.4 Kontinuálnà analýza","skipToC":false},"id":"#140","type":"component","lock":false,"position":70},{"name":"TextBlock","data":{"text":"### **09.4 Kontinuálnà analýza**\n\nZde se v menu nastavujà meznà hodnoty po jejichž pÅekroÄenà se spustà poplach: *Alarm O2 low, Alarm O2 high, Alarm He low, Alarm He high, Alarm pressure low, Alarm pressure high, Alarm temperature low, Alarm temperature high*.\n\nPoslednà z nastav
2itelných hodnot je Delay Re1 -> Re2 která urÄuje dobu která musà uplynout od vyhlášenà poplachu (relé Re1) aby byl vypnut kompresor (relé Re2). \nV menu nemusà být dostupné vÅ¡echny hodnoty â viditelnost položek menu se mÄnà podle toho jaká pÅÃdavná zaÅÃzenà jsou k analyzátoru pÅipojena.","textLarge":false,"imageOnRight":true,"image":{"recommendedSizes":{"width":"420","height":"280"}},"imageMobile":{"recommendedSizes":{"width":"750","height":"500"}}},"id":"#90","type":"component","lock":false,"position":71},{"name":"Divider","data":{"color":"darkGray"},"id":"#72","type":"component","lock":false,"position":72},{"name":"SectionDivider","data":{"title":"10. NabÃjenà a stav baterie","skipToC":false},"id":"#141","type":"component","lock":false,"position":73},{"name":"TextBlock","data":{"text":"### **10. NabÃjenà a stav baterie**\n\nKdykoli je analyzátor zapnutý, můžete zkontrolovat stav baterie pomocà stisknutà **| Ë
|**, pokud klávesa nemá na konkrétnà obrazovce jinou funkci. \nHodnota nabità baterie je vyjádÅena dvojitou Äáru v dolnà Äásti displeje. Rozsah je definován mezi 0 a\n100% nabÃjenÃ. \n\nKdyž je baterie témÄÅ vybitá, pÅipojte analyzátor pomocà dodaného kabelu k libovolné USB\nnabÃjeÄce nebo do USB portu poÄÃtaÄe. Plné nabità trvá pÅibližnÄ tÅi hodiny. \n\nKdyž je nabÃjeÄka pÅipojená, můžete zkontrolovat stav nabÃjenà stisknutÃm **| Ë
|**. Pokud baterie\nnenà plnÄ nabitá, Åada Å¡ipek se zobrazuje na stupnici od 0 do 100%. Pokud už je nabitá, zobrazà se dlouhá dvojitá Äára. \n\nBÄhem nabÃjenà jsou k dispozici vÅ¡echny funkce analyzátoru.","textLarge":false,"imageOnRight":true,"image":{"recommendedSizes":{"width":"420","height":"280"}},"imageMobile":{"recommendedSizes":{"width":"750","height":"500"}}},"id":"#92","type":"component","lock":false,"position":74},{"name":"Divider","data":{"color":"darkGray"},"id":"#93","type":"component","lock":false,"position":75},{"name":"SectionDivider","data":{"title":"11. Ãdržba","skipToC":false},"id":"#143","type":"component","lock":false,"position":76},{"name":"TextBlock","data":{"text":"### **11. Ãdržba**\n","textLarge":false,"imageOnRight":true,"image":{"recommendedSizes":{"width":"420","height":"280"}},"imageMobile":{"recommendedSizes":{"width":"750","height":"500"}}},"id":"#142","type":"component","lock":false,"position":77},{"name":"SectionDivider","data":{"title":"11.1. VýmÄna baterie","skipToC":false},"id":"#144","type":"component","lock":false,"position":78},{"name":"TextBlock","data":{"text":"\n### **11.1. VýmÄna baterie**\n\nPÅÃstroj využÃvá vestavÄnou dobÃjecà baterii. VýmÄna baterie je možná pouze ve výrobÄ.","textLarge":false,"imageOnRight":true,"image":{"recommendedSizes":{"width":"420","height":"280"}},"imageMobile":{"recommendedSizes":{"width":"750","height":"500"}}},"id":"#94","type":"component","lock":false,"position":79},{"name":"Divider","data":{"color":"darkGray"},"id":"#95","type":"component","lock":false,"position":80},{"name":"SectionDivider","data":{"title":"11.2 VýmÄna kyslÃkového senzoru","skipToC":false},"id":"#145","type":"component","lock":false,"position":81},{"name":"TextBlock","data":{"text":"### **11.2 VýmÄna kyslÃkového senzoru**\n\nKyslÃkový senzor má omezenou životnost. Analyzátor automaticky kontroluje stavy senzoru a na konci jeho životnosti se zobrazà zpráva âKyslÃkový senzor vyprÅ¡elâ po aktivaci pÅÃstroje. \n\nV takovém pÅÃpadÄ by mÄl být senzor co nejdÅÃve vymÄnÄn, protože pÅesnost mÄÅenà koncentrace kyslÃku již nelze zaruÄit.\n\nPokud si nejste jisti, zda jste schopni senzor správnÄ vymÄnit, zeptejte se svého dodavatele, prodejce nebo servisnÃho technika, který to vám ho vymÄnÃ.\n\nPÅi výmÄnÄ senzoru nejprve povolte Å¡roub a sejmÄte kryt senzoru kyslÃku.\nPoté odpojte konektor molex od senzoru, netahejte za kabeláž vycházejÃcà z pÅÃstroje.\nOdÅ¡roubujte starý senzor a namontujte nový tak, aby o-kroužek na snÃmaÄi tÄsnÄ pÅilnul k analyzátoru. K utahovánà senzoru nepoužÃvejte nadmÄrnou sÃlu. TÃm zabránÃte poÅ¡kozenà kabeláže.\n\nZnovu pÅipojte konektor senzoru kyslÃku a nezapomeÅte zkontrolovat polaritu. Nakonec zavÅete kryt senzoru.\nPÅed prvnà kalibracà nechejte nový senzor zahÅát alespoÅ 30 minut po vyjmutà z uzavÅeného obalu.\nKÅÞový Å¡roubovák je nutné vybavenà pro výmÄnu. Po každé výmÄnÄ senzoru musà být pÅÃstroj znovu zkalibrován.","textLarge":false,"imageOnRight":true,"image":{"recommendedSizes":{"width":"420","height":"280"}},"imageMobile":{"recommendedSizes":{"width":"750","height":"500"}}},"id":"#96","type":"component","lock":false,"position":82},{"name":"Image","data":{"firstImage":{"mimetype":"image/jpeg","size":131049,"hash":"4dd8bce6e7db9348ad3b10346315c55265b8c199","id":"ckondhmaj7fnb0776muqgbatc","filename":"8300-divesoft-analyzer-solo-manual-11.jpg","category":"divesoft/","type":"image"},"secondImage":{}},"id":"#98","type":"component","lock":false,"position":83},{"name":"Divider","data":{"color":"darkGray"},"id":"#99","type":"component","lock":false,"position":84},{"name":"SectionDivider","data":{"title":"11.3 SeÅÃzenà průtoku","skipToC":false},"id":"#146","type":"component","lock":false,"position":85},{"name":"TextBlock","data":{"text":"### **11.3 SeÅÃzenà průtoku**\n\nVe vÄtÅ¡inÄ pÅÃpadů je bÄžné proudÄnà plynu v omezovaÄi průtoku vhodné pro Å¡iroký rozsah vstupnÃho tlaku. \nKdyž je plyn Äasto analyzován za nÃzkého tlaku, může proudit pÅÃliÅ¡ málo, a tÃm take stabilizace mÄÅené hodnoty pomalejÅ¡Ã. \nPÅipojte pÅiložený omezovaÄ průtoku do otvoru v analyzátoru. \nOtáÄenÃm ventilu na lahvi regulujte prutok plynu omezovaÄem, dokud nenà dosáhnuto správného průtoku.\nPÅip
2ojte vzorkovaÄ k nádrži, otevÅete ventil a nastavte průtok plynu na požadovanou hodnotu pomocà 2mm klÃÄe s nástrÄným Å¡roubem. Rozsah nastavenà je relativnÄ malý, maximálnÄ 1/4 otáÄky. StavÄcà šroub již nepovolujte, může se uvolnit a vyfouknout tlakem plynu.\n\nSprávný průtok ve správnÄ nastaveném vzorkovaÄi je 0,2 litru/min. SeÅÃzenà je možné ovÄÅit pÅibližnÄ pÅipojenÃm hadice k vzorkovaÄi a ponoÅenÃm druhého konce do sklenice s vodou. Pro správné nastavenà musà z konce hadice unikat nepÅetržitý tok malých bublinek. Po zkouÅ¡ce hadici vysuÅ¡te, jinak může do analyzátoru vniknout voda.\n\nPokud si nejste jisti správným seÅÃzenÃm, obraÅ¥te se na svého prodejce nebo servis.\n\nK tomuto seÅÃzenà je potÅeba 2mm nástrÄný klÃÄ.","textLarge":false,"imageOnRight":true,"image":{"recommendedSizes":{"width":"420","height":"280"}},"imageMobile":{"recommendedSizes":{"width":"750","height":"500"}}},"id":"#100","type":"component","lock":false,"position":86},{"name":"Divider","data":{"color":"darkGray"},"id":"#101","type":"component","lock":false,"position":87},{"name":"SectionDivider","data":{"title":"11.4 Demontáž pÅÃstroje","skipToC":false},"id":"#147","type":"component","lock":false,"position":88},{"name":"TextBlock","data":{"text":"### **11.4 Demontáž pÅÃstroje**\n\nPÅÃstroj nerozebÃrejte. Analyzátor neobsahuje žádné uživatelem opravitelné Äásti kromÄ senzoru kyslÃku.\n\n**UpozornÄnÃ: Z analyzátoru sami nevyjÃmejte desku ploÅ¡ných spojů.ZpÄtné umÃstÄnà desky vyžaduje speciálnà postup a pÅÃstroje pro kalibraci.**","textLarge":false,"imageOnRight":true,"image":{"recommendedSizes":{"width":"420","height":"280"}},"imageMobile":{"recommendedSizes":{"width":"750","height":"500"}}},"id":"#102","type":"component","lock":false,"position":89},{"name":"Divider","data":{"color":"darkGray"},"id":"#103","type":"component","lock":false,"position":90},{"name":"SectionDivider","data":{"title":"12. PÅipojenà k poÄÃtaÄi","skipToC":false},"id":"#148","type":"component","lock":false,"position":91},{"name":"TextBlock","data":{"text":"### **12. PÅipojenà k poÄÃtaÄi**\n\nAnalyzátor lze pÅipojit k poÄÃtaÄi pomocà kabelu USB. \n\nMÄÅené hodnoty jsou pÅenášeny do PC pÅes virtuálnà sériový port. Pokud jste nenainstalovali vhodný ovladaÄ pro virtuálnà sériový port na USB, použijte bezplatný ovladaÄ poskytovaný výrobcem USB Äipu použitého v analyzátoru. \nTento ovladaÄ lze stáhnout na adrese http://www.ftdichip.com/Drivers/VCP.htm \nKonkrétnà ovladaÄ lze vybrat z kategorie VCP (virtuálnà komunikaÄnà port), v závislosti na použitém poÄÃtaÄi a operaÄnÃm systému. \n\nPÅenos dat musà být v analyzátoru aktivován volbou NabÃdka / PÅedvolby / Odeslat data do\nUSB = Zapnuto.\n\nPro pÅÃjem dat lze použÃt libovolný obslužný program emulace terminálu; napÅÃklad HyperTerminal je\ndostaÄujÃcà pro Microsoft Windows. Tento nástroj je souÄástà základnà instalace systému Windows.\n\n\nNamÄÅená data jsou pÅenášena v textovém režimu. Každou sekundu analyzátor pÅenášà data v následujÃcÃm formátu: \n\n\tHe xxx.x O2 yyy.y CR LF\n\nkde xxx.x je obsah helia v procentech, \nkde yyy.y je obsah kyslÃku v procentech, \nCR je symbol návratu vozÃku ASCII (desÃtkovÄ 13, Å¡estnáctkovÄ 0D), \nLF je symbol posuvu Åádku ASCII (desÃtkovÄ 10, Å¡estnáctkovÄ 0A). \n\nPokud dojde k chybÄ v mÄÅenÃ, je vadný záznam nahrazen hvÄzdiÄkami v\nnásledujÃcà formuláÅ: ***. *.\n\nVýstup je v sériové podobÄ ve formátu 8N1 (8 bitů, bez paritnÃho bitu, jeden stopbit), rychlost 115 200 bit / s, úroveÅ TTL.","textLarge":false,"imageOnRight":true,"image":{"recommendedSizes":{"width":"420","height":"280"}},"imageMobile":{"recommendedSizes":{"width":"750","height":"500"}}},"id":"#104","type":"component","lock":false,"position":92},{"name":"Divider","data":{"color":"darkGray"},"id":"#105","type":"component","lock":false,"position":93}
2,{"name":"SectionDivider","data":{"title":"13. Vady a jejich odstranÄnÃ","skipToC":false},"id":"#149","type":"component","lock":false,"position":94},{"name":"TextBlock","data":{"text":"### **13. Vady a jejich odstranÄnÃ**\n\nPo aktivaci je analyzátor automaticky testován, aby identifikoval jednu z následujÃcÃch chyb. VÅ¡echny chybové zprávy lze potvrdit klávesou a pÅÃstroj bude pokraÄovat v práci; za urÄitých okolnostà vÅ¡ak v omezeném provoznÃm režimu. Zpráva o pÅepÄtà (viz nÞe) je výjimkou, protože se může zobrazit kdykoli.","textLarge":false,"imageOnRight":true,"image":{"recommendedSizes":{"width":"420","height":"280"}},"imageMobile":{"recommendedSizes":{"width":"750","height":"500"}}},"id":"#106","type":"component","lock":false,"position":95},{"name":"Divider","data":{"color":"darkGray"},"id":"#107","type":"component","lock":false,"position":96},{"name":"SectionDivider","data":{"title":"13.1 Chybové zprávy","skipToC":false},"id":"#150","type":"component","lock":false,"position":97},{"name":"TextBlock","data":{"text":"### **13.1 Chybové zprávy**\n\n**Chyba 1 Heliový senzor nefunguje správnÄ** \n⢠DoÅ¡lo k chybÄ v elektronické nebo mechanické Äásti heliového senzoru. The\npÅÃstroj lze použÃt v nouzovém režimu pro mÄÅenà koncentrace kyslÃku.\nAnalyzátor musà být opraven, aby bylo možné mÄÅit hélium.\n\n**Chyba 2 PoÅ¡kozený nebo chybÄjÃcà snÃmaÄ kyslÃku** \n⢠Senzor kyslÃku je odstranÄn, odpojen nebo zniÄen. MÄÅenà kyslÃku\nkoncentrace bude nesprávná. Senzor lze doÄasnÄ deaktivovat (Menu / O2\ncell used = Off), koncentrace kyslÃku mÄÅená jiným pÅÃstrojem a zadaná\nruÄnÄ jako konstanta (Menu / O2 náhrada = n). Způsob zobrazenà mÄÅeného hodnoty nelze zmÄnit ani nelze provést kalibraci lambda sondy.\nVarovánà SnÃmaÄ kyslÃku je vypnutý\n⢠Tato zpráva se zobrazà pokaždé, když je senzor O2 vypnutý.\n\n**Chyba 3 Senzor kyslÃku vyprÅ¡el** \n⢠Senzor kyslÃku je starý a jeho výstupnà napÄtà je pÅÃliÅ¡ nÃzké. MÄÅenà bude nepÅesné\n(vedle hodnoty koncentrace O2 se zobrazà varovánà âNesprávnéâ) a nÄkteré\nrežimy mÄÅenà nelze aktivovat. Senzor musà být okamžitÄ vymÄnÄn za\nnový doporuÄený typ.\n⢠K této chybÄ může dojÃt také v pÅÃpadÄ, že je nástroj naplnÄn hypoxickou smÄsà (smÄs s nÃzkou\nobsah kyslÃku) pÅi aktivaci, napÅÃklad bezprostÅednÄ po pÅedchozÃm mÄÅenà nebo pokud je namÄÅená hypoxická smÄs dodána pÅed aktivacà analyzátoru. V takovém pÅÃpadÄ, pÅed aktivacà pÅÃstroj na chvÃli vypnÄte nebo pÅipojte ke zdroji vzduchu. \
2nNikdy nepoužÃvejte ústa k vyfukovánà vzduchu do vstupu nebo výstupu analyzátoru, abyste zabránili výparům\nkondenzace uvnitÅ pÅÃstroje (je možné opatrné nasávánà plynu ústy)\n\n\n**Chyba 4 ZaÅÃzenà je pÅÃliÅ¡ studené** \n⢠Teplota analyzátoru je pÅÃliÅ¡ nÃzká a mÄÅenà může být nepÅesné. ZahÅát\nanalyzátor v teplé mÃstnosti, aby se zvýšila jeho teplota nad bod mrazu (32 ° F). K ohÅevu nepoužÃvejte horkovzduÅ¡né dmychadlo, suÅ¡iÄku vzduchu, troubu ani žádný jiný podobný způsob analyzátor.\n\n**Chyba 5 ZaÅÃzenà je pÅÃliÅ¡ teplé** \n⢠Teplota analyzátoru je pÅÃliÅ¡ vysoká (napÅÃklad pokud byl vystaven sluneÄnÃmu záÅenà nebo uloženo v automobilu vyhÅátém sluneÄnÃm záÅenÃm); mÄÅenà může být nepÅesné. OchlaÄte analyzátor pod 40 stupÅů Celsia (104 ° F).\n\n**Varovánà NÃzká kapacita baterie** \n⢠Baterie je témÄÅ vybitá, co nejdÅÃve nabijte analyzátor.\n","textLarge":false,"imageOnRight":true,"image":{"recommendedSizes":{"width":"420","height":"280"}},"imageMobile":{"recommendedSizes":{"width":"750","height":"500"}}},"id":"#108","type":"component","lock":false,"position":98},{"name":"Divider","data":{"color":"darkGray"},"id":"#109","type":"component","lock":false,"position":99},{"name":"SectionDivider","data":{"title":"13.2 Poruchy pÅÃstroje","skipToC":false},"id":"#151","type":"component","lock":false,"position":100},{"name":"TextBlock","data":{"text":"### **13.2 Poruchy pÅÃstroje**\n\n**Obsah helia se nezobrazuje** \n⢠Sonda mÄÅà rychlost helia v obou smÄrech. Pokud se tyto údaje liÅ¡Ã, mÄÅenà je považován za nesprávný a obsah helia se nezobrazÃ. Tato situace může být docházÃ, pokud mÄÅený plyn protéká sondou pÅÃliÅ¡ rychle (nižšà rychlosti proudÄnà jsou kompenzováno výpoÄtem), nebo je zde znaÄný hluk pozadà (napÅÃklad v blÃzkosti bÄžÃcÃho kompresoru nebo plynového motoru). \n⢠Snižte rychlost průtoku plynu (to platà pro analyzátor, který
2nenà pÅipojen pomocà originálu sampler), posuÅte se dále od zdroje hluku. \n\n**PÅÃstroj ukazuje ménÄ než 0% nebo vÃce než 100% helia ve smÄsi** \n⢠Zobrazená hodnota pocházà pÅÃmo z namÄÅené a vypoÄÃtané hodnoty a má v Ä způsob byl zmÄnÄn na pozadÃ. Možná chyba mÄÅenà je symetrická a pro\nnapÅÃklad pÅi mÄÅenà smÄsi bez obsahu helia 0,2% nebo â0,2% helia\nlze zobrazit. Proto pÅi mÄÅenà Äistého hélia, napÅ. Může 99,8% nebo 100,2%\nse zobrazÃ. Pokud je odchylka v toleranci mÄÅenÃ, nenà to výsledek\nvada. \n\n**PÅÃstroj ukazuje ménÄ než 0% nebo vÃce než 100% kyslÃku ve smÄsi**\n⢠Zobrazená hodnota pocházà pÅÃmo z namÄÅené a vypoÄÃtané hodnoty a má v Ä způsob byl zmÄnÄn na pozadÃ. Možná chyba mÄÅenà je symetrická a pro\nnapÅÃklad pÅi mÄÅenà smÄsi bez obsahu kyslÃku 0,5% nebo -0,5% kyslÃku\nlze zobrazit. Proto pÅi mÄÅenà Äistého kyslÃku, napÅ. Může 99,5% nebo 100,5%\nse zobrazÃ. Pokud je odchylka v toleranci mÄÅenÃ, nenà to výsledek závada. V pÅÃpadÄ vÄtÅ¡Ã odchylky proveÄte novou kalibraci lambda sondy. Pokud je problém pÅetrvává, vymÄÅte senzor.","textLarge":false,"imageOnRight":true,"image":{"recommendedSizes":{"width":"420","height":"280"}},"imageMobile":{"recommendedSizes":{"width":"750","height":"500"}}},"id":"#110","type":"component","lock":false,"position":101},{"name":"Divider","data":{"color":"darkGray"},"id":"#111","type":"component","lock":false,"position":102},{"name":"SectionDivider","data":{"title":"14. Technické údaje","skipToC":false},"id":"#152","type":"component","lock":false,"position":103},{"name":"TextBlock","data":{"text":"### **14. Technické údaje**\n\nRozmÄry: 85 à 205 à 40 mm (31/4 à 77/8 à 11/2 palce) \n\nHmotnost: 332 g (bez obalu a pÅÃsluÅ¡enstvÃ) \n\nRozsah mÄÅenà koncentrace kyslÃku: 0 až 100% \n\nRozsah mÄÅenà koncentrace helia: 0 až 100% \n\nTeplota mÄÅenÃ: 0 až + 40 ° C (32â104 ° F) \n\nTlak smÄsi: OdpovÃdá tlaku okolà v rozmezà 700â1100 milibarů (20â\n32 palců Hg), což odpovÃdá standardnà atmosféÅe ve výšce 0 až 3000 m (0â10 000 ft) \n\nNominálnà průtok plynu: 0,2 l / min \n\nZákladna pro mÄÅenà rychlosti zvuku: 800 mm \n\nMÄÅicà cyklus: 200 ms \n\nPÅipojovacà rozmÄry vzorkovaÄe: Standard pro DIN ventil (EN 144-2) pro\n200/300 tyÄà (závit G 5/8). VzorkovaÄe s pÅipojenÃm k jakémukoli standardizovanému nebo bÄžnému ventilu jsou k dispozici na vyžádánà nebo jako volitelné vybavenà \n\nKyslÃkový senzor: R22 S (konektor Molex) \n\nSnadno vymÄnitelný senzor O2 \n\nOÄekávaná životnost snÃmaÄe kyslÃku: 2 roky \n\nVymÄnitelná baterie: ProstÅednictvÃm autorizovaného servisnÃho stÅediska \n\nBaterie: 210 mÄÅenà nebo 7 hodin nepÅetržitého provozu \n\nZáruka: 24 mÄsÃců, 12 mÄsÃců na baterii \n\nNabÃjenà a programovánÃ: USB-C \n\nDoba nabÃjenÃ: 3-4 hodiny \n\nDisplej: OLED \n\nTÄlo: ABS-PC ","textLarge":false,"imageOnRight":true,"image":{"recommendedSizes":{"width":"420","height":"280"}},"imageMobile":{"recommendedSizes":{"width":"750","height":"500"}}},"id":"#112","type":"component","lock":false,"position":104},{"name":"Divider","data":{"color":"darkGray"},"id":"#113","type":"component","lock":false,"position":105},{"name":"TextBlock","data":{"text":"### **ANALYZER SOLO O2 - UŽIVATELSKà PÅÃRUÄKA** \nHW 3.0, FW 2.29 \nAuthors: Jakub Å imánek, AleÅ¡ Procháska","textLarge":false,"imageOnRight":true,"image":{"recommendedSizes":{"width":"420","height":"280"}},"imageMobile":{"recommendedSizes":{"width":"750","height":"500"}}},"id":"#114","type":"component","lock":false,"position":106}],"id":"root","idBuffer":"#153","lastCommit":"b8b1af78-d8d2-4944-b421-25e3e0dd483e"}},"annotations":[],"language":{"type":"id","generated":false,"id":"Language:cjv3kwvoj000u083611381c6o","typename":"Language"},"__typename":"PageTranslation"},"Page:cl1q88ou8ekco08587cts1a1t":{"id":"cl1q88ou8ekco08587cts1a1t","type":{"type":"id","generated":false,"id":"PageType:ck2yidrqj00wv0821oy820vu1","typename":"PageType"},"tags":[{"type":"id","generated":false,"id":"Tag:clw52zeqhlclq0735wrys6js8","typename":"Tag"}],"translations({\"where\":{\"language\":{\"id\":\"cjv3kwvoj000u083611381c6o\"}}})":[{"type":"id","generated":false,"id":"PageTranslation:cl1q88oulekcv0858u1rmasnr","typename":"PageTranslation"}],"__typename":"Page"},"PageType:ck2yidrqj00wv0821oy820vu1":{"id":"ck2yidrqj00wv0821oy820vu1","name":"Event","__typename":"PageType"},"PageTranslation:cl1q88oulekcv0858u1rmasnr":{"id":"cl1q88oulekcv0858u1rmasnr","name":"Divesoft.blog / How to choose an instructor for your rebreather course","createdAt":"2022-04-08T09:29:51.309Z","content":{"type":"json","json":{"content":[{"name":"Header","data":{"products":[{"title":"Accessories","description":"Backplates, Consumables. Tanks.","img":{"recommendedSizes":{"width":"235","height":"235"}},"url":""},{"title":"Accessories sets","description":"Protection, maintenance, cleaning.","img":{"recommendedSizes":{"width":"235","height":"235"}},"url":""},{"title":"Spare parts","description":"Spare parts and components.","img":{"recommendedSizes":{"width":"235","height":"235"}},"url":""}
2,{"title":"Spare parts kits","description":"Completly Liberty spare parts kits.","img":{"recommendedSizes":{"width":"235","height":"235"}},"url":""}]},"id":"#2","type":"component","lock":false,"position":0},{"content":[{"name":"BlogArticle","data":{"title":"How to choose an instructor for your rebreather course","perex":"In previous articles we have discussed what [a rebreather is](https://www.divesoft.com/en/blog/what-is-a-rebreather-do-i-need-one-as-a-recreational-diver), and [the steps that lead to becoming a rebreather diver](https://www.divesoft.com/en/blog/7-steps-to-becoming-a-rebreather-diver). Let's just say we've been through this, and we are determined to get a rebreather. However, the purchase of a rebreather is contingent on qualifying as a Rebreather Diver. In this article, you will learn in detail what to focus on when choosing an instructor.","content":"**Rebreather instructors**\n\n[Rebreather](https://www.divesoft.com/en/products/ccr-liberty/philosophy) manufacturers, Divesoft not excluded, **offer their units through their instructors, who also provide divers with the necessary training for basic qualifications**. A rebreather diving course is always catered to the particular rebreather being used. If you are already a rebreather diver, you must at least go through a crossover for the new type of rebreather, as each rebreather has critical specifics components. \n\n\n\nDevices differ in their assembly, and **it is critical to know the specific assembly procedure to safely dive the unit**. However, the instruments also operate differently underwater between units, and it is necessary to become thoroughly familiar with this under the supervision of an experienced instructor.\n\nDivers who are completely **new to rebreathers need full training to bring them into a whole new world of knowledge, skills, habits, and mindset**. We begin this search by researching the manufacturer and this starts at their website, which typically includes [a list of their instructors](https://www.divesoft.com/en/instructors) for the particular unit (such as Divesoft). \n\nGood manufacturers take pride in their reputation, thus they also take care to **maintain high quality instructors**, so such a list should guarantee that the candidate will not make a bad choice. However, even among these instructors there are of course differences. \n\n**Criteria you should consider**\n\nThe first criterion for selecting an instructor will be the location and distance willing to travel for the course. This will narrow down my choice considerably. **Some training systems have their training materials worked out better than others and provide much better support for both students and instructors**, so this criterion can also be a deciding factor. \n\n\n\nHowever, I personally advocate that the qualities of the instructor themselves matter more than the flag they work under. So, if we have already chosen a particular instructor, it is a good idea to get some references. **How long he has been teaching, how often he teaches, how much he is involved in his own projects and diving for his own pleasure.** Instructors who are really dedicated to rebreather diving do up to ten to twenty rebreather courses a year, some even more. This keeps their skills constantly sharp, and they don't lose necessary habits and contact with their students. \n\nOn the other hand, if they aren't diving for themselves, they are unable to maintain perspective and develop the necessary overlap of experience. **Instructors who teach even less frequently, but regularly have tw
2o or three courses a year and are fully committed to their own development are also a very good choice**. You will certainly be pleased if such an instructor can answer your questions using his or her own wealth of experience gained through a rich, broad and growing practice. Some manufacturers try to maintain a list of instructors just as instructors are active, and if they have not done any training for a long time, they are dropped from the list. \n\nIt is very helpful if you can get information on how dutifully the instructor teaches. A properly executed [rebreather diving course](https://www.divesoft.com/en/blog/what-will-i-learn-in-a-rebreather-course) is challenging for instructors, and it is in your interest to be sure that for the money invested you are not just getting a plastic card, but a good load of knowledge and skills that the instructor will impart through intensive training.\n\n* [Jakub Å imánek](https://www.divesoft.com/en/about-us/jakub-simanek), Divesoft Factory IT","showTags":false,"showDate":true,"image":{"mimetype":"image/png","size":1415527,"hash":"dec953f8b514f7314fd854fee74a835eb2607e16","id":"cl1q90wd1uia407763esx6u0b","filename":"26-blog-instructors.png","category":"divesoft/","type":"image"}},"id":"#7","type":"component","lock":false,"position":0},{"name":"ProductShowcase","data":{"componentTemplateId":"cm9h4wr6ugjv10803yqs3tp71"},"id":"#9","type":"component","lock":false,"position":1}],"id":"#0","type":"container","lock":false,"position":1},{"content":[{"name":"Footer","data":{"copyrights":"Copyright © 2019 Divesoft LLC All rights reserved.","facebookUrl":"","youtubeUrl":"","instagramUrl":"","contacts":"**Divesoft, s.r.o.** Hálkova 2495 413 01 Roudnice nad Labem Äeská republika Tel.: +420 416 857 057 E-mail: [email protected]"},"id":"#3","type":"component","lock":false,"position":0}],"id":"#1","type":"container","lock":true,"position":2}],"id":"root","idBuffer":"#10","lastCommit":"58c1ff5c-e011-4ac2-8b27-e0d0be2315c3","lock":true}},"annotations":[{"type":"id","generated":true,"id":"PageTranslation:cl1q88oulekcv0858u1rmasnr.annotations.0","typename":"PageAnnotation"},{"type":"id","generated":true,"id":"PageTranslation:cl1q88oulekcv0858u1rmasnr.annotations.1","typename":"PageAnnotation"},{"type":"id","generated":true,"id":"PageTranslation:cl1q88oulekcv0858u1rmasnr.annotations.2","typename":"PageAnnotation"}],"language":{"type":"id","generated":false,"id":"Language:cjv3kwvoj000u083611381c6o","typename":"Language"},"__typename":"PageTranslation"},"PageTranslation:cl1q88oulekcv0858u1rmasnr.annotations.0":{"key":"perex","value":"In previous articles we have discussed what a rebreather is, and the steps that lead to becoming a rebreather diver. Let's just say we've been through this, and we are determined to get a rebreather. However, the purchase of a rebreather is contingent on qualifying as a Rebreather Diver. In this article, you will learn in detail what to focus on when choosing an instructor.","__typename":"PageAnnotation"},"PageTranslation:cl1q88oulekcv0858u1rmasnr.annotations.1":{"key":"image","value":"{\"mimetype\":\"image/png\",\"size\":1415527,\"hash\":\"dec953f8b514f7314fd854fee74a835eb2607e16\",\"id\":\"cl1q90wd1uia407763esx6u0b\",\"filename\":\"26-blog-instructors.png\",\"category\":\"divesoft/\",\"type\":\"image\"}","__typename":"PageAnnotation"},"PageTranslation:cl1q88oulekcv0858u1rmasnr.annotations.2":{"key":"title","value":"How to choose an instructor for your rebreather course","__typename":"PageAnnotation"},"Page:cl2fwdvaagxot0858dbvfzwa9":{"id":"cl2fwdvaagxot0858dbvfzwa9","type":{"type":"id","generated":false,"id":"PageType:cjv3l213x004f08366hjufttp","typename":"PageType"},"tags":[{"type":"id","generated":false,"id":"Tag:clw52z09zlclk0735mxb7v53p","typename":"Tag"},{"type":"id","generated":false,"id":"Tag:clyycdwe2y9ew0735y8v3nuvd","typename":"Tag"}],"translations({\"where\":{\"language\":{\"id\":\"cjv3kwvoj000u083611381c6o\"}}})":[{"type":"id","generated":false,"id":"PageTranslation:cl2fwdvapgxp00858y80qz20w","typename":"PageTranslation"}],"__typename":"Page"},"Tag:clyycdwe2y9ew0735y8v3nuvd":{"id":"clyycdwe2y9ew0735y8v3nuvd","name":"eshop/analyzer","__typename":"Tag"},"PageTranslation:cl2fwdvapgxp00858y80qz20w":{"id":"cl2fwdvapgxp00858y80qz20w","name":"Divesoft.blog / CCR Liberty testing","createdAt":"2022-04-26T08:39:58.129Z","content":{"type":"json","json":{"content":[{"name":"Header","data":{"products":[{"title":"Accessories","description":"Backplates, Consumables. Tanks.","img":{"recommendedSizes":{"width":"235","height":"235"}},"url":""},{"title":"Accessories sets","description":"Protection, maintenance, cleaning.","img":{"recommendedSizes":{"width":"235","height":"235"}},"url":""},{"title":"Spare parts","description":"Spare parts and components.","img":{"recommendedSizes":{"width":"235","height":"235"}},"url":""}
2,{"title":"Spare parts kits","description":"Completly Liberty spare parts kits.","img":{"recommendedSizes":{"width":"235","height":"235"}},"url":""}]},"id":"#0","type":"component","lock":false,"position":0},{"name":"BlogArticle","data":{"title":"CCR Liberty testing","perex":"For CCR Liberty testing we use a machine that we familiarly call \"Big Bertha\". Our co-founder Aleš Procháska answers questions about how this testing device works.","content":"**What exactly happens to the Liberty during testing?**\n\nWe simulate the diving environment in our [Divesoft lab](https://www.divesoft.com/en/blog/divesoft-lab). The diver is replaced by instruments in these unmanned tests. A stainless steel mannequin, called Iron Man, carries the [rebreather](https://www.divesoft.com/en/products/ccr-liberty/philosophy) on his back. He breathes through \"artificial lung\", a computer-controlled breathing simulator that can simulate different breathing rates, depths of inhalation, and the flow of the breathing cycle. \n\nAnother device simulates oxygen consumption and carbon dioxide exhaled. **A rebreather is submerged in water whose temperature can simulate conditions from the Arctic to the Persian Gulf.** The water is in a massive chamber that pressurizes to simulate depths approximating 300 feet - and in fact, we went a little further in designing it to reach the magical 1,000-foot milestone.\n\n\n\n**What does it measure?**\n\nThe basic measurement that most users are interested in is the work of breathing, which quantifies the ease of breathing with the rebreather. This is important both for the comfort of the diver, but **most importantly, if the work of breathing is able to avoid any CO2 retention at extreme depths during increased exertion combined with high gas density**.\n\nThe second key parameter is the endurance of the scrubber, how long it can absorb exhaled carbon dioxide before the CO2 concentration rises above the permissible limit.\n\nIn addition to these parameters, \"Big Bertha\" measures the hydrostatic imbalance, which shows how the breathing resistance changes when the diver is upside down or perhaps in the supine position. Also, the ability of the device to maintain the oxygen level without any fluctuations. Monitoring of where the water that condensates from the exhaled moisture goes, the characteristics of the pressure relief valve and the automatic diluent delivery, the temperature of the inhaled mixture, or whether some of the exhaled air remains in the mouthpiece until the next breath. Big Bertha gives Divesoft the ability to create a detailed analysis of the functionality and performance of the Liberty rebreather.\n\n**What conditions are rebreathers tested for?**\n\nThe standard test conditions for a rebreather are **a depth of 100 meters, a water temperature of 4°C, and a carbon dioxide exhalation rate of 1.6 liters per minute**, which corresponds to the heavy exertion of the diver. No diver would be able to bear such a load for long, but the test equipment can withstand it for hours. \n\nThen there are other combinations of parameters used for different specific tests, but they always have one thing in common - **they exceed human capabilities to make sure that the [apparatus under test can handle any load that a real person can put it through](https://www.divesoft.com/en/blog/would-you-trust-your-life-to-a-machine)**.\n\n\n\n**How does Bertha allow for better testing?**\n\nDivers with rebreathers have long traveled beyond the 100-meter milestone and continue to dive at depths to which the devices have never been tested for. While the behavior of the device can be estimated from testing at shallower depths, **there are several non-linear dependencies, and until its performance is measured, it will always be a guess**. Therefore, Bertha was developed to measure and describe the behavior of a breathing apparatus at extreme depths, which was not possible before with previous equipment.\n\nThe second fundamental thing is accessibility. We have Bertha in-house, so **we can test the devices we are developing as often and as long as we like**. Although several laboratories can test rebreathers within a hundred or even two hundred meters, such testing is always lengthy.\n\n**What is the future vision for testing, are we going to improve it any further?**\n\nThe test facility built around Bertha is for research and development and is therefore constantly being improved to be able to **test even newly developed rebreather features.** Development will never be finished because we are constantly striving to innovate and introduce new ideas. With innovations and new ideas come new problems. We will need to always have the capacity to test our designs safely and effectively. Other improvements are being made to facilitate testing, for example, we are now completing the installation of a handling device that will allow the chamber to be opened and closed automatically. That is not an easy thing to do because the pressure vessel lid weighs 600 kilograms. Until now, we have been handling it with a crane, which can be time consuming.\n\nDo you have any questions about Big Bertha? Let us know on [Facebook](https://www.facebook.com/divesoft/) or [Instagram](https://www.instagram.com/divesoft/)!","showTags":false,"showDate":false,"image":{"mimetype":"image/png","size":1137916,"hash":"f63971dbfbdbe5fb725238e10afeacb95544a056","id":"cl2fvs1sn0jvx0776j09sr0r1","filename":"27-blog-bertha.png","category":"divesoft/","type":"image","alt":"Big Bertha"}},"id":"#2","type":"component","lock":false,"position":1},{"name":"ProductShowcase","data":{"componentTemplateId":"cm9h4wr6ugjv10803yq
2s3tp71"},"id":"#3","type":"component","lock":false,"position":2},{"name":"Footer","data":{"copyrights":"Copyright © 2019 Divesoft LLC All rights reserved.","facebookUrl":"","youtubeUrl":"","instagramUrl":"","contacts":"**Divesoft, s.r.o.** Hálkova 2495 413 01 Roudnice nad Labem Äeská republika Tel.: +420 416 857 057 E-mail: [email protected]"},"id":"#1","type":"component","lock":false,"position":3}],"id":"root","idBuffer":"#4","lastCommit":"9101b0d6-039a-4ce7-b085-17aef0391530"}},"annotations":[{"type":"id","generated":true,"id":"PageTranslation:cl2fwdvapgxp00858y80qz20w.annotations.0","typename":"PageAnnotation"},{"type":"id","generated":true,"id":"PageTranslation:cl2fwdvapgxp00858y80qz20w.annotations.1","typename":"PageAnnotation"},{"type":"id","generated":true,"id":"PageTranslation:cl2fwdvapgxp00858y80qz20w.annotations.2","typename":"PageAnnotation"}],"language":{"type":"id","generated":false,"id":"Language:cjv3kwvoj000u083611381c6o","typename":"Language"},"__typename":"PageTranslation"},"PageTranslation:cl2fwdvapgxp00858y80qz20w.annotations.0":{"key":"image","value":"{\"mimetype\":\"image/png\",\"size\":1137916,\"hash\":\"f63971dbfbdbe5fb725238e10afeacb95544a056\",\"id\":\"cl2fvs1sn0jvx0776j09sr0r1\",\"filename\":\"27-blog-bertha.png\",\"category\":\"divesoft/\",\"type\":\"image\"}","__typename":"PageAnnotation"},"PageTranslation:cl2fwdvapgxp00858y80qz20w.annotations.1":{"key":"perex","value":"For CCR Liberty testing we use a machine that we familiarly call \"Big Bertha\". Our co-founder AleÅ¡ Procháska answers questions about how this testing device works.","__typename":"PageAnnotation"},"PageTranslation:cl2fwdvapgxp00858y80qz20w.annotations.2":{"key":"title","value":"CCR Liberty testing","__typename":"PageAnnotation"},"Page:cl2yfnr88iba8085879y08pat":{"id":"cl2yfnr88iba8085879y08pat","type":{"type":"id","generated":false,"id":"PageType:cjv3l213x004f08366hjufttp","typename":"PageType"},"tags":[],"translations({\"where\":{\"language\":{\"id\":\"cjv3kwvoj000u083611381c6o\"}}})":[{"type":"id","generated":false,"id":"PageTranslation:cl2yfnr8kibaf0858en9okhol","typename":"PageTranslation"}],"__typename":"Page"},"PageTranslation:cl2yfnr8kibaf0858en9okhol":{"id":"cl2yfnr8kibaf0858en9okhol","name":"CCR Liberty manual","createdAt":"2022-05-09T07:59:23.300Z","content":{"type":"json","json":{"content":[{"name":"Header","data":{"products":[{"title":"Accessories","description":"Backplates, Consumables. Tanks.","img":{"recommendedSizes":{"width":"235","height":"235"}},"url":""},{"title":"Accessories sets","description":"Protection, maintenance, cleaning.","img":{"recommendedSizes":{"width":"235","height":"235"}},"url":""},{"title":"Spare parts","description":"Spare parts and components.","img":{"recommendedSizes":{"width":"235","height":"235"}},"url":""},{"title":"Spare parts kits","description":"Completly Liberty spare parts kits.","img":{"recommendedSizes":{"width":"235","height":"235"}},"url":""}]},"id":"#0","type":"component","lock":false,"position":0},{"name":"SectionDivider","data":{"title":"User manual","skipToC":false},"id":"#470","type":"component","lock":false,"position":1},{"name":"ProductShowcase","data":{"backgroundColor":"#ffffff","isTextDark":true,"isImageRight":true,"image":{"mimetype":"image/png","size":193451,"hash":"2f12a80d683982b4b73c6c7e7ac6fe3092327056","id":"cl2emhqif01n10776x12hvep3","filename":"divesoft-ccr-liberty-fmcl-00-1200x800w.png","category":"divesoft/","type":"image"},"imageMobile":{},"title":"User manual","subtitle":"CCR Liberty","description":"CCR Liberty\nManual version: 2.17.3/100 \nRevision date 22.03.2025 \nCU HW rev 1.5 \nHS HW rev 3.0 \nFW 2.17\n","hideDescriptionOnMobile":false,"areButtons":false,"firstTitle":"Learn more >","firstUrl":"","secondTitle":"Configurator >","secondUrl":""},"id":"#2","type":"component","lock":false,"position":2},{"name":"Divider","data":{"color":"darkGray"},"id":"#6","type":"component","lock":false,"position":3},{"name":"TextBlock","data":{"text":"### **Content**\n\n**References to standards** \n\n[**Introduction**](#Introduction)\n\nUse of this manual \nResponsibility of the CCR Liberty user \nDocumentation \nUser support \n\n[**Technical data**](#Technical-data)\n\nDepth limits \nWater temperature limits \nCO<sub>2</sub> scrubber duration limit \nWeight \n\n","textLarge":false,"imageOnRight":true,"image":{"recommendedSizes":{"width":"420","height":"280"}},"imageMobile":{"recommendedSizes":{"width":"750","height":"500"}}},"id":"#3","type":"component","lock":false,"position":4},{"name":"TextBlock","data":{"text":"**References to standards**\n\nCCR Liberty is a personal protective equipment that is legislatively regulated by REGULATION (EU) 2016/425 OF THE EUROPEAN PARLIAMENT AND OF THE COUNCIL of 9 March 2016 on personal protective equipment. \nThis personal protective equipment has been designed and tested to a harmonised standard EN 14143:2014 Respiratory equipment - Self-contained re-breathing diving apparatus.\nEN 12021:2014 Respiratory equipment - Compressed gases for breathing apparatus. The standard was taken into account during testing. \n**Third party reference to standards** \nThird party products that have been tested and certified by their manufacturers are an integral part of this personal protective equipment. In the process, certificates referring to the following harmonised standards are provided:\nEN 144-1:2018 \nEN 144-3:2003 \nISO 12209-2:2013 \nEN 250:2014 \nEN ISO 9809-1:2019 \nEN ISO 9809-2:2019 \nDirective 2014/68/EU - pressure equipment\n\n**RISK CATEGORIES OF PPE** \nAccording to Annex I of Regulation (EU) 2016/425, which defines the risk categories of personal protective equipment, CCR Liberty and Liberty Sidemount belong to Category III.\nCategory III includes exclusively the risks that may cause very serious consequences such as death or irreversible damage to health relating to the following: \n\n(b) atmospheres with oxygen deficiency; \n(i) drowning; \n\nThis personal protective equipment is designed for underwater use. The risks against which it is intended to protect are staying in an oxygen-deficient environment (underwater) and drowning. The PPE protects against these risks only when used correctly.\nThis product may only be used if the person using it is thoroughly familiar with this manual, has received training from an accredited training agency specifically designed for diving with the Liberty CCR or Liberty Sidemount. The user of the device must be certified by the appropriate agency to use the CCR Liberty or Liberty Sidemount.\n","textLarge":false,"imageOnRight":true,"image":{"recommendedSizes":{"width":"420","height":"280"}},"imageMobile":{"recommendedSizes":{"width":"750","height":"500"}}},"id":"#471","type":"component","lock":false,"position":5},{"name":"SectionDivider","data":{"title":""},"id":"#469","type":"component","lock":false,"position":6},{"name":"Divider","data":{"color":"darkGray"},"id":"#7","type":"component","lock":false,"position":7},{"name":"SectionDivider","data":{"title":"Introduction"},"id":"#467","type":"component","lock":false,"position":8},{"name":"TextBlock","data":{"text":"### <span id=\"Introduction\">**Introduction**</span> \n\n**Use of this manual**\n\nThis user manual is part of the CCR Liberty documentation.\n\nThe CCR Liberty is intended to be used exclusively by a trained person who is capable of fully understanding the instructions contained in this manual or is in the process of training with the CCR Liberty in a course accredited by the manufacturer. The training course prerequisites are set by cooperating agencies.\n\n**Responsibility of the CCR Liberty user**\n\nStrong emphasis was placed on reliability during the development of the CCR Liberty. Internal parts are individually separated to minimize the impact that a failure of any given part may have on the rebreatherâs basic functionality. Several systems have multiple backups. The logic behind the CCR Liberty is that the controls will never prohibit the start of a dive, even if malfunctions are detected. The system never locks out the diver; instead, the system will indicate the status of the unit in light of any damage if able to do so. When [cave diving](https://www.divesoft.com/en/blog/ccr-liberty-cave-diving-resistance), the inability to submerge can mean not being able to return from a dive; therefore, the CCR Liberty does not impede submersion.\n\nIt is always the userâs responsibility to decide whether he/she switches to a backup apparatus or chooses to begin a dive with a partially malfunctioning rebreather.\n\nA CCR Liberty user must accept the fact that diving involves risk. Following everything the user has learned by reading the CCR Libertyâs technical manual and during their training on the rebreather can only reduce the risk. Diver safety is increased through by regular training, methodical education, and following good diving practices. Diving with a rebreather requires a far greater degree of discipline and awareness compared to diving with an open-circuit apparatus.\n\nIf you do not accept this risk and you are not a trained, careful, and disciplined diver, do not dive with the CCR Liberty.\n\nThe manufacturer does not bear any responsibility for the use of the CCR Liberty if the apparatus has been modified in any way that is not stated in this manual or in the technical guidelines issued by the manufacturer.\n\n**Documentation**\n\n**Version**\n\nThe technical documents are subjected to a process of continual development and improvement. Therefore, please regularly check the website at [divesoft.com](https://www.divesoft.com/en) for updates.\
2n\nThis manual provides operating instructions for the hardware and software (firmware) version of the CCR Liberty written on the tittle page.\n\n**Technical guidelines**\n\nThe manufacturer can issue technical guidelines. It is strongly recommended that the user regularly checks [divesoft.com](https://www.divesoft.com/en) for new guidelines. Registered users will receive notifications by e-mail.\n\n**Document updates**\n\nThe electronic form of the manual is always available in its complete, updated form. The electronic and printed forms of the manual may not be completely identical. In case of insignificant changes (correction of minor typing errors, for example), only the electronic version is updated.\n\n**User support**\n\nRegistered users are entitled to technical support. The extent of free support can be limited. The technical support department at Divesoft s.r.o. will provide limited support for potential and unregistered users. Prior to submitting a question, please familiarize yourself with the general principles of trimix rebreather diving and the CCR Liberty technical documents available for free","textLarge":false,"imageOnRight":true,"image":{"recommendedSizes":{"width":"420","height":"280"}},"imageMobile":{"recommendedSizes":{"width":"750","height":"500"}}},"id":"#4","type":"component","lock":false,"position":9},{"name":"Divider","data":{"color":"darkGray"},"id":"#8","type":"component","lock":false,"position":10},{"name":"SectionDivider","data":{"title":"Technical data"},"id":"#468","type":"component","lock":false,"position":11},{"name":"TextBlock","data":{"text":"### <span id=\"Technical-data\">**Technical data**</span>\n\n**Depth limits**\n\nThe maximum depth for which the CCR Liberty meets the requirements of the Harmonized Standard EN 14143:2013 is 100 m.\n\nThe Liberty rebreather is depth limited at 170m (557ft) due to the use of the Apeks DST4 Environmentally sealed 1st stage regulators. It is recommended that to dive beyond 170M (557ft) the Apeks DST4 1st stages MUST be changed with the Apeks UST4 kit. This does not apply to the Sidemount version, which uses first stages without a dry chamber.\n\n**Diluent / Max. depth**\n\n* Air : 40 m\n* Heliox 10/90: 100 m \n\n**Water temperature limits**\n\nThe CCR Liberty is intended for use in water temperatures above 4 °C and below 34 °C according to the requirements of EN 14143:2013 (Article 5.1).\n\nThe minimal temperature is determined through CO<sub>2</sub> scrubber duration tests, which are performed at 4 °C.\n\n**CO<sub>2</sub> scrubber duration limit**\n\nThe maximum safe operating period of the sorbent is 168 min, determined by a test in accordance to EN 14143:2013 (Article 6.6.2). During the test, 1.6 l/min of CO<sub>2</sub> were added to the breathing loop with a ventilation rate of 40 l/min and an exhalation temperature of 32±4 °C; the unit was submerged in 4° C water to a depth of 40 m with a ppCO<sub>2</sub> of 5mBar.\n \nThe sorbentâs actual maximum operating period can differ depending on the sorbent, temperature, depth, and the diverâs physical effort.\n\nUnder normal conditions, scrubber duration ranges from 4 h in deep cold water with moderate work to 6 hours for a minimal working dive. For details see section 3.2.1 Sorbent service life.\n\n**CO2 Absorbent material** \nTests were performed with SOFNOLIME 797 absorbent material from Molecular Products.\nCCR Liberty and Liberty Sidemount may only be used with Molecular Products' SOFNOLIME 797.\nAny other absoption materials are prohibited for use with CCR Liberty and Liberty Sidemount.\n\n\n**Weight**\n\nThe total ready-to-dive weight of The CCR Liberty (including scrubber), is approx. 37 kg.\n\nFor details see part 1.15 Weights of individual parts. \n\n**Service intervals**\n\nThe recommended service intervals are at 1 year, 3 years and 5 years.\n\nThe servicing of the unit can only be performed by authorised service technician or technical centre.\n\nNot performing services at regular intervals may result in voiding your warranty.","textLarge":false,"imageOnRight":true,"image":{"recommendedSizes":{"width":"420","height":"280"}},"imageMobile":{"recommendedSizes":{"width":"750","height":"500"}}},"id":"#5","type":"component","lock":false,"position":12},{"name":"TextBlock","data":{"text":"","textLarge":false,"imageOnRight":true,"image":{"recommendedSizes":{"width":"420","height":"280"}},"imageMobile":{"recommendedSizes":{"width":"750","height":"500"}}},"id":"#436","type":"component","lock":false,"position":13},{"name":"Divider","data":{"color":"darkGray"},"id":"#245","type":"component","lock":false,"position":14},{"name":"DownloadsNew","data":{"backgroundColor":"#ffffff","title":"","subtitle":"","showBreadcrumbs":false,"hideHeader":true,"files":[{"title":"Section 1 - Technical design","isTitleBold":true,"subtitle":"","url":{"url":"/en/manuals/ccr-liberty-manual/ccr-liberty-manual-01","pageId":"cl43w74lpl8dk0858to9uhj2u","urlNewWindow":true},"urlText":"Open","id":"1"},{"title":"Section 2 - Control-unit operation","isTitleBold":true,"subtitle":"","url":{"url":"/en/manuals/ccr-liberty-manual/ccr-liberty-manual-02","pageId":"cl43w7gb7l8e20858xrzqgqz9","urlNewWindow":true},"urlText":"Open","id":"2"},{"id":"3","title":"Section 3 - Procedures","url":{"url":"/en/manuals/ccr-liberty-manual/ccr-liberty-manual-03","pageId":"cl43w7qiml8ek08588cha4oc2","urlNewWindow":true},"urlText":"Open","isTitleBold":true}],"activeTab":"4"},"id":"#466","type":"component","lock":false,"position":15}
2,{"name":"ListOfLinks","data":{"links":[{"title":"> Next page / Section: 1 Technical design","url":{"url":"/en/manuals/ccr-liberty-manual/ccr-liberty-manual-01","pageId":"cl43w74lpl8dk0858to9uhj2u","urlNewWindow":true},"id":"1"}],"activeTab":"1"},"id":"#462","type":"component","lock":false,"position":16},{"name":"Footer","data":{"copyrights":"Copyright © 2019 Divesoft LLC All rights reserved.","facebookUrl":{"urlNewWindow":true,"url":"https://www.facebook.com/divesoft/"},"youtubeUrl":{"url":"https://www.youtube.com/channel/UCHI2-kHmfoUlAdhQXPKl8lA/featured","urlNewWindow":true},"instagramUrl":{"url":"https://www.instagram.com/divesoft/","urlNewWindow":true},"contacts":"**Divesoft s.r.o.** \nHálkova 2495 \n413 01 Roudnice nad Labem \nCzech Republic \nTel.: +420 416 857 057 \nE-mail: [email protected]"},"id":"#1","type":"component","lock":false,"position":17}],"id":"root","idBuffer":"#472","lastCommit":"5ec0a265-86e7-4ae9-9ac8-438072d19db3"}},"annotations":[],"language":{"type":"id","generated":false,"id":"Language:cjv3kwvoj000u083611381c6o","typename":"Language"},"__typename":"PageTranslation"},"Page:cl2ypayvtidsk08584m2igh8l":{"id":"cl2ypayvtidsk08584m2igh8l","type":{"type":"id","generated":false,"id":"PageType:cjv3l213x004f08366hjufttp","typename":"PageType"},"tags":[{"type":"id","generated":false,"id":"Tag:clw52zeqhlclq0735wrys6js8","typename":"Tag"},{"type":"id","generated":false,"id":"Tag:clyyc8ovoy9ai0735du6cmw7i","typename":"Tag"}],"translations({\"where\":{\"language\":{\"id\":\"cjv3kwvoj000u083611381c6o\"}}})":[{"type":"id","generated":false,"id":"PageTranslation:cl2ypayw6idsr0858lt8r4u8f","typename":"PageTranslation"}],"__typename":"Page"},"PageTranslation:cl2ypayw6idsr0858lt8r4u8f":{"id":"cl2ypayw6idsr0858lt8r4u8f","name":"Divesoft.blog / What will I learn in a rebreather course","createdAt":"2022-05-09T12:29:22.854Z","content":{"type":"json","json":{"content":[{"name":"Header","data":{"products":[{"title":"Accessories","description":"Backplates, Consumables. Tanks.","img":{"recommendedSizes":{"width":"235","height":"235"}},"url":""},{"title":"Accessories sets","description":"Protection, maintenance, cleaning.","img":{"recommendedSizes":{"width":"235","height":"235"}},"url":""},{"title":"Spare parts","description":"Spare parts and components.","img":{"recommendedSizes":{"width":"235","height":"235"}},"url":""},{"title":"Spare parts kits","description":"Completly Liberty spare parts kits.","img":{"recommendedSizes":{"width":"235","height":"235"}},"url":""}]},"id":"#0","type":"component","lock":false,"position":0},{"name":"BlogArticle","data":{"title":"What will I learn in a rebreather course","perex":"Let's face it, entering the rebreather world is the start of something new. You already know [how to choose an instructor for a rebreather course](https://www.divesoft.com/en/blog/how-to-choose-an-instructor-for-your-rebreather-course). If a student is to be well prepared to dive safely with a rebreather, such training, like OWD, should include a detailed theory section, pool training and open water diving. ","content":"The **theoretical section ranges from about 8 to 12 hours** where you will learn specific things about the operation of the device, its types and configurations, details on oxygen sensors, CO2 absorption, breathing work with the rebreather, etc. A very important chapter is of course physiology, which brings new contexts with [rebreather diving](https://www.divesoft.com/en/blog/7-steps-to-becoming-a-rebreather-diver), and it is necessary to be aware of new pitfalls thrown at the diver in the form of dangerous situations. \n\nWith a [rebreather](https://www.divesoft.com/en/products/ccr-liberty/philosophy), for example, you can easily get to physiological gas levels that are not at all common in open circuit diving. **Dive planning and gas management are also fundamentally different**. A good instructor will put all these new facts into a coherent context so that you understand the issues well. This is the only way you will be able to make the right decisions at important moments in the future. \n\nWe've already written about instrument set-up, but there's no harm in mentioning it again because it's a critical part of training. A properly assembled and well tested apparatus before the actual dive forms a keystone factor of a safe dive, and everyone needs to be able to operate it without hesitation.\n\n\n\n**Training in a pool or confined water** should give you a basic familiarity with how the apparatus behaves underwater. You will get a feel for it in a safe environment before venturing into open water. You will go through the most basic exercises and begin to learn the necessary habits. Usually, one training session in the pool is enough, but some training systems g
2ive even more attention to this part.\n\nThe core part of training, as with any other course, is training in a real open water environment to gain real experience. Given the wide range of skills a diver must qualify, **a good course should include a minimum of 8 dives of 40 - 60 minutes duration.** Anything less is insufficient. \n\nDuring this training you will learn to operate the unit in detail underwater. Controlling buoyancy or maintaining optimum loop volume will be new skills. You will get the drill of closing the mouthpiece every time you take it out of your mouth into your muscle memory. The mask won't be the only thing you'll be able to pour water out of underwater because you'll learn how to pour water out of the breathing circuit as well. This and many more such exercises will prepare you for common rebreather diving situations. **It would not be a good course if it does not also prepare you for emergency and risky situations.** You will learn the procedures for dealing with failures or unexpected events such as high and low partial pressure of oxygen, hypercapnia and so on. \n\nI dare say that **after completing the rebreather course you will leave as a new diver**. You will learn during the course that you cannot approach a rebreather in the same way as conventional open circuit, because it simply works on a different principle. \n\nWhen you encounter an obstacle underwater, you'd rather swim around it than swim over it in one mighty breath and exhale to return to the original depth. You will already understand that, unlike the open circuit, ascending to the surface can make situations worse and that you have much more time to solve the problem underwater.\n\n* [Jakub Å imánek](https://www.divesoft.com/en/about-us/jakub-simanek), Divesoft Factory IT","showTags":false,"showDate":false,"image":{"mimetype":"image/png","size":1606402,"hash":"ba566f77f12fb99d5df6fa7673266efe470d4c3b","id":"cl2ypxyvb5rmm0776ilpm8xr0","filename":"28-course-2.png","category":"divesoft/","type":"image"}},"id":"#2","type":"component","lock":false,"position":1},{"name":"ProductShowcase","data":{"componentTemplateId":"cm9h4wr6ugjv10803yqs3tp71"},"id":"#4","type":"component","lock":false,"position":2},{"name":"Footer","data":{"copyrights":"Copyright © 2019 Divesoft LLC All rights reserved.","facebookUrl":"","youtubeUrl":"","instagramUrl":"","contacts":"**Divesoft, s.r.o.** Hálkova 2495 413 01 Roudnice nad Labem Äeská republika Tel.: +420 416 857 057 E-mail: [email protected]"},"id":"#1","type":"component","lock":false,"position":4}],"id":"root","idBuffer":"#5","lastCommit":"a9a1770e-be55-45b8-a0d9-d3fe1c745f6c"}},"annotations":[{"type":"id","generated":true,"id":"PageTranslation:cl2ypayw6idsr0858lt8r4u8f.annotations.0","typename":"PageAnnotation"},{"type":"id","generated":true,"id":"PageTranslation:cl2ypayw6idsr0858lt8r4u8f.annotations.1","typename":"PageAnnotation"},{"type":"id","generated":true,"id":"PageTranslation:cl2ypayw6idsr0858lt8r4u8f.annotations.2","typename":"PageAnnotation"}],"language":{"type":"id","generated":false,"id":"Language:cjv3kwvoj000u083611381c6o","typename":"Language"},"__typename":"PageTranslation"},"PageTranslation:cl2ypayw6idsr0858lt8r4u8f.annotations.0":{"key":"title","value":"What will I learn in a rebreather course","__typename":"PageAnnotation"},"PageTranslation:cl2ypayw6idsr0858lt8r4u8f.annotations.1":{"key":"perex","value":"Let's face it, entering the rebreather world is the start of something new. You already know how to choose an instructor for a rebreather course. If a student is to be well prepared to dive safely with a rebreather, such training, like OWD, should include a detailed theory section, pool training and open water diving. ","__typename":"PageAnnotation"},"PageTranslation:cl2ypayw6idsr0858lt8r4u8f.annotations.2":{"key":"image","value":"{\"mimetype\":\"image/png\",\"size\":1606402,\"hash\":\"ba566f77f12fb99d5df6fa7673266efe470d4c3b\",\"id\":\"cl2ypxyvb5rmm0776ilpm8xr0\",\"filename\":\"28-course-2.png\",\"category\":\"divesoft/\",\"type\":\"image\"}","__typename":"PageAnnotation"},"Page:cl3vesldqknhj085858savf3u":{"id":"cl3vesldqknhj085858savf3u","type":{"type":"id","generated":false,"id":"PageType:cjv3l213x004f08366hjufttp","typename":"PageType"},"tags":[],"translations({\"where\":{\"language\":{\"id\":\"cjv3kwvoj000u083611381c6o\"}}})":[{"type":"id","generated":false,"id":"PageTranslation:cl3veslegknhq08583lme5wcy","typename":"PageTranslation"}],"__typename":"Page"},"PageTranslation:cl3veslegknhq08583lme5wcy":{"id":"cl3veslegknhq08583lme5wcy","name":"Diving Rebreather Configurator (CCR Liberty)","createdAt":"2022-06-01T09:51:33.208Z","content":{"type":"json","json":{"content":[{"name":"Header","data":{"componentTemplateId":"cjv7yndru048c0836j99ljogw"},"id":"#0","type":"component","lock":false,"position":0},{"name":"ProductCrossroadNew","data":{"componentTemplateId":"cmo5ko5huwtv40889ugkkecht"},"id":"#22","type":"component","lock":false,"position":1},{"name":"Spacer","data":{"spacingLarge":30,"spacingSmall":20,"backgroundColor":"#f0f0f0"},"id":"#23","type":"component","lock":false,"position":2},{"name":"ComponentHeader","data":{"isTitleH1":true,"title":"CCR Configurator","subtitle":"","showBreadcrumbs":false,"backgroundColor":"#f0f0f0"},"id":"#21","type":"component","lock":false,"position":4},{"name":"Configurator","data":{"isUnderMaintenance":false,"treeId":"62973cffdeac35e30482aec0","instructorUrl":{"url":"/en/instructors","pageId":"ckx4slj6v005k0a53p9i6x50m","urlNewWindow":true}},"id":"#2","type":"component","lock":false,"position":22},{"name":"Footer","data":{"componentTemplateId":"cjvwimxrl08e40798hjs5ek9w"},"id":"#1","type":"component","lock":false,"position":23}],"id":"root","idBuffer":"#24","lastCommit":"5fc89d8a-c8c8-47ad-9020-ae8d1c70ad8e"}},"annotations":[],"language":{"type":"id","generated":false,"id":"Language:cjv3kwvoj000u083611381c6o","typename":"Language"},"__typename":"PageTranslation"}
2,"Page:cl43w74lpl8dk0858to9uhj2u":{"id":"cl43w74lpl8dk0858to9uhj2u","type":{"type":"id","generated":false,"id":"PageType:cjv3l213x004f08366hjufttp","typename":"PageType"},"tags":[],"translations({\"where\":{\"language\":{\"id\":\"cjv3kwvoj000u083611381c6o\"}}})":[{"type":"id","generated":false,"id":"PageTranslation:cl43w74m3l8dr0858gnj0c71z","typename":"PageTranslation"}],"__typename":"Page"},"PageTranslation:cl43w74m3l8dr0858gnj0c71z":{"id":"cl43w74m3l8dr0858gnj0c71z","name":"CCR Liberty manual 01","createdAt":"2022-06-07T08:20:54.171Z","content":{"type":"json","json":{"content":[{"name":"Header","data":{"products":[{"title":"Accessories","description":"Backplates, Consumables. Tanks.","img":{"recommendedSizes":{"width":"235","height":"235"}},"url":""},{"title":"Accessories sets","description":"Protection, maintenance, cleaning.","img":{"recommendedSizes":{"width":"235","height":"235"}},"url":""},{"title":"Spare parts","description":"Spare parts and components.","img":{"recommendedSizes":{"width":"235","height":"235"}},"url":""},{"title":"Spare parts kits","description":"Completly Liberty spare parts kits.","img":{"recommendedSizes":{"width":"235","height":"235"}},"url":""}]},"id":"#0","type":"component","lock":false,"position":0},{"name":"Divider","data":{"color":"darkGray"},"id":"#9","type":"component","lock":false,"position":1},{"name":"SectionDivider","data":{"title":""},"id":"#543","type":"component","lock":false,"position":2},{"name":"TextBlock","data":{"text":"[**Section: 1. Technical design**](#1-.-Technical-design)\n\n[1.1\tBasic schematic](#1-.-1-Basic-schematic)\n\n[1.2\tDive/surface valve](#
21-.-2-Dive-/-surface-valve)\n\n[1.2.1\tInhalation valve](#1-.-2-.-1-Inhalation-valve) \n[1.2.2\tExhalation valve](#1-.-2-.-2-Exhalation-valve) \n[1.2.3\tMouthpiece](#1-.-2-.-3-Mouthpiece) \n[1.2.4\tUsage with a full face mask](#1-.-2-.-4-Usage-with-a-full-face-mask) \n\n[1.3\tCorrugated hoses and accessories](#1-.-3-Corrugated-hoses-and-accessories)\n\n[1.3.1\tHoses](#1-.-3-.-1-Hoses) \n[1.3.2\tAttachment to the head](#1-.-3-.-2-Attachment-to-the-head) \n[1.3.3\tConnection to the breathing bags](#1-.-3-.-3-Connection-to-the-breathing-bags) \n[1.3.4\tAttachment of the DSV](#1-.-3-.-4-Attachment-of-the-DSV) \n\n[1.4\tInhalation bag](#1-.-4-Inhalation-bag)\n\n[1.4.1\tAutomatic diluent valve](#1-.-4-.-1-Automatic-diluent-valve) \n[1.4.2\tManual diluent bypass valve](#1-.-4-.-2-Manual-diluent-bypass-valve)\n\n[1.5\tExhalation bag](#1-.-5-Exhalation-bag)\n\n[1.5.1\tManual oxygen bypass valve](#1-.-5-.-1-Manual-oxygen-bypass-valve)\n\n[1.5.2\tOverpressure valve](#1-.-5-.-2-Overpressure-valve) \n\n[1.6\tOxygen cylinder](#1-.-6-Oxygen-tank)\n\n[1.6.1\tCylinder](#1-.-6-.-1-Tank) \n[1.6.2\tValve](#1-.-6-.-2-Valve) \n[1.6.3\tReduction valve](#1-.-6-.-3-Reduction-valve) \n[1.6.4\tPressure reading](#1-.-6-.-4-Pressure-reading)\n\n[1.7\tDiluent cylinder](#1-.-7-Diluent-tank)\n\n[1.7.1\tCylinder](#1-.-7-.-1-Tank) \n[1.7.2\tValve](#1-.-7-.-2-Valve) \n[1.7.3\tReduction valve and pressure reading](#1-.-7-.-3-Reduction-valve-and-pressure-reading) \n[1.7.4\tBackup regulator (optional)](#1-.-7-.-4-Backup-regulator-(optional)) \n\n[1.7.5\tAir integration (2021 Edition only)] \n\n[1.7.6\tTransmitters (2021 Edition only)](#1-.-7-.-6-Transmitters-(2021-Edition-only))\n\n[1.7.7\tProcedure for pairing the transmitter (2021 Edition only)](#1-.-7-.-7-Procedures-for-pairing-the-transmitter-(2021-Edition-only))\n\n[1.8\tCO<sub>2</sub> scrubber](#1-.-8-CO2-scrubber)\n\n[1.9\tHead](#1-.-9-Head)\n\n[1.9.1\tControl units](#1-.-9-.-1-Control-units) \n[1.9.2\tDirect measurement of ppO<sub>2</sub>](#1-.-9-.-2-Direct-measurement-of-ppO2) \n[1.9.3\tMeasurement of He content](#1-.-9-.-3-Measurement-of-He-content) \n[1.9.4\tHelium blind plugs](#1-.-9-.-4-Helium-blind-plugs) \n[1.9.5\tPressure and depth measurement](#1-.-9-.-5-Pressure-and-depth-measurement) \n[1.9.6\tTemperature measurement](#1-.-9-.-6-Temperature-measurement) \n[1.9.7\tSolenoids](#1-.-9-.-7-Solenoids) \n[1.9.8\tPower supply](#1-.-9-.-8-Power-supply) \n\n[1.10\tVisual display units](#1-.-10-Visual-display-units)\n\n[1.10.1\tHandsets](#1-.-10-.-1-Handsets) \n[1.10.2\tHead-up display](#1-.-10-.-2-Head-up-display) \n[1.10.3\tBuddy display](#1-.-10-.-3-Buddy-display) \n\n[1.11\tBackplate and mounting](#1-.-11-Backplate-and-mounting)\n\n[1.12\tHarness](#1-.-12-Harness)\n\n[1.13\tBuoyancy compensator](#1-.-13-Buoyancy-compensator)\n\n[1.14\tBallast](#1-.-14-Ballast)\n\n[1.15\tWeights of individual parts](#1-.-15-Weights-of-individual-parts)\n\n","textLarge":false,"imageOnRight":true,"image":{"recommendedSizes":{"width":"420","height":"280"}},"imageMobile":{"recommendedSizes":{"width":"750","height":"500"}}},"id":"#471","type":"component","lock":false,"position":3},{"name":"Divider","data":{"color":"darkGray"},"id":"#472","type":"component","lock":false,"position":4},{"name":"SectionDivider","data":{"title":"1. Technical design"},"id":"#490","type":"component","lock":false,"position":5},{"name":"TextBlock","data":{"text":"### <span id=\"1-.-Technical-design\">**1. Technical design**</span>\n","textLarge":false,"imageOnRight":true,"image":{"recommendedSizes":{"width":"420","height":"280"}},"imageMobile":{"recommendedSizes":{"width":"750","height":"500"}}},"id":"#28","type":"component","lock":false,"position":6},{"name":"Image","data":{"firstImage":{"mimetype":"image/png","size":573677,"hash":"8576c1a66757f591cab0a740067a16547582721d","id":"cl3snlvcwdcx60776vbyyxl50","filename":"divesoft-ccr-liberty-manual-1-0-01.png","category":"divesoft/","type":"image"},"secondImage":{},"image":{"mimetype":"image/png","size":573677,"hash":"8576c1a66757f591cab0a740067a16547582721d","id":"cl3snlvcwdcx60776vbyyxl50","filename":"divesoft-ccr-liberty-manual-1-0-01.png","category":"divesoft/","type":"image"},"isHorizontal":true},"id":"#10","type":"component","lock":false,"position":7},{"name":"Image","data":{"firstImage":{"mimetype":"image/png","size":498748,"hash":"55322e8a51f1c0350158a3e03584ca83df66aa86","id":"cl3snq9k2dd1m0776xogmvcl8","filename":"divesoft-ccr-liberty-manual-1-0-02.png","category":"divesoft/","type":"image"},"secondImage":{},"image":{"mimetype":"image/png","size":498748,"hash":"55322e8a51f1c0350158a3e03584ca83df66aa86","id":"cl3snq9k2dd1m0776xogmvcl8","filename":"divesoft-ccr-liberty-manual-1-0-02.png","category":"divesoft/","type":"image"},"isHorizontal":true},"id":"#11","type":"component","lock":false,"position":8},{"name":"SectionDivider","data":{"title":"1.1 Basic schematic"},"id":"#491","type":"component","lock":false,"position":9},{"name":"TextBlock","data":{"text":"### <span id=\"1-.-1-Basic-schematic\">**1.1 Basic schematic**</span>\n","textLarge":false,"imageOnRight":true,"image":{"recommendedSizes":{"width":"420","height":"280"}},"imageMobile":{"recommendedSizes":{"width":"750","height":"500"}}},"id":"#14","type":"component","lock":false,"position":10},{"name":"Image","data":{"firstImage":{"mimetype":"image/png","size":131168,"hash":"c79b04853663f3b2a40d1e145915176ec88aa837","id":"cl4fc7apojdns0776sxhjtuaa","filename":"divesoft-ccr-liberty-manual-1-1-01.png","category":"divesoft/","type":"image"},"secondImage":{},"image":{"mimetype":"image/png","size":131168,"hash":"c79b04853663f3b2a40d1e145915176ec88aa837","id":"cl4fc7apojdns0776sxhjtuaa","filename":"divesoft-ccr-liberty-manual-1-1-01.png","category":"divesoft/","type":"image"},"isHorizontal":true},"id":"#12","type":"component","lock":false,"position":11},{"name":"TextBlock","data":{"text":"The principle of a rebreather involves in recycling the breathing mixture. Carbon dioxide is removed from the exhaled mixture and is again prepared for the next inhalation after being replenished with oxygen. The composition of the breathing mixture changes continuously.","textLarge":false,"imageOnRight":true,"image":{"recommendedSizes":{"width":"420","height":"280"}},"imageMobile":{"recommendedSizes":{"width":"750","height":"500"}}},"id":"#15","type":"component","lock":false,"position":12},{"name":"Divider","data":{"color":"darkGray"},"id":"#13","type":"component","lock":false,"position":13},{"name":"SectionDivider","data":{"title":"1.2 Dive/surface valve"},"id":"#492","type":"component","lock":false,"position":14},{"name":"TextBlock","data":{"text":"### <span id=\"1-.-2-Dive-/-surface-valve\">**1.2 Dive/surface valve**</span>\n\n\nThe breathing mixture is delivered to the dive/surface valve (DSV) through the corrugated hose from the left. When inhaling, the mixture passes through the inhalation valve to the mouthpiece and then into the diverâs respiratory tract. When exhaling, it passes through the exhalation valve into the corrugated hose on the right.\n\nThe direction of the mixtureâs flow is indicated on the DSV.","textLarge":false,"imageOnRight":true,"image":{"recommendedSizes":{"width":"420","height":"280"},"mimetype":"image/png","size":169539,"hash":"acba18f4f9e3da94db01f093d2b5f57a08f58b65","id":"cl3snr59edd260776tnp8unq7","filename":"divesoft-ccr-liberty-manual-1-2-01.png","category":"divesoft/","type":"image"},"imageMobile":{"recommendedSizes":{"width":"750","height":"500"}}},"id":"#16","type":"component","lock":false,"position":15}
2,{"name":"Divider","data":{"color":"darkGray"},"id":"#17","type":"component","lock":false,"position":16},{"name":"SectionDivider","data":{"title":"1.2.1 Inhalation valve"},"id":"#493","type":"component","lock":false,"position":17},{"name":"TextBlock","data":{"text":"### <span id=\"1-.-2-.-1-Inhalation-valve\">**1.2.1\tInhalation valve**</span> \n\nThe inhalation valve ensures that the exhaled mixture does not backflow into the inhalation bag and is not repeatedly inhaled by the diver without the removal of carbon dioxide and the addition of oxygen.\n\n\n\n","textLarge":false,"imageOnRight":true,"image":{"recommendedSizes":{"width":"420","height":"280"},"mimetype":"image/png","size":319997,"hash":"543aee478483eacabcff34e1b17064492df3a5ff","id":"cl3snrw1ddd2w0776wv4dgvcn","filename":"divesoft-ccr-liberty-manual-1-2-1-01.png","category":"divesoft/","type":"image"},"imageMobile":{"recommendedSizes":{"width":"750","height":"500"}}},"id":"#18","type":"component","lock":false,"position":18},{"name":"TextBlock","data":{"text":"The inhalation valve is situated within the connection of the left corrugated hose.\n\nA similar mushroom valve can be found in the exhalation valve an open circuitsâs second-stage regulator.\n\nThis is one of the most critical components of the rebreather. It is, however, difficult to detect a malfunction in this part during a dive, and such a malfunction can lead to loss of consciousness.\n","textLarge":false,"imageOnRight":true,"image":{"recommendedSizes":{"width":"420","height":"280"}},"imageMobile":{"recommendedSizes":{"width":"750","height":"500"}}},"id":"#19","type":"component","lock":false,"position":19},{"name":"Divider","data":{"color":"darkGray"},"id":"#20","type":"component","lock":false,"position":20},{"name":"SectionDivider","data":{"title":"1.2.2 Exhalation valve"},"id":"#494","type":"component","lock":false,"position":21},{"name":"TextBlock","data":{"text":"### <span id=\"1-.-2-.-2-Exhalation-valve\">**1.2.2 Exhalation valve**</span> \n\nThe exhalation valve directs the exhaled mixture via the corrugated hose to the exhalation bag. It prevents the diver from directly re-inhaling the exhaled mixture.\n\nThe exhalation valve is situated within the connection of the right corrugated hose.\n","textLarge":false,"imageOnRight":true,"image":{"recommendedSizes":{"width":"420","height":"280"}},"imageMobile":{"recommendedSizes":{"width":"750","height":"500"}}},"id":"#21","type":"component","lock":false,"position":22},{"name":"TextBlock","data":{"text":"**Closing the dive/surface valve**\n\nIf the diver is in the water and not using the DSV, the DSV must be closed. Otherwise, the circuit will become flooded with water.\n\nClosing the DSV is done by using the gate handle situated on the front part of the DSV. In the open position, the handle is put up; in the closed position, it is down.","textLarge":false,"imageOnRight":true,"image":{"recommendedSizes":{"width":"420","height":"280"},"mimetype":"image/png","size":340240,"hash":"47b4074c423b1a8185ab18b21af7f956965a52ec","id":"cl3snsgxzdd3x0776yy40zcmb","filename":"divesoft-ccr-liberty-manual-1-2-2-01.png","category":"divesoft/","type":"image"},"imageMobile":{"recommendedSizes":{"width":"750","height":"500"}}},"id":"#22","type":"component","lock":false,"position":23},{"name":"Divider","data":{"color":"darkGray"},"id":"#23","type":"component","lock":false,"position":24},{"name":"SectionDivider","data":{"title":"1.2.3 Mouthpiece"},"id":"#498","type":"component","lock":false,"position":25},{"name":"TextBlock","data":{"text":"### <span id=\"1-.-2-.-3-Mouthpiece\">**1.2.3 Mouthpiece**</span> \n\n\nCreating a tight seal around the rebreatherâs mouthpiece prevents water from entering into the circuit. The DSV and corrugated hoses function at a greater force than the regulator of an open-circuit apparatus. Therefore having, an anatomically suitable mouthpiece and proper clenching of the mouth is critical.\n\nWe do not recommend using a mouthpiece that can be shaped to the diverâs bite after heating. This kind of mouthpiece restricts the movement of the lower jaw, which leads to unilateral stress and will rapidly exhaust the masseter muscles.","textLarge":false,"imageOnRight":true,"image":{"recommendedSizes":{"width":"420","height":"280"}},"imageMobile":{"recommendedSizes":{"width":"750","height":"500"}}},"id":"#24","type":"component","lock":false,"position":26},{"name":"SectionDivider","data":{"title":"1.2.4 Mouthpiece retaining strap","skipToC":false},"id":"#567","type":"component","lock":false,"position":27},{"name":"TextBlock","data":{"text":"### **1.2.4 Mouthpiece Retaining Strap**\nEN 14143:2014 requires the use of a stra
2p to securely connect the mouthpiece to the diver's mouth. The retaining strap is intended to reduce the likelihood of potential water ingress into the breathing loop or drowning of the diver in the event of unconsciousness or convulsions. The Mouthpiece Retaining strap in the basic Liberty package is designed with a rubber elastic cord mounted on the DSV. \nAdjust the tension and force of the restraint by tightening or loosening the fisherman's knot. \nThis basic solution can be user upgraded with optional accessories on the Divesoft shop.\n","textLarge":false,"imageOnRight":true,"image":{"recommendedSizes":{"width":"420","height":"280"}},"imageMobile":{"recommendedSizes":{"width":"750","height":"500"}}},"id":"#565","type":"component","lock":false,"position":28},{"name":"Image","data":{"firstImage":{"mimetype":"image/jpeg","size":46806,"hash":"0aa6ea35aafab4252e70c4c977f7bee9204eb488","id":"clvz6er27vle60776ensh8j6y","filename":"mouth-retaining-strap.jpg","category":"divesoft/","type":"image"},"secondImage":{}},"id":"#566","type":"component","lock":false,"position":29},{"name":"Divider","data":{"color":"darkGray"},"id":"#25","type":"component","lock":false,"position":30},{"name":"SectionDivider","data":{"title":"1.2.5 Usage with a full face mask"},"id":"#499","type":"component","lock":false,"position":31},{"name":"TextBlock","data":{"text":"### <span id=\"1-.-2-.-5-Usage-with-a-full-face-mask\">**1.2.5 Usage with a full face mask**</span> \n\nEven though the mechanical dimensions of the DSV would allow for the connection of a full face mask, it is not possible to switch an open-circuit mixture inlet with an inlet from a rebreather. One of the reasons for this is the necessity of defogging the visor.\n\nConsult with the manufacturer regarding possibilities of connecting a full face mask to the rebreather. The use of such an apparatus will require procedures that deviate from this manual and from standard procedures taught in a course accredited by the rebreatherâs manufacturer.","textLarge":false,"imageOnRight":true,"image":{"recommendedSizes":{"width":"420","height":"280"}},"imageMobile":{"recommendedSizes":{"width":"750","height":"500"}}},"id":"#26","type":"component","lock":false,"position":32},{"name":"Divider","data":{"color":"darkGray"},"id":"#27","type":"component","lock":false,"position":33},{"name":"SectionDivider","data":{"title":"1.3 Corrugated hoses and accesories","skipToC":true},"id":"#500","type":"component","lock":false,"position":34},{"name":"TextBlock","data":{"text":"### <span id=\"1-.-3-Corrugated-hoses-and-accessories\">**1.3 Corrugated hoses and accessories**</span>","textLarge":false,"imageOnRight":true,"image":{"recommendedSizes":{"width":"420","height":"280"}},"imageMobile":{"recommendedSizes":{"width":"750","height":"500"}}},"id":"#30","type":"component","lock":false,"position":35},{"name":"SectionDivider","data":{"title":"1.3.1 Hoses"},"id":"#501","type":"component","lock":false,"position":36},{"name":"TextBlock","data":{"text":"### <span id=\"1-.-3-.-1-Hoses\">**1.3.1 Hoses**</span> \n\nThe corrugated hoses are made of EPDM rubber. Compatible chemical agents must be used for cleaning and disinfection see section 3.5.3 Cleaning and disinfection).\n\nThe corrugated hoses can be damaged if subjected to excessive stress. \n","textLarge":false,"imageOnRight":true,"image":{"recommendedSizes":{"width":"420","height":"280"},"mimetype":"image/png","size":517118,"hash":"fe42e27b8ba8665a178b899e4f85409acb11bdf0","id":"cl6j3bdjp0n8907769cni0y04","filename":"divesoft-ccr-liberty-manual-1-3-1-02.png","category":"divesoft/","type":"image"},"imageMobile":{"recommendedSizes":{"width":"750","height":"500"}}},"id":"#29","type":"component","lock":false,"position":37},{"name":"TextBlock","data":{"text":"In particular, it is necessary to avoid perforation, cutting, and excessive wear. Avoid long-term deformation of the hoses when storing the unit. Do not treat the hoses like a hanger.\n\nThe corrugated hoses are one of the least durable mechanical parts of the CCR Liberty. Pay appropriate attention to protecting and maintaining them.","textLarge":false,"imageOnRight":true,"image":{"recommendedSizes":{"width":"420","height":"280"},"mimetype":"image/png","size":72443,"hash":"fb02352814f66a2b3d1d91c424b5080ce74045df","id":"cl3snt5vvdd4z0776ypnp2hup","filename":"divesoft-ccr-liberty-manual-1-3-1-01.png","category":"divesoft/","type":"image"},"imageMobile":{"recommendedSizes":{"width":"750","height":"500"}}},"id":"#31","type":"component","lock":false,"position":38},{"name":"Divider","data":{"color":"darkGray"},"id":"#32","type":"component","lock":false,"position":39},{"name":"SectionDivider","data":{"title":"1.3.2 Attachment to the head"},"id":"#502","type":"component","lock":false,"position":40}
2,{"name":"TextBlock","data":{"text":"### <span id=\"1-.-3-.-2-Attachment-to-the-head\">**1.3.2 Attachment to the head**</span>\n\nUnlike almost all other bayonet connectors on the CCR Liberty, the bayonet connector on the exhalation side has three protrusions. This design prevents incorrect attachment of the hoses, since the inhalation side has only two protrusions.\n\nElbow on the exhalation side (left) and inhalation side (right).","textLarge":false,"imageOnRight":true,"image":{"recommendedSizes":{"width":"420","height":"280"}},"imageMobile":{"recommendedSizes":{"width":"750","height":"500"}}},"id":"#33","type":"component","lock":false,"position":41},{"name":"Image","data":{"firstImage":{"mimetype":"image/png","size":117921,"hash":"cef56604728689bc5bf25fb52c8ee903729075ba","id":"cl3snvfx9dd7x0776ac99l7di","filename":"divesoft-ccr-liberty-manual-1-3-2-01.png","category":"divesoft/","type":"image"},"secondImage":{"mimetype":"image/png","size":114531,"hash":"731d059d1a8ab472123f13b6f67b159f0bea727d","id":"cl3so2i3ddde40776y79wmh7o","filename":"divesoft-ccr-liberty-manual-1-3-2-02.png","category":"divesoft/","type":"image"},"image":{"mimetype":"image/png","size":117921,"hash":"cef56604728689bc5bf25fb52c8ee903729075ba","id":"cl3snvfx9dd7x0776ac99l7di","filename":"divesoft-ccr-liberty-manual-1-3-2-01.png","category":"divesoft/","type":"image"}},"id":"#437","type":"component","lock":false,"position":42},{"name":"Divider","data":{"color":"darkGray"},"id":"#34","type":"component","lock":false,"position":43},{"name":"SectionDivider","data":{"title":"1.3.3 Connection to the breathing bags"},"id":"#503","type":"component","lock":false,"position":44},{"name":"TextBlock","data":{"text":"### <span id=\"1-.-3-.-3-Connection-to-the-breathing-bags\">**1.3.3 Connection to the breathing bags**</span> \n\nThe T-pieces have standard bayonet connections. On the exhalation side, the T-piece has a partition that directs any water that has entered the DSV to the exhalation bag and improves the blending of the mixture when oxygen is added via the manual bypass valve.","textLarge":false,"imageOnRight":true,"image":{"recommendedSizes":{"width":"420","height":"280"}},"imageMobile":{"recommendedSizes":{"width":"750","height":"500"}}},"id":"#35","type":"component","lock":false,"position":45},{"name":"Image","data":{"firstImage":{"mimetype":"image/png","size":106357,"hash":"b7bfd1ef9753478d22fb92edca65fad103fc543a","id":"cl3so4krrddgb0776xaal7xup","filename":"divesoft-ccr-liberty-manual-1-3-3-01.png","category":"divesoft/","type":"image"},"secondImage":{"mimetype":"image/png","size":100116,"hash":"0c15a9b3b4c0871ea72086cc0dd1485b51038add","id":"cl4cf2nbdi9w90776t9ca68lx","filename":"divesoft-ccr-liberty-manual-1-3-3-02.png","category":"divesoft/","type":"image"},"image":{"mimetype":"image/png","size":106357,"hash":"b7bfd1ef9753478d22fb92edca65fad103fc543a","id":"cl3so4krrddgb0776xaal7xup","filename":"divesoft-ccr-liberty-manual-1-3-3-01.png","category":"divesoft/","type":"image"}},"id":"#438","type":"component","lock":false,"position":46}
2,{"name":"Divider","data":{"color":"darkGray"},"id":"#36","type":"component","lock":false,"position":47},{"name":"SectionDivider","data":{"title":"1.3.4 Attachment of the DSV"},"id":"#504","type":"component","lock":false,"position":48},{"name":"TextBlock","data":{"text":"### <span id=\"1-.-3-.-4-Attachment-of-the-DSV\">**1.3.4 Attachment of the DSV**</span> \n\nThe DSV attachment to the corrugated hoses is done with axial teeth that fit together and are secured with a wire retaining ring.\n\nThe baskets of the mushroom valves are inserted into the connector. When handling the baskets, pay close attention to their correct orientation.","textLarge":false,"imageOnRight":true,"image":{"recommendedSizes":{"width":"420","height":"280"},"mimetype":"image/png","size":103240,"hash":"cfa7bafd0bf53ab963021bd7f8a7b10c7fc71132","id":"cl3so74jyddhk0776s0hijbiw","filename":"divesoft-ccr-liberty-manual-1-3-4-01.png","category":"divesoft/","type":"image"},"imageMobile":{"recommendedSizes":{"width":"750","height":"500"}}},"id":"#37","type":"component","lock":false,"position":49},{"name":"Divider","data":{"color":"darkGray"},"id":"#38","type":"component","lock":false,"position":50},{"name":"SectionDivider","data":{"title":"1.4 Inhalation bag"},"id":"#505","type":"component","lock":false,"position":51},{"name":"TextBlock","data":{"text":"### <span id=\"1-.-4-Inhalation-bags\">**1.4 Inhalation counterlung**</span>","textLarge":false,"imageOnRight":true,"image":{"recommendedSizes":{"width":"420","height":"280"}},"imageMobile":{"recommendedSizes":{"width":"750","height":"500"}}},"id":"#466","type":"component","lock":false,"position":52},{"name":"TextBlock","data":{"text":"The inhalation bag is mounted on the left side of the harness (from the diverâs perspective when wearing the CCR Liberty).\n\nThe external cover is made from a resilient textile, ensuring mechanical protection. The internal bag is made from polyurethane. It is connected to the breathing circuit with a T-piece via the upper bulkhead with a bayonet connector.\n","textLarge":false,"imageOnRight":true,"image":{"recommendedSizes":{"width":"420","height":"280"},"mimetype":"image/png","size":68413,"hash":"79b4300e8fce2c95c2e84a22b63a52ff10c48ea7","id":"cl3so7lwxddi20776g4ginmbe","filename":"divesoft-ccr-liberty-manual-1-4-01.png","category":"divesoft/","type":"image"},"imageMobile":{"recommendedSizes":{"width":"750","height":"500"}}},"id":"#39","type":"component","lock":false,"position":53},{"name":"TextBlock","data":{"text":"The inhalation bag is affixed to the harness with two stainless-steel buckles and is secured with Velcro flaps. It can be easily removed for cleaning, disinfecting, and other handling.\n\nSee also section 3.5.3 Cleaning and disinfection.","textLarge":false,"imageOnRight":true,"image":{"recommendedSizes":{"width":"420","height":"280"}},"imageMobile":{"recommendedSizes":{"width":"750","height":"500"}}},"id":"#40","type":"component","lock":false,"position":54},{"name":"Divider","data":{"color":"darkGray"},"id":"#41","type":"component","lock":false,"position":55},{"name":"SectionDivider","data":{"title":"1.4.1 Automatic diluent valve"},"id":"#506","type":"component","lock":false,"position":56},{"name":"TextBlock","data":{"text":"### <span id=\"1-.-4-.-1-Automatic-diluent-valve\">**1.4.1 Automatic diluent valve**</span> \n\nThe automatic diluent valve (ADV) is mounted in the middle bulkhead with a bayonet connector.\n\nWhen the volume of the inhalation bag decreases, the ADV is pressed, and diluent is automatically added to the breathing circuit.\n\nThe ADV can be closed by sliding the collar.\n\nThe sensitivity of the ADV can be decreased with an additional spring, which is included as a spare part.","textLarge":false,"imageOnRight":true,"image":{"recommendedSizes":{"width":"420","height":"280"}},"imageMobile":{"recommendedSizes":{"width":"750","height":"500"}}},"id":"#42","type":"component","lock":false,"position":57},{"name":"Divider","data":{"color":"darkGray"},"id":"#43","type":"component","lock":false,"position":58},{"name":"SectionDivider","data":{"title":"1.4.2 Manual diluent bypass valve"},"id":"#507","type":"component","lock":false,"position":59},{"name":"TextBlock","data":{"text":"### <span id=\"1-.-4-.-2-Manual-diluent-bypass-valve\">**1.4.2 Manual diluent bypass valve**</span> \n\nThe manual diluent bypass valve is situated in the lower bulkhead of the inhalation bag and is equipped with a bayonet connector.\n\nThe valve is attached to the low pressure (LP) hose with a seatec-style quick-release connector.\n\nIt is o
2perated by pressing the center button.\n\nThe safety lock prevents diluent valve from accidentally falling out. Keep this information in mind when removing the valve.","textLarge":false,"imageOnRight":true,"image":{"recommendedSizes":{"width":"420","height":"280"}},"imageMobile":{"recommendedSizes":{"width":"750","height":"500"}}},"id":"#44","type":"component","lock":false,"position":60},{"name":"Divider","data":{"color":"darkGray"},"id":"#45","type":"component","lock":false,"position":61},{"name":"SectionDivider","data":{"title":"1.5 Exhalation bag"},"id":"#508","type":"component","lock":false,"position":62},{"name":"TextBlock","data":{"text":"### <span id=\"1-.-5-Exhalation-bag\">**1.5 Exhalation counterlung**</span>\n\nThe exhalation counterlung is situated on the right side of the harness. Itâs design and the way it is connected to the harness and to the breathing loop are similar to that of the inhalation bag.","textLarge":false,"imageOnRight":true,"image":{"recommendedSizes":{"width":"420","height":"280"},"mimetype":"image/png","size":68197,"hash":"0de32cd3d19155dce2ae611ed09e30142b38e66d","id":"cl3so81vzddis077675rc5tw6","filename":"divesoft-ccr-liberty-manual-1-5-01.png","category":"divesoft/","type":"image"},"imageMobile":{"recommendedSizes":{"width":"750","height":"500"}}},"id":"#46","type":"component","lock":false,"position":63},{"name":"Divider","data":{"color":"darkGray"},"id":"#47","type":"component","lock":false,"position":64},{"name":"SectionDivider","data":{"title":"1.5.1 Manual oxygen bypass valve"},"id":"#509","type":"component","lock":false,"position":65},{"name":"TextBlock","data":{"text":"### <span id=\"1-.-5-.-1-Manual-oxygen-bypass-valve\">**1.5.1 Manual oxygen bypass valve**</span> \n\nThe manual oxygen bypass valve is situated in the middle bulkhead of the exhalation bag and is equipped with a bayonet connector.\n\nThe valve is attached to the intermediate pressure hose with an oxygen quick-release connector. ","textLarge":false,"imageOnRight":true,"image":{"recommendedSizes":{"width":"420","height":"280"},"mimetype":"image/png","size":81447,"hash":"14c208fb664cfba76636cda9a41aa2403b3abe19","id":"cl3so8pjeddjj0776poo00zk3","filename":"divesoft-ccr-liberty-manual-1-5-1-01.png","category":"divesoft/","type":"image"},"imageMobile":{"recommendedSizes":{"width":"750","height":"500"}}},"id":"#48","type":"component","lock":false,"position":66},{"name":"TextBlock","data":{"text":"This connector is like a standard seatec-style quick-release connector with a collar.\n\nA standard connector cannot be connected to the oxygen quick\u0002release connector, though, it is possible to connect the oxygen hose to the normal connector.\n\nDo not remove the collar from the oxygen connector as connecting the wrong gas to the wrong valve could potentially be dangerous. This is a requirement of the EN 14141 norm.\n\nThe bayonet connector on the oxygen bypass valve has three protrusions.\n\nUse oxygen-compatible lubricant for maintenance of the oxygen bypass valve **(We recommend DuPont Krytox GPL-226).**","textLarge":false,"imageOnRight":true,"image":{"recommendedSizes":{"width":"420","height":"280"}},"imageMobile":{"recommendedSizes":{"width":"750","height":"500"}}},"id":"#49","type":"component","lock":false,"position":67},{"name":"Divider","data":{"color":"darkGray"},"id":"#50","type":"component","lock":false,"position":68},{"name":"SectionDivider","data":{"title":"1.5.2 Overpressure valve"},"id":"#510","type":"component","lock":false,"position":69},{"name":"TextBlock","data":{"text":"### <span id=\"1-.-5-.-2-Overpressure-valve\">**1.5.2 Overpressure valve**</span>\n\nThe overpressure valve (OPV) is mounted in the lower bulkhead of the exhalation bag and is equipped with a bayonet connector.\n\nThe required pressure is regulated via rotation. When set to a minimal pressure (by turning counterclockwise), the valve is opened; only a mushroom valve ensures minimal overpressure.","textLarge":false,"imageOnRight":true,"image":{"recommendedSizes":{"width":"420","height":"280"},"mimetype":"image/png","size":116307,"hash":"aa33120b90f8b63d4c9a0dda82d2623df4f1a577","id":"cl3so9pvxddke07763orcxs9q","filename":"divesoft-ccr-liberty-manual-1-5-2-01.png","category":"divesoft/","type":"image"},"imageMobile":{"recommendedSizes":{"width":"750","height":"500"}}},"id":"#51","type":"component","lock":false,"position":70},{"name":"TextBlock","data":{"text":"A safety lock prevents the OPV from accidentally falling out. To remove the valve push it in to unlock, and rotate in the direction of the arrows. Indicated on the valve.","textLarge":false,"imageOnRight":true,"image":{"recommendedSizes":{"width":"420","height":"280"}},"imageMobile":{"recommendedSizes":{"width":"750","height":"500"}}},"id":"#52","type":"component","lock":false,"position":71},{"name":"Divider","data":{"color":"darkGray"},"id":"#53","type":"component","lock":false,"position":72}
2,{"name":"SectionDivider","data":{"title":"1.6 Oxygen tank","skipToC":true},"id":"#511","type":"component","lock":false,"position":73},{"name":"TextBlock","data":{"text":"### <span id=\"1-.-6-Oxygen-tank\">**1.6 Oxygen Cylinder**</span>","textLarge":false,"imageOnRight":true,"image":{"recommendedSizes":{"width":"420","height":"280"}},"imageMobile":{"recommendedSizes":{"width":"750","height":"500"}}},"id":"#513","type":"component","lock":false,"position":74},{"name":"SectionDivider","data":{"title":"1.6.1 Tank"},"id":"#512","type":"component","lock":false,"position":75},{"name":"TextBlock","data":{"text":"### <span id=\"1-.-6-.-1-Tank\">**1.6.1 Cylinder**</span>\n\nThe CCR Liberty uses a three-liter steel cylinder with 100 mm diameter and has a 200 bar filling pressure. The original 300 bar filling pressure of the cylinder was changed according to valid technical standards.\n\nThe cylinder is labeled OXYGEN and is situated on the diver´s right side when wearing the CCR Liberty.","textLarge":false,"imageOnRight":true,"image":{"recommendedSizes":{"width":"420","height":"280"}},"imageMobile":{"recommendedSizes":{"width":"750","height":"500"}}},"id":"#54","type":"component","lock":false,"position":76},{"name":"Image","data":{"firstImage":{"mimetype":"image/png","size":481318,"hash":"2253c9f63b18a65d1a332c4757ac74dfef57db48","
2id":"cl3soa80zddkr0776059cbxlk","filename":"divesoft-ccr-liberty-manual-1-6-1-01.png","category":"divesoft/","type":"image"},"secondImage":{"mimetype":"image/png","size":486627,"hash":"5a6bbce72d94faff1e2cabe87e0b965b029508ef","id":"cl4gnm2mrjpl10776sjf9gu2l","filename":"divesoft-ccr-liberty-manual-1-6-1-02.png","category":"divesoft/","type":"image"},"image":{"type":"image"}},"id":"#55","type":"component","lock":false,"position":77},{"name":"TextBlock","data":{"text":"When connecting the oxygen cylinder to the unit, make sure the cylinder is in an upright orientation before tightening the handwheel on the oxygen first-stage regulator. Trying to straighten the cylinder when it is already screwed in will put tension on the threats and will be hard to remove without the help of tools.\n\nFor more information on filling, see section 3.2.5 Oxygen.\n\n<span style=\"color:red\">**WARNING:** The cylinders and valves are made of oxygen compatible materials and all components have been oxygen cleaned during their manufacture. However, unless assembled by a certified service technician, they cannot be considered oxygen clean.</span>","textLarge":false,"imageOnRight":true,"image":{"recommendedSizes":{"width":"420","height":"280"}},"imageMobile":{"recommendedSizes":{"width":"750","height":"500"}}},"id":"#56","type":"component","lock":false,"position":78},{"name":"Divider","data":{"color":"darkGray"},"id":"#57","type":"component","lock":false,"position":79},{"name":"SectionDivider","data":{"title":"1.6.2 Valve"},"id":"#514","type":"component","lock":false,"position":80},{"name":"TextBlock","data":{"text":"### <span id=\"1-.-6-.-2-Valve\">**1.6.2 Valve**</span> \n\nThe oxygen cylinder valve has a M26Ã2 200 bar outlet connection according EN 144-3. The valve is not compatible with standard 12209:2013 (formerly also known as DIN) valves to eliminate possible mix-up between oxygen and diluent cylinders, this is a requirement of the EN 14141 norm.","textLarge":false,"imageOnRight":true,"image":{"recommendedSizes":{"width":"420","height":"280"}},"imageMobile":{"recommendedSizes":{"width":"750","height":"500"}}},"id":"#58","type":"component","lock":false,"position":81},{"name":"Divider","data":{"color":"darkGray"},"id":"#59","type":"component","lock":false,"position":82},{"name":"SectionDivider","data":{"title":"1.6.3 Reduction valve"},"id":"#515","type":"component","lock":false,"position":83},{"name":"TextBlock","data":{"text":"### <span id=\"1-.-6-.-3-Reduction-valve\">**1.6.3 Reduction valve**</span>\n\nThe CCR Liberty uses an Apeks DST4 first-stage regulator with a specially made low-pressure turret mounted on the backplate that serves as a lower cylinder-mounting point. A Velcro strap wraps around the middle of the cylinder to secure it to the unit.\n\nThe reduction valve is equipped with an intermediate-pressure safety overpressure valve.\n\n**WARNING: The Liberty rebreather is depth limited at 170m (557ft) due to the use of the Apeks DST4 Environmentally sealed 1st stage regulators. It is recommended that to dive beyond 170M (557ft) the Apeks DST4 1st stages MUST be changed with the Apeks UST4 kit. This does not apply to the Sidemount version, which uses first stages without a dry chamber.**","textLarge":false,"imageOnRight":true,"image":{"recommendedSizes":{"width":"420","height":"280"}},"imageMobile":{"recommendedSizes":{"width":"750","height":"500"}}},"id":"#60","type":"component","lock":false,"position":84},{"name":"Divider","data":{"color":"darkGray"},"id":"#61","type":"component","lock":false,"position":85},{"name":"SectionDivider","data":{"title":"1.6.4 Pressure reading"},"id":"#516","type":"component","lock":false,"position":86},{"name":"TextBlock","data":{"text":"### <span id=\"1-.-6-.-4-Pressure-reading\">**1.6.4 Pressure reading**</span>\n\nThe oxygen pressure gauge is situated on the diverâs right side; the HP hose runs through an opening in the backplate.\n\nThe 2021 Edition Liberty features wireless cylinder pressure readings for both oxygen and diluent cylinders and one bailout mixture. In this case, after setting this option and placing pressure transmitters on the first stage regulators, it is possible to display the cylinder pressure on the handset display.","textLarge":false,"imageOnRight":true,"image":{"recommendedSizes":{"width":"420","height":"280"}},"imageMobile":{"recommendedSizes":{"width":"750","height":"500"}}},"id":"#62","type":"component","lock":false,"position":87},{"name":"Divider","data":{"color":"darkGray"},"id":"#63","type":"component","lock":false,"position":88},{"name":"SectionDivider","data":{"title":"1.7 Diluent tank"},"id":"#517","type":"component","lock":false,"position":89},{"name":"TextBlock","data":{"text":"### <span id=\"1-.-7-Diluent-tank\">**1.7 Diluent cylinder**</span>","textLarge":false,"imageOnRight":true,"image":{"recommendedSizes":{"width":"420","height":"280"}},"imageMobile":{"recommendedSizes":{"width":"750","height":"500"}}},"id":"#519","type":"component","lock":false,"position":90},{"name":"SectionDivider","data":{"title":"1.7.1 Tank"},"id":"#518","type":"component","lock":false,"position":91},{"name":"TextBlock","data":{"text":"### <span id=\"1-.-7-.-1-Tank\">**1.7.1 Cylinder**</span>\n\nThe CCR Liberty uses a three-liter steel cylinder with 100 mm diameter and 230 bar filling pressure. The original 300 bar filling pressure of the cylinder was changed due to utilizing a 230 bar valve.\n\nThe cylinder is labeled DILUENT and is situated on the diverâs left side when wearing the CCR Liberty.\n\nFor more information on filling, see section 3.2.5 Diluent.","textLarge":false,"imageOnRight":true,"image":{"recommendedSizes":{"width":"420","height":"280"}},"imageMobile":{"recommendedSizes":{"width":"750","height":"500"}}},"id":"#64","type":"component","lock":false,"position":92},{"name":"Divider","data":{"color":"darkGray"},"id":"#65","type":"component","lock":false,"position":93},{"name":"SectionDivider","data":{"title":"1.7.2 Valve"},"id":"#520","type":"component","lock":false,"position":94},{"name":"TextBlock","data":{"text":"### <span id=\"1-.-7-.-2-Valve\">**1.7.2 Valve**</span>\n\nThe diluent cylinder valve has a ISO 12209:2013 230 bar outlet connection (formerly also known as DIN G 5/8).","textLarge":false,"imageOnRight":true,"image":{"recommendedSizes":{"width":"420","height":"280"}},"imageMobile":{"recommendedSizes":{"width":"750","height":"500"}}},"id":"#66","type":"component","lock":false,"position":95},{"name":"Divider","data":{"color":"darkGray"},"id":"#67","type":"component","lock":false,"position":96},{"name":"SectionDivider","data":{"title":"1.7.3 Reduction valve and pressure reading"},"id":"#521","type":"component","lock":false,"position":97},{"name":"TextBlock","data":{"text":"### <span id=\"1-.-7-.-3-Reduction-valve-and-pressure-reading\">**1.7.3 Reduction valve and pressure reading**</span>\n\nThe design is similar to that of the oxygen cylinder, only mirrored.\n\n**WARNING: The Liberty rebreather is depth limited at 170m (557ft) due to the use of the Apeks DST4 Env
2ironmentally sealed 1st stage regulators. It is recommended that to dive beyond 170M (557ft) the Apeks DST4 1st stages MUST be changed with the Apeks UST4 kit. This does not apply to the Sidemount version, which uses first stages without a dry chamber.**","textLarge":false,"imageOnRight":true,"image":{"recommendedSizes":{"width":"420","height":"280"}},"imageMobile":{"recommendedSizes":{"width":"750","height":"500"}}},"id":"#68","type":"component","lock":false,"position":98},{"name":"Divider","data":{"color":"darkGray"},"id":"#69","type":"component","lock":false,"position":99},{"name":"SectionDivider","data":{"title":"1.7.4 Backup regulator (optional)"},"id":"#522","type":"component","lock":false,"position":100},{"name":"TextBlock","data":{"text":"### <span id=\"1-.-7-.-4-Backup-regulator-(optional)\">**1.7.4 Backup regulator (optional)**</span>\n\nThe second stage of a regulator may be connected to the output of the diluent first-stage via a LP hose of an appropriate length. This regulator can be used as a backup if the diluent at a given depth is breathable (oxygen partial pressure between 0.16 and 1.6 bars).\n\nHaving the backup regulator connected to the diluent may be useful for sanity breaths and for prolonged switching to a backup apparatus.\n\nHowever, it is advised to use the bailout only in special circumstances, such as when diving in extremely shallow water.","textLarge":false,"imageOnRight":true,"image":{"recommendedSizes":{"width":"420","height":"280"}},"imageMobile":{"recommendedSizes":{"width":"750","height":"500"}}},"id":"#70","type":"component","lock":false,"position":101},{"name":"SectionDivider","data":{"title":"1.7.5 Air integration (2021 Edition only)","skipToC":false},"id":"#568","type":"component","lock":false,"position":102},{"name":"TextBlock","data":{"text":"### <span id=\"1-.-7-.-5-Air-integration-(2021-Edition-only)\">**1.7.5 Air integration (2021 Edition only)**</span>\n\nYou can use any compatible transmitter (not included). For example, Shearwater / Aqualung / Pelagic (Suunto,\nRatio, Mares, Garmin, Scubapro smart are not compatible).\nThe transmitter is automatically activated by pressurization to 8 bar and more.\nThe transmitter turns off after 2 minutes at a tank pressure of <4 bar. Please do not leave\nthe Liberty pressurized for prolonged periods of time (at storage), since the transmitter has\ndeclared runtime of 300hrs on one battery","textLarge":false,"imageOnRight":true,"image":{"recommendedSizes":{"width":"420","height":"280"}},"imageMobile":{"recommendedSizes":{"width":"750","height":"500"}}},"id":"#544","type":"component","lock":false,"position":103},{"name":"SectionDivider","data":{"title":"1.7.6 Transmitters (2021 Edition only)","skipToC":false},"id":"#569","type":"component","lock":false,"position":104},{"name":"TextBlock","data":{"text":"### <span id=\"1-.-7-.-6-Transmitters-(2021-Edition-only)\">**1.7.6 Transmitters (2021 Edition only)**</span>\n\nIn the case of multiple transmitters, it is advisable to use yellow + grey, not two grey ones\n\n\n* More than two (max. three) transmitters are not recommended; random long signal dropouts can occur even when using two transmitters of the same color.\n* On the back-mounted unit place the transmitters with HP elbows to first stages. Factory tested orientation is parallel with the backplate â pointing to the other 1st stage.\n* Sidemount unit doesnât need any elbows. It is advisable to install the transmitter on a short HP hose (15 / 20cm) to prevent breaking off the transmitter accidentally.\n\n* Range â approx. 0.7â1m, rather less than more.","textLarge":false,"imageOnRight":true,"image":{"recommendedSizes":{"width":"420","height":"280"}},"imageMobile":{"recommendedSizes":{"width":"750","height":"500"}}},"id":"#546","type":"component","lock":false,"position":105},{"name":"Spacer","data":{"spacingLarge":30,"spacingSmall":20,"backgroundColor":"#ffffff"},"id":"#550","type":"component","lock":false,"position":106},{"name":"SectionDivider","data":{"title":"1.7.7 Procedure for pairing the transmitter (2021 Edition only)","skipToC":false},"id":"#570","type":"component","lock":false,"position":107}
2,{"name":"TextBlock","data":{"text":"### <span id=\"1-.-7-.-7-Procedure-for-pairing-the-transmitter-(2021-Edition-only)\">**1.7.7 Procedure for pairing the transmitter (2021 Edition only)**</span>","textLarge":false,"imageOnRight":true,"image":{"recommendedSizes":{"width":"420","height":"280"}},"imageMobile":{"recommendedSizes":{"width":"750","height":"500"}}},"id":"#549","type":"component","lock":false,"position":108},{"name":"TextBlock","data":{"text":"\n\n* Open the tank valves â let the transmitters 10â30s to turn on\n* Turn on AI (if off)\n* Global switch ***Setup / Wireless / Air integr / On***\n* If you have already set up the transmitters, turning off the AI function will not lose their serial numbers\n","textLarge":false,"imageOnRight":true,"image":{"recommendedSizes":{"width":"420","height":"280"},"mimetype":"image/png","size":17407,"hash":"28d230383c1104f0dd79a8755ced7296e7e69a45","id":"clo718mtjclv70776h5eyprcp","filename":"1-2.png","category":"divesoft/","type":"image"},"imageMobile":{"recommendedSizes":{"width":"750","height":"500"}},"file":{"mimetype":"image/jpeg","size":30584,"hash":"a2b836d3f7c53b9aa57593cddfd5edaff7430225","id":"cljch001ajurx0776y46wg4rj","filename":"2021-1.jpg","category":"divesoft/","type":"file"}},"id":"#547","type":"component","lock":false,"position":109},{"name":"TextBlock","data":{"text":"* Pair the transmitter ***Setup / Wireless / Air integr. / Oxygen*** or ***Setup / Wireless / Air integr. / Diluent***\n* If the transmitter is turned on and within range, it should have a serial number in the menu\n* Otherwise, set the last 6 digits of the serial number of the station via âEditâ\n\nIf you do not see any sensors, try repositioning the transmitters. Change the position of the\ntransmitters in small steps and always wait at least 10 seconds in each position. Always set\nthe transmitters one at a time. The position of the transmitters, their response or signal errors\nare the subjected to your feedback.","textLarge":false,"imageOnRight":true,"image":{"recommendedSizes":{"width":"420","height":"280"}},"imageMobile":{"recommendedSizes":{"width":"750","height":"500"}}},"id":"#551","type":"component","lock":false,"position":110},{"name":"TextBlock","data":{"text":"**Tank volumes**\n\nValues for tank volumes have to be set for precise\ngas consumption calculation\n\n**Oxy tank. vol.** the volume of the oxygen cylinder is\nused to calculate the minute oxygen consumption in\nlitres per minute.\n\n**Dil tank. vol.** the volume of the diluent cylinder is\nused only in the dive simulation.","textLarge":false,"imageOnRight":true,"image":{"recommendedSizes":{"width":"420","height":"280"},"mimetype":"image/png","size":14302,"hash":"a63e1d66c499dcd4af2a5d63a44803188cccee0c","id":"cljci0zwsjvnx0776fqe1qgym","filename":"2021-2.png","category":"divesoft/","type":"image"},"imageMobile":{"recommendedSizes":{"width":"750","height":"500"}}},"id":"#548","type":"component","lock":false,"position":111},{"name":"TextBlock","data":{"text":"**DISPLAY**\n\nThe color of the bargraph changes to yellow when\nit drops to half the nominal pressure of the cylinder\nand to red when the pressure falls below the set\nreserve (Setup / Mixtures / End pressure)","textLarge":false,"imageOnRight":true,"image":{"recommendedSizes":{"width":"420","height":"280"},"mimetype":"image/png","size":14400,"hash":"da361b965447f13a9f4dca74d4a0cb7c2e77aff6","id":"cljcikuspjw3k0776gv5ci238","filename":"2021-3.png","category":"divesoft/","type":"image"},"imageMobile":{"recommendedSizes":{"width":"750","height":"500"}}},"id":"#552","type":"component","lock":false,"position":112},{"name":"Spacer","data":{"spacingLarge":30,"spacingSmall":20,"backgroundColor":"#ffffff"},"id":"#562","type":"component","lock":false,"position":113},{"name":"TextBlock","data":{"text":"Can be easily tested with closed cylinders or in a dive\nsimulation.\n\nIt is possible to show values or bargraphs on the\nmain screen depending on your personal setting.\nThis setting is individual per handset, so you can set\neach HS differently.\n\n***Menu / Setup / Preferences / Display / Tank press.***\nOr in **Dive mode / Setup / Display / Tank Press.**","textLarge":false,"imageOnRight":true,"image":{"recommendedSizes":{"width":"420","height":"280"},"mimetype":"image/png","size":14924,"hash":"ec3d370851ead3f7e6c1d4ce4f9eeaa10c4bff25","id":"cljciopg3jw600776fksq0ud3","filename":"2021-4.png","category":"divesoft/","type":"image"},"imageMobile":{"recommendedSizes":{"width":"750","height":"500"}}},"id":"#553","type":"component","lock":false,"position":114},{"name":"TextBlock","data":{"text":"You can choose if you want to see Numbers instead\nof Clock and temperature values","textLarge":false,"imageOnRight":true,"image":{"recommendedSizes":{"width":"420","height":"280"},"mimetype":"image/png","size":114049,"hash":"5f029205fcd9a97915daa075ede0661738a56e2e","id":"cljciqlahjw7c0776x01yr50e","filename":"2021-5.png","category":"divesoft/","type":"image"},"imageMobile":{"recommendedSizes":{"width":"750","height":"500"}}}
2,"id":"#556","type":"component","lock":false,"position":115},{"name":"Spacer","data":{"spacingLarge":30,"spacingSmall":20,"backgroundColor":"#ffffff"},"id":"#560","type":"component","lock":false,"position":116},{"name":"TextBlock","data":{"text":"Graphs instead of solenoid opening boxes","textLarge":false,"imageOnRight":true,"image":{"recommendedSizes":{"width":"420","height":"280"},"mimetype":"image/png","size":105787,"hash":"8fa939e28e31ea6ab0b6449f23a0c4f1fe11f507","id":"cljcisiwkjw9l0776v721uypv","filename":"2021-6.png","category":"divesoft/","type":"image"},"imageMobile":{"recommendedSizes":{"width":"750","height":"500"}}},"id":"#557","type":"component","lock":false,"position":117},{"name":"Spacer","data":{"spacingLarge":30,"spacingSmall":20,"backgroundColor":"#ffffff"},"id":"#559","type":"component","lock":false,"position":118},{"name":"TextBlock","data":{"text":"\n\n\n\n\nOr both of them","textLarge":false,"imageOnRight":true,"image":{"recommendedSizes":{"width":"420","height":"280"},"mimetype":"image/png","size":81475,"hash":"bfe88aae72ea00fa32ec2190909d8f41f30029a1","id":"cljcius9gjwdo07769j8izfid","filename":"2021-7.png","category":"divesoft/","type":"image"},"imageMobile":{"recommendedSizes":{"width":"750","height":"500"}}},"id":"#558","type":"component","lock":false,"position":119},{"name":"TextBlock","data":{"text":"The synoptic screen shows both graph and numeric\nvalue.","textLarge":false,"imageOnRight":true,"image":{"recommendedSizes":{"width":"420","height":"280"},"mimetype":"image/png","size":60061,"hash":"59ebe421fb46e1b212c4b9a8ffc4065f0770cf5c","id":"cljciz9dkjwgb07762x9t9xos","filename":"2021-8.png","category":"divesoft/","type":"image"},"imageMobile":{"recommendedSizes":{"width":"750","height":"500"}}},"id":"#563","type":"component","lock":false,"position":120},{"name":"TextBlock","data":{"text":"**Signal failures**\n\n* <60 sec⦠holds the last value\n* 60 <90sec⦠old value is still legible, bargraph grey\n* > 90 sec⦠blank frame, instead of dash value only\n* c. Low transmitter battery â If one of the alarms below persists, replace the transmitter battery.\n* âRunning out of batteryâ â an almost empty battery is drawn over the bar graph every 5 seconds\n* âEmpty batteryâ â a bold âBâ is drawn every 5 seconds","textLarge":false,"imageOnRight":true,"image":{"recommendedSizes":{"width":"420","height":"280"}},"imageMobile":{"recommendedSizes":{"width":"750","height":"500"}}},"id":"#564","type":"component","lock":false,"position":121},{"name":"Divider","data":{"color":"darkGray"},"id":"#71","type":"component","lock":false,"position":122},{"name":"SectionDivider","data":{"title":"1.8 CO2 scrubber"},"id":"#523","type":"component","lock":false,"position":123},{"name":"TextBlock","data":{"text":"### <span id=\"1-.-8-CO2-scrubber\">**1.8 CO<sub>2</sub> scrubber**</span>","textLarge":false,"imageOnRight":true,"image":{"recommendedSizes":{"width":"420","height":"280"}},"imageMobile":{"recommendedSizes":{"width":"750","height":"500"}}},"id":"#470","type":"component","lock":false,"position":124},{"name":"TextBlock","data":{"text":"The CCR Liberty uses a radial scrubber. The breathing mixture flows from the outside to the center of the scrubber cartridge.\n\nThe scrubber apparatus consists of a scrubber cartridge inserted into a scrubber canister. A water trap is situated in the lower part of the canister.","textLarge":false,"imageOnRight":true,"image":{"recommendedSizes":{"width":"420","height":"280"},"mimetype":"image/png","size":162419,"hash":"bf37a95e55b6fdc802a27124cd4c69830a9694b1","id":"cl3soatfwddl90776cuq4ycgy","filename":"divesoft-ccr-liberty-manual-1-8-01.png","category":"divesoft/","type":"image"},"imageMobile":{"recommendedSizes":{"width":"750","height":"500"}}},"id":"#72","type":"component","lock":false,"position":125},{"name":"TextBlock","data":{"text":"The walls of the cartridges are fabricated with external and internal metal mesh. A metal disc presses down on the scrubber cartridge by means of a spring-loaded pressure plate. The pressure plate is fastened to the central tube with a retaining ring.\n\nThe scrubber cartridge capacity is pproximately 2.5 kg of sorbent. The sorbent volume is approximately 2.82-2.99 l.\n\nThe service life and replacement of the sorbent are described on section 3.2.1 Replacement of CO<sub>2</sub> sorbent.","textLarge":false,"imageOnRight":true,"image":{"recommendedSizes":{"width":"420","height":"280"}},"imageMobile":{"recommendedSizes":{"width":"750","height":"500"}}},"id":"#73","type":"component","lock":false,"position":126}
2,{"name":"Divider","data":{"color":"darkGray"},"id":"#74","type":"component","lock":false,"position":127},{"name":"SectionDivider","data":{"title":"1.9 Head"},"id":"#524","type":"component","lock":false,"position":128},{"name":"TextBlock","data":{"text":"### <span id=\"1-.-9-Head\">**1.9 Head**</span>\n\nThe head is mounted on top of the CO<sub>2</sub> scrubber canister.\n\nWhen mounting the head, push the scrubber-canister pin into the corresponding indention on the lower part of head, pushing down to seal it.","textLarge":false,"imageOnRight":true,"image":{"recommendedSizes":{"width":"420","height":"280"},"mimetype":"image/png","size":96985,"hash":"c16b73937909b076d83854b7c44c632461e6a0a8","id":"cl3socyjcddmw0776heqsdna5","filename":"divesoft-ccr-liberty-manual-1-9-1-01.png","category":"divesoft/","type":"image"},"imageMobile":{"recommendedSizes":{"width":"750","height":"500"},"mimetype":"image/png","size":132334,"hash":"a8085b4ff0b53321c98fda11c12d5cc246db5b51","id":"cl3sobr7iddmg0776ktm8yy0m","filename":"divesoft-ccr-liberty-manual-1-9-01.png","category":"divesoft/","type":"image"}},"id":"#75","type":"component","lock":false,"position":129},{"name":"TextBlock","data":{"text":"If it is difficult to remove the head, place the rebreather on a hard surface with the pin pointing downwards, as shown in the illustration. Press down on the head and the scrubber canister with your hands.","textLarge":false,"imageOnRight":true,"image":{"recommendedSizes":{"width":"420","height":"280"}},"imageMobile":{"recommendedSizes":{"width":"750","height":"500"}}},"id":"#439","type":"component","lock":false,"position":130},{"name":"Divider","data":{"color":"darkGray"},"id":"#76","type":"component","lock":false,"position":131},{"name":"SectionDivider","data":{"title":"1.9.1 Control units"},"id":"#525","type":"component","lock":false,"position":132},{"name":"TextBlock","data":{"text":"### <span id=\"1-.-9-.-1-Control-units\">**1.9.1 Control units**</span>\n\nThe control units (CUs) are independent, and each is connected to its own display unit or handset (HS). Each CU is equipped with its own power source, solenoid, temperature and pressure gauge, as well as its own, O<sub>2</sub> partial pressure and He concentration sensors","textLarge":false,"imageOnRight":true,"image":{"recommendedSizes":{"width":"420","height":"280"}},"imageMobile":{"recommendedSizes":{"width":"750","height":"500"}}},"id":"#77","type":"component","lock":false,"position":133},{"name":"TextBlock","data":{"text":"If one control unit fails, the other control unit takes over automatically.\n\nCUs and HSs are independent computers communicating via a bus. Each handset displays the activity results of both CUs and is used to control both CUs. Each HS is powered by the corresponding CU. In the event both handsets malfunction, both, or one of the remaining CUs will continue to regulate ppO<sub>2</sub> according to the last adjusted setpoint.\n \nIf communication between the CUs breaks down, each unit will continue to control its own solenoid. The control algorithm is sufficiently robust to prevent any ppO<sub>2</sub> deviations from the allowed limits during dual, parallel regulation.\n\n**Connection to a personal computer**\n\nThe memory of the operating protocols and content of the memory card can be read using a USB adapter connected to the handset connector as a mass storage device (like a flash drive). The connection to Windows, Mac, Linux, Android and iOS was tested, however there is no guarantee of compatibility with all operating systems and computers.\n\nWhen using the USB connection, the control unit is powered from the USB port and, at the same time, the battery is being charged.\n\nEach control unit contains the same dive logs; only one control unit needs to be connected to download the logs on a computer.\n\nAnother option is to connect the device via Bluetooth. To do this, you need to download a software for Mac or PC. It can be found at [Divesoft.Center.](https://www.divesoft.com/en/center)\n\nYou can also download recordings wirelessly using your mobile phone with the [Divesoft.App](https://www.divesoft.com/en/app). You can also send error messages using this app. The app downloads the dive and system records and sends them to the responsible DIVESOFT staff for review.","textLarge":false,"imageOnRight":true,"image":{"recommendedSizes":{"width":"420","height":"280"}},"imageMobile":{"recommendedSizes":{"width":"750","height":"500"}}},"id":"#78","type":"component","lock":false,"position":134},{"name":"Divider","data":{"color":"darkGray"},"id":"#79","type":"component","lock":false,"position":135},{"name":"SectionDivider","data":{"title":"1.9.2 Direct measurement of ppO2"},"id":"#526","type":"component","lock":false,"position":136},{"name":"TextBlock","data":{"text":"### <span id=\"1-.-9-.-2-Direct-measurement-of-ppO2\">**1.9.2 Direct measurement of ppO<sub>2</sub>**</span>\n\nTo measure ppO<sub>2</sub> only use DIVESOFT R22D-type sensors. The usage of other sensors from other manufacturers is prohibited.\n\nTwo oxygen sensors are connected to each CU, and all sensors are located on the inhalation side. Both CUs have access to all four oxygen sensors and are continually exchanging data.\n\nThe diver can manually exclude a sensor from operating and can also choose when to reinclude it. Choosing to manually exclude a sensor always has priority over an automatic detection of a faulty sensor. If all sensors are excluded, the CCR Liberty can be switched to a backup algorithm with calculates the partial pressure of oxygen indirectly based off the measured the He content (assuming the used diluent contains >20% He).\n\nCirculation of the mixture in the breathing loop is necessary for the measurement accuracy. If the user does not breathe from the rebreather, the mixture surrounding of the oxygen sensors can have a different proportion of oxygen than in the breathing loop. Thus, the displayed data can be inaccurate.\n\nA similary situation can occur in the event of a rapid desce
2nt when a larger amount of diluent is added, or when the setpoint is changed to high, and the ppO<sub>2</sub> in the loop is progressing to the new level.\n\nThe sensors are constantly being automatically evaluated. The ppO<sub>2</sub> measured by one sensor is always compared to the average reading of the other sensors. This way, each individual sensor is constantly being cross-checked and monitored for possible deviations. If the average deviation of the sensors exceeds 0.1 bar, the system will automatically exclude the sensor that deviates most from the average.\n\nOnly one sensor can be automatically excluded at a time, and only a total of two sensors can be automatically excluded. There will always be at least two sensors that the diver has to evaluate themselves. This procedure is described in section 3.4.4 Monitoring of devices.\n\n**<span style=\"color:red\">WARNING: Sensor exclusion works on the principle of a mathematical algorithm. Despite the efforts of developers to find the ideal risk-control solution, there is still a chance that the excluded sensor could be the only functional one. Always verify your oxygen sensors.</span>**\n\nRefer to the chapter âOxygen sensorsâ on how to handle and maintain your sensors.","textLarge":false,"imageOnRight":true,"image":{"recommendedSizes":{"width":"420","height":"280"}},"imageMobile":{"recommendedSizes":{"width":"750","height":"500"}}},"id":"#80","type":"component","lock":false,"position":137},{"name":"Divider","data":{"color":"darkGray"},"id":"#81","type":"component","lock":false,"position":138},{"name":"SectionDivider","data":{"title":"1.9.3 Measurement of He content"},"id":"#527","type":"component","lock":false,"position":139},{"name":"TextBlock","data":{"text":"### <span id=\"1-.-9-.-3-Measurement-of-He-content\">**1.9.3 Measurement of He content**</span>\n\nThe helium concentration is determined by the velocity of sound in the mixture. The He concentration sensors are connected to the inhalation side.\n\nA pressure drop caused by the circulation of the mixture in the breathing loop allows the gas to pass through the sensor.","textLarge":false,"imageOnRight":true,"image":{"recommendedSizes":{"width":"420","height":"280"}},"imageMobile":{"recommendedSizes":{"width":"750","height":"500"}}},"id":"#82","type":"component","lock":false,"position":140},{"name":"TextBlock","data":{"text":"If the user does not breathe from the rebreather, this process will not occur, and the sensor reading may be inaccurate.\n\nIf the utilized diluent contains >20% He and its composition is known, the He-concentration measuring function can be used ro reverse find the concentration of oxygen in the mixture based on the fact that the ratio of inert gases remains constant (process according to patent no. 303577). ","textLarge":false,"imageOnRight":true,"image":{"recommendedSizes":{"width":"420","height":"280"},"mimetype":"image/png","size":83504,"hash":"fd5624d892793e9dd8937eb3559eecc0b7413932","id":"cl3sodia1ddno0776nuvjinpn","filename":"divesoft-ccr-liberty-manual-1-9-3-01.png","category":"divesoft/","type":"image"},"imageMobile":{"recommendedSizes":{"width":"750","height":"500"}}},"id":"#83","type":"component","lock":false,"position":141},{"name":"TextBlock","data":{"text":"This principle of measuring the oxygen concentration (and its subsequent automatic conversion on the basis of the known ambient pressure to partial pressure) is used as the backup method of measuring ppO<sub>2</sub> in case all electrochemical ppO<sub>2</sub> sensors malfunction.\n \nOxygen measuring using helium sensors must be manually turned on in Setup / Faulty sensors / pO<sub>2</sub> source. This method is intended for use only in emergency situations. If possible, use a bailout apparatus.\n\nThe use of helium sensors also depends on the CCR Libertyâs settings. For the helium sensor function, the âTMX onlyâ must be selected by going to Menu / Setup / Preferences / He Measurement.\n\nFor proper functioning of helium sensors, the sensors must be calibrated regularly. Refer to Helium sensor calibration (see section 3.2.7) for the calibration procedure.\n\nAlways keep your helium sensors dry to ensure their long lifetime and functionality (see also section 3.5.1 Immediately after surfacing).\n\nDo not disassemble the sensors, as this may can result in irreparable damage.\n\n**<span style=\"color:red\">WARNING: Do not remove the helium sensors from the unit, even when faulty. Their removal will âs
2hort -circuitâ the scrubber, which will not be able to filter CO<sub>2</sub> from the breathing mixture.</span>**","textLarge":false,"imageOnRight":true,"image":{"recommendedSizes":{"width":"420","height":"280"}},"imageMobile":{"recommendedSizes":{"width":"750","height":"500"}}},"id":"#84","type":"component","lock":false,"position":142},{"name":"Divider","data":{"color":"darkGray"},"id":"#85","type":"component","lock":false,"position":143},{"name":"SectionDivider","data":{"title":"1.9.4 Helium blind plugs"},"id":"#528","type":"component","lock":false,"position":144},{"name":"TextBlock","data":{"text":"### <span id=\"1-.-9-.-4-Helium-blind-plugs\">**1.9.4 Helium blind plugs**</span>\n\nIncluded in your CCR Liberty are two helium sensor âblind plugsâ. These plugs are designed to act as a spacer so that the user can remove the high-fidelity sensors. The Divesoft helium sensors are highly sensitive to moisture and can be easily corrupted if the moisture is not removed through proper ventilation. \n\nThe purpose of these plugs is so that the helium sensors can be removed when the user is not diving with a helium mix. It is recommended that when the user is not diving with a helium gas mixture the user should use the helium blind plugs instead.\n\nTo install the Blind plugs:\n\n- First, take a hex key and remove the oxygen cells block.\n- Once the block is removed then take hex key and remove the hex screw within helium sensor securing sensor to Liberty head.\n - After screw is completely removed then firmly grasp helium sensor and gently remove sensor, take care as to not twist sensor upon removal.\n- Then install the blind plug in the identical orientation as the helium sensor then secure with a hex screw, always be sure to use **only two fingers** for tightening screw and **do not over tighten screws**.\n- Repeat this process for opposite side helium sensor.\n- Once both blind plugs are installed and hex screws properly secured then reinstall oxygen cells block, take care as to not over-tighten any screws.\n- Place helium sensors in a labeled small bag and properly store them in a climate controlled area to use best practices for your rebreather sensors. They are designed for extreme conditions of rebreather diving, but in order to guarantee their life, they must be properly cared for.\n- During your predive operations when using the blind plugs, the Liberty will show an error â sensor missing. Though the helium sensors are being disabled because the blind plugs are installed. This is expected and will not have any effect on diving operations.\n- If diving with trimix or other helium based mixtures, it is highly recommended that the Blind plugs be removed. And the high-fidelity helium sensors be installed into the Liberty head. Be sure to properly calibrate the sensors on air. Once the sensors are calibrated, check the Setup / Preferences if He measuring is set to âTMX onlyâ. This will guarantee that you have redundant ppO<sub>2</sub> measurement and proper helium measurement in your Liberty rebreather system.","textLarge":false,"imageOnRight":true,"image":{"recommendedSizes":{"width":"420","height":"280"}},"imageMobile":{"recommendedSizes":{"width":"750","height":"500"}}},"id":"#86","type":"component","lock":false,"position":145},{"name":"Divider","data":{"color":"darkGray"},"id":"#87","type":"component","lock":false,"position":146},{"name":"SectionDivider","data":{"title":"1.9.5 Pressure and depth measurement"},"id":"#529","type":"component","lock":false,"position":147},{"name":"TextBlock","data":{"text":"### <span id=\"1-.-9-.-5-Pressure-and-depth-measurement\">**1.9.5 Pressure and depth measurement**</span>\n\nEach of the CCR Libertyâs control units uses dual pressure sensors. The first sensor intended for measuring low pressure is used for determining sea level, for calibrating of the ppO<sub>2</sub> sensors, and for improving the accuracy of depth data in shallow water.\n\nThe second sensor is intended mainly for measuring hydrostatic pressure. The maximum scope of the sensor corresponds to the depth of 300 m.","textLarge":false,"imageOnRight":true,"image":{"recommendedSizes":{"width":"420","height":"280"}},"imageMobile":{"recommendedSizes":{"width":"750","height":"500"}}},"id":"#88","type":"component","lock":false,"position":148},{"name":"Divider","data":{"color":"darkGray"},"id":"#89","type":"component","lock":false,"position":149},{"name":"SectionDivider","data":{"title":"1.9.6 Temperature measurement"},"id":"#530","type":"component","lock":false,"position":150},{"name":"TextBlock","data":{"text":"### <span id=\"1-.-9-.-6-Temperature-measurement\">**1.9.6 Temperature measurement**</span>\n\nThe temperature in the breathing circuit is measured by temperature sensors within the pressure sensors. The water temperature sensors are situated in the handsets.\n\nTemperature data serves primarilly to supplement the accuracy of other sensor measurements. The water temperature shown on the HS display is only an approximate reading.","textLarge":false,"imageOnRight":true,"image":{"recommendedSizes":{"width":"420","height":"280"}},"imageMobile":{"recommendedSizes":{"width":"750","height":"500"}}},"id":"#90","type":"component","lock":false,"position":151},{"name":"Divider","data":{"color":"darkGray"},"id":"#91","type":"component","lock":false,"position":152},{"name":"SectionDivider","data":{"title":"1.9.7 Solenoids"},"id":"#531","type":"component","lock":false,"position":153},{"name":"TextBlock","data":{"text":"### <span id=\"1-.-9-.-7-Solenoids\">**1.9.7 Solenoids**</span>\n\nThe control units communicate with each other and, in normal circumstances, open the solenoid valves, which supply oxygen to the breathing circuit.\n\nThe solenoids are opened alternately left â right in a six-second interval. The solenoid opening is indicated in the dive mode by the â=â symbol in the left or right bottom corner of the handset screen.\n\n**Failed solenoid detection**\nThe solenoids are normally opened alternately left â right after six seconds. If one of the solenoids is defective and still registered as functional, then the oxygen injection interval is actually extended to 12 sec, because the device uses a non-functional solenoid every 6 seconds. In this case, the oxygen supply is insufficiently accurate.\n\nDefective solenoid detection works in case the solenoid is blocked in the closed position or disconnected altogether (connector failure). The electronics verify whether the solenoid responds to stimuli and evaluates whether the solenoid is functional or not. In the event of a malfunctioning solenoid, the diver will receive information on which of the two solenoids is malfunctioning. The diver has the option to disable the faulty solenoid during the dive ***Menu / Setup / Faulty sensors / Solenoids***.\n\nAs soon as the diver deactivates the solenoid, the device then uses only one solenoid with an\ninterval of 6 sec.\n\nThis is warning only, the device does not deactivate the solenoid automatically.\n\nThe warning is issued after multiple failed solenoid responses (cca 30-50sec delay), so do not rely on this warning. Since in a scenario of a âstuck openâ solenoid, you will get ppO2 creep or spike long before a solenoid failure warning.\n","textLarge":false,"imageOnRight":true,"image":{"recommendedSizes":{"width":"420","height":"280"}},"imageMobile":{"recommendedSizes":{"width":"750","height":"500"}}},"id":"#92","type":"component","lock":false,"position":154},{"name":"Divider","data":{"color":"darkGray"},"id":"#93","type":"component","lock":false,"position":155},{"name":"SectionDivider","data":{"title":"1.9.8 Power supply"},"id":"#532","type":"component","lock":false,"position":156},{"name":"TextBlock","data":{"text":"### <span id=\"1-.-9-.-8-Power
2-supply\">**1.9.8 Power supply**</span>\n\nThe CCR Liberty uses two Li-Ion batteries, one to power each control unit. The minimum service life of Li-Ion batteries is six months. The typical service life of the batteries is two years.\n\nSee also section 3.2.6 Battery charging.\n\nThe battery compartments are pressure resistant. If overpressure is formed inside of a battery compartment because of battery malfunction or helium diffusion, then an overpressure valve will release excess gases out of the rebreather and into the surrounding water.\n\n**Battery specification:**\n\n- Type: Li-Ion\n- Voltage: 3.6V \n- Capacity: 5.7Ah","textLarge":false,"imageOnRight":true,"image":{"recommendedSizes":{"width":"420","height":"280"}},"imageMobile":{"recommendedSizes":{"width":"750","height":"500"}}},"id":"#94","type":"component","lock":false,"position":157},{"name":"Divider","data":{"color":"darkGray"},"id":"#95","type":"component","lock":false,"position":158},{"name":"SectionDivider","data":{"title":"1.10 Visual display units"},"id":"#534","type":"component","lock":false,"position":159},{"name":"TextBlock","data":{"text":"### <span id=\"1-.-10-Visual-display-units\">**1.10 Visual display units**</span>","textLarge":false,"imageOnRight":true,"image":{"recommendedSizes":{"width":"420","height":"280"}},"imageMobile":{"recommendedSizes":{"width":"750","height":"500"}}},"id":"#535","type":"component","lock":false,"position":160},{"name":"SectionDivider","data":{"title":"1.10.1 Handsets"},"id":"#533","type":"component","lock":false,"position":161},{"name":"TextBlock","data":{"text":"### <span id=\"1-.-10-.-1-Handsets\">**1.10.1 Handsets**</span>\n\nThe handsets provide the CCR Libertyâs user with comprehensive information on the rebreatherâs status and the course of the dive. All functions of the control units are controlled using the handsets.\n\nThe functionality of both handsets is identical. Each handset controls both CUs simultaneously. In the event of a malfunction of one handset, the diver simply uses the other handset. During a dive, it is possible to set a different display mode on each handset.\n\nFor more information on handset operation, see section 2 Control-unit operation.","textLarge":false,"imageOnRight":true,"image":{"recommendedSizes":{"width":"420","height":"280"}},"imageMobile":{"recommendedSizes":{"width":"750","height":"500"}}},"id":"#96","type":"component","lock":false,"position":162},{"name":"Divider","data":{"color":"darkGray"},"id":"#97","type":"component","lock":false,"position":163},{"name":"SectionDivider","data":{"title":"1.10.2 Head-up display"},"id":"#536","type":"component","lock":false,"position":164},{"name":"TextBlock","data":{"text":"### <span id=\"1-.-10-.-2-Head-up-display\">**1.10.2 Head-up display**</span> \n\nThe head-up display (HUD) shows the current partial pressure or CCR error status during the dive.\n\nOther statuses are displayed in standby mode, during charging, and when the unit is connected to a computer.","textLarge":false,"imageOnRight":true,"image":{"recommendedSizes":{"width":"420","height":"280"},"mimetype":"image/png","size":120828,"hash":"b22dabd3fc8d935b1f92e7257c7e5b812c96e89e","id":"cl3sof920ddp80776d192imeq","filename":"divesoft-ccr-liberty-manual-1-10-2-01.png","category":"divesoft/","type":"image"},"imageMobile":{"recommendedSizes":{"width":"750","height":"500"}}},"id":"#98","type":"component","lock":false,"position":165},{"name":"TextBlock","data":{"text":"If you are not entirely sure what the HUD is displaying, check the parameters on the handset display. Always check the HS if the HUD displays a warning (outer LED blinks red) or an alarm (all three LEDs flashs red four times).\n\nSee the following table for the various HUD signals.\n\nThe brightness of the HUD can be adjusted using ***Setup / Preferences / Indication / HUD bright.*** Changing the brightness of the display is only applied in dive mode. In Surface mode, it is not affected.","textLarge":false,"imageOnRight":true,"image":{"recommendedSizes":{"width":"420","height":"280"}},"imageMobile":{"recommendedSizes":{"width":"750","height":"500"}}},"id":"#99","type":"component","lock":false,"position":166},{"name":"Divider","data":{"color":"darkGray"},"id":"#100","type":"component","lock":false,"position":167}
2,{"name":"SectionDivider","data":{"title":"1.10.3 Buddy display"},"id":"#537","type":"component","lock":false,"position":168},{"name":"TextBlock","data":{"text":"##### HUD and buddy-display signals - Absolute PO2**","textLarge":false,"imageOnRight":true,"image":{"recommendedSizes":{"width":"420","height":"280"}},"imageMobile":{"recommendedSizes":{"width":"750","height":"500"}}},"id":"#573","type":"component","lock":false,"position":169},{"name":"Image","data":{"firstImage":{"mimetype":"image/png","size":205332,"hash":"e4397563e3d7bdcf97ec7e9e914cc297506e50e1","id":"cl6j3t6al0ncg07765e1hrxf5","filename":"divesoft-ccr-liberty-manual-1-10-3-01.png","category":"divesoft/","type":"image"},"secondImage":{},"image":{"type":"image"}},"id":"#102","type":"component","lock":false,"position":170},{"name":"Spacer","data":{"spacingLarge":30,"spacingSmall":20,"backgroundColor":"#ffffff"},"id":"#575","type":"component","lock":false,"position":171},{"name":"Divider","data":{"color":"darkGray"},"id":"#576","type":"component","lock":false,"position":172},{"name":"Spacer","data":{"spacingLarge":30,"spacingSmall":20,"backgroundColor":"#ffffff"},"id":"#574","type":"component","lock":false,"position":173},{"name":"TextBlock","data":{"text":"##### Relative HUD signalization \n\"**Setup / Preferences / Indication / HUD ppO2**\"\nThe relative signalization uses almost the same signals as the time proven absolute ppO2 signalization.\nWith these two exceptions:\n\n* Solid green led - ppO2 is within +/- 0.1bar from the SP\n* Blinking signalizes difference of ppO2 from SP, by 0.1bar for each blink.","textLarge":false,"imageOnRight":true,"image":{"recommendedSizes":{"width":"420","height":"280"}},"imageMobile":{"recommendedSizes":{"width":"750","height":"500"}}},"id":"#571","type":"component","lock":false,"position":174},{"name":"Divider","data":{"color":"darkGray"},"id":"#488","type":"component","lock":false,"position":175},{"name":"TextBlock","data":{"text":"**Color blind mode**\n\nIf you cannot distinguish blue and green LED lights, check âColor blind modeâ in ***Setup / Preferences / Indication***. Signals for 1.05 ⤠ppO<sub>2</sub> ⤠1.65 will be changed according the following table:","textLarge":false,"imageOnRight":true,"image":{"recommendedSizes":{"width":"420","height":"280"}},"imageMobile":{"recommendedSizes":{"width":"750","height":"500"}}},"id":"#104","type":"component","lock":false,"position":176},{"name":"TextBlock","data":{"text":"### <span id=\"1-.-10-.-3-Buddy-display\">**1.10.3 Buddy display**</span> \n\nThe buddy display (BD) shows whether the values of the partial pressure of oxygen are within the range that is suitable for breathing or if an error situation has occurred. The displayed information is intended for the diving partner of the CCR Liberty´s user.\n\nPrior to diving, the user of the CCR Liberty must familiarize his/her diving partner with the buddy displayâs functionality and agree on the emergency procedure to be carried out in the event that the buddy display indicates an error situation.\n\nSee the following table for the various buddy-display signals.\n\n","textLarge":false,"imageOnRight":true,"image":{"recommendedSizes":{"width":"420","height":"280"}},"imageMobile":{"recommendedSizes":{"width":"750","height":"500"}}},"id":"#101","type":"component","lock":false,"position":177},{"name":"Image","data":{"firstImage":{"mimetype":"image/png","size":49503,"hash":"8664e32af7a4cbbe47e614a3cfea1bad1c95be8c","id":"cl6j3xquj0nco0776adx4gh8c","filename":"divesoft-ccr-liberty-manual-1-10-3-02.png","category":"divesoft/","type":"image"},"secondImage":{},"image":{"type":"image"}},"id":"#105","type":"component","lock":false,"position":178},{"name":"Divider","data":{"color":"darkGray"},"id":"#106","type":"component","lock":false,"position":179},{"name":"SectionDivider","data":{"title":"1.11 Backplate and mounting"},"id":"#538","type":"component","lock":false,"position":180},{"name":"TextBlock","data":{"text":"### <span id=\"1-.-11-Backplate-and-mounting\">**1.11 Backplate and mounting**</span>\n\nThe method of mounting the CCR Liberty on the diverâs body is based on the backplate and harness common among wing-type buoyancy compensators used in technical diving.\n\nThe body of the rebreather, comprised of the scrubber canister and the attached head is mounted to the backplate with a cam. The cam lever cannot be released when the diver is wearing the rebreather.","textLarge":false,"imageOnRight":true,"image":{"recommendedSizes":{"width":"420","height":"280"}},"imageMobile":{"recommendedSizes":{"width":"750","height":"500"}}},"id":"#107","type":"component","lock":false,"position":181},{"name":"Image","data":{"firstImage":{"mimetype":"image/png","size":142759,"hash":"dc96a887ec2f5f6369256f38404c0eaeab1abf46","id":"cl3sohv9sddr10776ymc3hb3h","filename":"divesoft-ccr-liberty-manual-1-11-01.png","category":"divesoft/","type":"image"},"secondImage":{"mimetype":"image/png","size":108064,"hash":"dc12b38164d9201fc0ad2159c643c6f3b856c8a2","id":"cl4gnogy8jpmd0776be5rooft","filename":"divesoft-ccr-liberty-manual-1-11-02.png","category":"divesoft/","type":"image"},"image":{"type":"image"}},"id":"#108","type":"component","lock":false,"position":182},{"name":"Image","data":{"firstImage":{"mimetype":"image/png","size":247396,"hash":"5e840dc45ec5bbf18431bbd22dc419b52e1dbd3f","id":"cl4gnp1dijpml0776jtxhs8r2","filename":"divesoft-ccr-liberty-manual-1-11-03.png","category":"divesoft/","type":"image"},"secondImage":{}},"id":"#485","type":"component","lock":false,"position":183},{"name":"TextBlock","data":{"text":"The CCR Libertyâs integrated stand, which serves as a lumbar support, is
2intended for setting the rebreather on a hard, level surface with sufficient rigidity. Always secure the standing rebreather to prevent falling.\n\nIf needed, it is possible to remove the CCR Libertyâs backplate, and use it with a harness for open-circuit diving. The backplate enables the attachment of a twin-set (two cylinders firmly connected with stainless steel bands) commonly used in technical diving, as well as attachment of a single cylinder.\n\nWhen mounting the CCR Liberty onto the backplate, set the bottom of the scrubber cannister into the protrusion in the rebreather stand.","textLarge":false,"imageOnRight":true,"image":{"recommendedSizes":{"width":"420","height":"280"}},"imageMobile":{"recommendedSizes":{"width":"750","height":"500"}}},"id":"#109","type":"component","lock":false,"position":184},{"name":"Divider","data":{"color":"darkGray"},"id":"#110","type":"component","lock":false,"position":185},{"name":"SectionDivider","data":{"title":"1.12 Harness"},"id":"#539","type":"component","lock":false,"position":186},{"name":"TextBlock","data":{"text":"### <span id=\"1-.-12-Harness\">**1.12 Harness**</span>\n\nThe backplate is equipped with a harness that is to ensure proper system functioning. Do not change the way was intended to be used. If you do try to take the harness out, record exactly how it is threaded to prevent an interference with the functionality of the whole system.\n\nIt is necessary to adjust the harness to ensure a proper fit. Adjust the harness without the mounted scrubber canister, head, corrugated hoses, and breathing bags.\n\nAdjust the length of the shoulder straps to where three fingers can easily fit under the straps at the collar-bone level.\n\nThe chest D-rings should be as low as possible, while still allowing you to cross your arms over your chest comfortably. The D-rings should be high enough for you to reach the left ring with your left thumb and the right ring with your right thumb. The D-ring on the left side of the waist strap should be roughly on your hip.\n\nAdjust the length of the left part of the belt strap so that it passes through the eye of the crotch strap with approximately 5 cm (strap width) still remaining between the ring and the eye. Adjust the right part so that the strap is slightly tight. If you shorten a strap, leave sufficient room for different suits or a possible change in body dimensions. After shortening, it is necessary to deburr the ends of the straps by heat sealing them with a cigarette lighter or candle. Do this carefully to avoid forming a hard surface on the strap ends.\n\nAdjust the length of the crotch strap so that it lies closely against the body but does not dig in. Set the position of the rear D-ring as low as possible but high enough so that it does not place pressure on the buttocks when swimming. The rear D-ring should be within the diverâs reach. Test the exact position of the rear D-ring in the water with the complete apparatus.","textLarge":false,"imageOnRight":true,"image":{"recommendedSizes":{"width":"420","height":"280"}},"imageMobile":{"recommendedSizes":{"width":"750","height":"500"}}},"id":"#111","type":"component","lock":false,"position":187},{"name":"Divider","data":{"color":"darkGray"},"id":"#112","type":"component","lock":false,"position":188},{"name":"SectionDivider","data":{"title":"1.13 Buoyancy compensator"},"id":"#540","type":"component","lock":false,"position":189},{"name":"TextBlock","data":{"text":"### <span id=\"1-.-13-Buoyancy-compensator\">**1.13 Buoyancy compensator**</span>\n\nThe CCR Liberty uses a wing-type buoyancy compensator (BCD) with a displacement of 200 N. The compensatorâs design and materials are very durable and even suitable for cave and wreck diving.\n\nThe wing has a two-ply design. The internal bladder is made of high-frequency-welded Cordura 560 fabric with PU coating. The wingâs external cover is made of Cordura 2000 fabric.\n\nThe wing is attached with screws along the edge of the backplate.\n\nTo correctly position the inflator, pass the low-pressure hose through the rubber ring on the corrugated hose, then through the rubber ring on the shoulder strap and finally through the second rubber ring on the corrugated hose. Do not skip either of the rings on the corrugated hose; upon disconnecting the quick-release connector from the inflator, it could move far enough back to where it is hard to find or reach.\n\nThe buoyancy compensator is not a life preserver. It does not maintain the diver in a face-up position. It is not designed to hold the diverâs face above the surface should he/she become unconscious or immobile.","textLarge":false,"imageOnRight":true,"image":{"recommendedSizes":{"width":"420","height":"280"}},"imageMobile":{"recommendedSizes":{"width":"750","height":"500"}}},"id":"#113","type":"component","lock":false,"position":190},{"name":"Divider","data":{"color":"darkGray"},"id":"#114","type":"component","lock":false,"position":191},{"name":"SectionDivider","data":{"title":"1.14 Ballast"},"id":"#541","type":"component","lock":false,"position":192},{"name":"TextBlock","data":{"text":"### <span id=\"1-.-14-Ballast\">**1.14 Ballast**</span>\n\nThe ballast system is composed of two pouches positioned on the sides of the scrubber canister and are attached to the cylinders. In the lower part of the pouches, there is a loop through which the attachment strap of the rebreather body is passed. The internal pouches, which contain the individual weights, are inserted into the external pouches. The upper flap of the external pouch is intended for inserting weights before a dive and removing them after. For emergency jettisoning of ballast, pull the red strap on the lower part of the pouch. This will open the external pouch and will release the internal pouch containing the ballast.\n\nFor regular ballast removal, do not use the method for emergency jettisoning. This could lead to excessive wear of the Velcro.\n\nA diver in a dry suit typically needs 2Ã4 kg of ballast. Proper ballast weight and distribution is a subject covered in the CCR Liberty diver course.","textLarge":false,"imageOnRight":true,"image":{"recommendedSizes":{"width":"420","height":"280"}},"imageMobile":{"recommendedSizes":{"width":"750","height":"500"}}},"id":"#115","type":"component","lock":false,"position":193},{"name":"Divider","data":{"color":"darkGray"},"id":"#116","type":"component","lock":false,"position":194},{"name":"SectionDivider","data":{"title":"1.15 Weights of individual parts"},"id":"#542","type":"component","lock":false,"position":195},{"name":"TextBlock","data":{"text":"### <span id=\"1-.-15-Weights-of-individual-parts\">**1.15 Weights of individual parts**</span>\n\nThe listed weights are merely an indication. The weight of the parts of each apparatus may vary.\n\n- Backplate with the wing, harness and hoses, without counterlungs ........ 10.68 kg\n- Weight pockets (without weights) ...................................................................... 0.43 kg\n- Counterlungs incl. all valves.................................................................................1.86 kg\n- Cylinder with valve, empty .......................................................................................... 5.44 kg\n- Corrugated hose, complete .................................................................................. 1.11 kg\n- Scrubber body and cartridge, without sorbent ................................................ 3.76 kg\n- Head incl. handsets, HUD and BD ....................................................................... 4.59 kg\n- Charger with cable ................................................................................................ 0.09 kg\n- Supplied accessories and small parts\n(without chargers) ............................1.00 kg\n- Peli
2Stormcase iM2975 ....................................................................................... 10.30 kg\n- Oxygen 3 l at 200 bar ............................................................................................ 0.84 kg\n- Diluent (air) 3 l at 300 bar ................................................................................... 0.91 kg\n- Sofnolime ............................................................................................................... 2.50 kg\n- Energy stored in batteries ...................................................................... 4.16Ã10-11 kg\n\n","textLarge":false,"imageOnRight":true,"image":{"recommendedSizes":{"width":"420","height":"280"}},"imageMobile":{"recommendedSizes":{"width":"750","height":"500"}}},"id":"#117","type":"component","lock":false,"position":196},{"name":"Divider","data":{"color":"darkGray"},"id":"#323","type":"component","lock":false,"position":197},{"name":"ListOfLinks","data":{"links":[{"title":"< Previous page / Introduction","url":{"url":"/en/manuals/ccr-liberty-manual","pageId":"cl2yfnr88iba8085879y08pat","urlNewWindow":true},"id":"1"},{"title":"> Next page / Section: 2. Control-unit operation","url":{"url":"/en/manuals/ccr-liberty-manual/ccr-liberty-manual-02","pageId":"cl43w7gb7l8e20858xrzqgqz9"},"id":"2"}],"activeTab":"2"},"id":"#465","type":"component","lock":false,"position":198},{"name":"Footer","data":{"copyrights":"Copyright © 2019 Divesoft LLC All rights reserved.","facebookUrl":{"urlNewWindow":true,"url":"https://www.facebook.com/divesoft/"},"youtubeUrl":{"url":"https://www.youtube.com/channel/UCHI2-kHmfoUlAdhQXPKl8lA/featured","urlNewWindow":true},"instagramUrl":{"url":"https://www.instagram.com/divesoft/","urlNewWindow":true},"contacts":"**Divesoft s.r.o.** \nHálkova 2495 \n413 01 Roudnice nad Labem \nCzech Republic \nTel.: +420 416 857 057 \nE-mail: [email protected]"},"id":"#1","type":"component","lock":false,"position":199}],"id":"root","idBuffer":"#577","lastCommit":"2084c84d-7685-4e82-bc16-929c69b79a71"}},"annotations":[],"language":{"type":"id","generated":false,"id":"Language:cjv3kwvoj000u083611381c6o","typename":"Language"},"__typename":"PageTranslation"},"Page:cl43w7gb7l8e20858xrzqgqz9":{"id":"cl43w7gb7l8e20858xrzqgqz9","type":{"type":"id","generated":false,"id":"PageType:cjv3l213x004f08366hjufttp","typename":"PageType"},"tags":[],"translations({\"where\":{\"language\":{\"id\":\"cjv3kwvoj000u083611381c6o\"}}})":[{"type":"id","generated":false,"id":"PageTranslation:cl43w7gbql8e908582rf924yn","typename":"PageTranslation"}],"__typename":"Page"},"PageTranslation:cl43w7gbql8e908582rf924yn":{"id":"cl43w7gbql8e908582rf924yn","name":"CCR Liberty manual 02","createdAt":"2022-06-07T08:21:09.349Z","content":{"type":"json","json":{"content":[{"name":"Header","data":{"products":[{"title":"Accessories","description":"Backplates, Consumables. Tanks.","img":{"recommendedSizes":{"width":"235","height":"235"}},"url":""},{"title":"Accessories sets","description":"Protection, maintenance, cleaning.","img":{"recommendedSizes":{"width":"235","height":"235"}},"url":""},{"title":"Spare parts","description":"Spare parts and components.","img":{"recommendedSizes":{"width":"235","height":"235"}},"url":""},{"title":"Spare parts kits","description":"Completly Liberty spare parts kits.","img":{"recommendedSizes":{"width":"235","height":"235"}},"url":""}]},"id":"#0","type":"component","lock":false,"position":0},{"name":"Divider","data":{"color":"darkGray"},"id":"#47","type":"component","lock":false,"position":1},{"name":"SectionDivider","data":{"title":""},"id":"#550","type":"component","lock":false,"position":2},{"name":"TextBlock","data":{"text":"[**Section: 2. Control-unit operation**](#2-.-Control-unit-operation)\n\n[2.1\tControl elements](#2.-1-Control-elements)\n\n[2.1.1\tSurface mode inputs](#2-.-1-.-1-Surface-mode-inputs) \n[2.1.2\tDive mode inputs](#2-.-1-.-2-Dive-mode-inputs) \n[2.1.3\tLanguage](#2-.-1-.-3-Language) \n\n[2.2\tSwitching on the unit](#2-.-2-Switching-on-the-unit)\n\n[2.2.1\tActivation](#2-.-2-.-1-Activation) \n\n[2.3\tSurface mode](#2-.-3-Surface-mode)\n\n[2.3.1\tEntering surface mode](#2-.-3-.-1-Entering-surface-mode) \n[2.3.2\tSurface mode primary screen](#2-.-3-.-2-Surface-mode-primary-screen) \n[2.3.3\tSurface mode O<sub>2</sub> sensors screen](#2-.-3-.-3-Surface-mode-O2-sensors-screen) \n[2.3.4\tSwitching to other modes](#2-.-3-.-4-Switching-to-other-modes) \n[2.3.5\tppO<sub>2</sub> control in surface mode](#2-.-3-.-5-ppO2-control-in-surface-mode) \n\n[2.4\tSetup](#2-.-4-Setup)\n\n[2.4.1\tEditor use](#2-.-4-.-1-Editor-use) \n[2.4.2\tSetpoints](#2-.-4-.-2-Setpoints) \n[2.4.3\tMixtures](#2-.-4-.-3-Mixtures) \n[2.4.4\tDecompression](#2-.-4-.-4-Decompression) \n[2.4.5\tAlarms](#2-.-4-.-5-Alarms) \n[2.4.6\tPreferences](#2-.-4-.-6-Preferences) \n[2.4.7\tCalibration](#2-.-4-.-7-Calibration) \n[2.4.8\tFaulty sensors](#2-.-4-.-8-Faulty-sensors) \n\n[2.5\tDive mode](#2-.-5-Dive-mode)\n\n[2.5.1\tDetailed screen](#2-.-5-.-1-Detailed-screen) \n[2.5.2\tSynoptic screen](#2-.-5-.-2-Synoptic-screen) \n[2.5.3\tBig Screen](#2-.-5-.-3-Big-Screen) \n[2.5.4\tDive profile screen](#2-.-5-.-4-Dive-profile-screen) \n[2.5.5\tSensors screen](#2-.-5-.-5-Sensors-screen) \n[2.5.6\tTTS Screen](#2-.-5-.-6-TTS-Screen) \n\n[2.6\tCCR mode](#2-.-6-CCR-mode)\n\n[2.6.1\tEntering CCR mode](#2-.-6-.-1-Entering-CCR-mode) \n[2.6.2\tSwitching to other modes](#2-.-6-.-2-Switching-to-other-modes) \n[2.6.3\tppO<sub>2</sub> regulation](#2-.-6-.-3-ppO2-regulation) \n[2.6.4\tDecompression](#2-.-6-.-4-Decompression) \n[2.6.5\tSpecific handset control](#2-.-6-.-5-Specific-handset-control) \n\n[2.7\tManual CCR mode](#2-.-7-Manual-CCR-mode)\n\n[2.7.1\tEntering manual CCR mode](#2-.-7-.-1-Entering-manual-CCR-mode) \n[2.7.2\tSwitching to other modes](#2-.-7-.-2-Switching-to-other-modes) \n[2.7.3\tppO<sub>2</sub> regulation](#2-.-7-.-3-ppO2-regulation) \n[2.7.4\tDecompression](#2-.-7-.-4-Decompression) \n\n[2.8\tBailout OC mode](#2-.-8-Bailout-OC-mode)\n\n[2.8.1\tEntering bailout OC mode](#2-.-8-.-1-Entering-bailout-OC-mode) \n[2.8.2\tSwitching to other modes](#2-.-8-.-2-Switching-to-othe-modes) \n[2.8.3\tMixture](#2-.-8-.-3-Mixture) \n[2.8.4\tDecompression](#2-.-8-.-4-Decompression) \n[2.8.5\tSpecific handset control](#2-.-8-.-5-Specific-handset-control) \n\n[2.9\tAscent plan](#2-.-9-Ascent-plan)\n\n[2.10\tSetup in Dive mode](#2-.-10-Setup-in-Dive-mode)\n\n[2.11\tGames](#2-.-11-Games)\n\n[2.11.1\tSokoban](#2-.-11-.-1-Sokoban) \n[2.11.2\tSnake](#2-.-11-.-2-Snake) \n\n[2.12\tList of pop-up alarms and notifications on CCR Liberty](#2-.-12-List-of-pop---up-alarms-and-notifications-on-CCR-Liberty)\n\n[2.12.1\tCritical priority](#2-.-12-.-1-Critical-priority) \n[2.12.2\tHigh priority](#2-.12-.-2-High-priority) \n[2.12.3\tMedium priority](#2-.-12-.-3-Medium-priority) \n[2.12.4\tNotifications](#2-.-12-.-4-Notifications) ","textLarge":false,"imageOnRight":true,"image":{"recommendedSizes":{"width":"420","height":"280"}},"imageMobile":{"recommendedSizes":{"width":"750","height":"500"}}},"id":"#479","type":"component","lock":false,"position":3},{"name":"Divider","data":{"color":"darkGray"},"id":"#480","type":"component","lock":false,"position":4},{"name":"SectionDivider","data":{"title":"2. Control-unit operation"},"id":"#487","type":"component","lock":false,"position":5},{"name":"TextBlock","data":{"text":"### <span id=\"2-.-Control-unit-operation\">**2. Control-unit operation**</span>","textLarge":false,"imageOnRight":true,"image":{"recommendedSizes":{"width":"420","height":"280"}},"imageMobile":{"recommendedSizes":{"width":"750","height":"500"}}},"id":"#489","type":"component","lock":false,"position":6},{"name":"SectionDivider","data":{"title":"2.1 Control elements"},"id":"#488","type":"component","lock":false,"position":7},{"name":"TextBlock","data":{"text":"### <span id=\"2.-1-Control-elements\">**2.1 Control elements**</span>\n\nAll electronics in the CCR Liberty are controlled via the handsets.\n\nThe following inputs and combinations are distinguished by:\n\n- Press upper key\n- Press lower key\n- Press both keys\n- Long press upper key\n- Long press lower key\n- Long press both keys\n- Coded key press (press both keys, then release one key and press it again, then release both keys)\n- Tilt the HS away from yourself\n- Tilt the HS toward yourself\n- Tilt the HS to the left\n- Tilt the HS to the right\n- Tap the display glass\n- Shine a light on the display\n\nâLong pressâ means pressing the key for more than 2.5 seconds. The key-press operation can be terminated by releasing the key one is currently on or when the last key is released (when pressing both keys).\n\nThe configuration of a given HS â whether set up for the left or right hand â will determine the tilting directions and which keys will constitute upper/lower.\n\nThe HS tilting configuration can be changed by tapping on the HS from any of the four sides.","textLarge":false,"imageOnRight":true,"image":{"recommendedSizes":{"width":"420","height":"280"}},"imageMobile":{"recommendedSizes":{"width":"750","height":"500"}}},"id":"#119","type":"component","lock":false,"position":8},{"name":"TextBlock","data":{"text":"","textLarge":false,"imageOnRight":true,"image":{"recommendedSizes":{"width":"420","height":"280"}},"imageMobile":{"recommendedSizes":{"width":"750","height":"500"}}},"id":"#436","type":"component","lock":false,"position":9},{"name":"Divider","data":{"color":"darkGray"},"id":"#120","type":"component","lock":false,"position":10},{"name":"SectionDivider","data":{"title":"2.1.1 Surface mode inputs"},"id":"#494","type":"component","lock":false,"position":11},{"name":"TextBlock","data":{"text":"### <span id=\"2-.-1-.-1-Surface-mode-inputs\">**2.1.1 Surface mode inputs**</span>\n\nThe keys and other inputs have assigned meanings in connection with the current item navigated to in the menu. At the same time, however, general rules, which apply wherever possible, are determined for their use.\n\n- Press upper key â select menu item\n- Press lower key â scroll through the menu\n- Press both keys â exit the menu without performing any action\n- Long press upper key â page up. Valid in Log book only. This has additional functions in the standard menu, indicated by a double check mark icon:\n\t- enable or disable mixture without entering mi
2xture edit (Setup/Mixtures/OC; Setup/Mixtures/CCR)\n\t- Switching On/Off daylight saving (Setup/Preferences/Time&GPS/Timezone).\n\nâ enable or disable mixture without entering mixture edit (Setup/Mixtures/OC; Setup/Mixtures/CCR)\n\nâ Switching On/Off daylight saving (Setup/Preferences/Time&GPS/Timezone).\n\n- Long press lower key â page down\n- Long press both keys â return to main screen\n- Coded key press â switch to maintenance mode (this can be done only from the main screen)\n- Tilt HS away from yourself â increase the entered digit by one or check box\n- Tilt HS toward yourself â decrease the entered digit by one or uncheck box\n- Tilt HS to the left â move the cursor to the left\n- Tilt HS to the right â move the cursor to the right\n\nIn certain instances, such as in the menu or editing screen, helpful symbols relating to the keys are displayed. A symbol can be either next to a single key indicating the action executed if the corresponding key is pressed, or between the keys (indicating the action executed if both keys are pressed).\n\nThe **|â|** symbol indicates the user can scroll through the menu. Scrolling in the menu is cyclical, so the cursor will return to the top of the menu list. A scroll-up function is not available due to the two-key control.\n\nThe **|â|** symbol means going back one level without executing any action.\n\nThe **|<span style=\"color:green\">â</span>|** symbol represents selecting an item or confirming an action.","textLarge":false,"imageOnRight":true,"image":{"recommendedSizes":{"width":"420","height":"280"}},"imageMobile":{"recommendedSizes":{"width":"750","height":"500"}}},"id":"#121","type":"component","lock":false,"position":12},{"name":"Divider","data":{"color":"darkGray"},"id":"#122","type":"component","lock":false,"position":13},{"name":"SectionDivider","data":{"title":"2.1.2 Dive mode inputs"},"id":"#493","type":"component","lock":false,"position":14},{"name":"TextBlock","data":{"text":"### <span id=\"2-.-1-.-2-Dive-mode-inputs\">**2.1.2 Dive mode inputs**</span>\n\nThe input meanings in surface mode also apply to dive mode. Some exceptions are:\n\nLong press upper key â shifts the setpoint to the next higher setpoint\n\nLong press lower key â shifts the setpoint to the next lower setpoint\n\nWhen playing decompression games, the tilting repsonse is more sensitive. Digit entry via tilting is limited to special cases only while in dive mode.\n\nTapping on the display glass will switch on the display if it was switched off. It is now also possible to set numeric values using the button editor. Setup/Preferences/Controls/Editor nav.\n\nIn the dark, shining a dive light on the display activates it in the same way as tapping on the glass. In a naturally lit environment, the display can be activated by covering and then uncovering it.","textLarge":false,"imageOnRight":true,"image":{"recommendedSizes":{"width":"420","height":"280"}},"imageMobile":{"recommendedSizes":{"width":"750","height":"500"}}},"id":"#123","type":"component","lock":false,"position":15},{"name":"Divider","data":{"color":"darkGray"},"id":"#124","type":"component","lock":false,"position":16},{"name":"SectionDivider","data":{"title":"2.1.3 Language"},"id":"#495","type":"component","lock":false,"position":17},{"name":"TextBlock","data":{"text":"### <span id=\"2-.-1-.-3-Language\">**2.1.3 Language**</span>\n\nAll textual information on the CCR Liberty is in English. Controlling the apparatus requires knowledge of the English language at a level that at least allows the user to thoroughly understand this information.","textLarge":false,"imageOnRight":true,"image":{"recommendedSizes":{"width":"420","height":"280"}},"imageMobile":{"recommendedSizes":{"width":"750","height":"500"}}},"id":"#125","type":"component","lock":false,"position":18},{"name":"Divider","data":{"color":"darkGray"},"id":"#126","type":"component","lock":false,"position":19},{"name":"SectionDivider","data":{"title":"2.2 Switching on the unit"},"id":"#496","type":"component","lock":false,"position":20},{"name":"TextBlock","data":{"text":"### <span id=\"2-.-2-Switching-on-the-unit\">**2.2 Switching on the unit**</span>\n\nSwitching on the CCR Libertyâs control unit requires it to be in standby mode, which is indicated on the HUD (slowly flashing blue LED) and the buddy display (slowly flashing green LED).\n\nIf the jumpers are removed (or turned so that the pins are not inserted in the connector), the rebreatherâs control unit cannot be turned on, except with USB power when connected to a computer via an adapter.","textLarge":false,"imageOnRight":true,"image":{"recommendedSizes":{"width":"420","height":"280"}},"imageMobile":{"recommendedSizes":{"width":"750","height":"500"}}},"id":"#127","type":"component","lock":false,"position":21},{"name":"Divider","data":{"color":"darkGray"},"id":"#128","type":"component","lock":false,"position":22},{"name":"SectionDivider","data":{"title":"2.2.1 Activation"},"id":"#497","type":"component","lock":false,"position":23},{"name":"TextBlock","data":{"text":"### <span id=\"2-.-2-.-1-Activation\">**2.2.1 Activation**</span>\n\nThe CCR Liberty is activated by pressing both keys on either handset for three seconds.\n\nAutomatic activation occurs in the event the units is submerged to a depth greater than 1.5 m. In such a case, the user cannot continue the dive, and must perform complete pre-dive preparation on the surface as soon as possible.\n\nIt is also possible to switch on the CCR Liberty via automatic activation in the event of damaging or losing both handsets. **Using this option is risky and should thus be c
2onsidered only for a rescue attempt, for example, evacuating a diver from a siphoning cave.**\n\nUpon activation, the rebreather switches to surface mode. If submerged to a depth greater than 1.5 m, the rebreather automatically switches to CCR mode (assuming the jumpers are connected to the batteries). **Due to a low depth sampling rate when the unit is switched off, the rebreather will automatically switch on after approximately one minute of being submerged at a depth greater than 1.5 meters.**\n\n**<span style=\"color:red\">WARNING: NEVER BREATHE FROM A UNIT THAT IS SWITCHED OFF! This can result in serious injury or death.</span>**","textLarge":false,"imageOnRight":true,"image":{"recommendedSizes":{"width":"420","height":"280"}},"imageMobile":{"recommendedSizes":{"width":"750","height":"500"}}},"id":"#129","type":"component","lock":false,"position":24},{"name":"Divider","data":{"color":"darkGray"},"id":"#130","type":"component","lock":false,"position":25},{"name":"SectionDivider","data":{"title":"2.3 Surface mode"},"id":"#498","type":"component","lock":false,"position":26},{"name":"TextBlock","data":{"text":"### <span id=\"2-.-3-Surface-mode\">**2.3 Surface mode**</span>","textLarge":false,"imageOnRight":true,"image":{"recommendedSizes":{"width":"420","height":"280"}},"imageMobile":{"recommendedSizes":{"width":"750","height":"500"}}},"id":"#499","type":"component","lock":false,"position":27},{"name":"SectionDivider","data":{"title":"2.3.1 Entering surface mode"},"id":"#500","type":"component","lock":false,"position":28},{"name":"TextBlock","data":{"text":"### <span id=\"2-.-3-.-1-Entering-surface-mode\">**2.3.1 Entering surface mode**</span>\n\nThe CCR Liberty switches to surface mode when turned on by pressing the keys. In the water, surface mode can be selected in the menu if the depth is less than 1.5 m.","textLarge":false,"imageOnRight":true,"image":{"recommendedSizes":{"width":"420","height":"280"}},"imageMobile":{"recommendedSizes":{"width":"750","height":"500"}}},"id":"#131","type":"component","lock":false,"position":29},{"name":"Divider","data":{"color":"darkGray"},"id":"#132","type":"component","lock":false,"position":30},{"name":"SectionDivider","data":{"title":"2.3.2 Surface mode primary screen"},"id":"#501","type":"component","lock":false,"position":31},{"name":"TextBlock","data":{"text":"### <span id=\"2-.-3-.-2-Surface-mode-primary-screen\">**2.3.2 Surface mode primary screen**</span>","textLarge":false,"imageOnRight":true,"image":{"recommendedSizes":{"width":"420","height":"280"}},"imageMobile":{"recommendedSizes":{"width":"750","height":"500"}}},"id":"#441","type":"component","lock":false,"position":32},{"name":"TextBlock","data":{"text":"**Date and Time**\n\nMaintain a correct local time setting; it will be used for log recording.\n\n**Stack time**\n\nThe scrubber stack timer runs continuously in dive mode (except OC bailout) regardless of depth, and it can be set to run on the surface (more in âStack timer sfc.â).","textLarge":false,"imageOnRight":true,"image":{"recommendedSizes":{"width":"420","height":"280"},"mimetype":"image/png","size":80308,"hash":"476b80124b526bc436e19436dbb987980e26e610","id":"cl3sojl40ddum0776403i84u3","filename":"divesoft-ccr-liberty-manual-2-3-2-01.png","category":"divesoft/","type":"image"},"imageMobile":{"recommendedSizes":{"width":"750","height":"500"}}},"id":"#133","type":"component","lock":false,"position":33},{"name":"TextBlock","data":{"text":"If you spend a long time in dive mode while not breathing from the rebreatherâs loop, then increase the time for the stack time warning.\n\nDonât forget to reset the timer when you refill the scrubber (Predive â Stack time reset).\n\n**Max altitude**\n\nThe maximum allowed altitude calculation is based on the ZHL decompression algorithm with an additional safety margin (GF = 0.80). It is a continuation of the decompression calculations and functions in the same manner as a decompression ceiling.\n\n**No fly**\n\nThe calculation of the no-fly time is based on the maximum allowed altitude according to the Bühlmann decompression algorithm ZHL.\n\nThe air pressure in the cabin of a commercial aircraft is maintained at a level corresponding to air pressure at 1800â2400 m (6000â8000 feet) above sea level while cruising altitude falls in the range 11 000â12 200 m (36 000â40 000 feet).\n\nThe no-fly time calculation uses the decisive altitude of 4464 m (14 646 ft). At this altitude compartments containing the oxygen masks will be opened automatically and the oxygen masks will drop down in front of the aircraft passengers.\n\n**Battery symbol**\n\nA graphical indication shows the remaining battery capacity. The two batteries are indicated separately.","textLarge":false,"imageOnRight":true,"image":{"recommendedSizes":{"width":"420","height":"280"}},"imageMobile":{"recommendedSizes":{"width":"750","height":"500"}}},"id":"#134","type":"component","lock":false,"position":34},{"name":"Image","data":{"firstImage":{"mimetype":"image/png","size":33293,"hash":"35f11085780f0861d890efffe30111131e1caf37","id":"cl6j45khv0ncy0776xtcgmf19","filename":"divesoft-ccr-liberty-manual-2-3-2-02.png","category":"divesoft/","type":"image"},"secondImage":{}},"id":"#135","type":"component","lock":false,"position":35},{"name":"TextBlock","data":{"text":"**Setpoints**\n\nDescent (â-.--â if disabled), low and high setpoints are listed.\n\n**ppO<sub>2</sub>**\n\nThe measured partial pressure of oxygen is displayed.","textLarge":false,"imageOnRight":true,"image":{"recommendedSizes":{"width":"420","height":"280"}},"imageMobile":{"recommendedSizes":{"width":"750","height":"500"}}},"id":"#136","type":"component","lock":false,"position":36},{"name":"Divider","data":{"color":"darkGray"},"id":"#137","type":"component","lock":false,"position":37},{"name":"SectionDivider","data":{"title":"2.3.3 Surface mode O2 sensors screen"},"id":"#502","type":"component","lock":false,"position":38},{"name":"TextBlock","data":{"text":"### <span id=\"2-.-3-.-3-Surface-mode-O2-sensors-screen\">**2.3.3 Surface mode O<sub>2</sub> sensors screen**</span>","textLarge":false,"imageOnRight":true,"image":{"recommendedSizes":{"width":"420","height":"280"}},"imageMobile":{"recommendedSizes":{"width":"750","height":"500"}}},"id":"#442","type":"component","lock":false,"position":39},{"name":"TextBlock","data":{"text":"To switch between the different screens in surface mode, press the top button. Both ppO<sub>2</sub> and sensor voltage can be read. If a sensor is not an operational state (not connected, offline, error, excluded, disabled, uncalibrated), the appropriate tag appears instead of the ppO<sub>2</sub> value.","textLarge":false,"imageOnRight":true,"image":{"recommendedSizes":{"width":"420","height":"280"},"mimetype":"image/png","size":348491,"hash":"a676b35787e5adef20c11efb7de01acb268717a6","id":"cl3sokpr8ddvo07765y34fuuk","filename":"divesoft-ccr-liberty-manual-2-3-3-01.png","category":"divesoft/","type":"image"},"imageMobile":{"recommendedSizes":{"width":"750","height":"500"}}},"id":"#138","type":"component","lock":false,"position":40}
2,{"name":"TextBlock","data":{"text":"You can also find the local time, the max. difference between the sensor readings, and the stack time on the O<sub>2</sub> sensors screen.\n \nIf after replacing the oxygen sensor you see its voltage is negative (-10mV), then it means that the connector to the sensor is wired backwards.\n\n","textLarge":false,"imageOnRight":true,"image":{"recommendedSizes":{"width":"420","height":"280"}},"imageMobile":{"recommendedSizes":{"width":"750","height":"500"}}},"id":"#139","type":"component","lock":false,"position":41},{"name":"Divider","data":{"color":"darkGray"},"id":"#140","type":"component","lock":false,"position":42},{"name":"SectionDivider","data":{"title":"2.3.4 Switching to other modes"},"id":"#503","type":"component","lock":false,"position":43},{"name":"TextBlock","data":{"text":"### <span id=\"2-.-3-.-4-Switching-to-other-modes\">**2.3.4 Switching to other modes**</span>\n","textLarge":false,"imageOnRight":true,"image":{"recommendedSizes":{"width":"420","height":"280"}},"imageMobile":{"recommendedSizes":{"width":"750","height":"500"}}},"id":"#443","type":"component","lock":false,"position":44},{"name":"TextBlock","data":{"text":"In the menu the user can switch from surface mode to the CCR, manual CCR, bailout and standby modes.\n\nIf submerged to a depth greater than 1.5 m, the rebreather automatically switches to CCR mode.\n","textLarge":false,"imageOnRight":true,"image":{"recommendedSizes":{"width":"420","height":"280"},"mimetype":"image/png","size":34636,"hash":"502928a109d20737a24f0f4fb20ca591f65a819e","id":"cl3solo2pddx90776lkh2cgud","filename":"divesoft-ccr-liberty-manual-2-3-4-01.png","category":"divesoft/","type":"image"},"imageMobile":{"recommendedSizes":{"width":"750","height":"500"}}},"id":"#141","type":"component","lock":false,"position":45},{"name":"Divider","data":{"color":"darkGray"},"id":"#142","type":"component","lock":false,"position":46}
2,{"name":"SectionDivider","data":{"title":"2.3.5 ppO2 control in surface mode"},"id":"#504","type":"component","lock":false,"position":47},{"name":"TextBlock","data":{"text":"### <span id=\"2-.-3-.-5-ppO2-control-in-surface-mode\">**2.3.5 ppO<sub>2</sub> control in surface mode**</span>\n \nSimple ppO<sub>2</sub> control is started in surface mode. If the oxygen content in the loop falls below 19% (with respect to the current atmospheric pressure) the solenoid will open to add 0.5 liter of oxygen. This should ensure that the partial pressure of oxygen will climb to a value of at least 0.23bar. Oxygen is then injected in six-second intervals (three seconds after the last closing of a solenoid). This control algorithm is intended to prevent a dangerous ppO<sub>2</sub> decline and the subsequent loss of consciousness of the user, who may have mistakenly breathed from the circuit without activating dive mode.\n\nppO<sub>2</sub> control is subject to other conditions; the oxygen cylinder must be full, connected, and open. PpO<sub>2</sub> sensors must also be installed and calibrated. It is advised for the user to avoid excessive physical activity prior to diving on the CCR Liberty, as doing so may cause a higher consumption of oxygen.\n\nppO<sub>2</sub> control in surface mode only maintains the oxygen level closely above the hypoxia threshold; therefore, it may not be used routinely for breathing. Oxygen addition is not active when the head is connected to the charger.","textLarge":false,"imageOnRight":true,"image":{"recommendedSizes":{"width":"420","height":"280"}},"imageMobile":{"recommendedSizes":{"width":"750","height":"500"}}},"id":"#143","type":"component","lock":false,"position":48},{"name":"Divider","data":{"color":"darkGray"},"id":"#144","type":"component","lock":false,"position":49},{"name":"SectionDivider","data":{"title":"2.4 Setup"},"id":"#505","type":"component","lock":false,"position":50},{"name":"TextBlock","data":{"text":"### <span id=\"2-.-4-Setup\">**2.4 Setup**</span>\n\nThe CCR Liberty is configured in surface mode. Activate the surface mode main menu with a short press of both keys and select Setup.\n\nSome values can be set during a dive; however, this is reserved for resolving exceptional situations only.\n\nThe values set will depend primarily on the userâs experience, physiology, and personal preferences. The fact that the CCR Liberty enables the user to choose his/her own values does not mean such a setting is safe or suitable for the individual and their planned dive.\n\nIf you are not sure which value to set, leave the values on the default setting.\n\nThe manufacturer does not provide a warranty for incorrectly operating the CCR Liberty if the faulty operation is the result of an improper setup.\n\nThe factory default setting values are indicated by square brackets.\n\n","textLarge":false,"imageOnRight":true,"image":{"recommendedSizes":{"width":"420","height":"280"}},"imageMobile":{"recommendedSizes":{"width":"750","height":"500"}}},"id":"#145","type":"component","lock":false,"position":51},{"name":"Divider","data":{"color":"darkGray"},"id":"#146","type":"component","lock":false,"position":52},{"name":"SectionDivider","data":{"title":"2.4.1 Editor use"},"id":"#506","type":"component","lock":false,"position":53},{"name":"TextBlock","data":{"text":"\n### <span id=\"2-.-4-.-1-Editor-use\">**2.4.1 Editor use**</span>\n\nMost of the values are edited in a similar manner.","textLarge":false,"imageOnRight":true,"image":{"recommendedSizes":{"width":"420","height":"280"}},"imageMobile":{"recommendedSizes":{"width":"750","height":"500"}}},"id":"#444","type":"component","lock":false,"position":54},{"name":"TextBlock","data":{"text":"â Press lower key - moves the cursor\n\nâ Press upper key - iterates 0-9 (if we are limited by the maximum value, then 0-MAX)\n\nâ Long press lower key - moves back by one character\n\nâ Long press upper key - resets the value to default and moves the cursor to the beginning\n\nâ To save, move the cursor to the last character and press again to confirm\n\n","textLarge":false,"imageOnRight":true,"image":{"recommendedSizes":{"width":"420","height":"280"},"mimetype":"image/png","size":25561,"hash":"c54b78519b545051344802594ee32617236d9070","i
2d":"cl3sommpcddyh0776pww0t77o","filename":"divesoft-ccr-liberty-manual-2-4-1-01.png","category":"divesoft/","type":"image"},"imageMobile":{"recommendedSizes":{"width":"750","height":"500"}}},"id":"#147","type":"component","lock":false,"position":55},{"name":"TextBlock","data":{"text":"**Aletrnative editing method by tilting**\n\nTilt toward yourselfâ decrease the digit by one or uncheck box.\n\n- â Tilt to the left â move the cursor to the left\n- â Tilt to the right â move the cursor to the right\n- â Press upper key â discard editing (reset to previous value)\n- â Long press upper key â reset to default value\n- â Press both keys â exit without save\n- â Press lower key â save and exit\n\n\nPermissible range is indicated by *minimum .. \\[default\\] .. maximum* value.\n\nThe display shows a brief description below.","textLarge":false,"imageOnRight":true,"image":{"recommendedSizes":{"width":"420","height":"280"}},"imageMobile":{"recommendedSizes":{"width":"750","height":"500"}}},"id":"#148","type":"component","lock":false,"position":56},{"name":"Divider","data":{"color":"darkGray"},"id":"#149","type":"component","lock":false,"position":57},{"name":"SectionDivider","data":{"title":"2.4.2 Setpoints"},"id":"#507","type":"component","lock":false,"position":58},{"name":"TextBlock","data":{"text":"### <span id=\"2-.-4-.-2-Setpoints\">**2.4.2 Setpoints**</span>\n\n**Use descent SP \\[Off\\]**\n\nThis enables the use of the descent setpoint.\n\n- â Use descent setpoint \\[On\\] enables Descent setpopint when starting a dive\n- â Use descent setpoint \\[On+Sfc\\] the same as above + when surface to 0.3m or less activates again Descent SP for repeat dives, siphon dives and others.\n\nSee also chapter 2.6.3 Descent setpoint.\n\n**Use deco SP \\[On/Off\\]**\n\nTurns on or off the decompression setpoint used especially during the ascent.\n\n**ppO<sub>2</sub> descent \\[0.4 bar\\]**\n\nValue of the descent setpoint (range: 0.2â1.0 bar).\n\nSee also chapter 2.6.3 Descent setpoint.\n\n**ppO<sub>2</sub> low \\[0.7 bar\\]**\n\nValue of the low setpoint (range: 0.4â1.3 bars).\n\nSee also chapter 2.6.3 Setpoint.\n\n**ppO<sub>2</sub> high \\[1.3 bar\\]**\n\nValue of the high setpoint (range: 0.7â1.6 bars).\n\nSee also chapter 2.6.3 Setpoint.\n\n**FO<sub>2</sub> limit \\[90%\\]**\n\nThe setpoint is limited to the percentage of ambient pressure (range: 60â96%).\n\nSetting a percentage that is too low reduces the effectiveness of decompression in shallow depths. Setting a percentage that is too high in shallow depths increases the intake of oxygen, which makes it necessary to discharge the contents of the breathing loop and makes balancing more difficult.\n\nSee also section 2.6.3 Setpoint limitation.","textLarge":false,"imageOnRight":true,"image":{"recommendedSizes":{"width":"420","height":"280"}},"imageMobile":{"recommendedSizes":{"width":"750","height":"500"}}},"id":"#150","type":"component","lock":false,"position":59},{"name":"TextBlock","data":{"text":"**SPh auto**\n\nAutomatic switching to high setpoint if values greater than 0 are entered into the chart, the unit will automatically switch to high setpoint according to specified parameters when underwater. This can occur due to exceeding a certain depth during descent, bottom time, or exceeding a certain depth during ascent.","textLarge":false,"imageOnRight":true,"image":{"recommendedSizes":{"width":"420","height":"280"},"mimetype":"image/png","size":9243,"hash":"8eb25b0e6f5757c10cdaf1c7f072226558def41a","id":"cl3sonla2de070776q2qcelwx","filename":"divesoft-ccr-liberty-manual-2-4-2-01.png","category":"divesoft/","type":"image"},"imageMobile":{"recommendedSizes":{"width":"750","height":"500"}}},"id":"#151","type":"component","lock":false,"position":60},{"name":"TextBlock","data":{"text":"The values are entered into the chart of the dive profile schematic. Navigate the chart with the bottom button, select the item with the top button, tilt to edit.\n\nFor re-dive activation, the diver must first ascend to 0.3m or shallower, and on subsequent dives (without exiting dive mode) AutoSP-High or AutoSP-Descent is reset at 1.5m.\n\n**SPdeco auto**\n\nSetting of automatic decompression setpoint switch.","textLarge":false,"imageOnRight":true,"image":{"recommendedSizes":{"width":"420","height":"280"}},"imageMobile":{"recommendedSizes":{"width":"750","height":"500"}}},"id":"#152","type":"component","lock":false,"position":61},{"name":"Divider","data":{"color":"darkGray"},"id":"#153","type":"component","lock":false,"position":62},{"name":"SectionDivider","data":{"title":"2.4.3 Mixtures"},"id":"#508","type":"component","lock":false,"position":63},{"name":"TextBlock","data":{"text":"### <span id=\"2-.-4-.-3-Mixtures\">**2.4.3 Mixtures**</span>\n\n**CCR**\n\nEight different diluent mixtures with variable fractions of oxygen, nitrogen and helium can be preset.\n\nSelect the mixture to edit with the upper key short press, and use tilting for changing the values or cursor position.","textLarge":false,"imageOnRight":true,"image":{"recommendedSizes":{"width":"420","height":"280"},"mimetype":"image/png","size":42162,"hash":"075f2a19e910e73fce8529c203ed83bb102f6a7f","id":"cl3sooneode1o0776nc26y8jc","filename":"divesoft-ccr-liberty-manual-2-4-3-01.png","category":"divesoft/","type":"image"},"imageMobile":{"recommendedSizes":{"width":"750","height":"500"}}},"id":"#154","type":"component","lock":false,"position":64},{"name":"TextBlock","data":{"text":"Each mixture can be enabled (marked checkbox) or disabled (clear checkbox). This can be done in the editing screen or via a shortcut â long press of the upper key in the list of mixtures.\n\nNext to every gas mix MOD and END is displayed. MOD is calculated in a way in which the diluent will always be able to dilute the mixture in the loop. It is calculated from a partial pressure 0.2 bar lower than the high setpoint.","textLarge":false,"imageOnRight":true,"image":{"recommendedSizes":{"width":"420","height":"280"},"mimetype":"image/png","size":10335,"hash":"24229c2307caa1290b378fe4fb519ee18457a6f9","id":"cl3sop701de2z07760buqfoay","filename":"divesoft-ccr-liberty-manual-2-4-3-02.png","category":"divesoft/","type":"image"},"imageMobile":{"recommendedSizes":{"width":"750","height":"500"}}},"id":"#155","type":"component","lock":false,"position":65}
2,{"name":"TextBlock","data":{"text":"The mixture you use as a diluent must be one of the selected mixtures. Setting an incorrect diluent composition will lead to an incorrect calculation of the decompression procedure and can lead to an inaccurate proportion of oxygen in the mixture if the rebreather switches to indirect measuring using the He sensors.\n\nSee also section 3.2.5 Diluent.\n","textLarge":false,"imageOnRight":true,"image":{"recommendedSizes":{"width":"420","height":"280"},"mimetype":"image/png","size":9554,"hash":"09f2faf80e41c4f2250f74ab74bced549bca945f","id":"cl3sopo85de3k0776r780bp22","filename":"divesoft-ccr-liberty-manual-2-4-3-03.png","category":"divesoft/","type":"image"},"imageMobile":{"recommendedSizes":{"width":"750","height":"500"}}},"id":"#156","type":"component","lock":false,"position":66},{"name":"TextBlock","data":{"text":"**OC**\n\nEight different OC bailout mixtures with various fractions of oxygen, nitrogen, and helium can be preset.\n\nEach mixture can be enabled (marked checkbox) or disabled (clear checkbox). Only enabled mixtures can be selected.\n\nNext to every gas mix a pressure (bar or PSI) and cylinder volume (litres or cubic feet) is displayed. During mixture editing, we set individual items separately. MOD (maximal operational depth) is displayed in a grey font, taking a maximum ppO<sub>2</sub> of 1.6 bar and END (equivalent narcotic depth) into consideration. END is usually expressed as the depth at which diving with air would have the same narcotic effects as the inert gases used in the current mixture. This theoretical depth is the equivalent of a specific target depth. In this case, however, the target depth is not known, therefore, the END is expressed as the % narcotic effect of the mixture on the air.\n\nMixtures that you have prepared for bailout (or staging) must be entered and enabled.\n\nUnused gas mixes must be disabled. Otherwise, the gas management calculations or BO RMT will be skewed.\n\nIn an emergency, a mixture can be enabled or even newly defined during a dive. However, this shoud be reserved for emergency situations only.\n\n**Def. diluent**\n\nAn alternative default diluent can only be selected from mixtures that are enabled.\n\n**2<sup>nd</sup>Def. Dil**\n\nIf a backup rebreather is used, it defines the composition of the diluent in the backup for relevant decompression calculations.\n\n**Def. OC mix**\n\nAn alternative default OC bailout mixture can be selected only from mixtures that are enabled.\n\n**End pressure**\n\nEnd-of-cylinder pressure for planning gas management in the scheduler and BO RMT during the dive.\n\n**Min PO<sub>2</sub>**\n\nSpecifies the usability of OC mixtures with respect to the minimum ppO<sub>2</sub>.\n\n**Max PO<sub>2</sub>**\n\nSpecifies the usability of OC mixtures with respect to maximum ppO<sub>2</sub>.\n\n**RMV**\n\nRespiration minute volume is used to calculate gas management in scheduler and BO RMT during dive. We recommend setting a sufficient margin to deal with an emergency situation. RMV during a CO<sub>2</sub> hit can significantly exceed 50 l / min.\n","textLarge":false,"imageOnRight":true,"image":{"recommendedSizes":{"width":"420","height":"280"}},"imageMobile":{"recommendedSizes":{"width":"750","height":"500"}}},"id":"#157","type":"component","lock":false,"position":67},{"name":"Divider","data":{"color":"darkGray"},"id":"#158","type":"component","lock":false,"position":68},{"name":"SectionDivider","data":{"title":"2.4.4 Decompression"},"id":"#509","type":"component","lock":false,"position":69},{"name":"TextBlock","data":{"text":"### <span id=\"2-.-4-.-4-Decompression\">**2.4.4 Decompression**</span>\n\n**GF low \\[0.30\\]**\n\nGradient factor at the start of decompression (range: 0.05â1.00)\n\nGF low determines an additional increase in safety at the decompression ceiling depth at the start of decompression. Setting a value of 1.00 corresponds to the Bühlmann decompression algorithm without an additional increase in safety using the gradient factor method.\n\nSetting low values leads to deeper and longer stops at the start of decompression.\n\n**GF high \\[0.80\\]**\n\nGradient factor at the end of decompression (range: 0.10â1.00)\n\nGF high determines an additional increase in safety when ascending to the surface. Setting a value of 1.00 corresponds to the Bühlmann decompression algorithm without an additional increase in safety using the gradient factor method.\n\nSetting low values leads to longer shallow decompression stops.\n\n**Bailout GF low \\[0.80\\]**\n\nGradient factor for bailout at the start of decompression (range: 0.05â1.00)\n\nAs a general rule for bailout GF low, a higher GF value (a lower additional increase in safety) is set.\n\n**Bailout GF high \\[0.95\\]**\n\nGradient factor for bailout at the end of decompression (range: 0.10â1.00)\n\nAs a general rule for bailout GF high, a higher GF value (a lower additional increase in safety) is set.\n\n**Deco model**\n\nYou can choose between the decompression models ZH-L16B and ZH-L16C. Decompression model C is slightly more conservative than model B.\n\n**Rate & zone**\n\nThis item allows you to set the descent and ascent speeds. The input is done in the schematic dive profile chart. Navigate the chart with the bottom button, select the item with the top button, tilt to edit. The \"descent rate\" is rate used exclusively in planner for descend. The following \"warn under\" depth is the first depth from which you may get the descend rate alarm, if you exceed the set \"max rate\". This setting is intended to limit the possible HPNS caused by fast descend in the deep part of the dive.\n\nThe ascent rates are divided into three zones: the maximum depth of the first limit; from the first limit to a second limit; and finally from the second limit to the surface. These limits can be defined in the graph on the right. The rates in the individual zones are part of the graph on the left output side.\n\n**Planner setup**\n\nThe planner is used to help setup decompression and gas management plans. For a detailed description, see Planner settings â section 3.1.1\n\n**Reset deco data**\n\nThis resets the saturation of inert gases and the calculation of oxygen toxicity to a state that corresponds to a very long period after the previous dive.\n\nA diver that uses the CCR Liberty after resetting the decompression data should not dive for 48 hours prior to submersion with the reset apparatus. Do not dive for 24 hours with a reset apparatus after significantly increasing altitude above sea level.","textLarge":false,"imageOnRight":true,"image":{"recommendedSizes":{"width":"420","height":"280"}},"imageMobile":{"recommendedSizes":{"width":"750","height":"500"}}},"id":"#159","type":"component","lock":false,"position":70},{"name":"Divider","data":{"color":"darkGray"},"id":"#160","type":"component","lock":false,"position":71},{"name":"SectionDivider","data":{"title":"2.4.5 Alarms"},"id":"#510","type":"component","lock":false,"position":72},{"name":"TextBlock","data":{"text":"### <span id=\"2-.-4-.-5-Alarms\">**2.4.5 Alarms**</span>","textLarge":false,"imageOnRight":true,"image":{"recommendedSizes":{"width":"420","height":"280"}},"imageMobile":{"recommendedSizes":{"width":"750","height":"500"}}},"id":"#477","type":"component","lock":false,"position":73},{"name":"TextBlock","data":{"text":"**Alarm sources**\n\n**CNS \\[On\\]**\n\nOxygen toxicity limit has been reached.\n\n**Descent rate \\[Off\\]**\n\nDescent rate has exceeded the set limit.","textLarge":false,"imageOnRight":true,"image":{"recommendedSizes":{"width":"420","height":"280"},"mimetype":"image/png","size":10170,"hash":"db65375a8abde65e219d470006b571b61fdd2c01","id":"cl3sorfgide580776swo5q8ot","filename":"divesoft-ccr-liberty-manual-2-4-5-01.png","category":"divesoft/","type":"image"},"imageMobile":{"recommendedSizes":{"width":"750","height":"500"}}},"id":"#161","type":"component","lock":false,"position":74},{"name":"TextBlock","data":{"text":"**Ascent rate \\[On\\]**\n\nAscent rate has exceeded the set limit; the system tolerates very short, fast movements.\n\n**Low battery \\[25%\\]**\n\nBattery power has dropped below the set limit (range: 0â40%). Setting 0 means deactivation of this alarm.\n\n**Min PO<sub>2</sub>**\n\nSpecifies the lower limit for ppO<sub>2</sub> alarm in CCR dive mode.\n \n**Max PO<sub>2</sub>**\n\nSpecifies the upper limit for ppO<sub>2</sub> alarm in CCR dive mode.\n \n**Air inegr.**\n\nEnables or disables low cylinder pressure alarms or loss of communication with the transmitter.\n\n**Notifications**\n\n","textLarge":false,"imageOnRight":true,"image":{"recommendedSizes":{"width":"420","height":"280"}},"imageMobile":{"recommendedSizes":{"width":"750","height":"500"}}},"id":"#162","type":"component","lock":false,"position":75},{"name":"TextBlock","data":{"text":"**No deco end \\[On\\]**\n\nEnd of the dive in zero time (Bühlmann decompression model terminology), i.e. notification that it will be necessary to reduce the ascent rate and/or perform decompression stops.\n\n**Gas switch reminder \\[Off\\]**\n\nThe alarm advises the user to switch to a different mix. This is used only in bailout OC mode.","textLarge":false,"imageOnRight":true,"image":{"recommendedSizes":{"width":"420","height":"280"},"mimetype":"image/png","size":10718,"hash":"bb353231c9dda54d0208574f6982bff4c17a59ad","id":"cl3soryi7de5m0776sxsf4mxw","filename":"divesoft-ccr-liberty-manual-2-4-5-02.png","category":"divesoft/","type":"image"},"imageMobile":{"recommendedSizes":{"width":"750","height":"500"}}},"id":"#163","type":"component","lock":false,"position":76},{"name":"TextBlock","data":{"text":"**Gas switch done \\[On\\]**\n\nNotifies that a change in mixture (in bailout OC mode) or diluent has been executed.","textLarge":false,"imageOnRight":true,"image":{"recommendedSizes":{"width":"420","height":"280"}},"imageMobile":{"recommendedSizes":{"width":"750","height":"500"}}},"id":"#164","type":"component","lock":false,"position":77},{"name":"TextBlock","data":{"text":"**Depth & Time**\n\nDepth and time notifications are set through a dive schematic graph. Navigate the graph using the bottom button, select with the top button, and set the values by tilting the computer.\n\nNotification that the set **depth during the descent** has been reached. It is possible to set three separate depths within the range of 0 â 300 m. 0 means deactivation of the notification.","textLarge":false,"imageOnRight":true,"image":{"recommendedSizes":{"width":"420","height":"280"},"mimetype":"image/png","size":9656,"hash":"1597572e668aa6a3eb69ed30719ebe88a3a6f7c3","id":"cl3sosewdde6e0776xob8nu9x","filename":"divesoft-ccr-liberty-manual-2-4-5-03.png","category":"divesoft/","type":"image"},"imageMobile":{"recommendedSizes":{"width":"750","height":"500"}}},"id":"#165","type":"component","lock":false,"position":78},{"name":"TextBlock","data":{"text":"Notification that the **dive time** has been reached. It is possible to set three separate times within the range of 0 â 999 min. 0 means deactivation of the notification.\n\nNotification that the set depth **during the ascent** has been reached. It is possible to set three separate depths within the range of 0 â 300 m. 0 means deactivation of the notification.\n\n**Stack time \\[150 min\\]**\n\nNotification that the cumulative time in any close circuit dive mode has been reached (range: 0 â 360min). 0 means deactivation of the notification.\n\nTo reset a timer go to the Predive menu.\n\n**Stack timer sfc.**\n\nThis feature can be set to not count stack time when in surface mode.\n\n**On** â counted on the surface\n\n**Off** â not counted on the surface\n\n**BO RMT expiration**\n\nEnables or disables notification for end of bottom time with respect to bailout gas supply for emergency surfacing.\n","textLarge":false,"imageOnRight":true,"image":{"recommendedSizes":{"width":"420","height":"280"}},"imageMobile":{"recommendedSizes":{"width":"750","height":"500"}}},"id":"#166","type":"component","lock":false,"position":79},{"name":"Divider","data":{"color":"darkGray"},"id":"#167","type":"component","lock":false,"position":80},{"name":"SectionDivider","data":{"title":"2.4.6 Preferences"},"id":"#511","type":"component","lock":false,"position":81},{"name":"TextBlock","data":{"text":"### <span id=\"2-.-4-.-6-Preferences\">**2.4.6 Preferences**</span>","textLarge":false,"imageOnRight":true,"image":{"recommendedSizes":{"width":"420","height":"280"}},"imageMobile":{"recommendedSizes":{"width":"750","height":"500"}}},"id":"#478","type":"component","lock":false,"position":82},{"name":"TextBlock","data":{"text":"### **Display**\n\n**Orientation**\n\nSetting for left/right hand.\n\n**Brightness**\n\nAdjusts the brightness of the handset display. Note: Display brightness significantly affects battery life.","textLarge":false,"imageOnRight":true,"image":{"recommendedSizes":{"width":"420","height":"280"},"mimetype":"image/png","size":44770,"hash":"146966dc5e90ec8ade5fc32c673d6229ebcb9076","i
2d":"cl3sot2hbde6z0776molcce11","filename":"divesoft-ccr-liberty-manual-2-4-6-01.png","category":"divesoft/","type":"image"},"imageMobile":{"recommendedSizes":{"width":"750","height":"500"}}},"id":"#168","type":"component","lock":false,"position":83},{"name":"TextBlock","data":{"text":"**Screensaver**\n\nThe display becomes inactive after a set period of timer (range: 0â120 s). 0 means that the display will be constantly active.\n\n**Screens**\n\nAny of the five following screens can be enabled or disabled. This can be done during a dive.","textLarge":false,"imageOnRight":true,"image":{"recommendedSizes":{"width":"420","height":"280"},"mimetype":"image/png","size":32019,"hash":"91454b09180b148cf6fd4bcde355445e536c284f","id":"cl3sotnjdde8z07768wtf4zj0","filename":"divesoft-ccr-liberty-manual-2-4-6-02.png","category":"divesoft/","type":"image"},"imageMobile":{"recommendedSizes":{"width":"750","height":"500"}}},"id":"#169","type":"component","lock":false,"position":84},{"name":"TextBlock","data":{"text":"**Detailed** â the primary screen displays all necessary information\n\n**Synoptic** â the depth value is easy to read; it is accompanied by other important information\n\n**Big** â the most important information written in large characters\n\n**Graph** â Dive profile screen\n\n**O<sub>2</sub> sensors** â detailed state of the sensors\n\n**TTS** â Time to surface screen with unique BO RMT value and future TTS\n\n**Cylinder press. \\[Num.\\] / \\[Graph\\] / \\[All\\]**\n\nDetermines how cylinder pressures are displayed on the detail screen. Numerically instead of time and CNS, or graphically instead of solenoid opening symbols.","textLarge":false,"imageOnRight":true,"image":{"recommendedSizes":{"width":"420","height":"280"}},"imageMobile":{"recommendedSizes":{"width":"750","height":"500"}}},"id":"#170","type":"component","lock":false,"position":85},{"name":"TextBlock","data":{"text":"### **Indication**\n\n**Auxiliary displays**\n\nThis refers to setting the position of HUD and buddy display. The default position for the HUD is on the right side and on the left side for the BD.\n\n**Color blind mode**\n\nIf you cannot distinguish blue and green LED lights on the HUD, switch the color blind mode on. See section 1.10.3 Color Blind mode.\n\n### **Timeouts**\n\n**Key delay \\[0\\]**\n\nMinimum key press duration (range: 1 â 5, in 100 ms).\n\n**Auto switch off \\[45\\]**\n\nThis represents the time period after which the CCR Liberty switches from surface mode to standby mode (range: 0 â 999 min.). 0 deactivates automatic switching to standby mode. If no handset is connected, a switch-off will occur after 150 minutes regardless of the setting.\n\n### **Time & GPS**\n\n**Set time**\n\nSets the time manualy only when GPS synchronisation is not used\n\n**Timezone + DST \\[ ' \\]**\n\nTime zone setting â necessary for correct synchronization with GPS long hold summer/winter time\n\n**Date format \\[ISO / EU / US\\]**\n\nISO \"YYYY-MM-DD\"\n\nEU \"DD.MM.YYYY\"\n\nUS \"MM/DD/YYYY\"\n\n**GPS Sync Time \\[On / Off\\]**\n\nAutomatic time synchronisation according to GPS\n\n**GPS Log2SD \\[Off/DiveDay/Always\\]**\n\nLogging of the traveled route to SD card (downloadable via USB cable) logs every 20s position + HDOP (accuracy) *.GPX â xml format for google maps.\n\nDiveDay - logs approx. 30 minutes before dive and 30 minutes after surfacing, marks dive and surfacing location.\n\nAlways â always logs if it has a signal ... not recommended because it will generate enough files on the SD card.\n\n**GPS format \\[DDDDD...\\]**\n\nSetting format and coordinate display\n\n \"DD.DDDDD\"\n \n \"DDMM.MMM\"\n \n\"DDMMSS.S\"\n\n### **Units & Misc**\n\n**Units \\[Metric\\]**\n\nMetric and imperial units can be set for the entire apparatus. All physical calculations are internally executed using the metric system; results are converted for display only.\n\n**Salinity**\n\nThis feature assesses the appropriate water salinity (Fresh/Sea). It has a direct influence to depth measurement.\n\n**Checklist \\[enabled\\]**\n\nWhen entering CCR mode from the surface mode menu, a checklist is displayed. This can be disabled.\n\n**BoCCR setting\\[Off/On\\]**\n\nIn other menus it enables setting of relevant items for CCR bailout (Mixtures, Default mode, Bailout stby (CCR) mode).\n\n**Default mode \\[Main /Bailout\\]**\n\nDefault mode of the unit when switched on by diving / jumping into the water.\n\n**Help \\[On/Off\\]**\n\nHelp for each menu item, displayed after 10s on one line.\n\n**Editor navig. \\[Tilt\\]**\n\nThe numbers in the editor can be increased or decreased by tilt or by tap. The tapping option may require some practice. Do not change the tilt setting unless you have a strong reason for preferring the tapping.\n\n**He measuring \\[TMX only\\]**\n\n**TMX only** â He sensors are used only in the case that the selected diluent contains > 20% helium.\n**Never** â He sensors are permanently deactivate.","textLarge":false,"imageOnRight":true,"image":{"recommendedSizes":{"width":"420","height":"280"}},"imageMobile":{"recommendedSizes":{"width":"750","height":"500"}}},"id":"#171","type":"component","lock":false,"position":86},{"name":"Divider","data":{"color":"darkGray"},"id":"#172","type":"component","lock":false,"position":87},{"name":"SectionDivider","data":{"title":"2.4.7 Calibration"},"id":"#512","type":"component","lock":false,"position":88},{"name":"TextBlock","data":{"text":"### <span id=\"2-.-4-.-7-Calibration\">**2.4.7 Calibration**</span>\n\n**Calibrate He-Air**\n\nThe He sensors are calibrated with air. The sensor is stable for a long period of time; therefore, perform a calibration only after replacing the sensor or if there are doubts about its accuracy. Sensors must be free of any traces of helium.\n\n**O<sub>2</sub> purity \\[99.5%\\].**\n\nThe oxygen concentration in the calibration gas can be set. If possible, use oxygen with a purity of at least 99.5% for calibration.\n\nDo not use air for calibration. The partial pressure of oxygen in air at atmospheric pressure differs significantly from the partial pressures determined by the setpoints. At the end of its service life, an oxygen sensor can successfully undergo calibration to 21% (air) but will no longer be capable of measuring a ppO<sub>2</sub> of 1 bar or higher.\n \nSee also section 3.2.8 Calibration of oxygen sensors and 3.2.5 Oxygen.\n\n**Calibrate pressure**\n\n**Recomm. days \\[3 days\\]**\n\nRecalibration of the oxygen sensors will be recommended after a set number of days (range: 0â30).\n\n**Horizontal calibration**\n\nThe accelerometers are used for c
2ontrol by tilting and tapping. They have to be calibrated. Place the handset on a level surface (e.g. a table) before starting a calibration.","textLarge":false,"imageOnRight":true,"image":{"recommendedSizes":{"width":"420","height":"280"}},"imageMobile":{"recommendedSizes":{"width":"750","height":"500"}}},"id":"#173","type":"component","lock":false,"position":89},{"name":"Divider","data":{"color":"darkGray"},"id":"#174","type":"component","lock":false,"position":90},{"name":"SectionDivider","data":{"title":"2.4.8 Faulty sensors"},"id":"#513","type":"component","lock":false,"position":91},{"name":"TextBlock","data":{"text":"### <span id=\"2-.-4-.-8-Faulty-sensors\">**2.4.8 Faulty sensors**</span>\n\n### **Oxygen sensors**\n\nThis is the oxygen sensor status overwiev. Based on the results, the user may have to exclude individual oxygen sensors for ppO<sub>2</sub> calculation.\n \n**Normal** â no sensor malfunction detected; the sensor is used as a data source.\n\n**Uncalibrated** â sensor has not been calibrated.\n\n**Excluded** â sensor excluded automatically by the algorithm. The algorithm can return the sensor to Normal status if it determines that the reason for exclusion has no longer exists.\n\n**Disabled** â sensor excluded manually.\n\n**Error** â sensor not present, or bad contact.\n\n**Offline** â sensor not available (digital communication at the module level is not functioning).\n\n### **Helium sensors**\n\nIt is possible to include and exclude helium sensors.\n\n**Normal** â no sensor malfunction detected; the sensor is used as a data source.\n\n**Uncalibrated** â sensor has not been calibrated.\n\n**Disabled** â sensor excluded manually.\n\n**Error** â sensor not present, or bad contact.\n\n**Offline** â sensor not available (digital communication at the module level is not functioning).\n\n### **Pressure sensors**\n\nThis is the pressure sensor status overview. Based on the results, the user may have to manually exclude individual sensors. Do not start a dive with more than one malfunctioning pressure sensor.\n\n**Normal** â no sensor malfunction detected; the sensor is used as a data source.\n\n**Disabled** â sensor excluded manually.\n\n**Error** â sensor not present, or bad contact.\n\n**Offline** â sensor not available (digital communication at the module level is not functioning).\n\nSee also section 1.9.5 Pressure and depth measurement.\n\n### **Other devices**\n\nYou can switch off a solenoid that is not functioning properly. If so, the other solenoid overtakes completely, and its frequency is corrected from 12 seconds to 6.\n\n**pO<sub>2</sub> source**\n\nSwitching the data source for the control of oxygen partial-pressure in the loop\n \nO<sub>2</sub> â Oxygen sensors are used for measuring and controlling the oxygen\n\nHe â He sensors are used to indirectly measure and control the oxygen\n\npO<sub>2</sub> source is only allowed if helium measurement is enabled","textLarge":false,"imageOnRight":true,"image":{"recommendedSizes":{"width":"420","height":"280"}},"imageMobile":{"recommendedSizes":{"width":"750","height":"500"}}},"id":"#175","type":"component","lock":false,"position":92},{"name":"Divider","data":{"color":"darkGray"},"id":"#176","type":"component","lock":false,"position":93},{"name":"SectionDivider","data":{"title":"2.5 Dive mode"},"id":"#514","type":"component","lock":false,"position":94},{"name":"TextBlock","data":{"text":"### <span id=\"2-.-5-Dive-mode\">**2.5 Dive mode**</span>","textLarge":false,"imageOnRight":true,"image":{"recommendedSizes":{"width":"420","height":"280"}},"imageMobile":{"recommendedSizes":{"width":"750","height":"500"}}},"id":"#445","type":"component","lock":false,"position":95},{"name":"SectionDivider","data":{"title":"2.5.1 Detailed screen"},"id":"#515","type":"component","lock":false,"position":96},{"name":"TextBlock","data":{"text":"\n### <span id=\"2-.-5-.-1-Detailed-screen\">**2.5.1 Detailed screen**</span>\n\nThe primary screen displays all necessary information during a dive. Most information is provided by clear values and unambiguou
2s symbols.\n\n**Dive time**\nThe timer starts after submersion (depth > 1.5 m) and halts after surfacing (depth < 0.5 m). In case ","textLarge":false,"imageOnRight":true,"image":{"recommendedSizes":{"width":"420","height":"280"},"mimetype":"image/png","size":267011,"hash":"6e7b59071d7f2f6ffb7466372471916a6c2bcfb7","id":"cl3soub5jdeaq077628o2jzbz","filename":"divesoft-ccr-liberty-manual-2-5-1-01.png","category":"divesoft/","type":"image"},"imageMobile":{"recommendedSizes":{"width":"750","height":"500"}}},"id":"#177","type":"component","lock":false,"position":97},{"name":"TextBlock","data":{"text":"of a stay on the surface (or at a very shallow depth) followed by a second submersion (during a time set in the dive termination timeout) the dive time indicated will be the time from the first submersion including the surface time.\n\n**Depth**\n\nThe depth can be read in the units selected in the setup (m or ft). Depth is calculated from measured hydrostatic pressure. Fresh water (default) or seawater density can be set for the depth calculation (units and salinity are set in Setup â Preferences).\n\nSetting fresh/sea water does not affect decompression calculations. Decompression is based on ambient pressure and is independent of the displayed depth.\n\n**No deco**\n\nYou can stay for the indicated time at the current depth, breathing the current mixture (current He content and current SP), to avoid a decompression obligation. It is, however, presumed that the diver will follow the recommended ascent rate.\n\nDuring the dive, there is a situation where the No Deco indicator already shows a zero value, but the decompression ceiling value is still not displayed. Such a situation can last for tens of seconds. The scenario is due to the fact that the No deco time has ended and the decompression ceiling is below the surface level, but its value is so low that there is no need for staged decompression as a free ascent is advised.\n\n**Ceiling**\n\nThe depth of the decompression ceiling decreases continuously up to the surface. The stops displayed are never random. Always stay below the depth of the ceiling, even if the ceiling depth is very shallow.\n\nThe ceiling indicator in the Liberty replaces the indicator of decompression stops. The diver selects the depth at which they do the decompression stop or steadily ascends in accordance to the decompression ceiling. This approach may be more effective in terms of decompression time. Time reference is TTS (Time To Surface). Do not follow the decompression ceiling at low depths if conditions do not permit it. Waves, currents, positive lift of gear at a shallow depth, no visual reference, and other factors can cause uncontrolled ascent above the ceiling or completely hinder decompression at this level.\n\nAscending above the ceiling generates a warning. A further violation of more than 1 m (3 ft), leads to an additional alarm. Both alarms are logged. The decompression calculation will continue without a penalization. The diver is responsible to decide how to minimize the probability of severe consequences.\n\nDecompression is no longer required when the ceiling value disappears. In that case, it is possible to surface.\n\n**TTS**\n\nThe time to surface (TTS) includes the complete decompression profile. The rounding of TTS is influenced by the settings in Menu / Setup / Decompression / Planner setup / Rounding. The rounding can be set to 60 s, 30 s, 1 s.","textLarge":false,"imageOnRight":true,"image":{"recommendedSizes":{"width":"420","height":"280"}},"imageMobile":{"recommendedSizes":{"width":"750","height":"500"}}},"id":"#178","type":"component","lock":false,"position":98},{"name":"TextBlock","data":{"text":"**Battery symbols**\n\n**Combined graphic symbol**\n\nA combined graphic symbol on the detailed screen is intended for rapid awareness. It tells the diver what must be done. The color of the warning symbols changes from yellow to red according to the degree of severity.","textLarge":false,"imageOnRight":true,"image":{"recommendedSizes":{"width":"420","height":"280"}},"imageMobile":{"recommendedSizes":{"width":"750","height":"500"}}},"id":"#180","type":"component","lock":false,"position":99},{"name":"Image","data":{"firstImage":{"mimetype":"image/png","size":115199,"hash":"c91bfc4908da1cc1f39622863c1518ccd2046770","i
2d":"cl6m1m0g71jso0776pe5sjz02","filename":"divesoft-ccr-liberty-manual-2-5-1-01.png","category":"divesoft/","type":"image"},"secondImage":{},"image":{"type":"image"}},"id":"#486","type":"component","lock":false,"position":100},{"name":"TextBlock","data":{"text":"**t (Temperature)**\n\nWater temperature is measured inside the HS housing. After a water temperature change wait about 1-2 minutes until the temperature reading is stable. The air temperature is affected by many factors and is only an approximate reading. If you see a yellow exclamation mark next to the temperature value, it means that the other handset is not communicating and the temperature is calculated based on only one sensor. In case you are using only one handset, you can switch the unit to the sidemount settings: Setup / Preferences / Controls & Build / Mount -> **Side**.\n\n**CNS**\n\nThe so called âoxygen clockâ is a percentage of consumption of CNS toxicity limit. Calculation is based on NOAA oxygen exposure limits.\n\nSee also section 3.4.1 Breathing high oxygen content gases.\n\n**Diluent**\n\nThe currently used diluent is displayed.\n\n**Solenoid symbols**\n\nIn the lower left and right corners, there are symbols indicating the state of the solenoids according to data from the control units.\n\nX â solenoid is closed\n\n= â solenoid is opened\n\n**SP**\n\nThe setpoint is a required ppO<sub>2</sub> value. The setpoint values are usually displayed in white. The setpoint value will be displayed in yellow when the value is not physically reachable (ex. Setpoint of 1.4 in 2 meters). The evaluation of the ability to reach the setpoint is influenced by the maximum FO<sub>2</sub>. For instance, a setpoint of 1.3 in 3 meters can be reached, but only if there is 100% of oxygen in the loop, but if the FO<sub>2</sub>
2 is set to 80% then the setpoint will be displayed in yellow, and the solenoid will not add oxygen for as long as the value of ppO<sub>2</sub> does not drop below 1.04bar \\[1.3Ã0.8\\]. The setpoint value will be displayed in red only when the setpoint is changed.\n\nFor information on adjusting the setpoint, see section 2.6.3 Setpoints.\n\n**O<sub>2</sub> sensors**\n\nThe ppO<sub>2</sub> measured by individual O<sub>2</sub> sensors is displayed.\n \n**ppO<sub>2</sub>**\n\nThe ppO<sub>2</sub> can be measured directly (using O<sub>2</sub> sensors) or indirectly (using He fraction sensors). **It shows the average value**.\n\nSee section 1.9.2 Direct measurement of ppO<sub>2</sub> and 1.9.3 Measurement of He content.\n \n**Exclamation mark**\n\nIf a yellow exclamation mark is displayed next to a value, it means that one or more sensors were excluded. This applies to the measurement of ppO<sub>2</sub>, temperature, pressure and helium.","textLarge":false,"imageOnRight":true,"image":{"recommendedSizes":{"width":"420","height":"280"}},"imageMobile":{"recommendedSizes":{"width":"750","height":"500"}}},"id":"#182","type":"component","lock":false,"position":101},{"name":"Divider","data":{"color":"darkGray"},"id":"#183","type":"component","lock":false,"position":102},{"name":"SectionDivider","data":{"title":"2.5.2 Synoptic screen"},"id":"#516","type":"component","lock":false,"position":103},{"name":"TextBlock","data":{"text":"### <span id=\"2-.-5-.-2-Synoptic-screen\">**2.5.2 Synoptic screen**</span>\n\nThe depth value is easy to read. It is accompanied by other important information.\n\nThe value meanings are indicated on the screen.","textLarge":false,"imageOnRight":true,"image":{"recommendedSizes":{"width":"420","height":"280"},"mimetype":"image/png","size":219240,"hash":"ee48c09d198c6529ce3205b72730f917228fefd2","id":"cl3sowabqded407763c9htbat","filename":"divesoft-ccr-liberty-manual-2-5-2-01.png","category":"divesoft/","type":"image"},"imageMobile":{"recommendedSizes":{"width":"750","height":"500"}}},"id":"#184","type":"component","lock":false,"position":104},{"name":"Divider","data":{"color":"darkGray"},"id":"#185","type":"component","lock":false,"position":105},{"name":"SectionDivider","data":{"title":"2.5.3 Big screen"},"id":"#517","type":"component","lock":false,"position":106},{"name":"TextBlock","data":{"text":"### <span id=\"2-.-5-.-3-Big-Screen\">**2.5.3 Big Screen**</span>\n\nThe most important information is written in big characters.\n\nThis screen is useful when visibility is very bad. Many divers can read the numbers even without a mask.","textLarge":false,"imageOnRight":true,"image":{"recommendedSizes":{"width":"420","height":"280"},"mimetype":"image/png","size":47878,"hash":"8ed138a52bbd01f1dce9ceacd5b488ba03648d87","id":"cl3sowphydedx07760c10vsvh","filename":"divesoft-ccr-liberty-manual-2-5-3-01.png","category":"divesoft/","type":"image"},"imageMobile":{"recommendedSizes":{"width":"750","height":"500"}}},"id":"#186","type":"component","lock":false,"position":107},{"name":"Divider","data":{"color":"darkGray"},"id":"#187","type":"component","lock":false,"position":108},{"name":"SectionDivider","data":{"title":"2.5.4 Dive profile screen"},"id":"#518","type":"component","lock":false,"position":109},{"name":"TextBlock","data":{"text":"### <span id=\"2-.-5-.-4-Dive-profile-screen\">**2.5.4 Dive profile screen**</span>","textLarge":false,"imageOnRight":true,"image":{"recommendedSizes":{"width":"420","height":"280"}},"imageMobile":{"recommendedSizes":{"width":"750","height":"500"}}},"id":"#446","type":"component","lock":false,"position":110},{"name":"TextBlock","data":{"text":"**Start**\n\nThe time of submersion is useful for checking compliance with the schedule.\n\n**Avg**\n\nThe average depth is indicated with the yellow horizontal line and with a number displayed in yellow.\n\n**Current depth**\n\nSee lower left corner.","textLarge":false,"imageOnRight":true,"image":{"recommendedSizes":{"width":"420","height":"280"},"mimetype":"image/png","size":132770,"hash":"e0c411ccc8489008f59c21b9f8a7a39e7b02b543","id":"cl3soxbimdeef0776m9v8n3cc","filename":"divesoft-ccr-liberty-manual-2-5-4-01.png","category":"divesoft/","type":"image"},"imageMobile":{"recommendedSizes":{"width":"750","height":"500"}}},"id":"#188","type":"component","lock":false,"position":111},{"name":"TextBlock","data":{"text":"**Dive time**\n\nRuntime of current dive is placed in lower right corner.\n\n**Max**\n\nThis is the maximum depth reached during the dive. The field with this value is placed in the middle of the bottom line.","textLarge":false,"imageOnRight":true,"image":{"recommendedSizes":{"width":"420","height":"280"}},"imageMobile":{"recommendedSizes":{"width":"750","height":"500"}}},"id":"#189","type":"component","lock":false,"position":112},{"name":"Divider","data":{"color":"darkGray"},"id":"#190","type":"component","lock":false,"position":113},{"name":"SectionDivider","data":{"title":"2.5.5 Sensors screen"},"id":"#519","type":"component","lock":false,"position":114},{"name":"TextBlock","data":{"text":"### <span id=\"2-.-5-.-5-Sensors-screen\">**2.5.5 Sensors screen**</span>\n\nThis screen displays the value potentials of the sensors and their calibrated ppO<sub>2</sub>
2 values.\n \n**Diluent**\n\nThe composition of the current diluent (O<sub>2</sub>/He)","textLarge":false,"imageOnRight":true,"image":{"recommendedSizes":{"width":"420","height":"280"},"mimetype":"image/png","size":348491,"hash":"7b19d012489be3020adfe70814c9a662e4d9187f","id":"cl3soyt73def80776x61en7r7","filename":"divesoft-ccr-liberty-manual-2-5-5-01.png","category":"divesoft/","type":"image"},"imageMobile":{"recommendedSizes":{"width":"750","height":"500"}}},"id":"#191","type":"component","lock":false,"position":115},{"name":"TextBlock","data":{"text":"**He0 / He1**\n\nHelium content in the loop as detected by the individual helium sensors. Under ideal conditions the measured value will correspond to the fraction of helium in the diluent.\n\n**pO<sub>2</sub>**\n\nPartial pressure of oxygen in diluent at current depth.\n\n**pO<sub>2</sub> indirect**\n\nIndirectly measured ppO<sub>2</sub> using helium sensors. The cell is shaded blue. When using indirect measurment of ppO<sub>2</sub> via the helium sensors, the cell will also be shaded blue.\n \n**Stack**\n\nScrubber stack time","textLarge":false,"imageOnRight":true,"image":{"recommendedSizes":{"width":"420","height":"280"}},"imageMobile":{"recommendedSizes":{"width":"750","height":"500"}}},"id":"#192","type":"component","lock":false,"position":116},{"name":"Divider","data":{"color":"darkGray"},"id":"#193","type":"component","lock":false,"position":117},{"name":"SectionDivider","data":{"title":"2.5.6 TTS screen"},"id":"#520","type":"component","lock":false,"position":118},{"name":"TextBlock","data":{"text":"### <span id=\"2-.-5-.-6-TTS-Screen\">**2.5.6 TTS Screen**</span>","textLarge":false,"imageOnRight":true,"image":{"recommendedSizes":{"width":"420","height":"280"}},"imageMobile":{"recommendedSizes":{"width":"750","height":"500"}}},"id":"#447","type":"component","lock":false,"position":119},{"name":"TextBlock","data":{"text":"This screen contains useful and unique timeout information.\n\n**BO RMT**\n\nBailout remaining time is the time that determines the maximum stay length at the current depth so that the bailout gas supply is sufficient for the entire ascent, including decompression.","textLarge":false,"imageOnRight":true,"image":{"recommendedSizes":{"width":"420","height":"280"},"mimetype":"image/png","size":10203,"hash":"112143db0d17de08fda0d10968f357ce9bba0b33","id":"cl3sozhgkdefk0776hb24hs47","filename":"divesoft-ccr-liberty-manual-2-5-6-01.png","category":"divesoft/","type":"image"},"imageMobile":{"recommendedSizes":{"width":"750","height":"500"}}},"id":"#194","type":"component","lock":false,"position":120},{"name":"TextBlock","data":{"text":"The algorithm counts all the set gases and their amount together with the specified minute consumption (RMV). In order for the calculation to be correct, it is always necessary to accurately enter the volume, pressure, and composition of the gas and to have only those gases actually used in the gas list. BO RMT is calculated based on the Bailout GF setting. If bailout rebreather is used as bailout source and Bo CCR mode is enabled in Setup -> Miscellaneous, then BO RMT is calculated based on:\n\n- â battery life\n- â scrubber depletion (Stack time)\n- â AI i oxygen pressure and the specified bottle size, it calculates a metabolic consumption of 1.6 l/min\n\nThe value is displayed in Bo CCR mode on the \"Sensors screen\" instead of the helium sensors. When the BORMT expires BoCCR will trigger an alarm.\n\n**BO TTS**\n\nThe time required to surface in the case of OC bail out ascent. The ascent time is calculated according to the Bailout GF setting\n\n**TTS (+2) (+5) (+10)**\n\nThe values of these three items represent future TTS (i.e. the length of ascent if the diver stays at the current depth for the next 2, 5, or 10 minutes). In the saturation phase of the dive, the values increase gradually; in the desaturation phase; it is the opposite.","textLarge":false,"imageOnRight":true,"image":{"recommendedSizes":{"width":"420","height":"280"}},"imageMobile":{"recommendedSizes":{"width":"750","height":"500"}}},"id":"#195","type":"component","lock":false,"position":121}
2,{"name":"Divider","data":{"color":"darkGray"},"id":"#196","type":"component","lock":false,"position":122},{"name":"SectionDivider","data":{"title":"2.6 CCR mode"},"id":"#521","type":"component","lock":false,"position":123},{"name":"TextBlock","data":{"text":"### <span id=\"2-.-6-CCR-mode\">**2.6 CCR mode**</span>\n\nThis is the primary dive mode with the CCR Liberty.","textLarge":false,"imageOnRight":true,"image":{"recommendedSizes":{"width":"420","height":"280"}},"imageMobile":{"recommendedSizes":{"width":"750","height":"500"}}},"id":"#523","type":"component","lock":false,"position":124},{"name":"SectionDivider","data":{"title":"2.6.1 Entering CCR mode"},"id":"#522","type":"component","lock":false,"position":125},{"name":"TextBlock","data":{"text":"### <span id=\"2-.-6-.-1-Entering-CCR-mode\">**2.6.1 Entering CCR mode**</span>\n\nThe standard method of switching to CCR mode is by selecting it in the menu from surface mode. If submersion to a depth greater than 1.5 m occurs in surface mode or standby mode, the rebreather will automatically switch to CCR mode. **Do not intentionally use this switching method; it is intended only for emergency situations.**","textLarge":false,"imageOnRight":true,"image":{"recommendedSizes":{"width":"420","height":"280"}},"imageMobile":{"recommendedSizes":{"width":"750","height":"500"}}},"id":"#197","type":"component","lock":false,"position":126},{"name":"TextBlock","data":{"text":"The process of switching to dive mode has the following course. By choosing dive mode, oxygen injection is started immediately based on the current partial pressure of oxygen and setpoint settings. At the same time, oxygen sensors are automatically verified, and their calibration is checked. If the calibration is older than the established number of calibration days, or the sensor voltages differ by more than 10%, warnings and recommendations for new calibration of oxygen sensors are shown.","textLarge":false,"imageOnRight":true,"image":{"recommendedSizes":{"width":"420","height":"280"},"mimetype":"image/png","size":8501,"hash":"920623820d1535817d6faa937819d8843a2cf0b7","id":"cl3sp0emodegi07764zogkgpn","filename":"divesoft-ccr-liberty-manual-2-6-1-01.png","category":"divesoft/","type":"image"},"imageMobile":{"recommendedSizes":{"width":"750","height":"500"}}},"id":"#198","type":"component","lock":false,"position":127},{"name":"TextBlock","data":{"text":"The next step is a pre-dive checklist. The diver should follow this list step by step and personally check all the items marked on it. Move to the next screen using the bottom button.\n\nAfter checking all the checklist items, the prebreathe screen appears. Prepare the device for prebreathing. Press the upper button to count down the pre-breathing time. The rules and procedure for prebreathing are described in section 3.2.12.","textLarge":false,"imageOnRight":true,"image":{"recommendedSizes":{"width":"420","height":"280"},"mimetype":"image/png","size":8323,"hash":"12cd9e9371199936a0bbcd75cfa44c23a03e9468","id":"cl3sp0wfhdegw0776zllm2kcg","filename":"divesoft-ccr-liberty-manual-2-6-1-02.png","category":"divesoft/","type":"image"},"imageMobile":{"recommendedSizes":{"width":"750","height":"500"}}},"id":"#199","type":"component","lock":false,"position":128},{"name":"TextBlock","data":{"text":"In the lower right corner, the average ppO<sub>2</sub> is displayed. All sensors and other values can be monitored on the second handset, where all dive mode screens are accessible. If pre-breathing is interrupted, the countdown can be reset with the lower key.\n\nThe end of pre-breathing is reported by vibration and âFINISHEDâ. If the diver does not continue by himself, after a few seconds, the basic Dive mode screen will automatically appear","textLarge":false,"imageOnRight":true,"image":{"recommendedSizes":{"width":"420","height":"280"},"mimetype":"image/png","size":9118,"hash":"35e87c86be90d7102433cab5aa5e79bfe8fee55b","id":"cl3sp1ex8dehr0776eaobw544","filename":"divesoft-ccr-liberty-manual-2-6-1-03.png","category":"divesoft/","type":"image"},"imageMobile":{"recommendedSizes":{"width":"750","height":"500"}}},"id":"#200","type":"component","lock":false,"position":129},{"name":"Divider","data":{"color":"darkGray"},"id":"#201","type":"component","lock":false,"position":130},{"name":"SectionDivider","data":{"title":"2.6.2 Switching to other modes"},"id":"#524","type":"component","lock":false,"position":131},{"name":"TextBlock","data":{"text":"### <span id=\"2-.-6-.-2-Switching-to-other-modes\">**2.6.2 Switching to other modes**</span>\n\nIt is possible to switch from CCR mode to the manual CCR and bailout OC modes in the menu. If the current depth is less than 1.5 m, it is possible to switch to surface mode and standby mode.","textLarge":false,"imageOnRight":true,"image":{"recommendedSizes":{"width":"420","height":"280"},"mimetype":"image/png","size":44666,"hash":"0b2e4d4edea8df37caccd66f62696a82b9e79b09","id":"cl3sp1yhodeio0776jdpt06g1","filename":"divesoft-ccr-liberty-manual-2-6-2-01.png","category":"divesoft/","type":"image"},"imageMobile":{"recommendedSizes":{"width":"750","height":"500"}}},"id":"#202","type":"component","lock":false,"position":132},{"name":"Divider","data":{"color":"darkGray"},"id":"#203","type":"component","lock":false,"position":133},{"name":"SectionDivider","data":{"title":"2.6.3 ppO2 regulation"},"id":"#525","type":"component","lock":false,"position":134},{"name":"TextBlock","data":{"text":"### <span id=\"2-.-6-.-3-ppO2-regulation\">**2.6.3 ppO<sub>2</sub> regulation**</span>\n \nThe basic function of the CCR Liberty is to maintain correct partial pressure of oxygen.\n\nA predictive algorithm of ppO<sub>2</sub> control is used. Measured ppO<sub>2</sub> is adjusted according to the mathematical model of the breathing loop. The calculation of O<sub>2</sub> delivery and possible subsequent opening of the solenoid is performed at six-second intervals. Oxygen is added alternately using the solenoids corresponding to both control units.\n\nIn the event that it is not possible to determine the actual depth (due to a malfunction or manual exclusion of all pressure sensors), regulation of oxygen delivery switches to a
2simple algorithm.\n\n**Setpoint**\n\nThe setpoint is a required ppO<sub>2</sub> value; for information on adjusting the setpoint, see section 2.4.2 Setpoints. Two special values, âlow setpointâ and âhigh setpointâ are fixed. These can be selected simply by a long press of the upper key (for the high setpoint) or lower key (for the low setpoint).\n\nIn the default setting, the low setpoint has the value of 0.7 bar (70 kPa). It is possible to reset it within the range of 0.4 to 1.3 bar.\n\nIn the standard setting, the high setpoint has the value of 1.3 bar (130 kPa). It is possible to reset it within the range of 0.7 to 1.6 bar.\n\nUpon starting the CCR dive mode, the low setpoint is activated by default.\n\n**Descent setpoint**\n\nThe descent setpoint is designed for situations when the diver needs to rapidly descend to a given depth, for example, when diving in a current. The utilized algorithm uses the natural rise of ppO<sub>2</sub> during descent. It is necessary to descend rapidly; the natural rise of ppO<sub>2</sub> has to be faster than the oxygen consumption.\n\nUse of the descent setpoint must be enabled in the configuration.\n\nIf it is enabled, the descent setpoint is automatically activated when switching from surface mode to CCR mode. It cannot be activated in another way. The descent setpoint has a variable value. The initial set value gives the ppO<sub>2</sub> on the surface. At depth, the current setpoint increases linearly by 0.2 bar (20 kPa) for every 10 m of depth (i.e. it increases by the same absolute values as when diving with an open circuit with air, only with a different initial value).\n\nThe descent setpoint is automatically switched to the low setpoint upon reaching that value or upon completing or significantly slowing down the descent, but no later than after ten minutes.\n\nWhen using the descent setpoint, the user must continuously check whether he/she has reached or exceeded the maximum physiologically permissible ppO<sub>2</sub> limit and adjust the rate of descent accordingly, or take other measures.\n\nDescent setpoint can be re-enabled by key shortcut or from the Setpoint menu (if we are at an applicable depth).\
2n\nIf On+Sfc is set in Setup / Setpoints / then the descent setpoint at the surface will never timeout.\n\n**<span style=\"color:red\">WARNING: if the initial Descent SP value is lower than the set threshold for the Low ppO<sub>2</sub> alarm, then while the Descent SP is active it will only alarm if it reaches 0.05bar less than the current Descent SP value - this is especially true at depths shallower than 6m when the Descent SP is set to 0.2bar (at the surface) and the default Low ppO<sub>2</sub> alarm is 0.3bar.</span>**\n\n**Setpoint limitation**\n\nBesides the set value, the setpoint limit is defined by the ambient pressure. For example, at a depth of 3 m, where the hydrostatic pressure is 1.3 bars, ppO<sub>2</sub> can reach a maximum of 1.3 bar when using pure oxygen.\n\nSince obtaining a presice 100% of oxygen in the loop is not always practical, the setpoint is set at 90% of the ambient pressure by default. This value can be reset within the range from 60% to 96%.\n\n**Emergency ppO<sub>2</sub> control**\n\nIf all chemical sensors are not valid (error, disabled etc.), the depth is < 6m/20ft, and the ppO<sub>2</sub> source is form O<sub>2</sub> sensors, an emergency O<sub>2</sub> injection + alarm is done every 6s.\n \nThe unit assumes that in a depth lower than six meters the risk of hypoxia is greater than the risk of hyperoxia, and prevents the fatal consequences of dysfunctional or disabled sensors. In this case, the diver must not continue his/her descent until the ppO<sub>2</sub> stabilizes and the diver is sure of the breathing mixture.\n\n**Emergency ppO<sub>2</sub> control by indirect measuring with He sensors**\n\nIf all chemical sensors fail in dive mode, an alarm âpO<sub>2</sub> measuring lostâ is brought up.\n\nIndirect measurement of ppO<sub>2</sub> using helium sensors can only be activated manually, provided that the helium measurement setting is switched on (TMX only) and the helium fraction in the diluent is greater than 20%. When using indirect oxygen measurement with helium sensors, always be sure that helium sensors are calibrated and functional.\n\nFor indirect oxygen measurements, all fields displayed with ppO<sub>2</sub> are blue.","textLarge":false,"imageOnRight":true,"image":{"recommendedSizes":{"width":"420","height":"280"}},"imageMobile":{"recommendedSizes":{"width":"750","height":"500"}}},"id":"#204","type":"component","lock":false,"position":135},{"name":"Divider","data":{"color":"darkGray"},"id":"#205","type":"component","lock":false,"position":136},{"name":"SectionDivider","data":{"title":"2.6.4 Decompression"},"id":"#526","type":"component","lock":false,"position":137},{"name":"TextBlock","data":{"text":"### <span id=\"2-.-6-.-4-Decompression\">**2.6.4 Decompression**</span>\n\nThe decompression algorithm takes measured ppO<sub>2</sub> values and inert gases according to the set diluent composition into account.\n\nDuring a dive, the safety level can be set in the menu by switching the set of standard and bailout gradient factors (GFs) without affecting the mode in which the CCR Liberty is operating.","textLarge":false,"imageOnRight":true,"image":{"recommendedSizes":{"width":"420","height":"280"}},"imageMobile":{"recommendedSizes":{"width":"750","height":"500"}}},"id":"#206","type":"component","lock":false,"position":138},{"name":"Divider","data":{"color":"darkGray"},"id":"#207","type":"component","lock":false,"position":139},{"name":"SectionDivider","data":{"title":"2.6.5 Specific handset control"},"id":"#527","type":"component","lock":false,"position":140},{"name":"TextBlock","data":{"text":"### <span id=\"2-.-6-.-5-Specific-handset-control\">**2.6.5 Specific handset control**</span>\n\nLong press upper key â next higher setpoint\n\nLong press lower key â next lower setpoint\n\nIf Descent SP and Deco SP are enabled in the settings, switching with key shortcuts also takes place between them.","textLarge":false,"imageOnRight":true,"image":{"recommendedSizes":{"width":"420","height":"280"}},"imageMobile":{"recommendedSizes":{"width":"750","height":"500"}}},"id":"#208","type":"component","lock":false,"position":141},{"name":"Divider","data":{"color":"darkGray"},"id":"#209","type":"component","lock":false,"position":142},{"name":"SectionDivider","data":{"title":"2.7 Manual CCR mode"},"id":"#528","type":"component","lock":false,"position":143},{"name":"TextBlock","data":{"text":"### <span id=\"2-.-7-Manual-CCR-mode\">**2.7 Manual CCR mode**</span>\n\nThis mode serves primarily for training","textLarge":false,"imageOnRight":true,"image":{"recommendedSizes":{"width":"420","height":"280"}},"imageMobile":{"recommendedSizes":{"width":"750","height":"500"}}},"id":"#530","type":"component","lock":false,"position":144},{"name":"SectionDivider","data":{"title":"2.7.1 Entering manual CCR mode"},"id":"#529","type":"component","lock":false,"position":145},{"name":"TextBlock","data":{"text":"### <span id=\"2-.-7-.-1-Entering-manual-CCR-mode\">**2.7.1 Entering manual CCR mode**</span>\n\nIt is possible to switch to manual CCR mode from the menu in CCR mode, bailout OC mode, or surface mode.","textLarge":false,"imageOnRight":true,"image":{"recommendedSizes":{"width":"420","height":"280"},"mimetype":"image/png","size":284331,"hash":"302d44c8c131c82b67f9f11ccb6698f96b630887","i
2d":"cl3sp2j9qdekh077634if2l1l","filename":"divesoft-ccr-liberty-manual-2-7-1-01.png","category":"divesoft/","type":"image"},"imageMobile":{"recommendedSizes":{"width":"750","height":"500"}}},"id":"#210","type":"component","lock":false,"position":146},{"name":"Divider","data":{"color":"darkGray"},"id":"#211","type":"component","lock":false,"position":147},{"name":"SectionDivider","data":{"title":"2.7.2 Switching to other modes"},"id":"#531","type":"component","lock":false,"position":148},{"name":"TextBlock","data":{"text":"### <span id=\"2-.-7-.-2-Switching-to-other-modes\">**2.7.2 Switching to other modes**</span>\n\nIn the menu, it is possible to switch from manual CCR mode to CCR mode and bailout OC mode. If the current depth is less than 1.5 m, it is possible to switch to surface mode and standby mode.","textLarge":false,"imageOnRight":true,"image":{"recommendedSizes":{"width":"420","height":"280"}},"imageMobile":{"recommendedSizes":{"width":"750","height":"500"}}},"id":"#212","type":"component","lock":false,"position":149},{"name":"Divider","data":{"color":"darkGray"},"id":"#213","type":"component","lock":false,"position":150},{"name":"SectionDivider","data":{"title":"2.7.3 ppO2 regulation"},"id":"#532","type":"component","lock":false,"position":151},{"name":"TextBlock","data":{"text":"### <span id=\"2-.-7-.-3-ppO2-regulation\">**2.7.3 ppO<sub>2</sub> regulation**</span>\n\nManual CCR mode is based upon CCR mode. However, automatic replenishment of oxygen is not available, and ppO<sub>2</sub> regulation is performed only manually. The display of ppO<sub>2</sub>, decompression calculations, and other data is operational.\n\nIt is assumed that the user adds oxygen manually using the manual bypass valve or by manipulating the oxygen-cylinder valve if any solenoid is locked in the open state.\n\nIf the ppO<sub>2</sub> falls below 0.3 bar, then oxygen will be added to the breathing loop automatically for safety reasons. This is possible only if the solenoids are operational and an oxygen supply is available.\n\nWhen manually adding oxygen to the breathing loop, anticipate a delay between adding oxygen and the change in measured values. This delay is due to the fact that oxygen is added to the exhalation bag and the mixture must pass through the scrubber before it reaches the sensors.","textLarge":false,"imageOnRight":true,"image":{"recommendedSizes":{"width":"420","height":"280"}},"imageMobile":{"recommendedSizes":{"width":"750","height":"500"}}},"id":"#214","type":"component","lock":false,"position":152},{"name":"Divider","data":{"color":"darkGray"},"id":"#215","type":"component","lock":false,"position":153},{"name":"SectionDivider","data":{"title":"2.7.4 Decompression"},"id":"#533","type":"component","lock":false,"position":154},{"name":"TextBlock","data":{"text":"### <span id=\"2-.-7-.-4-Decompression\">**2.7.4 Decompression**</span>\n\nThe decompression algorithm takes measured ppO<sub>2</sub> values and inert gases according to the set diluent composition into account.","textLarge":false,"imageOnRight":true,"image":{"recommendedSizes":{"width":"420","height":"280"}},"imageMobile":{"recommendedSizes":{"width":"750","height":"500"}}},"id":"#216","type":"component","lock":false,"position":155},{"name":"Divider","data":{"color":"darkGray"},"id":"#217","type":"component","lock":false,"position":156},{"name":"SectionDivider","data":{"title":"2.8 Bailout OC mode"},"id":"#534","type":"component","lock":false,"position":157},{"name":"TextBlock","data":{"text":"### <span id=\"2-.-8-Bailout-OC-mode\">**2.8 Bailout OC mode**</span>\n\nThis mode serves primarily for resolving emergency situations.","textLarge":false,"imageOnRight":true,"image":{"recommendedSizes":{"width":"420","height":"280"}},"imageMobile":{"recommendedSizes":{"width":"750","height":"500"}}},"id":"#448","type":"component","lock":false,"position":158},{"name":"SectionDivider","data":{"title":"2.8.1 Entering bailout OC mode"},"id":"#535","type":"component","lock":false,"position":159},{"name":"TextBlock","data":{"text":"### <span id=\"2-.-8-.-1-Entering-bailout-OC-mode\">**2.8.1 Entering bailout OC mode**</span>\n\nSwitching to bailout OC mode is achievable from the menu in CCR mode, manual CCR mode, or surface mode.","textLarge":false,"imageOnRight":true,"image":{"recommendedSizes":{"width":"420","height":"280"},"mimetype":"image/png","size":65057,"hash":"5da459b4be10d42077c753844c0ef1d7ca25652c","id":"cl3sp33lxdel707760lymgnjr","filename":"divesoft-ccr-liberty-manual-2-8-1-01.png","category":"divesoft/","type":"image"},"imageMobile":{"recommendedSizes":{"width":"750","height":"500"}}},"id":"#218","type":"component","lock":false,"position":160},{"name":"Divider","data":{"color":"darkGray"},"id":"#219","type":"component","lock":false,"position":161},{"name":"SectionDivider","data":{"title":"2.8.2 Switching to other modes"},"id":"#536","type":"component","lock":false,"position":162},{"name":"TextBlock","data":{"text":"### <span id=\"2-.-8-.-2-Switching-to-othe-modes\">**2.8.2 Switching to other modes**</span>\n\nIn the menu, it is possible to switch from bailout OC mode to CCR mode and manual CCR mode. If the current depth is less than 1.5 m, it is possible to switch to surface mode and standby mode.","textLarge":false,"imageOnRight":true,"image":{"recommendedSizes":{"width":"420","height":"280"}},"imageMobile":{"recommendedSizes":{"width":"750","height":"500"}}},"id":"#220","type":"component","lock":false,"position":163},{"name":"Divider","data":{"color":"darkGray"},"id":"#221","type":"component","lock":false,"position":164},{"name":"SectionDivider","data":{"title":"2.8.3 Mixture"},"id":"#537","type":"component","lock":false,"position":165},{"name":"TextBlock","data":{"text":"### <span id=\"2-.-8-.-3-Mixture\">**2.8.3 Mixture**</span>","textLarge":false,"imageOnRight":true,"image":{"recommendedSizes":{"width":"420","height":"280"}},"imageMobile":{"recommendedSizes":{"width":"750","height":"500"}}},"id":"#449","type":"component","lock":false,"position":166},{"name":"TextBlock","data":{"text":"In bailout mode it is assumed that the diver will not breathe from the apparatusâs breathing loop but will rather use a separate open-circuit apparatus. **Automatic ppO<sub>2</sub> regulation is deactivated in bailout mode**; the apparatus functions only as a decompression computer.\n\n**Due to this, you must not breathe from the unit, if it is switched to bailout OC mode**","textLarge":false,"imageOnRight":true,"image":{"recommendedSizes":{"width":"420","height":"280"},"mimetype":"image/png","size":66627,"hash":"968bc7affaab54ec4eddc0adc56b5d72c439e931","id":"cl3tsesumdnpp07760diugq68","filename":"divesoft-ccr-liberty-manual-2-8-3-01.png","category":"divesoft/","type":"image"},"imageMobile":{"recommendedSizes":{"width":"750","height":"500"}}},"id":"#222","type":"component","lock":false,"position":167}
2,{"name":"TextBlock","data":{"text":"Up to eight breathing mixtures are can be available in this mode. The user can select the currently utilized mixture from the menu or can successively select individual mixtures with a long press of the upper or lower key. After switching to bailout OC mode, the configured default mixture is set.","textLarge":false,"imageOnRight":true,"image":{"recommendedSizes":{"width":"420","height":"280"}},"imageMobile":{"recommendedSizes":{"width":"750","height":"500"}}},"id":"#223","type":"component","lock":false,"position":168},{"name":"Divider","data":{"color":"darkGray"},"id":"#224","type":"component","lock":false,"position":169},{"name":"SectionDivider","data":{"title":"2.8.4 Decompression"},"id":"#538","type":"component","lock":false,"position":170},{"name":"TextBlock","data":{"text":"### <span id=\"2-.-8-.-4-Decompression\">**2.8.4 Decompression**</span>\n\nThe decompression algorithm takes the partial-pressure values according to depth and the set mixture into account.\n\nAfter switching to bailout OC mode, the safety level is automatically set using the bailout gradient factors (GFs). It is possible to switch between the standard and bailout GF sets in the menu without affecting the mode in which the CCR Liberty is operating. If the diver switches back to the CCR mode during the dive, the GF automatically switches back to Standard GF.","textLarge":false,"imageOnRight":true,"image":{"recommendedSizes":{"width":"420","height":"280"}},"imageMobile":{"recommendedSizes":{"width":"750","height":"500"}}},"id":"#225","type":"component","lock":false,"position":171},{"name":"Divider","data":{"color":"darkGray"},"id":"#226","type":"component","lock":false,"position":172},{"name":"SectionDivider","data":{"title":"2.8.5 Specific handset control"},"id":"#539","type":"component","lock":false,"position":173},{"name":"TextBlock","data":{"text":"### <span id=\"2-.-8-.-5-Specific-handset-control\">**2.8.5 Specific handset control**</span>\n\nLong press upper key â change of mixture (up according to the list, cyclically)\n\nLong press lower key â change of mixture (down according to the list, cyclically)","textLarge":false,"imageOnRight":true,"image":{"recommendedSizes":{"width":"420","height":"280"}},"imageMobile":{"recommendedSizes":{"width":"750","height":"500"}}},"id":"#227","type":"component","lock":false,"position":174},{"name":"Divider","data":{"color":"darkGray"},"id":"#228","type":"component","lock":false,"position":175},{"name":"SectionDivider","data":{"title":"2.9 Ascent plan"},"id":"#540","type":"component","lock":false,"position":176},{"name":"TextBlock","data":{"text":"### <span id=\"2-.-9-Ascent-plan\">**2.9 Ascent plan**</span>","textLarge":false,"imageOnRight":true,"image":{"recommendedSizes":{"width":"420","height":"280"}},"imageMobile":{"recommendedSizes":{"width":"750","height":"500"}}},"id":"#450","type":"component","lock":false,"position":177},{"name":"TextBlock","data":{"text":"In any diving mode, you can view the current ascent plan with the entire decompression course. Although Decompression is shown on the Liberty using the depth of the decompression ceiling and time to surface, the Ascent plan is displayed in decompression stops at intervals of 3 m. The last column displays the gas with which the decompression stop is calculated","textLarge":false,"imageOnRight":true,"image":{"recommendedSizes":{"width":"420","height":"280"},"mimetype":"image/png","size":11362,"hash":"116a40e9031ce81d4b8c1a0e53302fe6b3aefe75","id":"cl3tsg9endnrs0776tdzumava","filename":"divesoft-ccr-liberty-manual-2-9-01.png","category":"divesoft/","type":"image"},"imageMobile":{"recommendedSizes":{"width":"750","height":"500"}}},"id":"#229","type":"component","lock":false,"position":178},{"name":"TextBlock","data":{"text":"If a diver is in no-deco time, only âFree ascentâ is shown.\n\nCalculating and displaying the Ascent Plan is also affected by the Planner setup setting; in particular, the depth of the last decompression stop (whether the ascent is calculated with all available mixes), or with the current mix only. Details of settings are in section 3.1.1 Planner settings.","textLarge":false,"imageOnRight":true,"image":{"recommendedSizes":{"width":"420","height":"280"}},"imageMobile":{"recommendedSizes":{"width":"750","height":"500"}}},"id":"#230","type":"component","lock":false,"position":179},{"name":"Divider","data":{"color":"darkGray"},"id":"#231","type":"component","lock":false,"position":180},{"name":"SectionDivider","data":{"title":"2.10 Setup in Dive mode"},"id":"#541","type":"component","lock":false,"position":181},{"name":"TextBlock","data":{"text":"### <span id=\"2-.-10-Setup-in-Dive-mode\">**2.10 Setup in Dive mode**</span>\n\nDuring the dive, many preconfigured factors can be changed, such as setting a new temporary setpoint, adding a new mix, removing a lost mixture, changing the diluent, or adjusting the brightness of the display or HUD.","textLarge":false,"imageOnRight":true,"image":{"recommendedSizes":{"width":"420","height":"280"},"mimetype":"image/png","size":11373,"hash":"0eb5e9a69ad6c4a8a44f4868de0dff3131f96591","id":"cl3tsh3x1dnti0776t92yb1nn","filename":"divesoft-ccr-liberty-manual-2-10-01.png","category":"divesoft/","type":"image"},"imageMobile":{"recommendedSizes":{"width":"750","height":"500"}}},"id":"#232","type":"component","lock":false,"position":182},{"name":"TextBlock","data":{"text":"**Setpoint**\n\nYou can set a new temporary setpoint b
2y adding or subtracting from the value of the current setpoint. To increase the current setpoint, press +0.1, until you reach the desired setpoint. Once you have reached the desired value, move the cursor to Accept and confirm the change by pressing the upper button.","textLarge":false,"imageOnRight":true,"image":{"recommendedSizes":{"width":"420","height":"280"},"mimetype":"image/png","size":10244,"hash":"a2e79015033354895199fbbbac5762259a0683bb","id":"cl3tshi4rdnv707761zqqpqg8","filename":"divesoft-ccr-liberty-manual-2-10-02.png","category":"divesoft/","type":"image"},"imageMobile":{"recommendedSizes":{"width":"750","height":"500"}}},"id":"#233","type":"component","lock":false,"position":183},{"name":"TextBlock","data":{"text":"To decrease the current setpoint, move the cursor to -0.1 and press the top button repeatedly until you reach your setpoint. Once you have reached the desired value, move the cursor to Accept and confirm the change by pressing the upper button.\n\nThese setpoints are only temporary. By switching to low or high setpoint, a temporary setpoint is deleted, and the procedure described above has to be repeated to reset it.\n\n**Set high**\n\nSwitch to high setpoint\n\n**Set low**\n\nSwitch to low setpoint\n\n**Faulty sensors**\n\nIn the event one or more sensors malfunction, it is necessary to exclude the faulty sensors from averaging. Disable the non-functional sensor or switch the oxygen measurement mode (oxygen or helium sensors). Faulty sensors would cause a poor evaluation of the unitâs condition, which could have fatal consequences. The procedure for excluding and including all sensors is the same as the procedure in the surface mode â see section 2.4.8 Faulty sensors.\n\n**Bailout GF**\n\nBailout gradient factors are used to accelerate decompression during an emergency. This reduces the safety margin to the acceptable minimum time for a safe ascent to the surface. Once the device is switched to Bailout GF, this item changes to Standard GF, which then can be used to switch back to standard gradient factors.\n\n**Screens**\n\nThis feature turns some screens on or off. The procedure is the same as the surface mode setting; see Chapter 2.4.6 Preferences.\n\n**Diluents**\n\nThe diluent setup feature is used to switch or set a new diluent if another diluent is used from an off-board source. In order for the diluent to be used correctly with respect to the decompression and the He-N2 ratio, a diluent flush should be performed to replace the original gas.\n\n**Mixtures (OC mode only)**\n\nThis feature can be used to edit current bailout mixtures or add a new bailout mixture. It is also possible to deselect a lost decompression bottle so it is not counted in the ascent calculation. The setting is the same as setting the blends in surface mode: chapter 2.4.3 Mixtures.\n\n**Brightness**\n\nAdjust the brightness of the display (1-10). The brightness of the display significantly affects the power consumption. To save the battery, reduce the brightness of the display to the lowest acceptable level.\n\n**HUD brightness**\n\nThe HUD diode brightness can be set to 3 different levels. In very dark conditions, the full brightness of the diodes may be irritating, but in sunny shallow water the low brightness may be less visible. The intensity is adjusted by pressing the upper button.","textLarge":false,"imageOnRight":true,"image":{"recommendedSizes":{"width":"420","height":"280"}},"imageMobile":{"recommendedSizes":{"width":"750","height":"500"}}},"id":"#234","type":"component","lock":false,"position":184},{"name":"Divider","data":{"color":"darkGray"},"id":"#235","type":"component","lock":false,"position":185},{"name":"SectionDivider","data":{"title":"2.11 Games"},"id":"#542","type":"component","lock":false,"position":186},{"name":"TextBlock","data":{"text":"### <span id=\"2-.-11-Games\">**2.11 Games**</span>\n\nDo not disable error messages and notifications if the games are played underwater.\n\nMake sure you maintain your position while playing during a dive. Check the pressure gauges and rebreather state on the second handset on a regular basis. Playing a game will reduce your attention. Remember: you want to dive safely, not just achieve a higher level in the game!","textLarge":false,"imageOnRight":true,"image":{"recommendedSizes":{"width":"420","height":"280"}},"imageMobile":{"recommendedSizes":{"width":"750","height":"500"}}},"id":"#236","type":"component","lock":false,"position":187},{"name":"Divider","data":{"color":"darkGray"},"id":"#237","type":"component","lock":false,"position":188},{"name":"SectionDivider","data":{"title":"2.11.1 Sokoban"},"id":"#543","type":"component","lock":false,"position":189},{"name":"TextBlock","data":{"text":"### <span id=\"2-.-11-.-1-Sokoban\">**2.11.1 Sokoban**</span>","textLarge":false,"imageOnRight":true,"image":{"recommendedSizes":{"width":"420","height":"280"}},"imageMobile":{"recommendedSizes":{"width":"750","height":"500"}}},"id":"#451","type":"component","lock":false,"position":190},{"name":"TextBlock","data":{"text":"Sokoban is a type of transport puzzle, in which the player (a diving mask with snorkel) pushes cylinders or crates around in a warehouse, trying to get them to storage locations (red dots).\n\nThe game is played on a board of squares, where each square is either a floor or a wall. Some floor squares contain cylinders, and some floor squares are marked as storage locations.","textLarge":false,"imageOnRight":true,"image":{"recommendedSizes":{"width":"420","height":"280"},"mimetype":"image/png","size":44832,"hash":"84f46a5fc51478d379805207c4c60771801100b9","id":"cl3tsi2ppdnvv0776860cxafq","filename":"divesoft-ccr-liberty-manual-2-11-1-01.png","category":"divesoft/","type":"image"},"imageMobile":{"recommendedSizes":{"width":"750","height":"500"}}},"id":"#238","type":"component","lock":false,"position":191},{"name":"TextBlock","data":{"text":"The player is confined to the board and may move horizontally or vertically onto empty squares (never through walls or boxes). The player can also bump into a cylinder, which pu
2shes it into the square beyond. Cylinders may not be pushed into other cylinders or walls, and they cannot be pulled. The puzzle is solved when all cylinders are in the storage locations.","textLarge":false,"imageOnRight":true,"image":{"recommendedSizes":{"width":"420","height":"280"}},"imageMobile":{"recommendedSizes":{"width":"750","height":"500"}}},"id":"#239","type":"component","lock":false,"position":192},{"name":"Divider","data":{"color":"darkGray"},"id":"#240","type":"component","lock":false,"position":193},{"name":"SectionDivider","data":{"title":"2.11.2 Snake"},"id":"#544","type":"component","lock":false,"position":194},{"name":"TextBlock","data":{"text":"### <span id=\"2-.-11-.-2-Snake\">**2.11.2 Snake**</span>","textLarge":false,"imageOnRight":true,"image":{"recommendedSizes":{"width":"420","height":"280"}},"imageMobile":{"recommendedSizes":{"width":"750","height":"500"}}},"id":"#452","type":"component","lock":false,"position":195},{"name":"TextBlock","data":{"text":"Snake is a game where the player maneuvers a line (the snake) which grows in length and is, itself, a primary obstacle.\n\nThe player controls the head of the snake. As it moves forward, it leaves a trail behind, resembling a moving snake. The snake has a specific length. The player loses when the snake runs into the screen border, a trail or another obstacle, eats poison (skull), or starves to death.","textLarge":false,"imageOnRight":true,"image":{"recommendedSizes":{"width":"420","height":"280"},"mimetype":"image/png","size":24729,"hash":"d4ffcad441d09b1d6b4e55e248c9092875d21f23","id":"cl3tsjasednx2077678ycg90e","filename":"divesoft-ccr-liberty-manual-2-11-1-02.png","category":"divesoft/","type":"image"},"imageMobile":{"recommendedSizes":{"width":"750","height":"500"}}},"id":"#241","type":"component","lock":false,"position":196},{"name":"TextBlock","data":{"text":"The snake can lose its length slowly (every 30 steps), and when it is too short, it dies from starvation.\n\nThe player attempts to eat fish by running into them with the head of the snake. Each fish eaten makes the snake longer, so maneuvering becomes progressively more difficult.","textLarge":false,"imageOnRight":true,"image":{"recommendedSizes":{"width":"420","height":"280"}},"imageMobile":{"recommendedSizes":{"width":"750","height":"500"}}},"id":"#242","type":"component","lock":false,"position":197},{"name":"Divider","data":{"color":"darkGray"},"id":"#243","type":"component","lock":false,"position":198},{"name":"SectionDivider","data":{"title":"2.12 List of pop-up alarms and notifications on CCR Liberty"},"id":"#545","type":"component","lock":false,"position":199},{"name":"TextBlock","data":{"text":"### <span id=\"2-.-12-List-of-pop---up-alarms-and-notifications-on-CCR-Liberty\">**2.12 List of pop-up alarms and notifications on CCR Liberty**</span>\n\nThis is exhaustive list of all possible alarms and messages displayed as a pop-up on the Liberty CCR handset.\n\nMessages are categorized according to priority, the âCriticalâ, âHighâ and âMediumâ are all some kind of a failure or diver error.\n\nThe âNotificationsâ are informative messages with the lowest priority, e.g. deco stop end, etc.\n\nIn the âCustomizationâ paragraph is the path through menu to the relevant item with \\[default\\] option in square brackets.\n\nPlease note that most menu items are available only in surface mode, but few are available only in dive.","textLarge":false,"imageOnRight":true,"image":{"recommendedSizes":{"width":"420","height":"280"}},"imageMobile":{"recommendedSizes":{"width":"750","height":"500"}}},"id":"#244","type":"component","lock":false,"position":200},{"name":"Divider","data":{"color":"darkGray"},"id":"#245","type":"component","lock":false,"position":201},{"name":"SectionDivider","data":{"title":"2.12.1 Critical priority"},"id":"#546","type":"component","lock":false,"position":202},{"name":"TextBlock","data":{"text":"### <span id=\"2-.-12-.-1-Critical-priority\">**2.12.1 Critical priority**</span>","textLarge":false,"imageOnRight":true,"image":{"recommendedSizes":{"width":"420","height":"280"}},"imageMobile":{"recommendedSizes":{"width":"750","height":"500"}}},"id":"#246","type":"component","lock":false,"position":203},{"name":"TextBlock","data":{"text":"### **<span style=\"background-color:red; width: 50%; color:white; display:block; text-align:center; padding: 0.8rem 50px;\">Low pO<sub>2</sub></span>**\n\nThe loop ppO<sub>2</sub> have fallen below the âMin pO<sub>2</sub>â threshold. When the ppO<sub>2</sub> falls even further, the alarm repeats every 0.1 bar.\n\nFor example, with default settings of ppO<sub>2</sub> 0.3 bar, first alarm sounds at ppO<sub>2</sub> just below 0.3 bar, then another at 0.2 bar, and at 0.1 bar.\n\n**Customization**\n\nSetup / Alarms / Alarm Sources / Min pO<sub>2</sub> \\[0.3]\n \nSurface mode uses fixed threshold of 0.18 bar.","textLarge":false,"imageOnRight":true,"image":{"recommendedSizes":{"width":"420","height":"280"}},"imageMobile":{"recommendedSizes":{"width":"750","height":"500"}}},"id":"#248","type":"component","lock":false,"position":204},{"name":"TextBlock","data":{"text":"### **<span style=\"background-color:red; width: 50%; color:white; display:block; text-align:center; padding: 0.8rem 50px;\">High pO<sub>2</sub></span>**\n\nThe loop (or OC mixture) ppO<sub>2</sub> exceeded the âMax pO<sub>2</sub>â threshold. If the ppO<sub>2</sub> keep rising, the alarm repeats every 0.2 bar.\n\nFor example, with default value of 1.6 bar, first alarm sounds just above the 1.6 bar, then at 1.8 bar, 2.0 bar etc.\n\n**Customization**\n\nCCR\n\nSetup / Alarms / Alarm Sources / Max pO<sub>2</sub> \\[1.6]\n\nOC\n\nSetup / Mixtures / Max pO<sub>2</sub> bottom \\[1.4]\n \nSetup / Mixtures / Max pO<sub>2</sub> deco \\[1.6]\n \nPlease note that internally the \"Setup / Mixtures / Max pO<sub>2</sub> deco\" equals \"Setup / Alarms / Alarm Sources / Max pO<sub>2</sub>\".\n\nChanging one will change the other as well.","textLarge":false,"imageOnRight":true,"image":{"recommendedSizes":{"width":"420","height":"280"}},"imageMobile":{"recommendedSizes":{"width":"750","height":"500"}}},"id":"#250","type":"component","lock":false,"position":205},{"name":"TextBlock","data":{"text":"### **<span style=\"background-color:red; width: 50%; color:white; display:block; text-align:center; padding: 0.8rem 50px;\">PO<sub>2</sub> measuring lost</span>**\n\nAll O<sub>2</sub> sensors are malfunctioning or disabled, the Liberty has no means of reading current ppO<sub>2</sub>.\n \nIf you are using trimix as a diluent, and have helium sensors in working order, then you can manually switch to the backup computed ppO<sub>2</sub> reading using helium sensors. The âpO<sub>2</sub> backup modeâ notification will follow, and all ppO<sub>2</sub> values will have a blue background to signify that they are not from the chemical oxygen sensors.\n\n**Customization**\n\nSwitching to backup O<sub>2</sub> reading:\n \nSetup / Faulty sensors / pO<sub>2</sub> source \\[O<sub>2</sub>]","textLarge":false,"imageOnRight":true,"image":{"recommendedSizes":{"width":"420","height":"280"}},"imageMobile":{"recommendedSizes":{"width":"750","height":"500"}}},"id":"#252","type":"component","lock":false,"position":206},{"name":"TextBlock","data":{"text":"### **<span style=\"background-color:red; width: 50%; color:white; display:block; text-align:center; padding: 0.8rem 50px;\">Above ceiling</span>**\n\nDiver is less than 1m above the calculated decompression ceiling.","textLarge":false,"imageOnRight":true,"image":{"recommendedSizes":{"width":"420","height":"280"}},"imageMobile":{"recommendedSizes":{"width":"750","height":"500"}}},"id":"#254","type":"component","lock":false,"position":207},{"name":"TextBlock","data":{"text":"### **<span style=\"background-color:red; width: 50%; color:white; display:block; text-align:center; padding: 0.8rem 50px;\">Very above ceiling</span>**\n\nDiver is more than 1m above the calculated decompression ceiling.","textLarge":false,"imageOnRight":true,"image":{"recommendedSizes":{"width":"420","height":"280"}},"imageMobile":{"recommendedSizes":{"width":"750","height":"500"}}},"id":"#256","type":"component","lock":false,"position":208},{"name":"Divider","data":{"color":"darkGray"},"id":"#257","type":"component","lock":false,"position":209},{"name":"SectionDivider","data":{"title":"2.12.2 High priority"},"id":"#547","type":"component","lock":false,"position":210},{"name":"TextBlock","data":{"text":"### <span id=\"2-.12-.-2-High-priority\">**2.12.2 High priority**</span>","textLarge":false,"imageOnRight":true,"image":{"recommendedSizes":{"width":"420","height":"280"}},"imageMobile":{"recommendedSizes":{"width":"750","height":"500"}}},"id":"#258","type":"component","lock":false,"position":211},{"name":"TextBlock","data":{"text":"### **<span style=\"background-color:red; width: 50%; color:white; display:block; text-align:center; padding: 0.8rem 50px;\">Check O<sub>2</sub> sensors !</span>**\n\nThis alarm occurs only if you have one or more oxygen sensors excluded, but not manually disabled. Alarm is triggered once an automatically excluded
2sensor exceeds the threshold for high ppO<sub>2</sub> alarm (see section âCriticalâ).\n \nThis message is a clear signal for performing a sensors validation, usually by diluent flush. You are looking to confirm which sensors are faulty and which are working correctly (even the excluded ones). Once you decide that with confidence, then you can manually disable the sensors which are faulty.\n\nThere is possibility that the excluded sensor(s) is the only working one, and the rest is limiting, unable to reach the current ppO<sub>2</sub>. This situation has happened before, and therefore is only a question of time when it will happen again.\n\nWhen you are confident that the excluded sensor is indeed faulty, you can manually disable the sensor to suppress this alarm.\n\nPlease note that you can manually re-include the excluded sensor in the faulty sensors screen as well.\n\n**Customization**\n\nManually disable and enable sensors:\n\nSetup / Faulty sensors / Oxygen sensors","textLarge":false,"imageOnRight":true,"image":{"recommendedSizes":{"width":"420","height":"280"}},"imageMobile":{"recommendedSizes":{"width":"750","height":"500"}}},"id":"#260","type":"component","lock":false,"position":212},{"name":"TextBlock","data":{"text":"### **<span style=\"background-color:red; width: 50%; color:white; display:block; text-align:center; padding: 0.8rem 50px;\">Oxygen #3 excluded</span>**\n\nOne of the oxygen sensors is deviating from the average calculated from the three other sensors by more than a 0.1 bar for at least 15 seconds. Unless disabled by diver, the sensor will be automatically enabled again, once it fits into the average for at least 10 seconds. The inclusion does not generate any alarm or notification.\n\nBe aware that once you have one sensor excluded, the average ppO<sub>2</sub> is calculated from the three valid sensors. Also, any other exclusion compares one sensor to the other two, which is more prone to exclude a valid sensor if the other two become current limited.\n\nIf you want to avoid automatic inclusion of the once excluded sensor, then you can manually disable it.\n\n**Customization**\n\nManually disable and enable sensors:\n\nSetup / Faulty sensors / Oxygen sensors","textLarge":false,"imageOnRight":true,"image":{"recommendedSizes":{"width":"420","height":"280"}},"imageMobile":{"recommendedSizes":{"width":"750","height":"500"}}},"id":"#262","type":"component","lock":false,"position":213},{"name":"TextBlock","data":{"text":"### **<span style=\"background-color:red; width: 50%; color:white; display:block; text-align:center; padding: 0.8rem 50px;\">Pressure #1 excluded</span>**\n\nLiberty uses four sensors in total, two for each computer unit. So, although extremely rare, you may see this message.\n\nYou may see this message after damaging fine pressure sensors (marked with âFâ in system check) by diving to depths of over 150m.\n\n**Customization**\n\nManually disable and enable sensors:\n\nSetup / Faulty sensors / Pressure sensors","textLarge":false,"imageOnRight":true,"image":{"recommendedSizes":{"width":"420","height":"280"}},"imageMobile":{"recommendedSizes":{"width":"750","height":"500"}}},"id":"#264","type":"component","lock":false,"position":214},{"name":"TextBlock","data":{"text":"### **<span style=\"background-color:red; width: 50%; color:white; display:block; text-align:center; padding: 0.8rem 50px;\">Other CU down</span>**\n\nThe Liberty head contains two control units âCUâ, they are connected by one communication line. If one of the CUs stops responding for 10 seconds, the alarm is raised.\n\nIf the one CU goes offline, either by a low battery or malfunction of any kind, the other CU keeps full functionality, injecting oxygen using its own solenoid. CU is limited only by having two oxygen cells, two pressure sensors, one HS.\n\nWhen using only one HS in sidemount, it is advised to connect HUD to one side and a handset to the other side of the head. So even running on one CU, you keep the ability to read loop ppO<sub>2</sub> on either HS or HUD.","textLarge":false,"imageOnRight":true,"image":{"recommendedSizes":{"width":"420","height":"280"}},"imageMobile":{"recommendedSizes":{"width":"750","height":"500"}}},"id":"#266","type":"component","lock":false,"position":215},{"name":"TextBlock","data":{"text":"### **<span style=\"background-color:red; width: 50%; color:white; display:block; text-align:center; padding: 0.8rem 50px;\">CNS O<sub>2</sub> toxicity 115%</span>**\n\nThe oxygen toxicity alarm sounds in three stages, at 75%, 90% and 100%. To notify the diver that he is reaching the NOAA oxygen exposure limit.\n\nIf you need to prolong your stay underwater, reaching the CNS limit, you can lower the setpoint to find a compromise between oxygen exposure and decompression time.\n\n**Customization**\n\nSetup / Alarms / Alarm Sources / CNS \\[On]","textLarge":false,"imageOnRight":true,"image":{"recommendedSizes":{"width":"420","height":"280"}},"imageMobile":{"recommendedSizes":{"width":"750","height":"500"}}},"id":"#268","type":"component","lock":false,"position":216},{"name":"TextBlock","data":{"text":"### **<span style=\"background-color:blue; width: 50%; color:white; display:block; text-align:center; padding: 0.8rem 50px;\">Stack time 240 min</span>**\n\nThe scrubber timer alarm. You can modify the notification time in surface menu according to your habits. Also, you can customize whether the timer should be active on the surface, or underwater only.\n\n**Customization**\n\nSetup / Alarms / Notifications / Stack time \\[150â]\n\nSetup / Alarms / Notifications / Stack timer on sfc. \\[On]\n\nOn ⦠timer running all the time when Liberty is in dive mode, even on the surface.\n\nOff ⦠timer running underwater only (below 1.5m).","textLarge":false,"imageOnRight":true,"image":{"recommendedSizes":{"width":"420","height":"280"}},"imageMobile":{"recommendedSizes":{"width":"750","height":"500"}}},"id":"#270","type":"component","lock":false,"position":217},{"name":"TextBlock","data":{"text":"### **<span style=\"background-color:red; width: 50%; color:white; display:block; text-align:center; padding: 0.8rem 50px;\">SLOW DOWN !!!</span>**\n\nAscent speed exceeded 60m per minute.\n\n**Customization**\n\nSetup / Alarms / Alarm sources / Ascent rate \\[On]","textLarge":false,"imageOnRight":true,"image":{"recommendedSizes":{"width":"420","height":"280"}},"imageMobile":{"recommendedSizes":{"width":"750","height":"500"}}},"id":"#272","type":"component","lock":false,"position":218},{"name":"TextBlock","data":{"text":"### **<span style=\"background-color:red; width: 50%; color:white; display:block; text-align:center; padding: 0.8rem 50px;\">pO<sub>2</sub> emergency mode</span>**\n\nNotification after manual switch to calculating ppO<sub>2</sub> from helium sensors data. See also âpO<sub>2</sub> measuring lostâ.\n\n**Customization**\n\nSetup / Faulty sensors / pO<sub>2</sub> source \\[O<sub>2</sub>]","textLarge":false,"imageOnRight":true,"image":{"recommendedSizes":{"width":"420","height":"280"}},"imageMobile":{"recommendedSizes":{"width":"750","height":"500"}}},"id":"#274","type":"component","lock":false,"position":219},{"name":"TextBlock","data":{"text":"### **<span style=\"background-color:blue; width: 50%; color:white; display:block; text-align:center; padding: 0.8rem 50px;\">Pressure sens. diff.</span>**\n\nOnly two pressure sensors are available and they differ by 1.5m or more. For example, when running on one CU and the fine pressure sensor is faulty.\n\n**Customization**\n\nSetup / Faulty sensors / Pressure sensors\n\nDisable or enable desired pressure sensor.\n","textLarge":false,"imageOnRight":true,"image":{"recommendedSizes":{"width":"420","height":"280"}},"imageMobile":{"recommendedSizes":{"width":"750","height":"500"}}},"id":"#276","type":"component","lock":false,"position":220},{"name":"TextBlock","data":{"text":"### **<span style=\"background-color:blue; width: 50%; color:white; display:block; text-align:center; padding: 0.8rem 20px;\">Pressure #3 sensor bad</span>**\n\nPressure sensor value differs from the average of other pressure sensors by 1.5m or more.\n\n**Customization**\n\nSetup / Faulty sensors / Pressure sensors\n\nDisable or enable desired pressure sensor.","textLarge":false,"imageOnRight":true,"image":{"recommendedSizes":{"width":"420","height":"280"}},"imageMobile":{"recommendedSizes":{"width":"750","height":"500"}}},"id":"#278","type":"component","lock":false,"position":221},{"name":"TextBlock","data":{"text":"### **<span style=\"background-color:red; width: 50%; color:white; display:block; text-align:center; padding: 0.8rem 50px;\">High humidity CU L</span>**\n\nIt occurs when the humidity in the CU is higher than 75%.","textLarge":false,"imageOnRight":true,"image":{"recommendedSizes":{"width":"420","height":"280"}},"imageMobile":{"recommendedSizes":{"width":"750","height":"500"}}},"id":"#280","type":"component","lock":false,"position":222},{"name":"TextBlock","data":{"text":"### **<span style=\"background-color:red; width: 50%; color:white; display:block; text-align:center; padding: 0.8rem 50px;\">Low battery</span>**\n\nThe battery level has reached warning level. Liberty has two batteries â one for each side, each battery then has
2its own alarm.\n\n**Customization**\n\nSetup / Alarms / Alarm sources / Low battery % \\[25]\n\nPlease note that setting the level below 10% suppresses the âCritical batteryâ alarm.\n\nFurthermore, setting the alarm threshold too low, may result in warning too late to be useful.","textLarge":false,"imageOnRight":true,"image":{"recommendedSizes":{"width":"420","height":"280"}},"imageMobile":{"recommendedSizes":{"width":"750","height":"500"}}},"id":"#282","type":"component","lock":false,"position":223},{"name":"TextBlock","data":{"text":"### **<span style=\"background-color:red; width: 50%; color:white; display:block; text-align:center; padding: 0.8rem 50px;\">Critical battery</span>**\n\nThe battery level has reached fixed level of 10%, the two batteries has separate alarms.\n\n**Customization**\n\nFixed at 10% battery level.\n\nThis alarm is not customizable, though please note that setting âLow batteryâ warning level below 10% suppresses the critical alarm. The diver will get only the âLow Batteryâ alarm.","textLarge":false,"imageOnRight":true,"image":{"recommendedSizes":{"width":"420","height":"280"}},"imageMobile":{"recommendedSizes":{"width":"750","height":"500"}}},"id":"#284","type":"component","lock":false,"position":224},{"name":"Divider","data":{"color":"darkGray"},"id":"#285","type":"component","lock":false,"position":225},{"name":"SectionDivider","data":{"title":"2.12.3 Medium priority"},"id":"#548","type":"component","lock":false,"position":226},{"name":"TextBlock","data":{"text":"### <span id=\"2-.-12-.-3-Medium-priority\">**2.12.3 Medium priority**</span>","textLarge":false,"imageOnRight":true,"image":{"recommendedSizes":{"width":"420","height":"280"}},"imageMobile":{"recommendedSizes":{"width":"750","height":"500"}}},"id":"#286","type":"component","lock":false,"position":227},{"name":"TextBlock","data":{"text":"### **<span style=\"background-color:red; width: 50%; color:white; display:block; text-align:center; padding: 0.8rem 50px;\">Slow down</span>**\n\nThe ascent or descent speed exceeded the set value.\n\n**Customization**\n\nSetup / Decompression / Rates & zones\n\nPlease note that ascent and descent rates are used also in the dive planner, TTS and ascent plan calculations.","textLarge":false,"imageOnRight":true,"image":{"recommendedSizes":{"width":"420","height":"280"}},"imageMobile":{"recommendedSizes":{"width":"750","height":"500"}}},"id":"#288","type":"component","lock":false,"position":228},{"name":"TextBlock","data":{"text":"### **<span style=\"background-color:blue; width: 50%; color:white; display:block; text-align:center; padding: 0.8rem 50px;\">BO RMT 4'</span>**\n\nBailout remaining time advance warning, warns about 5â before expiration. For more information see âBO RMT expiredâ below.","textLarge":false,"imageOnRight":true,"image":{"recommendedSizes":{"width":"420","height":"280"}},"imageMobile":{"recommendedSizes":{"width":"750","height":"500"}}},"id":"#290","type":"component","lock":false,"position":229},{"name":"TextBlock","data":{"text":"### **<span style=\"background-color:red; width: 50%; color:white; display:block; text-align:center; padding: 0.8rem 50px;\">BO RMT expired</span>**\n\nBailout remaining time expired. This marks a point of dive when the OC bailout will just last if you begin your ascent immediately. The calculations are based upon the decompression settings, enabled OC mixtures, cylinder volumes and pressures, respiratory minute value etc.\n\n<span style=\"color:red\">**Warning**</span>\n\nThe BO RMT is only relevant, when you have all configuration set precisely for the current dive. Especially the OC mixtures setting, having enabled other OC mixtures than you take on the dive will render the BORMT calculation invali
2d.","textLarge":false,"imageOnRight":true,"image":{"recommendedSizes":{"width":"420","height":"280"}},"imageMobile":{"recommendedSizes":{"width":"750","height":"500"}}},"id":"#292","type":"component","lock":false,"position":230},{"name":"TextBlock","data":{"text":"### **<span style=\"background-color:red; width: 50%; color:white; display:block; text-align:center; padding: 0.8rem 50px;\">BO RMT expired CNS</span>**\n\nLiberty FW version 2.12 and up.\n\nBailout remaining time for the dual CCR mode is active only when the âBOCCR settingsâ is\nenabled. This alarm is only in the Bailout CCR mode.\n\nThe last word indicates what is the limiting factor. At the moment that can be Battery, Stack\nand CNS.\n\n**Customization**\n\nSetup / Miscellaneous / BOCCR settings \\[Off]\n\nGlobal Bailout CCR switch also decides whether the BO RMT calculation will be OC or CCR.\n","textLarge":false,"imageOnRight":true,"image":{"recommendedSizes":{"width":"420","height":"280"}},"imageMobile":{"recommendedSizes":{"width":"750","height":"500"}}},"id":"#294","type":"component","lock":false,"position":231},{"name":"TextBlock","data":{"text":"### **<span style=\"background-color:blue; width: 50%; color:white; display:block; text-align:center; padding: 0.8rem 50px;\">Lost Gas EAN 50</span>**\n\nOpen circuit mode only.\n\nNotification that the best mix at this depth is marked âlostâ resulting in ascent plan and TTS recalculation without the best mix. Switching to this gas will remove the âlostâ tag and recalculate the ascent including the current best mix again.\n\nThis message can be caused for example by ignoring the âSwitch to EAN50â at 21m notification (see below). The algorithm is 1<sup>st</sup> notification, 2â pause, 2<sup>nd</sup> notification, 2â pause and if even at this point diver did not switch to the advised gas, the gas is marked as âlostâ.\n\n**Customization**\n\nSetup / Alarms / Notifications / Gas sw. reminder\\[Off]\n\nThe âLost gasâ feature is available only when âGas sw. remainderâ is turned on.","textLarge":false,"imageOnRight":true,"image":{"recommendedSizes":{"width":"420","height":"280"}},"imageMobile":{"recommendedSizes":{"width":"750","height":"500"}}},"id":"#296","type":"component","lock":false,"position":232},{"name":"TextBlock","data":{"text":"### **<span style=\"background-color:red; width: 50%; color:white; display:block; text-align:center; padding: 0.8rem 30px;\">Bailout MOD exceeded</span>**\n\nWarning on excceeding the MOD of the deepest available OC bailout mixture.\nThis warning des not apply when switched to the BoCCR or OC dive mode.\n\n**Customizazion**\n\nThe MOD is calculated using the *\"Setup / mixtures / Max pO2\"*. \n\nThere is no \"off\" switch for this warning.","textLarge":false,"imageOnRight":true,"image":{"recommendedSizes":{"width":"840","height":"560"}},"imageMobile":{"recommendedSizes":{"width":"750","height":"500"}}},"id":"#562","type":"component","lock":false,"position":233},{"name":"TextBlock","data":{"text":"### **<span style=\"background-color:red; width: 50%; color:white; display:block; text-align:center; padding: 0.8rem 50px;\">Dens 5.8 g/L</span>**\n\nLiberty FW version 2.19.0 and up.\n\nDiluent gas density reached set limit (adjustable from 0 to 8.0 g/L)\nThe density is calculated from diluent composition only (not a precise loop content changing with the ppO2), for clarity and consistent performance.\n\n**Customization**\n\nYou can adjust your gas density limit in \"Setup / Alarms / Alarm sources / Density\", setting less than 1.0 g/L suspends the alarm.\n\nYou can find a detailed article on our blog discussing the limits. In short, the 5.2 g/L is the suggested (RF4) gas density limit to be used in CCR diving to avoid CO2 retention caused by increased work of breathing and number of other possible complications to otherwise comfortable dive.","textLarge":false,"imageOnRight":true,"image":{"recommendedSizes":{"width":"840","height":"560"}},"imageMobile":{"recommendedSizes":{"width":"750","height":"500"}}},"id":"#565","type":"component","lock":false,"position":234},{"name":"Divider","data":{"color":"darkGray"},"id":"#297","type":"component","lock":false,"position":235},{"name":"SectionDivider","data":{"title":"2.12.4 Notifications"},"id":"#549","type":"component","lock":false,"position":236}
2,{"name":"TextBlock","data":{"text":"### <span id=\"2-.-12-.-4-Notifications\">**2.12.4 Notifications**</span>","textLarge":false,"imageOnRight":true,"image":{"recommendedSizes":{"width":"420","height":"280"}},"imageMobile":{"recommendedSizes":{"width":"750","height":"500"}}},"id":"#298","type":"component","lock":false,"position":237},{"name":"TextBlock","data":{"text":"### **<span style=\"background-color:blue; width: 50%; color:white; display:block; text-align:center; padding: 0.8rem 50px;\">High setpoint</span>**\n\nSetpoint change notification, automatic or manual. The automatic switch to high setpoint is configurable in menu âSPh autoâ.\n\n**Customization**\n\nSetup / Setpoints / SPh auto \\[Off]\n\nAutomatic switch to high setpoint, you may set a depth in descent, after a time or depth in ascent.","textLarge":false,"imageOnRight":true,"image":{"recommendedSizes":{"width":"420","height":"280"}},"imageMobile":{"recommendedSizes":{"width":"750","height":"500"}}},"id":"#300","type":"component","lock":false,"position":238},{"name":"TextBlock","data":{"text":"### **<span style=\"background-color:blue; width: 50%; color:white; display:block; text-align:center; padding: 0.8rem 50px;\">Low setpoint</span>**\n\nSetpoint change notification, automatic or manual.\n\nAutomatic switch to setpoint low is possible only when using descent setpoint feature. With the descent setpoint active, the Liberty will automatically switch to low setpoint once the loop ppO<sub>2</sub> reach the low setpoint, or after 10â from submersion.\n \n**Customization**\n\nSetup / Setpoints / Use descent SP \\[Off]\n\nSetup / Setpoints / ppO<sub>2</sub> descent \\[0.4]","textLarge":false,"imageOnRight":true,"image":{"recommendedSizes":{"width":"420","height":"280"}},"imageMobile":{"recommendedSizes":{"width":"750","height":"500"}}},"id":"#302","type":"component","lock":false,"position":239},{"name":"TextBlock","data":{"text":"### **<span style=\"background-color:blue; width: 50%; color:white; display:block; text-align:center; padding: 0.8rem 50px;\">Setpoint 1.1</span>**\n\nSetpoint change manual, immediately after setting custom SP.\n\n**Customization**\n\nSetup / Setpoint / Accept\n\nCustom setpoint is available in dive mode only.","textLarge":false,"imageOnRight":true,"image":{"recommendedSizes":{"width":"420","height":"280"}},"imageMobile":{"recommendedSizes":{"width":"750","height":"500"}}},"id":"#304","type":"component","lock":false,"position":240},{"name":"TextBlock","data":{"text":"### **<span style=\"background-color:blue; width: 50%; color:white; display:block; text-align:center; padding: 0.8rem 50px;\">Mode BO CCR</span>**\n\nManual or automatic mode change notification â OC, CCR, mCCR, BO CCR.\n\nAutomatic mode change is possible only from BO CCR to CCR, when the loop ppO<sub>2</sub> falls 20% below the diluent ppO<sub>2</sub> at current depth. For example, when the diver starts breathing from the unit in the BO CCR mode, without changing mode to CCR.\n\nPlease note that this is intended as an emergency feature only.","textLarge":false,"imageOnRight":true,"image":{"recommendedSizes":{"width":"420","height":"280"}},"imageMobile":{"recommendedSizes":{"width":"750","height":"500"}}},"id":"#306","type":"component","lock":false,"position":241},{"name":"TextBlock","data":{"text":"### **<span style=\"background-color:blue; width: 50%; color:white; display:block; text-align:center; padding: 0.8rem 50px;\">No deco end</span>**\n\nEnd of the no-decompression part of the dive.\n\n**Customization**\n\nSetup / Alarms / Notifications / No deco end \\[On]","textLarge":false,"imageOnRight":true,"image":{"recommendedSizes":{"width":"420","height":"280"}},"imageMobile":{"recommendedSizes":{"width":"750","height":"500"}}},"id":"#308","type":"component","lock":false,"position":242},{"name":"TextBlock","data":{"text":"### **<span style=\"background-color:blue; width: 50%; color:white; display:block; text-align:center; padding: 0.8rem 50px;\">Depth 55 m reached</span>**\n\nCustom depth notification, diver can set three depth notifications for descent, and three for ascent.\n\n**Customization**\n\nSetup / Alarms / Notifications / Depth & Time","textLarge":false,"imageOnRight":true,"image":{"recommendedSizes":{"width":"420","height":"280"}},"imageMobile":{"recommendedSizes":{"width":"750","height":"500"}}},"id":"#310","type":"component","lock":false,"position":243},{"name":"TextBlock","data":{"text":"### **<span style=\"background-color:blue; width: 50%; color:white; display:block; text-align:center; padding: 0.8rem 50px;\">Time 33' elapsed</span>**\n\nCustom elapsed dive time notification, diver can set three different notifications.\n\n**Customization**\n\nSetup / Alarms / Notifications / Depth & Time","textLarge":false,"imageOnRight":true,"image":{"recommendedSizes":{"width":"420","height":"280"}},"imageMobile":{"recommendedSizes":{"width":"750","height":"500"}}},"id":"#312","type":"component","lock":false,"position":244},{"name":"TextBlock","data":{"text":"### **<span style=\"background-color:blue; width: 50%; color:white; display:block; text-align:center; padding: 0.8rem 50px;\">Bookmark 3</span>**\n\nNotification that user bookmark has been saved to dive log.\n\n**Customization**\n\nApplications / Add bookmark\n\nThis item is available in dive mode only.","textLarge":false,"imageOnRight":true,"image":{"recommendedSizes":{"width":"420","height":"280"}},"imageMobile":{"recommendedSizes":{"width":"750","height":"500"}}},"id":"#314","type":"component","lock":false,"position":245},{"name":"TextBlock","data":{"text":"### **<span style=\"background-color:blue; width: 50%; color:white; display:block; text-align:center; padding: 0.8rem 50px;\">Switch to EAN50</span>**\n\nOpen circuit only.\n\nNotification for a gas change based on current depth, available mixtures and set maximum ppO<sub>2</sub>.\n\n**Customization**\n\nSetup / Alarms / Notifications / Gas sw. remainder \\[Off]","textLarge":false,"imageOnRight":true,"image":{"recommendedSizes":{"width":"420","height":"280"}},"imageMobile":{"recommendedSizes":{"width":"750","height":"500"}}},"id":"#316","type":"component","lock":false,"position":246},{"name":"TextBlock","data":{"text":"### **<span style=\"background-color:blue; width: 50%; color:white; display:block; text-align:center; padding: 0.8rem 50px;\">EAN50</span>**\n\nOpen circuit only.\n\nSwitched to an OC mixture, automatic notification immediately after gas switch in menu as a confirmation of a successful gas switch.","textLarge":false,"imageOnRight":true,"image":{"recommendedSizes":{"width":"420","height":"280"}},"imageMobile":{"recommendedSizes":{"width":"750","height":"500"}}},"id":"#318","type":"component","lock":false,"position":247},{"name":"TextBlock","data":{"text":"### **<span style=\"background-color:blue; width: 50%; color:white; display:block; text-align:center; padding: 0.8rem 50px;\">Diluent TMX 10/50</span>**\n\nSwitched to a different diluent, automatic notification immediately after a diluent switch in menu as a confirmation of a successful diluent switch.\n","textLarge":false,"imageOnRight":true,"image":{"recommendedSizes":{"width":"420","height":"280"}},"imageMobile":{"recommendedSizes":{"width":"750","height":"500"}}},"id":"#320","type":"component","lock":false,"position":248},{"name":"TextBlock","data":{"text":"### **<span style=\"background-color:blue; width: 50%; color:white; display:block; text-align:center; padding: 0.8rem 50px;\">Factory defaults</span>**\n\nAll user settings have been reset to factory defaults.\n\n**Customization**\n\nSetup / Miscellaneous / Factory defaults","textLarge":false,"imageOnRight":true,"image":{"recommendedSizes":{"width":"420","height":"280"}},"imageMobile":{"recommendedSizes":{"width":"750","height":"500"}}},"id":"#322","type":"component","lock":false,"position":249},{"name":"Divider","data":{"color":"darkGray"},"id":"#458","type":"component","lock":false,"position":250},{"name":"ListOfLinks","data":{"links":[{"title":"< Previous page / Section: 1. Technical design","url":{"url":"/en/manuals/ccr-liberty-manual/ccr-liberty-manual-01","pageId":"cl43w74lpl8dk0858to9uhj2u"}
2,"id":"1"},{"title":"> Next page / Section: 3. Procedures","url":{"url":"/en/manuals/ccr-liberty-manual/ccr-liberty-manual-03","pageId":"cl43w7qiml8ek08588cha4oc2"},"id":"2"}],"activeTab":"2"},"id":"#476","type":"component","lock":false,"position":251},{"name":"Footer","data":{"copyrights":"Copyright © 2019 Divesoft LLC All rights reserved.","facebookUrl":{"urlNewWindow":true,"url":"https://www.facebook.com/divesoft/"},"youtubeUrl":{"url":"https://www.youtube.com/channel/UCHI2-kHmfoUlAdhQXPKl8lA/featured","urlNewWindow":true},"instagramUrl":{"url":"https://www.instagram.com/divesoft/","urlNewWindow":true},"contacts":"**Divesoft s.r.o.** \nHálkova 2495 \n413 01 Roudnice nad Labem \nCzech Republic \nTel.: +420 416 857 057 \nE-mail: [email protected]"},"id":"#1","type":"component","lock":false,"position":252},{"name":"Image","data":{"firstImage":{},"secondImage":{}},"id":"#481","type":"component","lock":false,"position":253}],"id":"root","idBuffer":"#566","lastCommit":"960553bc-b252-4075-83e0-945a9e446a31"}},"annotations":[],"language":{"type":"id","generated":false,"id":"Language:cjv3kwvoj000u083611381c6o","typename":"Language"},"__typename":"PageTranslation"},"Page:cl43w7qiml8ek08588cha4oc2":{"id":"cl43w7qiml8ek08588cha4oc2","type":{"type":"id","generated":false,"id":"PageType:cjv3l213x004f08366hjufttp","typename":"PageType"},"tags":[],"translations({\"where\":{\"language\":{\"id\":\"cjv3kwvoj000u083611381c6o\"}}})":[{"type":"id","generated":false,"id":"PageTranslation:cl43w7qiwl8er08588bknubs2","typename":"PageTranslation"}],"__typename":"Page"},"PageTranslation:cl43w7qiwl8er08588bknubs2":{"id":"cl43w7qiwl8er08588bknubs2","name":"CCR Liberty manual 03","createdAt":"2022-06-07T08:21:22.568Z","content":{"type":"json","json":{"content":[{"name":"Header","data":{"products":[{"title":"Accessories","description":"Backplates, Consumables. Tanks.","img":{"recommendedSizes":{"width":"235","height":"235"}},"url":""},{"title":"Accessories sets","description":"Protection, maintenance, cleaning.","img":{"recommendedSizes":{"width":"235","height":"235"}},"url":""},{"title":"Spare parts","description":"Spare parts and components.","img":{"recommendedSizes":{"width":"235","height":"235"}},"url":""},{"title":"Spare parts kits","description":"Completly Liberty spare parts kits.","img":{"recommendedSizes":{"width":"235","height":"235"}},"url":""}]},"id":"#0","type":"component","lock":false,"position":0},{"name":"Divider","data":{"color":"darkGray"},"id":"#471","type":"component","lock":false,"position":1},{"name":"SectionDivider","data":{"title":""},"id":"#573","type":"component","lock":false,"position":2},{"name":"TextBlock","data":{"text":"[**Section: 3. Procedures**](#3-.-Procedures)\n\n[3.1\tDive plan](#3-.-1-Dive-plan) \n[3.1.1\tPlanner settings](#3-.-1-.-1-Planner-settings) \n[3.1.2\tPlanning](#3-.-1-.-2-Planning) \n\n[3.2\tDive preparation](#3-.-2-Dive-preparation)\n\n[3.2.1\tReplacement of CO<sub>2</sub> sorbent](#3-.-2-.-1-Replacement-of-CO2-sorbent) \n[3.2.2\tAssembling the rebreather body](#3-.-2-.-2-Assembling-the-rebreather-body) \n[3.2.3\tMounting the rebreather body](#3-.-2-.-3-Mounting-the-rebreather-body) \n[3.2.4\tAttaching the counterlungs and hoses](#3-.-2-.-4-Attaching-the-counterlungs-and-hoses) \n[3.2.5\tCylinder filling](#3-.-2-.-5-Tank-filling) \n[3.2.6\tBattery charging](#3-.-2-.-6-Battery-charging) \n[3.2.7\tHelium sensor calibration](#3-.-2-.-7-Helium-sensor-calibration) \n[3.2.8\tCalibration of the oxygen sensors](#3-.-2-.-8-Calibration-of-the-oxygen-sensors) \n[3.2.9\tPreparing the bailout cylinder](#3-.-2-.-9-Preparing-the-bailout-cylinder) \n[3.2.10\tSetting parameters](#3-.-2-.-10-Setting-parameters) \n[3.2.11\tDirectional valve check](#3-.-2-.-11-Directional-valve-check) \n[3.2.12\tPhysical inspection](#3-.-2-.-12-Physical-inspection) \n\n[3.3\tPre-dive inspection](#3-.-3-Pre---dive-inspection)\n\n[3.3.1\tInternal testing of the control units](#3-.-3-.-1-Internal-testing-of-the-control-units) \n[3.3.2\tPressure sensor test](#3-.-3-.-2-Pressure-sensor-test) \n[3.3.3\tComparison of oxygen sensors and their calibration](#3-.-3-.-3-Comparison-of-oxygen-sensors-and-their-calibration) \n[3.3.4\tHelium-sensor test](#3-.-3-.-4-Helium---sensor-test) \n[3.3.5\tBattery testing](#3-.-3-.-5-Battery-testing) \n[3.3.6\tSolenoid testing](#3-.-3-.-6-Solenoid-testing) \n[3.3.7\tHUD inspection](#3-.-3-.-7-HUD-inspection) \n[3.3.8\tBD inspection](#3-.-3-.-8-BD-inspection) \n[3.3.9\tNegative pressure test](#3-.-3-.-9-Negative-pressure-test) \n[3.3.10\tPositive pressure test](#3-.-3-.-10-Positive-pressure-test) \n[3.3.11\tIP Pressure](#3-.-3-.-11-IP-Pressure) \n[3.3.12\tPredive checklist](#3-.-3-.-12-Predive-checklist) \n[3.3.13\tPrebreathe](#3-.-3-.-13-Prebreathe) \n\n[3.4\tDiving](#3-.-4-Diving)\n\n[3.4.1\tBreathing high oxygen content gases](#3-.-4-.-1-Breathing-high-oxygen-content-gases) \n[3.4.2\tPutting on the apparatus](#3-.-4-.-2-Putting-on-the-apparatus) \n[3.4.3\tUsing the DSV](#3-.-4-.-3-Using-the-DSV) \n[3.4.4\tMonitoring of devices](#3-.-4-.-4-Monitoring-of-devices) \n[3.4.5\tSwitching to CCR mode](#3-.-4-.-5-Switching-to-CCR-mode) \n[3.4.6\tWater entry](#3-.-4-.-6-Water-entry) \n[3.4.7\tSubmersion](#3-.-4-.-7-Submersion) \n[3.4.8\tIn-water check](#3-.-4-.-8-In---water-check) \n[3.4.9\tDescent](#3-.-4-.-9-Descent) \n[3.4.10\tControlling buoyancy and trim](#3-.-4-.-10-Controlling-buoyancy-and-trim) \n[3.4.11\tMask clearing](#3-.-4-.-11-Mask-clearing) \n[3.4.12\tIncreased physical exertion](#3-.-4-.-12-Increased-physical-exertion) \n[3.4.13\tAscent](#3-.-4-.-13-Ascent) \n\n[3.5\tPost-dive procedures](#3-.-5-Post---dive-procedures)\n\n[3.5.1\tImmediately after surfacing](#3-.-5-.-1-Immediately-after-surfacing) \n[3.5.2\tCO<sub>2</sub> scrubber maintenance](#3-.-5-.-2-CO2-scrubber-maintenance) \n[3.5.3\tCleaning and disinfection](#3-.-5-.-3-Cleaning-and-disinfection) \n[3.5.4\tBattery care](#3-.-5-.-4-Battery-care) \n[3.5.5\tDive log download](#3-.-5-.-5-Dive-log-download) \n[3.5.
26\tLong-term storage](#3-.-5-.-6-Long---term-storage) \n\n[3.6\tEmergency procedures](#3-.-6-Emergency-procedures)\n\n[3.6.1\tEmergency ascent (bailout)](#3-.-6-.-1-Emergency-ascent-(bailout)) \n[3.6.2\tOxygen-source malfunction](#3-.-6-.-2-Oxygen---source-malfunction) \n[3.6.3\tDiluent-source malfunction](#3-.-6-.-3-Diluent---source-malfunction) \n[3.6.4\tScrubber malfunction](#3-.-6-.-4-Scrubber-malfunction) \n[3.6.5\tInadvertent release of the mouthpiece](#3-.-6-.-5-Inadvertent-release-of-the-mouthpiece) \n[3.6.6\tFlooding](#3-.-6-.-6-Flooding) \n[3.6.7\tLoss of buoyancy](#3-.-6-.-7-Loss-of-buoyancy) \n[3.6.8\tRescue on the surface](#3-.-6-.-8-Rescue-on-the-surface) \n[3.6.9\tMalfunction of oxygen-concentration measuring](#3-.-6-.-9-Malfunction-of-oxygen---concentration-measuring) \n\n[3.7\tMaintenance](#3-.-7-Maintenance)\n\n[3.7.1\tTools and replacement parts](#3-.-7-.-1-Tools-and-replacement-parts) \n[3.7.2\tDetection of leaks](#3-.-7-.-2-Detection-of-leaks) \n[3.7.3\tRegular service inspection](#3-.-7-.-3-Regular-service-inspection) \n[3.7.4\tLong-term maintenance](#3-.-7-.-4-Long---term-maintenance) \n[3.7.5\tFirmware update](#3-.-7-.-5-Firmware-update) \n\n[3.8\tTransport](#3-.-8-Transport)\n\n[3.8.1\tBy car](#3-.-8-.-1-By-car) \n[3.8.2\tBy boat](#3-.-8-.-2-By-boat) \n[3.8.3\tBy plane](#3-.-8-.-3-By-plane) ","textLarge":false,"imageOnRight":true,"image":{"recommendedSizes":{"width":"420","height":"280"}},"imageMobile":{"recommendedSizes":{"width":"750","height":"500"}}},"id":"#470","type":"component","lock":false,"position":3},{"name":"Divider","data":{"color":"darkGray"},"id":"#215","type":"component","lock":false,"position":4},{"name":"SectionDivider","data":{"title":"3. Procedures"},"id":"#574","type":"component","lock":false,"position":5},{"name":"TextBlock","data":{"text":"### <span id=\"3-.-Procedures\">**3. Procedures**</span>","textLarge":false,"imageOnRight":true,"image":{"recommendedSizes":{"width":"420","height":"280"}},"imageMobile":{"recommendedSizes":{"width":"750","height":"500"}}},"id":"#576","type":"component","lock":false,"position":6},{"name":"SectionDivider","data":{"title":"3.1 Dive plan"},"id":"#575","type":"component","lock":false,"position":7},{"name":"TextBlock","data":{"text":"### <span id=\"3-.-1-Dive-plan\">**3.1 Dive plan**</span>\n\nFor planning a dive in the strict sense (gas management and decompression) the internal functions of the CCR Liberty can be used. The planner calculates a dive plan in CCR mode or with an emergency bailout on open circuit. To compute the decompression, the Bühlmann ZHL-16B algorithm (with adjustable gradient factors) as well as, an on-line decompression calculation is used.","textLarge":false,"imageOnRight":true,"image":{"recommendedSizes":{"width":"420","height":"280"}},"imageMobile":{"recommendedSizes":{"width":"750","height":"500"}}},"id":"#324","type":"component","lock":false,"position":8},{"name":"Divider","data":{"color":"darkGray"},"id":"#325","type":"component","lock":false,"position":9},{"name":"SectionDivider","data":{"title":"3.1.1 Planner settings"},"id":"#577","type":"component","lock":false,"position":10},{"name":"TextBlock","data":{"text":"### <span id=\"3-.-1-.-1-Planner-settings\">**3.1.1 Planner settings**</span>","textLarge":false,"imageOnRight":true,"image":{"recommendedSizes":{"width":"420","height":"280"}},"imageMobile":{"recommendedSizes":{"width":"750","height":"500"}}},"id":"#460","type":"component","lock":false,"position":11},{"name":"TextBlock","data":{"text":"To simplify the planner control, the planner takes all set values as setpoints, breathing mixtures, gradient factors, and ascent speed from device settings. For the correct calculation of the plan, it is therefore necessary to set these items exactly as they will be used for the real dive.","textLarge":false,"imageOnRight":true,"image":{"recommendedSizes":{"width":"420","height":"280"},"mimetype":"image/png","size":10339,"hash":"52ad34c2e3862d7233dfc5143530d8429990292d","id":"cl3ve5jh4ebn90776n8lu3w1f","filename":"divesoft-ccr-liberty-manual-3-1-1-01.png","category":"divesoft/","type":"image"},"imageMobile":{"recommendedSizes":{"width":"750","height":"500"}}},"id":"#326","type":"component","lock":false,"position":12},{"name":"TextBlock","data":{"text":"**Particularly in the case of breathing mixtures for bailout, it is necessary to check only those mixtures which are actually available during the dive and to make sure their composition, pressure, and cylinder parameters are set correctly.** If any other mixtures are checked or mixtures have a larger gas reserve set, they will be included in the planning and will cause serious distortion to the dive plan, which may have tragic consequences.\n\nA detailed guide for setting these parameters can be found in the following sections:\n\n- 2.4.2 Setpoints\n- 2.4.3 Mixtures\n- 2.4.4 Decompression","textLarge":false,"imageOnRight":true,"image":{"recommendedSizes":{"width":"420","height":"280"}},"imageMobile":{"recommendedSizes":{"width":"750","height":"500"}}},"id":"#327","type":"component","lock":false,"position":13},{"name":"Spacer","data":{"spacingLarge":30,"spacingSmall":20,"backgroundColor":"#ffffff"},"id":"#550","type":"component","lock":false,"position":14},{"name":"TextBlock","data":{"text":"In mixture settings, note the Respiration minute volume expressed in liters per minute (l / min) or in cubic feet per minute (cu ft / min). We recommend that you choose a sufficient reserve for a crisis situation. During a CO<sub>2</sub> hit (hypercapnia), 78 a diverâs ventilation can exceed 50 l / min (1.8 cuft / min). For details on the planner settings, see Menu / Setup / Decompression / Planner setup","textLarge":false,"imageOnRight":true,"image":{"recommendedSizes":{"width":"420","height":"280"},"mimetype":"image/png","size":11242,"hash":"14b52498940c26b81abfd66a2edfc9326e222218","id":"cl3ve7zbxebrl0776hfior3yq","filename":"divesoft-ccr-liberty-manual-3-1-1-02.png","category":"divesoft/","type":"image"},"imageMobile":{"recommendedSizes":{"width":"750","height":"500"}}},"id":"#328","type":"component","lock":false,"position":15}
2,{"name":"TextBlock","data":{"text":"**Rounding**\n\nHere you can set the decompression rounding time to 60 seconds, 30 seconds or 1 second\n\n**Last stop**\n\nThis specifies the depth of the last planned stop at 3 m (10 ft) or 6 m (20 ft)","textLarge":false,"imageOnRight":true,"image":{"recommendedSizes":{"width":"420","height":"280"},"mimetype":"image/png","size":10313,"hash":"b72b24022dab0e2d8b4d4af38d1de840b91ed5f5","id":"cl3ve8h4iebsp0776a964y44n","filename":"divesoft-ccr-liberty-manual-3-1-1-03.png","category":"divesoft/","type":"image"},"imageMobile":{"recommendedSizes":{"width":"750","height":"500"}}},"id":"#329","type":"component","lock":false,"position":16},{"name":"TextBlock","data":{"text":"**Ascent gas**\n\nDetermine whether you want to plan the bailout ascent using all of the set gases, the Optimal option, or only one current gas. The most widely used gas in the planner is the Current option. This setting also influences the TTS calculation during the bailout of the output. It is either planned with all available mixes (optimal) or just current (current).\n\n**Ascent SP\" \\[High] / \\[Current]**\n\nSetpoint used for ascent in dive planner and TTS calculation during the real dive.\nPlanner: when set to \"Current\", the planner uses low setpoint through the whole dive.\nReal dive: use the \"Current\" value if you want to dive with a low SP for the entire dive.\nOr simply want to see a TTS calculated for an ascent using current setpoint instead of a high SP.\n\n**Gas switch**\n\nSelect this option to set the minimum switching stop length for open circuit bailout ascent. In this stop the diver tries to use the high ppO<sub>2</sub> and the oxygen window effect when changing the mixture. The stop depth is set automatically according to the ppO<sub>2</sub> mixture. The ascent ppO<sub>2</sub> 1.6 is used. If the stop is deeper than the first decompression stop, a separate stop is created and is included in the ascent and gas consumption plan. If the depth is in the step decompression zone, the setting determines the minimum stop length. The numeric value represents the length in minutes. If a zero value is selected, the stop is not counted.\n\n**Deep stops**\n\nHere you can include extra deep stops to reduce silent bubbles. Richard Pyleâs calculation procedure is used to halve the pressure between the start of the ascent and the depth of the first decompression stop. In this option, it is necessary to consider setting the gradient factors so that the medium and slow tissues are not saturated.","textLarge":false,"imageOnRight":true,"image":{"recommendedSizes":{"width":"420","height":"280"}},"imageMobile":{"recommendedSizes":{"width":"750","height":"500"}}},"id":"#330","type":"component","lock":false,"position":17},{"name":"Divider","data":{"color":"darkGray"},"id":"#331","type":"component","lock":false,"position":18},{"name":"SectionDivider","data":{"title":"3.1.2 Planning"},"id":"#578","type":"component","lock":false,"position":19},{"name":"TextBlock","data":{"text":"### <span id=\"3-.-1-.-2-Planning\">**3.1.2 Planning**</span>\n\nIn the scheduler, choose a planning mode (CCR / Bailout).","textLarge":false,"imageOnRight":true,"image":{"recommendedSizes":{"width":"420","height":"280"}},"imageMobile":{"recommendedSizes":{"width":"750","height":"500"}}},"id":"#332","type":"component","lock":false,"position":20},{"name":"TextBlock","data":{"text":"Liberty allows the plan to be calculated on each handset separately, so the user can simultaneously plan for the entire dive on the rebreather and an emergency plan with a bailout ascent on the second handset. Just set the surface interval, target depth, and bottom time. Bottom time includes the descent time.","textLarge":false,"imageOnRight":true,"image":{"recommendedSizes":{"width":"420","height":"280"},"mimetype":"image/png","size":10811,"hash":"c46721098eb811ac6c774eb1a08df716b7f20508","id":"cl3wtnmvuesnt0776ci6poyic","filename":"divesoft-ccr-liberty-manual-3-1-2-01.png","category":"divesoft/","type":"image"},"imageMobile":{"recommendedSizes":{"width":"750","height":"500"}}},"id":"#333","type":"component","lock":false,"position":21},{"name":"TextBlock","data":{"text":"For multiple diluents, select the diluent that is going to be used on the bottom. Surface interval is the planned time spent on the surface after the dive. This value is entered to account for the residual tissue saturation from previous dives and the rate of desaturation during the surface interval.","textLarge":false,"imageOnRight":true,"image":{"recommendedSizes":{"width":"420","height":"280"},"mimetype":"image/png","size":10899,"hash":"82ef56ee9efb7cb5f48d6b328dbfefc56ce2e604","id":"cl3wto3eqeso707763nflum3z","filename":"divesoft-ccr-liberty-manual-3-1-2-02.png","category":"divesoft/","type":"image"},"imageMobile":{"recommendedSizes":{"width":"750","height":"500"}}},"id":"#334","type":"component","lock":false,"position":22},{"name":"TextBlock","data":{"text":"After entering all values, select Plan dive.\n\nIn the case of CCR dive planning, a summary of the planned dive information (surface interval, target depth, bottom time, diluent) is displayed.","textLarge":false,"imageOnRight":true,"image":{"recommendedSizes":{"width":"420","height":"280"},"mimetype":"image/png","size":11644,"hash":"dad90a4d48600861615757dd3b734d8a0cebe2dd","id":"cl3wtojntesok0776u24qwbwc","filename":"divesoft-ccr-liberty-manual-3-1-2-03.png","category":"divesoft/","type":"image"},"imageMobile":{"recommendedSizes":{"width":"750","height":"500"}}},"id":"#335","type":"component","lock":false,"position":23},{"name":"TextBlock","data":{"text":"- No deco â Time with no decompression at the bottom with the current mixture\n- TTS â âTime to surfaceâ total ascent time\n- Total â total dive time\n- CNS â accumulated exposure of CNS for planned dive\n- NoFly: â Expected time limit of flying after surfacing","textLarge":false,"imageOnRight":true,"image":{"recommendedSizes":{"width":"420","height":"280"}},"imageMobile":{"recommendedSizes":{"width":"750","height":"500"}}},"id":"#336","type":"component","lock":false,"position":24},{"name":"Spacer","data":{"spacingLarge":30,"spacingSmall":20,"backgroundColor":"#ffffff"},"id":"#552","type":"component","lock":false,"position":25},{"name":"TextBlock","data":{"text":"In addition, when planning a bailout mode, an âInsufficient gasâ warning may appear if the specified amount of gas is not sufficient to complete the open circuit ascent.\n\nPress the bottom button to go to the next page. Use the top button to return to the previous page.","textLarge":false,"imageOnRight":true,"image":{"recommendedSizes":{"width":"420","height":"280"}},"imageMobile":{"recommendedSizes":{"width":"750","height":"500"}}},"id":"#551","type":"component","lock":false,"position":26},{"name":"TextBlock","data":{"text":"The second Bailout screen â âgas managementâ shows the individual gases used and their consumption in liters (cu ft) and bars (PSI). If the pressure exceeds the limits of the cylinder, it is red. In this case, it is necessary to add another gas to the dive plan. If you do not have additional gas available, shorten the bottom time or reduce the target depth.","textLarge":false,"imageOnRight":true,"image":{"recommendedSizes":{"width":"420","height":"280"},"mimetype":"image/png","size":10120,"hash":"f0d38786e219dd3e20d18cf1efab988d3699c392","id":"cl3wtoyw6esov0776xg6iyrpx","filename":"divesoft-ccr-liberty-manual-3-1-2-04.png","category":"divesoft/","type":"image"},"imageMobile":{"recommendedSizes":{"width":"750","height":"500"}}},"id":"#337","type":"component","lock":false,"position":27},{"name":"TextBlock","data":{"text":"Avoid reducing the RMV value, as the dive plan should always be done with possible crisis situations where increased gas consumption is anticipated.\n\nIf your gas management is O
2K, press the bottom button to go to the next page.","textLarge":false,"imageOnRight":true,"image":{"recommendedSizes":{"width":"420","height":"280"},"mimetype":"image/png","size":11923,"hash":"febd4e076ae46160d66eb0e20569bf8075a85fc7","id":"cl3wtpe0iesp60776m8nyzoz3","filename":"divesoft-ccr-liberty-manual-3-1-2-05.png","category":"divesoft/","type":"image"},"imageMobile":{"recommendedSizes":{"width":"750","height":"500"}}},"id":"#338","type":"component","lock":false,"position":28},{"name":"TextBlock","data":{"text":"The left column (Dpt) shows the depths of each step, including bottom time (yellow). The second column (Time) determines the time spent at a specific depth. The third column (RunT) represents the current dive time at the moment of leaving a given depth. The forth column (Gas) determines which gas is to be used at a given depth. Gases are color-coded. ","textLarge":false,"imageOnRight":true,"image":{"recommendedSizes":{"width":"420","height":"280"},"mimetype":"image/png","size":10330,"hash":"8fe1c5330c95d982f6fb050fc95ec2a23dea8258","id":"cl3wtpsl5espk0776wql51orj","filename":"divesoft-ccr-liberty-manual-3-1-2-06.png","category":"divesoft/","type":"image"},"imageMobile":{"recommendedSizes":{"width":"750","height":"500"}}},"id":"#339","type":"component","lock":false,"position":29},{"name":"TextBlock","data":{"text":"Helium blends are labeled brown, nitrox mixtures are green (various tints by amount of oxygen), air or diluent is white, oxygen is blue.\n\nIf the plan is longer than 8 steps, the plan is continued on the next page. The summary is expressed in pink. The first number represents the total time of the ascent, and the second number represents the total time of the entire dive.","textLarge":false,"imageOnRight":true,"image":{"recommendedSizes":{"width":"420","height":"280"}},"imageMobile":{"recommendedSizes":{"width":"750","height":"500"}}},"id":"#340","type":"component","lock":false,"position":30},{"name":"Divider","data":{"color":"darkGray"},"id":"#341","type":"component","lock":false,"position":31},{"name":"SectionDivider","data":{"title":"3.2 Dive preparation"},"id":"#579","type":"component","lock":false,"position":32},{"name":"TextBlock","data":{"text":"### <span id=\"3-.-2-Dive-preparation\">**3.2 Dive preparation**</span>","textLarge":false,"imageOnRight":true,"image":{"recommendedSizes":{"width":"420","height":"280"}},"imageMobile":{"recommendedSizes":{"width":"750","height":"500"}}},"id":"#580","type":"component","lock":false,"position":33},{"name":"SectionDivider","data":{"title":"3.2.1 Replacement of CO2 sorbent"},"id":"#581","type":"component","lock":false,"position":34},{"name":"TextBlock","data":{"text":"### <span id=\"3-.-2-.-1-Replacement-of-CO2-sorbent\">**3.2.1 Replacement of CO<sub>2</sub> sorbent**</span>\n \n**Sorbent service life**\n\nContinually keep records of the extent of scrubber consumption. Set a stack time warning, and donât forget to reset the stack timer after replacing the sorbent. If ever in doubt, replace the sorbent.\n\nThe recommended scrubber filling material is Sofnolime 797 sorbent (producer: Molecular Products). The cartridge holds approximately 2.5 kg of sorbent.\n\nThe maximum safe operating period of the sorbent is 168 min, determined by a test in accordance to EN 14143:2013 (Article 6.6.2). During the test, 1.6 l/min of CO<sub>2</sub> were added to the breathing loop with a ventilation rate of 40 l/min and an exhalation temperature of 32±4 °C; the unit was submerged in 4 °C water to a depth of 40 m with a ppCO<sub>2</sub> of 5mBar (test provided by Life Support Test Facility â LSTF 0916). This is the worst case scenario, and it considers a very high level of body exertion, with oxygen consumption of 1.78 l/min.\n","textLarge":false,"imageOnRight":true,"image":{"recommendedSizes":{"width":"420","height":"280"}},"imageMobile":{"recommendedSizes":{"width":"750","height":"500"}}},"id":"#342","type":"component","lock":false,"position":35},{"name":"TextBlock","data":{"text":"The physiological limit is not ppCO<sub>2</sub> 5 mBar, but ten times higher (Knafelc, 2000). A respiratory quotient 0.9 is too high; a more realistic estimate is 0.8-0.85. Sorbent service life is longer (or safety margin is bigger) than previously stated.\n\nIn the course of the sorbentâs service life, it is allowed to remove the scrubber cartridge a maximum of two times (see section 3.5.2 CO<sub>2</sub> scrubber maintenance).\n \n**Sorbent replacement procedure**\n\nHandle the sorbent in accordance with the manufacturerâs instructions. Comply with all safety instructions and use protective gear. Take environmental protection into account when disposing of used sorbent.\n\nRemove all of the old sorbent content from the cartridge.\n\nIf you disinfect the rebreather, proceed according to section 3.5.3 Cleaning and disinfection. It is preferable to disinfect after a dive rather than waiting for a longer period.","textLarge":false,"imageOnRight":true,"image":{"recommendedSizes":{"width":"420","height":"280"}},"imageMobile":{"recommendedSizes":{"width":"750","height":"500"}}},"id":"#344","type":"component","lock":false,"position":36},{"name":"TextBlock","data":{"text":"Place the scrubber cartridge on a clean surface. Handle it with clean, thoroughly washed hands. We recommend using disposable surgical gloves. Dirtying the cartridge can contaminate the breathing circuit and cause infection. A seemingly clean surface can be contaminated with microbes, especially in tropical and subtropical conditions.","textLarge":false,"imageOnRight":true,"image":{"recommendedSizes":{"width":"420","height":"280"},"mimetype":"image/png","size":251522,"hash":"c02517ee7a53f42d3780d5fa1437d9585f6f1205","id":"cl3wtqrgvespw0776sfimbqy5","filename":"divesoft-ccr-liberty-manual-3-2-1-01.png","category":"divesoft/","type":"image"},"imageMobile":{"recommendedSizes":{"width":"750","height":"500"}}},"id":"#345","type":"component","lock":false,"position":37},{"name":"TextBlock","data":{"text":"If you cannot ensure the cleanliness of a surface, place the cartridge on a clean towel.\n\nFollow these hygienic principles when filling and handling the scrubber in any way.\n\nIf you are working outside (recommended) and there is, at the least, moderate wind, stand sideways to the wind and pour the sorbent slowly into the cartridge from a height of approximately 20-30 cm (1 ft). Allow the wind to remove the finest dust particles.\n\nIf you are working indoors, pour the sorbent into the cartridge from a minimal height. Sorbent dust is aggressive and can cause corrosion. Therefore, we do not recommend working with the scrubber inside of an automobile, for example.\n\nIn order to prevent the sorbent from falling into the central tube, place the canisterâs metal disc lid over the opening, or plug it by other suitable means. Pour sorbent into the cartridge until it is approximately one-third full. Then gently lift the cartridge, and allow it to fall three times from a height of approximately 1 cm (1/2â). Repeat this process when the cartridge is two-thirds full and again when it is completely full. The cartridge is completely full when the sorbent reaches a level between the min and max lines marked on the central tube.\n\nAfter filling, place the metal disc and spring-loaded pressure plate on top of the sorbent. Then remove the pressure plate and lid, and verify that the surface of the sorbent is levelled and that no channels have formed. Place the metal disc and spring-loaded pressure plate on top of the sorbent again; press down and secure the assembly with the retaining ring. The retaining ring must fit into the slot on the pressure plate.\n\nIf the cartridge is not filled sufficiently, a gap of less than 6 mm or less will remain between the edge of the lid and edge of the metal mesh. In such a case, add sorbent and then shake and close the cartridge according to the procedure described above.\n\nIf the cartridge is overfilled, there will be a gap greater than 17 mm between the edge of the lid and the edge of the metal mesh, and it will not be possible to insert the retaining ring without excessive force. In such a case, remove the excess sorbent with a clean teaspoon or any other suitable tool. Shake the cartridge, and close the lid again.\n\n
2Before inserting the cartridge into the scrubber canister, check to ensure that the water trap is dry. If that is not the case, remove the water trap, and dry it with a towel.\n\n**After each scrubber change, the stack timer Menu / Predive / Stack time reset must be reset**\n\nThe stack timer measures the use of the scrubber by simply counting the time spent in the dive mode. You can adjust whether stack time is calculated on the surface or not.\n\nSorbent dust damages textiles, especially polyamide and cotton fabrics. Therefore, after working with the scrubber, immediately wash the towel on which the cartridge was placed and all clothing that was exposed to sorbent dust.\n\nDo not work with sorbent in the vicinity of load-bearing straps, ropes, or even metal mountain climbing or speleological equipment. In the event of possible exposure to sorbent, ropes and load-bearing straps should be discarded immediately, as their loading capacity can deteriorate significantly.\n\n**Condition of the scrubber before submersion**\n\nThe scrubber must have sufficient absorption capacity for the planned dive.\n\nThe sorbent must contain some amount moisture so that the chemical reactions that enable the scrubber to remove CO<sub>2</sub> from the breathing mixture can take place. This means that the scrubber cannot be completely dry or frozen.\n\nIn freezing weather, stow the rebreather in a warm space prior to the dive. If you are outside with the apparatus and a delay happens, maintain the temperature of the sorbent by breathing from the apparatus.","textLarge":false,"imageOnRight":true,"image":{"recommendedSizes":{"width":"420","height":"280"}},"imageMobile":{"recommendedSizes":{"width":"750","height":"500"}}},"id":"#346","type":"component","lock":false,"position":38},{"name":"Divider","data":{"color":"darkGray"},"id":"#347","type":"component","lock":false,"position":39},{"name":"SectionDivider","data":{"title":"3.2.2 Assembling the rebreather body"},"id":"#582","type":"component","lock":false,"position":40},{"name":"TextBlock","data":{"text":"### <span id=\"3-.-2-.-2-Assembling-the-rebreather-body\">**3.2.2 Assembling the rebreather body**</span>\n\nMount the head on the CO<sub>2</sub> scrubber canister.","textLarge":false,"imageOnRight":true,"image":{"recommendedSizes":{"width":"420","height":"280"}},"imageMobile":{"recommendedSizes":{"width":"750","height":"500"}}},"id":"#348","type":"component","lock":false,"position":41},{"name":"TextBlock","data":{"text":"When mounting the head, push the scrubber canister pin into the opening on the head, and close the head.\n\nPress on the head from above so that it is fully seated. If a lot force is required to completely close the head, apply a small amount of lubricant to the O-ring on the neck of the head. You can also choose an O-ring with a smaller cross section diameter.","textLarge":false,"imageOnRight":true,"image":{"recommendedSizes":{"width":"420","height":"280"},"mimetype":"image/png","size":132334,"hash":"a8085b4ff0b53321c98fda11c12d5cc246db5b51","id":"cl3sobr7iddmg0776ktm8yy0m","filename":"divesoft-ccr-liberty-manual-1-9-01.png","category":"divesoft/","type":"image"},"imageMobile":{"recommendedSizes":{"width":"750","height":"500"}}},"id":"#349","type":"component","lock":false,"position":42},{"name":"Divider","data":{"color":"darkGray"},"id":"#350","type":"component","lock":false,"position":43},{"name":"SectionDivider","data":{"title":"3.2.3 Mounting the rebreather body"},"id":"#583","type":"component","lock":false,"position":44},{"name":"TextBlock","data":{"text":"### <span id=\"3-.-2-.-3-Mounting-the-rebreather-body\">**3.2.3 Mounting the rebreather body**</span>","textLarge":false,"imageOnRight":true,"image":{"recommendedSizes":{"width":"420","height":"280"}},"imageMobile":{"recommendedSizes":{"width":"750","height":"500"}}},"id":"#351","type":"component","lock":false,"position":45},{"name":"Image","data":{"firstImage":{"mimetype":"image/png","size":247396,"hash":"5e840dc45ec5bbf18431bbd22dc419b52e1dbd3f","id":"cl4gnp1dijpml0776jtxhs8r2","filename":"divesoft-ccr-liberty-manual-1-11-03.png","category":"divesoft/","type":"image"},"secondImage":{},"image":{"mimetype":"image/png","size":247396,"hash":"5e840dc45ec5bbf18431bbd22dc419b52e1dbd3f","id":"cl4gnp1dijpml0776jtxhs8r2","filename":"divesoft-ccr-liberty-manual-1-11-03.png","category":"divesoft/","type":"image"}},"id":"#352","type":"component","lock":false,"position":46}
2,{"name":"TextBlock","data":{"text":"**Procedure:**\n\n1. Mount the body of the apparatus on the frame so that the recesses in the lower part fit into the protrusions on the base.\n2. Lift the lever in the center of the backplate.\n3. Press the rebreather body against the backplate so that the tongue in the upper part of the backplate fits into the recess in the head of the apparatus. If necessary, forcefully press the top of the head downward.\n4. Press down on the lever in the middle of the apparatus and check whether the lock is closed.\n5. Check whether the apparatus is firmly attached.\n6. Secure the body with the securing strap.","textLarge":false,"imageOnRight":true,"image":{"recommendedSizes":{"width":"420","height":"280"}},"imageMobile":{"recommendedSizes":{"width":"750","height":"500"}}},"id":"#353","type":"component","lock":false,"position":47},{"name":"Divider","data":{"color":"darkGray"},"id":"#354","type":"component","lock":false,"position":48},{"name":"SectionDivider","data":{"title":"3.2.4 Attaching the counterlungs and hoses"},"id":"#584","type":"component","lock":false,"position":49},{"name":"TextBlock","data":{"text":"### <span id=\"3-.-2-.-4-Attaching-the-counterlungs-and-hoses\">**3.2.4 Attaching the counterlungs and hoses**</span>\n\nThe position of the counterlungs in relation to the diverâs body determines the work of breathing. Adjust the position by shifting the upper strap on the back side of the counterlung.\n\n**Procedure:**\n\n1. Attach the counterlungs using the buckles so that the T-piece bulkheads are roughly at shoulder level and the flaps with Velcro are facing the center (toward each other).\n2. Connect the manual diluent bypass valve to the lower bulkhead of the left breathing bag.\n3. Connect the overpressure valve to the lower bulkhead of the right breathing bag.\n4. Connect the manual oxygen bypass valve to the middle bulkhead of the right breathing bag.\n5. Attach the inhalation T-piece (without the partition) to the upper bulkhead of the left breathing bag.\n6. Attach the exhalation T-piece (with the partition) to the upper bulkhead of the right breathing bag.\n7. Attach the terminal elbow of the inhalation (left) corrugated hose to the opening in the center of the head.\n8. Attach the terminal elbow of the exhalation (right) corrugated hose to the opening on the edge of the head.\n9. Screw the short oxygen hose to the 9/16â elbow on the side of the head. Tighten the union \nnut firmly by hand.\n10. Route the LP hoses to the ADV and to the manual diluent bypass valve and the HP hose to the diluent pressure gauge so that they pass together over the shoulder strap from the outside to the inside of the strap.\n11. Attach the ADV to the middle bulkhead of the left counterlung.\n12. Attach the quick-release connector of the LP hose to the manual diluent bypass valve.\n13. Straighten the hoses and secure them under the Velcro flap of the left breathing bag.\n14. Route the LP hose to the manual oxygen bypass valve, and the HP hose to the oxygen pressure gauge so that they unit pass together over the shoulder strap from the outside to the inside of the strap.\n15. Attach the quick-release connector of the LP hose to the manual oxygen bypass valve.\n16. Straighten the hoses and secure them under the Velcro flap of the right breathing bag.\n17. Route the LP hose of the buoyancy control device (BCD) under the first rubber band on the corrugated inflator hose of the BCD, then under the rubber band on the left shoulder strap above the D-ring, and finally under the second rubber band on the corrugated inflator hose.\n18. Connect the quick-release connector to the inflator of the BCD.\n19. Adjust the position of the BCD inflator hose so that it is easily accessible when diving.","textLarge":false,"imageOnRight":true,"image":{"recommendedSizes":{"width":"420","height":"280"}},"imageMobile":{"recommendedSizes":{"width":"750","height":"500"}}},"id":"#355","type":"component","lock":false,"position":50},{"name":"Spacer","data":{"spacingLarge":30,"spacingSmall":20,"backgroundColor":"#ffffff"},"id":"#357","type":"component","lock":false,"position":51},{"name":"TextBlock","data":{"text":"For attaching devices to the connectors, see also\n\n- section 1.3.1 Corrugated hoses\n- section 1.3.3 Connection to the breathing bags\n- section 1.4 Inhalation bag\n- and section 1.5 Exhalation bag","textLarge":false,"imageOnRight":true,"image":{"recommendedSizes":{"width":"420","height":"280"}},"imageMobile":{"recommendedSizes":{"width":"750","height":"500"}}},"id":"#356","type":"component","lock":false,"position":52},{"name":"Divider","data":{"color":"darkGray"},"id":"#358","type":"component","lock":false,"position":53},{"name":"SectionDivider","data":{"title":"3.2.5 Tank fillings"},"id":"#585","type":"component","lock":false,"position":54},{"name":"TextBlock","data":{"text":"### <span id=\"3-.-2-.-5-Tank-filling\">**3.2.5 Cylinder fillings**</span>\n\nWhen filling the cylinders with the breathing mixture, follow the procedures and rules with which you were familiarized in a technical gas blending course (trimix blender, etc.). If you have not successfully completed such a course, leave mixture blending to a qualified person.\n\nWhen handling oxygen, follow the procedures and rules with which you were familiarized in a trimix course and, subsequently, in a CCR Liberty course. If you have not successfully completed such a course, do not handle the CCR Liberty.\n\n**3.2.5.1 Diluent**\n\nChoose a diluent that is able to flush a high oxygen mix from the breathing loop. Prepare the diluent so the partial pressure of oxygen will be 0,2 bar lower than the planned setpoint at the greatest depth of your planned dive. Partial pressure of nitrogen should not exceed 4 bar (3.2 bar is recommended).\nIn regards to oxygen compatibility and cleanliness for oxygen service of the parts working with diluent, do not exceed an oxygen concentration of 21% (± 1%) in the diluent. Minimum oxygen concentration is 5%. \nDiluent contamination should not exceed the limits given by the standard EN12021:2014. Section 6.2 when using compressed air for the unit.\n\nMake sure that the diluent was filled by a compressor with properly maintained filters. \n\nThe gas must meet the requirements of EN12021:2014\nAlternatively, you can use an personal filter. When using a compressor with a combustion engine, ensure that the exhaust gases from the engine cannot get into the compressor intake. \n\nMixtures with higher helium present more advantages for a number of reasons. But a low O2 mix on the surface in shallow depths, with a lack of breathability, significantly increases risks. \n\nAfter filling, write the mixture composition with a permanent marker on a label (piece of duct tape) and attach it to the cylinder. \n\nThe consumption of diluent depends on the dive profile, frequency, and extent of depth changes. Diluent capacity is not limited by time but by the dive profile. This should be taken into account especially when planning dives in caves. Diluent is consumed mainly during the descent. During the ascent there is a zero theoretical consumption, and any practical consumption is mainly due to mask clearing.\nBased on a practical experience, the typical diluent consumption during a simple dive to a depth of 40 m is approximately 50 to 70 bar. This usually does not increase by staying longer at the same depth. \n\nAlways keep a sufficient safety margin (at least 50 bar) to cover unplanned situations. If the pressure in the diluent cylinder is lower than 70 bar, not even a brief dive should not started. \n\nAccording to the standards to which the CCR Liberty is CE certified and designated, do not dive to depths greater than 40 m. Therefore, the CCR Liberty is CE certified to 40 m.\n\n**Oxygen**\n\nUse oxygen intended for breathing. Oxygen contamination shall not exceed the limits given by the standard EN 12021 Section 6.2 vhen using compressed air for the unit.\n\nWe recommend using oxygen with a purity of at least 99.5%.\n\nOxygen consumption for gas duration calculations is 1.78 l/min according to the EN 14143:2014. When considering the initial cylinder pressure of 200 bar and a final pressure of 50 bar in the cylinder, the oxygen supply suffices for 253 minutes. In this calculation, oxygen contained in the diluent is not considered.\n\nThese conditions correspond to high levels of physical effort during a dive. If a diver is calm during a dive, consumption significantly decreases, and the quantity of oxygen and the sorbent service life is extended. A dive plan that relies on an entire dive being a low-effort dive is inaccurate.\n\nIn any case, an oxygen cylinder filled to 200 bar is sufficient for a dive, which greatly exceeds the duration of the CO<sub>2</sub> scrubber.\n \nIf the pressure in the oxygen cylinder is lower than 70 bar, not even a brief dive should be started.\n\nAccording to the valid technical standards, filling oxygen to an operating pressure greater than 200 bars is prohibited.","textLarge":false,"imageOnRight":true,"image":{"recommendedSizes":{"width":"420","height":"280"}},"imageMobile":{"recommendedSizes":{"width":"750","height":"500"}}},"id":"#359","type":"component","lock":false,"position":55},{"name":"Divider","data":{"color":"darkGray"},"id":"#360","type":"component","lock":false,"position":56},{"name":"SectionDivider","data":{"title":"3.2.6 Battery charging"},"id":"#586","type":"component","lock":false,"position":57},{"name":"TextBlock","data":{"text":"### <span id=\"3-.-2-.-6-Battery-charging\">**3.2.6 Battery charging**</span>\n\nBefore charging the batteries, remove the jumpers from the sockets.","textLarge":false,"imageOnRight":true,"image":{"recommendedSizes":{"width":"420","height":"280"}},"imageMobile":{"recommendedSizes":{"width":"750","height":"500"}}},"id":"#361","type":"component","lock":false,"position":58},{"name":"TextBlock","data":{"text":"We recommend charging the batteries to full c
2apacity one week or less before diving. Before a brief dive (up to one hour), it is permissible to store fully charged batteries for up to one month.\n\nDo not completely discharge the batteries before charging. The service life of the batteries is extended by frequent charging.","textLarge":false,"imageOnRight":true,"image":{"recommendedSizes":{"width":"420","height":"280"},"mimetype":"image/png","size":188551,"hash":"d88ff998053f6a4f6a79a6749be714c9a1d64d5c","id":"cl3wtu44besu90776zexfy6el","filename":"divesoft-ccr-liberty-manual-3-2-6-01.png","category":"divesoft/","type":"image"},"imageMobile":{"recommendedSizes":{"width":"750","height":"500"}}},"id":"#362","type":"component","lock":false,"position":59},{"name":"TextBlock","data":{"text":"For charging the batteries, use the enclosed charger or any USB charger dimensioned to 2 A (most chargers used with vehicle power outlets are not sufficiently dimensioned). Fully discharged batteries require approximately eight hours of charging.\n\nCharging from a computerâs USB port is possible, though charging is done with a significantly lower current. The time required for charging fully discharged batteries in this manner is approximately 15 hours. Charging from a computerâs USB port can be done via an adapter connected to the external connector of the handset.\n\nIn you prepare the CCR Liberty for diving no more than one week after charging, insert the jumpers so that their pins are inserted into the connector. The rebreather will thus be switched to standby mode, and it will be possible to switch on the control unit using the handset. If the jumpers are inserted in reverse position with the pins outside; in this position, the power supply is completely disconnected, and the control unit cannot be switched on. The Liberty 2021 edition can be stored for up to half a year with the jumpers connected. During this time the batteries will discharge to about 50%.\n\nA 30 sec switch-off timeout is active during charging. The timeout is prolonged by pressing a button in editor, but not by tilting. Do not alter the settings while charging, because the unit may switch-off suddenly.","textLarge":false,"imageOnRight":true,"image":{"recommendedSizes":{"width":"420","height":"280"}},"imageMobile":{"recommendedSizes":{"width":"750","height":"500"}}},"id":"#363","type":"component","lock":false,"position":60},{"name":"Divider","data":{"color":"darkGray"},"id":"#364","type":"component","lock":false,"position":61},{"name":"SectionDivider","data":{"title":"3.2.7 Helium sensor calibration"},"id":"#587","type":"component","lock":false,"position":62},{"name":"TextBlock","data":{"text":"### <span id=\"3-.-2-.-7-Helium-sensor-calibration\">**3.2.7 Helium sensor calibration**</span>\n\nFor proper helium measurement in the loop and indirect oxygen measurement, it is necessary to calibrate the helium sensors before their first use or if the measurement values are inaccurate.\n\nBefore calibration, make sure only air and no other gas is present in the inlet chamber of the helium sensor (inside the head) and that the helium sensors are not contaminated with moisture.\n\nSelect Menu / Setup / Calibration / Calibrate He â Air\n\nThe measured speed of sound should approximately be around 0.5500 ms. Start the calibration by pressing the start button. After the sensors stabilize, press the upper âAcceptâ button again.","textLarge":false,"imageOnRight":true,"image":{"recommendedSizes":{"width":"420","height":"280"}},"imageMobile":{"recommendedSizes":{"width":"750","height":"500"}}},"id":"#365","type":"component","lock":false,"position":63},{"name":"Divider","data":{"color":"darkGray"},"id":"#366","type":"component","lock":false,"position":64},{"name":"SectionDivider","data":{"title":"3.2.8 Calibration of the oxygen sensors"},"id":"#588","type":"component","lock":false,"position":65},{"name":"TextBlock","data":{"text":"### <span id=\"3-.-2-.-8-Calibration-of-the-oxygen-sensors\">**3.2.8 Calibration of the oxygen sensors**</span>\n\nInsert the measuring probe into the inhalation opening (in the center of the head). The head can be mou
2nted on the scrubber canister, but is not required. Connect the flow limiter to the oxygen hose quick-release.","textLarge":false,"imageOnRight":true,"image":{"recommendedSizes":{"width":"420","height":"280"}},"imageMobile":{"recommendedSizes":{"width":"750","height":"500"}}},"id":"#367","type":"component","lock":false,"position":66},{"name":"Image","data":{"firstImage":{"mimetype":"image/png","size":104876,"hash":"6059043d7eb665b46a082524aa00b0fa836d7eff","id":"cl3wtwut8eswe0776pci03ujv","filename":"divesoft-ccr-liberty-manual-3-2-8-01.png","category":"divesoft/","type":"image"},"secondImage":{"mimetype":"image/png","size":87217,"hash":"7c383a0dc3753a8b09a3e033c70cdb37deebc044","id":"cl4gq10trjs290776zpt6gsqp","filename":"divesoft-ccr-liberty-manual-3-2-8-02.png","category":"divesoft/","type":"image"},"image":{"type":"image"}},"id":"#368","type":"component","lock":false,"position":67},{"name":"TextBlock","data":{"text":"The hissing sound that accompanies the flow of oxygen can barely be heard in a quiet environment. The flow becomes more apparent if one uses a moistened finger to cover the discharge aperture. Connect the sampling tube between the flow limiter and measuring probe.\n\n**Procedure:**\n\n1. Start O<sub>2</sub> sensor calibration on HS in Predive â Calibration O<sub>2</sub>\n2. Wait for mV stabilization (this could take a while)\n3. Start calibration\n4. Save\n\nDuring calibration, the status of a sensorâs service life is also determined.\n\nAt higher altitudes above sea level, the partial pressure of oxygen in the calibration mixture decreases in proportion to lower atmospheric pressure. The CCR Liberty measures atmospheric pressure and takes it into account during calibration. Therefore, do not perform any corrections at higher altitudes above sea level.","textLarge":false,"imageOnRight":true,"image":{"recommendedSizes":{"width":"420","height":"280"}},"imageMobile":{"recommendedSizes":{"width":"750","height":"500"}}},"id":"#369","type":"component","lock":false,"position":68},{"name":"Divider","data":{"color":"darkGray"},"id":"#370","type":"component","lock":false,"position":69},{"name":"SectionDivider","data":{"title":"3.2.9 Preparing the bailout cylinder"},"id":"#589","type":"component","lock":false,"position":70},{"name":"TextBlock","data":{"text":"### <span id=\"3-.-2-.-9-Preparing-the-bailout-cylinder\">**3.2.9 Preparing the bailout cylinder**</span>\n\nThe bailout apparatus must ensure a reliable return to the surface at any time during a dive.\n\nThe standard solution is to use a corresponding number of stage and decompression cylinders with mixtures according to depth, distances, and the bailout plan. For a deep diving backup, it is recommended to use a mixture rich in He, regardless of the financial costs. The mixture will probably not be used for many dives. A higher content of He results in less negative buoyancy, which makes transporting the cylinder under water more convenient.\n\nPreparation of the bailout stage cylinders is similar to that of open-circuit diving with trimix. When planning and preparing, proceed according to the rules with which you were familiarized in a trimix course.\n\nThe gas must meet the requirements of EN12021:2014\n","textLarge":false,"imageOnRight":true,"image":{"recommendedSizes":{"width":"420","height":"280"}},"imageMobile":{"recommendedSizes":{"width":"750","height":"500"}}},"id":"#371","type":"component","lock":false,"position":71},{"name":"Divider","data":{"color":"darkGray"},"id":"#372","type":"component","lock":false,"position":72},{"name":"SectionDivider","data":{"title":"3.2.10 Setting parameters"},"id":"#590","type":"component","lock":false,"position":73},{"name":"TextBlock","data":{"text":"### <span id=\"3-.-2-.-10-Setting-parameters\">**3.2.10 Setting parameters**</span>\n\nSet or check the settings of all dive parameters.\n\nFor a detailed description, see section 2.4 Setup.","textLarge":false,"imageOnRight":true,"image":{"recommendedSizes":{"width":"420","height":"280"}},"imageMobile":{"recommendedSizes":{"width":"750","height":"500"}}},"id":"#373","type":"component","lock":false,"position":74},{"name":"Divider","data":{"color":"darkGray"},"id":"#374","type":"component","lock":false,"position":75},{"name":"SectionDivider","data":{"title":"3.2.11 Directional valve check"},"id":"#591","type":"component","lock":false,"position":76},{"name":"TextBlock","data":{"text":"### <span id=\"3-.-2-.-11-Directional-valve-check\">**3.2.11 Directional valve check**</span>\n\nThe purpose of this test is to detect possible leaks in the directional valves of the dive/surface valve (DSV). This type of leakage could seriously endanger the diver. It is not possible to assemble the complete breathing loop in the wrong direction, but the diver has to be sure that this part is not missing or leaking.\n\n**Procedure:**\n\n1. Put the bayonet socket cover on both T-pieces.\n2. Cover the left (inhale) elbow.\n3. Place the mouthpiece in your mouth, open the DSV and try to inhale. Inhaling should not be possible. The left corrugated hose collapses. Exhaling should be possible.\n4. Close the DSV, and check for leakage (the corrugated hose should stay collapsed).\n5. Open the DSV, unplug the inhale elbow, and cover the right (exhale) elbow with bayonet socket cover.\n6. Inhale from the mouthpiece, and try to exhale. Inhaling should be possible.\n7. Pull the exhalation elbow to extend the corrugated hose on the right side. Check for leakage (the corrugated hose stay extended).\n\nIf some leakage occurs, change the directional valves or do not dive.","textLarge":false,"imageOnRight":true,"image":{"recommendedSizes":{"width":"420","height":"280"}},"imageMobile":{"recommendedSizes":{"width":"750","height":"500"}}},"id":"#375","type":"component","lock":false,"position":77},{"name":"Divider","data":{"color":"darkGray"},"id":"#376","type":"component","lock":false,"position":78},{"name":"SectionDivider","data":{"title":"3.2.12 Physical inspection"},"id":"#592","type":"component","lock":false,"position":79},{"name":"TextBlock","data":{"text":"### <span id=\"3-.-2-.-12-Physical-inspection\">**3.2.12 Physical inspection**</span>\n\nCheck to ensure that the CCR Liberty is complete, correctly assembled, and mechanically undamaged.\n\nIf the CCR Liberty is operated
2within an organization where someone other than the diver is responsible for the physical preparation of the apparatus, we recommend providing them a list of detailed organizational rules. An assembly checklist in editable form is prepared for download on the divesoft.com website.","textLarge":false,"imageOnRight":true,"image":{"recommendedSizes":{"width":"420","height":"280"}},"imageMobile":{"recommendedSizes":{"width":"750","height":"500"}}},"id":"#378","type":"component","lock":false,"position":80},{"name":"Divider","data":{"color":"darkGray"},"id":"#379","type":"component","lock":false,"position":81},{"name":"SectionDivider","data":{"title":"3.3 Pre-dive inspection"},"id":"#593","type":"component","lock":false,"position":82},{"name":"TextBlock","data":{"text":"### <span id=\"3-.-3-Pre---dive-inspection\">**3.3 Pre-dive inspection**</span>","textLarge":false,"imageOnRight":true,"image":{"recommendedSizes":{"width":"420","height":"280"}},"imageMobile":{"recommendedSizes":{"width":"750","height":"500"}}},"id":"#465","type":"component","lock":false,"position":83},{"name":"TextBlock","data":{"text":"The pre-dive inspection (PDI) procedure can be started in surface mode. Testing is conducted immediately before the dive with a fully assembled rebreather with the control units switched on.\n\nTo start the test, select Menu/Predive/Predive check.","textLarge":false,"imageOnRight":true,"image":{"recommendedSizes":{"width":"420","height":"280"},"mimetype":"image/png","size":8900,"hash":"2df5ef52fc3c123c6127d977aab8e59e6332132a","id":"cl3wtvnyzesvo07768elop43o","filename":"divesoft-ccr-liberty-manual-3-3-01.png","category":"divesoft/","type":"image"},"imageMobile":{"recommendedSizes":{"width":"750","height":"500"}}},"id":"#380","type":"component","lock":false,"position":84},{"name":"TextBlock","data":{"text":"The user confirms the results of the individual inspection steps:\n\nOK â test result is positive top button; press the top button to continue.\n\nFAIL â partial test failure, but the other steps of the PDI will be performed normally. To continue with the PDI, press the bottom button.\n\nABORT â press both buttons to terminate the PDI. It is also necessary to use the ABORT command when a reparable defect is detected and the full PDI must be carried out again. The ABORT command is carried out automatically if the user does not respond to the prompt within two minutes.\n\nThe results of testing are recorded in the log.\n\nDuring the test, no oxygen is added. The user is warned before the test begins. This must be confirmed for the test to take place.\n\nThe test result notifies the user if the unit is divable, but does not influence the subsequent behavior of the apparatus; in particular, it does not block the functions necessary for undertaking a dive (in accordance with the Responsibility of the CCR Liberty User set forth in the introduction). Ignoring the conclusions of the pre-dive inspection is the diverâs choice, for which he/she bears responsibility.","textLarge":false,"imageOnRight":true,"image":{"recommendedSizes":{"width":"420","height":"280"}},"imageMobile":{"recommendedSizes":{"width":"750","height":"500"}}},"id":"#381","type":"component","lock":false,"position":85},{"name":"Divider","data":{"color":"darkGray"},"id":"#382","type":"component","lock":false,"position":86},{"name":"SectionDivider","data":{"title":"3.3.1 Internal testing of the control units"},"id":"#594","type":"component","lock":false,"position":87},{"name":"TextBlock","data":{"text":"### <span id=\"3-.-3-.-1-Internal-testing-of-the-control-units\">**3.3.1 Internal testing of the control units**</span>","textLarge":false,"imageOnRight":true,"image":{"recommendedSizes":{"width":"420","height":"280"}},"imageMobile":{"recommendedSizes":{"width":"750","height":"500"}}},"id":"#467","type":"component","lock":false,"position":88},{"name":"TextBlock","data":{"text":"A communication test between the control units and the peripheral devices is automatically started at the beginning of the pre-dive inspection.\n\nTesting is automatic. Confirmation by the user is required only in the event that the test result is negative.","textLarge":false,"imageOnRight":true,"image":{"recommendedSizes":{"width":"420","height":"280"},"mimetype":"image/png","size":412273,"hash":"43e5c616cb2f0aaafff997c7725674ccb289a5fe","id":"cl3wtxzafesxh0776ptyxbc39","filename":"divesoft-ccr-liberty-manual-3-3-1-01.png","category":"divesoft/","type":"image"},"imageMobile":{"recommendedSizes":{"width":"750","height":"500"}}},"id":"#383","type":"component","lock":false,"position":89},{"name":"TextBlock","data":{"text":"If the individual elements of the system are connected correctly, a green line appears between them. If the connection has failed for some reason, or if part of the system is missing (for example, a disconnected handset), the line appears red.","textLarge":false,"imageOnRight":true,"image":{"recommendedSizes":{"width":"420","height":"280"}},"imageMobile":{"recommendedSizes":{"width":"750","height":"500"}}},"id":"#384","type":"component","lock":false,"position":90},{"name":"Divider","data":{"color":"darkGray"},"id":"#385","type":"component","lock":false,"position":91},{"name":"SectionDivider","data":{"title":"3.3.2 Pressure sensor test"},"id":"#595","type":"component","lock":false,"position":92},{"name":"TextBlock","data":{"text":"### <span id=\"3-.-3-.-2-Pressure-sensor-test\">**3.3.2 Pressure sensor test**</span>","textLarge":false,"imageOnRight":true,"image":{"recommendedSizes":{"width":"420","height":"280"}},"imageMobile":{"recommendedSizes":{"width":"750","height":"500"}}},"id":"#468","type":"component","lock":false,"position":93},{"name":"TextBlock","data":{"text":"The system will display all pressure sensors and marked them with letters C or F.\n\nC â coarse. A coarse pressure sensor that measures the pressure from the water level to a depth of 300 m.\n\nF â fine. A fine pressure sensor that measures atmospheric pressure to depths up to 10 m.","textLarge":false,"imageOnRight":true,"image":{"recommendedSizes":{"width":"420","height":"280"},"mimetype":"image/png","size":10613,"hash":"1f57735fd552ccf762ca078a45a0502aa9ad3be6","id":"cl3wtyxmaesxy0776nu6jgmk5","filename":"divesoft-ccr-liberty-manual-3-3-2-01.png","category":"divesoft/","type":"image"},"imageMobile":{"recommendedSizes":{"width":"750","height":"500"}}},"id":"#386","type":"component","lock":false,"position":94},{"name":"TextBlock","data":{"text":"The purpose of the pressure sensor test is to determine whether the pressure sensor values correspond to the actual pressure (altitude) and do not show any significant deviations from the expected pressure or from each other.","textLarge":false,"imageOnRight":true,"image":{"recommendedSizes":{"width":"420","height":"280"}},"imageMobile":{"recommendedSizes":{"width":"750","height":"500"}}},"id":"#387","type":"component","lock":false,"position":95},{"name":"Divider","data":{"color":"darkGray"},"id":"#388","type":"component","lock":false,"position":96},{"name":"SectionDivider","data":{"title":"3.3.3 Comparison of oxygen sensors and their calibration"},"id":"#596","type":"component","lock":false,"position":97},{"name":"TextBlock","data":{"text":"### <span id=\"3-.-3-.-3-Comparison-of-oxygen-sensors-and-their-calibration\">**3.3.3 Comparison of oxygen sensors and their calibration**</span>","textLarge":false,"imageOnRight":true,"image":{"recommendedSizes":{"width":"420","height":"280"}},"imageMobile":{"recommendedSizes":{"width":"750","height":"500"}}},"id":"#396","type":"component","lock":false,"position":98},{"name":"TextBlock","data":{"text":"The current values of the individual sensors are shown on the display in millivolts (ppO<sub>2</sub> values are displayed in bars) using to the most recent calibration.\n\nThe purpose of the test is to verify that the oxygen sensors do not exhibit deviant voltage values, whether they are properly calibrated, and that the calibration is not too old. ","textLarge":false,"imageOnRight":true,"image":{"recommendedSizes":{"width":"420","height":"280"},"mimetype":"image/png","size":11936,"hash":"d9b299e2154467436419a2deac851637d895db13","id":"cl3wtzs3resye0776hwjxg0ft","filename":"divesoft-ccr-liberty-manual-3-3-3-01.png","category":"divesoft/","type":"image"},"imageMobile":{"recommendedSizes":{"width":"750","height":"500"}}},"id":"#390","type":"component","lock":false,"position":99},{"name":"TextBlock","data":{"text":"During testing, keep in mind that sensors measure the actual value of ppO<sub>2</sub> in the loop. If testing is preceded by oxygen manipulation, this will be reflected in the sensor voltage.\n\nSensor check\n\n- â A sensor is Offline or reports Error.\n- â Online sensors are checked for minimum voltage; at least 5mV must be measured on air at sea level.\n- â The permitted tolerance between the largest and the smallest voltage is 5%.\n- â The calibration age must be less than the set value in the configuration.\n\nSetup / Calibration / Recomm. Days","textLarge":false,"imageOnRight":true,"image":{"recommendedSizes":{"width":"420","height":"280"}},"imageMobile":{"recommendedSizes":{"width":"750","height":"500"}}},"id":"#397","type":"component","lock":false,"position":100},{"name":"Divider","data":{"color":"darkGray"},"id":"#391","type":"component","lock":false,"position":101},{"name":"SectionDivider","data":{"title":"3.3.4 Helium-sensor test"},"id":"#597","type":"component","lock":false,"position":102},{"name":"TextBlock","data":{"text":"### <span id=\"3-.-3-.-4-Helium---sensor-test\">**3.3.4 Helium-sensor test**</span>\n\nA functionality test of the He-concentration sensors is performed. The user is informed of the ongoing test on the HS display.","textLarge":false,"imageOnRight":true,"image":{"recommendedSizes":{"width":"420","height":"280"}},"imageMobile":{"recommendedSizes":{"width":"750","height":"500"}}},"id":"#392","type":"component","lock":false,"position":103},{"name":"TextBlock","data":{"text":"The purpose of the Helium-sensor test is to detect if the sensors are calibrated or if they show normal values. The picture shows a bad or missing calibration detected during the test. The test is automatic. Confirmation by the user is required only in the event that the test result is negative.","textLarge":false,"imageOnRight":true,"image":{"recommendedSizes":{"width":"420","height":"280"},"mimetype":"image/png","size":9107,"hash":"cbac350fffd8edd7d50551c934af51dabccc72c1","id":"cl3wu08unesz30776s3jakkmx","filename":"divesoft-ccr-liberty-manual-3-3-4-01.png","category":"divesoft/","type":"image"},"imageMobile":{"recommendedSizes":{"width":"750","height":"500"}}},"id":"#393","type":"component","lock":false,"position":104},{"name":"Divider","data":{"color":"darkGray"},"id":"#394","type":"component","lock":false,"position":105},{"name":"SectionDivider","data":{"title":"3.3.5 Battery testing"},"id":"#598","type":"component","lock":false,"position":106},{"name":"TextBlock","data":{"text":"### <span id=\"3-.-3-.-5-Battery-testing\">**3.3.5 Battery testing**</span>","textLarge":false,"imageOnRight":true,"image":{"recommendedSizes":{"width":"420","height":"280"}},"imageMobile":{"recommendedSizes":{"width":"750","height":"500"}}},"id":"#399","type":"component","lock":false,"position":107}
2,{"name":"TextBlock","data":{"text":"Both batteries are stressed with an artificial load caused by an intentionally increased power consumption by the processors, connected solenoids (without using energy-efficient control), vibration motors, and the maximum brightness of the HS display. After completing the test, the status of both batteries (%) (including the estimated duration of the batteries in dive mode) are shown.","textLarge":false,"imageOnRight":true,"image":{"recommendedSizes":{"width":"420","height":"280"},"mimetype":"image/png","size":11045,"hash":"f4f218e9a7e67390b9fb41fce9757e82b2d6d775","id":"cl3wu0smceszr07762kw9wt6n","filename":"divesoft-ccr-liberty-manual-3-3-5-01.png","category":"divesoft/","type":"image"},"imageMobile":{"recommendedSizes":{"width":"750","height":"500"}}},"id":"#395","type":"component","lock":false,"position":108},{"name":"TextBlock","data":{"text":"The user then decides whether he/she considers the batteriesâ estimated duration to be sufficient for the planned dive.","textLarge":false,"imageOnRight":true,"image":{"recommendedSizes":{"width":"420","height":"280"}},"imageMobile":{"recommendedSizes":{"width":"750","height":"500"}}},"id":"#398","type":"component","lock":false,"position":109},{"name":"Divider","data":{"color":"darkGray"},"id":"#400","type":"component","lock":false,"position":110},{"name":"SectionDivider","data":{"title":"3.3.6 Solenoid testing"},"id":"#599","type":"component","lock":false,"position":111},{"name":"TextBlock","data":{"text":"### <span id=\"3-.-3-.-6-Solenoid-testing\">**3.3.6 Solenoid testing**</span>","textLarge":false,"imageOnRight":true,"image":{"recommendedSizes":{"width":"420","height":"280"}},"imageMobile":{"recommendedSizes":{"width":"750","height":"500"}}},"id":"#401","type":"component","lock":false,"position":112},{"name":"TextBlock","data":{"text":"The left solenoid is repeatedly opened three times and closed in a two-seconds interval, with a 1:1 duty cycle. The expected activity of the solenoid is shown on the HS display. The right solenoid is subsequently tested in the same manner.\n\nThe test repeats cyclically if the user does not confirm the result or if automatic termination of the PDI does not occur due to the userâs inactivity.","textLarge":false,"imageOnRight":true,"image":{"recommendedSizes":{"width":"420","height":"280"},"mimetype":"image/png","size":9088,"hash":"2106615ee0d4de7893c634f20d744932570f239f","id":"cl3wu18fqet030776xbrnpin4","filename":"divesoft-ccr-liberty-manual-3-3-6-01.png","category":"divesoft/","type":"image"},"imageMobile":{"recommendedSizes":{"width":"750","height":"500"}}},"id":"#402","type":"component","lock":false,"position":113},{"name":"Divider","data":{"color":"darkGray"},"id":"#403","type":"component","lock":false,"position":114},{"name":"SectionDivider","data":{"title":"3.3.7 HUD inspection"},"id":"#600","type":"component","lock":false,"position":115},{"name":"TextBlock","data":{"text":"### <span id=\"3-.-3-.-7-HUD-inspection\">**3.3.7 HUD inspection**</span>","textLarge":false,"imageOnRight":true,"image":{"recommendedSizes":{"width":"420","height":"280"}},"imageMobile":{"recommendedSizes":{"width":"750","height":"500"}}},"id":"#404","type":"component","lock":false,"position":116},{"name":"TextBlock","data":{"text":"The diodes light up in blue, red, and green in three steps. At the same time, the HS displays which colors should light up on the HUD. Three different color combinations are displayed three times so that each of the three colors of the RGB spectrum are tested.\n\nThe test repeats cyclically if the user does not confirm the result or if automatic termination of the PDI does not occur due to the userâs inactivity.","textLarge":false,"imageOnRight":true,"image":{"recommendedSizes":{"width":"420","height":"280"},"mimetype":"image/png","size":334500,"hash":"d695cc0c1e0d34a9648a816734b13a91ee9538d6","id":"cl3wu1nilet0i0776syxvcc75","filename":"divesoft-ccr-liberty-manual-3-3-7-01.png","category":"divesoft/","type":"image"},"imageMobile":{"recommendedSizes":{"width":"750","height":"500"}}},"id":"#405","type":"component","lock":false,"position":117}
2,{"name":"Divider","data":{"color":"darkGray"},"id":"#406","type":"component","lock":false,"position":118},{"name":"SectionDivider","data":{"title":"3.3.8 BD inspection"},"id":"#601","type":"component","lock":false,"position":119},{"name":"TextBlock","data":{"text":"### <span id=\"3-.-3-.-8-BD-inspection\">**3.3.8 BD inspection**</span>\n\nThe buddy display successively lights up green at low, medium, and high intensities, then in red at low, medium and high intensities.","textLarge":false,"imageOnRight":true,"image":{"recommendedSizes":{"width":"420","height":"280"}},"imageMobile":{"recommendedSizes":{"width":"750","height":"500"}}},"id":"#407","type":"component","lock":false,"position":120},{"name":"TextBlock","data":{"text":" A symbol with the same color is at the same time displayed on the HS; intensity is indicated by the size of the symbol.\n\nThe test repeats cyclically if the user does not confirm the result or if automatic termination of the PDI does not occur due to the userâs inactivity.","textLarge":false,"imageOnRight":true,"image":{"recommendedSizes":{"width":"420","height":"280"},"mimetype":"image/png","size":298453,"hash":"30b15cb84bca2d8bef8021c1c494628a35f5cbb7","id":"cl3wu25iwet1d07767nr21jlo","filename":"divesoft-ccr-liberty-manual-3-3-8-01.png","category":"divesoft/","type":"image"},"imageMobile":{"recommendedSizes":{"width":"750","height":"500"}}},"id":"#408","type":"component","lock":false,"position":121},{"name":"Divider","data":{"color":"darkGray"},"id":"#409","type":"component","lock":false,"position":122},{"name":"SectionDivider","data":{"title":"3.3.9 Negative pressure test"},"id":"#602","type":"component","lock":false,"position":123},{"name":"TextBlock","data":{"text":"### <span id=\"3-.-3-.-9-Negative-pressure-test\">**3.3.9 Negative pressure test**</span>\n\n","textLarge":false,"imageOnRight":true,"image":{"recommendedSizes":{"width":"420","height":"280"}},"imageMobile":{"recommendedSizes":{"width":"750","height":"500"}}},"id":"#410","type":"component","lock":false,"position":124},{"name":"TextBlock","data":{"text":"The purpose of this test is to detect possible leakage in the breathing loop, which appears when the pressure in the loop is lower the ambient pressure. The test is conducted immediately before diving, with a fully assembled rebreather.","textLarge":false,"imageOnRight":true,"image":{"recommendedSizes":{"width":"420","height":"280"},"mimetype":"image/png","size":393022,"hash":"167befe4d52fad1b2cfe35d9a9c52e956e82ba90","id":"cl3wu2mxoet2e0776gicthbzg","filename":"divesoft-ccr-liberty-manual-3-3-9-01.png","category":"divesoft/","type":"image"},"imageMobile":{"recommendedSizes":{"width":"750","height":"500"}}},"id":"#411","type":"component","lock":false,"position":125},{"name":"TextBlock","data":{"text":"**Procedure:**\n\n1. Close the diluent and oxygen cylinder valves.\n2. Open the DSV, and create sufficient negative pressure with your mouth according to the indication on the HS display. The negative pressure is indicated by a white bar graph. For sufficient leakage testing, it is advisable to develop such a negative pressure where the white bar graph will cross over the green field.\n3. Close the DSV and cease all movement of the rebreather; in particular, do not move the bags and breathing hoses. After closing the mouthpiece, place the breathing hose loosely on the device. Movement of the breathing hoses and counterlungs causes pressure changes in the loop and distorts measurement results.\n4. Wait 60 seconds; the countdown runs automatically on the display.\n5. The test can be considered successful if the pressure loss after 60 seconds is less than 10 mbar (do not count the initial pressure change, as it is caused by the change of hose length).\n\nFinal evaluation of the test and confirmation of the result are left at the userâs discretion.\n\nSee also section 3.7.2 Detection of leaks.\n\nNote: In spite of a positive result of a negative pressure test, leaks may occur during the dive. This is most often caused by a loose or punctured rubber mouthpiece.","textLarge":false,"imageOnRight":true,"image":{"recommendedSizes":{"width":"420","height":"280"}},"imageMobile":{"recommendedSizes":{"width":"750","height":"500"}}},"id":"#412","type":"component","lock":false,"position":126}
2,{"name":"Divider","data":{"color":"darkGray"},"id":"#413","type":"component","lock":false,"position":127},{"name":"SectionDivider","data":{"title":"3.3.10 Positive pressure test"},"id":"#603","type":"component","lock":false,"position":128},{"name":"TextBlock","data":{"text":"### <span id=\"3-.-3-.-10-Positive-pressure-test\">**3.3.10 Positive pressure test**</span>\n\nThe purpose of this test is to detect possible leaks in the breathing loop, which appears when the pressure in the loop is higher than the ambient pressure.","textLarge":false,"imageOnRight":true,"image":{"recommendedSizes":{"width":"420","height":"280"},"mimetype":"image/png","size":133716,"hash":"7ea7fb756422457768b96068e602817a68a42618","id":"cl46yi2hxhec00776ph35h9fy","filename":"divesoft-ccr-liberty-manual-3-3-10-01.png","category":"divesoft/","type":"image"},"imageMobile":{"recommendedSizes":{"width":"750","height":"500"}}},"id":"#414","type":"component","lock":false,"position":129},{"name":"TextBlock","data":{"text":"**Procedure:**\n\n1. Close the oxygen cylinder valve and open the diluent cylinder valve.\n2. Close the DSV, and close the overpressure valve.\n3. With the manual diluent valve, create sufficient overpressure according to the indication on the HS display. It is also possible to do this using your mouth if you want to conserve gas in the diluent cylinder. If you want to set the device straight to the higher setpoint, pressurize the loop with oxygen.\n4. Cease all movement of the rebreather; in particular, do not move the bags and breathing hoses.\n5. Wait 60 seconds; the countdown runs automatically on the display.\n6. The result is influenced by the opening of the over-pressure valve, which is set to a maximum of 35 mbar. If you notice a pressure leakage above this value, verify that it is only the over-pressure valve and that the leakage has no other source. The pressure should no longer fall below the set limit of the ovre-pressure valve.\n\nFinal evaluation of the test and confirmation of the result are left at the userâs discretion.","textLarge":false,"imageOnRight":true,"image":{"recommendedSizes":{"width":"420","height":"280"}},"imageMobile":{"recommendedSizes":{"width":"750","height":"500"}}},"id":"#415","type":"component","lock":false,"position":130},{"name":"TextBlock","data":{"text":"See also section 3.7.2 Detection of leaks\n\nAfter finding and repairing the leaks, you must repeat all the pressure tests. For this you can use Menu / Predive / Pressure tests, which skips all the sensor, battery, and solenoid test, and starts the pressure tests right away.","textLarge":false,"imageOnRight":true,"image":{"recommendedSizes":{"width":"420","height":"280"},"mimetype":"image/png","size":11457,"hash":"f6255d8dd32102a382baa03193553f9a74aadfbb","id":"cl46yizdjhedf0776x92u67xk","filename":"divesoft-ccr-liberty-manual-3-3-10-02.png","category":"divesoft/","type":"image"},"imageMobile":{"recommendedSizes":{"width":"750","height":"500"}}},"id":"#416","type":"component","lock":false,"position":131},{"name":"Divider","data":{"color":"darkGray"},"id":"#417","type":"component","lock":false,"position":132},{"name":"SectionDivider","data":{"title":"3.3.11 IP Pressure"},"id":"#604","type":"component","lock":false,"position":133},{"name":"TextBlock","data":{"text":"### <span id=\"3-.-3-.-11-IP-Pressure\">**3.3.11 IP Pressure**</span>\n\nThe last item of the pre-dive check is the intermediate pressure gas leak check. (It works only if pressure transmitters are connected).\n\n1. The screen will display the initial pressure.\n2. Open the oxygen and diluent cylinders to pressurize the intermediate and high pressure compartments.\n3. Close the cylinder valves and observe any pressure drop as the display counts down. Any pressure drop indicates a leak in the intermediate or high pressure compartment. If this occurs, detect and correct the fault before diving.\n4. Open the valves fully again.","textLarge":false,"imageOnRight":true,"image":{"recommendedSizes":{"width":"420","height":"280"}},"imageMobile":{"recommendedSizes":{"width":"750","height":"500"}}},"id":"#418","type":"component","lock":false,"position":134},{"name":"Divider","data":{"color":"darkGray"},"id":"#419","type":"component","lock":false,"position":135},{"name":"SectionDivider","data":{"title":"3.3.12 Predive checklist"},"id":"#605","type":"component","lock":false,"position":136},{"name":"TextBlock","data":{"text":"### <span id=\"3-.-3-.-12-Predive-checklist\">**3.3.12 Predive checklist**</span>\n\nUpon entering Dive Mode, the unit automatically checks the oxygen sensors and their calibration. In the case of an old calibration or a sensor deviates of more than 10%, a warning will be issued along with recommendations for re-calibration. Follow the checklist. The diver is required to personally verify all the items listed.","textLarge":false,"imageOnRight":true,"image":{"recommendedSizes":{"width":"420","height":"280"}},"imageMobile":{"recommendedSizes":{"width":"750","height":"500"}}},"id":"#420","type":"component","lock":false,"position":137},{"name":"PhotoGallery","data":{"title":"","description":"","divider":false,"images":[{"id":"
21","image":{"mimetype":"image/png","size":11409,"hash":"7c16dce318830579acebf8b66c5a9d85f5efc8bc","id":"cl4gq2874js2y0776jo4zlmcd","filename":"divesoft-ccr-liberty-manual-3-3-12-01.png","category":"divesoft/","type":"image"}},{"id":"2","image":{"mimetype":"image/png","size":9621,"hash":"2b1ef78b3719a8a6401dbcfc36374521f3a08112","id":"cl4gq36zkjs3o0776fsy1wqgv","filename":"divesoft-ccr-liberty-manual-3-3-12-02.png","category":"divesoft/","type":"image"}},{"id":"3","image":{"mimetype":"image/png","size":9546,"hash":"464cdba3513ecb149e3d162f26f613a68dd1f1b8","id":"cl4ml0xzskwsr0776k2bl1vm4","filename":"divesoft-ccr-liberty-manual-3-3-12-03.png","category":"divesoft/","type":"image"}},{"id":"4","image":{"mimetype":"image/png","size":10852,"hash":"f79618242aef29069dc1b192f2ae388c393f3961","id":"cl4ml1elxkwt00776ngivof19","filename":"divesoft-ccr-liberty-manual-3-3-12-04.png","category":"divesoft/","type":"image"}},{"id":"5","image":{"mimetype":"image/png","size":10130,"hash":"036dee34e46a9789285d7729d16c74c0003a96b2","id":"cl4pdfequlw5r07763vap9ko9","filename":"divesoft-ccr-liberty-manual-3-3-12-05.png","category":"divesoft/","type":"image"}},{"id":"6","image":{"mimetype":"image/png","size":9816,"hash":"ecaa1c6bcdf61c8f480d7735276686c4192b5edf","id":"cl4pdfvztlw5z0776rjt3fppp","filename":"divesoft-ccr-liberty-manual-3-3-12-06.png","category":"divesoft/","type":"image"}}],"activeTab":"6"},"id":"#560","type":"component","lock":false,"position":138},{"name":"Divider","data":{"color":"darkGray"},"id":"#424","type":"component","lock":false,"position":139},{"name":"SectionDivider","data":{"title":"3.3.13 Prebreathe"},"id":"#606","type":"component","lock":false,"position":140},{"name":"TextBlock","data":{"text":"### <span id=\"3-.-3-.-13-Prebreathe\">**3.3.13 Prebreathe**</span>","textLarge":false,"imageOnRight":true,"image":{"recommendedSizes":{"width":"420","height":"280"}},"imageMobile":{"recommendedSizes":{"width":"750","height":"500"}}},"id":"#561","type":"component","lock":false,"position":141},{"name":"TextBlock","data":{"text":"Pre-breathing the unit has a major impact on the safety of the dive. We strongly recommend performing a pre-breath before and in between every individual dive. Pre-breathing is not related to the start of the scrubberâs chemical reaction, but to **verify the important functions of the device before the dive, in particular, the ability of the device to maintain ppO<sub>2</sub> at the setpoint and the functionality of the sorbent.** ","textLarge":false,"imageOnRight":true,"image":{"recommendedSizes":{"width":"420","height":"280"},"mimetype":"image/png","size":8501,"hash":"9cd85732d21baf81adc8b320a89895d51b148dac","id":"cl46yk9v7hef70776qb7kiqtx","filename":"divesoft-ccr-liberty-manual-3-3-13-01.png","category":"divesoft/","type":"image"},"imageMobile":{"recommendedSizes":{"width":"750","height":"500"}}},"id":"#425","type":"component","lock":false,"position":142},{"name":"TextBlock","data":{"text":"While the first function can be easily verified by observing oxygen sensors during breathing from the unit, testing the absorber functionality should only be performed under the conditions listed below, while also listening to your bodyâs reactions. Even after a 5-minute pre-breathing from the unit, it is not guaranteed that a poorly filled or missing absorber has been detected.","textLarge":false,"imageOnRight":true,"image":{"recommendedSizes":{"width":"420","height":"280"},"mimetype":"image/png","size":8323,"hash":"4b03dd986a135f691e03fbfcc12a602f0121530c","id":"cl4pdjxkzlw750776h2e5xn3f","filename":"divesoft-ccr-liberty-manual-3-3-13-02.png","category":"divesoft/","type":"image"},"imageMobile":{"recommendedSizes":{"width":"750","height":"500"}}},"id":"#562","type":"component","lock":false,"position":143},{"name":"Spacer","data":{"spacingLarge":30,"spacingSmall":20,"backgroundColor":"#ffffff"},"id":"#558","type":"component","lock":false,"position":144},{"name":"TextBlock","data":{"text":"**Procedure:**\n\n1. Ensure that the setpoints are reached in the loop so that overinflating does not lead to excessive oxygen addition that distorts the test result.\n2. Before starting the test, select a safe place to sit during its duration to avoid injury in case of loss of consciousness.","textLarge":false,"imageOnRight":true,"image":{"recommendedSizes":{"width":"420","height":"280"}
2,"mimetype":"image/png","size":9118,"hash":"52645c1b10767458094a91d111e721494b78b09f","id":"cl46yl0ckhefs0776rtyp8tso","filename":"divesoft-ccr-liberty-manual-3-3-13-03.png","category":"divesoft/","type":"image"},"imageMobile":{"recommendedSizes":{"width":"750","height":"500"}}},"id":"#427","type":"component","lock":false,"position":145},{"name":"TextBlock","data":{"text":"3. Put the mask on your face and keep it on throughout the entire test period to prevent the intake of ambient air through the nose, thereby compromising the accuracy of the test\n4. Start breathing from the device, and start the countdown on the handset.\n5. Monitor the partial pressure on the second handset and the behavior of all oxygen sensors.\n6. Make sure you breathe comfortably, that your breathing does not stop, and that there are no feelings of breathlessness, nausea, headache, or other unusual conditions.\n7. After finishing the test with a positive result, you can start the dive.\n\n**Warning: If you are pre-breathing in temperatures below freezing, under no circumstances should you stop breathing from the unit up until full submersion.** When you are not breathing from the unit, you are running the risk of letting your scrubberâs interstitial space freeze, hindering its functionality","textLarge":false,"imageOnRight":true,"image":{"recommendedSizes":{"width":"420","height":"280"}},"imageMobile":{"recommendedSizes":{"width":"750","height":"500"}}},"id":"#428","type":"component","lock":false,"position":146},{"name":"Divider","data":{"color":"darkGray"},"id":"#429","type":"component","lock":false,"position":147},{"name":"SectionDivider","data":{"title":"3.4 Diving"},"id":"#607","type":"component","lock":false,"position":148},{"name":"TextBlock","data":{"text":"### <span id=\"3-.-4-Diving\">**3.4 Diving**</span>","textLarge":false,"imageOnRight":true,"image":{"recommendedSizes":{"width":"420","height":"280"}},"imageMobile":{"recommendedSizes":{"width":"750","height":"500"}}},"id":"#609","type":"component","lock":false,"position":149},{"name":"SectionDivider","data":{"title":"3.4.1 Breathing high oxygen content gases"},"id":"#608","type":"component","lock":false,"position":150},{"name":"TextBlock","data":{"text":"### <span id=\"3-.-4-.-1-Breathing-high-oxygen-content-gases\">**3.4.1 Breathing high oxygen content gases**</span>\n\nThe mixture in the CCR Liberty circuit usually contains oxygen at a much higher partial pressure compare to the air we breathe on the surface.\n\n**Acute (CNS) oxygen poisoning**\n\nExposure to high oxygen partial pressure may, under certain circumstances, cause acute (CNS) oxygen poisoning. This can potentionally cause the affected person to drown.\n\nThe so called âoxygen clockâ is a percentage of consumption of CNS toxicity limit. Limit the maximum partial pressure and total exposure so that acute oxygen toxicity cannot occur, according to the following NOAA table.","textLarge":false,"imageOnRight":true,"image":{"recommendedSizes":{"width":"420","height":"280"}},"imageMobile":{"recommendedSizes":{"width":"750","height":"500"}}},"id":"#430","type":"component","lock":false,"position":151},{"name":"Image","data":{"firstImage":{"mimetype":"image/png","size":63964,"hash":"ee4a7322a8faf2997de324da37e8ed36aaf6c9cf","id":"cl6j58e6r0np30776s5w6ebw7","filename":"divesoft-ccr-liberty-manual-3-4-1-01.png","category":"divesoft/","type":"image"},"secondImage":{},"image":{"type":"image"}},"id":"#566","type":"component","lock":false,"position":152},{"name":"TextBlock","data":{"text":"","textLarge":false,"imageOnRight":true,"image":{"recommendedSizes":{"width":"420","height":"280"}},"imageMobile":{"recommendedSizes":{"width":"750","height":"500"}}},"id":"#565","type":"component","lock":false,"position":153},{"name":"TextBlock","data":{"text":"**Whole body oxygen toxicity**\n\nLong term exposure to oxygen partial pressure higher than 0.5 bar, common when using the CCR Liberty, leads to whole body (or pulmonary) oxygen poisoning. At exposures common to amateur technical diving, whole body toxicity symptoms are not significant. During rebreather diving, however, the diver is exposed to a relatively high partial pressure of oxygen throughout the dive, unlike with open circuit. Exceeding the whole body toxicity threshold is extremely dangerous.\n\nFor very long dives or a series of rebreather dives it is necessary to calculate with long-term exposure limits and to limit the overall exposure.\n\nThe main symptom of chronic toxicity is a temporary reduction in vital lung capacity. Another symptom may be nearsightedness (hyperoxic myopia). Symptoms may persist for several months.\n\nWhen ppO<sub>2</sub> ⥠1.4 bar then the CNS toxicity limit is always shorter than the pulmonary toxicity limit.\n\nFor calculations related to chronic toxicity, use the REPEX method that you learned from your nitrox diving course. The CCR Liberty does not perform calculations associated with chronic oxygen toxicity.","textLarge":false,"imageOnRight":true,"image":{"recommendedSizes":{"width":"420","height":"280"}},"imageMobile":{"recommendedSizes":{"width":"750","height":"500"}}},"id":"#432","type":"component","lock":false,"position":154},{"name":"Divider","data":{"color":"darkGray"},"id":"#433","type":"component","lock":false,"position":155},{"name":"SectionDivider","data":{"title":"3.4.2 Putting on the apparatus"},"id":"#610","type":"component","lock":false,"position":156},{"name":"TextBlock","data":{"text":"### <span id=\"3-.-4-.-2-Putting-on-the-apparatus\">**3.4.2 Putting on the apparatus**</span>\n\nAfter the pre-dive inspection, set the CCR Liberty on its stand on a hard surface â on the ground, a bench or table, or in a vehicleâs cargo space. Properly secure the rebreather so that it cannot fall, for example, by having a partner hold it.\n\n**Procedure:**\n\n01. Flip the breathing bags and corrugated hoses with the DSV to the opposite side of the rebreatherâs body.\n02. Position yourself under the shoulder straps. 101\n03. Put on the shoulder straps, ideally with both arms at the same time.\n04. Stand up on both feet. Due to the weight of the CCR Liberty, avoid rotating your spine, which could lead to injury. Before you stand up, carefully assume a kneeling position, and then stand up.\n05. Take the crotch strap up between your legs and pass the belt buckle through the eye of the crotch strap.\n06. Gently tighten the belt and fasten the belt buckle.\n07. Flip the breathing bags and corrugated hoses with the DSV to the front.\n08. Attach the breathing bags to the crotch strap V-straps with the buckles.\n09. Make sure that all of the straps are adequately tightened and are not twisted.\n10. Secure the handsets to your wrists. Ensure that the HS cables are wrapped around your \narms.\n11. Ensure that the HUD is attached to the DSV and its cable is wrapped around the corrugated hose.\n12. Check the accessibility of the BCD inflator.","textLarge":false,"imageOnRight":true,"image":{"recommendedSizes":{"width":"420","height":"280"}},"imageMobile":{"recommendedSizes":{"width":"750","height":"500"}}},"id":"#434","type":"component","lock":false,"position":157},{"name":"Divider","data":{"color":"darkGray"},"id":"#458","type":"component","lock":false,"position":158},{"name":"SectionDivider","data":{"title":"3.4.3 Using the DSV"},"id":"#611","type":"component","lock":false,"position":159},{"name":"TextBlock","data":{"text":"### <span id=\"3-.-4-.-3-Using-the-DSV\">**3.4.3 Using the DSV**</span>\n\nThe DSV must be closed at all times when it is not in your mouth. Close it before taking it out of your mouth; open it after putting it in your mouth, and clear the DSV before inhaling.\n\nOpening the DSV when it is not in your mouth will cause an immediate loss of buoyancy and could possibly flood the breathing loop.","textLarge":false,"imageOnRight":false,"image":{"recommendedSizes":{"width":"420","height":"280"}},"imageMobile":{"recommendedSizes":{"width":"750","height":"500"}}},"id":"#457","type":"component","lock":false,"position":160},{"name":"Divider","data":{"color":"darkGray"},"id":"#463","type":"component","lock":false,"position":161},{"name":"SectionDivider","data":{"title":"3.4.4 Monitoring of devices"},"id":"#612","type":"component","lock":false,"position":162},{"name":"TextBlock","data":{"text":"### <span id=\"3-.-4-.-4-Monitoring-of-devices\">**3.4.4 Monitoring of devices**</span>\n\n**Partial pressure of oxygen**\n\nYou must know the concentration of oxygen (ppO<sub>2</sub>) in the breathing loop at all times. Learn to use the HUD for continuous monitoring as it allows you to concentrate on other tasks.","textLarge":false,"imageOnRight":true,"image":{"recommendedSizes":{"width":"420","height":"280"},"mimetype":"image/png","size":78961,"hash":"33957b4de0a8fafa1dc92a074a00eea790c64bff","id":"cl4f9icvcjazw0776s28m14ul","filename":"divesoft-ccr-liberty-manual-3-4-4-01.png","category":"divesoft/","type":"image"},"imageMobile":{"recommendedSizes":{"width":"750","height":"500"}}},"id":"#459","type":"component","lock":false,"position":163}
2,{"name":"TextBlock","data":{"text":"**Always know your ppO<sub>2</sub>!**\n\nCheck the partial pressure of oxygen on the handset display regularly as well. If the values from various sensors differ, check whether any of the sensors is coming to the end of its service life.\n\nPay extra attention to the ppO<sub>2</sub> reading when changing depth significantly.","textLarge":false,"imageOnRight":true,"image":{"recommendedSizes":{"width":"420","height":"280"},"mimetype":"image/png","size":348491,"hash":"f2c030e839adbb4fdbd7cad9d7120c04cf9270b4","id":"cl4f9iqt0jb070776gpmefth5","filename":"divesoft-ccr-liberty-manual-3-4-4-02.png","category":"divesoft/","type":"image"},"imageMobile":{"recommendedSizes":{"width":"750","height":"500"}}},"id":"#472","type":"component","lock":false,"position":164},{"name":"TextBlock","data":{"text":"Do not rely solely on the alarm indicating reduced partial pressure of oxygen.\n\nReduced partial pressure of oxygen is also signaled on the buddy display. Familiarize your diving partners with the BD signals so that they will be able to recognize in time that you need help.\n\nFor monitoring ppO<sub>2</sub>, it is not enough to monitor the average value of all sensors, which is highlighted by a larger font. All sensors must be monitored, either on the main display of the handset or on the screen containing all the sensors. In case one doubtâs the displayed measurement of one or more sensors, compare the indirect oxygen measurement values with helium sensors (only if the helium fraction in the diluent is greater than 20% and helium measuring is enabled in the settings). These values can be found on the sensor voltage screen.\n\nAnother option is a diluent flush (correctly taught in the CCR Liberty Diver course) after which you compare the result with the value in the lower left corner on the sensor voltage screen. This gives the ppO<sub>2</sub> diluent at the current depth. The sensor, which after a diluent flush corresponds to the displayed value, can be considered valid. Pay attention if you are using a hypoxic diluent at a low depth.\n\nThe system can automatically disable one or two sensors. Always use your common sense, and make sure the discarded sensors are really the faulty ones and not the other way around.\n\n**Oxygen and diluent pressure**\n\nWe recommend checking the pressure of oxygen and diluent approximately once every five minutes.\n\nCompared to an open-circuit apparatus, the oxygen and diluent cylinders have a small volume. Even a minor leak can cause rapid loss of pressure. Therefore, it is necessary to check the oxygen and diluent pressure gauges (SPGs) more frequently than when diving with an open circuit.","textLarge":false,"imageOnRight":true,"image":{"recommendedSizes":{"width":"420","height":"280"}},"imageMobile":{"recommendedSizes":{"width":"750","height":"500"}}},"id":"#473","type":"component","lock":false,"position":165},{"name":"Divider","data":{"color":"darkGray"},"id":"#475","type":"component","lock":false,"position":166},{"name":"SectionDivider","data":{"title":"3.4.5 Switching to CCR mode"},"id":"#613","type":"component","lock":false,"position":167},{"name":"TextBlock","data":{"text":"### <span id=\"3-.-4-.-5-Switching-to-CCR-mode\">**3.4.5 Switching to CCR mode**</span>\n\nIn surface mode, pull up the menu and switch to CCR mode.\n\nPerform an inspection according to the displayed checklist.","textLarge":false,"imageOnRight":true,"image":{"recommendedSizes":{"width":"420","height":"280"}},"imageMobile":{"recommendedSizes":{"width":"750","height":"500"}}},"id":"#474","type":"component","lock":false,"position":168},{"name":"Divider","data":{"color":"darkGray"},"id":"#477","type":"component","lock":false,"position":169},{"name":"SectionDivider","data":{"title":"3.4.6 Water entry"},"id":"#614","type":"component","lock":false,"position":170},{"name":"TextBlock","data":{"text":"### <span id=\"3-.-4-.-6-Water-entry\">**3.4.6 Water entry**</span>\n\nDo not enter the water without having performed a pre-dive inspection according to chapter 3.3 Pre-dive inspection!\n\nWe recommend breathing from the rebreather for at least three minutes right before entering the water in order to make certain that the scrubber and the rest of the apparatus are working properly.\n\nIn freezing weather, do not allow the scrubber to cool down after transferring the rebreather from a warm environment. Limit the rebreatherâs exposure to freezing air. If necessary, keep the sorbent warm by breathing from the rebreather.\n\nWe recommend gradually entering the water and submerge the rebreather slowly.\n\nIf it is necessary to jump into the water, use the âgiant strideâ
2 method, whereby your legs and buttocks impact the water first, thus protecting the breathing bags and corrugated hoses from direct impact. When entering the water in this manner, have the DSV in your mouth; have it closed at the moment of entry. Sudden entry into the water must be supervised by a person qualified to provide assistance in the event that problems arise.\n\nPerform a bubble check after entering the water. Due to the small volume of the oxygen and diluent cylinders, minor leaks in the high-pressure and low-pressure parts, can lead to a rapid decline of pressure in the cylinders.","textLarge":false,"imageOnRight":true,"image":{"recommendedSizes":{"width":"420","height":"280"}},"imageMobile":{"recommendedSizes":{"width":"750","height":"500"}}},"id":"#478","type":"component","lock":false,"position":171},{"name":"Divider","data":{"color":"darkGray"},"id":"#476","type":"component","lock":false,"position":172},{"name":"SectionDivider","data":{"title":"3.4.7 Submersion"},"id":"#615","type":"component","lock":false,"position":173},{"name":"TextBlock","data":{"text":"### <span id=\"3-.-4-.-7-Submersion\">**3.4.7 Submersion**</span>\n\nDuring submersion, use the compensator (BCD) to control buoyancy.\n\nChoose an appropriate amount of ballast with respect to any possible change in weight during a dive. Do not overload yourself to facilitate submersion. Unlike in open-circuit diving, weight reduction due to consumption of gases is minimal. The possible use of the open-circuit bailout apparatus has a more significant impact on weight reduction. Determining of the correct amount of ballast is one of the skills that you will learn in the CCR Liberty course.","textLarge":false,"imageOnRight":true,"image":{"recommendedSizes":{"width":"420","height":"280"}},"imageMobile":{"recommendedSizes":{"width":"750","height":"500"}}},"id":"#479","type":"component","lock":false,"position":174},{"name":"Divider","data":{"color":"darkGray"},"id":"#483","type":"component","lock":false,"position":175},{"name":"SectionDivider","data":{"title":"3.4.8 In-water check"},"id":"#616","type":"component","lock":false,"position":176},{"name":"TextBlock","data":{"text":"### <span id=\"3-.-4-.-8-In---water-check\">**3.4.8 In-water check**</span>\n\nVerify the ppO<sub>2</sub> control system and adjust buoyancy.\n\nPerform a bubble check with your diving partner. Scan all parts of the breathing loop in the direction of the gas flow. Rotate horizontally using the âhelicopter turnâ.\n\nCheck your bailout source. Take a few breaths from the bailout bottle to see if the regulator is easily and quickly available and functional. Check the pressure in the bailout cylinder.","textLarge":false,"imageOnRight":true,"image":{"recommendedSizes":{"width":"420","height":"280"}},"imageMobile":{"recommendedSizes":{"width":"750","height":"500"}}},"id":"#484","type":"component","lock":false,"position":177},{"name":"Divider","data":{"color":"darkGray"},"id":"#482","type":"component","lock":false,"position":178},{"name":"SectionDivider","data":{"title":"3.4.9 Descent"},"id":"#617","type":"component","lock":false,"position":179},{"name":"TextBlock","data":{"text":"### <span id=\"3-.-4-.-9-Descent\">**3.4.9 Descent**</span>\n\nDuring the descent, the ADV adds diluent to the breathing loop; you can also add diluent manually. Diluent is added to the inhalation bag. During a rapid descent, the mixture delivered to the DSV is practically identical to the diluent.\n\nIf you use diluent with a low oxygen content (e.g. when starting a descent to a great depth), it is necessary to significantly limit the descent rate. Continue this until you reach a depth where the ppO<sub>2</sub> in the diluent exceeds 0.2 bar. It is also possible to isolate the ADV and administer the diluent manually for maximum control over the injected hypoxic diluent.\n\nDo not descend rapidly in order to reach the depth at which the mixture is breathable. Low partial pressure of oxygen in the loop leads to a significantly faster loss of consciousness than if you descend while holding your breath. Do not take this risk.\n\nUpon completion of the descent, it is possible to isolate the ADV to accurately maintain the optimum loop volume.","textLarge":false,"imageOnRight":true,"image":{"recommendedSizes":{"width":"420","height":"280"}},"imageMobile":{"recommendedSizes":{"width":"750","height":"500"}}},"id":"#485","type":"component","lock":false,"position":180},{"name":"Divider","data":{"color":"darkGray"},"id":"#481","type":"component","lock":false,"position":181},{"name":"SectionDivider","data":{"title":"3.4.10 Controlling buoyancy and trim"},"id":"#618","type":"component","lock":false,"position":182},{"name":"TextBlock","data":{"text":"### <span id=\"3-.-4-.-10-Controlling-buoyancy-and-trim\">**3.4.10 Controlling buoyancy and trim**</span>\n\nWhen diving with a rebreather, buoyancy cannot be controlled by breathing as in open-circuit diving. Since you are breathing within a closed loop, there is no effect on the overall buoyancy.\n\n
2Buoyancy corrections, however minor, is controlled with the compensator.\n\nFor a very small, increase of buoyancy temporarily (e.g. when swimming over an obstacle), you can add a small amount of diluent into the breathing loop instead of using the compensator. Though this method is convenient, it also leads to a greater consumption of oxygen and diluent. Remember: swimming around an obstacle is better than swimming over it.\n\nKeep balance corrections to a minimum by using other sources of buoyancy, such as a dry suit. The increased difficulty of controlling several points of buoyancy can overload the diver with tasks.\n\nThe optimum trim of the diver is horizontal, even when descending and ascending. During the course on diving with the CCR Liberty, you will find the optimum ballast position. Do not use a weight belt.\n\nWhen training to achieve the correct balance and trim, try to remain motionless and not change depth or body position for several tens of seconds.\n\nA buouancy backup system is always needed when diving. For example, this can be a dry suit, disposable ballast, a lift bag.","textLarge":false,"imageOnRight":true,"image":{"recommendedSizes":{"width":"420","height":"280"}},"imageMobile":{"recommendedSizes":{"width":"750","height":"500"}}},"id":"#486","type":"component","lock":false,"position":183},{"name":"Divider","data":{"color":"darkGray"},"id":"#435","type":"component","lock":false,"position":184},{"name":"SectionDivider","data":{"title":"3.4.11 Mask clearing"},"id":"#619","type":"component","lock":false,"position":185},{"name":"TextBlock","data":{"text":"### <span id=\"3-.-4-.-11-Mask-clearing\">**3.4.11 Mask clearing**</span>\n\nWhen diving with a rebreather, a significant portion of the mixture consumed during a dive can be lost when clearing the mask. Therefore, keep mask clearing to a minimum.","textLarge":false,"imageOnRight":true,"image":{"recommendedSizes":{"width":"420","height":"280"}},"imageMobile":{"recommendedSizes":{"width":"750","height":"500"}}},"id":"#487","type":"component","lock":false,"position":186},{"name":"Divider","data":{"color":"darkGray"},"id":"#491","type":"component","lock":false,"position":187},{"name":"SectionDivider","data":{"title":"3.4.12 Increased physical exertion"},"id":"#620","type":"component","lock":false,"position":188},{"name":"TextBlock","data":{"text":"### <span id=\"3-.-4-.-12-Increased-physical-exertion\">**3.4.12 Increased physical exertion**</span>\n\nThe CCR Liberty adds oxygen to the breathing loop as needed. Unlike with some mechanical rebreathers, increased physical exertion does not lead to a reduction of the partial pressure of oxygen.\n\nIn the case of longer physical exertion, check the pressure in the oxygen cylinder frequently.\n\nTake increased physical exertion into account for your decompression planning.\n\nIncreased effort also causes greater CO<sub>2</sub> production. In addition to shortening the life of the scrubber, increased CO<sub>2</sub> production (along with reduced ventilation due to gas density) has a significant effect on the increase in arterial CO<sub>2</sub>. This phenomenon causes a greater susceptibility to oxygen toxicity and nitrogen narcosis. There is also the risk of acute hypercapnia. Avoid increased strain at depth.","textLarge":false,"imageOnRight":true,"image":{"recommendedSizes":{"width":"420","height":"280"}},"imageMobile":{"recommendedSizes":{"width":"750","height":"500"}}},"id":"#492","type":"component","lock":false,"position":189},{"name":"Divider","data":{"color":"darkGray"},"id":"#490","type":"component","lock":false,"position":190},{"name":"SectionDivider","data":{"title":"3.4.13 Ascent"},"id":"#621","type":"component","lock":false,"position":191},{"name":"TextBlock","data":{"text":"### <span id=\"3-.-4-.-13-Ascent\">**3.4.13 Ascent**</span>\n\nUnder normal conditions (i.e. when ascending at a rate less than 15 m/min., with a minimum setpoint 0.8 bar) and a normal functioning apparatus, a decline in oxygen partial pressure (ppO<sub>2</sub>) below the limit of 0.16 bar does not occur.\n\nIf an inadvertent rapid ascent occurs in shallow depths, pay great attention to the ppO<sub>2</sub>. It is possible that a short-term decline will happen, but this will be automatically corrected with two to three inhalations.\n\nBefore starting an ascent, check to ensure that the oxygen cylinder valve is fully open.\n\nDuring the ascent, exp
2ansion of the breathing mixture in the circuit occurs due to the reduction of ambient pressure. It is necessary to expel the excess breathing mixture. The overpressure valve on the exhalation (right) counterlung is used for this purpose. Open the overpressure valve completely. Some divers consider it more convenient to expel excess breathing mixture via the nose through the mask. Do not expel excess gas via the mouth as doing so increases the risk of water leaking into the breathing circuit via the mouthpiece.","textLarge":false,"imageOnRight":true,"image":{"recommendedSizes":{"width":"420","height":"280"}},"imageMobile":{"recommendedSizes":{"width":"750","height":"500"}}},"id":"#493","type":"component","lock":false,"position":192},{"name":"Divider","data":{"color":"darkGray"},"id":"#489","type":"component","lock":false,"position":193},{"name":"SectionDivider","data":{"title":"3.5 Post-dive procedures"},"id":"#622","type":"component","lock":false,"position":194},{"name":"TextBlock","data":{"text":"### <span id=\"3-.-5-Post---dive-procedures\">**3.5 Post-dive procedures**</span>","textLarge":false,"imageOnRight":true,"image":{"recommendedSizes":{"width":"420","height":"280"}},"imageMobile":{"recommendedSizes":{"width":"750","height":"500"}}},"id":"#624","type":"component","lock":false,"position":195},{"name":"SectionDivider","data":{"title":"3.5.1 Immediately after surfacing"},"id":"#623","type":"component","lock":false,"position":196},{"name":"TextBlock","data":{"text":"### <span id=\"3-.-5-.-1-Immediately-after-surfacing\">**3.5.1 Immediately after surfacing**</span>\n\nClose the DSV, put the rebreather in a suitable place, close the cylinder valves and switch off the control units.\n\nIf a stable, firm, and level surface is available, set the rebreather up on its stand and take measures to prevent it from falling.\n\nIf you are in the field where it is not possible to place the rebreather on its stand, lay it down.\n\nWhen handling the rebreather, focus particular attention on protecting the corrugated hoses against damage.\n\nAs a general rule, it is necessary to dry out the water trap after every dive or at least at the end of the diving day. Detach the head, remove the scrubber cartridge, remove the water trap, and dry it with a paper towel. Use another paper towel, to dry the exterior surface of the cartridge.\n\nThe head should be left to dry to ensure proper functionality of the oxygen and helium sensors. Helium sensors are sensitive to moisture and condensation. Since moisture can condense directly inside the sensor, it is vital to dry out your head properly after diving.\n\nThis is important to ensure a long lifetime and functionality of your sensors.\n\nIn areas or periods with increased humidity, we strongly recommend using the DIVESOFT Head drying fan.","textLarge":false,"imageOnRight":true,"image":{"recommendedSizes":{"width":"420","height":"280"}},"imageMobile":{"recommendedSizes":{"width":"750","height":"500"}}},"id":"#494","type":"component","lock":false,"position":197},{"name":"Divider","data":{"color":"darkGray"},"id":"#488","type":"component","lock":false,"position":198},{"name":"SectionDivider","data":{"title":"3.5.2 CO2 scrubber maintenance"},"id":"#625","type":"component","lock":false,"position":199},{"name":"TextBlock","data":{"text":"### <span id=\"3-.-5-.-2-CO2-scrubber-maintenance\">**3.5.2 CO<sub>2</sub> scrubber maintenance**</span>\n\nIf the sorbent capacity is sufficient (with reserve for the next planned dive and not disinfecting the rebreather until the next dive), it is possible to reinsert the scrubber cartridge into the canister and leave it in the rebreather. You can leave the scrubber canister opened for a maximum of 24 hours if stored in a dry place. Mount the dry head and close the breathing loop openings for longer storage. We recommend using the âDIVESOFT scrubber cover with stickersâ. It is advisable to write the date of the first filling and the times of the individual dives on which the scrubber was used. Change the label after replacing the sorbent. Do not store used and sealed scrubber for more than 30 days after its first use.","textLarge":false,"imageOnRight":true,"image":{"recommendedSizes":{"width":"420","height":"280"}},"imageMobile":{"recommendedSizes":{"width":"750","height":"500"}}},"id":"#495","type":"component","lock":false,"position":200},{"name":"Divider","data":{"color":"darkGray"},"id":"#480","type":"component","lock":false,"position":201},{"name":"SectionDivider","data":{"title":"3.5.3 Cleaning and disinfection"},"id":"#626","type":"component","lock":false,"position":202},{"name":"TextBlock","data":{"text":"### <span id=\"3-.-5-.-3-Cleaning-and-disinfection\">**3.5.3 Cleaning and disinfection**</span>\n\nWhen in use, the rebreatherâs breathing loop is colonized by microorganisms from the diverâs respiratory tract and from the external environment. The purpose of regular cleaning and disinfection is to prevent the multiplication of these microbes to an extent that would pose a hazard to the user and to prevent the transmission of infection between various users.\n\nNo more than a week may pass from the first dive after disinfection until the next disinfection if the CCR Liberty is stored in a cool place. When storing the rebreather at a temperature higher than 25 °C, this interval decreases to four days; the weekly interval can be maintained only for the scrubber cartridge. It does not matter how many dives you undertake during the stated period.\n\nDisinfection is always necessary before changing users of the CCR Liberty. Never lend or borrow a rebreather that has not been disinfected! Transmission of infection can happen with a single inhalation. An infected user will not necessarily have any symptoms of infection.\n\nBegin cleaning by rinsing the assembled rebreather with clean fresh water. Disassemble the rebreather into its individual parts.\n\n**Procedure:**\n\n1. remove the ballast.\n2. unscrew and detach the oxygen and diluent cylinders, insert watertight stoppers in the regulator inlets.\n3. remove the HUD from the DSV.\n4. remove the breathing bags with corrugated hoses from the head.\n5. remove the ADV, manual valves, and overpressure valve from the breathing bags.\n6. detach the breathing bags from the harness.\n7. remove the head with the attached handsets and HUD.\n8. remove the CO<sub>2</sub> scrubber from the cartridge and dispose of it safely.\n9. remove the scrubber canister from the backplate, and remove the water trap.\n\nPut the head with the control units in a clean, cool, and dry place.\n\nPrepare the antiseptic solution in a suitable container, free of mechanical and chemical impurities. For example, a bathtub, mortar tub, or large Tupperware container is suitable for disinfection.\n\nFor ordinary disinfection, use a 0.5% concentrated Divesoft antiseptic. Follow the instructions when working with the antiseptic agent.\n\nRinse with clean fresh water and place the tube, water trap, corrugated hose assembly with an open DSV, breathing bags, and CO<sub>2</sub> filter in the tub. Manipulate the corrugated hose assembly and the DSV to expel air so that the antiseptic solution fills the entire space (this necessary skill is taught in the CCR Liberty training course). Completely fill the breathing bags with the antiseptic solution.\n\n
2If you notice mold growth, it is necessary to perform a thorough disinfection and surface cleaning. Most surfaces can be wiped with an antiseptic soaked rag. Use a bottle or tube brush to clean the inner surfaces of the corrugated hoses.\n\nLeave the parts in the antiseptic solution for one hour. Remove the parts when complete and rinse with clean fresh water, allowing them to dry afterwards. Do not dry the parts in direct sunlight.\n\nWhen more intensive disinfection is required, use a more concentrated solution (maximum 2%) or leave the parts in the antiseptic solution for a longer time (maximum four hours).\n\nInstead of Divesoft disinfection, one can use a different antiseptic agent based with quaternary ammonium salts that is compatible with the materials from which the CCR Liberty is made. The CCR Libertyâs manufacturer does not guarantee the compatibility of antiseptic agents other than Divesoft disinfectant. In any case do not use chlorine-based agents.\n\nIn normal circumstances, the head, ADV, manual bypass valves, and overpressure valve do not need to be disinfected.\n\nIf a more thorough disinfection is required, the oxygen sensors can be removed from the head, and the remaining parts can be washed with antiseptic solution. The ADV, manual bypass valves, and overpressure valve can be disinfected by submerging them in the antiseptic solution.\n\nThe antiseptic solution is highly toxic to aquatic organisms. Dispose of it in an environmentally friendly manner.","textLarge":false,"imageOnRight":true,"image":{"recommendedSizes":{"width":"420","height":"280"}},"imageMobile":{"recommendedSizes":{"width":"750","height":"500"}}},"id":"#501","type":"component","lock":false,"position":203},{"name":"Divider","data":{"color":"darkGray"},"id":"#500","type":"component","lock":false,"position":204},{"name":"SectionDivider","data":{"title":"3.5.4 Battery care"},"id":"#627","type":"component","lock":false,"position":205},{"name":"TextBlock","data":{"text":"### <span id=\"3-.-5-.-4-Battery-care\">**3.5.4 Battery care**</span>\n\nPrevent complete discharging of the batteries. If possible, charge the batteries after each day of diving.","textLarge":false,"imageOnRight":true,"image":{"recommendedSizes":{"width":"420","height":"280"}},"imageMobile":{"recommendedSizes":{"width":"750","height":"500"}}},"id":"#502","type":"component","lock":false,"position":206},{"name":"Divider","data":{"color":"darkGray"},"id":"#499","type":"component","lock":false,"position":207},{"name":"SectionDivider","data":{"title":"3.5.5 Dive log download"},"id":"#628","type":"component","lock":false,"position":208},{"name":"TextBlock","data":{"text":"### <span id=\"3-.-5-.-5-Dive-log-download\">**3.5.5 Dive log download**</span>","textLarge":false,"imageOnRight":true,"image":{"recommendedSizes":{"width":"420","height":"280"}},"imageMobile":{"recommendedSizes":{"width":"750","height":"500"}}},"id":"#549","type":"component","lock":false,"position":209},{"name":"TextBlock","data":{"text":"After disconnecting the handset and attaching a multipurpose USB connector to the handset connector on the head (without the connected handset), the CCR Libertyâs dive-record memory is accessible via the USB interface in mass storage mode. This means that for the computer to which the USB cable is connected, it appears as an ordinary flash drive with a read-only restriction. Records of individual dives are stored as separate files in the divelog folder.","textLarge":false,"imageOnRight":true,"image":{"recommendedSizes":{"width":"420","height":"280"},"mimetype":"image/png","size":63200,"hash":"14c287d4f5be3e063f08b9ce65b0b95177301707","id":"cl4f9gg1xjay00776mrymfaxc","filename":"divesoft-ccr-liberty-manual-3-5-5-01.png","category":"divesoft/","type":"image"},"imageMobile":{"recommendedSizes":{"width":"750","height":"500"}}},"id":"#503","type":"component","lock":false,"position":210},{"name":"TextBlock","data":{"text":"The control unit (CU) offers a micro DC card insert. Such a card is installed by the manufacturer, and a separate dive log (which is not dependent on the CUâs memory), is stored on it. The cardâs capacity is sufficient for storing detailed logs throughout the apparatusâs service life, though the diver can delete logs from the card whenever they want. The card is generally accessed in the same manner as accessing a mass storage device via a USB cable, though in the case of damage to the CU, the micro SD card can be removed from the connector on the control-unit board and the dive log can be read using an ordinary reader.\n\nDiver may upload the Liberty dive logs into the cloud at [wetnotes.com](https://wetnotes.com).\n\n**Wireless Dive Log Download (Bluetooth)**\n\nThe 2021 Edition has Bluetooth connectivity, making it possible to download logs wirelessly. To connect to your personal computer or mobile phone, you need to download the [Divesoft.App](https://www.divesoft.com/en/app) for mobile phones or [Divesoft.Center](https://www.divesoft.com/en/center) for Windows and Mac.\n\n\n**Pairing**\n\nLaunch the app on your mobile phone or personal computer. On Liberty, enter Menu\\Applications\\Bluetooth. This activates the Bluetooth signal and the device should appear in the app. Add the device and follow the app's instructions.\n","textLarge":false,"imageOnRight":true,"image":{"recommendedSizes":{"width":"420","height":"280"}},"imageMobile":{"recommendedSizes":{"width":"750","height":"500"}}},"id":"#504","type":"component","lock":false,"position":211},{"name":"Divider","data":{"color":"darkGray"},"id":"#498","type":"component","lock":false,"position":212},{"name":"SectionDivider","data":{"title":"3.5.6 Long-term storage"},"id":"#629","type":"component","lock":false,"position":213},{"name":"TextBlock","data":{"text":"### <span id=\"3-.-5-.-6-Long---term-storage\">**3.5.6 Long-term storage**</span>\n\nBefore storing the rebreather for a period longer than one week, proceed according to section 3.5.3 Cleaning and disinfection.\n\n
2If the CCR Liberty is stored in a dry and clean environment, do not connect the corrugated- hose assembly with the DSV to the head or to the breathing bags, and store the rebreather open. Dust occurs almost everywhere and is inevitable. Limit the accumulation of dust by, for example, covering the unit with a washed bed sheet. Store the detached corrugated hose assembly in a suitable container that will allow complete drying.\n\nIf you store the CCR Liberty in an environment with a lower degree of cleanliness, such as a home with pets, store it assembled and closed (without sorbent).\n\nBefore putting the closed rebreather in storage, all parts must be thoroughly dried, including all creases in the corrugated hoses and the interior surface of the bags.\n\nCharge the batteries at least once every six months.\n\nIf, after storing the unit for more than a month, you find that moisture persists inside the apparatus, or you can smell mustiness or mold from the corrugated hoses, it is necessary to disinfect the apparatus again.\n\nWhen storing the rebreather, make sure that no rubber parts (hoses, cables) are pinched or compressed.\n\nEnsure that the rebreather is securely fastened, and no other objects are leaning against it.","textLarge":false,"imageOnRight":true,"image":{"recommendedSizes":{"width":"420","height":"280"}},"imageMobile":{"recommendedSizes":{"width":"750","height":"500"}}},"id":"#505","type":"component","lock":false,"position":214},{"name":"Divider","data":{"color":"darkGray"},"id":"#497","type":"component","lock":false,"position":215},{"name":"SectionDivider","data":{"title":"3.6 Emergency procedures"},"id":"#630","type":"component","lock":false,"position":216},{"name":"TextBlock","data":{"text":"### <span id=\"3-.-6-Emergency-procedures\">**3.6 Emergency procedures**</span>\n\nPrevent the occurrence of emergency situations through high-quality training. Do not exceed the limits of your diving qualifications. Carefully adhere to the prescribed procedures before, during, and after every dive. In the event that prior to a dive you discover a problem associated with the rebreather, and you are not able to resolve it, do not dive with the rebreather, regardless of the severity of the problem.","textLarge":false,"imageOnRight":true,"image":{"recommendedSizes":{"width":"420","height":"280"}},"imageMobile":{"recommendedSizes":{"width":"750","height":"500"}}},"id":"#506","type":"component","lock":false,"position":217},{"name":"Divider","data":{"color":"darkGray"},"id":"#511","type":"component","lock":false,"position":218},{"name":"SectionDivider","data":{"title":"3.6.1 Emergency ascent (bailout)"},"id":"#631","type":"component","lock":false,"position":219},{"name":"TextBlock","data":{"text":"### <span id=\"3-.-6-.-1-Emergency-ascent-(bailout)\">**3.6.1 Emergency ascent (bailout)**</span>\n\nFor safety purposes, it is necessary to carry a bailout aparatus whenever diving on a rebreather. A common type of backup device is a standard stage bottle.\n\nIf, during a dive, a malfunction occurs in the CCR Liberty that you are not able to resolve or precisely identify, or if you have a suspicion that something is wrong with the rebreather, switch to the bailout apparatus:\n\n1. place the bailout breathing apparatus in the standby position,\n2. exhale into the circuit and close the DSV, but hold a sufficient amount of gas in your lungs for removing water from the mouthpiece of the bailout apparatus,\n3. Perform the standard procedure associated with beginning to breath of the bailout apparatus, e.g. for stage cylinders, check to be sure that you are breathing from the correct stage cylinder.\n\nIf you subsequently resolve the rebreather malfunction or if you determine that the cause of the problem is outside the rebreather, you can resume breathing off the rebreather.\n\nAfter switching to bailout OC mode, the safety level is automatically set using the bailout gradient factors (BoGF). It is possible to switch between the standard and bailout GF sets in the menu without affecting the mode in which the CCR Liberty is operating.\n\nKnowledge and skills related to stage bottle use is a
2necessary requirement for anyone interested in diving on the CCR Liberty. In a CCR Liberty diving course accredited by the manufacturer, the use of stage bottles for backup purposes is thoroughly practiced.","textLarge":false,"imageOnRight":true,"image":{"recommendedSizes":{"width":"420","height":"280"}},"imageMobile":{"recommendedSizes":{"width":"750","height":"500"}}},"id":"#512","type":"component","lock":false,"position":220},{"name":"Divider","data":{"color":"darkGray"},"id":"#496","type":"component","lock":false,"position":221},{"name":"SectionDivider","data":{"title":"3.6.2 Oxygen-source malfunction"},"id":"#632","type":"component","lock":false,"position":222},{"name":"TextBlock","data":{"text":"### <span id=\"3-.-6-.-2-Oxygen---source-malfunction\">**3.6.2 Oxygen-source malfunction**</span>\n\n**Low pressure in the oxygen cylinder**\n\nIn this case, it is necessary to terminate the dive.\n\nIt is necessary to switch to the bailout breathing apparatus no later than when the partial pressure of oxygen in the circuit falls below 0.3 bar.\n\nIf this situation arises due to a lack of thoroughness when preparing for the dive or due to failing to regularly check the pressure during the dive, please consider whether diving with a rebreather represents too great of a risk for you.\n\n**Solenoids have stopped delivering oxygen**\n\nIf the partial pressure falls significantly below the setpoint, but there is still sufficient pressure in the oxygen cylinder, use the manual bypass valve to add oxygen.\n\nAdd oxygen gradually by performing short presses. Breathe regularly. Oxygen will be delivered to the exhalation bag. It takes several inhalations before the oxygen in the scrubber blends with the breathing mixture and reaches the sensors on the inhalation side.\n\nIf the situation persists, control the delivery of oxygen manually. In a stabilized state (a low level of exertion at a fixed depth), it is necessary to add oxygen approximately once or twice per minute.\n\nThis malfunction does not pose an immediate threat to the diver. However, do not continue in your descent or penetration. Start your ascent or return.\n\n**Manual O<sub>2</sub> bypass valve free-flow**\n\nDisconnect the quick-release. Disengaging the quick-release connector causes a disruption of the oxygen delivery via the manual bypass valve.\n\nThis malfunction does not pose an immediate threat to the diver. However, do not continue in your descent or penetration. Start your ascent or return.\n\n**Manual bypass valve does not function, oxygen is not added after pressing**\n\nThis malfunction does not pose an immediate threat to the diver. However, do not continue in your descent or penetration. Start your ascent or return.\n\n**Oxygen delivery does not function by means of either the solenoids or manual bypass valve**\n\nIn this case, it is necessary to terminate the dive.\n\nIt is necessary to switch to the bailout breathing apparatus no later than when the partial pressure of oxygen in the circuit falls below 0.3 bar.","textLarge":false,"imageOnRight":true,"image":{"recommendedSizes":{"width":"420","height":"280"}},"imageMobile":{"recommendedSizes":{"width":"750","height":"500"}}},"id":"#513","type":"component","lock":false,"position":223},{"name":"Divider","data":{"color":"darkGray"},"id":"#510","type":"component","lock":false,"position":224},{"name":"SectionDivider","data":{"title":"3.6.3 Diluent-source malfunction"},"id":"#633","type":"component","lock":false,"position":225},{"name":"TextBlock","data":{"text":"### <span id=\"3-.-6-.-3-Diluent---source-malfunction\">**3.6.3 Diluent-source malfunction**</span>\n\n**Low pressure in the diluent cylinder**\n\nIn this case, it is necessary to terminate the dive. During the ascent, the diluent in the circuit expands and thus replenishes its volume in the circuit. If possible, do not increase depth during your return.\n\nAs long as the volume of diluent in the circuit is sufficient, it is possible to breathe from the rebreather. If it is not sufficient, it is necessary to switch to the bailout breathing apparatus.\n\nBear in mind that in this case it is not possible to perform the standard procedure for high ppO<sub>2</sub> (flushing out the loop, adding diluent) and that such a situation can be resolved only by immediately switching to the bailout breathing apparatus, which you should have in standby position.\n\n**ADV free-flow**\n\nClose the ADV by sliding the collar. This causes a disruption of the diluent delivery via the ADV.\n\nThis malfunction does not pose an immediate threat to the user. The dive can continue with manual addition of diluent to the circuit.\n\n**Manual bypass valve free-flow**\n\nDisconnect the quick-release. Disengaging the quick-release connector causes a disruption of the diluent delivery via the MBV.\n\nThis malfunction does not pose an immediate threat to the user. The dive can continue with automatic delivery of diluent into the circuit using the ADV. Manual delivery of diluent can be accomplished by pressing the ADV.\n\n**Manual bypass valve does not function, diluent is not added after pressing**\n\nThis malfunction does not pose an immediate threat to the user. The dive can continue with automatic delivery of diluent into the circuit using the ADV. Manual delivery of diluent can be accomplished by pressing the ADV.\n\n**Neither the ADV nor the manual bypass valve functions**\n\nIf the diluent pressure gauge indicates sufficient pressure, a malfunction in the first stage of the diluent regulator has likely occurred, and it is no longer possible to add diluent to the circuit.\n\nIn this case, it is necessary to terminate the dive. During the ascent, the diluent in the circuit expands and thus replenishes its volume in the circuit. If possible, do not increase depth during your return.\n\nIf the volume of diluent in the circuit is sufficient, it is possible to breathe from the rebreather. If it is not sufficient, it is necessary to switch to the bailout breathing apparatus.\n\nBear in mind that in this case it is not possible to perform the standard procedure for high ppO<sub>2</sub> (flushing out the loop, adding diluent) and that such a situation can be resolved only by immediately switching to the bailout breathing apparatus, which you should have in standby position.","textLarge":false,"imageOnRight":true,"image":{"recommendedSizes":{"width":"420","height":"280"}},"imageMobile":{"recommendedSizes":{"width":"750","height":"500"}}},"id":"#514","type":"component","lock":false,"position":226},{"name":"Divider","data":{"color":"darkGray"},"id":"#509","type":"component","lock":false,"position":227},{"name":"SectionDivider","data":{"title":"3.6.4 Scrubber malfunction"},"id":"#634","type":"component","lock":false,"position":228},{"name":"TextBlock","data":{"text":"### <span id=\"3-.-6-.-4-Scrubber-malfunction\">**3.6.4 Scrubber malfunction**</span>\n\nIf you feel the need to breathe more rapidly (ruling out your exertion level), it is possible that a higher carbon dioxide contration is present in the circuit due to a scrubber malfunction. Other symptoms of a CO<sub>2</sub> hit incluce nausea, headache, confusion.\n\nOn the contrary, another possible cause of similar symptoms is psychosomatic hyperventilation and reduced content of carbon dioxide in the blood and other bodily tissues. This usually occurs due to increased mental stress, such as when the diver is confronted with task overloading.\n\nIf the symptoms are severe, immediately switch to the bailout breathing apparatus, as there is a risk of a loss of consciousness. As soon as possible, take several slow, deep breaths from the backup apparatus. Of course, you should never allow such a situation to progress to the stage of severe symptoms.\n\nIf you experience discomfort when breathing but the symptoms are not severe enough to pose a risk of unconsciousness, test the concentration of carbon dioxide in your blood. Stay where you are without moving; do not in any case change depth significantly. Try to hold your breath for ten seconds.\n\nIf you are unable to hold your breath or it is extremly difficult to do so, it is apparent that the scrubber is not functioning properly (premature depletion of the sorbent, occurrence of channels in the sorbent by which air circumvents the scrubber) or there is a mechanical malfunction that has caused air to not pass through or to only partially pass through the scrubber (malfunction of the directional valve on the mouthpiece, joining of the inhalation and exhalation sides outside the scrubber). Switch to bailout and terminate the dive.\n\nIf holding your breath does not cause problems, the scrubber is working properly. Over the next several minutes, limit all other activity and concentrate on slow, steady breathing.","textLarge":false,"imageOnRight":true,"image":{"recommendedSizes":{"width":"420","height":"280"}},"imageMobile":{"recommendedSizes":{"width":"750","height":"500"}}},"id":"#515","type":"component","lock":false,"position":229},{"name":"Divider","data":{"color":"darkGray"},"id":"#508","type":"component","lock":false,"position":230}
2,{"name":"SectionDivider","data":{"title":"3.6.5 Inadvertent release of the mouthpiece"},"id":"#635","type":"component","lock":false,"position":231},{"name":"TextBlock","data":{"text":"### <span id=\"3-.-6-.-5-Inadvertent-release-of-the-mouthpiece\">**3.6.5 Inadvertent release of the mouthpiece**</span>\n\nWhen the mouthpiece falls out of the diverâs mouth, the DSV has a tendency to float. However, its connection to the breathing bag prevents the mouthpiece from floating beyond the diverâs reach.\n\nIf the mouthpiece falls out, immediately place it back in your mouth. If the mouthpiece is returned quick enough, no significant amount of water will have entered the breathing loop.\n\nIf this problem is not solved quickly, then the loop would flood. In this case, proceed according to the following section 3.6.6 Flooding.\n\nThere may be a strap (bungee cord) holding the DSV, which prevents the mouthpiece from accidentally falling out. Adjust the length of the bungee by shifting the knots.","textLarge":false,"imageOnRight":true,"image":{"recommendedSizes":{"width":"420","height":"280"}},"imageMobile":{"recommendedSizes":{"width":"750","height":"500"}}},"id":"#516","type":"component","lock":false,"position":232},{"name":"Divider","data":{"color":"darkGray"},"id":"#521","type":"component","lock":false,"position":233},{"name":"SectionDivider","data":{"title":"3.6.6 Flooding"},"id":"#636","type":"component","lock":false,"position":234},{"name":"TextBlock","data":{"text":"### <span id=\"3-.-6-.-6-Flooding\">**3.6.6 Flooding**</span>\n\nThe probability of significantly flooding the breathing circuit is very low. After carefully assembling the apparatus and performing the prescribed pre-dive procedures, flooding can be ruled out unless there is a major disruption of the breathing loopâs integrity due to mechanical damage. In the event of significant flooding, it is necessary to immediately switch to the bailout breathing apparatus and to use the compensator (BCD) to prevent loss of buoyancy.\n\nDo not inhale if the mixture from the rebreatherâs DSV contains fluid. In extreme cases, this could contain a so-called caustic cocktail (i.e. a caustic mixture with dissolved lye from the sorbent).\n\nA smaller amount of water can enter the circuit through the opened DSV when the mouthpiece falls out of the diverâs mouth. In such a case, water gets into the exhalation bag. Though this does not present an immediate danger, it is advisable to expel the water from the exhalation bag with the overpressure valve as soon as possible. Open the overpressure valve completely and deflate the buoyancy compensator. In order to avoid a significant change in buoyancy. Add diluent to the circuit with the manual bypass valve. Assume a position that brings the overpressure valve to the lowest point of the exhalation bag. Expel the water from the bag by pressing on the bag with your hand.","textLarge":false,"imageOnRight":true,"image":{"recommendedSizes":{"width":"420","height":"280"}},"imageMobile":{"recommendedSizes":{"width":"750","height":"500"}}},"id":"#522","type":"component","lock":false,"position":235},{"name":"Divider","data":{"color":"darkGray"},"id":"#520","type":"component","lock":false,"position":236},{"name":"SectionDivider","data":{"title":"3.6.7 Loss of buoyancy"},"id":"#637","type":"component","lock":false,"position":237},{"name":"TextBlock","data":{"text":"### <span id=\"3-.-6-.-7-Loss-of-buoyancy\">**3.6.7 Loss of buoyancy**</span>\n\nThe compensator (i.e. buoyancy control device or BCD) is the basic tool for controlling buoyancy. If the compensator is not functional, use other means of attaining buoyancy.\n\nIf the compensatorâs lift capacity does not suffice or if it fails to fill (whether that be with the power inflator or orally), use your dry suit to attain buoyancy. The CCR Liberty user must have sufficient knowledge and skill to safely use a dry suit as a backup source of buoyancy.\n\nIf it is not possible to attain sufficient buoyancy by using the compensator and dry suit and if, there is no other appropriate option, jettison the ballast. If it is not necessary to completely jettison the ballast, try to attain buoyancy by first removing the ballast on the left side and then, if necessary, on the right side. Jettisoning the ballast on the left side helps to bring the dry-suit release valve and the compensatorâs inflator in a better position for deflation.\n\nJettisoning ballast is a skill that, in addition to agility and mobility, requires training under the supervision of an instructor in a CCR Liberty diving course.","textLarge":false,"imageOnRight":true,"image":{"recommendedSizes":{"width":"420","height":"280"}},"imageMobile":{"recommendedSizes":{"width":"750","height":"500"}}},"id":"#523","type":"component","lock":false,"position":238},{"name":"Divider","data":{"color":"darkGray"},"id":"#519","type":"component","lock":false,"position":239},{"name":"SectionDivider","data":{"title":"3.6.8 Rescue on the surface"},"id":"#638","type":"component","lock":false,"position":240},{"name":"TextBlock","data":{"text":"### <span id=\"3-.-6-.-8-Rescue-on-the-surface\">**3.6.8 Rescue on the surface**</span>\n\nWhen assisting an injured CCR Liberty user on the surface, it is possible to increase buoyancy by jettisoning the ballast.\n\nEven if the diverâs life is in serious danger, and it would be necessary to remove all equipment during the rescue, buoyancy should be ensured by closing the DSV, inflating the compensator wings, and jettisoning the ballast. C
2omplete removal of the CCR Liberty and any other equipment attached to the harness can be time consuming. Sufficient buoyancy provided by the CCR Liberty can aid in the rescue process.","textLarge":false,"imageOnRight":true,"image":{"recommendedSizes":{"width":"420","height":"280"}},"imageMobile":{"recommendedSizes":{"width":"750","height":"500"}}},"id":"#524","type":"component","lock":false,"position":241},{"name":"Divider","data":{"color":"darkGray"},"id":"#518","type":"component","lock":false,"position":242},{"name":"SectionDivider","data":{"title":"3.6.9 Malfunction of oxygen-concentration measuring"},"id":"#639","type":"component","lock":false,"position":243},{"name":"TextBlock","data":{"text":"### <span id=\"3-.-6-.-9-Malfunction-of-oxygen---concentration-measuring\">**3.6.9 Malfunction of oxygen-concentration measuring**</span>\n\nIf the chemical oxygen sensors are not functional (excluded, disabled, error or offline state, see section 2.4.8 Faulty sensors) and a trimix is used as the diluent and the helium sensors are functional, then the CCR Liberty can be switched to indirectly determine the ppO<sub>2</sub> by measuring the helium content. See section 1.9.3 Measurement of He content.\n\nConsider this as an emergency procedure only when it is not possible to proceed according to section 3.6.1 Emergency ascent (bailout).","textLarge":false,"imageOnRight":true,"image":{"recommendedSizes":{"width":"420","height":"280"}},"imageMobile":{"recommendedSizes":{"width":"750","height":"500"}}},"id":"#525","type":"component","lock":false,"position":244},{"name":"Divider","data":{"color":"darkGray"},"id":"#517","type":"component","lock":false,"position":245},{"name":"SectionDivider","data":{"title":"3.7 Maintenance"},"id":"#640","type":"component","lock":false,"position":246},{"name":"TextBlock","data":{"text":"### <span id=\"3-.-7-Maintenance\">**3.7 Maintenance**</span>\n\nMaintenance operations, including necessary technical information, are described in the maintenance manual. In the user manual, only basic maintenance operations that every CCR Liberty user should master are described.\n\nUse only oxygen-compatible lubricant for the maintenance of parts that come into contact with oxygen under pressure.","textLarge":false,"imageOnRight":true,"image":{"recommendedSizes":{"width":"420","height":"280"}},"imageMobile":{"recommendedSizes":{"width":"750","height":"500"}}},"id":"#526","type":"component","lock":false,"position":247},{"name":"Divider","data":{"color":"darkGray"},"id":"#532","type":"component","lock":false,"position":248},{"name":"SectionDivider","data":{"title":"3.7.1 Tools and replacement parts"},"id":"#641","type":"component","lock":false,"position":249},{"name":"TextBlock","data":{"text":"### <span id=\"3-.-7-.-1-Tools-and-replacement-parts\">**3.7.1 Tools and replacement parts**</span>\n\nYour toolbox for resolving problems in the field should contain:\n\n- â Surgical gloves\n- â Roll of paper towels\n- â PE bag for storing the scrubber cartridge\n- â DSV mushroom valves (2 pcs)\n- â Mouthpiece\n- â Tightening straps\n- â Oxygen-compatible lubricant\n- â 2.5 mm and 3 mm hex keys\n- â #1 Phillips screwdriver\n- â Tool for removing O-rings (O-ring pick, plectrum, bamboo toothpick)\n- â Adjustable wrench\n- â Duct tape\n- â Permanent waterproof marker for writing on duct tape\n- â Set of O-rings","textLarge":false,"imageOnRight":true,"image":{"recommendedSizes":{"width":"420","height":"280"}},"imageMobile":{"recommendedSizes":{"width":"750","height":"500"}}},"id":"#533","type":"component","lock":false,"position":250},{"name":"Divider","data":{"color":"darkGray"},"id":"#531","type":"component","lock":false,"position":251},{"name":"SectionDivider","data":{"title":"3.7.2 Detection of leaks"},"id":"#642","type":"component","lock":false,"position":252},{"name":"TextBlock","data":{"text":"### <span id=\"3-.-7-.-2-Detection-of-leaks\">**3.7.2 Detection of leaks**</span>\n\nIf the source of a leak is not apparent, we recommend pressuring the unit to the find the leak.\n\nLeaks can generally be found by submerging a part or the entire rebreather in water while exerting pressure in the breathing loop. It is also possible to find leaks by applying a soapy solution on a certain area.\n\nAfter eliminating the problem, negative and positive pressure tests must be repeated.","textLarge":false,"imageOnRight":true,"image":{"recommendedSizes":{"width":"420","height":"280"}},"imageMobile":{"recommendedSizes":{"width":"750","height":"500"}}},"id":"#534","type":"component","lock":false,"position":253},{"name":"Divider","data":{"color":"darkGray"},"id":"#530","type":"component","lock":false,"position":254},{"name":"SectionDivider","data":{"title":"3.7.3 Regular service inspection"},"id":"#643","type":"component","lock":false,"position":255}
2,{"name":"TextBlock","data":{"text":"### <span id=\"3-.-7-.-3-Regular-service-inspection\">**3.7.3 Regular service inspection**</span>\n\nThe CCR Liberty requires yearly service inspections (maximum 12 months) or after 150 hours of usage, whichever occurs first.\n\nService inspections must be performed by a service technician certified by Liberty Systems or performed by the manufacturer. The replacement of components and the inspection process are determined by the manufacturerâs guidelines at the time of inspection.","textLarge":false,"imageOnRight":true,"image":{"recommendedSizes":{"width":"420","height":"280"}},"imageMobile":{"recommendedSizes":{"width":"750","height":"500"}}},"id":"#535","type":"component","lock":false,"position":256},{"name":"Divider","data":{"color":"darkGray"},"id":"#529","type":"component","lock":false,"position":257},{"name":"SectionDivider","data":{"title":"3.7.4 Long-term maintenance"},"id":"#644","type":"component","lock":false,"position":258},{"name":"Divider","data":{"color":"darkGray"},"id":"#528","type":"component","lock":false,"position":259},{"name":"TextBlock","data":{"text":"### <span id=\"3-.-7-.-4-Long---term-maintenance\">**3.7.4 Long-term maintenance**</span>\n\n**Oxygen sensors**\n\nWhen the oxygen sensors are calibrated, their degree of wear is checked. Of course, sensors can suddenly reach the end of their service life even during a dive, especially in an environment with a high partial pressure of oxygen. Therefore, we recommend replacing the sensors no later than one year after putting them into operation or 18 months max after their date of manufacture.\n\nHowever, despite good handling, the sensors may, exhibit deviations or limitations even during their recommended life. For this reason, we recommend using the DIVESOFT Oxygen sensor tester kit regularly to test the linearity of the sensors. It is the only accurate and safe way to detect a faulty or limited sensor.\n\nIt is not necessary to discard replaced sensors. Even though a sensorâs degree of wear prevents it from reliably measuring higher partial pressures of oxygen in the rebreather, it is often usefull for measuring lower partial pressures of oxygen when preparing mixtures.\n\n**Hoses**\n\nIf any hose shows signs of excessive wear or if damage is detected during a bubble check (see chapter 3.4.8 In-water check), replace it. Hoses should be replaced during annual inspection from normal wear and tear.\n\nThe service life of the hoses is five years max from the time they were first used and seven years max from their production date.\n\n**Straps**\n\nThe harness straps are highly durable. A strap that has been damaged on the edge should only be replaced if it was cut more than one-third of its width.\n\nStraps are generally replaced for aesthetic reasons. You can order a replacement when ordering a regular service inspection.","textLarge":false,"imageOnRight":true,"image":{"recommendedSizes":{"width":"420","height":"280"}},"imageMobile":{"recommendedSizes":{"width":"750","height":"500"}}},"id":"#536","type":"component","lock":false,"position":260},{"name":"Divider","data":{"color":"darkGray"},"id":"#678","type":"component","lock":false,"position":261},{"name":"SectionDivider","data":{"title":"3.7.5 Oxygen Sensor Block Maintenance Instructions","skipToC":false},"id":"#679","type":"component","lock":false,"position":262},{"name":"TextBlock","data":{"text":"### **3.7.5 Oxygen Sensor Block Maintenance Instructions**\nProper maintenance of the oxygen sensor block is crucial for extending the lifespan of the sensor wiring and ensuring accurate oxygen readings. Follow these instructions to maintain your CCR Liberty's oxygen sensors:\nRegular Drying Procedure\n\nAfter each dive or diving day, dry the oxygen sensors thoroughly.\n#### In normal conditions:\n\n1. Open the rebreather head.\n2. Place the head upside down in a well-ventilated area.\n3. Allow it to air dry completely.\n\n\n\n#### High Humidity Environments\n\n1. Use the specialized Divesoft ventilation fan.\n2. Attach the fan directly to the inhalation tube of the sensor block (located on the bottom side of the head).\n3. Operate the fan until the sensors are completely dry.\n\n#### Extreme Conditions or Flooding\nIf the unit has been exposed to extreme humidity or flooding:\n\n1. Remove the oxygen sensor block from the rebreather head.\n2. Carefully open the sensor block.\n1. Dry the components in an air-conditioned room.\n1. Ensure all parts are thoroughly dried before reassembly.\n\n\n**Note**: Proper drying of oxygen sensors after use is essential for maintaining sensor accuracy and preventing corrosion of the wiring.\n\nAlways refer to the full CCR Liberty user manual for comprehensive maintenance procedures and safety guidelines.","textLarge":false,"imageOnRight":true,"image":{"recommendedSizes":{"width":"420","height":"280"}},"imageMobile":{"recommendedSizes":{"width":"750","height":"500"}}},"id":"#677","type":"component","lock":false,"position":263},{"name":"Divider","data":{"color":"darkGray"},"id":"#680","type":"component","lock":false,"position":264},{"name":"SectionDivider","data":{"title":"3.7.6 Firmware update"},"id":"#645","type":"component","lock":false,"position":265},{"name":"TextBlock","data":{"text":"### <span id=\"3-.-7-.-6-Firmware-update\">**3.7.6 Firmware update**</span>","textLarge":false,"imageOnRight":true,"image":{"recommendedSizes":{"width":"420","height":"280"}},"imageMobile":{"recommendedSizes":{"width":"750","height":"500"}}},"id":"#548","type":"component","lock":false,"position":266},{"name":"TextBlock","data":{"text":"The CCR Libertyâs electronics have tw
2o different types of firmware (FW): one for the control unit, the other for the handset. It is possible to download the current version from the support page at [www.CCRLiberty.com](http://www.CCRLiberty.com). Perform FW updates in order to maintaining CE certification according to the description on the support page. Perform updates with the head removed from the rebreatherâs body.","textLarge":false,"imageOnRight":true,"image":{"recommendedSizes":{"width":"420","height":"280"},"mimetype":"image/png","size":148109,"hash":"bd669b96297ca31aea8b7cdbdcb01e34742bd006","id":"cl4f96q1fjas807760uv8l6s8","filename":"divesoft-ccr-liberty-manual-3-7-5-01.png","category":"divesoft/","type":"image"},"imageMobile":{"recommendedSizes":{"width":"750","height":"500"}}},"id":"#537","type":"component","lock":false,"position":267},{"name":"TextBlock","data":{"text":"To upgrade your new firmware, use the DIVESOFT.CENTER At the following link you will find the software download, user manual and other important information [https://www.divesoft.com/en/center](https://www.divesoft.com/en/center).\n\n**Minimum operating system requirements for Bluetooth functionality**\n\n**macOS**\nmacOS 11 (Big Sur)\nEarlier macOS versions USB functions only\n\n**Windows**\nWindows 10 or higher\nEarlier Windows versions USB functions only\n\n**Linux**\nAny 64-bit build","textLarge":false,"imageOnRight":true,"image":{"recommendedSizes":{"width":"420","height":"280"}},"imageMobile":{"recommendedSizes":{"width":"750","height":"500"}}},"id":"#538","type":"component","lock":false,"position":268},{"name":"Divider","data":{"color":"darkGray"},"id":"#527","type":"component","lock":false,"position":269},{"name":"SectionDivider","data":{"title":"3.8 Transport"},"id":"#646","type":"component","lock":false,"position":270},{"name":"TextBlock","data":{"text":"### <span id=\"3-.-8-Transport\">**3.8 Transport**</span>","textLarge":false,"imageOnRight":true,"image":{"recommendedSizes":{"width":"420","height":"280"}},"imageMobile":{"recommendedSizes":{"width":"750","height":"500"}}},"id":"#648","type":"component","lock":false,"position":271},{"name":"SectionDivider","data":{"title":"3.8.1 By car"},"id":"#647","type":"component","lock":false,"position":272},{"name":"TextBlock","data":{"text":"### <span id=\"3-.-8-.-1-By-car\">**3.8.1 By car**</span>\n\nTransport the CCR Liberty in the case in which it was delivered. Make sure the case is secure and will not move around in the vehicleâs cargo space.\n\nThe dustiness of the sorbent increases when transported in its loose state in the distribution canister. It is better to transport sorbent in the scrubber cartridge.","textLarge":false,"imageOnRight":true,"image":{"recommendedSizes":{"width":"420","height":"280"}},"imageMobile":{"recommendedSizes":{"width":"750","height":"500"}}},"id":"#539","type":"component","lock":false,"position":273},{"name":"Divider","data":{"color":"darkGray"},"id":"#545","type":"component","lock":false,"position":274},{"name":"SectionDivider","data":{"title":"3.8.2 By boat"},"id":"#649","type":"component","lock":false,"position":275},{"name":"TextBlock","data":{"text":"### <span id=\"3-.-8-.-2-By-boat\">**3.8.2 By boat**</span>\n\nOn a dive boat, it is usually possible to fasten the apparatus to a bench.\n\nFor securing the rebreather, use a line of approximately 1.5-2 m with secure knots. Tie the apparatus to a suitable structure.\n\nSecure the ready-to-dive CCR Liberty by passing the line over the cylinders and backplate, with the scrubber canister pressed to the back of the bench.\n\nIf you need to prepare the CCR Liberty for diving while onboard a boat, secure it to a bench using the holes in the upper part of the backplate. This will give you full access to the cylinders for filling, and you can easily remove the head and scrubber canister.","textLarge":false,"imageOnRight":true,"image":{"recommendedSizes":{"width":"420","height":"280"}},"imageMobile":{"recommendedSizes":{"width":"750","height":"500"}}},"id":"#546","type":"component","lock":false,"position":276},{"name":"SectionDivider","data":{"title":"3.8.3 By plane"},"id":"#650","type":"component","lock":false,"position":277},{"name":"TextBlock","data":{"text":"### <span id=\"3-.-8-.-3-By-plane\">**3.8.3 By plane**</span>\n\n**Pressure cylinders**\n\nAirline regulations generally require that all transported pressure cylinders should be empty with the valves dismounted. Place the valves in clean PE bags (Ziploc) and place duct tape over the cylinder necks to prevent contamination. It is possible that security personnel will want to look inside the cylinders, do not use tight plugs that are difficult to remove.\n\nWhen checking in your luggage at the airport, notify the airport personnel that you have empty pressure cylinders in your luggage. Depending on local regulations, it is possible that you will have to take the cylinders to a
2special check-in desk.\n\nConsider whether it might be better to rent cylinders at your destination. Dive centers equipped for closed-circuit diving usually have available cylinders that can be used with the CCR Liberty. If you want to arrange a cylinder rental, which is highly recommended, refer to the size specifications available at [divesoft.com](https://www.divesoft.com).\n\nWhen traveling by plane, it is advisable to separate the head of the device and transport it in the hand luggage. You will significantly reduce the weight of your checked luggage, and you will have the most expensive and sensitive part of your device under constant vigil. Be prepared to explain to airport staff that the head is a vital part of modern diving gear and you have this manual with you.\n\n**Sorbent**\n\nThe sorbent canister should be empty. If you are also transporting a supply of sorbent, it must be in the original packaging or in an appropriately sturdy and airtight container. Familiarize yourself with the regulations concerning the air transport of sorbent. Consider the possibility of purchasing sorbent at your destination.\n\n**Head**\n\nFor the purposes of air transport, the batteries must be disconnected by removing or turning the battery jumpers. Do not transport the CCR Liberty in standby mode.","textLarge":false,"imageOnRight":true,"image":{"recommendedSizes":{"width":"420","height":"280"}},"imageMobile":{"recommendedSizes":{"width":"750","height":"500"}}},"id":"#547","type":"component","lock":false,"position":278},{"name":"Divider","data":{"color":"darkGray"},"id":"#544","type":"component","lock":false,"position":279},{"name":"TextBlock","data":{"text":"### 3.9 Marking","textLarge":false,"imageOnRight":true,"image":{"recommendedSizes":{"width":"420","height":"280"}},"imageMobile":{"recommendedSizes":{"width":"750","height":"500"}}},"id":"#673","type":"component","lock":false,"position":280},{"name":"Image","data":{"firstImage":{"mimetype":"image/jpeg","size":174629,"hash":"35aae634269ecc42d0cfa9165b640ba69cad7176","id":"clw6g5a1cxpe50776k39auz28","filename":"ce-marking-2024.jpg","category":"divesoft/","type":"image"},"secondImage":{},"image":{"type":"image"}},"id":"#676","type":"component","lock":false,"position":281},{"name":"TextBlock","data":{"text":"### 3.10 NOTIFIED BODIES\n**PPE Regulation EU 2016/425 by** \nNotified Body No. 0598 SGS FIMKO P.O.Box 30 (Särkiniementie 3), 00211 Helsinki, Finland From 9th December 2020 \n**UKCA marking ** \nApproved body No. 0120, SGS United Kingdom Ltd. Unit 202b, Worle Parkway, Weston-super-Mare, BS22 6WA, UK. \nDeclaration of conformity available at:\nhttps://divesoft.com/en/products/ccr-liberty/documents\n","textLarge":false,"imageOnRight":true,"image":{"recommendedSizes":{"width":"420","height":"280"}},"imageMobile":{"recommendedSizes":{"width":"750","height":"500"}}},"id":"#674","type":"component","lock":false,"position":282},{"name":"TextBlock","data":{"text":"### 3.11 MANUFACTURER\nProduct manufactured by \n**Divesoft s.r.o. ** \nHálkova 2495 \n413 01 Roudnice nad Labem \nCzech Republic \n","textLarge":false,"imageOnRight":true,"image":{"recommendedSizes":{"width":"420","height":"280"}},"imageMobile":{"recommendedSizes":{"width":"750","height":"500"}}},"id":"#675","type":"component","lock":false,"position":283},{"name":"SectionDivider","data":{"title":"CCR Liberty User Manual"},"id":"#651","type":"component","lock":false,"position":284},{"name":"TextBlock","data":{"text":"### **CCR Liberty User Manual**\n\n- **Author** \nAdam Procháska, Jakub Šimánek, Aleš Procháska.\n\n- **Publisher** \nDivesoft s.r.o.\ndivesoft.com\n\n- **Issue** \nRevision 2.17.3/100\nRevision date 22.03.2025\n\n**Use of this manual approved by** \nLucie Šmejkalová, CEO\n\n","textLarge":false,"imageOnRight":true,"image":{"recommendedSizes":{"width":"420","height":"280"}},"imageMobile":{"recommendedSizes":{"width":"750","height":"500"}}},"id":"#553","type":"component","lock":false,"position":285},{"name":"Spacer","data":{"spacingLarge":30,"spacingSmall":20,"backgroundColor":"#ffffff"},"id":"#570","type":"component","lock":false,"position":286}
2,{"name":"Divider","data":{"color":"darkGray"},"id":"#664","type":"component","lock":false,"position":287},{"name":"Spacer","data":{"spacingLarge":30,"spacingSmall":20,"backgroundColor":"#ffffff"},"id":"#665","type":"component","lock":false,"position":288},{"name":"TextBlock","data":{"text":" ","textLarge":false,"imageOnRight":true,"image":{"recommendedSizes":{"width":"420","height":"280"}},"imageMobile":{"recommendedSizes":{"width":"750","height":"500"}}},"id":"#682","type":"component","lock":false,"position":289},{"name":"Spacer","data":{"spacingLarge":30,"spacingSmall":20,"backgroundColor":"#ffffff"},"id":"#703","type":"component","lock":false,"position":290},{"name":"Divider","data":{"color":"darkGray"},"id":"#714","type":"component","lock":false,"position":291},{"name":"TextBlock","data":{"text":" \n","textLarge":false,"imageOnRight":true,"image":{"recommendedSizes":{"width":"420","height":"280"}},"imageMobile":{"recommendedSizes":{"width":"750","height":"500"}}},"id":"#715","type":"component","lock":false,"position":292},{"name":"Divider","data":{"color":"darkGray"},"id":"#720","type":"component","lock":false,"position":293},{"name":"Divider","data":{"color":"darkGray"},"id":"#721","type":"component","lock":false,"position":294},{"name":"TextBlock","data":{"text":" ","textLarge":false,"imageOnRight":true,"image":{"recommendedSizes":{"width":"420","height":"280"}},"imageMobile":{"recommendedSizes":{"width":"750","height":"500"}}},"id":"#716","type":"component","lock":false,"position":295},{"name":"Divider","data":{"color":"darkGray"},"id":"#718","type":"component","lock":false,"position":296},{"name":"TextBlock","data":{"text":" ","textLarge":false,"imageOnRight":true,"image":{"recommendedSizes":{"width":"420","height":"280"}},"imageMobile":{"recommendedSizes":{"width":"750","height":"500"}}},"id":"#683","type":"component","lock":false,"position":297},{"name":"Divider","data":{"color":"darkGray"},"id":"#719","type":"component","lock":false,"position":298},{"name":"Divider","data":{"color":"darkGray"},"id":"#659","type":"component","lock":false,"position":299},{"name":"TextBlock","data":{"text":" ","textLarge":false,"imageOnRight":true,"image":{"recommendedSizes":{"width":"420","height":"280"}},"imageMobile":{"recommendedSizes":{"width":"750","height":"500"}}},"id":"#685","type":"component","lock":false,"position":300},{"name":"TextBlock","data":{"text":"","textLarge":false,"imageOnRight":true,"image":{"recommendedSizes":{"width":"420","height":"280"}},"imageMobile":{"recommendedSizes":{"width":"750","height":"500"}}},"id":"#684","type":"component","lock":false,"position":302},{"name":"Divider","data":{"color":"darkGray"},"id":"#671","type":"component","lock":false,"position":304},{"name":"ListOfLinks","data":{"links":[{"title":"< Previous page / Section: 2. Control-unit operation","url":{"url":"/en/manuals/ccr-liberty-manual/ccr-liberty-manual-02","pageId":"cl43w7gb7l8e20858xrzqgqz9"},"id":"1"}],"activeTab":"2"},"id":"#464","type":"component","lock":false,"position":318},{"name":"Footer","data":{"copyrights":"Copyright © 2019 Divesoft LLC All rights reserved.","facebookUrl":{"urlNewWindow":true,"url":"https://www.facebook.com/divesoft/"},"youtubeUrl":{"url":"https://www.youtube.com/channel/UCHI2-kHmfoUlAdhQXPKl8lA/featured","urlNewWindow":true},"instagramUrl":{"url":"https://www.instagram.com/divesoft/","urlNewWindow":true},"contacts":"**Divesoft s.r.o.** \nHálkova 2495 \n413 01 Roudnice nad Labem \nCzech Republic \nTel.: +420 416 857 057 \nE-mail: [email protected]"},"id":"#1","type":"component","lock":false,"position":319}],"id":"root","idBuffer":"#722","lastCommit":"b9f49ff2-8df1-4339-aa24-f466e7ee12ac"}},"annotations":[],"language":{"type":"id","generated":false,"id":"Language:cjv3kwvoj000u083611381c6o","typename":"Language"},"__typename":"PageTranslation"},"Page:cl48h6z8zlpye0858td9csdqy":{"id":"cl48h6z8zlpye0858td9csdqy","type":{"type":"id","generated":false,"id":"PageType:cjv3l213x004f08366hjufttp","typename":"PageType"},"tags":[{"type":"id","generated":false,"id":"Tag:clw52z09zlclk0735mxb7v53p","typename":"Tag"},{"type":"id","generated":false,"id":"Tag:clyycdwe2y9ew0735y8v3nuvd","typename":"Tag"},{"type":"id","generated":false,"id":"Tag:cm5ww05zc1b5d0803zglvz927","typename":"Tag"}],"translations({\"where\":{\"language\":{\"id\":\"cjv3kwvoj000u083611381c6o\"}}})":[{"type":"id","generated":false,"id":"PageTranslation:cl48h6z9blpyl0858xp9nhbyu","typename":"PageTranslation"}],"__typename":"Page"},"PageTranslation:cl48h6z9blpyl0858xp9nhbyu":{"id":"cl48h6z9blpyl0858xp9nhbyu","name":"Divesoft.blog / 5 basic principles of rebreather and one extra","createdAt":"2022-06-10T13:19:43.871Z","content":{"type":"json","json":{"content":[{"name":"Header","data":{"products":[{"title":"Accessories","description":"Backplates, Consumables. Tanks.","img":{"recommendedSizes":{"width":"235","height":"235"}},"url":""},{"title":"Accessories sets","description":"Protection, maintenance, cleaning.","img":{"recommendedSizes":{"width":"235","height":"235"}},"url":""},{"title":"Spare parts","description":"Spare parts and components.","img":{"recommendedSizes":{"width":"235","height":"235"}},"url":""}
2,{"title":"Spare parts kits","description":"Completly Liberty spare parts kits.","img":{"recommendedSizes":{"width":"235","height":"235"}},"url":""}]},"id":"#0","type":"component","lock":false,"position":0},{"name":"BlogArticle","data":{"title":"5 basic principles of rebreather and one extra","perex":"For a beginner entering the world of rebreathers, it can be quite confusing to see the many different principles of rebreathers available. Even some already experienced rebreather divers using one type of device need to be aware of the other types.","content":"In a [previous article](https://www.divesoft.com/en/blog/what-is-a-rebreather-do-i-need-one-as-a-recreational-diver) we explained the basic function of [rebreathers](https://www.divesoft.com/en/products/ccr-liberty/philosophy) and we were answering the question: \"How does the rebreather work\". But there is not just one rebreather, there are several fundamentally different types of Closed-Circuit Rebreather (CCR) and Semi-Closed Circuit Rebreather (SCR). So, let's review the basic principles of rebreathers that are used in recreational and professional diving. \n\n<h2>There are 5 types of rebreathers plus one extra:</h2>\n\n* O2 CCR\n* SCR\n* PSCR\n* mCCR\n* eCCR\n\nI consider all types to be proof of human ingenuity, but each of them has its own strengths, but of course also weaknesses. Let's focus on a basic understanding of the different principles, from the simplest to the most complex, and derive the advantages and disadvantages from there. \n\nFinally, **we will then show one solution that tries to use the most advantages with the least disadvantages**.\n\nSo let's take a look at how rebreathers work.\n\n<h2>O2 CCR</h2>\n\nThe oxygen closed circuit is** an ingeniously simple principle at first glance** and is actually the first ever independent breathing apparatus. \n\nAll we need to construct it is an oxygen source, which we inject into the breathing circuit via a demand valve sometimes supplemented by a constant flow nozzle, and a carbon dioxide scrubber to remove CO2 from the exhaled gas. For this, one or two counterlungs are sufficient to give the diver something to breathe from and a mouthpiece with directional valves to direct the flow of the breathing gas. In this way the device can operate without any electronics, virtually without the need to know the oxygen content of the loop, because if the device is well flushed with oxygen at the surface, the oxygen content of the breathing loop will always be very high during use. \n\nBecause the instrument uses only oxygen, it is the only unit that does not have to vent a single bubble, even at the ascent, where all other units must purge the excess gas volume.** Oxygen can be metabolized, so if you surface slowly enough, your body can process all the excess oxygen**. \n\nThe maximum compactness and very lightweight construction make it **easy to transport on dry land**, so it can also be used in areas other than diving. Such devices are used, for example, by firefighters, mine rescuers, pilots, etc.\n\nRecreational diving with an oxygen CCR is unfortunately very limited to a **maximum dive depth of 6 metres due to oxygen toxicity**. Even so, it can still be great for photography in shallow water, exploring mountain lakes and otherwise inaccessible places where we have to carry the device on our backs.\n\n\n*Oxygen Closed Circuit Rebreather â 1 In
2hale counterlung; 2 Dive/Surface valve (DSV); 3 Exhale Counterlung; 4 CO2 scrubber; 5 Oxygen supply; 6 Oxygen reduction valve; 7 constant flow nozzle; 8 Manual addition valve (MAV); 9 Oxygen SPG*\n\n<div class=\"row\">\n <div class=\"column\" >\n\t\t<p><b>Advantages:</b>\n\t\t<ul>\n\t\t\t<li>Maximum gas efficiency\n<li>Maximum simplicity of design\n<li>Minimal weight\n<li>Simple operation\n<li>No need for decompression stops\n<li>No electronics required\n\t\t</ul></p>\n\t</div>\n\t\n <div class=\"column\">\n\t<p><b>Disadvantages:</b>\n\t<ul>\n\t\t<li>Cannot be used deeper than 6m\n\t</ul></p>\n</div>\n</div>\n\n<h2> SCR</h2>\n\nTo go deeper than 6 metres, we need to dilute the oxygen. So, we will use a very similar principle to the oxygen CCR, but **instead of oxygen we will add NITROX**. This will be injected into the circuit through a constant flow nozzle so that the oxygen consumed is always replaced by the oxygen from the nitrox. Since we metabolize the oxygen, but cannot metabolize the nitrogen in the nitrox, **we must get rid of the ever-increasing nitrogen by venting some of the gas out of the circuit.** Hence the semi-closed circuit. The simplicity of the design has been preserved, but the opportunity to go deeper has been traded off for a not very high gas consumption efficiency. \n\nBecause we consume oxygen, the fraction of oxygen in the breathing circuit will always be less than that in the cylinder with the supplied gas. How much smaller it will be depending on how much oxygen we consume. If we are at rest we use about 0.6 litres, but on exertion we may use 2.5 to 3 litres of oxygen per minute. In the case of a lower value, a flow rate of 8 litres of Nitrox 36 per minute would be sufficient to maintain breathable gas, but we have to allow for the worst-case scenario of never dropping below breathable levels. In that case, we need up to 18 litres per minute. \n\nThis is already like an open circuit, however, unlike an open circuit, **this flow rate can remain constant for any achievable depth**. In this particular case, **the maximum is 35 metres**. This means that the SCR is still up to tens of litres per minute better than the open circuit.\n\nThe unstable oxygen consumption also leads to an unstable gas composition in the breathing loop. **More consumption means less oxygen and thus the need for longer decompression**. PO2 naturally varies with depth, so the best mixture is out of the question. This is another disadvantage. Without an oxygen sensor connected, the diver cannot be sure of what he is breathing and how to calculate decompression, so he has to start from worst-case scenarios for both maximum depth and decompression calculations. We can also consider the fact that we cannot fill the cylinders with available air as a disadvantage. Or we could, but then we couldn't dive directly from the surface because the partial pressure of oxygen would be too low.\n\nDespite some drawbacks, however, the** Constant Flow SCR is very simple to operate,** which is why this principle was used in the first recreational rebreathers. It has also been dusted off in the recent past and in a somewhat hybrid form combined with electronics is used in one of the recreational rebreathers of the current day.\n\n\n*Semi-closed Circuit Rebreather â 1 In
2hale counterlung; 2 Dive/Surface valve (DSV); 3 Exhale Counterlung; 4 CO2 scrubber; 5 Nitrox supply; 6 Nitrox reduction valve; 7 constant flow nozzle; 8 Manual addition valve (MAV); 9 Nitrox SPG; 10 Overpressure valve*\n\n<div class=\"row\">\n <div class=\"column\" >\n\t\t<p><b>Advantages:</b>\n\t\t<ul>\n\t\t\t<li>Simplicity of design\n<li>Applicable to recreational depths\n\t\t\t<li>With some self-discipline, </br>no monitoring electronics required\n\t\t</ul></p>\n\t</div>\n\t\n <div class=\"column\">\n\t<p><b>Disadvantages:</b>\n\t<ul>\n<li>Unstable and uncertain oxygen fraction </br>in the breathing loop\n\t<li>Lowest gas consumption efficiency </br>of all rebreathers\n\t</ul></p>\n</div>\n</div>\n\n<h2>PSCR</h2>\n\nAs a solution for those who needed** to save as much gas as possible without the need for any electronics**, a solution was found in the 1980s in the form of a passive semi-closed circuit. Everyone wants to know how this rebreather works. The word passive means that the mixture does not flow into the breathing circuit in a constant flow of gas but is injected by an ingenious mechanism every xth breath. Usually, every eighth or ninth breath. \n\nThe so-called breath keying is solved by t**he diver exhaling through a CO2 absorber partly into a large counterlung in the form of a bellows, and partly into a small counterlung**, which is placed inside the large one. Importantly, the small counterlung is separated from the large counterlung by a one-way valve, so that exhalation can be directed into it, but inhalation cannot be taken from it. Instead, when the diver inhales, it collapses along with the large counterlung as the diver sucks the gas out of the large counterlung, and with its other end with a second non-return valve, exhausts some of the gas into the surrounding environment. \n\nBy venting some of the gas to the surrounding environment, both counterlungs gradually shrink until they collapse completely. At that point, the diver can no longer breathe from the closed circuit, so the demand valve (essentially the second stage of the regulator) opens to supply the diver with a completely fresh mixture. With the exhalation, the counterlung fills and the whole cycle starts again. **The ratio of breaths from the closed circuit to the addition of fresh gas determines the ratio of the volumes of the two counterlungs.** As I mentioned above, the ratio is most often 8:1 or 9:1.\n\nThis system is actually very clever and retains a completely mechanical solution without the need for any electronics. It was and is therefore used for long and difficult cave explorations even at great depths. However, the mixture ratio in the loop and thus the partial pressure of oxygen is very unstable, and again always slightly lower than the oxygen content of the supply bottle. \n\nThe big disadvantage is **the inefficiency of decompression**, because you always have worse gas than in an open circuit, and the PO2 changes with depth, and breathing. Of course, the biggest disadvantage of all is the poor work of breathing, which comes from the counterlung placement usually very far from the diver's lungs. So any change in the diver's position will immediately have a negative effect on inspiratory or expiratory resistance. \n\nThe keying of the inspiration also means that the consumption, although lower than in an open circuit, increases proportionally with depth, as in an open circuit. \n\n\n*Passive Addition Semi-closed Circuit Rebreather â 1 In
2hale/Exhale counterlung bellows; 2 Discharge bellows; 3 Dive/Surface valve (DSV); 4 CO2 scrubber; 5 and 6 Directional valves; 7 Demand valve; 8 Manual addition valve (MAV); 9 reduction valve; 10 SPG*\n\n<div class=\"row\">\n <div class=\"column\" >\n\t\t<p><b>Advantages:</b>\n\t\t<ul>\n\t\t\t<li>Simplicity of principle \n\t\t\t<li>No electronics required \n\t\t\t<li>Durability of construction        \n\t\t\t<li>Large depth range \n\t\t</ul></p>\n\t</div>\n\t\n <div class=\"column\">\n\t<p><b>Disadvantages:</b>\n\t<ul>\n\t\t<li>Gas consumption increases in direct </br>proportion to ambient pressure\n<li>Generally longer decompression </br>than with OC\n<li>Very poor work of breathing\n<li>Unstable oxygen content in the loop\n\t</ul></p>\n</div>\n</div>\n\n<h2>eCCR</h2>\n\nTo counteract the disadvantages of semi-closed circuits, where the gas consumption and decompression process is not very efficient, we have to use a fully closed circuit, similar to the oxygen circuit at the beginning. However, in order to dive deep, we need to dilute the oxygen. This time, however, we do it by **leaving the oxygen alone and diluting it with another gas containing an inert gas** (nitrogen, helium). This gas could be air, trimix or even heliox. \n\n**The oxygen is injected into the circuit by means of a solenoid** (electro-magnetically controlled valve). The computer evaluates how much oxygen needs to be injected based on information from the oxygen sensors. The oxygen sensors react to the partial pressure by changing the electric current. The gas is diluted during descent by the previously mentioned diluent gas, which is injected by an automatic (mechanical) valve. **The computer adjusts the consumed oxygen to a pre-set oxygen partial pressure level** - setpoint. Therefore it is also referred to as Constant PO2 CCR.\n\nFrom the above, it follows that **the diver receives only the best mixture at any depth**. This achieves maximum gas consumption efficiency while minimizing decompression. See previous article (link) for details.\n\nDespite all the advantages and convenience of electronics that can also calculate decompression on-line, **the vulnerable point of such devices tends to be the faulty electronic components**. While today's electronics are of course at a different level than 40 years ago, the issue of oxygen sensors remains the same. Each eCCR has at least 3 sensors for comparing their readings and possibly identifying a faulty sensor.\n\nHowever, the other elements of the system are often not backed up, and in the event of their failure, the diver is forced to use emergency procedures.\n\n\n*Electronically controlled Closed Circuit Rebreather (eCCR) â 1 Inhale counterlung; 2 Dive/Surface valve (DSV); 3 Exhale Counterlung; 4 CO2 scrubber; 5 Oxygen supply; 6 Oxygen reduction valve; 8 Oxygen Manual addition valve (MAV); 9 Oxygen SPG; 10 Diluent supply, 11 Diluent reduction valve; 12 Diluent SPG; 13 Automatic Diluent Valve; 14 Diluent Manual Addition Valve (MAV); 15 Oxygen sensors; 16 Control unit (CU); 17 Solenoid; 18 Handset display.*\n\n<div class=\"row\">\n <div class=\"column\" >\n\t\t<p><b>Advantages:</b>\n\t\t<ul>\n\t\t\t<li>Maximum gas efficiency\n\t\t\t<li>Minimal decompression\n\t\t\t<li>Constant and known partial pressure </br>of oxygen in the loop\n\t\t\t<li>Maximum depth range\n\t\t</ul></p>\n\t</div>\n\t\n <div class=\"column\">\n\t<p><b>Disadvantages:</b>\n\t<ul>\n\t\t<li>Electronics can fail\n\t\t<li>Complexity of equipment\n\t</ul></p>\n</div>\n</div>\n\n<h2>mCCR</h2>\n\nThe trend to avoid electronics at all costs, but still enjoy the benefits of a fully closed circuit, such as maximum gas savings and minimum decompression, has led to the design of the mechanical CCR (mCCR). \n\nThis has been achieved by retaining the eCCR design but** instead of a solenoid, oxygen is injected through a constant mass flow**. The oxygen flow is achieved by a nozzle connected to a constant intermediate pressure. This means that the first stage of the oxygen regulator has a blanked section which registers ambient pressure. The ambient pressure therefore does not affect the intermediate pressure and so the oxygen flow through the nozzle decreases with increasing ambient pressure and therefore gas density. However, the amount of oxygen molecules that pass through the nozzle is independent of depth, so the oxygen flow still affects PO2 in the same way. \n\nSounds fantastic, doesn't it? Except that to keep oxygen from accumulating too much in the breathing loop, w**e have to set the oxygen flow rate lower than our metabolic consumption in order to maintain breathable gas.** This creates the need to inject oxygen manually. Thus, our oxygen is measured by the same sensors as in the case of eCCR, but everything is **monitored and controlled by the fallible human brain**, which is easily distracted. Not adding oxygen, especially during ascent to the surface, would of course have fatal consequences.\n\nA blinded first stage on oxygen is a very clever solution, but it comes with one drawback. The fact that **the mean pressure does not vary with depth implies that when the mean pressure equalizes with the ambient pressure, oxygen stops flowing altogether**. Further, it is not even possible to use separate manual injectors. mCCR is therefore limited by depth.\n\n\n*Manual Closed Circuit Rebreather (mCCR) â 1 In
2hale counterlung; 2 Dive/Surface valve (DSV); 3 Exhale Counterlung; 4 CO2 scrubber; 5 Oxygen supply; 6 Oxygen reduction valve (blinded); 8 Oxygen Manual addition valve (MAV); 9 Oxygen SPG; 10 Diluent supply, 11 Diluent reduction valve; 12 Diluent SPG; 13 Automatic Diluent Valve; 14 Diluent Manual Addition Valve (MAV); 15 Oxygen sensors; 17 Constant mass flow; 18 Handset display.*\n\n<div class=\"row\">\n <div class=\"column\" >\n\t\t<p><b>Advantages:</b>\n\t\t<ul>\n\t\t\t<li>Maximum gas consumption efficiency       \n\t\t\t<li>Minimum decompression\n\t\t</ul></p>\n\t</div>\n\t\n <div class=\"column\">\n\t<p><b>Disadvantages:</b>\n\t<ul>\n\t\t<li>Increased possibility of human factor failure\n\t\t<li>Depth limitation \n\t</ul></p>\n</div>\n</div>\n\n<h2>Fault tolerant eCCR</h2>\n\nIf we think about all the previous principles, we would like to have only advantages and get rid of disadvantages. This is clear. But what to do about it? We have thought about this too, and the solution we bring is that we can't do without electronics in this case. **We also have to give up maximum simplicity.** But what if by making the system more complex, or rather, by backing it up and securing it, we achieve greater security than with a simple system?\n\nWe know this from advanced technologies on which human lives depend, such as aerospace. **All systems are minimally duplicated or triplicated and ingeniously put together to complement or replace each other.** We have attempted the same in the case of the [Liberty CCR](https://www.divesoft.com/en/products/ccr-liberty) which we dare to call **the Fault Tolerant Rebreather**.\n\nIf we build two systems side by side, each with its own power source, its own set of sensors and its own solenoid, then everything is duplicated. In addition, if we interconnect the two systems so that they can communicate with each other continuously, sharing information from all sensors and evaluating it independently, then we achieve that **the failure of one or more components will not affect the operation of the entire system**. \n\nThe instrument can continue to operate without the need for any emergency diver intervention. **The diver, on the other hand, has maximum control of the situation**. He knows the readings from all the sensors and can evaluate or directly verify the accuracy of their readings. \n\nThe smart software also makes sure that the handling of this already quite complex device is user-friendly and the diver has as much or much less work to do with controlling the device than with conventional eCCRs.\n\nThe only disadvantage is the relative overall design complexity of the device, which is for the better and makes the diver's life rather easier.\n\n\n*Fault tolerant electronically controlled Closed Circuit Rebreather â 1 In
2hale counterlung; 2 Dive/Surface valve (DSV); 3 Exhale Counterlung; 4 CO2 scrubber; 5 Oxygen supply; 6 Oxygen reduction valve; 8 Oxygen Manual addition valve (MAV); 9 Oxygen SPG; 10 Diluent supply, 11 Diluent reduction valve; 12 Diluent SPG; 13 Automatic Diluent Valve; 14 Diluent Manual Addition Valve (MAV); 15 Oxygen sensors; 16 Control units (CU); 17 Solenoids; 18 Handset display.*\n\n<div class=\"row\">\n <div class=\"column\" >\n\t\t<p><b>Advantages:</b>\n\t\t<ul>\n\t\t\t<li>Maximum gas efficiency\n\t\t\t<li>Minimal decompression\n\t\t\t<li>Constant and known partial pressure </br>of oxygen in the loop\n\t\t\t<li>Fail-proof electronics\n\t\t\t<li>Maximum depth range\n\t\t</ul></p>\n\t</div>\n\t\n <div class=\"column\">\n\t<p><b>Disadvantages:</b>\n\t<ul>\n\t\t<li>Equipment design complexity\n\t</ul></p>\n</div>\n</div>","showTags":false,"showDate":false,"image":{"mimetype":"image/png","size":769617,"hash":"32fdd1bc951a02333e36aa4459718556c4df5e7f","id":"cl48jymulhw9o0776c2i0zuyj","filename":"29-fault-tolerant.png","category":"divesoft/","type":"image","alt":"5 basic principles of rebreather and one extra"}},"id":"#2","type":"component","lock":false,"position":1},{"name":"VideoGallery","data":{"title":"mCCR vs eCCR","description":"Watch some of our videos to get deeper into the topic!","divider":false,"videos":[{"video":{"type":"embeddedVideo","url":"https://www.youtube.com/embed/9c_vt8S5_gE"},"title":"Manual Rebreathers vs Electronic Rebreathers","text":"The difference between manual rebreathers and electronically controlled rebreathers.","id":"1"},{"id":"2","title":"mCCR vs eCCR with Jill Heinerth and Jeff Bozanic","text":"We bring in CCR experts; Jill Heinerth and Jeff Bozanic to discuss eCCRs where they have been and where they are going! ","video":{"type":"embeddedVideo","url":"https://www.youtube.com/embed/b9tc4abjmXY"}}]},"id":"#8","type":"component","lock":false,"position":2},{"name":"ProductShowcase","data":{"componentTemplateId":"cm9h4wr6ugjv10803yqs3tp71"},"id":"#9","type":"component","lock":false,"position":3},{"name":"Footer","data":{"copyrights":"Copyright © 2019 Divesoft LLC All rights reserved.","facebookUrl":"","youtubeUrl":"","instagramUrl":"","contacts":"**Divesoft, s.r.o.** Hálkova 2495 413 01 Roudnice nad Labem Äeská republika Tel.: +420 416 857 057 E-mail: [email protected]"},"id":"#1","type":"component","lock":false,"position":4}],"id":"root","idBuffer":"#10","lastCommit":"3e015474-2b96-4731-902d-9ea00f81d4a3"}},"annotations":[{"type":"id","generated":true,"id":"PageTranslation:cl48h6z9blpyl0858xp9nhbyu.annotations.0","typename":"PageAnnotation"},{"type":"id","generated":true,"id":"PageTranslation:cl48h6z9blpyl0858xp9nhbyu.annotations.1","typename":"PageAnnotation"},{"type":"id","generated":true,"id":"PageTranslation:cl48h6z9blpyl0858xp9nhbyu.annotations.2","typename":"PageAnnotation"}],"language":{"type":"id","generated":false,"id":"Language:cjv3kwvoj000u083611381c6o","typename":"Language"},"__typename":"PageTranslation"},"PageTranslation:cl48h6z9blpyl0858xp9nhbyu.annotations.0":{"key":"title","value":"5 basic principles of rebreather and one extra","__typename":"PageAnnotation"},"PageTranslation:cl48h6z9blpyl0858xp9nhbyu.annotations.1":{"key":"perex","value":"For a beginner entering the world of rebreathers, it can be quite confusing to see the many different principles of rebreathers available. Even some already experienced rebreather divers using one type of device need to be aware of the other types.","__typename":"PageAnnotation"},"PageTranslation:cl48h6z9blpyl0858xp9nhbyu.annotations.2":{"key":"image","value":"{\"mimetype\":\"image/png\",\"size\":769617,\"hash\":\"32fdd1bc951a02333e36aa4459718556c4df5e7f\",\"id\":\"cl48jymulhw9o0776c2i0zuyj\",\"filename\":\"29-fault-tolerant.png\",\"category\":\"divesoft/\",\"type\":\"image\"}","__typename":"PageAnnotation"},"Page:cl78rvnxwtvo808589liz2pfw":{"id":"cl78rvnxwtvo808589liz2pfw","type":{"type":"id","generated":false,"id":"PageType:cjv3l213x004f08366hjufttp","typename":"PageType"},"tags":[],"translations({\"where\":{\"language\":{\"id\":\"cjv3kwvoj000u083611381c6o\"}}})":[{"type":"id","generated":false,"id":"PageTranslation:cl78rvny9tvof08580yp0rngq","typename":"PageTranslation"}],"__typename":"Page"},"PageTranslation:cl78rvny9tvof08580yp0rngq":{"id":"cl78rvny9tvof08580yp0rngq","name":"Professional Flow limiter Mk2","createdAt":"2022-08-25T08:17:58.784Z","content":{"type":"json","json":{"content":[{"name":"Header","data":{"products":[{"title":"Accessories","description":"Backplates, Consumables. Tanks.","img":{"recommendedSizes":{"width":"235","height":"235"}},"url":""},{"title":"Accessories sets","description":"Protection, maintenance, cleaning.","img":{"recommendedSizes":{"width":"235","height":"235"}},"url":""},{"title":"Spare parts","description":"Spare parts and components.","img":{"recommendedSizes":{"width":"235","height":"235"}},"url":""}
2,{"title":"Spare parts kits","description":"Completly Liberty spare parts kits.","img":{"recommendedSizes":{"width":"235","height":"235"}},"url":""}]},"id":"#0","type":"component","lock":false,"position":0},{"name":"ProductCrossroadNew","data":{"componentTemplateId":"cmp172nfu00f208260n7srwjg"},"id":"#8","type":"component","lock":false,"position":1},{"name":"HeroV2","data":{"slides":[{"media":{"recommendedSizes":{"width":"3840","height":"2560"},"mimetype":"image/jpeg","size":2264693,"hash":"26a3d33d7c74faa67f17c5ac4d25777ba95698ad","id":"cmpciev5p4kip0800qyx73dlf","filename":"dsc00245-16.jpg","category":"divesoft/","type":"image","alt":"Scuba gas analyzer connected using Divesoft Flow Limiter Mk2"},"productName":"","title":"Professional Flow limiter Mk2","linkTitle":"BUY","link":{"url":"https://eshop.divesoft.com","urlNewWindow":true},"autoplayDuration":9000,"id":"1","linkUrl":{"urlNewWindow":true,"url":"https://eshop.divesoft.com/products/flow-limiters"}}],"activeTab":"1"},"id":"#9","type":"component","lock":false,"position":2},{"name":"Spacer","data":{"spacingLarge":30,"spacingSmall":"80","backgroundColor":"#ffffff"},"id":"#10","type":"component","lock":false,"position":3},{"name":"ImageTextBlock","data":{"backgroundColor":"white","content":"## Flow
2Limiter Mk2\n\n**Stable flow. Better analysis.**\n\nThe Divesoft Flow Limiter Mk2 creates a steady gas flow for more reliable breathing gas analysis.\nDesigned for scuba divers, dive shops, fill stations, and everyday diving operations, it helps analyzers work under stable conditions for smoother and more consistent gas measurements.\nIt attaches directly to the cylinder valve and is compact enough to take anywhere.\nSmall tool. Big difference.\n\n**Why divers choose the Flow Limiter Mk2**\n- \\> Stable flow for consistent breathing gas analysis \n- \\> Reliable gas measurement performance \n- \\> Easy connection to scuba cylinder valves \n- \\> Compact and durable design \n- \\> Ideal for diving gas analyzers and fill stations \n- \\> Designed for everyday diving operations \n","links":[],"isMirrored":false,"image":{"recommendedSizes":{"width":"1500","height":"1500"},"mimetype":"image/png","size":317758,"hash":"c6460a2988d4f1719f447d913fb664d0ee782ba1","id":"cl7zvuipudomm07761wnx40bj","filename":"8437-divesoft-professional-flow-limiter-mk2-02t.png","category":"divesoft/","type":"image","alt":"Scuba gas analyzer connected using Divesoft Flow Limiter Mk2"}},"id":"#11","type":"component","lock":false,"position":4},{"name":"PhotoGallery","data":{"title":"","description":"","divider":false,"images":[{"id":"1","image":{"mimetype":"image/png","size":155808,"hash":"5e5f844fa928c9d8a22e55948b205ba7a0115441","id":"cl7zvqe1bdoic0776ff26e8ci","filename":"8437-divesoft-professional-flow-limiter-mk2-01w.png","category":"divesoft/","type":"image"}},{"id":"2","image":{"mimetype":"image/png","size":199753,"hash":"b82668c297a478bb9d30067bcfcee4cad8076a7a","id":"cl7zvqrj3doj70776l9hr3oz2","filename":"8437-divesoft-professional-flow-limiter-mk2-02w.png","category":"divesoft/","type":"image"}},{"id":"3","image":{"mimetype":"image/png","size":182965,"hash":"6b36f0290a7c9477d81247e7b157ba0da2d2f719","id":"cl7zvqyk3doji0776fkrphdyc","filename":"8437-divesoft-professional-flow-limiter-mk2-03w.png","category":"divesoft/","type":"image"}}],"activeTab":"3"},"id":"#13","type":"component","lock":false,"position":5},{"name":"AccordionLinks","data":{"accordionTitle":"Documents","links":[{"itemTitle":"Quick reference","linkLabel":"Open","linkUrl":{"url":"/en/manuals/professional-flow-limiter-mk2-quick-reference-en","pageId":"clloxy7n3708p0735122lbaxh"},"id":"2"}],"storesTitle":"","appStoreLink":{"url":"https://apps.apple.com/cz/app/divesoft-app/id1545496130"},"googlePlayLink":{"url":"https://play.google.com/store/apps/details?id=com.divesoft.divesoft_app"}},"id":"#12","type":"component","lock":false,"position":6},{"name":"Footer","data":{"componentTemplateId":"cjvwimxrl08e40798hjs5ek9w"},"id":"#1","type":"component","lock":false,"position":13}],"id":"root","idBuffer":"#14","lastCommit":"5ee99c27-5a70-4ac2-868c-1d910b76b6e3"}},"annotations":[],"language":{"type":"id","generated":false,"id":"Language:cjv3kwvoj000u083611381c6o","typename":"Language"},"__typename":"PageTranslation"},"Page:cl7oo6u7qv8cf0858exiqv6ad":{"id":"cl7oo6u7qv8cf0858exiqv6ad","type":{"type":"id","generated":false,"id":"PageType:cjv3l213x004f08366hjufttp","typename":"PageType"},"tags":[],"translations({\"where\":{\"language\":{\"id\":\"cjv3kwvoj000u083611381c6o\"}}})":[{"type":"id","generated":false,"id":"PageTranslation:cl7oo6u84v8cm08582hjp1bi9","typename":"PageTranslation"}],"__typename":"Page"},"PageTranslation:cl7oo6u84v8cm08582hjp1bi9":{"id":"cl7oo6u84v8cm08582hjp1bi9","name":"Bail Out Rebreather","createdAt":"2022-09-05T11:19:00.483Z","content":{"type":"json","json":{"content":[{"name":"Header","data":{"products":[{"title":"Accessories","description":"Backplates, Consumables. Tanks.","img":{"recommendedSizes":{"width":"235","height":"235"}},"url":""},{"title":"Accessories sets","description":"Protection, maintenance, cleaning.","img":{"recommendedSizes":{"width":"235","height":"235"}},"url":""},{"title":"Spare parts","description":"Spare parts and components.","img":{"recommendedSizes":{"width":"235","height":"235"}},"url":""},{"title":"Spare parts kits","description":"Completly Liberty spare parts kits.","img":{"recommendedSizes":{"width":"235","height":"235"}},"url":""}]},"id":"#0","type":"component","lock":false,"position":0},{"name":"ProductCrossroadNew","data":{"componentTemplateId":"cmo5ko5huwtv40889ugkkecht"},"id":"#17","type":"component","lock":false,"position":1},{"name":"HeroV2","data":{"slides":[{"media":{"recommendedSizes":{"width":"3840","height":"2560"},"mimetype":"image/jpeg","size":11194736,"hash":"701a3d2ec257dbf7ecfa3b33388ed5bf56b3935c","id":"cmp2f3kn10w870800puaxs8xb","filename":"dsc01308.jpg","category":"divesoft/","type":"image"},"productName":"","title":"Liberty as Bailout Rebreather","linkTitle":"","link":{"url":"https://eshop.divesoft.com","urlNewWindow":true}
2,"autoplayDuration":9000,"id":"1"}],"activeTab":"1"},"id":"#18","type":"component","lock":false,"position":2},{"name":"Spacer","data":{"spacingLarge":"80","spacingSmall":"80","backgroundColor":"#ffffff"},"id":"#20","type":"component","lock":false,"position":3},{"name":"ImageTextBlock","data":{"backgroundColor":"white","content":"## More time. Less gas.\n\nThe CCR Liberty can be configured as a bailout rebreather for dives where traditional open-circuit bailout becomes large, heavy, and difficult to manage.\n\nBy recycling breathing gas, the Liberty rebreather helps reduce bailout gas requirements during long decompression dives, cave diving, and deep technical exploration.\n\n**Smaller setup. Greater flexibility underwater.**\n","links":[],"isMirrored":false,"image":{"recommendedSizes":{"width":"1500","height":"1500"},"mimetype":"image/jpeg","size":859850,"hash":"fe689d09a3326c556d872fb1e5453a43df5f2d1a","id":"clw4thkz2wv4q0776gz9lbmsz","filename":"divesoft-photo-079-bailout-procedures.jpg","category":"divesoft/","type":"image","alt":"CCR Liberty bailout rebreather by Divesoft"}},"id":"#19","type":"component","lock":false,"position":4},{"name":"ImageTextBlock","data":{"backgroundColor":"white","content":"## Why use a bailout rebreather?\n\nCarrying enough open-circuit bailout gas for deeper dives often means additional cylinders, more weight, and increased complexity.\n\nA bailout rebreather reduces gas consumption during ascent and decompression, helping divers carry less gas while maintaining extended bailout capability.\n\n**More efficiency. More options.**\n","links":[],"isMirrored":true,"image":{"recommendedSizes":{"width":"1500","height":"1500"},"mimetype":"image/jpeg","size":12463456,"hash":"c424fde6b30aea855e80410aac9c18b23863b539","id":"cmpcl55xt4n2708000hmgg5oj","filename":"dsc00442.jpg","category":"divesoft/","type":"image"}},"id":"#21","type":"component","lock":false,"position":5},{"name":"ImageTextBlock","data":{"backgroundColor":"white","content":"## One Liberty Platform\n\nWhether
2configured as a primary unit, dual rebreather, or bailout rebreather, the CCR Liberty keeps the same controls, interface, and diving logic throughout the system.\n\nFamiliar operation helps reduce task loading and keeps the dive simple when it matters most.\n\n**One system. Multiple possibilities.**\n","links":[],"isMirrored":false,"image":{"recommendedSizes":{"width":"1500","height":"1500"},"mimetype":"image/jpeg","size":219764,"hash":"03a31d75141c6973bafa3af8f4ae9d714298fd22","id":"cl7onnjfhaqss0776tyngsrzd","filename":"271862163-4738456929582049-3356379064534297937-n.jpg","category":"divesoft/","type":"image","alt":"CCR Liberty bailout rebreather by Divesoft"}},"id":"#22","type":"component","lock":false,"position":6},{"name":"ImageTextBlock","data":{"backgroundColor":"white","content":"## Build for exploration\n\nBuilt for exploration\nThe Liberty CCR is designed for demanding dives including:\n- \\> Cave diving \n- \\> Deep wreck exploration \n- \\> Long decompression dives \n- \\> Advanced technical diving \n- \\> Dual rebreather configurations \n \nReliable electronics, redundant systems, and smooth breathing performance help divers stay focused underwater.\n","links":[],"isMirrored":true,"image":{"recommendedSizes":{"width":"1500","height":"1500"},"mimetype":"image/jpeg","size":11194736,"hash":"701a3d2ec257dbf7ecfa3b33388ed5bf56b3935c","id":"cmp2f3kn10w870800puaxs8xb","filename":"dsc01308.jpg","category":"divesoft/","type":"image","alt":"Cave diver with Divesoft Liberty rebreather"},"activeTab":"1"},"id":"#23","type":"component","lock":false,"position":7},{"name":"ImageTextBlock","data":{"backgroundColor":"white","content":"## Learn more\nExplore more about bailout rebreather diving and training:\n\n- \\> [Diving with a bailout rebreather ](https://www.divesoft.com/en/blog/diving-with-bailout-rebreather)\n- \\> [Dual and bailout rebreathers training](http://www.divesoft.com/en/blog/ccr-diving-certification-courses-how-it-goes-and-what-you-need-to-know) \n","links":[],"isMirrored":false,"image":{"recommendedSizes":{"width":"1500","height":"1500"},"mimetype":"image/jpeg","size":426813,"hash":"2c89c5df69dcd6a06cd94f8a81cffdb88cb81dc7","id":"cl7onzrhiar25077663n542ys","filename":"pvt-liberty-1130x1130.jpg","category":"divesoft/","type":"image","alt":"Cave diver with Divesoft Liberty rebreather"}},"id":"#24","type":"component","lock":false,"position":8},{"name":"BlogPreviewV2","data":{"title":"Dive into more content","description":"Our community is built on sharing experiences, supporting one another, and growing together. Together, we overcome every depth and every challenge.","blogUrl":{"url":"/en/blog","pageId":"ckpcgx2c64h2d0788rft16oow","urlNewWindow":false},"articles":{"sourceType":"pages","data":{"title":"%page,annotations,title% ","perex":"%page,annotations,perex% ","image":{"dynamiclySourcedImage":"%page,annotations,image%"},"url":{"pageSourcedUrl":true}},"filters":[],"tagIds":["clw52vo5mlckc0735dl0is8ok"],"orderBy":"%page,createdAt%","order":"DESC"}},"id":"#28","type":"component","lock":false,"position":9},{"name":"Footer","data":{"componentTemplateId":"cjvwimxrl08e40798hjs5ek9w"},"id":"#1","type":"component","lock":false,"position":26}],"id":"root","idBuffer":"#29","lastCommit":"53a33d2a-f63e-44fb-921f-6fe917da5917"}},"annotations":[],"language":{"type":"id","generated":false,"id":"Language:cjv3kwvoj000u083611381c6o","typename":"Language"},"__typename":"PageTranslation"},"Page:cl8mqor4qyjzv0858vty0cfa3":{"id":"cl8mqor4qyjzv0858vty0cfa3","type":{"type":"id","generated":false,"id":"PageType:cjv3l213x004f08366hjufttp","typename":"PageType"},"tags":[],"translations({\"where\":{\"language\":{\"id\":\"cjv3kwvoj000u083611381c6o\"}}})":[{"type":"id","generated":false,"id":"PageTranslation:cl8mqor53yk0208586eqmg2jk","typename":"PageTranslation"}],"__typename":"Page"},"PageTranslation:cl8mqor53yk0208586eqmg2jk":{"id":"cl8mqor53yk0208586eqmg2jk","name":"#8402_oda_en","createdAt":"2022-09-29T07:33:05.510Z","content":{"type":"json","json":{"content":[{"name":"Header","data":{"products":[{"title":"Accessories","description":"Backplates, Consumables. Tanks.","img":{"recommendedSizes":{"width":"235","height":"235"}},"url":""},{"title":"Accessories sets","description":"Protection, maintenance, cleaning.","img":{"recommendedSizes":{"width":"235","height":"235"}},"url":""},{"title":"Spare parts","description":"Spare parts and components.","img":{"recommendedSizes":{"width":"235","height":"235"}},"url":""}
2,{"title":"Spare parts kits","description":"Completly Liberty spare parts kits.","img":{"recommendedSizes":{"width":"235","height":"235"}},"url":""}]},"id":"#0","type":"component","lock":false,"position":0},{"name":"SectionDivider","data":{"title":"ODA","skipToC":false},"id":"#49","type":"component","lock":false,"position":1},{"name":"ProductShowcase","data":{"backgroundColor":"#ffffff","isTextDark":true,"isImageRight":false,"image":{"mimetype":"image/png","size":701083,"hash":"3950cf85fed564ff323697c064bfe4f0778ffa3b","id":"ckqhtt67hvzfb0776g16oh8da","filename":"8402-divesoft-oda-banner.png","category":"divesoft/","type":"image"},"imageMobile":{},"title":"ODA","subtitle":"User manual","description":"","hideDescriptionOnMobile":false,"areButtons":false,"firstTitle":"Learn more >","firstUrl":"","secondTitle":"Configurator >","secondUrl":""},"id":"#2","type":"component","lock":false,"position":2},{"name":"Divider","data":{"color":"darkGray"},"id":"#3","type":"component","lock":false,"position":3},{"name":"TextBlock","data":{"text":"<span style=\"color:red\">**WARNING: ODA is a supplemental device. Do not use ODA as the sole source of information\ndisplayed.**</span>\n\t\n\n<span style=\"color:red\">**WARNING: This device is intended only for thoroughly trained persons with a valid certification\nfor diving with a Liberty rebreather. Improper use can cause injury or death.**</span>","textLarge":false,"imageOnRight":true,"image":{"recommendedSizes":{"width":"420","height":"280"}},"imageMobile":{"recommendedSizes":{"width":"750","height":"500"}}},"id":"#4","type":"component","lock":false,"position":4},{"name":"Divider","data":{"color":"darkGray"},"id":"#6","type":"component","lock":false,"position":5},{"name":"SectionDivider","data":{"title":"","skipToC":false},"id":"#51","type":"component","lock":false,"position":6},{"name":"TextBlock","data":{"text":"### Content\n\n[**1. ODA Technical specifications**](#1-.-ODA-Technical-specifications)\n\n[1.1 Material](#1-.-1-Material)\n\n[**2. What is the ODA**](#2-.-What-is-the-ODA)\n\n[**3. How to connect ODA and put it in to operation**](#3-.-How-to-connect-ODA-and-put-it-in-to-operation)\n\n[**4. Placement**](#4-.-Placement)\n\n[**5. Focus**](#5-.-Focus)\n\n[**6. Rear LED and ambient light sensor**](#6-.-Rear-diode-and-luxmeter)\n\n[**7. ODA behaviour during the Pre-dive check\nsequence**](#7-.-ODA-behaviour-during-the-Pre---dive-check-sequence)\n\n[**8. How to read the data on the display**](#8-.-How-to-read-the-data-on-the-display)\n\n[**9. Alarms**](#9-.-Alarms)\n\n[**10. Compass and its control**](#10-.-Compass-and-its-control)\n\n[10.1 Compass calibration](#10-.-1-Compass-callibration)\n\n[10.2 Presence of strong magnetic fields](#10-.-2-Presence-of-strong-magnetic-fields)\n\n[10.3 Position of the ODA relative to the diverâs eye](#10-.-3-Position-of-the-ODA-relative-to-the-diver´s-eye)\n\n[10.4 Azimuth fixation](#10-.-4-Azimuth-fixation)\n\n[10.5 Survey marks](#10-.-5-Survey-marks)\n\n[**11.0 Liberty FW update process with ODA**](#11-.-0-Liberty-FW-update-process-with-ODA)\n\n\n","textLarge":false,"imageOnRight":true,"image":{"recommendedSizes":{"width":"420","height":"280"}},"imageMobile":{"recommendedSizes":{"width":"750","height":"500"}}},"id":"#5","type":"component","lock":false,"position":7},{"name":"Divider","data":{"color":"darkGray"},"id":"#7","type":"component","lock":false,"position":8},{"name":"SectionDivider","data":{"title":"1. ODA Technical specifications"},"id":"#46","type":"component","lock":false,"position":9},{"name":"TextBlock","data":{"text":"### <span id=\"1-.-ODA-Technical-specifications\">**1. ODA Technical specifications**</span>\n\n**Max depth**: 300 m (984 ft)\n\n**Diameter**: 39,40 mm (1,55 in)\n\n**Length**: 66,50 mm (2,62 in)\n\n**Weight without holder**: 150 g (0,33 lb) connector and cable included\n\n**Buoyancy**: neutral\n\n**Connection**: HUD/BD connector\n\n**Connectivity**: Divesoft Liberty 2021 edition","textLarge":false,"imageOnRight":true,"image":{"recommendedSizes":{"width":"420","height":"280"}},"imageMobile":{"recommendedSizes":{"width":"750","height":"500"}}},"id":"#8","type":"component","lock":false,"position":10},{"name":"Divider","data":{"color":"darkGray"},"id":"#9","type":"component","lock":false,"position":11},{"name":"SectionDivider","data":{"title":"1.1 Material"},"id":"#47","type":"component","lock":false,"position":12},{"name":"TextBlock","data":{"text":"### <span id=\"1-.-1-Material\">**1.1 Material**</span>\n\n**Body**: Delrin\n\n**Optics**: Sapphire glass with anti-reflex coating\n\n**Display resolution**: 428 à 240 pixels\n\n**Focus**: Fully adjustable\n\n**Color**: black\n\n**Package content**: Semi hard case, ODA, lens cover, adjustable mount.","textLarge":false,"imageOnRight":true,"image":{"recommendedSizes":{"width":"420","height":"280"}},"imageMobile":{"recommendedSizes":{"width":"750","height":"500"}}},"id":"#10","type":"component","lock":false,"position":13},{"name":"Divider","data":{"color":"darkGray"},"id":"#11","type":"component","lock":false,"position":14},{"name":"SectionDivider","data":{"title":"2. What is the ODA"},"id":"#48","type":"component","lock":false,"position":15}
2,{"name":"TextBlock","data":{"text":"### <span id=\"2-.-What-is-the-ODA\">**2. What is the ODA**</span>\n\nThe ODA â Optical Display Adapter is a visual display device that provides diver with important\ninformation about the dive in the diverâs field of view. The purpose of this device is for the diver\nto always have dive information available, even when the diver cannot view the information\nfrom the handsets. The ODA maintains the diverâs constant awareness of dive conditions and\nnotifies the diver of the event of dangerous values impacting diver safety.\nDisplayed data: ppO2\n, depth, time, no-decompression time / decompression ceiling, TTS,\nsetpoint, oxygen sensor deviation, oxygen pressure, and diluent pressure.\nODA can only be used with the Divesoft Liberty platform. It cannot be connected to other\nrebreathers or used as a standalone computer.\n\n**IMPORTANT: ODA is only compatible with Liberty 2021 Edition and FW 2.16.2 and higher.** Make\nsure you have the correct FW installed in both the CU and the handset. (This can be found at\nthe start of the device or in the menu / Setup / System check)","textLarge":false,"imageOnRight":true,"image":{"recommendedSizes":{"width":"420","height":"280"}},"imageMobile":{"recommendedSizes":{"width":"750","height":"500"}}},"id":"#12","type":"component","lock":false,"position":16},{"name":"Divider","data":{"color":"darkGray"},"id":"#13","type":"component","lock":false,"position":17},{"name":"SectionDivider","data":{"title":"3. How to connect ODA and put it in to operation","skipToC":false},"id":"#52","type":"component","lock":false,"position":18},{"name":"TextBlock","data":{"text":"### <span id=\"3-.-How-to-connect-ODA-and-put-it-in-to-operation\">**3. How to connect ODA and put it in to operation**</span>\n\n<span style=\"color:red\">**Attention: Firmware version 2.16.2 or higher is required for proper ODA functionality**</span>\n\nThe ODA is equipped with a connector identical to the HUD or Buddy Display.\nTheoretically, it is possible to connect ODA to the left and right CU, but the cable routing\ndetermines a more advantageous connection to the right CU and the cable routing along the\nright corrugated hose.\n\nBefore installing the ODA connector to the Liberty head, make sure that there is an O-ring seal\non the connector and that it is well lubricated. Secure the connector in the head with the two\nenclosed screws using a 3 mm Allen key.\n\nWrap the ODA cable around the corrugated hose so that it does not form excess loops and is\nnot too short that head movements are restricted.\n\n**IMPORTANT: ODA needs to be enabled in Preferences in order to power on**. On the handset in the main\nmenu, select Setup / Preferences / Indication. For Left and Right, Buddy D., HUD, ODA, and None\nare selected. Depending on the actual ODA location (left CU, Right CU), select the ODA value for\nthe item. **Without this setting, ODA does not work!**\n\n**Recommendation**: If you use only one handset in conjunction with ODA, have ODA on the\nopposite CU than the handset. This allows you to back up the displayed information in the event\nof a failure of one of the CUs or batteries.","textLarge":false,"imageOnRight":true,"image":{"recommendedSizes":{"width":"420","height":"280"}},"imageMobile":{"recommendedSizes":{"width":"750","height":"500"}}},"id":"#14","type":"component","lock":false,"position":19},{"name":"Divider","data":{"color":"darkGray"},"id":"#15","type":"component","lock":false,"position":20},{"name":"SectionDivider","data":{"title":"4. Placement","skipToC":false},"id":"#53","type":"component","lock":false,"position":21},{"name":"TextBlock","data":{"text":"### <span id=\"4-.-Placement\">**4. Placement**</span>\n\nSlide the included ODA holder into the rail on the DSV or BOV of your Liberty. ODA can be\ninstalled on both the left and right eye, which is a matter of personal preference.\n\nEveryone has their dominant eye, which they perceive more naturally. The dominant eye can\nbe independent of whether you are right-handed or left-handed. If you do not know which is\nyour dominant eye, try which position of ODA suits you better and you feel more natural and\ncomfortable when watching it.\n\nIf you need to replace the ODA location side, you must unscrew the top hinge securing the ODA\nand screw it to the opposite side of the holderâs arm.\n\nIf necessary, you can flip the ODA display. Go to Setup / Preferences / Indication / HUD screen right/\nleft.\n\nAdjust the position of the ODA so that it is in your field of view and at the same time does not\nexcessively obstruct the view and does not collide with your diving mask. Pay close attention\nto the setting of the ODA angle to your eye. The angle has a major effect on the display of the\nentire ODA display.\n\nThe distance of the eyepiece from the eye should be approximately 4
2cm (about 1 1/2 inch).\n\n<span style=\"color:red\">**WARNING: Wiring the Handset and ODA on one side of the Liberty electronics significantly\nincreases the battery consumption on the associated Liberty half. If you are using both ODA and a handset on the same side, we recommend turning the handset off or setting up a screensaver. You can always wake the handset up in case of ODA failure.**</span>","textLarge":false,"imageOnRight":true,"image":{"recommendedSizes":{"width":"420","height":"280"}},"imageMobile":{"recommendedSizes":{"width":"750","height":"500"}}},"id":"#17","type":"component","lock":false,"position":22},{"name":"Divider","data":{"color":"darkGray"},"id":"#18","type":"component","lock":false,"position":23},{"name":"SectionDivider","data":{"title":"5. Focus","skipToC":false},"id":"#54","type":"component","lock":false,"position":24},{"name":"TextBlock","data":{"text":"### <span id=\"5-.-Focus\">**5. Focus**</span>\n\nRotate the eyepiece adjustment ring so that in the set ODA position, you can see the display\nsharply while seeing the surroundings without having to close the opposite eye or refocus\nbetween the display and the surroundings. The screen image should appear as if projected into\nthe environment. If you are unable to focus on the screen, change the distance of the eyepiece\nfrom the eye and continue focusing.\n\nIf the focusing mechanism is too stiff, it's for design reasons, and it's not a bad thing. **Use the included wrench to focus the eyepiece**.\n\nAlthough finding the optimal position so that you do not have to refocus may seem difficult at\nfirst, you will learn how to use ODA with your preferences in no time.","textLarge":false,"imageOnRight":true,"image":{"recommendedSizes":{"width":"420","height":"280"}},"imageMobile":{"recommendedSizes":{"width":"750","height":"500"}}},"id":"#19","type":"component","lock":false,"position":25},{"name":"Divider","data":{"color":"darkGray"},"id":"#20","type":"component","lock":false,"position":26},{"name":"SectionDivider","data":{"title":"6. Rear diode and luxmeter","skipToC":false},"id":"#55","type":"component","lock":false,"position":27},{"name":"TextBlock","data":{"text":"### <span id=\"6-.-Rear-diode-and-luxmeter\">**6. Rear LED and ambient light sensor**</span>\n\nAt the back of the ODA there is a LED serving as a buddy display, which indicates to the diving\npartner the breathability of the gas in the loop or reports the danger of the diver. The LED illuminates green within the safe range 0.2 bar < ppO2 < 1.6 bar. Outside the breathable range, LED lights up red.\n\nOn the back of the ODA there is also an ambient light sensor used to automatically adjust the brightness of\nthe display according to light intensity. It is not an LED, and does not emit any visble light.\n","textLarge":false,"imageOnRight":true,"image":{"recommendedSizes":{"width":"420","height":"280"}},"imageMobile":{"recommendedSizes":{"width":"750","height":"500"}}},"id":"#22","type":"component","lock":false,"position":28},{"name":"Divider","data":{"color":"darkGray"},"id":"#23","type":"component","lock":false,"position":29},{"name":"SectionDivider","data":{"title":"7. ODA behaviour during the Pre-dive check sequencer","skipToC":false},"id":"#56","type":"component","lock":false,"position":30},{"name":"TextBlock","data":{"text":"### <span id=\"7-.-ODA-behaviour-during-the-Pre---dive-check-sequence\">**7. ODA behaviour during the Pre-dive check sequence**</span>\n\nDuring the pre-dive check procedure, the base screen is displayed, and during the\nHUD check you will be prompted to check the ODA screen. When checking the Buddy display,\nthe corresponding colour of the rear LED lights up according to the colour displayed on the\ndisplay. However, the brightness of the LED remains the same and does not change as on the\nhandset or buddy display.","textLarge":false,"imageOnRight":true,"image":{"recommendedSizes":{"width":"420","height":"280"}},"imageMobile":{"recommendedSizes":{"width":"750","height":"500"}}},"id":"#24","type":"component","lock":false,"position":31},{"name":"Divider","data":{"color":"darkGray"},"id":"#25","type":"component","lock":false,"position":32},{"name":"SectionDivider","data":{"title":"8. How to read the data on the display","skipToC":false},"id":"#57","type":"component","lock":false,"position":33},{"name":"TextBlock","data":{"text":"### <span id=\"8-.-How-to-read-the-data-on-the-display\">**8. How to read the data on the display**</span>\n\n","textLarge":false,"imageOnRight":true,"image":{"recommendedSizes":{"width":"420","height":"280"}},"imageMobile":{"recommendedSizes":{"width":"750","height":"500"}}},"id":"#26","type":"component","lock":false,"position":34},{"name":"TextBlock","data":{"text":"**Dive time** â Cumulative dive time from the beginning\nof the descent. Time starts when the\ndiver descends to a depth of 1.5 m\n\n**Depth** (m or ft) â current depth in meters or feet\naccording to the Liberty settings","textLarge":false,"imageOnRight":true,"image":{"recommendedSizes":{"width":"420","height":"280"},"mimetype":"image/png","size":33180,"hash":"314c70f027a723a47b100ce810d083cbfd5a2532","id":"clefop5i15hzg0776wzl67l01","filename":"oda-dive-square.png","category":"divesoft/","type":"image","alt":"ODA Dive mode screen"},"imageMobile":{"recommendedSizes":{"width":"750","height":"500"}}},"id":"#27","type":"component","lock":false,"position":35},{"name":"TextBlock","data":{"text":"**SP** â currently used ppO2\n setpoint.\n \n**Compass accuracy**â if the compass accuracy is\nlow, an exclamation mark will appear next to the heading with a text warning about the low\ncompass accuracy","textLarge":false,"imageOnRight":true,"image":{"recommendedSizes":{"width":"420","height":"280"},"mimetype":"image/png","size":33572,"hash":"4cae41974b74e4383cd43c95f19c6d6a8197a34c","id":"clefosnmv5i330776z204szs5","filename":"oda-sfc-square.png","category":"divesoft/","type":"image"},"imageMobile":{"recommendedSizes":{"width":"750","height":"500"}}},"id":"#28","type":"component","lock":false,"position":36},{"name":"TextBlock","data":{"text":"**Battery capacity** â graphically displays the battery status of the Liberty. The colour of the\nbattery changes from green through yellow and orange to red.\n\n**pO<sub>2</sub>** â current oxygen partial pressure averaged from all active oxygen sensors.\n\n**TTS** â Time to surface. Cumulative time required to surface. Includes ascent time and time at\ndecompression stops.\n\n**Ceiling** â Decompression ceiling indicates the depth that the diver must not exceed when\nascending to prevent the excessive formation of bubbles in the body, which could lead to the\noutbreak of decompression sickness.\n\n**Heading** â current direction\n\n**Compass** â compass rose with indication of basic azimuths, world sides and current course.\n\n**Graphical representation of sensor deviation**â Each individual oxygen sensor is represented by\none column of the graph. The value of the sensor corresponds to the height of the graph, which can\nbe read approximately from the scale on the right. One scale division represents 0.2 bar ppO2\n,\nlarge scale divisions are by 1.0 bar. Hyperoxic values are shown in red, hypoxic values in blue. \n\nTriangle on the left indicates current setpoint value.\n\nThe scale is for guidance only. \n**An important fact for divers is whether the columns are in one\nplane, or whether one or more columns deviate from the others and, if so, to what extent they\ndeviate.**\n\nThe bars in the plane mean that all sensors show the same value.\n\nDeviating columns means a
2sensor with a different value than the others. Keep in mind that the\n**deviated sensor may not be defective, but the only correct one.** If the sensor deviates, verify\nthat the sensors are measured correctly according to the procedure you learned in the Liberty\nDiver course.\n\nThe discarded sensor is indicated by a grey bar.\n\n**Diluent pressure** â graphically represented pressure in the diluent tank (white bar graph). \n\n**Oxygen pressure** â graphically represented pressure in an oxygen tank (blue bargraph). \n\nThe bargraph resolution depends on the firmware version, up to 2.16.2 each segment is 50 bar. From firmware 2.16.3 and up the graph is divided to three segments each consisting of N smaller ones think of a rule of thirds. The maximum value is the configured cylinder pressure in menu. N can vary from one to four segments, depending on graph size. Full size one carries currently a two smaller segments.\n\n*Example would be a 230 bar cylinder, so Big segment = 230 / 3 = 76.7 bar.\n\nSmall segment would be 76,7 / 2 = 38.4 bar. *","textLarge":false,"imageOnRight":true,"image":{"recommendedSizes":{"width":"420","height":"280"}},"imageMobile":{"recommendedSizes":{"width":"750","height":"500"}}},"id":"#29","type":"component","lock":false,"position":37},{"name":"Divider","data":{"color":"darkGray"},"id":"#30","type":"component","lock":false,"position":38},{"name":"SectionDivider","data":{"title":"9. Alarms","skipToC":false},"id":"#58","type":"component","lock":false,"position":39},{"name":"TextBlock","data":{"text":"### <span id=\"9-.-Alarms\">**9. Alarms**</span>\n\nIf necessary, ODA will alert divers by a screen flashing. It is divided according to severity into\nnotifications and alarms.\n\n**Notifications** â operational notifications, such as setpoint change, end of no-decompression\ntime, etc. signalled by a short white flash. The value to which it applies is highlighted. The\nnotification is accompanied by a pop-up message.\n\n<span style=\"color:red\">**WARNING: in case of incorrect setting of the ODA position relative to the diverâs eye, the\nnotification flashes may be missed. Make sure your ODA position is well set.**</span>\n\n**Alarms** â displayed in case of a dangerous situation such as exceeding the ppO2 limits,\nexceeding the decompression ceiling, etc. It is displayed by repeated red flashing of the display.\nAt the same time, the value that was exceeded is highlighted. The warning is accompanied by\na pop-up message.\n\n<span style=\"color:red\">**WARNING: in case of incorrect setting of the ODA position relative to the diverâs eye, the\nwarning flashes may be missed. Make sure your ODA position is well set.**</span>","textLarge":false,"imageOnRight":true,"image":{"recommendedSizes":{"width":"420","height":"280"}},"imageMobile":{"recommendedSizes":{"width":"750","height":"500"}}},"id":"#31","type":"component","lock":false,"position":40},{"name":"Divider","data":{"color":"darkGray"},"id":"#32","type":"component","lock":false,"position":41},{"name":"SectionDivider","data":{"title":"10. Compass and its control","skipToC":false},"id":"#59","type":"component","lock":false,"position":42},{"name":"TextBlock","data":{"text":"### <span id=\"10-.-Compass-and-its-control\">**10. Compass and its control**</span>\n\nODA is equipped with a built-in compass in the body of the device. Thus, the diver directly\ndetermines the direction in which he is looking.\n\nThe compass accuracy is continually evaluated through the dive.\n\nIf the compass algorithm detects a limited accuracy, an exclamation mark will pop-up next to the heading. In the surface mode you get additional \"Low accuracy\" message in the bottom left corner of the screen.\n\nCompass accuracy is determined by the following factors:\n\n- â Compass calibration\n- â The presence of strong magnetic fields within range of the compass\n- â ODA position relative to the diverâs eye","textLarge":false,"imageOnRight":true,"image":{"recommendedSizes":{"width":"420","height":"280"}},"imageMobile":{"recommendedSizes":{"width":"750","height":"500"}}},"id":"#33","type":"component","lock":false,"position":43},{"name":"Divider","data":{"color":"darkGray"},"id":"#34","type":"component","lock":false,"position":44},{"name":"SectionDivider","data":{"title":"10.1 Compass callibration","skipToC":false},"id":"#60","type":"component","lock":false,"position":45},{"name":"TextBlock","data":{"text":"### <span id=\"10-.-1-Compass-calibration\">**10.1 Compass calibration**</span>\n\nCalibration is being run periodically on the background without the need to enter designated mode. If you susspect low accuracy or a see an exclamation mark next to the heading, make sure the ODA is not near the handset due to it's magnetic button technology. Then on the surface you can follow the calibration steps below. Underwater a helicopter turn or two usually suffice.\n\n1. Place the ODA on the left side, leave for 2â5 sec\n1. Place the ODA on the back, leave for 2â5 sec\n1. Place the ODA on the right side, leave for 2â5 sec\n1. Turn ODA several times in the air in the direction of imaginary eights","textLarge":false,"imageOnRight":true,"image":{"recommendedSizes":{"width":"420","height":"280"}},"imageMobile":{"recommendedSizes":{"width":"750","height":"500"}}},"id":"#35","type":"component","lock":false,"position":46}
2,{"name":"Divider","data":{"color":"darkGray"},"id":"#36","type":"component","lock":false,"position":47},{"name":"SectionDivider","data":{"title":"10.2 Presence of strong magnetic fields","skipToC":false},"id":"#61","type":"component","lock":false,"position":48},{"name":"TextBlock","data":{"text":"### <span id=\"10-.-2-Presence-of-strong-magnetic-fields\">**10.2 Presence of strong magnetic fields**</span>\n\nThe compass can be greatly affected by the magnetic field of surrounding objects such as\nwrecks, diving tanks, the high content of iron ore in the rock of the mineâs gallery and other\nmetal, magnetic or electronic objects. The accuracy of the compass may be temporarily\naffected to a greater or lesser extent within the range of magnetic fields.","textLarge":false,"imageOnRight":true,"image":{"recommendedSizes":{"width":"420","height":"280"}},"imageMobile":{"recommendedSizes":{"width":"750","height":"500"}}},"id":"#37","type":"component","lock":false,"position":49},{"name":"Divider","data":{"color":"darkGray"},"id":"#38","type":"component","lock":false,"position":50},{"name":"SectionDivider","data":{"title":"10.3 Position of the ODA relative to the diver´s eye","skipToC":false},"id":"#62","type":"component","lock":false,"position":51},{"name":"TextBlock","data":{"text":"### <span id=\"10-.-3-Position-of-the-ODA-relative-to-the-diver´s-eye\">**10.3 Position of the ODA relative to the diver´s eye**</span>\n\nIf you use a compass for general orientation, that is, you measure the azimuth you want to swim and you are\nonly interested in the relative orientation to the starting point and the return azimuth, no\nmatter what position you have the ODA mounted on your DSV or BOV. However, it is essential\nthat this **position is firmly fixed and does not change during the dive.**\n\nIf you use a compass to determine the exact bearing, for example to search for a wreck or\nother object under water, you need to have the compass exactly parallel to the Z axis of your\nhead and the ODA position firmly fixed","textLarge":false,"imageOnRight":true,"image":{"recommendedSizes":{"width":"420","height":"280"}},"imageMobile":{"recommendedSizes":{"width":"750","height":"500"}}},"id":"#39","type":"component","lock":false,"position":52},{"name":"Divider","data":{"color":"darkGray"},"id":"#40","type":"component","lock":false,"position":53},{"name":"SectionDivider","data":{"title":"10.4 Azimuth fixation","skipToC":false},"id":"#63","type":"component","lock":false,"position":54},{"name":"TextBlock","data":{"text":"### <span id=\"10-.-4-Azimuth-fixation\">**10.4 Azimuth fixation**</span>\n\nEnter the menu on your handset and select Application / set course.","textLarge":false,"imageOnRight":true,"image":{"recommendedSizes":{"width":"420","height":"280"}},"imageMobile":{"recommendedSizes":{"width":"750","height":"500"}}},"id":"#41","type":"component","lock":false,"position":55},{"name":"Divider","data":{"color":"darkGray"},"id":"#42","type":"component","lock":false,"position":56},{"name":"SectionDivider","data":{"title":"10.5 Survey marks","skipToC":false},"id":"#64","type":"component","lock":false,"position":57},{"name":"TextBlock","data":{"text":"### <span id=\"10-.-5-Survey-marks\">**10.5 Survey marks**</span>\n\nThe measured azimuth is indicated by a blue triangle .\n\n\nThe return azimuth (measured azimuth -180 °) is marked with a red square .","textLarge":false,"imageOnRight":true,"image":{"recommendedSizes":{"width":"420","height":"280"},"mimetype":"image/png","size":9504,"hash":"087e50fb5e02843540ecbcc14e6144de6981e88d","id":"cl8mtakimjgev07768ut4iqit","filename":"symbol2.png","category":"divesoft/","type":"image"},"imageMobile":{"recommendedSizes":{"width":"750","height":"500"}}},"id":"#43","type":"component","lock":false,"position":58},{"name":"SectionDivider","data":{"title":"11.0 Liberty FW update process with ODA","skipToC":false},"id":"#66","type":"component","lock":false,"position":59},{"name":"TextBlock","data":{"text":"## <span id=\"11-.-0-Liberty-FW-update-process-with-ODA\">**11.0 Liberty FW update process with ODA**</span>\n\t\nWe are continuously improving the user experience, both in and out of water.\nThe wireless firmware update process has seen a lot of work, currently improving a speed of the second phase of the update in firmware 2.17.0.\nPlease keep in mind this does not improve the speed of updating to the mentioned firmware 2.17.0. Though once running firmware 2.17.0, any future update will become more fluid.\n\nThe firmware update process consists of three phases: \n1.\tWireless transfer over the Bluetooth \n2.\tCopying of the received data to the other half of the Liberty head \n3.\tRestart with the update itself \n4.\tODA update \n","textLarge":false,"imageOnRight":true,"image":{"recommendedSizes":{"width":"420","height":"280"}},"imageMobile":{"recommendedSizes":{"width":"750","height":"500"}}},"id":"#65","type":"component","lock":false,"position":60},{"name":"TextBlock","data":{"text":"The firmware update process starts with the wireless transfer, which may take up some time (OS dependent). After the transfer finishes, still in the Bluetooth mode, you will see a message \"Firmware update pending\".","textLarge":false,"imageOnRight":true,"image":{"recommendedSizes":{"width":"420","height":"280"},"mimetype":"image/png","size":31271,"hash":"ec5273e2351fdd7b5683aea6b1c52a1fc3e40a9e","id":"cleoad4y185yp0776fqviupdz","filename":"oda-update1.png","category":"divesoft/","type":"image"},"imageMobile":{"recommendedSizes":{"width":"750","height":"500"}}},"id":"#67","type":"component","lock":false,"position":61},{"name":"TextBlock","data":{"text":"The second phase follows within thirty seconds. If the transfer was succesfull, Liberty will automatically exit the Bluetooth mode and then start the firmware duplication to the other half of the head. \n\nOn the older firmwares (before 2.17.0) you will see a \"Preparing update...\" screen.The improvement from 2.17.0 and up is that whole \"Preparing update...\" screen is gone, replaced by an indicator on the surface screen upper right corner. And furthermore the whole process is stremalined so it takes now less than 5 minutes, along which you can use the Liberty normally, or just leave it in the surface mode, that is up to you.","textLarge":false,"imageOnRight":true,"image":{"recommendedSizes":{"width":"420","height":"280"},"mimetype":"image/png","size":64413,"hash":"01cbeff1d27970673ec218baae9c82ebeda438af","id":"cleoafmrt86100776t45itese","filename":"oda-update2.png","category":"divesoft/","type":"image"},"imageMobile":{"recommendedSizes":{"width":"750","height":"500"}}},"id":"#73","type":"component","lock":false,"position":63},{"name":"Spacer","data":{"spacingLarge":30,"spacingSmall":20,"backgroundColor":"#ffffff"},"id":"#75","type":"component","lock":false,"position":64},{"name":"TextBlock","data":{"text":"Third phase begins with a queue for user to confirm the restart, after which the Liberty reboots into a bootloader mode and proceeds with the update.\nIf you \"deny\" the restart, the update will take place the soonest you remove and replace the battery jumpers (eg. when charging).\n","textLarge":false,"imageOnRight":true,"image":{"recommendedSizes":{"width":"420","height":"280"},"mimetype":"image/png","size":29152,"hash":"1ef8ff4937d9ed7445ee5515056c531d2cd5e6d5","id":"cleoagsu6863b07761yqe557g","filename":"oda-update3.png","category":"divesoft/","type":"image"},"imageMobile":{"recommendedSizes":{"width":"750","height":"500"}}},"id":"#74","type":"component","lock":false,"position":65}
2,{"name":"TextBlock","data":{"text":"A fourth phase - optional ODA update takes place on background, about a minute after Liberty startup (or ODA connection to the head). On firmware 2.16.3 and up is inidicated in the upper right corner of the surface screen.","textLarge":false,"imageOnRight":true,"image":{"recommendedSizes":{"width":"420","height":"280"}},"imageMobile":{"recommendedSizes":{"width":"750","height":"500"}}},"id":"#76","type":"component","lock":false,"position":66},{"name":"Divider","data":{"color":"darkGray"},"id":"#44","type":"component","lock":false,"position":67},{"name":"TextBlock","data":{"text":"### **ODA USER MANUAL**###\n\n- **Author**\n\nJakub Å imánek \n- **Publisher**\n\nDivesoft s .r .o . | www .divesoft .com\n\n- **Issue**\n\nRevision 1 .1 | 28 February 2023\n\n**Use of this manual approved by**\n\nLucie Å mejkalová, CEO\n","textLarge":false,"imageOnRight":true,"image":{"recommendedSizes":{"width":"420","height":"280"}},"imageMobile":{"recommendedSizes":{"width":"750","height":"500"}}},"id":"#45","type":"component","lock":false,"position":68},{"name":"TextBlock","data":{"text":"","textLarge":false,"imageOnRight":true,"image":{"recommendedSizes":{"width":"420","height":"280"}},"imageMobile":{"recommendedSizes":{"width":"750","height":"500"}}},"id":"#21","type":"component","lock":false,"position":69},{"name":"TextBlock","data":{"text":"","textLarge":false,"imageOnRight":true,"image":{"recommendedSizes":{"width":"420","height":"280"}},"imageMobile":{"recommendedSizes":{"width":"750","height":"500"}}},"id":"#16","type":"component","lock":false,"position":70},{"name":"Footer","data":{"copyrights":"Copyright © 2019 Divesoft LLC All rights reserved.","facebookUrl":"","youtubeUrl":"","instagramUrl":"","contacts":"**Divesoft, s.r.o.** Hálkova 2495 413 01 Roudnice nad Labem Äeská republika Tel.: +420 416 857 057 E-mail: [email protected]"},"id":"#1","type":"component","lock":false,"position":71}],"id":"root","idBuffer":"#77","lastCommit":"1a9892a7-1973-4ca2-894e-8e081d4339c2"}},"annotations":[],"language":{"type":"id","generated":false,"id":"Language:cjv3kwvoj000u083611381c6o","typename":"Language"},"__typename":"PageTranslation"},"Page:cl8tx5mksz54s0858ihl3q1u8":{"id":"cl8tx5mksz54s0858ihl3q1u8","type":{"type":"id","generated":false,"id":"PageType:cjv3l213x004f08366hjufttp","typename":"PageType"},"tags":[],"translations({\"where\":{\"language\":{\"id\":\"cjv3kwvoj000u083611381c6o\"}}})":[{"type":"id","generated":false,"id":"PageTranslation:cl8tx5ml3z54z08586hn3sp4j","typename":"PageTranslation"}],"__typename":"Page"},"PageTranslation:cl8tx5ml3z54z08586hn3sp4j":{"id":"cl8tx5ml3z54z08586hn3sp4j","name":"BOV-manual-en","createdAt":"2022-10-04T08:08:33.687Z","content":{"type":"json","json":{"content":[{"name":"Header","data":{"products":[{"title":"Accessories","description":"Backplates, Consumables. Tanks.","img":{"recommendedSizes":{"width":"235","height":"235"}},"url":""},{"title":"Accessories sets","description":"Protection, maintenance, cleaning.","img":{"recommendedSizes":{"width":"235","height":"235"}},"url":""},{"title":"Spare parts","description":"Spare parts and components.","img":{"recommendedSizes":{"width":"235","height":"235"}},"url":""},{"title":"Spare parts kits","description":"Completly Liberty spare parts kits.","img":{"recommendedSizes":{"width":"235","height":"235"}},"url":""}]},"id":"#0","type":"component","lock":false,"position":0},{"name":"SectionDivider","data":{"title":"BOV","skipToC":false},"id":"#69","type":"component","lock":false,"position":1},{"name":"ProductShowcase","data":{"backgroundColor":"#ffffff","isTextDark":true,"isImageRight":false,"image":{"mimetype":"image/png","size":415660,"hash":"3e2e07be8ebf739d432895dec8014fce7a43133b","id":"ckx3n4aj8c60j0776ks8af7et","filename":"divesoft-hp-bov-1080x1080.png","category":"divesoft/","type":"image"},"imageMobile":{},"title":"BOV","subtitle":"User manual","description":"","hideDescriptionOnMobile":false,"areButtons":false,"firstTitle":"Learn more >","firstUrl":"","secondTitle":"Configurator >","secondUrl":""},"id":"#2","type":"component","lock":false,"position":2},{"name":"Divider","data":{"color":"darkGray"},"id":"#6","type":"component","lock":false,"position":3},{"name":"SectionDivider","data":{"title":"Content","skipToC":false},"id":"#70","type":"component","lock":false,"position":4},{"name":"TextBlock","data":{"text":"### Content\n\n\n[**1. Purpose**](#1-.-Purpose)\n\n\n[**2. Installation**](#2-.-Installation)\n\n[**3. Usage**](#3-.-Usage)\n\n[**4. IBOV lever positions**](#4-.-IBOV-lever-positions)\n\n[**5. BOV with ADV positions**](#5-.-BOV-with-ADV-positions)\n\n[**6. OC position**](#6-.-OC-position)\n\n[**7. CCR position**](#7-.-CCR-position)\n\n[**8. CCR + ADV position**](#8-.-CCR-+-ADV-position)\n\n[**9. MAV**](#9-.-MAV)\n\n[**10. Maintenance**](#10-.-Maintenance)\n\n[**11. Lubrication**](#11-.-Lubrication)\n\n[**12. Adjustment of the inspiration resistance of the ADV**](#12-.-Adjustment-of-the-inspiration-resistance-of-the-ADV)\n\n[**13. Replacement of MAV levers**](#13-.-Replacement-of-MAV-levers)\n\n[**14. Periodic service**](#14-.-Periodic-service)\n\n","textLarge":false,"imageOnRight":true,"image":{"recommendedSizes":{"width":"420","height":"280"}},"imageMobile":{"recommendedSizes":{"width":"750","height":"500"}}},"id":"#5","type":"component","lock":false,"position":5},{"name":"Divider","data":{"color":"darkGray"},"id":"#7","type":"component","lock":false,"position":6},{"name":"SectionDivider","data":{"title":"1. Purpose"},"id":"#52","type":"component","lock":false,"position":7},{"name":"TextBlock","data":{"text":"### <span id=\"1-.-Purpose\">**1. Purpose**</span>\n\nDivesoft BOV is used to switch between closed circuit and open circuit on closed-circuit\ndiving devices â rebreathers. Divesoft BOV comes with connectors for selected types of\nrebreathesr. **BOV can only be used with listed rebreather types.** For use on another rebreather,\nthe appropriate connectors must be purchased. For use on other rebreathers, please contact\nDIVESOFT customer support at [email protected].\n","textLarge":false,"imageOnRight":true,"image":{"recommendedSizes":{"width":"420","height":"280"}},"imageMobile":{"recommendedSizes":{"width":"750","height":"500"}}},"id":"#8","type":"component","lock":false,"position":8},{"name":"Divider","data":{"color":"darkGray"},"id":"#9","type":"component","lock":false,"position":9},{"name":"SectionDivider","data":{"title":"2. Installation"},"id":"#53","type":"component","lock":false,"position":10},{"name":"TextBlock","data":{"text":"### <span id=\"2-.-Installation\">**2. Installation**</span>\n\nBefore installation, make sure that the directional valves are aligned with the gas flow in your\nunit. Possible reversed gas flow can cause serious injury or death!\n\nBefore installing the BOV with integrated MAVs, check the location of the diluent and oxygen\nhoses on your rebreather. When the gas flows from left to right (from a diver point of view),\nOxygen must be connected to the right MAV and the diluent to the left, while the gas flow\nfrom right to left must be connected to the left MAV and the diluent to the right. Inverted\nconnection can cause serious injury or death.\n\nCheck that the directional valves are not visibly damaged and attach the appropriate\nconnections to the BOV. In the case of integrated MAVs, set the MAV position towards the front\nof the BOV so that it is pointing downwards (the closest possible position for the connection\nof the middle pressure connection of the 2nd stage and the adjustment screw). You get an\nergonomic position for controlling manual valves.\n\nSecure the connections with retaining rings. **The retaining rings must be securely sitting along\nthe entire length of the groove.**\n\nAttach the breathing hose and adjust the position so that when the BOV is mounted on the\nrebreather, the mouthpiece will point towards the mouth. When used on Liberty, this position is\nperpendicular to the T-piece.\n\nInstall and fasten the tightening rings with screws. Take special care to ensure that the end\nof the hose is still evenly strapped over the neck of the connector and that there arenât any\nwrinkles on the hose. This would result in leakage into the breathing hose.\n\nConnect the medium pressure hose to the 2nd stage of the regulator.","textLarge":false,"imageOnRight":true,"image":{"recommendedSizes":{"width":"420","height":"280"}},"imageMobile":{"recommendedSizes":{"width":"750","height":"500"}}},"id":"#10","type":"component","lock":false,"position":11},{"name":"Image","data":{"firstImage":{"mimetype":"image/jpeg","size":44468,"hash":"e8b0fb9905c7d7abbcd8ec7dcb25117013f7fb52","id":"ck8nl07gg4cee077625t5edya","filename":"dive.jpg","category":"divesoft/","type":"image"},"secondImage":{"mimetype":"image/jpeg","size":44468,"hash":"e8b0fb9905c7d7abbcd8ec7dcb25117013f7fb52","id":"ck8nl07gg4cee077625t5edya","filename":"dive.jpg","category":"divesoft/","type":"image"}},"id":"#47","type":"component","lock":false,"position":12},{"name":"Divider","data":{"color":"darkGray"},"id":"#11","type":"component","lock":false,"position":13},{"name":"SectionDivider","data":{"title":"3. Usage"},"id":"#55","type":"component","lock":false,"position":14},{"name":"TextBlock","data":{"text":"### <span id=\"3-.-Usage\">**3. Usage**</span>\n\nPerform a seal test of the directional valves. Before diving with the BOV familiarize yourself\nwith the different BOV positions and its usage. Before every dive perform a loop check. If it is\nnot possible to test the tightness of the loop and the valves, do not start a dive. A non tight\nloop or directional valves can result in serious injury or death.","textLarge":false,"imageOnRight":true,"image":{"recommendedSizes":{"width":"420","height":"280"}},"imageMobile":{"recommendedSizes":{"width":"750","height":"500"}}},"id":"#12","type":"component","lock":false,"position":15}
2,{"name":"Divider","data":{"color":"darkGray"},"id":"#13","type":"component","lock":false,"position":16},{"name":"SectionDivider","data":{"title":"4. IBOV lever position"},"id":"#56","type":"component","lock":false,"position":17},{"name":"TextBlock","data":{"text":"### <span id=\"4-.-IBOV-lever-positions\">**4. IBOV lever positions**</span>\n\nvertical position = OC\n\nhorizontal position = CCR","textLarge":false,"imageOnRight":true,"image":{"recommendedSizes":{"width":"420","height":"280"}},"imageMobile":{"recommendedSizes":{"width":"750","height":"500"}}},"id":"#14","type":"component","lock":false,"position":18},{"name":"Divider","data":{"color":"darkGray"},"id":"#15","type":"component","lock":false,"position":19},{"name":"SectionDivider","data":{"title":"5. BOV with ADV positions"},"id":"#57","type":"component","lock":false,"position":20},{"name":"TextBlock","data":{"text":"### <span id=\"5-.-BOV-with-ADV-positions\">**5. BOV with ADV positions**</span>\n\nVertical position independent of button position = OC Horizontal position with th button to the\nright (from a diver viewpoint) = CCR + ADV\n\nHorizontal position with the button to the left = CCR (ADV isolated).","textLarge":false,"imageOnRight":true,"image":{"recommendedSizes":{"width":"420","height":"280"}},"imageMobile":{"recommendedSizes":{"width":"750","height":"500"}}},"id":"#17","type":"component","lock":false,"position":21},{"name":"Divider","data":{"color":"darkGray"},"id":"#18","type":"component","lock":false,"position":22},{"name":"SectionDivider","data":{"title":"6. OC position"},"id":"#58","type":"component","lock":false,"position":23},{"name":"TextBlock","data":{"text":"### <span id=\"6-.-OC-position\">**6. OC position**</span>\n\nWhen the rotary lever is in the vertical position. The BOV acts as a 2nd stage pulmonary\nregulator. At the same time, flow to the rebreather is closed so that the water is prevented\nfrom entering the loop. Always keep your BOV in the OC position, **if the mouthpiece is out of the\ndiverâs mouth to prevent flooding of the rebreather. **Flooding the rebreather during a dive can\ncause serious injury or death.\n\nPay attention to the breathability of the mixture. **Breating a hypoxic mixtures at a shallow\ndepth or on the surface from an open circuit can cause loss of consciousness, drowning and\ndeath. Always be sure that the gas flowing to the BOV 2nd stage is breathable at a given depth!**\n\n**When the BOV is connected to a diluent cylinder, in most cases, the supply of respiratory\ngas for the open circuit is inadequate. **It is always necessary to have a backup gas source\n(a spare bottle with sufficient amount of gas). Keep in mind that in the event of a malfunction\nyou have only a few seconds to switch to the secondary gas source. Keep the backup system\npermanently on standby.\n\nIf you use the same off-board cylinder for bailout and as, for example a gas source for dry suit\nvolume compensation and buoyancy compensation, make sure that the gas supply to the open\ncircuit is sufficient even with the expected expenditure.\n\n**BOV can not be used to share gas with a dive partner.** Always have a second stage available for\na sufficient gas supply in case of emergency.\n\nOnly connect quick couplings to the gas intake of the second stage. **The couplings must have\nsufficient maximum flow rates for respiration even at higher gas densities.**","textLarge":false,"imageOnRight":true,"image":{"recommendedSizes":{"width":"420","height":"280"}},"imageMobile":{"recommendedSizes":{"width":"750","height":"500"}}},"id":"#19","type":"component","lock":false,"position":24},{"name":"Image","data":{"firstImage":{"mimetype":"image/jpeg","size":44468,"hash":"e8b0fb9905c7d7abbcd8ec7dcb25117013f7fb52","id":"ck8nl07gg4cee077625t5edya","filename":"dive.jpg","category":"divesoft/","type":"image"},"secondImage":{"mimetype":"image/jpeg","size":44468,"hash":"e8b0fb9905c7d7abbcd8ec7dcb25117013f7fb52","id":"ck8nl07gg4cee077625t5edya","filename":"dive.jpg","category":"divesoft/","type":"image"}},"id":"#48","type":"component","lock":false,"position":25},{"name":"Divider","data":{"color":"darkGray"},"id":"#20","type":"component","lock":false,"position":26},{"name":"SectionDivider","data":{"title":"7. CCR position"},"id":"#59","type":"component","lock":false,"position":27},{"name":"TextBlock","data":{"text":"### <span id=\"7-.-CCR-position\">**7. CCR position**</span>\n\nWhen the rotary lever is in the horizontal position it connects the breathing hoses of the\nrebreather. In this position, the 2nd stage addition is excluded. In the CCR position, the\nmouthpiece is connected to the rest of the loop, so** it is important to prevent water from\nentering the mouthpiece as it would cause the rebreather to flood.**","textLarge":false,"imageOnRight":true,"image":{"recommendedSizes":{"width":"420","height":"280"}},"imageMobile":{"recommendedSizes":{"width":"750","height":"500"}}},"id":"#22","type":"component","lock":false,"position":28},{"name":"Image","data":{"firstImage":{"mimetype":"image/jpeg","size":44468,"hash":"e8b0fb9905c7d7abbcd8ec7dcb25117013f7fb52","id":"ck8nl07gg4cee077625t5edya","filename":"dive.jpg","category":"divesoft/","type":"image"},"secondImage":{"mimetype":"image/jpeg","size":44468,"hash":"e8b0fb9905c7d7abbcd8ec7dcb25117013f7fb52","id":"ck8nl07gg4cee077625t5edya","filename":"dive.jpg","category":"divesoft/","type":"image"}},"id":"#49","type":"component","lock":false,"position":29},{"name":"Divider","data":{"color":"darkGray"},"id":"#23","type":"component","lock":false,"position":30},{"name":"SectionDivider","data":{"title":"8. CCR + ADV position"},"id":"#60","type":"component","lock":false,"position":31},{"name":"TextBlock","data":{"text":"### <span id=\"8-.-CCR-+-ADV-position\">**8. CCR + ADV position**</span>\n\nIf BOV is equipped with built-in ADV, BOV has\none extra switching position. The vertical\nposition is always an open circuit regardless\nof whether the button is up or down. Pressing\nthe button allows you to switch between the\ntwo horizontal positions.","textLarge":false,"imageOnRight":true,"image":{"recommendedSizes":{"width":"420","height":"280"},"mimetype":"image/jpeg","size":44468,"hash":"e8b0fb9905c7d7abbcd8ec7dcb25117013f7fb52","id":"ck8nl07gg4cee077625t5edya","filename":"dive.jpg","category":"divesoft/","type":"image"},"imageMobile":{"recommendedSizes":{"width":"750","height":"500"}}},"id":"#24","type":"component","lock":false,"position":32},{"name":"Divider","data":{"color":"darkGray"},"id":"#25","type":"component","lock":false,"position":33},{"name":"SectionDivider","data":{"title":"9. MAV"},"id":"#61","type":"component","lock":false,"position":34},{"name":"TextBlock","data":{"text":"### <span id=\"9-.-MAV\">**9. MAV**</span>\n\n\nManual add valves placed on the BOV are a great, ergonomic solution. To control them, hold\nyour thumb against the middle-pressure or regulation screw and press the lever with your\npointer finger.\n\nMAV diluent flow rate 4.5 L / s\n\n(measured with air, with the first stage: Apeks DST)","textLarge":false,"imageOnRight":true,"image":{"recommendedSizes":{"width":"420","height":"280"}},"imageMobile":{"recommendedSizes":{"width":"750","height":"500"}}},"id":"#26","type":"component","lock":false,"position":35},{"name":"TextBlock","data":{"text":"MAV oxygen flow rate 1 L / s\nwhich indicatively corresponds to a 0.1 bar\npartial pressure increase of oxygen per\nsecond (depending on the type of CCR used)\n(measured with the first stage: Apeks DST).\nIn case your BOV is equipped with Single\nHose Adapter, **DO NOT use wrench to tighten\nit. Finger tight is enough in this case. **SHA\ndoes not screw all the way in on the lower\n(2nd stage) thread, few screw threads will be\nalways visible. Overtightening will cause the\nBOV and MAV to warp which leads to water/\ngas leaks and damage to the unit itself. \n","textLarge":false,"imageOnRight":true,"image":{"recommendedSizes":{"width":"420","height":"280"},"mimetype":"image/jpeg","size":44468,"hash":"e8b0fb9905c7d7abbcd8ec7dcb25117013f7fb52","id":"ck8nl07gg4cee077625t5edya","filename":"dive.jpg","category":"divesoft/","type":"image"},"imageMobile":{"recommendedSizes":{"width":"750","height":"500"}}},"id":"#27","type":"component","lock":false,"position":36},{"name":"Divider","data":{"color":"darkGray"},"id":"#30","type":"component","lock":false,"position":37},{"name":"SectionDivider","data":{"title":"10. Maintenance"},"id":"#62","type":"component","lock":false,"position":38},{"name":"TextBlock","data":{"text":"### <span id=\"10-.-Maintenance\">**10. Maintenance**</span>\n\n**Basic maintenance**\n\nBOV should be kept clean. After each dive, plug all medium pressure inlets and your rinse BOV\nincluding the inside of the BOV with clean freshwater at all switch valve positions. Allow water\nto drain and dry in a shady, ventilated place.","textLarge":false,"imageOnRight":true,"image":{"recommendedSizes":{"width":"420","height":"280"}},"imageMobile":{"recommendedSizes":{"width":"750","height":"500"}}},"id":"#31","type":"component","lock":false,"position":39},{"name":"TextBlock","data":{"text":"During replacement,\navoid contamination of the directional valve\ndiaphragms. Only handle the diaphragms\nat the tip of the silicone mandrel. Insert\nthe mandrel into the centre opening of the\ndirectional valve basket. The diaphragm must\nbe on the inner side of the basket. Gently\npull the thorn to lock the mandrel in the cup\nopening. When returning the basket to the\nBOV, check the position of the diaphragms\nin relation to the direction of flow. After\ninstallation, test the directional valves.","textLarge":false,"imageOnRight":true,"image":{"recommendedSizes":{"width":"420","height":"280"},"mimetype":"image/jpeg","size":44468,"hash":"e8b0fb9905c7d7abbcd8ec7dcb25117013f7fb52","id":"ck8nl07gg4cee077625t5edya","filename":"dive.jpg","category":"divesoft/","type":"image"},"imageMobile":{"recommendedSizes":{"width":"750","height":"500"}}},"id":"#50","type":"component","lock":false,"position":40}
2,{"name":"Divider","data":{"color":"darkGray"},"id":"#32","type":"component","lock":false,"position":41},{"name":"SectionDivider","data":{"title":"11. Lubrication"},"id":"#63","type":"component","lock":false,"position":42},{"name":"TextBlock","data":{"text":"### <span id=\"11-.-Lubrication\">**11. Lubrication**</span>\n\n**Only use Krytox GPL 201 lubricant to lubricate O-rings on the iBOV. Under no circumstances\nshould silicone based lubricants be used! Silicone lubricants can rupture directional valves\nand cause leakage. This can cause serious injury or death!**\n\nWhen lubricants other than Krytox GPL 201 are used, the sliding valve is not guaranteed to\nmove correctly and in some cases the valve may become jammed.\n\n\n**Replacing directional valve diaphragms**\n\nIf you find that the valves leak during the directional valve test, check that they are not\nblocked by debris or that they are not damaged. If they are damaged or you are not sure\nwhat the leakage is caused by, replace the directional valve diaphragms","textLarge":false,"imageOnRight":true,"image":{"recommendedSizes":{"width":"420","height":"280"}},"imageMobile":{"recommendedSizes":{"width":"750","height":"500"}}},"id":"#33","type":"component","lock":false,"position":43},{"name":"Divider","data":{"color":"darkGray"},"id":"#34","type":"component","lock":false,"position":44},{"name":"SectionDivider","data":{"title":"12. Adjustment of the inspiration resistance of the ADV"},"id":"#65","type":"component","lock":false,"position":45},{"name":"TextBlock","data":{"text":"### <span id=\"12-.-Adjustment-of-the-inspiration-resistance-of-the-ADV\">**12. Adjustment of the inspiration resistance of the ADV**</span>\n\nBreathing resistance can be adjusted by gently screwing the screw on the ADV valve. Insert\na flat screwdriver into the mouthpiece opening, the screw is located on the opposite wall.\nLoosen or tighten the resistance adjustment screw. Turn to the right to increase the inspiratory\nresistance, turning to the left to reduce the inspiratory resistance. Turn the screw in small\nsections and always retest the resistance. Even little intervention can have a great effect on\nthe inspiratory resistance. The factory setting of the resistance is 38 mbar +/- 2 mbar","textLarge":false,"imageOnRight":true,"image":{"recommendedSizes":{"width":"420","height":"280"}},"imageMobile":{"recommendedSizes":{"width":"750","height":"500"}}},"id":"#35","type":"component","lock":false,"position":46}
2,{"name":"Divider","data":{"color":"darkGray"},"id":"#64","type":"component","lock":false,"position":47},{"name":"SectionDivider","data":{"title":"13. Replacement of MAV levers"},"id":"#66","type":"component","lock":false,"position":48},{"name":"TextBlock","data":{"text":"### <span id=\"13-.-Replacement-of-MAV-levers\">**13. Replacement of MAV levers**</span>\n\nUnscrew the safety rings on the connections and remove the connectors. Unscew the cap of\nthe lever with a # 1 Philips screwdriver. Remove the old lever whilst holding down the spring.\nInstall the new lever and insert the spring into the grooves in the MAV body and the lever. Place\nthe lid on and secure it in place","textLarge":false,"imageOnRight":true,"image":{"recommendedSizes":{"width":"420","height":"280"}},"imageMobile":{"recommendedSizes":{"width":"750","height":"500"}}},"id":"#37","type":"component","lock":false,"position":49},{"name":"Divider","data":{"color":"darkGray"},"id":"#36","type":"component","lock":false,"position":50},{"name":"SectionDivider","data":{"title":"14. Periodic service"},"id":"#67","type":"component","lock":false,"position":51},{"name":"TextBlock","data":{"text":"### <span id=\"14-.-Periodic-service\">**14. Periodic service**</span>\n\nBOV must be serviced annually by an authorized Divesoft Service Center. For information on\nservice locations, please visit www.divesoft.com.","textLarge":false,"imageOnRight":true,"image":{"recommendedSizes":{"width":"420","height":"280"}},"imageMobile":{"recommendedSizes":{"width":"750","height":"500"}}},"id":"#51","type":"component","lock":false,"position":52},{"name":"Divider","data":{"color":"darkGray"},"id":"#44","type":"component","lock":false,"position":53},{"name":"SectionDivider","data":{"title":"BOV user manual"},"id":"#68","type":"component","lock":false,"position":54},{"name":"TextBlock","data":{"text":"### **BOV USER MANUAL**###\n\n- **Author**\n\nJakub Å imánek \n- **Publisher**\n\nLiberty systems s.r.o. | www.CCRLiberty.com\n\n\n- **Issue**\n\n24 April 2019, rev. 2.0\n\n**Use of this manual approved by**\n\nLucie Å mejkalová, CEO\n","textLarge":false,"imageOnRight":true,"image":{"recommendedSizes":{"width":"420","height":"280"}},"imageMobile":{"recommendedSizes":{"width":"750","height":"500"}}},"id":"#45","type":"component","lock":false,"position":55},{"name":"TextBlock","data":{"text":"","textLarge":false,"imageOnRight":true,"image":{"recommendedSizes":{"width":"420","height":"280"}},"imageMobile":{"recommendedSizes":{"width":"750","height":"500"}}},"id":"#21","type":"component","lock":false,"position":56},{"name":"TextBlock","data":{"text":"","textLarge":false,"imageOnRight":true,"image":{"recommendedSizes":{"width":"420","height":"280"}},"imageMobile":{"recommendedSizes":{"width":"750","height":"500"}}},"id":"#16","type":"component","lock":false,"position":57},{"name":"Footer","data":{"copyrights":"Copyright © 2019 Divesoft LLC All rights reserved.","facebookUrl":"","youtubeUrl":"","instagramUrl":"","contacts":"**Divesoft, s.r.o.** Hálkova 2495 413 01 Roudnice nad Labem Äeská republika Tel.: +420 416 857 057 E-mail: [email protected]"},"id":"#1","type":"component","lock":false,"position":58}],"id":"root","idBuffer":"#71","lastCommit":"aa339bf3-a5a2-40f8-b592-41d39751b0af"}},"annotations":[],"language":{"type":"id","generated":false,"id":"Language:cjv3kwvoj000u083611381c6o","typename":"Language"},"__typename":"PageTranslation"},"Page:cl8u22o4ez5mq08583oamhfwi":{"id":"cl8u22o4ez5mq08583oamhfwi","type":{"type":"id","generated":false,"id":"PageType:cjv3l213x004f08366hjufttp","typename":"PageType"},"tags":[],"translations({\"where\":{\"language\":{\"id\":\"cjv3kwvoj000u083611381c6o\"}}})":[{"type":"id","generated":false,"id":"PageTranslation:cl8u22o4pz5mx0858dpchpdgi","typename":"PageTranslation"}],"__typename":"Page"},"PageTranslation:cl8u22o4pz5mx0858dpchpdgi":{"id":"cl8u22o4pz5mx0858dpchpdgi","name":"bailout standby mode en","createdAt":"2022-10-04T10:26:13.801Z","content":{"type":"json","json":{"content":[{"name":"Header","data":{"products":[{"title":"Accessories","description":"Backplates, Consumables. Tanks.","img":{"recommendedSizes":{"width":"235","height":"235"}},"url":""},{"title":"Accessories sets","description":"Protection, maintenance, cleaning.","img":{"recommendedSizes":{"width":"235","height":"235"}},"url":""},{"title":"Spare parts","description":"Spare parts and components.","img":{"recommendedSizes":{"width":"235","height":"235"}},"url":""}
2,{"title":"Spare parts kits","description":"Completly Liberty spare parts kits.","img":{"recommendedSizes":{"width":"235","height":"235"}},"url":""}]},"id":"#0","type":"component","lock":false,"position":0},{"name":"ProductShowcase","data":{"backgroundColor":"#ffffff","isTextDark":true,"isImageRight":false,"image":{"mimetype":"image/png","size":469245,"hash":"f8a1c7a4fd9149c847eed819a0631c5e256035a1","id":"ckkmoqsbxw4g30776ca9h2kz4","filename":"divesoftduck-4.png","category":"divesoft/","type":"image"},"imageMobile":{},"title":"CCR Liberty Bailout Standby Mode","subtitle":"User manual","description":"Version 2.0 | 29 June 2018","hideDescriptionOnMobile":false,"areButtons":false,"firstTitle":"Learn more >","firstUrl":"","secondTitle":"Configurator >","secondUrl":""},"id":"#2","type":"component","lock":false,"position":1},{"name":"Divider","data":{"color":"darkGray"},"id":"#6","type":"component","lock":false,"position":2},{"name":"TextBlock","data":{"text":"### Content\n\n[**1. BAILOUT STANDBY (CCR) MODEs**](#1-.-BAILOUT-STANDBY-(CCR)-MODE)\n\n[1.1 Basic characteristics](#1-.-1-Basic-characteristics)\n\n[1.2 Decompression calculation in Bailout Standby (CCR)](#1-.-2-Decompression-calculation-in-Bailout-Standby-(CCR))\n\n[1.3 Starting the Bailout Standby mode (CCR) ](#1-.-3-Starting-the-Bailout-Standby-mode-(CCR))\n\n[1.4 Orientation in the Bailout standby mode (CCR)](#1-.-4-Orientation-in-the-Bailout-standby-mode-(CCR))\n\n[1.5 Bailout standby setup (CCR)](#1-.-5-Bailout-standby-setup-(CCR))\n \n[**2. Diving with Bailout Standby (CCR)**](#2-.-Diving-with-Bailout-Standby-(CCR))\n\n[2.1 Predive preparation of a bailout rebreather](#2-.-1-Predive-preparation-of-a-bailout-rebreather)\n\n[2.2 Diving with a Bailout standby (CCR)](#2-.-2-Diving-with-a-Bailout-standby-(CCR))\n","textLarge":false,"imageOnRight":true,"image":{"recommendedSizes":{"width":"420","height":"280"}},"imageMobile":{"recommendedSizes":{"width":"750","height":"500"}}},"id":"#5","type":"component","lock":false,"position":3},{"name":"Divider","data":{"color":"darkGray"},"id":"#7","type":"component","lock":false,"position":4},{"name":"TextBlock","data":{"text":"### <span id=\"1-.-BAILOUT-STANDBY-(CCR)-MODE\">**1. BAILOUT STANDBY (CCR) MODE**</span>\n\n### <span id=\"1-.-1-Basic-characteristics\">**1.1 Basic characteristics**</span>\n\nThe bailout standby mode is designated only for the\nuse of the rebreather as a backup unit. As in the case\nwhere two liberty units are used simultaneously in\nbackmount + sidemount configuration or in the double\nsidemount configuration. Regardless on which of these\ntwo configurations apply, one unit has to be defined as\na primary unit and one as a secondary (bailout) unit.\nLiberty in the bailout standby mode does not add oxygen\nthrough the solenoid valves, thus not changing buoyancy\nof the unit and wasting oxygen. It is presumed that the\ndiver does not breathe from the secondary unit and\nuses the primary unit. During descent diluent is added\nthrough an ADV, which compensates for the increase\nof pressure and decrease of loop volume. The oxygen\nis measured as normal during the whole dive, the data\nfrom all four oxygen sensors are displayed, including the\nvoltage values and the mean of all sensors.\n\nDuring the Bailout standby (CCR) mode the stack time\nis on hold. When the diver starts breathing from the\nbailout unit it must be switched to standard Dive mode\n(CCR). Only then will the automatic oxygen addition\nstart maintaining the setpoint and the unit will start\nfunctioning normally. If the diver will start using the unit\nwithout switching it to Dive mode, the mode will switch\nautomatically after a decrease of ppO2 by 20 % bellow\nppO2 of diluent at the current depth. This automatic\nmode is only an emergency solution and at some\nsituations (low depth, hypoxic diluent) can cause acute\nhypoxia of the diver before the automatic switch of the\noxygen addition. For this reason, always switch the unit\nto dive mode when you start breathing.\n\n\n","textLarge":false,"imageOnRight":true,"image":{"recommendedSizes":{"width":"420","height":"280"}},"imageMobile":{"recommendedSizes":{"width":"750","height":"500"}}},"id":"#8","type":"component","lock":false,"position":5},{"name":"Divider","data":{"color":"darkGray"},"id":"#9","type":"component","lock":false,"position":6},{"name":"TextBlock","data":{"text":"### <span id=\"1-.-2-Decompression-calculation-in-Bailout-Standby-(CCR)\">**1.2 Decompression calculation in Bailout Standby (CCR)**</span>\n\nDecompression is calculated from a fixed setpoint. In\nBailout Standby (CCR) the partial pressure in the loop is\nignored. For a correct calculation of decompression, it\nis necessary to have the same setpoints in your primary\nunit and in your bailout. The diver must switch between\nthe setpoints at both units simultaneously.\n\nWhen you switch to the bailout and when the unit is\nswitched to the standard Dive mode (CCR), the bailout\nhas rough information about the saturation of the\ntissue from the primary unit. It continues with standard\ndecompression calculation with respect to the current\nppO2 in the loop","textLarge":false,"imageOnRight":true,"image":{"recommendedSizes":{"width":"420","height":"280"}},"imageMobile":{"recommendedSizes":{"width":"750","height":"500"}}},"id":"#10","type":"component","lock":false,"position":7},{"name":"Divider","data":{"color":"darkGray"},"id":"#11","type":"component","lock":false,"position":8},{"name":"TextBlock","data":{"text":"### <span id=\"1-.-3-â Starting-the-Bailout-Standby-mode-(CCR)\">**1.3 â Starting the Bailout Standby mode (CCR)**</span>\n\nYou can run the mode by default from Surface mode\nin the Dive menu by selecting Bailout Stby (CCR). After\nselecting this item, the Oxygen Sensor Check is triggered\nand a predive checklist is displayed, like in the standard\n
2Dive Mode.\n\nAt the same time, you can start this mode during the\ndive by choosing Bailout Standby (CCR) in the Dive mode\nmenu. If the device is mostly used in this mode it is\npreferable to set it as the default mode (Menu / Setup /\nPreferences / Default mode).\n\nWhen entering the water, the device must be switched on\nand properly tested, see Diving in Bailout Standby (CCR),","textLarge":false,"imageOnRight":true,"image":{"recommendedSizes":{"width":"420","height":"280"}},"imageMobile":{"recommendedSizes":{"width":"750","height":"500"}}},"id":"#49","type":"component","lock":false,"position":9},{"name":"Divider","data":{"color":"darkGray"},"id":"#50","type":"component","lock":false,"position":10},{"name":"TextBlock","data":{"text":"### <span id=\"1-.-4-Orientation-in-the-Bailout-standby-mode-(CCR)\">**1.4 Orientation in the Bailout standby mode (CCR)**</span>\n\n","textLarge":false,"imageOnRight":true,"image":{"recommendedSizes":{"width":"420","height":"280"}},"imageMobile":{"recommendedSizes":{"width":"750","height":"500"}}},"id":"#51","type":"component","lock":false,"position":11},{"name":"Image","data":{"firstImage":{"mimetype":"image/jpeg","size":44468,"hash":"e8b0fb9905c7d7abbcd8ec7dcb25117013f7fb52","id":"ck8nl07gg4cee077625t5edya","filename":"dive.jpg","category":"divesoft/","type":"image"},"secondImage":{}},"id":"#52","type":"component","lock":false,"position":12},{"name":"Spacer","data":{"spacingLarge":30,"spacingSmall":20,"backgroundColor":"#ffffff"},"id":"#53","type":"component","lock":false,"position":13},{"name":"TextBlock","data":{"text":"Bailout standby (CCR) displays time, depth, battery,\nand time to surface (TTS) values, the same as with the\nstandard Dive mode. It also shows that the device is\nin CCR bailout mode, the values of all oxygen sensors\nincluding voltage, the set bailout diluent, the setpoint,\nthe diluent setting for the primary device (currently used\nin the decompression calculation), the average of ppO2\nfrom all oxygen sensors.\n\nSetpoint is not maintained. It serves only to calculate the\ndecompression based on the setpoint in the primary device.\nIn Bailout Standby (CCR) all settings are available as in\nStandard Dive Mode (CCR).","textLarge":false,"imageOnRight":true,"image":{"recommendedSizes":{"width":"420","height":"280"}},"imageMobile":{"recommendedSizes":{"width":"750","height":"500"}}},"id":"#54","type":"component","lock":false,"position":14},{"name":"Divider","data":{"color":"darkGray"},"id":"#55","type":"component","lock":false,"position":15},{"name":"TextBlock","data":{"text":"### <span id=\"1-.-5-Bailout-standby-setup-(CCR)\">**1.5 Bailout standby setup (CCR)**</span>\n\nIn addition to basic settings, the Bailout rebreather\nrequires additional settings. In some cases, less precise\nblending of the mixes may result in different diluent\ncomposition in the primary and bailout rebreather. For\nproper decompression calculation, it is essential that\nboth diluent mixtures are set for both the primary and\nthe bailout. In the Setup / Mixtures / CCR menu, set both\nknown blends. In the Setup / Mixtures / Def. diluent set\nthe diluent of the primary device. In the Setup / Mixtures\n/ Def. BO dil. Set the bailout device diluent.\n\nAll setpoints must be the same on both devices,\nincluding the descent Setpoint (menu / Setup /\nSetpoints) being switched on or off. Check the FO2 limit\nsetting (menu / Setup / Setpoints / FO2 limit).\nDo not forget to check the automatic switching to high\nsetpoint!","textLarge":false,"imageOnRight":true,"image":{"recommendedSizes":{"width":"420","height":"280"}},"imageMobile":{"recommendedSizes":{"width":"750","height":"500"}}},"id":"#56","type":"component","lock":false,"position":16},{"name":"Divider","data":{"color":"darkGray"},"id":"#57","type":"component","lock":false,"position":17},{"name":"TextBlock","data":{"text":"### <span id=\"2-.-Diving-with-Bailout-Standby-(CCR)\">**2. Diving with Bailout Standby (CCR)**</span>\n\nDiving with a backup rebreather is tremendously\nbeneficial in terms of gas management of bailout and\na certain freedom in difficult and deep dives, on the\nother hand.\n\nIt makes caring for you equipment twice as difficult and\nrequires special procedures during the dive.\nWe strongly recommend not using bailout rebreather\nas the only backup source. It is always necessary to\nhave an open circuit gas supply ready for an immediate\nemergency an immediate emergency solution and only\nthen switch to the backup rebreather. To use a backup\nrebreather, we recommend first acquiring sufficient\nexperience and attending a special course with\na Sidemount Liberty instructor.","textLarge":false,"imageOnRight":true,"image":{"recommendedSizes":{"width":"420","height":"280"}},"imageMobile":{"recommendedSizes":{"width":"750","height":"500"}}},"id":"#12","type":"component","lock":false,"position":18},{"name":"Divider","data":{"color":"darkGray"},"id":"#13","type":"component","lock":false,"position":19},{"name":"TextBlock","data":{"text":"### <span id=\"2-.-1-Predive-preparation-of-a-bailout-rebreather\">**2.1 Predive preparation of a bailout rebreather**</span>\n\nCalibrate and do the predive check with your rebreather\nbailout as with your main unit. Ensure that the setpoint\
2nsetting is the same as the primary device, and that\nthe gas mixture settings match the actual mixes in\nthe primary and backup devices. Switch to Bailout\nStandby (CCR) mode, see chapter Starting the Bailout\nStandby (CCR). Use a checklist to verify all system\nelements. Attention should be paid to ADV and to\nverifying that it is open and functional. If the ADV is\nblocked, underpressure will occur in the loop during the\ndescent. Underpressure in the loop is very risky, as when\nthe diver switches to the device and wants to breathe\nunderpressure in the loop may cause flooding of the\nrebreather. Start the five-minute pre-breathing timer\nand pre-breathe device. Close your mouthpiece.\n","textLarge":false,"imageOnRight":true,"image":{"recommendedSizes":{"width":"420","height":"280"}},"imageMobile":{"recommendedSizes":{"width":"750","height":"500"}}},"id":"#14","type":"component","lock":false,"position":20},{"name":"Divider","data":{"color":"darkGray"},"id":"#15","type":"component","lock":false,"position":21},{"name":"TextBlock","data":{"text":"","textLarge":false,"imageOnRight":true,"image":{"recommendedSizes":{"width":"420","height":"280"}},"imageMobile":{"recommendedSizes":{"width":"750","height":"500"}}},"id":"#17","type":"component","lock":false,"position":22},{"name":"TextBlock","data":{"text":"### <span id=\"2-.-2-Diving*-with-a-Bailout-standby-(CCR)\">**2.2 Diving with a Bailout standby (CCR)**</span>\n\n\nThe device must be positioned so that it is immediately\navailable in case of an emergency. During the dive, check\nthe functionality of the device regularly. Control of the\ndevice consists of control breathing (2 to 5 breaths).\nBefore switching to the backup rebreather, check the\nppO2 in the backup rebreather loop and make sure there\nis no negative pressure in the loop. The underpressure in\nthe loop is manifested by wholly collapsed counterlungs\nand stiffened, shortened corrugated hoses. For safety, a\nshort injection of diluent can be done before the using\nthe bailout rebreather.\n\nEvery first breath of the bailout rebreather should\nbe done with caution. The system may be partially\nor completely flooded. Be ready for an immediate\ntransition to an open circuit. We recommend performing\nthe first check during the safety check at 5 meters (20\nft) and then every 20 m (60 ft) of descent. After reaching\nthe bottom, check every 10-15 minutes. If a fault is\ndetected, immediately begin ascent and terminate the\ndive.\n\nWhen you switch the setpoint on the primary device,\nswitch the setpoint on the bailout device at the same\ntime.\n\nIn the event of a permanent transition to the bailout\nrebreather, switch the handset to the standard\nDive Mode (CCR). At the same time, we recommend\nswitching the primary device to Bailout Standby (CCR)\nmode to stop oxygen injecting and to maintain valid\ndecompression calculations. If the primary rebreather\nis compromised and a permanent rebreather bailout\noccurs immediately start the ascent and terminate the\ndive.","textLarge":false,"imageOnRight":true,"image":{"recommendedSizes":{"width":"420","height":"280"}},"imageMobile":{"recommendedSizes":{"width":"750","height":"500"}}},"id":"#19","type":"component","lock":false,"position":24},{"name":"Divider","data":{"color":"darkGray"},"id":"#44","type":"component","lock":false,"position":48},{"name":"TextBlock","data":{"text":"### **BAILOUT STANDBY MODE**\n\nUser manual\n\nDate of issue: 29 June 2018, rev. 2.0\n\nCU HW rev. 1.4/1.5, HS HW rev. 3.0, FW ver. 2.11\n\nAuthor: Jakub Å imánek\n\nPublished by Liberty Systems, s.r.o., ccrliberty.com","textLarge":false,"imageOnRight":true,"image":{"recommendedSizes":{"width":"420","height":"280"}},"imageMobile":{"recommendedSizes":{"width":"750","height":"500"}}},"id":"#45","type":"component","lock":false,"position":49},{"name":"TextBlock","data":{"text":"","textLarge":false,"imageOnRight":true,"image":{"recommendedSizes":{"width":"420","height":"280"}},"imageMobile":{"recommendedSizes":{"width":"750","height":"500"}}},"id":"#21","type":"component","lock":false,"position":50},{"name":"TextBlock","data":{"text":"","textLarge":false,"imageOnRight":true,"image":{"recommendedSizes":{"width":"420","height":"280"}},"imageMobile":{"recommendedSizes":{"width":"750","height":"500"}}},"id":"#16","type":"component","lock":false,"position":51},{"name":"Footer","data":{"copyrights":"Copyright © 2019 Divesoft LLC All rights reserved.","facebookUrl":"","youtubeUrl":"","instagramUrl":"","contacts":"**Divesoft, s.r.o.** Hálkova 2495 413 01 Roudnice nad Labem Äeská republika Tel.: +420 416 857 057 E-mail: [email protected]"},"id":"#1","type":"component","lock":false,"position":52}],"id":"root","idBuffer":"#58","lastCommit":"43171a41-f953-49bf-b4c2-8e6ae928a75b"}},"annotations":[],"language":{"type":"id","generated":false,"id":"Language:cjv3kwvoj000u083611381c6o","typename":"Language"},"__typename":"PageTranslation"},"Page:cl9mq5poj1rfh0858zgl8ksjn":{"id":"cl9mq5poj1rfh0858zgl8ksjn","type":{"type":"id","generated":false,"id":"PageType:cjv3l213x004f08366hjufttp","typename":"PageType"},"tags":[],"translations({\"where\":{\"language\":{\"id\":\"cjv3kwvoj000u083611381c6o\"}}})":[{"type":"id","generated":false,"id":"PageTranslation:cl9mq5poy1rfo0858dsq936uk","typename":"PageTranslation"}],"__typename":"Page"},"PageTranslation:cl9mq5poy1rfo0858dsq936uk":{"id":"cl9mq5poy1rfo0858dsq936uk","name":"CCR Liberty heavy manual_en","createdAt":"2022-10-24T11:57:59.506Z","content":{"type":"json","json":{"content":[{"name":"Header","data":{"products":[{"title":"Accessories","description":"Backplates, Consumables. Tanks.","img":{"recommendedSizes":{"width":"235","height":"235"}},"url":""},{"title":"Accessories sets","description":"Protection, maintenance, cleaning.","img":{"recommendedSizes":{"width":"235","height":"235"}},"url":""},{"title":"Spare parts","description":"Spare parts and components.","img":{"recommendedSizes":{"width":"235","height":"235"}},"url":""}
2,{"title":"Spare parts kits","description":"Completly Liberty spare parts kits.","img":{"recommendedSizes":{"width":"235","height":"235"}},"url":""}]},"id":"#0","type":"component","lock":false,"position":0},{"name":"ProductShowcase","data":{"backgroundColor":"#ffffff","isTextDark":true,"isImageRight":false,"image":{"mimetype":"image/png","size":2830456,"hash":"6573838ce7ac1e9711e8aaf10d6ef54f29bb3343","id":"cku5acuhn7xor0776kqhs8udt","filename":"6573838ce7ac1e9711e8aaf10d6ef54f29bb3343-heavy.png","category":"divesoft/","type":"image"},"imageMobile":{},"title":"CCR Liberty Heavy","subtitle":"User manual","description":"","hideDescriptionOnMobile":false,"areButtons":false,"firstTitle":"Learn more >","firstUrl":"","secondTitle":"Configurator >","secondUrl":""},"id":"#490","type":"component","lock":false,"position":1},{"name":"Divider","data":{"color":"darkGray"},"id":"#9","type":"component","lock":false,"position":2},{"name":"TextBlock","data":{"text":"### Content ###\n\n\n[**Introduction**](#Introduction)\n\n[**1. Use of this manual**](#1-.-Use-of-this-manual)\n\n[1.1\tResponsibility of the Liberty Heavy user](#1-.-1-Responsibility-of-the-Liberty-Heavy-user)\n\n[1.2\tNotice](#1-.-2-Notice)\n\n[**2. System of documentation**](#1-.-System-of-documentation)\n\n[2.1\tVersion](#2-.-1-Version)\n\n[2.2\tTechnical guidelines](#2-.-2-Technical-guidelines)\n\n[2.3\tUpdate of printed documentation](#2-.-3-Update-of-printed-documentation)\n\n[2.4\tUser support](#2-.-4-User-support)\n\n[2.5\tUse](#2-.-5-Use)\n\n[**3. Description**](#1-.-Description)\n\n[3.1\tConversion](#3-.-1-Conversion)\n\n[**4. Assembly**](#4-.-Assembly)\n\n[4.1\tCanister preparation](#4-.-1-Canister-preparation)\n\n[**5. Assembly**](#5-.-Assembly)\n\n[5.1\tFixing the Tanks](#5-.-1-Fixing-the-Tanks)\n\n[5.2\tFixing the canister with the head](#5-.-2-Fixing-the-canister-with-the-head)\n\n[5.3\tHose routing 2Ã3 litre version](#5-.-3-Hose-routing-2Ã3-litre-version)\n\n[5.3.1 Diluent routing](#5-.-3.-1-Diluent-routing)\n\n[5.3.2 Oxygen routing](#5-.-3.-2-Oxygen-routing)\n\n[5.4\tHose routing 2Ã7 litre version](#5-.-4-Hose-routing-2Ã7-litre-version)\n\n[5.4.1 Right post diluent first stage](#5-.-4.-1-Right-post-diluent-first-stage)\n\n[5.4.2 Left post diluent first stage](#5-.-4.-2-Left-post-diluent-first-stage)\n\n[5.4.3 Oxygen routing](#5-.-4.-3-Oxygen-routing)\n\n[5.5\tPersonal customisation of the position](#5-.-5-Personal-customisation-of-the-position)\n\n[5.6\tAdjusting the counterlung position](#5-.-6-Adjusting-the-counterlung-position)\n\n[5.7\tAdjusting the trim](#5-.-7-Adjusting-the-trim)\n\n[5.8\tLocation of tanks for dry suit](#5-.-8-Location-of-tanks-for-dry-suit)\n\n[5.9\tLocation of additional equipment](#5-.-9-Location-of-additional-equipment)\n\n[5.10\tAssembly of the loop and Dive checks](#5-.-10-Assembly-of-the-loop-and-Dive-checks)\n\n[**6. Maintenance**](#6-.-Maintenance)\n\n[6.1\tStorage](#6-.-1-Storage)\n\n\n\n","textLarge":false,"imageOnRight":true,"image":{"recommendedSizes":{"width":"420","height":"280"}},"imageMobile":{"recommendedSizes":{"width":"750","height":"500"}}},"id":"#471","type":"component","lock":false,"position":3},{"name":"Divider","data":{"color":"darkGray"},"id":"#492","type":"component","lock":false,"position":4},{"name":"Divider","data":{"color":"darkGray"},"id":"#491","type":"component","lock":false,"position":5},{"name":"TextBlock","data":{"text":"### <span id=\"Introduction\">**Introduction**</span>\n\n### <span id=\"1-.-Use-of-this-manual\">**1. Use of this manual**</span>\n\nThis is the Liberty Heavy rebreather manual.The manual only deals with the specifics of the\nHeavy version of Liberty and is only a manual supplementing the basic functions and controls\ndescribed in the Liberty main manual. Operation of bailout rebreather mode features is\ndescribed in the stand-alone Bailout standby mode manual.\n\n<span style=\"color:red\">**To understand the full functionality of the device, read the CCR Liberty main manual.** </span>\n\nThe Liberty Heavy is intended for use exclusively by a trained person who is capable of fully\nunderstanding the instructions contained in this manual or is in the process of training with\nthe Liberty Heavy in a course accredited by the manufacturer.","textLarge":false,"imageOnRight":true,"image":{"recommendedSizes":{"width":"420","height":"280"}},"imageMobile":{"recommendedSizes":{"width":"750","height":"500"}}},"id":"#28","type":"component","lock":false,"position":6},{"name":"TextBlock","data":{"text":"### <span id=\"1-.-1-Responsibility-of-the-Liberty-Heavy-use\">**1.1 Responsibility of the Liberty Heavy use**</span>\n\n\nStrong emphasis was placed on reliability during the development of the CCR Liberty Heavy.\nIndividual internal parts are separated in order to minimize the impact that failure of a given\npart may have on the rebreatherâs basic functionality. A number of systems have multiple\nbackups. The logic of the Liberty Heavyâs control never prohibits the start of a dive even in the\nevent that malfunctions are detected; it only indicates the status if able to do so in light of the\ndamage. When cave diving, the inability to submerge can mean not being able to return from\na dive; therefore, the Liberty Heavy does not impede submersion.\n\nThe user must always decide responsibly whether he/she switches to a backup apparatus or\neven starts a dive with a partially malfunctioning rebreather.\n\nA Liberty Heavy user must accept the fact that diving involves risk. Following everything that\nthe user has learned in the Liberty Heavyâs technical documentation and in training on diving\nwith this rebreather can reduce the risk but cannot eliminate it. Safety when diving is further\nimproved by regular training, methodical education and following good diving practices. Diving\nwith a rebreather requires a far higher degree of carefulness and discipline than diving with an\nopen-circuit apparatus.\n\n\nIf you do not accept the risk and you are not a trained, careful and disciplined diver, do not dive\nwith the Liberty Heavy.\n\n**The manufacturer does not bear any responsibility for use of the Liberty Heavy if the apparatus\nhas been modified in any way that is not stated in this manual or in the technical guidelines\nissued by the manufacturer.**\n","textLarge":false,"imageOnRight":true,"image":{"recommendedSizes":{"width":"420","height":"280"}},"imageMobile":{"recommendedSizes":{"width":"750","height":"500"}}},"id":"#14","type":"component","lock":false,"position":7},{"name":"TextBlock","data":{"text":"The principle of a rebreather involves in recycling the breathing mixture. Carbon dioxide is \nremoved from the exhaled mixture and is again prepared for the next inhalation after being \nreplenished with oxygen. The composition of the breathing mixture changes continuously.","textLarge":false,"imageOnRight":true,"image":{"recommendedSizes":{"width":"420","height":"280"}},"imageMobile":{"recommendedSizes":{"width":"750","height":"500"}}},"id":"#15","type":"component","lock":false,"position":8},{"name":"Divider","data":{"color":"darkGray"},"id":"#13","type":"component","lock":false,"position":9},{"name":"TextBlock","data":{"text":"### <span id=\"1-.-2-Notice\">**1.2 Notice**</span>\n\n**The Liberty Heavy is not a buoyancy compensator, nor a harness for attaching the device to\nthe diverâs body.**","textLarge":false,"imageOnRight":true,"image":{"recommendedSizes":{"width":"420","height":"280"}},"imageMobile":{"recommendedSizes":{"width":"750","height":"500"}}},"id":"#16","type":"component","lock":false,"position":10},{"name":"Divider","data":{"color":"darkGray"},"id":"#17","type":"component","lock":false,"position":11},{"name":"TextBlock","data":{"text":"### <span id=\"2-.-System-of-documentation\">**2. System of documentation**</span>\n\n\n### <span id=\"2-.-1-Version\">**2.1 Version**</span>\n\nThe technical documentation is subjected to a process of continual development and\nimprovement.Therefore, please regularly check the website at www.CCRLiberty.com for\nupdates.\
2n","textLarge":false,"imageOnRight":true,"image":{"recommendedSizes":{"width":"420","height":"280"}},"imageMobile":{"recommendedSizes":{"width":"750","height":"500"}}},"id":"#18","type":"component","lock":false,"position":12},{"name":"Divider","data":{"color":"darkGray"},"id":"#494","type":"component","lock":false,"position":13},{"name":"TextBlock","data":{"text":"### <span id=\"2-.-2-Technical-guidelines\">**2.2 Technical guidelines**</span> \n\nThe manufacturer can issue technical guidelines. It is strongly recommended that the user\nregularly checks www.CCRLiberty.com for new guidelines. Registered users will receive\nnotifications by e-mail.","textLarge":false,"imageOnRight":true,"image":{"recommendedSizes":{"width":"420","height":"280"}},"imageMobile":{"recommendedSizes":{"width":"750","height":"500"}}},"id":"#21","type":"component","lock":false,"position":14},{"name":"Divider","data":{"color":"darkGray"},"id":"#23","type":"component","lock":false,"position":15},{"name":"TextBlock","data":{"text":"### <span id=\"2-.-3-Update-of-printed-documentation\">**2.3 Update of printed documentation**</span> \n\n\nThe electronic form of the manual is always available in its complete, updated form.\n\nThe electronic and printed forms of the manual may not be completely identical. In case of\ninsignificant changes (correction of minor typing errors, for example), only the electronic\nversion is updated","textLarge":false,"imageOnRight":true,"image":{"recommendedSizes":{"width":"420","height":"280"}},"imageMobile":{"recommendedSizes":{"width":"750","height":"500"}}},"id":"#24","type":"component","lock":false,"position":16},{"name":"Divider","data":{"color":"darkGray"},"id":"#25","type":"component","lock":false,"position":17},{"name":"TextBlock","data":{"text":"### <span id=\"2-.-4-User-support\">**2.4 User support**</span> \n\nRegistered users are entitled to technical support. The extent of free support can be limited.\n\nThe technical support department at Liberty systems s.r.o. will provide limited support for\npotential and unregistered users.Prior to submitting a question, please familiarize yourself\nwith the general principles of rebreather diving with trimix and the freely available CCR Liberty\ntechnical documentation.","textLarge":false,"imageOnRight":true,"image":{"recommendedSizes":{"width":"420","height":"280"}},"imageMobile":{"recommendedSizes":{"width":"750","height":"500"}}},"id":"#26","type":"component","lock":false,"position":18},{"name":"Divider","data":{"color":"darkGray"},"id":"#27","type":"component","lock":false,"position":19},{"name":"TextBlock","data":{"text":"### <span id=\"2-.-5-Use\">**2.5 Use**</span>\n\nHeavy Liberty Rebreather is a modification of the original Liberty Rebreather. Liberty Heavy\nretains the complete head of the device including electronics, handsets and all sensors.\nHowever, Liberty Heavy requires a different mounting than the classic Liberty. This procedure is\nincluded in this manual and assembly checklist","textLarge":false,"imageOnRight":true,"image":{"recommendedSizes":{"width":"420","height":"280"}},"imageMobile":{"recommendedSizes":{"width":"750","height":"500"}}},"id":"#30","type":"component","lock":false,"position":20},{"name":"Divider","data":{"color":"darkGray"},"id":"#20","type":"component","lock":false,"position":21},{"name":"TextBlock","data":{"text":"### <span id=\"3-.-Description\">**3. Description**</span>\n\n\nLiberty Heavy can be used in a number of different configurations consisting of mutually\ncompatible parts.The deviceâs own configuration can be created in the online configurator\nhttps://ccrliberty.com/configurator.\n\nLiberty Heavy brings a new configuration of the popular rebreather with completely redundant\nelectronics. Divers can clamp the Liberty to their own standard backplate, bringing a high\nlevel of comfort, versatility, and a wide range of height adjustment options for any diverâs body\nheight. This gives the diver ample headroom that does not restrict anything. The adjustability\nof the deviceâs seating on the back brings the possibilities of fine-tuning the perfect trim.\n\nThe Liberty Heavy configuration has a 20 l wing in the base, but any other rebreather wing (with\nholes for hose passages) can be used according to the required volume to your chosen size and\nnumber of cylinders.\n\nThe Liberty Heavy allows you to change the configuration of the on-board cylinders from the\nclassic 2â3 liter to the large 7 liter cylinders in DIR configuration. Up to 4 cyl
2inders can be\nmounted in various combinations.\n\nThe removable wire stand allows very practical and convenient mounting of the off-board\nbottles while guaranteeing high stability of the device on land or on the boat.\n\nThe stainless steel frame of the instrument is well adapted for easy and elegant hose routing.\n\nThe Liberty Heavy is thus an excellent choice for all divers looking for a very comfortable,\ncompact and stable unit with a wide range of customization options, for divers looking for\na unit for the most demanding dives with many bailout cylinders, but also for recreational\ndivers at the beginning of their rebreather career.\n\nAll the extremely advanced features of the CCR Liberty remain. The configuration uses the\noriginal back-mounted counterlungs and manual valve system right at the mouthpiece. The\nwork of breathing thus remains unchanged from the highest standard Liberty rebreathers.","textLarge":false,"imageOnRight":true,"image":{"recommendedSizes":{"width":"420","height":"280"}},"imageMobile":{"recommendedSizes":{"width":"750","height":"500"}}},"id":"#29","type":"component","lock":false,"position":22},{"name":"TextBlock","data":{"text":"","textLarge":false,"imageOnRight":true,"image":{"recommendedSizes":{"width":"420","height":"280"}},"imageMobile":{"recommendedSizes":{"width":"750","height":"500"}}},"id":"#436","type":"component","lock":false,"position":23},{"name":"Divider","data":{"color":"darkGray"},"id":"#32","type":"component","lock":false,"position":24},{"name":"TextBlock","data":{"text":"### <span id=\"3-.-1-Conversion\">**3.1 Conversion**</span>\n\nLiberty Heavy is compatible with the standard CCR Liberty , so itâs possible to convert CCR\nLiberty to Liberty Heavy using a conversion kit.\n\nThe head including the handset and the buddy display, canister and scrubber are used from the\nback-mounted device.Alternatively, it is possible to replace the scrubber with a canister for\na shortened version.This version is not a standard part of the conversion kit, and needs to be\nrequested separately.\n\nBy purchasing the conversion kit to the back unit, Liberty Heavy can be rebuilt to classic CCR Liberty.","textLarge":false,"imageOnRight":true,"image":{"recommendedSizes":{"width":"420","height":"280"}},"imageMobile":{"recommendedSizes":{"width":"750","height":"500"}}},"id":"#33","type":"component","lock":false,"position":25},{"name":"Divider","data":{"color":"darkGray"},"id":"#34","type":"component","lock":false,"position":26},{"name":"TextBlock","data":{"text":"### <span id=\"4-.-Assembly\">**4. Assembly**</span> \n\n**WARNING: ALWAYS USE THE OFFICIAL CHECKLIST OR DIVESOFT.APP TO BUILD LIBERTY HEAVY**","textLarge":false,"imageOnRight":true,"image":{"recommendedSizes":{"width":"420","height":"280"}},"imageMobile":{"recommendedSizes":{"width":"750","height":"500"}}},"id":"#468","type":"component","lock":false,"position":27},{"name":"Image","data":{"firstImage":{"mimetype":"image/jpeg","size":44468,"hash":"e8b0fb9905c7d7abbcd8ec7dcb25117013f7fb52","id":"ck8nl07gg4cee077625t5edya","filename":"dive.jpg","category":"divesoft/","type":"image"},"secondImage":{"mimetype":"image/jpeg","size":44468,"hash":"e8b0fb9905c7d7abbcd8ec7dcb25117013f7fb52","id":"ck8nl07gg4cee077625t5edya","filename":"dive.jpg","category":"divesoft/","type":"image"}},"id":"#495","type":"component","lock":false,"position":28},{"name":"ProductsCompare","data":{"sectionTitle":"","firstTitle":"1","firstSubtitle":"","firstLearnMoreUrl":"","firstConfiguratorUrl":"","firstImage":{"recommendedSizes":{"width":200,"height":200},"mimetype":"image/png","size":5592731,"hash":"53656d5c669464c626faced3c3008c90bce708ae","id":"cjxbwn2ik074o0776q41xdbqy","filename":"fmcl-00005.png","category":"divesoft/","type":"image"},"firstFeatures":[],"secondTitle":"2","secondSubtitle":"","secondLearnMoreUrl":"","secondConfiguratorUrl":"","secondImage":{"recommendedSizes":{"width":200,"height":200},"mimetype":"image/png","size":5592731,"hash":"53656d5c669464c626faced3c3008c90bce708ae","id":"cjxbwn2ik074o0776q41xdbqy","filename":"fmcl-00005.png","category":"divesoft/","type":"image"},"secondFeatures":[],"thirdTitle":"3","thirdSubtitle":"","thirdLearnMoreUrl":"","thirdConfiguratorUrl":"","thirdImage":{"recommendedSizes":{"width":200,"height":200},"mimetype":"image/png","size":5592731,"hash":"53656d5c669464c626faced3c3008c90bce708ae","id":"cjxbwn2ik074o0776q41xdbqy","filename":"fmcl-00005.png","category":"divesoft/","type":"image"},"thirdFeatures":[],"fourthTitle":"","fourthSubtitle":"","fourthLearnMoreUrl":"","fourthConfiguratorUrl":"","fourthImage":{"recommendedSizes":{"width":200,"height":200}},"fourthFeatures":[],"fifthTitle":"","fifthSubtitle":"","fifthLearnMoreUrl":"","fifthConfiguratorUrl":"","fifthImage":{"recommendedSizes":{"width":200,"height":200}},"fifthFeatures":[]},"id":"#496","type":"component","lock":false,"position":29},{"name":"TextBlock","data":{"text":"Checklists for CCR Liberty in .pdf format are available at\nhttps://www.divesoft.com/en/products/ccr-liberty/documents","textLarge":false,"imageOnRight":true,"image":{"recommendedSizes":{"width":"420","height":"280"}},"imageMobile":{"recommendedSizes":{"width":"750","height":"500"}}},"id":"#497","type":"component","lock":false,"position":30},{"name":"Divider","data":{"color":"darkGray"},"id":"#36","type":"component","lock":false,"position":31},{"name":"TextBlock","data":{"text":"### <span id=\"4-.-1-Canister-preparation\">**4.1. Canister preparation**</span> \n\n\nSince the Liberty Heavy has a different system of attaching the canister and head to the frame\nand backplate, it is imperative to always connect the head and canister with a clip.\n\n<span style=\"color:red\">**WARNING: FAILURE TO USE THE BUCKLE WILL RESULT IN SEPARATION OF THE HEAD FROM\nTHE CA
2NISTER DURING THE DIVE, CATASTROPHIC FLOODING OF THE BREATHING LOOP AND RISK\nOF SERIOUS INJURY OR DEATH.**</span>\n\nTIP: If using the canister only with the Heavy or in combination with the Liberty Light, always\nleave the clip on the canister and do not remove it. This will avoid the embarrassment of\nforgetting to install the clip before a dive or losing it.","textLarge":false,"imageOnRight":true,"image":{"recommendedSizes":{"width":"420","height":"280"}},"imageMobile":{"recommendedSizes":{"width":"750","height":"500"}}},"id":"#37","type":"component","lock":false,"position":32},{"name":"TextBlock","data":{"text":"Step 1\n\nOpen all the levers on the buckle and insert\nthe tooth of the buckle into the lock on the\nscrubber canister","textLarge":false,"imageOnRight":true,"image":{"recommendedSizes":{"width":"420","height":"280"},"mimetype":"image/jpeg","size":44468,"hash":"e8b0fb9905c7d7abbcd8ec7dcb25117013f7fb52","id":"ck8nl07gg4cee077625t5edya","filename":"dive.jpg","category":"divesoft/","type":"image"},"imageMobile":{"recommendedSizes":{"width":"750","height":"500"}}},"id":"#498","type":"component","lock":false,"position":33},{"name":"TextBlock","data":{"text":"Step 2\n\nSecure the buckle position on the canister\nwith the buckle locking levers","textLarge":false,"imageOnRight":true,"image":{"recommendedSizes":{"width":"420","height":"280"},"mimetype":"image/jpeg","size":44468,"hash":"e8b0fb9905c7d7abbcd8ec7dcb25117013f7fb52","id":"ck8nl07gg4cee077625t5edya","filename":"dive.jpg","category":"divesoft/","type":"image"},"imageMobile":{"recommendedSizes":{"width":"750","height":"500"}}},"id":"#499","type":"component","lock":false,"position":34},{"name":"TextBlock","data":{"text":"Step 3\n\nInsert the beak of the buckle into the head\nlock and secure with the main buckle lever.\nThe closed buckle on the canister and head\nlooks like this. All levers of the buckle are\nsnapped, the buckle is firmly attached to\nthe head and canister and there is no gap\nbetween the head and canister","textLarge":false,"imageOnRight":true,"image":{"recommendedSizes":{"width":"420","height":"280"}},"imageMobile":{"recommendedSizes":{"width":"750","height":"500"}}},"id":"#500","type":"component","lock":false,"position":35},{"name":"Image","data":{"firstImage":{"mimetype":"image/jpeg","size":44468,"hash":"e8b0fb9905c7d7abbcd8ec7dcb25117013f7fb52","id":"ck8nl07gg4cee077625t5edya","filename":"dive.jpg","category":"divesoft/","type":"image"},"secondImage":{"mimetype":"image/jpeg","size":44468,"hash":"e8b0fb9905c7d7abbcd8ec7dcb25117013f7fb52","id":"ck8nl07gg4cee077625t5edya","filename":"dive.jpg","category":"divesoft/","type":"image"}},"id":"#501","type":"component","lock":false,"position":36},{"name":"TextBlock","data":{"text":"To open the head again, first release the lock from both sides at the same time. Tilt the main\nlever to the maximum position to separate the head from the canister.","textLarge":false,"imageOnRight":true,"image":{"recommendedSizes":{"width":"420","height":"280"},"mimetype":"image/jpeg","size":44468,"hash":"e8b0fb9905c7d7abbcd8ec7dcb25117013f7fb52","id":"ck8nl07gg4cee077625t5edya","filename":"dive.jpg","category":"divesoft/","type":"image"},"imageMobile":{"recommendedSizes":{"width":"750","height":"500"}}},"id":"#502","type":"component","lock":false,"position":37},{"name":"TextBlock","data":{"text":"The Liberty Heavy system is based on a frame that carries both the bottles and the canister.\nThe frame is always the same for all versions of Liberty Heavy. The only difference between the\nconfigurations is the placement of the two types of brackets on the frame.","textLarge":false,"imageOnRight":true,"image":{"recommendedSizes":{"width":"420","height":"280"}},"imageMobile":{"recommendedSizes":{"width":"750","height":"500"}}},"id":"#503","type":"component","lock":false,"position":38},{"name":"TextBlock","data":{"text":"For the 2â3 liter bottle configuration we use the small brackets. If we want to use the socalled GUE configuration with 7 liter bottles, we use large brackets. In both cases, it is still\npossible to attach a second set of bottles via the additional holes for the attachment straps.","textLarge":false,"imageOnRight":true,"image":{"recommendedSizes":{"width":"420","height":"280"}},"imageMobile":{"recommendedSizes":{"width":"750","height":"500"}}},"id":"#504","type":"component","lock":false,"position":39},{"name":"Image","data":{"firstImage":{"mimetype":"image/jpeg","size":44468,"hash":"e8b0fb9905c7d7abbcd8ec7dcb25117013f7fb52","id":"ck8nl07gg4cee077625t5edya","filename":"dive.jpg","category":"divesoft/","type":"image"},"secondImage":{"mimetype":"image/jpeg","size":44468,"hash":"e8b0fb9905c7d7abbcd8ec7dcb25117013f7fb52","id":"ck8nl07gg4cee077625t5edya","filename":"dive.jpg","category":"divesoft/","type":"image"}},"id":"#506","type":"component","lock":false,"position":40}
2,{"name":"TextBlock","data":{"text":"\tStand for 2Ã3 litre configuration. Stand for 2Ã7 configuration","textLarge":false,"imageOnRight":true,"image":{"recommendedSizes":{"width":"420","height":"280"}},"imageMobile":{"recommendedSizes":{"width":"750","height":"500"}}},"id":"#507","type":"component","lock":false,"position":41},{"name":"Image","data":{"firstImage":{"mimetype":"image/jpeg","size":44468,"hash":"e8b0fb9905c7d7abbcd8ec7dcb25117013f7fb52","id":"ck8nl07gg4cee077625t5edya","filename":"dive.jpg","category":"divesoft/","type":"image"},"secondImage":{"mimetype":"image/jpeg","size":44468,"hash":"e8b0fb9905c7d7abbcd8ec7dcb25117013f7fb52","id":"ck8nl07gg4cee077625t5edya","filename":"dive.jpg","category":"divesoft/","type":"image"}},"id":"#508","type":"component","lock":false,"position":42},{"name":"Spacer","data":{"spacingLarge":30,"spacingSmall":20,"backgroundColor":"#ffffff"},"id":"#510","type":"component","lock":false,"position":43},{"name":"TextBlock","data":{"text":"Each configuration comes with just one set of brackets suitable for that configuration. In case\nof combining different configurations, it is possible to purchase separately brackets for the\ngiven configuration.","textLarge":false,"imageOnRight":true,"image":{"recommendedSizes":{"width":"420","height":"280"}},"imageMobile":{"recommendedSizes":{"width":"750","height":"500"}}},"id":"#509","type":"component","lock":false,"position":44},{"name":"Image","data":{"firstImage":{"mimetype":"image/jpeg","size":44468,"hash":"e8b0fb9905c7d7abbcd8ec7dcb25117013f7fb52","id":"ck8nl07gg4cee077625t5edya","filename":"dive.jpg","category":"divesoft/","type":"image"},"secondImage":{}},"id":"#511","type":"component","lock":false,"position":45},{"name":"Divider","data":{"color":"darkGray"},"id":"#38","type":"component","lock":false,"position":46}
2,{"name":"TextBlock","data":{"text":"### <span id=\"5-.-Assembly\">**5. Assembly**</span> ","textLarge":false,"imageOnRight":true,"image":{"recommendedSizes":{"width":"420","height":"280"}},"imageMobile":{"recommendedSizes":{"width":"750","height":"500"}}},"id":"#466","type":"component","lock":false,"position":47},{"name":"Image","data":{"firstImage":{"mimetype":"image/jpeg","size":44468,"hash":"e8b0fb9905c7d7abbcd8ec7dcb25117013f7fb52","id":"ck8nl07gg4cee077625t5edya","filename":"dive.jpg","category":"divesoft/","type":"image"},"secondImage":{}},"id":"#512","type":"component","lock":false,"position":48},{"name":"Spacer","data":{"spacingLarge":30,"spacingSmall":20,"backgroundColor":"#ffffff"},"id":"#513","type":"component","lock":false,"position":49},{"name":"TextBlock","data":{"text":"The Liberty Heavy frame is designed so that any wing and backplate can be used as long as\nthey have standard bolt hole spacing.\nAssemble the Liberty Heavy by installing the wing, counterlung assembly and backplate onto\nthe bolts in the frame one at a time.\nTIP: To make it easier to mount the wing and other components to the frame, it is a good idea to\nsecure the bolt with red ring (included) so that the bolts do not come out of the frame during\nassembly of other parts.","textLarge":false,"imageOnRight":true,"image":{"recommendedSizes":{"width":"420","height":"280"}},"imageMobile":{"recommendedSizes":{"width":"750","height":"500"}}},"id":"#40","type":"component","lock":false,"position":50},{"name":"Divider","data":{"color":"darkGray"},"id":"#41","type":"component","lock":false,"position":51},{"name":"TextBlock","data":{"text":"### <span id=\"5-.-1-Fixing-the-Tanks\">**5.1 Fixing the Tanks**</span>","textLarge":false,"imageOnRight":true,"image":{"recommendedSizes":{"width":"420","height":"280"}},"imageMobile":{"recommendedSizes":{"width":"750","height":"500"}}},"id":"#514","type":"component","lock":false,"position":52},{"name":"TextBlock","data":{"text":" \n\nAttach the tanks to the frame using straps with an\nbuckle.\nThe height of the tanks affects the reach of the\nlow pressure hoses, so choose a height that will\nallow the hoses to reach the intended position.\nIn particular, the position of the oxygen hose\nconnection to the solenoid is critical\nClose the strap with the buckle and make sure\nthe tanks are secured tightly enough. Insert the\nremaining end of the strap into the elastic loops on\nthe strap so that it does not float.","textLarge":false,"imageOnRight":true,"image":{"recommendedSizes":{"width":"420","height":"280"},"mimetype":"image/jpeg","size":44468,"hash":"e8b0fb9905c7d7abbcd8ec7dcb25117013f7fb52","id":"ck8nl07gg4cee077625t5edya","filename":"dive.jpg","category":"divesoft/","type":"image"},"imageMobile":{"recommendedSizes":{"width":"750","height":"500"}}},"id":"#42","type":"component","lock":false,"position":53},{"name":"Divider","data":{"color":"darkGray"},"id":"#43","type":"component","lock":false,"position":54},{"name":"TextBlock","data":{"text":"### <span id=\"5-.-2-Fixing-the-canister-with-the-head\">**5.2 Fixing the canister with the head**</span> \n\nThe head canister MUST BE PRE-ARRANGED WITH\nTHE CHAIN as stated above.\nStand the canister on the unit stand and screw the\noxygen connection to the solenoid. It is imperative\nthat this step precedes the attachment of the\ncanister, as with the canister attached, fingers can\nno longer reach the oxygen connection.\n\n<span style=\"color:red\">**SECURE THE CANISTER WITH THE CENTRAL STRAP**</span>\n","textLarge":false,"imageOnRight":true,"image":{"recommendedSizes":{"width":"420","height":"280"}},"imageMobile":{"recommendedSizes":{"width":"750","height":"500"}}},"id":"#44","type":"component","lock":false,"position":55},{"name":"Divider","data":{"color":"darkGray"},"id":"#45","type":"component","lock":false,"position":56},{"name":"TextBlock","data":{"text":"### <span id=\"5-.-3-Hose-routing-2Ã3-litre-version\">**5.3 Hose routing 2Ã3 litre version**</span>\n\nTwo 3l tanks are mounted in the unit with the valves down. Diluent on the left, oxygen on the\nright. Both tanks have classic Nautec rebreather valves and are fitted with APEKS DST first\nstages with technical connections. The first stages are rotated horizontally and the technical\nconnections face the diver. The three-hole side faces upwards.","textLarge":false,"imageOnRight":true,"image":{"recommendedSizes":{"width":"420","height":"280"}},"imageMobile":{"recommendedSizes":{"width":"750","height":"500"}}},"id":"#46","type":"component","lock":false,"position":57},{"name":"Image","data":{"firstImage":{"mimetype":"image/jpeg","size":44468,"hash":"e8b0fb9905c7d7abbcd8ec7dcb25117013f7fb52","id":"ck8nl07gg4cee077625t5edya","filename":"dive.jpg","category":"divesoft/","type":"image"},"secondImage":{}},"id":"#515","type":"component","lock":false,"position":58},{"name":"Divider","data":{"color":"darkGray"},"id":"#47","type":"component","lock":false,"position":59},{"name":"TextBlock","data":{"text":"### <span id=\"5-.-3-.-1-Diluent-routing\">**5.3.1 Diluent routing**</span> \n\n","textLarge":false,"imageOnRight":true,"image":{"recommendedSizes":{"width":"420","height":"280"}},"imageMobile":{"recommendedSizes":{"width":"750","height":"500"}}},"id":"#48","type":"component","lock":false,"position":60},{"name":"TextBlock","data":{"text":"The three upper ports have hoses in order\nfrom left to right 1. BOV+DIL MAV; 2. ADV; 3.\nInflator.\n\n⢠H HP hose runs upwards along the frame\nattached with velcro stra
2ps on the side of\nthe tank, then passes through a hole in the\nhandle over the diverâs shoulder and the\ngauge is attached to the chest D-ring or\nunder the rubber\n\n","textLarge":false,"imageOnRight":true,"image":{"recommendedSizes":{"width":"420","height":"280"},"mimetype":"image/jpeg","size":44468,"hash":"e8b0fb9905c7d7abbcd8ec7dcb25117013f7fb52","id":"ck8nl07gg4cee077625t5edya","filename":"dive.jpg","category":"divesoft/","type":"image"},"imageMobile":{"recommendedSizes":{"width":"750","height":"500"}}},"id":"#49","type":"component","lock":false,"position":61},{"name":"TextBlock","data":{"text":"⢠The BOV hose is routed in front of the\nframe (between the frame and the\nbackplate) and is secured with velcro\nstraps). It does not pass through the wing\nbut makes an arc over the top of the wing\nand is routed along the inspiratory hose\n\n⢠The ADV hose follows the same route as\nthe BOV hose\n\n⢠It is routed through the front of the frame. On the wing it runs from the inflator elbow along\nthe inflator hose","textLarge":false,"imageOnRight":true,"image":{"recommendedSizes":{"width":"420","height":"280"}},"imageMobile":{"recommendedSizes":{"width":"750","height":"500"}}},"id":"#516","type":"component","lock":false,"position":62},{"name":"Divider","data":{"color":"darkGray"},"id":"#50","type":"component","lock":false,"position":63},{"name":"TextBlock","data":{"text":"### <span id=\"5-.-3-.-2-Oxygen-routing\">**5.3.2 Oxygen routing**</span>\n\nThere are two hoses leading out of the three upper LP ports. The middle port is for the solenoid\nhose, the outermost port is for the oxygen MAV.\n\n⢠The BOV is routed in front of the frame (between the frame and the backplate) and is held\nin place with velcro straps). It does not pass through the wing, but makes an arc over the\ntop of the wing and is routed along the exhaust hose.\n\n⢠Solenoid hose â runs directly along the canister to the banjo.","textLarge":false,"imageOnRight":true,"image":{"recommendedSizes":{"width":"420","height":"280"}},"imageMobile":{"recommendedSizes":{"width":"750","height":"500"}}},"id":"#51","type":"component","lock":false,"position":64},{"name":"TextBlock","data":{"text":"A safety lock prevents the OPV from accidentally falling out. To remove the valve push it in to \nunlock, and rotate in the direction of the arrows. Indicated on the valve.","textLarge":false,"imageOnRight":true,"image":{"recommendedSizes":{"width":"420","height":"280"}},"imageMobile":{"recommendedSizes":{"width":"750","height":"500"}}},"id":"#52","type":"component","lock":false,"position":65},{"name":"Divider","data":{"color":"darkGray"},"id":"#53","type":"component","lock":false,"position":66},{"name":"TextBlock","data":{"text":"### <span id=\"5-.-4-Hose-routing-2Ã7-litre-version\">**5.4 Hose routing 2Ã7 litre version**</span>\n\nTwo 7 litre diluent tanks are clamped in the frame with valves upwards, connected to each\nother by a flexible manifold. The two first stages of the Apeks DST are fitted with technical\nconnections, and are positioned vertically, connections downwards.","textLarge":false,"imageOnRight":true,"image":{"recommendedSizes":{"width":"420","height":"280"}},"imageMobile":{"recommendedSizes":{"width":"750","height":"500"}}},"id":"#54","type":"component","lock":false,"position":67},{"name":"Divider","data":{"color":"darkGray"},"id":"#57","type":"component","lock":false,"position":68},{"name":"TextBlock","data":{"text":"### <span id=\"5-.-4-.-1.Right-post-diluent-first-stage\">**5.4.1 Right post diluent first stage**</span> \n\n⢠The high-pressure hose from the pressure gauge runs crosswise behind the head to the left\nside of the diver, where it is clamped into the D-ring on the belt.\n\n⢠The 350 mm long ADV hose runs crosswise under the exhalation hose to the ADV T-piece.\n\n⢠The 665 mm long inflator hose runs crosswise under both corrugated hoses to the inflator\nhose on the left.\n\n⢠The long hose runs straight down from the bottom port. Second stage is not included.","textLarge":false,"imageOnRight":true,"image":{"recommendedSizes":{"width":"420","height":"280"}},"imageMobile":{"recommendedSizes":{"width":"750","height":"500"}}},"id":"#58","type":"component","lock":false,"position":69},{"name":"Image","data":{"firstImage":{"mimetype":"image/jpeg","size":44468,"hash":"e8b0fb9905c7d7abbcd8ec7dcb25117013f7fb52","id":"ck8nl07gg4cee077625t5edya","filename":"dive.jpg","category":"divesoft/","type":"image"},"secondImage":{}},"id":"#517","type":"component","lock":false,"position":70},{"name":"Divider","data":{"color":"darkGray"},"id":"#59","type":"component","lock":false,"position":71},{"name":"TextBlock","data":{"text":"### <span id=\"5-.-4-.-2-Left-post-diluent-first-stage\">**5.4.2 Left post diluent first stage**</span>\n\n⢠580 mm long hose for MAV diluent, which runs along the inspiratory hose to the single hose\nadapter on the BOV.\n\n⢠Dry suit hose leading directly down from the bottom port. This hose is not supplied with the\nunit.","textLarge":false,"imageOnRight":true,"image":{"recommendedSizes":{"width":"420","height":"280"}},"imageMobile":{"recommendedSizes":{"width":"750","height":"500"}}},"id":"#60","type":"component","lock":false,"position":72},{"name":"Divider","data":{"color":"darkGray"},"id":"#61","type":"component","lock":false,"position":73},{"name":"TextBlock","data":{"text":"### <span id=\"5-.-4-.-3-Oxygen-routing\">**5.4.3 Oxygen routing**</span>\n\nThe oxygen first stage is located on a 3 litre tank turned valve down and attached to the right\noxygen tank so that the first stage extends below the scrubber canister. The oxygen first stage\nis also fitted with a technical connection.\n\n⢠A 560 mm long solenoid hose runs from the technical connection then is routed along\nthe right side of the frame through two velcro loops and then directly into the solenoid\nconnection.\n\n⢠The hose to the O2 MAV runs on the opposite side of the same part of the frame as the\nsolenoid hose (on the tank side) and turns along the wrap hose to the O2 MAV at the wrap\nhose\n\n⢠HP hose to gauge of standard length as on BMCL runs forward of the frame (attached\nbetween frame and backplate with velcro stra
2ps and exits on the left side where the oxygen\ngauge is connected to the diluent gauge and attached together with the diluent gauge","textLarge":false,"imageOnRight":true,"image":{"recommendedSizes":{"width":"420","height":"280"}},"imageMobile":{"recommendedSizes":{"width":"750","height":"500"}}},"id":"#62","type":"component","lock":false,"position":74},{"name":"Divider","data":{"color":"darkGray"},"id":"#63","type":"component","lock":false,"position":75},{"name":"TextBlock","data":{"text":"### <span id=\"5-.-5-Personal-customisation-of-the-position\">**5.5 Personal customisation of the position**</span>\n\nEach unit can be personally customised by positioning the backplate against the frame. Three\nholes in the frame and stand are used for this purpose. The higher you position the backplate,\nthe lower the unit will be positioned on the diverâs body.\n\nTIP: people with a shorter stature may have difficulty when the unit obstructs behind their head\nin the standard setup. In this case, it is possible to fix a screw to the top hole. This will move\nthe unit down a few inches and give the diver a proctor behind the head.\n\nTIP: people with tall stature may have difficulty with low counterlung seating at the default\nsetting. This can result in impaired work of breathing. Moving the unit one hole lower will move\nthe unit up overall and this will get the counterlungs in the correct position.\n","textLarge":false,"imageOnRight":true,"image":{"recommendedSizes":{"width":"420","height":"280"}},"imageMobile":{"recommendedSizes":{"width":"750","height":"500"}}},"id":"#64","type":"component","lock":false,"position":76},{"name":"Divider","data":{"color":"darkGray"},"id":"#65","type":"component","lock":false,"position":77},{"name":"TextBlock","data":{"text":"### <span id=\"5-.-6-Adjusting-the-counterlung-position\">**5.6 Adjusting the counterlung position**</span>","textLarge":false,"imageOnRight":true,"image":{"recommendedSizes":{"width":"420","height":"280"}},"imageMobile":{"recommendedSizes":{"width":"750","height":"500"}}},"id":"#518","type":"component","lock":false,"position":78},{"name":"TextBlock","data":{"text":"\n\nThe poor position of the counterlung relative to the lungs fundamentally affects the work\nof breathing. The central part of the counterlung is provided with two pairs of holes for the\npassage of the screw. This allows the counterlungs to be positioned one level higher or lower.","textLarge":false,"imageOnRight":true,"image":{"recommendedSizes":{"width":"420","height":"280"},"mimetype":"image/jpeg","size":44468,"hash":"e8b0fb9905c7d7abbcd8ec7dcb25117013f7fb52","id":"ck8nl07gg4cee077625t5edya","filename":"dive.jpg","category":"divesoft/","type":"image"},"imageMobile":{"recommendedSizes":{"width":"750","height":"500"}}},"id":"#66","type":"component","lock":false,"position":79},{"name":"Divider","data":{"color":"darkGray"},"id":"#67","type":"component","lock":false,"position":80},{"name":"TextBlock","data":{"text":"### <span id=\"5-.-7-Adjusting-the-trim\">**5.7 Adjusting the trim**</span>\n\nAt Divesoft, we have tried to make the unit as balanced as possible. Yet, of course, it cannot be\nguaranteed that the trim will be tuned for everyone. Fine adjustment of the horizontal balance\nis achieved by moving the on-board cylinders relative to the unit. By not anchoring the first\nstages of the regulators, the diver has the ability to adjust the position of the cylinders to\nsome extent. If this is not sufficient, additional weight can be placed on the shoulder straps or\nbottles using special pockets. These pockets are not included with the Liberty Heavy.","textLarge":false,"imageOnRight":true,"image":{"recommendedSizes":{"width":"420","height":"280"}},"imageMobile":{"recommendedSizes":{"width":"750","height":"500"}}},"id":"#68","type":"component","lock":false,"position":81},{"name":"Divider","data":{"color":"darkGray"},"id":"#69","type":"component","lock":false,"position":82},{"name":"TextBlock","data":{"text":"### <span id=\"5-.-8-Location-of-tanks-for-dry-suit\">**5.8 Location of tanks for dry suit**</span>\n\n**The dry suit filling tank can be positioned in two ways:**\n\n1. The standard way on the backplate. In this position, the tank may interfere with proper\ncounterlung filling and thus impair work of breathing.\n\n2. By placing it as a second set of cylinders. For this option, use the additional straps in the\nbrackets. This Mounting can be used in both 2x3 liter and 2x7 liter configurations. You can\nalso mount an additional bottle to inflate the BCD on the opposite side of the unit in the\nsame way. This can save the amount of diluent used primarily for the important dilution of\nthe loop with optimal and often expensive gas.\n\nStraps for attaching the second set of tanks must be purchased
2separately","textLarge":false,"imageOnRight":true,"image":{"recommendedSizes":{"width":"420","height":"280"}},"imageMobile":{"recommendedSizes":{"width":"750","height":"500"}}},"id":"#70","type":"component","lock":false,"position":83},{"name":"Image","data":{"firstImage":{"mimetype":"image/jpeg","size":44468,"hash":"e8b0fb9905c7d7abbcd8ec7dcb25117013f7fb52","id":"ck8nl07gg4cee077625t5edya","filename":"dive.jpg","category":"divesoft/","type":"image"},"secondImage":{}},"id":"#519","type":"component","lock":false,"position":84},{"name":"Divider","data":{"color":"darkGray"},"id":"#71","type":"component","lock":false,"position":85},{"name":"TextBlock","data":{"text":"### <span id=\"5-.-9-Location-of-additional-equipment\">**5.9 Location of additional equipment**</span>\n\nThe positioning of the light canister or heating system can be either classically on the belt, or if\nyou have space left, the battery can be placed in the position of the second set of cylinders.","textLarge":false,"imageOnRight":true,"image":{"recommendedSizes":{"width":"420","height":"280"}},"imageMobile":{"recommendedSizes":{"width":"750","height":"500"}}},"id":"#470","type":"component","lock":false,"position":86},{"name":"Divider","data":{"color":"darkGray"},"id":"#74","type":"component","lock":false,"position":87},{"name":"TextBlock","data":{"text":"### <span id=\"5-.-10-Assembly-of-the-loop-and-Dive-checks\">**5.10 Assembly of the loop and Dive checks**</span>\n\n\n\n<span style=\"color:red\">**USE THE MAIN LIBERTY USER MANUAL FOR THE REST OF THE REBREATHER INSTALLATION.** </span>","textLarge":false,"imageOnRight":true,"image":{"recommendedSizes":{"width":"420","height":"280"}},"imageMobile":{"recommendedSizes":{"width":"750","height":"500"}}},"id":"#75","type":"component","lock":false,"position":88},{"name":"Divider","data":{"color":"darkGray"},"id":"#76","type":"component","lock":false,"position":89},{"name":"TextBlock","data":{"text":"### <span id=\"6-.-Maintenance\">**6. Maintenance**</span> \n\nAfter each dive in salty or polluted water, the device must be washed with clean, fresh water.\nAfter each day of diving, disassemble the device. For dismantling, use the reverse assembly\nprocedure.\n\nPut caps on the MAV and ADV connectors and disinfect the entire loop, including the\ncounterlungs, and rinse with drinking water. Let it dry in a shady, well-ventilated place. Treat\nthe head of the device as shown in the main manual.\n\nAfter diving in fresh water, it is not necessary to separate the backplate from the frame and\nstand, and it is possible to keep the wing and the center section of the counterlung. However,\nthe counterlungs themselves must always be rinsed and cleaned and disinfected after a day of\ndiving as above.\n\nDo not expose the device to excessive sunlight or extreme temperatures","textLarge":false,"imageOnRight":true,"image":{"recommendedSizes":{"width":"420","height":"280"}},"imageMobile":{"recommendedSizes":{"width":"750","height":"500"}}},"id":"#77","type":"component","lock":false,"position":90},{"name":"Divider","data":{"color":"darkGray"},"id":"#81","type":"component","lock":false,"position":91},{"name":"TextBlock","data":{"text":"### <span id=\"6-.-1-Storage\">**6.1 Storage**</span>\n\nStore the unit thoroughly cleaned, disinfected and above all perfectly dried at temperatures\nbetween 4° and 25°C in a dry room. Prevent unwanted objects and animals from entering the\ninstrument.\n\nProtect oxygen and helium sensors from frost and moisture.\n\nRefer to the basic Liberty user manual for details on maintaining the entire device.","textLarge":false,"imageOnRight":true,"image":{"recommendedSizes":{"width":"420","height":"280"}},"imageMobile":{"recommendedSizes":{"width":"750","height":"500"}}},"id":"#520","type":"component","lock":false,"position":92},{"name":"Divider","data":{"color":"darkGray"},"id":"#521","type":"component","lock":false,"position":93},{"name":"TextBlock","data":{"text":"**LIBERTY HEAVY USER MANUAL**\n\nDate of issue: 1 . 9 . 2021\n\nAuthor: Jakub Šimánek\n\nPublished by Divesoft s .r .o .\n\nwww .divesoft .com","textLarge":false,"imageOnRight":true,"image":{"recommendedSizes":{"width":"420","height":"280"}},"imageMobile":{"recommendedSizes":{"width":"750","height":"500"}}},"id":"#522","type":"component","lock":false,"position":94},{"name":"Footer","data":{"copyrights":"Copyright © 2019 Divesoft LLC All rights reserved.","facebookUrl":{"urlNewWindow":true,"url":"https://www.facebook.com/divesoft/"},"youtubeUrl":{"url":"https://www.youtube.com/channel/UCHI2-kHmfoUlAdhQXPKl8lA/featured","urlNewWindow":true},"instagramUrl":{"url":"https://www.instagram.com/divesoft/","urlNewWindow":true},"contacts":"**Divesoft s.r.o.** \nHálkova 2495 \n413 01 Roudnice nad Labem \nCzech Republic \nTel.: +420 416 857 057 \nE-mail: [email protected]"},"id":"#1","type":"component","lock":false,"position":95}],"id":"root","idBuffer":"#523","lastCommit":"019c2ff8-e62b-4dcd-b4aa-ea31d50a675a"}},"annotations":[],"language":{"type":"id","generated":false,"id":"Language:cjv3kwvoj000u083611381c6o","typename":"Language"},"__typename":"PageTranslation"},"Page:cl9y8rdi12u650858oza635r8":{"id":"cl9y8rdi12u650858oza635r8","type":{"type":"id","generated":false,"id":"PageType:cjv3l213x004f08366hjufttp","typename":"PageType"},"tags":[],"translations({\"where\":{\"language\":{\"id\":\"cjv3kwvoj000u083611381c6o\"}}})":[{"type":"id","generated":false,"id":"PageTranslation:cl9y8rdif2u6c0858t65nno8l","typename":"PageTranslation"}],"__typename":"Page"},"PageTranslation:cl9y8rdif2u6c0858t65nno8l":{"id":"cl9y8rdif2u6c0858t65nno8l","name":"CCR Liberty Sidemount manual_en","createdAt":"2022-11-01T13:24:11.175Z","content":{"type":"json","json":{"content":[{"name":"Header","data":{"products":[{"title":"Accessories","description":"Backplates, Consumables. Tanks.","img":{"recommendedSizes":{"width":"235","height":"235"}},"url":""},{"title":"Accessories sets","description":"Protection, maintenance, cleaning.","img":{"recommendedSizes":{"width":"235","height":"235"}},"url":""},{"title":"Spare parts","description":"Spare parts and components.","img":{"recommendedSizes":{"width":"235","height":"235"}},"url":""}
2,{"title":"Spare parts kits","description":"Completly Liberty spare parts kits.","img":{"recommendedSizes":{"width":"235","height":"235"}},"url":""}]},"id":"#0","type":"component","lock":false,"position":0},{"name":"ProductShowcase","data":{"backgroundColor":"#ffffff","isTextDark":true,"isImageRight":false,"image":{"mimetype":"image/png","size":259316,"hash":"9b3cdb102291f8c95b3a3408e0a493c1bbb94c38","id":"cjxc7r1hw07b20776e7kq8u9o","filename":"sidemount.png","category":"divesoft/","type":"image"},"imageMobile":{},"title":"CCR Liberty Sidemount","subtitle":"User manual","description":"**Author** \nAdam Procháska, Jakub Å imánek, AleÅ¡ Procháska. \n**Publisher** \nDivesoft s.r.o. divesoft.com \n**Issue ** \nRevision 2.17.6 100m March 2025\n","hideDescriptionOnMobile":false,"areButtons":false,"firstTitle":"Learn more >","firstUrl":"","secondTitle":"Configurator >","secondUrl":""},"id":"#490","type":"component","lock":false,"position":1},{"name":"Divider","data":{"color":"darkGray"},"id":"#9","type":"component","lock":false,"position":2},{"name":"TextBlock","data":{"text":"### Content ###\n\n\n[**Introduction**](#Introduction)\n\n[**1. Use of this manual**](#1-.-Use-of-this-manual)\n\n[1.1\tResponsibility of the Liberty Sidemount user](#1-.-1-Responsibility-of-the-Liberty-Sidemount-user)\n\n[1.2\tNotice](#1-.-2-Notice)\n\n[**2. System of documentation**](#1-.-System-of-documentation)\n\n[2.1\tVersion](#2-.-1-Version)\n\n[2.2\tTechnical guidelines](#2-.-2-Technical-guidelines)\n\n[2.3\tUpdate of printed documentation](#2-.-3-Update-of-printed-documentation)\n\n[2.4\tUser support](#2-.-4-User-support)\n\n[**3. Use**](#1-.-Use)\n\n[3.1\tDescription](#3-.-1-Description)\n\n[3.2\tConversion](#3-.-2-Conversion)\n\n[3.3\tCarrier](#3-.-3-Carrier)\n\n[3.4\tCylinders](#3-.-4-Cylinders)\n\n[3.5\tValves](#3-.-5-Valves)\n\n[3.6\tFirst stages](#3-.-6-First-stages)\n\n[3.7\tCounterlungs](#3-.-7-Counterlungs)\n\n[3.8 Water trap](#3-.-8-Water-trap)\n\n[3.9\tManual additional valves](#3-.-9-Manual-additional-valves)\n\n[3.10\tADV](#3-.-10-ADV)\n\n[3.11\tADV isolator](#3-.-11-ADV-isolator)\n\n[3.12\tHUD](#3-.-12-HUD)\n\n[3.13\tHandsets](#3-.-12-Handsets)\n\n[**4. Assembling**](#4-.-Assembling)\n\n[**5. Setting the diver´s harness**](#5-.-Setting-the-diver´s-harness)\n\n[**6. Fastening to a diver´s body**](#6-.-Fastening-to-a-diver´s-body)\n\n[**7. Setting procedure**](#7-.-Setting-procedure)\n\n[**8. Maintenance**](#8-.-Maintenance)\n\n\n\n\n\n","textLarge":false,"imageOnRight":true,"image":{"recommendedSizes":{"width":"420","height":"280"}},"imageMobile":{"recommendedSizes":{"width":"750","height":"500"}}},"id":"#471","type":"component","lock":false,"position":3},{"name":"Divider","data":{"color":"darkGray"},"id":"#491","type":"component","lock":false,"position":4},{"name":"TextBlock","data":{"text":"### <span id=\"Introduction\">**Introduction**</span>\n\n### <span id=\"1-.-Use-of-this-manual\">**1. Use of this manual**</span>\n\nThis is the Liberty Sidemount rebreather manual. The manual only deals with the specifics of\nthe sidemount version of Liberty and is only a manual supplementing the basic functions and\ncontrols described in the Liberty main manual. Operation of bailout rebreather mode features\nis described in the stand-alone Bailout standby mode manual.\n\n<span style=\"color:red\">**To understand the full functionality of the device, read the [CCR Liberty main manual](https://www.divesoft.com/en/manuals/ccr-liberty-manual).** </span>\n\nThe Liberty Sidemount is intended for use exclusively by a trained person who is capable of\nfully understanding the instructions contained in this manual or is in the process of training\nwith the Liberty Sidemount in a course accredited by the manufacturer. The initial requirements\nof such a training course include qualification for diving with trimix recognized by a training\nagency and sufficient experience with technical diving.\n","textLarge":false,"imageOnRight":true,"image":{"recommendedSizes":{"width":"420","height":"280"}},"imageMobile":{"recommendedSizes":{"width":"750","height":"500"}}},"id":"#28","type":"component","lock":false,"position":5},{"name":"TextBlock","data":{"text":"### <span id=\"1-.-1-Responsibility-of-the-Liberty-Sidemount-user\">**1.1 Responsibility of the Liberty Sidemount user**</span>\n\nStrong emphasis was placed on reliability during the development of the CCR Liberty\nSidemount. Individual internal parts are separated in order to minimize the impact that failure\nof a given part may have on the rebreatherâs basic functionality. A number of systems have\nmultiple backups. The logic of the Liberty Sidemountâs control never prohibits the start of\na dive even in the event that malfunctions are detected; it only indicates the status if able to do\nso in light of the damage. When cave diving, the inability to submerge can mean not being able\nto return from a dive; therefore, the Liberty Sidemount does not impede submersion.\n\nThe user must always decide responsibly whether he/she switches to a backup apparatus or\neven starts a dive with a partially malfunctioning rebreather.\n\nA Liberty Sidemount user must accept the fact that diving involves risk. Following everything\nthat the user has learned in the Liberty Sidemountâs technical documentation and in training\non diving with this rebreather can reduce the risk but cannot eliminate it. Safety when diving is\nfurther improved by regular training, methodical education and following good diving practices.\nDiving with a rebreather requires a far higher degree of carefulness and discipline than diving\nwith an open-circuit apparatus.\n\nIf you do not accept the risk and you are not a trained, careful and disciplined diver, do not dive\nwith the Liberty Sidemount.\n\nThe manufacturer does not bear any responsibility for use of the Liberty Sidemount if the\napparatus has been modified in any way that is not stated in this manual or in the technical\nguidelines issued by the manufacturer.","textLarge":false,"imageOnRight":true,"image":{"recommendedSizes":{"width":"420","height":"280"}},"imageMobile":{"recommendedSizes":{"width":"750","height":"500"}}},"id":"#14","type":"component","lock":false,"position":6},{"name":"TextBlock","data":{"text":"The principle of a rebreather involves in recycling the breathing mixture. Carbon dioxide is \nremoved from the exhaled mixture and is again prepared for the next inhalation after being \nreplenished with oxygen. The composition of the breathing mixture changes continuously.","textLarge":false,"imageOnRight":true,"image":{"recommendedSizes":{"width":"420","height":"280"}},"imageMobile":{"recommendedSizes":{"width":"750","height":"500"}}},"id":"#15","type":"component","lock":false,"position":7},{"name":"Divider","data":{"color":"darkGray"},"id":"#13","type":"component","lock":false,"position":8},{"name":"TextBlock","data":{"text":"### <span id=\"1-.-2-Notice\">**1.2 Notice**</span>\n\n**The Liberty Sidemount is not a buoyancy compensator, nor a harness for attaching the device to\nthe diverâs body.**","textLarge":false,"imageOnRight":true,"image":{"recommendedSizes":{"width":"420","height":"280"}},"imageMobile":{"recommendedSizes":{"width":"750","height":"500"}}},"id":"#16","type":"component","lock":false,"position":9},{"name":"Divider","data":{"color":"darkGray"},"id":"#17","type":"component","lock":false,"position":10},{"name":"TextBlock","data":{"text":"### <span id=\"2-.-System-of-documentation\">**2. System of documentation**</span>\n\n\n### <span id=\"2-.-1-Version\">**2.1 Version**</span>\n\nThe technical documentation is subjected to a process of continual development and\nimprovement. Therefore, please regularly check the website at www.divesoft.com for\nupdates.\
2n","textLarge":false,"imageOnRight":true,"image":{"recommendedSizes":{"width":"420","height":"280"}},"imageMobile":{"recommendedSizes":{"width":"750","height":"500"}}},"id":"#18","type":"component","lock":false,"position":11},{"name":"Divider","data":{"color":"darkGray"},"id":"#494","type":"component","lock":false,"position":12},{"name":"TextBlock","data":{"text":"### <span id=\"2-.-2-Technical-guidelines\">**2.2 Technical guidelines**</span> \n\nThe manufacturer can issue technical guidelines. It is strongly recommended that the user\nregularly checks www.divesoft.com for new guidelines. Registered users will receive\nnotifications by e-mail.","textLarge":false,"imageOnRight":true,"image":{"recommendedSizes":{"width":"420","height":"280"}},"imageMobile":{"recommendedSizes":{"width":"750","height":"500"}}},"id":"#21","type":"component","lock":false,"position":13},{"name":"Divider","data":{"color":"darkGray"},"id":"#23","type":"component","lock":false,"position":14},{"name":"TextBlock","data":{"text":"### <span id=\"2-.-3-Update-of-printed-documentation\">**2.3 Update of printed documentation**</span> \n\n\nThe electronic form of the manual is always available in its complete, updated form.\n\nThe electronic and printed forms of the manual may not be completely identical. In case of\ninsignificant changes (correction of minor typing errors, for example), only the electronic\nversion is updated.","textLarge":false,"imageOnRight":true,"image":{"recommendedSizes":{"width":"420","height":"280"}},"imageMobile":{"recommendedSizes":{"width":"750","height":"500"}}},"id":"#24","type":"component","lock":false,"position":15},{"name":"Divider","data":{"color":"darkGray"},"id":"#25","type":"component","lock":false,"position":16},{"name":"TextBlock","data":{"text":"### <span id=\"2-.-4-User-support\">**2.4 User support**</span> \n\nRegistered users are entitled to technical support. The extent of free support can be limited.\n\nRegistered users are entitled to technical support. The extent of free support can be limited.\n\nThe technical support department at Liberty systems s.r.o. will provide limited support for\npotential and unregistered users. Prior to submitting a question, please familiarize yourself\nwith the general principles of rebreather diving with trimix and the freely available CCR Liberty\ntechnical documentation.","textLarge":false,"imageOnRight":true,"image":{"recommendedSizes":{"width":"420","height":"280"}},"imageMobile":{"recommendedSizes":{"width":"750","height":"500"}}},"id":"#26","type":"component","lock":false,"position":17},{"name":"Divider","data":{"color":"darkGray"},"id":"#27","type":"component","lock":false,"position":18},{"name":"TextBlock","data":{"text":"### <span id=\"2-.-Use\">**3. Use**</span>\n\nSidemount Liberty Rebreather is a modification of the original Liberty Rebreather. Liberty\nSidemount retains the complete head of the device including electronics, handsets and all\nsensors. However, the device configuration is designed to be worn on the side. This allows the\ndevice to be used in low-ceiling areas such as caves or wrecks.","textLarge":false,"imageOnRight":true,"image":{"recommendedSizes":{"width":"420","height":"280"}},"imageMobile":{"recommendedSizes":{"width":"750","height":"500"}}},"id":"#30","type":"component","lock":false,"position":19},{"name":"Divider","data":{"color":"darkGray"},"id":"#20","type":"component","lock":false,"position":20},{"name":"TextBlock","data":{"text":"### <span id=\"3-.-Description\">**3.1 Description**</span>\n\n\nLiberty Sidemount can be used in a number of different configurations consisting of mutually\ncompatible parts. The deviceâs own configuration can be created in the online configurator\nhttps://ccrliberty.com/configurator.\n","textLarge":false,"imageOnRight":true,"image":{"recommendedSizes":{"width":"420","height":"280"}},"imageMobile":{"recommendedSizes":{"width":"750","height":"500"}}},"id":"#29","type":"component","lock":false,"position":21},{"name":"TextBlock","data":{"text":"","textLarge":false,"imageOnRight":true,"image":{"recommendedSizes":{"width":"420","height":"280"}},"imageMobile":{"recommendedSizes":{"width":"750","height":"500"}}},"id":"#436","type":"component","lock":false,"position":22},{"name":"Divider","data":{"color":"darkGray"},"id":"#32","type":"component","lock":false,"position":23},{"name":"TextBlock","data":{"text":"### <span id=\"3-.-1-Conversion\">**3.2 Conversion**</span>\n\nLiberty Sidemount is compatible with the standard CCR Liberty , so itâs possible to convert CCR\nLiberty to
2Liberty Sidemount using a conversion kit. The conversion kit includes Titanium rack,\ncounterlungs, connecting hoses, all medium pressure and high pressure hoses, breathing hoses,\nmouthpiece, manual valves, pressure gauges, first stages, 2 litre cylinders, valves, OPV and HUD\nwith longer cable.\n\nThe head including the handset and the buddy display, canister and scrubber are used from the\nback-mounted device. Alternatively, it is possible to replace the scrubber with a canister for\na shortened version. This version is not a standard part of the conversion kit, and needs to be\nrequested separately.\n\nBy purchasing the conversion kit to the back unit, Liberty Sidemount can be rebuilt to classic\nCCR Liberty","textLarge":false,"imageOnRight":true,"image":{"recommendedSizes":{"width":"420","height":"280"}},"imageMobile":{"recommendedSizes":{"width":"750","height":"500"}}},"id":"#33","type":"component","lock":false,"position":24},{"name":"Divider","data":{"color":"darkGray"},"id":"#596","type":"component","lock":false,"position":25},{"name":"Image","data":{"firstImage":{"mimetype":"image/png","size":378222,"hash":"5e69194ae1eb030f885946642811ad9a1f709cea","id":"clpgr2k9brhe807762aofa73p","filename":"sidemount-ccr-ilustrace-1-2.png","category":"divesoft/","type":"image"},"secondImage":{},"image":{"type":"image"}},"id":"#537","type":"component","lock":false,"position":26},{"name":"Divider","data":{"color":"darkGray"},"id":"#34","type":"component","lock":false,"position":27},{"name":"TextBlock","data":{"text":"### <span id=\"3-.-2-Carrier\">**3.3 Carrier**</span>\n\n","textLarge":false,"imageOnRight":true,"image":{"recommendedSizes":{"width":"420","height":"280"}},"imageMobile":{"recommendedSizes":{"width":"750","height":"500"}}},"id":"#519","type":"component","lock":false,"position":28},{"name":"Image","data":{"firstImage":{"mimetype":"image/png","size":288174,"hash":"05589c09bd47eb79d5304625c92b5a16af2cfd0b","id":"clpgr5o9jrhhm07769krqllbj","filename":"ram.png","category":"divesoft/","type":"image"},"secondImage":{},"image":{"type":"image"}},"id":"#538","type":"component","lock":false,"position":29},{"name":"Spacer","data":{"spacingLarge":30,"spacingSmall":20,"backgroundColor":"#ffffff"},"id":"#540","type":"component","lock":false,"position":30},{"name":"TextBlock","data":{"text":"The unit carrier is an open structure designed to connect and carry the individual parts of the\ndevice. Design is made of titanium and relieve cut-outs in order to achieve neutral buoyancy.\nAt the front of the carrier there are anchors on both sides for attaching a carabiner, in the area\nwhere the pressure cylinders are fastened are points for securing the counterlungs. The straps\nfor fastening the head and the canister can be found in the back of the unit. The carrier also\nallows for optimal routing of the high and middle pressure hoses.","textLarge":false,"imageOnRight":true,"image":{"recommendedSizes":{"width":"420","height":"280"}},"imageMobile":{"recommendedSizes":{"width":"750","height":"500"}}},"id":"#539","type":"component","lock":false,"position":31},{"name":"Divider","data":{"color":"darkGray"},"id":"#520","type":"component","lock":false,"position":32},{"name":"TextBlock","data":{"text":"### <span id=\"3-.-3-Cylinders\">**3.4 Cylinders**</span>\n\nTwo-litre steel or aluminium (US) bottles with a working pressure of 200 bar.","textLarge":false,"imageOnRight":true,"image":{"recommendedSizes":{"width":"420","height":"280"}},"imageMobile":{"recommendedSizes":{"width":"750","height":"500"}}},"id":"#521","type":"component","lock":false,"position":33},{"name":"Divider","data":{"color":"darkGray"},"id":"#522","type":"component","lock":false,"position":34},{"name":"TextBlock","data":{"text":"### <span id=\"3-.-4-Valves\">**3.5 Valves**</span>\n\n","textLarge":false,"imageOnRight":true,"image":{"recommendedSizes":{"width":"420","height":"280"}},"imageMobile":{"recommendedSizes":{"width":"750","height":"500"}}},"id":"#523","type":"component","lock":false,"position":35},{"name":"Image","data":{"firstImage":{"mimetype":"image/png","size":336724,"hash":"59ed247b09ffd298d9559aab70333c53b2e3145a","id":"clpgr7xoqrhk20776yr3y3uaj","filename":"ventilysm.png","category":"divesoft/","type":"image"},"secondImage":{},"image":{"type":"image"}},"id":"#541","type":"component","lock":false,"position":36},{"name":"Spacer","data":{"spacingLarge":30,"spacingSmall":20,"backgroundColor":"#ffffff"},"id":"#542","type":"component","lock":false,"position":37},{"name":"TextBlock","data":{"text":"High-quality valves for diluent (black knob) and oxygen (green knob). In the US, the valves are equipped with a burst disc. \nThe thread for the diluent valve is DIN G5/8. Thread for oxygen valve is M26x2. For units supplied outside the European Union and the United Kingdom, identical valves for both cylinders can be ordered.\n","textLarge":false,"imageOnRight":true,"image":{"recommendedSizes":{"width":"420","height":"280"}},"imageMobile":{"recommendedSizes":{"width":"750","height":"500"}}},"id":"#543","type":"component","lock":false,"position":38},{"name":"Divider","data":{"color":"darkGray"},"id":"#524","type":"component","lock":false,"position":39},{"name":"TextBlock","data":{"text":"### <span id=\"3-.-5-First-stages\">**3.6 First stages**</span>\n\nThe first stage Apeks US4 are used. The first stages are fitted\nwith overpressure valves.","textLarge":false,"imageOnRight":true,"image":{"recommendedSizes":{"width":"420","height":"280"}},"imageMobile":{"recommendedSizes":{"width":"750","height":"500"}}},"id":"#525","type":"component","lock":false,"position":40}
2,{"name":"Divider","data":{"color":"darkGray"},"id":"#526","type":"component","lock":false,"position":41},{"name":"TextBlock","data":{"text":"### <span id=\"3-.-6-Counterlungs\">**3.7 Counterlungs**</span>","textLarge":false,"imageOnRight":true,"image":{"recommendedSizes":{"width":"420","height":"280"}},"imageMobile":{"recommendedSizes":{"width":"750","height":"500"}}},"id":"#544","type":"component","lock":false,"position":42},{"name":"TextBlock","data":{"text":"\nBoth counterlungs (inhalation and exhalation) are located in one protective package. The\nexhalation lung is equipped with a water trap to prevent ingress of water into the head and\nscrubber. On the side of the exhalation lung is located the overpressure valve (OPV).\nThe overpressure valve is provided with a pulling cord. The valve diaphragm prevents ingress of\nwater when the valve is opened.","textLarge":false,"imageOnRight":true,"image":{"recommendedSizes":{"width":"420","height":"280"},"mimetype":"image/png","size":410938,"hash":"4826b35a54f88369ac3f61beb787f61a81625ce1","id":"clpgsd7warivt0776mkhzlyh2","filename":"counterlungs2.png","category":"divesoft/","type":"image"},"imageMobile":{"recommendedSizes":{"width":"750","height":"500"}}},"id":"#527","type":"component","lock":false,"position":43},{"name":"Divider","data":{"color":"darkGray"},"id":"#530","type":"component","lock":false,"position":44},{"name":"TextBlock","data":{"text":"### <span id=\"3-.-8-Water-trap\">**3.8 Water trap**</span>\n\nThe water trap of the shortened scrubber is solved by a sponge at the bottom of the device.\nBefore the dive, it is necessary to check if the sponge is dry. With a standard scrubber, the water\ntrap does not change.","textLarge":false,"imageOnRight":true,"image":{"recommendedSizes":{"width":"420","height":"280"}},"imageMobile":{"recommendedSizes":{"width":"750","height":"500"}}},"id":"#531","type":"component","lock":false,"position":45},{"name":"Divider","data":{"color":"darkGray"},"id":"#532","type":"component","lock":false,"position":46}
2,{"name":"TextBlock","data":{"text":"### <span id=\"3-.-9-Manual-additional-valves\">**3.9 Manual additional valves**</span>","textLarge":false,"imageOnRight":true,"image":{"recommendedSizes":{"width":"420","height":"280"}},"imageMobile":{"recommendedSizes":{"width":"750","height":"500"}}},"id":"#548","type":"component","lock":false,"position":47},{"name":"TextBlock","data":{"text":"\n\nManual addition valves for oxygen and diluent are placed next to the mouthpiece for better\nergonomics and intuitive control. The MAV of oxygen has limited flow to prevent high dose of\noxygen at depth.","textLarge":false,"imageOnRight":true,"image":{"recommendedSizes":{"width":"420","height":"280"},"mimetype":"image/png","size":429704,"hash":"1b7341f16ed41050fd382d126761e57067ace801","id":"clpguadr6rk6k0776surcc21w","filename":"mav-sm.png","category":"divesoft/","type":"image"},"imageMobile":{"recommendedSizes":{"width":"750","height":"500"}}},"id":"#533","type":"component","lock":false,"position":48},{"name":"Divider","data":{"color":"darkGray"},"id":"#534","type":"component","lock":false,"position":49},{"name":"TextBlock","data":{"text":"### <span id=\"3-.-10-ADV\">**3.10 ADV**</span>","textLarge":false,"imageOnRight":true,"image":{"recommendedSizes":{"width":"420","height":"280"}},"imageMobile":{"recommendedSizes":{"width":"750","height":"500"}}},"id":"#549","type":"component","lock":false,"position":50},{"name":"TextBlock","data":{"text":"\n\nThe device is equipped with a 2nd-stage underpressure ADV. The ADV is placed on the inhaler\nhose just behind the counterlung. This position with respect to the position of the lungs\nguarantees ideal gas dosing during descent or whenever the loop volume is too small.","textLarge":false,"imageOnRight":true,"image":{"recommendedSizes":{"width":"420","height":"280"},"mimetype":"image/png","size":382984,"hash":"ff912399094364372d12af954fddfa7c4f27835f","id":"clpgunuworkku0776ir0ekufw","filename":"adv.png","category":"divesoft/","type":"image"},"imageMobile":{"recommendedSizes":{"width":"750","height":"500"}}},"id":"#535","type":"component","lock":false,"position":51},{"name":"Divider","data":{"color":"darkGray"},"id":"#536","type":"component","lock":false,"position":52},{"name":"TextBlock","data":{"text":"### <span id=\"3-.11-ADV-isolator\">**3.11 ADV isolator**</span> \n\nOnly when requested. The ADV isolator is only available on request for devices that will be\nused as primary devices. Installing the isolator onto a device that is to be used as a backup\nrebreather is not recommended for the risk of its accidental closure. Closed ADV during\ndescent can cause an underpressure in the loop, which can result in catastrophic flooding\nof the device, or damage vital parts of the rebreather. In the event of an inhalation attempt,\nthe device in negative pressure can rapidly suck air from the lungs, resulting in a stressful\nsituation, which may end up in a potentially fatal scenario.\n","textLarge":false,"imageOnRight":true,"image":{"recommendedSizes":{"width":"420","height":"280"}},"imageMobile":{"recommendedSizes":{"width":"750","height":"500"}}},"id":"#468","type":"component","lock":false,"position":53},{"name":"Divider","data":{"color":"darkGray"},"id":"#550","type":"component","lock":false,"position":54},{"name":"TextBlock","data":{"text":"### <span id=\"3-.-12-HUD\">**3.12 HUD**</span> \n\n\nThe Head-up Display is the same as CCR Liberty, only difference is an extended cable to loop\naround longer breathing hoses.","textLarge":false,"imageOnRight":true,"image":{"recommendedSizes":{"width":"420","height":"280"}},"imageMobile":{"recommendedSizes":{"width":"750","height":"500"}}},"id":"#37","type":"component","lock":false,"position":55},{"name":"Divider","data":{"color":"darkGray"},"id":"#36","type":"component","lock":false,"position":56},{"name":"TextBlock","data":{"text":"### <span id=\"3-.-13-Handsets\">**3.13 Handsets**</span> \n\nSidemount Liberty uses the same handsets as CCR Liberty. The unused handset should be\nplaced under the rubber bungee on the body of the device or you can alternatively replace the\nhandset with the supplied connector plug.","textLarge":false,"imageOnRight":true,"image":{"recommendedSizes":{"width":"420","height":"280"}},"imageMobile":{"recommendedSizes":{"width":"750","height":"500"}}},"id":"#509","type":"component","lock":false,"position":57},{"name":"Divider","data":{"color":"darkGray"},"id":"#551","type":"component","lock":false,"position":58},{"name":"TextBlock","data":{"text":"### <span id=\"4-.-Assembling\">**4. Assembling**</span> \n\n1.** DIL cylinder â fitted on left side **","textLarge":false,"imageOnRight":true,"image":{"recommendedSizes":{"width":"420","height":"280"}},"imageMobile":{"recommendedSizes":{"width":"750","height":"500"}}},"id":"#466","type":"component","lock":false,"position":59},{"name":"Spacer","data":{"spacingLarge":30,"spacingSmall":20,"backgroundColor":"#ffffff"},"id":"#552","type":"component","lock":false,"position":60},{"name":"Image","data":{"firstImage":{"mimetype":"image/png","size":369110,"hash":"c6fe867b6f8b2d3a34aa9e9ff5820f698b151728","id":"clpgxawlurn2k0776zkyeijzr","filename":"sidemount-ccr-1-2.png","category":"divesoft/","type":"image"},"secondImage":{},"image":{"type":"image"}},"id":"#512","type":"component","lock":false,"position":61},{"name":"Spacer","data":{"spacingLarge":30,"spacingSmall":20,"backgroundColor":"#ffffff"},"id":"#513","type":"component","lock":false,"position":62},{"name":"TextBlock","data":{"text":"Place the diluent cylinder on the left side of the titanium carrier and fasten the velcro stra
2ps.\nThe valve spindle must be sloping downwards. The position of the bottles can be later adjusted\nwith respect to the position of the head of the instrument. Already at this stage, it is necessary\nto ensure proper hose routing. The hoses lead from the first stages to the bottom of the\ntitanium carrier whilst being secured with velcro fasteners in the middle. It comes back around\nthe top of the bottles, again fastened with velcro strips.\n\n2. **O2 cylinder â fitted on right side**\n","textLarge":false,"imageOnRight":true,"image":{"recommendedSizes":{"width":"420","height":"280"}},"imageMobile":{"recommendedSizes":{"width":"750","height":"500"}}},"id":"#40","type":"component","lock":false,"position":63},{"name":"Spacer","data":{"spacingLarge":30,"spacingSmall":20,"backgroundColor":"#ffffff"},"id":"#554","type":"component","lock":false,"position":64},{"name":"Image","data":{"firstImage":{"mimetype":"image/png","size":448399,"hash":"ff9b54de3ce414532f1195e6129959599a6e7403","id":"clpgxc878rn3o0776o4aftnoo","filename":"sidemount-ccr-2-2.png","category":"divesoft/","type":"image"},"secondImage":{},"image":{"type":"image"}},"id":"#553","type":"component","lock":false,"position":65},{"name":"Spacer","data":{"spacingLarge":30,"spacingSmall":20,"backgroundColor":"#ffffff"},"id":"#555","type":"component","lock":false,"position":66},{"name":"TextBlock","data":{"text":"Attach the oxygen cylinder to the right side of the titanium carrier. The valve spindle must\nslope upwards. Always pay attention to the precise routing of medium pressure and high\npressure hoses.\n\n3. **Attach the first stages to the valves**\n\nATTENTION! this step is critical: When attaching the first stages, make sure that the oxygen\nfirst stage is mounted onto the oxygen bottle and the diluent first stage is mounted onto the\ndiluent bottle.\n\n4. **Water trap installed on the bottom of the scrubber canister**\n\nEnsure that a water trap is present. In the standard scrubber, this is a plastic part that is\nfitted with an O-ring. For a shortened version of the scrubber, the water trap is designed with\na sponge on the bottom of the canister. In this case, it is necessary to check whether the\nsponge is sufficiently dry to absorb the condensate during the dive.\n\n","textLarge":false,"imageOnRight":true,"image":{"recommendedSizes":{"width":"420","height":"280"}},"imageMobile":{"recommendedSizes":{"width":"750","height":"500"}}},"id":"#556","type":"component","lock":false,"position":67},{"name":"TextBlock","data":{"text":"5. **Scrubber well packed with Sofnolime 797 and scrubber residual time is sufficient for planned dive.**","textLarge":false,"imageOnRight":true,"image":{"recommendedSizes":{"width":"420","height":"280"}},"imageMobile":{"recommendedSizes":{"width":"750","height":"500"}}},"id":"#562","type":"component","lock":false,"position":68},{"name":"TextBlock","data":{"text":"\n\nCorrect filling of the absorber is described in the CCR Liberty Manual. The procedure does not\nchange. The difference is only for the shortened version of the scrubber, where there is very\nlittle difference between the maximum and minimum sorbent levels. Always shake the sorbent\nproperly and always check that the scrubber level has not receded below the minimum mark.","textLarge":false,"imageOnRight":true,"image":{"recommendedSizes":{"width":"420","height":"280"},"mimetype":"image/png","size":287318,"hash":"8f60484bb685777ed4c45f2432c3e8563e4442f9","id":"clpgxjgxern990776a4w5ns1r","filename":"scrubber.png","category":"divesoft/","type":"image"},"imageMobile":{"recommendedSizes":{"width":"750","height":"500"}}},"id":"#561","type":"component","lock":false,"position":69},{"name":"TextBlock","data":{"text":"6. **Scrubber (filled with Sofnolime 797) is installed inside the canister**\n\nPut the scrubber into the canister so that it sits on the water trap.\n\n7. **Head O-ring well lubed, clean and not damaged**\n\nCheck the O-rings on the head, both outside and inside (on the start of the inhale tube). These\ntwo O-rings are essential for the watertightness and safe operation of the device. O-rings must\nnot show signs of damage, wear or dirt. Insufficiently lubricated O-rings make it difficult to\nattach the head to the canister, this can cause O-ring damage and consequent leakage. If the\nfault is found, replace the O-ring immediately. Do not start the dive if the O-ring is not replaced by a new one, adequately lubricated with silicone grease. In the case of dirty O-rings, carefully\nremove the O-rings by gently pressing the O-ring on the sides. Wipe the O-ring with a paper\ntowel and also wipe the O-ring groove carefully to get rid of any residue. Re-lubricate the\nO-ring and return it to the groove.\n\n8. **Safety plugs (jumpers) connected to batteries**\n","textLarge":false,"imageOnRight":true,"image":{"recommendedSizes":{"width":"420","height":"280"}},"imageMobile":{"recommendedSizes":{"width":"750","height":"500"}}},"id":"#563","type":"component","lock":false,"position":70},{"name":"Spacer","data":{"spacingLarge":30,"spacingSmall":20,"backgroundColor":"#ffffff"},"id":"#557","type":"component","lock":false,"position":71},{"name":"Image","data":{"firstImage":{"mimetype":"image/png","size":188551,"hash":"d88ff998053f6a4f6a79a6749be714c9a1d64d5c","id":"cl3wtu44besu90776zexfy6el","filename":"divesoft-ccr-liberty-manual-3-2-6-01.png","category":"divesoft/","type":"image"},"secondImage":{}},"id":"#558","type":"component","lock":false,"position":72},{"name":"Spacer","data":{"spacingLarge":30,"spacingSmall":20,"backgroundColor":"#ffffff"},"id":"#559","type":"component","lock":false,"position":73},{"name":"TextBlock","data":{"text":"9. **Head fits easily to canister â no visible gap between head and the canister**\n\n","textLarge":false,"imageOnRight":true,"image":{"recommendedSizes":{"width":"420","height":"280"}},"imageMobile":{"recommendedSizes":{"width":"750","height":"500"}}},"id":"#560","type":"component","lock":false,"position":74},{"name":"Spacer","data":{"spacingLarge":30,"spacingSmall":20,"backgroundColor":"#ffffff"},"id":"#565","type":"component","lock":false,"position":75},{"name":"Image","data":{"firstImage":{"mimetype":"image/png","size":132334,"hash":"a8085b4ff0b53321c98fda11c12d5cc246db5b51","id":"cl3sobr7iddmg0776ktm8yy0m","filename":"divesoft-ccr-liberty-manual-1-9-01.png","category":"divesoft/","type":"image"},"secondImage":{}},"id":"#566","type":"component","lock":false,"position":76},{"name":"Spacer","data":{"spacingLarge":30,"spacingSmall":20,"backgroundColor":"#ffffff"},"id":"#564","type":"component","lock":false,"position":77},{"name":"TextBlock","data":{"text":"Attach the head to the canister by first inserting the wider opening of the lock on the head of\nthe canister lock lever. Push the head of with your hand so that there is no visible gap between\nthe head and the canister.\n\n10. **Oxygen sensors calibrated**\n\nCalibrate the sensors according to the instructions in the main manual. Calibration is a crucial\nstep. Do not dive if you are not sure that the device is properly calibrated.\n\n<span style=\"color:red\">An uncalibrated device may cause serious injury or death.</span>\n\n\n11. **Short head connection hoses between head and counter lungs V-shape connected.**\n\n","textLarge":false,"imageOnRight":true,"image":{"recommendedSizes":{"width":"420","height":"280"}},"imageMobile":{"recommendedSizes":{"width":"750","height":"500"}}},"id":"#567","type":"component","lock":false,"position":78},{"name":"Spacer","data":{"spacingLarge":30,"spacingSmall":20,"backgroundColor":"#ffffff"},"id":"#570","type":"component","lock":false,"position":79},{"name":"TextBlock","data":{"text":"Connect the short connecting hose with the elbows to the head. The elbows are marked by\nlocation:\n\n* H â Center\n* H â Rim\n\nThe mark C is for the counterlung side.\n\nInsert the bayonets into the appropriate holes and rotate to lock them in position. ","textLarge":false,"imageOnRight":true,"image":{"recommendedSizes":{"width":"420","height":"280"},"mimetype":"image/png","size":53285,"hash":"da6d91b65653fd0194f2e1e8beb7ac0a51bdc37e","id":"clpgxzfkfrns40776nowy7ll3","filename":"shorthoses.png","category":"divesoft/","type":"image"},"imageMobile":{"recommendedSizes":{"width":"750","height":"500"}}},"id":"#568","type":"component","lock":false,"position":80},{"name":"TextBlock","data":{"text":"The hoses\nshould be holding a V. The order in which the hoses are assembled does not matter.\n\n12. **Oxygen supply hose connected to head**\n\n","textLarge":false,"imageOnRight":true,"image":{"recommendedSizes":{"width":"420","height":"280"}},"imageMobile":{"recommendedSizes":{"width":"750","height":"500"}}},"id":"#569","type":"component","lock":false,"position":81},{"name":"Spacer","data":{"spacingLarge":30,"spacingSmall":20,"backgroundColor":"#ffffff"},"id":"#572","type":"component","lock":false,"position":82},{"name":"Image","data":{"firstImage":{"mimetype":"image/png","size":150360,"hash":"08e51d81a1ce3edb46a55accd450bfbd5f7693b1","id":"clpgyzu5oroia0776a3vq8xyl","filename":"sidemount-ccr-13-2-1-2.png","category":"divesoft/","type":"image"},"secondImage":{},"image":{"type":"image"}},"id":"#571","type":"component","lock":false,"position":83},{"name":"Spacer","data":{"spacingLarge":30,"spacingSmall":20,"backgroundColor":"#ffffff"},"id":"#573","type":"component","lock":false,"position":84},{"name":"TextBlock","data":{"text":"Put the head onto the titanium bracket and screw the medium pressure hose connection to the\nbanjo thread on the head of the unit. Cover the banjo with a plastic cap attached to the hose.\nBefore using for the first time, it is advisable to stretch the cap slightly with your fingers.\n\n13. **Locks on the head and scrubber are secured with pins on the frame**\n\n","textLarge":false,"imageOnRight":true,"image":{"recommendedSizes":{"width":"420","height":"280"}},"imageMobile":{"recommendedSizes":{"width":"750","height":"500"}}},"id":"#574","type":"component","lock":false,"position":85},{"name":"Spacer","data":{"spacingLarge":30,"spacingSmall":20,"backgroundColor":"#ffffff"},"id":"#576","type":"component","lock":false,"position":86},{"name":"Image","data":{"firstImage":{"mimetype":"image/png","size":241698,"hash":"5c47f332bbc5c90e843d55d1e599caa87060c6a4","id":"clpgz4lufroog07762ebvt33h","filename":"sidemount-ccr-13-2-2-2.png","category":"divesoft/","type":"image"},"secondImage":{},"image":{"type":"image"}},"id":"#575","type":"component","lock":false,"position":87},{"name":"Spacer","data":{"spacingLarge":30,"spacingSmall":20,"backgroundColor":"#ffffff"},"id":"#577","type":"component","lock":false,"position":88},{"name":"TextBlock","data":{"text":"Place the body of the rebreather in the carrier so that both pins on the carrier fit into the\nopenings of the head and the canister. <span style=\"color:red\">**This step is crucial. For safety reasons, It is necessary to carefully check that both pins fit into both holes and the head is secured against disconnection. Disconnecting the head and the canister will cause fatal flooding.**</span>\n\n14. **Head strap tightened**\n\n","textLarge":false,"imageOnRight":true,"image":{"recommendedSizes":{"width":"420","height":"280"}},"imageMobile":{"recommendedSizes":{"width":"750","height":"500"}}},"id":"#514","type":"component","lock":false,"position":89},{"name":"Spacer","data":{"spacingLarge":30,"spacingSmall":20,"backgroundColor":"#ffffff"},"id":"#579","type":"component","lock":false,"position":90},{"name":"Image","data":{"firstImage":{"mimetype":"image/png","size":565314,"hash":"ff6e0b1a228ad8cbfb4a0c188edd1165eb123230","id":"clpgz5ssyrope07768a2imm6u","filename":"sidemount-ccr-14-2.png","category":"divesoft/","type":"image"},"secondImage":{},"image":{"type":"image"}},"id":"#578","type":"component","lock":false,"position":91},{"name":"Spacer","data":{"spacingLarge":30,"spacingSmall":20,"backgroundColor":"#ffffff"},"id":"#580","type":"component","lock":false,"position":92},{"name":"TextBlock","data":{"text":"Lead the strap through the holes and tighten it.\n\n15. **Scrubber can strap tightened**","textLarge":false,"imageOnRight":true,"image":{"recommendedSizes":{"width":"420","height":"280"}},"imageMobile":{"recommendedSizes":{"width":"750","height":"500"}}},"id":"#42","type":"component","lock":false,"position":93},{"name":"Spacer","data":{"spacingLarge":30,"spacingSmall":20,"backgroundColor":"#ffffff"},"id":"#582","type":"component","lock":false,"position":94},{"name":"Image","data":{"firstImage":{"mimetype":"image/png","size":577383,"hash":"aa31685f0bf9bcc0f95c5fc7a7a1434ceb370940","id":"clpgz6ietropo07760s1lapqx","filename":"sidemount-ccr-15-2.png","category":"divesoft/","type":"image"},"secondImage":{},"image":{"type":"image"}},"id":"#581","type":"component","lock":false,"position":95},{"name":"Spacer","data":{"spacingLarge":30,"spacingSmall":20,"backgroundColor":"#ffffff"},"id":"#583","type":"component","lock":false,"position":96},{"name":"TextBlock","data":{"text":"\n<span style=\"color:red\">Lead the strap through the holes and tighten it well. Re-check if the lock and pins on the\ncarrier were not dislocated when the straps were being manipulated with.</span>\n\n\n16. **Scrubber handle fitted**\n","textLarge":false,"imageOnRight":true,"image":{"recommendedSizes":{"width":"420","height":"280"}},"imageMobile":{"recommendedSizes":{"width":"750","height":"500"}}},"id":"#584","type":"component","lock":false,"position":97},{"name":"Spacer","data":{"spacingLarge":30,"spacingSmall":20,"backgroundColor":"#ffffff"},"id":"#586","type":"component","lock":false,"position":98},{"name":"Image","data":{"firstImage":{"mimetype":"image/png","size":589919,"hash":"35441cdcb77e388c3c04e46c08df7d8b73319fb8","id":"clpgz75sqror70776i16hh6ac","filename":"sidemount-ccr-16-2.png","category":"divesoft/","type":"image"},"secondImage":{},"image":{"type":"image"}},"id":"#515","type":"component","lock":false,"position":99},{"name":"Spacer","data":{"spacingLarge":30,"spacingSmall":20,"backgroundColor":"#ffffff"},"id":"#585","type":"component","lock":false,"position":100},{"name":"TextBlock","data":{"text":"Fasten the handle into the recess on the canister. The handle is only for surface manipulation\nand can be removed just before the dive.\n\n17. **HUD and Handset cables routed through the center of the rig beneath the lungs**\n\n\n18. **Counterlungs connected to short connection hoses**\n\n\n\n","textLarge":false,"imageOnRight":true,"image":{"recommendedSizes":{"width":"420","height":"280"}},"imageMobile":{"recommendedSizes":{"width":"750","height":"500"}}},"id":"#48","type":"component","lock":false,"position":101},{"name":"Spacer","data":{"spacingLarge":30,"spacingSmall":20,"backgroundColor":"#ffffff"},"id":"#588","type":"component","lock":false,"position":102},{"name":"Image","data":{"firstImage":{"mimetype":"image/png","size":660521,"hash":"c30c5fa15bd3193ecb9ea21808f91b30690bad87","id":"clph0g7f3rq0g07767nactf7r","filename":"ccr18-2.png","category":"divesoft/","type":"image"},"secondImage":{},"image":{"type":"image"}},"id":"#589","type":"component","lock":false,"position":103},{"name":"Spacer","data":{"spacingLarge":30,"spacingSmall":20,"backgroundColor":"#ffffff"},"id":"#587","type":"component","lock":false,"position":104},{"name":"TextBlock","data":{"text":"First place the counterlungs on their side so that the OPV is up and towards the front. Connect\nthe left short hose to the bottom port of the counterlung. Tilt the counterlung to the right so\nthat the OPV is on the right and the embroidered logo is at the top. Attach the second hose (it\nis necessary to turn the port slightly away from you).\n\n19. **Counterlungs attached to the frame with all Velcro stra
2ps**\n\n\n","textLarge":false,"imageOnRight":true,"image":{"recommendedSizes":{"width":"420","height":"280"}},"imageMobile":{"recommendedSizes":{"width":"750","height":"500"}}},"id":"#49","type":"component","lock":false,"position":105},{"name":"Spacer","data":{"spacingLarge":30,"spacingSmall":20,"backgroundColor":"#ffffff"},"id":"#591","type":"component","lock":false,"position":106},{"name":"Image","data":{"firstImage":{"mimetype":"image/png","size":576992,"hash":"c3fc5d73b13f49e0abf58d909cc6368162c6c757","id":"clph0hdpcrq0o0776bhxqu138","filename":"sidemount-ccr-19-2.png","category":"divesoft/","type":"image"},"secondImage":{},"image":{"type":"image"}},"id":"#592","type":"component","lock":false,"position":107},{"name":"Spacer","data":{"spacingLarge":30,"spacingSmall":20,"backgroundColor":"#ffffff"},"id":"#594","type":"component","lock":false,"position":108},{"name":"TextBlock","data":{"text":"20. **OPV connected on the right side**\n\n\n21. **Corrugated hoses mushroom valve directional flow test**\n\n\nPlace the mouthpiece in your mouth and open it. Close the inhalation end of the hose with the\nsupplied plug. Inhale from the hose so that the hose contracts. Leave the mouthpiece open\nand observe if the hose does not expand. Put the mouthpiece to your ear to make sure you do\nnot hear the passing air. If everything is OK, put the cap on the exhalation end of the hose and\nexhale until the hose is stretched. Do not close the mouthpiece and observe if the hose does\nnot contract again. Put the mouthpiece back to your ear again to listen for passing air. This test\nis very important. Damaged or leaking mouthpiece can cause serious injury or death.\n\n22. **Corrugated hoses well connected**\nConnect each hose to the neck of its counterlung.","textLarge":false,"imageOnRight":true,"image":{"recommendedSizes":{"width":"420","height":"280"}},"imageMobile":{"recommendedSizes":{"width":"750","height":"500"}}},"id":"#51","type":"component","lock":false,"position":109},{"name":"Spacer","data":{"spacingLarge":30,"spacingSmall":20,"backgroundColor":"#ffffff"},"id":"#590","type":"component","lock":false,"position":110},{"name":"Image","data":{"firstImage":{"mimetype":"image/png","size":616517,"hash":"0e03566ec516e7c158a3ef4077f12ba3b4e55579","id":"clph0jazarq1o0776mv1th8uo","filename":"g841-2.png","category":"divesoft/","type":"image"},"secondImage":{},"image":{"type":"image"}},"id":"#595","type":"component","lock":false,"position":111},{"name":"Spacer","data":{"spacingLarge":30,"spacingSmall":20,"backgroundColor":"#ffffff"},"id":"#593","type":"component","lock":false,"position":112},{"name":"TextBlock","data":{"text":"23. **ADV connected to LP DIL**\n\n\nConnect the medium pressure diluent hose to the ADV. If you have an ADV isolator installed,\nmake sure the isolator is open.\nWarning: Using ADV Isolator (shut off valve) when the unit is used as a bailout rebreather is\nstrongly discouraged.\n\n24. **DIL MAV connected to LP DIL**\n\nLead a medium pressure diluent hose (black) through the rubber bands on the breathing hose and connect to diluent MAV. An inflator quick release coupler is used for the connection.\n\n25. **O<sub>2</sub> MAV connected to oxygen**\n\nLead a medium pressure diluent hose through the rubber band on the breathing hose and\nconnect to oxygen MAV.\n\n26. **Fasten manometers under the rubber bandage on the breathing hoses**\n\n\n27. **DIL valve fully open**\n\n\nCheck and record the diluent pressure.\n\n28. **O2 valve fully open**\n\n\nCheck and record the oxygen pressure\n\n29. **ADV, O2 and diluent buttons are feeding and do not leak**\n\n\nGradually squeeze the ADV, Oxygen and diluent MAVs to determine if they dose gas and do not\nleak.\n\n30. **HUD connected to DSV**\n\n\nThread the HUD cable along the right breathing hose and slide it into the mouthpiece groove.\nThe HUD can be secured by moving the metal hooks of the snap rings to prevent accidental\ndisconnects of the HUD.\n\n31. **Pre-dive check done with no failure**\n\n\nPerform a complete Pre-dive check and prebreathing as instructed in the main manual.","textLarge":false,"imageOnRight":true,"image":{"recommendedSizes":{"width":"420","height":"280"}},"imageMobile":{"recommendedSizes":{"width":"750","height":"500"}}},"id":"#54","type":"component","lock":false,"position":113},{"name":"Divider","data":{"color":"darkGray"},"id":"#59","type":"component","lock":false,"position":114},{"name":"TextBlock","data":{"text":"### <span id=\"6.-Fastening-to-a-diverâs-body\">**6. Fastening to a diverâs body**</span>\n\nHarness or buoyancy compensator is not a part of the Liberty Sidemount. We recommend selecting a reliable harness that allows a comfortable fitting of the device to the diver's body and a compensator with sufficient capacity to cover the loss of buoyancy in case of catastrophic flooding of the device. \n\nThe apparatus must be donned so that it is positioned below the diver during the dive. The counterlung must be positioned on the diver's chest and the unit must be diagonally offset (approximately 25° to the longitudinal axis of the diver's body) to allow full swimming and lower limb movement. \n\n**Correct positioning of the unit on the diver's body is essential to maintain the breathing characteristics of the unit, which meets the requirements of EN 14143:2013**. If the position of the apparatus is different from that specified, the manufacturer does not guarantee the breathing characteristics specified in the quoted standard.\n","textLarge":false,"imageOnRight":true,"image":{"recommendedSizes":{"width":"420","height":"280"}},"imageMobile":{"recommendedSizes":{"width":"750","height":"500"}}}
2,"id":"#60","type":"component","lock":false,"position":115},{"name":"Image","data":{"firstImage":{"mimetype":"image/png","size":375026,"hash":"cf2a871adf6092696fcd3529f91924a529ed7951","id":"clph0ssxkrq5m0776um1j0qyn","filename":"pripevneni-sm.png","category":"divesoft/","type":"image"},"secondImage":{},"image":{"type":"image"}},"id":"#598","type":"component","lock":false,"position":116},{"name":"TextBlock","data":{"text":"A properly fitting sidemount harness is required to attach the device. A minimum of 4 D-rings is required. Two in the normal position of the shoulder straps and two asymmetrically positioned on the belt portion of the harness. NOTE: Both D-rings on the belt are on the left strap (without buckle). The right belt D-ring should be positioned so that it is almost at the belt buckle of the harness. The right D-ring should be placed approximately at the side seam of the imaginary pants (same position as the OC gauge D-ring on a regular OC setup).\n\nBolt snaps for 6 mm diameter bungee loops are used on the instrument frame. The length of the bungee loops must be adjusted so that the apparatus is snug against the diver's body and does not change position when the diver changes position in any direction. \nThe position can be adjusted by the length of the bungee loops and the position of the D-rings on the harness. \nProper rigging of the device is part of the Liberty Sidemount Diver course.\n\nTest the apparatus in the trim position. If the device is not perfectly parallel to the diver's body, it is possible to adjust the position by moving the carabiner on the head strap, by moving the D-ring on the harness on the lumbar strap (usually it is too far back) and adjusting the force of the rubber bungee of the harness.\n","textLarge":false,"imageOnRight":true,"image":{"recommendedSizes":{"width":"420","height":"280"}},"imageMobile":{"recommendedSizes":{"width":"750","height":"500"}}},"id":"#603","type":"component","lock":false,"position":117},{"name":"Divider","data":{"color":"darkGray"},"id":"#61","type":"component","lock":false,"position":118},{"name":"TextBlock","data":{"text":"### <span id=\"7-.-Individual-adjustments-of-breathing-hoses\">**7. Individual adjustments of breathing hoses**</span>\n\nThe hoses are deliberately delivered somewhat longer than needed to allow the diver to adapt\nthe length of one or the other hose to a shape that allows the diver to hold the mouthpiece\nfreely.","textLarge":false,"imageOnRight":true,"image":{"recommendedSizes":{"width":"420","height":"280"}},"imageMobile":{"recommendedSizes":{"width":"750","height":"500"}}},"id":"#62","type":"component","lock":false,"position":119},{"name":"Divider","data":{"color":"darkGray"},"id":"#63","type":"component","lock":false,"position":120},{"name":"TextBlock","data":{"text":"### <span id=\"8-.-Setting-procedure\">**8. Setting procedure**</span>\n\nPlace two or three tight loops of rubber bungee on the breathing hose of the unit. Place the\ninstrument on the edge of the table so that you can indicate the trim position next to it. Put the\nmouthpiece in your mouth and move the hoses towards each other so that you can easily hold\nthe mouthpiece in the mouth without resistance. For gentler tuning, loosen the rubber hose\nclamping rings at the elbows and rotate the hoses to the desired position. After setting the\nhose position, tighten the screws again.\n\nBy moving the hoses in the rubber loops, an asymmetry of the length of the breathing hoses\nresults in a small loop. Longer the hose can be shortened (approximately 3 rings). Shorten the\nhose carefully, preferably by small margins from the counterlung side. First, however, with a set\nhose, make several dives to verify that the hose settings suit you. To reassemble the hose, use\nthe supplied narrow snap ring which can be placed between the individual wraps.","textLarge":false,"imageOnRight":true,"image":{"recommendedSizes":{"width":"420","height":"280"}},"imageMobile":{"recommendedSizes":{"width":"750","height":"500"}}},"id":"#64","type":"component","lock":false,"position":121},{"name":"Divider","data":{"color":"darkGray"},"id":"#65","type":"component","lock":false,"position":122},{"name":"TextBlock","data":{"text":"### <span id=\"9-.-Maintenance\">**9. Maintenance**</span>\n\nAfter each dive in salty or polluted water, the device must be washed with clean, fresh water.\n\nAfter each day of diving, disassemble the device.\n\nFor dismantling, use the reverse assembly procedure. The breathing hoses are secured against\nrelease. It is first necessary to push towards the counterlungs until it is possible to rotate the\nbayonet neck and release the hose.\n\nPut caps on the MAV and ADV connectors and disinfect the entire loop, including the\ncounterlungs, and rinse with drinking water. Let it dry in a shady, well-ventilated place.\n\nTreat the head of the device as shown in the main manual.","textLarge":false,"imageOnRight":true,"image":{"recommendedSizes":{"width":"420","height":"280"}},"imageMobile":{"recommendedSizes":{"width":"750","height":"500"}}},"id":"#66","type":"component","lock":false,"position":123},{"name":"Divider","data":{"color":"darkGray"},"id":"#71","type":"component","lock":false,"position":124},{"name":"TextBlock","data":{"text":"### **Liberty Sidemount User Manual**\n\n- **Author** \nAdam Procháska, Jakub Šimánek, Aleš Procháska.\n\n- **Publisher** \nDivesoft s.r.o.\n
2divesoft.com\n\n- **Issue** \nRevision 2.17.5\nMarch 2025\n\n**Use of this manual approved by** \nLucie Å mejkalová, CEO\n\n**EC Type-examination for PPE Regulation EU 2016/425 Module B by** \nNotified Body No. 1463 \nPolsi Rejestr Statkow \nal. Gen. Józefa Hallera 126 \n80-416 GdaÅsk, Poland\n\n\n**PPE Regulation EU 2016/425 Module D by** \nNotified Body No. 1463\nNotified Body No. 1463 \nPolsi Rejestr Statkow \nal. Gen. Józefa Hallera 126 \n80-416 GdaÅsk, Poland\n\n\nDeclaration of conformity available at:\n\nhttps://divesoft.com/en/products/ccr-liberty/documents\n\n**Bluetooth®** \nThe Bluetooth® word mark and logos are registered trademarks owned by Bluetooth SIG, Inc. and any use of such marks by Divesoft s.r.o. is under license. Other trademarks and trade names are those of their respective owners.\n\n\n**Product manufactured by** \nDivesoft s.r.o. \nHálkova 2495 \n413 01 Roudnice nad Labem \nCzech Republic\n","textLarge":false,"imageOnRight":true,"image":{"recommendedSizes":{"width":"420","height":"280"}},"imageMobile":{"recommendedSizes":{"width":"750","height":"500"}}},"id":"#606","type":"component","lock":false,"position":125},{"name":"ListOfLinks","data":{"links":[{"title":"Module B certificate","url":{"url":"https://foxer360-media-library.s3.eu-central-1.amazonaws.com/divesoft/docs/5c1ef7448ed48df14a57f94c01bbb9c02ffa9384_form9-pcw-01-pper-certyfikat-zg-odnosci-z-typem-w-oparciu-o-zapewnienie-jakosci-procesu-produkcj-i-modul-d-edycja-20241126.pdf","analyticsTag":"Download","urlNewWindow":false},"id":"1"},{"title":"UKCA certificate","url":{"url":""},"id":"2"},{"title":"CE Declaration of Conformity","url":{"url":"https://foxer360-media-library.s3.eu-central-1.amazonaws.com/divesoft/docs/a17af6ab07526baf12bc5fc08af34a06693cd9c3_declaration-of-conformity-ce-sm-2025-signed.pdf","urlNewWindow":true,"analyticsTag":"Download"},"id":"3"},{"id":"4","title":"UKCA Declaration of Conformity"}],"activeTab":"4"},"id":"#616","type":"component","lock":false,"position":126},{"name":"Image","data":{"firstImage":{"mimetype":"image/jpeg","size":92174,"hash":"64afd658c5e1e25906681e60b4ca51f2a72a158c","id":"clr4rumdy66wd0776kih5j2nb","filename":"modul-b-nahrazka.jpg","category":"divesoft/","type":"image"},"secondImage":{}},"id":"#607","type":"component","lock":false,"position":127},{"name":"Image","data":{"firstImage":{"mimetype":"image/jpeg","size":90134,"hash":"6eeb9ffc6afbad40bf4e139f0168ad3997f85c94","id":"clr4smcna685107762uyody52","filename":"ukca-nahrazka.jpg","category":"divesoft/","type":"image"},"secondImage":{},"image":{"type":"image"}},"id":"#608","type":"component","lock":false,"position":128},{"name":"Image","data":{"firstImage":{"mimetype":"image/jpeg","size":96833,"hash":"b92490dfe7beac8a73bcc3cdec5637f4552eb505","id":"clr4svgt168n60776olaii6hg","filename":"nahrazka-ce.jpg","category":"divesoft/","type":"image"},"secondImage":{}},"id":"#611","type":"component","lock":false,"position":129},{"name":"ListOfLinks","data":{"links":[{"title":"User manual for FW version 1.13 (EN)","url":""},{"title":"Freedom Bottom Timer user manual 1.12 (EN)","url":""},{"title":"German user manual for FW version 1.5","url":""}]},"id":"#614","type":"component","lock":false,"position":130},{"name":"Image","data":{"firstImage":{"mimetype":"image/jpeg","size":98885,"hash":"b084c93b83307da0e2da192d27eca4214522ffa4","id":"clr4svtw968nl07765ki23lnd","filename":"nahrazka-ukca.jpg","category":"divesoft/","type":"image"},"secondImage":{}},"id":"#609","type":"component","lock":false,"position":131},{"name":"Footer","data":{"copyrights":"Copyright © 2019 Divesoft LLC All rights reserved.","facebookUrl":{"urlNewWindow":true,"url":"https://www.facebook.com/divesoft/"},"youtubeUrl":{"url":"https://www.youtube.com/channel/UCHI2-kHmfoUlAdhQXPKl8lA/featured","urlNewWindow":true},"instagramUrl":{"url":"https://www.instagram.com/divesoft/","urlNewWindow":true},"contacts":"**Divesoft s.r.o.** \nHálkova 2495 \n413 01 Roudnice nad Labem \nCzech Republic \nTel.: +420 416 857 057 \nE-mail: [email protected]"},"id":"#1","type":"component","lock":false,"position":132}],"id":"root","idBuffer":"#617","lastCommit":"f30e2ee8-be1d-475b-9aa7-0eb75605691e"}},"annotations":[],"language":{"type":"id","generated":false,"id":"Language:cjv3kwvoj000u083611381c6o","typename":"Language"},"__typename":"PageTranslation"},"Page:clagmvmlj1ek00835j9q8q4rs":{"id":"clagmvmlj1ek00835j9q8q4rs","type":{"type":"id","generated":false,"id":"PageType:cjv3l213x004f08366hjufttp","typename":"PageType"},"tags":[{"type":"id","generated":false,"id":"Tag:cl28w8de8gdo20858cjkbufee","typename":"Tag"},{"type":"id","generated":false,"id":"Tag:cm5ww05zc1b5d0803zglvz927","typename":"Tag"}],"translations({\"where\":{\"language\":{\"id\":\"cjv3kwvoj000u083611381c6o\"}}})":[{"type":"id","generated":false,"id":"PageTranslation:clagmvmlz1ek70835369m5n6c","typename":"PageTranslation"}],"__typename":"Page"}
2,"Tag:cl28w8de8gdo20858cjkbufee":{"id":"cl28w8de8gdo20858cjkbufee","name":"Becoming a CCR diver","__typename":"Tag"},"PageTranslation:clagmvmlz1ek70835369m5n6c":{"id":"clagmvmlz1ek70835369m5n6c","name":"CCR training from the perspective of training agencies","createdAt":"2022-11-14T10:19:15.383Z","content":{"type":"json","json":{"content":[{"name":"Header","data":{"products":[{"title":"Accessories","description":"Backplates, Consumables. Tanks.","img":{"recommendedSizes":{"width":"235","height":"235"}},"url":""},{"title":"Accessories sets","description":"Protection, maintenance, cleaning.","img":{"recommendedSizes":{"width":"235","height":"235"}},"url":""},{"title":"Spare parts","description":"Spare parts and components.","img":{"recommendedSizes":{"width":"235","height":"235"}},"url":""},{"title":"Spare parts kits","description":"Completly Liberty spare parts kits.","img":{"recommendedSizes":{"width":"235","height":"235"}},"url":""}]},"id":"#0","type":"component","lock":false,"position":0},{"name":"BlogArticle","data":{"title":"CCR training from the perspective of training agencies","perex":"Training organizations often have different approaches to teaching rebreathers. Some of them try to get divers involved in rebreathers as quickly as possible, while others require more experience of the candidate. Often insisting on a level where the diver can dive with a stage bottle, both have their advantages and disadvantages. The advantage of applying for CCR training early on is to avoid any bad habits you can get from open circuit diving. However, on the other hand, this is also a big disadvantage.","content":"In my opinion, a diver **needs to get a certain amount of experience with open circuit because it is the way to go in the event of a catastrophic instrument failure**. A CCR diver may dive closed circuit all the time, but in the event of an emergency a diver will revert to open circuit. That means he has to be sure of its use. If some training agencies allow divers to start diving with the CCR too early, this can lead to tragic ends. \n\n**The most extreme** I have seen is with a training agency that allows you to start with CCR directly as an Open Water Diver, or **after completing only 18 dives**. In my opinion and experience, this threshold is too low. A [diver needs to have an understanding](https://www.divesoft.com/en/blog/7-steps-to-becoming-a-rebreather-diver) of what is going on in the aquatic environment, how to react properly to basic situations such as increasing and decreasing ambient pressure, how to properly handle buoyancy, or how to generally come to terms with being in an environment that we can't ever breathe out of. \n\nFor those of us who have spent a large part of our lives diving these things may already be obvious, but let's put ourselves in the shoes of someone who's just starting. **Let's remember our very beginnings**. I, for example, still remember the feeling when I took my first breath underwater. It was so unnatural. All I had to do at that point was to breathe regularly, equalize the pressure in my ears, and not hold my breath as I ascended. I didn't have to deal with anything else. \n\nTo think that I would have had to know a lot of things about oxygen partial pressure, watch for it, make sure I didn't flood the loop, and be able to immediately switch to bailout from a cylinder strapped to my side, would have been overkill. These are mostly focusing on [the most basic elements of CCR diving](https://www.divesoft.com/en/blog/what-is-a-rebreather-do-i-need-one-as-a-recreational-diver). \n\n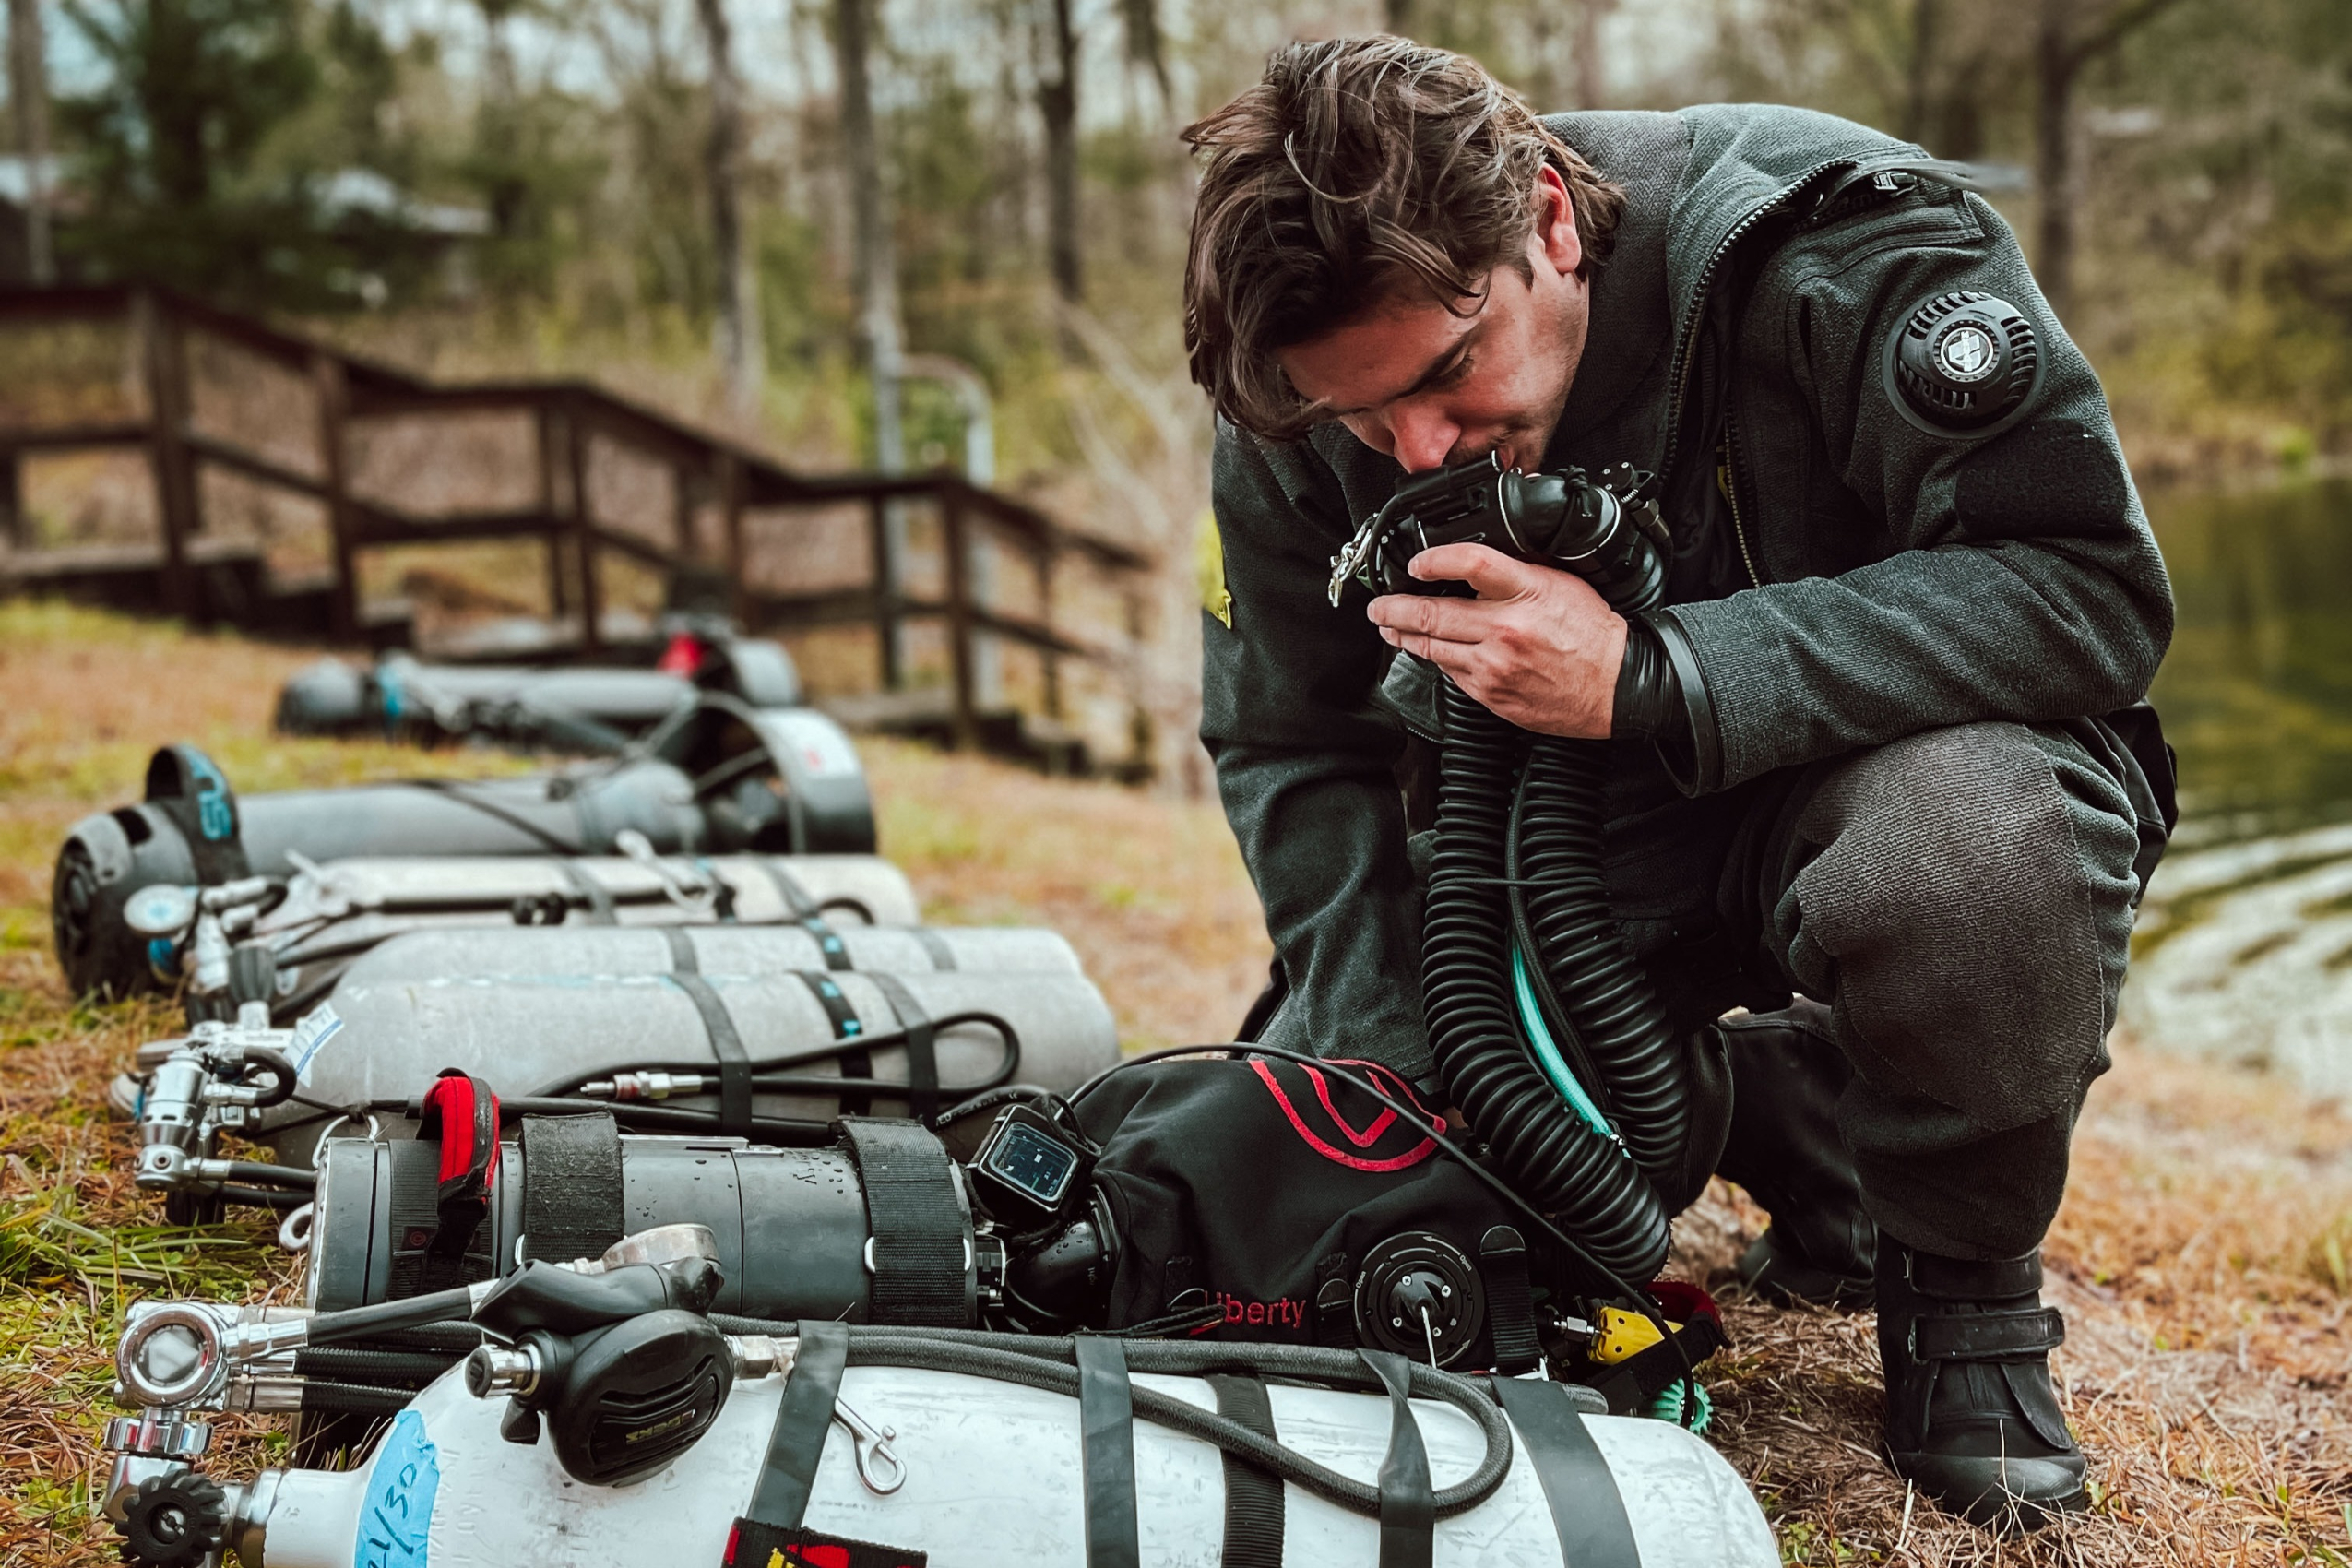\n\nFortunately for everyone, standing between the ambitions of the training agencies and the new student is [an instructor](https://www.divesoft.com/en/blog/how-to-choose-an-instructor-for-your-rebreather-course) who can correct the student and personally recommend a moment of patience before starting rebreather training. I'd say all the sensible instructors I know do this too.\n\nThe other thing that determines when a diver can start learning closed circuit is the manufacturer of that particular rebreather. Incorporating the teaching of a particular brand of device into a training system is preceded by a relatively long process of mutual approval between the manufacturer and the training agency. \n\nThe training agency examines whether [the rebreather](https://www.divesoft.com/en/products/ccr-liberty/philosophy) is sufficiently safe and may place conditions on certain elements, such as mandatory BOV, or require certificates of compliance with standards and testing such as CE or UKCA certification. **The manufacturer may in turn define the entry requirements and conditions under which diving with their equipment will be taught.** The manufacturer has the option to standardise training requirements for all training agencies.\n\n\n\nIn the case of Liberty, we have done our best to ensure the safety of diving also from the training agencies' approach. **We have created training documents for instructors, which the training agencies have adopted**. At the same time, we set minimum entry requirements for all. These requirements are a minimum of 50 dives, advanced knowledge of nitrox diving including accelerated decompression and the ability to carry a stage or bailout cylinder.\n\nAfter 50 dives, one has at least a reasonable understanding of what is going on underwater and **can concentrate on the other individual tasks set before them**. To start learning to use a stage or bailout cylinder only during rebreather training would be to unnecessarily burden the student with tasks. \n\nThe Liberty is a sophisticated piece of equipment that will offer the user an incredibly wide range of options from the start, and there is virtually n
2othing to prevent even an inexperienced diver from making a dive to 100 m (330 ft) once they have completed their first training with the CCR. However, such a dive may be the last for them, as it is too big a leap. Therefore, **we also require a certain moral maturity**, which cannot be acquired except by knowing all the risks involved in such an activity. This we try to achieve by a higher level of training with which the candidate can undergo training.\n\n\n\nNo matter how low the limit of training agencies, they are bound by an agreement with the manufacturer who has set minimum requirements and can thus offer courses from a certain level and experience of the diver.\n\nDespite all efforts to educate all divers, and to try to improve training procedures and materials, **accidents still occur on all types and brands of rebreathers due to unsafe or irresponsible diver behavior**. In this regard, there is a need to appeal to instructors and perhaps to the training agencies themselves to help weed out divers with unsafe attitudes to diving. \n\nEvery instructor has certainly encountered a student who had exaggerated ambitions or a tendency to underestimate the risks associated with diving or the use of the technique. In such a case,** the instructor should terminate the student's training without certifying the studen**t. But this rarely happens, because instructors rarely have the backing of the training system's standards. \n\nDemonstrating an inability to perform prescribed exercises to a satisfactory standard is very easy, but **demonstrating something as elusive as an unsafe attitude or opinion is very difficult**. Often it is something that just hangs in the air and is very difficult to express. A very experienced instructor has the ability to detect this, but the standards of his training organization usually won't allow him to. This should be changed and implemented into the standards of all training agencies. However, even so, the situation for instructors under commercial pressure will always be difficult.\n\n- Jakub Å imánek","showTags":false,"showDate":false,"image":{"mimetype":"image/png","size":986669,"hash":"94c748c937944f6631edcf0990c65a97be4ae9ea","id":"clcg5d6srhhs10776fgn7qokn","filename":"my-project-1.png","category":"divesoft/","type":"image"}},"id":"#4","type":"component","lock":false,"position":1},{"name":"Footer","data":{"copyrights":"Copyright © 2019 Divesoft LLC All rights reserved.","facebookUrl":"","youtubeUrl":"","instagramUrl":"","contacts":"**Divesoft, s.r.o.** Hálkova 2495 413 01 Roudnice nad Labem Äeská republika Tel.: +420 416 857 057 E-mail: [email protected]"},"id":"#1","type":"component","lock":false,"position":5}],"id":"root","idBuffer":"#6","lastCommit":"562657a9-7314-44d6-b177-3ec78b006c6f"}},"annotations":[{"type":"id","generated":true,"id":"PageTranslation:clagmvmlz1ek70835369m5n6c.annotations.0","typename":"PageAnnotation"},{"type":"id","generated":true,"id":"PageTranslation:clagmvmlz1ek70835369m5n6c.annotations.1","typename":"PageAnnotation"},{"type":"id","generated":true,"id":"PageTranslation:clagmvmlz1ek70835369m5n6c.annotations.2","typename":"PageAnnotation"}],"language":{"type":"id","generated":false,"id":"Language:cjv3kwvoj000u083611381c6o","typename":"Language"},"__typename":"PageTranslation"},"PageTranslation:clagmvmlz1ek70835369m5n6c.annotations.0":{"key":"title","value":"CCR training from the perspective of training agencies","__typename":"PageAnnotation"},"PageTranslation:clagmvmlz1ek70835369m5n6c.annotations.1":{"key":"image","value":"null","__typename":"PageAnnotation"},"PageTranslation:clagmvmlz1ek70835369m5n6c.annotations.2":{"key":"perex","value":"Training organizations often have different approaches to teaching rebreathers. Some of them try to get divers involved in rebreathers as quickly as possible, while others require more experience of the candidate. Often insisting on a level where the diver can dive with a stage bottle, both have their advantages and disadvantages. The advantage of applying for CCR training early on is to avoid any bad habits you can get from open circuit diving. However, on the other hand, this is also a big disadvantage. ","__typename":"PageAnnotation"},"Page:claqj12ud2tqp08353972by7b":{"id":"claqj12ud2tqp08353972by7b","type":{"type":"id","generated":false,"id":"PageType:cjv3l213x004f08366hjufttp","typename":"PageType"},"tags":[],"translations({\"where\":{\"language\":{\"id\":\"cjv3kwvoj000u083611381c6o\"}}})":[{"type":"id","generated":false,"id":"PageTranslation:claqj12uu2tqw0835zs6meabf","typename":"PageTranslation"}],"__typename":"Page"},"PageTranslation:claqj12uu2tqw0835zs6meabf":{"id":"claqj12uu2tqw0835zs6meabf","name":"Military","createdAt":"2022-11-21T08:29:13.013Z","content":{"type":"json","json":{"content":[{"name":"Header","data":{"products":[],"activeTab":"1"},"id":"#0","type":"component","lock":false,"position":0},{"name":"HeroV2","data":{"slides":[{"media":{"recommendedSizes":{"width":"3840","height":"2560"},"mimetype":"image/jpeg","size":1338681,"hash":"969fe8081cf8431f3abe628a3a4e30b0e91a49a0","id":"claqk5uhg2lu50776w5ym9bxp","filename":"divesoft-army.jpg","category":"divesoft/","type":"image"},"productName":"","title":"Military & Specials","linkTitle":"","link":{"url":"https://eshop.divesoft.com","urlNewWindow":true}
2,"autoplayDuration":9000,"id":"1"}],"activeTab":"1"},"id":"#15","type":"component","lock":false,"position":1},{"name":"Spacer","data":{"spacingLarge":30,"spacingSmall":20,"backgroundColor":"#ffffff"},"id":"#19","type":"component","lock":false,"position":2},{"name":"ImageTextBlock","data":{"backgroundColor":"white","content":"# **Trusted when it matters most.**\n\nDivesoft systems are used by military organizations, naval forces, law enforcement agencies, rescue teams, and special units around the world.\n\nBuilt for reliability, flexibility, and dependable performance in demanding operations.\n\n**Designed for professional use\nDivesoft systems support a wide range of professional diving applications:**\n- \\> Military diving operations \n- \\> Naval and maritime missions \n- \\> Police and law enforcement diving \n- \\> Rescue and recovery operations \n- \\> Special operations units ","links":[],"isMirrored":true,"image":{"recommendedSizes":{"width":"1500","height":"1500"},"mimetype":"image/jpeg","size":588307,"hash":"3b3d2d82d951dbb4fe9c1a24dd261d5f02f59c1c","id":"clath5zbv3pmt07761otijg93","filename":"dr1-7928smallcrop.jpg","category":"divesoft/","type":"image","alt":"Military"},"activeTab":"1"},"id":"#17","type":"component","lock":false,"position":4},{"name":"ImageTextBlock","data":{"backgroundColor":"white","content":"## NATO registered\n\nThe Divesoft Liberty CCR is listed in the NATO register and available for NATO forces and government organizations.\n","links":[],"isMirrored":false,"image":{"recommendedSizes":{"width":"1500","height":"1500"},"mimetype":"image/png","size":112010,"hash":"b5efafeb01d00ae75507ecbedb6c4c323a061c11","id":"cmp137rj20892080093fxx9qt","filename":"nato-otan-landscape-logo-croppedsvg.png","category":"divesoft/","type":"image"}},"id":"#16","type":"component","lock":false,"position":5},{"name":"HubSpotForm","data":{"backgroundColor":"#ffffff","isTitleH1":false,"title":"Contact us","subtitle":"If you represent a military organization, police unit, rescue service, or other professional diving team and are interested in Divesoft products, contact us for more information.","showBreadcrumbs":false,"hideHeader":false,"portalId":"145642557","formId":"4b764781-6745-422e-90a8-65ca2861d8a7"},"id":"#14","type":"component","lock":false,"position":6},{"name":"Footer","data":{"componentTemplateId":"cjvwimxrl08e40798hjs5ek9w"},"id":"#1","type":"component","lock":false,"position":7}],"id":"root","idBuffer":"#20","lastCommit":"d2d6c837-2455-4390-b533-838ba4ca280d"}},"annotations":[],"language":{"type":"id","generated":false,"id":"Language:cjv3kwvoj000u083611381c6o","typename":"Language"},"__typename":"PageTranslation"},"Page:clcafw4t28zoz08354eyxom1b":{"id":"clcafw4t28zoz08354eyxom1b","type":{"type":"id","generated":false,"id":"PageType:cjv3l213x004f08366hjufttp","typename":"PageType"},"tags":[{"type":"id","generated":false,"id":"Tag:clyycdwe2y9ew0735y8v3nuvd","typename":"Tag"},{"type":"id","generated":false,"id":"Tag:cm5ww05zc1b5d0803zglvz927","typename":"Tag"}],"translations({\"where\":{\"language\":{\"id\":\"cjv3kwvoj000u083611381c6o\"}}})":[{"type":"id","generated":false,"id":"PageTranslation:clcafw4tk8zp60835vz9ztoiq","typename":"PageTranslation"}],"__typename":"Page"},"PageTranslation:clcafw4tk8zp60835vz9ztoiq":{"id":"clcafw4tk8zp60835vz9ztoiq","name":"Divesoft.blog / The most spectacular dive of 2022","createdAt":"2022-12-30T11:36:29.288Z","content":{"type":"json","json":{"content":[{"name":"Header","data":{"products":[{"title":"Accessories","description":"Backplates, Consumables. Tanks.","img":{"recommendedSizes":{"width":"235","height":"235"}},"url":""},{"title":"Accessories sets","description":"Protection, maintenance, cleaning.","img":{"recommendedSizes":{"width":"235","height":"235"}},"url":""},{"title":"Spare parts","description":"Spare parts and components.","img":{"recommendedSizes":{"width":"235","height":"235"}},"url":""},{"title":"Spare parts kits","description":"Completly Liberty spare parts kits.","img":{"recommendedSizes":{"width":"235","height":"235"}},"url":""}]},"id":"#0","type":"component","lock":false,"position":0},{"name":"BlogArticle","data":{"title":"The most spectacular dive of 2022","perex":"What was my best dive of the year? As expected, the answer is not easy at all. There has been a number of spectacular dives that I got to do in 2022 ranging from diving on the 14th-century church in local waters to the caves in Bosnia and Herzegovina, exploring cave systems in Florida, wreck hunting in the English Channel and cave, wreck and a reef diving exploration in Palau. Lots of diving with amazing people with no shortage of good stories and incredible memories to keep.","content":"One dive, however, comes to mind due to a number of factors and it is the wreck of USS Perry in Palau.\n\n \n \n**The USS Perry** (DD-340/DMS-17) was a Clemson-class destroyer in the United States Navy during WWII and the ship was involved in various operations including escorting USS Arizona into Pearl Harbour before the infamous attack. She claimed a number of shot-down Japanese aircraft during the attack. After the Pearl Harbour attack, she served in the Pacific operating mainly as a mine sweeper** ending her career when she struck a mine in 1944 near Angaur Island - Palau**.\n\n \n \n<
2h2>The USS Perry Wreck</h2>\n\nThe wreck was discovered in 2000 and lies on the southeastern tip of Angaur Island in 78m of water and was featured in [one episode of the Deep Sea Detectives TV show](https://www.imdb.com/title/tt0916147/). To our knowledge, **the wreck was dived by less than 30 people at the time** which made it even more special. \n\nThis area is known for its harsh sea conditions, particularly very strong currents which make the potential to dive it quite limited. The last story we heard was that **the divers were picked up 15km away from the wreck site after finishing their drift deco**. \n\n \n \n<h2>Unpredictable currents</h2>\n\nAugust 2022 marked 100 years since the ship was commissioned, so it was a good time to attempt to dive the wreck.\n\nThe wreck location is about 1,5 hr by a speedboat from Koror island heading south. When we got to the location **the current was considered too strong to dive even though the local guys said that it was way weaker than what it usually is.** You don't want to get blown off the wreck by the current as the next stop would be Indonesia.\n\nDue to this, there were **strict safety conditions put in place** such as another chase boat with safety divers, a safety plane on standby and a cut-off time for a dive at 2 PM as the plane search is limited at night. Dive permits were also obtained to dive the wreck and our dive plan was carefully planned before the dive.\n\n \n\nThis was the 3rd and last ONLY date which looked suitable after previous weather forecasts scrapped the plans (most of us were on the plane the next day). We all decided to give it a go. Screw relaxing on the beach.\n\nAs the conditions are **very unpredictable**, there was a decent chance that we will spend a day on the boat staring at the blue water and then returning our full cylinders with TMX back to the dive centre at the end of the day. But we all decided to take the risk.\n\nTesting the strength of the current just in my mask and fins resulted in me zipping by our boat in a manner which didn't feel right to attempt in full gear. Before this, we ended up finding the shot line that was used a week earlier to try to shoot the wreck with 100m of line and totally crushed float buoys. \n\n<h2>Our dive</h2>\n\nApparently, after shooting the wreck the line dragged the buoy below the water, and it all disappeared. **Definitely a current not worth messing with**. We decided to wait it out. After about an hour of the current not slacking off, I decided to take a nap inspired by Antti until I got woken up by: <i>\"Wake up!!! Wake up, get your breather on Jakub, we are going!!!\"</i>\n\nOur team got ready and started the long pull on the shot, down to the bottom. At about 50m you could start to see the bottom in stellar visibility but no wreck, thinking *âYeah, they missed it\"*.\n\nWhen on the bottom in the distance we could see something that appeared like a wall. **We headed towards it and the USS Perry started shaping up**. The following time was just a blast of exploring with our dive team. The ship broke where she struck the mine and now lies in an \"L\" shape. When she sank, she dragged another mine down with her which now lies half-buried in the sand near the wreck. The wreck is nicely preserved and extremely interesting to explore. After 25 min of our bottom time, we followed our plan and after taking a stylish selfie began our ascend.\n\n\n \nThis dive was a highlight of the 2-week diving trip with great friends on a very unique site in lucky conditions and ended up being **one definitely of the most memorable dives I have ever done**. Could not ask for more apart from having more dives like this.\n\n\n\n- Jakub Slama\n\n","showTags":false,"showDate":false,"image":{"mimetype":"image/jpeg","size":212531,"hash":"505e3ce1f28e7fdd987c632c0d6cf817ed99189b","id":"clcagzn5kg2j00776ctm92qwz","filename":"uss-perry-main.jpg","category":"divesoft/","type":"image"}},"id":"#2","type":"component","lock":false,"position":1},{"name":"PhotoGallery","data":{"title":"Photogallery","description":"Check the dive profile and Jakub's underwater photos of the USS Perry wreck","divider":false,"images":[{"id":"
21","image":{"mimetype":"image/jpeg","size":108664,"hash":"2f0da534927726b977618d6c31687f5922a51e2f","id":"clcah1gxwg2jk0776xv7t8701","filename":"dive-app.jpg","category":"divesoft/","type":"image"}},{"id":"2","image":{"mimetype":"image/jpeg","size":330516,"hash":"7b3062a6548bca6400dcd873125876dcfb59d128","id":"clcah20icg2k60776a0ehakv6","filename":"uss-perry-1.jpg","category":"divesoft/","type":"image"}},{"id":"3","image":{"mimetype":"image/jpeg","size":369506,"hash":"9b9c10c8bf5c2bf77c2eaed2538165f073612e8e","id":"clcah26mdg2kz077667g2qn9m","filename":"uss-perry-2.jpg","category":"divesoft/","type":"image"}},{"id":"4","image":{"mimetype":"image/jpeg","size":440366,"hash":"d7753cd634ff0f4cc30ece83493e468a28867022","id":"clcah2cj6g2lo0776qeq191lk","filename":"uss-perry-3.jpg","category":"divesoft/","type":"image"}},{"id":"5","image":{"mimetype":"image/jpeg","size":262380,"hash":"5e5d1409d5a862e0fe808b64318c0aec6fb3652e","id":"clcah2i3ag2m10776watkmi6b","filename":"uss-perry-4.jpg","category":"divesoft/","type":"image"}},{"id":"6","image":{"mimetype":"image/jpeg","size":277618,"hash":"ad7682b268178d05af73fe2d282975d26fbcf67a","id":"clcah2ohcg2ma0776jfqmbl4t","filename":"uss-perry-5.jpg","category":"divesoft/","type":"image"}}],"activeTab":"7"},"id":"#4","type":"component","lock":false,"position":2},{"name":"ProductShowcase","data":{"componentTemplateId":"cm9h4wr6ugjv10803yqs3tp71"},"id":"#6","type":"component","lock":false,"position":3},{"name":"Footer","data":{"copyrights":"Copyright © 2019 Divesoft LLC All rights reserved.","facebookUrl":"","youtubeUrl":"","instagramUrl":"","contacts":"**Divesoft, s.r.o.** Hálkova 2495 413 01 Roudnice nad Labem Äeská republika Tel.: +420 416 857 057 E-mail: [email protected]"},"id":"#1","type":"component","lock":false,"position":4}],"id":"root","idBuffer":"#7","lastCommit":"78b01047-d257-4bd5-bf3c-959246ac9fae"}},"annotations":[],"language":{"type":"id","generated":false,"id":"Language:cjv3kwvoj000u083611381c6o","typename":"Language"},"__typename":"PageTranslation"},"Page:cldx11pfrfeok0835vfer80hk":{"id":"cldx11pfrfeok0835vfer80hk","type":{"type":"id","generated":false,"id":"PageType:cjv3l213x004f08366hjufttp","typename":"PageType"},"tags":[{"type":"id","generated":false,"id":"Tag:clw52z09zlclk0735mxb7v53p","typename":"Tag"},{"type":"id","generated":false,"id":"Tag:cm5ww0t651b710803pcl02cn4","typename":"Tag"}],"translations({\"where\":{\"language\":{\"id\":\"cjv3kwvoj000u083611381c6o\"}}})":[{"type":"id","generated":false,"id":"PageTranslation:cldx11pg5feor0835fd15wn5h","typename":"PageTranslation"}],"__typename":"Page"},"PageTranslation:cldx11pg5feor0835fd15wn5h":{"id":"cldx11pg5feor0835fd15wn5h","name":"Divesoft.blog / Rebreathers Role in Underwater Science","createdAt":"2023-02-09T11:39:19.444Z","content":{"type":"json","json":{"content":[{"name":"Header","data":{"products":[{"title":"Accessories","description":"Backplates, Consumables. Tanks.","img":{"recommendedSizes":{"width":"235","height":"235"}},"url":""},{"title":"Accessories sets","description":"Protection, maintenance, cleaning.","img":{"recommendedSizes":{"width":"235","height":"235"}},"url":""},{"title":"Spare parts","description":"Spare parts and components.","img":{"recommendedSizes":{"width":"235","height":"235"}},"url":""},{"title":"Spare parts kits","description":"Completly Liberty spare parts kits.","img":{"recommendedSizes":{"width":"235","height":"235"}},"url":""}]},"id":"#0","type":"component","lock":false,"position":0},{"name":"BlogArticle","data":{"title":"Rebreathers Role in Underwater Science","perex":"Carrying out science underwater has in recent times become commonly discussed in both the diving community and general media with agencies offering training and citizen science projects becoming developed. But what is the main difference in scientific diving from the general recreational world? ","content":"Actual **scientific diving** as an occupation **varies both in needs and training with the defined goal of diving to gather data, be that samples, observations or experimental manipulation** carried out by professional scientists or research teams. **Citizen science projects** on the other hand are volunteers from the general community that wish to contribute their skills and expertise, in this case in diving, to assist in data gathering under a structured project where extra assistance is required. Both are important, though different, with the latter adding valuable contributions to researchers understanding of the underwater world.\n\n<h2>Benefits of the use of CCRs for underwater research</h2>\n\nThe next question is **how can the use of CCRs benefit underwater research and why**? The obvious first thought is to get deeper for work with reduced gas costs and reduced risk accosted with deeper range open circuit, but that is just one component. The overall benef
2its from the fundamental nature CCR can develop huge advantages in shallow research in all fields. \n\nThe extension of gas use means **long periods gathering data** can be spent on a dive where classic open circuit gas supplies, rather than decompression, would be limiting factor. **Remote areas where only a smaller compressor** is present but oxygen can be sourced the filling times on the surface can also be addressed in this manner. \n\n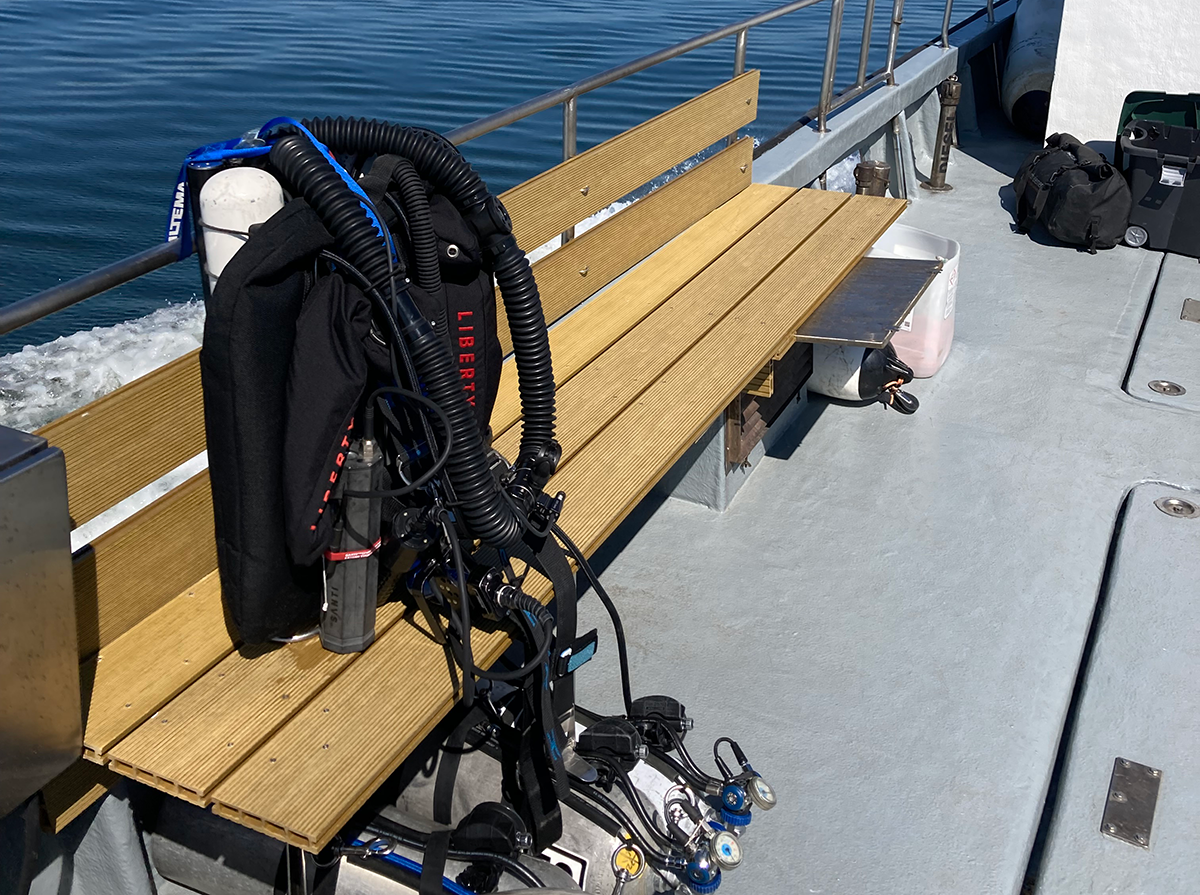\n\nA big advantage of CCR is **the extension of depth ranges and bottom times for the ranges 30- 40m**, where current recommendations on gas density suggest helium usage and decompression windows require even larger columns of gas. The fixed setpoint of a CCR means these ranges can be accessed using minimal gasses but also allow multiple levels to be completed moving shallower to gather further data while off gassing there, for example carrying out benthic biodiversity transects or fish surveys (Andradi-Brown et al, 2016). \n\nOne **great advantage in marine biological work is the reduced impact** that a silent diver on CCR has to the surrounding life and potential study subjects behaviour, shown by work on fish surveys comparing CCR and open circuit ( Linfield et al, 2014). \n\n<h2>And the disadvantages</h2>\n\nNow the advantages have been briefly covered, **what about the disadvantages**? The main one is **time and experience diving it requires to be able to dive a CCR** well enough to manage extra task loading that all scientific diving will add. This factor alone already limits the option for many professional scientists that do not have the place in their workload to train or regularly dive on a CCR. \n\nThe idea that 'training a scientist to dive is easier than training a diver to do science' differs when moving across to [rebreathers](https://www.divesoft.com/en/products/ccr-liberty/philosophy) and the skills of experienced teams can be harnessed to collect the relevant data if they have an understanding of the scientific questions being asked under the direction of the actual researcher. \n\n\n\nChallenges still exist in this approach as well due to **many countries having defined regulations** on how diving operations in research are carried out with extra considerations to safety and risk mitigation that are not common within the sport diving community. This applies closed circuit rebreathers in the application as well and in fact some countries that have stricter regulatory standards even do not allow CCRs to be used in occupational application, much to the determent of science in those areas.\n\n<h2>Training for CCR Scientific Diving</h2>\n\nDevelopment in [training](https://www.divesoft.com/en/events-blog/ccr-training-from-the-perspective-of-training-agencies) and technology though is occurring to address the regulatory challenges and educate CCR divers in approaches that allow them to carry out occupational diving activities. \n\n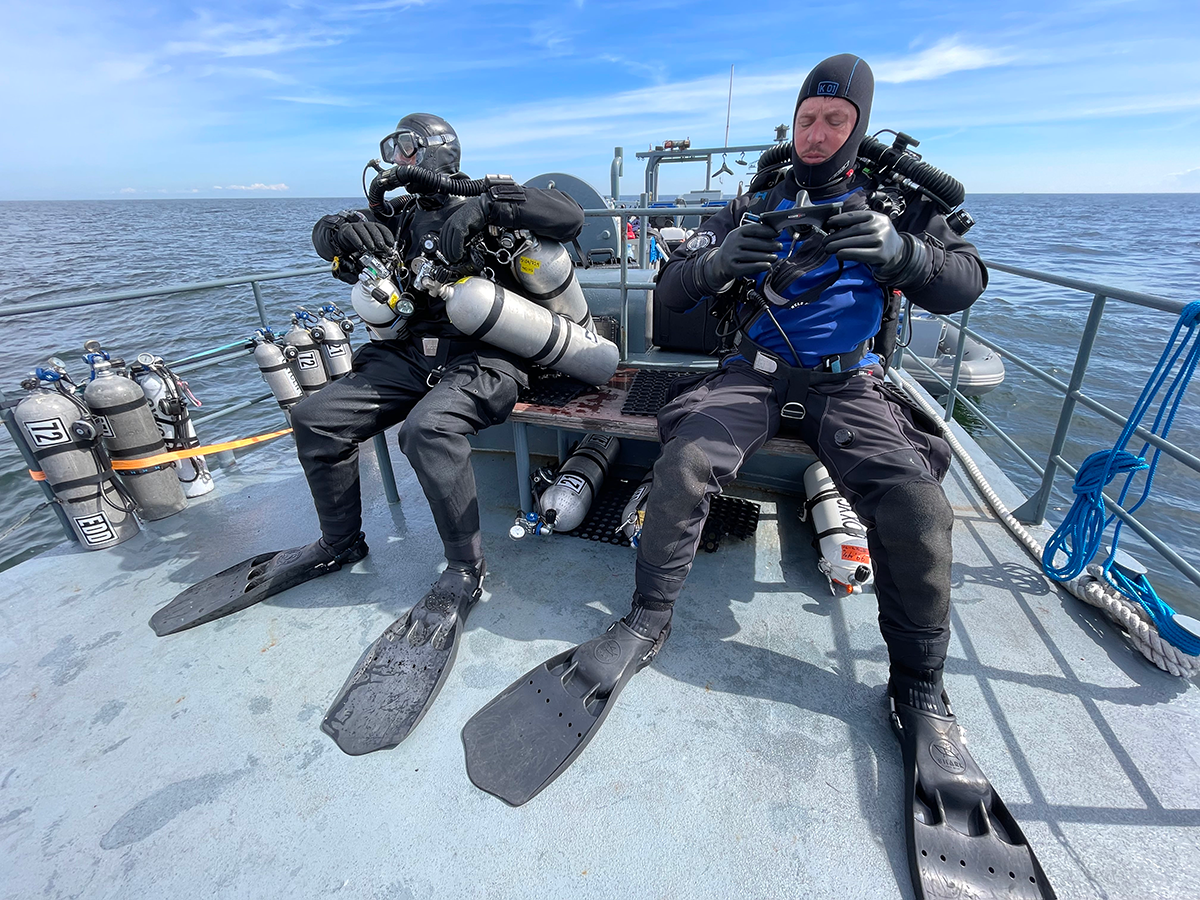\n\n**Such examples are in the USA**, with the [American Academy of Underwater Science](https://www.aaus.org/), with their standards allowing for CCR use with correct procedures. **On the European side** there is the [Finnish Scientific Diving Academy](https://www.helsinki.fi/en/research-stations/tvarminne-zoological-station/finnish-scientific-diving-academy), based at the University of Helsinki, which is running European Scientific Diver level programs but aimed at training operation specifically for CCR scientific work, predominately in colder waters with the risk and safety management, procedural development, task loading and other components that are part of occupational scientific diving. \n\nThese are not the only organisations offering training or opportunities and this area will grow as the benefits of CCR application in research grow. \n\n- Edd Stockdale - [Gradient Technical Diving](https://gradient-technical.com/) \n\n**Follow Edd** on [Facebook](https://www.facebook.com/edd.stockdale) and [Instagram](https://www.instagram.com/TecEddAdventures/) to learn more!\n\n[Finnish Scientific Diving Academy](https://www.helsinki.fi/en/research-stations/tvarminne-zoological-station/finnish-scientific-diving-academy)\n- [Facebook](https://www.facebook.com/FinnishScientificDivingAcademy/)\n- [Twitter](https://twitter.com/Fin_Sci_Diving)\n- [Instagram](https://www.instagram.com/finscidive/)\n- [LinkedIn](https://www.linkedin.com/company/finnish-scientific-diving-academy/)\n\n\n**Articles related:**\n- https://gue.com/blog/finlands-newly-established-scientific-diving-academy/\n- https://gue.com/blog/the-swan-a-17th-century-story-at-the-bottom-of-the-baltic-sea/\n- https://owusseurope.org/scientific-diving-in-tvarminne-finland/\n\n\n\nReferences:\n\nAndradi-Brown, D., East, A., Shepherd, LM., Stockdale, EJ., Rogers, AD., 2016 Challenges and opportunities in conducting mesophotic reef research. Reef Encounter 31 (1), 26-31\n \nLindfield, S.J., Harvey, E.S., McIlwain, J.L., Halford, A.R., 2014. Silent fish surveys:\nbubble-free diving highlights inaccuracies associated with SCUBA-based surveys in\nheavily fished areas. Methods Ecol. Evol./British Ecological Society 5 (10),\n1061â1069\n","showTags":false,"showDate":false,"image":{"mimetype":"image/png","size":875771,"hash":"c8a2a90dbe96bec17af2dddac698430f824af86c","id":"cldyimdma05ad07766mr0gprp","filename":"main-scientific.png","category":"divesoft/","type":"image"}},"id":"#2","type":"component","lock":false,"position":1},{"name":"ProductShowcase","data":{"componentTemplateId":"cm9h4wr6ugjv10803yq
2s3tp71"},"id":"#5","type":"component","lock":false,"position":2},{"name":"Footer","data":{"copyrights":"Copyright © 2019 Divesoft LLC All rights reserved.","facebookUrl":"","youtubeUrl":"","instagramUrl":"","contacts":"**Divesoft, s.r.o.** Hálkova 2495 413 01 Roudnice nad Labem Äeská republika Tel.: +420 416 857 057 E-mail: [email protected]"},"id":"#1","type":"component","lock":false,"position":5}],"id":"root","idBuffer":"#6","lastCommit":"b424393a-0d69-443e-aee4-86d7745f527d"}},"annotations":[{"type":"id","generated":true,"id":"PageTranslation:cldx11pg5feor0835fd15wn5h.annotations.0","typename":"PageAnnotation"},{"type":"id","generated":true,"id":"PageTranslation:cldx11pg5feor0835fd15wn5h.annotations.1","typename":"PageAnnotation"},{"type":"id","generated":true,"id":"PageTranslation:cldx11pg5feor0835fd15wn5h.annotations.2","typename":"PageAnnotation"}],"language":{"type":"id","generated":false,"id":"Language:cjv3kwvoj000u083611381c6o","typename":"Language"},"__typename":"PageTranslation"},"PageTranslation:cldx11pg5feor0835fd15wn5h.annotations.0":{"key":"title","value":"Rebreathers Role in Underwater Science","__typename":"PageAnnotation"},"PageTranslation:cldx11pg5feor0835fd15wn5h.annotations.1":{"key":"perex","value":"Carrying out science underwater has in recent times become commonly discussed in both the diving community and general media with agencies offering training and citizen science projects becoming developed. But what is the main difference in scientific diving from the general recreational world? ","__typename":"PageAnnotation"},"PageTranslation:cldx11pg5feor0835fd15wn5h.annotations.2":{"key":"image","value":"{\"mimetype\":\"image/png\",\"size\":875771,\"hash\":\"c8a2a90dbe96bec17af2dddac698430f824af86c\",\"id\":\"cldyimdma05ad07766mr0gprp\",\"filename\":\"main-scientific.png\",\"category\":\"divesoft/\",\"type\":\"image\"}","__typename":"PageAnnotation"},"Page:clf2f7jbtkl260835rps73xqp":{"id":"clf2f7jbtkl260835rps73xqp","type":{"type":"id","generated":false,"id":"PageType:cjv3l213x004f08366hjufttp","typename":"PageType"},"tags":[],"translations({\"where\":{\"language\":{\"id\":\"cjv3kwvoj000u083611381c6o\"}}})":[{"type":"id","generated":false,"id":"PageTranslation:clf2f7jc9kl2d08356evcfxxw","typename":"PageTranslation"}],"__typename":"Page"},"PageTranslation:clf2f7jc9kl2d08356evcfxxw":{"id":"clf2f7jc9kl2d08356evcfxxw","name":"Become a Partner","createdAt":"2023-03-10T10:54:19.304Z","content":{"type":"json","json":{"content":[{"name":"Header","data":{"products":[{"title":"Accessories","description":"Backplates, Consumables. Tanks.","img":{"recommendedSizes":{"width":"235","height":"235"}},"url":""},{"title":"Accessories sets","description":"Protection, maintenance, cleaning.","img":{"recommendedSizes":{"width":"235","height":"235"}},"url":""},{"title":"Spare parts","description":"Spare parts and components.","img":{"recommendedSizes":{"width":"235","height":"235"}},"url":""},{"title":"Spare parts kits","description":"Completly Liberty spare parts kits.","img":{"recommendedSizes":{"width":"235","height":"235"}},"url":""}]},"id":"#0","type":"component","lock":false,"position":0},{"name":"HubSpotForm","data":{"backgroundColor":"#ffffff","isTitleH1":false,"title":"Become a Partner","subtitle":"We appreciate your interest in becoming one of our partners.","showBreadcrumbs":false,"hideHeader":false,"portalId":"145642557","formId":"1e10cf15-e090-46ce-a385-65da800392ea"},"id":"#4","type":"component","lock":false,"position":2},{"name":"Footer","data":{"componentTemplateId":"cjvwimxrl08e40798hjs5ek9w"},"id":"#1","type":"component","lock":false,"position":4}],"id":"root","idBuffer":"#5","lastCommit":"71657b7c-3cc5-46cd-bd2e-8ca9b35a4dbd"}},"annotations":[],"language":{"type":"id","generated":false,"id":"Language:cjv3kwvoj000u083611381c6o","typename":"Language"},"__typename":"PageTranslation"},"Page:clf9rs5c3ltkw0835vujrrtxu":{"id":"clf9rs5c3ltkw0835vujrrtxu","type":{"type":"id","generated":false,"id":"PageType:cjv3l213x004f08366hjufttp","typename":"PageType"},"tags":[],"translations({\"where\":{\"language\":{\"id\":\"cjv3kwvoj000u083611381c6o\"}}})":[{"type":"id","generated":false,"id":"PageTranslation:clf9rs5coltl308354pfxeast","typename":"PageTranslation"}],"__typename":"Page"}
2,"PageTranslation:clf9rs5coltl308354pfxeast":{"id":"clf9rs5coltl308354pfxeast","name":"Analyzer DNA","createdAt":"2023-03-15T14:20:39.576Z","content":{"type":"json","json":{"content":[{"name":"Header","data":{"products":[{"title":"Accessories","description":"Backplates, Consumables. Tanks.","img":{"recommendedSizes":{"width":"235","height":"235"}},"url":""},{"title":"Accessories sets","description":"Protection, maintenance, cleaning.","img":{"recommendedSizes":{"width":"235","height":"235"}},"url":""},{"title":"Spare parts","description":"Spare parts and components.","img":{"recommendedSizes":{"width":"235","height":"235"}},"url":""},{"title":"Spare parts kits","description":"Completly Liberty spare parts kits.","img":{"recommendedSizes":{"width":"235","height":"235"}},"url":""}],"showScrollIndicator":true},"id":"#0","type":"component","lock":false,"position":0},{"name":"ProductCrossroadNew","data":{"componentTemplateId":"cmo3f1kzkw8pd0889hxoow8p1"},"id":"#25","type":"component","lock":false,"position":1},{"name":"HeroV2","data":{"slides":[{"recommendedSizes":{"width":"3840","height":"2560"}
2,"id":"1","media":{"mimetype":"image/png","size":7452469,"hash":"1fdf732f184a79c88e8717d0c7e089c98021e14d","id":"cmhneyias8top0850nvjlxoea","filename":"dna-hero-1.png","category":"divesoft/","type":"image"},"productName":"DNA","title":"Fits in Your Pocket","linkUrl":{"url":"https://eshop.divesoft.com/dna-o2-sensor-limited-edition/8504","urlNewWindow":true},"linkTitle":"Buy"},{"recommendedSizes":{"width":"3840","height":"2560"},"id":"2","media":{"mimetype":"image/jpeg","size":5717579,"hash":"711a3d7693e47e03fc718ef9b19f96c14d3b08f6","id":"cmhnf0imq8tpq0850dr2mr1hh","filename":"dna-hero-2.jpg","category":"divesoft/","type":"image"},"productName":"DNA","title":"Fits in Your Pocket","linkTitle":"Buy","linkUrl":{"urlNewWindow":true,"url":"https://eshop.divesoft.com/dna-o2-sensor-limited-edition/8504"}},{"id":"3","media":{"mimetype":"image/jpeg","size":1294367,"hash":"ba9779637396514474a5be4cb6c86d409bb4ba35","id":"cmhnf2evs8tr908505t6rsr5n","filename":"dna-hero-3.jpg","category":"divesoft/","type":"image"},"productName":"DNA","title":"Fits in Your Pocket","linkTitle":"Buy","linkUrl":{"url":"https://eshop.divesoft.com/dna-o2-sensor-limited-edition/8504","urlNewWindow":true}}],"variant":"a","activeTab":"3"},"id":"#2","type":"component","lock":false,"position":2},{"name":"CarouselTextBlock","data":{"title":"DNA ANALYZER","subtitle":"","contentText":"Small enough to take anywhere. DNA is a pocket nitrox gas analyzer that measures oxygen and shows the result in the Divesoft App. Know the mix. Start the dive.","buttonTitle":"Buy","buttonUrl":{"url":"https://eshop.divesoft.com/dna-o2-sensor-limited-edition/8504","urlNewWindow":true},"linkTitle":"Dive in","linkUrl":{"url":"#technical-specifications","urlNewWindow":false},"images":[{"image":{"recommendedSizes":{"width":"1500","height":"1000"},"mimetype":"image/png","size":279469,"hash":"13bff068d5dbfa64e46703d3f4fccb1f507a0ce3","id":"cmljjcplln33x0800s5co6frz","filename":"dna1.png","category":"divesoft/","type":"image"},"id":"1"},{"id":"2","image":{"mimetype":"image/png","size":223077,"hash":"54337a857f0ee119974cff2438b66a9c235dade2","id":"cmljjd0jin34k08005xur6u3z","filename":"dna2.png","category":"divesoft/","type":"image"}},{"id":"3","image":{"mimetype":"image/png","size":141641,"hash":"44f332eb0e5135965db9ba5856041ccefbf18ef8","id":"cmljjd8kfn35a0800rkltnn18","filename":"dna3.png","category":"divesoft/","type":"image"}},{"id":"4","image":{"mimetype":"image/png","size":174895,"hash":"45cf54d94638549089982256b1c4858a18983cae","id":"cmljjdja4n35u0800f8zb8l6v","filename":"dna4.png","category":"divesoft/","type":"image"}},{"id":"5","image":{"mimetype":"image/png","size":423176,"hash":"99a508889f2ca197da222aecae6c8ac2efc8e170","id":"cmljjdxc4n36d08004jmhueuv","filename":"dna5.png","category":"divesoft/","type":"image"}}],"backgroundColor":"silver","activeTab":"5"},"id":"#4","type":"component","lock":false,"position":3},{"name":"ImageTextBlock","data":{"title":"","content":"## Gas Analysis\n\n**Gas Mixes**\n\n- Air.\n- Nitrox.\n \nDNA measures oxygen in gas mixes.\n\n**Gases Measured**\n\n- \\> Oxygen","isMirrored":false,"image":{"recommendedSizes":{"width":"1500","height":"1500"},"mimetype":"image/jpeg","size":1294367,"hash":"ba9779637396514474a5be4cb6c86d409bb4ba35","id":"cmhnf2evs8tr908505t6rsr5n","filename":"dna-hero-3.jpg","category":"divesoft/","type":"image"}},"id":"#7","type":"component","lock":false,"position":4},{"name":"ImageTextBlock","data":{"title":"","content":"## Interface\n\n**Display**\n\nA smartphone with the Divesoft App serves as the analyzer display.\n\n**App**\n\nDNA works with the Divesoft App.\n\nThe app becomes the interface for measurements, calibration and analyzer status.","isMirrored":true,"image":{"recommendedSizes":{"width":"1500","height":"1500"},"mimetype":"image/png","size":7487085,"hash":"195184f12e12ac185dd2fb308031971794e75c94","id":"cmhnfl1868udv0850rl5fztc5","filename":"dna-phone.png","category":"divesoft/","type":"image"},"links":[{"id":"1","title":"Dive into Divesoft App","url":{"url":"/en/app","urlNewWindow":true,"pageId":"ckfccnc4a98bx0788f7enal83"},"color":"black"}],"activeTab":"1"},"id":"#9","type":"component","lock":false,"position":5},{"name":"ImageTextBlock","data":{"title":"","content":"## Practical Use\n\n- Boat dive.\n- Shore dive.\n- Travel dive.\n \nDNA is a practical nitrox gas analyzer for everyday diving, travel use and fast oxygen analysis.","isMirrored":false,"image":{"recommendedSizes":{"width":"1500","height":"1500"},"mimetype":"image/png","size":9756932,"hash":"0f78aed97075fada17c8dc7581fd778c82e120ee","id":"cmhnfpjqo8um80850be38pkp2","filename":"cylinders.png","category":"divesoft/","type":"image"}},"id":"#12","type":"component","lock":false,"position":6},{"name":"Showreel","data":{"isFullWidth":false,"slides":[{"title":"Travel Ready.","isTextCentered":true,"media":{"recommendedSizes":{"width":"3840","height":"2560"},"mimetype":"image/png","size":6344409,"hash":"c8640ed59cc84f20f7e531ae40fee994c4f9cdf8","id":"cmo23czabm8rk080026yfkntg","filename":"dna44.png","category":"divesoft/","type":"image"}
2,"autoplayDuration":5000,"id":"1"}]},"id":"#22","type":"component","lock":false,"position":7},{"name":"Spacer","data":{"spacingLarge":"80","spacingSmall":"80","backgroundColor":"#ffffff"},"id":"#26","type":"component","lock":false,"position":8},{"name":"ImageTextBlock","data":{"title":"","content":"## Hardware\n\n**Sensors / Measurement Principle**\n\nR22 oxygen sensor.\n\nCompatible with R22S and R22D sensors.\n\n**Power**\n\nReplaceable CR2450 battery.\nTypical battery life 1â2 years.\n\n**Construction**\n\nAnodized aluminum body with protective TPU ends.\n\nBuilt for durability during everyday diving and travel.","isMirrored":true,"image":{"recommendedSizes":{"width":"1500","height":"1500"},"mimetype":"image/jpeg","size":4273398,"hash":"a414290be5dc51c6d14d6c6168adf8c4dba2fd76","id":"cmhnfecx58u460850ojuip8oe","filename":"dna-multiple.jpg","category":"divesoft/","type":"image"}},"id":"#5","type":"component","lock":false,"position":9},{"name":"ImageTextBlock","data":{"title":"","content":"## Service & Maintenance\n\nBattery and oxygen sensor can be replaced by the user.\n\nFirmware updates available through the app.","isMirrored":false,"image":{"recommendedSizes":{"width":"1500","height":"1500"},"mimetype":"image/jpeg","size":5739226,"hash":"696717071e2ee59b249ea0242cb00baa57c15bb8","id":"cmhnfnekh8uik0850fxpe80jw","filename":"dna-oxygen-sensor-replacement.jpg","category":"divesoft/","type":"image"}},"id":"#11","type":"component","lock":false,"position":10},{"name":"ProductsCompare","data":{"componentTemplateId":"cmo217fjivvbv08890d7r7mhl"},"id":"#23","type":"component","lock":false,"position":11},{"name":"CallToAction","data":{"backgroundColor":"white","isCentered":true,"title":"","links":[{"title":"Buy","url":{"url":"https://eshop.divesoft.com/dna-o2-sensor-limited-edition/8504","urlNewWindow":true},"color":"black","type":"outline","id":"1"}],"linkPosition":"below","linkAlignment":"right","activeTab":"1"},"id":"#29","type":"component","lock":false,"position":12},{"name":"LinkAnchor","data":{"anchorId":"technical-specifications"},"id":"#27","type":"component","lock":false,"position":14},{"name":"AccordionText","data":{"accordionTitle":"Design","content":"**Dimensions** \n45.6 à 111 à 40 mm (1.8 à 4.4 à 1.6 in)\n\n**Weight** \n100 g (3.5 oz)\n\n**Weight with sensor** \n126 g (4.4 oz)\n\n**Materials** \naluminium body with protective TPU ends\n\n**Story** \nFrom that idea came a clear vision:â¨make gas analysis simple, smart, and portable.\nThe team combined precision engineering with practical design â a lightweight aluminum body, intuitive app integration, and a robust oxygen sensor proven in demanding conditions. Every detail was tested, refined, and optimized until the device felt like a natural part of a diverâs gear.\n\nThe result is the DNA Analyzer â a tool shaped by real needs, designed for independence, and crafted to give every diver full confidence in what they breathe.\n\n\n\n\n\n\n\n\n\n\n\n\n\n\n"},"id":"#13","type":"component","lock":false,"position":15},{"name":"AccordionText","data":{"accordionTitle":"Technical Specifications","content":"**Range of oxygen measurement** \n 0 â 100 %O<sub>2</sub>\n\n**Measuring temperature** \n0 â +40 °C (32 â 104 °F)\n\n**Range of oxygen measurement** \n700 â 1100 mbar (0â3000 m / 0â10000 ft)\n\n**Rated gas throughput** \n0.2 L/min\n\n**Oxygen sensor** \nDivesoft R-22S (Molex) or compatible\n\n**Gas connection options** \ndirect to analyzer valve, Professional Flow Limiter for DIN (EN 144-2) 200/300 bar G 5/8â³ or M26Ã2 valves, and a Flow Limiter for Quick Disconnect hoses.\n\n**Power** \nCR 2450 battery, user-replaceable (1â2 years life)"},"id":"#15","type":"component","lock":false,"position":16},{"name":"AccordionText","data":{"accordionTitle":"Connectivity","content":"The DNA Analyzer works hand in hand with the Divesoft App, giving you more than just oxygen readings â it gives you a complete overview of your gas management. Via Bluetooth, the analyzer sends your data straight to the app, where you can view, store, and share results in real time.\n\nThe app automatically calculates your MOD (Maximum Operating Depth) for up to three ppO<sub>2</sub> settings, generates cylinder labels ready for printing, and even compensates for altitude and pressure using its built-in sensors.\n\nYou can calibrate the analyzer directly through the app in just one tap â no cables, no guesswork. Everything is intuitive, visual, and designed for divers who prefer precision with simplicity.\n\nDivesoft App + DNA Analyzer = complete control of your breathing gas, wherever you dive. CR 2450 battery, user-replaceable (1â2 years life)"},"id":"#16","type":"component","lock":false,"position":17},{"name":"AccordionText","data":{"accordionTitle":"Packaging","content":"Comes in semi-hard zipper case for easy transporting and to protect your DNA analyzer from harsh field environments."},"id":"#17","type":"component","lock":false,"position":18},{"name":"AccordionText","data":{"accordionTitle":"Sustainability","content":"The DNA and the Oxygen sensor are purchased
2separately as the DNA can be used with a functional spent rebreather oxygen sensor R22 (Molex connection) which is easily replaceable by the user. Help the environment by recycling your buddyâs rebreather Oxygen sensor during their annual sensor replacement."},"id":"#18","type":"component","lock":false,"position":19},{"name":"AccordionText","data":{"accordionTitle":"Warranty","content":"- Warranty 24 months on analyzer\n- 12 months on sensor (battery excluded)\n"},"id":"#19","type":"component","lock":false,"position":20},{"name":"AccordionLinks","data":{"accordionTitle":"Downloads","links":[{"itemTitle":"User manual","linkLabel":"Open","linkUrl":{"urlNewWindow":true,"url":"/en/manuals/8460-dna-user-manual","pageId":"clmszuh0ravef0735zntydkcp"},"id":"1"},{"id":"3","itemTitle":"Quick reference","linkLabel":"Open","linkUrl":{"url":"/en/manuals/8460-dna-quick-reference","pageId":"clnkbz2s6da0m0735m12jhjra"}},{"id":"2","itemTitle":"Analyzers comparison","linkUrl":{"url":"http://foxer360-media-library.s3.eu-central-1.amazonaws.com/divesoft/docs/340ee3ff0777b8d06792ea829af47451c905b26c_analyzers-comparison-202601.pdf","mediaData":{"mimetype":"application/pdf","size":940217,"hash":"340ee3ff0777b8d06792ea829af47451c905b26c","id":"cmll1gmylnnyg08006ews1qxv","filename":"analyzers-comparison-202601.pdf","category":"divesoft/docs/","type":"file"},"urlNewWindow":true},"linkLabel":"Open"}],"storesTitle":"Divesoft App","appStoreLink":{"url":"https://apps.apple.com/cz/app/divesoft-app/id1545496130"},"googlePlayLink":{"url":"https://play.google.com/store/apps/details?id=com.divesoft.divesoft_app"},"activeTab":"2"},"id":"#20","type":"component","lock":false,"position":21},{"name":"CallToAction","data":{"componentTemplateId":"cmo9u6bhwy5g90889gprzyxzf"},"id":"#28","type":"component","lock":false,"position":22},{"name":"Footer","data":{"copyrights":"Copyright © 2019 Divesoft LLC All rights reserved.","facebookUrl":"","youtubeUrl":"","instagramUrl":"","contacts":"**Divesoft, s.r.o.** Hálkova 2495 413 01 Roudnice nad Labem Äeská republika Tel.: +420 416 857 057 E-mail: [email protected]"},"id":"#1","type":"component","lock":false,"position":23}],"id":"root","idBuffer":"#30","lastCommit":"2797b585-4e2f-4389-834a-195f6e00c991"}},"annotations":[],"language":{"type":"id","generated":false,"id":"Language:cjv3kwvoj000u083611381c6o","typename":"Language"},"__typename":"PageTranslation"},"Page:clfgt4fdjmf9v0835bv440kqj":{"id":"clfgt4fdjmf9v0835bv440kqj","type":{"type":"id","generated":false,"id":"PageType:cjv3l213x004f08366hjufttp","typename":"PageType"},"tags":[{"type":"id","generated":false,"id":"Tag:ckp59jt9n48lj0788mfuqrhym","typename":"Tag"}],"translations({\"where\":{\"language\":{\"id\":\"cjv3kwvoj000u083611381c6o\"}}})":[{"type":"id","generated":false,"id":"PageTranslation:clfgt4fdvmfa20835qlb59yt1","typename":"PageTranslation"}],"__typename":"Page"},"PageTranslation:clfgt4fdvmfa20835qlb59yt1":{"id":"clfgt4fdvmfa20835qlb59yt1","name":"Freedom+ computers","createdAt":"2023-03-20T12:32:35.299Z","content":{"type":"json","json":{"content":[{"name":"Header","data":{"componentTemplateId":"cjv7yndru048c0836j99ljogw"},"id":"#0","type":"component","lock":false,"position":0},{"name":"Showreel","data":{"isFullWidth":true,"slides":[{"title":"Coming Soon","isTextCentered":true,"media":{"recommendedSizes":{"width":"3840","height":"2560"},"mimetype":"image/png","size":621662,"hash":"a0f13c4b72fd3fa0b937fa8670fbcadb17d4a0e4","id":"cmpnzdkjp8pge0800mtzegd6c","filename":"freedom-blurred-1.png","category":"divesoft/","type":"image","alt":"Freedom+ computer coming soon"},"autoplayDuration":5000,"id":"1"}],"activeTab":"1"},"id":"#45","type":"component","lock":false,"position":1},{"name":"ImageTextBlock","data":{"backgroundColor":"white","content":"## Freedom Force\n\n**Ready for every dive.**\n\nFreedom Force is the next generation of the Divesoft Freedom dive computer. \n\nBuilt on the trusted foundation of Freedom - now more powerful, more intuitive, and ready for new adventures underwater.\n\nDesigned for divers who want clear information, reliable performance, and effortless control in every environment.\n\nFreedom Force is coming soon. Join the watch dog and get notified the moment it becomes available.\n\n**More possibilities. More freedom.\nComing soon.**\n","links":[{"title":"Be the first to know","url":{"url":"https://eshop.divesoft.com/freedom-force/8400?currency=CZK"},"color":"black","id":"1"}],"isMirrored":false,"image":{"recommendedSizes":{"width":"1500","height":"1500"}},"activeTab":"1"},"id":"#48","type":"component","lock":false,"position":2},{"name":"ImageTextBlock","data":{"backgroundColor":"white","content":"\n\n**S**ync â Bluetooth sync for dive logs, firmware updates, and configuration, ready to pair with your Divesoft ecosystem\n\n**M**ap â GPS logging at submersion and surface, with automatic timezone detection\n\n**A**ir Integration â Connect a SWIFT or Pelagic transmitter; sidemount ready\n\n**R**eadable â Clear screen visibility in any lighting condition\n\n**T**ailored â User-interchangeable frames in multiple colors","links":[],"isMirrored":true,"image":{"recommendedSizes":{"width":"1500","height":"1500"}},"activeTab":"1"},"id":"#49","type":"component","lock":false,"position":3},{"name":"CallToAction","data":{"backgroundColor":"white","isCentered":true,"title":"","links":[{"title":"Home","url":{"url":"/en","pageId":"cjv3l26tp004p0836i54n4u7a"},"color":"black","type":"outline","id":"1"}],"linkPosition":"below","linkAlignment":"right"},"id":"#46","type":"component","lock":false,"position":4},{"name":"CallToAction","data":{"componentTemplateId":"cmo9u6bhwy5g90889gprzyxzf"},"id":"#47","type":"component","lock":false,"position":5},{"name":"Footer","data":{"componentTemplateId":"cjvwimxrl08e40798hjs5ek9w"},"id":"#1","type":"component","lock":false,"position":6}],"id":"root","idBuffer":"#50","lastCommit":"a7f54a0d-df7b-4c11-93fc-fb27cfacc673"}},"annotations":[],"language":{"type":"id","generated":false,"id":"Language:cjv3kwvoj000u083611381c6o","typename":"Language"},"__typename":"PageTranslation"},"Page:clfgtftaemfdx0835x56ytrvp":{"id":"clfgtftaemfdx0835x56ytrvp","type":{"type":"id","generated":false,"id":"PageType:cjv3l213x004f08366hjufttp","typename":"PageType"},"tags":[],"translations({\"where\":{\"language\":{\"id\":\"cjv3kwvoj000u083611381c6o\"}}})":[{"type":"id","generated":false,"id":"PageTranslation:clfgtftccmfe40835lxjbemvb","typename":"PageTranslation"}],"__typename":"Page"},"PageTranslation:clfgtftccmfe40835lxjbemvb":{"id":"clfgtftccmfe40835lxjbemvb","name":"Freedom+ User manual","createdAt":"2023-03-20T12:41:26.604Z","content":{"type":"json","json":{"content":[{"name":"Header","data":{"products":[{"title":"Accessories","description":"Backplates, Consumables. Tanks.","img":{"recommendedSizes":{"width":"235","height":"235"}},"url":""},{"title":"Accessories sets","description":"Protection, maintenance, cleaning.","img":{"recommendedSizes":{"width":"235","height":"235"}},"url":""},{"title":"Spare parts","description":"Spare parts and components.","img":{"recommendedSizes":{"width":"235","height":"235"}},"url":""}
2,{"title":"Spare parts kits","description":"Completly Liberty spare parts kits.","img":{"recommendedSizes":{"width":"235","height":"235"}},"url":""}]},"id":"#0","type":"component","lock":false,"position":0},{"name":"SectionDivider","data":{"title":"User Manual","skipToC":false},"id":"#451","type":"component","lock":false,"position":1},{"name":"ProductShowcase","data":{"backgroundColor":"#ffffff","isTextDark":true,"isImageRight":true,"image":{"mimetype":"image/png","size":540989,"hash":"8a07b668a7743b96248bbc310595cfa51a3ec033","id":"clfwii42gm8hz0776uiwip3m4","filename":"7273-divesoft-freedom-plus-off-1080x1080-t-1.png","category":"divesoft/","type":"image"},"imageMobile":{},"title":"Freedom and Freedom+","subtitle":"User manual / Nitrox, Trimix & CCR dive computers","description":"HW rev. 4.0, FW 1.21.0\n\n","hideDescriptionOnMobile":false,"areButtons":false,"firstTitle":"Learn more >","firstUrl":"","secondTitle":"Configurator >","secondUrl":""},"id":"#2","type":"component","lock":false,"position":2},{"name":"Divider","data":{"color":"darkGray"},"id":"#17","type":"component","lock":false,"position":3},{"name":"SectionDivider","data":{"title":"","skipToC":false},"id":"#452","type":"component","lock":false,"position":4},{"name":"TextBlock","data":{"text":"### **Contents** \n**Introduction** \n\n[**Upgradable computer**](#upgradable-computer)\n\n[**Section 01: Quick start guide**](#Section-01) \n\n[**Section 02: Operation**](#Section-02) \n02.1 Control elements \n02.1.1 Meanings of inputs in surface modes \n02.1.2 Meanings of inputs in dive modes \n02.1.3 Language \n02.2 Brightness control \n02.3 Switching on the unit \n02.4 Switching off the unit \n\n[**Section 03: Diving**](#Section-03) \n03.1 Surface mode \n03.1.1 Entering surface mode \n03.1.2 Surface mode screen \n03.1.3 Switching to other modes \n03.2 Open Circuit \n03.2.1 Entering open circuit mode \n03.2.2 Detailed screen \n03.2.3 Synoptic screen \n03.2.4 Big Screen \n03.2.5 Dive profile screen \n03.2.6 Dive menu \n03.2.7 Gas switch shortcut \n03.3 Fixed setpoint CCR \n03.3.1 Predive and submersion \n03.3.2 Setpoint \n03.3.3 Dive menu \n03.3.4 Stack time \n03.4 Measured CCR \n03.4.1 O<sub>2</sub> sensors connection \n03.4.2 O<sub>2</sub> sensors calibration \n03.4.3 pO<sub>2</sub> reading \n03.5 Gauge \n03.5.1 Synoptic screen \n03.5.2 Big Screen \n03.5.3 Dive profile screen \n03.5.4 Dive menu \n03.6 Free \n03.6.1 Surface screen \n03.6.2 Dive screen \n03.7 Advised strategies \n03.7.1 Diving in darkness \n03.7.2 Decompression \n\n[**Section 04: Setup**](#Section-04) \n04.1 Editor use \n04.2 Decompression \n04.2.1 Gradient factor \n04.2.2 Safety stop |On| \n04.2.3 Ascent gas |Optimal| \n04.2.4 Deco stops \n04.2.5 Deep stops \n04.2.6 Ascent rate \n04.2.7 Descent rate \n04.3 Mixtures \n04.3.1 Mixture setup \n04.3.2 Def. OC mix \n04.3.3 End pressure 50 bar \n04.3.4 SAC Ç25 l/minÇ \n04.3.5 Gas switch 2 min \n04.3.6 Min pO<sub>2</sub> |0.18 ba| \n04.3.7 Max pO<sub>2</sub> |1.60 bar| \n04.4 Alarms \n04.4.1 Alarm sources \n04.4.2 Notifications \n04.5 Rebreather \n04.5.1 Const pO<sub>2</sub> \n04.5.2 aSCR \n04.5.3 pSCR \n04.5.4 Common settings \n04.6 Freediving Setup \n04.7 Preferences \n04.7.1 Display \n04.7.2 Timeouts \n04.7.3 User interface \n04.7.4.Metric \n04.7.5 Salinity |Fresh| \n04.7.6 Default mode |OC| \n04.7.7 Full log Off \n04.8 Calibration \n04.9 Miscellaneus \n04.10 Factory defaults \n\n[**Section 05: Log book**](#Section-05) \n05.1 Last dive \n05.2 Dive list \n05.3 Summary \n\n[**Section 06: Dive planner**](#Section-06) \n06.1 The dive parameters \n06.2 Dive plan \n06.2.1 Summary \n06.2.2 Deco stops \n\n[**Section 07: Log download**](#Section-07) \n07.1 Log processing in cloud \n07.2 Divesoft App \n07.3 Off-line log processing \n\n[**Section 08: System**](#Section-08) \n08.1 System check \n08.2 Service functions \n08.2.1 Debug \n08.2.2 Test \n08.2.3 Demo dive \n08.2.4 Syslog \n08.2.5 Miscellaneous \n\n[**Section 09: Apps**](#Section-09) \n09.1 Analyzer \n09.1.1 Measuring \n09.1.2 Calibration \n09.2 USB connection \n09.3 Emergency torch \n09.4 Inclinometr \n09.5 Games \n09.5.1 Sokoban \n09.5.2 Snake \n\n[**Section 10: Hardware**](#Section-10) \n10.1 Charging \n10.1.1 Powering in hyperbaric environment \n10.2 Wrist mount \n10.3 Control elements \n10.4 Physical dimensions \n10.5 O<sub>2</sub> sensor cable \n10.6 Environmental specifications \n10.7 Compliance \n10.7.1 CE marking \n10.7.2 EN 13319 \n10.7.3 FCC compliance \n10.7.4 Industry Canada (IC) Compliance Notice \n10.8 Disposal of waste equipment","textLarge":false,"imageOnRight":true,"image":{"recommendedSizes":{"width":"420","height":"280"}},"imageMobile":{"recommendedSizes":{"width":"750","height":"500"}}},"id":"#5","type":"component","lock":false,"position":5},{"name":"Divider","data":{"color":"darkGray"},"id":"#220","type":"component","lock":false,"position":6},{"name":"SectionDivider","data":{"title":"Introduction","skipToC":false},"id":"#453","type":"component","lock":false,"position":7},{"name":"TextBlock","data":{"text":"### **Introduction** \n\n**Use of this manual** \n\nThe Divesoft Freedom is intended for use exclusively by a trained person who is capable of fully\nunderstanding the instructions contained in this manual.\nThe technical documentation is subjected to a process of continual development and improvement.\nTherefore, please regularly check the website at www.divesoft.com for updates.\
2nThis manual provides operating instructions for the hardware and software (firmware) version of the\nDivesoft Freedom written on the tittle page. \n\n**Safety** \n\n<span style=\"color:red\">Warning</span>: This computer calculates a decompression profile using a mathematical model. It does not know\nyour specific physiological decompression requirements.\nThere is always a risk of decompression sickness (DCS) for any dive profile even if you follow the dive plan\nprescribed by dive computer. No procedure, dive computer or dive table will prevent the possibility of DCS or\noxygen toxicity! \n<span style=\"color:red\">Warning</span>: Use backup instruments! Ensure that you have access to backup instruments to measure depth\nand time. Ensure that you have access to a backup method of decompression profile calculation. Never risk\nyour life on only one source of information. \n<span style=\"color:red\">Warning</span>: Always check the device before diving in order to ensure that the display works, the device has not\nrun out of battery power and all settings are correct. \n<span style=\"color:red\">Warning</span>: All software contains bugs and the firmware of the Divesoft Freedom is no exception. The\ncomputer can probably do unintended things. \n<span style=\"color:red\">Warning</span>: This computer may malfunction at any time. The question is not whether it will fail but when it will\nfail. Always have a plan on how to handle failures. \n\n**Responsibility of the Divesoft Freedom user** \n\nA Divesoft Freedom user must accept the fact that diving involves risk. Adherence to everything that the\nuser has learned in the Divesoft Freedomâs technical documentation and in training can reduce the risk but\ncannot eliminate it. Safety when diving is further enhanced by regular training, methodical education and\nadherence to good diving practices. Technical diving requires a far higher degree of care and discipline than\nrecreational diving. \nIf you do not accept the risk and you are not a trained, careful and disciplined diver, do not dive with the\nDivesoft Freedom.","textLarge":false,"imageOnRight":true,"image":{"recommendedSizes":{"width":"420","height":"280"}},"imageMobile":{"recommendedSizes":{"width":"750","height":"500"}}},"id":"#3","type":"component","lock":false,"position":8},{"name":"Divider","data":{"color":"darkGray"},"id":"#15","type":"component","lock":false,"position":9},{"name":"SectionDivider","data":{"title":"Upgradable computer","skipToC":false},"id":"#454","type":"component","lock":false,"position":10},{"name":"TextBlock","data":{"text":"### <span id=\"upgradable-computer\">**Upgradable computer**</span> \n\nThe following table is valid only for the original version of Freedom. The Freedom+ is only available in the version corresponding to the Full Trimix license and can be upgraded to the Closed Circuit version.\n\n**Features of the Freedom versions**\n\n\tVersion Mixtures Air Nitrox Oxygen Trimix Rebreather\n\n\tAdvanced Bottom Timer - - - - - NO \n\tCCR Bottom Timer - - - - - Yes\n\tBasic Nitrox 1 Yes max40% No No No\n\tAdvanced Nitrox 3 Yes Yes Yes No No\n\tFull Trimix 9 Yes Yes Yes Yes No\n\tClosed Circuit 9+8 dil. Yes Yes Yes Yes Yes\n\nHardware of all versions of the Divesoft Freedom computer is the same1\n. Only the software differs.\nThe software version can be upgraded. \n\nPictures in this manual are based on the Closed Circuit version of the Divesoft Freedom. Limitation of other\nversions are mentioned in the text. \n","textLarge":false,"imageOnRight":true,"image":{"recommendedSizes":{"width":"420","height":"280"}},"imageMobile":{"recommendedSizes":{"width":"750","height":"500"}}},"id":"#4","type":"component","lock":false,"position":11},{"name":"Divider","data":{"color":"darkGray"},"id":"#20","type":"component","lock":false,"position":12},{"name":"SectionDivider","data":{"title":"1. Quick start guide","skipToC":false},"id":"#455","type":"component","lock":false,"position":13},{"name":"TextBlock","data":{"text":"### <span id=\"Section-01\">**Section 01: Quick start guide**","textLarge":false,"imageOnRight":true,"image":{"recommendedSizes":{"width":"420","height":"280"}},"imageMobile":{"recommendedSizes":{"width":"750","height":"500"}}},"id":"#6","type":"component","lock":false,"position":14},{"name":"Divider","data":{"color":"darkGray"},"id":"#299","type":"component","lock":false,"position":15}
2,{"name":"TextBlock","data":{"text":"**1. Recharge battery** \n\nUse the charger that you find in the package or another suitable USB charger or a computer USB port. See \"10.1 Charging\" for detailed information. \n\n**2. Switch on** \nHold both buttons until you feel a vibration and the display starts. The computer will be in surface mode in a few seconds. \n\n**3. Reset to factory defaults if necessary** \n\nIt is not necessary to reset a new computer. If you are in doubt about the correct setting, perform the reset to factory default. \nShortly press both buttons to enter the menu. Move the cursor to Setup with the lower button and select with the upper button. Then proceed in the same way to Miscellaneous -> Factory Defaults. Then move the cursor to Factory defaults, select and confirm. Horizontal calibration\nstarts automatically after the reset. Place the computer on a table and press any key. You will then be asked to place the computer vertically. Place the computer on the only straight side of the device and press the button again.\n\n**4. Adjust to right hand if required** \n\nAdjust display orientation to your preference. Shortly press both buttons to enter the menu. Move the\ncursor to Setup with the lower button and select with the upper button. Then select Setup â Preferences â Display\nâ Orientation. (Bottom timer licence: Setup â Orientation)\n\n**5. Switch to imperial units if required** \n\nAdjust the units to your preference. Shortly press both buttons to enter the menu. Move the cursor to Setup\nwith the lower button and select with the upper button. Then select Preferences â Units. \n\n**6. Select wrist mount** \n\nIf you prefer a strap, attach the strap to the computer. If you prefer a bungee, then remove the screws\nholding the bars and pass the bungee through the threaded holes. \nSee \"10.2 Wrist mount\" for detailed information. \n\n**7. Switch to dive mode** \n\nIn the menu select Dive â Default (OC). A brief overview of settings will appear. Verify settings and confirm\nwith the lower button. \n\nNow your Divesoft Freedom is prepared for simple dive with open circuit SCUBA using air.","textLarge":false,"imageOnRight":true,"image":{"recommendedSizes":{"width":"420","height":"280"}},"imageMobile":{"recommendedSizes":{"width":"750","height":"500"}}},"id":"#298","type":"component","lock":false,"position":16},{"name":"Divider","data":{"color":"darkGray"},"id":"#18","type":"component","lock":false,"position":17},{"name":"SectionDivider","data":{"title":"2. Operation","skipToC":true},"id":"#456","type":"component","lock":false,"position":18},{"name":"TextBlock","data":{"text":"### <span id=\"Section-02\">**Section 02: Operation** \n","textLarge":false,"imageOnRight":true,"image":{"recommendedSizes":{"width":"420","height":"280"}},"imageMobile":{"recommendedSizes":{"width":"750","height":"500"}}},"id":"#232","type":"component","lock":false,"position":19},{"name":"Divider","data":{"color":"darkGray"},"id":"#300","type":"component","lock":false,"position":20},{"name":"SectionDivider","data":{"title":"2.1 Control elements","skipToC":false},"id":"#457","type":"component","lock":false,"position":21},{"name":"TextBlock","data":{"text":"### **02.1 Control elements** \n\nFor technical specification of inputs see \"10.3 Control elements\" in the Hardware section.","textLarge":false,"imageOnRight":true,"image":{"recommendedSizes":{"width":"420","height":"280"}},"imageMobile":{"recommendedSizes":{"width":"750","height":"500"}}},"id":"#301","type":"component","lock":false,"position":22},{"name":"SectionDivider","data":{"title":"2.1.1 Meanings of inputs in surface modes","skipToC":false},"id":"#458","type":"component","lock":false,"position":23},{"name":"TextBlock","data":{"text":"### **02.1.1 Meanings of inputs in surface modes** \n\nThe keys and other inputs are assigned meanings in connection with the current navigation item in the menu. At the same time, however, general rules, which apply wherever possible, are determined for their use. \n\n**Press upper key** â confirm the menu item just selected \n\n**Press lower key** â cycle downward through the menu \
2n\n**Press both keys** â exit the menu without performing any action \n\n**Long press upper key** â page up \n\n**Long press lower key** â page down \n\n**Long press both keys** â return to main screen \n\n**Coded key press** (press both keys, then release one key and press it again, then release both keys) â enter service functions menu \n\n\n\nWherever possible (menu, editing screen), helpful symbols relating to the keys are displayed. A symbol can be either next to a key, indicating the action executed during a short key press, or between the keys,\nindicating the action executed during a short press of both keys. \n\nThe **|â|** symbol next to a key means move down one row in the menu. Moving in the menu is cyclical, so the first row appears again after the last row. \n\nUse a long press lower key to move up in the menu. \n\nThe **|â|** symbol means return one level without executing any action. \n\nThe **|v|** symbol represents confirmation of the action or selection. \n\nThe following control is only active if tilt is set in the editing menu (Menu\\Setup\\Preferences\\User inetrface\\Navigation\\Tilt). \n\n**Tilt away from yourself** â increase of the entered digit by one or check flag \n\n**Tilt toward yourself**â decrease of the entered digit by one or uncheck flag \n\n**Tilt to the left** â move the cursor to the left \n\n**Tilt to the right** â move the cursor to the right ","textLarge":false,"imageOnRight":true,"image":{"recommendedSizes":{"width":"420","height":"280"}},"imageMobile":{"recommendedSizes":{"width":"750","height":"500"}}},"id":"#233","type":"component","lock":false,"position":24},{"name":"SectionDivider","data":{"title":"2.1.2 Meanings of inputs in dive modes","skipToC":false},"id":"#459","type":"component","lock":false,"position":25},{"name":"TextBlock","data":{"text":"### **02.1.2 Meanings of inputs in dive modes** \n\nThe meanings of inputs are the same as in surface modes. Other possibilities are: \nLong press upper key â gas switch shortcut (previous mixture) \nLong press lower key â gas switch shortcut (next mixture) \nTilting is expanded with movement in games; otherwise, entry of digits, for which tilting is used in surface modes, is limited during the dive to only special cases. \nTapping on the display glass â switch on the display if it is switched off. \nShining a light on the display â in the dark, illuminating the display with a dive light activates it similarly as when tapping on the glass. In the light, the display can be activated by covering and then uncovering it.","textLarge":false,"imageOnRight":true,"image":{"recommendedSizes":{"width":"420","height":"280"}},"imageMobile":{"recommendedSizes":{"width":"750","height":"500"}}},"id":"#234","type":"component","lock":false,"position":26},{"name":"SectionDivider","data":{"title":"2.1.3 Language","skipToC":false},"id":"#460","type":"component","lock":false,"position":27},{"name":"TextBlock","data":{"text":"### **02.1.3 Language** \n\nAll textual information on the Divesoft Freedom is in English. Controlling the apparatus requires knowledge of the English language minimally at a level that allows the user to thoroughly understand this information. \n\nThe language setting can be changed in Menu\\Setup\\Preferences\\Language. Czech, German, Italian, Croatian, French and Spanish are available.","textLarge":false,"imageOnRight":true,"image":{"recommendedSizes":{"width":"420","height":"280"}},"imageMobile":{"recommendedSizes":{"width":"750","height":"500"}}},"id":"#235","type":"component","lock":false,"position":28},{"name":"SectionDivider","data":{"title":"2.2 Brightness control","skipToC":false},"id":"#461","type":"component","lock":false,"position":29},{"name":"TextBlock","data":{"text":"### **02.2 Brightness control** \n\nThe 3 levels of the display backlight brightness can be switched by the lower key; the display off, the level set in the Setup â Preferences â Display â Brightness and the maximum brightness (equivalent to\nlevel 9). \nIf the display is off, then use the short press to switch it on. The second and subsequent press with a short delay between presses (< 1 s) switches the brightness level. \nThe display canât shine through disturbed silt or mud on low brightness. If it is necessary to switch to the maximal brightness just short press the lower key repeatedly. The maximum brightness will be set after two\nbutton pushes (if the display was off in the beginning) or three pushes (if the display was on). \n\nAdjusting the function of the lower button may override the brightness control. \n\"Lower bttn.\" to \"\"Prev Scr\" \n\"Stopw btn.\" to \"Base\" or \"Always\". \
2nThe setting is placed in the same place as the Lower bttn. \nBottomTimer: Setup -> Preferences -> Lower bttn. \nOther licences: Setup -> Preferences -> User interface -> Lower bttn.\n\nSee also Advised strategies â \"3.7.1 Diving in darkness\".\nThis way of brightness control works in all modes except gauge and free mode, where lower button is assigned to stopwatch.","textLarge":false,"imageOnRight":true,"image":{"recommendedSizes":{"width":"420","height":"280"}},"imageMobile":{"recommendedSizes":{"width":"750","height":"500"}}},"id":"#236","type":"component","lock":false,"position":30},{"name":"SectionDivider","data":{"title":"2.3 Switching on the unit","skipToC":false},"id":"#462","type":"component","lock":false,"position":31},{"name":"TextBlock","data":{"text":"### **02.3 Switching on the unit** \n\nThe device is switched on by pressing both keys for three seconds. \n\nAutomatic activation occurs in the event of entering the water in standby mode. If submerged to a depth greater than 1.5 m, the computer switches to default mode (OC in the default setting, can be changed in Setup â Preferences). \n\nAutomatic activation is not immediate, it is necessary to wait a few seconds. The computer may be switched on automatically in higher depth if a descent is rapid. It does not affect the decompression calculation but the first few seconds of the dive profile record will be lost.\n\nThe automatic activation on submersion is disabled when switched to the flight mode. \n\nIn case the diver forgets to switch on the computer after a flight the computer will switch on at 5 m depth within 1 minute.","textLarge":false,"imageOnRight":true,"image":{"recommendedSizes":{"width":"420","height":"280"}},"imageMobile":{"recommendedSizes":{"width":"750","height":"500"}}},"id":"#237","type":"component","lock":false,"position":32},{"name":"SectionDivider","data":{"title":"2.4 Switching off the unit","skipToC":false},"id":"#463","type":"component","lock":false,"position":33},{"name":"TextBlock","data":{"text":"### **02.4 Switching off the unit** \n\nEnter the menu from surface mode, select Switch off and Standby mode in the second menu. \n\nOr you can select Flight mode in the second menu. This prevents an automatic activation due to a rapid pressure change and confusion of the surface level detection algorithm. \n\nYou can switch off directly from dive mode while on the surface. This way the unit will be switched to standby mode, so automatic activation by submersion is enabled. \n\nThe other way to switch off is by waiting for a timeout. \n\nUpon surfacing the Freedom will switch to surface mode after time set in the dive termination timeout. Then it will switch to standby mode after time set in the surface idle timeout. Pushing any button restarts the idle timer in the surface mode. ","textLarge":false,"imageOnRight":true,"image":{"recommendedSizes":{"width":"420","height":"280"}},"imageMobile":{"recommendedSizes":{"width":"750","height":"500"}}},"id":"#11","type":"component","lock":false,"position":34},{"name":"Image","data":{"firstImage":{"mimetype":"image/png","size":15085,"hash":"1db00a2b5e1464cd11082c530cf174bbe999b719","id":"cl0cejwffg63m0776nowoh8dg","filename":"divesoft-freedom-user-manual-02-4-a.png","category":"divesoft/","type":"image"},"secondImage":{}},"id":"#351","type":"component","lock":false,"position":35},{"name":"Spacer","data":{"spacingLarge":30,"spacingSmall":20,"backgroundColor":"#ffffff"},"id":"#394","type":"component","lock":false,"position":36},{"name":"Image","data":{"firstImage":{"mimetype":"image/jpeg","size":57145,"hash":"4cdd64023ec532716be965326b1f58f7dd2ee011","id":"cl0zsetwpm0tq0776m9fdlk7t","filename":"divesoft-freedom-user-manual-02-4-b.jpg","category":"divesoft/","type":"image"},"secondImage":{},"image":{"type":"image"}},"id":"#350","type":"component","lock":false,"position":37},{"name":"Divider","data":{"color":"darkGray"},"id":"#19","type":"component","lock":false,"position":38},{"name":"SectionDivider","data":{"title":"3. Diving","skipToC":true},"id":"#464","type":"component","lock":false,"position":39},{"name":"TextBlock","data":{"text":"### <span id=\"Section-03\">**Section 03: Diving** \n\n","textLarge":false,"imageOnRight":true,"image":{"recommendedSizes":{"width":"420","height":"280"}},"imageMobile":{"recommendedSizes":{"width":"750","height":"500"}}},"id":"#14","type":"component","lock":false,"position":40}
2,{"name":"Divider","data":{"color":"darkGray"},"id":"#302","type":"component","lock":false,"position":41},{"name":"SectionDivider","data":{"title":"3.1 Surface mode","skipToC":false},"id":"#465","type":"component","lock":false,"position":42},{"name":"TextBlock","data":{"text":"### **03.1 Surface mode** \n\nThe surface mode is indicated by the gray table gridlines. ","textLarge":false,"imageOnRight":true,"image":{"recommendedSizes":{"width":"420","height":"280"}},"imageMobile":{"recommendedSizes":{"width":"750","height":"500"}}},"id":"#303","type":"component","lock":false,"position":43},{"name":"SectionDivider","data":{"title":"3.1.1 Entering surface mode","skipToC":false},"id":"#466","type":"component","lock":false,"position":44},{"name":"TextBlock","data":{"text":"### **03.1.1 Entering surface mode** \n\nThe Divesoft Freedom switches to surface mode upon being switched on. ","textLarge":false,"imageOnRight":true,"image":{"recommendedSizes":{"width":"420","height":"280"}},"imageMobile":{"recommendedSizes":{"width":"750","height":"500"}}},"id":"#241","type":"component","lock":false,"position":45},{"name":"Spacer","data":{"spacingLarge":30,"spacingSmall":20,"backgroundColor":"#ffffff"},"id":"#395","type":"component","lock":false,"position":46}
2,{"name":"SectionDivider","data":{"title":"3.1.2 Surface mode screen","skipToC":false},"id":"#467","type":"component","lock":false,"position":47},{"name":"TextBlock","data":{"text":"### **03.1.2 Surface mode screen** \n\n**Date and Time** \nMaintain correct local time setting. It will be used for log recording. \nThe date format can be set in \nSetup -> Miscellaneous -> Date format\n\n**Surface time** \nThe time from a previous dive. If it was 99 days ago or more, then FREEDOM banner appears instead of the time. \n\n**Default mode** \nThe dive mode, to which the Freedom will be switched if submerged to a depth greater than 1.5 m. \n\n**No fly** \nThe calculation of the no fly time is based on the maximum allowed altitude according to the Bühlmannâs decompression algorithm ZHL. The air pressure in the cabin of a commercial aircraft is maintained at a level corresponding to air pressure at 1800â2400 m (6000â8000 feet) above sea level while cruising altitude falls in the range 11 000â12 200 m (36 000â40 000 feet). \nThe no fly time calculation uses the decisive altitude 4464 m (14 646 ft). At this altitude compartments containing the oxygen masks will be opened automatically and the oxygen masks will drop down in front of the aircraft passengers. \n\n**Max altitude** \nThe maximum allowed altitude calculation is based on the ZHL decompression algorithm with an additional safety margin (GF = 0.80).","textLarge":false,"imageOnRight":true,"image":{"recommendedSizes":{"width":"420","height":"280"}},"imageMobile":{"recommendedSizes":{"width":"750","height":"500"}}},"id":"#242","type":"component","lock":false,"position":48},{"name":"Spacer","data":{"spacingLarge":30,"spacingSmall":20,"backgroundColor":"#ffffff"},"id":"#396","type":"component","lock":false,"position":49},{"name":"Image","data":{"firstImage":{"mimetype":"image/png","size":39166,"hash":"f8e12983d8271ba2f7886ab2ca16231908cecd5c","id":"cl0ceyt6yg6cm0776auqwqwa5","filename":"divesoft-freedom-user-manual-03-2-2.png","category":"divesoft/","type":"image"},"secondImage":{}},"id":"#353","type":"component","lock":false,"position":50},{"name":"Spacer","data":{"spacingLarge":30,"spacingSmall":20,"backgroundColor":"#ffffff"},"id":"#397","type":"component","lock":false,"position":51},{"name":"TextBlock","data":{"text":"**Battery symbol **\nA graphical indication of remaining battery capacity. The estimated capacity of full battery is about\n20 hours. \nFor detailed information see the battery screen in the system check.","textLarge":false,"imageOnRight":true,"image":{"recommendedSizes":{"width":"420","height":"280"}},"imageMobile":{"recommendedSizes":{"width":"750","height":"500"}}},"id":"#24","type":"component","lock":false,"position":52},{"name":"SectionDivider","data":{"title":"3.1.3 Switching to other modes","skipToC":false},"id":"#468","type":"component","lock":false,"position":53},{"name":"TextBlock","data":{"text":"### **03.1.3 Switching to other modes** \nIn the menu â Dive, the user can switch from surface mode to open\ncircuit, rebreather, gauge and freediving modes. \nA dive mode cannot start while the Divesoft Freedom is connected\nto USB port or charger. See also Powering in hyperbaric environment\n(See section 10.1.1). \nThe Freedom computer can also be switched to the service menu.\nSee chapter \"8.2 Service functions\".","textLarge":false,"imageOnRight":true,"image":{"recommendedSizes":{"width":"420","height":"280"}},"imageMobile":{"recommendedSizes":{"width":"750","height":"500"}}},"id":"#26","type":"component","lock":false,"position":54},{"name":"Image","data":{"firstImage":{"mimetype":"image/png","size":33148,"hash":"3b8c0cfb88c3724f4851a9da460bb909b71f338e","id":"cl0zstrlxm0wb07766lsywo41","filename":"divesoft-freedom-user-manual-03-1-3.png","category":"divesoft/","type":"image"},"secondImage":{},"image":{"type":"image"}},"id":"#354","type":"component","lock":false,"position":55},{"name":"Spacer","data":{"spacingLarge":30,"spacingSmall":20,"backgroundColor":"#ffffff"},"id":"#398","type":"component","lock":false,"position":56},{"name":"SectionDivider","data":{"title":"3.2 Open Circuit","skipToC":false},"id":"#469","type":"component","lock":false,"position":57},{"name":"TextBlock","data":{"text":"### **03.2 Open Circuit** \nThe open circuit mode is indicated by the blue table gridlines. ","textLarge":false,"imageOnRight":true,"image":{"recommendedSizes":{"width":"420","height":"280"}},"imageMobile":{"recommendedSizes":{"width":"750","height":"500"}}},"id":"#28","type":"component","lock":false,"position":58},{"name":"SectionDivider","data":{"title":"3.2.1 Entering open circuit mode","skipToC":false},"id":"#470","type":"component","lock":false,"position":59},{"name":"TextBlock","data":{"text":"### **03.2.1 Entering open circuit mode** \nOpen circuit mode can be entered from the menu in surface mode, by automatic activation after submersion\n(if set as the default mode) or as a bailout from CCR mode (the Close\nCircuit version only). ","textLarge":false,"imageOnRight":true,"image":{"recommendedSizes":{"width":"420","height":"280"}},"imageMobile":{"recommendedSizes":{"width":"750","height":"500"}}},"id":"#243","type":"component","lock":false,"position":60},{"name":"SectionDivider","data":{"title":"3.2.2 Detailed screen","skipToC":false},"id":"#471","type":"component","lock":false,"position":61},{"name":"TextBlock","data":{"text":"### **03.2.2 Detailed screen** \nThe primary screen displays all necessary information during a dive. \n\n**Depth** \nThe depth can be read in the units set in the setup (m or ft). Depth\nis calculated from measured hydrostatic pressure. Fresh water\n(default) or seawater density can be set for the depth calculation. In the salinity setting you can select fresh water, salt water and EN13319. The salinity EN13319 is a value between fresh and salt water and can be set universally for all water types.\nWater density: \nFresh water 1.000 g/ml \nEN13319 1.020 g/ml \nSeawater 1.028 g/ml ","textLarge":false,"imageOnRight":true,"image":{"recommendedSizes":{"width":"420","height":"280"}},"imageMobile":{"recommendedSizes":{"width":"750","height":"500"}}},"id":"#244","type":"component","lock":false,"position":62},{"name":"Spacer","data":{"spacingLarge":30,"spacingSmall":20,"backgroundColor":"#ffffff"},"id":"#399","type":"component","lock":false,"position":63},{"name":"Image","data":{"firstImage":{"mimetype":"image/png","size":48367,"hash":"469c16ffc7bddd89477948da01f985a2bb9918a0","id":"cl0tkt6o9kojp0776x6n5d0qh","filename":"divesoft-freedom-user-manual-03-2-2.png","category":"divesoft/","type":"image"},"secondImage":{},"image":{"type":"image"}},"id":"#30","type":"component","lock":false,"position":64},{"name":"Spacer","data":{"spacingLarge":30,"spacingSmall":20,"backgroundColor":"#ffffff"},"id":"#400","type":"component","lock":false,"position":65}
2,{"name":"TextBlock","data":{"text":"Setting of fresh/sea water doesnât affect decompression calculations. Decompression is based on ambient\npressure and is independent of displayed depth. Only depth of decompression stops is rounded up to usual\nvalues according to settings of fresh/sea water and metric/imperial units.\n\n\n**Dive time** \nThe timer starts after submersion (depth > 1.5 m) and halts after surfacing (depth < 0.5 m). In case of\nstay on the surface (or at very shallow depth) followed by a second submersion (during a time set in the\ndive termination timeout) the dive time indicated will be the time from the first submersion including the\nsurface time. \nHowever, if the Dive time setting is set to CAVE, the time does not stop even when surfacing. This setting takes into account crossing the dry parts of the cave behind the siphon. Setup/Preferences/Timeouts/Dive time -> CAVE\n**Deco Stop** \nAlternatively, \"Gas switch\" will be displayed if it is a gas switch stop \nThe depth of the decompression stop can be read in the units set in the setup (m or ft). Last stop depth\ndepends on settings.\nThe Deco Stop value is shown only if the stops decompression regimen is set. See Setup â Decompression\nâ Deco stops (See section 4.2.4). \n**Stop Time** \nLength of the decompression stop at the Deco Stop depth. While on stop, there is a countdown timer here.\nRounding of the decompression stop length depends on setting.\nThe Stop Time value is shown only if the stops decompression regimen is set. See Setup â Decompression\nâ Deco stops (See section 4.2.4). \n**TTS** \nThe time to surface (TTS) includes the complete decompression profile. If optimal gas is selected in the\ndecompression settings, then the TTS considers changing of gases from the list of active mixtures; the gas\nswitch time is included.\nIf the current gas setting is selected in the decompression settings, then only the actual gas is used for\na TTS calculation.","textLarge":false,"imageOnRight":true,"image":{"recommendedSizes":{"width":"420","height":"280"}},"imageMobile":{"recommendedSizes":{"width":"750","height":"500"}}},"id":"#29","type":"component","lock":false,"position":66},{"name":"TextBlock","data":{"text":"**Ceiling** \nThe ceiling value is shown only if the ceiling decompression regimen\nis set. See Setup â Decompression â Deco stops (04.2.4).\nThe depth of the decompression ceiling decreases continuously up to\nthe surface. The reading is not artificially stopped anywhere during\nthe ascent. Always stay below the depth of the ceiling, even if the\nceiling depth is very shallow.\nAscent above the ceiling generates a warning. Further violation,\nmore than 1 m (3 ft), leads to an additional alarm. Both alarms are\nlogged. The Freedom will continue in o
2pen circuit dive mode. It will\nnot switch to a gauge mode or even an SOS mode. Diver should make\nresponsible decision in order to minimize the probability of severe\nconsequences.","textLarge":false,"imageOnRight":true,"image":{"recommendedSizes":{"width":"420","height":"280"}},"imageMobile":{"recommendedSizes":{"width":"750","height":"500"}}},"id":"#32","type":"component","lock":false,"position":67},{"name":"Spacer","data":{"spacingLarge":30,"spacingSmall":20,"backgroundColor":"#ffffff"},"id":"#402","type":"component","lock":false,"position":68},{"name":"Image","data":{"firstImage":{"mimetype":"image/png","size":44476,"hash":"8572245fa91f71a4d47c3105c3abe4fd7d21e026","id":"cl0tjftglknm407763witt8l9","filename":"divesoft-freedom-user-manual-03-2-2-b.png","category":"divesoft/","type":"image"},"secondImage":{},"image":{"type":"image"}},"id":"#31","type":"component","lock":false,"position":69},{"name":"Spacer","data":{"spacingLarge":30,"spacingSmall":20,"backgroundColor":"#ffffff"},"id":"#401","type":"component","lock":false,"position":70},{"name":"TextBlock","data":{"text":"**No deco** \nYou can stay for the indicated time at the current depth, breathing the current mixture, to avoid\na decompression obligation.\n","textLarge":false,"imageOnRight":true,"image":{"recommendedSizes":{"width":"420","height":"280"}},"imageMobile":{"recommendedSizes":{"width":"750","height":"500"}}},"id":"#33","type":"component","lock":false,"position":71},{"name":"TextBlock","data":{"text":"**SafetySt** \nLength of the safety stop is 3 min. The safety stop can be carried out within depth from 6 to 3 m (20 to\n10 ft). The safety stop is indicated if the maximum depth of a dive was greater than 10 m (30 ft).\n\nCountdown of the safety stop is interrupted at depths greater than\n6 m. Descent to depths greater than 10 m resets the time of the\nsafety stop back to 3 min.\nA violation of the 3 m ceiling is logged (silently). Ascent above 1.8 m\ngenerates an alarm and leads to the end of the safety stop regimen\nfor a current dive.\nThe safety stop can be switched off. See Setup â Decompression\nâ Safety stop \\[On] (See section 4.2.2).","textLarge":false,"imageOnRight":true,"image":{"recommendedSizes":{"width":"420","height":"280"}},"imageMobile":{"recommendedSizes":{"width":"750","height":"500"}}},"id":"#316","type":"component","lock":false,"position":72},{"name":"Image","data":{"firstImage":{"mimetype":"image/png","size":43643,"hash":"11f12392a45840fe44aeafe2a969cbb0aa261980","id":"cl0tjnzpbknsd0776u2r0wxwq","filename":"divesoft-freedom-user-manual-03-2-2-c.png","category":"divesoft/","type":"image"},"secondImage":{}},"id":"#34","type":"component","lock":false,"position":73},{"name":"Spacer","data":{"spacingLarge":30,"spacingSmall":20,"backgroundColor":"#ffffff"},"id":"#403","type":"component","lock":false,"position":74},{"name":"TextBlock","data":{"text":"**DeepStop** \nThe depth of the upcoming deep stop is based on Richard\nPyleâs algorithm. A timer countdown starts here after arriving to the\ndisplayed deep stop depth.\nViolation of the deep stop is logged but no alarm is generated\nbecause deep stops are considered as an additional safety factor\nonly.\nThese Pyle deep stops are shown only if switched on. See Setup â\nDecompression â Deep stops (See section 4.2.4).","textLarge":false,"imageOnRight":true,"image":{"recommendedSizes":{"width":"420","height":"280"}},"imageMobile":{"recommendedSizes":{"width":"750","height":"500"}}},"id":"#35","type":"component","lock":false,"position":75},{"name":"Image","data":{"firstImage":{"mimetype":"image/png","size":57761,"hash":"6f6c2ea8076d9881ff74f332572cf622aa7eb3e6","id":"cl0tj6o7xknih0776qkxuizza","filename":"divesoft-freedom-user-manual-03-2-2.png","category":"divesoft/","type":"image"},"secondImage":{},"image":{"type":"image"}},"id":"#36","type":"component","lock":false,"position":76},{"name":"Spacer","data":{"spacingLarge":30,"spacingSmall":20,"backgroundColor":"#ffffff"},"id":"#404","type":"component","lock":false,"position":77},{"name":"TextBlock","data":{"text":"**Local Time** \nThe local time is shown on the display directly above the mixture\nindication. \n\n**Mixture** \nThe center of the display indicates the current gas mixture.\nWarning: If the breathing mixture is not identical to the indicated mixture, then the calculated\ndecompression profile will be wrong and may be dangerous to follow. In that case you must use a backup\nmethod of the decompression profile calculation. \n\n**Max** \nThis shows the maximum depth reached during a dive.\n\n**CNS** \nExposure to high oxygen partial pressure may under certain circumstances cause acute (CNS) oxygen\npoisoning. This may cause the affected person to drown.\nThe so called âoxygen clockâ is a percentage of consumption of CNS toxicity limit. Calculation is based on\nNOAA oxygen exposure limits.\n","textLarge":false,"imageOnRight":true,"image":{"recommendedSizes":{"width":"420","height":"280"}},"imageMobile":{"recommendedSizes":{"width":"750","height":"500"}}},"id":"#37","type":"component","lock":false,"position":78},{"name":"TextBlock","data":{"text":"\tPO2 Max. Single Exposure Maximum per 24 h\n\n\t1.60 45 min 150 min \n\t1.55 83 min 165 min \n\t1.50 120 min 180 min \n\t1.45 135 min 180 min \n\t1.40 150 min 180 min \n\t1.35 165 min 195 min \n\t1.30 180 min 210 min \n\t1.25 195 min 225 min \n\t1.20 210 min 240 min \n\t1.10 240 min 270 min \n\t1.00 300 min 300 min \n\t0.90 360 min 360 min \n\t0.80 450 min 450 min \n\t0.70 570 min 570 min \n\t0.60 720 min 720 min \n\n","textLarge":false,"imageOnRight":true,"image":{"recommendedSizes":{"width":"420","height":"280"}},"imageMobile":{"recommendedSizes":{"width":"750","height":"500"}}},"id":"#317","type":"component","lock":false,"position":79},{"name":"Image","data":{"firstImage":{},"secondImage":{}},"id":"#38","type":"component","lock":false,"position":80},{"name":"TextBlock","data":{"text":"CNS oxygen clock value does not take chronic (pulmonary) oxygen poisoning into account. For exposures\ncommon to technical diving, chronic toxicity manifestations are not significant. For very long dives it is\nnecessary to calculate with long-term exposure limits and to limit the overall exposure.\nWhen pO<sub>2</sub>\n ⥠1.4 bar then the CNS toxicity limit is always shorter than the pulmonary toxicity limit.\nFor calculations related to chronic toxicity use the REPEX method that you know from the nitrox diving\ncourse. The Divesoft Freedom does not perform calculations associated with chronic oxygen toxicity.\n\n**Avg D** \nAverage depth. It is possible to create a new start point for depth averaging; in dive menu select Settings â\nReset average. \nBottomTimer: Reset average\n\n\n**Floor** \nDecompression floor is the depth at which the time to surface (TTS) does not increase.\nCalculation of the decompression floor is approximate. Staying at the exact depth of the indicated floor\nleads to a modest decrease in the upcoming decompression time.\nThis position on the detailed screen is customizable. You can alter the decompression floor, average\ndepth or TTS2 in Setup â Preferences â Display â OC Row4/Col3. \nTTS2 is Time to surface calculated with current OC mixture only.","textLarge":false,"imageOnRight":true,"image":{"recommendedSizes":{"width":"420","height":"280"}},"imageMobile":{"recommendedSizes":{"width":"750","height":"500"}}},"id":"#39","type":"component","lock":false,"position":81},{"name":"TextBlock","data":{"text":"**Temp** \nWater temperature is measured inside the computer case. After temperature change wait about\n1â2 minutes until the temperature reading reaches a stable value. The temperature in air is affected by\nmany factors and is only an indication.\nA temperature correction can be set in Setup â Calibration for better accuracy.\n**pO<sub>2</sub>** \nThe calculation is based on depth and O<sub>2</sub>\n fraction in breathing mixture.\n \n**Combined graphic symbol** \nThe combined graphic symbol on the detailed screen is intended for rapid orientation. It tells the diver what\nmust be done. The color of the warning symbols changes from yellow to red according to the degree of\nimportance. ","textLarge":false,"imageOnRight":true,"image":{"recommendedSizes":{"width":"420","height":"280"}},"imageMobile":{"recommendedSizes":{"width":"750","height":"500"}}},"id":"#41","type":"component","lock":false,"position":82},{"name":"Image","data":{"firstImage":{},"secondImage":{},"image":{"type":"image"}},"id":"#43","type":"component","lock":false,"position":83},{"name":"TextBlock","data":{"text":"Permitted to ascend to the surface. ","textLarge":false,"imageOnRight":true,"image":{"recommendedSizes":{"width":"420","height":"280"}},"imageMobile":{"recommendedSizes":{"width":"750","height":"500"}}},"id":"#42","type":"component","lock":false,"position":84},{"name":"Image","data":{"firstImage":{},"secondImage":{}},"id":"#48","type":"component","lock":false,"position":85},{"name":"TextBlock","data":{"text":"Permitted to ascend to the depth of the decompression stop or decompression ceiling. ","textLarge":false,"imageOnRight":true,"image":{"recommendedSizes":{"width":"420","height":"280"}},"imageMobile":{"recommendedSizes":{"width":"750","height":"500"}}},"id":"#52","type":"component","lock":false,"position":86},{"name":"Image","data":{"firstImage":{},"secondImage":{}},"id":"#47","type":"component","lock":false,"position":87},{"name":"TextBlock","data":{"text":"The depth of the decompression ceiling or decompression stop has been reached; do not change\ndepth. ","textLarge":false,"imageOnRight":true,"image":{"recommendedSizes":{"width":"420","height":"280"}},"imageMobile":{"recommendedSizes":{"width":"750","height":"500"}}},"id":"#53","type":"component","lock":false,"position":88},{"name":"Image","data":{"firstImage":{},"secondImage":{}},"id":"#46","type":"component","lock":false,"position":89},{"name":"TextBlock","data":{"text":"The depth of the safety stop has been reached; do not change depth. ","textLarge":false,"imageOnRight":true,"image":{"recommendedSizes":{"width":"420","height":"280"}},"imageMobile":{"recommendedSizes":{"width":"750","height":"500"}}},"id":"#51","type":"component","lock":false,"position":90},{"name":"Image","data":{"firstImage":{"recommendedSizes":{"width":"1000","height":"1000"}},"secondImage":{"recommendedSizes":{"width":"1000","height":"1000"}}},"id":"#472","type":"component","lock":false,"position":91},{"name":"TextBlock","data":{"text":"The ascent rate has been exceeded; slow down your ascent. ","textLarge":false,"imageOnRight":true,"image":{"recommendedSizes":{"width":"420","height":"280"}},"imageMobile":{"recommendedSizes":{"width":"750","height":"500"}}},"id":"#50","type":"component","lock":false,"position":92},{"name":"Image","data":{"firstImage":{},"secondImage":{}},"id":"#44","type":"component","lock":false,"position":93},{"name":"TextBlock","data":{"text":"The current depth is less than the depth of the decompression ceiling; descend.","textLarge":false,"imageOnRight":true,"image":{"recommendedSizes":{"width":"420","height":"280"}},"imageMobile":{"recommendedSizes":{"width":"750","height":"500"}}},"id":"#49","type":"component","lock":false,"position":94},{"name":"TextBlock","data":{"text":"**Vertical speed** \nThere is an indication of the ascent or descent rate below the combined graphical symbol. Can be set to\na relative (%) or absolute (m/min or ft/min) reading. The relative reading is based on the maximum ascent\nor descent rate. \nBottomTimer setting: \"Setup â Preferences â Vert. rate\" \nOther licences: \"Setup â Preferences â User interface â Vert. rate\"\n\n\n**Battery symbol** \nA graphical indication of the remaining battery capacity. See chapter Surface mode â Battery symbol\n(See section 3.1.2).","textLarge":false,"imageOnRight":true,"image":{"recommendedSizes":{"width":"420","height":"280"}},"imageMobile":{"recommendedSizes":{"width":"750","height":"500"}}},"id":"#54","type":"component","lock":false,"position":95},{"name":"SectionDivider","data":{"title":"3.2.3 Synoptic screen","skipToC":false},"id":"#473","type":"component","lock":false,"position":96},{"name":"TextBlock","data":{"text":"### **03.2.3 Synoptic screen** \nThe depth value is easy to read. It is accompanied by other important\ninformation.\nThe meaning of all values is identical to the detailed screen.","textLarge":false,"imageOnRight":true,"image":{"recommendedSizes":{"width":"420","height":"280"}},"imageMobile":{"recommendedSizes":{"width":"750","height":"500"}}},"id":"#222","type":"component","lock":false,"position":97},{"name":"Image","data":{"firstImage":{"mimetype":"image/png","size":34927,"hash":"e1e53cd09f98eb999b96e1f
2121302769a8126153","id":"cl0tlxnn2kpc10776c8i56yl5","filename":"divesoft-freedom-user-manual-03-2-3.png","category":"divesoft/","type":"image"},"secondImage":{}},"id":"#55","type":"component","lock":false,"position":98},{"name":"Spacer","data":{"spacingLarge":30,"spacingSmall":20,"backgroundColor":"#ffffff"},"id":"#405","type":"component","lock":false,"position":99},{"name":"SectionDivider","data":{"title":"3.2.4 Big Screen","skipToC":false},"id":"#474","type":"component","lock":false,"position":100},{"name":"TextBlock","data":{"text":"### **03.2.4 Big Screen** \n\nThe most important information is written in really big characters.\nThis screen is useful in very bad visibility. Many divers can read\nnumbers even without a mask.\nThe meaning of all values is identical to the detailed screen. \nOn the \"Big Screen\" you can customize the bottom line in Gauge mode.\nBottomTimer: \"Setup -> Preferences -> Big depth\"\nOther linces:\"Setup -> Preferences -> User interface -> Big depth\"\n - \"Avg\" displays average depth\n- \"Max\" displays maximum depth\n- \"Only\" displays current depth ONLY, nothing else.","textLarge":false,"imageOnRight":true,"image":{"recommendedSizes":{"width":"420","height":"280"}},"imageMobile":{"recommendedSizes":{"width":"750","height":"500"}}},"id":"#56","type":"component","lock":false,"position":101},{"name":"Spacer","data":{"spacingLarge":30,"spacingSmall":20,"backgroundColor":"#ffffff"},"id":"#407","type":"component","lock":false,"position":102},{"name":"Image","data":{"firstImage":{"mimetype":"image/png","size":29629,"hash":"3b235775934151025d80b4d713c78946389450e9","id":"cl0tmn055kpsy0776mlrzmnpy","filename":"divesoft-freedom-user-manual-03-2-4.png","category":"divesoft/","type":"image"},"secondImage":{},"image":{"type":"image"}},"id":"#57","type":"component","lock":false,"position":103},{"name":"Spacer","data":{"spacingLarge":30,"spacingSmall":20,"backgroundColor":"#ffffff"},"id":"#406","type":"component","lock":false,"position":104},{"name":"SectionDivider","data":{"title":"3.2.5 Dive profile screen","skipToC":false},"id":"#475","type":"component","lock":false,"position":105},{"name":"TextBlock","data":{"text":"### **03.2.5 Dive profile screen** \n\n**Start** \nThe time of submersion is useful for checking compliance with the\nschedule.\n\n**Avg** \nThe average depth is indicated with the yellow horizontal line and\nwith the average depth displayed in yellow.\nA new start point for depth averaging can be created (in dive menu\nselect Settings â Reset average). This point is indicated by the\nyellow vertical line and the horizontal average depth line starts from\nthere.\n\n**Current depth** \nSee lower left corner.\n\n**Dive time** \nRuntime of current dive is placed in lower right corner.\n\n**Max** \nMaximum depth reached during the dive. Field with this value is\nplaced in the middle of bottom line.","textLarge":false,"imageOnRight":true,"image":{"recommendedSizes":{"width":"420","height":"280"}},"imageMobile":{"recommendedSizes":{"width":"750","height":"500"}}},"id":"#58","type":"component","lock":false,"position":106},{"name":"Image","data":{"firstImage":{"mimetype":"image/png","size":31112,"hash":"125debcb0ef3f271fc89e04934c6769f5ebdf6b1","id":"cl0wl3aomloby0776mkjdr1kh","filename":"divesoft-freedom-user-manual-03-2-5a.png","category":"divesoft/","type":"image"},"secondImage":{},"image":{"type":"image"}},"id":"#60","type":"component","lock":false,"position":107},{"name":"Spacer","data":{"spacingLarge":30,"spacingSmall":20,"backgroundColor":"#ffffff"},"id":"#408","type":"component","lock":false,"position":108},{"name":"Image","data":{"firstImage":{"mimetype":"image/png","size":31286,"hash":"ba890b7f6addcbba4216bd525ff6205593399603","id":"cl0wl41ftloc50776g18hahxn","filename":"divesoft-freedom-user-manual-03-2-5b.png","category":"divesoft/","type":"image"},"secondImage":{},"image":{"type":"image"}},"id":"#59","type":"component","lock":false,"position":109},{"name":"Spacer","data":{"spacingLarge":30,"spacingSmall":20,"backgroundColor":"#ffffff"},"id":"#355","type":"component","lock":false,"position":110},{"name":"SectionDivider","data":{"title":"3.2.6 Dive menu","skipToC":false},"id":"#476","type":"component","lock":false,"position":111},{"name":"TextBlock","data":{"text":"### **03.2.6 Dive menu** \nDuring a dive, in any dive mode, press both keys simultaneously to\nshow the dive menu.\nThere is current depth, partial pressure of oxygen and dive time on\nthe bottom of the screen.\n\n","textLarge":false,"imageOnRight":true,"image":{"recommendedSizes":{"width":"420","height":"280"}},"imageMobile":{"recommendedSizes":{"width":"750","height":"500"}}},"id":"#61","type":"component","lock":false,"position":112},{"name":"Image","data":{"firstImage":{"mimetype":"image/bmp","size":77596,"hash":"7ba8c7a9db2c15d129cee1efe63fea9b69f5979c","id":"cl2yez0pw5hws0776rc47e1cb","filename":"00000016.BMP","category":"divesoft/","type":"image"},"secondImage":{},"image":{"type":"image"}},"id":"#423","type":"component","lock":false,"position":113},{"name":"TextBlock","data":{"text":"**Mix** \nMixture selection. Only active mixtures are listed and can be\nselected.\n\n**Mixtures with pO<sub>2</sub>** \n outside breathable range are displayed in red\n(if pO<sub>2</sub>\n is too high) or blue (if pO<sub>2</sub>\n is too low). This does not prevent\nselection of this mixture. An alarm will be activated after this kind\nof switch.\nLimits of breathable range are set in Setup â Mixtures.","textLarge":false,"imageOnRight":true,"image":{"recommendedSizes":{"width":"420","height":"280"}},"imageMobile":{"recommendedSizes":{"width":"750","height":"500"}}},"id":"#421","type":"component","lock":false,"position":114},{"name":"Image","data":{"firstImage":{"mimetype":"image/png","size":22532,"hash":"b459ac1ad7284fa1e9c752a1a54e9a29f39bdbcd","id":"cl0wl5a6alocc0776vp5xitzg","filename":"divesoft-freedom-user-manual-03-2-6b.png","category":"divesoft/","type":"image"},"secondImage":{}}
2,"id":"#62","type":"component","lock":false,"position":115},{"name":"Spacer","data":{"spacingLarge":30,"spacingSmall":20,"backgroundColor":"#ffffff"},"id":"#356","type":"component","lock":false,"position":116},{"name":"TextBlock","data":{"text":"**End dive** \nEnd dive and switch to surface mode. This menu item is enabled only\non the surface (at depth < 0.5 m).\n\n**Ascent plan** \nBy default the plan includes all gas switches during the\ndecompression, including gas switch stop duration. If ascent gas is\nset to current in decompression setting, then no gas switches are\nincluded in the plan.","textLarge":false,"imageOnRight":true,"image":{"recommendedSizes":{"width":"420","height":"280"}},"imageMobile":{"recommendedSizes":{"width":"750","height":"500"}}},"id":"#64","type":"component","lock":false,"position":117},{"name":"Spacer","data":{"spacingLarge":30,"spacingSmall":20,"backgroundColor":"#ffffff"},"id":"#357","type":"component","lock":false,"position":118},{"name":"Image","data":{"firstImage":{"mimetype":"image/png","size":48933,"hash":"2460759cc7d5c53dc3980ffd5bcc9e592f07fbaf","id":"cl0wl8oy4loe507764y8ul2fh","filename":"divesoft-freedom-user-manual-03-2-6c.png","category":"divesoft/","type":"image"},"secondImage":{},"image":{"type":"image"}},"id":"#65","type":"component","lock":false,"position":119},{"name":"Spacer","data":{"spacingLarge":30,"spacingSmall":20,"backgroundColor":"#ffffff"},"id":"#358","type":"component","lock":false,"position":120},{"name":"TextBlock","data":{"text":"**Setup â Bailout GF**\nSwitch to gradient factor pair for bailout (BoGF) and vice versa. You\ncan switch between standard and bailout GF anytime during a dive.\nSee also Setup â Decompression â Gradient factor (See section 4.2.2). ","textLarge":false,"imageOnRight":true,"image":{"recommendedSizes":{"width":"420","height":"280"}},"imageMobile":{"recommendedSizes":{"width":"750","height":"500"}}},"id":"#66","type":"component","lock":false,"position":121},{"name":"Spacer","data":{"spacingLarge":30,"spacingSmall":20,"backgroundColor":"#ffffff"},"id":"#360","type":"component","lock":false,"position":122},{"name":"Image","data":{"firstImage":{"mimetype":"image/png","size":33639,"hash":"3e26ea4df9159b3e01e51a4be04cb658b522c29e","id":"cl0wl9pmwloee0776i7i44co4","filename":"divesoft-freedom-user-manual-03-2-6d.png","category":"divesoft/","type":"image"},"secondImage":{},"image":{"type":"image"}},"id":"#67","type":"component","lock":false,"position":123},{"name":"Spacer","data":{"spacingLarge":30,"spacingSmall":20,"backgroundColor":"#ffffff"},"id":"#359","type":"component","lock":false,"position":124},{"name":"TextBlock","data":{"text":"**Setup â Reset average** \nIt restarts calculation of average depth. The restart point is indicated\nby the vertical line on the dive profile screen.\n\n**Setup â Mixture setup** \nCorresponds to mixture setup in Setup â Mixtures â Mixture setup.\nThis feature is intended only for emergency situations. Do not use\nthis setup on a regular basis.\n\n**Setup â Display** \nThis setting corresponds to Setup â Preferences â Display.\nSetup â Force dive end\nIf the surface pressure (zero depth) was incorrectly detected and the computer âdivesâ while on the surface\nthen the dive can be forced to stop with this function. \n\n<span style=\"color:red\">**Warning: Do not force dive end underwater!**</span>\n\n\n**Apps** \nThere are several items in the apps folder\n\n**Apps - Add bookmark** - marks the current moment in the dive log\n\n**Apps - Events** - allows you to view computer-issued warnings and pop-up messages\n\n**Apps - Emergency torch** - brightens the entire display to the maximum and emits the maximum amount of light possible. Can be used as an emergency torch in certain conditions when all other torches have failed.\n\n**Apps - Inclinometer** - a tool to measure the slope of a slope. Can be used for mapping caves and wrecks.\n\n**Apps - Sokoban Game** - a puzzle game for distraction on long decompression. For more information on games, see section 9 of this manual.\n\n**Apps - Snake** - a game for distraction on a long decompression. See section 9 of this manual for more about the games.","textLarge":false,"imageOnRight":true,"image":{"recommendedSizes":{"width":"420","height":"280"}},"imageMobile":{"recommendedSizes":{"width":"750","height":"500"}}},"id":"#68","type":"component","lock":false,"position":125},{"name":"SectionDivider","data":{"title":"3.2.7 Gas switch shortcut","skipToC":false},"id":"#477","type":"component","lock":false,"position":126}
2,{"name":"TextBlock","data":{"text":"### **03.2.7 Gas switch shortcut** \n\nLong press of the upper key selects previous gas mixture. Long press of the lower key selects next gas\nmixture. This list is cyclic.\nWhat mixtures can be switched depends on the setting in Setup â Preferences â User interface â Gas shortc. The\ndefault setting for gas shortcuts is off.\nIf Breathable is selected, then mixes with pO<sub>2</sub>\n inside the breathable range with regard to the current depth\nare switched. The limits of the breathable range are set in Setup â Mixtures.\nIf All is selected, then all active gas mixes are switched, regardless of breathability. An alarm could be\nactivated after this kind of switch. The computer will wait five seconds before generating an alarm. The user\ncan choose the correct gas mixture during this interval.","textLarge":false,"imageOnRight":true,"image":{"recommendedSizes":{"width":"420","height":"280"}},"imageMobile":{"recommendedSizes":{"width":"750","height":"500"}}},"id":"#223","type":"component","lock":false,"position":127},{"name":"SectionDivider","data":{"title":"3.3 Fixed setpoint CCR","skipToC":false},"id":"#478","type":"component","lock":false,"position":128},{"name":"TextBlock","data":{"text":"### **03.3 Fixed setpoint CCR** \nThe rebreather dive modes are only available in the Closed Circuit\nversion of the Divesoft Freedom.\nIt is strongly recommended to familiarize yourself with open circuit\n(OC) diving using the Divesoft Freedom before using for rebreather\ndiving. This chapter of User manual describes only the differences\nfrom OC diving. First you will have to study the OC mode.\nIf the Freedom is used as a backup computer for an eCCR then the\nproper setting corresponding to the setting of the eCCR electronic is\ncrucial. If a manual CCR (mCCR) is used then maintain the pO<sub>2</sub>\n in the\nbreathing loop on the value equivalent to the Feeedom setpoint (SP).\nIf a SCR is used then select the correct type of SCR and adjust its\nparameters in setup.\nSee Setup â Rebreather.\nDonât forget to set up the OC bailout too, especially the default mix.\nThe fixed setpoint CCR mode is indicated by the cyan table gridlines.","textLarge":false,"imageOnRight":true,"image":{"recommendedSizes":{"width":"420","height":"280"}},"imageMobile":{"recommendedSizes":{"width":"750","height":"500"}}},"id":"#224","type":"component","lock":false,"position":129},{"name":"Spacer","data":{"spacingLarge":30,"spacingSmall":20,"backgroundColor":"#ffffff"},"id":"#361","type":"component","lock":false,"position":130},{"name":"Image","data":{"firstImage":{"mimetype":"image/png","size":38213,"hash":"5cd6b6abe151647cb6570ed28dc368baea7e5d5a","id":"cl0wlheculofm0776px8ofmpo","filename":"divesoft-freedom-user-manual-03-3-a.png","category":"divesoft/","type":"image"},"secondImage":{},"image":{"type":"image"}},"id":"#69","type":"component","lock":false,"position":131},{"name":"Spacer","data":{"spacingLarge":30,"spacingSmall":20,"backgroundColor":"#ffffff"},"id":"#362","type":"component","lock":false,"position":132},{"name":"SectionDivider","data":{"title":"3.3.1 Predive and submersion","skipToC":false},"id":"#479","type":"component","lock":false,"position":133},{"name":"TextBlock","data":{"text":"### **03.3.1 Predive and submersion** \n\nSwitch the Freedom on before entering a water. Check the Freedom\nsettings as part of a predive check.\nThe first screen is a summary of\nrebreather specific parameters, the second screen is the summary of the decompression settings and\nthe OC (bailout) parameters.\nIf submersion to a depth greater than 1.5 m occurs, the computer\nswitches to the default mode. Set default mode to the CCR fixed\nduring dive preparation in Setup â Preferences. Do not intentionally\nuse this switching method; it is intended only for emergency\nsituations.","textLarge":false,"imageOnRight":true,"image":{"recommendedSizes":{"width":"420","height":"280"}},"imageMobile":{"recommendedSizes":{"width":"750","height":"500"}}},"id":"#70","type":"component","lock":false,"position":134},{"name":"Spacer","data":{"spacingLarge":30,"spacingSmall":20,"backgroundColor":"#ffffff"},"id":"#363","type":"component","lock":false,"position":135},{"name":"Image","data":{"firstImage":{"mimetype":"image/bmp","size":77878,"hash":"dc034a45896dc0ab39faafaed86718d87484e1e0","id":"cl2yg4ulq5j7i0776sjkwu6x3","filename":"00000037.BMP","category":"divesoft/","type":"image"},"secondImage":{},"image":{"type":"image"}},"id":"#77","type":"component","lock":false,"position":136},{"name":"Spacer","data":{"spacingLarge":30,"spacingSmall":20,"backgroundColor":"#ffffff"},"id":"#424","type":"component","lock":false,"position":137},{"name":"Spacer","data":{"spacingLarge":30,"spacingSmall":20,"backgroundColor":"#ffffff"},"id":"#427","type":"component","lock":false,"position":138},{"name":"Image","data":{"firstImage":{"mimetype":"image/bmp","size":77878,"hash":"c3161a65c4e79a8fe6558e584a2c1fcb97eb5f42","id":"cl2yg5q5t5j7s0776wkdxhssy","filename":"00000038.BMP","category":"divesoft/","type":"image"},"secondImage":{},"image":{"type":"image"}},"id":"#318","type":"component","lock":false,"position":139},{"name":"Spacer","data":{"spacingLarge":30,"spacingSmall":20,"backgroundColor":"#ffffff"},"id":"#426","type":"component","lock":false,"position":140},{"name":"SectionDivider","data":{"title":"3.3.2 Setpoint","skipToC":false},"id":"#480","type":"component","lock":false,"position":141},{"name":"TextBlock","data":{"text":"### **03.3.2 Setpoint** \n\nThe SP low is set after switching to the fixed setpoint CCR dive mode\non the surface. It can be switched to the SP high manually (via the\nshortcut or via the menu) or automatically at a set depth during\na descent or at a set runtime.\n\n**SP reading (eCCR)** \n\nThe current setpoint value is located where the pO<sub>2</sub>\n is situated on the\ndisplay in OC dive mode on both the detailed and synoptic screen.\n\n**pO<sub>2</sub> reading (SCR)** \nThe calculated pO<sub>2</sub>\n value is shown instead of the setpoint if you dive\nwith the SCR. See CCR/SCR Setup (See section 4.5).\n\n**Shortcut** \n\nWith the CCR the long press of the upper key selects the high setpoint. The long press of the lower key\nselects the low setpoint. The shortcut is by default off but it can be enabled in Setup â Rebreather â Const CCR Setup â SP shortcuts \nIf the semi-closed rebreather (SCR) is used, then the gas mixture is switched with this shortcut (similar to\nOC mode).\n\n**Manual SP setting** \n\nSelect Setpoint from the dive menu.\nThe high and low setpoint can be chosen directly from the menu. For\nthe current setpoint adjustment use the +0.10 and -0.10 menu items\nfor the SP value change (can be used repeatedly; the final value is\ndisplayed) and then select Accept for the change.","textLarge":false,"imageOnRight":true,"image":{"recommendedSizes":{"width":"420","height":"280"}},"imageMobile":{"recommendedSizes":{"width":"750","height":"500"}}},"id":"#75","type":"component","lock":false,"position":142},{"name":"Spacer","data":{"spacingLarge":30,"spacingSmall":20,"backgroundColor":"#ffffff"},"id":"#364","type":"component","lock":false,"position":143},{"name":"Image","data":{"firstImage":{"mimetype":"image/png","size":48615,"hash":"35188486389c8533a5609f9d47b2db7b3ad33526","id":"cl0wlkzdtlogb077681nydcjb","filename":"divesoft-freedom-user-manual-03-3-2a.png","category":"divesoft/","type":"image"},"secondImage":{},"image":{"type":"image"}},"id":"#72","type":"component","lock":false,"position":144},{"name":"Spacer","data":{"spacingLarge":30,"spacingSmall":20,"backgroundColor":"#ffffff"},"id":"#366","type":"component","lock":false,"position":145},{"name":"Image","data":{"firstImage":{"mimetype":"image/png","size":32521,"hash":"5446119cf5572bce548be777ce9b96a26c77a161","id":"cl0wlqwm1loha0776uc6mp7dz","filename":"divesoft-freedom-user-manual-03-3-2b.png","category":"divesoft/","type":"image"},"secondImage":{},"image":{"type":"image"}},"id":"#319","type":"component","lock":false,"position":146},{"name":"Spacer","data":{"spacingLarge":30,"spacingSmall":20,"backgroundColor":"#ffffff"},"id":"#365","type":"component","lock":false,"position":147},{"name":"SectionDivider","data":{"title":"3.3.3 Dive menu","skipToC":false},"id":"#481","type":"component","lock":false,"position":148},{"name":"TextBlock","data":{"text":"### **03.3.3 Dive menu** \n\n","textLarge":false,"imageOnRight":true,"image":{"recommendedSizes":{"width":"420","height":"280"}},"imageMobile":{"recommendedSizes":{"width":"750","height":"500"}}},"id":"#76","type":"component","lock":false,"position":149},{"name":"Image","data":{"firstImage":{"mimetype":"image/bmp","size":77596,"hash":"6f214a6e3f95f8e771a423cbc9727971ee023919","id":"cl2yh3lmv5k1m0776pzgiceqf","filename":"00000021.BMP","category":"divesoft/","type":"image"},"secondImage":{},"image":{"type":"image"}},"id":"#429","type":"component","lock":false,"position":150},{"name":"Spacer","data":{"spacingLarge":30,"spacingSmall":20,"backgroundColor":"#ffffff"},"id":"#430","type":"component","lock":false,"position":151},{"name":"TextBlock","data":{"text":"**Bailout mode (OC)** \n\nIt is assumed that the diver will not breathe from the\nrebreatherâs breathing loop but will rather use a separate opencircuit bailout apparatus.\nAfter switching to the bailout OC mode, the default OC mixture will\nbe used and the safety level will be automatically set using the\nbailout gradient factors. The BoGF tag appears on the detailed and\nsynoptic screen.\nIt is possible to switch between the standard and bailout GF sets\nin the menu without affecting the mode in which the Freedom is\noperating.","textLarge":false,"imageOnRight":true,"image":{"recommendedSizes":{"width":"420","height":"280"}},"imageMobile":{"recommendedSizes":{"width":"750","height":"500"}}},"id":"#428","type":"component","lock":false,"position":152},{"name":"TextBlock","data":{"text":"**Measured mode (CCR)** \nUse for switching to rebreather dive mode with the measured pO<sub>2</sub>\n. See next chapter.\n\n**Setpoint** \nUse to switch the low/high setpoint and the manual setting of the setpoint of the CCR. See the Setpoint\
2nchapter on previous page.\n\n**Mix** \nUse for gas mixture switching for SCR. This is similar to the OC mixture selection.\n\n**Diluent** \nUse this menu item for the diluent gas switch.\n\n**Setup â Diluents** \nThis (the CCR only) menu item corresponds to the mixture setup in Setup â SCR/CCR Setup â Const CCR\nsetup â Diluents.\n\n**Setup â Mixture setup** \nThis (the SCR only) menu item corresponds to the OC mixture setup in Setup â Mixtures â Mixture setup.","textLarge":false,"imageOnRight":true,"image":{"recommendedSizes":{"width":"420","height":"280"}},"imageMobile":{"recommendedSizes":{"width":"750","height":"500"}}},"id":"#78","type":"component","lock":false,"position":153},{"name":"SectionDivider","data":{"title":"3.3.4 Stack time","skipToC":false},"id":"#482","type":"component","lock":false,"position":154},{"name":"TextBlock","data":{"text":"### **03.3.4 Stack time** \n\nThe scrubber stack timer runs all the time in any rebreather mode\nregardless of depth, even on the surface.\nIf you spend a long time in dive mode while not breathing from the\nrebreatherâs loop, then increase the time for the stack time warning.\nDonât forget to reset the timer when you refill the scrubber (Dive\nâ Stack time reset).\nYou can find the stack time on the O<sub>2</sub>\n sensors screen.","textLarge":false,"imageOnRight":true,"image":{"recommendedSizes":{"width":"420","height":"280"}},"imageMobile":{"recommendedSizes":{"width":"750","height":"500"}}},"id":"#80","type":"component","lock":false,"position":155},{"name":"Image","data":{"firstImage":{},"secondImage":{}},"id":"#431","type":"component","lock":false,"position":156},{"name":"SectionDivider","data":{"title":"3.4 Measured CCR","skipToC":false},"id":"#483","type":"component","lock":false,"position":157},{"name":"TextBlock","data":{"text":"### **03.4 Measured CCR** \n\n**!! The production of cables to connect the Freedom and Freedom+ computers has been discontinued. Currently it is no longer possible to order the cable to the sensors.!!** \n\nThe rebreather dive modes are available in the Closed Circuit version\nof the Divesoft Freedom only.\nThis chapter of the user manual describes only the differences from\nthe fixed setpoint CCR diving. First you will have to study OC mode\nand fixed setpoint CCR mode.","textLarge":false,"imageOnRight":true,"image":{"recommendedSizes":{"width":"420","height":"280"}},"imageMobile":{"recommendedSizes":{"width":"750","height":"500"}}},"id":"#82","type":"component","lock":false,"position":158},{"name":"Spacer","data":{"spacingLarge":30,"spacingSmall":20,"backgroundColor":"#ffffff"},"id":"#368","type":"component","lock":false,"position":159},{"name":"Image","data":{"firstImage":{"mimetype":"image/jpeg","size":54835,"hash":"5c7c754632d5277ca8b098d94e0e6848b5acbf93","id":"cl0wlu8cxlohw0776d45v81mp","filename":"divesoft-freedom-user-manual-03-4-a.jpg","category":"divesoft/","type":"image"},"secondImage":{},"image":{"type":"image"}},"id":"#83","type":"component","lock":false,"position":160},{"name":"Spacer","data":{"spacingLarge":30,"spacingSmall":20,"backgroundColor":"#ffffff"},"id":"#369","type":"component","lock":false,"position":161},{"name":"SectionDivider","data":{"title":"3.4.1 O2 sensors connection","skipToC":false},"id":"#484","type":"component","lock":false,"position":162},{"name":"TextBlock","data":{"text":"### **03.4.1 O<sub>2</sub> sensors connection** \n\nThe measured CCR dive mode requires a connection to the O<sub>2</sub>\n sensors\nof a rebreather. One, two or three sensors can be connected.\nThe cable equipped with the Molex connectors is included in the\nCable is NOT includedin the Divesoft Freedom distribution package. This can be ordered from a third party dealer. . See also O<sub>2</sub>\n sensor cable (See section 10.5).","textLarge":false,"imageOnRight":true,"image":{"recommendedSizes":{"width":"420","height":"280"}},"imageMobile":{"recommendedSizes":{"width":"750","height":"500"}}},"id":"#225","type":"component","lock":false,"position":163},{"name":"SectionDivider","data":{"title":"3.4.2 O2 sensors calibration","skipToC":false},"id":"#485","type":"component","lock":false,"position":164},{"name":"TextBlock","data":{"text":"### ** 03.4.2 O<sub>2</sub> sensors calibration** \n\nIf possible, use oxygen with purity of at least 99.5% for calibration.\nDo not use air for calibration. The partial pressure of oxygen in air at\natmospheric pressure significantly differs from the partial pressures\ndetermined by the setpoints. At the end of its service life, an oxygen\nsensor can successfully undergo calibration to 21% (air), but will no\nlonger be capable of measuring pO<sub>2</sub>\n of 1 bar or higher. \n**Procedure:** \n1. Dive â Calibration O<sub>2</sub>â Start calibration \n2. Check the calibration gas \n3. Wait for stable values \n4. Start and wait for calibration process to end \n5. Confirm the save \nWhether or not a sensor is already at the end of its service life is also\ndetermined during calibration.\nAt higher altitudes above sea level, the partial pressure of oxygen in\nthe calibration mixture decreases in proportion to lower atmospheric\npressure. The Freedom measures atmospheric pressure and takes\nit into account during calibration. Therefore, do not perform any\ncorrections at higher altitudes above sea level.\nIt is preferred to calibrate O<sub>2</sub>\n sensors prior each dive. Do not use\nsensor reading from sensors calibrated more than three days ago.\n","textLarge":false,"imageOnRight":true,"image":{"recommendedSizes":{"width":"420","height":"280"}},"imageMobile":{"recommendedSizes":{"width":"750","height":"500"}}},"id":"#84","type":"component","lock":false,"position":165},{"name":"Spacer","data":{"spacingLarge":30,"spacingSmall":20,"backgroundColor":"#ffffff"},"id":"#370","type":"component","lock":false,"position":166},{"name":"Image","data":{"firstImage":{"mimetype":"image/png","size":15713,"hash":"07ffaa4f3b081d0d5a9bf84d6b32728740f24dac","i
2d":"cl0wm0paklol10776n7fi65yy","filename":"divesoft-freedom-user-manual-03-4-2a.png","category":"divesoft/","type":"image"},"secondImage":{},"image":{"type":"image"}},"id":"#85","type":"component","lock":false,"position":167},{"name":"Spacer","data":{"spacingLarge":30,"spacingSmall":20,"backgroundColor":"#ffffff"},"id":"#373","type":"component","lock":false,"position":168},{"name":"Image","data":{"firstImage":{"mimetype":"image/png","size":24815,"hash":"fd045312f4372634b71562494408ec7ae25cf9c3","id":"cl0wm1982lol80776kqlqmd2g","filename":"divesoft-freedom-user-manual-03-4-2b.png","category":"divesoft/","type":"image"},"secondImage":{},"image":{"type":"image"}},"id":"#88","type":"component","lock":false,"position":169},{"name":"Spacer","data":{"spacingLarge":30,"spacingSmall":20,"backgroundColor":"#ffffff"},"id":"#372","type":"component","lock":false,"position":170},{"name":"Image","data":{"firstImage":{"mimetype":"image/png","size":29714,"hash":"938d4a30f14a7f9cd409163d768279593cc4a26c","id":"cl0wm1x4slolf0776o49lcrp9","filename":"divesoft-freedom-user-manual-03-4-2c.png","category":"divesoft/","type":"image"},"secondImage":{},"image":{"type":"image"}},"id":"#87","type":"component","lock":false,"position":171},{"name":"Spacer","data":{"spacingLarge":30,"spacingSmall":20,"backgroundColor":"#ffffff"},"id":"#371","type":"component","lock":false,"position":172},{"name":"Image","data":{"firstImage":{"mimetype":"image/png","size":30334,"hash":"81aef34f112134e9ad45d564b2e8a0d258f74aaf","id":"cl0wm2egtlolm0776tatpbyli","filename":"divesoft-freedom-user-manual-03-4-2d.png","category":"divesoft/","type":"image"},"secondImage":{},"image":{"type":"image"}},"id":"#86","type":"component","lock":false,"position":173},{"name":"Spacer","data":{"spacingLarge":30,"spacingSmall":20,"backgroundColor":"#ffffff"},"id":"#374","type":"component","lock":false,"position":174},{"name":"SectionDivider","data":{"title":"3.4.3 pO2 reading","skipToC":false},"id":"#486","type":"component","lock":false,"position":175},{"name":"TextBlock","data":{"text":"### **03.4.3 pO<sub>2</sub> reading** \n\nThere is a separate O<sub>2</sub>\n sensor screen in both the surface and dive\nmode.\nNot only the pO<sub>2</sub>\n but also the voltage on sensors can be read. If the\nstate of a sensor is not in operational mode (not connected, error,\nexcluded, disabled, uncalibrated), the appropriate tag appears\ninstead of the pO<sub>2</sub>\n value.\nOn the detailed and synoptic screen there is only one reading of the\npO<sub>2</sub>\n value; the arithmetic average of active sensors is used.\nYou can mark any sensor as faulty during a dive in dive menu Setup\nâ Faulty sensors.\n","textLarge":false,"imageOnRight":true,"image":{"recommendedSizes":{"width":"420","height":"280"}},"imageMobile":{"recommendedSizes":{"width":"750","height":"500"}}},"id":"#89","type":"component","lock":false,"position":176},{"name":"Image","data":{"firstImage":{},"secondImage":{}},"id":"#432","type":"component","lock":false,"position":177},{"name":"SectionDivider","data":{"title":"3.5 Gauge","skipToC":false},"id":"#487","type":"component","lock":false,"position":178},{"name":"TextBlock","data":{"text":"### **03.5 Gauge**\n\nThe gauge mode is indicated by the dark red table gridlines.\nThere are two forms of the gauge mode â with and without rebreather O<sub>2</sub>\n sensor reading. The rebreather\ngauge mode is only available in the Closed Circuit version with at least one connected O<sub>2</sub>\n sensor \n Note: Gauge screen can be enabled in any mode (OC, CCR). Setup -> Preferences -> Display -> Screens -> Gauge","textLarge":false,"imageOnRight":true,"image":{"recommendedSizes":{"width":"420","height":"280"}},"imageMobile":{"recommendedSizes":{"width":"750","height":"500"}}},"id":"#92","type":"component","lock":false,"position":179},{"name":"Image","data":{"firstImage":{"mimetype":"image/png","size":35655,"hash":"5c2621799724a4cf4df00d0ff31bbecd8a92d48a","id":"cl0wm6364lolt0776cvts78qm","filename":"divesoft-freedom-user-manual-03-5-4a.png","category":"divesoft/","type":"image"},"secondImage":{},"image":{"type":"image"}},"id":"#93","type":"component","lock":false,"position":180},{"name":"Spacer","data":{"spacingLarge":30,"spacingSmall":20,"backgroundColor":"#ffffff"},"id":"#375","type":"component","lock":false,"position":181},{"name":"Image","data":{"firstImage":{},"secondImage":{}},"id":"#326","type":"component","lock":false,"position":182},{"name":"Image","data":{"firstImage":{},"secondImage":{}},"id":"#327","type":"component","lock":false,"position":183},{"name":"Image","data":{"firstImage":{},"secondImage":{}},"id":"#329","type":"component","lock":false,"position":184},{"name":"Image","data":{"firstImage":{},"secondImage":{}},"id":"#328","type":"component","lock":false,"position":185},{"name":"Image","data":{"firstImage":{},"secondImage":{}},"id":"#330","type":"component","lock":false,"position":186},{"name":"Image","data":{"firstImage":{},"secondImage":{}},"id":"#97","type":"component","lock":false,"position":187},{"name":"SectionDivider","data":{"title":"3.5.1 Synoptic screen","skipToC":false},"id":"#488","type":"component","lock":false,"position":188},{"name":"TextBlock","data":{"text":"### **03.5.1 Synoptic screen** \n\n**Stopwatch** \nOperate the stopwatch via the menu. See Stopwatch (See section 3.5.4).\n\n**Battery symbol**\nA graphical indication shows the remaining battery capacity. See\nBattery symbol (See section 3.1.2).\n\n**Dive time** \nThe timer starts after submersion (depth > 1.5 m) and halts after\nsurfacing (depth < 0.5 m). If stay on the surface (or at very shallow\ndepth) is followed by a second submersion (during a time set in the dive termination timeout), then the dive\ntime indicated will be the time from the first submersion including the surface time.\n\n**Local Time** \nThe local time is shown on the display in the top left corner of the middle section.\n\n**Vertical speed** \nThe ascent and desce
2nt rate indication can be set to a relative (%) or absolute (m/min or ft/min) reading.\nThe relative reading is based on the maximum ascent or descent rate. \nSet in: \nBottomTimer: \"Setup -> Preferences -> Vert. rate\" \nOther licences: \"Setup -> Preferences -> User interface -> Vert. rate\"\n\n**Depth** \nThe depth reading can be set to m or ft in the setup. Depth is calculated from measured hydrostatic\npressure. For calculation fresh water (default), seawater or universal EN13319 density can be set in Setup â Preferences. \nThe universal density EN13319 is closer to salt water and not very suitable for pure fresh water.\n\n**Max Depth** \nThe maximum depth reached during the dive.\n\n**Avg depth**\nThe average depth of the dive. A new start point for depth averaging can be created via the dive menu. This\npoint is indicated by the yellow vertical line on the profile screen.\n\n**Temp** \nWater temperature is measured inside the computer case. After a temperature change wait about 1-2\nminutes until the temperature reading reaches a stable value. The temperature in air is affected by many\nfactors and is only an indication.\nA temperature correction can be set in Setup â Calibration for better accuracy.","textLarge":false,"imageOnRight":true,"image":{"recommendedSizes":{"width":"420","height":"280"}},"imageMobile":{"recommendedSizes":{"width":"750","height":"500"}}},"id":"#94","type":"component","lock":false,"position":189},{"name":"SectionDivider","data":{"title":"3.5.2 Big Screen","skipToC":false},"id":"#489","type":"component","lock":false,"position":190},{"name":"TextBlock","data":{"text":"### **03.5.2 Big Screen** \n\nThe most important information is written in really big characters.\nThis screen is useful in very bad visibility. Many divers can read the\nnumbers even without a mask.\nThe meaning of all values is identical to the synoptic screen. \nOn the \"Big Screen\" you can customize the bottom line in Gauge mode. \nBottomTimer: \"Setup -> Preferences -> Big depth\" \nOther linces:\"Setup -> Preferences -> User interface -> Big depth\"\n - \"Avg\" displays average depth\n- \"Max\" displays maximum depth\n- \"Only\" displays current depth ONLY, nothing else. \n- ","textLarge":false,"imageOnRight":true,"image":{"recommendedSizes":{"width":"420","height":"280"}},"imageMobile":{"recommendedSizes":{"width":"750","height":"500"}}},"id":"#226","type":"component","lock":false,"position":191},{"name":"Spacer","data":{"spacingLarge":30,"spacingSmall":20,"backgroundColor":"#ffffff"},"id":"#376","type":"component","lock":false,"position":192},{"name":"Image","data":{"firstImage":{"mimetype":"image/png","size":29259,"hash":"ee40ef1e1a3b682355ea1cf30ddde558699c4ab1","id":"cl0wmchtxlomg0776ar67022h","filename":"divesoft-freedom-user-manual-03-5-2.png","category":"divesoft/","type":"image"},"secondImage":{},"image":{"type":"image"}},"id":"#333","type":"component","lock":false,"position":193},{"name":"Spacer","data":{"spacingLarge":30,"spacingSmall":20,"backgroundColor":"#ffffff"},"id":"#377","type":"component","lock":false,"position":194},{"name":"SectionDivider","data":{"title":"3.5.3 Dive profile screen","skipToC":false},"id":"#490","type":"component","lock":false,"position":195},{"name":"TextBlock","data":{"text":"### **03.5.3 Dive profile screen** \n\n**Start** \nThe time of submersion is useful for checking compliance with the\nschedule.\n\n**Avg** \nThe average depth is indicated in yellow by a horizontal line and\na numerical value.\nA new start point for depth averaging can be created in the dive\nmenu. This point is indicated by the yellow vertical line and the\nhorizontal average depth line starts from there.\n\n**Current depth** \nSee lower left corner.\n\n**Dive time** \nThe runtime of the current dive is placed in lower right corner.\n\n**Max** \nThe maximum depth reached during the dive. The field with this value\nis placed in the middle of bottom line.","textLarge":false,"imageOnRight":true,"image":{"recommendedSizes":{"width":"420","height":"280"}},"imageMobile":{"recommendedSizes":{"width":"750","height":"500"}}},"id":"#95","type":"component","lock":false,"position":196},{"name":"Spacer","data":{"spacingLarge":30,"spacingSmall":20,"backgroundColor":"#ffffff"},"id":"#381","type":"component","lock":false,"position":197},{"name":"Image","data":{"firstImage":{"mimetype":"image/png","size":24751,"hash":"1dbb3f24f0e713ef7a8f5be0c9719f5b58cc9ebc","id":"cl0wmdisklomu
20776oj4c9z29","filename":"divesoft-freedom-user-manual-03-5-3a.png","category":"divesoft/","type":"image"},"secondImage":{},"image":{"type":"image"}},"id":"#331","type":"component","lock":false,"position":198},{"name":"Spacer","data":{"spacingLarge":30,"spacingSmall":20,"backgroundColor":"#ffffff"},"id":"#380","type":"component","lock":false,"position":199},{"name":"Image","data":{"firstImage":{"mimetype":"image/png","size":24831,"hash":"aa18315d380344d1e84ff80a6194d3a4543096e2","id":"cl0wme8g8lon10776b1cp6x6t","filename":"divesoft-freedom-user-manual-03-5-3b.png","category":"divesoft/","type":"image"},"secondImage":{},"image":{"type":"image"}},"id":"#96","type":"component","lock":false,"position":200},{"name":"Spacer","data":{"spacingLarge":30,"spacingSmall":20,"backgroundColor":"#ffffff"},"id":"#379","type":"component","lock":false,"position":201},{"name":"SectionDivider","data":{"title":"3.5.4 Dive menu","skipToC":false},"id":"#491","type":"component","lock":false,"position":202},{"name":"TextBlock","data":{"text":"### **03.5.4 Dive menu** \n\nDuring a dive, in any dive mode, press both keys simultaneously to\nshow the dive menu.\nThis shows current depth, partial pressure of oxygen (rebreather\nonly) and dive time on the bottom of the screen.\n","textLarge":false,"imageOnRight":true,"image":{"recommendedSizes":{"width":"420","height":"280"}},"imageMobile":{"recommendedSizes":{"width":"750","height":"500"}}},"id":"#98","type":"component","lock":false,"position":203},{"name":"Spacer","data":{"spacingLarge":30,"spacingSmall":20,"backgroundColor":"#ffffff"},"id":"#383","type":"component","lock":false,"position":204},{"name":"Image","data":{"firstImage":{"mimetype":"image/png","size":35655,"hash":"5c2621799724a4cf4df00d0ff31bbecd8a92d48a","id":"cl0wm6364lolt0776cvts78qm","filename":"divesoft-freedom-user-manual-03-5-4a.png","category":"divesoft/","type":"image"},"secondImage":{},"image":{"mimetype":"image/png","size":35655,"hash":"5c2621799724a4cf4df00d0ff31bbecd8a92d48a","id":"cl0wm6364lolt0776cvts78qm","filename":"divesoft-freedom-user-manual-03-5-4a.png","category":"divesoft/","type":"image"}},"id":"#99","type":"component","lock":false,"position":205},{"name":"Spacer","data":{"spacingLarge":30,"spacingSmall":20,"backgroundColor":"#ffffff"},"id":"#382","type":"component","lock":false,"position":206},{"name":"TextBlock","data":{"text":"**Stopwatch** \nThe elapsed time is written in white while the stopwatch is running or\nin gray when the stopwatch is not running.\n\n**Start stopwatch** \nThis starts the timer.\nIf the stopwatch was previously halted then the count\ncontinues from the indicated time. \nThe stopwatch can be set to the bottom button control, short press to pause/start, long press to reset and straight start. \nBottomTimer: Setup -> Preferences -> Stopw. btn. \nOther licenses: Setup -> Preferences -> User ","textLarge":false,"imageOnRight":true,"image":{"recommendedSizes":{"width":"420","height":"280"}},"imageMobile":{"recommendedSizes":{"width":"750","height":"500"}}},"id":"#100","type":"component","lock":false,"position":207},{"name":"Spacer","data":{"spacingLarge":30,"spacingSmall":20,"backgroundColor":"#ffffff"},"id":"#384","type":"component","lock":false,"position":208},{"name":"Image","data":{"firstImage":{"mimetype":"image/jpeg","size":58296,"hash":"dc65116bd5bfa160c8a363c530f277e6ec03810e","id":"cl0wmkbsylooc0776hjzei525","filename":"divesoft-freedom-user-manual-03-5-4b.jpg","category":"divesoft/","type":"image"},"secondImage":{},"image":{"type":"image"}},"id":"#102","type":"component","lock":false,"position":209},{"name":"Spacer","data":{"spacingLarge":30,"spacingSmall":20,"backgroundColor":"#ffffff"},"id":"#385","type":"component","lock":false,"position":210},{"name":"TextBlock","data":{"text":"**Stop stopwatch** \nThis stops the timer, leaving the elapsed time displayed in gray.","textLarge":false,"imageOnRight":true,"image":{"recommendedSizes":{"width":"420","height":"280"}},"imageMobile":{"recommendedSizes":{"width":"750","height":"500"}}},"id":"#103","type":"component","lock":false,"position":211},{"name":"Spacer","data":{"spacingLarge":30,"spacingSmall":20,"backgroundColor":"#ffffff"},"id":"#386","type":"component","lock":false,"position":212},{"name":"Image","data":{"firstImage":{"mimetype":"image/png","size":43662,"hash":"1f78f0ad94044305a8ff42b42d41aa64c223a4f1","id":"cl0wml1ablooj0776qs651uuq","filename":"divesoft-freedom-user-manual-03-5-4c.png","category":"divesoft/","type":"image"},"secondImage":{},"image":{"type":"image"}},"id":"#101","type":"component","lock":false,"position":213},{"name":"Spacer","data":{"spacingLarge":30,"spacingSmall":20,"backgroundColor":"#ffffff"},"id":"#387","type":"component","lock":false,"position":214},{"name":"TextBlock","data":{"text":"**Restart stopwatch** \nThis restarts the timer from zero.\nThis function is especially useful for decompression stops.\n\n**Reset average** \nA new start point for depth averaging will be created. The restart point is indicated by the vertical line on\nthe dive profile screen.\n\n**Add bookmark** \nA bookmark will be created in the dive log. The bookmark number is displayed in the notification that\nfollows.\n\n**End dive** \nEnd dive and switch to surface mode. This menu item is enabled only on the surface.\n\n**Switch off** \nEnd dive and switch directly to standby mode. This menu item is enabled only on the surface.\n\n**Setup** \n**Brightness**\nThe display backlight brightness level can be set from 1 to\n9. The change in brightness is immediately reflected while\nadjusting.","textLarge":false,"imageOnRight":true,"image":{"recommendedSizes":{"width":"420","height":"280"}},"imageMobile":{"recommendedSizes":{"width":"750","height":"500"}}},"id":"#104","type":"component","lock":false,"position":215},{"name":"TextBlock","data":{"text":"**Orientation** \nThe left hand, right hand and auto orientation can be selected.\nAuto orientation selects the left or right hand position\nautomatically during the start. It will not switch the display\norientation when the diver changes position (i.e. during a head\ndown descent).\n\n**Screens** \nAny of the dive mode screen can be disabled.\n\n**Apps** \nThere are several items in the apps folder\n\n**Apps - Add bookmark** - marks the current moment in the dive log\n\n**Apps - Events** - allows you to view computer-issued warnings and pop-up messages\n\n**Apps - Emergency torch** - brightens the entire display to the maximum and emits the maximum amount of light possible. Can be used as an emergency torch in certain conditions when all other torches have failed.\n\n**Apps - Inclinometer** - a tool to measure the slope of a slope. Can be used for mapping caves and wrecks.\n\n**Apps - Sokoban Game** - a puzzle game for distraction on long decompression. For more information on games, see section 9 of this manual.\n\n**Apps - Snake** - a game for distraction on a long decompression. See section 9 of this manual for more about the games.","textLarge":false,"imageOnRight":true,"image":{"recommendedSizes":{"width":"420","height":"280"}},"imageMobile":{"recommendedSizes":{"width":"750","height":"500"}}},"id":"#107","type":"component","lock":false,"position":216},{"name":"Image","data":{"firstImage":{},"secondImage":{}},"id":"#335","type":"component","lock":false,"position":217},{"name":"TextBlock","data":{"text":"**Time** \nThe local time is shown on the display in the top left corner.\n\n**Duration** \nThe timer starts after entering the Free mode. Duration of a freediving session includes the time on the\nsurface and the time spent underwater.\n\n**Surface time** \nThis timer is triggered by surfacing.\n\n**Dive c
2ount** \nNumber of dives during a freediving session.\n\n**CumulativeT** \nThe cumulative time is the sum of the time spent underwater.\n\n**Max. depth** \nThis is the maximum depth reached during a freediving session.\n\n**Temp** \nWater temperature is measured inside the computer case. After temperature change wait about 1-2\nminutes until the temperature reading reaches a stable value. The temperature in air is affected by many\nfactors and is only an indication.\nA temperature correction can be set in Setup â Calibration for better accuracy.","textLarge":false,"imageOnRight":true,"image":{"recommendedSizes":{"width":"420","height":"280"}},"imageMobile":{"recommendedSizes":{"width":"750","height":"500"}}},"id":"#109","type":"component","lock":false,"position":218},{"name":"SectionDivider","data":{"title":"3.6 Free","skipToC":false},"id":"#492","type":"component","lock":false,"position":219},{"name":"TextBlock","data":{"text":"### **03.6 Free** \n\nThe freediving mode is indicated by the yellow table gridlines.","textLarge":false,"imageOnRight":true,"image":{"recommendedSizes":{"width":"420","height":"280"}},"imageMobile":{"recommendedSizes":{"width":"750","height":"500"}}},"id":"#229","type":"component","lock":false,"position":220},{"name":"SectionDivider","data":{"title":"3.6.1 Surface screen","skipToC":false},"id":"#493","type":"component","lock":false,"position":221},{"name":"TextBlock","data":{"text":"### **03.6.1 Surface screen**\nThe freediving surface screen is shown during a freediving session\nwhile on the surface.","textLarge":false,"imageOnRight":true,"image":{"recommendedSizes":{"width":"420","height":"280"}},"imageMobile":{"recommendedSizes":{"width":"750","height":"500"}}},"id":"#227","type":"component","lock":false,"position":222},{"name":"Spacer","data":{"spacingLarge":30,"spacingSmall":20,"backgroundColor":"#ffffff"},"id":"#388","type":"component","lock":false,"position":223},{"name":"Image","data":{"firstImage":{"mimetype":"image/png","size":42304,"hash":"4bfff114f8652c931425cc78e8e4d7b5b9d1e97a","id":"cl0wmr55clopc0776zdf0z5xx","filename":"divesoft-freedom-user-manual-03-6-1.png","category":"divesoft/","type":"image"},"secondImage":{},"image":{"type":"image"}},"id":"#339","type":"component","lock":false,"position":224},{"name":"Spacer","data":{"spacingLarge":30,"spacingSmall":20,"backgroundColor":"#ffffff"},"id":"#389","type":"component","lock":false,"position":225},{"name":"SectionDivider","data":{"title":"3.6.2 Dive screen","skipToC":false},"id":"#494","type":"component","lock":false,"position":226},{"name":"TextBlock","data":{"text":"### **03.6.2 Dive screen** \n\nThe freediving dive screen is shown during a dive (after the descent\nto the On depth and before the ascent above Off depth). Both depths\ncan be set in Setup â Freediving.\nThe dive screen with the maximum depth and the dive time of the\nlast dive is accessible after surfacing with a short press of the upper\nbutton from the surface screen.","textLarge":false,"imageOnRight":true,"image":{"recommendedSizes":{"width":"420","height":"280"}},"imageMobile":{"recommendedSizes":{"width":"750","height":"500"}}},"id":"#228","type":"component","lock":false,"position":227},{"name":"Spacer","data":{"spacingLarge":30,"spacingSmall":20,"backgroundColor":"#ffffff"},"id":"#391","type":"component","lock":false,"position":228},{"name":"Image","data":{"firstImage":{"mimetype":"image/png","size":35568,"hash":"caa3e8d5ac26f63b9242ad65f11132339586446f","id":"cl0wmssallopn0776aw8m9seb","filename":"divesoft-freedom-user-manual-03-6-2.png","category":"divesoft/","type":"image"},"secondImage":{},"image":{"type":"image"}},"id":"#110","type":"component","lock":false,"position":229},{"name":"Spacer","data":{"spacingLarge":30,"spacingSmall":20,"backgroundColor":"#ffffff"},"id":"#390","type":"component","lock":false,"position":230},{"name":"TextBlock","data":{"text":"**Stopwatch** \nOperate the stopwatch by the lower button: \nShort press: start/stop \nLong press: reset\n\n**Dive time** \nThe timer starts after submersion to the On depth and stops after ascending above the Off depth.\n\n**Depth** \nThe depth can be read in the units set in the setup (m or ft). Depth is calculated from measured hydrostatic\npressure. For calculation fresh water (default) or seawater density can be set.\n\n**Max Depth** \nThe maximum depth reached during the dive.\n\n**Temp** \nWater temperature is measured inside the computer case. Because the system is slow, it provides only an\nindication during short dives.","textLarge":false,"imageOnRight":true,"image":{"recommendedSizes":{"width":"420","height":"280"}},"imageMobile":{"recommendedSizes":{"width":"750","height":"500"}}},"id":"#111","type":"component","lock":false,"position":231}
2,{"name":"SectionDivider","data":{"title":"3.7 Advised strategies","skipToC":true},"id":"#497","type":"component","lock":false,"position":232},{"name":"TextBlock","data":{"text":"### **03.7 Advised strategies** ","textLarge":false,"imageOnRight":true,"image":{"recommendedSizes":{"width":"420","height":"280"}},"imageMobile":{"recommendedSizes":{"width":"750","height":"500"}}},"id":"#496","type":"component","lock":false,"position":233},{"name":"SectionDivider","data":{"title":"3.7.1 Diving in darkness","skipToC":false},"id":"#495","type":"component","lock":false,"position":234},{"name":"TextBlock","data":{"text":"### **03.7.1 Diving in darkness** \n\n**High brightness all the time** \nThis is the preferred option for a simple dive with a high power diving light (torch) used by all team\nmembers. Brightness level 6 to 8 is recommended.\nDonât use this option if light coming from the Freedom display and light coming from your diving\npartnerâs torch canât be clearly distinguished in the peripheral vision. Otherwise it may lead to the\nseparation of the team members. \n\n<span style=\"color:red\">**WARNING: Brightness higher than 7 will significantly reduce battery life per charge. A value of 9 will reduce battery life by up to 50%.**</span>\n\n\n**Switching on-off** \nThis option is typical for cave diving. Set brightness to a high level (6 to 9) and a short screensaver timeout\n(15 s is more than enough).\nPreferably activate the display by light during a dive. Move the Freedom to the light beam instead of moving\nthe beam to prevent confusion with a light signal.\n\n**Low brightness** \nFor diving with eyes accommodated to darkness use the lowest brightness setting (level 1). Your night\nvision will not be disturbed. It is preferred to have the display on all the time (i.e. screensaver timeout set\nto 0). This option is typical for night dives in clear water.\nDive with slightly brighter display while using a low power torch. Balance the power of the backlight to the\npower of your torch to find the optimal setting â no glare but good readability.\nThe display canât shine through disturbed silt or mud on low brightness. If it is necessary to switch to\nmaximal brightness just short press the lower key repeatedly. \n\n**Note:** Adjusting the function of the lower button may override the brightness control. \n\"Lower bttn.\" to \"\"Prev Scr\" \n\"Stopw btn.\" to \"Base\" or \"Always\". \nThe setting is placed in the same place as the Lower bttn. BottomTimer: Setup -> Preferences -> Lower bttn.\nOther licences: Setup -> Preferences -> User interface -> Lower bttn.","textLarge":false,"imageOnRight":true,"image":{"recommendedSizes":{"width":"420","height":"280"}},"imageMobile":{"recommendedSizes":{"width":"750","height":"500"}}},"id":"#113","type":"component","lock":false,"position":235},{"name":"SectionDivider","data":{"title":"3.7.2 Decompression","skipToC":false},"id":"#498","type":"component","lock":false,"position":236},{"name":"TextBlock","data":{"text":"### **03.7.2 Decompression**\n\n**Gradient factors** \nExperienced divers usually set GF regarding to planned dive profile and after dive activity.\nGF low 0.30 is default value suitable for an average healthy diver and dive profiles within recreational\nrange. Lower values are more suitable for deeper dives including extended range air dives and use of\nhelium rich mixtures. 0 is not uncommon. Use lower value if any risk factor is present. Higher value can\nbe used for relatively shallow dives, but influence of GF Low on these dives is small (zero on so called\nnon-decompression dives).\nDefault GF high 0.80 increases the time at the shallow stops relatively slightly compared to the bare\nBühlmannâs decompression algorithm ZHL. If any risk factor is present, lower value is more appropriate. This\nalso applies if another dive is planned in a short time or physical activity cannot be avoided shortly after\nthe dive. Low value of GF high also shortens so called no-deco limits. GF high 0.50 can be considered as very\nconservative. For an even smaller value is not usually the reason.\n\n**Risk factors** \nUse a more conservative setting and make only dives with short or no decompression if any risk factor is\npresent. \nThe major risk factors for decompression sickness (DCS) are: \n⢠Dehydration \n⢠Heart disease, especially PFO (patent foramen ovale) or ASD (atrial septal defect) \n⢠Previous DCS \n⢠Older age \n⢠Overweight or obesity \n⢠Exercise during a dive or post dive \n⢠Fatigue \n⢠Irresponsibility or inability to follow proper decompression procedures \n\nIf excessive fatigue or any other subclinical form of DCS occurs after a dive during which a proper\ndecompression was performed then the presence of one or more risk factors can be assumed.\n\n**Diving with air or one nitrox mixture** \nConfirm the following settings: \n⢠The default OC mix is set to air or nitrox, whichever one you plan to use (Setup â Mixtures) \n⢠All other gas mixtures are disabled (no checkbox checked on the list Setup â Mixtures â Mixture\nsetup)\n\n<span style=\"color:red\">
2**Warning: if the ascent gas is set to Optimal (Setup â Decompression) and multiple gas mixtures are\nenabled then the decompression plan expects their use.** </span>\n\nThis may lead to indication of shorter time to\nsurface (TTS) and shorter decompression stops. Improper settings like this canât affect the safety of the\ndecompression if you strictly follow the computer; it only affects the calculation of the plan. This is not\napplicable to the Basic nitrox version of the Freedom.\n\n**Multi-day repetitive dives** \nIt is advised to use a slightly more conservative setting for diving holidays. Do not disable or omit the safety\nstop. Use nitrox if available and if you are qualified.\nRemember that the diving computer does not know diverâs physical shape. Maintain a high level of hydration\nduring diving holidays. Do not dive drunken or hungover. Do not dive ill.\n\n**Long decompression safety** \nPreferably, control the decompression safety with the GF high setting and disable the safety stop if the\ndecompression obligation is longer than 20 minutes. A smaller value of the GF high setting can be used\nadditionally for increasing safety on the shallow end of decompression, if required.\nSwitch to bailout gradient factors if you wish to reduce the decompression time (while increasing the risk\nof DCS). Bailout GFâs shall be properly set before dive.\n\n**Multiple gas usage** \nThis is not applicable to the Basic nitrox version of the Freedom.\nMultiple gas usage requires appropriate qualification from a recognized training agency. \n\nConfirm the following settings: \n⢠The ascent gas is set to Optimal (Setup â Decompression) \n⢠All gas mixtures, which you plan to use are properly set and active; and other gas mixtures are\ninactive (Setup â Mixtures â Mixture setup) \n⢠The default OC mix is set to the gas you plan to descend with (Setup â Mixtures) \n⢠The gas switch time is set to your preferred time (commonly 2 or 3 minutes) \n\nNever switch the computer to another gas before you start breathing it. Make sure that you breathe the\nright gas with the MOD greater than your current depth.\n\n**\nExtreme deep diving** \nEvery technical diver who dives to depths greater than 100 m/330 ft has to develop his or her own\ndecompression strategy. It is necessary to increase the personal limit gradually, step by step. The maximum\noperating depth of the Freedom is 300 m/1000 ft. This is probably a much greater depth than you and your\nbody could handle.\n\nFor extreme depth, short bottom-time decompression strategies are common: \n⢠Dive only if in really good physical shape; get your heart examined for PFO \n⢠Use the computer only as a backup for the plan based on your previous experience \n⢠Use a very low value of the GF low; 0 is not uncommon \n⢠Use a high value of the GF high; 1 is not uncommon and even >1 is not uncommon (requires the\nspecial, personally granted license) \n⢠Use optimal gas mixtures \n⢠Stay in the water for minimum 15 minutes after surfacing \n⢠Avoid post-dive exercise; take advantage of the support team \n⢠Maintain thermal comfort during a dive; avoid a hot shower after the dive \n⢠Avoid diving or any other pressure change in the following 48 h \n\nThe Divesoft Freedom is not intended for long bottom-time extreme deep diving in any mode other than the\ngauge mode. \n\nThe Full trimix or the CCR version of the Divesoft Freedom is required for trimix decompression calculation.","textLarge":false,"imageOnRight":true,"image":{"recommendedSizes":{"width":"420","height":"280"}},"imageMobile":{"recommendedSizes":{"width":"750","height":"500"}}},"id":"#230","type":"component","lock":false,"position":237},{"name":"Divider","data":{"color":"darkGray"},"id":"#231","type":"component","lock":false,"position":238},{"name":"SectionDivider","data":{"title":"4. Setup","skipToC":false},"id":"#499","type":"component","lock":false,"position":239},{"name":"TextBlock","data":{"text":"### <span id=\"Section-04\">**Section 04: Setup**","textLarge":false,"imageOnRight":true,"image":{"recommendedSizes":{"width":"420","height":"280"}},"imageMobile":{"recommendedSizes":{"width":"750","height":"500"}}},"id":"#114","type":"component","lock":false,"position":240},{"name":"Divider","data":{"color":"darkGray"},"id":"#304","type":"component","lock":false,"position":241},{"name":"Image","data":{"firstImage":{"mimetype":"image/png","size":28921,"hash":"f18800c0c39212f9825e33d34fc2948dffdb98cd","id":"cl0wmv63llopu0776nfy838i9","filename":"divesoft-freedom-user-manual-04-0-0.png","category":"divesoft/","type":"image"},"secondImage":{},"image":{"type":"image"}},"id":"#116","type":"component","lock":false,"position":242},{"name":"Spacer","data":{"spacingLarge":30,"spacingSmall":20,"backgroundColor":"#ffffff"},"id":"#392","type":"component","lock":false,"position":243},{"name":"TextBlock","data":{"text":"The Divesoft Freedom is configured in the surface mode. Activate the\nsurface mode main menu with a short press of both keys and select\nSetup.\nSome values can be set during a dive; however, this possibility is\nreserved for resolving exceptional and emergency situations.\nThe particular set values depend primarily on the userâs experience,\nphysiology and personal preferences. The fact that Divesoft Freedom\nenables setting a certain value does not mean that this kind of\nsetting is safe and suitable for you and for your planned dive.\nIf you are not sure which value to set, leave the values of the default\nsett
2ing.\nThe manufacturer does not provide a warranty for faulty operation of the Divesoft Freedom if this kind of\nfaulty operation is the result of an improper setup.\nThe factory default setting value is shown in square brackets in the following headlines.","textLarge":false,"imageOnRight":true,"image":{"recommendedSizes":{"width":"420","height":"280"}},"imageMobile":{"recommendedSizes":{"width":"750","height":"500"}}},"id":"#115","type":"component","lock":false,"position":244},{"name":"TextBlock","data":{"text":"### **04.1 Editor use**","textLarge":false,"imageOnRight":true,"image":{"recommendedSizes":{"width":"420","height":"280"}},"imageMobile":{"recommendedSizes":{"width":"750","height":"500"}}},"id":"#117","type":"component","lock":false,"position":245},{"name":"Image","data":{"firstImage":{"mimetype":"image/png","size":15332,"hash":"3ed9d24916067c7340580518879651b0b2f26946","id":"cl0wmwikkloq107765njkglzh","filename":"divesoft-freedom-user-manual-04-1-0.png","category":"divesoft/","type":"image"},"secondImage":{},"image":{"type":"image"}},"id":"#119","type":"component","lock":false,"position":246},{"name":"Spacer","data":{"spacingLarge":30,"spacingSmall":20,"backgroundColor":"#ffffff"},"id":"#393","type":"component","lock":false,"position":247},{"name":"TextBlock","data":{"text":"The majority of variable values is edited in a similar manner. \n\nTilt toward yourselfâ decrease the entered digit by one or uncheck\nflag \nTilt to the left â move the cursor to the left \nTilt to the right â move the cursor to the right \nPress upper key â discard editing (reset to previous value) \nLong press upper key â reset to default value \nPress both keys â exit without save \nPress lower key â save and exit \nPermissible range is indicated by <minimum ..\\[default] .. maximum> value. \nThe display shows a brief description below. \nNote: Perform the Horizontal calibration (See section 4.8) if there is no valid response to tilting or tapping\n\nAn alternative method of input in the editor is the button method. This can be set in Setup -> Preferences -> User interface -> Navigation -> Bttn.\n\nUpper button - moves the cursor over characters \nLower button - sets the value \nLong press upper key - moves the cursor back one character \nLong press lower key - resets the value to the default and moves the cursor to the beginning. \n**To save the value you must scroll through all characters to the end, the editor will exit after the last character.**","textLarge":false,"imageOnRight":true,"image":{"recommendedSizes":{"width":"420","height":"280"}},"imageMobile":{"recommendedSizes":{"width":"750","height":"500"}}},"id":"#118","type":"component","lock":false,"position":248},{"name":"TextBlock","data":{"text":"### **04.2 Decompression**\n\n### **04.2.1 Gradient factor**\n","textLarge":false,"imageOnRight":true,"image":{"recommendedSizes":{"width":"420","height":"280"}},"imageMobile":{"recommendedSizes":{"width":"750","height":"500"}}},"id":"#120","type":"component","lock":false,"position":249},{"name":"Image","data":{"firstImage":{},"secondImage":{}},"id":"#121","type":"component","lock":false,"position":250},{"name":"TextBlock","data":{"text":"**GF low \\[0.30]** \nThe gradient factor at the start of decompression (range: 0.00â1.00).\nGF low determines an additional increase of safety at the depth of\nthe first decompression stop or, as the case may be, at the depth of\nthe decompression ceiling at the start of decompression. Setting the\nvalue of 1.00 corresponds to the Bühlmann decompression algorithm\nwithout additional increase of safety using the gradient factors\nmethod.\nSetting low values leads to deeper and longer stops at the start of\ndecompression.\nSee also Advised strategies â Gradient factors (See section 3.7.2).","textLarge":false,"imageOnRight":true,"image":{"recommendedSizes":{"width":"420","height":"280"}},"imageMobile":{"recommendedSizes":{"width":"750","height":"500"}}},"id":"#122","type":"component","lock":false,"position":251},{"name":"TextBlock","data":{"text":"**GF high \\[0.80]** \nThe gradient factor at the end of decompression (range: 0.00â1.00).\
2nGF high determines an additional increase of safety when ascending to the surface. Setting the value of\n1.00 corresponds to the Bühlmann decompression algorithm without additional increase of safety using the\ngradient factors method.\nSetting low values leads to prolongation of shallow decompression stops.\nFor extreme dives a GF high greater than 1 is sometimes used (less safe than the standard Bühlmann\ndecompression algorithm). This requires the special, personally granted license.\nSee also Advised strategies â Gradient factors (See section 3.7.2).\n\n**Bailout GF low \\[0.80]** \nThe gradient factor for bailout at the start of decompression (range: 0.00â1.00).\nAs a general rule, for bailout GF low a higher GF value (a lower additional increase of safety) is set than for\nstandard GF low.\n\n**Bailout GF high \\[0.95]** \nThe gradient factor for bailout at the end of decompression (range: 0.00â1.00).\nAs a general rule, for bailout GF high a higher GF value (a lower additional increase of safety) is set than for\nstandard GF high.","textLarge":false,"imageOnRight":true,"image":{"recommendedSizes":{"width":"420","height":"280"}},"imageMobile":{"recommendedSizes":{"width":"750","height":"500"}}},"id":"#123","type":"component","lock":false,"position":252},{"name":"TextBlock","data":{"text":"### **04.2.2 Safety stop (On)** \n3 minute safety stop within depth 6 to 3 m (20 to 10 ft) is indicated after a dive to a depth greater than 10 m\n(30 ft).","textLarge":false,"imageOnRight":true,"image":{"recommendedSizes":{"width":"420","height":"280"}},"imageMobile":{"recommendedSizes":{"width":"750","height":"500"}}},"id":"#238","type":"component","lock":false,"position":253},{"name":"TextBlock","data":{"text":"### **04.2.3 Ascent gas (Optimal)** \nSpecifies which mixture or set of mixtures will be used for ascent planning.\nIf optimal gas is selected, then the time to surface (TTS) and the dive plan assume the changing of gases\nfrom the list of active mixtures.\nIf current gas is selected, then only the gas currently breathed is used for TTS calculation and dive planning.\nThis setting is preferred for dives that do not involve changing gas mixtures.","textLarge":false,"imageOnRight":true,"image":{"recommendedSizes":{"width":"420","height":"280"}},"imageMobile":{"recommendedSizes":{"width":"750","height":"500"}}},"id":"#239","type":"component","lock":false,"position":254},{"name":"TextBlock","data":{"text":"### **04.2.4 Deco stops**","textLarge":false,"imageOnRight":true,"image":{"recommendedSizes":{"width":"420","height":"280"}},"imageMobile":{"recommendedSizes":{"width":"750","height":"500"}}},"id":"#240","type":"component","lock":false,"position":255}
2,{"name":"Image","data":{"firstImage":{},"secondImage":{}},"id":"#124","type":"component","lock":false,"position":256},{"name":"TextBlock","data":{"text":"**Stops/Ceil. \\[Stops**] \nThe Divesoft Freedom can be used in the regimen of separate\ndecompression stops or in the regimen with only the decompression\nceiling depth indicated.\nAs a general rule, the stops regimen is more suitable for open water\ndiving and is easy to understand and follow. The ceiling regimen\nis more suitable for cave and technical diving. The time spent on\ndecompression is slightly shorter if the ceiling regimen is used\nfor continuous decompression. Personal preference is the most\nimportant.\n\n**Last stop \\[3 m/10 ft]** \nThe depth of the shallowest decompression stop can be set to 3 m/10 ft or 6 m/20 ft. Choose the\ndepth according to the conditions on the surface and your preference. A deeper last stop extends the\ndecompression time slightly. Use the 6 m/20 ft last stop when using 100% oxygen for decompression.\n\n**Rounding \\[60 s]** \nYou can choose the time on stop rounding (1s; 30s; 60s).\n30 or 60s is a good choice for recreational dives. For deep dives, especially with a small value of the GF\nlow and resulting short stops on decompression start, it is better to choose the 1s rounding. Otherwise\na prolonged stay on the deco stop due to rounding may lead to the disappearance of the next short deco\nstop and could negatively affect the decompression profile smoothness.","textLarge":false,"imageOnRight":true,"image":{"recommendedSizes":{"width":"420","height":"280"}},"imageMobile":{"recommendedSizes":{"width":"750","height":"500"}}},"id":"#125","type":"component","lock":false,"position":257},{"name":"TextBlock","data":{"text":"### **04.2.5 Deep stops**\n\n**Pyle Deep stops (Off)** \nEmpiric modification of decompression profile according to Richard Pyleâs algorithm.\nThe combination of Pyle stops and a small value of the GF low can result in a not so optimal decompression\nprofile. Please choose only one preferred method. As a general rule, use GF low 0.30 or less and switch (left\nswitched) Pyle Deep stops Off.\n\n**Stops duration (2 min)**\nThe value of the Pyle stops duration (range: 1â3 min).","textLarge":false,"imageOnRight":true,"image":{"recommendedSizes":{"width":"420","height":"280"}},"imageMobile":{"recommendedSizes":{"width":"750","height":"500"}}},"id":"#245","type":"component","lock":false,"position":258},{"name":"TextBlock","data":{"text":"### **04.2.6 Ascent rate** \nRate is used for calculation of the ascent plan and indication of\nascent rate, if relative measuring (percentage) is set in Setup\nâ Preferences â User interface â Vertical speed","textLarge":false,"imageOnRight":true,"image":{"recommendedSizes":{"width":"420","height":"280"}},"imageMobile":{"recommendedSizes":{"width":"750","height":"500"}}},"id":"#246","type":"component","lock":false,"position":259},{"name":"TextBlock","data":{"text":"### **04.2.7 Descent rate** \nRate is used for calculation of the descent plan and indication of\ndescent rate, if relative measuring (percentage) is set in Setup\nâ Preferences â User interface â Vertical speed.","textLarge":false,"imageOnRight":true,"image":{"recommendedSizes":{"width":"420","height":"280"}},"imageMobile":{"recommendedSizes":{"width":"750","height":"500"}}},"id":"#282","type":"component","lock":false,"position":260},{"name":"TextBlock","data":{"text":"**Speed 1 Ç10 m/min / 33 ft/minÇ** \nThe anticipated ascent rate within small depths,\nin zone 1 (range: 1â20 m/min).\nThe value is m/min in metric and ft/min in imperial units.\n\n**Depth zone 1 Ç10 m / 3 ftÇ** \nThe depth defining zone 1. This zone lies between the surface and the set depth (range: 0â300 m).\nThe value is m in metric and ft in imperial units.\n\n**Speed 2 Ç10 m/min / 33 ft/minÇ** \nThe anticipated ascent rate within medium depths, in zone 2 (range: 1â20 m/min).\n\n**Depth zone 2 Ç80 m / 262 ftÇ** \nThe depth defining zone 2. This zone lies between depth zone 1 and the set depth (range: 0â300 m).\n\n**Speed 3 Ç18 m/min / 59 ft/minÇ** \nThe anticipated ascent rate within large depths, in zone 3. (range: 1â20 m/min).","textLarge":false,"imageOnRight":true,"image":{"recommendedSizes":{"width":"420","height":"280"}},"imageMobile":{"recommendedSizes":{"width":"750","height":"500"}}},"id":"#127","type":"component","lock":false,"position":261},{"name":"TextBlock","data":{"text":"**Warn under \\[80 m]** \nThe threshold at which the alarm is activated to indicate exceeding\nthe descent rate. At smaller depths, exceeding the descent rate is\nignored.\nThe value is in m metric and ft in imperial units.\nThis alarm is disabled in factory default setting. It can be enabled in\nSetup â Alarms â
2 Alarm sources â Rates â Descent rate.\n\n**Max rate \\[20 m/min]** \nThe anticipated descent rate (range: 1â40 m/min).\nThe set rate is also used for dive planning.\nThe value is m/min in metric and ft/min in imperial units.\nMax rate 30 m/min is used to indicate a descent rate at a depth shallower than the warn-under depth.\n","textLarge":false,"imageOnRight":true,"image":{"recommendedSizes":{"width":"420","height":"280"}},"imageMobile":{"recommendedSizes":{"width":"750","height":"500"}}},"id":"#129","type":"component","lock":false,"position":262},{"name":"TextBlock","data":{"text":"### **04.3 Mixtures**\n\n### **04.3.1 Mixture setup**\nThe number of available mixtures depends on the software version.","textLarge":false,"imageOnRight":true,"image":{"recommendedSizes":{"width":"420","height":"280"}},"imageMobile":{"recommendedSizes":{"width":"750","height":"500"}}},"id":"#130","type":"component","lock":false,"position":263},{"name":"TextBlock","data":{"text":"Each mixture can be set as active (marked checkbox) or inactive\n(clear box). It can be done in the editing screen or by a shortcut â\nlong press of the upper key in the list of mixtures. Only active\nmixtures can be selected.\nThe default mixture is always active.\nIn an emergency, a mixture can be marked as active during a dive.\nFurthermore, a new mixture can be defined during a dive. These\nfeatures are reserved for emergency situations.","textLarge":false,"imageOnRight":true,"image":{"recommendedSizes":{"width":"420","height":"280"}},"imageMobile":{"recommendedSizes":{"width":"750","height":"500"}}},"id":"#134","type":"component","lock":false,"position":264},{"name":"TextBlock","data":{"text":"### **04.3.2 Def. OC mix** \nA default mixture for an open circuit apparatus. A different default\nmixture can only be selected from mixtures that are marked as active.","textLarge":false,"imageOnRight":true,"image":{"recommendedSizes":{"width":"420","height":"280"}},"imageMobile":{"recommendedSizes":{"width":"750","height":"500"}}},"id":"#247","type":"component","lock":false,"position":265},{"name":"TextBlock","data":{"text":"\n### **04.3.3 End pressure Ç50 barÇ**\nDetermines the size of the tank's pressure safety margin. The value is reflected in the planner calculation.","textLarge":false,"imageOnRight":true,"image":{"recommendedSizes":{"width":"420","height":"280"}},"imageMobile":{"recommendedSizes":{"width":"750","height":"500"}}},"id":"#248","type":"component","lock":false,"position":266},{"name":"TextBlock","data":{"text":"\n### **04.3.4 SAC Ç25 l/minÇ**\nSurface Air Consumption determines the diver's gas consumption value. The value is used to calculate gas management in the planner.","textLarge":false,"imageOnRight":true,"image":{"recommendedSizes":{"width":"420","height":"280"}},"imageMobile":{"recommendedSizes":{"width":"750","height":"500"}}},"id":"#249","type":"component","lock":false,"position":267},{"name":"TextBlock","data":{"text":"### **04.3.5 Gas switch Ç2 minÇ** \nThe gas switch duration may be set from 0 to 5 minutes. This time will be added to the dive plan and TTS\ncalculation.","textLarge":false,"imageOnRight":true,"image":{"recommendedSizes":{"width":"420","height":"280"}},"imageMobile":{"recommendedSizes":{"width":"750","height":"500"}}},"id":"#250","type":"component","lock":false,"position":268},{"name":"TextBlock","data":{"text":"### **04.3.6 Min pO<sub>2</sub> Ç0.18 barÇ** \nThe low pO<sub>2</sub>\n alarm is activated if the current pO<sub>2</sub>\n is less than the set\nvalue (range: 0.18â0.40 bar). The setting of minimum partial pressure\nof oxygen plays a role in gas switching calculations.\n","textLarge":false,"imageOnRight":true,"image":{"recommendedSizes":{"width":"420","height":"280"}},"imageMobile":{"recommendedSizes":{"width":"750","height":"500"}}},"id":"#251","type":"component","lock":false,"position":269},{"name":"TextBlock","data":{"text":"### **04.3.7 Max pO<sub>2</sub> Ç1.60 barÇ** \nThe high pO<sub>2</sub>\n alarm is activated if current pO<sub>2</sub>\n is bigger than set value\n(range: 0.8â1.6 bar). The setting of maximum partial pressure of\noxygen plays role in gas switching calculations. ","textLarge":false,"imageOnRight":true,"image":{"recommendedSizes":{"width":"420","height":"280"}},"imageMobile":{"recommendedSizes":{"width":"750","height":"500"}}},"id":"#252","type":"component","lock":false,"position":270},{"name":"TextBlock","data":{"text":"### **04.4 Alarms**\n\nThere are two kinds of messages, alarms and notifications. Alarm\nmessages appears on red background, notifications on a blue\nbackground.","textLarge":false,"imageOnRight":true,"image":{"recommendedSizes":{"width":"420","height":"280"}},"imageMobile":{"recommendedSizes":{"width":"750","height":"500"}}},"id":"#136","type":"component","lock":false,"position":271},{"name":"Image","data":{"firstImage":{},"secondImage":{}},"id":"#345","type":"component","lock":false,"position":272},{"name":"TextBlock","data":{"text":"### **04.4.1 Alarm sources**","textLarge":false,"imageOnRight":true,"image":{"recommendedSizes":{"width":"420","height":"280"}},"imageMobile":{"recommendedSizes":{"width":"750","height":"500"}}},"id":"#138","type":"component","lock":false,"position":273},{"name":"TextBlock","data":{"text":"**Deco stop miss \\[On]** \nThe alarm is activated if the decompression stop is violated (in the stops regimen).\n\n**CNS \\[On]** \nThis alarm occurs when 75 %, 90 % and 100 % of CNS oxygen toxicity limit is reached.\n\n**Descent rate \\[Off]** \nA descent speed greater than set while deeper than set activates the alarm.\nSee descent rate setting in Setup â Desce
2nt rate (See section 4.2.7).\n\n**Ascent rate \\[On]** \nAn ascent speed greater then set for the current deep interval activates the alarm.\nSee ascent rate setting in Setup â Ascent rate (See section 4.2.4).\n\n**Low battery \\[25 %]** \nThe alarm is activated if the remaining battery capacity falls below this limit.\nRange is 0â40%; 0 means that the alarm is disabled.\nIf set to a value greater than 10 %, then a second alarm on 10 % occurs.","textLarge":false,"imageOnRight":true,"image":{"recommendedSizes":{"width":"420","height":"280"}},"imageMobile":{"recommendedSizes":{"width":"750","height":"500"}}},"id":"#140","type":"component","lock":false,"position":274},{"name":"TextBlock","data":{"text":"### **04.4.2 Notifications**","textLarge":false,"imageOnRight":true,"image":{"recommendedSizes":{"width":"420","height":"280"}},"imageMobile":{"recommendedSizes":{"width":"750","height":"500"}}},"id":"#253","type":"component","lock":false,"position":275},{"name":"TextBlock","data":{"text":"**No deco end \\[On]** \nThe end of the dive in zero time (in the terminology of the\nBühlmann decompression model), i.e. notification that there will be\na decompression obligation.\n\n**Deco stop end \\[On]**\nThe end of the decompression stop (in the stops regimen). You can\nascend to the next stop or to the surface, as indicated on the display.\n\n**Gas switch reminder \\[Off]** \nA recommendation to switch to a different mix.\n\n**Gas switch done \\[On]** \nThe change of mixture in OC mode or diluent in CCR mode has been executed.\nThis notification prevents accidental gas mix switch using a shortcut if any key is pressed unintentionally.\n\n**Depth & Time** \nA notification that the set time or depth during a descent or ascent has been reached. Up to three depth alerts can be set during descent, three time alerts, and three depth alerts during ascent. \nThe values are located on an imaginary dive profile in the editor. On the left are the values for descent depths (m, ft), on the \"bottom\" are the values for time (minutes), on the right are the values for ascent depths. \nLower key - moves the cursor to the next value \nUpper key - enter to edit the value. \nIt is possible to set three separate \ndepths in the range of 0â300 m, where 0 means deactivation of the notification. \nIt is possible to set three separate times in the range\nof 0â999 min., where 0 means deactivation of the notification.\n\n**Airbrake** \nSets alerts for air breaks during decompression with high oxygen gases. \nBreak above % - above how much %O<sub>2</sub> we consider the mixture to be oxygen/airbreak \nBreak after - after how many minutes on oxygen do we want to break \nBreak length - length of airbreak\nThe times are default 0 - off\n","textLarge":false,"imageOnRight":true,"image":{"recommendedSizes":{"width":"420","height":"280"}},"imageMobile":{"recommendedSizes":{"width":"750","height":"500"}}},"id":"#142","type":"component","lock":false,"position":276},{"name":"TextBlock","data":{"text":"### **04.5 Rebreather**\n\nRebreather settings are available in the Closed Circuit version of the Divesoft Freedom only.\nThere are four types of rebreather supported:\n\n**CCR Type**\n \n**CCR Type - CCR** \nConstatnt pO<sub>2</sub> CCR - Electronic or manual CCR (eCCR or mCCR), where pO<sub>2</sub>\n is stable regardless of depth change, set by setpoint.\n \n**CCR Type - aSCR** \nThe constant mass flow semi closed rebreather (active SCR).\n\n**CCR Type - pSCR** \nRespiratory minute volume keyed semi closed rebreather (passive SCR).","textLarge":false,"imageOnRight":true,"image":{"recommendedSizes":{"width":"420","height":"280"}},"imageMobile":{"recommendedSizes":{"width":"750","height":"500"}}},"id":"#40","type":"component","lock":false,"position":277},{"name":"TextBlock","data":{"text":"### **04.5.1 Const pO<sub>2</sub>** \n\n**Diluents** \n8 mixtures with any content of oxygen, helium and nitrogen can be set. This setting is independent from the\nOC mixture setting.\nThe control is the same as with OC mixtures.\n\n**Default diluent** \nA default diluent for a closed circuit rebreather.\n\n**SP Low \\[0.7]** \nThe SP low is set after switching to the fixed setpoint CCR dive mode on the surface.\n\n**SP High \\[1.3]** \nThe SP low can be switched to the SP high manually (via the shortcut or via the menu) or automatically at\na set depth during a descent or at a set runtime.\n\n**SPhigh auto \\[0 m/ft]** \nIt is possible to set the automatic switching of the high setpoint during exceeding the depth during descent, time or depth during ascent. The editor shows an imaginary dive profile, where on the left side is the depth during descent, on the \"bottom\" is the time and on the right the depth during ascent. \nLower key - cursor movement \nUpper key - enter the edit value\nWhen the set limits are exceeded to this depth, the high setpoint is automatically set. Zero disables this feature.\n\n**SP shortcuts \\[Off]** \nEnables or disables the use of button for switching setpoints\n\n**SP ascent \\[High]** \nSpecifies which setpoint will be used to calculate the TTS. Choice between current or high.","textLarge":false,"imageOnRight":true,"image":{"recommendedSizes":{"width":"420","height":"280"}},"imageMobile":{"recommendedSizes":{"width":"750","height":"500"}}},"id":"#254","type":"component","lock":false,"position":278},{"name":"TextBlock","data":{"text":"### **04.5.2 aSCR**\n\n**VO<sub>2</sub> \\[1.5 l/min]** \nThe metabolic consumption of oxygen (VO<sub>2</sub>\n) can be set in the range 0.5â3 l/min.\n\n**Constant flow \\[7.0 l/min]** \nThe constant flow of premix can be set in the range 5â20 l/min.","textLarge":false,"imageOnRight":true,"image":{"recommendedSizes":{"width":"420","height":"280"}},"imageMobile":{"recommendedSizes":{"width":"750","height":"500"}}},"id":"#255","type":"component","lock":false,"position":279},{"name":"TextBlock","data":{"text":"### **04.5.3 pSCR**\n\n**PA ratio \\[8.0]** \nThe PA ratio can be set in the range 2â
216. It is fixed by the design of the SCR. \nVentilatory coef O<sub>2</sub> \\[20] \nThe ventilatory coefficient for oxygen is a constant that represents the fact that the harder one works, the\nfaster one breathes (= respiratory minute volume/metabolic consumption of oxygen, VO<sub>2</sub>\n). Fit people have\na lower respiratory rate for equivalent amounts of work than unfit people, so the lower value represents\na physically fit individual (range: 14â28).","textLarge":false,"imageOnRight":true,"image":{"recommendedSizes":{"width":"420","height":"280"}},"imageMobile":{"recommendedSizes":{"width":"750","height":"500"}}},"id":"#256","type":"component","lock":false,"position":280},{"name":"TextBlock","data":{"text":"### **04.5.4 Common settings** \n\n**Stack time \\[0 min]** \nSet the scrubber lifetime. The stack time warning will be generated after this time expires. Zero disables\nthis feature.\n\n**Number of sensors \\[0]** \nEnter the number of O<sub>2</sub>\n chemical sensors connected to the Freedom using a cable. One, two or three sensors\ncan be connected.\nThe cable equipped with the Molex connectors is included in the Closed Circuit version of the Divesoft\nFreedom distribution package or can be ordered separately.\n\n**Faulty sensors** \nYou can mark any connected but untrusted sensor as disabled. By doing so, you will remove the these\nsensors from the calculation of the average pO<sub>2</sub>\n\n**Cell -> 10k** \nWhen using the Freedom with external sensors, it is sometimes necessary to adjust the voltage of the sensors, which can be changed by wiring the sensor. This adjustment determines terminator setting. Normally ON. On CCR cables with insulators usually need to be turned off.\n\n**3rd sens. ratio** \nCoefficient for 3rd sensor ratio. \nCoeficient for 3rd sensor voltage with disabled terminators, applies only on HW rev 3.0 and older.","textLarge":false,"imageOnRight":true,"image":{"recommendedSizes":{"width":"420","height":"280"}},"imageMobile":{"recommendedSizes":{"width":"750","height":"500"}}},"id":"#257","type":"component","lock":false,"position":281},{"name":"TextBlock","data":{"text":"### **04.6 Freediving Setup**\n\n**On depth \\[1.0]** \nThe descent to On depth triggers the start of a dive. Set value greater than Off depth.\n\n**Off depth \\[0.3]** \nThe ascent above Off depth means the end of a dive. Set value smaller than On depth.","textLarge":false,"imageOnRight":true,"image":{"recommendedSizes":{"width":"420","height":"280"}},"imageMobile":{"recommendedSizes":{"width":"750","height":"500"}}},"id":"#258","type":"component","lock":false,"position":282},{"name":"TextBlock","data":{"text":"### **04.7 Preferences**\n\n### **04.7.1 Display**\n\n**Orientation [Left hand]**","textLarge":false,"imageOnRight":true,"image":{"recommendedSizes":{"width":"420","height":"280"}},"imageMobile":{"recommendedSizes":{"width":"750","height":"500"}}},"id":"#164","type":"component","lock":false,"position":283},{"name":"Image","data":{"firstImage":{"mimetype":"image/jpeg","size":49583,"hash":"6d2460341c4681d9d75f0387457389976b638d83","id":"cl0wno1qmlous0776cz1n61in","filename":"divesoft-freedom-user-manual-04-7-1.jpg","category":"divesoft/","type":"image"},"secondImage":{},"image":{"type":"image"}},"id":"#343","type":"component","lock":false,"position":284},{"name":"TextBlock","data":{"text":"Left hand, right hand and the auto orientation can be selected.\nAuto orientation selects the left or right hand position automatically during the start. It will not switch the\ndisplay orientation when the diver changes position (i.e. during a head down descent).\n\n**Brightness**","textLarge":false,"imageOnRight":true,"image":{"recommendedSizes":{"width":"420","height":"280"}},"imageMobile":{"recommendedSizes":{"width":"750","height":"500"}}},"id":"#165","type":"component","lock":false,"position":285},{"name":"TextBlock","data":{"text":"The display backlight brightness level can be set from 1 to 9. The\nchange of brightness is immediately reflected during a setting, so\npreferably change this setting in the shade or in the dark.\nFor diving with eyes accommodated to darkness use the lowest\nbrightness setting (level 1). Use high brightness (level 5 to 9) for\ndiving with a high level of ambient light.\nAlso see advised
2strategies for Diving in darkness (See section 3.7.2). \n\n<span style=\"color:red\">**WARNING: Brightness higher than 7 will significantly reduce battery life per charge. A value of 9 will reduce battery life by up to 50%.** </span>\n\nExample: normal battery life with setting 5 is 18h, with brightness set to 9 it is only 9h","textLarge":false,"imageOnRight":true,"image":{"recommendedSizes":{"width":"420","height":"280"}},"imageMobile":{"recommendedSizes":{"width":"750","height":"500"}}},"id":"#166","type":"component","lock":false,"position":286},{"name":"TextBlock","data":{"text":"**Menu highlight** \nIncrease the font of the selected menu line\nCurr. - only the selected line is highlighted\nAll - whole menu in large font\nNone - all in small font\n\n**Screensaver \\[0 s]** \nThe display will be switched off after the screensaver timeout\nexpires. Zero disables this feature (i.e. display is all the time on).\n\n","textLarge":false,"imageOnRight":true,"image":{"recommendedSizes":{"width":"420","height":"280"}},"imageMobile":{"recommendedSizes":{"width":"750","height":"500"}}},"id":"#167","type":"component","lock":false,"position":287},{"name":"Image","data":{"firstImage":{"mimetype":"image/jpeg","size":16619,"hash":"d71ddb1198f5ad5642b19abc83c6a0c03f441cf7","id":"cl0wnoxw7lov10776eb3xh2sw","filename":"divesoft-freedom-user-manual-04-7-1b.jpg","category":"divesoft/","type":"image"},"secondImage":{},"image":{"type":"image"}},"id":"#346","type":"component","lock":false,"position":288},{"name":"TextBlock","data":{"text":"**Screens** \nAny dive mode screen can be disabled.\n\n**OC row4/col3 custom field** \nThe decompression floor or the average depth or TTS2 can be set for the\ndetailed OC screen. \nTTS2 is Time to surface calculated with current OC mixture only.","textLarge":false,"imageOnRight":true,"image":{"recommendedSizes":{"width":"420","height":"280"}},"imageMobile":{"recommendedSizes":{"width":"750","height":"500"}}},"id":"#168","type":"component","lock":false,"position":289},{"name":"Image","data":{"firstImage":{"mimetype":"image/png","size":48003,"hash":"1576babd317cfe033c77f1324be7793da48b6f47","id":"cl0wnqohilow50776jh2vtmns","filename":"divesoft-freedom-user-manual-04-7-1c.png","category":"divesoft/","type":"image"},"secondImage":{},"image":{"type":"image"}},"id":"#347","type":"component","lock":false,"position":290},{"name":"Spacer","data":{"spacingLarge":30,"spacingSmall":20,"backgroundColor":"#ffffff"},"id":"#409","type":"component","lock":false,"position":291},{"name":"TextBlock","data":{"text":"### **04.7.2 Timeouts** \n\n**Surface idle \\[10 min]** \nThe Freedom will be switched off after this timeout expires (range: 1â120 min).\nBefore switching off, âShutdown?â question is displayed for 30 s. Select No to restart this timer.\n\n**Prepared idle \\[15 min]** \nThe manually activated dive mode will be switched back to surface mode if the dive does not start during\nthis timeout (range: 1â120 min).\n\n**Dive termination \\[10 min]** \nThe dive will be terminated after surfacing and if no subsequent submersion starts during this timeout\n(range: 0â30 min). Zero disables this feature (i.e. dive will not be terminated automatically).\n\n**Dive end Confirm \\[Off]** \nIf the dive end confirmation is On then a confirmation dialog is displayed for 30 s before the dive ends.\nSelect No to restart the dive termination timer.\n\n**Dive time \\[Auto]** \nAuto - stop divetime on emergence \nCave - divetime stops after manual end of dive, for cave diving with more dry and wet (siphons/sumps) sections.","textLarge":false,"imageOnRight":true,"image":{"recommendedSizes":{"width":"420","height":"280"}},"imageMobile":{"recommendedSizes":{"width":"750","height":"500"}}},"id":"#169","type":"component","lock":false,"position":292},{"name":"Spacer","data":{"spacingLarge":30,"spacingSmall":20,"backgroundColor":"#ffffff"},"id":"#411","type":"component","lock":false,"position":293},{"name":"TextBlock","data":{"text":"### **04.7.3 User interface**\n\n\n**Checklist \\[Enabled]** \nIf this is not disabled then the setting summary will be shown when the dive mode starts.\nThis is an essential part of a predive check especially for muti-gas and rebreather diving.\n\n**Plan order\\[Time]** \nThe dive ascent plan can be sorted by time or by depth (i.e. in reverse order).\n\n**Key delay \\[0]**\nIf a greater value than 0 is set then a longer button press is needed to be recognized as valid user input. Use\nin case of troubles with unintended activation.\n\n**Navigation \\[Bttn]** \nThe numbers in the editor can be increased or decreased by tilt, by buttons or by tap. To control with tapping it is\nnecessary to practice a little. Do not change the setting to tap unless you have a strong reason.\n\n**Gas shortc. \\[Off]** \nThe default setting for gas shortcuts is off. If enabled then a long press of the upper key selects the\nprevious gas mixture and a long press of the lower key selects the next gas mixture. This list is cyclic.\n\nIf the âbreathableâ option is selected, then mixes with O<sub>2</sub>\n inside the breathable range with regard to the\ncurrent depth are switched. The limits of breathable range are set in Setup â Mixtures.\nIf the âallâ option is selected, then all mixes are switched, regardless breathability. Each gas switch produces an alert - both haptic and visual.\n\n**Vert. rate \\[Unit/min]** \nIf percent is set then the ascent and desce
2nt rate are indicated relatively to the ascent and descent speed\nlimits. If unit/min is set then the ascent or descent rate are indicated in depth unit per minute.\n\n**Stopw. bttn.** \nSpecifies under which conditions the bottom button functions as a stopwatch control in Gauge mode. You can choose between Disabled, Base scr only, or Always.\n\n**Big Depth** \nSpecifies what to display on the bottom line of the Big screen. \nAvg - displays average depth \nMax - displays maximum depth \nOnly - displays current depth ONLY, nothing else.\n\n**Lower bttn**. \nDetermines the behaviour of the bottom button. The button can be predefined to turn the display off and on for battery saving, or it can be used to reverse the scrolling direction between screens.","textLarge":false,"imageOnRight":true,"image":{"recommendedSizes":{"width":"420","height":"280"}},"imageMobile":{"recommendedSizes":{"width":"750","height":"500"}}},"id":"#259","type":"component","lock":false,"position":294},{"name":"TextBlock","data":{"text":"### **04.7.4 Units \\[Metric]**\nImperial or metric units can be selected.","textLarge":false,"imageOnRight":true,"image":{"recommendedSizes":{"width":"420","height":"280"}},"imageMobile":{"recommendedSizes":{"width":"750","height":"500"}}},"id":"#260","type":"component","lock":false,"position":295},{"name":"TextBlock","data":{"text":"### **04.7.5 Salinity \\[Fresh]**\n\nSalinity Fresh, Salt or EN 13319 can be set according the water density. If changed to the Sea option then the density of seawater will be used for the depth calculation.\nThe majority of depth gauges is calibrated to fresh water. Do not change this setting unless a direct\ncomparison with a depth gauge calibrated to seawater is needed.\nEN13319 which is the \"universal\" density according to the same standard - 1020 kg/m3, which is very close to salt water and quite far from fresh water. \nSetting of fresh/sea water doesnât affect decompression calculations. Decompression is based on ambient\npressure and is independent of displayed depth. Only depth of decompression stops is rounded up to usual\nvalues according to settings of fresh/sea water and metric/imperial units.","textLarge":false,"imageOnRight":true,"image":{"recommendedSizes":{"width":"420","height":"280"}},"imageMobile":{"recommendedSizes":{"width":"750","height":"500"}}},"id":"#261","type":"component","lock":false,"position":296},{"name":"TextBlock","data":{"text":"### **04.7.6 Default mode \\[OC]**\n\nIf submersion to a depth greater than 1.5 m occurs with the computer in surface mode or switched off, the\ncomputer switches to the selected default mode.","textLarge":false,"imageOnRight":true,"image":{"recommendedSizes":{"width":"420","height":"280"}},"imageMobile":{"recommendedSizes":{"width":"750","height":"500"}}},"id":"#262","type":"component","lock":false,"position":297},{"name":"TextBlock","data":{"text":"### **04.7.7 Full log \\[Off]**\n","textLarge":false,"imageOnRight":true,"image":{"recommendedSizes":{"width":"420","height":"280"}},"imageMobile":{"recommendedSizes":{"width":"750","height":"500"}}},"id":"#263","type":"component","lock":false,"position":298},{"name":"TextBlock","data":{"text":"### **04.8 Calibration**\n\n**Calibration O<sub>2</sub>** \nSee O<sub>2</sub>\n sensors calibration (See section 3.4.2).\n \n**Horizontal calibration** \nCalibration of accelerometers, which are used for control by tilt or tap. Place the computer horizontally\n(display up) and press any key. It is preferred to use a steady horizontal ground (e.g. a table).\n\n**Pressure corr. \\[0.00 mbar]** \nSpecify pressure sensor correction for more precise measurement of a barometric pressure or altitude. This\ncorrection is not needed for general use.\n\n**Temperature corr. \\[0.0 °C/°F]** \nSpecify temperature sensor correction for more precise measurement of temperature. This correction is not\nneeded for general use.","textLarge":false,"imageOnRight":true,"image":{"recommendedSizes":{"width":"420","height":"280"}},"imageMobile":{"recommendedSizes":{"width":"750","height":"500"}}},"id":"#264","type":"component","lock":false,"position":299},{"name":"TextBlock","data":{"text":"### **04.9 Miscellaneous** \n\n**Date and Time** \nSets the current time and date \nDo not change local time between repetitive dives because the change of local time affects the calculation\nof desaturation during a surface interval.\nIt is advised to set the local time of a destination prior to leaving for a diving vacation in a different time\nzone.\n\n**Date format** \nYou can choose between common time formats used in different parts of the world. \n\nISO YYYY-MM-DD 2021-10-18 \nEU DD.MM.YYYY 18.10.2021 \nUS MM/DD/YYYY 10/18/2021 \n\n**Set owner** \nThe name of the owner can be set. The first line is displayed when the device is started.\n\n**Factory defaults** \nReset all setting to default values (except date and time).\nComputer will be restarted and the horizontal calibration starts automatically after the reset\n","textLarge":false,"imageOnRight":true,"image":{"recommendedSizes":{"width":"420","height":"280"}},"imageMobile":{"recommendedSizes":{"width":"750","height":"500"}}},"id":"#265","type":"component","lock":false,"position":300},{"name":"TextBlock","data":{"text":"### **04.10 Factory defaults**\n\nReset all setting to default values (except date and time).\nComputer will be restarted and the horizontal calibration starts automatically after the reset","textLarge":false,"imageOnRight":true,"image":{"recommendedSizes":{"width":"420","height":"280"}},"imageMobile":{"recommendedSizes":{"width":"750","height":"500"}}},"id":"#266","type":"component","lock":false,"position":301},{"name":"Divider","data":{"color":"darkGray"},"id":"#292","type":"component","lock":false,"position":302},{"name":"TextBlock","data":{"text":"### <span id=\"Section-05\">**Section 05: Log book**","textLarge":false,"imageOnRight":true,"image":{"recommendedSizes":{"width":"420","height":"280"}},"imageMobile":{"recommendedSizes":{"width":"750","height":"500"}}},"id":"#186","type":"component","lock":false,"position":303},{"name":"Divider","data":{"color":"darkGray"},"id":"#305","type":"component","lock":false,"position":304},{"name":"Image","data":{"firstImage":{"mimetype":"image/jpeg","size":66804,"hash":"efffe3f6dafcfdcd07846aedc757a2610b004f99","id":"cl0wnvtvvlox207768g8aom4i","filename":"divesoft-freedom-user-manual-05-1-0.jpg","category":"divesoft/","type":"image"},"secondImage":{}},"id":"#211","type":"component","lock":false,"position":305},{"name":"Spacer","data":{"spacingLarge":30,"spacingSmall":20,"backgroundColor":"#ffffff"},"id":"#412","type":"component","lock":false,"position":306},{"name":"TextBlock","data":{"text":"### **05.1 Last dive**\n\nDetails from the last dive from list.\n\n**Dive profile** \nThe graph is plotted within a white line.\n\n**Decompression ceiling** \nThe graph is plotted within a red line; in deco dive only.\n\n**Date and time** \nThe time of submersion.\n\n**Depth** \nThe maximum depth of the dive.\n\n**T** \nThe temperature at its coldest point of the dive (measured during the ascent).\n\n**Duration** \nThis indicates time from submersion at the dive start to surfacing at the dive end. It includes all surface\nstays, if part of the dive. Notice if the decompression obligation was present.\n\n**Avg depth** \nThe average depth, calculated from the whole profile.\n\n**Mode** \nOriginal dive mode (at the dive start).\n\n**CNS** \nThe CNS oxygen clock value after surfacing.\n\n**Zoomed view - Event list** \nThe following context menu can be called up in the dive detail by pressing both buttons \nZoomed view -zooms the dive profile to detail for detailed viewing. The bottom button can be used to scroll the profile further, the top button to go back along the timeline. To return to the dive detail, press both buttons again and select Full view. \nEvent list - displays the events in the dive \nBack to menu - return one level back ","textLarge":false,"imageOnRight":true,"image":{"recommendedSizes":{"width":"420","height":"280"}},"imageMobile":{"recommendedSizes":{"width":"750","height":"500"}}},"id":"#170","type":"component","lock":false,"position":307},{"name":"Image","data":{"firstImage":{"mimetype":"image/png","size":57544,"hash":"1f6b734efab9cf30c809d7837b79134f8718fe68","id":"cl0wnxw23loxb0776yu6nh96n","filename":"divesoft-freedom-user-manual-05-2-0.png","category":"divesoft/","type":"image"},"secondImage":{},"image":{"type":"image"}},"id":"#212","type":"component","lock":false,"position":308},{"name":"Spacer","data":{"spacingLarge":30,"spacingSmall":20,"backgroundColor":"#ffffff"},"id":"#413","type":"component","lock":false,"position":309},{"name":"TextBlock","data":{"text":"### **05.2 Dive list**\n\nHere all dives from the memory of the Divesoft Freedom are\
2nlisted. The memory capacity is approximately 100 hours of typical\ndive profiles. When the memory is full, the oldest records are\nautomatically deleted.\nSecond and subsequent dives in one day are marked with\ncorresponding letters.\nDemo dives (logs stored after the dive simulation) are marked with\nlight blue characters. Test dives are marked with red characters (e.g.\nthe first dive to approx. 350 m).\nUse upper button short press to open the screen with the dive details.\nUse long press to go through the pages.","textLarge":false,"imageOnRight":true,"image":{"recommendedSizes":{"width":"420","height":"280"}},"imageMobile":{"recommendedSizes":{"width":"750","height":"500"}}},"id":"#171","type":"component","lock":false,"position":310},{"name":"TextBlock","data":{"text":"### **05.3 Summary**\n\nA summary of all dives from the memory of the Divesoft Freedom is shown (test and demo dives excluded).","textLarge":false,"imageOnRight":true,"image":{"recommendedSizes":{"width":"420","height":"280"}},"imageMobile":{"recommendedSizes":{"width":"750","height":"500"}}},"id":"#172","type":"component","lock":false,"position":311},{"name":"Divider","data":{"color":"darkGray"},"id":"#296","type":"component","lock":false,"position":312},{"name":"TextBlock","data":{"text":"### <span id=\"Section-06\">**Section 06: Dive planner**\n","textLarge":false,"imageOnRight":true,"image":{"recommendedSizes":{"width":"420","height":"280"}},"imageMobile":{"recommendedSizes":{"width":"750","height":"500"}}},"id":"#173","type":"component","lock":false,"position":313},{"name":"Divider","data":{"color":"darkGray"},"id":"#306","type":"component","lock":false,"position":314},{"name":"TextBlock","data":{"text":"### **06.1 The dive parameters** \n\nAll non-listed parameters are taken from the respective setting.","textLarge":false,"imageOnRight":true,"image":{"recommendedSizes":{"width":"420","height":"280"}},"imageMobile":{"recommendedSizes":{"width":"750","height":"500"}}},"id":"#307","type":"component","lock":false,"position":315},{"name":"TextBlock","data":{"text":"**Plan mode** \nSelect the dive mode you are planning for. \nOC â Open circuit SCUBA \nS/CCR â SCR or CCR SCUBA \nCCR+BO â SCR descent & bottom followed by OC bailout \nOther than OC plan mode is available in the Closed Circuit version\nonly. \n\n**Surface interval** \nEnter the surface interval from now (in minutes).\n\n**Target depth** \nEnter the bottom depth (in m/ft). For a multilevel dive use an average depth.\n\n**Bottom time** \nEnter the dive runtime when the ascent starts, including descent.\n\n**Bottom mix** \nThe gas mixture planned for a descent and the stay on the bottom.\n\n**Diluent** \nDiluent for the SCR/CCR dive (Closed Circuit version only).\n\n**Plan dive** \nThe resulting dive plan consists of a summary and a detailed listing of deco stops.\n\n**Simulation** \nStart real-time simulation of the dive. The computer will switch to dive mode and will show all displays in\nthe same way as during a real dive.\n\n**Save as default** \nSave the parameter set as a default for the following plans, otherwise it is forgotten after switch off.","textLarge":false,"imageOnRight":true,"image":{"recommendedSizes":{"width":"420","height":"280"}},"imageMobile":{"recommendedSizes":{"width":"750","height":"500"}}},"id":"#174","type":"component","lock":false,"position":316},{"name":"TextBlock","data":{"text":"### **06.2 Dive plan**","textLarge":false,"imageOnRight":true,"image":{"recommendedSizes":{"width":"420","height":"280"}},"imageMobile":{"recommendedSizes":{"width":"750","height":"500"}}},"id":"#175","type":"component","lock":false,"position":317},{"name":"TextBlock","data":{"text":"### **06.2.1 Summary**\n\n**Nodeco** \nThe runtime of the planned dive where the decompression obligation\nstarts.\n\n**TTS** \nThe time to surface at the ascent start.\n\n**Total** \nThe runtime when surfacing.\n\n**CNS** \nThe percentage of consumption of CNS toxicity limit.\n\n**NoFly** \nThe NoFly time after the planned dive.\n","textLarge":false,"imageOnRight":true,"image":{"recommendedSizes":{"width":"420","height":"280"}},"imageMobile":{"recommendedSizes":{"width":"750","height":"500"}}},"id":"#177","type":"component","lock":false,"position":318},{"name":"TextBlock","data":{"text":"### **06.2.2 Deco stops**","textLarge":false,"imageOnRight":true,"image":{"recommendedSizes":{"width":"420","height":"280"}},"imageMobile":{"recommendedSizes":{"width":"750","height":"500"}}},"id":"#267","type":"component","lock":false,"position":319},{"name":"Image","data":{"firstImage":{"mimetype":"image/png","size":42575,"hash":"b1d4efc480f13b549d7db3aa2e5b3a8a59fa61e3","id":"cl0wo16kdloxi0776tf4xu7fx","filename":"divesoft-freedom-user-manual-06-2-2.png","category":"divesoft/","type":"image"},"secondImage":{}},"id":"#152","type":"component","lock":false,"position":320},{"name":"Image","data":{"firstImage":{},"secondImage":{}},"id":"#150","type":"component","lock":false,"position":321},{"name":"TextBlock","data":{"text":"The description of the ascent profile and used gas mixtures.\nIf optimal gas is selected in the decompression settings, then the\nplan considers changing of gases from the list of active mixtures; the\ngas switch time is included.\nIf the current gas setting is selected in the decompression settings,\nthen only the actual gas is used.","textLarge":false,"imageOnRight":true,"image":{"recommendedSizes":{"width":"420","height":"280"}},"imageMobile":{"recommendedSizes":{"width":"750","height":"500"}}},"id":"#178","type":"component","lock":false,"position":322},{"name":"Divider","data":{"color":"darkGray"},"id":"#295","type":"component","lock":false,"position":323},{"name":"TextBlock","data":{"text":"### <span id=\"Section-07\">**Section 07: Log download**\n","textLarge":false,"imageOnRight":true,"image":{"recommendedSizes":{"width":"420","height":"280"}},"imageMobile":{"recommendedSizes":{"width":"750","height":"500"}}},"id":"#179","type":"component","lock":false,"position":324},{"name":"Divider","data":{"color":"darkGray"},"id":"#308","type":"component","lock":false,"position":325},{"name":"TextBlock","data":{"text":"Connect the USB cable included in distribution package to the Freedom connector and then to the USB\nport of your computer, tablet or mobile phone. **Attention, maintaining the connection order is very important.** A USB adapter will\nprobably be necessary for mobile devices. \nSelect the USB connection item in the menu Apps -> USB connection. The Divesoft Freedom\nmemory can be connected as a mass storage device (like a flash\ndrive). The connection to Windows, Mac, Linux, Android and iOS was\ntested, but there is no guarantee of compatibility with all operating\nsystems and all computers. Access to the internal memory is read\nonly.\nLogs are stored in the DIVELOG folder; data from one dive is stored as\none *.DLF file.","textLarge":false,"imageOnRight":true,"image":{"recommendedSizes":{"width":"420","height":"280"}},"imageMobile":{"recommendedSizes":{"width":"750","height":"500"}}},"id":"#309","type":"component","lock":false,"position":326},{"name":"TextBlock","data":{"text":"**WARNING: It is absolutely crucial to follow the cable connection procedure. The charging/data cable must be plugged into the Freedom first and then into the desktop, laptop or other devices.\nFailure to follow this procedure may cause irreversible damage to the device.**","textLarge":false,"imageOnRight":true,"image":{"recommendedSizes":{"width":"420","height":"280"}},"imageMobile":{"recommendedSizes":{"width":"750","height":"500"}}},"id":"#434","type":"component","lock":false,"position":327}
2,{"name":"TextBlock","data":{"text":"### **07.1 Log processing in cloud**\n\nDownload files from the DIVELOG folder to your hard drive and then\nupload data to WETNOTES.COM. Here you can store and edit your\ndives, study graphs, details and much more. If you wish, you can\nshare dives with your buddy or a group.\nVisit WETNOTES.COM and explore all the possibilities that it offers!\n","textLarge":false,"imageOnRight":true,"image":{"recommendedSizes":{"width":"420","height":"280"}},"imageMobile":{"recommendedSizes":{"width":"750","height":"500"}}},"id":"#180","type":"component","lock":false,"position":328},{"name":"Image","data":{"firstImage":{"mimetype":"image/png","size":215207,"hash":"43db6e820d50700035c4d3b95c5f22a5cde3407c","id":"cljh5f62rnu3e0776p6pcti5u","filename":"wetnotes.png","category":"divesoft/","type":"image"},"secondImage":{},"image":{"type":"image"}},"id":"#148","type":"component","lock":false,"position":329},{"name":"Image","data":{"firstImage":{},"secondImage":{}},"id":"#348","type":"component","lock":false,"position":330},{"name":"TextBlock","data":{"text":"### **07.2 Divesoft App** \nDive logs uploaded to Wetnotes.com can be viewed on mobile devices via the [Divesoft.app ](https://Divesoft.app) \nDownload the version for your mobile phone or tablet.\n","textLarge":false,"imageOnRight":true,"image":{"recommendedSizes":{"width":"420","height":"280"}},"imageMobile":{"recommendedSizes":{"width":"750","height":"500"}}},"id":"#181","type":"component","lock":false,"position":331},{"name":"TextBlock","data":{"text":"### **07.3 Off-line log processing**\nOffline storage of dive logs is not supported by Divesoft. Third party software such as Subsurface can be used \nhttps://subsurface-divelog.org/","textLarge":false,"imageOnRight":true,"image":{"recommendedSizes":{"width":"420","height":"280"}},"imageMobile":{"recommendedSizes":{"width":"750","height":"500"}}},"id":"#270","type":"component","lock":false,"position":332},{"name":"Divider","data":{"color":"darkGray"},"id":"#294","type":"component","lock":false,"position":333},{"name":"TextBlock","data":{"text":"### <span id=\"Section-08\">**Section 08: System**\n","textLarge":false,"imageOnRight":true,"image":{"recommendedSizes":{"width":"420","height":"280"}},"imageMobile":{"recommendedSizes":{"width":"750","height":"500"}}},"id":"#182","type":"component","lock":false,"position":334},{"name":"Divider","data":{"color":"darkGray"},"id":"#310","type":"component","lock":false,"position":335},{"name":"TextBlock","data":{"text":"### **08.1 System check**\n\nThere is detailed version, license, settings, battery and pressure sensor information described on 5 screens\n(6 for CCR version).","textLarge":false,"imageOnRight":true,"image":{"recommendedSizes":{"width":"420","height":"280"}},"imageMobile":{"recommendedSizes":{"width":"750","height":"500"}}},"id":"#311","type":"component","lock":false,"position":336},{"name":"TextBlock","data":{"text":"### **08.2 Service functions**\n\nService functions are primarily intended to support a qualified technician or to be performed with the\nrecommendation of the manufacturerâs technical support.\nThese functions are not blocked but no end user support is provided. A detailed description is beyond the\nscope of this manual. An IT specialist can understand most of them without further description.\nThe service functions menu is accessible via the coded key press (press both keys; release one key and\npress it again; release both keys).","textLarge":false,"imageOnRight":true,"image":{"recommendedSizes":{"width":"420","height":"280"}},"imageMobile":{"recommendedSizes":{"width":"750","height":"500"}}},"id":"#271","type":"component","lock":false,"position":337},{"name":"TextBlock","data":{"text":"### **08.2.1 Debug** \nAll debug information is read only. There is no risk associated with browsing them just for curiosity.\n\n**Devices** \nA detailed state of all sensors.\n\n**Deco model** \nThe state of the decompression model is described in detail on 5 screens (including the compartment\nsaturation graph).\n\n**Scheduler**\nThe firmware task list with information specifying the system footprint.\n\n**Variables**\nThe values of some internal variables.","textLarge":false,"imageOnRight":true,"image":{"recommendedSizes":{"width":"420","height":"280"}},"imageMobile":{"recommendedSizes":{"width":"750","height":"500"}}},"id":"#272","type":"component","lock":false,"position":338},{"name":"TextBlock","data":{"text":"### **08.2.2 Test** \n\nThere is no risk associated with performing these tests just for curiosity while on the surface.\n\n**Buttons** \nIt runs a simple test of both buttons.\n\n**Vibration** \nIt runs a short test of the vibration.\n\n**Display** \nA red, green and blue screen will be displayed for the display test.\n\n**Watchdog** \nWatchdog is a timer that is used to detect and recover from firmware malfunctions. You can intentionally\nhang the computer with this test. Do not use underwater!\n\n**Test dive** \nThe test dive is used by the manufacturer or an authorized service for the pressure sensor calibration and\ntightness test. It is similar to the gauge mode. The test dive log will be stored, but clearly marked as a test\ndive. The test dive is not included in the log summary.","textLarge":false,"imageOnRight":true,"image":{"recommendedSizes":{"width":"420","height":"280"}},"imageMobile":{"recommendedSizes":{"width":"750","height":"500"}}},"id":"#281","type":"component","lock":false,"position":339},{"name":"TextBlock","data":{"text":"### **08.2.3 Demo dive** \n\nThe test dives are suitable for those interested in a demonstration of the Divesoft Freedom features. There\nis no risk associated with the demo dive performing.\nDuring a demo dive almost all functions can be tested on the surface. One exception is the pressure sensor\nreading. Also O<sub>2</sub>
2\n sensors connected with a cable canât be used for the measured CCR dive mode.\nThe depth profile is provided and decompression gas mixtures are automatically switched. The Emergence\ndu Ressel demo dive uses the authentic depth profile from the penetration through the first siphon of this\nFrench cave.\nDemo dive logs can be permanently stored into the log memory. The oldest dive logs will be replaced by the\nnew demo dive log if the memory is full. Demo dive logs are clearly marked.\nA demo dive log, if this is the last dive, can be erased later using Demo dive â Erase demo log.\nThe single bottom-level demo dive functionality is equivalent to the dive simulation in the dive planner. See\nalso Dive planner (See section 6.1).","textLarge":false,"imageOnRight":true,"image":{"recommendedSizes":{"width":"420","height":"280"}},"imageMobile":{"recommendedSizes":{"width":"750","height":"500"}}},"id":"#273","type":"component","lock":false,"position":340},{"name":"TextBlock","data":{"text":"### **08.2.4 Syslog** \nThe system events log list. All information is read only.","textLarge":false,"imageOnRight":true,"image":{"recommendedSizes":{"width":"420","height":"280"}},"imageMobile":{"recommendedSizes":{"width":"750","height":"500"}}},"id":"#274","type":"component","lock":false,"position":341},{"name":"TextBlock","data":{"text":"### **08.2.5 Miscellaneous** \n\n<span style=\"color:red\">**Warning: These functions can alter values of internal variables or/and the state of the Divesoft Freedom.\nUse them with caution and only if you understand the consequences.**</span>\n\n\n**Force Dive Start** \nIt can be used for an extraordinary shallow dive in a place where initial submersion to a depth greater than\n1.5 m is impossible. This also can be used if the automatic dive start failed for any reason (e.g. submersion\nrecognition algorithm is confused by previous pressure changes unrelated to diving).\n\n**Force Dive End** \nIf the surface pressure (zero depth) was incorrectly detected and the computer âdivesâ while on the surface\nthen the dive can be forced to stop with this function.\n\n**Browse config** \nEvery setting can be read and changed. The majority of settings can also be changed using an ordinary\nsetup; the equivalent minimum and maximum limits for every setting will be applied. There are only few\ninternal
2configuration parameters intended for special use.\n\n**Reset deco data** \nThe residual inert gas saturation from previous dive(s) will be removed. Only use this function to give the\ncomputer to another diver whose surface interval is sufficient for a complete desaturation.\n\n**Bootloader** \nRestart to the bootloader mode for the firmware update or the version upgrade.\nConnect the USB cable included in distribution package to the USB port of your computer where the\n[Divesoft.center](https://www.divesoft.com/en/center) is properly installed. See [Divesoft support](https://www.divesoft.com/en/support) for further information and for the\nfirmware download.\nThe version license is fixed to the unitâs serial number and non-transferable to the other Divesoft Freedom\ncomputers.","textLarge":false,"imageOnRight":true,"image":{"recommendedSizes":{"width":"420","height":"280"}},"imageMobile":{"recommendedSizes":{"width":"750","height":"500"}}},"id":"#275","type":"component","lock":false,"position":342},{"name":"Divider","data":{"color":"darkGray"},"id":"#293","type":"component","lock":false,"position":343},{"name":"TextBlock","data":{"text":"### <span id=\"Section-09\">**Section 09: Apps**\n\n","textLarge":false,"imageOnRight":true,"image":{"recommendedSizes":{"width":"420","height":"280"}},"imageMobile":{"recommendedSizes":{"width":"750","height":"500"}}},"id":"#183","type":"component","lock":false,"position":344},{"name":"Divider","data":{"color":"darkGray"},"id":"#312","type":"component","lock":false,"position":345},{"name":"TextBlock","data":{"text":"### **09.1 Analyzer**\n\n<span style=\"color:red\">**Warning: O<sub>2</sub> sensor has to be calibrated before use! \nWarning: do not use expired or malfunctioning sensors!**</span> \n\nThe Divesoft Freedom computer can be used as a nitrox analyzer if an oxygen sensor is attached. The O<sub>2</sub>\nsensor housing can be ordered separately.\nO<sub>2</sub>\n sensors previously used in rebreather can be used, if they are still able to measure full range of oxygen\npressures in atmospheric pressure safely.","textLarge":false,"imageOnRight":true,"image":{"recommendedSizes":{"width":"420","height":"280"}},"imageMobile":{"recommendedSizes":{"width":"750","height":"500"}}},"id":"#313","type":"component","lock":false,"position":346},{"name":"TextBlock","data":{"text":"### **09.1.1 Measuring**\n\nConnect housing with O<sub>2</sub>\n sensor, start the Analyzer application and\nuse as any other nitrox analyzer.\nUse only barely audible stream of nitrox from SCUBA tank valve and\nbe sure to press housing inlet tightly.","textLarge":false,"imageOnRight":true,"image":{"recommendedSizes":{"width":"420","height":"280"}},"imageMobile":{"recommendedSizes":{"width":"750","height":"500"}}},"id":"#187","type":"component","lock":false,"position":347},{"name":"TextBlock","data":{"text":"### **09.1.2 Calibration**\n\nAnalyzer can be calibrated with air.\nPress lower key to start calibration. Confirm calibration with upper\nkey press when mV reading is stable.\nOld sensor may but may not be detected by low voltage during\ncalibration using air (see the sensor manufacturerâs datasheet).\nReliable method is to calibrate the sensor with air and then check the\nmaximum range with pure oxygen.\nRecalibrate analyzer sensor at least 24 h before measuring.\nCalibration process takes altitude (atmospheric pressure) and\ntemperature into account.\nRebreather sensor calibration has no connection with analyzer\nsensor calibration.","textLarge":false,"imageOnRight":true,"image":{"recommendedSizes":{"width":"420","height":"280"}},"imageMobile":{"recommendedSizes":{"width":"750","height":"500"}}},"id":"#184","type":"component","lock":false,"position":348},{"name":"Image","data":{"firstImage":{"mimetype":"image/png","size":26735,"hash":"0663c5ef94c0617307f407bb47bb3d7fed1e913a","id":"cl0wo8cguloz80776nvy66876","filename":"divesoft-freedom-user-manual-09-1-2.png","category":"divesoft/","type":"image"},"secondImage":{}},"id":"#146","type":"component","lock":false,"position":349},{"name":"Spacer","data":{"spacingLarge":30,"spacingSmall":20,"backgroundColor":"#ffffff"},"id":"#414","type":"component","lock":false,"position":350},{"name":"TextBlock","data":{"text":"### **9.2 USB connection** \nSwitches the computer into USB link mode for downloading dive logs.\nFreedom will report as a Mass storage device when connected by cable to a personal computer.","textLarge":false,"imageOnRight":true,"image":{"recommendedSizes":{"width":"420","height":"280"}},"imageMobile":{"recommendedSizes":{"width":"750","height":"500"}}},"id":"#144","type":"component","lock":false,"position":351},{"name":"Image","data":{"firstImage":{"mimetype":"image/jpeg","size":15764,"hash":"c0f022ad43df2fb29e3e93b5a20611d850894c7f","
2id":"cl0wo2ofbloy00776r7em225h","filename":"divesoft-freedom-user-manual-07-0-0.jpg","category":"divesoft/","type":"image"},"secondImage":{},"image":{"type":"image"}},"id":"#192","type":"component","lock":false,"position":352},{"name":"Spacer","data":{"spacingLarge":30,"spacingSmall":20,"backgroundColor":"#ffffff"},"id":"#415","type":"component","lock":false,"position":353},{"name":"TextBlock","data":{"text":"### **09.3 Emergency torch** \n brightens the entire display to the maximum and emits the maximum amount of light possible. Can be used as an emergency torch in certain conditions when all other torches have failed.\n","textLarge":false,"imageOnRight":true,"image":{"recommendedSizes":{"width":"420","height":"280"}},"imageMobile":{"recommendedSizes":{"width":"750","height":"500"}}},"id":"#277","type":"component","lock":false,"position":354},{"name":"Spacer","data":{"spacingLarge":30,"spacingSmall":20,"backgroundColor":"#ffffff"},"id":"#416","type":"component","lock":false,"position":355},{"name":"TextBlock","data":{"text":"### **09.4 Inclinometr** \nAn inclinometer is a tool for measuring the steepness of a slope. It can be used in mapping caves and wrecks. For correct and accurate operation, the computer must be well calibrated with horizontal calibration.\n\n**Games**\n\nDo not disable error messages and notifications related to decompression if the games are played during\na deco stop.\nEnsure to not accidentally reposition while playing during a dive. Check the pressure gauges on a regular\nbasis. Playing a game will reduce your attention. Remember: you want to decompress safely, not just\nachieve a higher level in the game!\nThe games were tested on children. Nobody was hurt.","textLarge":false,"imageOnRight":true,"image":{"recommendedSizes":{"width":"420","height":"280"}},"imageMobile":{"recommendedSizes":{"width":"750","height":"500"}}},"id":"#278","type":"component","lock":false,"position":356},{"name":"TextBlock","data":{"text":"### **09.5 Games**","textLarge":false,"imageOnRight":true,"image":{"recommendedSizes":{"width":"420","height":"280"}},"imageMobile":{"recommendedSizes":{"width":"750","height":"500"}}},"id":"#279","type":"component","lock":false,"position":357},{"name":"TextBlock","data":{"text":"### ** 09.5.1 Sokoban**\nSokoban is a type of transport puzzle, in which the player (a diving\nmask with snorkel) pushes tanks or crates around in a warehouse,\ntrying to get them to storage locations (red dots).\nThe game is played on a board of squares, where each square is\neither a floor or a wall. Some floor squares contain tanks, and some\nfloor squares are marked as storage locations.\nThe player is confined to the board, and may move horizontally or\nvertically onto empty squares (never through walls or boxes). The\nplayer can also move into a tank, which pushes it into the square\nbeyond. Tanks may not be pushed into other tanks or walls, and they\ncannot be pulled. The puzzle is solved when all tanks are in the\nstorage locations.","textLarge":false,"imageOnRight":true,"image":{"recommendedSizes":{"width":"420","height":"280"}},"imageMobile":{"recommendedSizes":{"width":"750","height":"500"}}},"id":"#280","type":"component","lock":false,"position":358},{"name":"Image","data":{"firstImage":{"mimetype":"image/png","size":27773,"hash":"ac6f6361fe5aa6ff462d7103a67fa69e2fe855b6","id":"cl0wobhb2lp0n0776521mmpve","filename":"divesoft-freedom-user-manual-09-2-1.png","category":"divesoft/","type":"image"},"secondImage":{},"image":{"type":"image"}},"id":"#193","type":"component","lock":false,"position":359},{"name":"Spacer","data":{"spacingLarge":30,"spacingSmall":20,"backgroundColor":"#ffffff"},"id":"#436","type":"component","lock":false,"position":360},{"name":"TextBlock","data":{"text":"### **09.5.2 Snake** \nSnake is a game where the player maneuvers a line which grows in\nlength, with the line itself being a primary obstacle.\nThe player controls the head of the snake. As it moves forward, it\nleaves a trail behind, resembling a moving snake. The snake has\na specific length. The player loses when the snake runs into the\nscreen border, a trail or another obstacle, or eats poison (skull), or\nstarves to death.\nThe snake lose its length slowly (every 30 steps), and when it is too\nshort, it dies from starvation.\nThe player attempts to eat fish by running into them with the head of\nthe snake. Each fish eaten makes the snake longer, so maneuvering becomes progressively more difficult.","textLarge":false,"imageOnRight":true,"image":{"recommendedSizes":{"width":"420","height":"280"}},"imageMobile":{"recommendedSizes":{"width":"750","height":"500"}}},"id":"#191","type":"component","lock":false,"position":361},{"name":"Image","data":{"firstImage":{"mimetype":"image/png","size":12149,"hash":"725d598b56e9a9225d1a38cdc15520f0ba4e653e","id":"cl0wocu0ulp0y0776xkfkno3c","filename":"divesoft-freedom-user-manual-09-2-2.png","category":"divesoft/","type":"image"},"secondImage":{},"image":{"type":"image"}},"id":"#349","type":"component","lock":false,"position":362},{"name":"Spacer","data":{"spacingLarge":30,"spacingSmall":20,"backgroundColor":"#ffffff"},"id":"#437","type":"component","lock":false,"position":363},{"name":"Divider","data":{"color":"darkGray"},"id":"#297","type":"component","lock":false,"position":364},{"name":"TextBlock","data":{"text":"### <span id=\"Section-10\">**Section 10: Hardware**\n","textLarge":false,"imageOnRight":true,"image":{"recommendedSizes":{"width":"420","height":"280"}},"imageMobile":{"recommendedSizes":{"width":"750","height":"500"}}},"id":"#190","type":"component","lock":false,"position":365},{"name":"Divider","data":{"color":"darkGray"},"id":"#314","type":"component","lock":false,"position":366},{"name":"TextBlock","data":{"text":"### **10.1 Charging**\n\nUse the included USB charging cable with Freedom connector to charge your Freedom computer. First c
2onnect the cable to your Freedom computer and subsequently connect the cable to a suitable power adapter (5V, 1A). Make sure the adapter is approved and certified for the area where you will be charging the Freedom and is suitable for use with the local power grid.\nThe Freedomâs connector is situated between the buttons. If the connector is protected by the lid, then\nunscrew the connector lid before attaching the cable.\nThe computer may or may not be switched on during charging. If the computer is switched on, then the icon\nin the top-right corner on the surface screen indicates the state of charge.","textLarge":false,"imageOnRight":true,"image":{"recommendedSizes":{"width":"420","height":"280"}},"imageMobile":{"recommendedSizes":{"width":"750","height":"500"}}},"id":"#315","type":"component","lock":false,"position":367},{"name":"TextBlock","data":{"text":"**WARNING: It is absolutely crucial to follow the cable connection procedure. The charging/data cable must first be plugged into the Freedom and then into the adapter and power outlet.\nFailure to follow this procedure may cause irreversible damage to the device. **","textLarge":false,"imageOnRight":true,"image":{"recommendedSizes":{"width":"420","height":"280"}},"imageMobile":{"recommendedSizes":{"width":"750","height":"500"}}},"id":"#433","type":"component","lock":false,"position":368},{"name":"TextBlock","data":{"text":"It takes about 5 hours to charge from near empty state to fully charged.\nMaximum charging current is less than 500 mA, so there is no difference between charging using the\ncharger or charging from an ordinary computer USB port.\nCharge the battery at least once every six months.","textLarge":false,"imageOnRight":true,"image":{"recommendedSizes":{"width":"420","height":"280"}},"imageMobile":{"recommendedSizes":{"width":"750","height":"500"}}},"id":"#196","type":"component","lock":false,"position":369},{"name":"TextBlock","data":{"text":"**WARNING: USING SMART CHARGERS THAT ALLOW CHARGING AT VOLTAGES HIGHER THAN 5V (SUCH AS 9V, 12V, 20V CHARGERS) MAY CAUSE IRREVERSIBLE DAMAGE TO THE FREEDOM AND FREEDOM+**","textLarge":false,"imageOnRight":true,"image":{"recommendedSizes":{"width":"420","height":"280"}},"imageMobile":{"recommendedSizes":{"width":"750","height":"500"}}},"id":"#441","type":"component","lock":false,"position":370},{"name":"Spacer","data":{"spacingLarge":30,"spacingSmall":20,"backgroundColor":"#ffffff"},"id":"#442","type":"component","lock":false,"position":371},{"name":"TextBlock","data":{"text":"**WARNING: MAKE SURE THE CONNECTOR IS COMPLETELY DRY AND CLEAN BEFORE CONNECTING THE CHARGER. FAILURE TO FOLLOW THIS PROCEDURE MAY CAUSE IRREVERSIBLE DAMAGE TO THE FREEDOM AND FREEDOM+**","textLarge":false,"imageOnRight":true,"image":{"recommendedSizes":{"width":"420","height":"280"}},"imageMobile":{"recommendedSizes":{"width":"750","height":"500"}}},"id":"#443","type":"component","lock":false,"position":372},{"name":"TextBlock","data":{"text":"**Freedom+ owners, show your charging cable some TLC ! ** \n1. Wipe your Freedom+ dry before charging. \n2. Keep your Freedom+ connector clean and dry, use Qtip and some rubbing alcohol to keep the connector pins shiny as new. \n3. Now the cable, press on the individual spring loaded pins (using Qtip) every now and then. This removes any oxidization inside the pins. \n4. And lastly, keep your Freedom+ safe. Charge the device with simple 5V chargers,
2keep away from smart chargers supporting high voltage protocols (eg. 9V/12V/20V).\n","textLarge":false,"imageOnRight":true,"image":{"recommendedSizes":{"width":"420","height":"280"}},"imageMobile":{"recommendedSizes":{"width":"750","height":"500"}}},"id":"#444","type":"component","lock":false,"position":373},{"name":"TextBlock","data":{"text":"### ***10.1.1 Powering in hyperbaric environment*** \nThe Divesoft Freedom cannot be powered externally and recharged during a dive (e.g. in hyperbaric\nchamber, in diving bell or mounted on ROV) without a special setting which is available only on request. The\nunit must be individually tested prior to such use.\n","textLarge":false,"imageOnRight":true,"image":{"recommendedSizes":{"width":"420","height":"280"}},"imageMobile":{"recommendedSizes":{"width":"750","height":"500"}}},"id":"#284","type":"component","lock":false,"position":374},{"name":"TextBlock","data":{"text":"### **10.2 Wrist mount**\n\nIf you prefer a strap, pass the strap under the bars. Use the Velcro on the strap to tighten.\nIf you prefer a bungee, then remove the screws holding the bars using a Torx screwdriver (T 20 size). Donât\nuse any other tool; screw heads are easily damaged.\nIf you want to use a silicon protective sleeve, install it before installing the bungee. It is not possible to\ninstall the sleeve on the computer with bungee already installed.\nPass the bungee through the threaded holes and secure with a knot. There is a special thread inside the\nholes which does not damage the bungee.\nUse a small flame to melt the braid of the bungee and make a tip on the end of it for easier pass-through.\nBoth the strap and bungee are included.\nIn any case, the opening on the back of the computer must remain freely accessible. When you mount the\ncomputer directly on bare skin avoid closing the opening. The pressure sensor is located there.","textLarge":false,"imageOnRight":true,"image":{"recommendedSizes":{"width":"420","height":"280"}},"imageMobile":{"recommendedSizes":{"width":"750","height":"500"}}},"id":"#285","type":"component","lock":false,"position":375},{"name":"TextBlock","data":{"text":"### **10.3 Control elements**\n\nThe following inputs and combinations thereof are differentiated: \n⢠Press upper key \n⢠Press lower key \n⢠Press both keys \n⢠Long press upper key \n⢠Long press lower key \n⢠Long press both keys \n⢠Coded key press (press\nboth keys, then release one\nkey and press it again, then\nrelease both keys) \n⢠Tilt away from yourself \n⢠Tilt toward yourself \n⢠Tilt to the left \n⢠Tilt to the right \n⢠Tap the display glass \n⢠Shine a light on the display ","textLarge":false,"imageOnRight":true,"image":{"recommendedSizes":{"width":"420","height":"280"}},"imageMobile":{"recommendedSizes":{"width":"750","height":"500"}}},"id":"#286","type":"component","lock":false,"position":376},{"name":"Image","data":{"firstImage":{"mimetype":"image/png","size":179299,"hash":"cecabe7686f85d00fba0814a71a72d624f2e56ee","id":"cl0woe1sxlp1507761e0pkwp3","filename":"divesoft-freedom-user-manual-10-3-0.png","category":"divesoft/","type":"image"},"secondImage":{},"image":{"type":"image"}},"id":"#197","type":"component","lock":false,"position":377},{"name":"Spacer","data":{"spacingLarge":30,"spacingSmall":20,"backgroundColor":"#ffffff"},"id":"#419","type":"component","lock":false,"position":378},{"name":"TextBlock","data":{"text":"âLong pressâ means pressing the key for more than 2.5 seconds. The key-press operation is terminated at\nthe moment the key is released or, in case of pressing both keys, when the last key is released.\nThe upper/lower keys and directions of tilting are determined by the display orientation, depending on\nwhether it is set up for the left or right hand.\nTilting can be changed in the configuration to tapping on the computer body from any of the four sides.\nNote: Perform the Horizontal calibration (See section 4.8) if there is no valid response to tilting or tapping","textLarge":false,"imageOnRight":true,"image":{"recommendedSizes":{"width":"420","height":"280"}},"imageMobile":{"recommendedSizes":{"width":"750","height":"500"}}},"id":"#198","type":"component","lock":false,"position":379},{"name":"TextBlock","data":{"text":"### **10.4 Physical dimensions**","textLarge":false,"imageOnRight":true,"image":{"recommendedSizes":{"width":"420","height":"280"}},"imageMobile":{"recommendedSizes":{"width":"750","height":"500"}}},"id":"#204","type":"component","lock":false,"position":380},{"name":"TextBlock","data":{"text":"","textLarge":false,"imageOnRight":true,"image":{"recommendedSizes":{"width":"420","height":"280"}},"imageMobile":{"recommendedSizes":{"width":"750","height":"500"}}},"id":"#450","type":"component","lock":false,"position":381},{"name":"Spacer","data":{"spacingLarge":30,"spacingSmall":20,"backgroundColor":"#ffffff"},"id":"#418","type":"component","lock":false,"position":382},{"name":"TextBlock","data":{"text":"### **10.5 O<sub>2</sub> sensor cable** \nThe cable equipped with the Molex connectors is NOT included in the\nthe Divesoft Freedom distribution package\nbut can be ordered separately from third party dealer.\nThe technical design of the connections on a specific type of\nrebreather is not the subject of this user manual.","textLarge":false,"imageOnRight":true,"image":{"recommendedSizes":{"width":"420","height":"280"}},"imageMobile":{"recommendedSizes":{"width":"750","height":"500"}}},"id":"#206","type":"component","lock":false,"position":383},{"name":"Image","data":{"firstImage":{"mimetype":"image/jpeg","size":54835,"hash":"5c7c754632d5277ca8b098d94e0e6848b5acbf93","id":"cl0wlu8cxlohw0776d45v81mp","filename":"divesoft-freedom-user-manual-03-4-a.jpg","category":"divesoft/","type":"image"},"secondImage":{}},"id":"#203","type":"component","lock":false,"position":384},{"name":"TextBlock","data":{"text":"Recommendation: if you are connecting an O2 sensor cable, it is advisable to plug it into the Freedom computer first and then into the oxygen sensors, although this is not always possible.","textLarge":false,"imageOnRight":true,"image":{"recommendedSizes":{"width":"420","height":"280"}},"imageMobile":{"recommendedSizes":{"width":"750","height":"500"}}},"id":"#435","type":"component","lock":false,"position":385},{"name":"Spacer","data":{"spacingLarge":30,"spacingSmall":20,"backgroundColor":"#ffffff"},"id":"#420","type":"component","lock":false,"position":386},{"name":"TextBlock","data":{"text":"### **10.6 Environmental specifications**\n\n**Recommended operating conditions** \nRecommended operating temperature range: 0 °C to 40 °C (32 °F to 104 °F)\n\n**Maximum operating conditions** \nPermitted short term operating temperature range: -10 °C to 45 °C (14°F to 113 °F)\nConsider the reduced battery capacity at low temperatures.\n\n**Long term storage conditions** \nStorage temperature range: 10 °C to 35 °C (50°F to 95°F)\nDonât expose to direct sunlight","textLarge":false,"imageOnRight":true,"image":{"recommendedSizes":{"width":"420","height":"280"}},"imageMobile":{"recommendedSizes":{"width":"750","height":"500"}}},"id":"#207","type":"component","lock":false,"position":387},{"name":"TextBlock","data":{"text":"### **10.7 Compliance**\n### **10.7.1 CE marking** \nDivesoft s.r.o. hereby declares that the Divesoft Freedom is in compliance with the essential requirements\nand other relevant provisions of Directive 1999/5/EC.\n","textLarge":false,"imageOnRight":true,"image":{"recommendedSizes":{"width":"420","height":"280"}},"imageMobile":{"recommendedSizes":{"width":"750","height":"500"}}},"id":"#287","type":"component","lock":false,"position":388},{"name":"TextBlock","data":{"text":"### **10.7.2 EN 13319** \nIndependent conformity assessment was performed to the harmodized Europian depth gauge standard\nEN 13319:2000.","textLarge":false,"imageOnRight":true,"image":{"recommendedSizes":{"width":"420","height":"280"}},"imageMobile":{"recommendedSizes":{"width":"750","height":"500"}}},"id":"#288","type":"component","lock":false,"position":389},{"name":"TextBlock","data":{"text":"### **10.7.3 FCC compliance** \nThis device complies with Part 15 of the FCC Rules. Operation is subject to the following two conditions:\n(1) this device may not cause harmful interference, and (2) this device must accept any interference\nreceived, including interference that may cause undesired operation.","textLarge":false,"imageOnRight":true,"image":{"recommendedSizes":{"width":"420","height":"280"}},"imageMobile":{"recommendedSizes":{"width":"750","height":"500"}}},"id":"#289","type":"component","lock":false,"position":390}
2,{"name":"TextBlock","data":{"text":"### **10.7.4 Industry Canada (IC)** Compliance Notice\nThis device complies with Industry Canada license-exempt RSS standard(s). Operation is subject to the\nfollowing two conditions: (1) this device may not cause interference, and (2) this device must accept any\ninterference, including interference that may cause undesired operation of the device.\nThis Class B digital apparatus complies with Canadian ICES-003.","textLarge":false,"imageOnRight":true,"image":{"recommendedSizes":{"width":"420","height":"280"}},"imageMobile":{"recommendedSizes":{"width":"750","height":"500"}}},"id":"#290","type":"component","lock":false,"position":391},{"name":"TextBlock","data":{"text":"### **10.8 Disposal of waste equipment**\n\n**Users in private households in the European Union**\nThis symbol on the product and accompanying documents means\nthat used electrical and electronic products should not be mixed\nwith general household waste. For proper treatment, recovery and\nrecycling, please take these products to designated collection points\nwhere they will be accepted free of charge. Alternatively, in some\ncountries you may be able to return your products to your local\nretailer upon purchase of an equivalent new product.\nDisposing of this product correctly will help save valuable resources\nand prevent any potential negative effects on human health and the\nenvironment, which could otherwise arise from inappropriate waste\nhandling.","textLarge":false,"imageOnRight":true,"image":{"recommendedSizes":{"width":"420","height":"280"}},"imageMobile":{"recommendedSizes":{"width":"750","height":"500"}}},"id":"#291","type":"component","lock":false,"position":392},{"name":"Image","data":{"firstImage":{"mimetype":"image/jpeg","size":7161,"hash":"42b1a6590e85f253df00785e1f92621d698696d8","id":"cl0wohasrlp1k0776lfm12lj3","filename":"divesoft-freedom-user-manual-10-8-0.jpg","category":"divesoft/","type":"image"},"secondImage":{},"image":{"type":"image"}},"id":"#200","type":"component","lock":false,"position":393},{"name":"TextBlock","data":{"text":"**For business users in the European Union** \nIf you wish to discard electrical and electronic equipment, please contact your dealer or supplier for further\ninformation.\n\n**Information on Disposal in other Countries outside the European Union** \nThis symbol is only valid in the European Union. If you wish to discard this product please contact your local\nauthorities or dealer and ask for the correct method of disposal","textLarge":false,"imageOnRight":true,"image":{"recommendedSizes":{"width":"420","height":"280"}},"imageMobile":{"recommendedSizes":{"width":"750","height":"500"}}},"id":"#112","type":"component","lock":false,"position":394},{"name":"Divider","data":{"color":"darkGray"},"id":"#439","type":"component","lock":false,"position":395},{"name":"TextBlock","data":{"text":"** Bluetooth®** \nThe Bluetooth® word mark and logos are registered trademarks owned by Bluetooth SIG, Inc. and any use of such marks by Divesoft s.r.o. is under license. Other trademarks and trade names are those of their respective owners.\n","textLarge":false,"imageOnRight":true,"image":{"recommendedSizes":{"width":"420","height":"280"}},"imageMobile":{"recommendedSizes":{"width":"750","height":"500"}}},"id":"#440","type":"component","lock":false,"position":396},{"name":"Spacer","data":{"spacingLarge":30,"spacingSmall":20,"backgroundColor":"#ffffff"},"id":"#447","type":"component","lock":false,"position":397},{"name":"Divider","data":{"color":"darkGray"},"id":"#449","type":"component","lock":false,"position":398},{"name":"Spacer","data":{"spacingLarge":30,"spacingSmall":20,"backgroundColor":"#ffffff"},"id":"#448","type":"component","lock":false,"position":399},{"name":"TextBlock","data":{"text":"## TECHNICAL DATA SHEET - FREEDOM+\nDiving decompression computer \n### DIMENSIONS\nExternal dimensions of the computer body: 81 à 53 à 26 mm (3.19 à 2.09 à 1.02 in)â\nExternal dimensions including components: 85 à 65 à 26 mm (3.43 à 2.56 à 1.02 in)\nWeight:192 g (6.8 oz) without strap/bungeeâ\n \n\n### CONSTRUCTION \nHard anodized aluminum body \nAcrylic glass with replaceable protective film \nconnector and button cover: POM-C \nBars: stainless steelâ\n\n### PRESSURE RESISTANCE\nMaximum operating depth: 300 m / 1,000 ft â\
2nTest pressure of each piece: 3.5 MPa â \n\n### DISPLAY\n2.4â³ color TFT LCD, 320 à 240 pxâ â\n \n### DECOMPRESSION CALCULATION \nBühlmann ZHL 16B / ZHL 16C algorithms with fully adjustable gradient factorsâ\n\n### DIVING MODES\nGauge, Freediving, OC up to 9 mixtures (Air, Nitrox, Trimix), upgrade to CCR (all in one hardware) â \nAlarms: vibration + visual (colour indication) - strong vibrations can be felt even in a dry suit\n\n### OPERATING TEMPERATURESâ¯\n0 - +40 °C | Short-term: -10 - +45 °C | Storage: +10 - +35 °Câ\n\n### POWERâ¯\nUser non-replaceable rechargeable Li Ion battery\nVoltage: 3.7 V \nCapacity: 1000 mAh (3.7 Wh) \nCharging: USB Type A, 5 V (< 500 mA)\nOperating time per charge: up to 18 h at brightness 5 / â 9 h at brightness 9â\nFull charge time: approx. 5 hâ\n\nâ \n### DATA INTERFACESâ¯\nUSB (Mass Storage) for logs & FW update \nBluetooth LE for wireless data transfer â\nBMD-380 certified Bluetooth module \nFCC ID: XPYBMD380\n\n**Warranty**: 24 months (12 months on battery)â","textLarge":false,"imageOnRight":true,"image":{"recommendedSizes":{"width":"420","height":"280"}},"imageMobile":{"recommendedSizes":{"width":"750","height":"500"}}},"id":"#446","type":"component","lock":false,"position":400},{"name":"Footer","data":{"copyrights":"Copyright © 2019 Divesoft LLC All rights reserved.","facebookUrl":{"urlNewWindow":true,"url":"https://www.facebook.com/divesoft/"},"youtubeUrl":{"url":"https://www.youtube.com/channel/UCHI2-kHmfoUlAdhQXPKl8lA/featured","urlNewWindow":true},"instagramUrl":{"url":"https://www.instagram.com/divesoft/","urlNewWindow":true},"contacts":"**Divesoft s.r.o.** \nHálkova 2495 \n413 01 Roudnice nad Labem \nCzech Republic \nTel.: +420 416 857 057 \nE-mail: [email protected]","twitterUrl":{"url":"https://twitter.com/divesoft","urlNewWindow":true}},"id":"#1","type":"component","lock":false,"position":401}],"id":"root","idBuffer":"#500","lastCommit":"c0dbdcc8-93e2-432b-b590-183525b316a7"}},"annotations":[],"language":{"type":"id","generated":false,"id":"Language:cjv3kwvoj000u083611381c6o","typename":"Language"},"__typename":"PageTranslation"},"Page:clfgtyzdumfnj0835m46yrcvf":{"id":"clfgtyzdumfnj0835m46yrcvf","type":{"type":"id","generated":false,"id":"PageType:cjv3l213x004f08366hjufttp","typename":"PageType"},"tags":[],"translations({\"where\":{\"language\":{\"id\":\"cjv3kwvoj000u083611381c6o\"}}})":[{"type":"id","generated":false,"id":"PageTranslation:clfgtyze6mfnq0835nt7pdzuf","typename":"PageTranslation"}],"__typename":"Page"},"PageTranslation:clfgtyze6mfnq0835nt7pdzuf":{"id":"clfgtyze6mfnq0835nt7pdzuf","name":"Freedom+ Quick reference","createdAt":"2023-03-20T12:56:20.910Z","content":{"type":"json","json":{"content":[{"name":"Header","data":{"products":[{"title":"Accessories","description":"Backplates, Consumables. Tanks.","img":{"recommendedSizes":{"width":"235","height":"235"}},"url":""},{"title":"Accessories sets","description":"Protection, maintenance, cleaning.","img":{"recommendedSizes":{"width":"235","height":"235"}},"url":""},{"title":"Spare parts","description":"Spare parts and components.","img":{"recommendedSizes":{"width":"235","height":"235"}},"url":""},{"title":"Spare parts kits","description":"Completly Liberty spare parts kits.","img":{"recommendedSizes":{"width":"235","height":"235"}},"url":""}]},"id":"#0","type":"component","lock":false,"position":0},{"name":"ProductShowcase","data":{"backgroundColor":"#ffffff","isTextDark":true,"isImageRight":true,"image":{"mimetype":"image/png","size":577939,"hash":"d98ea9250699d384d411d4b9b6ab764fb7b9a519","id":"clfwihsy5m8ht0776lcxlhc3s","filename":"7273-divesoft-freedom-plus-1080x1080-t-1png.png","category":"divesoft/","type":"image"},"imageMobile":{},"title":"Freedom+","subtitle":"Quick reference","description":"","hideDescriptionOnMobile":false,"areButtons":false,"firstTitle":"Learn more >","firstUrl":"","secondTitle":"Configurator >","secondUrl":""},"id":"#2","type":"component","lock":false,"position":1},{"name":"TextBlock","data":{"text":"This quick manual serves just for a quick fam
2iliarization \nwith the Divesoft FREEDOM+ computer. We strongly \nrecommend studying of the complete manual, which you \ncan find in support section of our web site divesoft.com.","textLarge":false,"imageOnRight":true,"image":{"recommendedSizes":{"width":"420","height":"280"}},"imageMobile":{"recommendedSizes":{"width":"750","height":"500"}}},"id":"#3","type":"component","lock":false,"position":2},{"name":"Divider","data":{"color":"darkGray"},"id":"#5","type":"component","lock":false,"position":3},{"name":"TextBlock","data":{"text":"**ACTIVATION** \nPress both buttons for 3 seconds. \nFor diving switch to main menu (both keys) and choose desired mode. \nAfter descend below 1.5 meter of depth is FREEDOM+ activated automatically. In which mode is FREEDOM+ activated depends on Default mode setting.","textLarge":false,"imageOnRight":true,"image":{"recommendedSizes":{"width":"420","height":"280"}},"imageMobile":{"recommendedSizes":{"width":"750","height":"500"}}},"id":"#4","type":"component","lock":false,"position":4},{"name":"Divider","data":{"color":"darkGray"},"id":"#24","type":"component","lock":false,"position":5},{"name":"Image","data":{"firstImage":{"mimetype":"image/png","size":39942,"hash":"9930c9cd619da80b2405451e9f91155e3c4a4554","id":"clgc80un4poyz0776gnr2gqr0","filename":"freedomplus-quick-reference-01.png","category":"divesoft/","type":"image"},"secondImage":{},"image":{"type":"image"}},"id":"#26","type":"component","lock":false,"position":6},{"name":"TextBlock","data":{"text":"**Check or set critical setting before your dive! Check especially \ndecompression setting, and mixtures. Wrong setting could \ncause serious injury or death.**","textLarge":false,"imageOnRight":true,"image":{"recommendedSizes":{"width":"420","height":"280"}},"imageMobile":{"recommendedSizes":{"width":"750","height":"500"}}},"id":"#7","type":"component","lock":false,"position":7},{"name":"Divider","data":{"color":"darkGray"},"id":"#25","type":"component","lock":false,"position":8},{"name":"TextBlock","data":{"text":"For setting these items go to main menu (both keys) â setup â decompression; or main menu â setup â mixtures. \nChoose desirable item and use buttons or tilting (depends on setting) to change the value.","textLarge":false,"imageOnRight":true,"image":{"recommendedSizes":{"width":"420","height":"280"}},"imageMobile":{"recommendedSizes":{"width":"750","height":"500"}}},"id":"#8","type":"component","lock":false,"position":9},{"name":"Divider","data":{"color":"darkGray"},"id":"#23","type":"component","lock":false,"position":10},{"name":"TextBlock","data":{"text":"**CHARGING** \nUse a coin to unscrew the plug of USB connector (between two buttons). Connect USB cable and plug the charger to grid or USB cable to your PC (or any electronic device with USB).","textLarge":false,"imageOnRight":true,"image":{"recommendedSizes":{"width":"420","height":"280"}},"imageMobile":{"recommendedSizes":{"width":"750","height":"500"}}},"id":"#6","type":"component","lock":false,"position":11},{"name":"Divider","data":{"color":"darkGray"},"id":"#22","type":"component","lock":false,"position":12},{"name":"TextBlock","data":{"text":"**DATA TRANSFER** \nInterconnect Freedom with your PC or tablet via USB cable. \nSelect USB connection in main menu - apps. Now you can store and edit your dives, study graphs, details and many more. \nIf you wish, you can share it with your buddy or group. \n\n**See web site [wetnotes.com](https://wetnotes.com/) and explore all the possibilities it offers! **\n","textLarge":false,"imageOnRight":true,"image":{"recommendedSizes":{"width":"420","height":"280"}},"imageMobile":{"recommendedSizes":{"width":"750","height":"500"}}},"id":"#12","type":"component","lock":false,"position":13},{"name":"Divider","data":{"color":"silver"},"id":"#16","type":"component","lock":false,"position":14},{"name":"TextBlock","data":{"text":"**COMMON OPERATIONS** \n\nEach button can be pressed short (at least 250 ms) or long (press and hold for 1 second).","textLarge":false,"imageOnRight":true,"image":{"recommendedSizes":{"width":"420","height":"280"}},"imageMobile":{"recommendedSizes":{"width":"750","height":"500"}}},"id":"#11","type":"component","lock":false,"position":15}
2,{"name":"Image","data":{"firstImage":{"mimetype":"image/png","size":478265,"hash":"bde38b8d731ad40ae1c0821f426da230b05b01c5","id":"clgc8288gpp0e0776udfyfjz3","filename":"freedomplus-quick-reference-02.png","category":"divesoft/","type":"image"},"secondImage":{},"image":{"type":"image"}},"id":"#27","type":"component","lock":false,"position":16},{"name":"Divider","data":{"color":"silver"},"id":"#17","type":"component","lock":false,"position":17},{"name":"TextBlock","data":{"text":"**MAIN SCREEN CODES** \n**KEY 1** cycle through the dive screens \n**KEY 2** on or off the screen (energy saving) \n**BOTH KEYS** entry to standard menu ","textLarge":false,"imageOnRight":true,"image":{"recommendedSizes":{"width":"420","height":"280"}},"imageMobile":{"recommendedSizes":{"width":"750","height":"500"}}},"id":"#10","type":"component","lock":false,"position":18},{"name":"Divider","data":{"color":"silver"},"id":"#18","type":"component","lock":false,"position":19},{"name":"TextBlock","data":{"text":"**OPEN CIRCUIT MODE** \n**KEY 1 LONG** gas switch up (cyclic) \n**KEY 2 LONG** gas switch down (cyclic) ","textLarge":false,"imageOnRight":true,"image":{"recommendedSizes":{"width":"420","height":"280"}},"imageMobile":{"recommendedSizes":{"width":"750","height":"500"}}},"id":"#15","type":"component","lock":false,"position":20},{"name":"Divider","data":{"color":"darkGray"},"id":"#19","type":"component","lock":false,"position":21},{"name":"TextBlock","data":{"text":"**WORKING WITH MENUS** \n**KEY 1** select highlighted item \n**KEY 2** cycle through the menu item \n**KEY 2 LONG** go one step back in the menu \n**BOTH KEYS** return one level back ","textLarge":false,"imageOnRight":true,"image":{"recommendedSizes":{"width":"420","height":"280"}},"imageMobile":{"recommendedSizes":{"width":"750","height":"500"}}},"id":"#14","type":"component","lock":false,"position":22},{"name":"Divider","data":{"color":"darkGray"},"id":"#21","type":"component","lock":false,"position":23},{"name":"TextBlock","data":{"text":"**LOG BOOK â OTHER DIVES** \n**KEY 1 LONG** Page Up (to later dives) \n**KEY 2 LONG** Page Down (to earlier dives) ","textLarge":false,"imageOnRight":true,"image":{"recommendedSizes":{"width":"420","height":"280"}},"imageMobile":{"recommendedSizes":{"width":"750","height":"500"}}},"id":"#13","type":"component","lock":false,"position":24},{"name":"Divider","data":{"color":"darkGray"},"id":"#20","type":"component","lock":false,"position":25},{"name":"TextBlock","data":{"text":"**SELECT WRIST MOUNT** \nIf you prefer a strap, attach the strap to the computer. \nIf you prefer a bungee, then remove the screws holding the bars and pass the bungee through the threaded holes.","textLarge":false,"imageOnRight":true,"image":{"recommendedSizes":{"width":"420","height":"280"}},"imageMobile":{"recommendedSizes":{"width":"750","height":"500"}}},"id":"#9","type":"component","lock":false,"position":26},{"name":"Footer","data":{"copyrights":"Copyright © 2019 Divesoft LLC All rights reserved.","facebookUrl":{"urlNewWindow":true,"url":"https://www.facebook.com/divesoft/"},"youtubeUrl":{"url":"https://www.youtube.com/channel/UCHI2-kHmfoUlAdhQXPKl8lA/featured","urlNewWindow":true},"instagramUrl":{"url":"https://www.instagram.com/divesoft/","urlNewWindow":true},"contacts":"**Divesoft s.r.o.** \nHálkova 2495 \n413 01 Roudnice nad Labem \nCzech Republic \nTel.: +420 416 857 057 \nE-mail: [email protected]","twitterUrl":{"url":"https://twitter.com/divesoft","urlNewWindow":true}},"id":"#1","type":"component","lock":false,"position":27}],"id":"root","idBuffer":"#28","lastCommit":"837cf62f-5a8e-488f-a6ab-ab03e66c8cac"}},"annotations":[],"language":{"type":"id","generated":false,"id":"Language:cjv3kwvoj000u083611381c6o","typename":"Language"},"__typename":"PageTranslation"},"Page:clfwgsbptnzzu0835o780vtem":{"id":"clfwgsbptnzzu0835o780vtem","type":{"type":"id","generated":false,"id":"PageType:cjv3l213x004f08366hjufttp","typename":"PageType"},"tags":[{"type":"id","generated":false,"id":"Tag:ckp59jt9n48lj0788mfuqrhym","typename":"Tag"}],"translations({\"where\":{\"language\":{\"id\":\"cjv3kwvoj000u083611381c6o\"}}})":[{"type":"id","generated":false,"id":"PageTranslation:clfwgsbqao0010835qxj2viio","typename":"PageTranslation"}],"__typename":"Page"},"PageTranslation:clfwgsbqao0010835qxj2viio":{"id":"clfwgsbqao0010835qxj2viio","name":"Service points","createdAt":"2023-03-31T11:31:34.114Z","content":{"type":"json","json":{"content":[{"name":"Header","data":{"products":[{"title":"Accessories","description":"Backplates, Consumables. Tanks.","img":{"recommendedSizes":{"width":"235","height":"235"}},"url":""},{"title":"Accessories sets","description":"Protection, maintenance, cleaning.","img":{"recommendedSizes":{"width":"235","height":"235"}},"url":""},{"title":"Spare parts","description":"Spare parts and components.","img":{"recommendedSizes":{"width":"235","height":"235"}},"url":""}
2,{"title":"Spare parts kits","description":"Completly Liberty spare parts kits.","img":{"recommendedSizes":{"width":"235","height":"235"}},"url":""}]},"id":"#0","type":"component","lock":false,"position":0},{"name":"ServicePointsMapNew","data":{"isTitleH1":false,"title":"Diving Equipment Service Points","subtitle":"Find your closest service points to ensure your diving equipment is well-maintained and ready for your next underwater adventure. Our comprehensive list includes contact information for certified service centers where you can receive professional assistance and repairs.","showBreadcrumbs":false,"hideHeader":false,"filterByAddress":"false","urlToForm":"","btnTitle":"","mapItems":{"datasourceId":"cjvz0fl7504bm0742u9axw37g","data":{"city":"%city%","service":"%service%","lat":"%lat%","lng":"%lng%","title":"%name%","country":"%country%","address":"%address%","storeChief":"%contactPerson%","phone":"%phone%","web":{"url":"%webPages,0%"},"addFilter":"%service% ","slugComponents":"contacts/service-points/%name%","detailsLink":true},"filters":[]},"thirdFilter":true,"addFilterText":"Select service"},"id":"#5","type":"component","lock":false,"position":1},{"name":"Footer","data":{"componentTemplateId":"cjvwimxrl08e40798hjs5ek9w"},"id":"#1","type":"component","lock":false,"position":5}],"id":"root","idBuffer":"#6","lastCommit":"dbe0a9a7-35fb-49ad-bca4-81fc1788bf4b"}},"annotations":[],"language":{"type":"id","generated":false,"id":"Language:cjv3kwvoj000u083611381c6o","typename":"Language"},"__typename":"PageTranslation"},"Page:clg24qsywoqir0835nda961iz":{"id":"clg24qsywoqir0835nda961iz","type":{"type":"id","generated":false,"id":"PageType:cjv3l213x004f08366hjufttp","typename":"PageType"},"tags":[{"type":"id","generated":false,"id":"Tag:clw52z09zlclk0735mxb7v53p","typename":"Tag"},{"type":"id","generated":false,"id":"Tag:clyycdwe2y9ew0735y8v3nuvd","typename":"Tag"},{"type":"id","generated":false,"id":"Tag:cm5ww0t651b710803pcl02cn4","typename":"Tag"}],"translations({\"where\":{\"language\":{\"id\":\"cjv3kwvoj000u083611381c6o\"}}})":[{"type":"id","generated":false,"id":"PageTranslation:clg24qsz9oqiy083513ouzbmz","typename":"PageTranslation"}],"__typename":"Page"},"PageTranslation:clg24qsz9oqiy083513ouzbmz":{"id":"clg24qsz9oqiy083513ouzbmz","name":"Divesoft.blog / CCR Liberty cave diving resistance","createdAt":"2023-04-04T10:41:04.821Z","content":{"type":"json","json":{"content":[{"name":"Header","data":{"products":[{"title":"Accessories","description":"Backplates, Consumables. Tanks.","img":{"recommendedSizes":{"width":"235","height":"235"}},"url":""},{"title":"Accessories sets","description":"Protection, maintenance, cleaning.","img":{"recommendedSizes":{"width":"235","height":"235"}},"url":""},{"title":"Spare parts","description":"Spare parts and components.","img":{"recommendedSizes":{"width":"235","height":"235"}},"url":""},{"title":"Spare parts kits","description":"Completly Liberty spare parts kits.","img":{"recommendedSizes":{"width":"235","height":"235"}},"url":""}]},"id":"#0","type":"component","lock":false,"position":0},{"name":"BlogArticle","data":{"title":"CCR Liberty cave diving resistance ","perex":"CCR Liberty rebreathers have cave diving DNA. These units were designed by cavers and first tested by cavers. The durability of the Liberty was a key element straight from the beginning and was always kept in mind during the tests. ","content":"Confined spaces, typically caves or wrecks, can be an excellent training ground for resilience. In these environments, contact with solid \"obstacles\" such as the ceiling of a cave or the structure of a wreck is often unavoidable. During transport, contact with the cave or other surfaces cannot be avoided, especially if divers are transporting equipment via crawling caves. \n\nWhen an obstacle is hit, it is the [rebreather](https://www.divesoft.com/en/products/ccr-liberty/philosophy) that must often \"swerve\" or absorb the impact. This often involves sharp or abrasive surfaces, e.g. corroded wreck structure, sharp protrusions in caves due to the genesis of the cave or fillings (speleothems - decorations). \n\n**The resistance of the unit can be categorized
2into three areas:** \n* The inherent resilience of the unit, \n* transport resistance, and \n* resistance to diving, especially in confined spaces. \n\nThe intrinsic resistance of the unit is determined by the quality of workmanship, the materials used and its philosophy a Fault Tolerant Rebreather, which Divesoft promotes. The quality of the unit's workmanship can also be seen in person at many events worldwide. \n\n\nEntrance to JuriÅ¡ko Vrelo, photo by PÅemek\n\n<h2>Installation of the unit in a confined space</h2>\n\nCave diving in most karst areas cannot do without transporting gear through caves, often through crawling caves or single-rope technique through verticals. **The unit is often transported by the diver in a semi-disassembled state**. With full weight, it is impossible to complete the heavier rope sections or push it through the crawlway; the whole back unit cannot be put into the speleothem. \n\nSubsequent assembly takes place in a confined space with an unlimited amount of sediment, which **fundamentally limits the delicate handling of technically advanced equipment**. Liberty rebreathers have also been tested in this environment with compelling success. Examples include crawl transport in Chýnov Cave, rappelling down the rock in Alberic Cave, siphon diving (sump diving) behind the Grande Siphon in the North Branch of Bue Marina, etc. \n\n\nChýnovská cave, photo by M. DvoÅáÄek\n\n<h2>Scratches are inevitable</h2>\n\nThe Liberty will have no respite even after plunging, especially in the flooded crawlspaces. **Contact of the sidemount unit with rock is inevitable**, the unit's body grinds against the rock and the lungs are clawed by sharp protrusions. More than once, a diver is left hanging by the hand set cable, typically in zero visibility while trying to free another jammed piece of gear, etc. \n\nWith the Classic Backmount unit, the head and buddy light suffer the most. Low caves stirred up halocline or otherwise reduced visibility while swimming... and contact with the ceiling can be difficult to avoid. If a diver hits the ceiling while scooting and it shows up as a small scratch on the buddy light, what more could you ask for? With the cave head cover, all worries are completely put to rest. Proof can be seen in the dives in JuriÅ¡ko Vrielo, the tunnels around JÃloviÅ¡tÄ, the caves in Sardinia, etc. \n\nWe also proved the unit's resilience during last year's expedition to JuriÅ¡ka Vrelo, we left the unit between dives in the cave near the spring, where the relative humidity is almost 100%. **The unit was then in the cave for 4 days, completed 3 dives and worked with all sensors without any problems all the time**. Not a single oxygen sensor was disabled. \n\n\nMine adit, author selfie\n\n- [Petr Chmel](https://speleoaquanaut.cz/clanek-spolupracujeme-s-pustym-zlebem-expedice-meduza-2022-1-489)","showTags":false,"showDate":false,"image":{"mimetype":"image/png","size":1434033,"hash":"6dbfaae32587b37b0bb4a2a0a49747b157b310e2","id":"clg24s0mynmq707765tsovg37","filename":"main-resistant.png","category":"divesoft/","type":"image"}},"id":"#3","type":"component","lock":false,"position":1},{"name":"ProductShowcase","data":{"componentTemplateId":"cm9h4wr6ugjv10803yqs3tp71"},"id":"#5","type":"component","lock":false,"position":2},{"name":"Footer","data":{"copyrights":"Copyright © 2019 Divesoft LLC All rights reserved.","facebookUrl":"","youtubeUrl":"","instagramUrl":"","contacts":"**Divesoft, s.r.o.** Hálkova 2495 413 01 Roudnice nad Labem Äeská republika Tel.: +420 416 857 057 E-mail: [email protected]"},"id":"#1","type":"component","lock":false,"position":5}],"id":"root","idBuffer":"#6","lastCommit":"41cb737c-512a-465b-b5d7-225bb885b4a2"}},"annotations":[{"type":"id","generated":true,"id":"PageTranslation:clg24qsz9oqiy083513ouzbmz.annotations.0","typename":"PageAnnotation"},{"type":"id","generated":true,"id":"PageTranslation:clg24qsz9oqiy083513ouzbmz.annotations.1","typename":"PageAnnotation"},{"type":"id","generated":true,"id":"PageTranslation:clg24qsz9oqiy083513ouzbmz.annotations.2","typename":"PageAnnotation"}],"language":{"type":"id","generated":false,"id":"Language:cjv3kwvoj000u083611381c6o","typename":"Language"},"__typename":"PageTranslation"},"PageTranslation:clg24qsz9oqiy083513ouzbmz.annotations.0":{"key":"title","value":"CCR Liberty cave diving resistance","__typename":"PageAnnotation"},"PageTranslation:clg24qsz9oqiy083513ouzbmz.annotations.1":{"key":"perex","value":"CCR Liberty rebreathers have cave diving DNA. These units were designed by cavers and first tested by cavers. The durability of the Liberty was a key element straight from the beginning and was always kept in mind during the tests. ","__typename":"PageAnnotation"},"PageTranslation:clg24qsz9oqiy083513ouzbmz.annotations.2":{"key":"image","value":"{\"mimetype\":\"image/png\",\"size\":1434033,\"hash\":\"6dbfaae32587b37b0bb4a2a0a49747b157b310e2\",\"id\":\"clg24s0mynmq707765tsovg37\",\"filename\":\"main-resistant.png\",\"category\":\"divesoft/\",\"type\":\"image\"}","__typename":"PageAnnotation"},"Page:clivhpar079d80835we1pgzk8":{"id":"clivhpar079d80835we1pgzk8","type":{"type":"id","generated":false,"id":"PageType:cjv3l213x004f08366hjufttp","typename":"PageType"},"tags":[{"type":"id","generated":false,"id":"Tag:cjv3szrcv01bz0836yo8myb0r","typename":"Tag"},{"type":"id","generated":false,"id":"Tag:cm5ww05zc1b5d0803zglvz927","typename":"Tag"}],"translations({\"where\":{\"language\":{\"id\":\"cjv3kwvoj000u083611381c6o\"}}})":[{"type":"id","generated":false,"id":"PageTranslation:clivhparp79df08353
2s99nc80","typename":"PageTranslation"}],"__typename":"Page"},"Tag:cjv3szrcv01bz0836yo8myb0r":{"id":"cjv3szrcv01bz0836yo8myb0r","name":"Done by design","__typename":"Tag"},"PageTranslation:clivhparp79df08353s99nc80":{"id":"clivhparp79df08353s99nc80","name":"Discovering the Ancient Shipwreck Capital: 58 Wrecks Unveiled in Tiny Greek Archipelago! / Divesoft.blog","createdAt":"2023-06-14T09:08:33.349Z","content":{"type":"json","json":{"content":[{"name":"Header","data":{"products":[{"title":"Accessories","description":"Backplates, Consumables. Tanks.","img":{"recommendedSizes":{"width":"235","height":"235"}},"url":""},{"title":"Accessories sets","description":"Protection, maintenance, cleaning.","img":{"recommendedSizes":{"width":"235","height":"235"}},"url":""},{"title":"Spare parts","description":"Spare parts and components.","img":{"recommendedSizes":{"width":"235","height":"235"}},"url":""},{"title":"Spare parts kits","description":"Completly Liberty spare parts kits.","img":{"recommendedSizes":{"width":"235","height":"235"}},"url":""}]},"id":"#0","type":"component","lock":false,"position":0},{"name":"BlogArticle","data":{"title":"Discovering the Ancient Shipwreck Capital: 58 Wrecks Unveiled in Tiny Greek Archipelago!","perex":"Dive into the intriguing world of ancient shipwrecks as we explore the Fourni archipelago, the shipwreck capital of the world. Discover the secrets of long-distance trade routes and the cargo that was found beneath the waves in this tiny Greek archipelago.","content":"<h2>The Fourni Archipelago: A Treasure Trove for Underwater Archaeologists</h2>\n\n With an astounding 58 shipwrecks found among the 13 islands and islets, the small Fourni archipelago has earned itself the title of the ancient shipwreck capital of the world! Underwater archaeologists are thrilled by the hidden secrets in this area, which have revealed valuable information about **long-distance trade routes between the Black Sea, Aegean Sea, Cyprus, the Levant, and Egypt** throughout the ages.\n \n \n \n<h2>Astonishing Diversity of Cargoes and Shipwrecks</h2>\n\nThe experts were not only surprised by the number of shipwrecks spanning various centuries but also by the diverse cargoes they carried, some of which were found for the first time. The multitude of wrecks is likely evidence of the significant traffic in the area rather than the area being unsafe.\n\nOut of the 58 shipwrecks identified in the Fourni archipelago, one in particular stands out the most due to its structural integrity and diverse cargo. This shipwreck carries **six different types of amphorae, originating from the Crimea and Heraclea Pontica regions**, along with domestic pottery from the Phocaea region in northwestern Asia Minor.\n\n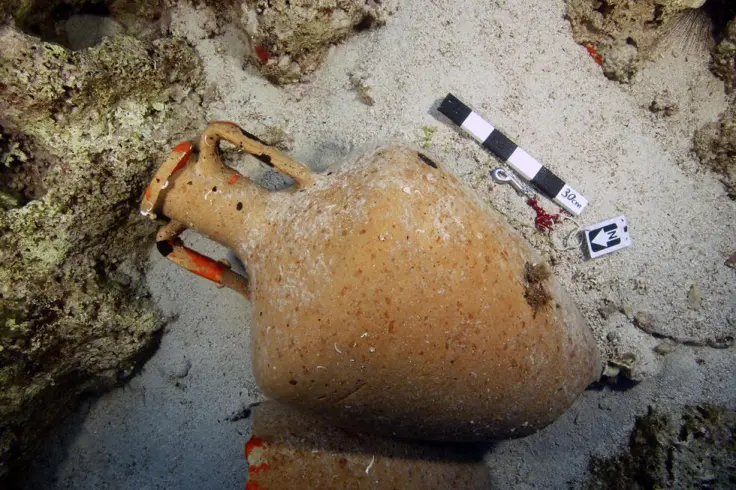\n\n<h2>Uncovering Hidden Treasures and Precise Dating</h2>\n\nDuring the 2021 and 2022 surveys, researchers cleared sand deposits and opened a test trench, revealing the wreck's stratigraphy. Around 15 buried amphorae were uncovered, including one type attributed to the city of Sinope on the Black Sea. \n\nIn addition, table wares and wooden parts believed to be from the vessel's hull were retrieved. These findings allowed scientists to **date the wreck quite accurately between 480 and 520 AD**, likely during Emperor Anastasius I Dicorus' reign (491-518 AD), who is known for his fiscal and monetary reforms that fueled the expansionist policies of 6th-century emperors.\n\n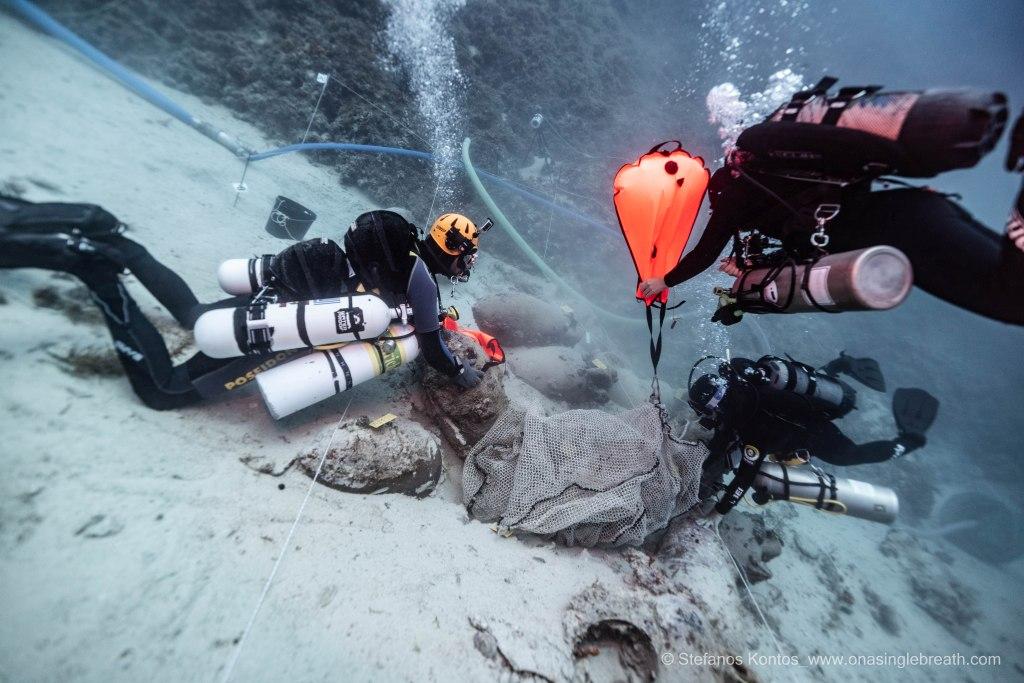\n\nThe Fourni archipelago's astounding shipwrecks offer a unique window into the past. These artifacts continue to provide invaluable insights into ancient maritime trade and the history of the Mediterranean region. As underwater archaeologists continue to unravel the mysteries hidden in these sunken vessels, we are reminded of the incredible stories that lie beneath the sea, waiting to be discovered and shared with the world.\n\n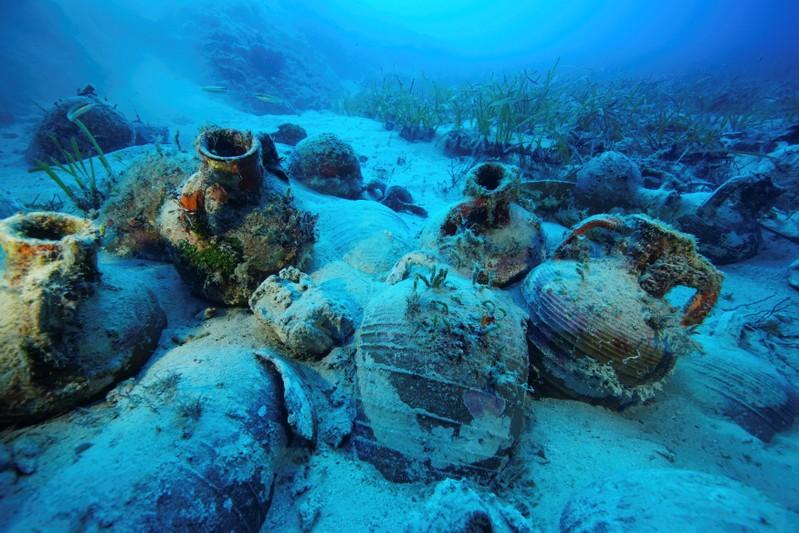\n\n-\tVasilis Mentogiannis\n\nKORSEAI - INSTITUTE OF HISTORICAL AND ARCHAEOLOGICAL RESEARCH\n\nhttps://korseai.com/\n\nhttps://www.facebook.com/korseaiarchaeology\n","showTags":false,"showDate":false,"image":{"mimetype":"image/jpeg","size":425560,"hash":"ddc581b35652755ea90901c77d682dd52ef578d6","id":"clivis4r4fs2y0776414aeo8y","filename":"fournoi-00016.jpg","category":"divesoft/","type":"image"}},"id":"#2","type":"component","lock":false,"position":1},{"name":"ProductShowcase","data":{"componentTemplateId":"cm9h4wr6ugjv10803yq
2s3tp71"},"id":"#4","type":"component","lock":false,"position":2},{"name":"Footer","data":{"copyrights":"Copyright © 2019 Divesoft LLC All rights reserved.","facebookUrl":"","youtubeUrl":"","instagramUrl":"","contacts":"**Divesoft, s.r.o.** Hálkova 2495 413 01 Roudnice nad Labem Äeská republika Tel.: +420 416 857 057 E-mail: [email protected]"},"id":"#1","type":"component","lock":false,"position":4}],"id":"root","idBuffer":"#5","lastCommit":"5b5dc677-6e1f-49f7-ab6e-80c33e6208a7"}},"annotations":[],"language":{"type":"id","generated":false,"id":"Language:cjv3kwvoj000u083611381c6o","typename":"Language"},"__typename":"PageTranslation"},"Page:cljck4wh192zw0835tw3xy3kp":{"id":"cljck4wh192zw0835tw3xy3kp","type":{"type":"id","generated":false,"id":"PageType:cjv3l213x004f08366hjufttp","typename":"PageType"},"tags":[],"translations({\"where\":{\"language\":{\"id\":\"cjv3kwvoj000u083611381c6o\"}}})":[{"type":"id","generated":false,"id":"PageTranslation:cljck4whi93030835xl45su7s","typename":"PageTranslation"}],"__typename":"Page"},"PageTranslation:cljck4whi93030835xl45su7s":{"id":"cljck4whi93030835xl45su7s","name":"Freedom user manual 01","createdAt":"2023-06-26T07:48:45.557Z","content":{"type":"json","json":{"content":[{"name":"Header","data":{"products":[{"title":"Accessories","description":"Backplates, Consumables. Tanks.","img":{"recommendedSizes":{"width":"235","height":"235"}},"url":""},{"title":"Accessories sets","description":"Protection, maintenance, cleaning.","img":{"recommendedSizes":{"width":"235","height":"235"}},"url":""},{"title":"Spare parts","description":"Spare parts and components.","img":{"recommendedSizes":{"width":"235","height":"235"}},"url":""},{"title":"Spare parts kits","description":"Completly Liberty spare parts kits.","img":{"recommendedSizes":{"width":"235","height":"235"}},"url":""}]},"id":"#0","type":"component","lock":false,"position":0},{"name":"ProductShowcase","data":{"backgroundColor":"#ffffff","isTextDark":true,"isImageRight":true,"image":{"mimetype":"image/png","size":525097,"hash":"4c6f45dcfcd42b909b417dc3ba6f520e221843e0","id":"cklscy53e79ge0776dwju688d","filename":"divesoft-freedom.png","category":"divesoft/","type":"image"},"imageMobile":{},"title":"User manual","subtitle":"Freedom / Nitrox, Trimix & CCR dive computer","description":"HW rev. 3.1, FW 1.18.2 ","hideDescriptionOnMobile":false,"areButtons":false,"firstTitle":"Learn more >","firstUrl":"","secondTitle":"Configurator >","secondUrl":""},"id":"#2","type":"component","lock":false,"position":1},{"name":"Divider","data":{"color":"darkGray"},"id":"#17","type":"component","lock":false,"position":2},{"name":"TextBlock","data":{"text":"### **Contents** \n\n[**Section 02: Operation**](#Section-02) \n02.1 Control elements \n02.1.1 Meanings of inputs in surface modes \n02.1.2 Meanings of inputs in dive modes \n02.1.3 Language \n02.2 Brightness control \n02.3 Switching on the unit \n02.4 Switching off the unit \n\n[**Section 03: Diving**](#Section-03) \n03.1 Surface mode \n03.1.1 Entering surface mode \n03.1.2 Surface mode screen \n03.1.3 Switching to other modes \n03.2 Open Circuit \n03.2.1 Entering open circuit mode \n03.2.2 Detailed screen \n03.2.3 Synoptic screen \n03.2.4 Big Screen \n03.2.5 Dive profile screen \n03.2.6 Dive menu \n03.2.7 Gas switch shortcut \n03.3 Fixed setpoint CCR \n03.3.1 Predive and submersion \n03.3.2 Setpoint \n03.3.3 Dive menu \n03.3.4 Stack time \n03.4 Measured CCR \n03.4.1 O<sub>2</sub> sensors connection \n03.4.2 O<sub>2</sub> sensors calibration \n03.4.3 pO<sub>2</sub> reading \n03.5 Gauge \n03.5.1 Synoptic screen \n03.5.2 Big Screen \n03.5.3 Dive profile screen \n03.5.4 Dive menu \n03.6 Free \n03.6.1 Surface screen \n03.6.2 Dive screen \n03.7 Advised strategies \n03.7.1 Diving in darkness \n03.7.2 Decompression ","textLarge":false,"imageOnRight":true,"image":{"recommendedSizes":{"width":"420","height":"280"}},"imageMobile":{"recommendedSizes":{"width":"750","height":"500"}}},"id":"#5","type":"component","lock":false,"position":3},{"name":"Divider","data":{"color":"darkGray"},"id":"#18","type":"component","lock":false,"position":12},{"name":"TextBlock","data":{"text":"### <span id=\"Section-02\">**Section 02: Operation** \n","textLarge":false,"imageOnRight":true,"image":{"recommendedSizes":{"width":"420","height":"280"}},"imageMobile":{"recommendedSizes":{"width":"750","height":"500"}}},"id":"#232","type":"component","lock":false,"position":13},{"name":"Divider","data":{"color":"darkGray"},"id":"#300","type":"component","lock":false,"position":14},{"name":"TextBlock","data":{"text":"### **02.1 Control elements** \n\nFor technical specification of inputs see \"10.3 Control elements\" in the Hardware section.","textLarge":false,"imageOnRight":true,"image":{"recommendedSizes":{"width":"420","height":"280"}},"imageMobile":{"recommendedSizes":{"width":"750","height":"500"}}},"id":"#301","type":"component","lock":false,"position":15}
2,{"name":"TextBlock","data":{"text":"### **02.1.1 Meanings of inputs in surface modes** \n\nThe keys and other inputs are assigned meanings in connection with the current navigation item in the menu. At the same time, however, general rules, which apply wherever possible, are determined for their use. \n\nPress upper key â confirm the menu item just selected \n\nPress lower key â cycle downward through the menu \n\nPress both keys â exit the menu without performing any action \n\nLong press upper key â page up \n\nLong press lower key â page down \n\nLong press both keys â return to main screen \n\nCoded key press (press both keys, then release one key and press it again, then release both keys) â enter service functions menu \n\nTilt away from yourself â increase of the entered digit by one or check flag \n\nTilt toward yourselfâ decrease of the entered digit by one or uncheck flag \n\nTilt to the left â move the cursor to the left \n\nTilt to the right â move the cursor to the right \n\nWherever possible (menu, editing screen), helpful symbols relating to the keys are displayed. A symbol can be either next to a key, indicating the action executed during a short key press, or between the keys,\nindicating the action executed during a short press of both keys. \n\nThe **|â|** symbol next to a key means move down one row in the menu. Moving in the menu is cyclical, so the first row appears again after the last row. The move-up function is not available. \n\nThe **|â|** symbol means return one level without executing any action. \n\nThe **|v|** symbol represents confirmation of the action or selection. ","textLarge":false,"imageOnRight":true,"image":{"recommendedSizes":{"width":"420","height":"280"}},"imageMobile":{"recommendedSizes":{"width":"750","height":"500"}}},"id":"#233","type":"component","lock":false,"position":16},{"name":"TextBlock","data":{"text":"### **02.1.2 Meanings of inputs in dive modes** \n\nThe meanings of inputs are the same as in surface modes. Other possibilities are: \nLong press upper key â gas switch shortcut (previous mixture) \nLong press lower key â gas switch shortcut (next mixture) \nTilting is expanded with movement in games; otherwise, entry of digits, for which tilting is used in surface modes, is limited during the dive to only special cases. \nTapping on the display glass â switch on the display if it is switched off. \nShining a light on the display â in the dark, illuminating the display with a dive light activates it similarly as when tapping on the glass. In the light, the display can be activated by covering and then uncovering it.","textLarge":false,"imageOnRight":true,"image":{"recommendedSizes":{"width":"420","height":"280"}},"imageMobile":{"recommendedSizes":{"width":"750","height":"500"}}},"id":"#234","type":"component","lock":false,"position":17},{"name":"TextBlock","data":{"text":"### **02.1.3 Language** \n\nAll textual information on the Divesoft Freedom is in English. Controlling the apparatus requires knowledge of the English language minimally at a level that allows the user to thoroughly understand this information.","textLarge":false,"imageOnRight":true,"image":{"recommendedSizes":{"width":"420","height":"280"}},"imageMobile":{"recommendedSizes":{"width":"750","height":"500"}}},"id":"#235","type":"component","lock":false,"position":18},{"name":"TextBlock","data":{"text":"### **02.2 Brightness control** \n\nThe 3 levels of the display backlight brightness can be switched by the lower key; the display off, the level set in the Setup â Preferences â Display â Brightness and the maximum brightness (equivalent to\nlevel 9). \nIf the display is off, then use the short press to switch it on. The second and subsequent press with a short delay between presses (< 1 s) switches the brightness level. \nThe display canât shine through disturbed silt or mud on low brightness. If it is necessary to switch to the maximal brightness just short press the lower key repeatedly. The maximum brightness will be set after two\nbutton pushes (if the display was off in the beginning) or three pushes (if the display was on). \n\nAdjusting the function of the lower button may override the brightness control. \n\"Lower bttn.\" to \"\"Prev Scr\" \n\"Stopw btn.\" to \"Base\" or \"Always\". \
2nThe setting is placed in the same place as the Lower bttn. BottomTimer: Setup -> Preferences -> Lower bttn.\nOther licences: Setup -> Preferences -> User interface -> Lower bttn.\n\nSee also Advised strategies â \"3.7.1 Diving in darkness\".\nThis way of brightness control works in all modes except gauge and free mode, where lower button is assigned to stopwatch.","textLarge":false,"imageOnRight":true,"image":{"recommendedSizes":{"width":"420","height":"280"}},"imageMobile":{"recommendedSizes":{"width":"750","height":"500"}}},"id":"#236","type":"component","lock":false,"position":19},{"name":"TextBlock","data":{"text":"### **02.3 Switching on the unit** \n\nThe device is switched on by pressing both keys for three seconds. \n\nAutomatic activation occurs in the event of entering the water in standby mode. If submerged to a depth greater than 1.5 m, the computer switches to default mode (OC in the default setting, can be changed in Setup â Preferences). \n\nAutomatic activation is not immediate, it is necessary to wait a few seconds. The computer may be switched on automatically in higher depth if a descent is rapid. It does not affect the decompression calculation but the first few seconds of the dive profile record will be lost.\n\nThe automatic activation on submersion is disabled when switched to the flight mode. \n\nIn case the diver forgets to switch on the computer after a flight the computer will switch on at 5 m depth within 1 minute.","textLarge":false,"imageOnRight":true,"image":{"recommendedSizes":{"width":"420","height":"280"}},"imageMobile":{"recommendedSizes":{"width":"750","height":"500"}}},"id":"#237","type":"component","lock":false,"position":20},{"name":"TextBlock","data":{"text":"### **02.4 Switching off the unit** \n\nEnter the menu from surface mode, select Switch off and Standby mode in the second menu. \n\nOr you can select Flight mode in the second menu. This prevents an automatic activation due to a rapid pressure change and confusion of the surface level detection algorithm. \n\nYou can switch off directly from dive mode while on the surface. This way the unit will be switched to standby mode, so automatic activation by submersion is enabled. \n\nThe other way to switch off is by waiting for a timeout. \n\nUpon surfacing the Freedom will switch to surface mode after time set in the dive termination timeout. Then it will switch to standby mode after time set in the surface idle timeout. Pushing any button restarts the idle timer in the surface mode. ","textLarge":false,"imageOnRight":true,"image":{"recommendedSizes":{"width":"420","height":"280"}},"imageMobile":{"recommendedSizes":{"width":"750","height":"500"}}},"id":"#11","type":"component","lock":false,"position":21},{"name":"Image","data":{"firstImage":{"mimetype":"image/png","size":15085,"hash":"1db00a2b5e1464cd11082c530cf174bbe999b719","id":"cl0cejwffg63m0776nowoh8dg","filename":"divesoft-freedom-user-manual-02-4-a.png","category":"divesoft/","type":"image"},"secondImage":{}},"id":"#351","type":"component","lock":false,"position":22},{"name":"Spacer","data":{"spacingLarge":30,"spacingSmall":20,"backgroundColor":"#ffffff"},"id":"#394","type":"component","lock":false,"position":23},{"name":"Image","data":{"firstImage":{"mimetype":"image/jpeg","size":57145,"hash":"4cdd64023ec532716be965326b1f58f7dd2ee011","id":"cl0zsetwpm0tq0776m9fdlk7t","filename":"divesoft-freedom-user-manual-02-4-b.jpg","category":"divesoft/","type":"image"},"secondImage":{},"image":{"type":"image"}},"id":"#350","type":"component","lock":false,"position":24},{"name":"Divider","data":{"color":"darkGray"},"id":"#19","type":"component","lock":false,"position":25},{"name":"TextBlock","data":{"text":"### <span id=\"Section-03\">**Section 03: Diving** \n\n","textLarge":false,"imageOnRight":true,"image":{"recommendedSizes":{"width":"420","height":"280"}},"imageMobile":{"recommendedSizes":{"width":"750","height":"500"}}},"id":"#14","type":"component","lock":false,"position":26},{"name":"Divider","data":{"color":"darkGray"},"id":"#302","type":"component","lock":false,"position":27},{"name":"TextBlock","data":{"text":"### **03.1 Surface mode** \n\nThe surface mode is indicated by the gray table gridlines. ","textLarge":false,"imageOnRight":true,"image":{"recommendedSizes":{"width":"420","height":"280"}},"imageMobile":{"recommendedSizes":{"width":"750","height":"500"}}},"id":"#303","type":"component","lock":false,"position":28},{"name":"TextBlock","data":{"text":"### **03.1.1 Entering surface mode** \n\nThe Divesoft Freedom switches to surface mode upon being switched on. ","textLarge":false,"imageOnRight":true,"image":{"recommendedSizes":{"width":"420","height":"280"}},"imageMobile":{"recommendedSizes":{"width":"750","height":"500"}}},"id":"#241","type":"component","lock":false,"position":29},{"name":"Spacer","data":{"spacingLarge":30,"spacingSmall":20,"backgroundColor":"#ffffff"},"id":"#395","type":"component","lock":false,"position":30},{"name":"TextBlock","data":{"text":"### **03.1.2 Surface mode screen** \n\n**Date and Time** \nMaintain correct local time setting. It will be used for log recording. \nThe date format can be set in \nSetup -> Miscellaneous -> Date format\n\n**Surface time** \nThe time from a previous dive. If it was 99 days ago or more, then FREEDOM banner appears instead of the time. \n\n**Default mode** \nThe dive mode, to which the Freedom will be switched if submerged to a depth greater than 1.5 m. \n\n**No fly** \nThe calculation of the no fly time is based on the maximum allowed altitude according to the Bühlmannâs decompression algorithm ZHL. The air pressure in the cabin of a commercial aircraft is maintained at a level corresponding to air pressure at 1800â2400 m (6000â8000 feet) above sea level while cruising altitude falls in the range 11 000â12 200 m (36 000â40 000 feet). \nThe no fly time calculation uses the decisive altitude 4464 m (14 646 ft). At this altitude compartments containing the oxygen masks will be opened automatically and the oxygen masks will drop down in front of the aircraft passengers. \n\n**Max altitude** \nThe maximum allowed altitude calculation is based on the ZHL decompression algorithm with an additional safety margin (GF = 0.80).","textLarge":false,"imageOnRight":true,"image":{"recommendedSizes":{"width":"420","height":"280"}},"imageMobile":{"recommendedSizes":{"width":"750","height":"500"}}},"id":"#242","type":"component","lock":false,"position":31},{"name":"Spacer","data":{"spacingLarge":30,"spacingSmall":20,"backgroundColor":"#ffffff"},"id":"#396","type":"component","lock":false,"position":32},{"name":"Image","data":{"firstImage":{"mimetype":"image/png","size":39166,"hash":"f8e12983d8271ba2f7886ab2ca16231908cecd5c","i
2d":"cl0ceyt6yg6cm0776auqwqwa5","filename":"divesoft-freedom-user-manual-03-2-2.png","category":"divesoft/","type":"image"},"secondImage":{}},"id":"#353","type":"component","lock":false,"position":33},{"name":"Spacer","data":{"spacingLarge":30,"spacingSmall":20,"backgroundColor":"#ffffff"},"id":"#397","type":"component","lock":false,"position":34},{"name":"TextBlock","data":{"text":"**Battery symbol **\nA graphical indication of remaining battery capacity. The estimated capacity of full battery is about\n10 hours. \nFor detailed information see the battery screen in the system check.","textLarge":false,"imageOnRight":true,"image":{"recommendedSizes":{"width":"420","height":"280"}},"imageMobile":{"recommendedSizes":{"width":"750","height":"500"}}},"id":"#24","type":"component","lock":false,"position":35},{"name":"TextBlock","data":{"text":"### **03.1.3 Switching to other modes** \nIn the menu â Dive, the user can switch from surface mode to open\ncircuit, rebreather, gauge and freediving modes. \nA dive mode cannot start while the Divesoft Freedom is connected\nto USB port or charger. See also Powering in hyperbaric environment\n(See section 10.1.1). \nThe Freedom computer can also be switched to the service menu.\nSee chapter \"8.2 Service functions\".","textLarge":false,"imageOnRight":true,"image":{"recommendedSizes":{"width":"420","height":"280"}},"imageMobile":{"recommendedSizes":{"width":"750","height":"500"}}},"id":"#26","type":"component","lock":false,"position":36},{"name":"Image","data":{"firstImage":{"mimetype":"image/png","size":33148,"hash":"3b8c0cfb88c3724f4851a9da460bb909b71f338e","id":"cl0zstrlxm0wb07766lsywo41","filename":"divesoft-freedom-user-manual-03-1-3.png","category":"divesoft/","type":"image"},"secondImage":{},"image":{"type":"image"}},"id":"#354","type":"component","lock":false,"position":37},{"name":"Spacer","data":{"spacingLarge":30,"spacingSmall":20,"backgroundColor":"#ffffff"},"id":"#398","type":"component","lock":false,"position":38},{"name":"TextBlock","data":{"text":"### **03.2 Open Circuit** \nThe open circuit mode is indicated by the blue table gridlines. ","textLarge":false,"imageOnRight":true,"image":{"recommendedSizes":{"width":"420","height":"280"}},"imageMobile":{"recommendedSizes":{"width":"750","height":"500"}}},"id":"#28","type":"component","lock":false,"position":39},{"name":"TextBlock","data":{"text":"### **03.2.1 Entering open circuit mode** \nOpen circuit mode can be entered from the menu in surface mode, by automatic activation after submersion\n(if set as the default mode) or as a bailout from CCR mode (the Close\nCircuit version only). ","textLarge":false,"imageOnRight":true,"image":{"recommendedSizes":{"width":"420","height":"280"}},"imageMobile":{"recommendedSizes":{"width":"750","height":"500"}}},"id":"#243","type":"component","lock":false,"position":40},{"name":"TextBlock","data":{"text":"### **03.2.2 Detailed screen** \nThe primary screen displays all necessary information during a dive.\nDepth\nThe depth can be read in the units set in the setup (m or ft). Depth\nis calculated from measured hydrostatic pressure. Fresh water\n(default) or seawater density can be set for the depth calculation.","textLarge":false,"imageOnRight":true,"image":{"recommendedSizes":{"width":"420","height":"280"}},"imageMobile":{"recommendedSizes":{"width":"750","height":"500"}}},"id":"#244","type":"component","lock":false,"position":41},{"name":"Spacer","data":{"spacingLarge":30,"spacingSmall":20,"backgroundColor":"#ffffff"},"id":"#399","type":"component","lock":false,"position":42},{"name":"Image","data":{"firstImage":{"mimetype":"image/png","size":48367,"hash":"469c16ffc7bddd89477948da01f985a2bb9918a0","id":"cl0tkt6o9kojp0776x6n5d0qh","filename":"divesoft-freedom-user-manual-03-2-2.png","category":"divesoft/","type":"image"},"secondImage":{},"image":{"type":"image"}},"id":"#30","type":"component","lock":false,"position":43},{"name":"Spacer","data":{"spacingLarge":30,"spacingSmall":20,"backgroundColor":"#ffffff"},"id":"#400","type":"component","lock":false,"position":44},{"name":"TextBlock","data":{"text":"Setting of fresh/sea water doesnât affect decompression calculations. Decompression is based on ambient\npressure and is independent of displayed depth. Only depth of decompression stops is rounded up to usual\nvalues according to settings of fresh/sea water and metric/imperial units.\n\n\n**Dive time** \nThe timer starts after submersion (depth > 1.5 m) and halts after surfacing (depth < 0.5 m). In case of\nstay on the surface (or at very shallow depth) followed by a second submersion (during a time set in the\ndive termination timeout) the dive time indicated will be the time from the first submersion including the\nsurface time. \n\n**Deco Stop** Alternatively, \"Gas switch\" will be displayed if it is a gas switch stop \nThe depth of the decompression stop can be read in the units set in the setup (m or ft). Last stop depth\ndepends on settings.\nThe Deco Stop value is shown only if the stops decompression regimen is set. See Setup â Decompression\nâ Deco stops (See section 4.2.4). \n**Stop Time** \nLength of the decompression stop at the Deco Stop depth. While on stop, there is a countdown timer here.\nRounding of the decompression stop length depends on setting.\nThe Stop Time value is shown only if the stops decompression regimen is set. See Setup â Decompression\nâ Deco stops (See section 4.2.4). \n**TTS** \nThe time to surface (TTS) includes the complete decompression profile. If optimal gas is selected in the\ndecompression settings, then the TTS considers changing of gases from the list of active mixtures; the gas\nswitch time is included.\nIf the current gas setting is selected in the decompression settings, then only the actual gas is used for\na TTS calculation.","textLarge":false,"imageOnRight":true,"image":{"recommendedSizes":{"width":"420","height":"280"}},"imageMobile":{"recommendedSizes":{"width":"750","height":"500"}}},"id":"#29","type":"component","lock":false,"position":45},{"name":"TextBlock","data":{"text":"**Ceiling** \nThe ceiling value is shown only if the ceiling decompression regimen\nis set. See Setup â Decompression â Deco stops (c4.2.4).\nThe depth of the decompression ceiling decreases continuously up to\nthe surface. The reading is not artificially stopped anywhere during\nthe ascent. Always stay below the depth of the ceiling, even if the\nceiling depth is very shallow.\nAscent above the ceiling generates a warning. Further violation,\nmore than 1 m (3 ft), leads to an additional alarm. Both alarms are\nlogged. The Freedom will c
2ontinue in open circuit dive mode. It will\nnot switch to a gauge mode or even an SOS mode. Diver should make\nresponsible decision in order to minimize the probability of severe\nconsequences.","textLarge":false,"imageOnRight":true,"image":{"recommendedSizes":{"width":"420","height":"280"}},"imageMobile":{"recommendedSizes":{"width":"750","height":"500"}}},"id":"#32","type":"component","lock":false,"position":46},{"name":"Spacer","data":{"spacingLarge":30,"spacingSmall":20,"backgroundColor":"#ffffff"},"id":"#402","type":"component","lock":false,"position":47},{"name":"Image","data":{"firstImage":{"mimetype":"image/png","size":44476,"hash":"8572245fa91f71a4d47c3105c3abe4fd7d21e026","id":"cl0tjftglknm407763witt8l9","filename":"divesoft-freedom-user-manual-03-2-2-b.png","category":"divesoft/","type":"image"},"secondImage":{},"image":{"type":"image"}},"id":"#31","type":"component","lock":false,"position":48},{"name":"Spacer","data":{"spacingLarge":30,"spacingSmall":20,"backgroundColor":"#ffffff"},"id":"#401","type":"component","lock":false,"position":49},{"name":"TextBlock","data":{"text":"**No deco** \nYou can stay for the indicated time at the current depth, breathing the current mixture, to avoid\na decompression obligation.\n","textLarge":false,"imageOnRight":true,"image":{"recommendedSizes":{"width":"420","height":"280"}},"imageMobile":{"recommendedSizes":{"width":"750","height":"500"}}},"id":"#33","type":"component","lock":false,"position":50},{"name":"TextBlock","data":{"text":"**SafetySt** \nLength of the safety stop is 3 min. The safety stop can be carried out within depth from 6 to 3 m (20 to\n10 ft). The safety stop is indicated if the maximum depth of a dive was greater than 10 m (30 ft).\n\nCountdown of the safety stop is interrupted at depths greater than\n6 m. Descent to depths greater than 10 m resets the time of the\nsafety stop back to 3 min.\nA violation of the 3 m ceiling is logged (silently). Ascent above 1.8 m\ngenerates an alarm and leads to the end of the safety stop regimen\nfor a current dive.\nThe safety stop can be switched off. See Setup â Decompression\nâ Safety stop \\[On] (See section 4.2.2).","textLarge":false,"imageOnRight":true,"image":{"recommendedSizes":{"width":"420","height":"280"}},"imageMobile":{"recommendedSizes":{"width":"750","height":"500"}}},"id":"#316","type":"component","lock":false,"position":51},{"name":"Image","data":{"firstImage":{"mimetype":"image/png","size":43643,"hash":"11f12392a45840fe44aeafe2a969cbb0aa261980","id":"cl0tjnzpbknsd0776u2r0wxwq","filename":"divesoft-freedom-user-manual-03-2-2-c.png","category":"divesoft/","type":"image"},"secondImage":{}},"id":"#34","type":"component","lock":false,"position":52},{"name":"Spacer","data":{"spacingLarge":30,"spacingSmall":20,"backgroundColor":"#ffffff"},"id":"#403","type":"component","lock":false,"position":53},{"name":"TextBlock","data":{"text":"**DeepStop** \nThe depth of the upcoming deep stop is based on Richard\nPyleâs algorithm. A timer countdown starts here after arriving to the\ndisplayed deep stop depth.\nViolation of the deep stop is logged but no alarm is generated\nbecause deep stops are considered as an additional safety factor\nonly.\nThese Pyle deep stops are shown only if switched on. See Setup â\nDecompression â Deep stops (See section 4.2.4).","textLarge":false,"imageOnRight":true,"image":{"recommendedSizes":{"width":"420","height":"280"}},"imageMobile":{"recommendedSizes":{"width":"750","height":"500"}}},"id":"#35","type":"component","lock":false,"position":54},{"name":"Image","data":{"firstImage":{"mimetype":"image/png","size":57761,"hash":"6f6c2ea8076d9881ff74f332572cf622aa7eb3e6","id":"cl0tj6o7xknih0776qkxuizza","filename":"divesoft-freedom-user-manual-03-2-2.png","category":"divesoft/","type":"image"},"secondImage":{},"image":{"type":"image"}},"id":"#36","type":"component","lock":false,"position":55},{"name":"Spacer","data":{"spacingLarge":30,"spacingSmall":20,"backgroundColor":"#ffffff"},"id":"#404","type":"component","lock":false,"position":56},{"name":"TextBlock","data":{"text":"**Local Time** \nThe local time is shown on the display directly above the mixture\nindication. \n\n**Mixture** \nThe center of the display indicates the current gas mixture.\nWarning: If the breathing mixture is not identical to the indicated mixture, then the calculated\ndecompression profile will be wrong and may be dangerous to follow. In that case you must use a backup\nmethod of the decompression profile calculation. \n\n**Max** \nThis shows the maximum depth reached during a dive.\n\n**CNS** \nExposure to high oxygen partial pressure may under certain circumstances cause acute (CNS) oxygen\npoisoning. This may cause the affected person to drown.\nThe so called âoxygen clockâ is a percentage of consumption of CNS toxicity limit. Calculation is based on\nNOAA oxygen exposure limits.\n","textLarge":false,"imageOnRight":true,"image":{"recommendedSizes":{"width":"420","height":"280"}},"imageMobile":{"recommendedSizes":{"width":"750","height":"500"}}},"id":"#37","type":"component","lock":false,"position":57},{"name":"TextBlock","data":{"text":"pO<sub>2</sub>\n(bar)\nMaximum Single Exposure\n(minutes)\nMaximum per 24 hr\n(minutes)\n1.60 45 150\n1.55 83 165\n1.50 120 180\n1.45 135 180\n1.40 150 180\n1.35 165 195\n1.30 180 210\n1.25 195 225\n1.20 210 240\n1.10 240 270\n1.00 300 300\n0.9
20 360 360\n0.80 450 450\n0.70 570 570\n0.60 720 720","textLarge":false,"imageOnRight":true,"image":{"recommendedSizes":{"width":"420","height":"280"}},"imageMobile":{"recommendedSizes":{"width":"750","height":"500"}}},"id":"#317","type":"component","lock":false,"position":58},{"name":"Image","data":{"firstImage":{},"secondImage":{}},"id":"#38","type":"component","lock":false,"position":59},{"name":"TextBlock","data":{"text":"CNS oxygen clock value does not take chronic (pulmonary) oxygen poisoning into account. For exposures\ncommon to technical diving, chronic toxicity manifestations are not significant. For very long dives it is\nnecessary to calculate with long-term exposure limits and to limit the overall exposure.\nWhen pO<sub>2</sub>\n ⥠1.4 bar then the CNS toxicity limit is always shorter than the pulmonary toxicity limit.\nFor calculations related to chronic toxicity use the REPEX method that you know from the nitrox diving\ncourse. The Divesoft Freedom does not perform calculations associated with chronic oxygen toxicity.\n\n**Avg D** \nAverage depth. It is possible to create a new start point for depth averaging; in dive menu select Settings â\nReset average. \nBottomTimer: Reset average\n\n\n**Floor**\nDecompression floor is the depth at which the time to surface (TTS) does not increase.\nCalculation of the decompression floor is approximate. Staying at the exact depth of the indicated floor\nleads to a modest decrease in the upcoming decompression time.\nThis position on the detailed screen is customizable. You can alter the decompression floor or average\ndepth in Setup â Preferences â Display â OC Row4/Col3.","textLarge":false,"imageOnRight":true,"image":{"recommendedSizes":{"width":"420","height":"280"}},"imageMobile":{"recommendedSizes":{"width":"750","height":"500"}}},"id":"#39","type":"component","lock":false,"position":60},{"name":"TextBlock","data":{"text":"**Temp** \nWater temperature is measured inside the computer case. After temperature change wait about\n1â2 minutes until the temperature reading reaches a stable value. The temperature in air is affected by\nmany factors and is only an indication.\nA temperature correction can be set in Setup â Calibration for better accuracy.\n**pO<sub>2</sub>** \nThe calculation is based on depth and O<sub>2</sub>\n fraction in breathing mixture.\n \n**Combined graphic symbol** \nThe combined graphic symbol on the detailed screen is intended for rapid orientation. It tells the diver what\nmust be done. The color of the warning symbols changes from yellow to red according to the degree of\nimportance. ","textLarge":false,"imageOnRight":true,"image":{"recommendedSizes":{"width":"420","height":"280"}},"imageMobile":{"recommendedSizes":{"width":"750","height":"500"}}},"id":"#41","type":"component","lock":false,"position":61},{"name":"Image","data":{"firstImage":{},"secondImage":{},"image":{"type":"image"}},"id":"#43","type":"component","lock":false,"position":62},{"name":"TextBlock","data":{"text":"Permitted to ascend to the surface. ","textLarge":false,"imageOnRight":true,"image":{"recommendedSizes":{"width":"420","height":"280"}},"imageMobile":{"recommendedSizes":{"width":"750","height":"500"}}},"id":"#42","type":"component","lock":false,"position":63},{"name":"Image","data":{"firstImage":{},"secondImage":{}},"id":"#48","type":"component","lock":false,"position":64},{"name":"TextBlock","data":{"text":"Permitted to ascend to the depth of the decompression stop or decompression ceiling. ","textLarge":false,"imageOnRight":true,"image":{"recommendedSizes":{"width":"420","height":"280"}},"imageMobile":{"recommendedSizes":{"width":"750","height":"500"}}},"id":"#52","type":"component","lock":false,"position":65},{"name":"Image","data":{"firstImage":{},"secondImage":{}},"id":"#47","type":"component","lock":false,"position":66},{"name":"TextBlock","data":{"text":"The depth of the decompression ceiling or decompression stop has been reached; do not change\ndepth. ","textLarge":false,"imageOnRight":true,"image":{"recommendedSizes":{"width":"420","height":"280"}},"imageMobile":{"recommendedSizes":{"width":"750","height":"500"}}},"id":"#53","type":"component","lock":false,"position":67},{"name":"Image","data":{"firstImage":{},"secondImage":{}},"id":"#46","type":"component","lock":false,"position":68},{"name":"TextBlock","data":{"text":"The depth of the safety stop has been reached; do not change depth. ","textLarge":false,"imageOnRight":true,"image":{"recommendedSizes":{"width":"420","height":"280"}},"imageMobile":{"recommendedSizes":{"width":"750","height":"500"}}},"id":"#51","type":"component","lock":false,"position":69},{"name":"Image","data":{"firstImage":{},"secondImage":{}},"id":"#45","type":"component","lock":false,"position":70},{"name":"TextBlock","data":{"text":"The ascent rate has been exceeded; slow down your ascent. ","textLarge":false,"imageOnRight":true,"image":{"recommendedSizes":{"width":"420","height":"280"}},"imageMobile":{"recommendedSizes":{"width":"750","height":"500"}}},"id":"#50","type":"component","lock":false,"position":71},{"name":"Image","data":{"firstImage":{},"secondImage":{}},"id":"#44","type":"component","lock":false,"position":72},{"name":"TextBlock","data":{"text":"The current depth is less than the depth of the decompression ceiling; descend.","textLarge":false,"imageOnRight":true,"image":{"recommendedSizes":{"width":"420","height":"280"}},"imageMobile":{"recommendedSizes":{"width":"750","height":"500"}}},"id":"#49","type":"component","lock":false,"position":73},{"name":"TextBlock","data":{"text":"**Vertical speed** \nThere is an indication of the ascent or descent rate below the combined graphical symbol. Can be set to\na relative (%) or absolute (m/min or ft/min) reading. The relative reading is based on the maximum ascent\nor descent rate. \nBottomTimer setting: \"Setup â Preferences â Vert. rate\" \nOther licences: \"Setup â Preferences â User interface â Vert. rate\"\n\n\n**Battery symbol** \nA graphical indication of the remaining battery capacity. See chapter Surface mode â Battery symbol\n(See section 3.1.2).","textLarge":false,"imageOnRight":true,"image":{"recommendedSizes":{"width":"420","height":"280"}},"imageMobile":{"recommendedSizes":{"width":"750","height":"500"}}},"id":"#54","type":"component","lock":false,"position":74},{"name":"TextBlock","data":{"text":"### **03.2.3 Synoptic screen** \nThe depth value is easy to read. It is accompanied by other important\ninformation.\nThe meaning of all values is identical to the detailed screen.","textLarge":false,"imageOnRight":true,"image":{"recommendedSizes":{"width":"420","height":"280"}},"imageMobile":{"recommendedSizes":{"width":"750","height":"500"}}},"id":"#222","type":"component","lock":false,"position":75},{"name":"Image","data":{"firstImage":{"mimetype":"image/png","size":34927,"hash":"e1e53cd09f98eb999b96e1f
2121302769a8126153","id":"cl0tlxnn2kpc10776c8i56yl5","filename":"divesoft-freedom-user-manual-03-2-3.png","category":"divesoft/","type":"image"},"secondImage":{}},"id":"#55","type":"component","lock":false,"position":76},{"name":"Spacer","data":{"spacingLarge":30,"spacingSmall":20,"backgroundColor":"#ffffff"},"id":"#405","type":"component","lock":false,"position":77},{"name":"TextBlock","data":{"text":"### **03.2.4 Big Screen** \n\nThe most important information is written in really big characters.\nThis screen is useful in very bad visibility. Many divers can read\nnumbers even without a mask.\nThe meaning of all values is identical to the detailed screen. \nOn the \"Big Screen\" you can customize the bottom line in Gauge mode.\nBottomTimer: \"Setup -> Preferences -> Big depth\"\nOther linces:\"Setup -> Preferences -> User interface -> Big depth\"\n - \"Avg\" displays average depth\n- \"Max\" displays maximum depth\n- \"Only\" displays current depth ONLY, nothing else.","textLarge":false,"imageOnRight":true,"image":{"recommendedSizes":{"width":"420","height":"280"}},"imageMobile":{"recommendedSizes":{"width":"750","height":"500"}}},"id":"#56","type":"component","lock":false,"position":78},{"name":"Spacer","data":{"spacingLarge":30,"spacingSmall":20,"backgroundColor":"#ffffff"},"id":"#407","type":"component","lock":false,"position":79},{"name":"Image","data":{"firstImage":{"mimetype":"image/png","size":29629,"hash":"3b235775934151025d80b4d713c78946389450e9","id":"cl0tmn055kpsy0776mlrzmnpy","filename":"divesoft-freedom-user-manual-03-2-4.png","category":"divesoft/","type":"image"},"secondImage":{},"image":{"type":"image"}},"id":"#57","type":"component","lock":false,"position":80},{"name":"Spacer","data":{"spacingLarge":30,"spacingSmall":20,"backgroundColor":"#ffffff"},"id":"#406","type":"component","lock":false,"position":81},{"name":"TextBlock","data":{"text":"### **03.2.5 Dive profile screen** \n\n**Start** \nThe time of submersion is useful for checking compliance with the\nschedule.\n\n**Avg** \nThe average depth is indicated with the yellow horizontal line and\nwith the average depth displayed in yellow.\nA new start point for depth averaging can be created (in dive menu\nselect Settings â Reset average). This point is indicated by the\nyellow vertical line and the horizontal average depth line starts from\nthere.\n\n**Current depth** \nSee lower left corner.\n\n**Dive time** \nRuntime of current dive is placed in lower right corner.\n\n**Max** \nMaximum depth reached during the dive. Field with this value is\nplaced in the middle of bottom line.","textLarge":false,"imageOnRight":true,"image":{"recommendedSizes":{"width":"420","height":"280"}},"imageMobile":{"recommendedSizes":{"width":"750","height":"500"}}},"id":"#58","type":"component","lock":false,"position":82},{"name":"Image","data":{"firstImage":{"mimetype":"image/png","size":31112,"hash":"125debcb0ef3f271fc89e04934c6769f5ebdf6b1","id":"cl0wl3aomloby0776mkjdr1kh","filename":"divesoft-freedom-user-manual-03-2-5a.png","category":"divesoft/","type":"image"},"secondImage":{},"image":{"type":"image"}},"id":"#60","type":"component","lock":false,"position":83},{"name":"Spacer","data":{"spacingLarge":30,"spacingSmall":20,"backgroundColor":"#ffffff"},"id":"#408","type":"component","lock":false,"position":84},{"name":"Image","data":{"firstImage":{"mimetype":"image/png","size":31286,"hash":"ba890b7f6addcbba4216bd525ff6205593399603","id":"cl0wl41ftloc50776g18hahxn","filename":"divesoft-freedom-user-manual-03-2-5b.png","category":"divesoft/","type":"image"},"secondImage":{},"image":{"type":"image"}},"id":"#59","type":"component","lock":false,"position":85},{"name":"Spacer","data":{"spacingLarge":30,"spacingSmall":20,"backgroundColor":"#ffffff"},"id":"#355","type":"component","lock":false,"position":86},{"name":"TextBlock","data":{"text":"### **03.2.6 Dive menu** \nDuring a dive, in any dive mode, press both keys simultaneously to\nshow the dive menu.\nThere is current depth, partial pressure of oxygen and dive time on\nthe bottom of the screen.\n\n","textLarge":false,"imageOnRight":true,"image":{"recommendedSizes":{"width":"420","height":"280"}},"imageMobile":{"recommendedSizes":{"width":"750","height":"500"}}},"id":"#61","type":"component","lock":false,"position":87},{"name":"Image","data":{"firstImage":{"mimetype":"image/bmp","size":77596,"hash":"7ba8c7a9db2c15d129cee1efe63fea9b69f5979c","id":"cl2yez0pw5hws0776rc47e1cb","filename":"00000016.BMP","category":"divesoft/","type":"image"},"secondImage":{},"image":{"type":"image"}},"id":"#423","type":"component","lock":false,"position":88},{"name":"TextBlock","data":{"text":"**Mix** \nMixture selection. Only active mixtures are listed and can be\nselected.\n\n**Mixtures with pO<sub>2</sub>** \n outside breathable range are displayed in red\n(if pO<sub>2</sub>\n is too high) or blue (if pO<sub>2</sub>\n is too low). This does not prevent\nselection of this mixture. An alarm will be activated after this kind\nof switch.\nLimits of breathable range are set in Setup â Mixtures.","textLarge":false,"imageOnRight":true,"image":{"recommendedSizes":{"width":"420","height":"280"}},"imageMobile":{"recommendedSizes":{"width":"750","height":"500"}}},"id":"#421","type":"component","lock":false,"position":89},{"name":"Image","data":{"firstImage":{"mimetype":"image/png","size":22532,"hash":"b459ac1ad7284fa1e9c752a1a54e9a29f39bdbcd","id":"cl0wl5a6alocc0776vp5xitzg","filename":"divesoft-freedom-user-manual-03-2-6b.png","category":"divesoft/","type":"image"},"secondImage":{}},"id":"#62","type":"component","lock":false,"position":90},{"name":"Spacer","data":{"spacingLarge":30,"spacingSmall":20,"backgroundColor":"#ffffff"},"id":"#356","type":"component","lock":false,"position":91},{"name":"TextBlock","data":{"text":"**End dive** \nEnd dive and switch to surface mode. This menu item is enabled only\non the surface (at depth < 0.5 m).\n\n**Ascent plan** \nBy default the plan includes all gas switches during the\ndecompression, including gas switch stop duration. If ascent gas is\nset to current in decompression setting, then no gas switches are\nincluded in the plan.","textLarge":false,"imageOnRight":true,"image":{"recommendedSizes":{"width":"420","height":"280"}},"imageMobile":{"recommendedSizes":{"width":"750","height":"500"}}},"id":"#64","type":"component","lock":false,"position":92},{"name":"Spacer","data":{"spacingLarge":30,"spacingSmall":20,"backgroundColor":"#ffffff"},"id":"#357","type":"component","lock":false,"position":93},{"name":"Image","data":{"firstImage":{"mimetype":"image/png","size":48933,"hash":"2460759cc7d5c53dc3980ffd5bcc9e592f07fbaf","id":"cl0wl8oy4loe507764y8ul2fh","filename":"divesoft-freedom-user-manual-03-2-6c.png","category":"divesoft/","type":"image"},"secondImage":{},"image":{"type":"image"}},"id":"#65","type":"component","lock":false,"position":94},{"name":"Spacer","data":{"spacingLarge":30,"spacingSmall":20,"backgroundColor":"#ffffff"},"id":"#358","type":"component","lock":false,"position":95},{"name":"TextBlock","data":{"text":"**Setup â Bailout GF**\nSwitch to gradient factor pair for bailout (BoGF) and vice versa. You\ncan switch between standard and bailout GF anytime during a dive.\nSee also Setup â Decompression â Gradient factor (See section 4.2.2). ","textLarge":false,"imageOnRight":true,"image":{"recommendedSizes":{"width":"420","height":"280"}},"imageMobile":{"recommendedSizes":{"width":"750","height":"500"}}},"id":"#66","type":"component","lock":false,"position":96},{"name":"Spacer","data":{"spacingLarge":30,"spacingSmall":20,"backgroundColor":"#ffffff"},"id":"#360","type":"component","lock":false,"position":97},{"name":"Image","data":{"firstImage":{"mimetype":"image/png","size":33639,"hash":"3e26ea4df9159b3e01e51a4be04cb658b522c29e","id":"cl0wl9pmwloee0776i7i44co4","filename":"divesoft-freedom-user-manual-03-2-6d.png","category":"divesoft/","type":"image"},"secondImage":{},"image":{"type":"image"}},"id":"#67","type":"component","lock":false,"position":98},{"name":"Spacer","data":{"spacingLarge":30,"spacingSmall":20,"backgroundColor":"#ffffff"},"id":"#359","type":"component","lock":false,"position":99},{"name":"TextBlock","data":{"text":"**Setup â Reset average** \nIt restarts calculation of average depth. The restart point is indicated\nby the vertical line on the dive profile screen.\n\n**Setup â Mixture setup** \nCorresponds to mixture setup in Setup â Mixtures â Mixture setup.\nThis feature is intended only for emergency situations. Do not use\nthis setup on a regular basis.\n\n**Setup â Display** \nThis setting corresponds to Setup â Preferences â Display.\nSetup â Force dive end\nIf the surface pressure (zero depth) was incorrectly detected and the computer âdivesâ while on the surface\nthen the dive can be forced to stop with this function. \n\n<span style=\"color:red\">**Warning: Do not force dive end underwater!**</span>\n\n\n**Apps** \nThere are several items in the apps folder\n\n**Apps - Add bookmark** - marks the current moment in the dive log\n\n**Apps - Events** - allows you to view computer-issued warnings and pop-up messages\n\n**Apps - Emergency torch** - brightens the entire display to the maximum and emits the maximum amount of light possible. Can be used as an emergency torch in certain conditions when all other torches have failed.\n\n**Apps - Inclinometer** - a tool to measure the slope of a slope. Can be used for mapping caves and wrecks.\n\n**Apps - Sokoban Game** - a puzzle game for distraction on long decompression. For more information on games, see section 9 of this manual.\n\n**Apps - Snake** - a game for distraction on a long decompression. See section 9 of this manual for more about the games.","textLarge":false,"imageOnRight":true,"image":{"recommendedSizes":{"width":"420","height":"280"}},"imageMobile":{"recommendedSizes":{"width":"750","height":"500"}}},"id":"#68","type":"component","lock":false,"position":100},{"name":"TextBlock","data":{"text":"### **03.2.7 Gas switch shortcut** \n\nLong press of the upper key selects previous gas mixture. Long press of the lower key selects next gas\nmixture. This list is cyclic.\nWhat mixtures can be switched depends on the setting in Setup â Preferences â User interface â Gas shortc. The\ndefault setting for gas shortcuts is off.\nIf Breathable is selected, then mixes with pO<sub>2</sub>\n inside the breathable range with regard to the current depth\nare switched. The limits of the breathable range are set in Setup â Mixtures.\nIf All is selected, then all active gas mixes are switched, regardless of breathability. An alarm could be\nactivated after this kind of switch. The computer will wait five seconds before generating an alarm. The user\ncan choose the correct gas mixture during this interval.","textLarge":false,"imageOnRight":true,"image":{"recommendedSizes":{"width":"420","height":"280"}},"imageMobile":{"recommendedSizes":{"width":"750","height":"500"}}},"id":"#223","type":"component","lock":false,"position":101},{"name":"TextBlock","data":{"text":"### **03.3 Fixed setpoint CCR** \nThe rebreather dive modes are only available in the Closed Circuit\nversion of the Divesoft Freedom.\nIt is strongly recommended to familiarize yourself with open circuit\n(OC) diving using the Divesoft Freedom before using for rebreather\ndiving. This chapter of User manual describes only the differences\nfrom OC diving. First you will have to study the OC mode.\nIf the Freedom is used as a backup computer for an eCCR then the\nproper setting corresponding to the setting of the eCCR electronic is\ncrucial. If a manual CCR (mCCR) is used then maintain the pO<sub>2</sub>\n in the\nbreathing loop on the value equivalent to the Feeedom setpoint (SP).\nIf a SCR is used then select the correct type of SCR and adjust its\nparameters in setup.\nSee Setup â Rebreather.\nDonât forget to set up the OC bailout too, especially the default mix.\nThe fixed setpoint CCR mode is indicated by the cyan table gridlines.","textLarge":false,"imageOnRight":true,"image":{"recommendedSizes":{"width":"420","height":"280"}},"imageMobile":{"recommendedSizes":{"width":"750","height":"500"}}},"id":"#224","type":"component","lock":false,"position":102},{"name":"Spacer","data":{"spacingLarge":30,"spacingSmall":20,"backgroundColor":"#ffffff"},"id":"#361","type":"component","lock":false,"position":103},{"name":"Image","data":{"firstImage":{"mimetype":"image/png","size":38213,"hash":"5cd6b6abe151647cb6570ed28dc368baea7e5d5a","id":"cl0wlheculofm0776px8ofmpo","filename":"divesoft-freedom-user-manual-03-3-a.png","category":"divesoft/","type":"image"},"secondImage":{},"image":{"type":"image"}},"id":"#69","type":"component","lock":false,"position":104},{"name":"Spacer","data":{"spacingLarge":30,"spacingSmall":20,"backgroundColor":"#ffffff"},"id":"#362","type":"component","lock":false,"position":105},{"name":"TextBlock","data":{"text":"### **03.3.1 Predive and submersion** \n\nSwitch the Freedom on before entering a water. Check the Freedom\nsett
2ings as part of a predive check.\nThe first screen is a summary of\nrebreather specific parameters, the second screen is the summary of the decompression settings and\nthe OC (bailout) parameters.\nIf submersion to a depth greater than 1.5 m occurs, the computer\nswitches to the default mode. Set default mode to the CCR fixed\nduring dive preparation in Setup â Preferences. Do not intentionally\nuse this switching method; it is intended only for emergency\nsituations.","textLarge":false,"imageOnRight":true,"image":{"recommendedSizes":{"width":"420","height":"280"}},"imageMobile":{"recommendedSizes":{"width":"750","height":"500"}}},"id":"#70","type":"component","lock":false,"position":106},{"name":"Spacer","data":{"spacingLarge":30,"spacingSmall":20,"backgroundColor":"#ffffff"},"id":"#363","type":"component","lock":false,"position":107},{"name":"Image","data":{"firstImage":{"mimetype":"image/bmp","size":77878,"hash":"dc034a45896dc0ab39faafaed86718d87484e1e0","id":"cl2yg4ulq5j7i0776sjkwu6x3","filename":"00000037.BMP","category":"divesoft/","type":"image"},"secondImage":{},"image":{"type":"image"}},"id":"#77","type":"component","lock":false,"position":108},{"name":"Spacer","data":{"spacingLarge":30,"spacingSmall":20,"backgroundColor":"#ffffff"},"id":"#424","type":"component","lock":false,"position":109},{"name":"Spacer","data":{"spacingLarge":30,"spacingSmall":20,"backgroundColor":"#ffffff"},"id":"#427","type":"component","lock":false,"position":110},{"name":"Image","data":{"firstImage":{"mimetype":"image/bmp","size":77878,"hash":"c3161a65c4e79a8fe6558e584a2c1fcb97eb5f42","id":"cl2yg5q5t5j7s0776wkdxhssy","filename":"00000038.BMP","category":"divesoft/","type":"image"},"secondImage":{},"image":{"type":"image"}},"id":"#318","type":"component","lock":false,"position":111},{"name":"Spacer","data":{"spacingLarge":30,"spacingSmall":20,"backgroundColor":"#ffffff"},"id":"#426","type":"component","lock":false,"position":112},{"name":"TextBlock","data":{"text":"### **03.3.2 Setpoint** \n\nThe SP low is set after switching to the fixed setpoint CCR dive mode\non the surface. It can be switched to the SP high manually (via the\nshortcut or via the menu) or automatically at a set depth during\na descent or at a set runtime.\n\n**SP reading (eCCR)** \n\nThe current setpoint value is located where the pO<sub>2</sub>\n is situated on the\ndisplay in OC dive mode on both the detailed and synoptic screen.\n\n**pO<sub>2</sub> reading (SCR)** \nThe calculated pO<sub>2</sub>\n value is shown instead of the setpoint if you dive\nwith the SCR. See CCR/SCR Setup (See section 4.5).\n\n**Shortcut** \n\nWith the CCR the long press of the upper key selects the high setpoint. The long press of the lower key\nselects the low setpoint. The shortcut is by default off but it can be enabled in Setup â Rebreather â Const CCR Setup â SP shortcuts \nIf the semi-closed rebreather (SCR) is used, then the gas mixture is switched with this shortcut (similar to\nOC mode).\n\n**Manual SP setting** \n\nSelect Setpoint from the dive menu.\nThe high and low setpoint can be chosen directly from the menu. For\nthe current setpoint adjustment use the +0.10 and -0.10 menu items\nfor the SP value change (can be used repeatedly; the final value is\ndisplayed) and then select Accept for the change.","textLarge":false,"imageOnRight":true,"image":{"recommendedSizes":{"width":"420","height":"280"}},"imageMobile":{"recommendedSizes":{"width":"750","height":"500"}}},"id":"#75","type":"component","lock":false,"position":113},{"name":"Spacer","data":{"spacingLarge":30,"spacingSmall":20,"backgroundColor":"#ffffff"},"id":"#364","type":"component","lock":false,"position":114},{"name":"Image","data":{"firstImage":{"mimetype":"image/png","size":48615,"hash":"35188486389c8533a5609f9d47b2db7b3ad33526","id":"cl0wlkzdtlogb077681nydcjb","filename":"divesoft-freedom-user-manual-03-3-2a.png","category":"divesoft/","type":"image"},"secondImage":{},"image":{"type":"image"}},"id":"#72","type":"component","lock":false,"position":115},{"name":"Spacer","data":{"spacingLarge":30,"spacingSmall":20,"backgroundColor":"#ffffff"},"id":"#366","type":"component","lock":false,"position":116},{"name":"Image","data":{"firstImage":{"mimetype":"image/png","size":32521,"hash":"5446119cf5572bce548be777ce9b96a26c77a161","id":"cl0wlqwm1loha0776uc6mp7dz","filename":"divesoft-freedom-user-manual-03-3-2b.png","category":"divesoft/","type":"image"},"secondImage":{},"image":{"type":"image"}},"id":"#319","type":"component","lock":false,"position":117}
2,{"name":"Spacer","data":{"spacingLarge":30,"spacingSmall":20,"backgroundColor":"#ffffff"},"id":"#365","type":"component","lock":false,"position":118},{"name":"TextBlock","data":{"text":"### **03.3.3 Dive menu** \n\n","textLarge":false,"imageOnRight":true,"image":{"recommendedSizes":{"width":"420","height":"280"}},"imageMobile":{"recommendedSizes":{"width":"750","height":"500"}}},"id":"#76","type":"component","lock":false,"position":119},{"name":"Image","data":{"firstImage":{"mimetype":"image/bmp","size":77596,"hash":"6f214a6e3f95f8e771a423cbc9727971ee023919","id":"cl2yh3lmv5k1m0776pzgiceqf","filename":"00000021.BMP","category":"divesoft/","type":"image"},"secondImage":{},"image":{"type":"image"}},"id":"#429","type":"component","lock":false,"position":120},{"name":"Spacer","data":{"spacingLarge":30,"spacingSmall":20,"backgroundColor":"#ffffff"},"id":"#430","type":"component","lock":false,"position":121},{"name":"TextBlock","data":{"text":"**Bailout mode (OC)** \n\nIt is assumed that the diver will not breathe from the\nrebreatherâs breathing loop but will rather use a separate opencircuit bailout apparatus.\nAfter switching to the bailout OC mode, the default OC mixture will\nbe used and the safety level will be automatically set using the\nbailout gradient factors. The BoGF tag appears on the detailed and\nsynoptic screen.\nIt is possible to switch between the standard and bailout GF sets\nin the menu without affecting the mode in which the Freedom is\noperating.","textLarge":false,"imageOnRight":true,"image":{"recommendedSizes":{"width":"420","height":"280"}},"imageMobile":{"recommendedSizes":{"width":"750","height":"500"}}},"id":"#428","type":"component","lock":false,"position":122},{"name":"TextBlock","data":{"text":"**Measured mode (CCR)** \nUse for switching to rebreather dive mode with the measured pO<sub>2</sub>\n. See next chapter.\n\n**Setpoint** \nUse to switch the low/high setpoint and the manual setting of the setpoint of the CCR. See the Setpoint\nchapter on previous page.\n\n**Mix** \nUse for gas mixture switching for SCR. This is similar to the OC mixture selection.\n\n**Diluent** \nUse this menu item for the diluent gas switch.\n\n**Setup â Diluents** \nThis (the CCR only) menu item corresponds to the mixture setup in Setup â SCR/CCR Setup â Const CCR\nsetup â Diluents.\n\n**Setup â Mixture setup** \nThis (the SCR only) menu item corresponds to the OC mixture setup in Setup â Mixtures â Mixture setup.","textLarge":false,"imageOnRight":true,"image":{"recommendedSizes":{"width":"420","height":"280"}},"imageMobile":{"recommendedSizes":{"width":"750","height":"500"}}},"id":"#78","type":"component","lock":false,"position":123},{"name":"TextBlock","data":{"text":"### **03.3.4 Stack time** \n\nThe scrubber stack timer runs all the time in any rebreather mode\nregardless of depth, even on the surface.\nIf you spend a long time in dive mode while not breathing from the\nrebreatherâs loop, then increase the time for the stack time warning.\nDonât forget to reset the timer when you refill the scrubber (Dive\nâ Stack time reset).\nYou can find the stack time on the O<sub>2</sub>\n sensors screen.","textLarge":false,"imageOnRight":true,"image":{"recommendedSizes":{"width":"420","height":"280"}},"imageMobile":{"recommendedSizes":{"width":"750","height":"500"}}},"id":"#80","type":"component","lock":false,"position":124},{"name":"Image","data":{"firstImage":{},"secondImage":{}},"id":"#431","type":"component","lock":false,"position":125},{"name":"TextBlock","data":{"text":"### **03.4 Measured CCR** \n\nThe rebreather dive modes are available in the Closed Circuit version\nof the Divesoft Freedom only.\nThis chapter of the user manual describes only the differences from\nthe fixed setpoint CCR diving. First you will have to study OC mode\nand fixed setpoint CCR mode.","textLarge":false,"imageOnRight":true,"image":{"recommendedSizes":{"width":"420","height":"280"}},"imageMobile":{"recommendedSizes":{"width":"750","height":"500"}}},"id":"#82","type":"component","lock":false,"position":126}
2,{"name":"Spacer","data":{"spacingLarge":30,"spacingSmall":20,"backgroundColor":"#ffffff"},"id":"#368","type":"component","lock":false,"position":127},{"name":"Image","data":{"firstImage":{"mimetype":"image/jpeg","size":54835,"hash":"5c7c754632d5277ca8b098d94e0e6848b5acbf93","id":"cl0wlu8cxlohw0776d45v81mp","filename":"divesoft-freedom-user-manual-03-4-a.jpg","category":"divesoft/","type":"image"},"secondImage":{},"image":{"type":"image"}},"id":"#83","type":"component","lock":false,"position":128},{"name":"Spacer","data":{"spacingLarge":30,"spacingSmall":20,"backgroundColor":"#ffffff"},"id":"#369","type":"component","lock":false,"position":129},{"name":"TextBlock","data":{"text":"### **03.4.1 O<sub>2</sub> sensors connection** \n\nThe measured CCR dive mode requires a connection to the O<sub>2</sub>\n sensors\nof a rebreather. One, two or three sensors can be connected.\nThe cable equipped with the Molex connectors is included in the\nClosed Circuit version of the Divesoft Freedom distribution package\nor can be ordered separately. See also O<sub>2</sub>\n sensor cable (See section 10.5).","textLarge":false,"imageOnRight":true,"image":{"recommendedSizes":{"width":"420","height":"280"}},"imageMobile":{"recommendedSizes":{"width":"750","height":"500"}}},"id":"#225","type":"component","lock":false,"position":130},{"name":"TextBlock","data":{"text":"### ** 03.4.2 O<sub>2</sub> sensors calibration** \n\nIf possible, use oxygen with purity of at least 99.5% for calibration.\nDo not use air for calibration. The partial pressure of oxygen in air at\natmospheric pressure significantly differs from the partial pressures\ndetermined by the setpoints. At the end of its service life, an oxygen\nsensor can successfully undergo calibration to 21% (air), but will no\nlonger be capable of measuring pO<sub>2</sub>\n of 1 bar or higher. \n**Procedure:** \n1. Dive â Calibration O<sub>2</sub>â Start calibration \n2. Check the calibration gas \n3. Wait for stable values \n4. Start and wait for calibration process to end \n5. Confirm the save \nWhether or not a sensor is already at the end of its service life is also\ndetermined during calibration.\nAt higher altitudes above sea level, the partial pressure of oxygen in\nthe calibration mixture decreases in proportion to lower atmospheric\npressure. The Freedom measures atmospheric pressure and takes\nit into account during calibration. Therefore, do not perform any\ncorrections at higher altitudes above sea level.\nIt is preferred to calibrate O<sub>2</sub>\n sensors prior each dive. Do not use\nsensor reading from sensors calibrated more than three days ago.\n","textLarge":false,"imageOnRight":true,"image":{"recommendedSizes":{"width":"420","height":"280"}},"imageMobile":{"recommendedSizes":{"width":"750","height":"500"}}},"id":"#84","type":"component","lock":false,"position":131},{"name":"Spacer","data":{"spacingLarge":30,"spacingSmall":20,"backgroundColor":"#ffffff"},"id":"#370","type":"component","lock":false,"position":132},{"name":"Image","data":{"firstImage":{"mimetype":"image/png","size":15713,"hash":"07ffaa4f3b081d0d5a9bf84d6b32728740f24dac","id":"cl0wm0paklol10776n7fi65yy","filename":"divesoft-freedom-user-manual-03-4-2a.png","category":"divesoft/","type":"image"},"secondImage":{},"image":{"type":"image"}},"id":"#85","type":"component","lock":false,"position":133},{"name":"Spacer","data":{"spacingLarge":30,"spacingSmall":20,"backgroundColor":"#ffffff"},"id":"#373","type":"component","lock":false,"position":134},{"name":"Image","data":{"firstImage":{"mimetype":"image/png","size":24815,"hash":"fd045312f4372634b71562494408ec7ae25cf9c3","id":"cl0wm1982lol80776kqlqmd2g","filename":"divesoft-freedom-user-manual-03-4-2b.png","category":"divesoft/","type":"image"},"secondImage":{},"image":{"type":"image"}},"id":"#88","type":"component","lock":false,"position":135},{"name":"Spacer","data":{"spacingLarge":30,"spacingSmall":20,"backgroundColor":"#ffffff"},"id":"#372","type":"component","lock":false,"position":136},{"name":"Image","data":{"firstImage":{"mimetype":"image/png","size":29714,"hash":"938d4a30f14a7f9cd409163d
2768279593cc4a26c","id":"cl0wm1x4slolf0776o49lcrp9","filename":"divesoft-freedom-user-manual-03-4-2c.png","category":"divesoft/","type":"image"},"secondImage":{},"image":{"type":"image"}},"id":"#87","type":"component","lock":false,"position":137},{"name":"Spacer","data":{"spacingLarge":30,"spacingSmall":20,"backgroundColor":"#ffffff"},"id":"#371","type":"component","lock":false,"position":138},{"name":"Image","data":{"firstImage":{"mimetype":"image/png","size":30334,"hash":"81aef34f112134e9ad45d564b2e8a0d258f74aaf","id":"cl0wm2egtlolm0776tatpbyli","filename":"divesoft-freedom-user-manual-03-4-2d.png","category":"divesoft/","type":"image"},"secondImage":{},"image":{"type":"image"}},"id":"#86","type":"component","lock":false,"position":139},{"name":"Spacer","data":{"spacingLarge":30,"spacingSmall":20,"backgroundColor":"#ffffff"},"id":"#374","type":"component","lock":false,"position":140},{"name":"TextBlock","data":{"text":"### **03.4.3 pO<sub>2</sub> reading** \n\nThere is a separate O<sub>2</sub>\n sensor screen in both the surface and dive\nmode.\nNot only the pO<sub>2</sub>\n but also the voltage on sensors can be read. If the\nstate of a sensor is not in operational mode (not connected, error,\nexcluded, disabled, uncalibrated), the appropriate tag appears\ninstead of the pO<sub>2</sub>\n value.\nOn the detailed and synoptic screen there is only one reading of the\npO<sub>2</sub>\n value; the arithmetic average of active sensors is used.\nYou can mark any sensor as faulty during a dive in dive menu Setup\nâ Faulty sensors.\n","textLarge":false,"imageOnRight":true,"image":{"recommendedSizes":{"width":"420","height":"280"}},"imageMobile":{"recommendedSizes":{"width":"750","height":"500"}}},"id":"#89","type":"component","lock":false,"position":141},{"name":"Image","data":{"firstImage":{},"secondImage":{}},"id":"#432","type":"component","lock":false,"position":142},{"name":"TextBlock","data":{"text":"### **03.5 Gauge**\n\nThe gauge mode is indicated by the dark red table gridlines.\nThere are two forms of the gauge mode â with and without rebreather O<sub>2</sub>\n sensor reading. The rebreather\ngauge mode is only available in the Closed Circuit version with at last one connected O<sub>2</sub>\n sensor \n Note: Gauge screen can be enabled in any mode (OC, CCR). Setup -> Preferences -> Display -> Screens -> Gauge","textLarge":false,"imageOnRight":true,"image":{"recommendedSizes":{"width":"420","height":"280"}},"imageMobile":{"recommendedSizes":{"width":"750","height":"500"}}},"id":"#92","type":"component","lock":false,"position":143},{"name":"Image","data":{"firstImage":{"mimetype":"image/png","size":35655,"hash":"5c2621799724a4cf4df00d0ff31bbecd8a92d48a","id":"cl0wm6364lolt0776cvts78qm","filename":"divesoft-freedom-user-manual-03-5-4a.png","category":"divesoft/","type":"image"},"secondImage":{},"image":{"type":"image"}},"id":"#93","type":"component","lock":false,"position":144},{"name":"Spacer","data":{"spacingLarge":30,"spacingSmall":20,"backgroundColor":"#ffffff"},"id":"#375","type":"component","lock":false,"position":145},{"name":"Image","data":{"firstImage":{},"secondImage":{}},"id":"#326","type":"component","lock":false,"position":146},{"name":"Image","data":{"firstImage":{},"secondImage":{}},"id":"#327","type":"component","lock":false,"position":147},{"name":"Image","data":{"firstImage":{},"secondImage":{}},"id":"#329","type":"component","lock":false,"position":148},{"name":"Image","data":{"firstImage":{},"secondImage":{}},"id":"#328","type":"component","lock":false,"position":149},{"name":"Image","data":{"firstImage":{},"secondImage":{}},"id":"#330","type":"component","lock":false,"position":150},{"name":"Image","data":{"firstImage":{},"secondImage":{}},"id":"#97","type":"component","lock":false,"position":151},{"name":"TextBlock","data":{"text":"### **03.5.1 Synoptic screen** \n\n**Stopwatch** \nOperate the stopwatch via the menu. See Stopwatch (See section 3.5.4).\n\n**Battery symbol**\nA graphical indication shows the remaining battery capacity. See\nBattery symbol (See section 3.1.2).\n\n**Dive time** \nThe timer starts after submersion (depth > 1.5 m) and halts after\nsurfacing (depth < 0.5 m). If stay on the surface (or at very shallow\ndepth) is followed by a second submersion (during a time set in the dive termination timeout), then the dive\ntime indicated will be the time from the first submersion including the surface time.\n\n**Local Time** \nThe local time is shown on the display in the top left corner of the middle section.\n\n**Vertical speed** \nThe ascent and desce
2nt rate indication can be set to a relative (%) or absolute (m/min or ft/min) reading.\nThe relative reading is based on the maximum ascent or descent rate. \nSet in: \nBottomTimer: \"Setup -> Preferences -> Vert. rate\" \nOther licences: \"Setup -> Preferences -> User interface -> Vert. rate\"\n\n**Depth** \nThe depth reading can be set to m or ft in the setup. Depth is calculated from measured hydrostatic\npressure. For calculation fresh water (default), seawater or universal EN13319 density can be set in Setup â Preferences. \nThe universal density EN13319 is closer to salt water and not very suitable for pure fresh water.\n\n**Max Depth** \nThe maximum depth reached during the dive.\n\n**Avg depth**\nThe average depth of the dive. A new start point for depth averaging can be created via the dive menu. This\npoint is indicated by the yellow vertical line on the profile screen.\n\n**Temp** \nWater temperature is measured inside the computer case. After a temperature change wait about 1-2\nminutes until the temperature reading reaches a stable value. The temperature in air is affected by many\nfactors and is only an indication.\nA temperature correction can be set in Setup â Calibration for better accuracy.","textLarge":false,"imageOnRight":true,"image":{"recommendedSizes":{"width":"420","height":"280"}},"imageMobile":{"recommendedSizes":{"width":"750","height":"500"}}},"id":"#94","type":"component","lock":false,"position":152},{"name":"TextBlock","data":{"text":"### **03.5.2 Big Screen** \n\nThe most important information is written in really big characters.\nThis screen is useful in very bad visibility. Many divers can read the\nnumbers even without a mask.\nThe meaning of all values is identical to the synoptic screen. \nOn the \"Big Screen\" you can customize the bottom line in Gauge mode.\nBottomTimer: \"Setup -> Preferences -> Big depth\"\nOther linces:\"Setup -> Preferences -> User interface -> Big depth\"\n - \"Avg\" displays average depth\n- \"Max\" displays maximum depth\n- \"Only\" displays current depth ONLY, nothing else. \n- ","textLarge":false,"imageOnRight":true,"image":{"recommendedSizes":{"width":"420","height":"280"}},"imageMobile":{"recommendedSizes":{"width":"750","height":"500"}}},"id":"#226","type":"component","lock":false,"position":153},{"name":"Spacer","data":{"spacingLarge":30,"spacingSmall":20,"backgroundColor":"#ffffff"},"id":"#376","type":"component","lock":false,"position":154},{"name":"Image","data":{"firstImage":{"mimetype":"image/png","size":29259,"hash":"ee40ef1e1a3b682355ea1cf30ddde558699c4ab1","id":"cl0wmchtxlomg0776ar67022h","filename":"divesoft-freedom-user-manual-03-5-2.png","category":"divesoft/","type":"image"},"secondImage":{},"image":{"type":"image"}},"id":"#333","type":"component","lock":false,"position":155},{"name":"Spacer","data":{"spacingLarge":30,"spacingSmall":20,"backgroundColor":"#ffffff"},"id":"#377","type":"component","lock":false,"position":156},{"name":"Spacer","data":{"spacingLarge":30,"spacingSmall":20,"backgroundColor":"#ffffff"},"id":"#378","type":"component","lock":false,"position":157},{"name":"TextBlock","data":{"text":"### **03.5.3 Dive profile screen** \n\n**Start** \nThe time of submersion is useful for checking compliance with the\nschedule.\n\n**Avg** \nThe average depth is indicated in yellow by a horizontal line and\na numerical value.\nA new start point for depth averaging can be created in the dive\nmenu. This point is indicated by the yellow vertical line and the\nhorizontal average depth line starts from there.\n\n**Current depth** \nSee lower left corner.\n\n**Dive time** \nThe runtime of the current dive is placed in lower right corner.\n\n**Max** \nThe maximum depth reached during the dive. The field with this value\nis placed in the middle of bottom line.","textLarge":false,"imageOnRight":true,"image":{"recommendedSizes":{"width":"420","height":"280"}},"imageMobile":{"recommendedSizes":{"width":"750","height":"500"}}},"id":"#95","type":"component","lock":false,"position":158},{"name":"Spacer","data":{"spacingLarge":30,"spacingSmall":20,"backgroundColor":"#ffffff"},"id":"#381","type":"component","lock":false,"position":159},{"name":"Image","data":{"firstImage":{"mimetype":"image/png","size":24751,"hash":"1dbb3f24f0e713ef7a8f5be0c9719f5b58cc9ebc","id":"cl0wmdisklomu
20776oj4c9z29","filename":"divesoft-freedom-user-manual-03-5-3a.png","category":"divesoft/","type":"image"},"secondImage":{},"image":{"type":"image"}},"id":"#331","type":"component","lock":false,"position":160},{"name":"Spacer","data":{"spacingLarge":30,"spacingSmall":20,"backgroundColor":"#ffffff"},"id":"#380","type":"component","lock":false,"position":161},{"name":"Image","data":{"firstImage":{"mimetype":"image/png","size":24831,"hash":"aa18315d380344d1e84ff80a6194d3a4543096e2","id":"cl0wme8g8lon10776b1cp6x6t","filename":"divesoft-freedom-user-manual-03-5-3b.png","category":"divesoft/","type":"image"},"secondImage":{},"image":{"type":"image"}},"id":"#96","type":"component","lock":false,"position":162},{"name":"Spacer","data":{"spacingLarge":30,"spacingSmall":20,"backgroundColor":"#ffffff"},"id":"#379","type":"component","lock":false,"position":163},{"name":"TextBlock","data":{"text":"### **03.5.4 Dive menu** \n\nDuring a dive, in any dive mode, press both keys simultaneously to\nshow the dive menu.\nThis shows current depth, partial pressure of oxygen (rebreather\nonly) and dive time on the bottom of the screen.\n","textLarge":false,"imageOnRight":true,"image":{"recommendedSizes":{"width":"420","height":"280"}},"imageMobile":{"recommendedSizes":{"width":"750","height":"500"}}},"id":"#98","type":"component","lock":false,"position":164},{"name":"Spacer","data":{"spacingLarge":30,"spacingSmall":20,"backgroundColor":"#ffffff"},"id":"#383","type":"component","lock":false,"position":165},{"name":"Image","data":{"firstImage":{"mimetype":"image/png","size":35655,"hash":"5c2621799724a4cf4df00d0ff31bbecd8a92d48a","id":"cl0wm6364lolt0776cvts78qm","filename":"divesoft-freedom-user-manual-03-5-4a.png","category":"divesoft/","type":"image"},"secondImage":{},"image":{"mimetype":"image/png","size":35655,"hash":"5c2621799724a4cf4df00d0ff31bbecd8a92d48a","id":"cl0wm6364lolt0776cvts78qm","filename":"divesoft-freedom-user-manual-03-5-4a.png","category":"divesoft/","type":"image"}},"id":"#99","type":"component","lock":false,"position":166},{"name":"Spacer","data":{"spacingLarge":30,"spacingSmall":20,"backgroundColor":"#ffffff"},"id":"#382","type":"component","lock":false,"position":167},{"name":"TextBlock","data":{"text":"**Stopwatch** \nThe elapsed time is written in white while the stopwatch is running or\nin gray when the stopwatch is not running.\n\n**Start stopwatch** \nThis starts the timer.\nIf the stopwatch was previously halted then the count\ncontinues from the indicated time. \nThe stopwatch can be set to the bottom button control, short press to pause/start, long press to reset and straight start. \nBottomTimer: Setup -> Preferences -> Stopw. btn. \nOther licenses: Setup -> Preferences -> User ","textLarge":false,"imageOnRight":true,"image":{"recommendedSizes":{"width":"420","height":"280"}},"imageMobile":{"recommendedSizes":{"width":"750","height":"500"}}},"id":"#100","type":"component","lock":false,"position":168},{"name":"Spacer","data":{"spacingLarge":30,"spacingSmall":20,"backgroundColor":"#ffffff"},"id":"#384","type":"component","lock":false,"position":169},{"name":"Image","data":{"firstImage":{"mimetype":"image/jpeg","size":58296,"hash":"dc65116bd5bfa160c8a363c530f277e6ec03810e","id":"cl0wmkbsylooc0776hjzei525","filename":"divesoft-freedom-user-manual-03-5-4b.jpg","category":"divesoft/","type":"image"},"secondImage":{},"image":{"type":"image"}},"id":"#102","type":"component","lock":false,"position":170},{"name":"Spacer","data":{"spacingLarge":30,"spacingSmall":20,"backgroundColor":"#ffffff"},"id":"#385","type":"component","lock":false,"position":171},{"name":"TextBlock","data":{"text":"**Stop stopwatch** \nThis stops the timer, leaving the elapsed time displayed in gray.","textLarge":false,"imageOnRight":true,"image":{"recommendedSizes":{"width":"420","height":"280"}},"imageMobile":{"recommendedSizes":{"width":"750","height":"500"}}},"id":"#103","type":"component","lock":false,"position":172},{"name":"Spacer","data":{"spacingLarge":30,"spacingSmall":20,"backgroundColor":"#ffffff"},"id":"#386","type":"component","lock":false,"position":173},{"name":"Image","data":{"firstImage":{"mimetype":"image/png","size":43662,"hash":"1f78f0ad94044305a8ff42b42d41aa64c223a4f1","id":"cl0wml1ablooj0776qs651uuq","filename":"divesoft-freedom-user-manual-03-5-4c.png","category":"divesoft/","type":"image"},"secondImage":{},"image":{"type":"image"}},"id":"#101","type":"component","lock":false,"position":174},{"name":"Spacer","data":{"spacingLarge":30,"spacingSmall":20,"backgroundColor":"#ffffff"},"id":"#387","type":"component","lock":false,"position":175},{"name":"TextBlock","data":{"text":"**Restart stopwatch** \nThis restarts the timer from zero.\nThis function is especially useful for decompression stops.\n\n**Reset average** \nA new start point for depth averaging will be created. The restart point is indicated by the vertical line on\nthe dive profile screen.\n\n**Add bookmark** \nA bookmark will be created in the dive log. The bookmark number is displayed in the notification that\nfollows.\n\n**End dive** \nEnd dive and switch to surface mode. This menu item is enabled only on the surface.\n\n**Switch off** \nEnd dive and switch directly to standby mode. This menu item is enabled only on the surface.\n\n**Setup** \n**Brightness**\nThe display backlight brightness level can be set from 1 to\n9. The change in brightness is immediately reflected while\nadjusting.","textLarge":false,"imageOnRight":true,"image":{"recommendedSizes":{"width":"420","height":"280"}},"imageMobile":{"recommendedSizes":{"width":"750","height":"500"}}},"id":"#104","type":"component","lock":false,"position":176},{"name":"TextBlock","data":{"text":"**Orientation** \nThe left hand, right hand and auto orientation can be selected.\nAuto orientation selects the left or right hand position\nautomatically during the start. It will not switch the display\norientation when the diver changes position (i.e. during a head\ndown descent).\n\n**Screens** \nAny of the dive mode screen can be disabled.\n\n**Apps** \nThere are several items in the apps folder\n\n**Apps - Add bookmark** - marks the current moment in the dive log\n\n**Apps - Events** - allows you to view computer-issued warnings and pop-up messages\n\n**Apps - Emergency torch** - brightens the entire display to the maximum and emits the maximum amount of light possible. Can be used as an emergency torch in certain conditions when all other torches have failed.\n\n**Apps - Inclinometer** - a tool to measure the slope of a slope. Can be used for mapping caves and wrecks.\n\n**Apps - Sokoban Game** - a puzzle game for distraction on long decompression. For more information on games, see section 9 of this manual.\n\n**Apps - Snake** - a game for distraction on a long decompression. See section 9 of this manual for more about the games.","textLarge":false,"imageOnRight":true,"image":{"recommendedSizes":{"width":"420","height":"280"}},"imageMobile":{"recommendedSizes":{"width":"750","height":"500"}}},"id":"#107","type":"component","lock":false,"position":177},{"name":"Image","data":{"firstImage":{},"secondImage":{}},"id":"#335","type":"component","lock":false,"position":178},{"name":"TextBlock","data":{"text":"**Time** \nThe local time is shown on the display in the top left corner.\n\n**Duration** \nThe timer starts after entering the Free mode. Duration of a freediving session includes the time on the\nsurface and the time spent underwater.\n\n**Surface time** \nThis timer is triggered by surfacing.\n\n**Dive c
2ount** \nNumber of dives during a freediving session.\n\n**CumulativeT** \nThe cumulative time is the sum of the time spent underwater.\n\n**Max. depth** \nThis is the maximum depth reached during a freediving session.\n\n**Temp** \nWater temperature is measured inside the computer case. After temperature change wait about 1-2\nminutes until the temperature reading reaches a stable value. The temperature in air is affected by many\nfactors and is only an indication.\nA temperature correction can be set in Setup â Calibration for better accuracy.","textLarge":false,"imageOnRight":true,"image":{"recommendedSizes":{"width":"420","height":"280"}},"imageMobile":{"recommendedSizes":{"width":"750","height":"500"}}},"id":"#109","type":"component","lock":false,"position":179},{"name":"TextBlock","data":{"text":"### **03.6 Free** \n\nThe freediving mode is indicated by the yellow table gridlines.","textLarge":false,"imageOnRight":true,"image":{"recommendedSizes":{"width":"420","height":"280"}},"imageMobile":{"recommendedSizes":{"width":"750","height":"500"}}},"id":"#229","type":"component","lock":false,"position":180},{"name":"TextBlock","data":{"text":"### **03.6.1 Surface screen**\nThe freediving surface screen is shown during a freediving session\nwhile on the surface.","textLarge":false,"imageOnRight":true,"image":{"recommendedSizes":{"width":"420","height":"280"}},"imageMobile":{"recommendedSizes":{"width":"750","height":"500"}}},"id":"#227","type":"component","lock":false,"position":181},{"name":"Spacer","data":{"spacingLarge":30,"spacingSmall":20,"backgroundColor":"#ffffff"},"id":"#388","type":"component","lock":false,"position":182},{"name":"Image","data":{"firstImage":{"mimetype":"image/png","size":42304,"hash":"4bfff114f8652c931425cc78e8e4d7b5b9d1e97a","id":"cl0wmr55clopc0776zdf0z5xx","filename":"divesoft-freedom-user-manual-03-6-1.png","category":"divesoft/","type":"image"},"secondImage":{},"image":{"type":"image"}},"id":"#339","type":"component","lock":false,"position":183},{"name":"Spacer","data":{"spacingLarge":30,"spacingSmall":20,"backgroundColor":"#ffffff"},"id":"#389","type":"component","lock":false,"position":184},{"name":"TextBlock","data":{"text":"### **03.6.2 Dive screen** \n\nThe freediving dive screen is shown during a dive (after the descent\nto the On depth and before the ascent above Off depth). Both depths\ncan be set in Setup â Freediving.\nThe dive screen with the maximum depth and the dive time of the\nlast dive is accessible after surfacing with a short press of the upper\nbutton from the surface screen.","textLarge":false,"imageOnRight":true,"image":{"recommendedSizes":{"width":"420","height":"280"}},"imageMobile":{"recommendedSizes":{"width":"750","height":"500"}}},"id":"#228","type":"component","lock":false,"position":185},{"name":"Spacer","data":{"spacingLarge":30,"spacingSmall":20,"backgroundColor":"#ffffff"},"id":"#391","type":"component","lock":false,"position":186},{"name":"Image","data":{"firstImage":{"mimetype":"image/png","size":35568,"hash":"caa3e8d5ac26f63b9242ad65f11132339586446f","id":"cl0wmssallopn0776aw8m9seb","filename":"divesoft-freedom-user-manual-03-6-2.png","category":"divesoft/","type":"image"},"secondImage":{},"image":{"type":"image"}},"id":"#110","type":"component","lock":false,"position":187},{"name":"Spacer","data":{"spacingLarge":30,"spacingSmall":20,"backgroundColor":"#ffffff"},"id":"#390","type":"component","lock":false,"position":188},{"name":"TextBlock","data":{"text":"**Stopwatch** \nOperate the stopwatch by the lower button: \nShort press: start/stop \nLong press: reset\n\n**Dive time** \nThe timer starts after submersion to the On depth and stops after ascending above the Off depth.\n\n**Depth** \nThe depth can be read in the units set in the setup (m or ft). Depth is calculated from measured hydrostatic\npressure. For calculation fresh water (default) or seawater density can be set.\n\n**Max Depth** \nThe maximum depth reached during the dive.\n\n**Temp** \nWater temperature is measured inside the computer case. Because the system is slow, it provides only an\nindication during short dives.","textLarge":false,"imageOnRight":true,"image":{"recommendedSizes":{"width":"420","height":"280"}},"imageMobile":{"recommendedSizes":{"width":"750","height":"500"}}},"id":"#111","type":"component","lock":false,"position":189},{"name":"TextBlock","data":{"text":"### **03.7 Advised strategies** \n\n### **03.7.1 Diving in darkness** \n\n**High brightness all the time** \nThis is the preferred option for a simple dive with a high power diving light (torch) used by all team\nmembers. Brightness level 6 to 8 is recommended.\nDonât use this option if light coming from the Freedom display and light coming from your diving\npartnerâs torch canât be clearly distinguished in the peripheral vision. Otherwise it may lead to the\nseparation of the team members. \n\n<span style=\"color:red\">**WARNING: Brightness higher than 7 will significantly reduce battery life per charge. A value of 9 will reduce battery life by up to 50%.**</span>\n\n\n**Switching on-off** \nThis option is typical for cave diving. Set brightness to a high level (6 to 9) and a short screensaver timeout\n(15 s is more than enough).\nPreferably activate the display by light during a dive. Move the Freedom to the light beam instead of moving\nthe beam to prevent confusion with a light signal.\n\n**Low brightness** \nFor diving with eyes accommodated to darkness use the lowest brightness setting (level 1). Your night\nvision will not be disturbed. It is preferred to have the display on all the time (i.e. screensaver timeout set\nto 0). This option is typical for night dives in clear water.\nDive with slightly brighter display while using a low power torch. Balance the power of the backlight to the\npower of your torch to find the optimal setting â no glare but good readability.\nThe display canât shine through disturbed silt or mud on low brightness. If it is necessary to switch to\nmaximal brightness just short press the lower key repeatedly. \n\n**Note:** Adjusting the function of the lower button may override the brightness control. \n\"Lower bttn.\" to \"\"Prev Scr\" \n\"Stopw btn.\" to \"Base\" or \"Always\". \
2nThe setting is placed in the same place as the Lower bttn. BottomTimer: Setup -> Preferences -> Lower bttn.\nOther licences: Setup -> Preferences -> User interface -> Lower bttn.","textLarge":false,"imageOnRight":true,"image":{"recommendedSizes":{"width":"420","height":"280"}},"imageMobile":{"recommendedSizes":{"width":"750","height":"500"}}},"id":"#113","type":"component","lock":false,"position":190},{"name":"TextBlock","data":{"text":"### **03.7.2 Decompression**\n\n**Gradient factors** \nExperienced divers usually set GF regarding to planned dive profile and after dive activity.\nGF low 0.30 is default value suitable for an average healthy diver and dive profiles within recreational\nrange. Lower values are more suitable for deeper dives including extended range air dives and use of\nhelium rich mixtures. 0 is not uncommon. Use lower value if any risk factor is present. Higher value can\nbe used for relatively shallow dives, but influence of GF Low on these dives is small (zero on so called\nnon-decompression dives).\nDefault GF high 0.80 increases the time at the shallow stops relatively slightly compared to the bare\nBühlmannâs decompression algorithm ZHL. If any risk factor is present, lower value is more appropriate. This\nalso applies if another dive is planned in a short time or physical activity cannot be avoided shortly after\nthe dive. Low value of GF high also shortens so called no-deco limits. GF high 0.50 can be considered as very\nconservative. For an even smaller value is not usually the reason.\n\n**Risk factors** \nUse a more conservative setting and make only dives with short or no decompression if any risk factor is\npresent. \nThe major risk factors for decompression sickness (DCS) are: \n⢠Dehydration \n⢠Heart disease, especially PFO (patent foramen ovale) or ASD (atrial septal defect) \n⢠Previous DCS \n⢠Older age \n⢠Overweight or obesity \n⢠Exercise during a dive or post dive \n⢠Fatigue \n⢠Irresponsibility or inability to follow proper decompression procedures \n\nIf excessive fatigue or any other subclinical form of DCS occurs after a dive during which a proper\ndecompression was performed then the presence of one or more risk factors can be assumed.\n\n**Diving with air or one nitrox mixture** \nConfirm the following settings: \n⢠The default OC mix is set to air or nitrox, whichever one you plan to use (Setup â Mixtures) \n⢠All other gas mixtures are disabled (no checkbox checked on the list Setup â Mixtures â Mixture\nsetup)\n\n<span style=\"color:red\">**Warning: if the ascent gas is set to Optimal (Setup â Decompression) and multiple gas mixtures are\nenabled then the decompression plan expects their use.** </span>\n\nThis may lead to indication of shorter time to\nsurface (TTS) and shorter decompression stops. Improper settings like this canât affect the safety of the\ndecompression if you strictly follow the computer; it only affects the calculation of the plan. This is not\napplicable to the Basic nitrox version of the Freedom.\n\n**Multi-day repetitive dives** \nIt is advised to use a slightly more conservative setting for diving holidays. Do not disable or omit the safety\nstop. Use nitrox if available and if you are qualified.\nRemember that the diving computer does not know diverâs physical shape. Maintain a high level of hydration\nduring diving holidays. Do not dive drunken or hungover. Do not dive ill.\n\n**Long decompression safety** \nPreferably, control the decompression safety with the GF high setting and disable the safety stop if the\ndecompression obligation is longer than 20 minutes. A smaller value of the GF high setting can be used\nadditionally for increasing safety on the shallow end of decompression, if required.\nSwitch to bailout gradient factors if you wish to reduce the decompression time (while increasing the risk\nof DCS). Bailout GFâs shall be properly set before dive.\n\n**Multiple gas usage** \nThis is not applicable to the Basic nitrox version of the Freedom.\nMultiple gas usage requires appropriate qualification from a recognized training agency. \n\nConfirm the following settings: \n⢠The ascent gas is set to Optimal
2(Setup â Decompression) \n⢠All gas mixtures, which you plan to use are properly set and active; and other gas mixtures are\ninactive (Setup â Mixtures â Mixture setup) \n⢠The default OC mix is set to the gas you plan to descend with (Setup â Mixtures) \n⢠The gas switch time is set to your preferred time (commonly 2 or 3 minutes) \n\nNever switch the computer to another gas before you start breathing it. Make sure that you breathe the\nright gas with the MOD greater than your current depth.\n\n**\nExtreme deep diving** \nEvery technical diver who dives to depths greater than 100 m/330 ft has to develop his or her own\ndecompression strategy. It is necessary to increase the personal limit gradually, step by step. The maximum\noperating depth of the Freedom is 300 m/1000 ft. This is probably a much greater depth than you and your\nbody could handle.\n\nFor extreme depth, short bottom-time decompression strategies are common: \n⢠Dive only if in really good physical shape; get your heart examined for PFO \n⢠Use the computer only as a backup for the plan based on your previous experience \n⢠Use a very low value of the GF low; 0 is not uncommon \n⢠Use a high value of the GF high; 1 is not uncommon and even >1 is not uncommon (requires the\nspecial, personally granted license) \n⢠Use optimal gas mixtures \n⢠Stay in the water for minimum 15 minutes after surfacing \n⢠Avoid post-dive exercise; take advantage of the support team \n⢠Maintain thermal comfort during a dive; avoid a hot shower after the dive \n⢠Avoid diving or any other pressure change in the following 48 h \n\nThe Divesoft Freedom is not intended for long bottom-time extreme deep diving in any mode other than the\ngauge mode. \n\nThe Full trimix or the CCR version of the Divesoft Freedom is required for trimix decompression calculation.","textLarge":false,"imageOnRight":true,"image":{"recommendedSizes":{"width":"420","height":"280"}},"imageMobile":{"recommendedSizes":{"width":"750","height":"500"}}},"id":"#230","type":"component","lock":false,"position":191},{"name":"Divider","data":{"color":"darkGray"},"id":"#314","type":"component","lock":false,"position":319},{"name":"Footer","data":{"copyrights":"Copyright © 2019 Divesoft LLC All rights reserved.","facebookUrl":"","youtubeUrl":"","instagramUrl":"","contacts":"**Divesoft, s.r.o.** Hálkova 2495 413 01 Roudnice nad Labem Äeská republika Tel.: +420 416 857 057 E-mail: [email protected]"},"id":"#1","type":"component","lock":false,"position":344},{"name":"Spacer","data":{"spacingLarge":30,"spacingSmall":20,"backgroundColor":"#ffffff"},"id":"#410","type":"component","lock":false,"position":345},{"name":"Spacer","data":{"spacingLarge":30,"spacingSmall":20,"backgroundColor":"#ffffff"},"id":"#417","type":"component","lock":false,"position":346}],"id":"root","idBuffer":"#438","lastCommit":"cffb688b-7b3c-465c-a948-66170c75951d"}},"annotations":[],"language":{"type":"id","generated":false,"id":"Language:cjv3kwvoj000u083611381c6o","typename":"Language"},"__typename":"PageTranslation"},"Page:cljck5m2r930n08357znc2yvi":{"id":"cljck5m2r930n08357znc2yvi","type":{"type":"id","generated":false,"id":"PageType:cjv3l213x004f08366hjufttp","typename":"PageType"},"tags":[],"translations({\"where\":{\"language\":{\"id\":\"cjv3kwvoj000u083611381c6o\"}}})":[{"type":"id","generated":false,"id":"PageTranslation:cljck5m35930u083591jldpxa","typename":"PageTranslation"}],"__typename":"Page"},"PageTranslation:cljck5m35930u083591jldpxa":{"id":"cljck5m35930u083591jldpxa","name":"Freedom user manual 02","createdAt":"2023-06-26T07:49:18.736Z","content":{"type":"json","json":{"content":[{"name":"Header","data":{"products":[{"title":"Accessories","description":"Backplates, Consumables. Tanks.","img":{"recommendedSizes":{"width":"235","height":"235"}},"url":""},{"title":"Accessories sets","description":"Protection, maintenance, cleaning.","img":{"recommendedSizes":{"width":"235","height":"235"}},"url":""},{"title":"Spare parts","description":"Spare parts and components.","img":{"recommendedSizes":{"width":"235","height":"235"}},"url":""}
2,{"title":"Spare parts kits","description":"Completly Liberty spare parts kits.","img":{"recommendedSizes":{"width":"235","height":"235"}},"url":""}]},"id":"#0","type":"component","lock":false,"position":0},{"name":"ProductShowcase","data":{"backgroundColor":"#ffffff","isTextDark":true,"isImageRight":true,"image":{"mimetype":"image/png","size":525097,"hash":"4c6f45dcfcd42b909b417dc3ba6f520e221843e0","id":"cklscy53e79ge0776dwju688d","filename":"divesoft-freedom.png","category":"divesoft/","type":"image"},"imageMobile":{},"title":"User manual","subtitle":"Freedom / Nitrox, Trimix & CCR dive computer","description":"HW rev. 3.1, FW 1.18.2 ","hideDescriptionOnMobile":false,"areButtons":false,"firstTitle":"Learn more >","firstUrl":"","secondTitle":"Configurator >","secondUrl":""},"id":"#2","type":"component","lock":false,"position":1},{"name":"Divider","data":{"color":"darkGray"},"id":"#17","type":"component","lock":false,"position":2},{"name":"TextBlock","data":{"text":"### **Contents** \n\n[**Section 04: Setup**](#Section-04) \n04.1 Editor use \n04.2 Decompression \n04.2.1 Gradient factor \n04.2.2 Safety stop |On| \n04.2.3 Ascent gas |Optimal| \n04.2.4 Deco stops \n04.2.5 Deep stops \n04.2.6 Ascent rate \n04.2.7 Descent rate \n04.3 Mixtures \n04.3.1 Mixture setup \n04.3.2 Def. OC mix \n04.3.3 End pressure 50 bar \n04.3.4 SAC Ç25 l/minÇ \n04.3.5 Gas switch 2 min \n04.3.6 Min pO<sub>2</sub> |0.18 ba| \n04.3.7 Max pO<sub>2</sub> |1.60 bar| \n04.4 Alarms \n04.4.1 Alarm sources \n04.4.2 Notifications \n04.5 Rebreather \n04.5.1 Const pO<sub>2</sub> \n04.5.2 aSCR \n04.5.3 pSCR \n04.5.4 Common settings \n04.6 Freediving Setup \n04.7 Preferences \n04.7.1 Display \n04.7.2 Timeouts \n04.7.3 User interface \n04.7.4.Metric \n04.7.5 Salinity |Fresh| \n04.7.6 Default mode |OC| \n04.7.7 Full log Off \n04.8 Calibration \n04.9 Miscellaneus \n04.10 Factory defaults \n\n[**Section 05: Log book**](#Section-05) \n05.1 Last dive \n05.2 Dive list \n05.3 Summary \n\n[**Section 06: Dive planner**](#Section-06) \n06.1 The dive parameters \n06.2 Dive plan \n06.2.1 Summary \n06.2.2 Deco stops \n\n[**Section 07: Log download**](#Section-07) \n07.1 Log processing in cloud \n07.2 Divesoft App \n07.3 Off-line log processing \n\n[**Section 08: System**](#Section-08) \n08.1 System check \n08.2 Service functions \n08.2.1 Debug \n08.2.2 Test \n08.2.3 Demo dive \n08.2.4 Syslog \n08.2.5 Miscellaneous \n\n[**Section 09: Apps**](#Section-09) \n09.1 Analyzer \n09.1.1 Measuring \n09.1.2 Calibration \n09.2 USB connection \n09.3 Emergency torch \n09.4 Inclinometr \n09.5 Games \n09.5.1 Sokoban \n09.5.2 Snake \n\n[**Section 10: Hardware**](#Section-10) \n10.1 Charging \n10.1.1 Powering in hyperbaric environment \n10.2 Wrist mount \n10.3 Control elements \n10.4 Physical dimensions \n10.5 O<sub>2</sub> sensor cable \n10.6 Environmental specifications \n10.7 Compliance \n10.7.1 CE marking \n10.7.2 EN 13319 \n10.7.3 FCC compliance \n10.7.4 Industry Canada (IC) Compliance Notice \n10.8 Disposal of waste equipment","textLarge":false,"imageOnRight":true,"image":{"recommendedSizes":{"width":"420","height":"280"}},"imageMobile":{"recommendedSizes":{"width":"750","height":"500"}}},"id":"#5","type":"component","lock":false,"position":3},{"name":"Divider","data":{"color":"darkGray"},"id":"#231","type":"component","lock":false,"position":192},{"name":"TextBlock","data":{"text":"### <span id=\"Section-04\">**Section 04: Setup**","textLarge":false,"imageOnRight":true,"image":{"recommendedSizes":{"width":"420","height":"280"}},"imageMobile":{"recommendedSizes":{"width":"750","height":"500"}}},"id":"#114","type":"component","lock":false,"position":193},{"name":"Divider","data":{"color":"darkGray"},"id":"#304","type":"component","lock":false,"position":194},{"name":"Image","data":{"firstImage":{"mimetype":"image/png","size":28921,"hash":"f18800c0c39212f9825e33d34fc2948dffdb98cd","id":"cl0wmv63llopu0776nfy838i9","filename":"divesoft-freedom-user-manual-04-0-0.png","category":"divesoft/","type":"image"},"secondImage":{},"image":{"type":"image"}},"id":"#116","type":"component","lock":false,"position":195},{"name":"Spacer","data":{"spacingLarge":30,"spacingSmall":20,"backgroundColor":"#ffffff"},"id":"#392","type":"component","lock":false,"position":196},{"name":"TextBlock","data":{"text":"The Divesoft Freedom is configured in the surface mode. Activate the\nsurface mode main menu with a short press of both keys and select\nSetup.\nSome values can be set during a dive; however, this possibility is\nreserved for resolving exceptional and emergency situations.\nThe particular set values depend primarily on the userâs experience,\nphysiology and personal preferences. The fact that Divesoft Freedom\nenables setting a certain value does not mean that this kind of\nsetting is safe and suitable for you and for your planned dive.\nIf you are not sure which value to set, leave the values of the default\nsett
2ing.\nThe manufacturer does not provide a warranty for faulty operation of the Divesoft Freedom if this kind of\nfaulty operation is the result of an improper setup.\nThe factory default setting value is shown in square brackets in the following headlines.","textLarge":false,"imageOnRight":true,"image":{"recommendedSizes":{"width":"420","height":"280"}},"imageMobile":{"recommendedSizes":{"width":"750","height":"500"}}},"id":"#115","type":"component","lock":false,"position":197},{"name":"TextBlock","data":{"text":"### **04.1 Editor use**","textLarge":false,"imageOnRight":true,"image":{"recommendedSizes":{"width":"420","height":"280"}},"imageMobile":{"recommendedSizes":{"width":"750","height":"500"}}},"id":"#117","type":"component","lock":false,"position":198},{"name":"Image","data":{"firstImage":{"mimetype":"image/png","size":15332,"hash":"3ed9d24916067c7340580518879651b0b2f26946","id":"cl0wmwikkloq107765njkglzh","filename":"divesoft-freedom-user-manual-04-1-0.png","category":"divesoft/","type":"image"},"secondImage":{},"image":{"type":"image"}},"id":"#119","type":"component","lock":false,"position":199},{"name":"Spacer","data":{"spacingLarge":30,"spacingSmall":20,"backgroundColor":"#ffffff"},"id":"#393","type":"component","lock":false,"position":200},{"name":"TextBlock","data":{"text":"The majority of variable values is edited in a similar manner. \n\nTilt toward yourselfâ decrease the entered digit by one or uncheck\nflag \nTilt to the left â move the cursor to the left \nTilt to the right â move the cursor to the right \nPress upper key â discard editing (reset to previous value) \nLong press upper key â reset to default value \nPress both keys â exit without save \nPress lower key â save and exit \nPermissible range is indicated by <minimum ..\\[default] .. maximum> value. \nThe display shows a brief description below. \nNote: Perform the Horizontal calibration (See section 4.8) if there is no valid response to tilting or tapping\n\nAn alternative method of input in the editor is the button method. This can be set in Setup -> Preferences -> User interface -> Navigation -> Bttn.\n\nUpper button - moves the cursor over characters \nLower button - sets the value \nLong press upper key - moves the cursor back one character \nLong press lower key - resets the value to the default and moves the cursor to the beginning. \n**To save the value you must scroll through all characters to the end, the editor will exit after the last character.**","textLarge":false,"imageOnRight":true,"image":{"recommendedSizes":{"width":"420","height":"280"}},"imageMobile":{"recommendedSizes":{"width":"750","height":"500"}}},"id":"#118","type":"component","lock":false,"position":201},{"name":"TextBlock","data":{"text":"### **04.2 Decompression**\n\n### **04.2.1 Gradient factor**\n","textLarge":false,"imageOnRight":true,"image":{"recommendedSizes":{"width":"420","height":"280"}},"imageMobile":{"recommendedSizes":{"width":"750","height":"500"}}},"id":"#120","type":"component","lock":false,"position":202},{"name":"Image","data":{"firstImage":{},"secondImage":{}},"id":"#121","type":"component","lock":false,"position":203},{"name":"TextBlock","data":{"text":"**GF low \\[0.30]** \nThe gradient factor at the start of decompression (range: 0.00â1.00).\nGF low determines an additional increase of safety at the depth of\nthe first decompression stop or, as the case may be, at the depth of\nthe decompression ceiling at the start of decompression. Setting the\nvalue of 1.00 corresponds to the Bühlmann decompression algorithm\nwithout additional increase of safety using the gradient factors\nmethod.\nSetting low values leads to deeper and longer stops at the start of\ndecompression.\nSee also Advised strategies â Gradient factors (See section 3.7.2).","textLarge":false,"imageOnRight":true,"image":{"recommendedSizes":{"width":"420","height":"280"}},"imageMobile":{"recommendedSizes":{"width":"750","height":"500"}}},"id":"#122","type":"component","lock":false,"position":204},{"name":"TextBlock","data":{"text":"**GF high \\[0.80]** \nThe gradient factor at the end of decompression (range: 0.00â1.00).\
2nGF high determines an additional increase of safety when ascending to the surface. Setting the value of\n1.00 corresponds to the Bühlmann decompression algorithm without additional increase of safety using the\ngradient factors method.\nSetting low values leads to prolongation of shallow decompression stops.\nFor extreme dives a GF high greater than 1 is sometimes used (less safe than the standard Bühlmann\ndecompression algorithm). This requires the special, personally granted license.\nSee also Advised strategies â Gradient factors (See section 3.7.2).\n\n**Bailout GF low \\[0.80]** \nThe gradient factor for bailout at the start of decompression (range: 0.00â1.00).\nAs a general rule, for bailout GF low a higher GF value (a lower additional increase of safety) is set than for\nstandard GF low.\n\n**Bailout GF high \\[0.95]** \nThe gradient factor for bailout at the end of decompression (range: 0.00â1.00).\nAs a general rule, for bailout GF high a higher GF value (a lower additional increase of safety) is set than for\nstandard GF high.","textLarge":false,"imageOnRight":true,"image":{"recommendedSizes":{"width":"420","height":"280"}},"imageMobile":{"recommendedSizes":{"width":"750","height":"500"}}},"id":"#123","type":"component","lock":false,"position":205},{"name":"TextBlock","data":{"text":"### **04.2.2 Safety stop (On)** \n3 minute safety stop within depth 6 to 3 m (20 to 10 ft) is indicated after a dive to a depth greater than 10 m\n(30 ft).","textLarge":false,"imageOnRight":true,"image":{"recommendedSizes":{"width":"420","height":"280"}},"imageMobile":{"recommendedSizes":{"width":"750","height":"500"}}},"id":"#238","type":"component","lock":false,"position":206},{"name":"TextBlock","data":{"text":"### **04.2.3 Ascent gas (Optimal)** \nSpecifies which mixture or set of mixtures will be used for ascent planning.\nIf optimal gas is selected, then the time to surface (TTS) and the dive plan assume the changing of gases\nfrom the list of active mixtures.\nIf current gas is selected, then only the gas currently breathed is used for TTS calculation and dive planning.\nThis setting is preferred for dives that do not involve changing gas mixtures.","textLarge":false,"imageOnRight":true,"image":{"recommendedSizes":{"width":"420","height":"280"}},"imageMobile":{"recommendedSizes":{"width":"750","height":"500"}}},"id":"#239","type":"component","lock":false,"position":207},{"name":"TextBlock","data":{"text":"### **04.2.4 Deco stops**","textLarge":false,"imageOnRight":true,"image":{"recommendedSizes":{"width":"420","height":"280"}},"imageMobile":{"recommendedSizes":{"width":"750","height":"500"}}},"id":"#240","type":"component","lock":false,"position":208},{"name":"Image","data":{"firstImage":{},"secondImage":{}},"id":"#124","type":"component","lock":false,"position":209},{"name":"TextBlock","data":{"text":"**Stops/Ceil. \\[Stops**] \nThe Divesoft Freedom can be used in the regimen of separate\ndecompression stops or in the regimen with only the decompression\nceiling depth indicated.\nAs a general rule, the stops regimen is more suitable for open water\ndiving and is easy to understand and follow. The ceiling regimen\nis more suitable for cave and technical diving. The time spent on\ndecompression is slightly shorter if the ceiling regimen is used\nfor continuous decompression. Personal preference is the most\nimportant.\n\n**Last stop \\[3 m/10 ft]** \nThe depth of the shallowest decompression stop can be set to 3 m/10 ft or 6 m/20 ft. Choose the\ndepth according to the conditions on the surface and your preference. A deeper last stop extends the\ndecompression time slightly. Use the 6 m/20 ft last stop when using 100% oxygen for decompression.\n\n**Rounding \\[60 s]** \nYou can choose the time on stop rounding (1s; 30s; 60s).\n30 or 60s is a good choice for recreational dives. For deep dives, especially with a small value of the GF\nlow and resulting short stops on decompression start, it is better to choose the 1s rounding. Otherwise\na prolonged stay on the deco stop due to rounding may lead to the disappearance of the next short deco\nstop and could negatively affect the decompression profile smoothness.","textLarge":false,"imageOnRight":true,"image":{"recommendedSizes":{"width":"420","height":"280"}},"imageMobile":{"recommendedSizes":{"width":"750","height":"500"}}},"id":"#125","type":"component","lock":false,"position":210},{"name":"TextBlock","data":{"text":"### **04.2.5 Deep stops**\n\n**Pyle Deep stops (Off)** \nEmpiric modification of decompression profile according to Richard Pyleâs algorithm.\nThe combination of Pyle stops and a small value of the GF low can result in a
2not so optimal decompression\nprofile. Please choose only one preferred method. As a general rule, use GF low 0.30 or less and switch (left\nswitched) Pyle Deep stops Off.\n\n**Stops duration (2 min)**\nThe value of the Pyle stops duration (range: 1â3 min).","textLarge":false,"imageOnRight":true,"image":{"recommendedSizes":{"width":"420","height":"280"}},"imageMobile":{"recommendedSizes":{"width":"750","height":"500"}}},"id":"#245","type":"component","lock":false,"position":211},{"name":"TextBlock","data":{"text":"### **04.2.6 Ascent rate** \nRate is used for calculation of the ascent plan and indication of\nascent rate, if relative measuring (percentage) is set in Setup\nâ Preferences â User interface â Vertical speed","textLarge":false,"imageOnRight":true,"image":{"recommendedSizes":{"width":"420","height":"280"}},"imageMobile":{"recommendedSizes":{"width":"750","height":"500"}}},"id":"#246","type":"component","lock":false,"position":212},{"name":"TextBlock","data":{"text":"### **04.2.7 Descent rate** \nRate is used for calculation of the descent plan and indication of\ndescent rate, if relative measuring (percentage) is set in Setup\nâ Preferences â User interface â Vertical speed.","textLarge":false,"imageOnRight":true,"image":{"recommendedSizes":{"width":"420","height":"280"}},"imageMobile":{"recommendedSizes":{"width":"750","height":"500"}}},"id":"#282","type":"component","lock":false,"position":213},{"name":"TextBlock","data":{"text":"**Speed 1 Ç10 m/min / 33 ft/minÇ** \nThe anticipated ascent rate within small depths,\nin zone 1 (range: 1â20 m/min).\nThe value is m/min in metric and ft/min in imperial units.\n\n**Depth zone 1 Ç10 m / 3 ftÇ** \nThe depth defining zone 1. This zone lies between the surface and the set depth (range: 0â300 m).\nThe value is m in metric and ft in imperial units.\n\n**Speed 2 Ç10 m/min / 33 ft/minÇ** \nThe anticipated ascent rate within medium depths, in zone 2 (range: 1â20 m/min).\n\n**Depth zone 2 Ç80 m / 262 ftÇ** \nThe depth defining zone 2. This zone lies between depth zone 1 and the set depth (range: 0â300 m).\n\n**Speed 3 Ç18 m/min / 59 ft/minÇ** \nThe anticipated ascent rate within large depths, in zone 3. (range: 1â20 m/min).","textLarge":false,"imageOnRight":true,"image":{"recommendedSizes":{"width":"420","height":"280"}},"imageMobile":{"recommendedSizes":{"width":"750","height":"500"}}},"id":"#127","type":"component","lock":false,"position":214},{"name":"TextBlock","data":{"text":"**Warn under \\[80 m]** \nThe threshold at which the alarm is activated to indicate exceeding\nthe descent rate. At smaller depths, exceeding the descent rate is\nignored.\nThe value is in m metric and ft in imperial units.\nThis alarm is disabled in factory default setting. It can be enabled in\nSetup â Alarms â Alarm sources â Rates â Descent rate.\n\n**Max rate \\[20 m/min]** \nThe anticipated descent rate (range: 1â40 m/min).\nThe set rate is also used for dive planning.\nThe value is m/min in metric and ft/min in imperial units.\nMax rate 30 m/min is used to indicate a descent rate at a depth shallower than the warn-under depth.\n","textLarge":false,"imageOnRight":true,"image":{"recommendedSizes":{"width":"420","height":"280"}},"imageMobile":{"recommendedSizes":{"width":"750","height":"500"}}},"id":"#129","type":"component","lock":false,"position":215},{"name":"TextBlock","data":{"text":"### **04.3 Mixtures**\n\n### **04.3.1 Mixture setup**\nThe number of available mixtures depends on the software version.","textLarge":false,"imageOnRight":true,"image":{"recommendedSizes":{"width":"420","height":"280"}},"imageMobile":{"recommendedSizes":{"width":"750","height":"500"}}},"id":"#130","type":"component","lock":false,"position":216},{"name":"TextBlock","data":{"text":"Each mixture can be set as active (marked checkbox) or inactive\n(clear box). It can be done in the editing screen or by a shortcut â\nlong press of the upper key in the list of mixtures. Only active\nmixtures can be selected.\nThe default mixture is always active.\nIn an emergency, a mixture can be marked as active during a dive.\nFurthermore, a new mixture can be defined during a dive. These\nfeatures are reserved for emergency situations.","textLarge":false,"imageOnRight":true,"image":{"recommendedSizes":{"width":"420","height":"280"}},"imageMobile":{"recommendedSizes":{"width":"750","height":"500"}}},"id":"#134","type":"component","lock":false,"position":217},{"name":"TextBlock","data":{"text":"### **04.3.2 Def. OC mix** \nA default mixture for an open circuit apparatus. A different default\nmixture can only be selected from mixtures that are marked as active.","textLarge":false,"imageOnRight":true,"image":{"recommendedSizes":{"width":"420","height":"280"}},"imageMobile":{"recommendedSizes":{"width":"750","height":"500"}}},"id":"#247","type":"component","lock":false,"position":218},{"name":"TextBlock","data":{"text":"\n### **04.3.3 End pressure Ç50 barÇ**\nDetermines the size of the tank's pressure safety margin. The value is reflected in the planner calculation.","textLarge":false,"imageOnRight":true,"image":{"recommendedSizes":{"width":"420","height":"280"}},"imageMobile":{"recommendedSizes":{"width":"750","height":"500"}}},"id":"#248","type":"component","lock":false,"position":219},{"name":"TextBlock","data":{"text":"\n### **04.3.4 SAC Ç25 l/minÇ**\nSurface Air Consumption determines the diver's gas consumption value. The value is used to calculate gas management in the planner.â","textLarge":false,"imageOnRight":true,"image":{"recommendedSizes":{"width":"420","height":"280"}},"imageMobile":{"recommendedSizes":{"width":"750","height":"500"}}},"id":"#249","type":"component","lock":false,"position":220},{"name":"TextBlock","data":{"text":"### **04.3.5 Gas switch Ç2 minÇ** \nThe gas switch duration may be set from 0 to 5 minutes. This time will be added to the dive plan and TTS\ncalculation.","textLarge":false,"imageOnRight":true,"image":{"recommendedSizes":{"width":"420","height":"280"}},"imageMobile":{"recommendedSizes":{"width":"750","height":"500"}}},"id":"#250","type":"component","lock":false,"position":221},{"name":"TextBlock","data":{"text":"### **04.3.6 Min pO<sub>2</sub> Ç0.18 barÇ** \nThe low pO<sub>2</sub>\n alarm is activated if the current pO<sub>2</sub>\n is less than the set\nvalue (range: 0.18â0.40 bar). The setting of minimum partial pressure\nof oxygen plays a role in gas switching calculations.\n","textLarge":false,"imageOnRight":true,"image":{"recommendedSizes":{"width":"420","height":"280"}},"imageMobile":{"recommendedSizes":{"width":"750","height":"500"}}},"id":"#251","type":"component","lock":false,"position":222},{"name":"TextBlock","data":{"text":"### **04.3.7 Max pO<sub>2</sub> Ç1.60 barÇ** \nThe high pO<sub>2</sub>\n alarm is activated if current pO<sub>2</sub>\n is bigger than set value\n(range: 0.8â1.6 bar). The setting of maximum partial pressure of\noxygen plays role in gas switching calculations. ","textLarge":false,"imageOnRight":true,"image":{"recommendedSizes":{"width":"420","height":"280"}},"imageMobile":{"recommendedSizes":{"width":"750","height":"500"}}},"id":"#252","type":"component","lock":false,"position":223},{"name":"TextBlock","data":{"text":"### **04.4 Alarms**\n\nThere are two kinds of messages, alarms and notifications. Alarm\nmessages appears on red background, notifications on a blue\nbackground.","textLarge":false,"imageOnRight":true,"image":{"recommendedSizes":{"width":"420","height":"280"}},"imageMobile":{"recommendedSizes":{"width":"750","height":"500"}}},"id":"#136","type":"component","lock":false,"position":224},{"name":"Image","data":{"firstImage":{},"secondImage":{}},"id":"#345","type":"component","lock":false,"position":225},{"name":"TextBlock","data":{"text":"### **04.4.1 Alarm sources**","textLarge":false,"imageOnRight":true,"image":{"recommendedSizes":{"width":"420","height":"280"}},"imageMobile":{"recommendedSizes":{"width":"750","height":"500"}}},"id":"#138","type":"component","lock":false,"position":226},{"name":"TextBlock","data":{"text":"**Deco stop miss \\[On]** \nThe alarm is activated if the decompression stop is violated (in the stops regimen).\n\n**CNS \\[On]** \nThis alarm occurs when 75 %, 90 % and 100 % of CNS oxygen toxicity limit is reached.\n\n**Descent rate \\[Off]** \nA descent speed greater than set while deeper than set activates the alarm.\nSee descent rate setting in Setup â Desce
2nt rate (See section 4.2.7).\n\n**Ascent rate \\[On]** \nAn ascent speed greater then set for the current deep interval activates the alarm.\nSee ascent rate setting in Setup â Ascent rate (See section 4.2.4).\n\n**Low battery \\[25 %]** \nThe alarm is activated if the remaining battery capacity falls below this limit.\nRange is 0â40%; 0 means that the alarm is disabled.\nIf set to a value greater than 10 %, then a second alarm on 10 % occurs.","textLarge":false,"imageOnRight":true,"image":{"recommendedSizes":{"width":"420","height":"280"}},"imageMobile":{"recommendedSizes":{"width":"750","height":"500"}}},"id":"#140","type":"component","lock":false,"position":227},{"name":"TextBlock","data":{"text":"### **04.4.2 Notifications**","textLarge":false,"imageOnRight":true,"image":{"recommendedSizes":{"width":"420","height":"280"}},"imageMobile":{"recommendedSizes":{"width":"750","height":"500"}}},"id":"#253","type":"component","lock":false,"position":228},{"name":"TextBlock","data":{"text":"**No deco end \\[On]** \nThe end of the dive in zero time (in the terminology of the\nBühlmann decompression model), i.e. notification that there will be\na decompression obligation.\n\n**Deco stop end \\[On]**\nThe end of the decompression stop (in the stops regimen). You can\nascend to the next stop or to the surface, as indicated on the display.\n\n**Gas switch reminder \\[Off]** \nA recommendation to switch to a different mix.\n\n**Gas switch done \\[On]** \nThe change of mixture in OC mode or diluent in CCR mode has been executed.\nThis notification prevents accidental gas mix switch using a shortcut if any key is pressed unintentionally.\n\n**Depth & Time** \nA notification that the set time or depth during a descent or ascent has been reached. Up to three depth alerts can be set during descent, three time alerts, and three depth alerts during ascent. \nThe values are located on an imaginary dive profile in the editor. On the left are the values for descent depths (m, ft), on the \"bottom\" are the values for time (minutes), on the right are the values for ascent depths. \nLower key - moves the cursor to the next value \nUpper key - enter to edit the value. \nIt is possible to set three separate \ndepths in the range of 0â300 m, where 0 means deactivation of the notification. \nIt is possible to set three separate times in the range\nof 0â999 min., where 0 means deactivation of the notification.\n\n**Airbrake** \nSets alerts for air breaks during decompression with high oxygen gases. \nBreak above % - above how much %O<sub>2</sub> we consider the mixture to be oxygen/airbreak \nBreak after - after how many minutes on oxygen do we want to break \nBreak length - length of airbreak\nThe times are default 0 - off\n","textLarge":false,"imageOnRight":true,"image":{"recommendedSizes":{"width":"420","height":"280"}},"imageMobile":{"recommendedSizes":{"width":"750","height":"500"}}},"id":"#142","type":"component","lock":false,"position":229},{"name":"TextBlock","data":{"text":"### **04.5 Rebreather**\n\nRebreather settings are available in the Closed Circuit version of the Divesoft Freedom only.\nThere are four types of rebreather supported:\n\n**CCR Type**\n \n**CCR Type - CCR** \nConstatnt pO<sub>2</sub> CCR - Electronic or manual CCR (eCCR or mCCR), where pO<sub>2</sub>\n is stable regardless of depth change, set by setpoint.\n \n**CCR Type - aSCR** \nThe constant mass flow semi closed rebreather (active SCR).\n\n**CCR Type - pSCR** \nRespiratory minute volume keyed semi closed rebreather (passive SCR).","textLarge":false,"imageOnRight":true,"image":{"recommendedSizes":{"width":"420","height":"280"}},"imageMobile":{"recommendedSizes":{"width":"750","height":"500"}}},"id":"#40","type":"component","lock":false,"position":230},{"name":"TextBlock","data":{"text":"### **04.5.1 Const pO<sub>2</sub>** \n\n**Diluents** \n8 mixtures with any content of oxygen, helium and nitrogen can be set. This setting is independent from the\nOC mixture setting.\nThe control is the same as with OC mixtures.\n\n**Default diluent** \nA default diluent for a closed circuit rebreather.\n\n**SP Low \\[0.7]** \nThe SP low is set after switching to the fixed setpoint CCR dive mode on the surface.\n\n**SP High \\[1.3]** \nThe SP low can be switched to the SP high manually (via the shortcut or via the menu) or automatically at\na set depth during a descent or at a set runtime.\n\n**SPhigh auto \\[0 m/ft]** \nIt is possible to set the automatic switching of the high setpoint during exceeding the depth during descent, time or depth during ascent. The editor shows an imaginary dive profile, where on the left side is the depth during descent, on the \"bottom\" is the time and on the right the depth during ascent. \nLower key - cursor movement \nUpper key - enter the edit value\nWhen the set limits are exceeded to this depth, the high setpoint is automatically set. Zero disables this feature.\n\n**SP shortcuts \\[Off]** \nEnables or disables the use of button for switching setpoints\n\n**SP ascent \\[High]** \nSpecifies which setpoint will be used to calculate the TTS. Choice between current or high.","textLarge":false,"imageOnRight":true,"image":{"recommendedSizes":{"width":"420","height":"280"}},"imageMobile":{"recommendedSizes":{"width":"750","height":"500"}}},"id":"#254","type":"component","lock":false,"position":231}
2,{"name":"TextBlock","data":{"text":"### **04.5.2 aSCR**\n\n**VO<sub>2</sub> \\[1.5 l/min]** \nThe metabolic consumption of oxygen (VO<sub>2</sub>\n) can be set in the range 0.5â3 l/min.\n\n**Constant flow \\[7.0 l/min]** \nThe constant flow of premix can be set in the range 5â20 l/min.","textLarge":false,"imageOnRight":true,"image":{"recommendedSizes":{"width":"420","height":"280"}},"imageMobile":{"recommendedSizes":{"width":"750","height":"500"}}},"id":"#255","type":"component","lock":false,"position":232},{"name":"TextBlock","data":{"text":"### **04.5.3 pSCR**\n\n**PA ratio \\[8.0]** \nThe PA ratio can be set in the range 2â16. It is fixed by the design of the SCR. \nVentilatory coef O<sub>2</sub> \\[20] \nThe ventilatory coefficient for oxygen is a constant that represents the fact that the harder one works, the\nfaster one breathes (= respiratory minute volume/metabolic consumption of oxygen, VO<sub>2</sub>\n). Fit people have\na lower respiratory rate for equivalent amounts of work than unfit people, so the lower value represents\na physically fit individual (range: 14â28).","textLarge":false,"imageOnRight":true,"image":{"recommendedSizes":{"width":"420","height":"280"}},"imageMobile":{"recommendedSizes":{"width":"750","height":"500"}}},"id":"#256","type":"component","lock":false,"position":233},{"name":"TextBlock","data":{"text":"### **04.5.4 Common settings** \n\n**Stack time \\[0 min]** \nSet the scrubber lifetime. The stack time warning will be generated after this time expires. Zero disables\nthis feature.\n\n**Number of sensors \\[0]** \nEnter the number of O<sub>2</sub>\n chemical sensors connected to the Freedom using a cable. One, two or three sensors\ncan be connected.\nThe cable equipped with the Molex connectors is included in the Closed Circuit version of the Divesoft\nFreedom distribution package or can be ordered separately.\n\n**Faulty sensors** \nYou can mark any connected but untrusted sensor as disabled. By doing so, you will remove the these\nsensors from the calculation of the average pO<sub>2</sub>\n\n**Cell -> 10k** \nWhen using the Freedom with external sensors, it is sometimes necessary to adjust the voltage of the sensors, which can be changed by wiring the sensor. This adjustment determines terminator setting. Normally ON. On CCR cables with insulators usually need to be turned off.\n\n**3rd sens. ratio** \ncoefficient for 3rd sensor if terminators are disabled, only up to HW rev 3.0 on the latest 3.1 this is no longer the case.","textLarge":false,"imageOnRight":true,"image":{"recommendedSizes":{"width":"420","height":"280"}},"imageMobile":{"recommendedSizes":{"width":"750","height":"500"}}},"id":"#257","type":"component","lock":false,"position":234},{"name":"TextBlock","data":{"text":"### **04.6 Freediving Setup**\n\n**On depth \\[1.0]** \nThe descent to On depth triggers the start of a dive. Set value greater than Off depth.\n\n**Off depth \\[0.3]** \nThe ascent above Off depth means the end of a dive. Set value smaller than On depth.","textLarge":false,"imageOnRight":true,"image":{"recommendedSizes":{"width":"420","height":"280"}},"imageMobile":{"recommendedSizes":{"width":"750","height":"500"}}},"id":"#258","type":"component","lock":false,"position":235},{"name":"TextBlock","data":{"text":"### **04.7 Preferences**\n\n### **04.7.1 Display**\n\n**Orientation [Left hand]**","textLarge":false,"imageOnRight":true,"image":{"recommendedSizes":{"width":"420","height":"280"}},"imageMobile":{"recommendedSizes":{"width":"750","height":"500"}}},"id":"#164","type":"component","lock":false,"position":236},{"name":"Image","data":{"firstImage":{"mimetype":"image/jpeg","size":49583,"hash":"6d2460341c4681d9d75f0387457389976b638d83","id":"cl0wno1qmlous0776cz1n61in","filename":"divesoft-freedom-user-manual-04-7-1.jpg","category":"divesoft/","type":"image"},"secondImage":{},"image":{"type":"image"}},"id":"#343","type":"component","lock":false,"position":237},{"name":"TextBlock","data":{"text":"Left hand, right hand and the auto orientation can be selected.\nAuto orientation selects the left or right hand position automatically during the start. It will not switch the\ndisplay orientation when the diver changes position (i.e. during a head down de
2scent).\n\n**Brightness**","textLarge":false,"imageOnRight":true,"image":{"recommendedSizes":{"width":"420","height":"280"}},"imageMobile":{"recommendedSizes":{"width":"750","height":"500"}}},"id":"#165","type":"component","lock":false,"position":238},{"name":"TextBlock","data":{"text":"The display backlight brightness level can be set from 1 to 9. The\nchange of brightness is immediately reflected during a setting, so\npreferably change this setting in the shade or in the dark.\nFor diving with eyes accommodated to darkness use the lowest\nbrightness setting (level 1). Use high brightness (level 5 to 9) for\ndiving with a high level of ambient light.\nAlso see advised strategies for Diving in darkness (See section 3.7.2). \n\n<span style=\"color:red\">**WARNING: Brightness higher than 7 will significantly reduce battery life per charge. A value of 9 will reduce battery life by up to 50%.** </span>\n\nExample: normal battery time with setting 5 is 18h, with brightness set to 9 it is only 9h","textLarge":false,"imageOnRight":true,"image":{"recommendedSizes":{"width":"420","height":"280"}},"imageMobile":{"recommendedSizes":{"width":"750","height":"500"}}},"id":"#166","type":"component","lock":false,"position":239},{"name":"TextBlock","data":{"text":"**Menu highlight** \nIncrease the font of the selected menu line\nCurr. - only the selected line is highlighted\nAll - whole menu in large font\nNone - all in small font\n\n**Screensaver \\[0 s]** \nThe display will be switched off after the screensaver timeout\nexpires. Zero disables this feature (i.e. display is all the time on).\n\n","textLarge":false,"imageOnRight":true,"image":{"recommendedSizes":{"width":"420","height":"280"}},"imageMobile":{"recommendedSizes":{"width":"750","height":"500"}}},"id":"#167","type":"component","lock":false,"position":240},{"name":"Image","data":{"firstImage":{"mimetype":"image/jpeg","size":16619,"hash":"d71ddb1198f5ad5642b19abc83c6a0c03f441cf7","id":"cl0wnoxw7lov10776eb3xh2sw","filename":"divesoft-freedom-user-manual-04-7-1b.jpg","category":"divesoft/","type":"image"},"secondImage":{},"image":{"type":"image"}},"id":"#346","type":"component","lock":false,"position":241},{"name":"TextBlock","data":{"text":"**Screens** \nAny dive mode screen can be disabled.\n\n**OC row4/col3 custom field** \nThe decompression floor or the average depth can be set for the\ndetailed OC screen.","textLarge":false,"imageOnRight":true,"image":{"recommendedSizes":{"width":"420","height":"280"}},"imageMobile":{"recommendedSizes":{"width":"750","height":"500"}}},"id":"#168","type":"component","lock":false,"position":242},{"name":"Spacer","data":{"spacingLarge":30,"spacingSmall":20,"backgroundColor":"#ffffff"},"id":"#409","type":"component","lock":false,"position":243},{"name":"TextBlock","data":{"text":"### **04.7.2 Timeouts** \n\n**Surface idle \\[10 min]** \nThe Freedom will be switched off after this timeout expires (range: 1â120 min).\nBefore switching off, âShutdown?â question is displayed for 30 s. Select No to restart this timer.\n\n**Prepared idle \\[15 min]** \nThe manually activated dive mode will be switched back to surface mode if the dive does not start during\nthis timeout (range: 1â120 min).\n\n**Dive termination \\[10 min]** \nThe dive will be terminated after surfacing and if no subsequent submersion starts during this timeout\n(range: 0â30 min). Zero disables this feature (i.e. dive will not be terminated automatically).\n\n**Dive end Confirm \\[Off]** \nIf the dive end confirmation is On then a confirmation dialog is displayed for 30 s before the dive ends.\nSelect No to restart the dive termination timer.\n\n**Dive time \\[Auto]** \nAuto - stop divetime on emergence \nCave - divetime stops after manual end of dive, for cave diving with more dry and wet (siphons/sumps) sections.","textLarge":false,"imageOnRight":true,"image":{"recommendedSizes":{"width":"420","height":"280"}},"imageMobile":{"recommendedSizes":{"width":"750","height":"500"}}},"id":"#169","type":"component","lock":false,"position":244},{"name":"Image","data":{"firstImage":{"mimetype":"image/png","size":48003,"hash":"1576babd317cfe033
2c77f1324be7793da48b6f47","id":"cl0wnqohilow50776jh2vtmns","filename":"divesoft-freedom-user-manual-04-7-1c.png","category":"divesoft/","type":"image"},"secondImage":{},"image":{"type":"image"}},"id":"#347","type":"component","lock":false,"position":245},{"name":"Spacer","data":{"spacingLarge":30,"spacingSmall":20,"backgroundColor":"#ffffff"},"id":"#411","type":"component","lock":false,"position":246},{"name":"TextBlock","data":{"text":"### **04.7.3 User interface**\n\n\n**Checklist \\[Enabled]** \nIf this is not disabled then the setting summary will be shown when the dive mode starts.\nThis is an essential part of a predive check especially for muti-gas and rebreather diving.\n\n**Plan order\\[Time]** \nThe dive ascent plan can be sorted by time or by depth (i.e. in reverse order).\n\n**Key delay \\[0]**\nIf a greater value than 0 is set then a longer button press is needed to be recognized as valid user input. Use\nin case of troubles with unintended activation.\n\n**Navigation \\[Tilt]** \nThe numbers in the editor can be increased or decreased by tilt, by buttons or by tap. To control with tapping it is\nnecessary to practice a little. Do not change the setting to tap unless you have a strong reason.\n\n**Gas shortc. \\[Off]** \nThe default setting for gas shortcuts is off. If enabled then a long press of the upper key selects the\nprevious gas mixture and a long press of the lower key selects the next gas mixture. This list is cyclic.\n\nIf the âbreathableâ option is selected, then mixes with O<sub>2</sub>\n inside the breathable range with regard to the\ncurrent depth are switched. The limits of breathable range are set in Setup â Mixtures.\nIf the âallâ option is selected, then all mixes are switched, regardless breathability. An alarm will be\nactivated after this kind of switch.\n\n**Vert. rate \\[Unit/min]** \nIf percent is set then the ascent and descent rate are indicated relatively to the ascent and descent speed\nlimits. If unit/min is set then the ascent or descent rate are indicated in depth unit per minute.\n\n**Stopw. bttn.** \nSpecifies under which conditions the bottom button functions as a stopwatch control in Gauge mode. You can choose between Disabled, Base scr only, or Always.\n\n**Big Depth** \nSpecifies what to display on the bottom line of the Big screen. \nAvg - displays average depth \nMax - displays maximum depth \nOnly - displays current depth ONLY, nothing else.\n\n**Lower bttn**. \nDetermines the behaviour of the bottom button. The button can be predefined to turn the display off and on for battery saving, or it can be used to reverse the scrolling direction between screens.","textLarge":false,"imageOnRight":true,"image":{"recommendedSizes":{"width":"420","height":"280"}},"imageMobile":{"recommendedSizes":{"width":"750","height":"500"}}},"id":"#259","type":"component","lock":false,"position":247},{"name":"TextBlock","data":{"text":"### **04.7.4 Units \\[Metric]**\nImperial or metric units can be selected.","textLarge":false,"imageOnRight":true,"image":{"recommendedSizes":{"width":"420","height":"280"}},"imageMobile":{"recommendedSizes":{"width":"750","height":"500"}}},"id":"#260","type":"component","lock":false,"position":248},{"name":"TextBlock","data":{"text":"### **04.7.5 Salinity \\[Fresh]**\n\nSalinity Fresh, Salt or EN 13319 can be set according the water density. If changed to the Sea option then the density of seawater will be used for the depth calculation.\nThe majority of depth gauges is calibrated to fresh water. Do not change this setting unless a direct\ncomparison with a depth gauge calibrated to seawater is needed.\nEN13319 which is the \"universal\" density according to the same standard - 1020 kg/m3, which is very close to salt water and quite far from fresh water. \nSetting of fresh/sea water doesnât affect decompression calculations. Decompression is based on ambient\npressure and is independent of displayed depth. Only depth of decompression stops is rounded up to usual\nvalues according to settings of fresh/sea water and metric/imperial units.","textLarge":false,"imageOnRight":true,"image":{"recommendedSizes":{"width":"420","height":"280"}},"imageMobile":{"recommendedSizes":{"width":"750","height":"500"}}},"id":"#261","type":"component","lock":false,"position":249},{"name":"TextBlock","data":{"text":"### **04.7.6 Default mode \\[OC]**\n\nIf submersion to a depth greater than 1.5 m occurs with the computer in surface mode or switched off, the\ncomputer switches to the selected default mode.","textLarge":false,"imageOnRight":true,"image":{"recommendedSizes":{"width":"420","height":"280"}},"imageMobile":{"recommendedSizes":{"width":"750","height":"500"}}},"id":"#262","type":"component","lock":false,"position":250},{"name":"TextBlock","data":{"text":"### **04.7.7 Full log \\[Off]**\n","textLarge":false,"imageOnRight":true,"image":{"recommendedSizes":{"width":"420","height":"280"}},"imageMobile":{"recommendedSizes":{"width":"750","height":"500"}}},"id":"#263","type":"component","lock":false,"position":251},{"name":"TextBlock","data":{"text":"### **04.8 Calibration**\n\n**Calibration O<sub>2</sub>** \nSee O<sub>2</sub>\n sensors calibration (See section 3.4.2).\n \n**Horizontal calibration** \nCalibration of accelerometers, which are used for c
2ontrol by tilt or tap. Place the computer horizontally\n(display up) and press any key. It is preferred to use a steady horizontal ground (e.g. a table).\n\n**Pressure corr. \\[0.00 mbar]** \nSpecify pressure sensor correction for more precise measurement of a barometric pressure or altitude. This\ncorrection is not needed for general use.\n\n**Temperature corr. \\[0.0 °C/°F]** \nSpecify temperature sensor correction for more precise measurement of temperature. This correction is not\nneeded for general use.","textLarge":false,"imageOnRight":true,"image":{"recommendedSizes":{"width":"420","height":"280"}},"imageMobile":{"recommendedSizes":{"width":"750","height":"500"}}},"id":"#264","type":"component","lock":false,"position":252},{"name":"TextBlock","data":{"text":"### **04.9 Miscellaneous** \n\n**Date and Time** \nSets the current time and date \nDo not change local time between repetitive dives because the change of local time affects the calculation\nof desaturation during a surface interval.\nIt is advised to set the local time of a destination prior to leaving for a diving vacation in a different time\nzone.\n\n**Date format** \nYou can choose between common time formats used in different parts of the world. \n\nISO YYYY-MM-DD 2021-10-18 \nEU DD.MM.YYYY 18.10.2021 \nUS MM/DD/YYYY 10/18/2021 \n\n**Set owner** \nThe name of the owner can be set. The first line is displayed when the device is started.\n\n**Factory defaults** \nReset all setting to default values (except date and time).\nComputer will be restarted and the horizontal calibration starts automatically after the reset\n","textLarge":false,"imageOnRight":true,"image":{"recommendedSizes":{"width":"420","height":"280"}},"imageMobile":{"recommendedSizes":{"width":"750","height":"500"}}},"id":"#265","type":"component","lock":false,"position":253},{"name":"TextBlock","data":{"text":"### **04.10 Factory defaults**\n\nReset all setting to default values (except date and time).\nComputer will be restarted and the horizontal calibration starts automatically after the reset","textLarge":false,"imageOnRight":true,"image":{"recommendedSizes":{"width":"420","height":"280"}},"imageMobile":{"recommendedSizes":{"width":"750","height":"500"}}},"id":"#266","type":"component","lock":false,"position":254},{"name":"Divider","data":{"color":"darkGray"},"id":"#292","type":"component","lock":false,"position":255}
2,{"name":"TextBlock","data":{"text":"### <span id=\"Section-05\">**Section 05: Log book**","textLarge":false,"imageOnRight":true,"image":{"recommendedSizes":{"width":"420","height":"280"}},"imageMobile":{"recommendedSizes":{"width":"750","height":"500"}}},"id":"#186","type":"component","lock":false,"position":256},{"name":"Divider","data":{"color":"darkGray"},"id":"#305","type":"component","lock":false,"position":257},{"name":"Image","data":{"firstImage":{"mimetype":"image/jpeg","size":66804,"hash":"efffe3f6dafcfdcd07846aedc757a2610b004f99","id":"cl0wnvtvvlox207768g8aom4i","filename":"divesoft-freedom-user-manual-05-1-0.jpg","category":"divesoft/","type":"image"},"secondImage":{}},"id":"#211","type":"component","lock":false,"position":258},{"name":"Spacer","data":{"spacingLarge":30,"spacingSmall":20,"backgroundColor":"#ffffff"},"id":"#412","type":"component","lock":false,"position":259},{"name":"TextBlock","data":{"text":"### **05.1 Last dive**\n\nDetails from the last dive from list.\n\n**Dive profile** \nThe graph is plotted within a white line.\n\n**Decompression ceiling** \nThe graph is plotted within a red line; in deco dive only.\n\n**Date and time** \nThe time of submersion.\n\n**Depth** \nThe maximum depth of the dive.\n\n**T** \nThe temperature at its coldest point of the dive (measured during the ascent).\n\n**Duration** \nThis indicates time from submersion at the dive start to surfacing at the dive end. It includes all surface\nstays, if part of the dive. Notice if the decompression obligation was present.\n\n**Avg depth** \nThe average depth, calculated from the whole profile.\n\n**Mode** \nOriginal dive mode (at the dive start).\n\n**CNS** \nThe CNS oxygen clock value after surfacing.\n\n**Zoomed view - Event list** \nThe following context menu can be called up in the dive detail by pressing both buttons \nZoomed view -zooms the dive profile to detail for detailed viewing. The bottom button can be used to scroll the profile further, the top button to go back along the timeline. To return to the dive detail, press both buttons again and select Full view. \nEvent list - displays the events in the dive \nBack to menu - return one level back ","textLarge":false,"imageOnRight":true,"image":{"recommendedSizes":{"width":"420","height":"280"}},"imageMobile":{"recommendedSizes":{"width":"750","height":"500"}}},"id":"#170","type":"component","lock":false,"position":260},{"name":"Image","data":{"firstImage":{"mimetype":"image/png","size":57544,"hash":"1f6b734efab9cf30c809d7837b79134f8718fe68","id":"cl0wnxw23loxb0776yu6nh96n","filename":"divesoft-freedom-user-manual-05-2-0.png","category":"divesoft/","type":"image"},"secondImage":{},"image":{"type":"image"}},"id":"#212","type":"component","lock":false,"position":261},{"name":"Spacer","data":{"spacingLarge":30,"spacingSmall":20,"backgroundColor":"#ffffff"},"id":"#413","type":"component","lock":false,"position":262},{"name":"TextBlock","data":{"text":"### **05.2 Dive list**\n\nHere all dives from the memory of the Divesoft Freedom are\
2nlisted. The memory capacity is approximately 100 hours of typical\ndive profiles. When the memory is full, the oldest records are\nautomatically deleted.\nSecond and subsequent dives in one day are marked with\ncorresponding letters.\nDemo dives (logs stored after the dive simulation) are marked with\nlight blue characters. Test dives are marked with red characters (e.g.\nthe first dive to approx. 350 m).\nUse upper button short press to open the screen with the dive details.\nUse long press to go through the pages.","textLarge":false,"imageOnRight":true,"image":{"recommendedSizes":{"width":"420","height":"280"}},"imageMobile":{"recommendedSizes":{"width":"750","height":"500"}}},"id":"#171","type":"component","lock":false,"position":263},{"name":"TextBlock","data":{"text":"### **05.3 Summary**\n\nA summary of all dives from the memory of the Divesoft Freedom is shown (test and demo dives excluded).","textLarge":false,"imageOnRight":true,"image":{"recommendedSizes":{"width":"420","height":"280"}},"imageMobile":{"recommendedSizes":{"width":"750","height":"500"}}},"id":"#172","type":"component","lock":false,"position":264},{"name":"Divider","data":{"color":"darkGray"},"id":"#296","type":"component","lock":false,"position":265},{"name":"TextBlock","data":{"text":"### <span id=\"Section-06\">**Section 06: Dive planner**\n","textLarge":false,"imageOnRight":true,"image":{"recommendedSizes":{"width":"420","height":"280"}},"imageMobile":{"recommendedSizes":{"width":"750","height":"500"}}},"id":"#173","type":"component","lock":false,"position":266},{"name":"Divider","data":{"color":"darkGray"},"id":"#306","type":"component","lock":false,"position":267},{"name":"TextBlock","data":{"text":"### **06.1 The dive parameters** \n\nAll non-listed parameters are taken from the respective setting.","textLarge":false,"imageOnRight":true,"image":{"recommendedSizes":{"width":"420","height":"280"}},"imageMobile":{"recommendedSizes":{"width":"750","height":"500"}}},"id":"#307","type":"component","lock":false,"position":268},{"name":"TextBlock","data":{"text":"**Plan mode** \nSelect the dive mode you are planning for. \nOC â Open circuit SCUBA \nS/CCR â SCR or CCR SCUBA \nCCR+BO â SCR descent & bottom followed by OC bailout \nOther than OC plan mode is available in the Closed Circuit version\nonly. \n\n**Surface interval** \nEnter the surface interval from now (in minutes).\n\n**Target depth** \nEnter the bottom depth (in m/ft). For a multilevel dive use an average depth.\n\n**Bottom time** \nEnter the dive runtime when the ascent starts, including descent.\n\n**Bottom mix** \nThe gas mixture planned for a descent and the stay on the bottom.\n\n**Diluent** \nDiluent for the SCR/CCR dive (Closed Circuit version only).\n\n**Plan dive** \nThe resulting dive plan consists of a summary and a detailed listing of deco stops.\n\n**Simulation** \nStart real-time simulation of the dive. The computer will switch to dive mode and will show all displays in\nthe same way as during a real dive.\n\n**Save as default** \nSave the parameter set as a default for the following plans, otherwise it is forgotten after switch off.","textLarge":false,"imageOnRight":true,"image":{"recommendedSizes":{"width":"420","height":"280"}},"imageMobile":{"recommendedSizes":{"width":"750","height":"500"}}},"id":"#174","type":"component","lock":false,"position":269},{"name":"TextBlock","data":{"text":"### **06.2 Dive plan**","textLarge":false,"imageOnRight":true,"image":{"recommendedSizes":{"width":"420","height":"280"}},"imageMobile":{"recommendedSizes":{"width":"750","height":"500"}}},"id":"#175","type":"component","lock":false,"position":270},{"name":"TextBlock","data":{"text":"### **06.2.1 Summary**\n\n**Nodeco** \nThe runtime of the planned dive where the decompression obligation\nstarts.\n\n**TTS** \nThe time to surface at the ascent start.\n\n**Total** \nThe runtime when surfacing.\n\n**CNS** \nThe percentage of consumption of CNS toxicity limit.\n\n**NoFly** \nThe NoFly time after the planned dive.\n","textLarge":false,"imageOnRight":true,"image":{"recommendedSizes":{"width":"420","height":"280"}},"imageMobile":{"recommendedSizes":{"width":"750","height":"500"}}},"id":"#177","type":"component","lock":false,"position":271},{"name":"TextBlock","data":{"text":"### **06.2.2 Deco stops**","textLarge":false,"imageOnRight":true,"image":{"recommendedSizes":{"width":"420","height":"280"}},"imageMobile":{"recommendedSizes":{"width":"750","height":"500"}}},"id":"#267","type":"component","lock":false,"position":272},{"name":"Image","data":{"firstImage":{"mimetype":"image/png","size":42575,"hash":"b1d4efc480f13b549d7db3aa2e5b3a8a59fa61e3","id":"cl0wo16kdloxi0776tf4xu7fx","filename":"divesoft-freedom-user-manual-06-2-2.png","category":"divesoft/","type":"image"},"secondImage":{}},"id":"#152","type":"component","lock":false,"position":273},{"name":"Image","data":{"firstImage":{},"secondImage":{}},"id":"#150","type":"component","lock":false,"position":274},{"name":"TextBlock","data":{"text":"The description of the ascent profile and used gas mixtures.\nIf optimal gas is selected in the decompression settings, then the\nplan considers changing of gases from the list of active mixtures; the\ngas switch time is included.\nIf the current gas setting is selected in the decompression settings,\nthen only the actual gas is used.","textLarge":false,"imageOnRight":true,"image":{"recommendedSizes":{"width":"420","height":"280"}},"imageMobile":{"recommendedSizes":{"width":"750","height":"500"}}},"id":"#178","type":"component","lock":false,"position":275}
2,{"name":"Divider","data":{"color":"darkGray"},"id":"#295","type":"component","lock":false,"position":276},{"name":"TextBlock","data":{"text":"### <span id=\"Section-07\">**Section 07: Log download**\n","textLarge":false,"imageOnRight":true,"image":{"recommendedSizes":{"width":"420","height":"280"}},"imageMobile":{"recommendedSizes":{"width":"750","height":"500"}}},"id":"#179","type":"component","lock":false,"position":277},{"name":"Divider","data":{"color":"darkGray"},"id":"#308","type":"component","lock":false,"position":278},{"name":"TextBlock","data":{"text":"Connect the USB cable included in distribution package to the Freedom connector and then to the USB\nport of your computer, tablet or mobile phone. **Attention, maintaining the connection order is very important.** A USB adapter will\nprobably be necessary for mobile devices. \nSelect the USB connection item in the menu Apps -> USB connection. The Divesoft Freedom\nmemory can be connected as a mass storage device (like a flash\ndrive). The connection to Windows, Mac, Linux, Android and iOS was\ntested, but there is no guarantee of compatibility with all operating\nsystems and all computers. Access to the internal memory is read\nonly.\nLogs are stored in the DIVELOG folder; data from one dive is stored as\none *.DLF file.","textLarge":false,"imageOnRight":true,"image":{"recommendedSizes":{"width":"420","height":"280"}},"imageMobile":{"recommendedSizes":{"width":"750","height":"500"}}},"id":"#309","type":"component","lock":false,"position":279},{"name":"TextBlock","data":{"text":"**WARNING: It is absolutely crucial to follow the cable connection procedure. The charging/data cable must be plugged into the Freedom first and then into the desktop, laptop or other devices.\nFailure to follow this procedure may cause irreversible damage to the device.**","textLarge":false,"imageOnRight":true,"image":{"recommendedSizes":{"width":"420","height":"280"}},"imageMobile":{"recommendedSizes":{"width":"750","height":"500"}}},"id":"#434","type":"component","lock":false,"position":280},{"name":"TextBlock","data":{"text":"### **07.1 Log processing in cloud**\n\nDownload files from the DIVELOG folder to your hard drive and then\nupload data to WETNOTES.COM. Here you can store and edit your\ndives, study graphs, details and much more. If you wish, you can\nshare dives with your buddy or a group.\nVisit WETNOTES.COM and explore all the possibilities that it offers!\n","textLarge":false,"imageOnRight":true,"image":{"recommendedSizes":{"width":"420","height":"280"}},"imageMobile":{"recommendedSizes":{"width":"750","height":"500"}}},"id":"#180","type":"component","lock":false,"position":281},{"name":"Image","data":{"firstImage":{"mimetype":"image/png","size":47635,"hash":"601eab3e650e81a8641bd03056577e7a97526d86","id":"cl0wo4z9wloya0776v10jw8ly","filename":"divesoft-freedom-user-manual-07-2-0a.png","category":"divesoft/","type":"image"},"secondImage":{},"image":{"type":"image"}},"id":"#148","type":"component","lock":false,"position":282},{"name":"Image","data":{"firstImage":{},"secondImage":{}},"id":"#348","type":"component","lock":false,"position":283},{"name":"TextBlock","data":{"text":"### **07.2 Divesoft App** \nDive logs uploaded to Wetnotes.com can be viewed on mobile devices via the \\[Divesoft.app ](https://Divesoft.app) \nDownload the version for your mobile phone or tablet.\n","textLarge":false,"imageOnRight":true,"image":{"recommendedSizes":{"width":"420","height":"280"}},"imageMobile":{"recommendedSizes":{"width":"750","height":"500"}}},"id":"#181","type":"component","lock":false,"position":284},{"name":"TextBlock","data":{"text":"### **07.3 Off-line log processing**\nOffline storage of dive logs is not supported by Divesoft. Third party software such as Subsurface can be used \nhttps://subsurface-divelog.org/","textLarge":false,"imageOnRight":true,"image":{"recommendedSizes":{"width":"420","height":"280"}},"imageMobile":{"recommendedSizes":{"width":"750","height":"500"}}},"id":"#270","type":"component","lock":false,"position":285},{"name":"Divider","data":{"color":"darkGray"},"id":"#294","type":"component","lock":false,"position":286}
2,{"name":"TextBlock","data":{"text":"### <span id=\"Section-08\">**Section 08: System**\n","textLarge":false,"imageOnRight":true,"image":{"recommendedSizes":{"width":"420","height":"280"}},"imageMobile":{"recommendedSizes":{"width":"750","height":"500"}}},"id":"#182","type":"component","lock":false,"position":287},{"name":"Divider","data":{"color":"darkGray"},"id":"#310","type":"component","lock":false,"position":288},{"name":"TextBlock","data":{"text":"### **08.1 System check**\n\nThere is detailed version, license, settings, battery and pressure sensor information described on 5 screens\n(6 for CCR version).","textLarge":false,"imageOnRight":true,"image":{"recommendedSizes":{"width":"420","height":"280"}},"imageMobile":{"recommendedSizes":{"width":"750","height":"500"}}},"id":"#311","type":"component","lock":false,"position":289},{"name":"TextBlock","data":{"text":"### **08.2 Service functions**\n\nService functions are primarily intended to support a qualified technician or to be performed with the\nrecommendation of the manufacturerâs technical support.\nThese functions are not blocked but no end user support is provided. A detailed description is beyond the\nscope of this manual. An IT specialist can understand most of them without further description.\nThe service functions menu is accessible via the coded key press (press both keys; release one key and\npress it again; release both keys).","textLarge":false,"imageOnRight":true,"image":{"recommendedSizes":{"width":"420","height":"280"}},"imageMobile":{"recommendedSizes":{"width":"750","height":"500"}}},"id":"#271","type":"component","lock":false,"position":290},{"name":"TextBlock","data":{"text":"### **08.2.1 Debug** \nAll debug information is read only. There is no risk associated with browsing them just for curiosity.\n\n**Sensors** \nA detailed state of all sensors.\n\n**Deco model** \nThe state of the decompression model is described in detail on 5 screens (including the compartment\nsaturation graph).\n\n**Scheduler**\nThe firmware task list with information specifying the system footprint.\n\n**Variables**\nThe values of some internal variables.","textLarge":false,"imageOnRight":true,"image":{"recommendedSizes":{"width":"420","height":"280"}},"imageMobile":{"recommendedSizes":{"width":"750","height":"500"}}},"id":"#272","type":"component","lock":false,"position":291},{"name":"TextBlock","data":{"text":"### **08.2.2 Test** \n\nThere is no risk associated with performing these tests just for curiosity while on the surface.\n\n**Buttons** \nIt runs a simple test of both buttons.\n\n**Vibration** \nIt runs a short test of the vibration.\n\n**Display** \nA red, green and blue screen will be displayed for the display test.\n\n**Watchdog** \nWatchdog is a timer that is used to detect and recover from firmware malfunctions. You can intentionally\nhang the computer with this test. Do not use underwater!\n\n**Test dive** \nThe test dive is used by the manufacturer or an authorized service for the pressure sensor calibration and\ntightness test. It is similar to the gauge mode. The test dive log will be stored, but clearly marked as a test\ndive. The test dive is not included in the log summary.","textLarge":false,"imageOnRight":true,"image":{"recommendedSizes":{"width":"420","height":"280"}},"imageMobile":{"recommendedSizes":{"width":"750","height":"500"}}},"id":"#281","type":"component","lock":false,"position":292},{"name":"TextBlock","data":{"text":"### **08.2.3 Demo dive** \n\nThe test dives are suitable for those interested in a demonstration of the Divesoft Freedom features. There\nis no risk associated with the demo dive performing.\nDuring a demo dive almost all functions can be tested on the surface. One exception is the pressure sensor\nreading. Also O<sub>2</sub>
2\n sensors connected with a cable canât be used for the measured CCR dive mode.\nThe depth profile is provided and decompression gas mixtures are automatically switched. The Emergence\ndu Ressel demo dive uses the authentic depth profile from the penetration through the first siphon of this\nFrench cave.\nDemo dive logs can be permanently stored into the log memory. The oldest dive logs will be replaced by the\nnew demo dive log if the memory is full. Demo dive logs are clearly marked.\nA demo dive log, if this is the last dive, can be erased later using Demo dive â Erase demo log.\nThe single bottom-level demo dive functionality is equivalent to the dive simulation in the dive planner. See\nalso Dive planner (See section 6.1).","textLarge":false,"imageOnRight":true,"image":{"recommendedSizes":{"width":"420","height":"280"}},"imageMobile":{"recommendedSizes":{"width":"750","height":"500"}}},"id":"#273","type":"component","lock":false,"position":293},{"name":"TextBlock","data":{"text":"### **08.2.4 Syslog** \nThe system events log list. All information is read only.","textLarge":false,"imageOnRight":true,"image":{"recommendedSizes":{"width":"420","height":"280"}},"imageMobile":{"recommendedSizes":{"width":"750","height":"500"}}},"id":"#274","type":"component","lock":false,"position":294},{"name":"TextBlock","data":{"text":"### **08.2.5 Miscellaneous** \n\n<span style=\"color:red\">**Warning: These functions can alter values of internal variables or/and the state of the Divesoft Freedom.\nUse them with caution and only if you understand the consequences.**</span>\n\n\n**Force Dive Start** \nIt can be used for an extraordinary shallow dive in a place where initial submersion to a depth greater than\n1.5 m is impossible. This also can be used if the automatic dive start failed for any reason (e.g. submersion\nrecognition algorithm is confused by previous pressure changes unrelated to diving).\n\n**Force Dive End** \nIf the surface pressure (zero depth) was incorrectly detected and the computer âdivesâ while on the surface\nthen the dive can be forced to stop with this function.\n\n**Browse config** \nEvery setting can be read and changed. The majority of settings can also be changed using an ordinary\nsetup; the equivalent minimum and maximum limits for every setting will be applied. There are only few\ninternal
2configuration parameters intended for special use.\n\n**Reset deco data** \nThe residual inert gas saturation from previous dive(s) will be removed. Only use this function to give the\ncomputer to another diver whose surface interval is sufficient for a complete desaturation.\n\n**Bootloader** \nFIRMWARE UPDATE\n\n\nRestart to the bootloader mode for the firmware update or the version upgrade.\nConnect the USB cable included in distribution package to the USB port of your computer where the\n[Divesoft.Center ](https://www.divesoft.com/en/center) software is properly installed. Click on the link for further information and for the\nfirmware download.\nThe version license is fixed to the unitâs serial number and non-transferable to the other Divesoft Freedom\ncomputers.","textLarge":false,"imageOnRight":true,"image":{"recommendedSizes":{"width":"420","height":"280"}},"imageMobile":{"recommendedSizes":{"width":"750","height":"500"}}},"id":"#275","type":"component","lock":false,"position":295},{"name":"Divider","data":{"color":"darkGray"},"id":"#293","type":"component","lock":false,"position":296},{"name":"TextBlock","data":{"text":"### <span id=\"Section-09\">**Section 09: Apps**\n\n","textLarge":false,"imageOnRight":true,"image":{"recommendedSizes":{"width":"420","height":"280"}},"imageMobile":{"recommendedSizes":{"width":"750","height":"500"}}},"id":"#183","type":"component","lock":false,"position":297},{"name":"Divider","data":{"color":"darkGray"},"id":"#312","type":"component","lock":false,"position":298},{"name":"TextBlock","data":{"text":"### **09.1 Analyzer**\n\n<span style=\"color:red\">**Warning: O<sub>2</sub> sensor has to be calibrated before use! \nWarning: do not use expired or malfunctioning sensors!**</span> \n\nThe Divesoft Freedom computer can be used as a nitrox analyzer if an oxygen sensor is attached. The O<sub>2</sub>\nsensor housing can be ordered separately.\nO<sub>2</sub>\n sensors previously used in rebreather can be used, if they are still able to measure full range of oxygen\npressures in atmospheric pressure safely.","textLarge":false,"imageOnRight":true,"image":{"recommendedSizes":{"width":"420","height":"280"}},"imageMobile":{"recommendedSizes":{"width":"750","height":"500"}}},"id":"#313","type":"component","lock":false,"position":299},{"name":"TextBlock","data":{"text":"### **09.1.1 Measuring**\n\nConnect housing with O<sub>2</sub>\n sensor, start the Analyzer application and\nuse as any other nitrox analyzer.\nUse only barely audible stream of nitrox from SCUBA tank valve and\nbe sure to press housing inlet tightly.","textLarge":false,"imageOnRight":true,"image":{"recommendedSizes":{"width":"420","height":"280"}},"imageMobile":{"recommendedSizes":{"width":"750","height":"500"}}},"id":"#187","type":"component","lock":false,"position":300},{"name":"TextBlock","data":{"text":"### **09.1.2 Calibration**\n\nAnalyzer can be calibrated with air.\nPress lower key to start calibration. Confirm calibration with upper\nkey press when mV reading is stable.\nOld sensor may but may not be detected by low voltage during\ncalibration using air (see the sensor manufacturerâs datasheet).\nReliable method is to calibrate the sensor with air and then check the\nmaximum range with pure oxygen.\nRecalibrate analyzer sensor at least 24 h before measuring.\nCalibration process takes altitude (atmospheric pressure) and\ntemperature into account.\nRebreather sensor calibration has no connection with analyzer\nsensor calibration.","textLarge":false,"imageOnRight":true,"image":{"recommendedSizes":{"width":"420","height":"280"}},"imageMobile":{"recommendedSizes":{"width":"750","height":"500"}}},"id":"#184","type":"component","lock":false,"position":301},{"name":"Image","data":{"firstImage":{"mimetype":"image/png","size":26735,"hash":"0663c5ef94c0617307f407bb47bb3d7fed1e913a","id":"cl0wo8cguloz80776nvy66876","filename":"divesoft-freedom-user-manual-09-1-2.png","category":"divesoft/","type":"image"},"secondImage":{}},"id":"#146","type":"component","lock":false,"position":302},{"name":"Spacer","data":{"spacingLarge":30,"spacingSmall":20,"backgroundColor":"#ffffff"},"id":"#414","type":"component","lock":false,"position":303},{"name":"TextBlock","data":{"text":"### **9.2 USB connection** \nSwitches the computer into USB link mode for downloading dives, uploading a new license, or updating firmware.\nFreedom will report as a Mass storage device when connected by cable to a personal computer.","textLarge":false,"imageOnRight":true,"image":{"recommendedSizes":{"width":"420","height":"280"}},"imageMobile":{"recommendedSizes":{"width":"750","height":"500"}}},"id":"#144","type":"component","lock":false,"position":304},{"name":"Image","data":{"firstImage":{"mimetype":"image/jpeg","size":15764,"hash":"c0f022ad43df2fb29e3e93b5a20611d850894c7f","
2id":"cl0wo2ofbloy00776r7em225h","filename":"divesoft-freedom-user-manual-07-0-0.jpg","category":"divesoft/","type":"image"},"secondImage":{},"image":{"type":"image"}},"id":"#192","type":"component","lock":false,"position":305},{"name":"Spacer","data":{"spacingLarge":30,"spacingSmall":20,"backgroundColor":"#ffffff"},"id":"#415","type":"component","lock":false,"position":306},{"name":"TextBlock","data":{"text":"### **09.3 Emergency torch** \n brightens the entire display to the maximum and emits the maximum amount of light possible. Can be used as an emergency torch in certain conditions when all other torches have failed.\n","textLarge":false,"imageOnRight":true,"image":{"recommendedSizes":{"width":"420","height":"280"}},"imageMobile":{"recommendedSizes":{"width":"750","height":"500"}}},"id":"#277","type":"component","lock":false,"position":307},{"name":"Spacer","data":{"spacingLarge":30,"spacingSmall":20,"backgroundColor":"#ffffff"},"id":"#416","type":"component","lock":false,"position":308},{"name":"TextBlock","data":{"text":"### **09.4 Inclinometr** \nAn inclinometer is a tool for measuring the steepness of a slope. It can be used in mapping caves and wrecks. For correct and accurate operation, the computer must be well calibrated with horizontal calibration.\n\n**Games**\n\nDo not disable error messages and notifications related to decompression if the games are played during\na deco stop.\nEnsure to not accidentally reposition while playing during a dive. Check the pressure gauges on a regular\nbasis. Playing a game will reduce your attention. Remember: you want to decompress safely, not just\nachieve a higher level in the game!\nThe games were tested on children. Nobody was hurt.","textLarge":false,"imageOnRight":true,"image":{"recommendedSizes":{"width":"420","height":"280"}},"imageMobile":{"recommendedSizes":{"width":"750","height":"500"}}},"id":"#278","type":"component","lock":false,"position":309},{"name":"TextBlock","data":{"text":"### **09.5 Games**","textLarge":false,"imageOnRight":true,"image":{"recommendedSizes":{"width":"420","height":"280"}},"imageMobile":{"recommendedSizes":{"width":"750","height":"500"}}},"id":"#279","type":"component","lock":false,"position":310},{"name":"TextBlock","data":{"text":"### ** 09.5.1 Sokoban**\nSokoban is a type of transport puzzle, in which the player (a diving\nmask with snorkel) pushes tanks or crates around in a warehouse,\ntrying to get them to storage locations (red dots).\nThe game is played on a board of squares, where each square is\neither a floor or a wall. Some floor squares contain tanks, and some\nfloor squares are marked as storage locations.\nThe player is confined to the board, and may move horizontally or\nvertically onto empty squares (never through walls or boxes). The\nplayer can also move into a tank, which pushes it into the square\nbeyond. Tanks may not be pushed into other tanks or walls, and they\ncannot be pulled. The puzzle is solved when all tanks are in the\nstorage locations.","textLarge":false,"imageOnRight":true,"image":{"recommendedSizes":{"width":"420","height":"280"}},"imageMobile":{"recommendedSizes":{"width":"750","height":"500"}}},"id":"#280","type":"component","lock":false,"position":311},{"name":"Image","data":{"firstImage":{"mimetype":"image/png","size":27773,"hash":"ac6f6361fe5aa6ff462d7103a67fa69e2fe855b6","id":"cl0wobhb2lp0n0776521mmpve","filename":"divesoft-freedom-user-manual-09-2-1.png","category":"divesoft/","type":"image"},"secondImage":{},"image":{"type":"image"}},"id":"#193","type":"component","lock":false,"position":312},{"name":"Spacer","data":{"spacingLarge":30,"spacingSmall":20,"backgroundColor":"#ffffff"},"id":"#436","type":"component","lock":false,"position":313},{"name":"TextBlock","data":{"text":"### **09.5.2 Snake** \nSnake is a game where the player maneuvers a line which grows in\nlength, with the line itself being a primary obstacle.\nThe player controls the head of the snake. As it moves forward, it\nleaves a trail behind, resembling a moving snake. The snake has\na specific length. The player loses when the snake runs into the\nscreen border, a trail or another obstacle, or eats poison (skull), or\nstarves to death.\nThe snake lose its length slowly (every 30 steps), and when it is too\nshort, it dies from starvation.\nThe player attempts to eat fish by running into them with the head of\nthe snake. Each fish eaten makes the snake longer, so maneuvering becomes progressively more difficult.","textLarge":false,"imageOnRight":true,"image":{"recommendedSizes":{"width":"420","height":"280"}},"imageMobile":{"recommendedSizes":{"width":"750","height":"500"}}},"id":"#191","type":"component","lock":false,"position":314},{"name":"Image","data":{"firstImage":{"mimetype":"image/png","size":12149,"hash":"725d598b56e9a9225d1a38cdc15520f0ba4e653e","id":"cl0wocu0ulp0y0776xkfkno3c","filename":"divesoft-freedom-user-manual-09-2-2.png","category":"divesoft/","type":"image"},"secondImage":{},"image":{"type":"image"}},"id":"#349","type":"component","lock":false,"position":315},{"name":"Spacer","data":{"spacingLarge":30,"spacingSmall":20,"backgroundColor":"#ffffff"},"id":"#437","type":"component","lock":false,"position":316},{"name":"Divider","data":{"color":"darkGray"},"id":"#297","type":"component","lock":false,"position":317},{"name":"TextBlock","data":{"text":"### <span id=\"Section-10\">**Section 10: Hardware**\n","textLarge":false,"imageOnRight":true,"image":{"recommendedSizes":{"width":"420","height":"280"}},"imageMobile":{"recommendedSizes":{"width":"750","height":"500"}}},"id":"#190","type":"component","lock":false,"position":318},{"name":"Divider","data":{"color":"darkGray"},"id":"#314","type":"component","lock":false,"position":319},{"name":"TextBlock","data":{"text":"### **10.1 Charging**\n\nUse the included USB charging cable with Freedom connector to charge your Freedom computer. First c
2onnect the cable to your Freedom computer and subsequently connect the cable to a suitable power adapter (5V, 1A). Make sure the adapter is approved and certified for the area where you will be charging the Freedom and is suitable for use with the local power grid.\nThe Freedomâs connector is situated between the buttons. If the connector is protected by the lid, then\nunscrew the connector lid before attaching the cable.\nThe computer may or may not be switched on during charging. If the computer is switched on, then the icon\nin the top-right corner on the surface screen indicates the state of charge.","textLarge":false,"imageOnRight":true,"image":{"recommendedSizes":{"width":"420","height":"280"}},"imageMobile":{"recommendedSizes":{"width":"750","height":"500"}}},"id":"#315","type":"component","lock":false,"position":320},{"name":"TextBlock","data":{"text":"**WARNING: It is absolutely crucial to follow the cable connection procedure. The charging/data cable must first be plugged into the Freedom and then into the adapter and power outlet.\nFailure to follow this procedure may cause irreversible damage to the device. **","textLarge":false,"imageOnRight":true,"image":{"recommendedSizes":{"width":"420","height":"280"}},"imageMobile":{"recommendedSizes":{"width":"750","height":"500"}}},"id":"#433","type":"component","lock":false,"position":321},{"name":"TextBlock","data":{"text":"It takes about 5 hours to charge from near empty state to fully charged.\nMaximum charging current is less than 500 mA, so there is no difference between charging using the\ncharger or charging from an ordinary computer USB port.\nCharge the battery at least once every six months.","textLarge":false,"imageOnRight":true,"image":{"recommendedSizes":{"width":"420","height":"280"}},"imageMobile":{"recommendedSizes":{"width":"750","height":"500"}}},"id":"#196","type":"component","lock":false,"position":322},{"name":"TextBlock","data":{"text":"### **10.1.1 Powering in hyperbaric environment** \nThe Divesoft Freedom cannot be powered externally and recharged during a dive (e.g. in hyperbaric\nchamber, in diving bell or mounted on ROV) without a special setting which is available only on request. The\nunit must be individually tested prior to such use.\n","textLarge":false,"imageOnRight":true,"image":{"recommendedSizes":{"width":"420","height":"280"}},"imageMobile":{"recommendedSizes":{"width":"750","height":"500"}}},"id":"#284","type":"component","lock":false,"position":323},{"name":"TextBlock","data":{"text":"### **10.2 Wrist mount**\n\nIf you prefer a strap, pass the strap under the bars. Use the Velcro on the strap to tighten.\nIf you prefer a bungee, then remove the screws holding the bars using a Torx screwdriver (T 20 size). Donât\nuse any other tool; screw heads are easily damaged.\nIf you want to use a silicon protective sleeve, install it before installing the bungee. It is not possible to\ninstall the sleeve on the computer with bungee already installed.\nPass the bungee through the threaded holes and secure with a knot. There is a special thread inside the\nholes which does not damage the bungee.\nUse a small flame to melt the braid of the bungee and make a tip on the end of it for easier pass-through.\nBoth the strap and bungee are included.\nIn any case, the opening on the back of the computer must remain freely accessible. When you mount the\ncomputer directly on bare skin avoid closing the opening. The pressure sensor is located there.","textLarge":false,"imageOnRight":true,"image":{"recommendedSizes":{"width":"420","height":"280"}},"imageMobile":{"recommendedSizes":{"width":"750","height":"500"}}},"id":"#285","type":"component","lock":false,"position":324},{"name":"TextBlock","data":{"text":"### **10.3 Control elements**\n\nThe following inputs and combinations thereof are differentiated: \n⢠Press upper key \n⢠Press lower key \n⢠Press both keys \n⢠Long press upper key \n⢠Long press lower key \n⢠Long press both keys \n⢠Coded key press (press\nboth keys, then release one\nkey and press it again, then\nrelease both keys) \n⢠Tilt away from yourself \n⢠Tilt toward yourself \n⢠Tilt to the left \n⢠Tilt to the right \n⢠Tap the display glass \n⢠Shine a light on the display ","textLarge":false,"imageOnRight":true,"image":{"recommendedSizes":{"width":"420","height":"280"}},"imageMobile":{"recommendedSizes":{"width":"750","height":"500"}}},"id":"#286","type":"component","lock":false,"position":325},{"name":"Image","data":{"firstImage":{"mimetype":"image/png","size":179299,"hash":"cecabe7686f85d00fba0814a71a72d624f2e56ee","id":"cl0woe1sxlp1507761e0pkwp3","filename":"divesoft-freedom-user-manual-10-3-0.png","category":"divesoft/","type":"image"},"secondImage":{},"image":{"type":"image"}},"id":"#197","type":"component","lock":false,"position":326},{"name":"Spacer","data":{"spacingLarge":30,"spacingSmall":20,"backgroundColor":"#ffffff"},"id":"#419","type":"component","lock":false,"position":327}
2,{"name":"TextBlock","data":{"text":"âLong pressâ means pressing the key for more than 2.5 seconds. The key-press operation is terminated at\nthe moment the key is released or, in case of pressing both keys, when the last key is released.\nThe upper/lower keys and directions of tilting are determined by the display orientation, depending on\nwhether it is set up for the left or right hand.\nTilting can be changed in the configuration to tapping on the computer body from any of the four sides.\nNote: Perform the Horizontal calibration (See section 4.8) if there is no valid response to tilting or tapping","textLarge":false,"imageOnRight":true,"image":{"recommendedSizes":{"width":"420","height":"280"}},"imageMobile":{"recommendedSizes":{"width":"750","height":"500"}}},"id":"#198","type":"component","lock":false,"position":328},{"name":"TextBlock","data":{"text":"### **10.4 Physical dimensions**","textLarge":false,"imageOnRight":true,"image":{"recommendedSizes":{"width":"420","height":"280"}},"imageMobile":{"recommendedSizes":{"width":"750","height":"500"}}},"id":"#204","type":"component","lock":false,"position":329},{"name":"Image","data":{"firstImage":{"mimetype":"image/jpeg","size":43464,"hash":"d66f469bd51a878643596845475651ef0a19fa54","id":"cl0woev6xlp1c077662izhxlp","filename":"divesoft-freedom-user-manual-10-4-0.jpg","category":"divesoft/","type":"image"},"secondImage":{},"image":{"type":"image"}},"id":"#202","type":"component","lock":false,"position":330},{"name":"Spacer","data":{"spacingLarge":30,"spacingSmall":20,"backgroundColor":"#ffffff"},"id":"#418","type":"component","lock":false,"position":331},{"name":"TextBlock","data":{"text":"### **10.5 O<sub>2</sub> sensor cable** \nThe cable equipped with the Molex connectors is included in the\nClosed Circuit version of the Divesoft Freedom distribution package\nor can be ordered separately.\nThe technical design of the connections on a specific type of\nrebreather is not the subject of this user manual.","textLarge":false,"imageOnRight":true,"image":{"recommendedSizes":{"width":"420","height":"280"}},"imageMobile":{"recommendedSizes":{"width":"750","height":"500"}}},"id":"#206","type":"component","lock":false,"position":332},{"name":"Image","data":{"firstImage":{"mimetype":"image/jpeg","size":54835,"hash":"5c7c754632d5277ca8b098d94e0e6848b5acbf93","id":"cl0wlu8cxlohw0776d45v81mp","filename":"divesoft-freedom-user-manual-03-4-a.jpg","category":"divesoft/","type":"image"},"secondImage":{}},"id":"#203","type":"component","lock":false,"position":333},{"name":"TextBlock","data":{"text":"Recommendation: if you are connecting an O2 sensor cable, it is advisable to plug it into the Freedom computer first and then into the oxygen sensors, although this is not always possible.","textLarge":false,"imageOnRight":true,"image":{"recommendedSizes":{"width":"420","height":"280"}},"imageMobile":{"recommendedSizes":{"width":"750","height":"500"}}},"id":"#435","type":"component","lock":false,"position":334},{"name":"Spacer","data":{"spacingLarge":30,"spacingSmall":20,"backgroundColor":"#ffffff"},"id":"#420","type":"component","lock":false,"position":335},{"name":"TextBlock","data":{"text":"### **10.6 Environmental specifications**\n\n**Recommended operating conditions** \nRecommended operating temperature range: 0 °C to 40 °C (32 °F to 104 °F)\n\n**Maximum operating conditions** \nPermitted short term operating temperature range: -10 °C to 45 °C (14°F to 113 °F)\nConsider the reduced battery capacity at low temperatures.\n\n**Long term storage conditions** \nStorage temperature range: 10 °C to 35 °C (50°F to 95°F)\nDonât expose to direct sunlight","textLarge":false,"imageOnRight":true,"image":{"recommendedSizes":{"width":"420","height":"280"}},"imageMobile":{"recommendedSizes":{"width":"750","height":"500"}}},"id":"#207","type":"component","lock":false,"position":336},{"name":"TextBlock","data":{"text":"### **10.7 Compliance**\n### **10.7.1 CE marking** \nDivesoft s.r.o. hereby declares that the Divesoft Freedom is in compliance with the essential requirements\nand other relevant provisions of Directive 1999/5/EC.\n","textLarge":false,"imageOnRight":true,"image":{"recommendedSizes":{"width":"420","height":"280"}},"imageMobile":{"recommendedSizes":{"width":"750","height":"500"}}},"id":"#287","type":"component","lock":false,"position":337},{"name":"TextBlock","data":{"text":"### **10.7.2 EN 13319** \nIndependent conformity assessment was performed to the harmodized Europian depth gauge standard\nEN 13319:2000.","textLarge":false,"imageOnRight":true,"image":{"recommendedSizes":{"width":"420","height":"280"}},"imageMobile":{"recommendedSizes":{"width":"750","height":"500"}}},"id":"#288","type":"component","lock":false,"position":338},{"name":"TextBlock","data":{"text":"### **10.7.3 FCC compliance** \nThis device complies with Part 15 of the FCC Rules. Operation is subject to the following two conditions:\n(1) this device may not cause harmful interference, and (2) this device must accept any interference\nreceived, including interference that may cause undesired operation.","textLarge":false,"imageOnRight":true,"image":{"recommendedSizes":{"width":"420","height":"280"}},"imageMobile":{"recommendedSizes":{"width":"750","height":"500"}}},"id":"#289","type":"component","lock":false,"position":339},{"name":"TextBlock","data":{"text":"### **10.7.4 Industry Canada (IC)** Compliance Notice\nThis device complies with Industry Canada license-exempt RSS standard(s). Operation is subject to the\nfollowing two conditions: (1) this device may not cause interference, and (2) this device must accept any\ninterference, including interference that may cause undesired operation of the device.\nThis Class B digital apparatus complies with Canadian ICES-003.","textLarge":false,"imageOnRight":true,"image":{"recommendedSizes":{"width":"420","height":"280"}},"imageMobile":{"recommendedSizes":{"width":"750","height":"500"}}},"id":"#290","type":"component","lock":false,"position":340},{"name":"TextBlock","data":{"text":"### **10.8 Disposal of waste equipment**\n\n**Users in private households in the European Union**\nThis symbol on the product and accompanying documents means\nthat used electrical and electronic products should not be mixed\nwith general household waste. For proper treatment, recovery and\nrecycling, please take these products to designated collection points\nwhere they will be accepted free of charge. Alternatively, in some\ncountries you may be able to return your products to your local\nretailer upon purchase of an equivalent new product.\nDisposing of this product correctly will help save valuable resources\nand prevent any potential negative effects on human health and the\nenvironment, which could otherwise arise from inappropriate waste\nhandling.","textLarge":false,"imageOnRight":true,"image":{"recommendedSizes":{"width":"420","height":"280"}},"imageMobile":{"recommendedSizes":{"width":"750","height":"500"}}},"id":"#291","type":"component","lock":false,"position":341},{"name":"Image","data":{"firstImage":{"mimetype":"image/jpeg","size":7161,"hash":"42b1a6590e85f253df00785e1f92621d698696d8","id":"cl0wohasrlp1k0776lfm12lj3","filename":"divesoft-freedom-user-manual-10-8-0.jpg","category":"divesoft/","type":"image"},"secondImage":{},"image":{"type":"image"}},"id":"#200","type":"component","lock":false,"position":342},{"name":"TextBlock","data":{"text":"**For business users in the European Union** \nIf you wish to discard electrical and electronic equipment, please contact your dealer or supplier for further\ninformation.\n\n**Information on Disposal in other Countries outside the European Union** \nThis symbol is only valid in the European Union. If you wish to discard this product please contact your local\nauthorities or dealer and ask for the correct method of disposal","textLarge":false,"imageOnRight":true,"image":{"recommendedSizes":{"width":"420","height":"280"}},"imageMobile":{"recommendedSizes":{"width":"750","height":"500"}}},"id":"#112","type":"component","lock":false,"position":343},{"name":"Footer","data":{"copyrights":"Copyright © 2019 Divesoft LLC All rights reserved.","facebookUrl":"","youtubeUrl":"","instagramUrl":"","contacts":"**Divesoft, s.r.o.** Hálkova 2495 413 01 Roudnice nad Labem Äeská republika Tel.: +420 416 857 057 E-mail: [email protected]"},"id":"#1","type":"component","lock":false,"position":344},{"name":"Spacer","data":{"spacingLarge":30,"spacingSmall":20,"backgroundColor":"#ffffff"},"id":"#410","type":"component","lock":false,"position":345},{"name":"Spacer","data":{"spacingLarge":30,"spacingSmall":20,"backgroundColor":"#ffffff"},"id":"#417","type":"component","lock":false,"position":346}],"id":"root","idBuffer":"#438","lastCommit":"4277a97a-7cad-46cd-a620-7b237a2e2c8e"}},"annotations":[],"language":{"type":"id","generated":false,"id":"Language:cjv3kwvoj000u083611381c6o","typename":"Language"},"__typename":"PageTranslation"},"Page:cljh5dijh9q0l0835t4bdfam7":{"id":"cljh5dijh9q0l0835t4bdfam7","type":{"type":"id","generated":false,"id":"PageType:cjv3l213x004f08366hjufttp","typename":"PageType"},"tags":[],"translations({\"where\":{\"language\":{\"id\":\"cjv3kwvoj000u083611381c6o\"}}})":[{"type":"id","generated":false,"id":"PageTranslation:cljh5dik09q0s0835jmfu5sp3","typename":"PageTranslation"}],"__typename":"Page"},"PageTranslation:cljh5dik09q0s0835jmfu5sp3":{"id":"cljh5dik09q0s0835jmfu5sp3","name":"Analyzer Solo Quick reference","createdAt":"2023-06-29T12:54:24.048Z","content":{"type":"json","json":{"content":[{"name":"Header","data":{"products":[{"title":"Accessories","description":"Backplates, Consumables. Tanks.","img":{"recommendedSizes":{"width":"235","height":"235"}},"url":""},{"title":"Accessories sets","description":"Protection, maintenance, cleaning.","img":{"recommendedSizes":{"width":"235","height":"235"}},"url":""},{"title":"Spare parts","description":"Spare parts and components.","img":{"recommendedSizes":{"width":"235","height":"235"}},"url":""}
2,{"title":"Spare parts kits","description":"Completly Liberty spare parts kits.","img":{"recommendedSizes":{"width":"235","height":"235"}},"url":""}]},"id":"#0","type":"component","lock":false,"position":0},{"name":"ProductShowcase","data":{"backgroundColor":"#ffffff","isTextDark":true,"isImageRight":true,"image":{"mimetype":"image/png","size":2484040,"hash":"55856afc16538afd3ff513c08b98a1a9886e1706","id":"ckm4li2dcb37r07764e2ol0x9","filename":"divesoft-analyzer-solo.png","category":"divesoft/","type":"image"},"imageMobile":{},"title":"Quick reference","subtitle":"Analyzer SOLO","description":"version 2022/02/02 \n\n#8300","hideDescriptionOnMobile":false,"areButtons":false,"firstTitle":"Learn more >","firstUrl":"","secondTitle":"Configurator >","secondUrl":""},"id":"#2","type":"component","lock":false,"position":1},{"name":"TextBlock","data":{"text":"This quick manual serves just for quick familiarization with Divesoft analyzer. \nWe strongly recommend studying of the complete manual, which you can find in support section of our web site divesoft.com","textLarge":false,"imageOnRight":true,"image":{"recommendedSizes":{"width":"420","height":"280"}},"imageMobile":{"recommendedSizes":{"width":"750","height":"500"}}},"id":"#3","type":"component","lock":false,"position":2},{"name":"Divider","data":{"color":"darkGray"},"id":"#20","type":"component","lock":false,"position":3},{"name":"Image","data":{"firstImage":{"mimetype":"image/png","size":337036,"hash":"c0022000e33f111119dfd3d39f5be69d36a22092","id":"ckycvc5u8rf8j0776qkzz9a30","filename":"8302-divesoft-analyzer-solo-o2-qr01.png","category":"divesoft/","type":"image"},"secondImage":{},"image":{"type":"image"}},"id":"#26","type":"component","lock":false,"position":4},{"name":"Divider","data":{"color":"darkGray"},"id":"#5","type":"component","lock":false,"position":5},{"name":"TextBlock","data":{"text":"**ANALYZER OPERATION** \n**ON/OFF** â activation/deactivation. Press for approximately one second. Upon activation, an automatic check of the instrument is performed and the analyzer automatically switches to the measuring mode. \nThe **MENU** key displays the available options. The menu changes in individual measuring modes, depending on the functions relevant to the applicable mode. Shift/move the cursor to the left while editing/changing the values. \n**OK** is used to enter the selected menu item, confirm a changed value or perform the prepared action. The selected menu item can also be called up by repeatedly pressing the MENU key. \n**ESC** is used to exit the menu or return from the value-editing mode without saving the changed value. \nThe **UP** and **DOWN** arrow keys are used to browse the menu or change the value of a number above the cursor. \n**MODE** key used to change the display layout during gas analysis. Also, shift/move the cursor to the right while editing/changing values. \n**CAL** starts the calibration process of the O2 sensor. Other functions of the keys are described in the relevant chapters of the complete manual.","textLarge":false,"imageOnRight":true,"image":{"recommendedSizes":{"width":"420","height":"280"}},"imageMobile":{"recommendedSizes":{"width":"750","height":"500"}}},"id":"#4","type":"component","lock":false,"position":6},{"name":"Divider","data":{"color":"darkGray"},"id":"#24","type":"component","lock":false,"position":7},{"name":"TextBlock","data":{"text":"**ACTIVATION** \nPress the **ON/OFF** key for at least one second.","textLarge":false,"imageOnRight":true,"image":{"recommendedSizes":{"width":"420","height":"280"}},"imageMobile":{"recommendedSizes":{"width":"750","height":"500"}}},"id":"#8","type":"component","lock":false,"position":8},{"name":"Divider","data":{"color":"darkGray"},"id":"#19","type":"component","lock":false,"position":9},{"name":"Image","data":{"firstImage":{"mimetype":"image/png","size":48453,"hash":"21087ec4716565868865a78e8aa4a33ed8c2f553","id":"ckycvcqusrf910776gfmz1er6","filename":"8302-divesoft-analyzer-solo-o2-qr02.png","category":"divesoft/","type":"image"},"secondImage":{},"image":{"type":"image"}},"id":"#27","type":"component","lock":false,"position":10},{"name":"Divider","data":{"color":"darkGray"},"id":"#23","type":"component","lock":false,"position":11},{"name":"TextBlock","data":{"text":"**CALIBRATION** \nThe Divesoft analyzer allows up to three\u0002point calibration for highly accurate measurements. One-point calibration is described here. See the full manual for two and three point calibration. \n1. Press **CAL** \n2. Choose â1 point cal.â (**OK**) \n3. Confirm âair valueâ (**OK**) \n4. When âSTABLEâ shows on display, confirm the value by pressing the âOKâkey. Device will automatically switch to gas analysis mode.","textLarge":false,"imageOnRight":true,"image":{"recommendedSizes":{"width":"420","height":"280"}},"imageMobile":{"recommendedSizes":{"width":"750","height":"500"}}},"id":"#6","type":"component","lock":false,"position":12},{"name":"Divider","data":{"color":"darkGray"},"id":"#22","type":"component","lock":false,"position":13},{"name":"TextBlock","data":{"text":"**MEASURING** \n**NOTICE: The analyzer must be calibrated\nbefore its initial use.** \n1. Attach the sampler to the compressed gas bottle and use the hose to connect it to the analyzer. \n2. Open the valve on the bottle. \n3. The gas composition is displayed after approximately 5â10 seconds. \n4. Scroll with the MODE key for more information. \n5. With the OK key, you can suspend and, by pressing it again, resume measuring. \n6. When the measuring is completed, close the valve on the tank and by loosening the discharge valve (generally 1/2 turn suffices) discharge the excess pressure of the gas so that the flow limiter can be unscrewed from the tank valve.","textLarge":false,"imageOnRight":true,"image":{"recommendedSizes":{"width":"420","height":"280"}},"imageMobile":{"recommendedSizes":{"width":"750","height":"500"}}},"id":"#12","type":"component","lock":false,"position":14},{"name":"Divider","data":{"color":"darkGray"},"id":"#16","type":"component","lock":false,"position":15}
2,{"name":"TextBlock","data":{"text":"**DEACTIVATION** \nSwitch off by pressing the **ON/OFF** key for one second.","textLarge":false,"imageOnRight":true,"image":{"recommendedSizes":{"width":"420","height":"280"}},"imageMobile":{"recommendedSizes":{"width":"750","height":"500"}}},"id":"#11","type":"component","lock":false,"position":16},{"name":"Footer","data":{"copyrights":"Copyright © 2019 Divesoft LLC All rights reserved.","facebookUrl":{"urlNewWindow":true,"url":"https://www.facebook.com/divesoft/"},"youtubeUrl":{"url":"https://www.youtube.com/channel/UCHI2-kHmfoUlAdhQXPKl8lA/featured","urlNewWindow":true},"instagramUrl":{"url":"https://www.instagram.com/divesoft/","urlNewWindow":true},"contacts":"**Divesoft s.r.o.** \nHálkova 2495 \n413 01 Roudnice nad Labem \nCzech Republic \nTel.: +420 416 857 057 \nE-mail: [email protected]","twitterUrl":{"url":"https://twitter.com/divesoft","urlNewWindow":true}},"id":"#1","type":"component","lock":false,"position":17}],"id":"root","idBuffer":"#28","lastCommit":"3459eab0-90f8-4c4c-93c3-6db3a78b1744"}},"annotations":[],"language":{"type":"id","generated":false,"id":"Language:cjv3kwvoj000u083611381c6o","typename":"Language"},"__typename":"PageTranslation"},"Page:cljh5ki1y9q1p0835lp0f4qak":{"id":"cljh5ki1y9q1p0835lp0f4qak","type":{"type":"id","generated":false,"id":"PageType:cjv3l213x004f08366hjufttp","typename":"PageType"},"tags":[],"translations({\"where\":{\"language\":{\"id\":\"cjv3kwvoj000u083611381c6o\"}}})":[{"type":"id","generated":false,"id":"PageTranslation:cljh5ki2n9q1w0835mg73tdgf","typename":"PageTranslation"}],"__typename":"Page"},"PageTranslation:cljh5ki2n9q1w0835mg73tdgf":{"id":"cljh5ki2n9q1w0835mg73tdgf","name":"Analyzer Solo O2 Quick reference","createdAt":"2023-06-29T12:59:50.015Z","content":{"type":"json","json":{"content":[{"name":"Header","data":{"products":[{"title":"Accessories","description":"Backplates, Consumables. Tanks.","img":{"recommendedSizes":{"width":"235","height":"235"}},"url":""},{"title":"Accessories sets","description":"Protection, maintenance, cleaning.","img":{"recommendedSizes":{"width":"235","height":"235"}},"url":""},{"title":"Spare parts","description":"Spare parts and components.","img":{"recommendedSizes":{"width":"235","height":"235"}},"url":""},{"title":"Spare parts kits","description":"Completly Liberty spare parts kits.","img":{"recommendedSizes":{"width":"235","height":"235"}},"url":""}]},"id":"#0","type":"component","lock":false,"position":0},{"name":"ProductShowcase","data":{"backgroundColor":"#ffffff","isTextDark":true,"isImageRight":true,"image":{"mimetype":"image/png","size":274302,"hash":"8fa1f1400e1916d0efe7ce00329e405fb32ef028","id":"ckyslvk89wxk80776fw45stch","filename":"8302-divesoft-analyzer-solo-o2-p-01-1080x1080-w.png","category":"divesoft/","type":"image"},"imageMobile":{},"title":"Quick reference","subtitle":"Analyzer SOLO O2","description":"version 2022/02/02 \n\n#8302","hideDescriptionOnMobile":false,"areButtons":false,"firstTitle":"Learn more >","firstUrl":"","secondTitle":"Configurator >","secondUrl":""},"id":"#2","type":"component","lock":false,"position":1},{"name":"TextBlock","data":{"text":"This quick manual serves just for quick familiarization with Divesoft analyzer. \nWe strongly recommend studying of the complete manual, which you can find in support section of our web site divesoft.com","textLarge":false,"imageOnRight":true,"image":{"recommendedSizes":{"width":"420","height":"280"}},"imageMobile":{"recommendedSizes":{"width":"750","height":"500"}}},"id":"#3","type":"component","lock":false,"position":2},{"name":"Divider","data":{"color":"darkGray"},"id":"#20","type":"component","lock":false,"position":3},{"name":"Image","data":{"firstImage":{"mimetype":"image/png","size":337036,"hash":"c0022000e33f111119dfd3d39f5be69d36a22092","id":"ckycvc5u8rf8j0776qkzz9a30","filename":"8302-divesoft-analyzer-solo-o2-qr01.png","category":"divesoft/","type":"image"},"secondImage":{},"image":{"type":"image"}},"id":"#26","type":"component","lock":false,"position":4},{"name":"Divider","data":{"color":"darkGray"},"id":"#5","type":"component","lock":false,"position":5}
2,{"name":"TextBlock","data":{"text":"**ANALYZER OPERATION** \n**ON/OFF** â activation/deactivation. Press for approximately one second. Upon activation, an automatic check of the instrument is performed and the analyzer automatically switches to the measuring mode. \nThe **MENU** key displays the available options. The menu changes in individual measuring modes, depending on the functions relevant to the applicable mode. Shift/move the cursor to the left while editing/changing the values. \n**OK** is used to enter the selected menu item, confirm a changed value or perform the prepared action. The selected menu item can also be called up by repeatedly pressing the MENU key. \n**ESC** is used to exit the menu or return from the value-editing mode without saving the changed value. \nThe **UP** and **DOWN** arrow keys are used to browse the menu or change the value of a number above the cursor. \n**MODE** key used to change the display layout during gas analysis. Also, shift/move the cursor to the right while editing/changing values. \n**CAL** starts the calibration process of the O2 sensor. Other functions of the keys are described in the relevant chapters of the complete manual.","textLarge":false,"imageOnRight":true,"image":{"recommendedSizes":{"width":"420","height":"280"}},"imageMobile":{"recommendedSizes":{"width":"750","height":"500"}}},"id":"#4","type":"component","lock":false,"position":6},{"name":"Divider","data":{"color":"darkGray"},"id":"#24","type":"component","lock":false,"position":7},{"name":"TextBlock","data":{"text":"**ACTIVATION** \nPress the **ON/OFF** key for at least one second.","textLarge":false,"imageOnRight":true,"image":{"recommendedSizes":{"width":"420","height":"280"}},"imageMobile":{"recommendedSizes":{"width":"750","height":"500"}}},"id":"#8","type":"component","lock":false,"position":8},{"name":"Divider","data":{"color":"darkGray"},"id":"#19","type":"component","lock":false,"position":9},{"name":"Image","data":{"firstImage":{"mimetype":"image/png","size":48453,"hash":"21087ec4716565868865a78e8aa4a33ed8c2f553","id":"ckycvcqusrf910776gfmz1er6","filename":"8302-divesoft-analyzer-solo-o2-qr02.png","category":"divesoft/","type":"image"},"secondImage":{},"image":{"type":"image"}},"id":"#27","type":"component","lock":false,"position":10},{"name":"Divider","data":{"color":"darkGray"},"id":"#23","type":"component","lock":false,"position":11},{"name":"TextBlock","data":{"text":"**CALIBRATION** \nThe Divesoft analyzer allows up to three\u0002point calibration for highly accurate measurements. One-point calibration is described here. See the full manual for two and three point calibration. \n1. Press **CAL** \n2. Choose â1 point cal.â (**OK**) \n3. Confirm âair valueâ (**OK**) \n4. When âSTABLEâ shows on display, confirm the value by pressing the âOKâkey. Device will automatically switch to gas analysis mode.","textLarge":false,"imageOnRight":true,"image":{"recommendedSizes":{"width":"420","height":"280"}},"imageMobile":{"recommendedSizes":{"width":"750","height":"500"}}},"id":"#6","type":"component","lock":false,"position":12},{"name":"Divider","data":{"color":"darkGray"},"id":"#22","type":"component","lock":false,"position":13},{"name":"TextBlock","data":{"text":"**MEASURING** \n**NOTICE: The analyzer must be calibrated\nbefore its initial use.** \n1. Attach the sampler to the compressed gas bottle and use the hose to connect it to the analyzer. \n2. Open the valve on the bottle. \n3. The gas composition is displayed after approximately 5â10 seconds. \n4. Scroll with the MODE key for more information. \n5. With the OK key, you can suspend and, by pressing it again, resume measuring. \n6. When the measuring is completed, close the valve on the tank and by loosening the discharge valve (generally 1/2 turn suffices) discharge the excess pressure of the gas so that the flow limiter can be unscrewed from the tank valve.","textLarge":false,"imageOnRight":true,"image":{"recommendedSizes":{"width":"420","height":"280"}},"imageMobile":{"recommendedSizes":{"width":"750","height":"500"}}},"id":"#12","type":"component","lock":false,"position":14},{"name":"Divider","data":{"color":"darkGray"},"id":"#16","type":"component","lock":false,"position":15}
2,{"name":"TextBlock","data":{"text":"**DEACTIVATION** \nSwitch off by pressing the **ON/OFF** key for one second.","textLarge":false,"imageOnRight":true,"image":{"recommendedSizes":{"width":"420","height":"280"}},"imageMobile":{"recommendedSizes":{"width":"750","height":"500"}}},"id":"#11","type":"component","lock":false,"position":16},{"name":"Footer","data":{"copyrights":"Copyright © 2019 Divesoft LLC All rights reserved.","facebookUrl":{"urlNewWindow":true,"url":"https://www.facebook.com/divesoft/"},"youtubeUrl":{"url":"https://www.youtube.com/channel/UCHI2-kHmfoUlAdhQXPKl8lA/featured","urlNewWindow":true},"instagramUrl":{"url":"https://www.instagram.com/divesoft/","urlNewWindow":true},"contacts":"**Divesoft s.r.o.** \nHálkova 2495 \n413 01 Roudnice nad Labem \nCzech Republic \nTel.: +420 416 857 057 \nE-mail: [email protected]","twitterUrl":{"url":"https://twitter.com/divesoft","urlNewWindow":true}},"id":"#1","type":"component","lock":false,"position":17}],"id":"root","idBuffer":"#28","lastCommit":"d82ec1da-1eec-41c4-b9ae-6bc932707228"}},"annotations":[],"language":{"type":"id","generated":false,"id":"Language:cjv3kwvoj000u083611381c6o","typename":"Language"},"__typename":"PageTranslation"},"Page:clloxy7n3708p0735122lbaxh":{"id":"clloxy7n3708p0735122lbaxh","type":{"type":"id","generated":false,"id":"PageType:cjv3l213x004f08366hjufttp","typename":"PageType"},"tags":[],"translations({\"where\":{\"language\":{\"id\":\"cjv3kwvoj000u083611381c6o\"}}})":[{"type":"id","generated":false,"id":"PageTranslation:clloxy7nn708w07352zabs5ta","typename":"PageTranslation"}],"__typename":"Page"},"PageTranslation:clloxy7nn708w07352zabs5ta":{"id":"clloxy7nn708w07352zabs5ta","name":"Professional flow limiter Mk2","createdAt":"2023-08-24T09:08:06.851Z","content":{"type":"json","json":{"content":[{"name":"Header","data":{"products":[{"title":"Accessories","description":"Backplates, Consumables. Tanks.","img":{"recommendedSizes":{"width":"235","height":"235"}},"url":""},{"title":"Accessories sets","description":"Protection, maintenance, cleaning.","img":{"recommendedSizes":{"width":"235","height":"235"}},"url":""},{"title":"Spare parts","description":"Spare parts and components.","img":{"recommendedSizes":{"width":"235","height":"235"}},"url":""},{"title":"Spare parts kits","description":"Completly Liberty spare parts kits.","img":{"recommendedSizes":{"width":"235","height":"235"}},"url":""}]},"id":"#0","type":"component","lock":false,"position":0},{"name":"SectionDivider","data":{"title":"Quick reference","skipToC":false},"id":"#28","type":"component","lock":false,"position":1},{"name":"ProductShowcase","data":{"backgroundColor":"#ffffff","isTextDark":true,"isImageRight":true,"image":{"mimetype":"image/png","size":199753,"hash":"b82668c297a478bb9d30067bcfcee4cad8076a7a","id":"cl7zvqrj3doj70776l9hr3oz2","filename":"8437-divesoft-professional-flow-limiter-mk2-02w.png","category":"divesoft/","type":"image"},"imageMobile":{},"title":"Quick reference","subtitle":"Professional flow limiter Mk2","description":"version 2025/02 \n\n#8437, #8447, #8437","hideDescriptionOnMobile":false,"areButtons":false,"firstTitle":"Learn more >","firstUrl":"","secondTitle":"Configurator >","secondUrl":""},"id":"#2","type":"component","lock":false,"position":2},{"name":"Divider","data":{"color":"darkGray"},"id":"#24","type":"component","lock":false,"position":3},{"name":"SectionDivider","data":{"title":"Operating instructions","skipToC":false},"id":"#29","type":"component","lock":false,"position":4},{"name":"TextBlock","data":{"text":"1. Connect the Professional Flow Limiter Mk2 to the fitting of your cylinder valve. Stay in a safe direction. Do not stand in the direction of the gas flow.\n\n2. For the first use, or after the nozzle has been turned clockwise to a hard stop, turn the gas sampling nozzle counterclockwise several turns to ensure it is not in the bleed position. \n\n3. Slowly open the cylinder valve. Gas should be flowing through the device, you may not hear it once the hose is attached. Correct flow rate is 0.2-0.4 lpm.\n\n4. Connect your analyzer to the gas sampling nozzle via the C
2onnection hose #8009 (not included). If the hose pops off the nozzle is in the bleed position. \n\n5. Take your measurements.\n\n6. Close the cylinder valve.\n\n7. Turn the gas sampling nozzle clockwise to vent the remaining gas from the device.*\n\n8. Turn the gas sampling nozzle counterclockwise ¼ - ½ turn to return it to a sampling position for the next use. \n\n9. Disconnect the device from cylinder valve.\n\n*It is not necessary to turn the nozzle clockwise to a hard stop, doing so will completely halt flow if desired.","textLarge":false,"imageOnRight":true,"image":{"recommendedSizes":{"width":"420","height":"280"}},"imageMobile":{"recommendedSizes":{"width":"750","height":"500"}}},"id":"#8","type":"component","lock":false,"position":5},{"name":"Divider","data":{"color":"darkGray"},"id":"#23","type":"component","lock":false,"position":6},{"name":"Footer","data":{"copyrights":"Copyright © 2019 Divesoft LLC All rights reserved.","facebookUrl":{"urlNewWindow":true,"url":"https://www.facebook.com/divesoft/"},"youtubeUrl":{"url":"https://www.youtube.com/channel/UCHI2-kHmfoUlAdhQXPKl8lA/featured","urlNewWindow":true},"instagramUrl":{"url":"https://www.instagram.com/divesoft/","urlNewWindow":true},"contacts":"**Divesoft s.r.o.** \nHálkova 2495 \n413 01 Roudnice nad Labem \nCzech Republic \nTel.: +420 416 857 057 \nE-mail: [email protected]","twitterUrl":{"url":"https://twitter.com/divesoft","urlNewWindow":true}},"id":"#1","type":"component","lock":false,"position":7}],"id":"root","idBuffer":"#30","lastCommit":"b6fde235-f25d-4879-a363-bf86140999b6"}},"annotations":[],"language":{"type":"id","generated":false,"id":"Language:cjv3kwvoj000u083611381c6o","typename":"Language"},"__typename":"PageTranslation"},"Page:clmeyb3r19lwj0735yt504zs0":{"id":"clmeyb3r19lwj0735yt504zs0","type":{"type":"id","generated":false,"id":"PageType:cjv3l213x004f08366hjufttp","typename":"PageType"},"tags":[{"type":"id","generated":false,"id":"Tag:cjv3szrcv01bz0836yo8myb0r","typename":"Tag"},{"type":"id","generated":false,"id":"Tag:cm5ww0t651b710803pcl02cn4","typename":"Tag"}],"translations({\"where\":{\"language\":{\"id\":\"cjv3kwvoj000u083611381c6o\"}}})":[{"type":"id","generated":false,"id":"PageTranslation:clmeyb3rc9lwq0735wnimfgep","typename":"PageTranslation"}],"__typename":"Page"},"PageTranslation:clmeyb3rc9lwq0735wnimfgep":{"id":"clmeyb3rc9lwq0735wnimfgep","name":"divesoft.blog / My Story of Finding a Submarine in the Shetlands","createdAt":"2023-09-11T14:00:08.904Z","content":{"type":"json","json":{"content":[{"name":"Header","data":{"products":[{"title":"Accessories","description":"Backplates, Consumables. Tanks.","img":{"recommendedSizes":{"width":"235","height":"235"}},"url":""},{"title":"Accessories sets","description":"Protection, maintenance, cleaning.","img":{"recommendedSizes":{"width":"235","height":"235"}},"url":""},{"title":"Spare parts","description":"Spare parts and components.","img":{"recommendedSizes":{"width":"235","height":"235"}},"url":""},{"title":"Spare parts kits","description":"Completly Liberty spare parts kits.","img":{"recommendedSizes":{"width":"235","height":"235"}},"url":""}]},"id":"#0","type":"component","lock":false,"position":0},{"name":"BlogArticle","data":{"title":"My Story of a Found Submarine in Shetland","perex":"It's Christmas 2019 and we're in Egypt recapping our Christmas Eve morning dives. We've just returned from diving off Elphinstone Reef where we managed some funny photos with longfin sharks. One photo is of a diver from Belgium who was part of our group. \n\nBoth of our nations have a generally positive relationship with beer, so we exchange photos at the bar in the evening. The discussion revealed that we have both been rebreather diving for a long time and are interested in wrecks. But why am I starting my story about diving off Shetland in Scotland in Egypt?","content":"\n<h2>From Norway to Shetland</h2>\n\nRoel and I continue to keep in touch and occasionally like each other's interesting photos and experiences. Once Roel approached me about the possibility of a CCR safari in Norway, organised by Scottish Shetland. After a moment's thought, I nodded and pondered the risks of diving with a buddy I'd never been in the water with, a group of people I didn't know at all, and a boat that was actually a converted fishing barge. Over the next few months, two more spots opened up on the boat and so my fears were greatly diminished by the participation of Tomas Zloch, who I had already dived with and was glad to have joined. And why are we still in Norway?\n \n \n \nWe were impressed by the Norwegian expedition and understood the rules and procedures that apply on a Scottish ship. Apparently **our approach to diving, based on an emphasis on safety and a positive experience, also attracted the attention of the Scottish divers**, who after an initial distance began to communicate with us warmly. Therefore, when the invitation to participate in an expedition aimed at discovering deep wrecks off the Scottish Shatlands came, there was nothing to think about!\n\t\nThe planning of the trip was clear after the experience in Norway - we would be on ferries for most of the route and minimize driving time - especially in England. The plane option was out of the question due to the amount of gear. As the plan was to **dive wrecks at depths of up to 120m, it was clear that the only way to plan and safely execute such dives was to use two CCRs**. In my case, these were the primary unit, the <a href=\"https://www.divesoft.com/en/products/ccr-liberty/ccr-liberty-bmcl-fmcl\"><b>CCR Liberty in the FMCL variant</b></a> and the <a href=\"https://www.divesoft.com/en/products/ccr-liberty/ccr-liberty-sidemount\"><b>
2CCR Liberty in the Sidemount</b></a> variant as the <a href=\"https://www.divesoft.com/en/blog/diving-with-bailout-rebreather\">Bailout unit</a>. Currently, I don't think there is a more ideal solution as Divesoft has developed firmware that supports just the use of two units in Primary - Bailout mode.\n\n\n\n<h2>The Unpredictable North Sea</h2>\n\nThe diving in the North Sea around Shetland is wonderful, but **highly dependent on the weather**. The combination of ocean waves with tidal current and local wind is particularly problematic. This unfortunately only allowed us to make one of the planned deep dives. The remaining 5 days we dived known wrecks in areas outside the open sea at depths of up to 70m. These WWI era wrecks were no longer in a fully compact state, but contained a large number of beautiful details and artifacts. What was particularly nice was that, unlike Egypt or the Mediterranean, **these artefacts are not salvaged**.\n\n\n\nThe uncompromising weather forecast was exactly confirmed and finally the last day of our expedition came with calmer water. Due to our planned departure, we had to wake up very early to make our dive in the morning tidal window when conditions are at their best. The original, ideal dive plan for the expedition was to discover more wrecks. \n\n<h2>The Pinnacle Dive - The German Submarine UC-55</h2>\n\nFor one dive, the site where the **German submarine UC-55** was sunk in 1917 was chosen. **The minelaying submarine was operating in the North Sea and a total of 9 ships fell victim to it**. It suffered a fatal malfunction leading to loss of control and submergence below operational depth. Subsequent water in the engine room caused chlorine leakage from the batteries and the need to surface, where the submarine was already an easy target for Allied ships.\n\nThe information from the Royal Navy archives and the sonar scan of the bottom clearly indicated that **we were descending to UC-55**. But still, I had an adrenaline rush and a curiosity to see what condition the submarine was in **after 106 years of not being seen by the human eye**. The descent down the ro
2pe was not so idyllic and the considerable current that tilted the descent rope extended our descent to 105 meters. The middle part of the descent in particular seemed interminable, the daylight had already completely disappeared and our torches were still not reaching the bottom. We were \"kicking\" against the current. And suddenly we see her !!! Quickly place the strobe light on the rope, turn on the camera and video lights and hurray to discover.\n\n<h2>Identification Challenges Underwater</h2>\n\n**To identify the wreck accurately, we had two plans.** Plan \"A\", based on **finding the serial number of anything**, was rejected from the first moments. The propeller was so overgrown with vegetation that accessing its serial number would have meant some time of cleaning and scraping, followed by sediment floating away. On one dive below 100 metres there really wasn't time for that. Hence plan \"B\" - **to monitor the damage to the submarine and compare it with the description of events and the condition of the submarine just before it sank**, recorded by the Royal Navy directly from the ships that had a hand in the disposal. In the allotted time we just manage to swim around the submarine and stop for a moment at the guns, turret, mines and a few other details.\n\nLast we leave the submarine in the agreed runtime and climb up. During the ascent we disconnect the decompression trap from the descent rope and for the next 2 and a half hours we and three other divers will be carried by the current. The decompression option with the trapeze unattached completely eliminates the influence of the current and the need to hold on to the trapeze. But the effect of the waves does not leave us and therefore the whole decompression we are in a fully neutral buoyancy with minimal chance to be helped by the constantly bouncing trapeze.\n\n\n\n<h2>The Euphoric Return</h2>\n\nWe are on board and euphoria reigns. We are debating the details of the dive and still on the camera displays showing the captain the details of the submarine. **It's clear, confirmed, it's UC-55**. The submarine is compact with some damage but **well-preserved features**. We agree that for the completeness of our experience, the submarine deserves at least two more dives. The euphoria slowly fades and the next step is to pack up the gear and leave.\n\n\n\nUpon returning home, a pleasant mood of interest in our discovery begins to prevail. **[The BBC issues a report on its homepage](https://www.bbc.com/news/uk-scotland-north-east-orkney-shetland-66302352)** and a prime time interview with a Scottish colleague follows. Various diving magazines and websites ask permission to publish photos, and requests for interviews and lectures come in. It's very enjoyable and keeps me coming back to UC-55 in my thoughts. \n\t\nI think that **discovering a wreck is a dream of most divers**, it came true for me and I am grateful for it and only in the corner of my soul I dare to dream that it could ever happen again to me, a Central European.\n\n\n\n\n\n<h3>About the author</h3>\n\n<h4>Martin Mako JaneÄek</h4>\n\n\"I've been diving since 2002, when I first did several \"intro\" dives in different locations around the world such as: Kenya, Dominican Republic, and Egypt. Subsequently, I completed my OWD and AOWD in Egypt, and started diving recreationally on a regular basis. \n\nIn 2010 I combined my diving with [Kapr Divers](https://www.kaprdivers.cz/) where I gradually became a technical, cave, and trimix diver. In 2015 I became the happy owner of a CCR Liberty Rebreather, and underwater adventure took on a new dimension. I became interested in \"drowned\" history and gradually dived the wrecks of Egypt, the Baltic, Florida, South Africa and the Mediterranean. I had the opportunity to be present at the identification of the B-24 bomber in Croatia, and the exploration of the foundations of the Judith Bridge in Prague. \n\nI was enchanted by the history under the surface of both the Slap and OrlÃkka reservoirs, where I had the opportunity to be part of the team that filmed a documentary focused on the flooded TÄchnice church, which is regularly broadcast on several TV stations. The biggest bonus of diving for me is my wife Lucie, who I met in the Kapr Divers team and we continue to happily go through life together, not only underwater.\"\n\n[https://www.facebook.com/mako.janecek](https://www.facebook.com/mako.janecek)\n\n[https://www.kaprdivers.cz/](https://www.kaprdivers.cz/)\n","showTags":false,"showDate":false,"image":{"mimetype":"image/png","size":566612,"hash":"39666f7d2209aaa1dce14fdd72cc45ede55bc6ae","id":"clmg82ziot6zk07769n2zkrka","filename":"header.png","category":"divesoft/","type":"image"}},"id":"#2","type":"component","lock":false,"position":1},{"name":"ProductShowcase","data":{"componentTemplateId":"cm9h4wr6ugjv10803yq
2s3tp71"},"id":"#4","type":"component","lock":false,"position":2},{"name":"Footer","data":{"copyrights":"Copyright © 2019 Divesoft LLC All rights reserved.","facebookUrl":"","youtubeUrl":"","instagramUrl":"","contacts":"**Divesoft, s.r.o.** Hálkova 2495 413 01 Roudnice nad Labem Äeská republika Tel.: +420 416 857 057 E-mail: [email protected]"},"id":"#1","type":"component","lock":false,"position":4}],"id":"root","idBuffer":"#5","lastCommit":"9507f491-0a17-43a9-951a-479f1aa69eeb"}},"annotations":[],"language":{"type":"id","generated":false,"id":"Language:cjv3kwvoj000u083611381c6o","typename":"Language"},"__typename":"PageTranslation"},"Page:clmszuh0ravef0735zntydkcp":{"id":"clmszuh0ravef0735zntydkcp","type":{"type":"id","generated":false,"id":"PageType:cjv3l213x004f08366hjufttp","typename":"PageType"},"tags":[],"translations({\"where\":{\"language\":{\"id\":\"cjv3kwvoj000u083611381c6o\"}}})":[{"type":"id","generated":false,"id":"PageTranslation:clmszuh17avem0735s4tzfjpa","typename":"PageTranslation"}],"__typename":"Page"},"PageTranslation:clmszuh17avem0735s4tzfjpa":{"id":"clmszuh17avem0735s4tzfjpa","name":"#8460 DNA User Manual","createdAt":"2023-09-21T09:51:58.650Z","content":{"type":"json","json":{"content":[{"name":"Header","data":{"products":[{"title":"Accessories","description":"Backplates, Consumables. Tanks.","img":{"recommendedSizes":{"width":"235","height":"235"}},"url":""},{"title":"Accessories sets","description":"Protection, maintenance, cleaning.","img":{"recommendedSizes":{"width":"235","height":"235"}},"url":""},{"title":"Spare parts","description":"Spare parts and components.","img":{"recommendedSizes":{"width":"235","height":"235"}},"url":""},{"title":"Spare parts kits","description":"Completly Liberty spare parts kits.","img":{"recommendedSizes":{"width":"235","height":"235"}},"url":""}]},"id":"#0","type":"component","lock":false,"position":0},{"name":"SectionDivider","data":{"title":"User manual","skipToC":false},"id":"#62","type":"component","lock":false,"position":1},{"name":"ProductShowcase","data":{"backgroundColor":"#ffffff","isTextDark":true,"isImageRight":true,"image":{"mimetype":"image/png","size":364868,"hash":"84cbf3f53e7a468f5a7011b1c8979cdc36ed7973","id":"cloy12tjnm7g80776mdrhoku7","filename":"8460-divesoft-dna-divesoft-nitrox-analyzer-02-b.png","category":"divesoft/","type":"image"},"imageMobile":{},"title":"User manual","subtitle":"Analyzer DNA","description":"version 2023/11/11 \n#8460","hideDescriptionOnMobile":false,"areButtons":false,"firstTitle":"Learn more >","firstUrl":"","secondTitle":"Configurator >","secondUrl":""},"id":"#30","type":"component","lock":false,"position":2},{"name":"TextBlock","data":{"text":"Dear user, thank you for purchasing[ Divesoft Nitrox Analyzer](https://www.divesoft.com/dna). \nWe wish you many safe NITROX dives.","textLarge":false,"imageOnRight":true,"image":{"recommendedSizes":{"width":"420","height":"280"}},"imageMobile":{"recommendedSizes":{"width":"750","height":"500"}}},"id":"#4","type":"component","lock":false,"position":3},{"name":"Divider","data":{"color":"darkGray"},"id":"#44","type":"component","lock":false,"position":4},{"name":"SectionDivider","data":{"title":"Disclaimer","skipToC":false},"id":"#63","type":"component","lock":false,"position":5},{"name":"TextBlock","data":{"text":"### **DISCLAIMER** \n\n\n**WARNING\nThis analyzer is designed for measuring the content of oxygen in air or NITROX. It cannot be used to analyze mixtures containing other gases than oxygen - nitrogen mixtures. For diving breathing mixtures containing helium use one of DIVESOFTâs trimix analyzers.**\n\n**ATTENTION: THE DEVICE IS NOT WATERPROOF. DO NOT EXPOSE THE ANALYZER TO WATER.**\n","textLarge":false,"imageOnRight":true,"image":{"recommendedSizes":{"width":"420","height":"280"}},"imageMobile":{"recommendedSizes":{"width":"750","height":"500"}}},"id":"#11","type":"component","lock":false,"position":6},{"name":"TextBlock","data":{"text":"The physical and chemical principles of the sensors used do not guarantee that the sensors will be selectively sensitive to a specific gas (oxygen, helium); there are a number of gases to which the sensors respond. Therefore, the gas composition shown by the analyzer does not mean by itself that the real composition of the mix is equal to the displayed values. The displayed mix composition is invali
2d unless the mixing technology ensures that there are no other gases present in the mix except air/nitrogen, pure oxygen and pure helium.\n\nThe analyzer is not a certified measuring instrument. The results of measuring are only informative and it is not possible to use such results where a certified measuring instrument is required.","textLarge":false,"imageOnRight":true,"image":{"recommendedSizes":{"width":"420","height":"280"}},"imageMobile":{"recommendedSizes":{"width":"750","height":"500"}}},"id":"#10","type":"component","lock":false,"position":7},{"name":"TextBlock","data":{"text":"When analyzing mixes in situations where the incorrect composition of the mixes could cause material damage, injury to health or threaten human health or life, for example in the case of breathing mixes for diving, the results of the analysis may not be used as confirmation of the correct mix composition. In these cases, the analyzer can only be used as an aid for increasing the probability that such incorrect mix composition will be detected before its use. The correctness of the mix composition must be established by the technology used to prepare it.\n\nThe correct preparation of breathing mixes for diving (NITROX included) requires special knowledge and experience which is possible to gain, for example, through an appropriate course. A failure to apply such knowledge can lead to an incorrect mix, even though the results of the analysis are seemingly correct. Such a situation can also be the result of a failure to take into account the influence of temperature and compressibility, an insufficient blending of the mix and other factors.\n\nPlease remember that the analyzer can be broken or damaged and that the oxygen sensor is by its nature subject to ageing and thus its properties deteriorate.\n\nTherefore always verify the measured data in another way, such as by precise preparation of the mix, another analytical method, etc. In addition, the measured value must be subject to critical assessment using a common-sense approach and if it differs from the allowable variation of mixing accuracy, it must be considered invali
2d.","textLarge":false,"imageOnRight":true,"image":{"recommendedSizes":{"width":"420","height":"280"}},"imageMobile":{"recommendedSizes":{"width":"750","height":"500"}}},"id":"#9","type":"component","lock":false,"position":8},{"name":"Divider","data":{"color":"darkGray"},"id":"#59","type":"component","lock":false,"position":9},{"name":"SectionDivider","data":{"title":"","skipToC":false},"id":"#64","type":"component","lock":false,"position":10},{"name":"TextBlock","data":{"text":"### **Content** \n\nDISCLAIMER \n1. TECHNICAL DATA \n2. USE \n2.1 Pairing \n2.2 Calibration \n2.3 Analyzing \n3. MAINTENANCE \n3.1 Battery Replacement \n3.2 Changing the sensor \n3.3 Firmware update \n3.4 Used sensors and batteries","textLarge":false,"imageOnRight":true,"image":{"recommendedSizes":{"width":"420","height":"280"}},"imageMobile":{"recommendedSizes":{"width":"750","height":"500"}}},"id":"#58","type":"component","lock":false,"position":11},{"name":"Divider","data":{"color":"darkGray"},"id":"#33","type":"component","lock":false,"position":12},{"name":"SectionDivider","data":{"title":"1. Technical data","skipToC":false},"id":"#65","type":"component","lock":false,"position":13},{"name":"TextBlock","data":{"text":"### **1. TECHNICAL DATA**","textLarge":false,"imageOnRight":true,"image":{"recommendedSizes":{"width":"420","height":"280"}},"imageMobile":{"recommendedSizes":{"width":"750","height":"500"}}},"id":"#26","type":"component","lock":false,"position":14},{"name":"Image","data":{"firstImage":{"mimetype":"image/png","size":81863,"hash":"bf8073e83b89f63faa357c3d53a6a6154bbdad7e","id":"closp2msil2tc07767qvukjlf","filename":"8460-divesoft-dna-divesoft-nitrox-analyzer-manual-01.png","category":"divesoft/","type":"image"},"secondImage":{},"image":{"type":"image"}},"id":"#27","type":"component","lock":false,"position":15},{"name":"TextBlock","data":{"text":"Dimensions: 45,6 Ã 111 x 40 mm \nWeight: 100 g \nWeight with DIVESOFT sensor: 126 g \nBattery used: CR 2450 \nCompatible oxygen sensors: R22S, R22D \nMeasuring range: Total measuring range is up to 300mV, uses two subranges (up to 150mV and up to 300mV). The switching is automatic. The polarity of the sensor must be observed. \nAccuracy: Oxygen analysis from 1-100% with accuracy of +/-1%.\n","textLarge":false,"imageOnRight":true,"image":{"recommendedSizes":{"width":"420","height":"280"}},"imageMobile":{"recommendedSizes":{"width":"750","height":"500"}}},"id":"#5","type":"component","lock":false,"position":16},{"name":"Divider","data":{"color":"darkGray"},"id":"#34","type":"component","lock":false,"position":17},{"name":"SectionDivider","data":{"title":"2. Use","skipToC":true},"id":"#66","type":"component","lock":false,"position":18},{"name":"TextBlock","data":{"text":"### **2. USE**","textLarge":false,"imageOnRight":true,"image":{"recommendedSizes":{"width":"420","height":"280"}},"imageMobile":{"recommendedSizes":{"width":"750","height":"500"}}},"id":"#67","type":"component","lock":false,"position":19},{"name":"SectionDivider","data":{"title":"2.1 Before first use","skipToC":false},"id":"#68","type":"component","lock":false,"position":20},{"name":"TextBlock","data":{"text":"### **2.1 Before first use**\nFor battery saving reasons before purchasing the product, the battery is separate from the analyzer. Before first use, **install the included battery** according to section [3.1 Battery Replacement](#3-.-MAINTENANCE)","textLarge":false,"imageOnRight":true,"image":{"recommendedSizes":{"width":"420","height":"280"}},"imageMobile":{"recommendedSizes":{"width":"750","height":"500"}}},"id":"#61","type":"component","lock":false,"position":21},{"name":"SectionDivider","data":{"title":"2.2 App download","skipToC":false},"id":"#69","type":"component","lock":false,"position":22},{"name":"TextBlock","data":{"text":"### **2.2 App Download** \n\nTo use the analyzer, you must download the Divesoft.App. This app is available for both Android and iOs ph
2one operating systems. These versions are available here, or directly in the app stores:\n","textLarge":false,"imageOnRight":true,"image":{"recommendedSizes":{"width":"420","height":"280"}},"imageMobile":{"recommendedSizes":{"width":"750","height":"500"}}},"id":"#6","type":"component","lock":false,"position":23},{"name":"TextBlock","data":{"text":"<a href=\"https://apps.apple.com/app/divesoft-app/id1545496130\"></a> \n\n<a href=\"https://play.google.com/store/apps/details?id=com.divesoft.divesoft_app\"></a>","textLarge":false,"imageOnRight":true,"image":{"recommendedSizes":{"width":"420","height":"280"}},"imageMobile":{"recommendedSizes":{"width":"750","height":"500"}}},"id":"#32","type":"component","lock":false,"position":24},{"name":"TextBlock","data":{"text":"**NOTE: Analyzer feature works in** **app version** **1.7.0 or higher**. ","textLarge":false,"imageOnRight":true,"image":{"recommendedSizes":{"width":"420","height":"280"}},"imageMobile":{"recommendedSizes":{"width":"750","height":"500"}}},"id":"#60","type":"component","lock":false,"position":25},{"name":"Divider","data":{"color":"darkGray"},"id":"#50","type":"component","lock":false,"position":26},{"name":"SectionDivider","data":{"title":"2.3 Pairing","skipToC":false},"id":"#70","type":"component","lock":false,"position":27},{"name":"TextBlock","data":{"text":"### **2.3 Pairing** \n1. Launch the app on your mobile phone. \n2. Select the ANALYZER tile on the home screen. \n3. The app will give you available analyzers nearby. The serial numbers of the DNA analyzers are displayed. The serial number can be found on the body of the analyzer under the ring. \n4. The app will show you a measurement screen with the uncalibrated sensor and the sensor voltage value. \n\nNote - the next time you run the app, if the paired DNA analyzer is in range, the app will display the analyzer measurement directly.\n","textLarge":false,"imageOnRight":true,"image":{"recommendedSizes":{"width":"420","height":"280"}},"imageMobile":{"recommendedSizes":{"width":"750","height":"500"}}},"id":"#8","type":"component","lock":false,"position":28},{"name":"Image","data":{"firstImage":{"mimetype":"image/png","size":190234,"hash":"888d59a7cb0de8bed82693da7e8786a273275ed1","id":"clowv44u7ltq90776vyeekhju","filename":"screenshot-20231103-125922-divesoftapp.png","category":"divesoft/","type":"image"},"secondImage":{},"image":{"type":"image"}},"id":"#36","type":"component","lock":false,"position":29},{"name":"Spacer","data":{"spacingLarge":30,"spacingSmall":20,"backgroundColor":"#ffffff"},"id":"#57","type":"component","lock":false,"position":30},{"name":"Image","data":{"firstImage":{"mimetype":"image/png","size":125879,"hash":"ec528bd2d59afc6d917b55bf1978541127ea8cb6","id":"clowv539gltqg0776vvo0plaq","filename":"screenshot-20231103-130430-divesoftapp.png","category":"divesoft/","type":"image"},"secondImage":{},"image":{"type":"image"}},"id":"#37","type":"component","lock":false,"position":31},{"name":"Divider","data":{"color":"darkGray"},"id":"#35","type":"component","lock":false,"position":32},{"name":"SectionDivider","data":{"title":"2.4 Calibration","skipToC":false},"id":"#71","type":"component","lock":false,"position":33},{"name":"TextBlock","data":{"text":"### **2.4 Calibration** \n\nCalibration is required before each new use of the analyzer. Calibration can be to ambient air or to oxygen. \n\nIn the case of calibration to air, it must be ensured that the gas in contact with the sensor is guaranteed to be air. If there is a risk that the sensor has been purged with a gas other than air, draw air from the inlet hole of the analyzer for about 10 seconds.\n\nIf calibrating on oxygen, a guaranteed source of pure oxygen is required. For oxygen calibration, we recommend the use of a professional DIVESOFT flow limiter with tubing for accurate and efficie
2nt calibration.\n","textLarge":false,"imageOnRight":true,"image":{"recommendedSizes":{"width":"420","height":"280"}},"imageMobile":{"recommendedSizes":{"width":"750","height":"500"}}},"id":"#12","type":"component","lock":false,"position":34},{"name":"Image","data":{"firstImage":{"mimetype":"image/png","size":199697,"hash":"8527392b86ad124832717722dee8a255a1a1d317","id":"clowtnl7dlsk80776ld621ftx","filename":"screenshot-20231103-130449-divesoftapp.png","category":"divesoft/","type":"image"},"secondImage":{},"image":{"type":"image"}},"id":"#39","type":"component","lock":false,"position":35},{"name":"Spacer","data":{"spacingLarge":30,"spacingSmall":20,"backgroundColor":"#ffffff"},"id":"#45","type":"component","lock":false,"position":36},{"name":"TextBlock","data":{"text":"1. Select the calibration option using the button at the bottom of the app screen. \n2. Select the calibration method AIR or OXYGEN. \n3. Allow the calibration gas to flow into the analyzer and wait for the sensor voltage to stabilize. \n4. Press CONFIRM.\n","textLarge":false,"imageOnRight":true,"image":{"recommendedSizes":{"width":"420","height":"280"}},"imageMobile":{"recommendedSizes":{"width":"750","height":"500"}}},"id":"#7","type":"component","lock":false,"position":37},{"name":"Spacer","data":{"spacingLarge":30,"spacingSmall":20,"backgroundColor":"#ffffff"},"id":"#46","type":"component","lock":false,"position":38},{"name":"Image","data":{"firstImage":{"mimetype":"image/png","size":122202,"hash":"0d8716a03e23643ea13593684ea7d2e88a2640f1","id":"clowv6c17ltqq0776i92r6gpa","filename":"screenshot-20231103-130506-divesoftapp.png","category":"divesoft/","type":"image"},"secondImage":{},"image":{"type":"image"}},"id":"#38","type":"component","lock":false,"position":39},{"name":"Spacer","data":{"spacingLarge":30,"spacingSmall":20,"backgroundColor":"#ffffff"},"id":"#47","type":"component","lock":false,"position":40},{"name":"TextBlock","data":{"text":"NOTE: Ensure that the sensor voltage value is within the sensor manufacturer's parameters when exposed to the gas. DIVESOFT oxygen sensors have an air voltage range of 7 - 13 mV. It is advisable to verify that the sensor shows linear measurement values When calibrating on oxygen. This can be done by multiplying the air voltage value by 4.76. The result should correspond to the voltage value on oxygen.","textLarge":false,"imageOnRight":true,"image":{"recommendedSizes":{"width":"420","height":"280"}},"imageMobile":{"recommendedSizes":{"width":"750","height":"500"}}},"id":"#15","type":"component","lock":false,"position":41},{"name":"Divider","data":{"color":"darkGray"},"id":"#48","type":"component","lock":false,"position":42},{"name":"SectionDivider","data":{"title":"2.5 Analyzing","skipToC":false},"id":"#72","type":"component","lock":false,"position":43},{"name":"TextBlock","data":{"text":"### **2.5 Analyzing** \n\nStart the application and wait for the DNA analyzer to pair - display the mixture value and the oxygen sensor voltage. \nOpen the valve of the cylinder containing the gas to be analyzed so that only a very gentle stream of gas escapes from the valve. \nPlace the front of the analyzer against the bottle valve and press firmly so that all the analyzed gas flows through the analyzer and no gas leaks past. \nMonitor the value in the mobile app. The steady state value can be considered as the measurement result. \n\nNOTE: For a more accurate and efficient measurement with minimal loss of measured gas, use the [DIVESOFT professional limiter](https://eshop.divesoft.com/products/flow-limiters). The flow limiter tubing fits into the inlet hole in the front of the restrictor.\n","textLarge":false,"imageOnRight":true,"image":{"recommendedSizes":{"width":"420","height":"280"}},"imageMobile":{"recommendedSizes":{"width":"750","height":"500"}}},"id":"#16","type":"component","lock":false,"position":44},{"name":"Image","data":{"firstImage":{"mimetype":"image/png","size":429258,"hash":"379ad0b3c8482dd19f1e0faf3263508420e9e6ce","id":"clowvi4wnlu290776e76v4lvu","filename":"8460-divesoft-dna-divesoft-nitrox-analyzer-manual-05.png","category":"divesoft/","type":"image"},"secondImage":{},"image":{"type":"image"}},"id":"#40","type":"component","lock":false,"position":45},{"name":"Divider","data":{"color":"darkGray"},"id":"#49","type":"component","lock":false,"position":46}
2,{"name":"Spacer","data":{"spacingLarge":30,"spacingSmall":20,"backgroundColor":"#ffffff"},"id":"#19","type":"component","lock":false,"position":47},{"name":"SectionDivider","data":{"title":"3. Maintenance","skipToC":true},"id":"#73","type":"component","lock":false,"position":48},{"name":"TextBlock","data":{"text":"### **3. MAINTENANCE** ","textLarge":false,"imageOnRight":true,"image":{"recommendedSizes":{"width":"420","height":"280"}},"imageMobile":{"recommendedSizes":{"width":"750","height":"500"}}},"id":"#74","type":"component","lock":false,"position":49},{"name":"SectionDivider","data":{"title":"3.1 Battery replacement","skipToC":false},"id":"#75","type":"component","lock":false,"position":50},{"name":"TextBlock","data":{"text":"### **3.1 Battery Replacement** \n\nThe DNA analyzer uses commercially available **CR 2450** button cell batteries. \nThe battery life in the analyzer is 1 - 2 years. The battery status is displayed on the application screen when the analyzer is connected. Replace the battery if the battery capacity is low or the application cannot find the analyzer at all. \n\n1. Pull the bottom of the analyzer out. \n2. Remove the battery - use your fingernail or a flat tool to flip the metal lever to the side and remove the battery. \n3. Insert the new battery with the narrower side down. \n4. The LED will flash 8 times green if the battery has sufficient capacity. If the battery capacity is low, the LED will flash 8 times in red. \n \nThe battery is included in the package. \nThe battery is not covered by the warranty.\n","textLarge":false,"imageOnRight":true,"image":{"recommendedSizes":{"width":"420","height":"280"}},"imageMobile":{"recommendedSizes":{"width":"750","height":"500"}}},"id":"#14","type":"component","lock":false,"position":51},{"name":"Image","data":{"firstImage":{"mimetype":"image/png","size":95827,"hash":"e22e6e55f7f197bff06fa3273c95e6e4677213b8","id":"clowvlcjllu5r0776f20j3zme","filename":"8460-divesoft-dna-divesoft-nitrox-analyzer-manual-02.png","category":"divesoft/","type":"image"},"secondImage":{},"image":{"type":"image"}},"id":"#42","type":"component","lock":false,"position":52},{"name":"Image","data":{"firstImage":{"mimetype":"image/png","size":166415,"hash":"3e02007b41e3a33e9c48470102c4064d423eab24","id":"clowvk3w2lu3x0776ih7d56a4","filename":"8460-divesoft-dna-divesoft-nitrox-analyzer-manual-04.png","category":"divesoft/","type":"image"},"secondImage":{},"image":{"type":"image"}},"id":"#41","type":"component","lock":false,"position":53},{"name":"Divider","data":{"color":"darkGray"},"id":"#54","type":"component","lock":false,"position":54},{"name":"SectionDivider","data":{"title":"3.2 Changing the sensor","skipToC":false},"id":"#76","type":"component","lock":false,"position":55},{"name":"TextBlock","data":{"text":"### **3.2 Changing the sensor** \nR22 sensors with molex connector are used in the device. For the analysis of NITROX mixtures, sensors discarded after 1 year of use in rebreathers can be used. The sensor should not be more than 2 years old overall at the time of use in the analyzer and should produce a voltage within the range specified by the manufacturer.\n","textLarge":false,"imageOnRight":true,"image":{"recommendedSizes":{"width":"420","height":"280"}},"imageMobile":{"recommendedSizes":{"width":"750","height":"500"}}},"id":"#13","type":"component","lock":false,"position":56},{"name":"TextBlock","data":{"text":"1. Pull out the front of the analyzer (Do not use brute force or violent movement to avoid damage to the cables). \n2. Remove the molex connector. To remove the molex connector, use a fingernail or flat tool to pry the white lever inside the sensor and gently pull on the connector cables. \n3. Unscrew the sensor from the analyzer. \n4. Screw the new sensor into the front of the analyzer. \n5. Connect the molex connector. CAUTION: The polarity of the sensor must be observed! \n6. Pressurize the front of the analyzer into the analyzer body. ","textLarge":false,"imageOnRight":true,"image":{"recommendedSizes":{"width":"420","height":"280"}},"imageMobile":{"recommendedSizes":{"width":"750","height":"500"}}},"id":"#18","type":"component","lock":false,"position":57},{"name":"Image","data":{"firstImage":{"mimetype":"image/png","size":116138,"hash":"d80317f878604201656e31263da17b230a72bf95","id":"clowvnp6blu8i0776o5owunz9","filename":"8460-divesoft-dna-divesoft-nitrox-analyzer-manual-03.png","category":"divesoft/","type":"image"},"secondImage":{},"image":{"type":"image"}},"id":"#43","type":"component","lock":false,"position":58},{"name":"TextBlock","data":{"text":"The sensor is not included in the basic package.\n","textLarge":false,"imageOnRight":true,"image":{"recommendedSizes":{"width":"420","height":"280"}},"imageMobile":{"recommendedSizes":{"width":"750","height":"500"}}},"id":"#17","type":"component","lock":false,"position":59},{"name":"Divider","data":{"color":"darkGray"},"id":"#53","type":"component","lock":false,"position":60},{"name":"SectionDivider","data":{"title":"3.3 Firmware update","skipToC":false},"id":"#77","type":"component","lock":false,"position":61},{"name":"TextBlock","data":{"text":"### **3.3 Firmware update** \n\n**WARNING: Firmware updates are at your own risk. DIVESOFT is not liable for user misconduct that may cause the product to malfunction. If you are not sure whether you can handle the update, send the DNA analyzer to a DIVESOFT service technician. ** \n\n**WARNING: Do not perform a firmware update with a low battery. Check battery status before updating firmware.**\n","textLarge":false,"imageOnRight":false,"image":{"recommendedSizes":{"width":"420","height":"280"}},"imageMobile":{"recommendedSizes":{"width":"750","height":"500"}}},"id":"#22","type":"component","lock":false,"position":62},{"name":"TextBlock","data":{"text":"When a new firmware is available, you will be prompted in the App / Analyzer, a new button âFW update availableâ will appear.\n\nSince the DNA is built around the Nordic nRF microcontroller, the firmware is updated through the 3rd party App from Nordic called ânRF Device Firmware Updateâ.\n\nRead this instructions thoroughly before starting the update, once you switch the DNA into the DFU mode, you will lose access to the âupdate screenâ with instructions. You can always find the update instructions in the user manual (App / Manual
2s / Analyzer DNA).\n","textLarge":false,"imageOnRight":true,"image":{"recommendedSizes":{"width":"420","height":"280"}},"imageMobile":{"recommendedSizes":{"width":"750","height":"500"}}},"id":"#21","type":"component","lock":false,"position":63},{"name":"TextBlock","data":{"text":"**The update itself consists of three steps, which you will find in the âFW update availableâ screen.**\n\n1.\tStudy thoroughly the instructions in (this) manual.\n2.\tDownload the firmware itself, which is under the step #2 â a link to the firmware in a *.ZIP format. Do NOT unpack the archive, leave it as is.\n3.\tLastly, you will need a 3rd party App for the update itself ânRF Device Firmware Updateâ, you will find the link on the update screen, in step #3.\n","textLarge":false,"imageOnRight":true,"image":{"recommendedSizes":{"width":"420","height":"280"}},"imageMobile":{"recommendedSizes":{"width":"750","height":"500"}}},"id":"#80","type":"component","lock":false,"position":64},{"name":"Divider","data":{"color":"darkGray"},"id":"#86","type":"component","lock":false,"position":65},{"name":"TextBlock","data":{"text":"**The update process**\n\n\n1. Continue only if you have completed the preparation steps.\n\t* \"nRF Device Firmware Update\" installed\n\t* Firmware archive downloaded\n2. Pull out the bottom of the analyzer so you can see the LED next to the battery. \n3. Enter the DFU mode - press and hold the button in the hole on the bottom the analyzer for 6 sec, until the LED starts flashing red and green. \n\t* To press the button, use, for example, a SIM card removal tool or a paper clip. \n\t* During the DFU mode, the DivesoftApp will not be able to connect to the DNA. \n4. If the LED is not flashing, repeat the previous step, just hold the button a bit longer. \n5. Start the \"nRF Device Firmware Update\" App \n\t1. Choose the downloaded firmware archive, named \"DNA_X_Y_Z_NNNN.zip\"\n\t\t* Where X_Y_Z_NNNN represents the version, eg. 2_4_1_8200\n\t2. Connect to the device named \"DNA-DFU\" \n\t3. Press the Upload/Start button. \n6. After the new firmware is loaded, the DNA will start automatically.","textLarge":false,"imageOnRight":true,"image":{"recommendedSizes":{"width":"420","height":"280"}},"imageMobile":{"recommendedSizes":{"width":"750","height":"500"}}},"id":"#79","type":"component","lock":false,"position":66},{"name":"Spacer","data":{"spacingLarge":30,"spacingSmall":20,"backgroundColor":"#ffffff"},"id":"#87","type":"component","lock":false,"position":67},{"name":"TextBlock","data":{"text":"**NOTE:** Should an error occur during upload, the device will remain in the DFU mode and the action can be repeated. In case of inactivity for 2 minutes, the DNA will switch back to standard mode.","textLarge":false,"imageOnRight":true,"image":{"recommendedSizes":{"width":"420","height":"280"}},"imageMobile":{"recommendedSizes":{"width":"750","height":"500"}}},"id":"#85","type":"component","lock":false,"position":68},{"name":"Divider","data":{"color":"darkGray"},"id":"#52","type":"component","lock":false,"position":70},{"name":"SectionDivider","data":{"title":"3.4 Used sensors and batteries","skipToC":false},"id":"#78","type":"component","lock":false,"position":71},{"name":"TextBlock","data":{"text":"### **3.4 Used sensors and batteries** \n\nTreat used oxygen sensors as hazardous waste. Use collection points or containers designed for the collection of used batteries. \nDispose of used batteries in designated collection containers or take them to a collection point.\n","textLarge":false,"imageOnRight":true,"image":{"recommendedSizes":{"width":"420","height":"280"}},"imageMobile":{"recommendedSizes":{"width":"750","height":"500"}}},"id":"#23","type":"component","lock":false,"position":72},{"name":"Divider","data":{"color":"darkGray"},"id":"#56","type":"component","lock":false,"position":73},{"name":"TextBlock","data":{"text":"### **ANALYZER DNA - USER MANUAL** \n\nDate of issue: 11 November 2023 \nHW 1.0, FW 2.4.0 \nAuthors: Jakub Å imánek \nPublished by Divesoft s. r. o.","textLarge":false,"imageOnRight":true,"image":{"recommendedSizes":{"width":"420","height":"280"}},"imageMobile":{"recommendedSizes":{"width":"750","height":"500"}}},"id":"#51","type":"component","lock":false,"position":74},{"name":"Footer","data":{"copyrights":"Copyright © 2019 Divesoft LLC All rights reserved.","facebookUrl":"","youtubeUrl":"","instagramUrl":"","contacts":"**Divesoft, s.r.o.** Hálkova 2495 413 01 Roudnice nad Labem Äeská republika Tel.: +420 416 857 057 E-mail: [email protected]"},"id":"#1","type":"component","lock":false,"position":75}],"id":"root","idBuffer":"#88","lastCommit":"d2ba26ee-3607-4a51-965d-5cdeeacb5fac"}},"annotations":[],"language":{"type":"id","generated":false,"id":"Language:cjv3kwvoj000u083611381c6o","typename":"Language"},"__typename":"PageTranslation"},"Page:clnkbz2s6da0m0735m12jhjra":{"id":"clnkbz2s6da0m0735m12jhjra","type":{"type":"id","generated":false,"id":"PageType:cjv3l213x004f08366hjufttp","typename":"PageType"},"tags":[],"translations({\"where\":{\"language\":{\"id\":\"cjv3kwvoj000u083611381c6o\"}}})":[{"type":"id","generated":false,"id":"PageTranslation:clnkbz2smda0t07357gcv71o5","typename":"PageTranslation"}],"__typename":"Page"},"PageTranslation:clnkbz2smda0t07357gcv71o5":{"id":"clnkbz2smda0t07357gcv71o5","name":"#8460 DNA Quick Reference","createdAt":"2023-10-10T13:01:15.622Z","content":{"type":"json","json":{"content":[{"name":"Header","data":{"products":[{"title":"Accessories","description":"Backplates, Consumables. Tanks.","img":{"recommendedSizes":{"width":"235","height":"235"}},"url":""},{"title":"Accessories sets","description":"Protection, maintenance, cleaning.","img":{"recommendedSizes":{"width":"235","height":"235"}},"url":""},{"title":"Spare parts","description":"Spare parts and components.","img":{"recommendedSizes":{"width":"235","height":"235"}},"url":""}
2,{"title":"Spare parts kits","description":"Completly Liberty spare parts kits.","img":{"recommendedSizes":{"width":"235","height":"235"}},"url":""}]},"id":"#0","type":"component","lock":false,"position":0},{"name":"ProductShowcase","data":{"backgroundColor":"#ffffff","isTextDark":true,"isImageRight":true,"image":{"mimetype":"image/png","size":364868,"hash":"84cbf3f53e7a468f5a7011b1c8979cdc36ed7973","id":"cloy12tjnm7g80776mdrhoku7","filename":"8460-divesoft-dna-divesoft-nitrox-analyzer-02-b.png","category":"divesoft/","type":"image"},"imageMobile":{},"title":"Quick reference","subtitle":"Analyzer DNA","description":"version 2023/11/11 \n#8460","hideDescriptionOnMobile":false,"areButtons":false,"firstTitle":"Learn more >","firstUrl":"","secondTitle":"Configurator >","secondUrl":""},"id":"#30","type":"component","lock":false,"position":1},{"name":"TextBlock","data":{"text":"**This is just a quick and brief guide.**\n\nFor complete information read the full [User manual](https://www.divesoft.com/en/manuals/8460-dna-user-manual).","textLarge":false,"imageOnRight":true,"image":{"recommendedSizes":{"width":"420","height":"280"}},"imageMobile":{"recommendedSizes":{"width":"750","height":"500"}}},"id":"#4","type":"component","lock":false,"position":2},{"name":"Divider","data":{"color":"darkGray"},"id":"#33","type":"component","lock":false,"position":3},{"name":"TextBlock","data":{"text":"### **USE **\n\n### App Download \nTo use the analyzer, you must download the Divesoft.App. This app is available for both Android and iOs ph
2one operating systems. These versions are available here, or directly in the app stores:\n","textLarge":false,"imageOnRight":true,"image":{"recommendedSizes":{"width":"420","height":"280"}},"imageMobile":{"recommendedSizes":{"width":"750","height":"500"}}},"id":"#6","type":"component","lock":false,"position":4},{"name":"Spacer","data":{"spacingLarge":30,"spacingSmall":20,"backgroundColor":"#ffffff"},"id":"#36","type":"component","lock":false,"position":5},{"name":"TextBlock","data":{"text":"<a href=\"https://apps.apple.com/app/divesoft-app/id1545496130\"></a> \n\n<a href=\"https://play.google.com/store/apps/details?id=com.divesoft.divesoft_app\"></a>","textLarge":false,"imageOnRight":true,"image":{"recommendedSizes":{"width":"420","height":"280"}},"imageMobile":{"recommendedSizes":{"width":"750","height":"500"}}},"id":"#32","type":"component","lock":false,"position":6},{"name":"Spacer","data":{"spacingLarge":30,"spacingSmall":20,"backgroundColor":"#ffffff"},"id":"#38","type":"component","lock":false,"position":7},{"name":"TextBlock","data":{"text":"### Pairing \n1. Launch the app on your mobile phone. \n2. Select the ANALYZER tile on the home screen \n3. The app will give you available analyzers nearby. The serial numbers of the DNA analyzers are displayed. The serial number can be found on the body of the analyzer under the ring. \n4. The app will show you a measurement screen with the uncalibrated sensor and the sensor voltage value\n\nNote - the next time you run the app, if the paired DNA analyzer is in range, the app will display the analyzer measurement directly\n","textLarge":false,"imageOnRight":true,"image":{"recommendedSizes":{"width":"420","height":"280"}},"imageMobile":{"recommendedSizes":{"width":"750","height":"500"}}},"id":"#8","type":"component","lock":false,"position":8},{"name":"Divider","data":{"color":"darkGray"},"id":"#35","type":"component","lock":false,"position":9},{"name":"TextBlock","data":{"text":"### **Calibration ** \n\nCalibration is required before each new use of the analyzer. Calibration can be to ambient air or to oxygen. \n","textLarge":false,"imageOnRight":true,"image":{"recommendedSizes":{"width":"420","height":"280"}},"imageMobile":{"recommendedSizes":{"width":"750","height":"500"}}},"id":"#12","type":"component","lock":false,"position":10},{"name":"TextBlock","data":{"text":"1. Select the calibration option using the button at the bottom of the app screen. \n2. Select the calibration method AIR or OXYGEN \n3. Allow the calibration gas to flow into the analyzer and wait for the sensor voltage to stabilize. \n4. Press CONFIRM\n","textLarge":false,"imageOnRight":true,"image":{"recommendedSizes":{"width":"420","height":"280"}},"imageMobile":{"recommendedSizes":{"width":"750","height":"500"}}},"id":"#7","type":"component","lock":false,"position":11},{"name":"TextBlock","data":{"text":"NOTE: Ensure that the sensor voltage value is within the sensor manufacturer's parameters when exposed to the gas. DIVESOFT oxygen sensors have an air voltage range of 7 - 13 mV. It is advisable to verify that the sensor shows linear measurement values When calibrating on oxygen. This can be done by multiplying the air voltage value by 4.76. The result should correspond to the voltage value on oxygen.","textLarge":false,"imageOnRight":true,"image":{"recommendedSizes":{"width":"420","height":"280"}},"imageMobile":{"recommendedSizes":{"width":"750","height":"500"}}},"id":"#15","type":"component","lock":false,"position":12},{"name":"Divider","data":{"color":"darkGray"},"id":"#37","type":"component","lock":false,"position":13},{"name":"TextBlock","data":{"text":"### **Analyzing ** \n\nStart the application and wait for the DNA analyzer to pair - display the mixture value and the oxygen sensor voltage. \nOpen the valve of the cylinder containing the gas to be analyzed so that only a very gentle stream of gas escapes from the valve \nPlace the front of the analyzer against the bottle valve and press firmly so that all the analyzed gas flows through the analyzer and no gas leaks past. \nMonitor the value in the mobile app. The steady state value can be considered as the measurement result. \n\nNOTE: For a more accurate and efficie
2nt measurement with minimal loss of measured gas, use the [DIVESOFT professional limiter](https://eshop.divesoft.com/products/flow-limiters). The flow limiter tubing fits into the inlet hole in the front of the restrictor.\n","textLarge":false,"imageOnRight":true,"image":{"recommendedSizes":{"width":"420","height":"280"}},"imageMobile":{"recommendedSizes":{"width":"750","height":"500"}}},"id":"#16","type":"component","lock":false,"position":14},{"name":"Spacer","data":{"spacingLarge":30,"spacingSmall":20,"backgroundColor":"#ffffff"},"id":"#19","type":"component","lock":false,"position":15},{"name":"Footer","data":{"copyrights":"Copyright © 2019 Divesoft LLC All rights reserved.","facebookUrl":"","youtubeUrl":"","instagramUrl":"","contacts":"**Divesoft, s.r.o.** Hálkova 2495 413 01 Roudnice nad Labem Äeská republika Tel.: +420 416 857 057 E-mail: [email protected]"},"id":"#1","type":"component","lock":false,"position":16}],"id":"root","idBuffer":"#39","lastCommit":"7ac5de70-88d2-467f-be07-cbd6cbaa94f3"}},"annotations":[],"language":{"type":"id","generated":false,"id":"Language:cjv3kwvoj000u083611381c6o","typename":"Language"},"__typename":"PageTranslation"},"Page:clpgoxg4elslm07356zu3m5n5":{"id":"clpgoxg4elslm07356zu3m5n5","type":{"type":"id","generated":false,"id":"PageType:cjv3l213x004f08366hjufttp","typename":"PageType"},"tags":[],"translations({\"where\":{\"language\":{\"id\":\"cjv3kwvoj000u083611381c6o\"}}})":[{"type":"id","generated":false,"id":"PageTranslation:clpgoxg4ulslt07356kqrhfpq","typename":"PageTranslation"}],"__typename":"Page"},"PageTranslation:clpgoxg4ulslt07356kqrhfpq":{"id":"clpgoxg4ulslt07356kqrhfpq","name":"CCR Liberty user manual 04","createdAt":"2023-11-27T09:12:14.573Z","content":{"type":"json","json":{"content":[{"name":"Header","data":{"products":[{"title":"Accessories","description":"Backplates, Consumables. Tanks.","img":{"recommendedSizes":{"width":"235","height":"235"}},"url":""},{"title":"Accessories sets","description":"Protection, maintenance, cleaning.","img":{"recommendedSizes":{"width":"235","height":"235"}},"url":""},{"title":"Spare parts","description":"Spare parts and components.","img":{"recommendedSizes":{"width":"235","height":"235"}},"url":""},{"title":"Spare parts kits","description":"Completly Liberty spare parts kits.","img":{"recommendedSizes":{"width":"235","height":"235"}},"url":""}]},"id":"#0","type":"component","lock":false,"position":0},{"name":"Footer","data":{"copyrights":"Copyright © 2019 Divesoft LLC All rights reserved.","facebookUrl":"","youtubeUrl":"","instagramUrl":"","contacts":"**Divesoft, s.r.o.** Hálkova 2495 413 01 Roudnice nad Labem Äeská republika Tel.: +420 416 857 057 E-mail: [email protected]"},"id":"#1","type":"component","lock":false,"position":1}],"id":"root","idBuffer":"#2","lastCommit":"fd7ba897-6b02-494c-ba3f-fc8ace8e755a"}},"annotations":[],"language":{"type":"id","generated":false,"id":"Language:cjv3kwvoj000u083611381c6o","typename":"Language"},"__typename":"PageTranslation"},"Page:clpi7kucdm37e0735u15o8rfy":{"id":"clpi7kucdm37e0735u15o8rfy","type":{"type":"id","generated":false,"id":"PageType:cjv3l213x004f08366hjufttp","typename":"PageType"},"tags":[],"translations({\"where\":{\"language\":{\"id\":\"cjv3kwvoj000u083611381c6o\"}}})":[{"type":"id","generated":false,"id":"PageTranslation:clpi7kucqm37l0735xfhjaad1","typename":"PageTranslation"}],"__typename":"Page"},"PageTranslation:clpi7kucqm37l0735xfhjaad1":{"id":"clpi7kucqm37l0735xfhjaad1","name":"BOV","createdAt":"2023-11-28T10:42:05.353Z","content":{"type":"json","json":{"content":[{"name":"Header","data":{"products":[{"title":"Accessories","description":"Backplates, Consumables. Tanks.","img":{"recommendedSizes":{"width":"235","height":"235"}},"url":""},{"title":"Accessories sets","description":"Protection, maintenance, cleaning.","img":{"recommendedSizes":{"width":"235","height":"235"}},"url":""},{"title":"Spare parts","description":"Spare parts and components.","img":{"recommendedSizes":{"width":"235","height":"235"}},"url":""},{"title":"Spare parts kits","description":"Completly Liberty spare parts kits.","img":{"recommendedSizes":{"width":"235","height":"235"}},"url":""}]},"id":"#0","type":"component","lock":false,"position":0},{"name":"LinkCrossroad","data":{"title":"BOV","subtitle":"","showBreadcrumbs":true,"hideHeader":false,"firstTitle":"Choose Category","firstColumn":"1","firstLinks":[{"title":"User manual","url":{"url":"/en/support/bov/user-manuals","mediaData":{"mimetype":"application/pdf","size":4225099,"hash":"2372b31c0cf1fd57bf45a46cdf9b00a82099d456","id":"ck88hk63q1tzd0776fdtkhfok","filename":"bov-en-manual.pdf","category":"divesoft/docs/","type":"file"},"urlNewWindow":"","pageId":"clpia71x6m3ud0735ba2n1yml"},"anchor":"","id":"1"}],"secondTitle":"","secondColumn":"1","secondLinks":[],"thirdTitle":"","thirdColumn":"1","thirdLinks":[],"fourthTitle":"","fourthColumn":"1","fourthLinks":[],"fifthTitle":"","fifthColumn":"1","fifthLinks":[],"activeTab":"1"},"id":"#3","type":"component","lock":false,"position":1},{"name":"ListOfLinks","data":{"links":[{"title":"User manual for FW version 1.13 (EN)","url":""},{"title":"Freedom Bottom Timer user manual 1.12 (EN)","url":""},{"title":"German user manual for FW version 1.5","url":""}]},"id":"#12","type":"component","lock":false,"position":5},{"name":"Footer","data":{"copyrights":"Copyright © 2019 Divesoft LLC All rights reserved.","facebookUrl":"","youtubeUrl":"","instagramUrl":"","contacts":"**Divesoft, s.r.o.** Hálkova 2495 413 01 Roudnice nad Labem Äeská republika Tel.: +420 416 857 057 E-mail: [email protected]"},"id":"#1","type":"component","lock":false,"position":12}],"id":"root","idBuffer":"#13","lastCommit":"23b8d122-4515-4f92-9e06-0c7627942550"}},"annotations":[],"language":{"type":"id","generated":false,"id":"Language:cjv3kwvoj000u083611381c6o","typename":"Language"},"__typename":"PageTranslation"},"Page:clpia71x6m3ud0735ba2n1yml":{"id":"clpia71x6m3ud0735ba2n1yml","type":{"type":"id","generated":false,"id":"PageType:cjv3l213x004f08366hjufttp","typename":"PageType"},"tags":[],"translations({\"where\":{\"language\":{\"id\":\"cjv3kwvoj000u083611381c6o\"}}})":[{"type":"id","generated":false,"id":"PageTranslation:clpia71xnm3uk0735jxr284xz","typename":"PageTranslation"}],"__typename":"Page"},"PageTranslation:clpia71xnm3uk0735jxr284xz":{"id":"clpia71xnm3uk0735jxr284xz","name":"User manuals","createdAt":"2023-11-28T11:55:20.843Z","content":{"type":"json","json":{"content":[{"name":"Header","data":{"products":[{"title":"Accessories","description":"Backplates, Consumables. Tanks.","img":{"recommendedSizes":{"width":"235","height":"235"}},"url":""},{"title":"Accessories sets","description":"Protection, maintenance, cleaning.","img":{"recommendedSizes":{"width":"235","height":"235"}},"url":""},{"title":"Spare parts","description":"Spare parts and components.","img":{"recommendedSizes":{"width":"235","height":"235"}},"url":""}
2,{"title":"Spare parts kits","description":"Completly Liberty spare parts kits.","img":{"recommendedSizes":{"width":"235","height":"235"}},"url":""}]},"id":"#0","type":"component","lock":false,"position":0},{"name":"Spacer","data":{"spacingLarge":30,"spacingSmall":20,"backgroundColor":"#f0f0f0"},"id":"#6","type":"component","lock":false,"position":1},{"name":"ComponentHeader","data":{"title":"BOV","subtitle":"","showBreadcrumbs":true,"backgroundColor":"#f0f0f0"},"id":"#5","type":"component","lock":false,"position":2},{"name":"Spacer","data":{"spacingLarge":30,"spacingSmall":20,"backgroundColor":"#f0f0f0"},"id":"#7","type":"component","lock":false,"position":3},{"name":"Spacer","data":{"spacingLarge":30,"spacingSmall":20,"backgroundColor":"#ffffff"},"id":"#8","type":"component","lock":false,"position":4},{"name":"DownloadsNew","data":{"backgroundColor":"#ffffff","title":"","subtitle":"","showBreadcrumbs":false,"hideHeader":true,"files":[{"title":"BOV manual","isTitleBold":false,"subtitle":"","url":{"url":"https://www.divesoft.com/en/manuals/bov","mediaData":{"mimetype":"application/pdf","size":4225099,"hash":"2372b31c0cf1fd57bf45a46cdf9b00a82099d456","id":"ck88hk63q1tzd0776fdtkhfok","filename":"bov-en-manual.pdf","category":"divesoft/docs/","type":"file"},"urlNewWindow":true},"urlText":"Open","id":"1"}],"activeTab":"1"},"id":"#2","type":"component","lock":false,"position":7},{"name":"Footer","data":{"copyrights":"Copyright © 2019 Divesoft LLC All rights reserved.","facebookUrl":"","youtubeUrl":"","instagramUrl":"","contacts":"**Divesoft, s.r.o.** Hálkova 2495 413 01 Roudnice nad Labem Äeská republika Tel.: +420 416 857 057 E-mail: [email protected]"},"id":"#1","type":"component","lock":false,"position":8}],"id":"root","idBuffer":"#9","lastCommit":"9d40754d-fa62-4864-aea1-17390d626d75"}},"annotations":[],"language":{"type":"id","generated":false,"id":"Language:cjv3kwvoj000u083611381c6o","typename":"Language"},"__typename":"PageTranslation"},"Page:clsyeohcd8d1j0735f1581opx":{"id":"clsyeohcd8d1j0735f1581opx","type":{"type":"id","generated":false,"id":"PageType:ck2yidrqj00wv0821oy820vu1","typename":"PageType"},"tags":[],"translations({\"where\":{\"language\":{\"id\":\"cjv3kwvoj000u083611381c6o\"}}})":[{"type":"id","generated":false,"id":"PageTranslation:clsyeohct8d1q0735c9yor5ns","typename":"PageTranslation"}],"__typename":"Page"},"PageTranslation:clsyeohct8d1q0735c9yor5ns":{"id":"clsyeohct8d1q0735c9yor5ns","name":"Liberty Divers Club","createdAt":"2024-02-23T08:44:18.269Z","content":{"type":"json","json":{"content":[{"name":"Header","data":{"componentTemplateId":"cjv7yndru048c0836j99ljogw"},"id":"#0","type":"component","lock":false,"position":0},{"name":"Spacer","data":{"spacingLarge":30,"spacingSmall":20,"backgroundColor":"#ffffff"},"id":"#60","type":"component","lock":false,"position":1},{"name":"ComponentHeader","data":{"title":"Liberty Divers Club","subtitle":"","showBreadcrumbs":false,"backgroundColor":"#ffffff"},"id":"#58","type":"component","lock":false,"position":2},{"name":"Spacer","data":{"spacingLarge":30,"spacingSmall":20,"backgroundColor":"#ffffff"},"id":"#59","type":"component","lock":false,"position":3},{"name":"TextBlock","data":{"text":"A global community for Liberty CCR divers\nThe Liberty Divers Club is an independent community for divers who use and love the Divesoft Liberty rebreather. It brings together rebreather divers from around the world through events, training, shared experiences, and community support.\n\nWhether you are new to the Liberty CCR or already an experienced rebreather diver, the club offers a place to meet like-minded people, learn new skills, explore new dive sites, and stay connected with the growing Liberty community.\n\nWhat you can find in the club:\n\n\\> Community events and diving activities \n\n\\> Shared experiences from Liberty CCR divers worldwide \n\n\\>Training opportunities and workshops \n\n\\> Tips, knowledge, and community support \n\n\\> News and updates from the Liberty diving community \n\n\n**Visit Liberty Divers Club**\n\nLearn more or become a member at:\nhttps://www.libertydivers.com/\n","textLarge":false,"imageOnRight":true,"image":{"recommendedSizes":{"width":"420","height":"280"}},"imageMobile":{"recommendedSizes":{"width":"750","height":"500"}}},"id":"#43","type":"component","lock":false,"position":4},{"name":"Spacer","data":{"spacingLarge":30,"spacingSmall":20,"backgroundColor":"#ffffff"},"id":"#45","type":"component","lock":false,"position":5},{"name":"Image","data":{"firstImage":{"mimetype":"image/jpeg","size":2314959,"hash":"e89a7091a306699f1c9a93e89fdb1dd35cf08df4","id":"clsylbj3ou1k00776vtrsopwa","filename":"libertydiversclub-01.jpg","category":"divesoft/","type":"image","alt":"Members of the Liberty Divers Club preparing for a rebreather dive"},"secondImage":{"mimetype":"image/jpeg","size":1395703,"hash":"8ac400255f6b0261b4bb176cb2aa34d707f37e8c","id":"clsylbnmqu1k60776qnfq86j4","filename":"libertydiversclub-02.jpg","category":"divesoft/","type":"image","alt":"Divesoft Liberty CCR divers exploring underwater environments"},"image":{"type":"image"}},"id":"#23","type":"component","lock":false,"position":6},{"name":"Spacer","data":{"spacingLarge":30,"spacingSmall":20,"backgroundColor":"#ffffff"},"id":"#49","type":"component","lock":false,"position":10},{"name":"Image","data":{"firstImage":{"mimetype":"image/jpeg","size":1782370,"hash":"3f8a861f64ff77e763668bf0cb75e29396bcf573","id":"clsylbv5nu1kc07762wzra98d","filename":"libertydiversclub-03.jpg","category":"divesoft/","type":"image","alt":"Divesoft Liberty CCR divers exploring underwater environments"},"secondImage":{"mimetype":"image/jpeg","size":1906411,"hash":"adcc99b95ad711d0e186724c9f3e51180b8f1578","id":"clsylbzblu1kk07760hegslt4","filename":"libertydiversclub-04.jpg","category":"divesoft/","type":"image","alt":"Divesoft Liberty CCR divers exploring underwater environments"}},"id":"#48","type":"component","lock":false,"position":11},{"name":"Spacer","data":{"spacingLarge":30,"spacingSmall":20,"backgroundColor":"#ffffff"},"id":"#55","type":"component","lock":false,"position":13},{"name":"Image","data":{"firstImage":{"mimetype":"image/jpeg","size":1571651,"hash":"d39d05c45d57a51e146f1d2fc8fe607117a294ef","id":"clsylc49ou1ks07764ghu8xox","filename":"libertydiversclub-05.jpg","category":"divesoft/","type":"image","alt":"Divesoft Liberty CCR divers exploring underwater environments"},"secondImage":{"mimetype":"image/jpeg","size":2710743,"hash":"402b3
21ea7eba1ba63ba93ff059eda50648c11998","id":"clsylc96tu1l00776e6l6km0i","filename":"libertydiversclub-06.jpg","category":"divesoft/","type":"image","alt":"Divesoft Liberty CCR divers exploring underwater environments"},"image":{"type":"image"}},"id":"#52","type":"component","lock":false,"position":14},{"name":"Spacer","data":{"spacingLarge":30,"spacingSmall":20,"backgroundColor":"#ffffff"},"id":"#71","type":"component","lock":false,"position":16},{"name":"Image","data":{"firstImage":{"mimetype":"image/jpeg","size":2071974,"hash":"a427efc8b44fa1899737a14c8bb92ba2eb661709","id":"clsylce1fu1l70776qs08gke4","filename":"libertydiversclub-07.jpg","category":"divesoft/","type":"image","alt":"Divesoft Liberty CCR divers exploring underwater environments"},"secondImage":{"mimetype":"image/jpeg","size":2819712,"hash":"26659bbebda744ccc07979bbcd6e279e7308a92f","id":"clsylci87u1ld0776bon0ovjo","filename":"libertydiversclub-08.jpg","category":"divesoft/","type":"image","alt":"Divesoft Liberty CCR divers exploring underwater environments"}},"id":"#54","type":"component","lock":false,"position":17},{"name":"Image","data":{"firstImage":{"mimetype":"image/jpeg","size":1846887,"hash":"cc3b76780933ed9c63afd50dc6e243b9c672f532","id":"clsylcmhsu1lk0776w4lekut4","filename":"libertydiversclub-09.jpg","category":"divesoft/","type":"image","alt":"Divesoft Liberty CCR divers exploring underwater environments"},"secondImage":{"mimetype":"image/jpeg","size":1318601,"hash":"36c7e91ced8a1d63a1214af59aeda4c7ae82ad8b","id":"clsylcqxku1lq0776syzxe94y","filename":"libertydiversclub-10.jpg","category":"divesoft/","type":"image","alt":"Divesoft Liberty CCR divers exploring underwater environments"}},"id":"#56","type":"component","lock":false,"position":18},{"name":"Spacer","data":{"spacingLarge":30,"spacingSmall":20,"backgroundColor":"#ffffff"},"id":"#20","type":"component","lock":false,"position":21},{"name":"Footer","data":{"componentTemplateId":"cjvwimxrl08e40798hjs5ek9w"},"id":"#1","type":"component","lock":false,"position":22}],"id":"root","idBuffer":"#72","lastCommit":"d9ca3243-9476-4f2e-8b33-3664e933b74b"}},"annotations":[],"language":{"type":"id","generated":false,"id":"Language:cjv3kwvoj000u083611381c6o","typename":"Language"},"__typename":"PageTranslation"},"Page:clutqeck7fy2g0735ynx14jaf":{"id":"clutqeck7fy2g0735ynx14jaf","type":{"type":"id","generated":false,"id":"PageType:cjv3l213x004f08366hjufttp","typename":"PageType"},"tags":[{"type":"id","generated":false,"id":"Tag:cjv3szrcv01bz0836yo8myb0r","typename":"Tag"},{"type":"id","generated":false,"id":"Tag:clw52z09zlclk0735mxb7v53p","typename":"Tag"}],"translations({\"where\":{\"language\":{\"id\":\"cjv3kwvoj000u083611381c6o\"}}})":[{"type":"id","generated":false,"id":"PageTranslation:clutqecknfy2n0735f8y5e38q","typename":"PageTranslation"}],"__typename":"Page"},"PageTranslation:clutqecknfy2n0735f8y5e38q":{"id":"clutqecknfy2n0735f8y5e38q","name":"divesoft.blog / Rebreather Configurations","createdAt":"2024-04-10T11:32:54.694Z","content":{"type":"json","json":{"content":[{"name":"Header","data":{"products":[{"title":"Accessories","description":"Backplates, Consumables. Tanks.","img":{"recommendedSizes":{"width":"235","height":"235"}},"url":""},{"title":"Accessories sets","description":"Protection, maintenance, cleaning.","img":{"recommendedSizes":{"width":"235","height":"235"}},"url":""},{"title":"Spare parts","description":"Spare parts and components.","img":{"recommendedSizes":{"width":"235","height":"235"}},"url":""},{"title":"Spare parts kits","description":"Completly Liberty spare parts kits.","img":{"recommendedSizes":{"width":"235","height":"235"}},"url":""}]},"id":"#0","type":"component","lock":false,"position":0},{"name":"BlogArticle","data":{"title":"Rebreather Configurations","perex":"Rebreather configurations are a critical element of the diving system just like conventional open circuit diving, such as backmount and sidemount. Configurations are a balance between the diving environment and the userâs comfort. Normally, dictated by the underwater environment, rebreathers must take a step further by being an ambient pressure system, operating underwater, be robust, perform well, be comfortable to wear, and must even travel well!","content":" \nDivesoft's vision was to reimagine the closed circuit rebreather design and begin again from the ground up. The Liberty Classic configuration was created unconventionally by designing the unit around work of breathing and fault tolerance. The only conventional aspect of the classic was that it is
2worn on the divers back and employed front mount counterlungs. This initial design has grown and evolved into the line up that we see today of the Liberty Classic, Heavy, and the popular Liberty Sidemount rebreather.\n\nItâs easy to go beyond the scope of this post by diving into the history of rebreather design and how they were worn and configured. We are going to focus on popular configurations, Chest mounted rebreathers, backmounted (BM) rebreathers, and sidemount (SM) rebreathers.\n\nThe configuration and design of the rebreather is critical because it affects the hydrostatic pressure between the diver and rebreather (Closed Circuit Rebreather or CCR). The hydrostatic balance of the counterlung location, the divers trim, and the unitâs design all affect the overall work of breathing (WOB). WOB is a critical factor because the divers lungs move the gas through the system, if there are any disruptions or imbalances that create more work, this can cause fatigue, CO2 retention, hypercapnia and even asphyxia.\n\n \nHistorically rebreather design and configurations being mostly shaped by WOB which meant placement and orientation of the counterlung system lead to design focus. Logically the best hydrostatic balance was what was close to the user's chest, this led to the obvious chest mounted rebreathers. Simple and effective units that began life as primarily oxygen systems and later evolved into mixed gas systems are now popular again as they travel extremely well and often have good WOB.\n\nMoving forward in rebreather evolution and even skipping ahead of semi-closed systems (robust and simple designs that were a branch away from fully closed rebreathers to work around pesky electronics) leads us to mixed gas electronic CCRs such as the CCR Liberty Classic. The first backmount configuration started life with front mounted counterlungs. This was the go-to configuration for high performance rebreathers because they utilized the reliable WOB close to the users chest but able to easily add gasses and integrate a simple and effective automatic diluent valve. Many users prefer this configuration as it is a very effective and proven configuration for deep rebreather diving. Other than front mounted counterlungs we also had encased counterlungs housed within the rebreather assembly on the divers back. We continue to see this around with a few manufacturers.\n\nIn the last 12 or so years there has been a revival of rebreathers and what is now available on the market has given the consumer a huge variety in rebreathers and how they are configured. Backmounted counterlungs (CL) that are free and unencumbered by a case have become more popular than frontmounted counterlungs. Gas addition manual add valves have gone from a handheld block to the Divesoft Libertyâs popular mouthpiece manual add valves (MAVs). The phrase, âIf you can find your mouth, you can find your MAVsâ, has proven this configuration to be very user friendly. Back-mounted counterlungs have a variety of advantages, such as, a clear chest, good work of breathing, lung placement allows for the diver to exhibit good trim, effective breathing in all orientations, dewatering capabilities, and effective protection of water intrusion to the electronics through water traps and âTâ pieces.\n\n \nSidemount rebreathers have also become another very popular configuration with exploration because they allow us to utilize rebreather technology through restrictions safer than before. A true sidemount rebreather is completely self contained and is worn similar to a single sidemount cylinder. The Liberty sidemount configuration specifically is a complete system with both diluent and oxygen gas on board, easily removable, and has redundant computers, and redundant displays.\n\nSidemount rebreathers are an incredible tool and great way to configure a rebreather for expedition diving because they are able to travel well, can easily offboard gas into the unit, and should be removable in a manner similar to a SM cylinder. Limitations of Sidemount rebreathers are that they are not as flood tolerant as a backmounted rebreather because any water trap or âTâ piece would hamper the work of breathing, thus, any water intrusion will migrate directly to the rebreather's electronics and scrubber. Thus, it is critical for a sidemount rebreather to employ a robust water resistant scrubber such as a radial scrubber and resistant electronics. Hydrostatic loading is also very depen
2dent on the unitâs orientation within the water. The diverâs trim has a significant impact on the work of breathing. Combined with the water vulnerability and easy changes in WOB from the divers trim, they often defend the notion that sidemount rebreathers are more advanced and having CCR experience with a BM unit will help the divers experience with SM rebreathers.\n\nA rebreather diver can combine the configurations of a double BM rebreather or combine a BM rebreather with a sidemount rebreather to employ a primary rebreather with a backup rebreather or âbailoutâ rebreather. This configuration is relatively new to the community and has been defined between a âDual Rebreather or Dual CCRâ or a âBailout Rebreatherâ. This different nomenclature defines two different functionalities, one that both rebreathers are being used in conjunction during the dive and the diver is swapping between the two breathing loops in a certain time interval not only for functional verification of the second unit.\n\n \nTwo, the bailout rebreather is defined as the purely backup rebreather for the diver. This means that the diver is on one primary system and only changes between loops to verify breathing loop integrity during depth changes or over time. Loop integrity and function check are critical to be constantly monitored. Discussion on the management of this goes well beyond the scope of rebreather configurations. A double BM rebreather would employ a set of backmounted CL and frontmounted CL. A primary BM unit and a SM unit would ideally use BM CL to maintain a clear chest for the SM rebreathers loop to remain at the ready for the diver.\n\nWith all of the development in rebreathers in the last 24 years one begs to ask the question. What does the future of rebreather configurations look like? Will it look like dual systems such as Closed Circuit Rebreather combined with an Open Circuit system backup? Or will we move to a trifecta of a Primary Closed Circuit Rebreather, Bailout Closed Circuit Rebreather, and an Open Circuit system? Or will we remove the Open Circuit system completely and just have a primary CCR and bailout CCR?\n\nThe OC scuba system will forever be utilized SCUBA systems because we will always need a diluent and inflation gas systems to drive the rebreathers. It will likely just move from being a complete breathing gas to primarily drive gas system for the rebreathers that the diver may also breathe from through a bailout valve (BOV) during a transition between both systems.\n\nWhichever way the community goes, it will likely be a combination of things as every diver has a different experience and dive sites have different requirements. What will be critical is that we will need manufactures that are willing to innovate and be receptive to the divers requirements in order to continue the sport of underwater exploration. We are truly living in an exciting time as there has never been more resources and support for underwater exploration than there are today.\n\nAuthor: Joseph Jonathan Bosquez","showTags":false,"showDate":false,"image":{"mimetype":"image/jpeg","size":336757,"hash":"7869d0352d1c09534e72c934422b7f95f8a9d055","id":"cluwpfdfuik600776qwi0kefl","filename":"joseph-jonathan-bosquez.jpg","category":"divesoft/","type":"image","alt":"Joseph Jonathan Bosquez"}},"id":"#2","type":"component","lock":false,"position":1},{"name":"ProductShowcase","data":{"componentTemplateId":"cm9h4wr6ugjv10803yqs3tp71"},"id":"#4","type":"component","lock":false,"position":2},{"name":"Footer","data":{"copyrights":"Copyright © 2019 Divesoft LLC All rights reserved.","facebookUrl":"","youtubeUrl":"","instagramUrl":"","contacts":"**Divesoft, s.r.o.** Hálkova 2495 413 01 Roudnice nad Labem Äeská republika Tel.: +420 416 857 057 E-mail: [email protected]"},"id":"#1","type":"component","lock":false,"position":4}],"id":"root","idBuffer":"#5","lastCommit":"75f3bbf0-90ed-4598-9258-555ced8afab1"}},"annotations":[{"type":"id","generated":true,"id":"PageTranslation:clutqecknfy2n0735f8y5e38q.annotations.0","typename":"PageAnnotation"},{"type":"id","generated":true,"id":"PageTranslation:clutqecknfy2n0735f8y5e38q.annotations.1","typename":"PageAnnotation"},{"type":"id","generated":true,"id":"PageTranslation:clutqecknfy2n0735f8y5e38q.annotations.2","typename":"PageAnnotation"}],"language":{"type":"id","generated":false,"id":"Language:cjv3kwvoj000u083611381c6o","typename":"Language"},"__typename":"PageTranslation"},"PageTranslation:clutqecknfy2n0735f8y5e38q.annotations.0":{"key":"title","value":"Rebreather Configurations","__typename":"PageAnnotation"},"PageTranslation:clutqecknfy2n0735f8y5e38q.annotations.1":{"key":"perex","value":"Rebreather configurations are a critical element of the diving system just like conventional open circuit diving, such as backmount and sidemount. Configurations are a balance between the diving environment and the userâs comfort. Normally, dictated by the underwater environment, rebreathers must take a step further by being an ambient pressure system, operating underwater, be robust, perform well, be comfortable to wear, and must even travel well!","__typename":"PageAnnotation"},"PageTranslation:clutqecknfy2n0735f8y5e38q.annotations.2":{"key":"image","value":"{\"mimetype\":\"image/jpeg\",\"size\":867645,\"hash\":\"849081ad7121bcc428bf8775d0d6be388d8fa8e0\",\"id\":\"cluv537ati0ls07768wybqxne\",\"filename\":\"divesoft-photo-016.jpg\",\"category\":\"divesoft/\",\"type\":\"image\"}","__typename":"PageAnnotation"},"Page:clw4qh5k6l9n907353ehehufe":{"id":"clw4qh5k6l9n907353ehehufe","type":{"type":"id","generated":false,"id":"PageType:cjv3l213x004f08366hjufttp","typename":"PageType"},"tags":[{"type":"id","generated":false,"id":"Tag:cjv3szrcv01bz0836yo8myb0r","typename":"Tag"},{"type":"id","generated":false,"id":"Tag:cm5ww0z2w1b7708035dpdbq9a","typename":"Tag"}],"translations({\"where\":{\"language\":{\"id\":\"cjv3kwvoj000u083611381c6o\"}}}
2)":[{"type":"id","generated":false,"id":"PageTranslation:clw4qh5kjl9ng0735nzyt32h9","typename":"PageTranslation"}],"__typename":"Page"},"Tag:cm5ww0z2w1b7708035dpdbq9a":{"id":"cm5ww0z2w1b7708035dpdbq9a","name":"Blog: Expert","__typename":"Tag"},"PageTranslation:clw4qh5kjl9ng0735nzyt32h9":{"id":"clw4qh5kjl9ng0735nzyt32h9","name":"Bailout procedures","createdAt":"2024-05-13T09:00:15.859Z","content":{"type":"json","json":{"content":[{"name":"Header","data":{"products":[{"title":"Accessories","description":"Backplates, Consumables. Tanks.","img":{"recommendedSizes":{"width":"235","height":"235"}},"url":""},{"title":"Accessories sets","description":"Protection, maintenance, cleaning.","img":{"recommendedSizes":{"width":"235","height":"235"}},"url":""},{"title":"Spare parts","description":"Spare parts and components.","img":{"recommendedSizes":{"width":"235","height":"235"}},"url":""},{"title":"Spare parts kits","description":"Completly Liberty spare parts kits.","img":{"recommendedSizes":{"width":"235","height":"235"}},"url":""}]},"id":"#0","type":"component","lock":false,"position":0},{"name":"BlogArticle","data":{"title":"Bailout procedures","perex":"When in doubt - Bailout!\n\nFirst things first, what is bailing out? Why do we carry a complete backup egress system to our rebreather? Why donât we carry a backup egress system to our OC system? Are all bailouts the same? What makes a bailout system better than another? In this blog post we will discuss what type of factors we consider while planning for when things go FUBAR and we have to get ourselves back to the surface.","content":" \nBailing out is a term used by technical divers to refer to a backup system to get the diver back to the surface. When I teach divers how to use rebreathers, I define the rebreather as the primary SCUBA system and the OC SCUBA as the secondary system. It doesn't necessarily have to be a rebreather (CCR) and an open circuit (OC) system, it can be two OC systems or two CCR systems. Then we have to ask ourselves, why just two? Why not three? Itâs quite easy to get buried in the weeds, but in the end divers have to balance what is reliable with what is practical.\n\nOpen Circuit bailout is 1.5x the amount of gas you need from maximum penetration to return home. It is not gas for your buddy, unless the dive team plans to utilize a âteam bailoutâ strategy. Whether you carry all of your gas with you in case you get blown off the wreck or stage cylinders nicely in the cave, you have to plan it and carry it yourself.\n\nCCR bailout or a [bailout rebreather](https://www.divesoft.com/en/products/ccr-liberty/bail-out-rebreather) is a second rebreather that is utilized to return home in the event of a failed primary rebreather. This is often utilized in conjunction with some additional OC gas that acts as a transition gas and drives the diluent of both primary and secondary rebreathers. A Bailout rebreather must be able to independently function but does not need to be transferable. Transfer of a bailout rebreather in a team bailout setting is a particular strategy that must be planned for before the dive. The rebreather is also a backup decompression system because the primary focus will be for the diver to get back to the door quickly and begin decompression as soon as possible.\n\nTeam bailout is often scrutinized and is associated with divers individually not carrying enough OC gas but are required to depend on a buddy to get home but that does not necessarily have to be the strategy. When a cave undergoes a period of lots of diving, such as the exploration of P3, or Weeki Wachee, divers will stage safety cylinders that are placed throughout a system to supplement the diver in the event of an equipment failure and make sure the diver has enough gas to safely get to the surface. Team mates do not depend on this gas but it does create a nice and cozy margin for project divers. Habitats with staged decompression gas are a critical piece of the bailout strategy along with Habitat rebreathers and redundant power sources.\n\n \nAt NASA, during EVA operations there are three types of egress scenarios; 1st being standard, we have reached the end of our objectives and to adhere to the timeline, time to pack up the worksite and make our way back to the door. 2nd, there is a pressing problem and we need to organize ourselves efficie
2ntly, pack up the worksite, end the mission and begin to make our way back to the door. 3rd, the emergency scenario where we leave the worksite immediately and all priorities are to egress to the airlock. \n\nIn rebreather diving, the parallel is the 1st scenario of staying on rebreather the entire dive, the ideal dive. 2nd, would be the rebreather has encountered a failure and PO2 monitoring/control has failed or the scrubber is no longer usable. Going beyond the obvious SCR and other strategies to extend our gas, this scenario means for us to make our exit quickly and efficiently. 3rd, the diver has encountered a caustic event or an injury, requiring a rapid egress towards decompression and to the door. In the #2 scenario would the diver remove things placed into the system? Say a guideline or jumps? The technical diver should have adequate gas planning to calmly end the dive and perform the planned decompression with no emergency because the gas requirements should be more than adequate to end the dive. #3 scenario is under extraordinary circumstances such as a caustic burn where the diverâs gas consumption is much higher than anticipated thus the diver is consuming more gas. Combined with the elevated gas consumption and the diverâs injury, the diver will require that the exit be as efficient and quick as possible, while performing all required decompression obligations.\n\n \nBailout systems are the backup system so that in the event of a failure a diver can safely exit back to the surface. Technical divers are trained from the beginning to always have a backup system in the form of a redundant gas delivery system combined with conservative gas management strategies. For OC tech diving in caves we follow the rule of 1/3rd gas management which is arguably not conservative enough in the event of a system failure but is still quite standard practice. The 1/3rd of gas is typically never used unless an emergency occurs. With Rebreather divers they are all often technical minded and the secondary OC system referred to as âbailoutâ is often untouched unless incorporated as a diluent gas through offboarding which is quite common practice in cave diving. \n\nPlanning for our bailout in rebreather diving is not an overly complicated endeavor. We calculate how much gas is required for our planned range and decompression obligation, simple enough, right? The biggest problem is that most divers like to let their ego get in the way and base their gas planning on an ideal gas consumption on a normal day ( I know Iâve had to learn this the hard way). Oftentimes we donât practice OC diving enough for us to maintain our good practices and good gas consumption, isnât that the reason why we got into CCR diving?? Then in the event we do have a rebreather failure and have to go on OC itâs often not in the best conditions and we need to get our butt back to the door.\n\n \nBreathing is elevated, a flooded rebreather is throwing off any and all trim, stress, kicking yourself thinking how could you have taken the loop out of your mouth! All of this brings up the wonderful RMV that you were once so proud of. This scenario is just an example of making a mistake and flooding the rebreather. Now if this was a flood on a SM unit - this could quickly lead to a caustic event, now youâve got an entire myriad of problems, throat spasms, coughing/gagging just to name a few.\n\nThe reality is you need to plan for an âOh S***â moment, bailout and get your butt back home. Let's put some numbers down and say I normally plan for a .7 cuft RMV, then what I will do is plan for that initial bailout moment at a 1.5 cuft RMV, for 5 min, maybe 10 minutes, then I will settle down (all while moving towards the door) and bring my rate back down to a .7 RMV until I get to my decompression gas.\n\n \nBailout procedures are very site specific and mission specific. Daily conditions can often have a significant impact on the divers' bailout strategy. This could mean an additional buffer of gas, perhaps using an Al80 for oxygen rather than an Al40 but it should always be scrutinized and constantly be reevaluated, especially when things have never been a problem, because that's when we should practice a bailout and see how we do. The old adage of practice makes perfect is good, but perfect practice makes better. Remember, every day we have an opportunity to be a better diver!\n\nAuthor: Joseph Jonathan Bosquez","showTags":false,"showDate":false,"image":{"mimetype":"image/jpeg","size":859850,"hash":"fe689d09a3326c556d872fb1e5453a43df5f2d1a","id":"clw4thkz2wv4q0776gz9lbmsz","filename":"divesoft-photo-079-bailout-procedures.jpg","category":"divesoft/","type":"image","dynamiclySourcedImage":" "}},"id":"#2","type":"component","lock":false,"position":1},{"name":"ProductShowcase","data":{"componentTemplateId":"cm9h4wr6ugjv10803yqs3tp71"},"id":"#6","type":"component","lock":false,"position":2},{"name":"Footer","data":{"copyrights":"Copyright © 2019 Divesoft LLC All rights reserved.","facebookUrl":"","youtubeUrl":"","instagramUrl":"","contacts":"**Divesoft, s.r.o.** Hálkova 2495 413 01 Roudnice nad Labem Äeská republika Tel.: +420 416 857 057 E-mail: [email protected]"},"id":"#1","type":"component","lock":false,"position":6}],"id":"root","idBuffer":"#7","lastCommit":"44739586-ed80-4d9b-95fe-6ea24c7ea3c8"}},"annotations":[],"language":{"type":"id","generated":false,"id":"Language:cjv3kwvoj000u083611381c6o","typename":"Language"},"__typename":"PageTranslation"},"Page:clxa0ibm1qtls07356bxbmpc2":{"id":"clxa0ibm1qtls07356bxbmpc2","type":{"type":"id","generated":false,"id":"PageType:cjv3l213x004f08366hjufttp","typename":"PageType"},"tags":[{"type":"id","generated":false,"id":"Tag:cjv3szrcv01bz0836yo8myb0r","typename":"Tag"},{"type":"id","generated":false,"id":"Tag:clyyc8ovoy9ai0735du6cmw7i","typename":"Tag"},{"type":"id","generated":false,"id":"Tag:cm5ww0t651b710803pcl02cn4","typename":"Tag"}],"translations({\"where\":{\"language\":{\"id\":\"cjv3kwvoj000u083611381c6o\"}}})":[{"type":"id","generated":false,"id":"PageTranslation:clxa0ibmkqtlz0735cwt023nr","typename":"PageTranslation"}],"__typename":"Page"},"PageTranslation:clxa0ibmkqtlz0735cwt023nr":{"id":"clxa0ibmkqtlz0735cwt023nr","name":"A Comprehensive Guide to Technical Dive Planning / Part 1","createdAt":"2024-06-11T06:19:39.740Z","content":{"type":"json","json":{"content":[{"name":"Header","data":{"products":[{"title":"Accessories","description":"Backplates, Consumables. Tanks.","img":{"recommendedSizes":{"width":"235","height":"235"}},"url":""},{"title":"Accessories sets","description":"Protection, maintenance, cleaning.","img":{"recommendedSizes":{"width":"235","height":"235"}},"url":""},{"title":"Spare parts","description":"Spare parts and components.","img":{"recommendedSizes":{"width":"235","height":"235"}},"url":""},{"title":"Spare parts kits","description":"Completly Liberty spare parts kits.","img":{"recommendedSizes":{"width":"235","height":"235"}},"url":""}]},"id":"#0","type":"component","lock":false,"position":0},{"name":"BlogArticle","data":{"title":"A Comprehensive Guide to Technical Dive Planning / Part 1","perex":"Preparing for a dive is undoubtedly a key element of a safe and successful event. A good plan can be the difference between a great experience and disaster.","content":"Let's face it, every dive is actually planned. Even simply agreeing with a friend that you're going diving at Swan Lake and meeting at 5:00, is a plan. What is crucial, however, is the level of detail, sophistication and care that goes into preparing the dive. This will vary with the difficulty of the dive and the various conditions that come into play. Putting two extreme examples against each other, the level will be dramatically different for a routine recreational dive versus a challenging technical expedition to an unexplored site in a remote area. Contrast a few minutes of deliberation between two friends versus a year's preparation by a multi-person team. Let's focus on the **plan for a technical scuba dive without the support of a dive center**, which often solves many things for us. \n\nSo let's go through the different elements that each plan should contain. If possible, all team members should prepare the plan together or at least consult with each other. If only one, usually the most experienced team member or event leader, is preparing the plan, he or she should thoroughly brief the other team members on the plan during a joint briefing. Team members must then demonstrate that they are familiar with the plan, understand it and understand their role and assigned tasks.\n\n \n\n**Location and weather** \nSometimes the choice of the place is clear and we plan everything else around that, and other times we put together criteria of what we would like to see, experience, discover and what we have available. If we choose a place in the latter way, we have to turn to literature, maps or specialised websites with a database of sites. The location of wrecks can be guessed by local fishermen who repeatedly lose their nets in the same place. They also have an idea where marine life is concentrated. Local people such as herders, farmers or foresters, who know the area intimately, can help find new caves. Places that are still hidden from our community but that locals have knowledge of, are still plentiful even in today's modern world. \n\nNautical charts can give us a rough idea of what the bottom relief looks like. Today
2we can find some online, such as Navionics ChartViewer.\n\n \n\nIf we have information about a site from a source such as a list of dive sites, a description from someone who has dived there before us, and so on, we can then extract as much information as possible on things such as depth, location, prominent features and landmarks, access to the site, and possible hazards. \nThe weather can be tricky and can make the event very difficult or even impossible. We need to have long-term and detailed short-term local forecasts. The long term is mainly concerned with choosing the right time of year to hold the event. We can easily find out the average temperature and precipitation in each period, periodic precipitation and winds, tidal forces, currents. In short, to choose the most suitable time of the year for the planned diving. Local short-term forecasting has been greatly facilitated by weather apps and websites such as Yr.no or Windy.com. \n\n \nEspecially the latter can display a huge amount of detailed data about the current weather situation anyw
2here in the world and forecasts for 9 days ahead, which includes wind, precipitation, waves, currents, tides, sea temperature (at the surface) and more. We have to take into account that there is no perfect forecast. We can consider a forecast up to a maximum of 24 hours ahead as relatively reliable data, while we consider data up to three days ahead as a probable course. Anything beyond the three-day horizon can only be accepted as a rough guide.\n\n \n\nThe exception is the tide forecast. There, on the other hand, iron-clad regularity and predictability apply. It is, however, very strictly location-specific, and so we must obtain tide tables as close as possible to the location of the planned dive. Timing the dive so that the tidal currents are as small as possible and flow in the right direction during the dive is essential. This is done at the peak of the tide. \n\n \n\n**Logistics** \nLogistics is usually the least attractive part of the planning and the event itself. We have to take into account all conceivable operations necessary to carry out the event. Especially how to get to the site, how to get all the equipment there, where to stay, where to rent a boat, where and how to fill the bottles, and so on. The logistics of the dive itself then include deploying the progress or decompression cylinders, providing a decompression ladder, ascent rope and such. \n\n \n\n**Teams** \nThe basic prerequisite for forming a technical scuba diving team is ensuring sufficient skills, experience and qualifications of all members. Events of a technical nature are often announced with a certain minimum level/qualification required. Where practical teams are divided into support and exploratory teams. Cave diving especially in Europe often requires an extra large team of porters. These do not even have to be divers themselves but must be proficient cavers and climbers. All equipment must be carried through miles of passageways, rarely upright and often by crawling, climbing, rappelling and traversing. This determines the ratio of porters per diver. On a recent historic crossing of a 7 km section in the Moravian Karst, there were 40 dry support team members to two cave divers. \nThe underwater support team is responsible for deploying the progression cylinders and transporting all the necessary materials and technical diving equipment to the right places and removing those no longer needed. This allows the exploration team to concentrate on reaching the target or making new discoveries. \n\n \n\n**Choice of technical diving equipment** \nWe use the information about the location and difficulty of the dive to choose the equipment we will need. It would be nice if we could always use the same equipment for all types of dives, but that is simply not possible, despite the beliefs of some fundamentalists. Or at least not yet. \nWe must first determine the basic equipment configuration. Will it be open circuit or closed circuit? Backmount or sidemount? Dry suit or wet suit? You say to yourself, if I have all that available, why should I choose in the meantime, I'll take the better one, but that certainly doesn't have to be the case. While rebreathers may seem to do all the work, for conditions such as a challenging cave transport to cross a siphon, lightweight self-contained steel cylinders are probably more appropriate. For deep dives closed circuit. For dives with long underwater penetration of a cave or wreck or extreme depths many progression or decompression cylinders, a double rebreather or bailout rebreather are suitable, for narrow spaces a sidemount rebreather. The amount of cylinders and gases then follows from gas management planning, which we discuss below. \nFor the basic configuration of technical equipment we have to think about what additional equipment we will use. Guide lines, buoys, reels, spare lights, spare cutters, heating systems, scooters, transport bags and boxes, and other technical diving gear. \nSome missions require very specific tools and pieces of equipment designed for specific purposes. Biologists like Sonia Rowley or Richard Pyle need trap nets, sampling vials. Other times divers need mapping plates, but also hammers, crowbars, saws, metal detectors, markers, dye
2s, and so on. \n\n \n\n**Dive objectives** \nHa, this is probably the most fun and adventurous part of the planning. We're discussing with our friends what exactly we're going to do underwater and how the dive will work. We have a map of the site, cave or wreck in front of us and we think about how best to execute the dive. Everyone is assigned their tasks and responsibilities within the team. A timing plan of specific steps to take while on the bottom is made. The exposure will then be determined from that. That is, the depth and time of the dive. These are the necessary inputs for planning decompression, gas management, gas selection and setpoints. But we will talk about that in the [next part of this article](https://www.divesoft.com/en/blog/a-comprehensive-guide-to-technical-dive-planning-part-2). We will show the actual calculations and the dive planner app. \n\n \n\nAuthor: Jakub Å imánek","showTags":false,"showDate":true,"image":{"mimetype":"image/jpeg","size":824586,"hash":"d322f43ddae101f5df4f901479ade16f0f633691","id":"clwrmh9vd49e30776kgaqtxv8","filename":"divesoft-photo-074-1.jpg","category":"divesoft/","type":"image"}},"id":"#2","type":"component","lock":false,"position":1},{"name":"ProductShowcase","data":{"componentTemplateId":"cm9h4wr6ugjv10803yqs3tp71"},"id":"#9","type":"component","lock":false,"position":2},{"name":"Footer","data":{"copyrights":"Copyright © 2019 Divesoft LLC All rights reserved.","facebookUrl":"","youtubeUrl":"","instagramUrl":"","contacts":"**Divesoft, s.r.o.** Hálkova 2495 413 01 Roudnice nad Labem Äeská republika Tel.: +420 416 857 057 E-mail: [email protected]"},"id":"#1","type":"component","lock":false,"position":3}],"id":"root","idBuffer":"#10","lastCommit":"aa2eaea2-1ab3-4b29-ad27-8745640fa693"}},"annotations":[],"language":{"type":"id","generated":false,"id":"Language:cjv3kwvoj000u083611381c6o","typename":"Language"},"__typename":"PageTranslation"},"Page:clxt2bo5ttdck0735uhterl3g":{"id":"clxt2bo5ttdck0735uhterl3g","type":{"type":"id","generated":false,"id":"PageType:cjv3l213x004f08366hjufttp","typename":"PageType"},"tags":[{"type":"id","generated":false,"id":"Tag:ckp59jt9n48lj0788mfuqrhym","typename":"Tag"}],"translations({\"where\":{\"language\":{\"id\":\"cjv3kwvoj000u083611381c6o\"}}})":[{"type":"id","generated":false,"id":"PageTranslation:clxt2bo67tdcr0735a3fxsn2t","typename":"PageTranslation"}],"__typename":"Page"},"PageTranslation:clxt2bo67tdcr0735a3fxsn2t":{"id":"clxt2bo67tdcr0735a3fxsn2t","name":"Store detail","createdAt":"2024-06-24T14:18:05.983Z","content":{"type":"json","json":{"content":[{"name":"Header","data":{"products":[{"title":"Accessories","description":"Backplates, Consumables. Tanks.","img":{"recommendedSizes":{"width":"235","height":"235"}},"url":""},{"title":"Accessories sets","description":"Protection, maintenance, cleaning.","img":{"recommendedSizes":{"width":"235","height":"235"}},"url":""},{"title":"Spare parts","description":"Spare parts and components.","img":{"recommendedSizes":{"width":"235","height":"235"}},"url":""},{"title":"Spare parts kits","description":"Completly Liberty spare parts kits.","img":{"recommendedSizes":{"width":"235","height":"235"}},"url":""}]},"id":"#0","type":"component","lock":false,"position":0},{"name":"Hero","data":{"title":"Dive Gear Service %cx,0,name% ","text":"","btnTitle":"","url":"","image":{"recommendedSizes":{"width":"1600","height":"560"}},"paddingTop":false,"smallFontSize":false},"id":"#3","type":"component","lock":false,"position":4},{"name":"News","data":{"title":"Contact person: %cx,0,contactPerson%\n\nAddress: %cx,0,city%, %cx,0,address%, %cx,0,zip%, %cx,0,country% \n\nPhone: %cx,0,phone% \n\nWeb: [%cx,0,webPages,0%](%cx,0,webPages,0%)","shareUrl":"","hideShare":true,"firstText":"","firstImg":{"recommendedSizes":{"width":"980","height":"480"}},"secondText":"","secondImg":{"recommendedSizes":{"width":"480","height":"290"}},"thirdImg":{"recommendedSizes":{"width":"480","height":"290"}},"thirdText":"","buttonUrl":""},"id":"#4","type":"component","lock":false,"position":5},{"name":"Footer","data":{"copyrights":"Copyright © 2019 Divesoft LLC All rights reserved.","facebookUrl":{"urlNewWindow":true,"url":"https://www.facebook.com/divesoft/"},"youtubeUrl":{"url":"https://www.youtube.com/channel/UCHI2-kHmfoUlAdhQXPKl8lA/featured","urlNewWindow":true},"instagramUrl":{"url":"https://www.instagram.com/divesoft/","urlNewWindow":true},"contacts":"**Divesoft s.r.o.** \nHálkova 2495 \n413 01 Roudnice nad Labem \nCzech Republic \nTel.: +420 416 857 057 \nE-mail: [email protected]"},"id":"#1","type":"component","lock":false,"position":7}],"id":"root","idBuffer":"#8","lastCommit":"1f866fb0-e273-45f9-b8de-65d956269c93"}},"annotations":[],"language":{"type":"id","generated":false,"id":"Language:cjv3kwvoj000u083611381c6o","typename":"Language"},"__typename":"PageTranslation"},"Page:clyfnkvvtw5400735aaroiwlr":{"id":"clyfnkvvtw5400735aaroiwlr","type":{"type":"id","generated":false,"id":"PageType:cjv3l213x004f08366hjufttp","typename":"PageType"},"tags":[{"type":"id","generated":false,"id":"Tag:cjv3szrcv01bz0836yo8myb0r","typename":"Tag"},{"type":"id","generated":false,"id":"Tag:clyyc8ovoy9ai0735du6cmw7i","typename":"Tag"},{"type":"id","generated":false,"id":"Tag:cm5ww0t651b710803pcl02cn4","typename":"Tag"}],"translations({\"where\":{\"language\":{\"id\":\"cjv3kwvoj000u083611381c6o\"}}})":[{"type":"id","generated":false,"id":"PageTranslation:clyfnkvw7w54707350cspqqb8","typename":"PageTranslation"}],"__typename":"Page"},"PageTranslation:clyfnkvw7w54707350cspqqb8":{"id":"clyfnkvw7w54707350cspqqb8","name":"A Comprehensive Guide to Technical Dive Planning / Part 2","createdAt":"2024-0
27-10T09:44:03.702Z","content":{"type":"json","json":{"content":[{"name":"Header","data":{"products":[{"title":"Accessories","description":"Backplates, Consumables. Tanks.","img":{"recommendedSizes":{"width":"235","height":"235"}},"url":""},{"title":"Accessories sets","description":"Protection, maintenance, cleaning.","img":{"recommendedSizes":{"width":"235","height":"235"}},"url":""},{"title":"Spare parts","description":"Spare parts and components.","img":{"recommendedSizes":{"width":"235","height":"235"}},"url":""},{"title":"Spare parts kits","description":"Completly Liberty spare parts kits.","img":{"recommendedSizes":{"width":"235","height":"235"}},"url":""}]},"id":"#0","type":"component","lock":false,"position":0},{"name":"BlogArticle","data":{"title":"A COMPREHENSIVE GUIDE TO TECHNICAL DIVE PLANNING / PART 2","perex":"In the [previous part](https://www.divesoft.com/en/blog/a-comprehensive-guide-to-technical-dive-planning-part-1) of the article we have discussed the event and the dive very broadly. In the second part of the article we will focus on planning the dive itself. That is, everything you need to plan for staying safely underwater and returning to the surface.","content":"**Decompression** \n\nIt will soon be 120 years since the publication of the first Haldane decompression tables and we are still not very clear on the issues that are most typical for diving activity. According to recent research, it seems that algorithms generating deep stops are out of date and the best we have is the Bühlmann model modified by gradient factors. The choice of the gradient factor is already the first step in decomposition planning. Current trends show that the safest and most effective is to use a GF low in the range of 40 - 50 and a GF high of 60 - 80. What you set in your planning app and your dive computer will affect the depth of the first stop (GF low) and the level of tissue saturation on surfacing (GF high). \n\n \n\nSpeaking of scheduling apps, that's the current modern trend. After the use of spreadsheets and planning software on the desktop computer comes mobile phones, which are now more powerful than PCs in the days of the first decompression software. Mobile phones are always at our fingertips and their operation is easy. Divesoft.app has an advanced scheduler that is continually improved. You choose whether you plan for open or closed circuit, set all the parameters and enter the dive profile, i.e. maximum depth and time. The app takes into account the subtle nuances of personal customisation of the planner. It is also possible to customize the profile for multi-level dives by adding additional points to the chart. This makes it suitable for advanced cave dives with multi-level depth profiles. \n\nA bailout plan is available in CCR mode. This is a must for planning with a rebreather, because decompression on the open circuit at a moment at which you can no longer dive with CCR due to a failure, is usually longer and you consume a significant amount of gas. You can further adjust the plan to make it acceptable and feasible in the planned conditions. \n\n \n\nOnce you are satisfied, you can transfer the plan to a .pdf format using the Print function and print the plan by sending it to the printer. You can take this plan underwater with you and follow it. \n\nIn any case, every technical diver should have an understanding of the ratio of time to surface at what depth and be able to derive the decompression time off the top of their head. Some people use this as a basic method and software just to confirm, but it can work the other way around. In any case, it comes in handy when the decompression computer fails. \n\n**Gas management** \n\nThe amount of time we can spend at the bottom is determined by the amount of gas we have available. Everything can be planned by calculations on paper or by entering it into a dive planning app, where it is easier and infinitely faster. \n\n \n\nWhen planning an open circuit dive, we have to take into account that we always have to get to the surface safely even if we or a team member runs out of gas at the worst possible moment, i.e. at the end of the planned time on the bottom. Above all, we must know the minimum amount of gas we need to surface. We take into account that we will be breathing two from one apparatus and under stress, so we have to add our partner's consumption to our own and multiply it by the stress factor of 1.5. We must not forget to multiply the result by the ambient pressure. We calculate the output until the first gas switch, where the partner switches to decompression gas and therefore has their supply. We can be conservative and calculate the pressure of the maximum depth, or we can be more realistic and calculate the average pressure between the maximum depth and the depth of the first gas switch. Let's take the example of a dive to 60 m with a gas switch at 21 m. The pressure at 60 m is 7 atm, at 20 m it is 3 atm. The average pressure will therefore be (7+3) / 2 = 5 atm. \n\nMy consumption is 15 l/min. \nPartner's consumption 15 l/min \nStress coefficient 1.5 à \nCalculation: (15 + 15) à 1.5 à 5 = 225 l/min \nAscent time from 60 m to 21 m at 10 m/min = 4 minutes \nCalculation: 4 à 225 = 900 litres. \n\nOn the bottom, however, we'll probably deal with a crisis situation and shoot a buoy to the surface, for example. For this reason it is a good idea to allow some extra time, at least 3 minutes. That's 3 à [(15 l/min + 15 l/min) à 1.5 à 7 atm] = 945 litres \n\n900 litres is the amount of gas we will need to ascend to 21 metres, where we will switch to decompression gas, and 945 litres are needed to deal with the situation at the bottom, so 1845 litres in total. If we have 2Ã12 litre cylinders, that's 77 bar in the cylinder that we have to start surfacing with. 123 bar is therefore available for the dive itself, which is enough for us at 60 metres: \n\n(123 bar à 24 l) / (15 l/min à 7 atm) = 28 minutes \n\nWe count decompression cylinders separately. Here we calculate the simple c
2onsumption. \n\n**Gas management for CCR** \n\nIn the case of closed circuit diving, gas management is simple for CCR and the bailout bottle remains unused. \n\nOxygen consumption is simply the dive time à 1.5 l/min. Although the physiological consumption is lower, we have to calculate the gas losses associated with the dive. \n\n \n\nThe diluent consumption depends on the loop volume and the depth of immersion, or repeated descents. If the profile is simple, we can calculate the loop volume multiplied by the pressure. For a more realistic result, we multiply by two to account for gas losses during small changes in depth. \n\nMore challenging and critically important is gas management planning for the bailout. We have to take into account that a bailout will happen at the worst moment of the dive, i.e. at the end of the planned time on the bottom at maximum depth. We add again 3 minutes to solve the problem. \n\nThe question is what consumption to choose. Since this is a really critical situation where we have to switch from CCR to OC and CO2 hit is in play, we calculate a consumption of 50 l/min. This applies for at least the first 10 minutes of the rescue plan. \n\nSo we count the first 3 minutes on the bottom, let's say again at 60 meters: \n\n3 à (50 l/min à 7 atm) = 1050 l \n\nAscent to 21 m takes 4 minutes and the average pressure is 5 atm: 4 à (50 l/min à 5 atm) = 1000 l \n\nTo climb to 21 metres, we need 2050 litres, which is equivalent to one Al80 bottle. \n\nNext, we have 3 minutes left at a consumption of 50 l/min and the rest is calculated with a consumption of 25 l/min. This is a realistic calculation, as CCR divers easily lose their low consumption capabilities as they can breathe as much as they want with CCR, and their transition to OC is often accompanied by an unpleasant surprise at how much gas they have exhaled. \n\nAnother interesting element of the bailout plan is that we choose a conservative PO2 value on the bottom with CCR, and the subsequent decompression is actually longer than if the same dive had been done with OC. \n \n\nCalculating the consumption at all decompression stops can be rather tedious, so it is more convenient to use a scheduling application. Divesoft.app assumes that the diver is using a stock of bailout gases that they do not change, so the app has a virtual stock of cylinders that the user uses most often. He then chooses from these cylinders when planning the dive, but of course he can add or change any other mixture during the planning process. \nIn the application settings, you can also set the length of time to solve a problem, the consumption in a critical (stressful) situation, the length of a stressful situation and the consumption outside a stressful situation. The app then calculates everything for you. \n\n**Selecting Mixtures and Setpoints** \n\nChoosing a mixture is always like walking a tightrope. We have to balance over dangerous precipices, and we don't want to fall into any of them. Those chasms have names like decompression sickness, oxygen poisoning, nitrogen anesthesia and gas density. \n\nThe first question should be: how much oxygen? The answer might be as much as possible, which is partly true. We metabolize oxygen, so it doesn't contribute to decompression sickness (quite the opposite, in fact), so the more we have in the mix, the less inert gases we'll suck into our tissues, and the less decompression duties we'll have. \n\nOn the other hand, there must not be too much of it, lest we endanger ourselves with oxygen poisoning. We must carefully consider the exposure time to determine the maximum partial pressure of oxygen (PO2 ). The NOAA table of CNS oxygen exposures will help us to do this. This table is not very exact, and we suspect that many things are a little different, but it is the best we have for now. \n\n**PO2 (bar)**\t/ Single dive exposure (minutes)\t/ *24-hour exposure*\n(minutes) \n\n**1,6**\t/ 045 / *150* \n**1,5*
2*\t/ 120\t/ *180* \n**1,4**\t/ 150\t/ *180* \n**1,3**\t/ 180\t/ *210* \n**1,2**\t/ 210\t/ *240* \n**1,1**\t/ 240\t/ *270* \n**1,0**\t/ 300\t/ *300* \n**0,9**\t/ 360\t/ *360* \n**0,8**\t/ 450\t/ *450* \n**0,7**\t/ 570\t/ *570* \n**0,6**\t/ 720\t/ *720* \n \nIn the case of an open circuit, maximum PO2 for the mixture at maximum depth and PO2 for decompression. This partial pressure will only ever be reached at maximum depth and will decrease with decreasing depth. With the circuit closed, however, the partial pressure remains the same all the time (until we switch to a different setpoint), in which case the oxygen exposure is much more severe. Hence, with a rebreather we always choose much more conservative values. While with OC we can expect a PO2 of 1.4 on the bottom and 1.6 on decompression, with CCR the maximum PO2 will be 1.2 on the bottom and if the total dive length allows it, we can get up to 1.4 on decompression. Of course we are talking about the preset setpoint. The actual mixture should be 0.2 bar PO2 lower still at the target depth so that we have enough reserve to dilute the loop in case of trouble. \n\nSo how do we find out how much oxygen should be in the mixture? By a simple calculation of Dalton's law. We calculate the absolute pressure at the maximum depth. \n\nF = PO2 / P \n\nFor example, for a depth of 60 m and a selected partial pressure of 1.4, calculate the oxygen fraction as follows: \n\nF = 1,4 / 7 \nF = 0,2 \n\nWe then find that for a depth of 60 m we use 20% oxygen in the mixture.\nFor closed circuit diving, the pattern remains the same of course, but we have different entry criteria. In particular, the maximum PO2 will be 1.2 bar. But we also have to ensure that the total gas at depth is dilutable. It is therefore advisable to select a maximum PO2 of the mixture that is 0.2 bar lower than the setpoint. In our case, 1 bar. \n\nF = PO2 / P \nF = 1 / 7 \nF = 0,14 \n\nThe proportion of oxygen in the diluent will be 14%. \n\nThe CNS oxygen toxicity breaks down by 50% every 90 minutes and this should be taken into account when planning repeat dives. \n\nIn addition to CNS oxygen toxicity, we have whole-body toxicity arising from prolonged exposures even at lower POs2 . We calculate it in OTU (oxygen toxicity unit). One unit of OTU is produced by a minute exposure to PO2 1.0. A daily limit of 300 OTUs is set for whole body toxicity. If we were calculating the entire OC dive, we would have to take the individual levels at each PO2 level and add them together. \n\nFor example, a dive to 60m for 20 minutes on a mixture with 20% oxygen and decompression to EAN 50 from a depth of 21m. We already know that the PO2 at the bottom is 1.4 bar \n\nOTU bottom 1,4 Ã 20 = 28 \nOTU output (average pressure 5 bar) (5 Ã 0.2) Ã 4 = 4 \nOTU deco 21m 1,5 Ã 4 = 6 \nOTU deco 18 m 1,4 Ã 2 = 2,8 \nOTU deco 15 m 1,2 Ã 1 = 1,2 \nOTU deco 12 m 1,1 Ã 3 = 3,3 \nOTU deco 9 m 0,9 Ã 5 = 4,5 \nOTU deco 6 m 0,8 Ã 22 = 17,6 \nTotal OTUs = 67.4 \n\nIt is clear from the previous calculation that whole body toxicity does not play a very significant role in open circuit diving. However, it is different in rebreather diving. If we perform the same dive with CCR, the OTU calculation will obviously be much easier, and let's see what it does to the result. Let's take a setpoint of 1.2 bar on the bottom and 1.4 on the decompression. \n\nThe time at setpoint 1.2 is 20 minutes and according to the decompression planner the total output at setpoint 1.4 is 39 minutes. \n\nOTU bottom 1,2 Ã 20 = 24 \nOTU decompression = 1.4 Ã 39 = 54.6 \nTotal OTUs per dive = 78.6 \n\nWe can see that a separate dive won't affect us much. The problem may arise in the case of repeated dives. When diving with a CCR at an attractive site or expedition, where several dives a day for a week or more are dived, the whole body form of oxygen toxicity may already be a problem that must be seriously taken into account. \n\n \n\n**Clean head** \n\nOnce we have our oxygen, we then need to focus on making sure that at each dive depth our cognitive, mental and reactionary abilities are as little affected as possible by the narcotic effect of inert gases at high pressure. If we are diving with air on an open circuit, we can say that at a depth of 30 meters our mind is still acceptably efficie
2nt. So we will take this depth and relate our calculations to it. We will call this depth the equivalent narcotic depth (END). \n\nSo we need to find out what the partial pressure of nitrogen is at those 30 meters with air: \n\nPN2 = FN2 à P \nPN2 = 0,78 à 4 \nPN2 = 3,12 bar \n\nTo be even more conservative, we can use the simplified 3 bar PN2, which corresponds to a depth of 28 m. \n\nIf we want to find the amount of helium in the mixture, we can actually add the sum of the maximum partial pressures of oxygen and nitrogen, and subtract it from the ambient pressure at the maximum depth. So if we use the 60 meter depth from the previous examples, it will look like this for planning the OC of the mixture: \n\nPHemax = P - (PO2 + PN2) \nPHemax = 7 - (1,4 + 3) \nPHemax = 2,6 bar \n\nAccording to the already known formula we calculate the fraction of helium \n\nFHe = 2.6 / 7 = 0.37 \n\nIf we take all the information together, we get a trimix 20/37.If we wanted to use a standardized mixture, we would go for the closest one, which is trimix 18/45. \n\nOn the other hand, if we add too much helium and still use helium penalties, which I don't want to go into, the decompression software will unnecessarily increase the decompression time. \n\nIf we use the same procedure to calculate the mixture for the diluent, where we want a maximum oxygen partial pressure of 1 bar, we arrive at a mixture of trimix 14/43. \n\n \n\n**Rescue and evacuation plan** \n\nLast, but certainly not least, the most important element of planning is to think through the rescue and evacuation plan when things don't go as they should. We would prefer to tuck away the fact that a tragic or very dangerous event may happen as deeply as possible or even erase it altogether, but that could backfire badly. If we already have an advance plan of what to do at what time, what first aid, CPR or technical rescue equipment we will need from a given location, where to call in an emergency, where to take an injured or disabled DCS, it will make things significantly easier when something serious actually happens. \n\nMake sure you have an adequate supply of oxygen and all CPR supplies in advance. If you can get an AED the better for you. Consider using a stretcher to get the casualty out of the water, scooters to get the casualty to the boat or shore. \n\nFind out all safety contacts for paramedics, decompression chambers and insurance companies. Secure locations for arrival of rescue personnel, identify possible helicopter landing sites.\nThere are many options to consider and it is up to each team to think carefully and prepare. \n\n \n\n**Conclusion** \nPlanning a technical dive is a very complex matter and technical diving cannot be done without planning. If you dive the same sites repeatedly with the same or similar exposures, the plan can be used repeatedly and over time will become routine. However, one must never forget to update such a plan. The technical diver must be first and foremost. \n\n \n\nAuthor: Jakub Šimánek","showTags":false,"showDate":true,"image":{"mimetype":"image/jpeg","size":969448,"hash":"bc909a55cf9f2b36f7d736b271f626c5f51b7a74","id":"clye9bswknh0s0776i5dedmrb","filename":"divesoft-photo-062-1.jpg","category":"divesoft/","type":"image"}},"id":"#2","type":"component","lock":false,"position":1},{"name":"ProductShowcase","data":{"componentTemplateId":"cm9h4wr6ugjv10803yqs3tp71"},"id":"#21","type":"component","lock":false,"position":2},{"name":"Footer","data":{"copyrights":"Copyright © 2019 Divesoft LLC All rights reserved.","facebookUrl":{"urlNewWindow":true,"url":"https://www.facebook.com/divesoft/"},"youtubeUrl":{"url":"https://www.youtube.com/@divesoft_tv","urlNewWindow":true},"instagramUrl":{"url":"https://www.instagram.com/divesoft/","urlNewWindow":true},"contacts":"**Divesoft s.r.o.** \nHálkova 2495 \n413 01 Roudnice nad Labem \nCzech Republic \nTel.: +420 416 857 057 \nE-mail: [email protected]","twitterUrl":{"url":"","urlNewWindow":true,"pageId":"cjv3l26tp004p0836i54n4u7a"}},"id":"#1","type":"component","lock":false,"position":3}],"id":"root","idBuffer":"#22","lastCommit":"429a9605-194f-4e6b-b5e5-4c93fc37faf4"}},"annotations":[],"language":{"type":"id","generated":false,"id":"Language:cjv3kwvoj000u083611381c6o","typename":"Language"},"__typename":"PageTranslation"}
2,"Page:clywzcl9jy02r07350uek6rob":{"id":"clywzcl9jy02r07350uek6rob","type":{"type":"id","generated":false,"id":"PageType:cjv3l213x004f08366hjufttp","typename":"PageType"},"tags":[],"translations({\"where\":{\"language\":{\"id\":\"cjv3kwvoj000u083611381c6o\"}}})":[{"type":"id","generated":false,"id":"PageTranslation:clywzcl9xy02y0735dwsix2yu","typename":"PageTranslation"}],"__typename":"Page"},"PageTranslation:clywzcl9xy02y0735dwsix2yu":{"id":"clywzcl9xy02y0735dwsix2yu","name":"Other documents","createdAt":"2024-07-22T12:45:37.076Z","content":{"type":"json","json":{"content":[{"name":"Header","data":{"componentTemplateId":"cjv7yndru048c0836j99ljogw"},"id":"#0","type":"component","lock":false,"position":0},{"name":"DownloadsNew","data":{"backgroundColor":"#ffffff","title":"Service/other documents","subtitle":"","showBreadcrumbs":false,"hideHeader":false,"files":[{"id":"19","title":"Divesoft maintenance and service request form","url":{"url":"http://foxer360-media-library.s3.eu-central-1.amazonaws.com/divesoft/docs/76ada33b0e6aa588bbcca2ae941cf9f622944eac_divesoft-maintenance-request-form-cz.pdf","urlNewWindow":true},"isTitleBold":false},{"id":"20","title":"Regulatory information","isTitleBold":false,"url":{"url":"https://www.divesoft.com/en/manuals/regulatory-information","urlNewWindow":true},"urlText":"Open"},{"id":"21","title":"Size guide","url":{"url":"/en/downloads/size-guide","pageId":"ckg68bbngab8607889mbsjxt5","urlNewWindow":true},"urlText":"Open","isTitleBold":false},{"id":"22","title":"Secure payment information","isTitleBold":false,"url":{"url":"/en/downloads/secure-payment","pageId":"cjv83bs6804tb08366aj9zqyw","urlNewWindow":false},"urlText":"Open"}],"activeTab":"19"},"id":"#5","type":"component","lock":false,"position":1},{"name":"TextBlock","data":{"text":"**Service procedure** \n1. Please complete all requested information in Divesoft maintenance and service request form. \n2. Download the form and send it with the description of the issue via Contact support window below. \n3. Based on the information in the form, we will provide you with a solution and next steps. \n4. If you have any further questions, please email us at [email protected]. \n**NOTE: The service of the device will not begin, if the package don´t include the maintenace and service request form.**","textLarge":false,"imageOnRight":true,"image":{"recommendedSizes":{"width":"840","height":"560"}},"imageMobile":{"recommendedSizes":{"width":"750","height":"500"}}},"id":"#9","type":"component","lock":false,"position":3},{"name":"Footer","data":{"componentTemplateId":"cjvwimxrl08e40798hjs5ek9w"},"id":"#1","type":"component","lock":false,"position":10}],"id":"root","idBuffer":"#11","lastCommit":"cc81a6a4-348f-4aed-88dc-8e7afac49782"}},"annotations":[],"language":{"type":"id","generated":false,"id":"Language:cjv3kwvoj000u083611381c6o","typename":"Language"},"__typename":"PageTranslation"},"Page:clzcn909f0fwy07353ic6rr8c":{"id":"clzcn909f0fwy07353ic6rr8c","type":{"type":"id","generated":false,"id":"PageType:cjv3l213x004f08366hjufttp","typename":"PageType"},"tags":[],"translations({\"where\":{\"language\":{\"id\":\"cjv3kwvoj000u083611381c6o\"}}})":[{"type":"id","generated":false,"id":"PageTranslation:clzcn909s0fx50735owfm9hww","typename":"PageTranslation"}],"__typename":"Page"},"PageTranslation:clzcn909s0fx50735owfm9hww":{"id":"clzcn909s0fx50735owfm9hww","name":"Freedom+ and Freedom CZ","createdAt":"2024-08-02T11:51:13.312Z","content":{"type":"json","json":{"content":[{"name":"Header","data":{"products":[{"title":"Accessories","description":"Backplates, Consumables. Tanks.","img":{"recommendedSizes":{"width":"235","height":"235"}},"url":""},{"title":"Accessories sets","description":"Protection, maintenance, cleaning.","img":{"recommendedSizes":{"width":"235","height":"235"}},"url":""},{"title":"Spare parts","description":"Spare parts and components.","img":{"recommendedSizes":{"width":"235","height":"235"}},"url":""},{"title":"Spare parts kits","description":"Completly Liberty spare parts kits.","img":{"recommendedSizes":{"width":"235","height":"235"}},"url":""}]},"id":"#0","type":"component","lock":false,"position":0},{"name":"ProductShowcase","data":{"backgroundColor":"#ffffff","isTextDark":true,"isImageRight":true,"image":{"mimetype":"image/png","size":540989,"hash":"8a07b668a7743b96248bbc310595cfa
251a3ec033","id":"clfwii42gm8hz0776uiwip3m4","filename":"7273-divesoft-freedom-plus-off-1080x1080-t-1.png","category":"divesoft/","type":"image"},"imageMobile":{},"title":"Freedom a Freedom+","subtitle":"Uživatelská pÅÃruÄka/ Nitrox, Trimix & CCR potápÄÄský poÄÃtaÄ","description":"HW rev. 4.0, FW 1.21.0\n\n","hideDescriptionOnMobile":false,"areButtons":false,"firstTitle":"Learn more >","firstUrl":"","secondTitle":"Configurator >","secondUrl":""},"id":"#2","type":"component","lock":false,"position":1},{"name":"Divider","data":{"color":"darkGray"},"id":"#17","type":"component","lock":false,"position":2},{"name":"TextBlock","data":{"text":"### **Obsah** \n**Ãvod** \n\n[**Upgradable computer**](#upgradable-computer)\n\n[**Section 01: Quick start guide**](#Section-01) \n\n[**Section 02: Operation**](#Section-02) \n02.1 Control elements \n02.1.1 Meanings of inputs in surface modes \n02.1.2 Meanings of inputs in dive modes \n02.1.3 Language \n02.2 Brightness control \n02.3 Switching on the unit \n02.4 Switching off the unit \n\n[**Section 03: Diving**](#Section-03) \n03.1 Surface mode \n03.1.1 Entering surface mode \n03.1.2 Surface mode screen \n03.1.3 Switching to other modes \n03.2 Open Circuit \n03.2.1 Entering open circuit mode \n03.2.2 Detailed screen \n03.2.3 Synoptic screen \n03.2.4 Big Screen \n03.2.5 Dive profile screen \n03.2.6 Dive menu \n03.2.7 Gas switch shortcut \n03.3 Fixed setpoint CCR \n03.3.1 Predive and submersion \n03.3.2 Setpoint \n03.3.3 Dive menu \n03.3.4 Stack time \n03.4 Measured CCR \n03.4.1 O<sub>2</sub> sensors connection \n03.4.2 O<sub>2</sub> sensors calibration \n03.4.3 pO<sub>2</sub> reading \n03.5 Gauge \n03.5.1 Synoptic screen \n03.5.2 Big Screen \n03.5.3 Dive profile screen \n03.5.4 Dive menu \n03.6 Free \n03.6.1 Surface screen \n03.6.2 Dive screen \n03.7 Advised strategies \n03.7.1 Diving in darkness \n03.7.2 Decompression \n\n[**Section 04: Setup**](#Section-04) \n04.1 Editor use \n04.2 Decompression \n04.2.1 Gradient factor \n04.2.2 Safety stop |On| \n04.2.3 Ascent gas |Optimal| \n04.2.4 Deco stops \n04.2.5 Deep stops \n04.2.6 Ascent rate \n04.2.7 Descent rate \n04.3 Mixtures \n04.3.1 Mixture setup \n04.3.2 Def. OC mix \n04.3.3 End pressure 50 bar \n04.3.4 SAC Ç25 l/minÇ \n04.3.5 Gas switch 2 min \n04.3.6 Min pO<sub>2</sub> |0.18 ba| \n04.3.7 Max pO<sub>2</sub> |1.60 bar| \n04.4 Alarms \n04.4.1 Alarm sources \n04.4.2 Notifications \n04.5 Rebreather \n04.5.1 Const pO<sub>2</sub> \n04.5.2 aSCR \n04.5.3 pSCR \n04.5.4 Common settings \n04.6 Freediving Setup \n04.7 Preferences \n04.7.1 Display \n04.7.2 Timeouts \n04.7.3 User interface \n04.7.4.Metric \n04.7.5 Salinity |Fresh| \n04.7.6 Default mode |OC| \n04.7.7 Full log Off \n04.8 Calibration \n04.9 Miscellaneus \n04.10 Factory defaults \n\n[**Section 05: Log book**](#Section-05) \n05.1 Last dive \n05.2 Dive list \n05.3 Summary \n\n[**Section 06: Dive planner**](#Section-06) \n06.1 The dive parameters \n06.2 Dive plan \n06.2.1 Summary \n06.2.2 Deco stops \n\n[**Section 07: Log download**](#Section-07) \n07.1 Log processing in cloud \n07.2 Divesoft App \n07.3 Off-line log processing \n\n[**Section 08: System**](#Section-08) \n08.1 System check \n08.2 Service functions \n08.2.1 Debug \n08.2.2 Test \n08.2.3 Demo dive \n08.2.4 Syslog \n08.2.5 Miscellaneous \n\n[**Section 09: Apps**](#Section-09) \n09.1 Analyzer \n09.1.1 Measuring \n09.1.2 Calibration \n09.2 USB connection \n09.3 Emergency torch \n09.4 Inclinometr \n09.5 Games \n09.5.1 Sokoban \n09.5.2 Snake \n\n[**Section 10: Hardware**](#Section-10) \n10.1 Charging \n10.1.1 Powering in hyperbaric environment \n10.2 Wrist mount \n10.3 Control elements \n10.4 Physical dimensions \n10.5 O<sub>2</sub> sensor cable \n10.6 Environmental specifications \n10.7 Compliance \n10.7.1 CE marking \n10.7.2 EN 13319 \n10.7.3 FCC compliance \n10.7.4 Industry Canada (IC) Compliance Notice \n10.8 Disposal of waste equipment","textLarge":false,"imageOnRight":true,"image":{"recommendedSizes":{"width":"420","height":"280"}},"imageMobile":{"recommendedSizes":{"width":"750","height":"500"}}},"id":"#5","type":"component","lock":false,"position":3},{"name":"Divider","data":{"color":"darkGray"},"id":"#220","type":"component","lock":false,"position":4},{"name":"TextBlock","data":{"text":"### **Ãvod** \n\n**Použità tohoto manuálu** \n\nPÅÃstroj Divesoft Freedom je urÄen výhradnÄ pro použità vyÅ¡kolenou osobou, která je schopna plnÄ porozumÄt pokynům obsaženým v tomto návodu. \nTechnická dokumentace podléhá procesu neustálého vývoje a zdokonalovánÃ.\nProto pravidelnÄ sledujte webové stránky na adrese www.divesoft.com, kde najdete aktualizace.\nTato pÅÃruÄka obsahuje návod k obsluze pro hardwarovou a softwarovou (firmwarovou) verzi zaÅÃzenà Divesoft Freedom uvedenou na titulnà stranÄ. \n\n**BezpeÄnost** \n\n<span style=\"color:red\">UpozornÄnÃ</span>: Tento poÄÃtaÄ vypoÄÃtá dekompresnà profil pomocà matematického modelu. Nezná vaÅ¡e konkrétnà fyziologické požadavky na dekompresi. U každého profilu ponoru vždy existuje riziko dekompresnà nemoci (DCS), i když dodržujete plán ponoru pÅedepsaný potápÄÄským poÄÃtaÄem. Žádný postup, potápÄÄský poÄÃtaÄ ani potápÄÄská tabulka nezabránà možnosti vzniku DCS nebo otravy kyslÃkem! \n<span style=\"color:red\">UpozornÄnÃ</span>: PoužÃvejte záložnà nástroje! ZajistÄte si pÅÃstup k záložnÃm pÅÃstrojům pro mÄÅenà hloubky a Äasu. ZajistÄte si pÅÃstup k záložnà metodÄ výpoÄtu dekompresnÃho profilu. Nikdy neriskujte svůj život pouze na základÄ jednoho zdroje informacÃ. \n<span style=\"color:red\">UpozornÄnÃ</span>: PÅed potápÄnÃm vždy pÅÃstroj zkontrolujte, zda funguje displej, zda se nevybila baterie a zda jsou vÅ¡echna nastavenà správná. \n<span style=\"color:red\">UpozornÄnÃ</span>: Každý software obsahuje chyby a firmware Divesoft Freedom nenà výjimkou. PoÄÃtaÄ může pravdÄpodobnÄ dÄlat nechtÄné vÄci. \n<span style=\"color:red\">UpozornÄnÃ</span>: Tento poÄÃtaÄ se může kdykoli porouchat. Otázkou nenÃ, zda se porouchá, ale kdy se porouchá. Vždy mÄjte plán, jak se s poruchami vypoÅádat. \n\n**OdpovÄdnost uživatele Divesoft Freedom** \n\nUživatel Divesoft Freedom musà pÅijmout skuteÄnost, že potápÄnà je spojeno s rizikem. Dodržovánà vÅ¡eho, co se uživatel dozvÄdÄl z technické dokumentace Divesoft Freedom a z výcviku, může riziko snÞit, ale nemůže ho odstranit. BezpeÄnost pÅi potápÄnà dále zvyÅ¡uje pravidelné Å¡kolenÃ, metodické vzdÄlávánà a dodržovánà správné potápÄÄské praxe. Technické potápÄnà vyžaduje mnohem vyÅ¡Å¡Ã mÃru opatrnosti a disciplÃny než rekreaÄnà potápÄnÃ. Pokud toto riziko neakceptujete a nejste vyÅ¡kolenÃ, opatrnà a disciplinovanà potápÄÄi, nepotápÄjte se s pÅÃstrojem Divesoft Freedom.\n\n\n","textLarge":false,"imageOnRight":true,"image":{"recommendedSizes":{"width":"420","height":"280"}},"imageMobile":{"recommendedSizes":{"width":"750","height":"500"}}},"id":"#3","type":"component","lock":false,"position":5},{"name":"Divider","data":{"color":"darkGray"},"id":"#15","type":"component","lock":false,"position":6},{"name":"TextBlock","data":{"text":"### <span id=\"upgradable-computer\">**PoÄÃtaÄ s možnostà upgradu**</span> \n\n**Vlastnosti verzà Freedom**\n\n\tVerze SmÄsà Air Nitrox KyslÃk Trimix Rebreather\n\n\tAdvanced Bottom Timer - - - - - NO \n\tCCR Bottom Timer - - - - - Yes\n\tBasic Nitrox 1 Yes max40% No No No\n\tAdvanced Nitrox 3 Yes Yes Yes No No\n\tFull Trimix 9 Yes Yes Yes Yes No\n\tClosed Circuit 9+8 dil. Yes Yes Yes Yes Yes\n\ntato tabulka se vztahuje pouze na poÄÃtaÄ Freedom. NovÄjÅ¡Ã Freedom+ je dodáván pouze ve verzi odpovÃdajÃcà licenci Full Trimix a je možné jej upgradovat na Closed Circuit \n\nObrázky v této pÅÃruÄce jsou založeny na verzi Divesoft Freedom s uzavÅeným okruhem. Omezenà jiných verzà jsou uvedena v textu. \n","textLarge":false,"imageOnRight":true,"image":{"recommendedSizes":{"width":"420","height":"280"}},"imageMobile":{"recommendedSizes":{"width":"750","height":"500"}}},"id":"#4","type":"component","lock":false,"position":7},{"name":"Divider","data":{"color":"darkGray"},"id":"#20","type":"component","lock":false,"position":8},{"name":"TextBlock","data":{"text":"### <span id=\"Section-01\">**Äást 01: Rychlý průvodce**","textLarge":false,"imageOnRight":true,"image":{"recommendedSizes":{"width":"420","height":"280"}},"imageMobile":{"recommendedSizes":{"width":"750","height":"500"}}},"id":"#6","type":"component","lock":false,"position":9},{"name":"Divider","data":{"color":"darkGray"},"id":"#299","type":"component","lock":false,"position":10},{"name":"TextBlock","data":{"text":"**1. Nabijte baterii** \n\nPoužijte nabÃjeÄku, kterou najdete v balenÃ, nebo jinou vhodnou nabÃjeÄku USB Äi USB port poÄÃtaÄe. Podrobné informace naleznete v Äásti \"10.1 NabÃjenÃ\". \n\n**2. SpusÅ¥te poÄÃtaÄ** \nPodržte obÄ tlaÄÃtka, dokud neucÃtÃte vibrace a dokud
2se nespustà displej. PoÄÃtaÄ se bÄhem nÄkolika sekund pÅepne do režimu povrchu. \n\n**3. V pÅÃpadÄ potÅeby obnovte výchozà továrnà nastavenÃ** \n\nNový poÄÃtaÄ nenà nutné resetovat. Pokud máte pochybnosti o správném nastavenÃ, proveÄte obnovenà továrnÃho nastavenÃ. \nKrátkým stisknutÃm obou tlaÄÃtek vstupte do nabÃdky. SpodnÃm tlaÄÃtkem pÅesuÅte kurzor na položku Setup (NastavenÃ) a hornÃm tlaÄÃtkem ji vyberte. Poté stejným způsobem pÅejdÄte na položku Miscellaneous (Různé) -> Factory Defaults (Výchozà továrnà nastavenÃ). Poté pÅesuÅte kurzor na položku Továrnà nastavenÃ, vyberte a potvrÄte. Horizontálnà kalibrace se po resetovánà spustà automaticky. Položte poÄÃtaÄ na stůl a stisknÄte libovolnou klávesu. Poté budete vyzváni, abyste poÄÃtaÄ postavili do svislé polohy. UmÃstÄte poÄÃtaÄ na jedinou rovnou stranu zaÅÃzenà a znovu stisknÄte tlaÄÃtko .\n\n**4. V pÅÃpadÄ potÅeby nastavte na pravou ruku** \n\nNastavte orientaci displeje podle svých preferencÃ. Krátkým stisknutÃm obou tlaÄÃtek vstupte do nabÃdky. SpodnÃm tlaÄÃtkem pÅesuÅte kurzor na položku Setup (NastavenÃ) a hornÃm tlaÄÃtkem ji vyberte. Poté vyberte možnost Nastavenà â PÅedvolby â Displej â Orientace. (Bottom timer licence: Nastavenà â Orientace)\n\n**5. V pÅÃpadÄ potÅeby pÅepnÄte na imperiálnà jednotky** \n\nUpravte jednotky podle svých preferencÃ. Krátkým stisknutÃm obou tlaÄÃtek vstupte do nabÃdky. PÅesuÅte kurzor na položku Setup\ndolnÃm tlaÄÃtkem a vyberte hornÃm tlaÄÃtkem. Poté vyberte možnost PÅedvolby â Jednotky. \n\n**6. Vyberte uchycenà na zápÄstÃ** \n\nPokud dáváte pÅednost ÅemÃnku, pÅipevnÄte jej k poÄÃtaÄi. Pokud dáváte pÅednost poutku, odstraÅte Å¡rouby držÃcà tyÄe a protáhnÄte poutko otvory se závitem. \nPodrobné informace naleznete v Äásti \"10.2 UpevnÄnà na zápÄstÃ\". \n\n**7. PÅepnutà do režimu potápÄnÃ** \n\nV nabÃdce vyberte možnost Ponor â Výchozà (OC). Zobrazà se struÄný pÅehled nastavenÃ. Zkontrolujte nastavenà a potvrÄte je dolnÃm tlaÄÃtkem. \n\nNynà je váš pÅÃstroj Divesoft Freedom pÅipraven k jednoduchému ponoru s otevÅeným okruhem SCUBA s použitÃm vzduchu.","textLarge":false,"imageOnRight":true,"image":{"recommendedSizes":{"width":"420","height":"280"}},"imageMobile":{"recommendedSizes":{"width":"750","height":"500"}}},"id":"#298","type":"component","lock":false,"position":11},{"name":"Divider","data":{"color":"darkGray"},"id":"#18","type":"component","lock":false,"position":12},{"name":"TextBlock","data":{"text":"### <span id=\"Section-02\">**Äást 02: Provoz** \n","textLarge":false,"imageOnRight":true,"image":{"recommendedSizes":{"width":"420","height":"280"}},"imageMobile":{"recommendedSizes":{"width":"750","height":"500"}}},"id":"#232","type":"component","lock":false,"position":13},{"name":"Divider","data":{"color":"darkGray"},"id":"#300","type":"component","lock":false,"position":14},{"name":"TextBlock","data":{"text":"### **02.1 Ovládacà prvky** \n\nTechnická specifikace vstupů viz \"10.3 Ovládacà prvky\" v Äásti Hardware.","textLarge":false,"imageOnRight":true,"image":{"recommendedSizes":{"width":"420","height":"280"}},"imageMobile":{"recommendedSizes":{"width":"750","height":"500"}}},"id":"#301","type":"component","lock":false,"position":15},{"name":"TextBlock","data":{"text":"### **02.1.1 Významy vstupů v povrchových režimech** \n\nTlaÄÃtkům a dalÅ¡Ãm vstupům jsou pÅiÅazeny významy v souvislosti s aktuálnà navigaÄnà položkou v nabÃdce. SouÄasnÄ jsou vÅ¡ak pro jejich použità stanovena obecná pravidla, která platà vÅ¡ude, kde je to možné. \n\nStisk hornà tlaÄÃtka - potvrzenà právÄ zvolené položky nabÃdky \n\nStisk dolnÃho tlaÄÃtka - procházÃte nabÃdku smÄrem dolů \n\nStisk obou tlaÄÃtek - opuÅ¡tÄnà nabÃdky bez provedenà jakékoli akce \n\nDlouhé stisknutà hornÃho tlaÄÃtka - listovánà nahoru \n\nDlouhé stisknutà spodnÃho tlaÄÃtka
2- posun o stránku dolů \n\nDlouhé stisknutà obou tlaÄÃtek - návrat na hlavnà obrazovku \n\nKódované stisknutà kláves (stisknÄte obÄ tlaÄÃtka, pak jedno tlaÄÃtko uvolnÄte a znovu stisknÄte, pak obÄ tlaÄÃtka uvolnÄte) - vstup do nabÃdky servisnÃch funkcà \n\nNaklonÄnà smÄrem od sebe - zvÄtÅ¡enà zadané ÄÃslice o jedniÄku nebo zaÅ¡krtnutà pÅÃznaku \n\nNaklonÄnà smÄrem k sobÄ - snÞenà zadané ÄÃslice o jedniÄku nebo zruÅ¡enà zaÅ¡krtnutà pÅÃznaku \n\nNaklonÄnà doleva - posunutà kurzoru doleva \n\nNaklonÄnà doprava - posunutà kurzoru doprava \n\nVÅ¡ude, kde je to možné (menu, editaÄnà obrazovka), jsou zobrazeny užiteÄné symboly vztahujÃcà se k tlaÄÃtkům. Symbol může být buÄ vedle klávesy a oznaÄovat akci provedenou pÅi krátkém stisku klávesy, nebo mezi klávesami,\noznaÄujÃcà akci provedenou pÅi krátkém stisku obou kláves. \n\nSymbol **|â|** vedle klávesy znamená posun o jeden Åádek dolů v nabÃdce. Pohyb v nabÃdce je cyklický, takže prvnà Åádek se objevà znovu po poslednÃm Åádku. \n\nDlouhým stiskem dolnà klávesy se v nabÃdce posunete nahoru. \n\nSymbol **|â|** znamená návrat o jednu úroveÅ bez provedenà jakékoli akce. \n\nSymbol **|v|** pÅedstavuje potvrzenà akce nebo výbÄru. ","textLarge":false,"imageOnRight":true,"image":{"recommendedSizes":{"width":"420","height":"280"}},"imageMobile":{"recommendedSizes":{"width":"750","height":"500"}}},"id":"#233","type":"component","lock":false,"position":16},{"name":"TextBlock","data":{"text":"### **02.1.2 Významy vstupů v režimech potápÄnÃ** \n\nVýznam vstupů je stejný jako v povrchových režimech. DalÅ¡Ã možnosti jsou: \nDlouhý stisk hornÃho tlaÄÃtka - zkratka pro pÅepnutà plynu (pÅedchozà smÄs). \nDlouhé stisknutà spodnÃho tlaÄÃtka - zkratka pro pÅepnutà plynu (dalÅ¡Ã smÄs) \nNaklápÄnà je rozÅ¡ÃÅeno o pohyb ve hrách; jinak je zadávánà ÄÃslic, pro které se v povrchových režimech použÃvá naklápÄnÃ, bÄhem ponoru omezeno pouze na speciálnà pÅÃpady. \nKlepnutà na sklo displeje - zapnutà displeje, pokud je vypnutý. \nPosvÃcenà na displej - ve tmÄ se pÅi osvÄtlenà displeje potápÄÄským svÄtlem aktivuje podobnÄ jako pÅi poklepánà na sklo. Na svÄtle lze displej aktivovat jeho zakrytÃm a následným odkrytÃm.","textLarge":false,"imageOnRight":true,"image":{"recommendedSizes":{"width":"420","height":"280"}},"imageMobile":{"recommendedSizes":{"width":"750","height":"500"}}},"id":"#234","type":"component","lock":false,"position":17},{"name":"TextBlock","data":{"text":"### **02.1.3 Jazyk** \n\nVeÅ¡keré textové informace v systému Divesoft Freedom jsou v angliÄtinÄ. Ovládánà pÅÃstroje vyžaduje znalost anglického jazyka minimálnÄ na takové úrovni, aby uživatel tÄmto informacÃm důkladnÄ porozumÄl.\n\nNastavenà jazyka lze zmÄnit v nabÃdce Menu\\Setup\\Preferences\\Language. K dispozici je **ÄeÅ¡tina**, nÄmÄina, italÅ¡tina, chorvatÅ¡tina, francouzÅ¡tina a Å¡panÄlÅ¡tina.","textLarge":false,"imageOnRight":true,"image":{"recommendedSizes":{"width":"420","height":"280"}},"imageMobile":{"recommendedSizes":{"width":"750","height":"500"}}},"id":"#235","type":"component","lock":false,"position":18},{"name":"TextBlock","data":{"text":"### **02.2 Nastavenà jasu** \n\nSpodnÃm tlaÄÃtkem lze pÅepÃnat 3 úrovnÄ jasu podsvÃcenà displeje: vypnutà displeje, úroveÅ nastavenou v Nastavenà â Vlastnosti â Displej â Jas a maximálnà jas (odpovÃdá úrovni 9). \nPokud je displej vypnutý, pak jej krátkým stiskem zapnete. Druhým a dalÅ¡Ãm stiskem s krátkou prodlevou mezi stisky (< 1 s) pÅepnete úroveÅ jasu. \nPÅi nÃzkém jasu nemůže displej prosvÃtat pÅes rozvÃÅené bahno nebo neÄistoty. Pokud je nutné pÅepnout na maximálnà jas, staÄà opakovanÄ krátce stisknout spodnà tlaÄÃtko. Maximálnà jas se nastavà po dvou stisknutÃch tlaÄÃtka (pokud byl displej na zaÄátku vypnutý) nebo po tÅech stisknutÃch (pokud byl displej zapnutý). \n\nNastavenà funkce spodnÃho tlaÄÃtka může zruÅ¡it regulaci jasu. \n\"Lower bttn.\" na \"\"Prev Scr\"\". \n\"Stopw btn.\" na \"Base\" nebo \"Always\". \
2nNastavenà je umÃstÄno na stejném mÃstÄ jako \"Lower bttn\". \nBottomTimer: Nastavenà -> Vlastnosti -> Lower bttn. \nOstatnà licence: V pÅÃpadÄ, že se jedná o tzv: Nastavenà -> PÅedvolby -> Uživatelské rozhranà -> Lower bttn.\n\nViz také DoporuÄené strategie - \"3.7.1 PotápÄnà ve tmÄ\".\nTento způsob ovládánà jasu funguje ve vÅ¡ech režimech kromÄ režimu mÄÅidla a volného režimu, kde je spodnà tlaÄÃtko pÅiÅazeno stopkám.","textLarge":false,"imageOnRight":true,"image":{"recommendedSizes":{"width":"420","height":"280"}},"imageMobile":{"recommendedSizes":{"width":"750","height":"500"}}},"id":"#236","type":"component","lock":false,"position":19},{"name":"TextBlock","data":{"text":"### **02.3 Zapnutà pÅÃstroje** \n\nPÅÃstroj se zapÃná stisknutÃm obou tlaÄÃtek po dobu tÅà sekund. \n\nK automatické aktivaci dojde v pÅÃpadÄ vstupu do vody v pohotovostnÃm režimu. PÅi ponoÅenà do hloubky vÄtÅ¡Ã než 1,5 m se poÄÃtaÄ pÅepne do výchozÃho režimu (OC ve výchozÃm nastavenÃ, lze zmÄnit v Nastavenà â Vlastnosti). \n\nAutomatická aktivace nenà okamžitá, je nutné nÄkolik sekund poÄkat. PoÄÃtaÄ se může automaticky zapnout ve vÄtÅ¡Ã hloubce, pokud je sestup rychlý. Nemá to vliv na výpoÄet dekomprese, ale ztratà se prvnÃch nÄkolik sekund záznamu profilu ponoru.\n\nPÅi pÅepnutà do letového režimu je automatická aktivace pÅi ponoÅenà vypnuta. \n\nV pÅÃpadÄ, že potápÄÄ zapomene zapnout poÄÃtaÄ po letu, zapne se poÄÃtaÄ v hloubce 5 m do 1 minuty.","textLarge":false,"imageOnRight":true,"image":{"recommendedSizes":{"width":"420","height":"280"}},"imageMobile":{"recommendedSizes":{"width":"750","height":"500"}}},"id":"#237","type":"component","lock":false,"position":20},{"name":"TextBlock","data":{"text":"### **02.4 Vypnutà pÅÃstroje** \n\nVstupte do nabÃdky z povrchového režimu, v druhé nabÃdce vyberte možnost Vypnout a pohotovostnà režim. \n\nNebo můžete ve druhém menu vybrat položku Letový režim. TÃm zabránÃte automatické aktivaci v důsledku rychlé zmÄny tlaku a zmatenà algoritmu detekce hladiny na povrchu. \n\nVypnutà můžete provést pÅÃmo z režimu potápÄnÃ, když jste na hladinÄ. TÃmto způsobem se pÅÃstroj pÅepne do pohotovostnÃho režimu, takže automatická aktivace ponoÅenÃm je povolena. \n\nDruhým způsobem vypnutà je vyÄkánà na Äasový limit. \n\nPo vynoÅenà se pÅÃstroj Freedom pÅepne do režimu na hladinÄ po uplynutà doby nastavené v Äasovém limitu pro ukonÄenà ponoru. Poté se pÅepne do pohotovostnÃho režimu po dobÄ nastavené v Äasovém limitu neÄinnosti na hladinÄ. StisknutÃm libovolného tlaÄÃtka se znovu spustà ÄasovaÄ neÄinnosti v režimu vynoÅenÃ. ","textLarge":false,"imageOnRight":true,"image":{"recommendedSizes":{"width":"420","height":"280"}},"imageMobile":{"recommendedSizes":{"width":"750","height":"500"}}},"id":"#11","type":"component","lock":false,"position":21},{"name":"Image","data":{"firstImage":{"mimetype":"image/png","size":15085,"hash":"1db00a2b5e1464cd11082c530cf174bbe999b719","id":"cl0cejwffg63m0776nowoh8dg","filename":"divesoft-freedom-user-manual-02-4-a.png","category":"divesoft/","type":"image"},"secondImage":{}},"id":"#351","type":"component","lock":false,"position":22},{"name":"Spacer","data":{"spacingLarge":30,"spacingSmall":20,"backgroundColor":"#ffffff"},"id":"#394","type":"component","lock":false,"position":23},{"name":"Image","data":{"firstImage":{"mimetype":"image/jpeg","size":57145,"hash":"4cdd64023ec532716be965326b1f58f7dd2ee011","id":"cl0zsetwpm0tq0776m9fdlk7t","filename":"divesoft-freedom-user-manual-02-4-b.jpg","category":"divesoft/","type":"image"},"secondImage":{},"image":{"type":"image"}},"id":"#350","type":"component","lock":false,"position":24},{"name":"Divider","data":{"color":"darkGray"},"id":"#19","type":"component","lock":false,"position":25},{"name":"TextBlock","data":{"text":"### <span id=\"Section-03\">**Äást 03: PotápÄnÃ** \n\n","textLarge":false,"imageOnRight":true,"image":{"recommendedSizes":{"width":"420","height":"280"}},"imageMobile":{"recommendedSizes":{"width":"750","height":"500"}}},"id":"#14","type":"component","lock":false,"position":26},{"name":"Divider","data":{"color":"darkGray"},"id":"#302","type":"component","lock":false,"position":27},{"name":"TextBlock","data":{"text":"### **03.1 Povrchový režim** \n\nRežim povrchu je oznaÄen Å¡edými mÅÞkami tabulky. ","textLarge":false,"imageOnRight":true,"image":{"recommendedSizes":{"width":"420","height":"280"}},"imageMobile":{"recommendedSizes":{"width":"750","height":"500"}}},"id":"#303","type":"component","lock":false,"position":28},{"name":"TextBlock","data":{"text":"### **03.1.1 Vstup do povrchového režimu** \n\nDivesoft Freedom se po zapnutà pÅepne do povrchového režimu. ","textLarge":false,"imageOnRight":true,"image":{"recommendedSizes":{"width":"420","height":"280"}},"imageMobile":{"recommendedSizes":{"width":"750","height":"500"}}},"id":"#241","type":"component","lock":false,"position":29},{"name":"Spacer","data":{"spacingLarge":30,"spacingSmall":20,"backgroundColor":"#ffffff"},"id":"#395","type":"component","lock":false,"position":30},{"name":"TextBlock","data":{"text":"### **03.1.2 Obrazovka Povrchového režimu** \n\n**Datum a Äas** \nUdržujte správné nastavenà mÃstnÃho Äasu. Bude se použÃvat pro záznam protokolu. \nFormát data lze nastavit v \nNastavenà -> Různé -> Formát data\n\n**Na povrchu** \nÄas z pÅedchozÃho ponoru. Pokud se ponor uskuteÄnil pÅed 99 a vÃce dny, zobrazà se mÃsto Äasu nápis FREEDOM. \n\n**Výchozà režim** \n
2Režim potápÄnÃ, do kterého se pÅÃstroj Freedom pÅepne pÅi ponoÅenà do hloubky vÄtÅ¡Ã než 1,5 m.. \n\n**Nelétat** \nVýpoÄet doby zákazu letu vycházà z maximálnà povolené výšky podle Bühlmannova dekompresnÃho algoritmu ZHL. Tlak vzduchu v kabinÄ dopravnÃho letadla je udržován na úrovni odpovÃdajÃcà tlaku vzduchu ve výšce 1800-2400 m (6000-8000 stop) nad moÅem, zatÃmco cestovnà výška spadá do rozmezà 11 000-12 200 m (36 000-40 000 stop). \nPÅi výpoÄtu doby bez letu se použÃvá rozhodujÃcà výška 4464 m (14 646 stop). V této výšce se automaticky otevÅou oddÃly obsahujÃcà kyslÃkové masky a kyslÃkové masky se spustà dolů pÅed cestujÃcà letadla. \n\n**Max výška** \nVýpoÄet maximálnà povolené výšky je založen na dekompresnÃm algoritmu ZHL s dodateÄnou bezpeÄnostnà rezervou (GF = 0,80).","textLarge":false,"imageOnRight":true,"image":{"recommendedSizes":{"width":"420","height":"280"}},"imageMobile":{"recommendedSizes":{"width":"750","height":"500"}}},"id":"#242","type":"component","lock":false,"position":31},{"name":"Spacer","data":{"spacingLarge":30,"spacingSmall":20,"backgroundColor":"#ffffff"},"id":"#396","type":"component","lock":false,"position":32},{"name":"Image","data":{"firstImage":{"mimetype":"image/png","size":39166,"hash":"f8e12983d8271ba2f7886ab2ca16231908cecd5c","id":"cl0ceyt6yg6cm0776auqwqwa5","filename":"divesoft-freedom-user-manual-03-2-2.png","category":"divesoft/","type":"image"},"secondImage":{}},"id":"#353","type":"component","lock":false,"position":33},{"name":"Spacer","data":{"spacingLarge":30,"spacingSmall":20,"backgroundColor":"#ffffff"},"id":"#397","type":"component","lock":false,"position":34},{"name":"TextBlock","data":{"text":"**Symbol baterie **\nGrafický údaj o zbývajÃcà kapacitÄ baterie. Odhadovaná kapacita plné baterie je pÅibližnÄ\n20 hodin. \nPodrobné informace naleznete na obrazovce baterie v kontrole systému.","textLarge":false,"imageOnRight":true,"image":{"recommendedSizes":{"width":"420","height":"280"}},"imageMobile":{"recommendedSizes":{"width":"750","height":"500"}}},"id":"#24","type":"component","lock":false,"position":35},{"name":"TextBlock","data":{"text":"### **03.1.3 PÅepnutà do jiných režimů** \nV nabÃdce â PotápÄnà může uživatel pÅepÃnat z povrchového režimu na režim otevÅeného okruhu, rebreatheru, hloubkomÄru a freedivingu. \nRežim potápÄnà nelze spustit, pokud je pÅÃstroj Divesoft Freedom pÅipojen k portu USB nebo k nabÃjeÄce. Viz také Napájenà v hyperbarickém prostÅedÃ\n(Viz kapitola 10.1.1). \nPoÄÃtaÄ Freedom lze také pÅepnout do servisnÃho menu.\nViz kapitola \"8.2 Servisnà funkce\".","textLarge":false,"imageOnRight":true,"image":{"recommendedSizes":{"width":"420","height":"280"}},"imageMobile":{"recommendedSizes":{"width":"750","height":"500"}}},"id":"#26","type":"component","lock":false,"position":36},{"name":"Image","data":{"firstImage":{"mimetype":"image/png","size":33148,"hash":"3b8c0cfb88c3724f4851a9da460bb909b71f338e","id":"cl0zstrlxm0wb07766lsywo41","filename":"divesoft-freedom-user-manual-03-1-3.png","category":"divesoft/","type":"image"},"secondImage":{},"image":{"type":"image"}},"id":"#354","type":"component","lock":false,"position":37},{"name":"Spacer","data":{"spacingLarge":30,"spacingSmall":20,"backgroundColor":"#ffffff"},"id":"#398","type":"component","lock":false,"position":38},{"name":"TextBlock","data":{"text":"### **03.2 OtevÅený okruh** \nRežim rozpojeného obvodu je vyznaÄen modrými liniemi tabulky. ","textLarge":false,"imageOnRight":true,"image":{"recommendedSizes":{"width":"420","height":"280"}},"imageMobile":{"recommendedSizes":{"width":"750","height":"500"}}},"id":"#28","type":"component","lock":false,"position":39},{"name":"TextBlock","data":{"text":"### **03.2.1 PÅechod do režimu otevÅeného okruhu** \nOpen circuit mode can be entered from the menu in surface mode, by automatic activation after submersion\n(if set as the default mode) or as a bailout from CCR mode (the Close\nCircuit version only). ","textLarge":false,"imageOnRight":true,"image":{"recommendedSizes":{"width":"420","height":"280"}},"imageMobile":{"recommendedSizes":{"width":"750","height":"500"}}},"id":"#243","type":"component","lock":false,"position":40}
2,{"name":"TextBlock","data":{"text":"### **03.2.2 Detailnà obrazovka** \nPrimárnà obrazovka zobrazuje vÅ¡echny potÅebné informace bÄhem ponoru. \n\n**Hloubka**\nHloubku lze odeÄÃst v jednotkách nastavených v nastavenà (m nebo ft). Hloubka se vypoÄÃtá z namÄÅeného hydrostatického tlaku. Pro výpoÄet hloubky lze nastavit hustotu sladké vody (výchozà nastavenÃ) nebo moÅské vody. V nastavenà salinity můžete vybrat sladkou vodu, slanou vodu a EN13319. Hustota vody EN13319 je hodnota mezi sladkou a slanou vodou a lze ji nastavit univerzálnÄ pro vÅ¡echny typy vody. \nHustota vody: \nSladká voda 1,000 g/ml \n13319 1,020 g/ml \nMoÅská voda 1,028 g/ml","textLarge":false,"imageOnRight":true,"image":{"recommendedSizes":{"width":"420","height":"280"}},"imageMobile":{"recommendedSizes":{"width":"750","height":"500"}}},"id":"#244","type":"component","lock":false,"position":41},{"name":"Spacer","data":{"spacingLarge":30,"spacingSmall":20,"backgroundColor":"#ffffff"},"id":"#399","type":"component","lock":false,"position":42},{"name":"Image","data":{"firstImage":{"mimetype":"image/png","size":48367,"hash":"469c16ffc7bddd89477948da01f985a2bb9918a0","id":"cl0tkt6o9kojp0776x6n5d0qh","filename":"divesoft-freedom-user-manual-03-2-2.png","category":"divesoft/","type":"image"},"secondImage":{},"image":{"type":"image"}},"id":"#30","type":"component","lock":false,"position":43},{"name":"Spacer","data":{"spacingLarge":30,"spacingSmall":20,"backgroundColor":"#ffffff"},"id":"#400","type":"component","lock":false,"position":44},{"name":"TextBlock","data":{"text":"Nastavenà sladké/moÅské vody nemá vliv na dekompresnà výpoÄty. Dekomprese je založena na okolnÃm tlaku a je nezávislá na zobrazené hloubce. Pouze hloubka dekompresnÃch zastávek se zaokrouhluje na obvyklé hodnoty podle nastavenà sladké/moÅské vody a metrických/imperiálnÃch jednotek.\n\n\n**Äas ponoru** \nÄasovaÄ se spustà po zanoÅenà (hloubka > 1,5 m) a zastavà se po vynoÅenà (hloubka < 0,5 m). V pÅÃpadÄ pobytu na hladinÄ (nebo ve velmi malé hloubce) s následným druhým ponoÅenÃm (bÄhem doby nastavené v Äasovém limitu ukonÄenà ponoru) bude indikovaný Äas ponoru odpovÃdat dobÄ od prvnÃho ponoÅenà vÄetnÄ doby vynoÅenÃ. \nPokud je vÅ¡ak nastavenà Äasu ponoru nastaveno na hodnotu CAVE, Äas se nezastavà ani pÅi vynoÅenÃ. Toto nastavenà zohledÅuje pÅechod suchých Äástà jeskynÄ za sifonem. NastavenÃ/PÅedvolby/Äas ponoru/Äas ponoru -> CAVE (JeskynÄ) \n**Zastávka** \nAlternativnÄ se zobrazà \"Gas switch\", pokud se jedná o zastávku pro pÅepnutà plynu. \nHloubku dekompresnà zastávky lze ÄÃst v jednotkách nastavených v nastavenà (m nebo ft). Hloubka poslednà zastávky závisà na nastavenÃ.\nHodnota dekompresnà zastávky se zobrazà pouze v pÅÃpadÄ, že je nastaven režim dekompresnà zastávky. Viz Nastavenà â Dekomprese\nâ Zastávky dekomprese (viz kapitola 4.2.4). \n**Stop Time** \nDélka dekompresnà zastávky v hloubce zastávky. BÄhem zastávky je zde zobrazen ÄasovaÄ odpoÄÃtávánÃ. Zaokrouhlenà délky dekompresnà zastávky závisà na nastavenÃ. Hodnota Stop Time se zobrazuje pouze v pÅÃpadÄ, že je nastaven režim dekompresnà zastávky. Viz Nastavenà â Dekomprese â Zastávky dekomprese (viz kapitola 4.2.4). \n**TTS** \nDoba do vynoÅenà (TTS) zahrnuje celý dekompresnà profil. Pokud je v nastavenà dekomprese vybrán optimálnà plyn, pak TTS zohledÅuje zmÄnu plynů ze seznamu aktivnÃch smÄsÃ; je zahrnuta doba pÅepnutà plynu. Pokud je v nastavenà dekomprese vybráno aktuálnà nastavenà plynu, pak je pro výpoÄet TTS použit pouze aktuálnà plyn.","textLarge":false,"imageOnRight":true,"image":{"recommendedSizes":{"width":"420","height":"280"}},"imageMobile":{"recommendedSizes":{"width":"750","height":"500"}}},"id":"#29","type":"component","lock":false,"position":45},{"name":"TextBlock","data":{"text":"**Strop** \nHodnota stropu se zobrazà pouze v pÅÃpadÄ, že je režim dekomprese stropu\nnastaven. \nViz Nastavenà â Dekomprese â Zastávky dekomprese (04.2.4).\nHloubka stropu dekomprese se plynule snižuje až k dosaženà hladiny. Ãdaj nenà bÄhem výstupu nikde umÄle zastaven. **Vždy se držte pod hloubkou stro
2pu**, a to i v pÅÃpadÄ, že je \nhloubka stropu velmi malá.\nStoupánà nad strop vyvolá varovánÃ. DalÅ¡Ã poruÅ¡enÃ,\no vÃce než 1 m (3 stopy), vede k dalÅ¡Ãmu výstražnému signálu. Oba alarmy jsou\nzaznamenány. Freedom bude pokraÄovat v režimu potápÄnà s otevÅeným okruhem. NepÅepne se do režimu mÄÅiÄe nebo dokonce do režimu SOS. PotápÄÄ by se mÄl zodpovÄdnÄ rozhodnout, aby minimalizoval pravdÄpodobnost vážného\nnásledků.","textLarge":false,"imageOnRight":true,"image":{"recommendedSizes":{"width":"420","height":"280"}},"imageMobile":{"recommendedSizes":{"width":"750","height":"500"}}},"id":"#32","type":"component","lock":false,"position":46},{"name":"Spacer","data":{"spacingLarge":30,"spacingSmall":20,"backgroundColor":"#ffffff"},"id":"#402","type":"component","lock":false,"position":47},{"name":"Image","data":{"firstImage":{"mimetype":"image/png","size":44476,"hash":"8572245fa91f71a4d47c3105c3abe4fd7d21e026","id":"cl0tjftglknm407763witt8l9","filename":"divesoft-freedom-user-manual-03-2-2-b.png","category":"divesoft/","type":"image"},"secondImage":{},"image":{"type":"image"}},"id":"#31","type":"component","lock":false,"position":48},{"name":"Spacer","data":{"spacingLarge":30,"spacingSmall":20,"backgroundColor":"#ffffff"},"id":"#401","type":"component","lock":false,"position":49},{"name":"TextBlock","data":{"text":"**No deco** \nJe možné zůstat po uvedenou dobu v aktuálnà hloubce a dýchat aktuálnà smÄs, aniž byste se museli podrobit stupÅovité dekompresi.","textLarge":false,"imageOnRight":true,"image":{"recommendedSizes":{"width":"420","height":"280"}},"imageMobile":{"recommendedSizes":{"width":"750","height":"500"}}},"id":"#33","type":"component","lock":false,"position":50},{"name":"TextBlock","data":{"text":"**Bezp. Zastáv.** \nDélka bezpeÄnostnà zastávky je 3 min. BezpeÄnostnà zastávku lze provést v hloubce od 6 do 3 m. BezpeÄnostnà zastávka je indikována, pokud byla maximálnà hloubka ponoru vÄtÅ¡Ã než 10 m.\n\nOdpoÄÃtávánà bezpeÄnostnà zastávky se pÅeruÅ¡Ã v hloubkách vÄtÅ¡Ãch než 6 m. Sestup do hloubky vÄtÅ¡Ã než 10 m resetuje Äas bezpeÄnostnà zastávky zpÄt na 3 min.\nPoruÅ¡enà limitu 3 m je zaznamenáno (v tichosti). Sestup nad 1,8 m generuje alarm a vede k ukonÄenà režimu bezpeÄnostnà zastávky pro aktuálnà ponor.\nBezpeÄnostnà stop lze vypnout. Viz Nastavenà â Dekomprese\nâ Bezp. zastáv. \\[On] (viz kapitola 4.2.2).","textLarge":false,"imageOnRight":true,"image":{"recommendedSizes":{"width":"420","height":"280"}},"imageMobile":{"recommendedSizes":{"width":"750","height":"500"}}},"id":"#316","type":"component","lock":false,"position":51},{"name":"Image","data":{"firstImage":{"mimetype":"image/png","size":43643,"hash":"11f12392a45840fe44aeafe2a969cbb0aa261980","id":"cl0tjnzpbknsd0776u2r0wxwq","filename":"divesoft-freedom-user-manual-03-2-2-c.png","category":"divesoft/","type":"image"},"secondImage":{}},"id":"#34","type":"component","lock":false,"position":52},{"name":"Spacer","data":{"spacingLarge":30,"spacingSmall":20,"backgroundColor":"#ffffff"},"id":"#403","type":"component","lock":false,"position":53},{"name":"TextBlock","data":{"text":"**Hloubková zastávka** \nHloubka nadcházejÃcà hluboké zastávky je založena na algoritmu Richarda Pyla. Po dosaženà zobrazené hloubky hlubokého zastavenà se zde spustà odpoÄÃtávánà ÄasovaÄe. PoruÅ¡enà hloubkového zastavenà je zaznamenáno, ale nenà generován žádný alarm, protože hloubkové zastavenà je považováno pouze za dodateÄný bezpeÄnostnà faktor. Tato Pyleova hloubková zastavenà jsou zobrazena pouze v pÅÃpadÄ, že jsou zapnuta. Viz Nastavenà â Dekomprese â Hluboké zastávky (viz kapitola 4.2.4). \n**UpozornÄnÃ**: Podle výsledků poslednÃch vÄdeckých výzkumů nejsou hloubkové zastávky výhodou, a v nÄkterých pÅÃpadech mohou zvýšit riziko DCS. PeÄlivÄ zvažte zaÅazenà hloubkových zastávek.","textLarge":false,"imageOnRight":true,"image":{"recommendedSizes":{"width":"420","height":"280"}},"imageMobile":{"recommendedSizes":{"width":"750","height":"500"}}},"id":"#35","type":"component","lock":false,"position":54},{"name":"Image","data":{"firstImage":{"mimetype":"image/png","size":57761,"hash":"6f6c2ea8076d9881ff74f332572cf622aa7eb3e6","id":"cl0tj6o7xknih0776qkxuizza","filename":"divesoft-freedom-user-manual-03-2-2.png","category":"divesoft/","type":"image"},"secondImage":{},"image":{"type":"image"}},"id":"#36","type":"component","lock":false,"position":55},{"name":"Spacer","data":{"spacingLarge":30,"spacingSmall":20,"backgroundColor":"#ffffff"},"id":"#404","type":"component","lock":false,"position":56},{"name":"TextBlock","data":{"text":"**MÃstnà Äas** \nMÃstnà Äas se zobrazuje na displeji pÅÃmo nad indikacà smÄsi.\n\n**SmÄsi** \nUprostÅed displeje se zobrazuje aktuálnà smÄs plynů. **UpozornÄnÃ**: Pokud nenà dýchacà smÄs totožná s indikovanou smÄsÃ, bude vypoÄtený dekompresnà profil nesprávný a může být nebezpeÄný. V takovém pÅÃpadÄ musÃte použÃt záložnà metodu výpoÄtu dekompresnÃho profilu. \n\n**Max** \nUkazuje maximálnà hloubku dosaženou bÄhem ponoru.\n\n**CNS** \nVystavenà vysokému parciálnÃmu tlaku kyslÃku může za urÄitých okolnostà způsobit akutnà otravu kyslÃkem (CNS). Ta může způsobit, že se postižený utopÃ. Tzv. kyslÃkové hodiny pÅedstavujà procento spotÅeby limitnà hodnoty toxicity CNS. VýpoÄet vycházà z limitů expozice kyslÃku NOAA.\n","textLarge":false,"imageOnRight":true,"image":{"recommendedSizes":{"width":"420","height":"280"}},"imageMobile":{"recommendedSizes":{"width":"750","height":"500"}}},"id":"#37","type":"component","lock":false,"position":57},{"name":"TextBlock","data":{"text":"\tPO2 Max. jednorázová expozice Maximum za 24 h\n\n\t1.60 45 min 150 min \n\t1.55 83 min 165 min \n\t1.50 120 min 180 min \n\t1.45 135 min 180 min \n\t1.40 150 min 180 min \n\t1.35 165 min 195 min \n\t1.30 180 min 210 min \n\t1.25 195 min 225 min \n\t1.20 210 min 240 min \n\t1.10 240 min 270 min \n\t1.00 300 min 300 min \n\t0.90 360 min 360 min \n\t0.80 450 min 450 min \n\t0.70 570 min 570 min \n\t0.60 720 min 720 min \n\n","textLarge":false,"imageOnRight":true,"image":{"recommendedSizes":{"width":"420","height":"280"}},"imageMobile":{"recommendedSizes":{"width":"750","height":"500"}}},"id":"#317","type":"component","lock":false,"position":58},{"name":"Image","data":{"firstImage":{},"secondImage":{}},"id":"#38","type":"component","lock":false,"position":59},{"name":"TextBlock","data":{"text":"Hodnota kyslÃkových hodin CNS nezohledÅuje chronickou (plicnÃ) otravu kyslÃkem. Pro expozice\nbÄžné pro technické potápÄnÃ, nejsou projevy chronické toxicity významné. U velmi dlouhých ponorů je nutné kalkulovat s dlouhodobými expoziÄnÃmi limity a omezit celkovou expozici. StejnÄ tak pÅi komulaci intenzivnÃch ponorů v kr
2átkém Äasovém obdobà (napÅ. potápÄÄské safari). \nKdyž pO<sub>2</sub>\n ⥠1,4 baru, pak je hranice toxicity pro CNS vždy kratÅ¡Ã než hranice plicnà toxicity.\nPro výpoÄty týkajÃcà se chronické toxicity použijte metodu REPEX, kterou znáte z potápÄnà s nitroxem.\nz kurzu. Divesoft Freedom neprovádà výpoÄty spojené s chronickou toxicitou kyslÃku.\n\n**Prům.**\nPrůmÄrná hloubka. Je možné vytvoÅit nový poÄáteÄnà bod pro průmÄrovánà hloubky; v nabÃdce potápÄnà vyberte Nastavenà â Obnovit průmÄr. \nBottomTimer: Obnovenà průmÄru\n\n\n**Floor** \nDekompresnà dno je hloubka, ve které se doba do vynoÅenà (TTS) nezvyÅ¡uje.\nVýpoÄet dekompresnÃho dna je pÅibližný. Zůstat v pÅesné hloubce uvedeného dna\nvede k mÃrnému zkrácenà nadcházejÃcà doby dekomprese.\nTuto polohu na obrazovce s podrobnými informacemi lze pÅizpůsobit. Můžete zmÄnit dekompresnà dno, průmÄrnou\nhloubku nebo TTS2 v nabÃdce Nastavenà â Vlastnosti â Displej â Volitelné pole. \nTTS2 je Äas do vynoÅenà vypoÄÃtaný pouze s aktuálnà smÄsà OC.","textLarge":false,"imageOnRight":true,"image":{"recommendedSizes":{"width":"420","height":"280"}},"imageMobile":{"recommendedSizes":{"width":"750","height":"500"}}},"id":"#39","type":"component","lock":false,"position":60},{"name":"TextBlock","data":{"text":"**Tepl.** \nTeplota vody se mÄÅà uvnitÅ tÄla poÄÃtaÄe. Po zmÄnÄ teploty poÄkejte asi 1-2 minuty, dokud údaj o teplotÄ nedosáhne stabilnà hodnoty. Teplota vzduchu je ovlivnÄna mnoha faktory a je pouze orientaÄnÃ. V nabÃdce Nastavenà â Kalibrace lze nastavit teplotnà korekci pro lepÅ¡Ã pÅesnost. \n**pO<sub>2</sub>** \nVýpoÄet je založen na hloubce a podÃlu O<sub>2</sub> v dýchacà smÄsi.\n \n**Kombinovaný grafický symbol** \nKombinovaný grafický symbol na detailnà obrazovce sloužà k rychlé orientaci. ÅÃká potápÄÄi, co je tÅeba udÄlat. Barva výstražných symbolů se mÄnà od žluté po Äervenou podle stupnÄ důležitosti.","textLarge":false,"imageOnRight":true,"image":{"recommendedSizes":{"width":"420","height":"280"}},"imageMobile":{"recommendedSizes":{"width":"750","height":"500"}}},"id":"#41","type":"component","lock":false,"position":61},{"name":"Image","data":{"firstImage":{},"secondImage":{},"image":{"type":"image"}},"id":"#43","type":"component","lock":false,"position":62},{"name":"TextBlock","data":{"text":"Povoleno vystoupit na povrch.","textLarge":false,"imageOnRight":true,"image":{"recommendedSizes":{"width":"420","height":"280"}},"imageMobile":{"recommendedSizes":{"width":"750","height":"500"}}},"id":"#42","type":"component","lock":false,"position":63},{"name":"Image","data":{"firstImage":{},"secondImage":{}},"id":"#48","type":"component","lock":false,"position":64},{"name":"TextBlock","data":{"text":"Povoleno vystoupat do hloubky dekompresnà zastávky nebo dekompresnÃho stropu.","textLarge":false,"imageOnRight":true,"image":{"recommendedSizes":{"width":"420","height":"280"}},"imageMobile":{"recommendedSizes":{"width":"750","height":"500"}}},"id":"#52","type":"component","lock":false,"position":65},{"name":"Image","data":{"firstImage":{},"secondImage":{}},"id":"#47","type":"component","lock":false,"position":66},{"name":"TextBlock","data":{"text":"Bylo dosaženo hloubky dekompresnÃho stropu nebo dekompresnà zastávky; hloubku nemÄÅte.","textLarge":false,"imageOnRight":true,"image":{"recommendedSizes":{"width":"420","height":"280"}},"imageMobile":{"recommendedSizes":{"width":"750","height":"500"}}},"id":"#53","type":"component","lock":false,"position":67},{"name":"Image","data":{"firstImage":{},"secondImage":{}},"id":"#46","type":"component","lock":false,"position":68},{"name":"TextBlock","data":{"text":"Rychlost výstupu byla pÅekroÄena; zpomalte výstup.","textLarge":false,"imageOnRight":true,"image":{"recommendedSizes":{"width":"420","height":"280"}},"imageMobile":{"recommendedSizes":{"width":"750","height":"500"}}},"id":"#50","type":"component","lock":false,"position":71},{"name":"Image","data":{"firstImage":{},"secondImage":{}},"id":"#44","type":"component","lock":false,"position":72},{"name":"TextBlock","data":{"text":"Aktuálnà hloubka je menÅ¡Ã než hloubka dekompresnÃho stropu; sestupte.","textLarge":false,"imageOnRight":true,"image":{"recommendedSizes":{"width":"420","height":"280"}},"imageMobile":{"recommendedSizes":{"width":"750","height":"500"}}},"id":"#49","type":"component","lock":false,"position":73},{"name":"TextBlock","data":{"text":"**Vertikálnà rychlost** \nPod kombinovaným grafickým symbolem se nac
2házà údaj o rychlosti stoupánà nebo klesánÃ. Lze nastavit relativnà (%) nebo absolutnà (m/min nebo ft/min) údaj. Relativnà údaj je založen na maximálnà rychlosti stoupánà nebo klesánÃ. \nNastavenà v BottomTimer: \"Nastavenà â Vlastnosti â Vert. rychl.\" \nOstatnà licence: \"Nastavenà â Vlastnosti â Uživ. rozhranà â Vert. rychl.\"\n\n\n**Symbol baterie** \nGrafický údaj o zbývajÃcà kapacitÄ baterie. Viz kapitola Režim povrchu - symbol baterie (viz Äást 3.1.2).","textLarge":false,"imageOnRight":true,"image":{"recommendedSizes":{"width":"420","height":"280"}},"imageMobile":{"recommendedSizes":{"width":"750","height":"500"}}},"id":"#54","type":"component","lock":false,"position":74},{"name":"TextBlock","data":{"text":"### **03.2.3 PÅehledná obrazovka** \nHodnota hloubky je snadno Äitelná. Je doplnÄna dalÅ¡Ãmi důležitými informacemi. Význam vÅ¡ech hodnot je shodný s podrobnou obrazovkou.","textLarge":false,"imageOnRight":true,"image":{"recommendedSizes":{"width":"420","height":"280"}},"imageMobile":{"recommendedSizes":{"width":"750","height":"500"}}},"id":"#222","type":"component","lock":false,"position":75},{"name":"Image","data":{"firstImage":{"mimetype":"image/png","size":34927,"hash":"e1e53cd09f98eb999b96e1f121302769a8126153","id":"cl0tlxnn2kpc10776c8i56yl5","filename":"divesoft-freedom-user-manual-03-2-3.png","category":"divesoft/","type":"image"},"secondImage":{}},"id":"#55","type":"component","lock":false,"position":76},{"name":"Spacer","data":{"spacingLarge":30,"spacingSmall":20,"backgroundColor":"#ffffff"},"id":"#405","type":"component","lock":false,"position":77},{"name":"TextBlock","data":{"text":"### **03.2.4 Velká obrazovka** \n\nNejdůležitÄjÅ¡Ã informace jsou napsány opravdu velkým pÃsmem. Tato obrazovka je užiteÄná pÅi velmi Å¡patné viditelnosti. Mnoho potápÄÄů dokáže pÅeÄÃst ÄÃsla i bez masky. Význam vÅ¡ech hodnot je totožný s podrobnou obrazovkou. \nNa \"Velké obrazovce\" můžete v režimu Gauge pÅizpůsobit spodnà Åádek. BottomTimer: \"Nastavenà -> Vlastnost -> Velká hloubka\" DalÅ¡Ã Åádky: \"Nastavenà -> PÅedvolby -> Uživatelské rozhranà -> Velká hloubka\" \n - \"Prům.\" zobrazuje průmÄrnou hloubku \n- \"Max\" zobrazuje maximálnà hloubku\n- \"Pouze\" zobrazuje POUZE aktuálnà hloubku, nic jiného.","textLarge":false,"imageOnRight":true,"image":{"recommendedSizes":{"width":"420","height":"280"}},"imageMobile":{"recommendedSizes":{"width":"750","height":"500"}}},"id":"#56","type":"component","lock":false,"position":78},{"name":"Spacer","data":{"spacingLarge":30,"spacingSmall":20,"backgroundColor":"#ffffff"},"id":"#407","type":"component","lock":false,"position":79},{"name":"Image","data":{"firstImage":{"mimetype":"image/png","size":29629,"hash":"3b235775934151025d80b4d713c78946389450e9","id":"cl0tmn055kpsy0776mlrzmnpy","filename":"divesoft-freedom-user-manual-03-2-4.png","category":"divesoft/","type":"image"},"secondImage":{},"image":{"type":"image"}},"id":"#57","type":"component","lock":false,"position":80},{"name":"Spacer","data":{"spacingLarge":30,"spacingSmall":20,"backgroundColor":"#ffffff"},"id":"#406","type":"component","lock":false,"position":81},{"name":"TextBlock","data":{"text":"### **03.2.5 obrazovka Profil** \n\n**Start** \nDoba ponoÅenà je užiteÄná pro kontrolu dodržovánà harmonogramu.\n\n**Prům.** \nPrůmÄrná hloubka je oznaÄena žlutou vodorovnou Äarou a průmÄrná hloubka je zobrazena žlutÄ. Lze vytvoÅit nový poÄáteÄnà bod pro průmÄrovánà hloubky (v nabÃdce potápÄnà vyberte Nastavenà â Obnovit průmÄr). Tento bod je oznaÄen žlutou svislou Äarou a od nÄj zaÄÃná vodorovná Äára průmÄrné hloubky.\n\n**Aktuálnà hloubka** \nViz levý dolnà roh.\n\n**Äas ponoru** \nÄas aktuálnÃho ponoru je umÃstÄn v pravém dolnÃm rohu.\n\n**Max** \nMaximálnà hloubka dosažená bÄhem ponoru. Pole s touto hodnotou je umÃstÄno uprostÅed spodnÃho Åádku.","textLarge":false,"imageOnRight":true,"image":{"recommendedSizes":{"width":"420","height":"280"}},"imageMobile":{"recommendedSizes":{"width":"750","height":"500"}}},"id":"#58","type":"component","lock":false,"position":82},{"name":"Image","data":{"firstImage":{"mimetype":"image/png","size":31112,"hash":"125debcb0ef3f271fc89e04934c6769f5ebdf6b1","id":"cl0wl3aomloby0776mkjdr1kh","filename":"divesoft-freedom-user-manual-03-2-5a.png","category":"divesoft/","type":"image"},"secondImage":{},"image":{"type":"image"}},"id":"#60","type":"component","lock":false,"position":83},{"name":"Spacer","data":{"spacingLarge":30,"spacingSmall":20,"backgroundColor":"#ffffff"},"id":"#408","type":"component","lock":false,"position":84},{"name":"Image","data":{"firstImage":{"mimetype":"image/png","size":31286,"hash":"ba890b7f6addcbba4216bd525ff6205593399603","id":"cl0wl41ftloc50776g18hahxn","filename":"divesoft-freedom-user-manual-03-2-5b.png","category":"divesoft/","type":"image"},"secondImage":{},"image":{"type":"image"}},"id":"#59","type":"component","lock":false,"position":85},{"name":"Spacer","data":{"spacingLarge":30,"spacingSmall":20,"backgroundColor":"#ffffff"},"id":"#355","type":"component","lock":false,"position":86},{"name":"TextBlock","data":{"text":"### **03.2.6 Ponorové menu** \nBÄhem ponoru, v jakémkoli režimu ponoru, stisknÄte obÄ tlaÄÃtka souÄasnÄ pro zobrazenà nabÃdky ponoru. V dolnà Äásti obrazovky je aktuálnà hloubka, parciálnà tlak kyslÃku a Äas ponoru.","textLarge":false,"imageOnRight":true,"image":{"recommendedSizes":{"width":"420","height":"280"}},"imageMobile":{"recommendedSizes":{"width":"750","height":"500"}}},"id":"#61","type":"component","lock":false,"position":87},{"name":"Image","data":{"firstImage":{"mimetype":"image/bmp","size":77596,"hash":"7ba8c7a9db2c15d129cee1efe63fea9b69f5979c","id":"cl2yez0pw5hws0776rc47e1cb","filename":"00000016.BMP","category":"divesoft/","type":"image"},"secondImage":{},"image":{"type":"image"}},"id":"#423","type":"component","lock":false,"position":88},{"name":"TextBlock","data":{"text":"**SmÄs** \nVýbÄr smÄsi. V seznamu jsou uvedeny pouze aktivnà smÄsi, které lze vybrat.\n\n**SmÄsi s pO<sub>2</sub>** \nmimo dýchatelný rozsah jsou zobrazeny ÄervenÄ (pokud je pO<sub>2</sub> pÅÃliÅ¡ vysoké) nebo modÅe (pokud je pO<sub>2</sub> pÅÃliÅ¡ nÃzké). To nebránà výbÄru této smÄsi. Po tomto druhu pÅepnutà se aktivuje alarm. Limity dýchatelného rozsahu se nastavujà v nabÃdce Nastavenà â SmÄsi.","textLarge":false,"imageOnRight":true,"image":{"recommendedSizes":{"width":"420","height":"280"}},"imageMobile":{"recommendedSizes":{"width":"750","height":"500"}}},"id":"#421","type":"component","lock":false,"position":89},{"name":"Image","data":{"firstImage":{"mimetype":"image/png","size":22532,"hash":"b459ac1ad7284fa1e9c752a1a54e9a29f39bdbcd","id":"cl0wl5a6alocc0776vp5xitzg","filename":"divesoft-freedom-user-manual-03-2-6b.png","category":"divesoft/","type":"image"},"secondImage":{}},"id":"#62","type":"component","lock":false,"position":90},{"name":"Spacer","data":{"spacingLarge":30,"spacingSmall":20,"backgroundColor":"#ffffff"},"id":"#356","type":"component","lock":false,"position":91},{"name":"TextBlock","data":{"text":"**UkonÄenà ponoru** \nUkonÄete ponor a pÅepnÄte se do povrchového režimu. Tato položka nabÃdky je aktivnà pouze na hladinÄ (v hloubce < 0,5 m).\n\n**Plán výstupu** \nVe výchozÃm nastavenà plán zahrnuje vÅ¡echny zÄmny plynu bÄhem dekomprese, vÄetnÄ doby trvánà zastávky na zmÄnu plynu. Pokud je v nastavenà dekomprese výstupnà plyn nastaven na aktuálnÃ, nejsou do plánu zahrnuty žádné zmÄny plynu.","textLarge":false,"imageOnRight":true,"image":{"recommendedSizes":{"width":"420","height":"280"}},"imageMobile":{"recommendedSizes":{"width":"750","height":"500"}}},"id":"#64","type":"component","lock":false,"position":92},{"name":"Spacer","data":{"spacingLarge":30,"spacingSmall":20,"backgroundColor":"#ffffff"},"id":"#357","type":"component","lock":false,"position":93},{"name":"Image","data":{"firstImage":{"mimetype":"image/png","size":48933,"hash":"2460759cc7d5c53dc3980ffd5bcc9e592f07fbaf","id":"cl0wl8oy4loe507764y8ul2fh","filename":"divesoft-freedom-user-manual-03-2-6c.png","category":"divesoft/","type":"image"},"secondImage":{},"image":{"type":"image"}},"id":"#65","type":"component","lock":false,"position":94},{"name":"Spacer","data":{"spacingLarge":30,"spacingSmall":20,"backgroundColor":"#ffffff"},"id":"#358","type":"component","lock":false,"position":95},{"name":"TextBlock","data":{"text":"**Nastavenà â Bailout GF**\nPÅepnutà na dvojici gradientnÃch faktorů pro záchranu (BoGF) a naopak. Mezi standardnÃm a záchranným GF můžete pÅepÃnat kdykoli bÄhem ponoru. Viz také Nastavenà â Dekomprese â Gradientnà faktor (viz kapitola 4.2.2).","textLarge":false,"imageOnRight":true,"image":{"recommendedSizes":{"width":"420","height":"280"}},"imageMobile":{"recommendedSizes":{"width":"750","height":"500"}}},"id":"#66","type":"component","lock":false,"position":96},{"name":"Spacer","data":{"spacingLarge":30,"spacingSmall":20,"backgroundColor":"#ffffff"},"id":"#360","type":"component","lock":false,"position":97},{"name":"Image","data":{"firstImage":{"mimetype":"image/png","size":33639,"hash":"3e26ea4df9159b3e01e51a4be04cb658b522c29e","id":"cl0wl9pmwloee0776i7i44co4","filename":"divesoft-freedom-user-manual-03-2-6d.png","category":"divesoft/","type":"image"},"secondImage":{},"image":{"type":"image"}},"id":"#67","type":"component","lock":false,"position":98},{"name":"Spacer","data":{"spacingLarge":30,"spacingSmall":20,"backgroundColor":"#ffffff"},"id":"#359","type":"component","lock":false,"position":99},{"name":"TextBlock","data":{"text":"**Nastavenà - Resetuj průmÄr** \nZnovu spustà výpoÄet průmÄrné hloubky. Bod restartu je oznaÄen svislou Äarou na obrazovce profilu ponoru.\n\n**Nastavenà - Nastavenà smÄsi** \nOdpovÃdá nastavenà smÄsi v nabÃdce Nastavenà â SmÄsi â Nastavenà smÄsi. Tato funkce je urÄena pouze pro nouzové situace. NepoužÃvejte toto nastavenà pravidelnÄ.\n\n**Nastavenà - Displej** \nToto nastavenà odpovÃdá funkci Nastavenà â Vlastnosti â Displej. \n\n**Nastavenà - ZruÅ¡ ponor (force)** \
2nPokud byl nesprávnÄ zjiÅ¡tÄn tlak na hladinÄ (nulová hloubka) a poÄÃtaÄ se \"potápÃ\", zatÃmco je na hladinÄ, pak lze pomocà této funkce vynutit ukonÄenà ponoru. \n\n<span style=\"color:red\">**VarovánÃ: NepoužÃvejte force na ukonÄenà ponoru pod vodou!**</span>\n\n\n**Aplikace** \nThere are several items in the apps folder\n\n**Aplikace - PÅidat záložku** - oznaÄà aktuálnà okamžik v protokolu ponoru\n\n**Aplikace - události** - umožÅuje zobrazit varovánà a vyskakovacà zprávy vydané poÄÃtaÄem.\n\n**Aplikace - Nouzová svÃtilna** - maximálnÄ rozjasnà celý displej a vydává maximálnà možné množstvà svÄtla. Lze ji použÃt jako nouzovou svÃtilnu za urÄitých podmÃnek, když vÅ¡echny ostatnà svÃtilny selžou.\n\n**Aplikace - SklonomÄr** - nástroj pro mÄÅenà sklonu svahu. Lze použÃt k mapovánà jeskynà a vraků.\n\n**Aplikace - Hra Sokoban** - logická hra pro rozptýlenà pÅi dlouhé dekompresi. DalÅ¡Ã informace o hrách naleznete v Äásti 9 této pÅÃruÄky.\n\n**Aplikace - Had** - hra pro rozptýlenà pÅi dlouhé dekompresi. DalÅ¡Ã informace o hrách naleznete v Äásti 9 této pÅÃruÄky.","textLarge":false,"imageOnRight":true,"image":{"recommendedSizes":{"width":"420","height":"280"}},"imageMobile":{"recommendedSizes":{"width":"750","height":"500"}}},"id":"#68","type":"component","lock":false,"position":100},{"name":"TextBlock","data":{"text":"### **03.2.7 Zkratka pÅepÃnaÄe plynu**\n\nDlouhým stiskem hornà klávesy se vybere pÅedchozà smÄs plynu. Dlouhým stiskem dolnà klávesy se vybere dalÅ¡Ã smÄs plynu. Tento seznam je cyklický. Jaké smÄsi lze pÅepÃnat, závisà na nastavenà v nabÃdce Nastavenà â Vlastnosti â Uživatelské rozhranà â PÅep. plynu. Výchozà nastavenà pro plynové zkratky je vypnuto. Pokud je vybrána možnost Dých. (Dýchatelný), pak se pÅepÃnajà smÄsi s pO<sub>2</sub> uvnitÅ dýchatelného rozsahu s ohledem na aktuálnà hloubku. Hranice dýchatelného rozsahu se nastavujà v nabÃdce Nastavenà â SmÄsi. Pokud je vybrána možnost VÅ¡e, pak se pÅepÃnajà vÅ¡echny aktivnà plynové smÄsi bez ohledu na dýchatelnost. Po tomto druhu pÅepnutà by se mohl aktivovat alarm. PoÄÃtaÄ vyÄká pÄt sekund, než se spustà alarm. BÄhem tohoto intervalu může uživatel zvolit správnou smÄs plynů.","textLarge":false,"imageOnRight":true,"image":{"recommendedSizes":{"width":"420","height":"280"}},"imageMobile":{"recommendedSizes":{"width":"750","height":"500"}}},"id":"#223","type":"component","lock":false,"position":101},{"name":"TextBlock","data":{"text":"### **03.3 Fixed CCR** \nRežimy potápÄnà s dýchacÃm pÅÃstrojem jsou dostupné pouze ve verzi Divesoft Freedom s uzavÅeným okruhem.\nPÅed použitÃm pÅÃstroje Divesoft Freedom pro rebreatherové potápÄnà se důraznÄ doporuÄuje seznámit se s potápÄnÃm v otevÅeném okruhu (OC). Tato kapitola uživatelské pÅÃruÄky popisuje pouze rozdÃly oproti potápÄnà v režimu OC.\n\nNejprve si prostudujte OC režim.\nPokud je Freedom použÃván jako záložnà poÄÃtaÄ pro eCCR je zcela zásadnÃ, aby nastavenà odpovÃdalo nastavenà elektroniky eCCR. Pokud je použit manuálnà CCR (mCCR) udržujte pO<sub>2</sub>\nv dýchacà smyÄce na hodnotÄ odpovÃdajÃcà setpointu (SP) na Freedomu.\nPokud je použit SCR, nestavte pÅÃsluÅ¡ný typ SCR a pÅizpůsobte jeho parametry v nastavenÃ. Viz Nastavenà â Rebreather.\nNezapomeÅte si takénastavit OC bailout, zvláštÄ pak výchozà smÄs.\nRežim Fixed CCR je oznaÄen svÄtle modrými rámeÄky.","textLarge":false,"imageOnRight":true,"image":{"recommendedSizes":{"width":"420","height":"280"}},"imageMobile":{"recommendedSizes":{"width":"750","height":"500"}}},"id":"#224","type":"component","lock":false,"position":102},{"name":"Spacer","data":{"spacingLarge":30,"spacingSmall":20,"backgroundColor":"#ffffff"},"id":"#361","type":"component","lock":false,"position":103},{"name":"Image","data":{"firstImage":{"mimetype":"image/png","size":38213,"hash":"5cd6b6abe151647cb6570ed28dc368baea7e5d5a","id":"cl0wlheculofm0776px8ofmpo","filename":"divesoft-freedom-user-manual-03-3-a.png","category":"divesoft/","type":"image"},"secondImage":{},"image":{"type":"image"}},"id":"#69","type":"component","lock":false,"position":104},{"name":"Spacer","data":{"spacingLarge":30,"spacingSmall":20,"backgroundColor":"#ffffff"},"id":"#362","type":"component","lock":false,"position":105},{"name":"TextBlock","data":{"text":"### **03.3.1 PÅÃprava a zanoÅenÃ** \n\nPÅed vstupem do vody zapnÄte pÅÃstroj Freedom. Zkontrolujte zaÅÃzenà Freedom\njako souÄást kontroly pÅed ponorem.\nNa prvnà obrazovce je shrnutÃ\nspecifických parametrů rebreatheru, druhá obrazovka je souhrnem nastavenà dekomprese a parametrů OC (bailout).\nPokud dojde k ponoÅenà do hloubky vÄtÅ¡Ã než 1,5 m, poÄÃtaÄ\npÅepne do výchozÃho režimu. Nastavenà výchozÃho režimu na pevnou hodnotu CCR\nbÄhem pÅÃpravy na ponor v nabÃdce Nastavenà âVlastnosti. Tento způsob pÅepÃnánà zámÄrnÄ nepoužÃvejte, je urÄen pouze pro nouzové situace.","textLarge":false,"imageOnRight":true,"image":{"recommendedSizes":{"width":"420","height":"280"}},"imageMobile":{"recommendedSizes":{"width":"750","height":"500"}}},"id":"#70","type":"component","lock":false,"position":106},{"name":"Spacer","data":{"spacingLarge":30,"spacingSmall":20,"backgroundColor":"#ffffff"},"id":"#363","type":"component","lock":false,"position":107}
2,{"name":"Image","data":{"firstImage":{"mimetype":"image/bmp","size":77878,"hash":"dc034a45896dc0ab39faafaed86718d87484e1e0","id":"cl2yg4ulq5j7i0776sjkwu6x3","filename":"00000037.BMP","category":"divesoft/","type":"image"},"secondImage":{},"image":{"type":"image"}},"id":"#77","type":"component","lock":false,"position":108},{"name":"Spacer","data":{"spacingLarge":30,"spacingSmall":20,"backgroundColor":"#ffffff"},"id":"#424","type":"component","lock":false,"position":109},{"name":"Spacer","data":{"spacingLarge":30,"spacingSmall":20,"backgroundColor":"#ffffff"},"id":"#427","type":"component","lock":false,"position":110},{"name":"Image","data":{"firstImage":{"mimetype":"image/bmp","size":77878,"hash":"c3161a65c4e79a8fe6558e584a2c1fcb97eb5f42","id":"cl2yg5q5t5j7s0776wkdxhssy","filename":"00000038.BMP","category":"divesoft/","type":"image"},"secondImage":{},"image":{"type":"image"}},"id":"#318","type":"component","lock":false,"position":111},{"name":"Spacer","data":{"spacingLarge":30,"spacingSmall":20,"backgroundColor":"#ffffff"},"id":"#426","type":"component","lock":false,"position":112},{"name":"TextBlock","data":{"text":"### **03.3.2 Setpoint** \n\nPo pÅepnutà do režimu Fixed CCR se nastavà nÃzký P. Na vysoký SP lze pÅepnout ruÄnÄ (pomocà klávesové zkratky nebo pÅes menu) nebo automaticky v nastavené hloubce bÄhem sestupu nebo v nastaveném Äase bÄhu..\n\n**Ätenà SP (eCCR)** \n\nAktuálnà nastavená hodnota se nacházà v mÃstÄ, kde se na displeji v režimu potápÄnà OC na podrobné i pÅehledné obrazovce nacházà hodnota pO<sub>2</sub>.\n\n**Ätenà pO<sub>2</sub>(SCR)** \nPokud se potápÃte s SCR, zobrazuje se mÃsto setpointu vypoÄtená hodnota pO<sub>2</sub>. Viz Äást Nastavenà CCR/SCR (viz kapitola 4.5).\n\n**Zkratky** \n\nU CCR se dlouhým stiskem hornÃho tlaÄÃtka zvolà vysoký setpoint. Dlouhým stiskem dolnÃho tlaÄÃtka se zvolà nÃzký setpoint. Zkratka je ve výchozÃm nastavenà vypnutá, ale lze ji zapnout v nabÃdce Setup â Rebreather â Const CCR Setup â SP shortcuts Pokud je použit polouzavÅený rebreather (SCR), pak se smÄs plynů pÅepÃná touto zkratkou (podobnÄ jako v režimu OC).\n\n**RuÄnà nastavenà SP** \n\nV ponorovém menu zvolte možnost Setpoint (Nastavená hodnota). Vysoký a nÃzký setpoint lze zvolit pÅÃmo z nabÃdky. Pro nastavenà aktuálnà žádané hodnoty použijte položky menu +0,10 a -0,10 pro zmÄnu hodnoty SP (lze použÃt opakovanÄ; zobrazà se koneÄná hodnota) a poté pro zmÄnu zvolte Accept.","textLarge":false,"imageOnRight":true,"image":{"recommendedSizes":{"width":"420","height":"280"}},"imageMobile":{"recommendedSizes":{"width":"750","height":"500"}}},"id":"#75","type":"component","lock":false,"position":113},{"name":"Spacer","data":{"spacingLarge":30,"spacingSmall":20,"backgroundColor":"#ffffff"},"id":"#364","type":"component","lock":false,"position":114},{"name":"Image","data":{"firstImage":{"mimetype":"image/png","size":48615,"hash":"35188486389c8533a5609f9d47b2db7b3ad33526","id":"cl0wlkzdtlogb077681nydcjb","filename":"divesoft-freedom-user-manual-03-3-2a.png","category":"divesoft/","type":"image"},"secondImage":{},"image":{"type":"image"}},"id":"#72","type":"component","lock":false,"position":115},{"name":"Spacer","data":{"spacingLarge":30,"spacingSmall":20,"backgroundColor":"#ffffff"},"id":"#366","type":"component","lock":false,"position":116},{"name":"Image","data":{"firstImage":{"mimetype":"image/png","size":32521,"hash":"5446119cf5572bce548be777ce9b96a26c77a161","id":"cl0wlqwm1loha0776uc6mp7dz","filename":"divesoft-freedom-user-manual-03-3-2b.png","category":"divesoft/","type":"image"},"secondImage":{},"image":{"type":"image"}},"id":"#319","type":"component","lock":false,"position":117},{"name":"Spacer","data":{"spacingLarge":30,"spacingSmall":20,"backgroundColor":"#ffffff"},"id":"#365","type":"component","lock":false,"position":118},{"name":"TextBlock","data":{"text":"### **03.3.3 Ponorové menu** \n\n","textLarge":false,"imageOnRight":true,"image":{"recommendedSizes":{"width":"420","height":"280"}},"imageMobile":{"recommendedSizes":{"width":"750","height":"500"}}},"id":"#76","type":"component","lock":false,"position":119},{"name":"Image","data":{"firstImage":{"mimetype":"image/bmp","size":77596,"hash":"6f214a6e3f95f8e771a423cbc9727971ee023919","id":"cl2yh3lmv5k1m0776pzgiceqf","filename":"00000021.BMP","category":"divesoft/","type":"image"},"secondImage":{},"image":{"type":"image"}},"id":"#429","type":"component","lock":false,"position":120}
2,{"name":"Spacer","data":{"spacingLarge":30,"spacingSmall":20,"backgroundColor":"#ffffff"},"id":"#430","type":"component","lock":false,"position":121},{"name":"TextBlock","data":{"text":"**Bailout režim (OC)** \n\nPÅedpokládá se, že potápÄÄ nebude dýchat z dýchacà smyÄky rebreatheru, ale použije samostatný záchranný pÅÃstroj s otevÅeným okruhem.\nPo pÅepnutà do bail-out OC režimu bude použita výchozà OC smÄs a bezpeÄnostnà úroveÅ bude automaticky nastavena pomocà gradientnÃch faktorů bailoutu. ZnaÄka BoGF se zobrazà na podrobné a na pÅehledné obrazovce.\nV nabÃdce je možné pÅepÃnat mezi standardnÃmi a bailoutovými sadami GF, aniž by byl ovlivnÄn režim, ve kterém je zaÅÃzenà Freedom provozováno.","textLarge":false,"imageOnRight":true,"image":{"recommendedSizes":{"width":"420","height":"280"}},"imageMobile":{"recommendedSizes":{"width":"750","height":"500"}}},"id":"#428","type":"component","lock":false,"position":122},{"name":"TextBlock","data":{"text":"**MÄÅený režim (CCR)** \nSloužà k pÅepnutà do režimu opakovaného potápÄnà s namÄÅeným pO<sub>2</sub>.\n. Viz dalÅ¡Ã kapitola.\n\n**Setpoint** (Nastavená hodnota) \nSloužà k pÅepÃnánà nÃzké/vysoké setpoint a k ruÄnÃmu nastavenà setpointu CCR. Viz kapitola Nastavenà (Setpoint)\nkapitola na pÅedchozà stranÄ.\n\n**SmÄs** \nSloužà k pÅepÃnánà smÄsi plynů pro SCR. Jedná se o podobnou funkci jako u volby smÄsi OC.\n\n**Diluent** \nTuto položku nabÃdky použijte pro pÅepÃnánà plynu pro diluent.\n\n**Nastavenà - Diluenty** \nTato položka nabÃdky (pouze pro CCR) odpovÃdá nastavenà smÄsi v nabÃdce Setup â SCR/CCR Setup â Const CCR.\nNastavenà â Diluenty.\n\n**Nastavenà - Nastavenà smÄsi** \nTato položka nabÃdky (pouze SCR) odpovÃdá nastavenà smÄsi OC v nabÃdce Nastavenà â SmÄsi â Nastavenà smÄsi.","textLarge":false,"imageOnRight":true,"image":{"recommendedSizes":{"width":"420","height":"280"}},"imageMobile":{"recommendedSizes":{"width":"750","height":"500"}}},"id":"#78","type":"component","lock":false,"position":123},{"name":"TextBlock","data":{"text":"### **03.3.4 Pohl. varo.** \n\nÄasovaÄ zásobnÃku skruberu bÄžà neustále v jakémkoli režimu rebreatheru bez ohledu na hloubku, a to i na hladinÄ.\nPokud strávÃte dlouhou dobu v režimu potápÄnà a pÅitom nedýcháte z.\nsmyÄky rebreatheru, pak prodlužte dobu pro varovánà pÅed Äasem skruberu\nNezapomeÅte pÅi doplÅovánà zásobnÃku vynulovat ÄasovaÄ (Ponor â Vynulovat pohlcovaÄ).\nÄas skruberu můžete nalézt na obrazovce O<sub>2</sub>\n Äidel.","textLarge":false,"imageOnRight":true,"image":{"recommendedSizes":{"width":"420","height":"280"}},"imageMobile":{"recommendedSizes":{"width":"750","height":"500"}}},"id":"#80","type":"component","lock":false,"position":124},{"name":"Image","data":{"firstImage":{},"secondImage":{}},"id":"#431","type":"component","lock":false,"position":125},{"name":"TextBlock","data":{"text":"### **03.4 MÄÅený CCR** \n\nRežimy potápÄnà s rebreatherem jsou k dispozici pouze ve verzi Divesoft Freedom s uzavÅeným okruhem. Tato kapitola uživatelské pÅÃruÄky popisuje pouze rozdÃly oproti potápÄnà s pevnÄ nastavenou hodnotou CCR. Nejprve si prostudujte režim OC a režim Fixed CCR.","textLarge":false,"imageOnRight":true,"image":{"recommendedSizes":{"width":"420","height":"280"}},"imageMobile":{"recommendedSizes":{"width":"750","height":"500"}}},"id":"#82","type":"component","lock":false,"position":126},{"name":"Spacer","data":{"spacingLarge":30,"spacingSmall":20,"backgroundColor":"#ffffff"},"id":"#368","type":"component","lock":false,"position":127},{"name":"Image","data":{"firstImage":{"mimetype":"image/jpeg","size":54835,"hash":"5c7c754632d5277ca8b098d94e0e6848b5acbf93","id":"cl0wlu8cxlohw0776d45v81mp","filename":"divesoft-freedom-user-manual-03-4-a.jpg","category":"divesoft/","type":"image"},"secondImage":{},"image":{"type":"image"}},"id":"#83","type":"component","lock":false,"position":128},{"name":"Spacer","data":{"spacingLarge":30,"spacingSmall":20,"backgroundColor":"#ffffff"},"id":"#369","type":"component","lock":false,"position":129},{"name":"TextBlock","data":{"text":"### **03.4.1 PÅipojenà O<sub>2</sub> Äidel** \n\nRežim MÄÅený CCR vyžaduje pÅipojenà k O<sub>2</sub>\n v dýchacÃm pÅÃstroji. Lze pÅipojit jeden, dva nebo tÅi snÃmaÄe.\nKabel vybavený konektory Molex. Kabel NENà souÄástà distribuÄnÃho balÃÄku Divesoft Freedom. Ten lze objednat u prodejce tÅetà strany. Viz také kabel k senzoru O<sub>2</sub>
2 (viz kapitola 10.5).\n\nV souÄasné dobÄ nejsou k dispozici žádné kabely ani vlastnÃ, ani kabely výrobců tÅetÃch stran.","textLarge":false,"imageOnRight":true,"image":{"recommendedSizes":{"width":"420","height":"280"}},"imageMobile":{"recommendedSizes":{"width":"750","height":"500"}}},"id":"#225","type":"component","lock":false,"position":130},{"name":"TextBlock","data":{"text":"### ** 03.4.2 Kalibrace O<sub>2</sub> Äidel** \n\nPokud je to možné, použÃvejte ke kalibraci kyslÃk o ÄistotÄ nejménÄ 99,5 %.\nKe kalibraci nepoužÃvejte vzduch. Parciálnà tlak kyslÃku ve vzduchu pÅi atmosférickém tlaku se výraznÄ liÅ¡Ã od parciálnÃch tlaků urÄených setpointy. Na konci své životnosti může snÃmaÄ kyslÃku úspÄÅ¡nÄ projÃt kalibracà na 21 % (vzduch), ale nebude již schopen mÄÅit pO<sub>2</sub> 1 bar nebo vyÅ¡Å¡Ã. \n**Postup:** \n1. Ponor â Kalibrace O<sub>2</sub>â Spustit kalibraci \n2. OvÄÅte kalibraÄnà plyn\n3. PoÄkejte na stabilnà hodnoty\n4. Zahajte kalibraci a vyÄkejte, než se dokonÄÃ\n5. ConPotvrÄte kalibraci\nPÅi kalibraci se také zjiÅ¡Å¥uje, zda je již snÃmaÄ na konci své životnosti.\nVe vyÅ¡Å¡Ãch nadmoÅských výškách klesá parciálnà tlak kyslÃku v kalibraÄnà smÄsi úmÄrnÄ nižšÃmu atmosférickému tlaku. PÅÃstroj Freedom mÄÅà atmosférický tlak a zohledÅuje jej pÅi kalibraci. Proto ve vyÅ¡Å¡Ãch nadmoÅských výškách neprovádÄjte žádné korekce. Kalibraci snÃmaÄů O<sub>2</sub> je vhodné provádÄt pÅed každým ponorem. NepoužÃvejte údaje ze senzorů kalibrovaných pÅed vÃce než tÅemi dny.\n","textLarge":false,"imageOnRight":true,"image":{"recommendedSizes":{"width":"420","height":"280"}},"imageMobile":{"recommendedSizes":{"width":"750","height":"500"}}},"id":"#84","type":"component","lock":false,"position":131},{"name":"Spacer","data":{"spacingLarge":30,"spacingSmall":20,"backgroundColor":"#ffffff"},"id":"#370","type":"component","lock":false,"position":132},{"name":"Image","data":{"firstImage":{"mimetype":"image/png","size":15713,"hash":"07ffaa4f3b081d0d5a9bf84d6b32728740f24dac","id":"cl0wm0paklol10776n7fi65yy","filename":"divesoft-freedom-user-manual-03-4-2a.png","category":"divesoft/","type":"image"},"secondImage":{},"image":{"type":"image"}},"id":"#85","type":"component","lock":false,"position":133},{"name":"Spacer","data":{"spacingLarge":30,"spacingSmall":20,"backgroundColor":"#ffffff"},"id":"#373","type":"component","lock":false,"position":134},{"name":"Image","data":{"firstImage":{"mimetype":"image/png","size":24815,"hash":"fd045312f4372634b71562494408ec7ae25cf9c3","id":"cl0wm1982lol80776kqlqmd2g","filename":"divesoft-freedom-user-manual-03-4-2b.png","category":"divesoft/","type":"image"},"secondImage":{},"image":{"type":"image"}},"id":"#88","type":"component","lock":false,"position":135},{"name":"Spacer","data":{"spacingLarge":30,"spacingSmall":20,"backgroundColor":"#ffffff"},"id":"#372","type":"component","lock":false,"position":136},{"name":"Image","data":{"firstImage":{"mimetype":"image/png","size":29714,"hash":"938d4a30f14a7f9cd409163d768279593cc4a26c","id":"cl0wm1x4slolf0776o49lcrp9","filename":"divesoft-freedom-user-manual-03-4-2c.png","category":"divesoft/","type":"image"},"secondImage":{},"image":{"type":"image"}},"id":"#87","type":"component","lock":false,"position":137},{"name":"Spacer","data":{"spacingLarge":30,"spacingSmall":20,"backgroundColor":"#ffffff"},"id":"#371","type":"component","lock":false,"position":138},{"name":"Image","data":{"firstImage":{"mimetype":"image/png","size":30334,"hash":"81aef34f112134e9ad45d564b2e8a0d258f74aaf","id":"cl0wm2egtlolm0776tatpbyli","filename":"divesoft-freedom-user-manual-03-4-2d.png","category":"divesoft/","type":"image"},"secondImage":{},"image":{"type":"image"}},"id":"#86","type":"component","lock":false,"position":139},{"name":"Spacer","data":{"spacingLarge":30,"spacingSmall":20,"backgroundColor":"#ffffff"},"id":"#374","type":"component","lock":false,"position":140},{"name":"TextBlock","data":{"text":"### **03.4.3 Ätenà pO<sub>2</sub>** \n\nV režimu na hladinÄ i v režimu potápÄnà je k dispozici samostatná obrazovka snÃmaÄe O<sub>2</sub>. Lze na nà odeÄÃtat nejen pO<sub>2</sub>, ale také napÄtà na senzorech. Pokud je stav Äidla mimo provoznà režim (nepÅipojeno, chyba, vylouÄeno, vypnuto, nekalibrováno), zobrazà se mÃsto hodnoty pO<sub>2</sub> pÅÃsluÅ¡ný Å¡tÃtek. Na podrobné a synoptické obrazovce je k dispozici pouze jeden údaj hodnoty pO<sub>2</sub>; použÃvá se aritmetický průmÄr aktivnÃch Äidel. BÄhem ponoru můžete oznaÄit libovolný snÃmaÄ jako vadný v nabÃdce Nastavenà ponoru â Vadné snÃmaÄe.\n\n","textLarge":false,"imageOnRight":true,"image":{"recommendedSizes":{"width":"420","height":"280"}},"imageMobile":{"recommendedSizes":{"width":"750","height":"500"}}},"id":"#89","type":"component","lock":false,"position":141},{"name":"Image","data":{"firstImage":{},"secondImage":{}},"id":"#432","type":"component","lock":false,"position":142},{"name":"TextBlock","data":{"text":"### **03.5 HloubkomÄr**\n\nRežim hloubkomÄru je oznaÄen tmavÄ Äervenými mÅÞkami tabulky. Existujà dvÄ formy režimu hloubkomÄr - s odeÄtem a bez odeÄtu snÃmaÄe O2 rebreatheru. Režim hloubkomÄru s rebreatherem je k dispozici pouze ve verzi s uzavÅeným okruhem s alespoÅ jednÃm pÅipojeným snÃmaÄem O2.\nPoznámka: Obrazovku mÄÅidla lze zapnout v jakémkoli režimu (OC, CCR). Nastavenà -> Vlastnosti -> Displej -> Obrazovky -> HloubkomÄr","textLarge":false,"imageOnRight":true,"image":{"recommendedSizes":{"width":"420","height":"280"}},"imageMobile":{"recommendedSizes":{"width":"750","height":"500"}}},"id":"#92","type":"component","lock":false,"position":143},{"name":"Image","data":{"firstImage":{"mimetype":"image/png","size":35655,"hash":"5c2621799724a4cf4df00d0ff31bbecd8a92d48a","id":"cl0wm6364lolt0776cvts78qm","filename":"divesoft-freedom-user-manual-03-5-4a.png","category":"divesoft/","type":"image"},"secondImage":{},"image":{"type":"image"}},"id":"#93","type":"component","lock":false,"position":144},{"name":"Spacer","data":{"spacingLarge":30,"spacingSmall":20,"backgroundColor":"#ffffff"},"id":"#375","type":"component","lock":false,"position":145},{"name":"Image","data":{"firstImage":{},"secondImage":{}},"id":"#326","type":"component","lock":false,"position":146},{"name":"Image","data":{"firstImage":{},"secondImage":{}},"id":"#327","type":"component","lock":false,"position":147},{"name":"Image","data":{"firstImage":{},"secondImage":{}},"id":"#329","type":"component","lock":false,"position":148},{"name":"Image","data":{"firstImage":{},"secondImage":{}},"id":"#328","type":"component","lock":false,"position":149},{"name":"Image","data":{"firstImage":{},"secondImage":{}},"id":"#330","type":"component","lock":false,"position":150},{"name":"Image","data":{"firstImage":{},"secondImage":{}},"id":"#97","type":"component","lock":false,"position":151},{"name":"TextBlock","data":{"text":"### **03.5.1 PÅehledná obrazovka** \n\n**Stopky** \nOvládánà stopek prostÅednictvÃm nabÃdky. Viz Äást Stopky (viz kapitola 3.5.4).\n\n**Symbol baterie**\nGrafická indikace zobrazuje zbývajÃcà kapacitu baterie. Viz .\nSymbol baterie (viz Äást 3.1.2).\n\n**Äas ponoru** \nÄasovaÄ se spustà po ponoÅenà do vody (hloubka > 1,5 m) a zastavà se po.\nvynoÅenà (hloubka < 0,5 m). Pokud zůstanete na hladinÄ (nebo ve velmi malé hloubce.\nhloubce) následuje druhé ponoÅenà (bÄhem doby nastavené v Äasovém limitu pro ukonÄenà ponoru), pak se ÄasovaÄ ponoru zastavÃ.\nbude uvedena doba od prvnÃho ponoÅenà vÄetnÄ doby vynoÅenÃ.\n\n**MÃstnà Äas** \nMÃstnà Äas se zobrazuje na displeji v levém hornÃm rohu stÅednà Äásti.\n\n**Rychlost výstupu** \nIndikaci rychlosti stoupánà a klesánà lze nastavit na relativnà (%) nebo absolutnà (m/min nebo ft/min) údaj.\nRelativnà údaj je založen na maximálnà rychlosti stoupánà nebo klesánÃ. \nNastavenà v: \nBottomTimer: \"Nastavenà -> Vlastnosti -> Rychlost výstupu\". \nDalÅ¡Ã licence: \"Nastavenà -> Vlastnosti -> Uživatelské rozhranà -> Rychlost výstupu\".\n\n**Hloubka** \nV nastavenà lze nastavit odeÄet hloubky na m nebo ft. Hloubka se vypoÄÃtá z namÄÅené hydrostatické\ntlaku. Pro výpoÄet sladké vody (výchozà nastavenÃ), moÅské vody nebo univerzálnà hustoty EN13319 lze nastavit v nabÃdce Nastavenà â Vlastnosti. \nUniverzálnà hustota EN13319 je bližšà slané vodÄ a nenà pÅÃliÅ¡ vhodná pro Äistou sladkou vodu.\n\n**Max. hloubka** \nMaximálnà hloubka dosažená bÄhem ponoru.\n\n**Prům. hloubka**\nPrůmÄrná hloubka bÄhem ponoru. Nový poÄáteÄnà bod pro zprůmÄrovánà hloubky lze vytvoÅit prostÅednictvÃm nabÃdky ponoru. Tato stránka\nbod je na obrazovce profilu oznaÄen žlutou svislou Äarou.\n\n**Tepl** \nTeplota vody se mÄÅà uvnitÅ tÄla poÄÃtaÄe. Po zmÄnÄ teploty poÄkejte asi 1-2\nminuty, dokud údaj o teplotÄ nedosáhne stabilnà hodnoty. Teplota ve vzduchu je ovlivnÄna mnoha\nfaktorů a je pouze orientaÄnÃ.\nV nabÃdce Nastavenà â Kalibrace lze nastavit teplotnà korekci pro lepÅ¡Ã pÅesnost.","textLarge":false,"imageOnRight":true,"image":{"recommendedSizes":{"width":"420","height":"280"}},"imageMobile":{"recommendedSizes":{"width":"750","height":"500"}}},"id":"#94","type":"component","lock":false,"position":152},{"name":"TextBlock","data":{"text":"### **03.5.2 Velká obrazovka** \n\nNejdůležitÄjÅ¡Ã informace jsou napsány opravdu velkým pÃsmem. Tato obrazovka je užiteÄná pÅi velmi Å¡patné viditelnosti. Mnoho potápÄÄů dokáže pÅeÄÃst ÄÃsla i bez masky. Význam vÅ¡ech hodnot je totožný s podrobnou obrazovkou. \nNa \"Velké obrazovce\" můžete v režimu Gauge pÅizpůsobit spodnà Åádek. BottomTimer: \"Nastavenà -> Vlastnost ->
2 Velká hloubka\" DalÅ¡Ã Åádky: \"Nastavenà -> PÅedvolby -> Uživatelské rozhranà -> Velká hloubka\" \n - \"Prům.\" zobrazuje průmÄrnou hloubku \n- \"Max\" zobrazuje maximálnà hloubku\n- \"Pouze\" zobrazuje POUZE aktuálnà hloubku, nic jiného.","textLarge":false,"imageOnRight":true,"image":{"recommendedSizes":{"width":"420","height":"280"}},"imageMobile":{"recommendedSizes":{"width":"750","height":"500"}}},"id":"#226","type":"component","lock":false,"position":153},{"name":"Spacer","data":{"spacingLarge":30,"spacingSmall":20,"backgroundColor":"#ffffff"},"id":"#376","type":"component","lock":false,"position":154},{"name":"Image","data":{"firstImage":{"mimetype":"image/png","size":29259,"hash":"ee40ef1e1a3b682355ea1cf30ddde558699c4ab1","id":"cl0wmchtxlomg0776ar67022h","filename":"divesoft-freedom-user-manual-03-5-2.png","category":"divesoft/","type":"image"},"secondImage":{},"image":{"type":"image"}},"id":"#333","type":"component","lock":false,"position":155},{"name":"Spacer","data":{"spacingLarge":30,"spacingSmall":20,"backgroundColor":"#ffffff"},"id":"#377","type":"component","lock":false,"position":156},{"name":"Spacer","data":{"spacingLarge":30,"spacingSmall":20,"backgroundColor":"#ffffff"},"id":"#378","type":"component","lock":false,"position":157},{"name":"TextBlock","data":{"text":"### **03.5.3 obrazovka Profil** \n\n**Start** \nDoba ponoÅenà je užiteÄná pro kontrolu dodržovánà harmonogramu.\n\n**Prům.** \nPrůmÄrná hloubka je oznaÄena žlutou vodorovnou Äarou a průmÄrná hloubka je zobrazena žlutÄ. Lze vytvoÅit nový poÄáteÄnà bod pro průmÄrovánà hloubky (v nabÃdce potápÄnà vyberte Nastavenà â Obnovit průmÄr). Tento bod je oznaÄen žlutou svislou Äarou a od nÄj zaÄÃná vodorovná Äára průmÄrné hloubky.\n\n**Aktuálnà hloubka** \nViz levý dolnà roh.\n\n**Äas ponoru** \nÄas aktuálnÃho ponoru je umÃstÄn v pravém dolnÃm rohu.\n\n**Max** \nMaximálnà hloubka dosažená bÄhem ponoru. Pole s touto hodnotou je umÃstÄno uprostÅed spodnÃho Åádku.","textLarge":false,"imageOnRight":true,"image":{"recommendedSizes":{"width":"420","height":"280"}},"imageMobile":{"recommendedSizes":{"width":"750","height":"500"}}},"id":"#95","type":"component","lock":false,"position":158},{"name":"Spacer","data":{"spacingLarge":30,"spacingSmall":20,"backgroundColor":"#ffffff"},"id":"#381","type":"component","lock":false,"position":159},{"name":"Image","data":{"firstImage":{"mimetype":"image/png","size":24751,"hash":"1dbb3f24f0e713ef7a8f5be0c9719f5b58cc9ebc","id":"cl0wmdisklomu0776oj4c9z29","filename":"divesoft-freedom-user-manual-03-5-3a.png","category":"divesoft/","type":"image"},"secondImage":{},"image":{"type":"image"}},"id":"#331","type":"component","lock":false,"position":160},{"name":"Spacer","data":{"spacingLarge":30,"spacingSmall":20,"backgroundColor":"#ffffff"},"id":"#380","type":"component","lock":false,"position":161},{"name":"Image","data":{"firstImage":{"mimetype":"image/png","size":24831,"hash":"aa18315d380344d1e84ff80a6194d3a4543096e2","id":"cl0wme8g8lon10776b1cp6x6t","filename":"divesoft-freedom-user-manual-03-5-3b.png","category":"divesoft/","type":"image"},"secondImage":{},"image":{"type":"image"}},"id":"#96","type":"component","lock":false,"position":162},{"name":"Spacer","data":{"spacingLarge":30,"spacingSmall":20,"backgroundColor":"#ffffff"},"id":"#379","type":"component","lock":false,"position":163},{"name":"TextBlock","data":{"text":"### **03.5.4 Ponorové menu** \n\nBÄhem ponoru v jakémkoli režimu potápÄnà zobrazÃte souÄasným stisknutÃm obou tlaÄÃtek nabÃdku ponoru. Ta zobrazuje aktuálnà hloubku, ÄásteÄný tlak kyslÃku (pouze rebreather) a Äas ponoru v dolnà Äásti obrazovky.\n","textLarge":false,"imageOnRight":true,"image":{"recommendedSizes":{"width":"420","height":"280"}},"imageMobile":{"recommendedSizes":{"width":"750","height":"500"}}},"id":"#98","type":"component","lock":false,"position":164},{"name":"Spacer","data":{"spacingLarge":30,"spacingSmall":20,"backgroundColor":"#ffffff"},"id":"#383","type":"component","lock":false,"position":165},{"name":"Image","data":{"firstImage":{"mimetype":"image/png","size":35655,"hash":"5c2621799724a4cf4df00d0ff31bbecd8a92d48a","id":"cl0wm6364lolt0776cvts78qm","filename":"divesoft-freedom-user-manual-03-5-4a.png","category":"divesoft/","type":"image"},"secondImage":{},"image":{"mimetype":"image/png","size":35655,"hash":"5c2621799724a4cf4df00d0ff31bbecd8a92d48a","id":"cl0wm6364lolt0776cvts78qm","filename":"divesoft-freedom-user-manual-03-5-4a.png","category":"divesoft/","type":"image"}},"id":"#99","type":"component","lock":false,"position":166},{"name":"Spacer","data":{"spacingLarge":30,"spacingSmall":20,"backgroundColor":"#ffffff"},"id":"#382","type":"component","lock":false,"position":167}
2,{"name":"TextBlock","data":{"text":"**Stopky**\nUplynulý Äas je zapsán bÃle, když stopky bÄžÃ, nebo Å¡edÄ, když stopky nebÄžÃ.\n\n**Spustit stopky** \nTÃm se spustà ÄasovaÄ. Pokud byly stopky pÅedtÃm zastaveny, pak poÄÃtánà pokraÄuje od uvedeného Äasu. \nStopky lze nastavit na ovládánà spodnÃm tlaÄÃtkem, krátkým stisknutÃm pozastavit/spustit, dlouhým stisknutÃm vynulovat a rovnou spustit. \nBottomTimer: Nastavenà -> Vlastnosti -> TlaÄ. stopk. \nDalÅ¡Ã licence: Nastavenà stopek: Nastavenà -> Vlastnosti -> Uživatel. rozhranà -> TlaÄ. stopk.","textLarge":false,"imageOnRight":true,"image":{"recommendedSizes":{"width":"420","height":"280"}},"imageMobile":{"recommendedSizes":{"width":"750","height":"500"}}},"id":"#100","type":"component","lock":false,"position":168},{"name":"Spacer","data":{"spacingLarge":30,"spacingSmall":20,"backgroundColor":"#ffffff"},"id":"#384","type":"component","lock":false,"position":169},{"name":"Image","data":{"firstImage":{"mimetype":"image/jpeg","size":58296,"hash":"dc65116bd5bfa160c8a363c530f277e6ec03810e","id":"cl0wmkbsylooc0776hjzei525","filename":"divesoft-freedom-user-manual-03-5-4b.jpg","category":"divesoft/","type":"image"},"secondImage":{},"image":{"type":"image"}},"id":"#102","type":"component","lock":false,"position":170},{"name":"Spacer","data":{"spacingLarge":30,"spacingSmall":20,"backgroundColor":"#ffffff"},"id":"#385","type":"component","lock":false,"position":171},{"name":"TextBlock","data":{"text":"**Zastavenà stopek** \nTÃm se ÄasovaÄ zastavà a uplynulý Äas se zobrazà šedÄ.","textLarge":false,"imageOnRight":true,"image":{"recommendedSizes":{"width":"420","height":"280"}},"imageMobile":{"recommendedSizes":{"width":"750","height":"500"}}},"id":"#103","type":"component","lock":false,"position":172},{"name":"Spacer","data":{"spacingLarge":30,"spacingSmall":20,"backgroundColor":"#ffffff"},"id":"#386","type":"component","lock":false,"position":173},{"name":"Image","data":{"firstImage":{"mimetype":"image/png","size":43662,"hash":"1f78f0ad94044305a8ff42b42d41aa64c223a4f1","id":"cl0wml1ablooj0776qs651uuq","filename":"divesoft-freedom-user-manual-03-5-4c.png","category":"divesoft/","type":"image"},"secondImage":{},"image":{"type":"image"}},"id":"#101","type":"component","lock":false,"position":174},{"name":"Spacer","data":{"spacingLarge":30,"spacingSmall":20,"backgroundColor":"#ffffff"},"id":"#387","type":"component","lock":false,"position":175},{"name":"TextBlock","data":{"text":"**Znovu spustit stopky** \nRestartuje ÄasovaÄ od nuly.\nTato funkce je užiteÄná zejména pÅi dekompresnÃch zastávkách.\n\n**Resetovat průmÄr** \nVytvoÅà se nový poÄáteÄnà bod pro průmÄrovánà hloubky. Bod opÄtovného spuÅ¡tÄnà je oznaÄen svislou Äarou na\nobrazovce profilu ponoru.\n\n**PÅidat záložku** \nV protokolu ponoru se vytvoÅà záložka. ÄÃslo záložky se zobrazà v oznámenÃ, které\nnásleduje.\n\n**UkonÄenà ponoru** \nUkonÄenà ponoru a pÅepnutà do povrchového režimu. Tato položka nabÃdky je aktivnà pouze na hladinÄ.\n\n**Vypnout** \nUkonÄenà ponoru a pÅepnutà pÅÃmo do pohotovostnÃho režimu. Tato položka nabÃdky je povolena pouze na hladinÄ.\n\n**NastavenÃ** \n**Jas**\nÃroveÅ jasu podsvÃcenà displeje lze nastavit od 1 do\n9. ZmÄna jasu se okamžitÄ projevà pÅi\nnastavovánÃ.","textLarge":false,"imageOnRight":true,"image":{"recommendedSizes":{"width":"420","height":"280"}},"imageMobile":{"recommendedSizes":{"width":"750","height":"500"}}},"id":"#104","type":"component","lock":false,"position":176},{"name":"TextBlock","data":{"text":"**Orientace** \nLze zvolit levou, pravou a automatickou orientaci.\nAutomatická orientace vybÃrá polohu pro levou nebo pravou ruku.\nautomaticky pÅi spuÅ¡tÄnÃ. NepÅepÃná displej\norientaci, když potápÄÄ zmÄnà polohu (tj. bÄhem letu hlavou).\nklesánà dolů).\n\n**ZobrazenÃ** \nKteroukoli z obrazovek režimu potápÄnà lze vypnout.\n\n**Aplikace** \nVe složce aplikacà je nÄkolik položek\n\n**Aplikace - PÅidat záložku** - oznaÄuje aktuálnà okamžik v záznamu ponoru.\n\n**Aplikace - Události**
2- umožÅuje zobrazit varovánà a vyskakovacà zprávy vydané poÄÃtaÄem.\n\n**Aplikace - Nouzová svÃtilna** - maximálnÄ rozjasnà celý displej a vydává maximálnà možné množstvà svÄtla. Lze ji použÃt jako nouzovou svÃtilnu za urÄitých podmÃnek, když vÅ¡echny ostatnà svÃtilny selžou.\n\n**Aplikace - SklonomÄr** - nástroj pro mÄÅenà sklonu svahu. Lze použÃt k mapovánà jeskynà a vraků.\n\n**Aplikace - Sokoban hra** - logická hra pro rozptýlenà pÅi dlouhé dekompresi. DalÅ¡Ã informace o hrách naleznete v Äásti 9 této pÅÃruÄky.\n\n**Aplikace - Had** - hra pro rozptýlenà pÅi dlouhé dekompresi. DalÅ¡Ã informace o hrách naleznete v Äásti 9 této pÅÃruÄky.","textLarge":false,"imageOnRight":true,"image":{"recommendedSizes":{"width":"420","height":"280"}},"imageMobile":{"recommendedSizes":{"width":"750","height":"500"}}},"id":"#107","type":"component","lock":false,"position":177},{"name":"Image","data":{"firstImage":{},"secondImage":{}},"id":"#335","type":"component","lock":false,"position":178},{"name":"TextBlock","data":{"text":"**Äas** \nMÃstnà Äas se zobrazuje na displeji v levém hornÃm rohu.\n\n**TrvánÃ** \nÄasovaÄ se spustà po vstupu do volného režimu. Doba trvánà freedivingu zahrnuje Äas na\nna hladinÄ a Äas strávený pod vodou.\n\n**Äas na hladinÄ** \nTento ÄasovaÄ se spustà pÅi vynoÅenÃ.\n\n**PoÄet ponorů** \nPoÄet ponorů bÄhem freedivingu.\n\n**KumulativnÃT** \nKumulativnà Äas je souÄet Äasů strávených pod vodou.\n\n**Max. hloubka** \nJedná se o maximálnà hloubku dosaženou bÄhem freedivingu.\n\n**Teplota** \nTeplota vody se mÄÅà uvnitÅ tÄla pÃtaÄe. Po zmÄnÄ teploty poÄkejte asi 1-2\nminuty, dokud údaj o teplotÄ nedosáhne stabilnà hodnoty. Teplotu ve vzduchu ovlivÅuje mnoho\nfaktorů a je pouze orientaÄnÃ.\nV nabÃdce Nastavenà â Kalibrace lze nastavit teplotnà korekci pro lepÅ¡Ã pÅesnost.","textLarge":false,"imageOnRight":true,"image":{"recommendedSizes":{"width":"420","height":"280"}},"imageMobile":{"recommendedSizes":{"width":"750","height":"500"}}},"id":"#109","type":"component","lock":false,"position":179},{"name":"TextBlock","data":{"text":"### **03.6 Apnea** \n\nRežim freedivingu je oznaÄen žlutými mÅÞkami tabulky.","textLarge":false,"imageOnRight":true,"image":{"recommendedSizes":{"width":"420","height":"280"}},"imageMobile":{"recommendedSizes":{"width":"750","height":"500"}}},"id":"#229","type":"component","lock":false,"position":180},{"name":"TextBlock","data":{"text":"### **03.6.1 Povrchový režim**\nObrazovka povrchového režimu pÅi freedivingu se zobrazuje bÄhem freedivingu na hladinÄ.","textLarge":false,"imageOnRight":true,"image":{"recommendedSizes":{"width":"420","height":"280"}},"imageMobile":{"recommendedSizes":{"width":"750","height":"500"}}},"id":"#227","type":"component","lock":false,"position":181},{"name":"Spacer","data":{"spacingLarge":30,"spacingSmall":20,"backgroundColor":"#ffffff"},"id":"#388","type":"component","lock":false,"position":182},{"name":"Image","data":{"firstImage":{"mimetype":"image/png","size":42304,"hash":"4bfff114f8652c931425cc78e8e4d7b5b9d1e97a","id":"cl0wmr55clopc0776zdf0z5xx","filename":"divesoft-freedom-user-manual-03-6-1.png","category":"divesoft/","type":"image"},"secondImage":{},"image":{"type":"image"}},"id":"#339","type":"component","lock":false,"position":183},{"name":"Spacer","data":{"spacingLarge":30,"spacingSmall":20,"backgroundColor":"#ffffff"},"id":"#389","type":"component","lock":false,"position":184},{"name":"TextBlock","data":{"text":"### **03.6.2 Obrazovka ponoru** \n\nPonorová obrazovka pro freediving se zobrazuje bÄhem ponoru (po sestupu do hloubky On a pÅed výstupem nad hloubku Off). ObÄ hloubky lze nastavit v nabÃdce Nastavenà â Apnea. Obrazovka ponoru s maximálnà hloubkou a Äasem poslednÃho ponoru je pÅÃstupná po vynoÅenà krátkým stisknutÃm hornÃho tlaÄÃtka z obrazovky na hladinÄ.","textLarge":false,"imageOnRight":true,"image":{"recommendedSizes":{"width":"420","height":"280"}},"imageMobile":{"recommendedSizes":{"width":"750","height":"500"}}},"id":"#228","type":"component","lock":false,"position":185},{"name":"Spacer","data":{"spacingLarge":30,"spacingSmall":20,"backgroundColor":"#ffffff"},"id":"#391","type":"component","lock":false,"position":186},{"name":"Image","data":{"firstImage":{"mimetype":"image/png","size":35568,"hash":"caa3e8d5ac26f63b9242ad65f11132339586446f","id":"cl0wmssallopn0776aw8m9seb","filename":"divesoft-freedom-user-manual-03-6-2.png","category":"divesoft/","type":"image"},"secondImage":{},"image":{"type":"image"}},"id":"#110","type":"component","lock":false,"position":187},{"name":"Spacer","data":{"spacingLarge":30,"spacingSmall":20,"backgroundColor":"#ffffff"},"id":"#390","type":"component","lock":false,"position":188},{"name":"TextBlock","data":{"text":"**Stopky** Ovládánà stopek pomocà spodnÃho tlaÄÃtka: Krátké stisknutÃ: spuÅ¡tÄnÃ/zastavenà Dlouhé stisknutÃ: resetovánÃ\n\n**Äas ponoru** ÄasovaÄ se spustà po ponoÅenà do hloubky zapnutà a zastavà se po vystoupánà nad hloubku vypnutÃ.\n\n**Hloubka** Hloubku lze odeÄÃtat v jednotkách nastavených v nastavenà (m nebo ft). Hloubka se vypoÄÃtává z namÄÅeného hydrostatického tlaku. Pro výpoÄet lze nastavit hustotu sladké vody (výchozà nastavenÃ) nebo moÅské vody.\n\n**Max hloub.** Maximálnà hloubka dosažená bÄhem ponoru.\n\n**Tepl.** Teplota vody se mÄÅà uvnitÅ skÅÃnÄ poÄÃtaÄe. Protože je systém pomalý, poskytuje pouze údaj bÄhem krátkých ponorů.","textLarge":false,"imageOnRight":true,"image":{"recommendedSizes":{"width":"420","height":"280"}},"imageMobile":{"recommendedSizes":{"width":"750","height":"500"}}},"id":"#111","type":"component","lock":false,"position":189},{"name":"TextBlock","data":{"text":"### **03.7 DoporuÄené strategie** \n\n### **03.7.1 PotápÄnà ve tmÄ** \n\n**Vysoký jas po celou dobu** \nJedná se o preferovanou možnost jednoduchého potápÄnà s výkonným potápÄÄským svÄtlem (svÃtilnou), které použÃvajà vÅ¡ichni Älenové týmu. DoporuÄuje se úroveÅ jasu 6 až 8. Tuto možnost nepoužÃvejte, pokud nelze v perifernÃm vidÄnà jasnÄ rozliÅ¡it svÄtlo vycházejÃcà z displeje Freedom a svÄtlo vycházejÃcà ze svÃtilny vaÅ¡eho potápÄÄského partnera. V opaÄném pÅÃpadÄ může dojÃt k oddÄlenà Älenů týmu. \n\n<span style=\"color:red\">**UPOZORNÄNÃ: Jas vyÅ¡Å¡Ã než 7 výraznÄ snižuje životnost baterie na jedno nabitÃ. Hodnota 9 snÃžà životnost baterie až o 50 %.**</span>
2\n\n\n**Zapnutà a vypnutÃ** \nTato možnost je typická pro jeskynnà potápÄnÃ. Nastavte vysoký jas (6 až 9) a krátký Äasový limit spoÅiÄe obrazovky (15 s je vÃce než dostateÄný). Displej aktivujte nejlépe svÄtlem bÄhem potápÄnÃ. NamÃsto pohybu svÄtelného paprsku pÅesuÅte Freedom na svÄtelný paprsek, aby nedoÅ¡lo k zámÄnÄ se svÄtelným signálem.\n\n**NÃzký jas** Pro potápÄnà s oÄima pÅizpůsobenýma tmÄ použijte nejnižšà nastavenà jasu (úroveÅ 1). VaÅ¡e noÄnà vidÄnà nebude ruÅ¡eno. UpÅednostÅuje se mÃt displej stále zapnutý (tj. Äasový limit spoÅiÄe obrazovky nastavený na 0). Tato možnost je typická pro noÄnà ponory v Äisté vodÄ. PÅi potápÄnà s mÃrnÄ jasnÄjÅ¡Ãm displejem použÃvejte svÃtilnu s nÃzkým výkonem. Vyvažte výkon podsvÃcenà displeje s výkonem svÃtilny, abyste naÅ¡li optimálnà nastavenà - bez oslnÄnÃ, ale s dobrou ÄitelnostÃ. PÅi nÃzkém jasu displej nemůže prosvÃtat pÅes naruÅ¡ené bahno nebo bahno. Pokud je nutné pÅepnout na maximálnà jas, staÄà opakovanÄ krátce stisknout spodnà tlaÄÃtko. \n\n**Poznámka:** Nastavenà funkce spodnÃho tlaÄÃtka může zruÅ¡it regulaci jasu. \n\"Lower bttn.\" na \"\"Prev Scr\" \"Stopw btn.\" na \"Base\" nebo \"Always\". \nNastavenà je umÃstÄno na stejném mÃstÄ jako Dolnà bttn.\nBottomTimer: Setup -> Preferences -> Lower bttn.\nOther licences: Setup -> Preferences -> User interface -> Lower bttn.","textLarge":false,"imageOnRight":true,"image":{"recommendedSizes":{"width":"420","height":"280"}},"imageMobile":{"recommendedSizes":{"width":"750","height":"500"}}},"id":"#113","type":"component","lock":false,"position":190},{"name":"TextBlock","data":{"text":"### **03.7.2 Dekomprese**\n\n**Gradientnà faktory** \nZkuÅ¡enà potápÄÄi obvykle nastavujà GF s ohledem na plánovaný profil ponoru a aktivitu po ponoru.\nGF nÃzký 0,30 je výchozà hodnota vhodná pro průmÄrného zdravého potápÄÄe a profily ponorů v rámci rekreaÄnÃho potápÄnÃ.\nrozsahu. Nižšà hodnoty jsou vhodnÄjÅ¡Ã pro hlubÅ¡Ã ponory vÄetnÄ ponorů s prodlouženým dosahem vzduchu a použitÃ\nsmÄsà bohatých na helium. Hodnota 0 nenà neobvyklá. Pokud je pÅÃtomen nÄjaký rizikový faktor, použijte nižšà hodnotu. VyÅ¡Å¡Ã hodnota může\npoužÃt pro relativnÄ mÄlké ponory, ale vliv GF Low na tyto ponory je malý (nula na tzv.\nnedekompresnÃch ponorech).\nVýchozà hodnota GF high 0,80 pomÄrnÄ mÃrnÄ prodlužuje dobu na mÄlkých zastávkách ve srovnánà s holým\nBühlmannovým dekompresnÃm algoritmem ZHL. Pokud je pÅÃtomen nÄjaký rizikový faktor, je vhodnÄjÅ¡Ã nižšà hodnota. Tento\nplatà také v pÅÃpadÄ, že je v krátké dobÄ plánován dalÅ¡Ã ponor nebo se nelze vyhnout fyzické aktivitÄ krátce po skonÄenà ponoru.\nponoru. NÃzká hodnota GF high také zkracuje tzv. bezdekubitnà limity. GF high 0,50 lze považovat za velmi\nkonzervativnÃ. Pro jeÅ¡tÄ nižšà hodnotu obvykle nenà důvod.\n\n**Rizikové faktory** \nPoužijte konzervativnÄjÅ¡Ã nastavenà a provádÄjte pouze ponory s krátkou dekompresà nebo bez dekomprese, pokud je nÄkterý z rizikových faktorů\npÅÃtomen. \nHlavnà rizikové faktory dekompresnà nemoci (DCS) jsou: \n- Dehydratace \n- SrdeÄnà onemocnÄnÃ, zejména PFO (patentnà foramen ovale) nebo ASD (defekt sÃÅového septa). \n- PÅedchozà DCS \n- vyÅ¡Å¡Ã vÄk \n- Nadváha nebo obezita \n- CviÄenà bÄhem ponoru nebo po ponoru \n- Ãnava \n- NezodpovÄdnost nebo neschopnost dodržovat správné dekompresnà postupy \n\nPokud se nadmÄrná únava nebo jakákoli jiná subklinická forma DCS objevà po ponoru, bÄhem nÄhož doÅ¡lo k Åádné\ndekompresi, lze pÅedpokládat pÅÃtomnost jednoho nebo vÃce rizikových faktorů.\n\n**PotápÄnà se vzduchem nebo jednou smÄsà nitroxu**. \nPotvrÄte následujÃcà nastavenÃ: \n- Výchozà OC smÄs je nastavena na vzduch nebo nitrox, podle toho, kterou plánujete použÃt (Nastavenà â SmÄsi). \n- VÅ¡echny ostatnà smÄsi plynů jsou vypnuté (v seznamu Nastavenà â SmÄsi â SmÄs nenà zaÅ¡krtnuto žádné polÃÄko).\nSetup)\n\n<span style=\"color:red\">**UpozornÄnÃ: pokud je výstupnà plyn nastaven na Optimálnà (Nastavenà â Dekomprese) a je nastaveno vÃce smÄsà plynů\npovoleny, pak dekompresnà plán oÄekává jejich použitÃ.** </span>\n\nTo může vést k indikaci kratÅ¡Ã doby do\nna povrch (TTS) a kratÅ¡Ã dekompresnà zastávky. Nesprávné nastavenÃ, jako je toto, nemůže mÃt vliv na bezpeÄnost.\ndekompresi, pokud
2se budete striktnÄ ÅÃdit poÄÃtaÄem; ovlivÅuje pouze výpoÄet plánu. To nenÃ\nPlatà pro základnà nitroxovou verzi pÅÃstroje Freedom.\n\n**VÃcedennà opakované ponory** \nDoporuÄujeme použÃvat mÃrnÄ konzervativnÄjÅ¡Ã nastavenà pro potápÄnà na dovolené. NevypÃnejte ani nevynechávejte bezpeÄnostnÃ\nstop. PoužÃvejte nitrox, pokud je k dispozici a pokud jste kvalifikovanÃ.\nPamatujte, že potápÄÄský poÄÃtaÄ nezná fyzickou kondici potápÄÄe. Udržujte vysokou úroveÅ hydratace\nbÄhem potápÄÄské dovolené. NepotápÄjte se opilà nebo s kocovinou. NepotápÄjte se nemocnÃ.\n\n**Dlouhodobá dekompresnà bezpeÄnost** \nPÅednostnÄ ovládejte dekompresnà pojistku s vysokým nastavenÃm GF a vypnÄte bezpeÄnostnà zarážku, pokud je\ndekompresnà povinnost delÅ¡Ã než 20 minut. Lze použÃt i menÅ¡Ã hodnotu vysokého nastavenà GF\ndodateÄnÄ pro zvýšenà bezpeÄnosti na mÄlkém konci dekomprese, pokud je to nutné.\nPokud chcete zkrátit dobu dekomprese (a zároveÅ zvýšit riziko), pÅepnÄte na faktory záchranného gradientu.\nDCS). Bailout GF musà být správnÄ nastaveny pÅed ponorem.\n\n**Použità vÃce plynů** \nToto neplatà pro základnà nitroxovou verzi Freedom.\nPoužità vÃce plynů vyžaduje pÅÃsluÅ¡nou kvalifikaci od uznávané výcvikové agentury. \n\nPotvrÄte následujÃcà nastavenÃ: \n- výstupnà plyn je nastaven na Optimal (Nastavenà â Dekomprese). \n- VÅ¡echny smÄsi plynů, které plánujete použÃt, jsou správnÄ nastaveny a aktivnÃ; a ostatnà smÄsi plynů jsou\nneaktivnà (Nastavenà â SmÄsi â Nastavenà smÄsÃ). \n- Výchozà OC smÄs je nastavena na plyn, se kterým plánujete klesat (Nastavenà â SmÄsi). \n- Äas pÅepnutà plynu je nastaven na vámi preferovaný Äas (obvykle 2 nebo 3 minuty). \n\nNikdy nepÅepÃnejte poÄÃtaÄ na jiný plyn dÅÃve, než zaÄnete dýchat. UjistÄte se, že dýcháte\nsprávný plyn s MOD vÄtÅ¡Ãm, než je vaÅ¡e aktuálnà hloubka.\n\n**\nExtrémnÄ hluboké potápÄnÃ** \nKaždý technický potápÄÄ, který se potápà do hloubek vÄtÅ¡Ãch než 100 m/330 stop, si musà vyvinout vlastnÃ.\ndekompresnà strategii. Osobnà limit je nutné zvyÅ¡ovat postupnÄ, krok za krokem. MaximálnÃ\nprovoznà hloubka pÅÃstroje Freedom je 300 m/1000 ft. To je pravdÄpodobnÄ mnohem vÄtÅ¡Ã hloubka, než do jaké se vy a vaÅ¡e\nby vaÅ¡e tÄlo zvládlo.\n\nPro extrémnà hloubky jsou bÄžné strategie krátké dekomprese pÅi dnÄ: \n- PotápÄjte se pouze v pÅÃpadÄ, že jste v opravdu dobré fyzické kondici; nechte si vyÅ¡etÅit srdce na PFO. \n- PoÄÃtaÄ použÃvejte pouze jako zálohu plánu založeného na vaÅ¡ich pÅedchozÃch zkuÅ¡enostech. \n- PoužÃvejte velmi nÃzkou hodnotu GF low; 0 nenà neobvyklá hodnota. \n- Použijte vysokou hodnotu GF high; 1 nenà neobvyklá a ani >1 nenà neobvyklá (vyžaduje se\nzvláštnÃ, osobnÄ udÄlenou licenci) \n- PoužÃvejte optimálnà smÄsi plynů \n- ZůstaÅte ve vodÄ minimálnÄ 15 minut po vynoÅenÃ. \n- VyhnÄte se cviÄenà po ponoru; využijte služeb podpůrného týmu \n- Udržujte tepelný komfort bÄhem ponoru; vyhnÄte se horké sprÅ¡e po ponoru \n- VyhnÄte se potápÄnà nebo jakékoli jiné zmÄnÄ tlaku v následujÃcÃch 48 h. \n\nPotápÄÄský pÅÃstroj Divesoft Freedom nenà urÄen pro extrémnà hloubkové potápÄnà s dlouhým pobytem u dna v jiném režimu než v režimu\nrežimu manometru. \n\nPro výpoÄet dekomprese v režimu trimix je nutná verze pÅÃstroje Divesoft Freedom Full trimix nebo CCR.","textLarge":false,"imageOnRight":true,"image":{"recommendedSizes":{"width":"420","height":"280"}},"imageMobile":{"recommendedSizes":{"width":"750","height":"500"}}},"id":"#230","type":"component","lock":false,"position":191},{"name":"Divider","data":{"color":"darkGray"},"id":"#231","type":"component","lock":false,"position":192},{"name":"TextBlock","data":{"text":"### <span id=\"Section-04\">**Äást 04: NastavenÃ**","textLarge":false,"imageOnRight":true,"image":{"recommendedSizes":{"width":"420","height":"280"}},"imageMobile":{"recommendedSizes":{"width":"750","height":"500"}}},"id":"#114","type":"component","lock":false,"position":193},{"name":"Divider","data":{"color":"darkGray"},"id":"#304","type":"component","lock":false,"position":194},{"name":"Image","data":{"firstImage":{"mimetype":"image/png","size":28921,"hash":"f18800c0c39212f9825e33d34fc2948dffdb98cd","id":"cl0wmv63llopu0776nfy838i9","filename":"divesoft-freedom-user-manual-04-0-0.png","category":"divesoft/","type":"image"},"secondImage":{},"image":{"type":"image"}},"id":"#116","type":"component","lock":false,"position":195},{"name":"Spacer","data":{"spacingLarge":30,"spacingSmall":20,"backgroundColor":"#ffffff"},"id":"#392","type":"component","lock":false,"position":196},{"name":"TextBlock","data":{"text":"Divesoft Freedom je nakonfigurován v povrchovém režimu. Aktivujte\nhlavnà nabÃdku povrchového režimu krátkým stisknutÃm obou tlaÄÃtek a vyberte možnost\nSetup (NastavenÃ).\nNÄkteré hodnoty lze nastavit bÄhem ponoru; tato možnost je vÅ¡ak\nvyhrazena pro ÅeÅ¡enà výjimeÄných a nouzových situacÃ.\nKonkrétnà nastavené hodnoty závisà pÅedevÅ¡Ãm na zkuÅ¡enostech uživatele,\nfyziologii a osobnÃch preferencÃch. SkuteÄnost, že Divesoft Freedom\numožÅuje nastav
2it urÄitou hodnotu, neznamená, že tento druh\nnastavenà je pro vás a pro váš plánovaný ponor bezpeÄný a vhodný.\nPokud si nejste jisti, jakou hodnotu nastavit, ponechte výchozà hodnoty.\nnastavenÃ.\nVýrobce neposkytuje záruku na chybnou funkci systému Divesoft Freedom, pokud tento druh nastavenà nenà v poÅádku.\nvadný provoz je důsledkem nesprávného nastavenÃ.\nVýchozà hodnota nastavenà z výroby je v následujÃcÃch titulcÃch uvedena v hranatých závorkách.","textLarge":false,"imageOnRight":true,"image":{"recommendedSizes":{"width":"420","height":"280"}},"imageMobile":{"recommendedSizes":{"width":"750","height":"500"}}},"id":"#115","type":"component","lock":false,"position":197},{"name":"TextBlock","data":{"text":"### **04.1 PoužÃvánà editoru**","textLarge":false,"imageOnRight":true,"image":{"recommendedSizes":{"width":"420","height":"280"}},"imageMobile":{"recommendedSizes":{"width":"750","height":"500"}}},"id":"#117","type":"component","lock":false,"position":198},{"name":"Image","data":{"firstImage":{"mimetype":"image/png","size":15332,"hash":"3ed9d24916067c7340580518879651b0b2f26946","id":"cl0wmwikkloq107765njkglzh","filename":"divesoft-freedom-user-manual-04-1-0.png","category":"divesoft/","type":"image"},"secondImage":{},"image":{"type":"image"}},"id":"#119","type":"component","lock":false,"position":199},{"name":"Spacer","data":{"spacingLarge":30,"spacingSmall":20,"backgroundColor":"#ffffff"},"id":"#393","type":"component","lock":false,"position":200},{"name":"TextBlock","data":{"text":"Podobným způsobem se upravuje vÄtÅ¡ina hodnot promÄnných. \n\nNaklonit smÄrem k sobÄ - snÞit zadanou ÄÃslici o jednu nebo zruÅ¡it zaÅ¡krtnutÃ.\npÅÃznak \nNaklonÄ
2nà doleva - posunutà kurzoru doleva \nNaklonit doprava - posunout kurzoru doprava \nStisknutà hornÃho tlaÄÃtka - zruÅ¡enà editace (obnovenà pÅedchozà hodnoty) \nDlouhé stisknutà hornÃho tlaÄÃtka - obnovenà výchozà hodnoty \nStisknutà obou tlaÄÃtek - ukonÄenà bez uloženà \nStisknutà dolnÃho tlaÄÃtka - uloženà a ukonÄenà \nPÅÃpustný rozsah je oznaÄen <minimálnà ..\\[výchozÃ] .. maximálnÃ> hodnotou. \nNa displeji se zobrazà struÄný popis nÞe. \nPoznámka: ProveÄte horizontálnà kalibraci (viz kapitola 4.8), pokud nenà platná odezva na naklápÄnà nebo klepánÃ.\n\nAlternativnÃm způsobem zadávánà v editoru je metoda tlaÄÃtek. Tu lze nastavit v nabÃdce Nastavenà -> Vlastnosti -> Uživatelské rozhranà -> Pohyb -> TlaÄÃtka\n\nHornà tlaÄÃtko - pÅesouvá kurzor nad znaky \nDolnà tlaÄÃtko - nastavuje hodnotu \nDlouhé stisknutà hornÃho tlaÄÃtka - posune kurzor o jeden znak zpÄt \nDlouhé stisknutà spodnÃho tlaÄÃtka - obnovà výchozà hodnotu a posune kurzor na zaÄátek. \n**Chcete-li hodnotu uložit, musÃte projÃt vÅ¡echny znaky až na konec, editor se ukonÄà po poslednÃm znaku**.","textLarge":false,"imageOnRight":true,"image":{"recommendedSizes":{"width":"420","height":"280"}},"imageMobile":{"recommendedSizes":{"width":"750","height":"500"}}},"id":"#118","type":"component","lock":false,"position":201},{"name":"TextBlock","data":{"text":"### **04.2 Dekomprese**\n\n### **04.2.1 Gradientnà faktory**\n","textLarge":false,"imageOnRight":true,"image":{"recommendedSizes":{"width":"420","height":"280"}},"imageMobile":{"recommendedSizes":{"width":"750","height":"500"}}},"id":"#120","type":"component","lock":false,"position":202},{"name":"Image","data":{"firstImage":{},"secondImage":{}},"id":"#121","type":"component","lock":false,"position":203},{"name":"TextBlock","data":{"text":"**GF nÃzký \\[0.30]** \nGradientnà faktor na zaÄátku dekomprese (rozmezÃ: 0,00-1,00).\nNÃzký GF urÄuje dodateÄné zvýšenà bezpeÄnosti v hloubce prvnà dekompresnà zastávky, pÅÃpadnÄ v hloubce dekompresnÃho stropu na zaÄátku dekomprese. Nastavenà hodnoty 1,00 odpovÃdá Bühlmannovu dekompresnÃmu algoritmu bez dodateÄného zvýšenà bezpeÄnosti pomocà metody gradientnÃch faktorů.\nNastavenà nÃzkých hodnot vede k hlubÅ¡Ãm a delÅ¡Ãm zastávkám na zaÄátku dekomprese.\nViz také DoporuÄené strategie - Gradientnà faktory (viz kapitola 3.7.2).","textLarge":false,"imageOnRight":true,"image":{"recommendedSizes":{"width":"420","height":"280"}},"imageMobile":{"recommendedSizes":{"width":"750","height":"500"}}},"id":"#122","type":"component","lock":false,"position":204},{"name":"TextBlock","data":{"text":"**GF vysoký \\[0.80]** \nGradientnà faktor na konci dekomprese (rozmezÃ: 0,00-1,00).\nVysoký GF urÄuje dodateÄné zvýšenà bezpeÄnosti pÅi výstupu na povrch. Nastavenà hodnoty\n1,00 odpovÃdá Bühlmannovu dekompresnÃmu algoritmu bez dodateÄného zvýšenà bezpeÄnosti pÅi použità tzv.\nmetody gradientnÃch faktorů.\nNastavenà nÃzkých hodnot vede k prodlouženà mÄlkých dekompresnÃch zastávek.\n\n**Bailout GF nÃzký \\[0.80]** \nGradientnà faktor pro záchranu na zaÄátku dekomprese (rozmezÃ: 0,00-1,00).\nObecnÄ platÃ, že pro záchranný GF nÃzký se nastavuje vyÅ¡Å¡Ã hodnota GF (nižšà dodateÄné zvýšenà bezpeÄnosti) než pro\nstandardnà GF low.\n\n**Bailout GF vysoký \\[0.95]** \nGradientnà faktor pro záchranu na konci dekomprese (rozmezÃ: 0,00-1,00).\nObecnÄ platÃ, že pro záchranný GF vysoký se nastavuje vyÅ¡Å¡Ã hodnota GF (nižšà dodateÄné zvýšenà bezpeÄnosti) než pro\nstandardnà GF high.","textLarge":false,"imageOnRight":true,"image":{"recommendedSizes":{"width":"420","height":"280"}},"imageMobile":{"recommendedSizes":{"width":"750","height":"500"}}},"id":"#123","type":"component","lock":false,"position":205},{"name":"TextBlock","data":{"text":"### **04.2.2 BezpeÄnostnà zastávka (Zap.)** \nPo ponoru do hloubky vÄtÅ¡Ã než 10 m je indikována 3minutová bezpeÄnostnà zastávka v hloubce 6 až 3 m.","textLarge":false,"imageOnRight":true,"image":{"recommendedSizes":{"width":"420","height":"280"}},"imageMobile":{"recommendedSizes":{"width":"750","height":"500"}}},"id":"#238","type":"component","lock":false,"position":206},{"name":"TextBlock","data":{"text":"### **04.2.3 Deco smÄs (Optimal)** \nUrÄuje, která smÄs nebo sada smÄsà bude použita pro plánovánà stoupánÃ.\nPokud je zvolen optimálnà plyn, pak Äas do vynoÅenà (TTS) a plán ponoru pÅedpokládajà zmÄnu plynů.\nze seznamu aktivnÃch smÄsÃ.\nPokud je vybrán aktuálnà plyn, pak se pro výpoÄet TTS a plánovánà ponoru použije pouze aktuálnÄ vdechovaný plyn.\nToto nastavenà se up
2ÅednostÅuje u ponorů, pÅi kterých nedocházà ke zmÄnÄ smÄsi plynů.","textLarge":false,"imageOnRight":true,"image":{"recommendedSizes":{"width":"420","height":"280"}},"imageMobile":{"recommendedSizes":{"width":"750","height":"500"}}},"id":"#239","type":"component","lock":false,"position":207},{"name":"TextBlock","data":{"text":"### **04.2.4 Zastávky**","textLarge":false,"imageOnRight":true,"image":{"recommendedSizes":{"width":"420","height":"280"}},"imageMobile":{"recommendedSizes":{"width":"750","height":"500"}}},"id":"#240","type":"component","lock":false,"position":208},{"name":"Image","data":{"firstImage":{},"secondImage":{}},"id":"#124","type":"component","lock":false,"position":209},{"name":"TextBlock","data":{"text":"**Zastávky/strop. \\[Zastávky**] \nDivesoft Freedom lze použÃt v režimu samostatných\ndekompresnÃch zastávek nebo v režimu s uvedenou pouze hloubkou dekompresnÃho stropu.\nObecnÄ platÃ, že režim zastávek je vhodnÄjÅ¡Ã pro potápÄnà ve volné vodÄ a je snadno pochopitelný a dodržovaný. Režim se stropem je vhodnÄjÅ¡Ã pro jeskynnà a technické potápÄnÃ. Doba strávená dekompresà je o nÄco kratÅ¡Ã, pokud se stropnà režim použÃvá pro kontinuálnà dekompresi. NejdůležitÄjÅ¡Ã jsou osobnà preference.\n\n**Poslednà zastávka \\[3 m/10 ft]** \nHloubku nejmÄlÄà dekompresnà zastávky lze nastavit na 3 m/10 ft nebo 6 m/20 ft. Hloubku zvolte podle podmÃnek na povrchu a podle svých preferencÃ. HlubÅ¡Ã poslednà zastávka mÃrnÄ prodlužuje dobu dekomprese. PÅi použità 100% kyslÃku pro dekompresi použijte poslednà zastávku 6 m/20 ft.\n\n**Zaokrouhlenà \\[60 s]** \nMůžete si zvolit Äas pÅi zaokrouhlovánà zastávek (1 s; 30 s; 60 s).\nPro rekreaÄnà ponory je dobrou volbou 30 nebo 60s. Pro hluboké ponory, zejména s malou hodnotou GF low a z toho plynoucÃmi krátkými zastávkami na zaÄátku dekomprese, je lepÅ¡Ã zvolit zaokrouhlenà 1s. V opaÄném pÅÃpadÄ může delÅ¡Ã pobyt na dekompresnà zastávce v důsledku zaokrouhlovánà vést k zániku dalÅ¡Ã krátké dekomprese\na mohlo by to negativnÄ ovlivnit plynulost dekompresnÃho profilu.","textLarge":false,"imageOnRight":true,"image":{"recommendedSizes":{"width":"420","height":"280"}},"imageMobile":{"recommendedSizes":{"width":"750","height":"500"}}},"id":"#125","type":"component","lock":false,"position":210},{"name":"TextBlock","data":{"text":"### **04.2.5 Deep stops**\n\n**Pyle Deep stops (Off)** \nEmpiric modification of decompression profile according to Richard Pyleâs algorithm.\nThe combination of Pyle stops and a small value of the GF low can result in a not so optimal decompression\nprofile. Please choose only one preferred method. As a general rule, use GF low 0.30 or less and switch (left\nswitched) Pyle Deep stops Off.\n\n**Stops duration (2 min)**\nThe value of the Pyle stops duration (range: 1â3 min).","textLarge":false,"imageOnRight":true,"image":{"recommendedSizes":{"width":"420","height":"280"}},"imageMobile":{"recommendedSizes":{"width":"750","height":"500"}}},"id":"#245","type":"component","lock":false,"position":211},{"name":"TextBlock","data":{"text":"### **04.2.6 Výstupová rychlost** \nRychlost se použÃvá pro výpoÄet plánu stoupánà a indikaci rychlosti stoupánÃ, pokud je v Nastavenà â Vlastnosti â Uživatelské rozhranà â Vertikálnà rychlost ","textLarge":false,"imageOnRight":true,"image":{"recommendedSizes":{"width":"420","height":"280"}},"imageMobile":{"recommendedSizes":{"width":"750","height":"500"}}},"id":"#246","type":"component","lock":false,"position":212},{"name":"TextBlock","data":{"text":"### **04.2.7 Sestupová rychlost** \nRychlost se použÃvá pro výpoÄet plánu sestupu a indikaci.\nrychlosti klesánÃ, pokud je v Nastavenà nastaveno relativnà mÄÅenà (v procentech).\nâ Vlastnosti â Uživatelské rozhranà â Vertikálnà rychlost.","textLarge":false,"imageOnRight":true,"image":{"recommendedSizes":{"width":"420","height":"280"}},"imageMobile":{"recommendedSizes":{"width":"750","height":"500"}}},"id":"#282","type":"component","lock":false,"position":213},{"name":"TextBlock","data":{"text":"**Rychlost 1 Ç10 m/min / 33 ft/minÇ** \nPÅedpokládaná rychlost stoupánà v malých hloubkách,\nv zónÄ 1 (rozsah: 1-20 m/min).\nHodnota je m/min v metrických a ft/m
2in v imperiálnÃch jednotkách.\n\n**Hloubková zóna 1 Ç10 m / 3 ftÇ** \nHloubka vymezujÃcà zónu 1. Tato zóna ležà mezi hladinou a nastavenou hloubkou (rozsah: 0-300 m).\nHodnota je m v metrických jednotkách a ft v imperiálnÃch jednotkách.\n\n**Rychlost 2 Ç10 m/min / 33 ft/minÇ** \nPÅedpokládaná rychlost stoupánà v rámci stÅednÃch hloubek, v zónÄ 2 (rozsah: 1-20 m/min).\n\n**Hloubková zóna 2 Ç80 m / 262 ftÇ** \nHloubka vymezujÃcà zónu 2. Tato zóna ležà mezi hloubkovou zónou 1 a nastavenou hloubkou (rozsah: 0-300 m).\n\n**Rychlost 3 Ç18 m/min / 59 ft/minÇ** \nPÅedpokládaná rychlost stoupánà v rámci velkých hloubek, v zónÄ 3. (rozsah: 1-20 m/min).","textLarge":false,"imageOnRight":true,"image":{"recommendedSizes":{"width":"420","height":"280"}},"imageMobile":{"recommendedSizes":{"width":"750","height":"500"}}},"id":"#127","type":"component","lock":false,"position":214},{"name":"TextBlock","data":{"text":"**UpozornÄnà pod \\[80 m]** \nHranice, pÅi které se aktivuje alarm signalizujÃcà pÅekroÄenà hodnoty\nrychlosti klesánÃ. V menÅ¡Ãch hloubkách je pÅekroÄenà rychlosti klesánÃ\nignorováno.\nHodnota je v metrických jednotkách m a v imperiálnÃch jednotkách ft.\nTento alarm je ve výchozÃm továrnÃm nastavenà vypnut. Lze jej povolit v\nNastavenà â Alarmy â Zdroje alarmů â Sestupová Rychlost \n\n**Max. rychlost \\[20 m/min]**. \nPÅedpokládaná rychlost klesánà (rozsah: 1-40 m/min).\nNastavená rychlost se použÃvá také pro plánovánà ponoru.\nHodnota je m/min v metrických a ft/min v imperiálnÃch jednotkách.\nMaximálnà rychlost 30 m/min se použÃvá k oznaÄenà rychlosti klesánà v hloubce menÅ¡Ã, než je hloubka zapnutého ponoru.\n","textLarge":false,"imageOnRight":true,"image":{"recommendedSizes":{"width":"420","height":"280"}},"imageMobile":{"recommendedSizes":{"width":"750","height":"500"}}},"id":"#129","type":"component","lock":false,"position":215},{"name":"TextBlock","data":{"text":"### **04.3 SmÄsi**\n\n### **04.3.1 Nastavenà smÄsÃ**\nPoÄet dostupných smÄsà závisà na verzi softwaru.","textLarge":false,"imageOnRight":true,"image":{"recommendedSizes":{"width":"420","height":"280"}},"imageMobile":{"recommendedSizes":{"width":"750","height":"500"}}},"id":"#130","type":"component","lock":false,"position":216},{"name":"TextBlock","data":{"text":"Každou smÄs lze nastavit jako aktivnà (zaÅ¡krtávacà polÃÄko) nebo neaktivnÃ.\n(vymazat polÃÄko). To lze provést na obrazovce úprav nebo pomocà klávesové zkratky -\ndlouhým stiskem hornà klávesy v seznamu smÄsÃ. VybÃrat lze pouze aktivnà smÄsi.\nVýchozà smÄs je vždy aktivnÃ.\nV pÅÃpadÄ nouze lze smÄs bÄhem ponoru oznaÄit jako aktivnÃ.\nKromÄ toho lze bÄhem ponoru definovat novou smÄs. Tyto funkce jsou vyhrazeny pro nouzové situace.","textLarge":false,"imageOnRight":true,"image":{"recommendedSizes":{"width":"420","height":"280"}},"imageMobile":{"recommendedSizes":{"width":"750","height":"500"}}},"id":"#134","type":"component","lock":false,"position":217},{"name":"TextBlock","data":{"text":"### **04.3.2 Výchozà smÄs OC** \nVýchozà smÄs pro pÅÃstroj s otevÅeným obvodem. Jinou výchozà smÄs lze vybrat pouze ze smÄsÃ, které jsou oznaÄeny jako aktivnÃ.","textLarge":false,"imageOnRight":true,"image":{"recommendedSizes":{"width":"420","height":"280"}},"imageMobile":{"recommendedSizes":{"width":"750","height":"500"}}},"id":"#247","type":"component","lock":false,"position":218},{"name":"TextBlock","data":{"text":"\n### **04.3.3 Rezervnà tlak Ç50 barÇ**\nUrÄuje velikost tlakové bezpeÄnostnà rezervy lahve. Tato hodnota se promÃtne do výpoÄtu plánovaÄe.","textLarge":false,"imageOnRight":true,"image":{"recommendedSizes":{"width":"420","height":"280"}},"imageMobile":{"recommendedSizes":{"width":"750","height":"500"}}},"id":"#248","type":"component","lock":false,"position":219},{"name":"TextBlock","data":{"text":"\n### **04.3.4 SAC Ç25 l/minÇ**\nSurface Air Consumption - SpotÅeba vzduchu na povrchu urÄuje hodnotu spotÅeby plynu potápÄÄe. Tato hodnota se použÃvá k výpoÄtu hospodaÅenà s plynem v plánovaÄi.","textLarge":false,"imageOnRight":true,"image":{"recommendedSizes":{"width":"420","height":"280"}},"imageMobile":{"recommendedSizes":{"width":"750","height":"500"}}},"id":"#249","type":"component","lock":false,"position":220},{"name":"TextBlock","data":{"text":"### **04.3.5 Gas switch Ç2 minÇ** \nDélku spÃnánà plynu lze nastavit v rozmezà 0 až 5 minut. Tato doba se pÅiÄte k plánu ponoru a výpoÄtu TTS.","textLarge":false,"imageOnRight":true,"image":{"recommendedSizes":{"width":"420","height":"280"}},"imageMobile":{"recommendedSizes":{"width":"750","height":"500"}}},"id":"#250","type":"component","lock":false,"position":221},{"name":"TextBlock","data":{"text":"### **04.3.6 Min pO<sub>2</sub> Ç0.18 barÇ** \nAlarm nÃzkého pO2 se aktivuje, pokud je aktuálnà pO2 nižšà než nastavená hodnota (rozsah: 0,18-0,40 bar). Nastavenà minimálnÃho parciálnÃho tlaku kyslÃku hraje roli pÅi výpoÄtech pÅepÃnánà plynů.","textLarge":false,"imageOnRight":true,"image":{"recommendedSizes":{"width":"420","height":"280"}},"imageMobile":{"recommendedSizes":{"width":"750","height":"500"}}},"id":"#251","type":"component","lock":false,"position":222},{"name":"TextBlock","data":{"text":"### **04.3.7 Max pO<sub>2</sub> Ç1.60 barÇ** \nAlarm vysokého pO2 se aktivuje, pokud je aktuálnà pO2 vyÅ¡Å¡Ã než nastavená hodnota (rozsah: 0,8-1,6 bar). Nastavenà maximálnÃho parciálnÃho tlaku kyslÃku hraje roli pÅi výpoÄtech pÅepÃnánà plynů.","textLarge":false,"imageOnRight":true,"image":{"recommendedSizes":{"width":"420","height":"280"}},"imageMobile":{"recommendedSizes":{"width":"750","height":"500"}}},"id":"#252","type":"component","lock":false,"position":223},{"name":"TextBlock","data":{"text":"### **04.4 Alarmy**\n\nExistujà dva druhy zpráv, alarmy a upozornÄnÃ. Alarmy se zobrazujà na Äerveném pozadÃ, oznámenà na modrém pozadÃ.","textLarge":false,"imageOnRight":true,"image":{"recommendedSizes":{"width":"420","height":"280"}},"imageMobile":{"recommendedSizes":{"width":"750","height":"500"}}},"id":"#136","type":"component","lock":false,"position":224},{"name":"Image","data":{"firstImage":{},"secondImage":{}},"id":"#345","type":"component","lock":false,"position":225},{"name":"TextBlock","data":{"text":"### **04.4.1 Zdroje alarmů**","textLarge":false,"imageOnRight":true,"image":{"recommendedSizes":{"width":"420","height":"280"}},"imageMobile":{"recommendedSizes":{"width":"750","height":"500"}}},"id":"#138","type":"component","lock":false,"position":226},{"name":"TextBlock","data":{"text":"**Vynechánà zastávky \\[Zapnuto]** \nAlarm se aktivuje, pokud dojde k poruÅ¡enà dekompresnà zastávky (v režimu zastávek).\n\n**CNS \\[Zapnuto]** \nTento alarm se objevà pÅi dosaženà 75 %, 90 % a 100 % limitu toxicity kyslÃku pro CNS.\n\n**Sestupová rychlost\\[Vypnuto]** \nRychlost sestupu vyÅ¡Å¡Ã než nastavená a zároveÅ hlubÅ¡Ã než nastavená aktivuje alarm.\nViz nastavenà rychlosti klesánà v Äásti Nastavenà â Rychlost klesánà (viz kapitola 4.2.7).\n\n**Výstupová rychlost \\[Zapnuto]** \nRychlost stoupánà vyÅ¡Å¡Ã než nastavená pro aktuálnà hluboký interval aktivuje alarm.\nViz nastavenà rychlosti stoupánà v Äásti Nastavenà â Rychlost stoupánà (viz kapitola 4.2.4).\n\n**Vybitá baterie \\[25 %]** \nAlarm se aktivuje, pokud zbývajÃcà kapacita baterie klesne pod tuto hranici.\nRozsah je 0-40 %; 0 znamená, že alarm je deaktivován.\nJe-li nastavena hodnota vyÅ¡Å¡Ã než 10 %, dojde k druhému alarmu na 10 %.","textLarge":false,"imageOnRight":true,"image":{"recommendedSizes":{"width":"420","height":"280"}},"imageMobile":{"recommendedSizes":{"width":"750","height":"500"}}},"id":"#140","type":"component","lock":false,"position":227},{"name":"TextBlock","data":{"text":"### **04.4.2 UpozornÄnÃ**","textLarge":false,"imageOnRight":true,"image":{"recommendedSizes":{"width":"420","height":"280"}},"imageMobile":{"recommendedSizes":{"width":"750","height":"500"}}},"id":"#253","type":"component","lock":false,"position":228},{"name":"TextBlock","data":{"text":"**Uplynutà no-deco \\[[Zapnuto]** \nKonec ponoru v nulovém Äase (v terminologii\nBühlmannova dekompresnÃho modelu), tj. oznámenÃ, že dojde k\npovinnost dekomprese.\n\n**Konec zastávky \\[Zapnuto]**\nKonec dekompresnà zastávky (v režimu zastávek). Můžete\nvystoupit na dalÅ¡Ã zastávku nebo na hladinu, jak je indikováno na displeji.\n\n**DoporuÄená smÄs \\[Vypnuto]** \nDoporuÄenà pÅepnout na jinou smÄs.\n\n**PÅepnutà plynu provedeno \\[Zapnuto]** \nByla provedena zmÄna smÄsi v režimu OC nebo Åedidla v režimu CCR.\nToto upozornÄnà zabraÅuje náhodnému pÅepnutà smÄsi plynu pomocà zkratky, pokud je neúmyslnÄ stisknuta
2nÄkterá klávesa.\n\n**Hloubka a Äas** \nOznámenÃ, že bylo dosaženo nastaveného Äasu nebo hloubky pÅi sestupu nebo výstupu. BÄhem sestupu lze nastavit až tÅi upozornÄnà na hloubku, bÄhem výstupu tÅi upozornÄnà na Äas a tÅi upozornÄnà na hloubku. \nHodnoty jsou umÃstÄny na pomyslném profilu ponoru v editoru. Vlevo jsou hodnoty pro hloubky sestupu (m, ft), \"dole\" jsou hodnoty pro Äas (minuty), vpravo jsou hodnoty pro hloubky výstupu. \nDolnà tlaÄÃtko - pÅesune kurzor na dalÅ¡Ã hodnotu \nHornà tlaÄÃtko - enter pro úpravu hodnoty. \nJe možné nastavit tÅi samostatné \nhloubek v rozsahu 0-300 m, pÅiÄemž 0 znamená deaktivaci hlášenÃ. \nJe možné nastavit tÅi samostatné Äasy v rozsahu\nv rozsahu 0-999 min, kde 0 znamená deaktivaci oznámenÃ.\n\n**Airbreak** \nNastavà upozornÄnà na pÅeruÅ¡enà dýchánà smÄsi pÅi dekompresi s vysokým obsahem kyslÃku v plynech. \nPÅestávka nad % - nad kolik %O<sub>2</sub> považujeme smÄs za kyslÃk/airbreak vzduchu. \
2nPÅestávka po - po kolika minutách na kyslÃku chceme provést pÅeruÅ¡enÃ. \nDélka pÅestávky - délka pÅestávky na vzduchu\nÄasy jsou standardnÄ 0 - vypnuto\n","textLarge":false,"imageOnRight":true,"image":{"recommendedSizes":{"width":"420","height":"280"}},"imageMobile":{"recommendedSizes":{"width":"750","height":"500"}}},"id":"#142","type":"component","lock":false,"position":229},{"name":"TextBlock","data":{"text":"### **04.5 Rebreather**\n\nNastavenà rebreatheru je k dispozici pouze ve verzi Divesoft Freedom s uzavÅeným okruhem.\nPodporovány jsou ÄtyÅi typy rebreatherů:\n\n**CCR Typ**\n \n**CCR Typ - CCR** \nPÅÃstroj s kontantnÃm pO<sub>2</sub> CCR - Electronický nebo manuálnà CCR (eCCR or mCCR), kde pO<sub>2</sub>\nje stálý, nezávisle na hloubce.\n \n**CCR Typ - aSCR** \nPÅÃstroj s polouzavÅeným okruhem se stálým průtokem (aktivnà SCR).\n\n**CCR Typ - pSCR** \nPÅÃstroj s polouzavÅeným okruhem s klÃÄovaným pomÄrem nádechů (pasivnà SCR).","textLarge":false,"imageOnRight":true,"image":{"recommendedSizes":{"width":"420","height":"280"}},"imageMobile":{"recommendedSizes":{"width":"750","height":"500"}}},"id":"#40","type":"component","lock":false,"position":230},{"name":"TextBlock","data":{"text":"### **04.5.1 Const pO<sub>2</sub>** \n\n**Diluenty** \nLze nastavit až 8 smÄsà s libovolným obsahem kyslÃku, helia a dusÃku. Toto nastavenà je nezávislé na nastavenà smÄsi OC.\nOvládánà je stejné jako u smÄsà OC.\n\n**Výchozà dil** \nVýchozà diluent pro CCR.\n\n**SP nÃzký \\[0.7]** \nHodnota nÃzkého setpointu, která je nastavena pÅi pÅepnutà do režimu Fixed CCR.\n\n**SP Vysoký \\[1.3]** \nSP nÃzký lze pÅepnout na SP vysoký ruÄnÄ (pomocà klávesové zkratky nebo v menu) nebo automaticky v nastavené hloubce bÄhem sestupu nebo v nastaveném Äase.\n\n**SPv auto \\[0 m/ft]** \nJe možné nastavit automatické pÅepÃnánà vysokého setpointu pÅi pÅekroÄenà hloubky bÄhem sestupu, Äasu nebo hloubky bÄhem výstupu. Editor zobrazuje pomyslný profil ponoru, kde na levé stranÄ je hloubka bÄhem sestupu, na \"spodnÃ\" stranÄ je Äas a na pravé stranÄ hloubka bÄhem výstupu. \nDolnà tlaÄÃtko - pohyb kurzoru \nHornà tlaÄÃtko - zadánà editaÄnà hodnoty\nPÅi pÅekroÄenà nastavených limitů do této hloubky se automaticky nastavà vysoká nastavená hodnota. Nula tuto funkci deaktivuje.\n\n**SP zkratky\\[Off]** \nPovoluje nebo zakazuje použità tlaÄÃtka pro pÅepÃnánà setpointů.\n\n**Výst. SP \\[High]** \nUrÄuje, který setpoint bude použit pro výpoÄet TTS. Volba mezi aktuálnà nebo vysokou hodnotou.","textLarge":false,"imageOnRight":true,"image":{"recommendedSizes":{"width":"420","height":"280"}},"imageMobile":{"recommendedSizes":{"width":"750","height":"500"}}},"id":"#254","type":"component","lock":false,"position":231},{"name":"TextBlock","data":{"text":"### **04.5.2 aSCR**\n\n**VO<sub>2</sub> \\[1.5 l/min]** \nMetabolickou spotÅebu kyslÃku (VO2 ) lze nastavit v rozmezà 0,5-3 l/min.\n\n**Constant flow \\[7.0 l/min]** \nKonstantnà průtok premixu lze nastavit v rozmezà 5-20 l/min.","textLarge":false,"imageOnRight":true,"image":{"recommendedSizes":{"width":"420","height":"280"}},"imageMobile":{"recommendedSizes":{"width":"750","height":"500"}}},"id":"#255","type":"component","lock":false,"position":232},{"name":"TextBlock","data":{"text":"### **04.5.3 pSCR**\n\n**PA ratio \\[8.0]** \nPomÄr PA lze nastavit v rozsahu 2-16. Je pevnÄ stanoven konstrukcà SCR.\nVentilaÄnà koeficient O2 [20]\nVentilaÄnà koeficient pro kyslÃk je konstanta, která vyjadÅuje skuteÄnost, že ÄÃm vÃce ÄlovÄk pracuje, tÃm rychleji dýchá (= dechový minutový objem/metabolická spotÅeba kyslÃku, VO2 ). Zdatnà lidé majà pÅi stejném množstvà práce nižšà dechovou frekvenci než lidé neschopnÃ, takže nižšà hodnota pÅedstavuje fyzicky zdatného jedince (rozmezÃ: 14-28).\n","textLarge":false,"imageOnRight":true,"image":{"recommendedSizes":{"width":"420","height":"280"}},"imageMobile":{"recommendedSizes":{"width":"750","height":"500"}}},"id":"#256","type":"component","lock":false,"position":233},{"name":"TextBlock","data":{"text":"### **04.5.4 Common settings** \n\n**Pohl. varo. \\[0 min]** \nNastavte životnost skruberu. Po uplynutà této doby se vygeneruje varovánà o dobÄ provozu kruberu. Nula tuto funkci vypne.\n\n**PoÄet senzorů \\[0]** \nZadejte poÄet chemických senzorů O2 pÅipojených k pÅÃstroji Freedom pomocà kabelu. Lze pÅipojit jeden, dva nebo tÅi senzory. Kabel vybavený konektory Molex nenà souÄástà distribuÄnÃho balÃÄku. V souÄasné dobÄ jej iani nelze objednat samostatnÄ.\n\n**Vadné senzory** \nKaždý pÅipojený, ale nedůvÄryhodný senzor můžete oznaÄit jako zakázaný. TÃm odstranÃte tyto senzory z výpoÄtu průmÄrného pO2.\n\n**Cell -> 10k** \nPÅi použità pÅÃstroje Freedom s externÃmi senzory je nÄkdy nutné upravit napÄtà senzorů, které lze zmÄnit zapojenÃm senzoru. Toto nastavenà urÄuje nastavenà terminátoru. NormálnÄ zapnuto. Na kabelech CCR s izolátory je obvykle tÅeba vypnout.\n\n**3rd sens. ratio** \nKoeficient pro pomÄr 3. snÃmaÄe. \nKoeficient pro napÄtà 3. senzoru s vypnutými terminátory, platà pouze pro HW rev. 3.0 a starÅ¡Ã.","textLarge":false,"imageOnRight":true,"image":{"recommendedSizes":{"width":"420","height":"280"}},"imageMobile":{"recommendedSizes":{"width":"750","height":"500"}}},"id":"#257","type":"component","lock":false,"position":234},{"name":"TextBlock","data":{"text":"### **04.6 Apnea nastavenÃ**\n\n**ZanoÅenà \\[1.0]** \nSestup do této hloubky zahájà ponor. Nastavte hodnotu vÄtÅ¡Ã než je hloubka VynoÅenÃ\n\n**VynoÅenà \\[0.3]** \nVynoÅenà nad tuto hloubku ukonÄà ponor. Nastavte hodnotu nižšà než hloubku ZanoÅenÃ.","textLarge":false,"imageOnRight":true,"image":{"recommendedSizes":{"width":"420","height":"280"}},"imageMobile":{"recommendedSizes":{"width":"750","height":"500"}}},"id":"#258","type":"component","lock":false,"position":235},{"name":"TextBlock","data":{"text":"### **04.7 Vlastnosti**\n\n### **04.7.1 Displej**\n\n**Orientace [Left hand]**","textLarge":false,"imageOnRight":true,"image":{"recommendedSizes":{"width":"420","height":"280"}},"imageMobile":{"recommendedSizes":{"width":"750","height":"500"}}},"id":"#164","type":"component","lock":false,"position":236}
2,{"name":"Image","data":{"firstImage":{"mimetype":"image/jpeg","size":49583,"hash":"6d2460341c4681d9d75f0387457389976b638d83","id":"cl0wno1qmlous0776cz1n61in","filename":"divesoft-freedom-user-manual-04-7-1.jpg","category":"divesoft/","type":"image"},"secondImage":{},"image":{"type":"image"}},"id":"#343","type":"component","lock":false,"position":237},{"name":"TextBlock","data":{"text":"Lze zvolit levou, pravou a automatickou orientaci.\nAutomatická orientace automaticky zvolà polohu levé nebo pravé ruky bÄhem startu. NepÅepne se\norientaci displeje, když potápÄÄ zmÄnà polohu (napÅ. pÅi sestupu hlavou dolů).\n\n**Jas**","textLarge":false,"imageOnRight":true,"image":{"recommendedSizes":{"width":"420","height":"280"}},"imageMobile":{"recommendedSizes":{"width":"750","height":"500"}}},"id":"#165","type":"component","lock":false,"position":238},{"name":"TextBlock","data":{"text":"ÃroveÅ jasu podsvÃcenà displeje lze nastavit od 1 do 9. Stránka\nZmÄna jasu se projevà okamžitÄ bÄhem nastavenÃ, takže\nradÄji mÄÅte toto nastavenà ve stÃnu nebo ve tmÄ.\nPro potápÄnà s oÄima pÅizpůsobenýma tmÄ použijte nejnižšà hodnotu.\nnastavenà jasu (úroveÅ 1). Vysoký jas (úroveÅ 5 až 9) použÃvejte pro\npotápÄnà s vysokou úrovnà okolnÃho svÄtla.\nViz také doporuÄené strategie pro potápÄnà ve tmÄ (viz kapitola 3.7.2). \n\n<span style=\"color:red\">**UPOZORNÄNÃ: Jas vyÅ¡Å¡Ã než 7 výraznÄ snižuje životnost baterie na jedno nabitÃ. Hodnota 9 snÃžà životnost baterie až o 50 %.** </span>\n\nPÅÃklad: bÄžná výdrž baterie pÅi nastavenà 5 je 18 h, pÅi jasu nastaveném na 9 je to pouze 9 h.","textLarge":false,"imageOnRight":true,"image":{"recommendedSizes":{"width":"420","height":"280"}},"imageMobile":{"recommendedSizes":{"width":"750","height":"500"}}},"id":"#166","type":"component","lock":false,"position":239},{"name":"TextBlock","data":{"text":"**ZvýraznÄnà menu** \nZvÄtÅ¡enà pÃsma vybraného Åádku nabÃdky\nVybr. - zvýraznà se pouze vybraný Åádek\nVÅ¡e - celé menu velkým pÃsmem\nNikdy - celá nabÃdka malým pÃsmem\n\n**SpoÅiÄ \\[0 s]** \nPo uplynutà Äasového limitu spoÅiÄe obrazovky se displej vypne.\nvyprÅ¡Ã. Nula tuto funkci deaktivuje (tj. displej je stále zapnutý).\n\n","textLarge":false,"imageOnRight":true,"image":{"recommendedSizes":{"width":"420","height":"280"}},"imageMobile":{"recommendedSizes":{"width":"750","height":"500"}}},"id":"#167","type":"component","lock":false,"position":240},{"name":"Image","data":{"firstImage":{"mimetype":"image/jpeg","size":16619,"hash":"d71ddb1198f5ad5642b19abc83c6a0c03f441cf7","id":"cl0wnoxw7lov10776eb3xh2sw","filename":"divesoft-freedom-user-manual-04-7-1b.jpg","category":"divesoft/","type":"image"},"secondImage":{},"image":{"type":"image"}},"id":"#346","type":"component","lock":false,"position":241},{"name":"TextBlock","data":{"text":"**Obrazovky** \nJakoukoli obrazovku režimu potápÄnà lze vypnout.\n\n**Volitelné pole** \nDekompresnà dno nebo průmÄrnou hloubku nebo TTS2 lze nastavit pro\npodrobnou obrazovku OC. \nTTS2 je Äas do vynoÅenà vypoÄÃtaný pouze s aktuálnà smÄsà OC.","textLarge":false,"imageOnRight":true,"image":{"recommendedSizes":{"width":"420","height":"280"}},"imageMobile":{"recommendedSizes":{"width":"750","height":"500"}}},"id":"#168","type":"component","lock":false,"position":242},{"name":"Image","data":{"firstImage":{"mimetype":"image/png","size":48003,"hash":"1576babd317cfe033c77f1324be7793da48b6f47","id":"cl0wnqohilow50776jh2vtmns","filename":"divesoft-freedom-user-manual-04-7-1c.png","category":"divesoft/","type":"image"},"secondImage":{},"image":{"type":"image"}},"id":"#347","type":"component","lock":false,"position":243},{"name":"Spacer","data":{"spacingLarge":30,"spacingSmall":20,"backgroundColor":"#ffffff"},"id":"#409","type":"component","lock":false,"position":244},{"name":"TextBlock","data":{"text":"### **04.7.2 ÄasovaÄe** \n\n**Aut. vypnutà \\[10 min]** \nPo uplynutà tohoto Äasového limitu (rozsah: 1-120 min) se Freedom vypne.\nPÅed vypnutÃm se na 30 s zobrazà otázka \" Vypnout?\". VýbÄrem možnosti Ne tento ÄasovaÄ znovu spustÃte.\n\n**ZruÅ¡enà ponoru** \nRuÄnÄ aktivovaný režim potápÄnà se pÅepne zpÄt do povrchového režimu, pokud se bÄhem ponoru nespustÃ.\n(rozsah: 1-120 min).\n\n\n**UkonÄenà ponoru \\[10 min]** \nPotápÄnà bude ukonÄeno po vynoÅenà a pokud bÄhem tohoto Äasového limitu nezaÄne žádné dalÅ¡Ã zanoÅenÃ.\n(rozsah: 0-30 min). Nula tuto funkci deaktivuje (tj. ponor nebude automaticky ukonÄen).\n\n**Potvrdit ukonÄenà \\[Off]** \nPokud je potvrzenà konce ponoru zapnuto, zobrazà se na 30 s pÅed koncem ponoru dialogové okno s potvrzenÃm.\nVýbÄrem možnosti Ne znovu spustÃte ÄasovaÄ ukonÄenà ponoru.\n\n**Äas ponoru \\[Auto]** \nAuto - zastavenà Äasu ponoru pÅi vynoÅenà \nNons - Äas ponoru se zastavà po manuálnÃm ukonÄenà ponoru, pro potápÄnà v jeskynÃch s vÄtÅ¡Ãm poÄtem suchých a mokrých úseků (sifony).","textLarge":false,"imageOnRight":true,"image":{"recommendedSizes":{"width":"420","height":"280"}},"imageMobile":{"recommendedSizes":{"width":"750","height":"500"}}},"id":"#169","type":"component","lock":false,"position":245},{"name":"Spacer","data":{"spacingLarge":30,"spacingSmall":20,"backgroundColor":"#ffffff"},"id":"#411","type":"component","lock":false,"position":246},{"name":"TextBlock","data":{"text":"### **04.7.3 Uživatelské rozhranÃ**\n\n\n**Checklist \\[Enabled]** \nNenÃ-li tato volba vypnuta, pak se pÅi spuÅ¡tÄnà režimu potápÄnà zobrazà pÅehled nastavenÃ.\nJedná se o nezbytnou souÄást kontroly pÅed ponorem, zejména pÅi potápÄnà s muti-plyny a rebreathery.\n\n**PoÅadÃ\\[Äas]** \nPlán výstupu pÅi ponoru lze seÅadit podle Äasu nebo podle hloubky (tj. v opaÄném poÅadÃ).\n\n**ZpoždÄnà tlaÄÃtka \\[0]**\nPokud je nastavena vÄtÅ¡Ã hodnota než 0, je tÅeba delÅ¡Ãho stisku tlaÄÃtka, aby bylo rozpoznáno jako platný vstup uživatele. Použijte\nv pÅÃpadÄ potÞà s nechtÄnou aktivacÃ.\n\n**Pohyb \\[TlaÄÃtka]** \nÄÃsla v editoru lze zvÄtÅ¡ovat nebo zmenÅ¡ovat naklonÄnÃm, tlaÄÃtky nebo klepnutÃm. Pro ovládánà klepnutÃm je\nnutné trochu procviÄit. NemÄÅte nastavenà na klepánÃ, pokud k tomu nemáte pádný důvod.\n\n**PÅep. smÄsÃ. \\[Vypnuto]** \nVýchozà nastavenà pro plynové klávesové zkratky je vypnuto. Pokud je zapnuta, pak dlouhým stiskem hornÃho tlaÄÃtka vyberete tzv.\npÅedchozà smÄs plynů a dlouhým stiskem dolnÃho tlaÄÃtka se vybere dalÅ¡Ã smÄs plynů. Tento seznam je cyklický.\n\nPokud je vybrána možnost \"dýchatelný\", pak se smÄsi s O<sub>2</sub>\n uvnitÅ dýchatelného rozsahu s ohledem na\naktuálnà hloubky, jsou pÅepÃnány. Hranice dýchatelného rozsahu se nastavujà v nabÃdce Nastavenà â SmÄsi.\nPokud je vybrána možnost \"vÅ¡echny\", pak se pÅepÃnajà vÅ¡echny smÄsi bez ohledu na prodyÅ¡nost. Každé pÅepnutà plynu vyvolá výstrahu - haptickou i vizuálnÃ.\n\n**Vert. rychl. \\[Jednotka/min]** \nPokud je nastaveno procento, pak je ryc
2hlost stoupánà a klesánà indikována relativnÄ k rychlosti stoupánà a klesánÃ.\nlimity. Pokud je nastavena jednotka/min, pak je rychlost stoupánà nebo klesánà indikována v jednotkách hloubky za minutu.\n\n**TlaÄ. stopk.** \nUrÄuje, za jakých podmÃnek funguje spodnà tlaÄÃtko jako ovládánà stopek v režimu Gauge. Můžete si vybrat mezi možnostmi Vypnuto, Pouze základnà scr nebo Vždy.\n\n**Velká hloubka** \nUrÄuje, co se má zobrazovat na spodnÃm Åádku velké obrazovky. \nPrům - zobrazuje průmÄrnou hloubku \nMax - zobrazuje maximálnà hloubku \nPouze - zobrazuje POUZE aktuálnà hloubku, nic jiného.\n\n**Spod tlaÄ.**. \nUrÄuje chovánà spodnÃho tlaÄÃtka. TlaÄÃtko může být pÅeddefinováno pro vypnutà a zapnutà displeje kvůli úspoÅe baterie nebo může být použito pro obrácenà smÄru posouvánà mezi obrazovkami.","textLarge":false,"imageOnRight":true,"image":{"recommendedSizes":{"width":"420","height":"280"}},"imageMobile":{"recommendedSizes":{"width":"750","height":"500"}}},"id":"#259","type":"component","lock":false,"position":247},{"name":"TextBlock","data":{"text":"### **04.7.4 Jednotky \\[Metrické]**\nLze zvolit imperiálnà nebo metrické jednotky.","textLarge":false,"imageOnRight":true,"image":{"recommendedSizes":{"width":"420","height":"280"}},"imageMobile":{"recommendedSizes":{"width":"750","height":"500"}}},"id":"#260","type":"component","lock":false,"position":248},{"name":"TextBlock","data":{"text":"### **04.7.5 Salinita \\[Sladká]**\n\nSalinita Sladká, Slaná nebo EN 13319 lze nastavit podle hustoty vody. Pokud se zmÄnà na možnost MoÅe, použije se pro výpoÄet hloubky hustota moÅské vody.\nVÄtÅ¡ina hloubkomÄrů je kalibrována na sladkou vodu. Toto nastavenà nemÄÅte, pokud nenà nutné pÅÃmé srovnánà s hloubkomÄrem kalibrovaným na moÅskou vodu. EN13319, což je \"univerzálnÃ\" hustota podle stejné normy - 1020 kg/m3, což je velmi blÃzko slané vodÄ a pomÄrnÄ daleko od sladké vody. \nNastavenà sladké/moÅské vody nemá vliv na dekompresnà výpoÄty. Dekomprese vycházà z okolnÃho tlaku a je nezávislá na zobrazené hloubce. Pouze hloubka dekompresnÃch zastávek se zaokrouhluje na obvyklé hodnoty podle nastavenà sladké/moÅské vody a metrických/imperiálnÃch jednotek.","textLarge":false,"imageOnRight":true,"image":{"recommendedSizes":{"width":"420","height":"280"}},"imageMobile":{"recommendedSizes":{"width":"750","height":"500"}}},"id":"#261","type":"component","lock":false,"position":249},{"name":"TextBlock","data":{"text":"### **04.7.6 Výchozà režim \\[OC]**\n\nPokud dojde k ponoÅenà do hloubky vÄtÅ¡Ã než 1,5 m s poÄÃtaÄem v povrchovém režimu nebo vypnutým, poÄÃtaÄ se pÅepne do zvoleného výchozÃho režimu.","textLarge":false,"imageOnRight":true,"image":{"recommendedSizes":{"width":"420","height":"280"}},"imageMobile":{"recommendedSizes":{"width":"750","height":"500"}}},"id":"#262","type":"component","lock":false,"position":250},{"name":"TextBlock","data":{"text":"### **04.7.7 Full log \\[Vypnuto]**\n","textLarge":false,"imageOnRight":true,"image":{"recommendedSizes":{"width":"420","height":"280"}},"imageMobile":{"recommendedSizes":{"width":"750","height":"500"}}},"id":"#263","type":"component","lock":false,"position":251},{"name":"TextBlock","data":{"text":"### **04.8 Kalibrace**\n\n**Kalibrace O<sub>2</sub>** \nViz kalibrace O<sub>2</sub>\n Äidel (See section 3.4.2).\n \n**Horizontálnà kalibrace** \nKalibrace akcelerometrů, které se použÃvajà pro ovládánà náklonem nebo poklepem. UmÃstÄte poÄÃtaÄ do vodorovné polohy\n(displejem nahoru) a stisknÄte libovolnou klávesu. PÅednostnÄ se použÃvá stabilnà vodorovná podložka (napÅ. stůl).\n\n**Korekce tlaku \\[0.00 mbar]** \nSpecify pressure sensor correction for more precise measurement of a barometric pressure or altitude. This\ncorrection is not needed for general use.\n\n**Korekce teploty \\[0.0 °C/°F]** \nZadejte korekci teplotnÃho Äidla pro pÅesnÄjÅ¡Ã mÄÅenà teploty. Tato korekce nenÃ\npro bÄžné použitÃ.","textLarge":false,"imageOnRight":true,"image":{"recommendedSizes":{"width":"420","height":"280"}},"imageMobile":{"recommendedSizes":{"width":"750","height":"500"}}},"id":"#264","type":"component","lock":false,"position":252},{"name":"TextBlock","data":{"text":"### **04.9 DalÅ¡Ã funkce** \n\n**Datum a Äas** \nNastavà aktuálnà Äas a datum \nNemÄÅte mÃstnà Äas mezi opakovanými ponory, protože zmÄna mÃstnÃho Äasu ovlivÅuje výpoÄet\ndesaturace bÄhem intervalu na hladinÄ.\nDoporuÄujeme nastavit mÃstnà Äas v cÃlové destinaci pÅed odjezdem na potápÄÄskou dovolenou v jiném Äase.\npásmu.\n\n**Äas.zóna, DST** \n\n**Nasavenà vlastnÃka**\nNastavte si jméno, které bude zobrazeno pÅi spuÅ¡tÄnà poÄÃtaÄe a na povrchové obrazovce.\n\n\n**Formát** \nMůžete si vybrat mezi bÄžnými Äasovým
2i formáty použÃvanými v různých Äástech svÄta. \n\nISO YYYY-MM-DD 2021-10-18 \nEU DD.MM.YYYY 18.10.2021 \nUS MM/DD/YYYY 10/18/2021 \n\n**NápovÄda** \nZobrazovánà nápovÄdy po setrvánà kurzoru na položce.\n\n**Továrnà nastavenÃ** \nObnovà vÅ¡echna nastavenà na výchozà hodnoty (kromÄ data a Äasu).\nPoÄÃtaÄ se restartuje a po obnovenà se automaticky spustà horizontálnà kalibrace.\n","textLarge":false,"imageOnRight":true,"image":{"recommendedSizes":{"width":"420","height":"280"}},"imageMobile":{"recommendedSizes":{"width":"750","height":"500"}}},"id":"#265","type":"component","lock":false,"position":253},{"name":"Divider","data":{"color":"darkGray"},"id":"#292","type":"component","lock":false,"position":255},{"name":"TextBlock","data":{"text":"### <span id=\"Section-05\">**Section 05: DenÃk ponorů**","textLarge":false,"imageOnRight":true,"image":{"recommendedSizes":{"width":"420","height":"280"}},"imageMobile":{"recommendedSizes":{"width":"750","height":"500"}}},"id":"#186","type":"component","lock":false,"position":256},{"name":"Divider","data":{"color":"darkGray"},"id":"#305","type":"component","lock":false,"position":257},{"name":"Image","data":{"firstImage":{"mimetype":"image/jpeg","size":66804,"hash":"efffe3f6dafcfdcd07846aedc757a2610b004f99","id":"cl0wnvtvvlox207768g8aom4i","filename":"divesoft-freedom-user-manual-05-1-0.jpg","category":"divesoft/","type":"image"},"secondImage":{}},"id":"#211","type":"component","lock":false,"position":258},{"name":"Spacer","data":{"spacingLarge":30,"spacingSmall":20,"backgroundColor":"#ffffff"},"id":"#412","type":"component","lock":false,"position":259},{"name":"TextBlock","data":{"text":"### **05.1 Poslednà ponor**\n\nPodrobnosti z poslednÃho ponoru ze seznamu.\n\n**Profil ponoru** \nGraf je vynesen bÃlou Äarou.\n\n**Dekompresnà strop** \nGraf je vykreslen do Äervené Äáry; pouze pÅi dekompresnÃm ponoru.\n\n**Datum a Äas** \nÄas ponoru.\n\n**Hloubka** \nMaximálnà hloubka ponoru.\n\n**T** \nTeplota v nejchladnÄjÅ¡Ãm bodÄ ponoru (mÄÅená bÄhem výstupu).\n\n**TrvánÃ** \nUdává dobu od ponoÅenà na zaÄátku ponoru do vynoÅenà na konci ponoru. Zahrnuje vÅ¡echny výstupy na hladinu\npobyt na hladinÄ, pokud je souÄástà ponoru. Zaznamenejte, zda byla pÅÃtomna dekompresnà povinnost.\n\n**PrůmÄrná hloubka** \nPrůmÄrná hloubka vypoÄtená z celého profilu.\n\n**Režim** \nPůvodnà režim ponoru (na zaÄátku ponoru).\n\n**CNS** \nHodnota kyslÃkových hodin CNS po vynoÅenÃ.\n\n**ZvÄtÅ¡ené zobrazenà - seznam událostÃ** \nStisknutÃm obou tlaÄÃtek lze v detailu ponoru vyvolat následujÃcà kontextovou nabÃdku \nPÅiblÞený graf -zvÄtÅ¡Ã profil ponoru na detail pro podrobné prohlÞenÃ. Spodnà tlaÄÃtko lze použÃt k dalÅ¡Ãmu posunu profilu, hornà tlaÄÃtko k návratu zpÄt po Äasové ose. Chcete-li se vrátit do detailu ponoru, stisknÄte znovu obÄ tlaÄÃtka a vyberte možnost Ãplné zobrazenÃ. \nSeznam událostà - zobrazà události v ponoru. \nZpÄt do nabÃdky - návrat o jednu úroveÅ zpÄt ","textLarge":false,"imageOnRight":true,"image":{"recommendedSizes":{"width":"420","height":"280"}},"imageMobile":{"recommendedSizes":{"width":"750","height":"500"}}},"id":"#170","type":"component","lock":false,"position":260},{"name":"Image","data":{"firstImage":{"mimetype":"image/png","size":57544,"hash":"1f6b734efab9cf30c809d7837b79134f8718fe68","id":"cl0wnxw23loxb0776yu6nh96n","filename":"divesoft-freedom-user-manual-05-2-0.png","category":"divesoft/","type":"image"},"secondImage":{},"image":{"type":"image"}},"id":"#212","type":"component","lock":false,"position":261},{"name":"Spacer","data":{"spacingLarge":30,"spacingSmall":20,"backgroundColor":"#ffffff"},"id":"#413","type":"component","lock":false,"position":262},{"name":"TextBlock","data":{"text":"### **05.2 Seznam ponorů**\n\nZde jsou vÅ¡echny ponory z pamÄti Divesoft Freedom\nuvedeny. Kapacita pamÄti je pÅibližnÄ 100 hodin typických potápÄÄských profilů. Po zaplnÄnà pamÄti se nejstarÅ¡Ã záznamy automaticky vymažou.\nDruhé a dalÅ¡Ã ponory v jednom dni jsou oznaÄeny symbolem\no
2dpovÃdajÃcÃmi pÃsmeny.\nDemo ponory (záznamy uložené po simulaci ponoru) jsou oznaÄeny svÄtle modrými znaky. ZkuÅ¡ebnà ponory jsou oznaÄeny Äervenými znaky (napÅ. prvnà ponor do hloubky pÅibližnÄ 350 m).\nKrátkým stiskem hornÃho tlaÄÃtka otevÅete obrazovku s podrobnostmi o ponoru.\nDlouhým stisknutÃm procházÃte jednotlivé stránky.","textLarge":false,"imageOnRight":true,"image":{"recommendedSizes":{"width":"420","height":"280"}},"imageMobile":{"recommendedSizes":{"width":"750","height":"500"}}},"id":"#171","type":"component","lock":false,"position":263},{"name":"TextBlock","data":{"text":"### **05.3 Souhrn**\n\nZobrazà se pÅehled vÅ¡ech ponorů z pamÄti pÅÃstroje Divesoft Freedom (bez testovacÃch a demo ponorů).","textLarge":false,"imageOnRight":true,"image":{"recommendedSizes":{"width":"420","height":"280"}},"imageMobile":{"recommendedSizes":{"width":"750","height":"500"}}},"id":"#172","type":"component","lock":false,"position":264},{"name":"Divider","data":{"color":"darkGray"},"id":"#296","type":"component","lock":false,"position":265},{"name":"TextBlock","data":{"text":"### <span id=\"Section-06\">**Section 06: PlánovaÄ**\n","textLarge":false,"imageOnRight":true,"image":{"recommendedSizes":{"width":"420","height":"280"}},"imageMobile":{"recommendedSizes":{"width":"750","height":"500"}}},"id":"#173","type":"component","lock":false,"position":266},{"name":"Divider","data":{"color":"darkGray"},"id":"#306","type":"component","lock":false,"position":267},{"name":"TextBlock","data":{"text":"### **06.1 Parametry ponoru** \n\nVÅ¡echny neuvedené parametry jsou pÅevzaty z pÅÃsluÅ¡ného nastavenÃ.","textLarge":false,"imageOnRight":true,"image":{"recommendedSizes":{"width":"420","height":"280"}},"imageMobile":{"recommendedSizes":{"width":"750","height":"500"}}},"id":"#307","type":"component","lock":false,"position":268},{"name":"TextBlock","data":{"text":"**Režim plánovánÃ** \nZvolte plánovaný režim ponoru. \nOC - pÅÃstrojs otevÅeným okruhem \nS/CCR - pÅÃstroj SCR nebo CCR \nCCR+BO - sestup SCR a sestup na dno následovaný bailout OC. \nJiný režim než OC plánovánà je k dispozici ve verzi s uzavÅeným okruhem\npouze v tomto režimu. \n\n**Povrchový interval** \nZadejte interval vynoÅovánà od této chvÃle (v minutách).\n\n**CÃlová hloubka** \nZadejte hloubku dna (v m/stopách). U vÃceúrovÅového ponoru použijte průmÄrnou hloubku.\n\n**Délka ponoru** \nZadejte dobu trvánà ponoru pÅi zahájenà výstupu vÄetnÄ sestupu.\n\n**SmÄs na dno** \nSmÄs plynů plánovaná pro sestup a pobyt na dnÄ.\n\n**Diluent** \nÅedidlo pro ponor SCR/CCR (pouze verze s uzavÅeným okruhem).\n\n**Naplánovat** \nVýsledný plán ponoru se skládá ze shrnutà a podrobného výÄtu zastávek na dekompresi.\n\n**Simulace** \nSpustà simulaci ponoru v reálném Äase. PoÄÃtaÄ se pÅepne do režimu potápÄnà a zobrazà vÅ¡echny displeje v.\nstejným způsobem jako pÅi skuteÄném ponoru.\n\n**Uložit jako výchozÃ** \nNastavený parametr uložte jako výchozà pro následujÃcà plány, jinak se po vypnutà zapomene.","textLarge":false,"imageOnRight":true,"image":{"recommendedSizes":{"width":"420","height":"280"}},"imageMobile":{"recommendedSizes":{"width":"750","height":"500"}}},"id":"#174","type":"component","lock":false,"position":269},{"name":"TextBlock","data":{"text":"### **06.2 Plán ponoru**","textLarge":false,"imageOnRight":true,"image":{"recommendedSizes":{"width":"420","height":"280"}},"imageMobile":{"recommendedSizes":{"width":"750","height":"500"}}},"id":"#175","type":"component","lock":false,"position":270},{"name":"TextBlock","data":{"text":"### **06.2.1 Summary**\n\n**Nodeco** \nThe runtime of the planned dive where the decompression obligation\nstarts.\n\n**TTS** \nThe time to surface at the ascent start.\n\n**Total** \nThe runtime when surfacing.\n\n**CNS** \nThe percentage of consumption of CNS toxicity limit.\n\n**NoFly** \nThe NoFly time after the planned dive.\n","textLarge":false,"imageOnRight":true,"image":{"recommendedSizes":{"width":"420","height":"280"}},"imageMobile":{"recommendedSizes":{"width":"750","height":"500"}}},"id":"#177","type":"component","lock":false,"position":271},{"name":"TextBlock","data":{"text":"### **06.2.2 Zastávky**","textLarge":false,"imageOnRight":true,"image":{"recommendedSizes":{"width":"420","height":"280"}},"imageMobile":{"recommendedSizes":{"width":"750","height":"500"}}},"id":"#267","type":"component","lock":false,"position":272},{"name":"Image","data":{"firstImage":{"mimetype":"image/png","size":42575,"hash":"b1d4efc480f13b549d7db3aa2e5b3a8a59fa61e3","id":"cl0wo16kdloxi0776tf4xu7fx","filename":"divesoft-freedom-user-manual-06-2-2.png","category":"divesoft/","type":"image"},"secondImage":{}},"id":"#152","type":"component","lock":false,"position":273},{"name":"Image","data":{"firstImage":{},"secondImage":{}},"id":"#150","type":"component","lock":false,"position":274},{"name":"TextBlock","data":{"text":"Popis profilu výstupu a použitých smÄsà plynů.\nPokud je v nastavenà dekomprese zvolen optimálnà plyn, pak plán uvažuje zmÄnu plynů ze seznamu aktivnÃch smÄsÃ; je zahrnuta doba pÅepnutà plynu.\nPokud je v nastavenà dekomprese vybráno aktuálnà nastavenà plynu,\npak se použije pouze aktuálnà plyn.","textLarge":false,"imageOnRight":true,"image":{"recommendedSizes":{"width":"420","height":"280"}},"imageMobile":{"recommendedSizes":{"width":"750","height":"500"}}},"id":"#178","type":"component","lock":false,"position":275}
2,{"name":"Divider","data":{"color":"darkGray"},"id":"#295","type":"component","lock":false,"position":276},{"name":"TextBlock","data":{"text":"### <span id=\"Section-07\">**Section 07: Staženà záznamů ponoru**\n","textLarge":false,"imageOnRight":true,"image":{"recommendedSizes":{"width":"420","height":"280"}},"imageMobile":{"recommendedSizes":{"width":"750","height":"500"}}},"id":"#179","type":"component","lock":false,"position":277},{"name":"Divider","data":{"color":"darkGray"},"id":"#308","type":"component","lock":false,"position":278},{"name":"TextBlock","data":{"text":"PÅipojte kabel USB, který je souÄástà distribuÄnÃho balenÃ, ke konektoru Freedom a poté k portu USB poÄÃtaÄe, tabletu nebo mobilnÃho telefonu. **Pozor, zachovánà poÅadà pÅipojenà je velmi důležité.** Pro mobilnà zaÅÃzenà bude pravdÄpodobnÄ nutný adaptér USB. \nV nabÃdce Aplikace -> PÅipojenà USB vyberte položku PÅipojenà USB. PamÄÅ¥ Divesoft Freedom lze pÅipojit jako pamÄÅ¥ové zaÅÃzenà (jako flash disk). Bylo testováno pÅipojenà k operaÄnÃm systémům Windows, Mac, Linux, Android a iOS, ale nenà zaruÄena kompatibilita se vÅ¡emi operaÄnÃmi systémy a vÅ¡emi poÄÃtaÄi. PÅÃstup k internà pamÄti je pouze pro ÄtenÃ.\nZáznamy se ukládajà do složky DIVELOG; data z jednoho ponoru se ukládajà jako\njeden soubor *.DLF.","textLarge":false,"imageOnRight":true,"image":{"recommendedSizes":{"width":"420","height":"280"}},"imageMobile":{"recommendedSizes":{"width":"750","height":"500"}}},"id":"#309","type":"component","lock":false,"position":279},{"name":"TextBlock","data":{"text":"**UPOZORNÄNÃ: Je naprosto nezbytné dodržet postup pÅipojenà kabelu. NabÃjecÃ/datový kabel musà být nejprve zapojen do zaÅÃzenà Freedom a poté do stolnÃho poÄÃtaÄe, notebooku nebo jiného zaÅÃzenÃ.\nNedodrženà tohoto postupu může způsobit nevratné poÅ¡kozenà zaÅÃzenÃ.**","textLarge":false,"imageOnRight":true,"image":{"recommendedSizes":{"width":"420","height":"280"}},"imageMobile":{"recommendedSizes":{"width":"750","height":"500"}}},"id":"#434","type":"component","lock":false,"position":280},{"name":"TextBlock","data":{"text":"### **07.1 Zpracovánà logu na cloudu**\n\nStáhnÄte si soubory ze složky DIVELOG na pevný disk a potom\nnahrajte data na WETNOTES.COM. Zde můžete ukládat a upravovat své\nponory, studovat grafy, podrobnosti a mnoho dalÅ¡Ãho. Pokud chcete, můžete\nsdÃlet ponory se svým kamarádem nebo skupinou.\nNavÅ¡tivte stránky WETNOTES.COM a prozkoumejte vÅ¡echny možnosti, které nabÃzÃ!\n","textLarge":false,"imageOnRight":true,"image":{"recommendedSizes":{"width":"420","height":"280"}},"imageMobile":{"recommendedSizes":{"width":"750","height":"500"}}},"id":"#180","type":"component","lock":false,"position":281},{"name":"Image","data":{"firstImage":{"mimetype":"image/png","size":215207,"hash":"43db6e820d50700035c4d3b95c5f22a5cde3407c","i
2d":"cljh5f62rnu3e0776p6pcti5u","filename":"wetnotes.png","category":"divesoft/","type":"image"},"secondImage":{},"image":{"type":"image"}},"id":"#148","type":"component","lock":false,"position":282},{"name":"Image","data":{"firstImage":{},"secondImage":{}},"id":"#348","type":"component","lock":false,"position":283},{"name":"TextBlock","data":{"text":"### **07.2 Divesoft App** \nZáznamy o potápÄnà nahrané na Wetnotes.com si můžete prohlédnout na mobilnÃch zaÅÃzenÃch prostÅednictvÃm aplikace [Divesoft.app ](https://Divesoft.app) \nStáhnÄte si verzi pro mobilnà telefon nebo tablet.\n\nPoÄÃtaÄ Freedom+ je schopen prostÅednictvÃm Bluetooth nahrát logy pÅÃmo do aplikace. SpusÅ¥e Bluetooth v Menu -> Aplikace -> BLE a propojte Freedom s vaÅ¡Ãm mobilnÃm telefonem.\n","textLarge":false,"imageOnRight":true,"image":{"recommendedSizes":{"width":"420","height":"280"}},"imageMobile":{"recommendedSizes":{"width":"750","height":"500"}}},"id":"#181","type":"component","lock":false,"position":284},{"name":"TextBlock","data":{"text":"### **07.3 Off-line zpracovánà záznamů**\nDivesoft nepodporuje ukládánà záznamů o ponorech v režimu offline. Lze použÃt software tÅetÃch stran, napÅÃklad Subsurface. \nhttps://subsurface-divelog.org/","textLarge":false,"imageOnRight":true,"image":{"recommendedSizes":{"width":"420","height":"280"}},"imageMobile":{"recommendedSizes":{"width":"750","height":"500"}}},"id":"#270","type":"component","lock":false,"position":285},{"name":"Divider","data":{"color":"darkGray"},"id":"#294","type":"component","lock":false,"position":286},{"name":"TextBlock","data":{"text":"### <span id=\"Section-08\">**Äást 08: Systém**\n","textLarge":false,"imageOnRight":true,"image":{"recommendedSizes":{"width":"420","height":"280"}},"imageMobile":{"recommendedSizes":{"width":"750","height":"500"}}},"id":"#182","type":"component","lock":false,"position":287},{"name":"Divider","data":{"color":"darkGray"},"id":"#310","type":"component","lock":false,"position":288},{"name":"TextBlock","data":{"text":"### **08.1 Stav zaÅÃzenÃ**\n\nNa 5 obrazovkách jsou popsány podrobné informace o verzi, licenci, nastavenÃ, baterii a snÃmaÄi tlaku.\n(6 pro verzi CCR).","textLarge":false,"imageOnRight":true,"image":{"recommendedSizes":{"width":"420","height":"280"}},"imageMobile":{"recommendedSizes":{"width":"750","height":"500"}}},"id":"#311","type":"component","lock":false,"position":289},{"name":"TextBlock","data":{"text":"### **08.2 Servisnà funkce**\n\nServisnà funkce jsou primárnÄ urÄeny k podpoÅe kvalifikovaného technika nebo k provádÄnà s pomocÃ\ndoporuÄenÃm technické podpory výrobce.\nTyto funkce nejsou blokovány, ale nenà poskytována podpora koncovým uživatelům. Podrobný popis pÅesahuje rozsah této pÅÃruÄky. OdbornÃk na IT vÄtÅ¡inu z nich pochopà i bez dalÅ¡Ãho popisu.\nNabÃdka servisnÃch funkcà je pÅÃstupná pomocà kódovaného stisku kláves (stisknÄte obÄ klávesy; uvolnÄte jednu klávesu a znovu ji stisknÄte; uvolnÄte obÄ klávesy).","textLarge":false,"imageOnRight":true,"image":{"recommendedSizes":{"width":"420","height":"280"}},"imageMobile":{"recommendedSizes":{"width":"750","height":"500"}}},"id":"#271","type":"component","lock":false,"position":290},{"name":"TextBlock","data":{"text":"### **08.2.1 Debug** \nVÅ¡echny informace o debugovánà jsou urÄeny pouze pro ÄtenÃ. Jejich prohlÞenà jen ze zvÄdavosti nepÅedstavuje žádné riziko.\n\n**ZaÅÃzenÃ** \nPodrobný stav vÅ¡ech senzorů.\n\n**Deco model** \nStav dekompresnÃho modelu je podrobnÄ popsán na 5 obrazovkách (vÄetnÄ oddÃlu\ngrafu nasycenÃ).\n\n**Scheduler**\nSeznam úloh firmwaru s informacemi upÅesÅujÃcÃmi stopu systému.\n\n**Variables** (PromÄnné**)\nHodnoty nÄkterých vnitÅnÃch promÄnných.","textLarge":false,"imageOnRight":true,"image":{"recommendedSizes":{"width":"420","height":"280"}},"imageMobile":{"recommendedSizes":{"width":"750","height":"500"}}},"id":"#272","type":"component","lock":false,"position":291},{"name":"TextBlock","data":{"text":"### **08.2.2 Test** \n\nProvedenà tÄchto testů jen ze zvÄdavosti pÅi pobytu na povrchu nepÅedstavuje žádné riziko.\n\n**TlaÄÃtka** \nProvede jednoduchý test obou tlaÄÃtek.\n\n**Vibrace** \nProvede krátký test vibracÃ.\n\n**Displej** \nPÅi testu displeje se zobrazà Äervená, zelená a modrá obrazovka.\n\n**Watchdog** \nWatchdog je ÄasovaÄ, který sloužà k detekci a obnovÄ chybného firmwaru. Můžete zámÄrnÄ\ntÃmto testem poÄÃtaÄ zavÄsit. NepoužÃvejte jej pod vodou!\n\n**Testt dive** \nZkuÅ¡ebnà ponor použÃvá výrobce nebo autorizovaný servis pro kalibraci tlakového snÃmaÄe a\ntest tÄsnosti. Je podobný režimu mÄÅidla. Záznam o zkuÅ¡ebnÃm ponoru se uložÃ, ale zÅetelnÄ se oznaÄà jako zkuÅ¡ebnÃ.\nponor. ZkuÅ¡ebnà ponor nenà zahrnut do pÅehledu protokolu.","textLarge":false,"imageOnRight":true,"image":{"recommendedSizes":{"width":"420","height":"280"}},"imageMobile":{"recommendedSizes":{"width":"750","height":"500"}}},"id":"#281","type":"component","lock":false,"position":292},{"name":"TextBlock","data":{"text":"### **08.2.3 Demo dive** \n\nZkuÅ¡ebnà ponory jsou vhodné pro zájemce o ukázku funkcà systému Divesoft Freedom. S provádÄnÃm ukázkových ponorů nenà spojeno žádné riziko. BÄhem ukázkového ponoru lze na hladinÄ vyzkouÅ¡et témÄÅ vÅ¡echny funkce. Jednou z výjimek je snÃmánà údajů z tlakového senzoru. Také senzory O2 pÅipojené kabelem nelze použÃt pro režim mÄÅeného ponoru CCR. Je k dispozici hloubkový profil a dekompresnà plynové smÄsi se pÅepÃnajà automaticky. Ukázkový ponor Emergence du Ressel využÃvá autentický hloubkový profil z průniku prvnÃm sifonem této francouzské jeskynÄ. Záznamy demo ponoru lze trvale uložit do pamÄti záznamů. Pokud je pamÄÅ¥ plná, nejstarÅ¡Ã záznamy o ponoru se nahradà novým záznamem o demo ponoru. Záznamy o ukázkových ponorech jsou zÅetelnÄ oznaÄeny. Záznam o demo ponoru, pokud se jedná o poslednà ponor, lze pozdÄji vymazat pomocà Demo ponor â Vymazat záznam o demo ponoru. Funkce jednoho demo ponoru na úrovni dna je ekvivalentnà simulaci ponoru v plánovaÄi ponorů. Viz také PlánovaÄ ponorů (viz kapitola 6.1).\n","textLarge":false,"imageOnRight":true,"image":{"recommendedSizes":{"width":"420","height":"280"}},"imageMobile":{"recommendedSizes":{"width":"750","height":"500"}}},"id":"#273","type":"component","lock":false,"position":293},{"name":"TextBlock","data":{"text":"### **08.2.4 Syslog** \nSeznam protokolu systémových událostÃ. VÅ¡echny informace jsou urÄeny pouze pro ÄtenÃ.","textLarge":false,"imageOnRight":true,"image":{"recommendedSizes":{"width":"420","height":"280"}},"imageMobile":{"recommendedSizes":{"width":"750","height":"500"}}},"id":"#274","type":"component","lock":false,"position":294},{"name":"TextBlock","data":{"text":"### **08.2.5 DalÅ¡Ã funkce** \n\n<span style=\"color:red\">**Warning: These functions can alter values of internal variables or/and the state of the Divesoft Freedom.\nUse them with caution and only if you understand the consequences.**</span>\n\n\n**Force Dive Start** \nLze jej použÃt pro mimoÅádnÄ mÄlký ponor v mÃstÄ, kde je poÄáteÄnà ponor do hloubky vÄtÅ¡Ã než.\n1,5 m nenà možné. Lze ji použÃt také v pÅÃpadÄ, že automatický start ponoru z jakéhokoli důvodu selhal (napÅ. ponoÅenà do\nalgoritmus rozpoznánà ponoru zmátly pÅedchozà zmÄny tlaku nesouvisejÃcà s ponoÅenÃm).\n\n**Force Dive end** \nPokud byl nesprávnÄ rozpoznán tlak na hladinÄ (nulová hloubka) a poÄÃtaÄ se \"potápÃ\", zatÃmco je na hladinÄ.\npak lze ponor touto funkcà vynutit k ukonÄenÃ.\n\n**ProhlÞet konfiguraci** \nKaždé nastavenà lze pÅeÄÃst a zmÄnit. VÄtÅ¡inu nastavenà lze mÄnit také pomocà bÄžného\nnastavenÃ; pro každé nastavenà se použijà ekvivalentnà minimálnà a maximálnà limity. Existuje pouze nÄkolik\ninternÃch konfiguraÄnÃch parametrů urÄených pro speciálnà použitÃ.\n\n**Resetovánà deco dat** \nOdstranà se zbytkové nasycenà inertnÃm plynem z pÅedchozÃho ponoru (ponorů). Tuto funkci použijte pouze pro zadánÃ\npoÄÃtaÄ jinému potápÄÄi, jehož interval na hladinÄ je dostateÄný pro úplné odsÃÅenÃ.\n\n**Bootloader** \n
2Restartujte do režimu zavadÄÄe pro aktualizaci firmwaru nebo aktualizaci verze.\nPÅipojte kabel USB, který je souÄástà distribuÄnÃho balÃÄku, k portu USB poÄÃtaÄe, kde se nacházÃ\n[Divesoft.center](https://www.divesoft.com/en/center) is správnÄ nainstalován. See [Divesoft support](https://www.divesoft.com/en/support) pro dalÅ¡Ã informace a staženà firmwaru.\nLicence verze je pevnÄ spojena se sériovým ÄÃslem jednotky a je nepÅenosná na dalÅ¡Ã poÄÃtaÄe Divesoft Freedom.","textLarge":false,"imageOnRight":true,"image":{"recommendedSizes":{"width":"420","height":"280"}},"imageMobile":{"recommendedSizes":{"width":"750","height":"500"}}},"id":"#275","type":"component","lock":false,"position":295},{"name":"Divider","data":{"color":"darkGray"},"id":"#293","type":"component","lock":false,"position":296},{"name":"TextBlock","data":{"text":"### <span id=\"Section-09\">**Section 09: Aplikace**\n\n","textLarge":false,"imageOnRight":true,"image":{"recommendedSizes":{"width":"420","height":"280"}},"imageMobile":{"recommendedSizes":{"width":"750","height":"500"}}},"id":"#183","type":"component","lock":false,"position":297},{"name":"Divider","data":{"color":"darkGray"},"id":"#312","type":"component","lock":false,"position":298},{"name":"TextBlock","data":{"text":"### **09.1 Analyzátor**\n\n<span style=\"color:red\">**Warning: O<sub>2</sub> senzor musà být pÅed použitÃm kalibrován! \nUpozornÄnÃ: NepoužÃvejte proÅ¡lé nebo nefunkÄnà senzory!**</span> \n\nPoÄÃtaÄ Divesoft Freedom lze použÃt jako analyzátor nitroxu, pokud je pÅipojen kyslÃkový senzor. O<sub>2</sub>\npouzdro senzoru lze objednat samostatnÄ.\nO<sub>2</sub>\n lze použÃt senzory dÅÃve použÃvané v rebreatheru, pokud jsou stále schopny mÄÅit plný rozsah kyslÃku.\npÅi atmosférickém tlaku.","textLarge":false,"imageOnRight":true,"image":{"recommendedSizes":{"width":"420","height":"280"}},"imageMobile":{"recommendedSizes":{"width":"750","height":"500"}}},"id":"#313","type":"component","lock":false,"position":299},{"name":"TextBlock","data":{"text":"### **09.1.1 MÄÅenÃ**\n\nPÅipojte kryt s O<sub>2</sub>\nsensorem, spusÅ¥te aplikaci Analyzer a použÃvejte ji jako jakýkoli jiný analyzátor nitroxu.\nPoužÃvejte pouze sotva slyÅ¡itelný proud nitroxu z ventilu nádrže SCUBA a nezapomeÅte pevnÄ stisknout vstupnà otvor pouzdra.","textLarge":false,"imageOnRight":true,"image":{"recommendedSizes":{"width":"420","height":"280"}},"imageMobile":{"recommendedSizes":{"width":"750","height":"500"}}},"id":"#187","type":"component","lock":false,"position":300},{"name":"TextBlock","data":{"text":"### **09.1.2 Kalibrace**\n\nAnalyzátor lze kalibrovat vzduchem.\nKalibraci spustÃte stisknutÃm spodnÃho tlaÄÃtka. Když je údaj mV stabilnÃ, potvrÄte kalibraci stisknutÃm hornà klávesy.\nStarý senzor může, ale nemusà být detekován nÃzkým napÄtÃm bÄhem\nkalibraci pomocà vzduchu (viz datový list výrobce senzoru).\nSpolehlivou metodou je kalibrace snÃmaÄe vzduchem a následná kontrola maximálnÃho rozsahu Äistým kyslÃkem.\nSenzor analyzátoru pÅekalibrujte nejménÄ 24 h pÅed mÄÅenÃm.\nKalibraÄnà proces zohledÅuje nadmoÅskou výšku (atmosférický tlak) a teplotu.\nKalibrace senzoru rebreatheru nemá žádnou souvislost s kalibracà senzoru analyzátoru.","textLarge":false,"imageOnRight":true,"image":{"recommendedSizes":{"width":"420","height":"280"}},"imageMobile":{"recommendedSizes":{"width":"750","height":"500"}}},"id":"#184","type":"component","lock":false,"position":301},{"name":"Image","data":{"firstImage":{"mimetype":"image/png","size":26735,"hash":"0663c5ef94c0617307f407bb47bb3d7fed1e913a","id":"cl0wo8cguloz80776nvy66876","filename":"divesoft-freedom-user-manual-09-1-2.png","category":"divesoft/","type":"image"},"secondImage":{}},"id":"#146","type":"component","lock":false,"position":302},{"name":"Spacer","data":{"spacingLarge":30,"spacingSmall":20,"backgroundColor":"#ffffff"},"id":"#414","type":"component","lock":false,"position":303},{"name":"TextBlock","data":{"text":"### **9.2 USB pÅipojenÃ** \nPÅepne poÄÃtaÄ do režimu propojenà USB pro stahovánà záznamů o ponorech.\nPo pÅipojenà kabelem k osobnÃmu poÄÃtaÄi se systém Freedom ohlásà jako velkokapacitnà pamÄÅ¥ové zaÅÃzenÃ.","textLarge":false,"imageOnRight":true,"image":{"recommendedSizes":{"width":"420","height":"280"}},"imageMobile":{"recommendedSizes":{"width":"750","height":"500"}}},"id":"#144","type":"component","lock":false,"position":304},{"name":"Image","data":{"firstImage":{"mimetype":"image/jpeg","size":15764,"hash":"c0f022ad43df2fb29e3e93b5a20611d850894c7f","
2id":"cl0wo2ofbloy00776r7em225h","filename":"divesoft-freedom-user-manual-07-0-0.jpg","category":"divesoft/","type":"image"},"secondImage":{},"image":{"type":"image"}},"id":"#192","type":"component","lock":false,"position":305},{"name":"Spacer","data":{"spacingLarge":30,"spacingSmall":20,"backgroundColor":"#ffffff"},"id":"#415","type":"component","lock":false,"position":306},{"name":"TextBlock","data":{"text":"### **09.3 Nouzová svÃtilna** \n RozsvÃtà celý displej na maximum a vyzaÅuje maximálnà možné množstvà svÄtla. Lze ji použÃt jako nouzovou svÃtilnu za urÄitých podmÃnek, kdy vÅ¡echny ostatnà svÃtilny selhaly.","textLarge":false,"imageOnRight":true,"image":{"recommendedSizes":{"width":"420","height":"280"}},"imageMobile":{"recommendedSizes":{"width":"750","height":"500"}}},"id":"#277","type":"component","lock":false,"position":307},{"name":"Spacer","data":{"spacingLarge":30,"spacingSmall":20,"backgroundColor":"#ffffff"},"id":"#416","type":"component","lock":false,"position":308},{"name":"TextBlock","data":{"text":"### **09.4 SklonomÄr** \nSklonomÄr je nástroj pro mÄÅenà strmosti svahu. Lze jej použÃt pÅi mapovánà jeskynà a vraků. Pro správnou a pÅesnou funkci musà být dobÅe kalibrován pomocà poÄÃtaÄe s horizontálnà kalibracÃ.\n\n**Hry**\n\nNevypÃnejte chybová hlášenà a oznámenà souvisejÃcà s dekompresÃ, pokud se hry hrajà bÄhem dekompresnà zastávky.\nDbejte na to, abyste pÅi hranà bÄhem ponoru náhodnÄ nezmÄnili polohu. PravidelnÄ kontrolujte manometry. Hranà hry snÞà vaÅ¡i pozornost. Pamatujte: chcete bezpeÄnÄ provést dekompresi, ne jen dosáhnout vyššà úrovnÄ ve hÅe!\nHry byly testovány na dÄtech. Nikomu se nic nestalo.","textLarge":false,"imageOnRight":true,"image":{"recommendedSizes":{"width":"420","height":"280"}},"imageMobile":{"recommendedSizes":{"width":"750","height":"500"}}},"id":"#278","type":"component","lock":false,"position":309},{"name":"TextBlock","data":{"text":"### **09.5 Hry**","textLarge":false,"imageOnRight":true,"image":{"recommendedSizes":{"width":"420","height":"280"}},"imageMobile":{"recommendedSizes":{"width":"750","height":"500"}}},"id":"#279","type":"component","lock":false,"position":310},{"name":"TextBlock","data":{"text":"### ** 09.5.1 Sokoban**\nSokoban je typ dopravnà hádanky, ve které hrÃ¡Ä (potápÄÄská maska se Å¡norchlem) posouvá nádrže nebo bedny ve skladu a snažà se je dostat na skladovacà mÃsta (Äervené teÄky).\nHra se hraje na hracà ploÅ¡e složené ze Ätverců, kde každý Ätverec pÅedstavuje buÄ podlahu, nebo zeÄ. NÄkteré Ätverce podlahy obsahujà nádrže a nÄkteré Ätverce podlahy jsou oznaÄeny jako skladovacà mÃsta.\nHrÃ¡Ä je omezen na hracà plochu a může se pohybovat horizontálnÄ nebo vertikálnÄ na prázdné Ätverce (nikdy ne pÅes stÄny nebo krabice). HrÃ¡Ä se také může pÅesunout do nádrže, ÄÃmž ji posune do Ätverce za nÃ. Nádrže nelze tlaÄit do jiných nádržà ani do stÄn a nelze je táhnout. Hádanka je vyÅeÅ¡ena, když jsou vÅ¡echny nádrže na úložných mÃstech.\n\n","textLarge":false,"imageOnRight":true,"image":{"recommendedSizes":{"width":"420","height":"280"}},"imageMobile":{"recommendedSizes":{"width":"750","height":"500"}}},"id":"#280","type":"component","lock":false,"position":311},{"name":"Image","data":{"firstImage":{"mimetype":"image/png","size":27773,"hash":"ac6f6361fe5aa6ff462d7103a67fa69e2fe855b6","id":"cl0wobhb2lp0n0776521mmpve","filename":"divesoft-freedom-user-manual-09-2-1.png","category":"divesoft/","type":"image"},"secondImage":{},"image":{"type":"image"}},"id":"#193","type":"component","lock":false,"position":312},{"name":"Spacer","data":{"spacingLarge":30,"spacingSmall":20,"backgroundColor":"#ffffff"},"id":"#436","type":"component","lock":false,"position":313},{"name":"TextBlock","data":{"text":"### **09.5.2 Had** \nHad je hra, ve které hrÃ¡Ä manévruje po ÄáÅe, která roste do délky, pÅiÄemž hlavnà pÅekážkou je samotná Äára.\nHrÃ¡Ä ovládá hlavu hada. PÅi pohybu vpÅed za sebou zanechává stopu, která pÅipomÃná pohybujÃcÃho se hada. Had má urÄitou délku. HrÃ¡Ä prohraje, když had narazà na hranici obrazovky, na stopu nebo jinou pÅekážku, nebo když sežere jed (lebku), pÅÃpadnÄ zemÅe hlady.\nHad ztrácà délku pomalu (každých 30 kroků), a když je pÅÃliÅ¡ krátký, umÃrá hlady.\nHrÃ¡Ä se pokouÅ¡Ã snÃst ryby tak, že do nich n
2arazà hlavou hada. Každá snÄdená ryba hada prodlužuje, takže manévrovánà je postupnÄ obtÞnÄjÅ¡Ã.","textLarge":false,"imageOnRight":true,"image":{"recommendedSizes":{"width":"420","height":"280"}},"imageMobile":{"recommendedSizes":{"width":"750","height":"500"}}},"id":"#191","type":"component","lock":false,"position":314},{"name":"Image","data":{"firstImage":{"mimetype":"image/png","size":12149,"hash":"725d598b56e9a9225d1a38cdc15520f0ba4e653e","id":"cl0wocu0ulp0y0776xkfkno3c","filename":"divesoft-freedom-user-manual-09-2-2.png","category":"divesoft/","type":"image"},"secondImage":{},"image":{"type":"image"}},"id":"#349","type":"component","lock":false,"position":315},{"name":"Spacer","data":{"spacingLarge":30,"spacingSmall":20,"backgroundColor":"#ffffff"},"id":"#437","type":"component","lock":false,"position":316},{"name":"Divider","data":{"color":"darkGray"},"id":"#297","type":"component","lock":false,"position":317},{"name":"TextBlock","data":{"text":"### <span id=\"Section-10\">**Section 10: Hardware**\n","textLarge":false,"imageOnRight":true,"image":{"recommendedSizes":{"width":"420","height":"280"}},"imageMobile":{"recommendedSizes":{"width":"750","height":"500"}}},"id":"#190","type":"component","lock":false,"position":318},{"name":"Divider","data":{"color":"darkGray"},"id":"#314","type":"component","lock":false,"position":319},{"name":"TextBlock","data":{"text":"### **10.1 NabÃjenÃ**\n\nK nabÃjenà poÄÃtaÄe Freedom použijte pÅiložený nabÃjecà kabel USB s konektorem Freedom. Nejprve pÅipojte kabel k poÄÃtaÄi Freedom a následnÄ kabel pÅipojte k vhodnému napájecÃmu adaptéru (5V, 1A). UjistÄte se, že adaptér je schválen a certifikován pro oblast, kde budete poÄÃtaÄ Freedom nabÃjet, a že je vhodný pro použità s mÃstnà elektrickou sÃtÃ.\nKonektor zaÅÃzenà Freedom se nacházà mezi tlaÄÃtky. Pokud je konektor chránÄn vÃkem, pak\npÅed pÅipojenÃm kabelu odÅ¡roubujte vÃko konektoru.\nPoÄÃtaÄ může, ale nemusà být bÄhem nabÃjenà zapnutý. Pokud je poÄÃtaÄ zapnutý, zobrazà se ikona\nv pravém hornÃm rohu na povrchové obrazovce ukazuje stav nabÃjenÃ.","textLarge":false,"imageOnRight":true,"image":{"recommendedSizes":{"width":"420","height":"280"}},"imageMobile":{"recommendedSizes":{"width":"750","height":"500"}}},"id":"#315","type":"component","lock":false,"position":320},{"name":"TextBlock","data":{"text":"**UPOZORNÄNÃ: Je naprosto nezbytné dodržet postup pÅipojenà kabelu. NabÃjecÃ/datový kabel musà být nejprve zapojen do zaÅÃzenà Freedom a poté do adaptéru a zásuvky.\nNedodrženà tohoto postupu může způsobit nevratné poÅ¡kozenà zaÅÃzenÃ. **","textLarge":false,"imageOnRight":true,"image":{"recommendedSizes":{"width":"420","height":"280"}},"imageMobile":{"recommendedSizes":{"width":"750","height":"500"}}},"id":"#433","type":"component","lock":false,"position":321},{"name":"TextBlock","data":{"text":"It takes about 5 hours to charge from near empty state to fully charged.\nMaximum charging current is less than 500 mA, so there is no difference between charging using the\ncharger or charging from an ordinary computer USB port.\nCharge the battery at least once every six months.","textLarge":false,"imageOnRight":true,"image":{"recommendedSizes":{"width":"420","height":"280"}},"imageMobile":{"recommendedSizes":{"width":"750","height":"500"}}},"id":"#196","type":"component","lock":false,"position":322},{"name":"TextBlock","data":{"text":"### **10.1.1 Napájenà v hyperbarickém prostÅedÃ** \nDivesoft Freedom nelze napájet externÄ a dobÃjet bÄhem ponoru (napÅ. v hyperbarické komoÅe, v potápÄÄském zvonu nebo pÅipevnÄn na ROV) bez speciálnÃho nastavenÃ, které je k dispozici pouze na vyžádánÃ. PÅed takovým použitÃm musà být pÅÃstroj individuálnÄ otestován.","textLarge":false,"imageOnRight":true,"image":{"recommendedSizes":{"width":"420","height":"280"}},"imageMobile":{"recommendedSizes":{"width":"750","height":"500"}}},"id":"#284","type":"component","lock":false,"position":323},{"name":"TextBlock","data":{"text":"### **10.2 Uchycenà na zápÄstÃ**\n\nPokud dáváte pÅednost ÅemÃnku, provleÄte jej pod tyÄkami. K utaženà použijte suchý zip na ÅemÃnku.\nPokud dáváte pÅednost bungee, pak pomocà šroubováku Torx (velikost T 20) odstraÅte Å¡rouby držÃcà hrazdiÄky. NepoužÃvejte žádný jiný nástroj, hlavy Å¡roubů se snadno poÅ¡kodÃ.\nPokud chcete použÃt silikonovou ochranné pouzdro, nainstalujte jej pÅed instalacà bungee. Nenà možné\nnainstalovat pouzdro na poÄÃtaÄ s již nainstalovaným bungee.\nProtáhnÄte bungee otvory se závitem a zajistÄte jej uzlem. UvnitÅ otvorů je speciálnà závit, který bungee nepoÅ¡kodÃ.\nPomocà malého plamene roztavte oplet z bungee a vytvoÅte na jeho konci Å¡piÄku pro snadnÄjÅ¡Ã průchod.\nPopruh i bungee jsou souÄástà balenÃ.\nV každém pÅÃpadÄ musà zůstat otvor na zadnà stranÄ poÄÃtaÄe volnÄ pÅÃstupný. PÅi montáži poÄÃtaÄe pÅÃmo na holou kůži se vyhnÄte uzavÅenà otvoru. Nacházà se zde totiž snÃmaÄ tlaku.","textLarge":false,"imageOnRight":true,"image":{"recommendedSizes":{"width":"420","height":"280"}},"imageMobile":{"recommendedSizes":{"width":"750","height":"500"}}},"id":"#285","type":"component","lock":false,"position":324},{"name":"TextBlock","data":{"text":"### **10.3 Kontrolnà prvky**\n\nRozliÅ¡ujà se následujÃcà vstupy a jejich kombinace: \n- Stisk hornÃho tlaÄÃtka \n- Stisk spodnÃho tlaÄÃtka \n- Stisk obou kláves \n- Dlouhé stisknutà hornÃho tlaÄÃtka \n- Dlouhé stisknutà spodnÃho tlaÄÃtka \n- Dlouhé stisknutà obou tlaÄÃtek \n- Kódované stisknutà tlaÄÃtka (stisknÄte\nobÄ tlaÄÃtka, pak jedno uvolnÄte\na stisknÄte jej znovu, pak\nuvolnÄte obÄ klávesy) \n- NaklonÄnà smÄrem od sebe \n- NaklonÄnà smÄrem k sobÄ \n- NaklonÄnà doleva \n- NaklonÄnà doprava \n- Ťuknutà na sklo displeje \n- PosvÃcenà na displej ","textLarge":false,"imageOnRight":true,"image":{"recommendedSizes":{"width":"420","height":"280"}},"imageMobile":{"recommendedSizes":{"width":"750","height":"500"}}},"id":"#286","type":"component","lock":false,"position":325},{"name":"Image","data":{"firstImage":{"mimetype":"image/png","size":179299,"hash":"cecabe7686f85d00fba0814a71a72d624f2e56ee","id":"cl0woe1sxlp1507761e0pkwp3","filename":"divesoft-freedom-user-manual-10-3-0.png","category":"divesoft/","type":"image"},"secondImage":{},"image":{"type":"image"}},"id":"#197","type":"component","lock":false,"position":326},{"name":"Spacer","data":{"spacingLarge":30,"spacingSmall":20,"backgroundColor":"#ffffff"},"id":"#419","type":"component","lock":false,"position":327}
2,{"name":"TextBlock","data":{"text":"âDlouhý stiskâ znamená stisknutà tlaÄÃtka na dobu delÅ¡Ã než 2,5 sekundy. Operace stisknutà klávesy je ukonÄena pÅi\nokamžiku uvolnÄnà klávesy nebo v pÅÃpadÄ stisknutà obou kláves v okamžiku uvolnÄnà poslednà klávesy.\nHornÃ/dolnà klávesy a smÄry naklápÄnà jsou urÄeny orientacà displeje v závislosti na\nzda je nastaven pro levou nebo pravou ruku.\nNaklápÄnà lze v konfiguraci zmÄnit tak, aby bylo možné klepnout na tÄlo poÄÃtaÄe z kterékoli ze ÄtyÅ stran.\nPoznámka: Pokud nenà platná odezva na naklápÄnà nebo klepánÃ, proveÄte horizontálnà kalibraci (viz Äást 4.8).","textLarge":false,"imageOnRight":true,"image":{"recommendedSizes":{"width":"420","height":"280"}},"imageMobile":{"recommendedSizes":{"width":"750","height":"500"}}},"id":"#198","type":"component","lock":false,"position":328},{"name":"TextBlock","data":{"text":"### **10.4 Fyzické rozmÄry**","textLarge":false,"imageOnRight":true,"image":{"recommendedSizes":{"width":"420","height":"280"}},"imageMobile":{"recommendedSizes":{"width":"750","height":"500"}}},"id":"#204","type":"component","lock":false,"position":329},{"name":"Image","data":{"firstImage":{"mimetype":"image/jpeg","size":43464,"hash":"d66f469bd51a878643596845475651ef0a19fa54","id":"cl0woev6xlp1c077662izhxlp","filename":"divesoft-freedom-user-manual-10-4-0.jpg","category":"divesoft/","type":"image"},"secondImage":{},"image":{"type":"image"}},"id":"#202","type":"component","lock":false,"position":330},{"name":"Spacer","data":{"spacingLarge":30,"spacingSmall":20,"backgroundColor":"#ffffff"},"id":"#418","type":"component","lock":false,"position":331},{"name":"TextBlock","data":{"text":"### **10.5 Kabel O<sub>2</sub> sensorů** \nKabel vybavený konektory Molex NENà souÄástà balenÃ.\ndistribuÄnÃho balÃÄku Divesoft Freedom\na nynà jej ani nelze objednat samostatnÄ u prodejce tÅetà strany.\nTechnické provedenà pÅÃpojek na konkrétnÃm typu\nrebreatheru nenà pÅedmÄtem této uživatelské pÅÃruÄky.","textLarge":false,"imageOnRight":true,"image":{"recommendedSizes":{"width":"420","height":"280"}},"imageMobile":{"recommendedSizes":{"width":"750","height":"500"}}},"id":"#206","type":"component","lock":false,"position":332},{"name":"Image","data":{"firstImage":{"mimetype":"image/jpeg","size":54835,"hash":"5c7c754632d5277ca8b098d94e0e6848b5acbf93","id":"cl0wlu8cxlohw0776d45v81mp","filename":"divesoft-freedom-user-manual-03-4-a.jpg","category":"divesoft/","type":"image"},"secondImage":{}},"id":"#203","type":"component","lock":false,"position":333},{"name":"TextBlock","data":{"text":"Recommendation: if you are connecting an O2 sensor cable, it is advisable to plug it into the Freedom computer first and then into the oxygen sensors, although this is not always possible.","textLarge":false,"imageOnRight":true,"image":{"recommendedSizes":{"width":"420","height":"280"}},"imageMobile":{"recommendedSizes":{"width":"750","height":"500"}}},"id":"#435","type":"component","lock":false,"position":334},{"name":"Spacer","data":{"spacingLarge":30,"spacingSmall":20,"backgroundColor":"#ffffff"},"id":"#420","type":"component","lock":false,"position":335},{"name":"TextBlock","data":{"text":"### **10.6 Specifikace prostÅedÃ**\n\n**DoporuÄené provoznà podmÃnky** \nDoporuÄený rozsah provoznÃch teplot: 0 °C až 40 °C (32 °F až 104 °F)\n\n**Maximálnà provoznà podmÃnky** \nPÅÃpustný rozsah krátkodobých provoznÃch teplot: -10 °C až 45 °C (14 °F až 113 °F)\nZohlednÄte snÞenou kapacitu baterie pÅi nÃzkých teplotách.\n\n**Dlouhodobé skladovacà podmÃnky** \nRozsah skladovacÃch teplot: 10 °C až 35 °C (50°F až 95°F)\nNevystavujte pÅÃmému sluneÄnÃmu záÅenÃ\n\nTranslated with www.DeepL.com/Translator (free version)","textLarge":false,"imageOnRight":true,"image":{"recommendedSizes":{"width":"420","height":"280"}},"imageMobile":{"recommendedSizes":{"width":"750","height":"500"}}},"id":"#207","type":"component","lock":false,"position":336},{"name":"TextBlock","data":{"text":"### **10.7 Shoda**\n### **10.7.1 OznaÄenà CE** \nSpoleÄnost Divesoft s.r.o. tÃmto prohlaÅ¡uje, že zaÅÃzenà Divesoft Freedom je ve shodÄ se základnÃmi požadavky.\na dalÅ¡Ãmi pÅÃsluÅ¡nými ustanovenÃmi smÄrnice 1999/5/ES.\n","textLarge":false,"imageOnRight":true,"image":{"recommendedSizes":{"width":"420","height":"280"}},"imageMobile":{"recommendedSizes":{"width":"750","height":"500"}}},"id":"#287","type":"component","lock":false,"position":337},{"name":"TextBlock","data":{"text":"### **10.7.2 CS 13319** \nNezávislé posouzenà shody bylo provedeno podle harmodizované evropské normy pro hloubkomÄry.\nEN 13319:2000.","textLarge":false,"imageOnRight":true,"image":{"recommendedSizes":{"width":"420","height":"280"}},"imageMobile":{"recommendedSizes":{"width":"750","height":"500"}}},"id":"#288","type":"component","lock":false,"position":338},{"name":"TextBlock","data":{"text":"### **10.7.3 Shoda s FCC** \nToto zaÅÃzenà splÅuje požadavky Äásti 15 pravidel FCC. Provoz podléhá následujÃcÃm dvÄma podmÃnkám:\n(1) toto zaÅÃzenà nesmà způsobovat Å¡kodlivé ruÅ¡enà a (2) toto zaÅÃzenà musà akceptovat jakékoli ruÅ¡enÃ.\nvÄetnÄ ruÅ¡enÃ, které může způsobit nežádoucà provoz.","textLarge":false,"imageOnRight":true,"image":{"recommendedSizes":{"width":"420","height":"280"}},"imageMobile":{"recommendedSizes":{"width":"750","height":"500"}}},"id":"#289","type":"component","lock":false,"position":339},{"name":"TextBlock","data":{"text":"### **10.7.4 Oznámenà o shodÄ s pÅedpisy Industry Canada (IC)**\nTento pÅÃstroj je v souladu s normou (normami) RSS, na kterou se nevztahuje licence Industry Canada. Provoz podléhá\nnásledujÃcÃm dvÄma podmÃnkám: (1) toto zaÅÃzenà nesmà způsobovat ruÅ¡enà a (2) toto zaÅÃzenà musà akceptovat veÅ¡keré ruÅ¡ivé vlivy.\nruÅ¡enÃ, vÄetnÄ ruÅ¡enÃ, které může způsobit nežádoucà provoz zaÅÃzenÃ.\nTento digitálnà pÅÃstroj tÅÃdy B je v souladu s kanadskou normou ICES-003.","textLarge":false,"imageOnRight":true,"image":{"recommendedSizes":{"width":"420","height":"280"}},"imageMobile":{"recommendedSizes":{"width":"750","height":"500"}}},"id":"#290","type":"component","lock":false,"position":340},{"name":"TextBlock","data":{"text":"### **10.8 Likvidace odpadnÃho zaÅÃzenÃ**\n\n**Uživatelé v soukromých domácnostech v Evropské unii**\nTento symbol na výrobku a v průvodnà dokumentaci znamená\nže použité elektrické a elektronické výrobky by se nemÄly mÃchat\ns bÄžným domovnÃm odpadem. Pro správné zpracovánÃ, využità a\nrecyklaci odevzdávejte tyto výrobky na urÄených sbÄrných mÃstech\nkde budou pÅijaty zdarma. PÅÃpadnÄ v nÄkterých\nzemÃch můžete výrobky odevzdat v mÃstnÃm obchodÄ.\nprodejce po zakoupenà ekvivalentnÃho nového výrobku.\nSprávná likvidace tohoto výrobku pomůže uÅ¡etÅit cenné zdroje.\na zabránit pÅÃpadným negativnÃm dopadům na lidské zdravà a životnà prostÅedÃ.\nživotnÃmu prostÅedÃ, které by jinak mohly vzniknout v důsledku nevhodného nakládánà s odpady.\nnakládánà s odpadem.","textLarge":false,"imageOnRight":true,"image":{"recommendedSizes":{"width":"420","height":"280"}},"imageMobile":{"recommendedSizes":{"width":"750","height":"500"}}},"id":"#291","type":"component","lock":false,"position":341},{"name":"Image","data":{"firstImage":{"mimetype":"image/jpeg","size":7161,"hash":"42b1a6590e85f253df00785e1f92621d698696d8","id":"cl0wohasrlp1k0776lfm12lj3","filename":"divesoft-freedom-user-manual-10-8-0.jpg","category":"divesoft/","type":"image"},"secondImage":{},"image":{"type":"image"}},"id":"#200","type":"component","lock":false,"position":342},{"name":"TextBlock","data":{"text":"**Pro podnikové uživatele v Evropské unii** \nPokud si pÅejete vyÅadit elektrické a elektronické zaÅÃzenÃ, obraÅ¥te se na svého prodejce nebo dodavatele, který vám poskytne dalÅ¡Ã informace.\ninformace.\n\n**Informace o likvidaci v jiných zemÃch mimo Evropskou unii** \nTento symbol platà pouze v Evropské unii. Pokud si pÅejete tento výrobek zlikvidovat, obraÅ¥te se prosÃm na mÃstnÃ\núÅady nebo prodejce a zeptejte se na správný způsob likvi
2dace.","textLarge":false,"imageOnRight":true,"image":{"recommendedSizes":{"width":"420","height":"280"}},"imageMobile":{"recommendedSizes":{"width":"750","height":"500"}}},"id":"#112","type":"component","lock":false,"position":343},{"name":"Divider","data":{"color":"darkGray"},"id":"#439","type":"component","lock":false,"position":344},{"name":"TextBlock","data":{"text":"** Bluetooth®** \nSlovnà znaÄka a loga Bluetooth® jsou registrované ochranné známky vlastnÄné spoleÄnostà Bluetooth SIG, Inc. a jakékoli použità tÄchto znaÄek spoleÄnostà Divesoft s.r.o. je podmÃnÄno licencÃ. Ostatnà ochranné známky a obchodnà názvy patÅà pÅÃsluÅ¡ným vlastnÃkům.\n","textLarge":false,"imageOnRight":true,"image":{"recommendedSizes":{"width":"420","height":"280"}},"imageMobile":{"recommendedSizes":{"width":"750","height":"500"}}},"id":"#440","type":"component","lock":false,"position":345},{"name":"Footer","data":{"copyrights":"Copyright © 2019 Divesoft LLC All rights reserved.","facebookUrl":{"urlNewWindow":true,"url":"https://www.facebook.com/divesoft/"},"youtubeUrl":{"url":"https://www.youtube.com/channel/UCHI2-kHmfoUlAdhQXPKl8lA/featured","urlNewWindow":true},"instagramUrl":{"url":"https://www.instagram.com/divesoft/","urlNewWindow":true},"contacts":"**Divesoft s.r.o.** \nHálkova 2495 \n413 01 Roudnice nad Labem \nCzech Republic \nTel.: +420 416 857 057 \nE-mail: [email protected]","twitterUrl":{"url":"https://twitter.com/divesoft","urlNewWindow":true}},"id":"#1","type":"component","lock":false,"position":346},{"name":"Spacer","data":{"spacingLarge":30,"spacingSmall":20,"backgroundColor":"#ffffff"},"id":"#410","type":"component","lock":false,"position":347},{"name":"Spacer","data":{"spacingLarge":30,"spacingSmall":20,"backgroundColor":"#ffffff"},"id":"#417","type":"component","lock":false,"position":348},{"name":"Image","data":{"firstImage":{},"secondImage":{}},"id":"#438","type":"component","lock":false,"position":349}],"id":"root","idBuffer":"#441","lastCommit":"b3653423-47db-4188-acda-a7dd02ffc679"}},"annotations":[],"language":{"type":"id","generated":false,"id":"Language:cjv3kwvoj000u083611381c6o","typename":"Language"},"__typename":"PageTranslation"},"Page:clzplug0f34lh0735jo6y64vw":{"id":"clzplug0f34lh0735jo6y64vw","type":{"type":"id","generated":false,"id":"PageType:cjv3l213x004f08366hjufttp","typename":"PageType"},"tags":[{"type":"id","generated":false,"id":"Tag:cjv3szrcv01bz0836yo8myb0r","typename":"Tag"},{"type":"id","generated":false,"id":"Tag:cm5ww0t651b710803pcl02cn4","typename":"Tag"}],"translations({\"where\":{\"language\":{\"id\":\"cjv3kwvoj000u083611381c6o\"}}})":[{"type":"id","generated":false,"id":"PageTranslation:clzplug0s34lo0735yxwy5jxb","typename":"PageTranslation"}],"__typename":"Page"},"PageTranslation:clzplug0s34lo0735yxwy5jxb":{"id":"clzplug0s34lo0735yxwy5jxb","name":"Cold water diving","createdAt":"2024-08-11T13:32:54.555Z","content":{"type":"json","json":{"content":[{"name":"Header","data":{"products":[{"title":"Accessories","description":"Backplates, Consumables. Tanks.","img":{"recommendedSizes":{"width":"235","height":"235"}},"url":""},{"title":"Accessories sets","description":"Protection, maintenance, cleaning.","img":{"recommendedSizes":{"width":"235","height":"235"}},"url":""},{"title":"Spare parts","description":"Spare parts and components.","img":{"recommendedSizes":{"width":"235","height":"235"}},"url":""},{"title":"Spare parts kits","description":"Completly Liberty spare parts kits.","img":{"recommendedSizes":{"width":"235","height":"235"}},"url":""}]},"id":"#0","type":"component","lock":false,"position":0},{"name":"BlogArticle","data":{"title":"Cold Water Diving","perex":"When beginning an article on cold water you first need to define at what point diving is considered âcold waterâ. In regards to ice diving this is pretty obvious but what about that range from frozen to warm? ","content":"Cover photo: Petri Laaksonen - Montala mine, Finland\n\nMany of the training agencies and organisations define it as less than 15°C but many would argue that is still pretty temperate and that it should be lower before being considered âcoldâ. I guess it depends on your opinion and what you are used to. One warm water diving friend that came to Sweden for an early season trip, when finding out that the water temp was 3°C asked âWhat is the other missing number?â. Needless to say he was a bit wide eyed when informed there was a 0 but it was in front of the three.\n\n\nPhoto: Tiffany Norberg - Kitting up on the Baltic Sea\n\nFor the purposes of this article, and the fact that I predominately dive in less than 10°C, we will call cold 6°C and less, as the core topic here is handling the conditions not only underwater, but also on land, so letâs look at why this article has even been written and what is challenging in regards to these conditions.\n\n\nPhoto: Tiffany Norberg - getting ready for winter diving in Swede
2n\n\nTo begin letâs consider the fundamental consideration with diving in cold water, staying warm, both on the surface and underwater. Drysuits are basically a must in modern diving for this environment as are suitable undergarments to stay warm. These are often very bulky, though comfortable, and require more weight depending on the purpose. The big key consideration is the wicking ability of anything worn under a drysuit. It must remove moisture from the body away from the skin and as such the primary rule is no cotton or material that attracts water, especially against the skin. In addition to this, you will sweat in the suit while moving around on land so to make life nicer, a good base layer that wicks moisture fast but can also be cleaned easily makes your cold water experience more enjoyable. I would recommend a merino wool base layer, then a suitable thicker layer on top and maybe a middle layer if diving in even lower temps or on longer dives. While warm you also need to consider the range of movement as you still need to reach valves, swim, and have a range of freedom, so the actual drysuit may be bigger in size than a warm water suit. I have a multiple suits for different temperatures and diving ranges which have room for this base layer. \nA big component of diving in these conditions is staying warm prior to diving. Wear suitable clothing, gloves and a hat that keep your extremities warm before even getting changed to go in the water, as they will not warm up after you have. \n\n\nPhoto: Marcin Wojturski - Ready for a 6 hourmine exploration dive\n\nWhat about heating? It is great in these conditions, but again comes with its own challenges and issues. The first consideration is getting a system where the battery is external to the suit. Pressure increases reaction rates and if you get a rapid increase or burn you cannot turn off an internal system. The same applies to chemical heating pads, do not use them diving or you will get burned. With heating you need to consider the physiological effects as well related to decompression and complications caused if for example your battery fails on ascent so you get colder during that phase. Often many divers will use their heating later on in a dive when getting cold, or during ascents to offset this risk, but not always; sometimes itâs just nice to stay warm on shallower dives.\n\n\nPhoto: Edd Stockdale - Getting gear ready for a dive\n\nItâs not only you that needs to stay warm as well, so does your diving gear. Due to the very nature of diving, equipment is not really designed for sub 0°C temperatures and freezing. If diving open circuit you have the risk of free flows when opening regulators in cold conditions on the surface and of drawing to much gas underwater, even in 2-6°C. As such pre dive checks and protocols need to be slightly different while still testing everything. Ensuring your gear spends the minimum amount of time standing in low temps, testing functionality in the warmth before heading to water, and no purging or breathing of regulators until in-water. When itâs -20°C surface temp we donât even open valves until they are submerged.\nUnderwater itself you need to reduce high flow, breathe slower and use repeated small presses of BCD and drysuit inflation buttons instead of long fills.\n\n\nPhoto: Edd Stockdale - Diver in the Arctic ready to jump into the ice hole\n\nRebreathers in the cold, while having huge benef
2it with warm gas returning for inhalation helping maintain body heat, also have careful considerations, most critical of which is the CO2 absorbent. Chemical reactions slow down when cold and this applies to the rate at which scrubbers work, so reduced usage of time compared to warm conditions is important and needs to be considered when planning dives. In addition all the electronics, both on the CCR, and also other items get effected as well. Batteries run shorter times, pressure sensors can get damaged by water on them freezing (common issue with dive computers and handsets that have sensors on them) and plastics/ O-rings become more brittle and can crack. Consideration of the model of CCR for the conditions they are designed for is important as well, both for resilience to the conditions and operational design, for example use with heavy dry gloves. \nHaving seen a neck seal of a drysuit freeze and crack you can imagine what can happen to other items.\n\n\n\nSo with all this trouble and cold, why go diving in it at all? Cold water environments are often amazing regardless of whether you are a nature diver, wreck enthusiast or an overhead junkie. It is a different fascinating world which, while challenging, can offer an entire new aspect to your diving. Granted you will have to get some specific equipment, learn how to use everything with dry gloves and change some of your protocols, but you will have the opportunity to see places less visited, greater preserved wrecks or mines, and amazing wildlife. \nHuge development in drysuits, active heating, CCR technology and batteries mean what was once a more obscure area of diving is now becoming accessible to even the most warm water diver. \n\n\nPhoto: Alf Norkko - Survey of seagrass beds in the Gulf of Finland\n\nHopefully you get to try it soon.\n\nAuthor: [Edd Stockdale](https://www.divesoft.com/en/ambassadors/eddstockdale)","showTags":false,"showDate":true,"image":{"mimetype":"image/jpeg","size":2837951,"hash":"95442fc28ed32d2e63459df271a5efb3779640ae","id":"clz859d5www1u077612z7likn","filename":"edd-stockdale-cold-water-diving-01.jpg","category":"divesoft/","type":"image","alt":""}},"id":"#2","type":"component","lock":false,"position":1},{"name":"ProductShowcase","data":{"componentTemplateId":"cm9h4wr6ugjv10803yqs3tp71"},"id":"#21","type":"component","lock":false,"position":2},{"name":"Footer","data":{"copyrights":"Copyright © 2019 Divesoft LLC All rights reserved.","facebookUrl":{"urlNewWindow":true,"url":"https://www.facebook.com/divesoft/"},"youtubeUrl":{"url":"https://www.youtube.com/@divesoft_tv","urlNewWindow":true},"instagramUrl":{"url":"https://www.instagram.com/divesoft/","urlNewWindow":true},"contacts":"**Divesoft s.r.o.** \nHálkova 2495 \n413 01 Roudnice nad Labem \nCzech Republic \nTel.: +420 416 857 057 \nE-mail: [email protected]","twitterUrl":{"url":"","urlNewWindow":true,"pageId":"cjv3l26tp004p0836i54n4u7a"}},"id":"#1","type":"component","lock":false,"position":3}],"id":"root","idBuffer":"#22","lastCommit":"e285756c-cfea-4f34-a70d-d64b15d8e3cf"}},"annotations":[],"language":{"type":"id","generated":false,"id":"Language:cjv3kwvoj000u083611381c6o","typename":"Language"},"__typename":"PageTranslation"},"Page:cm0az5m5s0t9b0818fxjonef0":{"id":"cm0az5m5s0t9b0818fxjonef0","type":{"type":"id","generated":false,"id":"PageType:cjv3l213x004f08366hjufttp","typename":"PageType"},"tags":[],"translations({\"where\":{\"language\":{\"id\":\"cjv3kwvoj000u083611381c6o\"}}})":[{"type":"id","generated":false,"id":"PageTranslation:cm0az5m690t9i0818ann3i2av","typename":"PageTranslation"}],"__typename":"Page"},"PageTranslation:cm0az5m690t9i0818ann3i2av":{"id":"cm0az5m690t9i0818ann3i2av","name":"CCR Liberty Manual CZ","createdAt":"2024-08-26T12:28:40.448Z","content":{"type":"json","json":{"content":[{"name":"Header","data":{"products":[{"title":"Accessories","description":"Backplates, Consumables. Tanks.","img":{"recommendedSizes":{"width":"235","height":"235"}},"url":""},{"title":"Accessories sets","description":"Protection, maintenance, cleaning.","img":{"recommendedSizes":{"width":"235","height":"235"}},"url":""},{"title":"Spare parts","description":"Spare parts and components.","img":{"recommendedSizes":{"width":"235","height":"235"}},"url":""}
2,{"title":"Spare parts kits","description":"Completly Liberty spare parts kits.","img":{"recommendedSizes":{"width":"235","height":"235"}},"url":""}]},"id":"#0","type":"component","lock":false,"position":0},{"name":"SectionDivider","data":{"title":"User manual","skipToC":false},"id":"#470","type":"component","lock":false,"position":1},{"name":"ProductShowcase","data":{"backgroundColor":"#ffffff","isTextDark":true,"isImageRight":true,"image":{"mimetype":"image/png","size":193451,"hash":"2f12a80d683982b4b73c6c7e7ac6fe3092327056","id":"cl2emhqif01n10776x12hvep3","filename":"divesoft-ccr-liberty-fmcl-00-1200x800w.png","category":"divesoft/","type":"image"},"imageMobile":{},"title":"User manual","subtitle":"CCR Liberty","description":"CCR Liberty\nManual version: 2.17.2/40 \nRevision date 22.04.2024 \nCU HW rev 1.5 \nHS HW rev 3.0 \nFW 2.17\n","hideDescriptionOnMobile":false,"areButtons":false,"firstTitle":"Learn more >","firstUrl":"","secondTitle":"Configurator >","secondUrl":""},"id":"#2","type":"component","lock":false,"position":2},{"name":"Divider","data":{"color":"darkGray"},"id":"#6","type":"component","lock":false,"position":3},{"name":"TextBlock","data":{"text":"### **Obsah**\n\n**Odkazy na normy **\n\n[**Ãvod**](#Ãvod)\n\nPoužità této pÅÃruÄky OdpovÄdnost uživatele CCR Liberty Dokumentace Podpora uživatele\n\n[**Technické údaje**](#Technical-data)\n\nLimity hloubky Limity teploty vody Limity CO<sub>2</sub> limit doby trvánà praÄky Hmotnost\n","textLarge":false,"imageOnRight":true,"image":{"recommendedSizes":{"width":"420","height":"280"}},"imageMobile":{"recommendedSizes":{"width":"750","height":"500"}}},"id":"#3","type":"component","lock":false,"position":4},{"name":"TextBlock","data":{"text":"**Odkazy na normy**\n\nCCR Liberty je osobnà ochranný prostÅedek, který je legislativnÄ upraven NAÅÃZENÃM EVROPSKÃHO PARLAMENTU A RADY (EU) 2016/425 ze dne 9. bÅezna 2016 o osobnÃch ochranných prostÅedcÃch. \nTento osobnà ochranný prostÅedek byl navržen a testován podle harmonizované normy EN 14143:2014 Dýchacà pÅÃstroje - Samostatné dýchacà potápÄÄské pÅÃstroje. EN 12021:2014 Dýchacà pÅÃstroje - StlaÄené plyny pro dýchacà pÅÃstroje. Tato norma byla pÅi testovánà zohlednÄna. \n**Odkazy na normy tÅetÃch stran** NedÃlnou souÄástà tohoto osobnÃho ochranného prostÅedku jsou výrobky tÅetÃch stran, které byly testovány a certifikovány jejich výrobci. PÅitom jsou poskytovány certifikáty odkazujÃcà na následujÃcà harmonizované normy: EN 144-1:2018 EN 144-3:2003 ISO 12209-2:2013 EN 250:2014 EN ISO 9809-1:2019 EN ISO 9809-2:2019 SmÄrnice 2014/68/EU - tlaková zaÅÃzenÃ.\n\n**RIZIKOVà KATEGORIE OOPP** Podle pÅÃlohy I naÅÃzenà (EU) 2016/425, která definuje rizikové kategorie osobnÃch ochranných prostÅedků, patÅà CCR Liberty a Liberty Sidemount do kategorie III. Kategorie III zahrnuje výhradnÄ rizika, která mohou způsobit velmi vážné následky, jako je smrt nebo nevratné poÅ¡kozenà zdravÃ, souvisejÃcà s následujÃcÃmi faktory: \n\n(b) atmosféry s nedostatkem kyslÃku; i) utonutÃ;\n\nTento osobnà ochranný prostÅedek je urÄen pro použità pod vodou. Rizika, pÅed kterými má chránit, jsou pobyt v prostÅedà s nedostatkem kyslÃku (pod vodou) a utonutÃ. Osobnà ochranný prostÅedek chránà pÅed tÄmito riziky pouze pÅi správném použitÃ. Tento výrobek smà být použÃván pouze tehdy, pokud je osoba, která jej použÃvá, důkladnÄ seznámena s tÃmto návodem, absolvovala Å¡kolenà v akreditované Å¡kolicà agentuÅe speciálnÄ urÄené pro potápÄnà s pÅÃstrojem Liberty CCR nebo Liberty Sidemount. Uživatel pÅÃstroje musà být certifikován pÅÃsluÅ¡nou agenturou pro použÃvánà pÅÃstroje Liberty CCR nebo Liberty Sidemount.","textLarge":false,"imageOnRight":true,"image":{"recommendedSizes":{"width":"420","height":"280"}},"imageMobile":{"recommendedSizes":{"width":"750","height":"500"}}},"id":"#471","type":"component","lock":false,"position":5},{"name":"SectionDivider","data":{"title":""},"id":"#469","type":"component","lock":false,"position":6},{"name":"Divider","data":{"color":"darkGray"},"id":"#7","type":"component","lock":false,"position":7},{"name":"SectionDivider","data":{"title":"Introduction"},"id":"#467","type":"component","lock":false,"position":8},{"name":"TextBlock","data":{"text":"### <span id=\"Ãvod\">**Ãvod**</span>\n\n**Použità této pÅÃruÄky**\n\nTato uživatelská pÅÃruÄka je souÄástà dokumentace CCR Liberty.\n\nZaÅÃzenà CCR Liberty je urÄeno k použÃvánà výhradnÄ vyÅ¡kolenou osobou, která je schopna plnÄ porozumÄt pokynům obsaženým v této pÅÃruÄce nebo se s nÃm zaÅ¡koluje v
2kurzu akreditovaném výrobcem. PÅedpoklady pro absolvovánà školicÃho kurzu stanovà spolupracujÃcà agentury.\n\n**OdpovÄdnost uživatele CCR Liberty**\n\nPÅi vývoji zaÅÃzenà CCR Liberty byl kladen velký důraz na spolehlivost. VnitÅnà Äásti jsou od sebe oddÄleny tak, aby se minimalizoval dopad, který může mÃt porucha kterékoli Äásti na základnà funkÄnost rebreatheru. NÄkolik systémů má nÄkolik záloh. Logika systému CCR Liberty spoÄÃvá v tom, že ovládacà prvky nikdy nezakážou zahájenà ponoru, a to ani v pÅÃpadÄ zjiÅ¡tÄnà poruchy. Systém nikdy nezablokuje potápÄÄe; mÃsto toho systém indikuje stav jednotky s ohledem na pÅÃpadné poÅ¡kozenÃ, pokud je toho schopen. PÅi [jeskynnÃm potápÄnÃ](https://www.divesoft.com/en/blog/ccr-liberty-cave-diving-resistance) může nemožnost ponoÅenà znamenat nemožnost návratu z ponoru; proto systém CCR Liberty nebránà ponoÅenÃ.\n\nJe vždy na odpovÄdnosti uživatele, aby se rozhodl, zda pÅejde na záložnà pÅÃstroj, nebo se rozhodne zahájit ponor s ÄásteÄnÄ nefunkÄnÃm rebreatherem.\n\nUživatel pÅÃstroje CCR Liberty musà pÅijmout skuteÄnost, že potápÄnà s sebou nese riziko. Dodržovánà vÅ¡eho, co se uživatel nauÄil pÅi Ätenà technické pÅÃruÄky CCR Liberty a bÄhem svého výcviku na rebreatheru, může toto riziko pouze snÞit. BezpeÄnost potápÄÄe se zvyÅ¡uje pravidelným Å¡kolenÃm, metodickým vzdÄlávánÃm a dodržovánÃm správné potápÄÄské praxe. PotápÄnà s rebreatherem vyžaduje mnohem vÄtÅ¡Ã mÃru disciplÃny a uvÄdomÄlosti ve srovnánà s potápÄnÃm s pÅÃstrojem s otevÅeným okruhem.\n\nPokud toto riziko neakceptujete a nejste vyÅ¡kolenÃ, opatrnà a disciplinovanà potápÄÄi, nepotápÄjte se s pÅÃstrojem CCR Liberty.\n\nVýrobce nenese žádnou odpovÄdnost za použÃvánà pÅÃstroje CCR Liberty, pokud byl pÅÃstroj upraven jakýmkoli způsobem, který nenà uveden v tomto návodu nebo v technických pokynech vydaných výrobcem.\n\n**Dokumentace**\n\n**Verze**\n\nTechnická dokumentace podléhá procesu neustálého vývoje a zdokonalovánÃ. Proto pravidelnÄ sledujte webové stránky na adrese [divesoft.com](https://www.divesoft.com/en), kde najdete aktualizace.\n\nTato pÅÃruÄka obsahuje návod k obsluze pro hardwarovou a softwarovou (firmwarovou) verzi CCR Liberty napsanou na titulnà stranÄ.\n\n**Technické pokyny**\n\nVýrobce může vydat technické pokyny. DůraznÄ se doporuÄuje, aby uživatel pravidelnÄ kontroloval [divesoft.com](https://www.divesoft.com/en), zda nejsou k dispozici nové pokyny. Registrovanà uživatelé budou dostávat upozornÄnà e-mailem.\n\n**Aktualizace dokumentů**\n\nElektronická podoba pÅÃruÄky je vždy k dispozici v kompletnÃ, aktualizované podobÄ. Elektronická a tiÅ¡tÄná podoba pÅÃruÄky nemusà být zcela totožná. V pÅÃpadÄ nepodstatných zmÄn (napÅÃklad oprava drobných pÅeklepů) je aktualizována pouze elektronická verze.\n\n**Podpora uživatelů**\n\nRegistrovanà uživatelé majà nárok na technickou podporu. Rozsah bezplatné podpory může být omezen. OddÄlenà technické podpory spoleÄnosti Divesoft s.r.o. bude poskytovat omezenou podporu potenciálnÃm a neregistrovaným uživatelům. PÅed zadánÃm dotazu se prosÃm seznamte s obecnými zásadami potápÄnà s trimixovým rebreatherem a s technickými dokumenty CCR Liberty, které jsou k dispozici zdarma","textLarge":false,"imageOnRight":true,"image":{"recommendedSizes":{"width":"420","height":"280"}},"imageMobile":{"recommendedSizes":{"width":"750","height":"500"}}},"id":"#4","type":"component","lock":false,"position":9},{"name":"Divider","data":{"color":"darkGray"},"id":"#8","type":"component","lock":false,"position":10},{"name":"SectionDivider","data":{"title":"Technical data"},"id":"#468","type":"component","lock":false,"position":11},{"name":"TextBlock","data":{"text":"### <span id=\"Technical-data\">**Technické údaje**</span>\n\n**Omezenà hloubky**\n\nMaximálnà hloubka, pro kterou CCR Liberty splÅuje požadavky harmonizované normy EN 14143:2013, je 40 m.\n\nHloubka rebreatheru Liberty je omezena na 170 m (557 stop) dÃky použità ekologicky utÄsnÄných regulátorů 1. stupnÄ Apeks DST4. DoporuÄujeme, abyste se pro potápÄnà v hloubce vyÅ¡Å¡Ã než 170 m (557 stop) MUSELI vymÄnit 1. stupnÄ Apeks DST4 za sadu Apeks UST4. To neplatà pro verzi Sidemount, která použÃvá prvnà stupnÄ bez suché komory.\n\n**Åedidlo / maximálnà hloubka**\n\n* Vzduch : 40 m\n\n**Omezenà teploty vody**\n\nZaÅÃzenà CCR Liberty je urÄeno pro použità pÅi teplotách vody nad 4 °C a pod 34 °C podle požadavků normy EN 14143:2013 (Älánek 5.1).\n\nMinimálnà teplota se urÄuje na základÄ zkouÅ¡ek trvánà CO<sub>2</sub> praÄky, které se provádÄjà pÅi teplotÄ 4 °C.\n\n**Meznà doba trvánà praÄky CO<sub>2</sub>**\n\nMaximálnà bezpeÄná doba provozu sorbentu je 168 min a urÄuje se zkouÅ¡kou podle normy EN 14143:2013 (Älánek 6.6.2). BÄhem zkouÅ¡ky bylo do dýchacà smyÄky pÅidáno 1,6 l/min CO<sub>2</sub> pÅi ventilaÄnà rychlosti 40 l/min a výdechové teplotÄ 32 ± 4 °C;
2 jednotka byla ponoÅena do vody o teplotÄ 4 °C do hloubky 40 m s ppCO<sub>2</sub> 5 mBar.\n \nSkuteÄná maximálnà provoznà doba sorbentu se může liÅ¡it v závislosti na sorbentu, teplotÄ, hloubce a fyzické námaze potápÄÄe.\n\nZa normálnÃch podmÃnek se doba provozu sorbentu pohybuje od 4 h v hluboké studené vodÄ s mÃrnou pracà až po 6 h pÅi minimálnÃm pracovnÃm ponoru. Podrobnosti viz oddÃl 3.2.1 Životnost sorbentu.\n\n**AbsorpÄnà materiál CO2** Testy byly provedeny s absorpÄnÃm materiálem SOFNOLIME 797 od spoleÄnosti Molecular Products. CCR Liberty a Liberty Sidemount lze použÃvat pouze s absorpÄnÃm materiálem SOFNOLIME 797 od spoleÄnosti Molecular Products. Jakékoli jiné absopÄnà materiály je zakázáno použÃvat s CCR Liberty a Liberty Sidemount.\n\n\n**Hmotnost**\n\nCelková hmotnost zaÅÃzenà CCR Liberty pÅipraveného k ponoÅenà (vÄetnÄ skruberu) je pÅibližnÄ 37 kg.\n\nPodrobnosti viz Äást 1.15 Hmotnosti jednotlivých dÃlů. \n\n**Servisnà intervaly**\n\nDoporuÄené servisnà intervaly jsou 1 rok, 3 roky a 5 let.\n\nServis jednotky může provádÄt pouze autorizovaný servisnà technik nebo technické stÅedisko.\n\nNeprovádÄnà servisu v pravidelných intervalech může mÃt za následek ztrátu záruky.","textLarge":false,"imageOnRight":true,"image":{"recommendedSizes":{"width":"420","height":"280"}},"imageMobile":{"recommendedSizes":{"width":"750","height":"500"}}},"id":"#5","type":"component","lock":false,"position":12},{"name":"TextBlock","data":{"text":"","textLarge":false,"imageOnRight":true,"image":{"recommendedSizes":{"width":"420","height":"280"}},"imageMobile":{"recommendedSizes":{"width":"750","height":"500"}}},"id":"#436","type":"component","lock":false,"position":13},{"name":"Divider","data":{"color":"darkGray"},"id":"#245","type":"component","lock":false,"position":14},{"name":"DownloadsNew","data":{"backgroundColor":"#ffffff","title":"","subtitle":"","showBreadcrumbs":false,"hideHeader":true,"files":[{"title":"Section 1 - Technical design","isTitleBold":true,"subtitle":"","url":{"url":"/en/manuals/ccr-liberty-manual-cz/ccr-liberty-manual-01-cz","pageId":"cm0azhkkt0tbs0818ccjyu659","urlNewWindow":true},"urlText":"Open","id":"1"},{"title":"Section 2 - Control-unit operation","isTitleBold":true,"subtitle":"","url":{"url":"/en/manuals/ccr-liberty-manual-cz/ccr-liberty-manual-02-cz","pageId":"cm0cctnnd12dy0818yp2e3eli","urlNewWindow":true},"urlText":"Open","id":"2"},{"id":"3","title":"Section 3 - Procedures","url":{"url":"/en/manuals/ccr-liberty-manual-cz/ccr-liberty-manual-03-cz","pageId":"cm0divz1e180h08186q8py4jd","urlNewWindow":true},"urlText":"Open","isTitleBold":true}],"activeTab":"3"},"id":"#466","type":"component","lock":false,"position":15},{"name":"ListOfLinks","data":{"links":[{"title":"> Next page / Section: 1 Technical design","url":{"url":"/en/manuals/ccr-liberty-manual/ccr-liberty-manual-01","pageId":"cl43w74lpl8dk0858to9uhj2u","urlNewWindow":true},"id":"1"}],"activeTab":"1"},"id":"#462","type":"component","lock":false,"position":16},{"name":"Footer","data":{"copyrights":"Copyright © 2019 Divesoft LLC All rights reserved.","facebookUrl":{"urlNewWindow":true,"url":"https://www.facebook.com/divesoft/"},"youtubeUrl":{"url":"https://www.youtube.com/channel/UCHI2-kHmfoUlAdhQXPKl8lA/featured","urlNewWindow":true},"instagramUrl":{"url":"https://www.instagram.com/divesoft/","urlNewWindow":true},"contacts":"**Divesoft s.r.o.** \nHálkova 2495 \n413 01 Roudnice nad Labem \nCzech Republic \nTel.: +420 416 857 057 \nE-mail: [email protected]"},"id":"#1","type":"component","lock":false,"position":17}],"id":"root","idBuffer":"#472","lastCommit":"5009dd15-c008-49cb-9448-ed0a6b115971"}},"annotations":[],"language":{"type":"id","generated":false,"id":"Language:cjv3kwvoj000u083611381c6o","typename":"Language"},"__typename":"PageTranslation"},"Page:cm0azhkkt0tbs0818ccjyu659":{"id":"cm0azhkkt0tbs0818ccjyu659","type":{"type":"id","generated":false,"id":"PageType:cjv3l213x004f08366hjufttp","typename":"PageType"},"tags":[],"translations({\"where\":{\"language\":{\"id\":\"cjv3kwvoj000u083611381c6o\"}}})":[{"type":"id","generated":false,"id":"PageTranslation:cm0azhkld0tbz0818ka5iyekf","typename":"PageTranslation"}],"__typename":"Page"},"PageTranslation:cm0azhkld0tbz0818ka5iyekf":{"id":"cm0azhkld0tbz0818ka5iyekf","name":"CCR Liberty Manual 01 CZ","createdAt":"2024-08-26T12:37:58.272Z","content":{"type":"json","json":{"content":[{"name":"Header","data":{"products":[{"title":"Accessories","description":"Backplates, Consumables. Tanks.","img":{"recommendedSizes":{"width":"235","height":"235"}},"url":""},{"title":"Accessories sets","description":"Protection, maintenance, cleaning.","img":{"recommendedSizes":{"width":"235","height":"235"}},"url":""},{"title":"Spare parts","description":"Spare parts and components.","img":{"recommendedSizes":{"width":"235","height":"235"}},"url":""}
2,{"title":"Spare parts kits","description":"Completly Liberty spare parts kits.","img":{"recommendedSizes":{"width":"235","height":"235"}},"url":""}]},"id":"#0","type":"component","lock":false,"position":0},{"name":"Divider","data":{"color":"darkGray"},"id":"#9","type":"component","lock":false,"position":1},{"name":"SectionDivider","data":{"title":""},"id":"#543","type":"component","lock":false,"position":2},{"name":"TextBlock","data":{"text":"[**Section: 1. Technical design**](#1-.-Technical-design)\n\n[1.1\tBasic schematic](#1-.-1-Basic-schematic)\n\n[1.2\tDive/surface valve](#1-.-2-Dive-/-surface-valve)\n\n[1.2.1\tInhalation valve](#1-.-2-.-1-Inhalation-valve) \n[1.2.2\tExhalation valve](#1-.-2-.-2-Exhalation-valve) \n[1.2.3\tMouthpiece](#1-.-2-.-3-Mouthpiece) \n[1.2.4\tUsage with a full face mask](#1-.-2-.-4-Usage-with-a-full-face-mask) \n\n[1.3\tCorrugated hoses and accessories](#1-.-3-Corrugated-hoses-and-accessories)\n\n[1.3.1\tHoses](#1-.-3-.-1-Hoses) \n[1.3.2\tAttachment to the head](#1-.-3-.-2-Attachment-to-the-head) \n[1.3.3\tConnection to the breathing bags](#1-.-3-.-3-Connection-to-the-breathing-bags) \n[1.3.4\tAttachment of the DSV](#1-.-3-.-4-Attachment-of-the-DSV) \n\n[1.4\tInhalation bag](#1-.-4-Inhalation-bag)\n\n[1.4.1\tAutomatic diluent valve](#1-.-4-.-1-Automatic-diluent-valve) \n[1.4.2\tManual diluent bypass valve](#1-.-4-.-2-Manual-diluent-bypass-valve)\n\n[1.5\tExhalation bag](#1-.-5-Exhalation-bag)\n\n[1.5.1\tManual oxygen bypass valve](#1-.-5-.-1-Manual-oxygen-bypass-valve)\n\n[1.5.2\tOverpressure valve](#1-.-5-.-2-Overpressure-valve) \n\n[1.6\tOxygen cylinder](#1-.-6-Oxygen-tank)\n\n[1.6.1\tCylinder](#1-.-6-.-1-Tank) \n[1.6.2\tValve](#1-.-6-.-2-Valve) \n[1.6.3\tReduction valve](#1-.-6-.-3-Reduction-valve) \n[1.6.4\tPressure reading](#1-.-6-.-4-Pressure-reading)\n\n[1.7\tDiluent cylinder](#1-.-7-Diluent-tank)\n\n[1.7.1\tCylinder](#1-.-7-.-1-Tank) \n[1.7.2\tValve](#1-.-7-.-2-Valve) \n[1.7.3\tReduction valve and pressure reading](#1-.-7-.-3-Reduction-valve-and-pressure-reading) \n[1.7.4\tBackup regulator (optional)](#1-.-7-.-4-Backup-regulator-(optional)) \n\n[1.7.5\tAir integration (2021 Edition only)] \n\n[1.7.6\tTransmitters (2021 Edition only)](#1-.-7-.-6-Transmitters-(2021-Edition-only))\n\n[1.7.7\tProcedure for pairing the transmitter (2021 Edition only)](#1-.-7-.-7-Procedures-for-pairing-the-transmitter-(2021-Edition-only))\n\n[1.8\tCO<sub>2</sub> scrubber](#1-.-8-CO2-scrubber)\n\n[1.9\tHead](#1-.-9-Head)\n\n[1.9.1\tControl units](#1-.-9-.-1-Control-units) \n[1.9.2\tDirect measurement of ppO<sub>2</sub>](#1-.-9-.-2-Direct-measurement-of-ppO2) \n[1.9.3\tMeasurement of He content](#1-.-9-.-3-Measurement-of-He-content) \n[1.9.4\tHelium blind plugs](#1-.-9-.-4-Helium-blind-plugs) \n[1.9.5\tPressure and depth measurement](#1-.-9-.-5-Pressure-and-depth-measurement) \n[1.9.6\tTemperature measurement](#1-.-9-.-6-Temperature-measurement) \n[1.9.7\tSolenoids](#1-.-9-.-7-Solenoids) \n[1.9.8\tPower supply](#1-.-9-.-8-Power-supply) \n\n[1.10\tVisual display units](#1-.-10-Visual-display-units)\n\n[1.10.1\tHandsets](#1-.-10-.-1-Handsets) \n[1.10.2\tHead-up display](#1-.-10-.-2-Head-up-display) \n[1.10.3\tBuddy display](#1-.-10-.-3-Buddy-display) \n\n[1.11\tBackplate and mounting](#1-.-11-Backplate-and-mounting)\n\n[1.12\tHarness](#1-.-12-Harness)\n\n[1.13\tBuoyancy compensator](#1-.-13-Buoyancy-compensator)\n\n[1.14\tBallast](#1-.-14-Ballast)\n\n[1.15\tWeights of individual parts](#1-.-15-Weights-of-individual-parts)\n\n","textLarge":false,"imageOnRight":true,"image":{"recommendedSizes":{"width":"420","height":"280"}},"imageMobile":{"recommendedSizes":{"width":"750","height":"500"}}},"id":"#471","type":"component","lock":false,"position":3},{"name":"Divider","data":{"color":"darkGray"},"id":"#472","type":"component","lock":false,"position":4},{"name":"SectionDivider","data":{"title":"1. Technical design"},"id":"#490","type":"component","lock":false,"position":5},{"name":"TextBlock","data":{"text":"### <span id=\"1-.-Technical-design\">**1. Technical design**</span>\n","textLarge":false,"imageOnRight":true,"image":{"recommendedSizes":{"width":"420","height":"280"}},"imageMobile":{"recommendedSizes":{"width":"750","height":"500"}}},"id":"#28","type":"component","lock":false,"position":6},{"name":"Image","data":{"firstImage":{"mimetype":"image/png","size":573677,"hash":"8576c1a66757f591cab0a740067a16547582721d","id":"cl3snlvcwdcx60776vbyyxl50","filename":"divesoft-ccr-liberty-manual-1-0-01.png","category":"divesoft/","type":"image"},"secondImage":{},"image":{"mimetype":"image/png","size":573677,"hash":"8576c1a66757f591cab0a740067a16547582721d","id":"cl3snlvcwdcx60776vbyyxl50","filename":"divesoft-ccr-liberty-manual-1-0-01.png","category":"divesoft/","type":"image"},"isHorizontal":true},"id":"#10","type":"component","lock":false,"position":7},{"name":"Image","data":{"firstImage":{"mimetype":"image/png","size":498748,"hash":"55322e8a51f1c0350158a3e03584ca83df66aa86","id":"cl3snq9k2dd1m0776xogmvcl8","filename":"divesoft-ccr-liberty-manual-1-0-02.png","category":"divesoft/","type":"image"},"secondImage":{},"image":{"mimetype":"image/png","size":498748,"hash":"55322e8a51f1c0350158a3e03584ca83df66aa86","id":"cl3snq9k2dd1m0776xogmvcl8","filename":"divesoft-ccr-liberty-manual-1-0-02.png","category":"divesoft/","type":"image"},"isHorizontal":true},"id":"#11","type":"component","lock":false,"position":8},{"name":"SectionDivider","data":{"title":"1.1 Basic schematic"},"id":"#491","type":"component","lock":false,"position":9},{"name":"TextBlock","data":{"text":"### <span id=\"1-.-1-Basic-schematic\">**1.1 Basic schematic**</span>\n","textLarge":false,"imageOnRight":true,"image":{"recommendedSizes":{"width":"420","height":"280"}},"imageMobile":{"recommendedSizes":{"width":"750","height":"500"}}},"id":"#14","type":"component","lock":false,"position":10},{"name":"Image","data":{"firstImage":{"mimetype":"image/png","size":131168,"hash":"c79b04853663f3b2a40d1e145915176ec88aa837","id":"cl4fc7apojdns0776sxhjtuaa","filename":"divesoft-ccr-liberty-manual-1-1-01.png","category":"divesoft/","type":"image"},"secondImage":{},"image":{"mimetype":"image/png","size":131168,"hash":"c79b04853663f3b2a40d1e145915176ec88aa837","id":"cl4fc7apojdns0776sxhjtuaa","filename":"divesoft-ccr-liberty-manual-1-1-01.png","category":"divesoft/","type":"image"},"isHorizontal":true},"id":"#12","type":"component","lock":false,"position":11},{"name":"TextBlock","data":{"text":"Princip rebreatheru spoÄÃvá v recyklaci dýchacà smÄsi. Z vydechované smÄsi je odstranÄ
2n oxid uhliÄitý a po doplnÄnà kyslÃkem je opÄt pÅipraven k dalÅ¡Ãmu vdechu. Složenà dýchacà smÄsi se průbÄžnÄ mÄnÃ.","textLarge":false,"imageOnRight":true,"image":{"recommendedSizes":{"width":"420","height":"280"}},"imageMobile":{"recommendedSizes":{"width":"750","height":"500"}}},"id":"#15","type":"component","lock":false,"position":12},{"name":"Divider","data":{"color":"darkGray"},"id":"#13","type":"component","lock":false,"position":13},{"name":"SectionDivider","data":{"title":"1.2 Dive/surface valve"},"id":"#492","type":"component","lock":false,"position":14},{"name":"TextBlock","data":{"text":"### <span id=â1-.-2-Dive-/-surface-valveâ>**1.2 Dive/surface valve**</span>\n\n\nDýchacà smÄs je pÅivádÄna do ventilu pro potápÄnÃ/povrchový ventil (DSV) vrapovou hadicà zleva. PÅi nádechu procházà smÄs pÅes nádechový ventil do náustku a poté do dýchacÃho ústrojà potápÄÄe. PÅi výdechu procházà výdechovým ventilem do vlnité hadice zprava.\n\nSmÄr proudÄnà smÄsi je vyznaÄen na pÅÃstroji DSV.","textLarge":false,"imageOnRight":true,"image":{"recommendedSizes":{"width":"420","height":"280"},"mimetype":"image/png","size":169539,"hash":"acba18f4f9e3da94db01f093d2b5f57a08f58b65","id":"cl3snr59edd260776tnp8unq7","filename":"divesoft-ccr-liberty-manual-1-2-01.png","category":"divesoft/","type":"image"},"imageMobile":{"recommendedSizes":{"width":"750","height":"500"}}},"id":"#16","type":"component","lock":false,"position":15},{"name":"Divider","data":{"color":"darkGray"},"id":"#17","type":"component","lock":false,"position":16},{"name":"SectionDivider","data":{"title":"1.2.1 Inhalation valve"},"id":"#493","type":"component","lock":false,"position":17},{"name":"TextBlock","data":{"text":"### <span id=\"1-.-2-.-1-Inhalation-valve\">**1.2.1 Nádechový ventil**</span> \n\n\nNádechový ventil zajiÅ¡Å¥uje, aby se vydechovaná smÄs nevrátila zpÄt do nádechového vaku a potápÄÄ ji opakovanÄ nevdechoval bez odstranÄnà oxidu uhliÄitého a pÅidánà kyslÃku.\n\n\n\n","textLarge":false,"imageOnRight":true,"image":{"recommendedSizes":{"width":"420","height":"280"},"mimetype":"image/png","size":319997,"hash":"543aee478483eacabcff34e1b17064492df3a5ff","id":"cl3snrw1ddd2w0776wv4dgvcn","filename":"divesoft-ccr-liberty-manual-1-2-1-01.png","category":"divesoft/","type":"image"},"imageMobile":{"recommendedSizes":{"width":"750","height":"500"}}},"id":"#18","type":"component","lock":false,"position":18},{"name":"TextBlock","data":{"text":"Nádechový ventil je umÃstÄn v pÅÃpojce levé vrapové hadice.\n\nPodobný jednosmÄrný ventil se nacházà ve výdechovém ventilu druhého stupnÄ regulátoru otevÅeného okruhu.\n\nJedná se o jednu z nejkritiÄtÄjÅ¡Ãch souÄástà rebreatheru. Je vÅ¡ak obtÞné zjistit poruchu této Äásti bÄhem ponoru a taková porucha může vést ke ztrátÄ vÄdomÃ.\n","textLarge":false,"imageOnRight":true,"image":{"recommendedSizes":{"width":"420","height":"280"}},"imageMobile":{"recommendedSizes":{"width":"750","height":"500"}}},"id":"#19","type":"component","lock":false,"position":19},{"name":"Divider","data":{"color":"darkGray"},"id":"#20","type":"component","lock":false,"position":20},{"name":"SectionDivider","data":{"title":"1.2.2 Exhalation valve"},"id":"#494","type":"component","lock":false,"position":21},{"name":"TextBlock","data":{"text":"### <span id=\"1-.-2-.-2-Exhalation-valve\">**1.2.2 Výdechový ventil**</span> \n\nVýdechový ventil vede vydechovanou smÄs vrapovou hadicà do výdechového vaku. ZabraÅuje potápÄÄi v pÅÃmém vdechovánà vydechované smÄsi.\n\nVýdechový ventil je umÃstÄn v pÅÃpojce pravé vrapové hadice.\n","textLarge":false,"imageOnRight":true,"image":{"recommendedSizes":{"width":"420","height":"280"}},"imageMobile":{"recommendedSizes":{"width":"750","height":"500"}}},"id":"#21","type":"component","lock":false,"position":22},{"name":"TextBlock","data":{"text":"**ZavÅenà dive/surface ventilu**\n\nPokud je potápÄÄ ve vodÄ a nepoužÃvá DSV, musà být DSV uzavÅen. Jinak dojde k zaplavenà okruhu vodou.\n\nUzavÅenà DSV se provádà pomocà šoupátka umÃstÄného na pÅednà Äásti DSV. V otevÅené poloze je páka umÃstÄna nahoÅe, v zavÅené poloze je dole.","textLarge":false,"imageOnRight":true,"image":{"recommendedSizes":{"width":"420","height":"280"},"mimetype":"image/png","size":340240,"hash":"47b4074c423b1a8185ab18b21af7f956965a52ec","id":"cl3snsgxzdd3x0776yy40zcmb","filename":"divesoft-ccr-liberty-manual-1-2-2-01.png","category":"divesoft/","type":"image"},"imageMobile":{"recommendedSizes":{"width":"750","height":"500"}}},"id":"#22","type":"component","lock":false,"position":23},{"name":"Divider","data":{"color":"darkGray"},"id":"#23","type":"component","lock":false,"position":24},{"name":"SectionDivider","data":{"title":"1.2.3 Mouthpiece"},"id":"#498","type":"component","lock":false,"position":25},{"name":"TextBlock","data":{"text":"### <span id=\"1-.-2-.-3-Mouthpiece\">**1.2.3 Náustek**</span> \n\n\nTÄsné utÄsnÄnà náustku rebreatheru zabraÅuje vniknutà vody do okruhu. DSV a vlnité hadice fungujà s vÄtÅ¡Ã silou než regulátor pÅÃstroje s otevÅeným okruhem. Proto je rozhodujÃcà mÃt, anatomicky vhodný náustek a správné sevÅenà úst.\n\nNedoporuÄujeme použÃvat náustek,
2který lze po zahÅátà vytvarovat podle skusu potápÄÄe. Takový náustek omezuje pohyb dolnà Äelisti, což vede k jednostrannému namáhánà a rychle vyÄerpá žvýkacà svaly.","textLarge":false,"imageOnRight":true,"image":{"recommendedSizes":{"width":"420","height":"280"}},"imageMobile":{"recommendedSizes":{"width":"750","height":"500"}}},"id":"#24","type":"component","lock":false,"position":26},{"name":"TextBlock","data":{"text":"### **1.2.4 UpevÅovacà pásek náustku**\nNorma EN 14143:2014 vyžaduje použità pásku pro bezpeÄné pÅipojenà náustku k ústům potápÄÄe. ÃÄelem upevÅovacÃho popruhu je snÞit pravdÄpodobnost možného vniknutà vody do dýchacà smyÄky nebo utonutà potápÄÄe v pÅÃpadÄ bezvÄdomà nebo kÅeÄÃ. UpevÅovacà popruh náustku v základnÃm balenà Liberty je navržen s gumovou elastickou Å¡Åůrou pÅipevnÄnou na DSV. \nNapÄtà a sÃlu zádržného popruhu upravÃte utaženÃm nebo povolenÃm rybáÅského uzlu. \nToto základnà ÅeÅ¡enà lze uživatelsky vylepÅ¡it volitelným pÅÃsluÅ¡enstvÃm v obchodÄ Divesoft.\n","textLarge":false,"imageOnRight":true,"image":{"recommendedSizes":{"width":"420","height":"280"}},"imageMobile":{"recommendedSizes":{"width":"750","height":"500"}}},"id":"#565","type":"component","lock":false,"position":27},{"name":"Image","data":{"firstImage":{"mimetype":"image/jpeg","size":46806,"hash":"0aa6ea35aafab4252e70c4c977f7bee9204eb488","id":"clvz6er27vle60776ensh8j6y","filename":"mouth-retaining-strap.jpg","category":"divesoft/","type":"image"},"secondImage":{}},"id":"#566","type":"component","lock":false,"position":28},{"name":"Divider","data":{"color":"darkGray"},"id":"#25","type":"component","lock":false,"position":29},{"name":"SectionDivider","data":{"title":"1.2.4 Usage with a full face mask"},"id":"#499","type":"component","lock":false,"position":30},{"name":"TextBlock","data":{"text":"### <span id=\"1-.-2-.-5-Usage-with-a-full-face-mask\">**1.2.5 Použità s celoobliÄejovou maskou**</span> \n\nPÅestože mechanické rozmÄry DSV by umožÅovaly pÅipojenà celoobliÄejové masky, nenà možné zamÄnit vstup smÄsi s otevÅeným okruhem za vstup z rebreatheru. JednÃm z důvodů je nutnost odmlžovánà zornÃku.\n\nMožnosti pÅipojenà celoobliÄejové masky k rebreatheru konzultujte s výrobcem. Použità takového pÅÃstroje bude vyžadovat postupy, které se odchylujà od této pÅÃruÄky a od standardnÃch postupů vyuÄovaných v kurzu akreditovaném výrobcem rebreatheru.","textLarge":false,"imageOnRight":true,"image":{"recommendedSizes":{"width":"420","height":"280"}},"imageMobile":{"recommendedSizes":{"width":"750","height":"500"}}},"id":"#26","type":"component","lock":false,"position":31},{"name":"Divider","data":{"color":"darkGray"},"id":"#27","type":"component","lock":false,"position":32},{"name":"SectionDivider","data":{"title":"1.3 Corrugated hoses and accesories","skipToC":true},"id":"#500","type":"component","lock":false,"position":33},{"name":"TextBlock","data":{"text":"### <span id=\"1-.-3-Corrugated-hoses-and-accessories\">**1.3 Vrapové hadice a pÅÃsluÅ¡enstvÃ**</span>","textLarge":false,"imageOnRight":true,"image":{"recommendedSizes":{"width":"420","height":"280"}},"imageMobile":{"recommendedSizes":{"width":"750","height":"500"}}},"id":"#30","type":"component","lock":false,"position":34},{"name":"SectionDivider","data":{"title":"1.3.1 Hoses"},"id":"#501","type":"component","lock":false,"position":35},{"name":"TextBlock","data":{"text":"### <span id=â1-.-3-.-1-Hosesâ>**1.3.1 Hadice**</span> \n\nVrapové hadice jsou vyrobeny z pryže EPDM. K ÄiÅ¡tÄnà a dezinfekci je tÅeba použÃvat kompatibilnà chemické prostÅedky, viz kapitola 3.5.3 ÄiÅ¡tÄnà a dezinfekce).\n\nVlnité hadice se mohou pÅi nadmÄrném namáhánà poÅ¡kodit. \n","textLarge":false,"imageOnRight":true,"image":{"recommendedSizes":{"width":"420","height":"280"},"mimetype":"image/png","size":517118,"hash":"fe42e27b8ba8665a178b899e4f85409acb11bdf0","id":"cl6j3bdjp0n8907769cni0y04","filename":"divesoft-ccr-liberty-manual-1-3-1-02.png","category":"divesoft/","type":"image"},"imageMobile":{"recommendedSizes":{"width":"750","height":"500"}}},"id":"#29","type":"component","lock":false,"position":36},{"name":"TextBlock","data":{"text":"Zejména je tÅeba zabránit perforaci, proÅÃznutà a na
2dmÄrnému opotÅebenÃ. PÅi skladovánà pÅÃstroje zabraÅte dlouhodobé deformaci hadic. S hadicemi nezacházejte jako s vÄšákem.\n\nVrapové hadice jsou jednou z nejménÄ odolných mechanických Äástà zaÅÃzenà CCR Liberty. VÄnujte jejich ochranÄ a údržbÄ náležitou pozornost.","textLarge":false,"imageOnRight":true,"image":{"recommendedSizes":{"width":"420","height":"280"},"mimetype":"image/png","size":72443,"hash":"fb02352814f66a2b3d1d91c424b5080ce74045df","id":"cl3snt5vvdd4z0776ypnp2hup","filename":"divesoft-ccr-liberty-manual-1-3-1-01.png","category":"divesoft/","type":"image"},"imageMobile":{"recommendedSizes":{"width":"750","height":"500"}}},"id":"#31","type":"component","lock":false,"position":37},{"name":"Divider","data":{"color":"darkGray"},"id":"#32","type":"component","lock":false,"position":38},{"name":"SectionDivider","data":{"title":"1.3.2 Attachment to the head"},"id":"#502","type":"component","lock":false,"position":39},{"name":"TextBlock","data":{"text":"### <span id=\"1-.-3-.-2-Attachment-to-the-head\">**1.3.2 PÅipojenà k hlavÄ**</span>\n\nNa rozdÃl od témÄÅ vÅ¡ech ostatnÃch bajonetových konektorů CCR Liberty má bajonetový konektor na výdechové stranÄ tÅi výstupky. Tato konstrukce zabraÅuje nesprávnému pÅipojenà hadic, protože vdechová strana má pouze dva výstupky.\n\nKoleno na výdechové stranÄ (vlevo) a na vdechové stranÄ (vpravo).","textLarge":false,"imageOnRight":true,"image":{"recommendedSizes":{"width":"420","height":"280"}},"imageMobile":{"recommendedSizes":{"width":"750","height":"500"}}},"id":"#33","type":"component","lock":false,"position":40},{"name":"Image","data":{"firstImage":{"mimetype":"image/png","size":117921,"hash":"cef56604728689bc5bf25fb52c8ee903729075ba","id":"cl3snvfx9dd7x0776ac99l7di","filename":"divesoft-ccr-liberty-manual-1-3-2-01.png","category":"divesoft/","type":"image"},"secondImage":{"mimetype":"image/png","size":114531,"hash":"731d059d1a8ab472123f13b6f67b159f0bea727d","id":"cl3so2i3ddde40776y79wmh7o","filename":"divesoft-ccr-liberty-manual-1-3-2-02.png","category":"divesoft/","type":"image"},"image":{"mimetype":"image/png","size":117921,"hash":"cef56604728689bc5bf25fb52c8ee903729075ba","id":"cl3snvfx9dd7x0776ac99l7di","filename":"divesoft-ccr-liberty-manual-1-3-2-01.png","category":"divesoft/","type":"image"}},"id":"#437","type":"component","lock":false,"position":41},{"name":"Divider","data":{"color":"darkGray"},"id":"#34","type":"component","lock":false,"position":42},{"name":"SectionDivider","data":{"title":"1.3.3 Connection to the breathing bags"},"id":"#503","type":"component","lock":false,"position":43},{"name":"TextBlock","data":{"text":"### <span id=\"1-.-3-.-3-Connection-to-the-breathing-bags\">**1.3.3 PÅipojenà k dýchacÃm vakům**</span> \n\nT-kusy majà standardnà bajonetové pÅipojenÃ. Na stranÄ výdechu má T-kus pÅepážku, která odvádà veÅ¡kerou vodu, která se dostala do DSV, do výdechového vaku a zlepÅ¡uje mÃsenà smÄsi pÅi pÅidávánà kyslÃku pÅes ruÄnà obtokový ventil.","textLarge":false,"imageOnRight":true,"image":{"recommendedSizes":{"width":"420","height":"280"}},"imageMobile":{"recommendedSizes":{"width":"750","height":"500"}}},"id":"#35","type":"component","lock":false,"position":44},{"name":"Image","data":{"firstImage":{"mimetype":"image/png","size":106357,"hash":"b7bfd1ef9753478d22fb92edca65fad103fc543a","id":"cl3so4krrddgb0776xaal7xup","filename":"divesoft-ccr-liberty-manual-1-3-3-01.png","category":"divesoft/","type":"image"},"secondImage":{"mimetype":"image/png","size":100116,"hash":"0c15a9b3b4c0871ea72086cc0dd1485b51038add","id":"cl4cf2nbdi9w90776t9ca68lx","filename":"divesoft-ccr-liberty-manual-1-3-3-02.png","category":"divesoft/","type":"image"},"image":{"mimetype":"image/png","size":106357,"hash":"b7bfd1ef9753478d22fb92edca65fad103fc543a","id":"cl3so4krrddgb0776xaal7xup","filename":"divesoft-ccr-liberty-manual-1-3-3-01.png","category":"divesoft/","type":"image"}},"id":"#438","type":"component","lock":false,"position":45},{"name":"Divider","data":{"color":"darkGray"},"id":"#36","type":"component","lock":false,"position":46}
2,{"name":"SectionDivider","data":{"title":"1.3.4 Attachment of the DSV"},"id":"#504","type":"component","lock":false,"position":47},{"name":"TextBlock","data":{"text":"### <span id=\"1-.-3-.-4-Attachment-of-the-DSV\">**1.3.4 PÅipojenà DSV**</span> \n\nUpevnÄnà DSV k vrapovým hadicÃm se provádà pomocà axiálnÃch zubů, které do sebe zapadajà a jsou zajiÅ¡tÄny drátÄným pojistným kroužkem.\n\nKoÅ¡e jednosmÄrných ventilů se zasunou do spojky. PÅi manipulaci s koÅ¡i dbejte na jejich správnou orientaci.","textLarge":false,"imageOnRight":true,"image":{"recommendedSizes":{"width":"420","height":"280"},"mimetype":"image/png","size":103240,"hash":"cfa7bafd0bf53ab963021bd7f8a7b10c7fc71132","id":"cl3so74jyddhk0776s0hijbiw","filename":"divesoft-ccr-liberty-manual-1-3-4-01.png","category":"divesoft/","type":"image"},"imageMobile":{"recommendedSizes":{"width":"750","height":"500"}}},"id":"#37","type":"component","lock":false,"position":48},{"name":"Divider","data":{"color":"darkGray"},"id":"#38","type":"component","lock":false,"position":49},{"name":"SectionDivider","data":{"title":"1.4 Inhalation bag"},"id":"#505","type":"component","lock":false,"position":50},{"name":"TextBlock","data":{"text":"### <span id=\"1-.-4-Inhalation-bags\">**1.4 Nádechový vak**</span>","textLarge":false,"imageOnRight":true,"image":{"recommendedSizes":{"width":"420","height":"280"}},"imageMobile":{"recommendedSizes":{"width":"750","height":"500"}}},"id":"#466","type":"component","lock":false,"position":51},{"name":"TextBlock","data":{"text":"Nádechový vak je umÃstÄn na levé stranÄ postroje (z pohledu potápÄÄe, který má na sobÄ CCR Liberty).\n\nVnÄjÅ¡Ã obal je vyroben z pružné textilie, která zajiÅ¡Å¥uje mechanickou ochranu. VnitÅnà vak je vyroben z polyuretanu. K dýchacÃmu okruhu je pÅipojen pomocà T-kusu pÅes hornà pÅepážku s bajonetovým konektorem.","textLarge":false,"imageOnRight":true,"image":{"recommendedSizes":{"width":"420","height":"280"},"mimetype":"image/png","size":68413,"hash":"79b4300e8fce2c95c2e84a22b63a52ff10c48ea7","id":"cl3so7lwxddi20776g4ginmbe","filename":"divesoft-ccr-liberty-manual-1-4-01.png","category":"divesoft/","type":"image"},"imageMobile":{"recommendedSizes":{"width":"750","height":"500"}}},"id":"#39","type":"component","lock":false,"position":52},{"name":"TextBlock","data":{"text":"The inhalation bag is affixed to the harness with two stainless-steel buckles and is secured with Velcro flaps. It can be easily removed for cleaning, disinfecting, and other handling.\n\nSee also section 3.5.3 Cleaning and disinfection.","textLarge":false,"imageOnRight":true,"image":{"recommendedSizes":{"width":"420","height":"280"}},"imageMobile":{"recommendedSizes":{"width":"750","height":"500"}}},"id":"#40","type":"component","lock":false,"position":53},{"name":"Divider","data":{"color":"darkGray"},"id":"#41","type":"component","lock":false,"position":54},{"name":"SectionDivider","data":{"title":"1.4.1 Automatic diluent valve"},"id":"#506","type":"component","lock":false,"position":55},{"name":"TextBlock","data":{"text":"### <span id=\"1-.-4-.-1-Automatic-diluent-valve\">**1.4.1 Automatic diluentnà ventil**</span> \n\nAutomatický ventil ÅedicÃho plynu (ADV) je namontován ve stÅednà pÅepážce s bajonetovým konektorem.\n\nKdyž se objem nádechového vaku zmenÅ¡Ã, stiskne se ADV a do dýchacÃho okruhu se automaticky pÅidá Åedicà prostÅedek.\n\nADV lze uzavÅÃt posunutÃm lÃmce.\n\nCitlivost ADV lze snÞit pomocà pÅÃdavné pružiny, která je souÄástà dodávky jako náhradnà dÃl.","textLarge":false,"imageOnRight":true,"image":{"recommendedSizes":{"width":"420","height":"280"}},"imageMobile":{"recommendedSizes":{"width":"750","height":"500"}}},"id":"#42","type":"component","lock":false,"position":56},{"name":"Divider","data":{"color":"darkGray"},"id":"#43","type":"component","lock":false,"position":57},{"name":"SectionDivider","data":{"title":"1.4.2 Manual diluent bypass valve"},"id":"#507","type":"component","lock":false,"position":58},{"name":"TextBlock","data":{"text":"### <span id=\"1-.-4-.-2-Manual-diluent-bypass-valve\">**1.4.2 RuÄnà dávka diluentu**</span> \n\nManuálnà ventil diluentu je umÃstÄn ve spodnà pÅepážce nádechového vaku a je vybaven bajonetovým konektorem.\n\nVentil je pÅipojen k nÃzkotlaké hadici (LP) pomocà rychlospojky typu seatec.\n\nOvládá se stisknutÃm stÅedového tlaÄÃtka.\n\nBezpeÄnostnà pojistka zabraÅuje náhodnému vypadnutà ruÄnÃho ventilu. PÅi demontáži ventilu mÄjte tuto informaci na pamÄti.","textLarge":false,"imageOnRight":true,"image":{"recommendedSizes":{"width":"420","height":"280"}},"imageMobile":{"recommendedSizes":{"width":"750","height":"500"}}},"id":"#44","type":"component","lock":false,"position":59},{"name":"Divider","data":{"color":"darkGray"},"id":"#45","type":"component","lock":false,"position":60},{"name":"SectionDivider","data":{"title":"1.5 Exhalation bag"},"id":"#508","type":"component","lock":false,"position":61},{"name":"TextBlock","data":{"text":"### <span id=\"1-.-5-Exhalation-bag\">**1.5 Výdechový vak**\n\nVýdechový vak je umÃstÄný na pravé stranÄ postroje. Jeho konstrukce a způsob pÅipojenà k postroji a k dýchacà smyÄce jsou podobné jako u nádechového vaku.","textLarge":false,"imageOnRight":true,"image":{"recommendedSizes":{"width":"420","height":"280"},"mimetype":"image/png","size":68197,"hash":"0de32cd3d19155dce2ae611ed09e30142b38e66d","id":"cl3so81vzddis077675rc5tw6","filename":"divesoft-ccr-liberty-manual-1-5-01.png","category":"divesoft/","type":"image"},"imageMobile":{"recommendedSizes":{"width":"750","height":"500"}}},"id":"#46","type":"component","lock":false,"position":62},{"name":"Divider","data":{"color":"darkGray"},"id":"#47","type":"component","lock":false,"position":63},{"name":"SectionDivider","data":{"title":"1.5.1 Manual oxygen bypass valve"},"id":"#509","type":"component","lock":false,"position":64},{"name":"TextBlock","data":{"text":"### <span id=\"1-.-5-.-1-Manual-oxygen-bypass-valve\">**1.5.1 RuÄnà dávka kyslÃku**</span> \n\nRuÄnà dávka kyslÃku je umÃstÄna ve stÅednà pÅepážce výdechového vaku a je vybaven bajonetovým konektorem.\n\nVentil je pÅipojen ke stÅedotlaké hadici pomocà kyslÃkové rychlospojky. ","textLarge":false,"imageOnRight":true,"image":{"recommendedSizes":{"width":"420","height":"280"},"mimetype":"image/png","size":81447,"hash":"14c208fb664cfba76636cda9a41aa2403b3abe19","id":"cl3so8pjeddjj0776poo00zk3","filename":"divesoft-ccr-liberty-manual-1-5-1-01.png","category":"divesoft/","type":"image"},"imageMobile":{"recommendedSizes":{"width":"750","height":"500"}}},"id":"#48","type":"component","lock":false,"position":65}
2,{"name":"TextBlock","data":{"text":"Tento konektor je jako standardnà rychlospojka typu seatec s lÃmcem.\n\nStandardnà konektor nelze pÅipojit ke kyslÃkové rychlospojce, je vÅ¡ak možné pÅipojit kyslÃkovou hadici k normálnÃmu konektoru.\n\nNeodstraÅujte lÃmec z kyslÃkového konektoru, protože pÅipojenà nesprávného plynu k nesprávnému ventilu by mohlo být potenciálnÄ nebezpeÄné. Jedná se o požadavek normy EN 14141.\n\nBajonetový konektor na kyslÃkovém pÅepouÅ¡tÄcÃm ventilu má tÅi výstupky.\n\nPro údržbu kyslÃkového pÅepouÅ¡tÄcÃho ventilu použÃvejte mazivo kompatibilnà s kyslÃkem **(doporuÄujeme DuPont Krytox GPL-226)**.","textLarge":false,"imageOnRight":true,"image":{"recommendedSizes":{"width":"420","height":"280"}},"imageMobile":{"recommendedSizes":{"width":"750","height":"500"}}},"id":"#49","type":"component","lock":false,"position":66},{"name":"Divider","data":{"color":"darkGray"},"id":"#50","type":"component","lock":false,"position":67},{"name":"SectionDivider","data":{"title":"1.5.2 Overpressure valve"},"id":"#510","type":"component","lock":false,"position":68},{"name":"TextBlock","data":{"text":"### <span id=\"1-.-5-.-2-Overpressure-valve\">**1.5.2 PÅetlakový ventil**</span>\n\nPÅetlakový ventil (OPV) je namontován ve spodnà pÅepážce výdechového vaku a je vybaven bajonetovým konektorem.\n\nPožadovaný tlak se reguluje otáÄenÃm. PÅi nastavenà minimálnÃho tlaku (otáÄenÃm proti smÄru hodinových ruÄiÄek) se ventil otevÅe; minimálnà pÅetlak zajiÅ¡Å¥uje pouze hÅibový ventil.","textLarge":false,"imageOnRight":true,"image":{"recommendedSizes":{"width":"420","height":"280"},"mimetype":"image/png","size":116307,"hash":"aa33120b90f8b63d4c9a0dda82d2623df4f1a577","id":"cl3so9pvxddke07763orcxs9q","filename":"divesoft-ccr-liberty-manual-1-5-2-01.png","category":"divesoft/","type":"image"},"imageMobile":{"recommendedSizes":{"width":"750","height":"500"}}},"id":"#51","type":"component","lock":false,"position":69},{"name":"TextBlock","data":{"text":"BezpeÄnostnà pojistka zabraÅuje náhodnému vypadnutà OPV. Chcete-li ventil vyjmout, zatlaÄte na nÄj, aby se odblokoval, a otoÄte jÃm ve smÄru Å¡ipek. OznaÄeno na ventilu.","textLarge":false,"imageOnRight":true,"image":{"recommendedSizes":{"width":"420","height":"280"}},"imageMobile":{"recommendedSizes":{"width":"750","height":"500"}}},"id":"#52","type":"component","lock":false,"position":70},{"name":"Divider","data":{"color":"darkGray"},"id":"#53","type":"component","lock":false,"position":71},{"name":"SectionDivider","data":{"title":"1.6 Oxygen tank","skipToC":true},"id":"#511","type":"component","lock":false,"position":72},{"name":"TextBlock","data":{"text":"### <span id=\"1-.-6-Oxygen-tank\">**1.6 KyslÃková lahev**</span>","textLarge":false,"imageOnRight":true,"image":{"recommendedSizes":{"width":"420","height":"280"}},"imageMobile":{"recommendedSizes":{"width":"750","height":"500"}}},"id":"#513","type":"component","lock":false,"position":73},{"name":"SectionDivider","data":{"title":"1.6.1 Tank"},"id":"#512","type":"component","lock":false,"position":74},{"name":"TextBlock","data":{"text":"### <span id=\"1-.-6-.-1-Tank\">**1.6.1 Lahev**</span>\n\nCCR Liberty použÃvá tÅÃlitrovou ocelovou láhev o průmÄru 100 mm s plnicÃm tlakem 200 barů. Původnà plnicà tlak lahve 300 barů byl zmÄnÄn podle platných technických norem.\n\nTlaková láhev je oznaÄena OXYGEN a je umÃstÄna na pravé stranÄ potápÄÄe, který má na sobÄ pÅÃstroj CCR Liberty.","textLarge":false,"imageOnRight":true,"image":{"recommendedSizes":{"width":"420","height":"280"}},"imageMobile":{"recommendedSizes":{"width":"750","height":"500"}}},"id":"#54","type":"component","lock":false,"position":75},{"name":"Image","data":{"firstImage":{"mimetype":"image/png","size":481318,"hash":"2253c9f63b18a65d1a332c4757ac74dfef57db48","
2id":"cl3soa80zddkr0776059cbxlk","filename":"divesoft-ccr-liberty-manual-1-6-1-01.png","category":"divesoft/","type":"image"},"secondImage":{"mimetype":"image/png","size":486627,"hash":"5a6bbce72d94faff1e2cabe87e0b965b029508ef","id":"cl4gnm2mrjpl10776sjf9gu2l","filename":"divesoft-ccr-liberty-manual-1-6-1-02.png","category":"divesoft/","type":"image"},"image":{"type":"image"}},"id":"#55","type":"component","lock":false,"position":76},{"name":"TextBlock","data":{"text":"PÅi pÅipojovánà kyslÃkové lahve k pÅÃstroji se pÅed utaženÃm ruÄnÃho kola na regulátoru prvnÃho stupnÄ kyslÃku ujistÄte, že je láhev ve svislé poloze. Pokus o narovnánà tlakové láhve, když je již naÅ¡roubovaná, způsobà pnutà hrozeb a bude obtÞné ji odstranit bez pomoci náÅadÃ.\n\nDalÅ¡Ã informace o plnÄnà naleznete v Äásti 3.2.5 KyslÃk.\n\n<span style=âcolor:redâ>**UPOZORNÄNÃ:** Láhve a ventily jsou vyrobeny z materiálů kompatibilnÃch s kyslÃkem a vÅ¡echny souÄásti byly pÅi výrobÄ oÄiÅ¡tÄny od kyslÃku. Pokud je vÅ¡ak nemontoval certifikovaný servisnà technik, nelze je považovat za kyslÃkovÄ Äisté.</span>","textLarge":false,"imageOnRight":true,"image":{"recommendedSizes":{"width":"420","height":"280"}},"imageMobile":{"recommendedSizes":{"width":"750","height":"500"}}},"id":"#56","type":"component","lock":false,"position":77},{"name":"Divider","data":{"color":"darkGray"},"id":"#57","type":"component","lock":false,"position":78},{"name":"SectionDivider","data":{"title":"1.6.2 Valve"},"id":"#514","type":"component","lock":false,"position":79},{"name":"TextBlock","data":{"text":"### <span id=\"1-.-6-.-2-Valve\">**1.6.2 Ventil**</span> \n\nVentil kyslÃkové láhve má výstupnà pÅipojenà M26 à 2 200 barů podle normy EN 144-3. Ventil nenà kompatibilnà s ventily podle normy 12209:2013 (dÅÃve známé také jako DIN), aby se vylouÄila možná zámÄna kyslÃkových lahvà a lahvà s Åedidlem, což je požadavek normy EN 14141.","textLarge":false,"imageOnRight":true,"image":{"recommendedSizes":{"width":"420","height":"280"}},"imageMobile":{"recommendedSizes":{"width":"750","height":"500"}}},"id":"#58","type":"component","lock":false,"position":80},{"name":"Divider","data":{"color":"darkGray"},"id":"#59","type":"component","lock":false,"position":81},{"name":"SectionDivider","data":{"title":"1.6.3 Reduction valve"},"id":"#515","type":"component","lock":false,"position":82},{"name":"TextBlock","data":{"text":"### <span id=\"1-.-6-.-3-Reduction-valve\">**1.6.3 RedukÄnà ventil**</span>\n\nModel CCR Liberty použÃvá prvostupÅový regulátor Apeks DST4 se speciálnÄ vyrobenou nÃzkotlakou vÄžiÄkou namontovanou na zadnà desce, která sloužà jako dolnà montážnà bod pro tlakovou láhev. StÅed lahve obepÃná pásek se suchým zipem, který ji upevÅuje k jednotce.\n\nRedukÄnà ventil je vybaven stÅedotlakým bezpeÄnostnÃm pÅetlakovým ventilem.\n\n**UPOZORNÄNÃ: Rebreather Liberty je omezen hloubkou 170 m (557 stop) kvůli použità ekologicky utÄsnÄných regulátorů 1. stupnÄ Apeks DST4. Pro potápÄnà v hloubce nad 170 m (557 stop) se doporuÄuje vymÄnit 1. stupnÄ Apeks DST4 za sadu Apeks UST4. To neplatà pro verzi Sidemount, která použÃvá prvnà stupnÄ bez suché komory**.","textLarge":false,"imageOnRight":true,"image":{"recommendedSizes":{"width":"420","height":"280"}},"imageMobile":{"recommendedSizes":{"width":"750","height":"500"}}},"id":"#60","type":"component","lock":false,"position":83},{"name":"Divider","data":{"color":"darkGray"},"id":"#61","type":"component","lock":false,"position":84},{"name":"SectionDivider","data":{"title":"1.6.4 Pressure reading"},"id":"#516","type":"component","lock":false,"position":85},{"name":"TextBlock","data":{"text":"### <span id=\"1-.-6-.-4-Pressure-reading\">**1.6.4 OdeÄet tlaku**</span>\n\nManometr tlaku kyslÃku je umÃstÄn na pravé stranÄ potápÄÄe; hadice HP vede otvorem v zadnà desce.\n\nModel Liberty edice 2021 je vybaven bezdrátovým mÄÅenÃm tlaku v lahvÃch pro kyslÃk i Åedidlo a jednu záchrannou smÄs. V tomto pÅÃpadÄ je po nastavenà této možnosti a umÃstÄnà vysÃlaÄů tlaku na regulátory prvnÃho stupnÄ možné zobrazit tlak v lahvi na displeji sluchátka.","textLarge":false,"imageOnRight":true,"image":{"recommendedSizes":{"width":"420","height":"280"}},"imageMobile":{"recommendedSizes":{"width":"750","height":"500"}}},"id":"#62","type":"component","lock":false,"position":86},{"name":"Divider","data":{"color":"darkGray"},"id":"#63","type":"component","lock":false,"position":87},{"name":"SectionDivider","data":{"title":"1.7 Diluent tank"},"id":"#517","type":"component","lock":false,"position":88},{"name":"TextBlock","data":{"text":"### <span id=\"1-.-7-Diluent-tank\">**1.7 Lahev diluentu**</span>","textLarge":false,"imageOnRight":true,"image":{"recommendedSizes":{"width":"420","height":"280"}},"imageMobile":{"recommendedSizes":{"width":"750","height":"500"}}},"id":"#519","type":"component","lock":false,"position":89},{"name":"SectionDivider","data":{"title":"1.7.1 Tank"},"id":"#518","type":"component","lock":false,"position":90},{"name":"TextBlock","data":{"text":"### <span id=\"1-.-7-.-1-Tank\">**1.7.1 Lahev**</span>\n\nCCR Liberty použÃvá tÅÃlitrovou ocelovou láhev o průmÄru 100 mm a plnicÃm tlaku 230 barů. Původnà plnicà tlak lahve 300 barů byl zmÄnÄn kvůli použità ventilu 230 barů.\n\nLáhev je oznaÄena DILUENT a je umÃstÄna na levé stranÄ potápÄÄe, který má na sobÄ pÅÃstroj CCR Liberty.\n\nDalÅ¡Ã informace o plnÄnà naleznete v Äásti 3.2.5 Diluent.","textLarge":false,"imageOnRight":true,"image":{"recommendedSizes":{"width":"420","height":"280"}},"imageMobile":{"recommendedSizes":{"width":"750","height":"500"}}},"id":"#64","type":"component","lock":false,"position":91},{"name":"Divider","data":{"color":"darkGray"},"id":"#65","type":"component","lock":false,"position":92},{"name":"SectionDivider","data":{"title":"1.7.2 Valve"},"id":"#520","type":"component","lock":false,"position":93},{"name":"TextBlock","data":{"text":"### <span id=\"1-.-7-.-2-Valve\">**1.7.2 Ventil**</span>\n\nVentil lahve s Åedidlem má výstupnà pÅipojenà 230 bar podle normy ISO 12209:2013 (dÅÃve známé také jako DIN G 5/8).","textLarge":false,"imageOnRight":true,"image":{"recommendedSizes":{"width":"420","height":"280"}},"imageMobile":{"recommendedSizes":{"width":"750","height":"500"}}},"id":"#66","type":"component","lock":false,"position":94},{"name":"Divider","data":{"color":"darkGray"},"id":"#67","type":"component","lock":false,"position":95},{"name":"SectionDivider","data":{"title":"1.7.3 Reduction valve and pressure reading"},"id":"#521","type":"component","lock":false,"position":96},{"name":"TextBlock","data":{"text":"### <span id=\"1-.-7-.-3-Reduction-valve-and-pressure-reading\">**1.7.3 RedukÄnà ventil a odeÄet tlaku**</span>\n\nKonstrukce je podobná jako u kyslÃkové láhve, pouze zrcadlovÄ obrácená.\n\n**UPOZORNÄNÃ: Rebreather Liberty je omezen hloubkou 170 m (557 stop) kvůli použità utÄsnÄných regulátorů 1. stupnÄ Apeks DST4. DoporuÄujeme, abyste si pro potápÄnà v hloubce nad 170 m (557 stop) vymÄnili 1. stupnÄ Apeks DST4 za sadu Apeks UST4. To neplatà pro verzi Sidemount, která použÃvá prvnà stupnÄ bez suché komory**.","textLarge":false,"imageOnRight":true,"image":{"recommendedSizes":{"width":"420","height":"280"}},"imageMobile":{"recommendedSizes":{"width":"750","height":"500"}}},"id":"#68","type":"component","lock":false,"position":97},{"name":"Divider","data":{"color":"darkGray"},"id":"#69","type":"component","lock":false,"position":98},{"name":"SectionDivider","data":{"title":"1.7.4 Backup regulator (optional)"},"id":"#522","type":"component","lock":false,"position":99},{"name":"TextBlock","data":{"text":"### <span id=\"1-.-7-.-4-Backup-regulator-(optional)\">**1.7.4 Backup regulator (volitelné)**</span>\n\nDruhý stupeÅ regulátoru může být pÅipojen k výstupu prvnÃho stupnÄ diluentu a pomocà hadice LP vhodné délky. Tento regulátor lze použÃt jako záložnÃ, pokud je Åedicà prostÅedek v dané hloubce dýchatelný (parciálnà tlak kyslÃku mezi 0,16 a 1,6 bary).\n\nMÃt záložnà regulátor pÅipojený k diluentu může být užiteÄné pro sanitárnà dýchánà a pro dlouhodobé pÅepÃnánà na záložnà pÅÃstroj.\n\nZáložnà pÅÃstroj se vÅ¡ak doporuÄuje použÃvat pouze za zvláštnÃch okolnostÃ, napÅÃklad pÅi potápÄnà v extrémnÄ mÄlké vodÄ.","textLarge":false,"imageOnRight":true,"image":{"recommendedSizes":{"width":"420","height":"280"}},"imageMobile":{"recommendedSizes":{"width":"750","height":"500"}}},"id":"#70","type":"component","lock":false,"position":100},{"name":"TextBlock","data":{"text":"### <span id=\"1-.-7-.-5-Air-integration-(2021-Edition-only)\">**1.7.5 Vzdálené odeÄÃtánà tlaku (2021 Edition only)**</span>\n\nYou can use any compatible transmitter (not included). For example, Shearwater / Aqualung / Pelagic (Suunto,\nRatio, Mares, Garmin, Scubapro smart are not compatible).\nThe transmitter is automatically activated by pressurization to 8 bar and more.\nThe transmitter turns off after 2 minutes at a tank pressure of <4 bar. Please do not leave\nthe Liberty pressurized for prolonged periods of time (at storage), since the transmitter has\ndeclared runtime of 300hrs on one battery","textLarge":false,"imageOnRight":true,"image":{"recommendedSizes":{"width":"420","height":"280"}},"imageMobile":{"recommendedSizes":{"width":"750","height":"500"}}},"id":"#544","type":"component","lock":false,"position":101},{"name":"TextBlock","data":{"text":"### <span id=\"1-.-7-.-6-Transmitters-(2021-Edition-only)\">**1.7.6 VysÃlaÄe (pouze 2021 Edition)**</span>\n\nV pÅÃpadÄ vÃce vysÃlaÄů je vhodné použÃt žlutý + Å¡edý, nikoliv dva Å¡edé.\n\n\n* - VÃce než dva (max. tÅi) vysÃlaÄe se nedoporuÄujÃ; náhodný dlouhý signál\n* může dojÃt k výpadkům signálu i pÅi použità dvou vysÃlaÄů stejné barvy.\n* \n* - Na zadnà stranÄ jednotky umÃstÄte vysÃlaÄe s koleny HP na prvnà stupnÄ. TovárnÃ\n* testovaná orientace je rovnobÄžná se zadnà deskou - smÄÅuje k druhému 1. stupni.\n* Jednotka pro boÄnà montáž nepotÅebuje žádná kolena. DoporuÄuje se instalovat vysÃlaÄ na krátký\n* HP hadici (15 / 20 cm), aby nedoÅ¡lo k náhodnému ulomenà vysÃlaÄe.\n* \n* \n* - Dosah - pÅibližnÄ 0,7-1 m, spÃÅ¡e ménÄ než vÃce.\n***\n\n","textLarge":false,"imageOnRight":true,"image":{"recommendedSizes":{"width":"420","height":"280"}},"imageMobile":{"recommendedSizes":{"width":"750","height":"500"}}},"id":"#546","type":"component","lock":false,"position":102},{"name":"Spacer","data":{"spacingLarge":30,"spacingSmall":20,"backgroundColor":"#ffffff"},"id":"#550","type":"component","lock":false,"position":103},{"name":"TextBlock","data":{"text":"### <span id=\"1-.-7-.-7-Procedure-for-pairing-the-transmitter-(2021-Edition-only)\">**1.7.7 Postup párovánà vysÃlaÄe (pouze 2021 Edition)**</span>","textLarge":false,"imageOnRight":true,"image":{"recommendedSizes":{"width":"420","height":"280"}},"imageMobile":{"recommendedSizes":{"width":"750","height":"500"}}},"id":"#549","type":"component","lock":false,"position":104},{"name":"TextBlock","data":{"text":"\n* - OtevÅete ventily lahve - nechte vysÃlaÄe pracovat\n* 10-30s, aby se zapnuly\n* - ZapnÄte AI (Air integration) (pokud je vypnut)\n* - Globálnà pÅepÃnaÄ Nastavenà / Bezdrátové pÅipojenà / Integrace vzduchu / Zapnuto\n* - Pokud jste již nastav
2ili vysÃlaÄe,\n* vypnutÃm funkce AI se neztratà jejich\n* sériová ÄÃsla","textLarge":false,"imageOnRight":true,"image":{"recommendedSizes":{"width":"420","height":"280"},"mimetype":"image/png","size":17407,"hash":"28d230383c1104f0dd79a8755ced7296e7e69a45","id":"clo718mtjclv70776h5eyprcp","filename":"1-2.png","category":"divesoft/","type":"image"},"imageMobile":{"recommendedSizes":{"width":"750","height":"500"}},"file":{"mimetype":"image/jpeg","size":30584,"hash":"a2b836d3f7c53b9aa57593cddfd5edaff7430225","id":"cljch001ajurx0776y46wg4rj","filename":"2021-1.jpg","category":"divesoft/","type":"file"}},"id":"#547","type":"component","lock":false,"position":105},{"name":"TextBlock","data":{"text":"* - Spárovánà vysÃlaÄe Nastavenà / Bezdrátové pÅipojenà / Integrace vzduchu.\n* / Oxygen nebo Setup / Wireless / Air integr. /\n* Diluent\n* - Pokud je vysÃlaÄ zapnutý a v dosahu, mÄl by mÃt v nabÃdce uvedeno sériové ÄÃslo.\n* - V opaÄném pÅÃpadÄ nastavte poslednÃch 6 ÄÃslic sériového ÄÃsla stanice prostÅednictvÃm âEditâ (Ãpravy).\n\n\n\nPokud se nezobrazujà žádné snÃmaÄe, zkuste zmÄnit polohu vysÃlaÄů. ZmÄÅte polohu\npo malých krocÃch a v každé poloze vždy vyÄkejte alespoÅ 10 sekund. Vždy nastavte\nvysÃlaÄe po jednom. Poloha vysÃlaÄů, jejich odezva nebo chyby signálu\njsou pÅedmÄtem vaÅ¡Ã zpÄtné vazby.* ⢠Pair the transmitter Setup / Wireless / Air integr.\n","textLarge":false,"imageOnRight":true,"image":{"recommendedSizes":{"width":"420","height":"280"}},"imageMobile":{"recommendedSizes":{"width":"750","height":"500"}}},"id":"#551","type":"component","lock":false,"position":106},{"name":"TextBlock","data":{"text":"**Objem lahve**\n\nHodnoty objemů nádržà musà být nastaveny pÅesnÄ.\nvýpoÄet spotÅeby plynu\n\n**Objem kyslÃkové lahve obj.** objem kyslÃkové láhve je\npoužit pro výpoÄet minutové spotÅeby kyslÃku v\nlitrech za minutu.\n\n**Dil lahev obj.** objem lahve s Åedidlem je\npoužÃvá pouze pÅi simulaci ponoru.","textLarge":false,"imageOnRight":true,"image":{"recommendedSizes":{"width":"420","height":"280"},"mimetype":"image/png","size":14302,"hash":"a63e1d66c499dcd4af2a5d63a44803188cccee0c","id":"cljci0zwsjvnx0776fqe1qgym","filename":"2021-2.png","category":"divesoft/","type":"image"},"imageMobile":{"recommendedSizes":{"width":"750","height":"500"}}},"id":"#548","type":"component","lock":false,"position":107},{"name":"TextBlock","data":{"text":"**DISPLAY**\n\nBarva sloupcového grafu se zmÄnà na žlutou, když\nklesne na polovinu jmenovitého tlaku lahve.\na na Äervenou, když tlak klesne pod nastavenou hodnotu.\nrezervy (Nastavenà / SmÄsi / Koncový tlak).","textLarge":false,"imageOnRight":true,"image":{"recommendedSizes":{"width":"420","height":"280"},"mimetype":"image/png","size":14400,"hash":"da361b965447f13a9f4dca74d4a0cb7c2e77aff6","id":"cljcikuspjw3k0776gv5ci238","filename":"2021-3.png","category":"divesoft/","type":"image"},"imageMobile":{"recommendedSizes":{"width":"750","height":"500"}}},"id":"#552","type":"component","lock":false,"position":108},{"name":"Spacer","data":{"spacingLarge":30,"spacingSmall":20,"backgroundColor":"#ffffff"},"id":"#562","type":"component","lock":false,"position":109},{"name":"TextBlock","data":{"text":"Lze snadno testovat s uzavÅenými lahvemi nebo pÅi potápÄnÃ.\nsimulace.\n\nJe možné zobrazit hodnoty nebo bargrafy na displeji.\nhlavnà obrazovce v závislosti na osobnÃm nastavenÃ.\nToto nastavenà je individuálnà pro každé sluchátko, takže můžete nastavit napÅ.\nkaždé HS jinak.\n\nMenu / Setup / Preferences / Display / Tank press.\nOr in Dive mode / Setup /Display / Tank Press.","textLarge":false,"imageOnRight":true,"image":{"recommendedSizes":{"width":"420","height":"280"},"mimetype":"image/png","size":14924,"hash":"ec3d370851ead3f7e6c1d4ce4f9eeaa10c4bff25","id":"cljciopg3jw600776fksq0ud3","filename":"2021-4.png","category":"divesoft/","type":"image"},"imageMobile":{"recommendedSizes":{"width":"750","height":"500"}}},"id":"#553","type":"component","lock":false,"position":110},{"name":"TextBlock","data":{"text":"Můžete si vybrat, jestli chcete mÃsto toho zobrazit ÄÃsla\nHodiny a hodnoty teploty","textLarge":false,"imageOnRight":true,"image":{"recommendedSizes":{"width":"420","height":"280"},"mimetype":"image/png","size":114049,"hash":"5f029205fcd9a97915daa075ede0661738a56e2e","id":"cljciqlahjw7c0776x01yr50e","filename":"2021-5.png","category":"divesoft/","type":"image"},"imageMobile":{"recommendedSizes":{"width":"750","height":"500"}}},"id":"#556","type":"component","lock":false,"position":111},{"name":"Spacer","data":{"spacingLarge":30,"spacingSmall":20,"backgroundColor":"#ffffff"},"id":"#560","type":"component","lock":false,"position":112},{"name":"TextBlock","data":{"text":"Grafy mÃsto solenoidových otevÃracÃch polÃÄek","textLarge":false,"imageOnRight":true,"image":{"recommendedSizes":{"width":"420","height":"280"},"mimetype":"image/png","size":105787,"hash":"8fa939e28e31ea6ab0b6449f23a0c4f1fe11f507","id":"cljcisiwkjw9l0776v721uypv","filename":"2021-6.png","category":"divesoft/","type":"image"},"imageMobile":{"recommendedSizes":{"width":"750","height":"500"}}},"id":"#557","type":"component","lock":false,"position":113},{"name":"Spacer","data":{"spacingLarge":30,"spacingSmall":20,"backgroundColor":"#ffffff"},"id":"#559","type":"component","lock":false,"position":114},{"name":"TextBlock","data":{"text":"\n\n\n\n\nNebo oba","textLarge":false,"imageOnRight":true,"image":{"recommendedSizes":{"width":"420","height":"280"},"mimetype":"image/png","size":81475,"hash":"bfe88aae72ea00fa32ec2190909d8f41f30029a1","id":"cljcius9gjwdo07769j8izfid","filename":"2021-7.png","category":"divesoft/","type":"image"},"imageMobile":{"recommendedSizes":{"width":"750","height":"500"}}}
2,"id":"#558","type":"component","lock":false,"position":115},{"name":"TextBlock","data":{"text":"pÅeheledná obrazovka zobrazuje graf i ÄÃselné údaje.\nhodnotu.","textLarge":false,"imageOnRight":true,"image":{"recommendedSizes":{"width":"420","height":"280"},"mimetype":"image/png","size":60061,"hash":"59ebe421fb46e1b212c4b9a8ffc4065f0770cf5c","id":"cljciz9dkjwgb07762x9t9xos","filename":"2021-8.png","category":"divesoft/","type":"image"},"imageMobile":{"recommendedSizes":{"width":"750","height":"500"}}},"id":"#563","type":"component","lock":false,"position":116},{"name":"TextBlock","data":{"text":"**Závady signálu**\n\n* - <60 s... uchovává poslednà hodnotu\n* - 60 <90sec... stará hodnota je stále Äitelná, bargraf Å¡edý\n* - > 90 sec... prázdný rámeÄek, mÃsto pomlÄky pouze hodnota\n* - c. Vybitá baterie vysÃlaÄe - Pokud nÄkterý z nÞe uvedených alarmů pÅetrvává, vymÄÅte vysÃlaÄ.\n* baterie.\n* - âDocházà baterieâ - nad sloupcovým grafem se každých 5 minut vykreslà témÄÅ prázdná baterie.\n* sekund\n* - âPrázdná baterieâ - každých 5 sekund se vykreslà tuÄné pÃsmeno âBâ.","textLarge":false,"imageOnRight":true,"image":{"recommendedSizes":{"width":"420","height":"280"}},"imageMobile":{"recommendedSizes":{"width":"750","height":"500"}}},"id":"#564","type":"component","lock":false,"position":117},{"name":"Divider","data":{"color":"darkGray"},"id":"#71","type":"component","lock":false,"position":118},{"name":"SectionDivider","data":{"title":"1.8 CO2 scrubber"},"id":"#523","type":"component","lock":false,"position":119},{"name":"TextBlock","data":{"text":"### <span id=\"1-.-8-CO2-scrubber\">**1.8 CO<sub>2</sub> scrubber**</span>","textLarge":false,"imageOnRight":true,"image":{"recommendedSizes":{"width":"420","height":"280"}},"imageMobile":{"recommendedSizes":{"width":"750","height":"500"}}},"id":"#470","type":"component","lock":false,"position":120},{"name":"TextBlock","data":{"text":"CCR Liberty použÃvá radiálnà skruber. Dýchacà smÄs proudà z vnÄjÅ¡Ã strany do stÅedu kazety skruberu.\n\nPÅÃstroj se skládá ze skruberové kazety vložené do skruberového kanystru. Ve spodnà Äásti kanystru je umÃstÄn lapaÄ vody.","textLarge":false,"imageOnRight":true,"image":{"recommendedSizes":{"width":"420","height":"280"},"mimetype":"image/png","size":162419,"hash":"bf37a95e55b6fdc802a27124cd4c69830a9694b1","id":"cl3soatfwddl90776cuq4ycgy","filename":"divesoft-ccr-liberty-manual-1-8-01.png","category":"divesoft/","type":"image"},"imageMobile":{"recommendedSizes":{"width":"750","height":"500"}}},"id":"#72","type":"component","lock":false,"position":121},{"name":"TextBlock","data":{"text":"StÄny kazet jsou vyrobeny z vnÄjÅ¡Ã a vnitÅnà kovové sÃÅ¥oviny. Kovový kotouÄ tlaÄà na Äisticà kazetu pomocà pÅÃtlaÄné desky s pružinou. PÅÃtlaÄná deska je pÅipevnÄna k centrálnà trubce pomocà pÅÃdržného kroužku.\n\nKapacita náplnÄ skruberu je pÅibližnÄ 2,5 kg sorbentu. Objem sorbentu je pÅibližnÄ 2,82-2,99 l.\n\nŽivotnost a výmÄna sorbentu jsou popsány v oddÃle 3.2.1 VýmÄna sorbentu CO<sub>2</sub>.","textLarge":false,"imageOnRight":true,"image":{"recommendedSizes":{"width":"420","height":"280"}},"imageMobile":{"recommendedSizes":{"width":"750","height":"500"}}},"id":"#73","type":"component","lock":false,"position":122},{"name":"Divider","data":{"color":"darkGray"},"id":"#74","type":"component","lock":false,"position":123},{"name":"SectionDivider","data":{"title":"1.9 Head"},"id":"#524","type":"component","lock":false,"position":124},{"name":"TextBlock","data":{"text":"### <span id=\"1-.-9-Head\">**1.9 Hlava**</span>\n\nHlava je namontována na hornà Äásti kanystru praÄky CO<sub>2</sub>.\n\nPÅi montáži hlavy zasuÅte Äep kanystru skruberu do pÅÃsluÅ¡ného důlku na spodnà Äásti hlavice a zatlaÄte jej dolů, aby se utÄsnil.","textLarge":false,"imageOnRight":true,"image":{"recommendedSizes":{"width":"420","height":"280"},"mimetype":"image/png","size":96985,"hash":"c16b73937909b076d83854b7c44c632461e6a0a8","id":"cl3socyjcddmw0776heqsdna5","filename":"divesoft-ccr-liberty-manual-1-9-1-01.png","category":"divesoft/","type":"image"},"imageMobile":{"recommendedSizes":{"width":"750","height":"500"},"mimetype":"image/png","size":132334,"hash":"a8085b4ff0b53321c98fda11c12d5cc246db5b51","id":"cl3sobr7iddmg0776ktm8yy0m","filename":"divesoft-ccr-liberty-manual-1-9-01.png","category":"divesoft/","type":"image"}},"id":"#75","type":"component","lock":false,"position":125},{"name":"TextBlock","data":{"text":"Pokud je obtÞné hlavu sejmout, položte dýchacà pÅÃstroj na tvrdý povrch tak, aby kolÃk smÄÅoval dolů, jak je znázornÄno na obrázku. Rukama zatlaÄte na hlavu a nádobku retraku.","textLarge":false,"imageOnRight":true,"image":{"recommendedSizes":{"width":"420","height":"280"}},"imageMobile":{"recommendedSizes":{"width":"750","height":"500"}}},"id":"#439","type":"component","lock":false,"position":126}
2,{"name":"Divider","data":{"color":"darkGray"},"id":"#76","type":"component","lock":false,"position":127},{"name":"SectionDivider","data":{"title":"1.9.1 Control units"},"id":"#525","type":"component","lock":false,"position":128},{"name":"TextBlock","data":{"text":"### <span id=\"1-.-9-.-1-Control-units\">**1.9.1 ÅÃdicà jednotky**</span>\n\nÅÃdicà jednotky (CU) jsou nezávislé a každá je pÅipojena k vlastnÃmu displeji nebo sluchátku (HS). Každá CU je vybavena vlastnÃm zdrojem napájenÃ, solenoidem, mÄÅiÄem teploty a tlaku, jakož i vlastnÃmi snÃmaÄi parciálnÃho tlaku O<sub>2</sub> a koncentrace He.","textLarge":false,"imageOnRight":true,"image":{"recommendedSizes":{"width":"420","height":"280"}},"imageMobile":{"recommendedSizes":{"width":"750","height":"500"}}},"id":"#77","type":"component","lock":false,"position":129},{"name":"TextBlock","data":{"text":"Pokud jedna ÅÃdicà jednotka selže, pÅevezme ÅÃzenà automaticky druhá ÅÃdicà jednotka.\n\nJednotky CU a HS jsou nezávislé poÄÃtaÄe komunikujÃcà prostÅednictvÃm sbÄrnice. Každé sluchátko zobrazuje výsledky Äinnosti obou CU a sloužà k ovládánà obou CU. Každá HS je napájena pÅÃsluÅ¡nou CU. V pÅÃpadÄ poruchy obou sluchátek budou obÄ nebo jedna ze zbývajÃcÃch CU pokraÄovat v regulaci ppO<sub>2</sub> podle poslednà nastavené žádané hodnoty.\n \nPokud dojde k výpadku komunikace mezi CU, bude každá jednotka pokraÄovat v ÅÃzenà svého solenoidu. ÅÃdicà algoritmus je dostateÄnÄ robustnÃ, aby zabránil jakýmkoli odchylkám ppO<sub>2</sub> od povolených mezà pÅi duálnÃ, paralelnà regulaci.\n\n**PÅipojenà k osobnÃmu poÄÃtaÄi**\n\nPamÄÅ¥ provoznÃch protokolů a obsah pamÄÅ¥ové karty lze ÄÃst pomocà adaptéru USB pÅipojeného ke konektoru sluchátka jako pamÄÅ¥ové zaÅÃzenà (jako flash disk). Bylo testováno pÅipojenà k operaÄnÃm systémům Windows, Mac, Linux, Android a iOS, nicménÄ nenà zaruÄena kompatibilita se vÅ¡emi operaÄnÃmi systémy a poÄÃtaÄi.\n\nPÅi použità pÅipojenà USB je ÅÃdicà jednotka napájena z portu USB a souÄasnÄ se nabÃjà baterie.\n\nKaždá ÅÃdicà jednotka obsahuje stejné záznamy o ponorech; pro staženà záznamů do poÄÃtaÄe je tÅeba pÅipojit pouze jednu ÅÃdicà jednotku.\n\nDalÅ¡Ã možnostà je pÅipojenà pÅÃstroje pÅes Bluetooth. K tomu je tÅeba stáhnout software pro Mac nebo PC. Najdete ho na adrese [Divesoft.Center.] (https://www.divesoft.com/en/center).\n\nZáznamy můžete stahovat také bezdrátovÄ pomocà mobilnÃho telefonu pomocà aplikace [Divesoft.App](https://www.divesoft.com/en/app). Pomocà této aplikace můžete také odesÃlat chybové zprávy. Aplikace stáhne záznamy z ponorů a ze systému a odeÅ¡le je odpovÄdným pracovnÃkům spoleÄnosti DIVESOFT ke kontrole.","textLarge":false,"imageOnRight":true,"image":{"recommendedSizes":{"width":"420","height":"280"}},"imageMobile":{"recommendedSizes":{"width":"750","height":"500"}}},"id":"#78","type":"component","lock":false,"position":130},{"name":"Divider","data":{"color":"darkGray"},"id":"#79","type":"component","lock":false,"position":131},{"name":"SectionDivider","data":{"title":"1.9.2 Direct measurement of ppO2"},"id":"#526","type":"component","lock":false,"position":132},{"name":"TextBlock","data":{"text":"### <span id=\"1-.-9-.-2-Direct-measurement-of-ppO2\">**1.9.2 PÅÃmé mÄÅenà PO<sub>2</sub>**</span>\n\nK mÄÅenà ppO<sub>2</sub> použÃvejte pouze senzory typu DIVESOFT R22D. Použità jiných senzorů jiných výrobců je zakázáno.\n\nKe každé CU jsou pÅipojeny dva kyslÃkové senzory a vÅ¡echny senzory jsou umÃstÄny na stranÄ vdechu. ObÄ CU majà pÅÃstup ke vÅ¡em ÄtyÅem snÃmaÄům kyslÃku a neustále si vymÄÅujà data.\n\nPotápÄÄ může ruÄnÄ vylouÄit Äidlo z provozu a může také zvolit, kdy jej znovu vylouÄÃ. Volba ruÄnÃho vylouÄenà Äidla má vždy pÅednost pÅed automatickou detekcà vadného Äidla. Pokud jsou vylouÄeny vÅ¡echny snÃmaÄe, lze CCR Liberty pÅepnout na záložnà algoritmus s výpoÄtem parciálnÃho tlaku kyslÃku nepÅÃmo na základÄ namÄÅeného obsahu He (za pÅedpokladu, že použité Åedidlo obsahuje >20 % He).\n\nPro pÅesnost mÄÅenà je nutná cirkulace smÄsi v dýchacà smyÄce. Pokud uživatel nedýchá z rebreatheru, může mÃt smÄs v okolà kyslÃkových senzorů jiný podÃl kyslÃku než v dýchacà smyÄce. Zobrazené údaje tak mohou být nepÅesné.\n\nPodobná situace může nastat v pÅÃpadÄ rychlého sestupu, kdy je pÅidáno vÄtÅ¡Ã množstvà Åedidla, nebo když je nastavená hodnota zmÄnÄna na vysokou a ppO<sub>2</sub> v dýchacà smyÄce postupuje na novou úroveÅ.\n\nSenzory jsou neustále automaticky vyhodnocovány. Hodnota ppO<sub>2</sub> namÄÅená jednÃm senzorem je vždy porovnávána s průmÄrnou hodnotou ostatnÃch senzorů. TÃmto způsobem je každý jednotlivý senzor neustále kÅÞovÄ k
2ontrolován a sledovány pÅÃpadné odchylky. Pokud průmÄrná odchylka Äidel pÅekroÄà 0,1 baru, systém automaticky vylouÄà Äidlo, které se od průmÄru odchyluje nejvÃce.\n\nV jednom okamžiku lze automaticky vylouÄit pouze jeden snÃmaÄ a celkem lze automaticky vylouÄit pouze dva snÃmaÄe. Vždy budou k dispozici alespoÅ dva snÃmaÄe, které musà potápÄÄ vyhodnotit sám. Tento postup je popsán v kapitole 3.4.4 Monitorovánà zaÅÃzenÃ.\n\n**<span style=âcolor:redâ>UPOZORNÄNÃ: VylouÄenà snÃmaÄe funguje na principu matematického algoritmu. I pÅes snahu vývojáÅů najÃt ideálnà ÅeÅ¡enà kontroly rizik stále existuje možnost, že vylouÄený snÃmaÄ může být jediný funkÄnÃ. Vždy si ovÄÅte své kyslÃkové senzory.</span>**\n\nInformace o zacházenà se snÃmaÄi kyslÃku a jejich údržbÄ naleznete v kapitole âSnÃmaÄe kyslÃkuâ.","textLarge":false,"imageOnRight":true,"image":{"recommendedSizes":{"width":"420","height":"280"}},"imageMobile":{"recommendedSizes":{"width":"750","height":"500"}}},"id":"#80","type":"component","lock":false,"position":133},{"name":"Divider","data":{"color":"darkGray"},"id":"#81","type":"component","lock":false,"position":134},{"name":"SectionDivider","data":{"title":"1.9.3 Measurement of He content"},"id":"#527","type":"component","lock":false,"position":135},{"name":"TextBlock","data":{"text":"### <span id=\"1-.-9-.-3-Measurement-of-He-content\">**1.9.3 MÄÅenà obsahu He**</span>\n\nKoncentrace helia je urÄena rychlostà zvuku ve smÄsi. SnÃmaÄe koncentrace He jsou pÅipojeny k inhalaÄnà stranÄ.\n\nPokles tlaku způsobený cirkulacà smÄsi v dýchacà smyÄce umožÅuje, aby plyn procházel senzorem.","textLarge":false,"imageOnRight":true,"image":{"recommendedSizes":{"width":"420","height":"280"}},"imageMobile":{"recommendedSizes":{"width":"750","height":"500"}}},"id":"#82","type":"component","lock":false,"position":136},{"name":"TextBlock","data":{"text":"Pokud uživatel z rebreatheru nedýchá, tento proces neprobÄhne a údaje ze senzoru mohou být nepÅesné.\n\nPokud využÃvané Åedidlo obsahuje > 20 % He a jeho složenà je známo, lze pomocà funkce mÄÅenà koncentrace He zpÄtnÄ zjistit koncentraci kyslÃku ve smÄsi na základÄ toho, že pomÄr inertnÃch plynů zůstává konstantnà (postup podle patentu Ä. 303577). ","textLarge":false,"imageOnRight":true,"image":{"recommendedSizes":{"width":"420","height":"280"},"mimetype":"image/png","size":83504,"hash":"fd5624d892793e9dd8937eb3559eecc0b7413932","id":"cl3sodia1ddno0776nuvjinpn","filename":"divesoft-ccr-liberty-manual-1-9-3-01.png","category":"divesoft/","type":"image"},"imageMobile":{"recommendedSizes":{"width":"750","height":"500"}}},"id":"#83","type":"component","lock":false,"position":137},{"name":"TextBlock","data":{"text":"Tento princip mÄÅenà koncentrace kyslÃku (a jeho následný automatický pÅepoÄet na základÄ známého okolnÃho tlaku na parciálnà tlak) se použÃvá jako záložnà metoda mÄÅenà ppO<sub>2</sub> v pÅÃpadÄ, že vÅ¡echny elektrochemické snÃmaÄe ppO<sub>2</sub> selžou.\n \nMÄÅenà kyslÃku pomocà heliových senzorů musà být zapnuto ruÄnÄ v nabÃdce Setup / Faulty sensors / pO<sub>2</sub> source (Nastavenà / Vadné senzory / Zdroj pO<sub>2</sub>). Tato metoda je urÄena pouze pro použità v nouzových situacÃch. Pokud je to možné, použijte záchranný pÅÃstroj.\n\nPoužità heliových senzorů závisà také na nastavenà CCR Liberty. Pro funkci heliového senzoru je tÅeba zvolit âTMX onlyâ (pouze TMX), a to v Menu / Nastavenà / PÅedvolby / MÄÅenà He.\n\nPro správnou funkci heliových senzorů je nutné senzory pravidelnÄ kalibrovat. Postup kalibrace naleznete v Äásti Kalibrace heliových senzorů (viz kapitola 3.2.7).\n\nHéliové senzory udržujte vždy v suchu, abyste zajistili jejich dlouhou životnost a funkÄnost (viz také Äást 3.5.1 BezprostÅednÄ po vynoÅenÃ).\n\nSenzory nerozebÃrejte, protože by mohlo dojÃt k jejich neopravitelnému poÅ¡kozenÃ.\n\n**<span style=âcolor:redâ>UPOZORNÄNÃ: NevyjÃmejte heliové senzory z pÅÃstroje, ani když jsou vadné. Jejich vyjmutÃm dojde ke âzkratuâ skruberu, který
2nebude schopen filtrovat CO<sub>2</sub> z dýchacà smÄsi.</span>**.This principle of measuring the oxygen concentration (and its subsequent automatic conversion on the basis of the known ambient pressure to partial pressure) is used as the backup method of measuring ppO<sub>2</sub> in case all electrochemical ppO<sub>2</sub> sensors malfunction.\n ","textLarge":false,"imageOnRight":true,"image":{"recommendedSizes":{"width":"420","height":"280"}},"imageMobile":{"recommendedSizes":{"width":"750","height":"500"}}},"id":"#84","type":"component","lock":false,"position":138},{"name":"Divider","data":{"color":"darkGray"},"id":"#85","type":"component","lock":false,"position":139},{"name":"SectionDivider","data":{"title":"1.9.4 Helium blind plugs"},"id":"#528","type":"component","lock":false,"position":140},{"name":"TextBlock","data":{"text":"### <span id=\"1-.-9-.-4-Helium-blind-plugs\">**1.9.4 cHeliové záslepky**</span>\n\nSouÄástà vaÅ¡eho zaÅÃzenà CCR Liberty jsou dva â zaslepovacÃâ konektory heliového senzoru. Tyto zátky jsou navrženy tak, aby fungovaly jako distanÄnà vložka a uživatel mohl vyjmout vysoce citlivé senzory. Héliové senzory Divesoft jsou vysoce citlivé na vlhkost a mohou se snadno poÅ¡kodit, pokud nenà vlhkost odstranÄ
2na Åádným vÄtránÃm. DůraznÄ doporuÄujeme použÃvat pÅi procedurách po ponoru náš pÅÃsluÅ¡enstvà - ventilátor na hlavÄ, aby se odstranila vlhkost, která by se mohla bÄhem potápÄnà v senzorech nahromadit.\n\nÃÄelem tÄchto zátek je, aby bylo možné odstranit senzory helia, když se uživatel nepotápà se smÄsà helia. DoporuÄujeme, aby uživatel v dobÄ, kdy se nepotápà s héliovou smÄsà plynů, použÃval mÃsto toho zátky pro zaslepenà hélia.\n\nInstalace slepých zátek:\n\n- Nejprve vezmÄte Å¡estihranný klÃÄ a vyjmÄte blok kyslÃkových Älánků.\n- Jakmile je blok odstranÄn, vezmÄte Å¡estihranný klÃÄ a odstraÅte Å¡estihranný Å¡roub uvnitÅ senzoru helia, který zajiÅ¡Å¥uje senzor k hlavÄ Liberty.\n - Po úplném odstranÄnà šroubu pevnÄ uchopte snÃmaÄ hélia a opatrnÄ jej vyjmÄte, dbejte na to, abyste snÃmaÄ pÅi vyjmutà nepÅekroutili.\n- Poté nainstalujte zaslepovacà zátku ve stejné orientaci jako Äidlo hélia a zajistÄte ji Å¡estihranným Å¡roubem, vždy dbejte na to, abyste Å¡roub utahovali **pouze dvÄma prsty** a **neutahujte Å¡rouby pÅÃliÅ¡ silnÄ**.\n- Tento postup zopakujte i pro Äidlo helia na opaÄné stranÄ.\n- Jakmile jsou obÄ zaslepovacà zátky nainstalovány a Å¡estihranné Å¡rouby ÅádnÄ zajiÅ¡tÄny, namontujte zpÄt blok kyslÃkových Älánků, dbejte na to, abyste Å¡rouby neutáhli pÅÃliÅ¡.\n- UmÃstÄte heliové senzory do oznaÄeného malého sáÄku a ÅádnÄ je uložte v klimatizovaném prostoru, abyste použili osvÄdÄené postupy pro vaÅ¡e rebreatherové senzory. Jsou urÄeny pro extrémnà podmÃnky rebreatherového potápÄnÃ, ale aby byla zaruÄena jejich životnost, je tÅeba o nÄ ÅádnÄ peÄovat.\n- BÄhem vaÅ¡ich operacà pÅed ponorem pÅi použità slepých zátek bude pÅÃstroj Liberty zobrazovat chybu - senzor chybÃ. AÄkoli jsou senzory helia vypnuty, protože jsou nainstalovány slepé zátky. Tato skuteÄnost je oÄekávaná a nebude mÃt žádný vliv na potápÄÄské operace.\n- Pokud se potápÃte s trimixem nebo jinými smÄsmi na bázi helia, důraznÄ doporuÄujeme slepé zátky odstranit. A do hlavy Liberty nainstalovat vysoce vÄrné senzory helia. UjistÄte se, že jste snÃmaÄe ÅádnÄ zkalibrovali na vzduchu. Po kalibraci snÃmaÄů zkontrolujte v Setup / Preferences (Nastavenà / PÅedvolby), zda je mÄÅenà helia nastaveno na âTMX onlyâ (Pouze TMX). TÃm zaruÄÃte, že budete mÃt v systému Liberty rebreather redundantnà mÄÅenà ppO<sub>2</sub> a správné mÄÅenà helia.","textLarge":false,"imageOnRight":true,"image":{"recommendedSizes":{"width":"420","height":"280"}},"imageMobile":{"recommendedSizes":{"width":"750","height":"500"}}},"id":"#86","type":"component","lock":false,"position":141},{"name":"Divider","data":{"color":"darkGray"},"id":"#87","type":"component","lock":false,"position":142},{"name":"SectionDivider","data":{"title":"1.9.5 Pressure and depth measurement"},"id":"#529","type":"component","lock":false,"position":143},{"name":"TextBlock","data":{"text":"### <span id=\"1-.-9-.-5-Pressure-and-depth-measurement\">**1.9.5 MÄÅenà tlaku a hloubky**</span>\n\nKaždá z ÅÃdicÃch jednotek CCR Liberty použÃvá dva tlakové senzory. Prvnà snÃmaÄ urÄený k mÄÅenà nÃzkého tlaku se použÃvá k urÄenà výšky hladiny moÅe, ke kalibraci snÃmaÄů ppO<sub>2</sub> a ke zlepÅ¡enà pÅesnosti údajů o hloubce v mÄlké vodÄ.\n\nDruhý senzor je urÄen pÅedevÅ¡Ãm k mÄÅenà hydrostatického tlaku. Maximálnà rozsah Äidla odpovÃdá hloubce 300 m.","textLarge":false,"imageOnRight":true,"image":{"recommendedSizes":{"width":"420","height":"280"}},"imageMobile":{"recommendedSizes":{"width":"750","height":"500"}}},"id":"#88","type":"component","lock":false,"position":144},{"name":"Divider","data":{"color":"darkGray"},"id":"#89","type":"component","lock":false,"position":145},{"name":"SectionDivider","data":{"title":"1.9.6 Temperature measurement"},"id":"#530","type":"component","lock":false,"position":146},{"name":"TextBlock","data":{"text":"### <span id=\"1-.-9-.-6-Temperature-measurement\">**1.9.6 MÄÅenà teploty**</span>\n\nTeplota v dýchacÃm okruhu je mÄÅena teplotnÃmi Äidly v tlakových Äidlech. SnÃmaÄe teploty vody jsou umÃstÄny v handsetech.\n\nÃdaje o teplotÄ sloužà pÅedevÅ¡Ãm k doplnÄnà pÅesnosti mÄÅenà ostatnÃch Äidel. Teplota vody zobrazená na displeji HS je pouze pÅibližný údaj.","textLarge":false,"imageOnRight":true,"image":{"recommendedSizes":{"width":"420","height":"280"}},"imageMobile":{"recommendedSizes":{"width":"750","height":"500"}}},"id":"#90","type":"component","lock":false,"position":147},{"name":"Divider","data":{"color":"darkGray"},"id":"#91","type":"component","lock":false,"position":148},{"name":"SectionDivider","data":{"title":"1.9.7 Solenoids"},"id":"#531","type":"component","lock":false,"position":149},{"name":"TextBlock","data":{"text":"### <span id=\"1-.-9-.-7-Solenoids\">**1.9.7 Solenoids**</span>\n\nThe control units communicate with each other and, in normal circumstances, open the solenoid valves, which supply oxygen to the breathing circuit.\n\nThe solenoids are opened alternately left â right in a six-second interval. The solenoid opening is indicated in the dive mode by the â=â symbol in the left or right bottom corner of the handset screen.\n\n**Failed solenoid detection**\nThe solenoids are normally opened alternately left â right after six seconds. If one of the solenoids is defective and still registered as functional, then the oxygen injection interval is actually extended to 12 sec, because the device uses a non-functional solenoid every 6 seconds. In this case, the oxygen supply is insufficiently accurate.\n\nDefective solenoid detection works in case the solenoid is blocked in the closed position or disconnected altogether (connector failure). The electronics verify whether the solenoid responds to stimuli and evaluates whether the solenoid is functional or not. In the event of a malfunctioning solenoid, the diver will receive information on which of the two solenoids is malfunctioning. The diver has the option to disable the faulty solenoid during the dive ***Menu / Setup / Faulty sensors / Solenoids***.\n\nAs soon as the diver deactivates the solenoid, the device then uses only one solenoid with an\ninterval of 6 sec.\n\nThis is warning only, the device does not deactivate the solenoid automatically.\n\nThe warning is issued after multiple failed solenoid responses (cca 30-50sec delay), so do not rely on this warning. Since in a scenario of a âstuck openâ solenoid, you will get ppO2 creep or spike long before a solenoid failure warning.\n","textLarge":false,"imageOnRight":true,"image":{"recommendedSizes":{"width":"420","height":"280"}},"imageMobile":{"recommendedSizes":{"width":"750","height":"500"}}},"id":"#92","type":"component","lock":false,"position":150},{"name":"Divider","data":{"color":"darkGray"},"id":"#93","type":"component","lock":false,"position":151},{"name":"SectionDivider","data":{"title":"1.9.8 Power supply"},"id":"#532","type":"component","lock":false,"position":152},{"name":"TextBlock","data":{"text":"### <span id=\"1-.-9-.-8-Power
2-supply\">**1.9.8 NapájenÃCCR Liberty použÃvá dvÄ Li-Ion baterie, jednu pro napájenà každé ÅÃdicà jednotky. Minimálnà životnost Li-Ion baterià je Å¡est mÄsÃců. Typická životnost baterià je dva roky.\n\nViz také Äást 3.2.6 NabÃjenà bateriÃ.\n\nProstory pro baterie jsou odolné proti tlaku. Pokud se uvnitÅ bateriového prostoru vytvoÅà pÅetlak z důvodu poruchy baterie nebo difúze helia, pak pÅetlakový ventil vypustà pÅebyteÄné plyny ven z rebreatheru a do okolnà vody.\n\n**Specifikace baterie:**\n\n- Typ: Li-Ion\n- NapÄtÃ: 3,6 V \n- Kapacita: 5,7 Ah**</span>\n\nThe CCR Liberty uses two Li-Ion batteries, one to power each control unit. The minimum service life of Li-Ion batteries is six months. The typical service life of the batteries is two years.\n\nSee also section 3.2.6 Battery charging.\n\nThe battery compartments are pressure resistant. If overpressure is formed inside of a battery compartment because of battery malfunction or helium diffusion, then an overpressure valve will release excess gases out of the rebreather and into the surrounding water.\n\n**Battery specification:**\n\n- Type: Li-Ion\n- Voltage: 3.6V \n- Capacity: 5.7Ah","textLarge":false,"imageOnRight":true,"image":{"recommendedSizes":{"width":"420","height":"280"}},"imageMobile":{"recommendedSizes":{"width":"750","height":"500"}}},"id":"#94","type":"component","lock":false,"position":153},{"name":"Divider","data":{"color":"darkGray"},"id":"#95","type":"component","lock":false,"position":154},{"name":"SectionDivider","data":{"title":"1.10 Visual display units"},"id":"#534","type":"component","lock":false,"position":155},{"name":"TextBlock","data":{"text":"### <span id=\"1-.-10-Visual-display-units\">**1.10 Zobrazovacà jednotky**</span>","textLarge":false,"imageOnRight":true,"image":{"recommendedSizes":{"width":"420","height":"280"}},"imageMobile":{"recommendedSizes":{"width":"750","height":"500"}}},"id":"#535","type":"component","lock":false,"position":156},{"name":"SectionDivider","data":{"title":"1.10.1 Handsets"},"id":"#533","type":"component","lock":false,"position":157},{"name":"TextBlock","data":{"text":"### <span id=\"1-.-10-.-1-Handsets\">**1.10.1 Handsety**</span>\n\nHandsety poskytujà uživateli CCR Liberty komplexnà informace o stavu rebreatheru a průbÄhu ponoru. VÅ¡echny funkce ÅÃdicÃch jednotek se ovládajà pomocà sluchátek.\n\nFunkce obou sluchátek jsou shodné. Každý handset ovládá obÄ ÅÃdicà jednotky souÄasnÄ. V pÅÃpadÄ poruchy jednoho sluchátka potápÄÄ jednoduÅ¡e použije druhý handset. BÄhem ponoru je možné na každém z nich nastavit jiný režim zobrazenÃ.\n\nDalÅ¡Ã informace o ovládánà handsetu naleznete v Äásti 2 Ovládánà ÅÃdicà jednotky.","textLarge":false,"imageOnRight":true,"image":{"recommendedSizes":{"width":"420","height":"280"}},"imageMobile":{"recommendedSizes":{"width":"750","height":"500"}}},"id":"#96","type":"component","lock":false,"position":158},{"name":"Divider","data":{"color":"darkGray"},"id":"#97","type":"component","lock":false,"position":159},{"name":"SectionDivider","data":{"title":"1.10.2 Head-up display"},"id":"#536","type":"component","lock":false,"position":160},{"name":"TextBlock","data":{"text":"### <span id=\"1-.-10-.-2-Head-up-display\">**1.10.2 Head-up display**</span> \n\nNa head-up displeji (HUD) se bÄhem ponoru zobrazuje aktuálnà stav parciálnÃho tlaku nebo chyby CCR.\n\nDalÅ¡Ã stavy se zobrazujà v pohotovostnÃm režimu, bÄhem nabÃjenà a pÅi pÅipojenà pÅÃstroje k poÄÃtaÄi.","textLarge":false,"imageOnRight":true,"image":{"recommendedSizes":{"width":"420","height":"280"},"mimetype":"image/png","size":120828,"hash":"b22dabd3fc8d935b1f92e7257c7e5b812c96e89e","id":"cl3sof920ddp80776d192imeq","filename":"divesoft-ccr-liberty-manual-1-10-2-01.png","category":"divesoft/","type":"image"},"imageMobile":{"recommendedSizes":{"width":"750","height":"500"}}},"id":"#98","type":"component","lock":false,"position":161},{"name":"TextBlock","data":{"text":"Pokud si nejste zcela jisti, co HUD zobrazuje, zkontrolujte parametry na displeji sluchátka. Vždy zkontrolujte HS, pokud HUD zobrazuje výstrahu (vnÄjÅ¡Ã LED bliká ÄervenÄ) nebo alarm (vÅ¡echny tÅi LED bliknou ÄtyÅikrát ÄervenÄ).\n\nJednotlivé signály HUD jsou uvedeny v následujÃcà tabulce.\n\nJas HUD lze nastavit pomocà nabÃdky Nastavenà / Vlastnosti / Indikace / Jas HUD. ZmÄna jasu displeje se uplatÅuje pouze v režimu potápÄnÃ. V režimu Surface na ni nemá vliv.","textLarge":false,"imageOnRight":true,"image":{"recommendedSizes":{"width":"420","height":"280"}},"imageMobile":{"recommendedSizes":{"width":"750","height":"500"}}},"id":"#99","type":"component","lock":false,"position":162},{"name":"Divider","data":{"color":"darkGray"},"id":"#100","type":"component","lock":false,"position":163},{"name":"SectionDivider","data":{"title":"1.10.3 Buddy display"},"id":"#537","type":"component","lock":false,"position":164},{"name":"TextBlock","data":{"text":"### <span id=\"1-.-10-.-3-Buddy-display\">**1.10.3 Buddy displej**</span> \n\nBuddy displej (BD) ukazuje, zda jsou hodnoty parciálnÃho tlaku kyslÃku v rozmezÃ, které je vhodné pro dýchánÃ, nebo zda doÅ¡lo k chybné situaci. Zobrazené informace jsou urÄeny pro potápÄÄského partnera uživatele CCR Liberty.\n\nPÅed potápÄnÃm musà uživatel p
2ÅÃstroje CCR Liberty seznámit svého potápÄÄského partnera s funkcà buddy displeje a dohodnout se na nouzovém postupu, který bude proveden v pÅÃpadÄ, že buddy displej indikuje chybovou situaci.\n\nJednotlivé signály buddy displeje jsou uvedeny v následujÃcà tabulce.\n\n**Signály HUD a buddy-displeje**","textLarge":false,"imageOnRight":true,"image":{"recommendedSizes":{"width":"420","height":"280"}},"imageMobile":{"recommendedSizes":{"width":"750","height":"500"}}},"id":"#101","type":"component","lock":false,"position":165},{"name":"Image","data":{"firstImage":{"mimetype":"image/png","size":205332,"hash":"e4397563e3d7bdcf97ec7e9e914cc297506e50e1","id":"cl6j3t6al0ncg07765e1hrxf5","filename":"divesoft-ccr-liberty-manual-1-10-3-01.png","category":"divesoft/","type":"image"},"secondImage":{},"image":{"type":"image"}},"id":"#102","type":"component","lock":false,"position":166},{"name":"Divider","data":{"color":"darkGray"},"id":"#488","type":"component","lock":false,"position":167},{"name":"TextBlock","data":{"text":"**Režim pro barvoslepé**\n\nPokud nedokážete rozliÅ¡it modrá a zelená svÄtla LED, zaÅ¡krtnÄte âColor blind modeâ v Setup / Preferences / Indication. Signály pro 1,05 ⤠ppO<sub>2</sub> ⤠1,65 se zmÄnà podle následujÃcà tabulky:","textLarge":false,"imageOnRight":true,"image":{"recommendedSizes":{"width":"420","height":"280"}},"imageMobile":{"recommendedSizes":{"width":"750","height":"500"}}},"id":"#104","type":"component","lock":false,"position":168},{"name":"Image","data":{"firstImage":{"mimetype":"image/png","size":49503,"hash":"8664e32af7a4cbbe47e614a3cfea1bad1c95be8c","id":"cl6j3xquj0nco0776adx4gh8c","filename":"divesoft-ccr-liberty-manual-1-10-3-02.png","category":"divesoft/","type":"image"},"secondImage":{},"image":{"type":"image"}},"id":"#105","type":"component","lock":false,"position":169},{"name":"Divider","data":{"color":"darkGray"},"id":"#106","type":"component","lock":false,"position":170},{"name":"SectionDivider","data":{"title":"1.11 Backplate and mounting"},"id":"#538","type":"component","lock":false,"position":171},{"name":"TextBlock","data":{"text":"### <span id=\"1-.-11-Backplate-and-mounting\">**1.11 Backplate a montáž**</span>\n\nZpůsob upevnÄnà CCR Liberty na tÄlo potápÄÄe vycházà z backplate a postroje, které jsou bÄžné u kompenzátorů vztlaku typu kÅÃdla použÃvaných pÅi technickém potápÄnÃ.\n\nTÄlo rebreatheru, které se skládá z kanystru a pÅipojené hlavy, je pÅipevnÄno k backplate pomocà vaÄky. Páku vaÄky nelze uvolnit, když má potápÄÄ na sobÄ rebreather.","textLarge":false,"imageOnRight":true,"image":{"recommendedSizes":{"width":"420","height":"280"}},"imageMobile":{"recommendedSizes":{"width":"750","height":"500"}}},"id":"#107","type":"component","lock":false,"position":172},{"name":"Image","data":{"firstImage":{"mimetype":"image/png","size":142759,"hash":"dc96a887ec2f5f6369256f38404c0eaeab1abf46","id":"cl3sohv9sddr10776ymc3hb3h","filename":"divesoft-ccr-liberty-manual-1-11-01.png","category":"divesoft/","type":"image"},"secondImage":{"mimetype":"image/png","size":108064,"hash":"dc12b38164d9201fc0ad2159c643c6f3b856c8a2","id":"cl4gnogy8jpmd0776be5rooft","filename":"divesoft-ccr-liberty-manual-1-11-02.png","category":"divesoft/","type":"image"},"image":{"type":"image"}},"id":"#108","type":"component","lock":false,"position":173},{"name":"Image","data":{"firstImage":{"mimetype":"image/png","size":247396,"hash":"5e840dc45ec5bbf18431bbd22dc419b52e1dbd3f","id":"cl4gnp1dijpml0776jtxhs8r2","filename":"divesoft-ccr-liberty-manual-1-11-03.png","category":"divesoft/","type":"image"},"secondImage":{}},"id":"#485","type":"component","lock":false,"position":174},{"name":"TextBlock","data":{"text":"Integrovaný stojan CCR Liberty, který sloužà jako bedernà opÄrka, je urÄen k postavenà rebreatheru na tvrdý, rovný povrch s dostateÄnou tuhostÃ. StojÃcà rebreather vždy zajistÄte, abyste zabránili jeho pádu.\n\nV pÅÃpadÄ potÅeby je možné opÄrnou desku pÅÃstroje CCR Liberty odejmout a použÃt ji s postrojem pro potápÄnà s otevÅeným okruhem. Zadnà deska umožÅuje pÅipevnÄnà dvojsady (dvÄ lahve pevnÄ spojené nerezovými pásky) bÄžnÄ použÃvané pÅi technickém potápÄnÃ, stejnÄ jako pÅipevnÄnà jedné lahve.\n\nPÅi montáži pÅÃstroje CCR Liberty na backplate zasuÅte dno kanystru rebreatheru do výstupku ve stojanu rebreatheru.","textLarge":false,"imageOnRight":true,"image":{"recommendedSizes":{"width":"420","height":"280"}},"imageMobile":{"recommendedSizes":{"width":"750","height":"500"}}},"id":"#109","type":"component","lock":false,"position":175},{"name":"Divider","data":{"color":"darkGray"},"id":"#110","type":"component","lock":false,"position":176},{"name":"SectionDivider","data":{"title":"1.12 Harness"},"id":"#539","type":"component","lock":false,"position":177},{"name":"TextBlock","data":{"text":"### <span id=\"1-.-12-Harness\">**1.12 Postroj**</span>\n\nZadnà deska je vybavena postrojem, který má zajistit správnou funkci systému. NemÄÅte způsob byl urÄen k použitÃ. Pokud se pokusÃte svazek vyjmout, zaznamenejte pÅesnÄ, jak je navleÄen, aby nedoÅ¡lo k zásahu do funkÄnosti celého systému.\n\nPro zajiÅ¡tÄnà správného uchycenà je nutné postroj upravit. Postroj upravte bez namontovaného ÄisticÃho kanystru, hlavy, vlnitých hadic a dýchacÃch vaků.\n\nNastavte délku ramennÃch popruhů tak, aby se pod nÄ v úrovni klÃÄnà kosti snadno veÅ¡ly tÅi prsty.\
2n\nHrudnà D-kroužky by mÄly být co nejnÞe a zároveÅ by mÄly umožÅovat pohodlné pÅekÅÞenà rukou na hrudi. D-kroužky by mÄly být dostateÄnÄ vysoko, abyste na levý kroužek dosáhli levým palcem a na pravý kroužek pravým palcem. D-kroužek na levé stranÄ bedernÃho popruhu by mÄl být zhruba na vaÅ¡em boku.\n\nUpravte délku levé Äásti popruhu tak, aby procházel okem rozkrokového popruhu a mezi kroužkem a okem zbývalo jeÅ¡tÄ pÅibližnÄ 5 cm (Å¡ÃÅka popruhu). Pravou Äást nastavte tak, aby byl popruh mÃrnÄ napnutý. Pokud popruh zkracujete, ponechte si dostateÄný prostor pro různé obleky nebo pÅÃpadnou zmÄnu tÄlesných rozmÄrů. Po zkrácenà je nutné konce ÅemÃnků zaÄiÅ¡tit tepelným zatavenÃm zapalovaÄem nebo svÃÄkou. Postupujte opatrnÄ, aby se na koncÃch popruhů nevytvoÅil tvrdý povrch.\n\nUpravte délku popruhu v rozkroku tak, aby tÄsnÄ pÅiléhal k tÄlu, ale nezakusoval se do nÄj. Polohu zadnÃho D-kroužku nastavte co nejnÞe, ale dostateÄnÄ vysoko, aby pÅi plavánà netlaÄil na hýždÄ. Zadnà D-kroužek by mÄl být v dosahu potápÄÄe. PÅesnou polohu zadnÃho D-kroužku vyzkouÅ¡ejte ve vodÄ s kompletnÃm pÅÃstrojem.","textLarge":false,"imageOnRight":true,"image":{"recommendedSizes":{"width":"420","height":"280"}},"imageMobile":{"recommendedSizes":{"width":"750","height":"500"}}},"id":"#111","type":"component","lock":false,"position":178},{"name":"Divider","data":{"color":"darkGray"},"id":"#112","type":"component","lock":false,"position":179},{"name":"SectionDivider","data":{"title":"1.13 Buoyancy compensator"},"id":"#540","type":"component","lock":false,"position":180},{"name":"TextBlock","data":{"text":"### <span id=\"1-.-13-Buoyancy-compensator\">**1.13 Kompenzace vztlaku**</span>\n\nCCR Liberty použÃvá kompenzátor vztlaku (BCD) kÅÃdlového typu s výtlakem 200 N. Konstrukce a materiály kompenzátoru jsou velmi odolné a vhodné i pro potápÄnà v jeskynÃch a pÅi vracÃch.\n\nKÅÃdlo má dvouvrstvou konstrukci. VnitÅnà mÄchýŠje vyroben z vysokofrekvenÄnÄ svaÅované tkaniny Cordura 560 s PU zátÄrem. VnÄjÅ¡Ã potah kÅÃdla je vyroben z tkaniny Cordura 2000.\n\nKÅÃdlo se pÅipevÅuje pomocà šroubů podél okraje zadnà desky.\n\nPro správné umÃstÄnà nafukovaÄky protáhnÄte nÃzkotlakou hadici gumovým kroužkem na vlnité hadici, poté gumovým kroužkem na ramennÃm popruhu a nakonec druhým gumovým kroužkem na vlnité hadici. Nevynechávejte žádný z kroužků na vlnité hadici; po odpojenà rychlospojky od nafukovaÄe by se mohla posunout natolik dozadu, že by ji bylo obtÞné najÃt nebo dosáhnout.\n\nKompenzátor vztlaku nenà záchranná vesta. Neudržuje potápÄÄe v poloze obliÄejem vzhůru. Nenà urÄen k tomu, aby udržoval obliÄej potápÄÄe nad hladinou, pokud by upadl do bezvÄdomà nebo se znehybnil.","textLarge":false,"imageOnRight":true,"image":{"recommendedSizes":{"width":"420","height":"280"}},"imageMobile":{"recommendedSizes":{"width":"750","height":"500"}}},"id":"#113","type":"component","lock":false,"position":181},{"name":"Divider","data":{"color":"darkGray"},"id":"#114","type":"component","lock":false,"position":182},{"name":"SectionDivider","data":{"title":"1.14 Ballast"},"id":"#541","type":"component","lock":false,"position":183},{"name":"TextBlock","data":{"text":"### <span id=\"1-.-14-Ballast\">**1.14 ZátÄž**</span>\n\nZátÄžový systém se skládá ze dvou vaků umÃstÄných po stranách kanystru ÄisticÃho zaÅÃzenà a pÅipevnÄných k válcům. Ve spodnà Äásti vaků je smyÄka, kterou procházà upevÅovacà popruh tÄla rebreatheru. VnitÅnà vaky, které obsahujà jednotlivá závažÃ, se vkládajà do vnÄjÅ¡Ãch vaků. Hornà chlopeÅ vnÄjÅ¡Ãho vaku je urÄena k vloženà závažà pÅed ponorem a k jejich vyjmutà po ponoru. Pro nouzové vyhozenà zátÄže zatáhnÄte za Äervený popruh na spodnà Äásti vaku. TÃm se otevÅe vnÄjÅ¡Ã vak a uvolnà se vnitÅnà vak obsahujÃcà zátÄž.\n\nPÅi bÄžném odstraÅovánà balastu nepoužÃvejte metodu pro nouzové vyhozenÃ. Mohlo by dojÃt k nadmÄrnému opotÅebenà suchého zipu.\n\nPotápÄÄ v suchém obleku obvykle potÅebuje 2Ã4 kg zátÄže. Správná váha a rozloženà balastu je tématem, kterému se vÄnuje kurz potápÄÄe CCR Liberty.","textLarge":false,"imageOnRight":true,"image":{"recommendedSizes":{"width":"420","height":"280"}},"imageMobile":{"recommendedSizes":{"width":"750","height":"500"}}},"id":"#115","type":"component","lock":false,"position":184},{"name":"Divider","data":{"color":"darkGray"},"id":"#116","type":"component","lock":false,"position":185},{"name":"SectionDivider","data":{"title":"1.15 Weights of individual parts"},"id":"#542","type":"component","lock":false,"position":186},{"name":"TextBlock","data":{"text":"### <span id=\"1-.-15-Weights-of-individual-parts\">**1.15 Hmotnosti jednotlivých dÃlů**</span>\n\nUvedené hmotnosti jsou pouze orientaÄnÃ. Hmotnost jednotlivých Äástà pÅÃstroje se může liÅ¡it.\n\n- Backplate s kÅÃdlem, postrojem a hadicemi, bez protikusů ........ 10,68 kg\n- Hmotnostnà kapsy (bez závažÃ) ...................................................................... 0,43 kg\n- Dýchacà vaky vÄetnÄ vÅ¡ech ventilů.................................................................................1,86 kg\n- Lahev s ventilem, prázdná .......................................................................................... 5,44 kg\n- Vrapová hadice, kompletnà .................................................................................. 1,11 kg\n- TÄlo skruberu a vložka, bez sorbentu ................................................ 3,76 kg\n- Hlava vÄetnÄ handsetů, HUD a BD ....................................................................... 4,59 kg\n- NabÃjeÄka s kabelem ................................................................................................ 0,09 kg\n- Dodávané pÅÃsluÅ¡enstvà a drobné dÃly\n(bez nabÃjeÄek) ............................1.00 kg\n- Peli
2Stormcase iM2975 ....................................................................................... 10,30 kg\n- KyslÃk 3 l pÅi 200 barech ............................................................................................ 0,84 kg\n- Diluent (vzduch) 3 l pÅi 300 barech ................................................................................... 0,91 kg\n- Sofnolime ............................................................................................................... 2,50 kg\n- Energie uložená v bateriÃch ...................................................................... 4,16Ã10-11 kg\n","textLarge":false,"imageOnRight":true,"image":{"recommendedSizes":{"width":"420","height":"280"}},"imageMobile":{"recommendedSizes":{"width":"750","height":"500"}}},"id":"#117","type":"component","lock":false,"position":187},{"name":"Divider","data":{"color":"darkGray"},"id":"#323","type":"component","lock":false,"position":188},{"name":"ListOfLinks","data":{"links":[{"title":"< Previous page / Introduction","url":{"url":"/en/manuals/ccr-liberty-manual","pageId":"cl2yfnr88iba8085879y08pat","urlNewWindow":true},"id":"1"},{"title":"> Next page / Section: 2. Control-unit operation","url":{"url":"/en/manuals/ccr-liberty-manual/ccr-liberty-manual-02","pageId":"cl43w7gb7l8e20858xrzqgqz9"},"id":"2"}],"activeTab":"2"},"id":"#465","type":"component","lock":false,"position":189},{"name":"Footer","data":{"copyrights":"Copyright © 2019 Divesoft LLC All rights reserved.","facebookUrl":{"urlNewWindow":true,"url":"https://www.facebook.com/divesoft/"},"youtubeUrl":{"url":"https://www.youtube.com/channel/UCHI2-kHmfoUlAdhQXPKl8lA/featured","urlNewWindow":true},"instagramUrl":{"url":"https://www.instagram.com/divesoft/","urlNewWindow":true},"contacts":"**Divesoft s.r.o.** \nHálkova 2495 \n413 01 Roudnice nad Labem \nCzech Republic \nTel.: +420 416 857 057 \nE-mail: [email protected]"},"id":"#1","type":"component","lock":false,"position":190}],"id":"root","idBuffer":"#567","lastCommit":"d6b36a03-549a-4edf-a625-5dbcf2665725"}},"annotations":[],"language":{"type":"id","generated":false,"id":"Language:cjv3kwvoj000u083611381c6o","typename":"Language"},"__typename":"PageTranslation"},"Page:cm0cctnnd12dy0818yp2e3eli":{"id":"cm0cctnnd12dy0818yp2e3eli","type":{"type":"id","generated":false,"id":"PageType:cjv3l213x004f08366hjufttp","typename":"PageType"},"tags":[],"translations({\"where\":{\"language\":{\"id\":\"cjv3kwvoj000u083611381c6o\"}}})":[{"type":"id","generated":false,"id":"PageTranslation:cm0cctno112e808189j2hk94e","typename":"PageTranslation"}],"__typename":"Page"},"PageTranslation:cm0cctno112e808189j2hk94e":{"id":"cm0cctno112e808189j2hk94e","name":"CCR Liberty Manual 02 CZ","createdAt":"2024-08-27T11:39:03.313Z","content":{"type":"json","json":{"content":[{"name":"Header","data":{"products":[{"title":"Accessories","description":"Backplates, Consumables. Tanks.","img":{"recommendedSizes":{"width":"235","height":"235"}},"url":""},{"title":"Accessories sets","description":"Protection, maintenance, cleaning.","img":{"recommendedSizes":{"width":"235","height":"235"}},"url":""},{"title":"Spare parts","description":"Spare parts and components.","img":{"recommendedSizes":{"width":"235","height":"235"}},"url":""},{"title":"Spare parts kits","description":"Completly Liberty spare parts kits.","img":{"recommendedSizes":{"width":"235","height":"235"}},"url":""}]},"id":"#0","type":"component","lock":false,"position":0},{"name":"Divider","data":{"color":"darkGray"},"id":"#47","type":"component","lock":false,"position":1},{"name":"SectionDivider","data":{"title":""},"id":"#550","type":"component","lock":false,"position":2},{"name":"TextBlock","data":{"text":"[**Section: 2. Control-unit operation**](#2-.-Control-unit-operation)\n\n[2.1\tControl elements](#2.-1-Control-elements)\n\n[2.1.1\tSurface mode inputs](#2-.-1-.-1-Surface-mode-inputs) \n[2.1.2\tDive mode inputs](#2-.-1-.-2-Dive-mode-inputs) \n[2.1.3\tLanguage](#2-.-1-.-3-Language) \n\n[2.2\tSwitching on the unit](#2-.-2-Switching-on-the-unit)\n\n[2.2.1\tActivation](#2-.-2-.-1-Activation) \n\n[2.3\tSurface mode](#2-.-3-Surface-mode)\n\n[2.3.1\tEntering surface mode](#2-.-3-.-1-Entering-surface-mode) \n[2.3.2\tSurface mode primary screen](#2-.-3-.-2-Surface-mode-primary-screen) \n[2.3.3\tSurface mode O<sub>2</sub> sensors screen](#2-.-3-.-3-Surface-mode-O2-sensors-screen) \n[2.3.4\tSwitching to other modes](#2-.-3-.-4-Switching-to-other-modes) \n[2.3.5\tppO<sub>2</sub> control in surface mode](#2-.-3-.-5-ppO2-control-in-surface-mode) \n\n[2.4\tSetup](#2-.-4-Setup)\n\n[2.4.1\tEditor use](#2-.-4-.-1-Editor-use) \n[2.4.2\tSetpoints](#2-.-4-.-2-Setpoints) \n[2.4.3\tMixtures](#2-.-4-.-3-Mixtures) \n[2.4.4\tDecompression](#2-.-4-.-4-Decompression) \n[2.4.5\tAlarms](#2-.-4-.-5-Alarms) \n[2.4.6\tPreferences](#2-.-4-.-6-Preferences) \n[2.4.7\tCalibration](#2-.-4-.-7-Calibration) \n[2.4.8\tFaulty sensors](#2-.-4-.-8-Faulty-sensors) \n\n[2.5\tDive mode](#2-.-5-Dive-mode)\n\n[2.5.1\tDetailed screen](#2-.-5-.-1-Detailed-screen) \n[2.5.2\tSynoptic screen](#2-.-5-.-2-Synoptic-screen) \n[2.5.3\tBig Screen](#2-.-5-.-3-Big-Screen) \n[2.5.4\tDive profile screen](#2-.-5-.-4-Dive-profile-screen) \n[2.5.5\tSensors screen](#2-.-5-.-5-Sensors-screen) \n[2.5.6\tTTS Screen](#2-.-5-.-6-TTS-Screen) \n\n[2.6\tCCR mode](#2-.-6-CCR-mode)\n\n[2.6.1\tEntering CCR mode](#2-.-6-.-1-Entering-CCR-mode) \n[2.6.2\tSwitching to other modes](#2-.-6-.-2-Switching-to-other-modes) \n[2.6.3\tppO<sub>2</sub> regulation](#2-.-6-.-3-ppO2-regulation) \n[2.6.4\tDecompression](#2-.-6-.-4-Decompression) \n[2.6.5\tSpecific handset control](#2-.-6-.-5-Specific-handset-control) \n\n[2.7\tManual CCR mode](#2-.-7-Manual-CCR-mode)\n\n[2.7.1\tEntering manual CCR mode](#2-.-7-.-1-Entering-manual-CCR-mode) \n[2.7.2\tSwitching to other modes](#2-.-7-.-2-Switching-to-other-modes) \n[2.7.3\tppO<sub>2</sub> regulation](#2-.-7-.-3-ppO2-regulation) \n[2.7.4\tDecompression](#2-.-7-.-4-Decompression) \n\n[2.8\tBailout OC mode](#2-.-8-Bailout-OC-mode)\n\n[2.8.1\tEntering bailout OC mode](#2-.-8-.-1-Entering-bailout-OC-mode) \n[2.8.2\tSwitching to other modes](#2-.-8-.-2-Switching-to-othe-modes) \n[2.8.3\tMixture](#2-.-8-.-3-Mixture) \n[2.8.4\tDecompression](#2-.-8-.-4-Decompression) \n[2.8.5\tSpecific handset control](#2-.-8-.-5-Specific-handset-control) \n\n[2.9\tAscent plan](#2-.-9-Ascent-plan)\n\n[2.10\tSetup in Dive mode](#2-.-10-Setup-in-Dive-mode)\n\n[2.11\tGames](#2-.-11-Games)\n\n[2.11.1\tSokoban](#2-.-11-.-1-Sokoban) \n[2.11.2\tSnake](#2-.-11-.-2-Snake) \n\n[2.12\tList of pop-up alarms and notifications on CCR Liberty](#2-.-12-List-of-pop---up-alarms-and-notifications-on-CCR-Liberty)\n\n[2.12.1\tCritical priority](#2-.-12-.-1-Critical-priority) \n[2.12.2\tHigh priority](#2-.12-.-2-High-priority) \n[2.12.3\tMedium priority](#2-.-12-.-3-Medium-priority) \n[2.12.4\tNotifications](#2-.-12-.-4-Notifications) ","textLarge":false,"imageOnRight":true,"image":{"recommendedSizes":{"width":"420","height":"280"}},"imageMobile":{"recommendedSizes":{"width":"750","height":"500"}}},"id":"#479","type":"component","lock":false,"position":3},{"name":"Divider","data":{"color":"darkGray"},"id":"#480","type":"component","lock":false,"position":4},{"name":"SectionDivider","data":{"title":"2. Control-unit operation"},"id":"#487","type":"component","lock":false,"position":5},{"name":"TextBlock","data":{"text":"### <span id=\"2-.-Control-unit-operation\">**2. Provoz ÅÃdicà jednotky**</span>","textLarge":false,"imageOnRight":true,"image":{"recommendedSizes":{"width":"420","height":"280"}},"imageMobile":{"recommendedSizes":{"width":"750","height":"500"}}},"id":"#489","type":"component","lock":false,"position":6},{"name":"SectionDivider","data":{"title":"2.1 Control elements"},"id":"#488","type":"component","lock":false,"position":7},{"name":"TextBlock","data":{"text":"### <span id=\"2.-1-Control-elements\">**2.1 Ovládacà prvkyVeÅ¡kerá elektronika v systému CCR Liberty se ovládá prostÅednictvÃm sluchátek.\n\nR
2ozliÅ¡ujà se následujÃcà vstupy a kombinace:\n\n- StisknÄte hornà tlaÄÃtko\n- StisknÄte spodnà klávesu\n- StisknÄte obÄ klávesy\n- Dlouhý stisk hornà klávesy\n- Dlouhé stisknutà spodnà klávesy\n- Dlouhé stisknutà obou kláves\n- Kódované stisknutà kláves (stisknÄte obÄ klávesy, pak jednu klávesu uvolnÄte a znovu stisknÄte, pak obÄ uvolnÄte). \nklávesy)\n- Naklonit HS smÄrem od sebe\n- NaklonÄnà HS smÄrem k sobÄ\n- Naklonit HS doleva\n- Naklonit HS doprava\n- KlepnÄte na sklo displeje\n- PosviÅ¥te si na displej\n- \n\nâDlouhý stiskâ znamená stisknutà tlaÄÃtka na dobu delÅ¡Ã než 2,5 sekundy. Operaci stisknutà klávesy lze ukonÄit uvolnÄnÃm klávesy, na které se právÄ nacházÃ, nebo po uvolnÄnà poslednà klávesy (pÅi stisknutà obou kláves).\n\nKonfigurace daného HS - aÅ¥ už je nastaven pro levou nebo pravou ruku - urÄà smÄry naklápÄnà a to, které klávesy budou tvoÅit hornÃ/dolnÃ.\n\nKonfiguraci naklápÄnà HS lze zmÄnit klepnutÃm na HS z kterékoli ze ÄtyÅ stran.**</span>\n\n","textLarge":false,"imageOnRight":true,"image":{"recommendedSizes":{"width":"420","height":"280"}},"imageMobile":{"recommendedSizes":{"width":"750","height":"500"}}},"id":"#119","type":"component","lock":false,"position":8},{"name":"TextBlock","data":{"text":"","textLarge":false,"imageOnRight":true,"image":{"recommendedSizes":{"width":"420","height":"280"}},"imageMobile":{"recommendedSizes":{"width":"750","height":"500"}}},"id":"#436","type":"component","lock":false,"position":9},{"name":"Divider","data":{"color":"darkGray"},"id":"#120","type":"component","lock":false,"position":10},{"name":"SectionDivider","data":{"title":"2.1.1 Surface mode inputs"},"id":"#494","type":"component","lock":false,"position":11},{"name":"TextBlock","data":{"text":"### <span id=\"2-.-1-.-1-Surface-mode-inputs\">**2.1.1 Vstupy v povrchovém režimu**</span>\n\nKlávesy a dalÅ¡Ã vstupy majà pÅiÅazený význam v souvislosti s aktuálnà položkou, na kterou se v nabÃdce pÅecházÃ. ZároveÅ jsou vÅ¡ak pro jejich použità stanovena obecná pravidla, která platà vÅ¡ude, kde je to možné.\n\n- Stisk hornà klávesy - výbÄr položky nabÃdky\n- StisknÄte dolnà klávesu - procházenà nabÃdky\n- StisknÄte obÄ klávesy - ukonÄenà nabÃdky bez provedenà jakékoli akce\n- Dlouhé stisknutà hornà klávesy - zobrazenà stránky nahoru. Platà pouze v knize záznamů. Ve standardnà nabÃdce má tato funkce dalÅ¡Ã funkce, které jsou oznaÄeny ikonou dvojitého zaÅ¡krtnutÃ:\n\n- povolit nebo zakázat smÄs bez zadánà editace smÄsi (Setup/Mixtures/OC; Setup/Mixtures/CCR).\n\n- ZapnutÃ/vypnutà letnÃho Äasu (Setup/Preferences/Time&GPS/Timezone).\n\n- Dlouhé stisknutà spodnà klávesy - stránka dolů\n- Dlouhé stisknutà obou kláves - návrat na hlavnà obrazovku\n- Kódované stisknutà klávesy - pÅepnutà do režimu údržby (lze provést pouze z hlavnà obrazovky).\n- NaklonÄnà HS smÄrem od sebe - zvýšenà zadané ÄÃslice o jednu nebo zaÅ¡krtnutà polÃÄka\n- NaklonÄnà HS smÄrem k sobÄ - snÞenà zadané ÄÃslice o jedniÄku nebo zruÅ¡enà zaÅ¡krtnutà polÃÄka\n- NaklonÄnà HS doleva - posunutà kurzoru doleva\n- Naklonit HS doprava - posunout kurzor doprava.\n\nV nÄkterých pÅÃpadech, napÅÃklad v nabÃdce nebo na obrazovce úprav, se zobrazujà užiteÄné symboly vztahujÃcà se ke klávesám. Symbol může být buÄ vedle jedné klávesy a oznaÄovat akci provedenou pÅi stisknutà pÅÃsluÅ¡né klávesy, nebo mezi klávesami (oznaÄovat akci provedenou pÅi stisknutà obou kláves).\n\nSymbol **|â|** oznaÄuje, že uživatel může procházet nabÃdkou. Procházenà v nabÃdce je cyklické, takže kurzor se vrátà na zaÄátek seznamu nabÃdky. Funkce posouvánà nahoru nenà k dispozici kvůli ovládánà dvÄma klávesami.\n\nSymbol **||** znamená návrat o jednu úroveÅ zpÄt bez provedenà jakékoli akce.\n\nSymbol **|<span style=âcolor:greenâ>â</span>|** pÅedstavuje výbÄr položky nebo potvrzenà akce.","textLarge":false,"imageOnRight":true,"image":{"recommendedSizes":{"width":"420","height":"280"}},"imageMobile":{"recommendedSizes":{"width":"750","height":"500"}}},"id":"#121","type":"component","lock":false,"position":12},{"name":"Divider","data":{"color":"darkGray"},"id":"#122","type":"component","lock":false,"position":13},{"name":"SectionDivider","data":{"title":"2.1.2 Dive mode inputs"},"id":"#493","type":"component","lock":false,"position":14},{"name":"TextBlock","data":{"text":"### <span id=\"2-.-1-.-2-Dive-mode-inputs\">**2.1.2 Vstupy v režimu potápÄnÃ**</span>\n\nVýznamy vstupů v povrchovém režimu platà i pro režim potápÄnÃ. NÄkteré výjimky jsou následujÃcÃ:\n\nDlouhý stisk hornà klávesy - posouvá žádanou hodnotu na nejbližšà vyššà žádanou hodnotu.\n\nDlouhé stisknutà dolnà klávesy - posune žádanou hodnotu na nejbližšà nižšà žádanou hodnotu.\n\nPÅi dekompresnÃch hrách je reakce na naklonÄnà citlivÄjÅ¡Ã. Zadávánà ÄÃslic pomocà naklápÄnà je omezeno pouze na zvláštnà pÅÃpady v režimu potápÄnÃ.\n\nKlepnutÃm na sklo displeje se displej zapne, pokud byl vypnutý. Pomocà editoru tlaÄÃtek je nynà možné zadávat také ÄÃselné hodnoty. NastavenÃ/PÅedvolby/OvládánÃ/Editor navigace.\n\nVe tmÄ se rozsvÃcenÃm potápÄÄského svÄtla na dis
2plej aktivuje stejným způsobem jako klepnutÃm na sklo. V pÅirozenÄ osvÄtleném prostÅedà lze displej aktivovat jeho zakrytÃm a následným odkrytÃm.","textLarge":false,"imageOnRight":true,"image":{"recommendedSizes":{"width":"420","height":"280"}},"imageMobile":{"recommendedSizes":{"width":"750","height":"500"}}},"id":"#123","type":"component","lock":false,"position":15},{"name":"Divider","data":{"color":"darkGray"},"id":"#124","type":"component","lock":false,"position":16},{"name":"SectionDivider","data":{"title":"2.1.3 Language"},"id":"#495","type":"component","lock":false,"position":17},{"name":"TextBlock","data":{"text":"### <span id=\"2-.-1-.-3-Language\">**2.1.3 Jazyk**</span>\n\nVeÅ¡keré textové informace o CCR Liberty jsou v angliÄtinÄ. Ovládánà pÅÃstroje vyžaduje znalost anglického jazyka alespoÅ na takové úrovni, aby uživatel tÄmto informacÃm důkladnÄ porozumÄl.\n\nV poslednÃch verzÃch firmwaru lze nastavit ÄeÅ¡tinu. Setup/Preferences/Language","textLarge":false,"imageOnRight":true,"image":{"recommendedSizes":{"width":"420","height":"280"}},"imageMobile":{"recommendedSizes":{"width":"750","height":"500"}}},"id":"#125","type":"component","lock":false,"position":18},{"name":"Divider","data":{"color":"darkGray"},"id":"#126","type":"component","lock":false,"position":19},{"name":"SectionDivider","data":{"title":"2.2 Switching on the unit"},"id":"#496","type":"component","lock":false,"position":20},{"name":"TextBlock","data":{"text":"### <span id=\"2-.-2-Switching-on-the-unit\">**2.2 Zapnutà pÅÃstroje**</span>\n\nZapnutà ÅÃdicà jednotky CCR Liberty vyžaduje, aby byla v pohotovostnÃm režimu, který je indikován na displeji HUD (pomalu blikajÃcà modrá LED) a na displeji kamaráda (pomalu blikajÃcà zelená LED).\n\nPokud jsou propojky odstranÄny (nebo otoÄeny tak, že kolÃky nejsou zasunuty do konektoru), nelze ÅÃdicà jednotku rebreatheru zapnout, s výjimkou napájenà pÅes USB pÅi pÅipojenà k poÄÃtaÄi pomocà adaptéru.","textLarge":false,"imageOnRight":true,"image":{"recommendedSizes":{"width":"420","height":"280"}},"imageMobile":{"recommendedSizes":{"width":"750","height":"500"}}},"id":"#127","type":"component","lock":false,"position":21},{"name":"Divider","data":{"color":"darkGray"},"id":"#128","type":"component","lock":false,"position":22},{"name":"SectionDivider","data":{"title":"2.2.1 Activation"},"id":"#497","type":"component","lock":false,"position":23},{"name":"TextBlock","data":{"text":"### <span id=\"2-.-2-.-1-Activation\">**2.2.1 Aktivace**</span>\n\nCCR Liberty se aktivuje stisknutÃm obou tlaÄÃtek na obou sluchátkách po dobu tÅà sekund.\n\nK automatické aktivaci dojde v pÅÃpadÄ, že se jednotky ponoÅà do hloubky vÄtÅ¡Ã než 1,5 m. V takovém pÅÃpadÄ uživatel nemůže pokraÄovat v ponoru a musà co nejdÅÃve provést kompletnà pÅÃpravu pÅed ponorem na hladinÄ.\n\nZapnutà CCR Liberty prostÅednictvÃm automatické aktivace je možné také v pÅÃpadÄ poÅ¡kozenà nebo ztráty obou sluchátek. **Použità této možnosti je riskantnÃ, a proto by mÄlo být zvažováno pouze pÅi záchranném pokusu, napÅÃklad pÅi evakuaci potápÄÄe z jeskynÄ, kde docházà k sifonovánÃ**.\n\nPo aktivaci se rebreather pÅepne do povrchového režimu. PÅi ponoÅenà do hloubky vÄtÅ¡Ã než 1,5 m se rebreather automaticky pÅepne do režimu CCR (za pÅedpokladu, že jsou jumpery pÅipojeny k bateriÃm). **Vzhledem k nÃzké frekvenci vzorkovánà hloubky pÅi vypnutém pÅÃstroji se rebreather automaticky zapne pÅibližnÄ po jedné minutÄ ponoÅenà do hloubky vÄtÅ¡Ã než 1,5 m.**\n\n**<span style=\"color:red\">VAROVÃNÃ: NIKDY NEDÃCHEJTE Z VYPNUTÃHO PÅÃSTROJE! Může to mÃt za následek vážné zranÄnà nebo smrt.</span>**","textLarge":false,"imageOnRight":true,"image":{"recommendedSizes":{"width":"420","height":"280"}},"imageMobile":{"recommendedSizes":{"width":"750","height":"500"}}},"id":"#129","type":"component","lock":false,"position":24},{"name":"Divider","data":{"color":"darkGray"},"id":"#130","type":"component","lock":false,"position":25},{"name":"SectionDivider","data":{"title":"2.3 Surface mode"},"id":"#498","type":"component","lock":false,"position":26},{"name":"TextBlock","data":{"text":"### <span id=\"2-.-3-Surface-mode\">**2.3 Povrchový režim**</span>","textLarge":false,"imageOnRight":true,"image":{"recommendedSizes":{"width":"420","height":"280"}},"imageMobile":{"recommendedSizes":{"width":"750","height":"500"}}},"id":"#499","type":"component","lock":false,"position":27},{"name":"SectionDivider","data":{"title":"2.3.1 Entering surface mode"},"id":"#500","type":"component","lock":false,"position":28},{"name":"TextBlock","data":{"text":"### <span id=\"2-.-3-.-1-Entering-surface-mode\">**2.3.1 Vstup do povrchového režimu**</span>\n\nCCR Liberty se po zapnutà stisknutÃm tlaÄÃtek pÅepne do povrchového režimu. Ve vodÄ lze povrchový režim zvolit v menu, pokud je hloubka menÅ¡Ã než 1,5 m.","textLarge":false,"imageOnRight":true,"image":{"recommendedSizes":{"width":"420","height":"280"}},"imageMobile":{"recommendedSizes":{"width":"750","height":"500"}}},"id":"#131","type":"component","lock":false,"position":29},{"name":"Divider","data":{"color":"darkGray"},"id":"#132","type":"component","lock":false,"position":30},{"name":"SectionDivider","data":{"title":"2.3.2 Surface mode primary screen"},"id":"#501","type":"component","lock":false,"position":31},{"name":"TextBlock","data":{"text":"### <span id=\"2-.-3-.-2-Surface-mode-primary-screen\">**2.3.2 Hlavnà obrazovka v režimu Surface**</span>","textLarge":false,"imageOnRight":true,"image":{"recommendedSizes":{"width":"420","height":"280"}},"imageMobile":{"recommendedSizes":{"width":"750","height":"500"}}},"id":"#441","type":"component","lock":false,"position":32},{"name":"TextBlock","data":{"text":"**Date and Time**\n\nUdržujte správné nastavenà mÃstnÃho Äasu; bude se použÃvat pro záznam protokolu.\n\n**Stack time**\n\nÄasovaÄ zásobnÃku skruberu bÄžà nepÅetržitÄ v režimu potápÄnà (s výjimkou OC bailout) bez ohledu na hloubku a lze jej nastavit tak, aby bÄžel i na hladinÄ (vÃce v Äásti âÄasovaÄ zásobnÃku sfcâ.).","textLarge":false,"imageOnRight":true,"image":{"recommendedSizes":{"width":"420","height":"280"},"mimetype":"image/png","size":80308,"hash":"476b80124b526bc436e19436dbb987980e26e610","id":"cl3sojl40ddum0776403i84u3","filename":"divesoft-ccr-liberty-manual-2-3-2-01.png","category":"divesoft/","type":"image"},"imageMobile":{"recommendedSizes":{"width":"750","height":"500"}}},"id":"#133","type":"component","lock":false,"position":33},{"name":"TextBlock","data":{"text":"Pokud strávÃte dlouhou dobu v režimu potápÄnà a pÅitom nedýcháte ze smyÄky rebreatheru, zvyÅ¡te Äas pro varovánà o dobÄ stack time.\n\nNezapomeÅte ÄasovaÄ vynulovat, když doplnÃte náplÅ do dýchacÃho pÅÃstroje (Predive â Stack time reset).\n\n**Max altitude**\n\nVýpoÄet maximálnà povolené výšky je založen na dekompresnÃm algoritmu ZHL s dodateÄnou bezpeÄnostnà rezervou (GF = 0,80). Je pokraÄovánÃm dekompresnÃch výpoÄtů a funguje stejnÄ jako dekompresnà strop.\n\n**No fly**\n\nVýpoÄet doby zákazu letu vycházà z maximálnà povolené výšky podle Bühlmannova dekompresnÃho algoritmu ZHL.\n\nTlak vzduchu v kabinÄ dopravnÃho letadla je udržován na úrovni odpovÃdajÃcà tlaku vzduchu ve výšce 1800-2400 m (6000-8000 stop) nad moÅem, zatÃmco cestovnà výška spadá do rozmezà 11 000-12 200 m (36 000-40 000 stop).\n\nPÅi výpoÄtu doby zákazu letu se použÃvá rozhodujÃcà výška 4464 m (14 646 stop). V této výšce se automaticky otevÅou oddÃly obsahujÃcà kyslÃkové masky a kyslÃkové masky
2se spustà dolů pÅed cestujÃcà letadla.\n\n**Symbol baterie**\n\nZbývajÃcà kapacita baterie se zobrazuje graficky. ObÄ baterie jsou indikovány samostatnÄ.","textLarge":false,"imageOnRight":true,"image":{"recommendedSizes":{"width":"420","height":"280"}},"imageMobile":{"recommendedSizes":{"width":"750","height":"500"}}},"id":"#134","type":"component","lock":false,"position":34},{"name":"Image","data":{"firstImage":{"mimetype":"image/png","size":33293,"hash":"35f11085780f0861d890efffe30111131e1caf37","id":"cl6j45khv0ncy0776xtcgmf19","filename":"divesoft-ccr-liberty-manual-2-3-2-02.png","category":"divesoft/","type":"image"},"secondImage":{}},"id":"#135","type":"component","lock":false,"position":35},{"name":"TextBlock","data":{"text":"**Setpoints**\n\nSestupový (\"-.--\" pokud je deaktivován), nÃzký a vysoký setpoint jsou uvedeny.\nppO<sub>2</sub>\nZobrazuje se namÄÅený parciálnà tlak kyslÃku.","textLarge":false,"imageOnRight":true,"image":{"recommendedSizes":{"width":"420","height":"280"}},"imageMobile":{"recommendedSizes":{"width":"750","height":"500"}}},"id":"#136","type":"component","lock":false,"position":36},{"name":"Divider","data":{"color":"darkGray"},"id":"#137","type":"component","lock":false,"position":37},{"name":"SectionDivider","data":{"title":"2.3.3 Surface mode O2 sensors screen"},"id":"#502","type":"component","lock":false,"position":38},{"name":"TextBlock","data":{"text":"### <span id=\"2-.-3-.-3-Surface-mode-O2-sensors-screen\">**2.3.3 Povrchový režim O<sub>2</sub> obrazovka senzorů**</span>","textLarge":false,"imageOnRight":true,"image":{"recommendedSizes":{"width":"420","height":"280"}},"imageMobile":{"recommendedSizes":{"width":"750","height":"500"}}},"id":"#442","type":"component","lock":false,"position":39},{"name":"TextBlock","data":{"text":"Chcete-li pÅepÃnat mezi různými obrazovkami v režimu povrchu, stisknÄte hornà tlaÄÃtko. Lze odeÄÃtat jak ppO<sub>2</sub>, tak napÄtà senzoru. Pokud senzor nenà v provoznÃm stavu (nepÅipojen, offline, chyba, vylouÄen, vypnut, nekalibrován), zobrazà se mÃsto hodnoty ppO<sub>2</sub> pÅÃsluÅ¡ný tag.","textLarge":false,"imageOnRight":true,"image":{"recommendedSizes":{"width":"420","height":"280"},"mimetype":"image/png","size":348491,"hash":"a676b35787e5adef20c11efb7de01acb268717a6","id":"cl3sokpr8ddvo07765y34fuuk","filename":"divesoft-ccr-liberty-manual-2-3-3-01.png","category":"divesoft/","type":"image"},"imageMobile":{"recommendedSizes":{"width":"750","height":"500"}}},"id":"#138","type":"component","lock":false,"position":40},{"name":"TextBlock","data":{"text":"Na obrazovce Senzory O<sub>2</sub> můžete také zjistit mÃstnà Äas, maximálnà rozdÃl mezi hodnotami senzorů a Äas zásobnÃku.\n \nPokud po výmÄnÄ snÃmaÄe kyslÃku zjistÃte, že jeho napÄtà je záporné (-10 mV), znamená to, že konektor ke snÃmaÄi je zapojen obrácenÄ.","textLarge":false,"imageOnRight":true,"image":{"recommendedSizes":{"width":"420","height":"280"}},"imageMobile":{"recommendedSizes":{"width":"750","height":"500"}}},"id":"#139","type":"component","lock":false,"position":41},{"name":"Divider","data":{"color":"darkGray"},"id":"#140","type":"component","lock":false,"position":42},{"name":"SectionDivider","data":{"title":"2.3.4 Switching to other modes"},"id":"#503","type":"component","lock":false,"position":43},{"name":"TextBlock","data":{"text":"### <span id=\"2-.-3-.-4-Switching-to-other-modes\">**2.3.4 PÅepnutà do jiných režimů**</span>\n","textLarge":false,"imageOnRight":true,"image":{"recommendedSizes":{"width":"420","height":"280"}},"imageMobile":{"recommendedSizes":{"width":"750","height":"500"}}},"id":"#443","type":"component","lock":false,"position":44},{"name":"TextBlock","data":{"text":"V nabÃdce může uživatel pÅepÃnat z povrchového režimu na režim CCR, ruÄnà CCR, záchranný režim a pohotovostnà režim.\n\nPÅi ponoÅenà do hloubky vÄtÅ¡Ã než 1,5 m se rebreather automaticky pÅepne do režimu CCR.","textLarge":false,"imageOnRight":true,"image":{"recommendedSizes":{"width":"420","height":"280"},"mimetype":"image/png","size":34636,"hash":"502928a109d20737a24f0f4fb20ca591f65a819e","id":"cl3solo2pddx90776lkh2cgud","filename":"divesoft-ccr-liberty-manual-2-3-4-01.png","category":"divesoft/","type":"image"},"imageMobile":{"recommendedSizes":{"width":"750","height":"500"}}},"id":"#141","type":"component","lock":false,"position":45},{"name":"Divider","data":{"color":"darkGray"},"id":"#142","type":"component","lock":false,"position":46}
2,{"name":"SectionDivider","data":{"title":"2.3.5 ppO2 control in surface mode"},"id":"#504","type":"component","lock":false,"position":47},{"name":"TextBlock","data":{"text":"### <span id=\"2-.-3-.-5-ppO2-control-in-surface-mode\">**2.3.5 ÅÃzenà ppO<sub>2</sub> v povrchovém režimu**</span>\n \nJednoduché ÅÃzenà ppO<sub>2</sub> je spuÅ¡tÄno v povrchovém režimu. Pokud obsah kyslÃku ve smyÄce klesne pod 19 % (vzhledem k aktuálnÃmu atmosférickému tlaku), solenoid se otevÅe a pÅidá 0,5 litru kyslÃku. To by mÄlo zajistit, že parciálnà tlak kyslÃku stoupne na hodnotu alespoÅ 0,23 bar. KyslÃk se pak vstÅikuje v Å¡estisekundových intervalech (tÅi sekundy po poslednÃm uzavÅenà solenoidu). Tento ÅÃdicà algoritmus má zabránit nebezpeÄnému poklesu ppO<sub>2</sub> a následné ztrátÄ vÄdomà uživatele, který se mohl omylem nadechnout z okruhu, aniž by aktivoval režim potápÄnÃ.\n\nÅÃzenà ppO<sub>2</sub> podléhá dalÅ¡Ãm podmÃnkám; kyslÃková láhev musà být plná, pÅipojená a otevÅená. Senzory ppO<sub>2</sub> musà být rovnÄž nainstalovány a kalibrovány. Uživateli se doporuÄuje, aby se pÅed potápÄnÃm na CCR Liberty vyvaroval nadmÄrné fyzické aktivity, protože to může způsobit vyÅ¡Å¡Ã spotÅebu kyslÃku.\n\nÅÃzenà ppO<sub>2</sub> v povrchovém režimu pouze udržuje hladinu kyslÃku tÄsnÄ nad prahem hypoxie; nesmà se proto bÄžnÄ použÃvat k dýchánÃ. PÅidávánà kyslÃku nenà aktivnÃ, když je hlava pÅipojena k nabÃjeÄce.\n\n","textLarge":false,"imageOnRight":true,"image":{"recommendedSizes":{"width":"420","height":"280"}},"imageMobile":{"recommendedSizes":{"width":"750","height":"500"}}},"id":"#143","type":"component","lock":false,"position":48},{"name":"Divider","data":{"color":"darkGray"},"id":"#144","type":"component","lock":false,"position":49},{"name":"SectionDivider","data":{"title":"2.4 Setup"},"id":"#505","type":"component","lock":false,"position":50},{"name":"TextBlock","data":{"text":"### <span id=\"2-.-4-Setup\">**2.4 NastavenÃ**</span>\n\nCCR Liberty je nakonfigurován v povrchovém režimu. Aktivujte hlavnà nabÃdku povrchového režimu krátkým stisknutÃm obou tlaÄÃtek a vyberte možnost Setup.\n\nNÄkteré hodnoty lze nastavit i bÄhem ponoru; to je vÅ¡ak vyhrazeno pouze pro ÅeÅ¡enà výjimeÄných situacÃ.\n\nNastavené hodnoty budou záviset pÅedevÅ¡Ãm na zkuÅ¡enostech, fyziologii a osobnÃch preferencÃch uživatele. SkuteÄnost, že pÅÃstroj CCR Liberty umožÅuje uživateli zvolit si vlastnà hodnoty, neznamená, že takové nastavenà je bezpeÄné nebo vhodné pro daného ÄlovÄka a jeho plánovaný ponor.\n\nPokud si nejste jisti, jakou hodnotu nastavit, ponechte hodnoty na výchozÃm nastavenÃ.\n\nVýrobce neposkytuje záruku na nesprávnou funkci pÅÃstroje CCR Liberty, pokud je chybná funkce důsledkem nesprávného nastavenÃ.\n\nVýchozà hodnoty nastavenà z výroby jsou oznaÄeny hranatými závorkami.","textLarge":false,"imageOnRight":true,"image":{"recommendedSizes":{"width":"420","height":"280"}},"imageMobile":{"recommendedSizes":{"width":"750","height":"500"}}},"id":"#145","type":"component","lock":false,"position":51},{"name":"Divider","data":{"color":"darkGray"},"id":"#146","type":"component","lock":false,"position":52},{"name":"SectionDivider","data":{"title":"2.4.1 Editor use"},"id":"#506","type":"component","lock":false,"position":53},{"name":"TextBlock","data":{"text":"### <span id=\"2-.-4-.-1-Editor-use\">**2.4.1 Použità editoru**</span>\n\nVÄtÅ¡ina hodnot se upravuje podobným způsobem.","textLarge":false,"imageOnRight":true,"image":{"recommendedSizes":{"width":"420","height":"280"}},"imageMobile":{"recommendedSizes":{"width":"750","height":"500"}}},"id":"#444","type":"component","lock":false,"position":54},{"name":"TextBlock","data":{"text":"- StisknÄte spodnà klávesu - pÅesune kurzor\n\n- Stisk hornà klávesy - iterace 0-9 (pokud jsme omezeni maximálnà hodnotou, pak 0-MAX)\n\n- Dlouhý stisk dolnà klávesy - posune se o jeden znak zpÄt\n\n- Dlouhý stisk hornà klávesy - obnovà v
2ýchozà hodnotu a posune kurzor na zaÄátek\n\n- Chcete-li uložit, pÅesuÅte kurzor na poslednà znak a opÄtovným stisknutÃm potvrÄte.","textLarge":false,"imageOnRight":true,"image":{"recommendedSizes":{"width":"420","height":"280"},"mimetype":"image/png","size":25561,"hash":"c54b78519b545051344802594ee32617236d9070","id":"cl3sommpcddyh0776pww0t77o","filename":"divesoft-ccr-liberty-manual-2-4-1-01.png","category":"divesoft/","type":"image"},"imageMobile":{"recommendedSizes":{"width":"750","height":"500"}}},"id":"#147","type":"component","lock":false,"position":55},{"name":"TextBlock","data":{"text":"**Aletrativnà metoda úprav naklonÄnÃm**\n\nNakloÅte se smÄrem k sobÄ - zmenÅ¡ete ÄÃslici o jednu nebo zruÅ¡te zaÅ¡krtnutà polÃÄka.\n\n- NaklonÄnà doleva - posunutà kurzoru doleva.\n- NaklonÄnà doprava - posunutà kurzoru doprava\n- StisknÄte hornà tlaÄÃtko - zruÅ¡enà úprav (obnovenà pÅedchozà hodnoty).\n- Dlouhé stisknutà hornà klávesy - obnovenà výchozà hodnoty\n- StisknÄte obÄ klávesy - ukonÄenà bez uloženÃ\n- StisknÄte dolnà klávesu - uloženà a ukonÄenÃ\n\n\nPÅÃpustný rozsah je oznaÄen *minimum .. \\[výchozÃ\\] .. maximálnÃ* hodnota.\n\nNa displeji se zobrazà struÄný popis nÞe.\n","textLarge":false,"imageOnRight":true,"image":{"recommendedSizes":{"width":"420","height":"280"}},"imageMobile":{"recommendedSizes":{"width":"750","height":"500"}}},"id":"#148","type":"component","lock":false,"position":56},{"name":"Divider","data":{"color":"darkGray"},"id":"#149","type":"component","lock":false,"position":57},{"name":"SectionDivider","data":{"title":"2.4.2 Setpoints"},"id":"#507","type":"component","lock":false,"position":58},{"name":"TextBlock","data":{"text":"### <span id=\"2-.-4-.-2-Setpoints\">**2.4.2 Setpointy**</span>\n\n**Použità sestupu SP \\[Off\\]**\n\nUmožÅuje použità sestupné žádané hodnoty.\n\n- Use descent setpoint \\[On\\] (PoužÃt nastavenou hodnotu sestupu) povoluje nastavenà sestupu pÅi zahájenà ponoru.\n- Use descent setpoint \\[On+Sfc\\] totéž co výše + pÅi vynoÅenà do 0,3 m nebo ménÄ opÄt aktivuje Descent SP pro opakované ponory, sifonové ponory a dalÅ¡Ã.\n\nViz také kapitola 2.6.3 Nastavená hodnota sestupu.\n\n**PoužÃvejte deco SP \\[On/Off\\]**.\n\nZapÃná nebo vypÃná nastavenou hodnotu dekomprese použÃvanou zejména pÅi výstupu.\n\n**ppO<sub>2</sub> sestup \\[0,4 baru\\]**\n\nHodnota nastavené hodnoty sestupu (rozsah: 0,2-1,0 bar).\n\nViz také kapitola 2.6.3 Nastavená hodnota klesánÃ.\n\n**ppO<sub>2</sub> low \\[0,7 bar\\]**\n\nHodnota nÃzké žádané hodnoty (rozsah: 0,4-1,3 barů).\n\nViz také kapitola 2.6.3 Nastavená hodnota.\n\n**ppO<sub>2</sub> high \\[1,3 bar\\]**\n\nHodnota vysoké žádané hodnoty (rozsah: 0,7-1,6 barů).\n\nViz také kapitola 2.6.3 Nastavená hodnota.\n\n**FO<sub>2</sub> limit \\[90 %\\]**\n\nPožadovaná hodnota je omezena na procento okolnÃho tlaku (rozsah: 60-96 %).\n\nNastavenà pÅÃliÅ¡ nÃzkého procenta snižuje úÄinnost dekomprese v malých hloubkách. Nastavenà pÅÃliÅ¡ vysokého procenta v malých hloubkách zvyÅ¡uje pÅÃjem kyslÃku, což způsobuje nutnost vypouÅ¡tÄnà obsahu dýchacà smyÄky a ztÄžuje vyvažovánÃ.\n\nViz také oddÃl 2.6.3 Omezenà nastavené hodnoty.\n\n","textLarge":false,"imageOnRight":true,"image":{"recommendedSizes":{"width":"420","height":"280"}},"imageMobile":{"recommendedSizes":{"width":"750","height":"500"}}},"id":"#150","type":"component","lock":false,"position":59},{"name":"TextBlock","data":{"text":"**SPh auto**\n\nAutomatické pÅepnutà na vysokou žádanou hodnotu Pokud jsou do grafu zadány hodnoty vÄtÅ¡Ã než 0, jednotka se pÅi pobytu pod vodou automaticky pÅepne na vysokou žádanou hodnotu podle zadaných parametrů. K tomu může dojÃt v důsledku pÅekroÄenà urÄité hloubky pÅi sestupu, Äasu na dnÄ nebo pÅekroÄenà urÄité hloubky pÅi výstupu.\n\n","textLarge":false,"imageOnRight":true,"image":{"recommendedSizes":{"width":"420","height":"280"},"mimetype":"image/png","size":9243,"hash":"8eb25b0e6f5757c10cdaf1c7f072226558def41a","id":"cl3sonla2de070776q2qcelwx","filename":"divesoft-ccr-liberty-manual-2-4-2-01.png","category":"divesoft/","type":"image"},"imageMobile":{"recommendedSizes":{"width":"750","height":"500"}}},"id":"#151","type":"component","lock":false,"position":60},{"name":"TextBlock","data":{"text":"Hodnoty se zapisujà do grafu schématu profilu ponoru. Pohybujte se v diagramu pomocà spodnÃho tlaÄÃtka, vyberte položku pomocà hornÃho tlaÄÃtka, nakloÅte k editaci.\n\nPro aktivaci opakovaného ponoru musà potápÄÄ nejprve vystoupat do hloubky 0,3 m nebo menÅ¡Ã a pÅi dalÅ¡Ãch ponorech (bez ukonÄenà režimu ponoru) se AutoSP-High nebo AutoSP-Descent vynuluje na hodnotu 1,5 m.\n\n**SPdeco auto**\n\nNastavenà spÃnaÄe automatické dekomprese.\n","textLarge":false,"imageOnRight":true,"image":{"recommendedSizes":{"width":"420","height":"280"}},"imageMobile":{"recommendedSizes":{"width":"750","height":"500"}}},"id":"#152","type":"component","lock":false,"position":61},{"name":"Divider","data":{"color":"darkGray"},"id":"#153","type":"component","lock":false,"position":62},{"name":"SectionDivider","data":{"title":"2.4.3 Mixtures"},"id":"#508","type":"component","lock":false,"position":63},{"name":"TextBlock","data":{"text":"### <span id=\"2-.-4-.-3-Mixtures\">**2.4.3 Mixtures**</span>\n\n**CCR**\n\nLze pÅednastavit osm různých smÄsà Åedidla s promÄnlivým podÃlem kyslÃku, dusÃku a helia.\n\nKrátkým stiskem hornÃho tlaÄÃtka vyberte smÄs, kterou chcete upravit, a naklánÄnÃm zmÄÅte hodnoty nebo polohu kurzoru.","textLarge":false,"imageOnRight":true,"image":{"recommendedSizes":{"width":"420","height":"280"},"mimetype":"image/png","size":42162,"hash":"075f2a19e910e73fce8529c203ed83bb102f6a7f","id":"cl3sooneode1o0776nc26y8jc","filename":"divesoft-ccr-liberty-manual-2-4-3-01.png","category":"divesoft/","type":"image"},"imageMobile":{"recommendedSizes":{"width":"750","height":"500"}}},"id":"#154","type":"component","lock":false,"position":64},{"name":"TextBlock","data":{"text":"Každou smÄs lze povolit (zaÅ¡krtávacà polÃÄko) nebo zakázat (vymazat zaÅ¡krtávacà polÃÄko). To lze provést na obrazovce úprav nebo pomocà klávesové zkratky - dlouhým stiskem hornà klávesy v seznamu smÄsÃ.\n\nVedle každé smÄsi plynů se zobrazà MOD a END. MOD se vypoÄÃtá tak, aby Åedidlo bylo vždy schopno zÅedit smÄs ve smyÄce. PoÄÃtá se z parciálnÃho tlaku o 0,2 baru nižšÃho, než je vysoká požadovaná hodnota.","textLarge":false,"imageOnRight":true,"image":{"recommendedSizes":{"width":"420","height":"280"},"mimetype":"image/png","size":10335,"hash":"24229c2307caa1290b378fe4fb519ee18457a6f9","id":"cl3sop701de2z07760buqfoay","filename":"divesoft-ccr-liberty-manual-2-4-3-02.png","category":"divesoft/","type":"image"},"imageMobile":{"recommendedSizes":{"width":"750","height":"500"}}},"id":"#155","type":"component","lock":false,"position":65}
2,{"name":"TextBlock","data":{"text":"SmÄs, kterou použijete jako Åedidlo, musà být jednou z vybraných smÄsÃ. Nastavenà nesprávného složenà Åedidla vede k nesprávnému výpoÄtu dekompresnÃho postupu a může vést k nepÅesnému podÃlu kyslÃku ve smÄsi, pokud rebreather pÅejde na nepÅÃmé mÄÅenà pomocà He senzorů.\n\nViz také oddÃl 3.2.5 Diluent.","textLarge":false,"imageOnRight":true,"image":{"recommendedSizes":{"width":"420","height":"280"},"mimetype":"image/png","size":9554,"hash":"09f2faf80e41c4f2250f74ab74bced549bca945f","id":"cl3sopo85de3k0776r780bp22","filename":"divesoft-ccr-liberty-manual-2-4-3-03.png","category":"divesoft/","type":"image"},"imageMobile":{"recommendedSizes":{"width":"750","height":"500"}}},"id":"#156","type":"component","lock":false,"position":66},{"name":"TextBlock","data":{"text":"**OC**\n\nLze pÅednastavit osm různých záchranných smÄsà OC s různými podÃly kyslÃku, dusÃku a helia.\n\nKaždou smÄs lze povolit (oznaÄené zaÅ¡krtávacà polÃÄko) nebo zakázat (vymazat zaÅ¡krtávacà polÃÄko). Vybrat lze pouze povolené smÄsi.\n\nVedle každé smÄsi plynů se zobrazuje tlak (bar nebo PSI) a objem lahve (litry nebo stopy krychlové). PÅi úpravÄ smÄsi nastavujeme jednotlivé položky samostatnÄ. MOD (maximálnà provoznà hloubka) se zobrazuje Å¡edým pÃsmem s ohledem na maximálnà ppO<sub>2</sub> 1,6 bar a END (ekvivalentnà narkotická hloubka). END se obvykle vyjadÅuje jako hloubka, ve které by potápÄnà se vzduchem mÄlo stejné narkotické úÄinky jako inertnà plyny použité v aktuálnà smÄsi. Tato teoretická hloubka je ekvivalentem urÄité cÃlové hloubky. V tomto pÅÃpadÄ vÅ¡ak cÃlová hloubka nenà známa, proto se END vyjadÅuje jako % narkotického úÄinku smÄsi na vzduchu.\n\nSmÄsi, které jste pÅipravili pro záchranu (nebo etapizaci), musà být zadány a povoleny.\n\nNepoužité plynové smÄsi musà být zakázány. V opaÄném pÅÃpadÄ budou výpoÄty plynového hospodáÅstvà nebo BO RMT zkreslené.\n\nV pÅÃpadÄ nouze lze smÄs povolit nebo dokonce novÄ definovat bÄhem ponoru. To by vÅ¡ak mÄlo být vyhrazeno pouze pro nouzové situace.\n**Def. diluent**\n\nAlternativnà výchozà Åedidlo lze vybrat pouze ze smÄsÃ, které jsou povoleny.\n\n**2<sup>nd</sup>Def. Dil**\n\nPokud je použit záložnà rebreather, definuje složenà Åedidla v záloze pro pÅÃsluÅ¡né dekompresnà výpoÄty.\n\n**Def. OC mix**\n\nAlternativnà výchozà záchrannou smÄs OC lze vybrat pouze ze smÄsÃ, které jsou povoleny.\n\n**End pressure**\n\nTlak na konci lahve pro plánovánà ÅÃzenà plynu v plánovaÄi a BO RMT bÄhem ponoru.\n\n**Min PO<sub>2</sub>**\n\nSpecifies the usability of OC mixtures with respect to the minimum ppO<sub>2</sub>.\n\n**Max PO<sub>2</sub>**\n\nSpecifies the usability of OC mixtures with respect to maximum ppO<sub>2</sub>.\n\n**RMV**\n\nRespiraÄnà minutový objem se použÃvá k výpoÄtu plynového hospodáÅstvà v plánovaÄi a BO RMT bÄhem ponoru. DoporuÄujeme nastavit dostateÄnou rezervu pro ÅeÅ¡enà nouzové situace. RMV pÅi zásahu CO<sub>2</sub> může výraznÄ pÅekroÄit 50 l/min.","textLarge":false,"imageOnRight":true,"image":{"recommendedSizes":{"width":"420","height":"280"}},"imageMobile":{"recommendedSizes":{"width":"750","height":"500"}}},"id":"#157","type":"component","lock":false,"position":67},{"name":"Divider","data":{"color":"darkGray"},"id":"#158","type":"component","lock":false,"position":68},{"name":"SectionDivider","data":{"title":"2.4.4 Decompression"},"id":"#509","type":"component","lock":false,"position":69},{"name":"TextBlock","data":{"text":"### <span id=\"2-.-4-.-4-Decompression\">**2.4.4 Dekomprese**</span>\n\n**GF low \\[0.30\\]**\n\nGradientnà faktor na zaÄátku dekomprese (rozmezÃ: 0,05-1,00)\n\nNÃzký GF urÄuje dodateÄné zvýšenà bezpeÄnosti v hloubce dekompresnÃho stropu na zaÄátku dekomprese. Nastavenà hodnoty 1,00 odpovÃdá Bühlmannovu dekompresnÃmu algoritmu bez dodateÄného zvýšenà bezpeÄnosti pomocà metody gradientnÃho faktoru.\n\nNastavenà nÃzkých hodnot vede k hlubÅ¡Ãm a delÅ¡Ãm zastávkám na zaÄátku dekomprese.\n\n**GF high \\[0.80\\]**\n\nGradientnà faktor na konci dekomprese (rozmezÃ: 0,10-1,00)\n\nVysoký GF urÄuje dodateÄné zvýšenà bezpeÄnosti pÅi výstupu na povrch. Nastavenà hodnoty 1,00 odpovÃdá Bühlmannovu dekompresnÃmu algoritmu bez dodateÄného zvýšenà bezpeÄnosti pomocà metody gradientnÃho faktoru.\n\nNastavenà nÃzkých hodnot vede k delÅ¡Ãm mÄlkým dekompresnÃm zastávkám.\n\n**Bailout GF low \\[0.80\\]**\n\nGradient factor for bailout at the start of decompression (range: 0.05â1.00)\n\nAs a general rule for bailout GF low, a higher GF value (a lower additional increase in safety) is set.\n\n**Bailout GF high \\[0.95\\]**\n\nGradientnà faktor pro záchranu na konci dekomprese (rozmezÃ: 0,10-1,00)\n\nObecnÄ platÃ, že pro vysoký GF záchrany se nastavuje vyÅ¡Å¡Ã hodnota GF (nižšà dodateÄné zvýšenà bezpeÄnosti).\n\n**Deco model**\n\ncMůžete si vybrat mezi dekompresnÃmi modely ZH-L16B a ZH-L16C. Dekompresnà model C je o nÄco konzervativnÄjÅ¡Ã než model B.\n\n**Rate & zone**\n\nTato položka umožÅuje nastav
2it rychlost klesánà a stoupánÃ. Zadánà se provádà ve schematickém grafu profilu ponoru. Pohybujte se v grafu pomocà spodnÃho tlaÄÃtka, vyberte položku pomocà hornÃho tlaÄÃtka, nakloÅte pro editaci. âRychlost sestupuâ je rychlost použÃvaná výhradnÄ v plánovaÄi pro sestup. NásledujÃcà hloubka âwarn underâ je prvnà hloubka, od které se může zobrazit alarm rychlosti klesánÃ, pokud pÅekroÄÃte nastavenou âmax. rychlostâ. Toto nastavenà je urÄeno k omezenà možného HPNS způsobeného rychlým sestupem v hluboké Äásti ponoru.\n\nRychlost výstupu je rozdÄlena do tÅà zón: maximálnà hloubka prvnÃho limitu; od prvnÃho limitu k druhému limitu; a koneÄnÄ od druhého limitu k hladinÄ. Tyto limity lze vymezit v grafu vpravo. Rychlosti v jednotlivých zónách jsou souÄástà grafu na levé stranÄ výstupu.\n\n**Planner setup**\n\nThe planner is used to help setup decompression and gas management plans. For a detailed description, see Planner settings â section 3.1.1\n\n**Reset deco data**\n\nTÃm se obnovà nasycenà inertnÃmi plyny a výpoÄet toxicity kyslÃku do stavu, který odpovÃdá velmi dlouhé dobÄ po pÅedchozÃm ponoru.\n\nPotápÄÄ, který použÃvá pÅÃstroj CCR Liberty po vynulovánà dekompresnÃch údajů, by se nemÄl potápÄt 48 hodin pÅed ponorem s vynulovaným pÅÃstrojem. NepotápÄjte se 24 hodin s resetovacÃm pÅÃstrojem po výrazném zvýšenà nadmoÅské výšky nad hladinou moÅe.\n","textLarge":false,"imageOnRight":true,"image":{"recommendedSizes":{"width":"420","height":"280"}},"imageMobile":{"recommendedSizes":{"width":"750","height":"500"}}},"id":"#159","type":"component","lock":false,"position":70},{"name":"Divider","data":{"color":"darkGray"},"id":"#160","type":"component","lock":false,"position":71},{"name":"SectionDivider","data":{"title":"2.4.5 Alarms"},"id":"#510","type":"component","lock":false,"position":72},{"name":"TextBlock","data":{"text":"### <span id=\"2-.-4-.-5-Alarms\">**2.4.5 Alarms**</span>","textLarge":false,"imageOnRight":true,"image":{"recommendedSizes":{"width":"420","height":"280"}},"imageMobile":{"recommendedSizes":{"width":"750","height":"500"}}},"id":"#477","type":"component","lock":false,"position":73},{"name":"TextBlock","data":{"text":"**Alarm sources**\n\n**CNS \\[On\\]**\n\nBylo dosaženo limitu toxicity kyslÃku.\n\n**Descent rate \\[Off\\]**\n\nRychlost klesánà pÅekroÄila nastavený limit.\n","textLarge":false,"imageOnRight":true,"image":{"recommendedSizes":{"width":"420","height":"280"},"mimetype":"image/png","size":10170,"hash":"db65375a8abde65e219d470006b571b61fdd2c01","id":"cl3sorfgide580776swo5q8ot","filename":"divesoft-ccr-liberty-manual-2-4-5-01.png","category":"divesoft/","type":"image"},"imageMobile":{"recommendedSizes":{"width":"750","height":"500"}}},"id":"#161","type":"component","lock":false,"position":74},{"name":"TextBlock","data":{"text":"**Ascent rate \\[On\\]**\n\nRychlost stoupánà pÅekroÄila nastavený limit; systém toleruje velmi krátké a rychlé pohyby.\n\n**Low battery \\[25%\\]**\n\nNapájenà baterie kleslo pod nastavený limit (rozsah: 0-40 %). Nastavenà 0 znamená deaktivaci tohoto alarmu.\n\n**Min PO<sub>2</sub>**\n\nUrÄuje dolnà mez pro alarm ppO<sub>2</sub> v režimu potápÄnà CCR.\n \n**Max PO<sub>2</sub>**\n\nUrÄuje hornà mez pro alarm ppO<sub>2</sub> v režimu potápÄnà CCR.\n \n**Air inegr.**\n\nPovoluje nebo zakazuje alarmy nÃzkého tlaku v lahvi nebo ztráty komunikace s vysÃlaÄem.\n\n**Notifications**","textLarge":false,"imageOnRight":true,"image":{"recommendedSizes":{"width":"420","height":"280"}},"imageMobile":{"recommendedSizes":{"width":"750","height":"500"}}},"id":"#162","type":"component","lock":false,"position":75},{"name":"TextBlock","data":{"text":"**No deco end \\[On\\]**\n\nKonec ponoru v nulovém Äase (terminologie Bühlmannova dekompresnÃho modelu), tj. oznámenÃ, že bude nutné snÞit rychlost výstupu a/nebo provést dekompresnà zastávky.\n\n**Gas switch reminder \\[Off\\]**\n\nAlarm uživatele upozornÃ, aby pÅepnul na jinou smÄs. PoužÃvá se pouze v záchranném režimu OC.","textLarge":false,"imageOnRight":true,"image":{"recommendedSizes":{"width":"420","height":"280"},"mimetype":"image/png","size":10718,"hash":"bb353231c9dda54d0208574f6982bff4c17a59ad","id":"cl3soryi7de5m0776sxsf4mxw","filename":"divesoft-ccr-liberty-manual-2-4-5-02.png","category":"divesoft/","type":"image"},"imageMobile":{"recommendedSizes":{"width":"750","height":"500"}}},"id":"#163","type":"component","lock":false,"position":76},{"name":"TextBlock","data":{"text":"**Gas switch done \\[On\\]**\n\nUpozorÅuje, že byla provedena zmÄna smÄsi (v režimu bailout OC) nebo diluentu.","textLarge":false,"imageOnRight":true,"image":{"recommendedSizes":{"width":"420","height":"280"}},"imageMobile":{"recommendedSizes":{"width":"750","height":"500"}}},"id":"#164","type":"component","lock":false,"position":77},{"name":"TextBlock","data":{"text":"**Depth & Time**\n\nHloubkové a Äasové upozornÄnà se nastavuje pomocà schematického grafu ponoru. Pohybujte se po grafu pomocà spodnÃho tlaÄÃtka, vybÃrejte pomocà hornÃho tlaÄÃtka a nastavujte hodnoty naklánÄnÃm poÄÃtaÄe.\n\nOznámenà o dosaženà nastavené **hloubky bÄhem sestupu**. Je možné nastav
2it tÅi samostatné hloubky v rozsahu 0-300 m. 0 znamená deaktivaci oznámenÃ.","textLarge":false,"imageOnRight":true,"image":{"recommendedSizes":{"width":"420","height":"280"},"mimetype":"image/png","size":9656,"hash":"1597572e668aa6a3eb69ed30719ebe88a3a6f7c3","id":"cl3sosewdde6e0776xob8nu9x","filename":"divesoft-ccr-liberty-manual-2-4-5-03.png","category":"divesoft/","type":"image"},"imageMobile":{"recommendedSizes":{"width":"750","height":"500"}}},"id":"#165","type":"component","lock":false,"position":78},{"name":"TextBlock","data":{"text":"Oznámenà o dosaženà **Äasu ponoru**. Je možné nastavit tÅi samostatné Äasy v rozmezà 0 - 999 min. 0 znamená deaktivaci oznámenÃ.\n\nOznámenÃ, že bylo dosaženo nastavené hloubky **pÅi výstupu**. Je možné nastavit tÅi samostatné hloubky v rozsahu 0 - 300 m. 0 znamená deaktivaci oznámenÃ.\n\n**Stack time \\[150 min\\]**\n\nOznámenà o dosaženà kumulativnÃho Äasu v jakémkoli režimu ponoru s uzavÅeným okruhem (rozsah: 0 - 360 min). 0 znamená deaktivaci oznámenÃ.\n\nChcete-li ÄasovaÄ vynulovat, pÅejdÄte do nabÃdky Predive me (PÅed ponorem).nu.\n\n**Stack timer sfc.**\n\nTuto funkci lze nastavit tak, aby se v povrchovém režimu nezapoÄÃtával Äas skruberu.\n\n**On** â poÄÃtáno na povrchu\n\n**Off** â nepoÄÃtá se s povrchem\n\n**BO RMT expiration**\n\nPovoluje nebo zakazuje upozornÄnà na konec spodnà doby s ohledem na záchranný pÅÃvod plynu pro nouzové vynoÅenÃ.","textLarge":false,"imageOnRight":true,"image":{"recommendedSizes":{"width":"420","height":"280"}},"imageMobile":{"recommendedSizes":{"width":"750","height":"500"}}},"id":"#166","type":"component","lock":false,"position":79},{"name":"Divider","data":{"color":"darkGray"},"id":"#167","type":"component","lock":false,"position":80},{"name":"SectionDivider","data":{"title":"2.4.6 Preferences"},"id":"#511","type":"component","lock":false,"position":81},{"name":"TextBlock","data":{"text":"### <span id=\"2-.-4-.-6-Preferences\">**2.4.6 Preferences**</span>","textLarge":false,"imageOnRight":true,"image":{"recommendedSizes":{"width":"420","height":"280"}},"imageMobile":{"recommendedSizes":{"width":"750","height":"500"}}},"id":"#478","type":"component","lock":false,"position":82},{"name":"TextBlock","data":{"text":"### **Display**\n\n**Orientation**\n\nNastavenà pro levou/pravou ruku.\n\n**Brightness**\n\nUpravuje jas displeje handsetu: Jas displeje významnÄ ovlivÅuje výdrž baterie.","textLarge":false,"imageOnRight":true,"image":{"recommendedSizes":{"width":"420","height":"280"},"mimetype":"image/png","size":44770,"hash":"146966dc5e90ec8ade5fc32c673d6229ebcb9076","id":"cl3sot2hbde6z0776molcce11","filename":"divesoft-ccr-liberty-manual-2-4-6-01.png","category":"divesoft/","type":"image"},"imageMobile":{"recommendedSizes":{"width":"750","height":"500"}}},"id":"#168","type":"component","lock":false,"position":83},{"name":"TextBlock","data":{"text":"**Screensaver**\n\nPo uplynutà nastavené doby ÄasovaÄe (rozsah: 0-120 s) se displej stane neaktivnÃm. Hodnota 0 znamená, že displej bude neustále aktivnÃ.\n\n**Screens**\n\nKteroukoli z následujÃcÃch pÄti obrazovek lze povolit nebo zakázat. To lze provést bÄhem ponoru.","textLarge":false,"imageOnRight":true,"image":{"recommendedSizes":{"width":"420","height":"280"},"mimetype":"image/png","size":32019,"hash":"91454b09180b148cf6fd4bcde355445e536c284f","id":"cl3sotnjdde8z07768wtf4zj0","filename":"divesoft-ccr-liberty-manual-2-4-6-02.png","category":"divesoft/","type":"image"},"imageMobile":{"recommendedSizes":{"width":"750","height":"500"}}},"id":"#169","type":"component","lock":false,"position":84},{"name":"TextBlock","data":{"text":"**Detailed** â primárnà obrazovka zobrazuje vÅ¡echny potÅebné informace\n\n**Synoptic** â hodnota hloubky je snadno Äitelná; je doplnÄna dalÅ¡Ãmi důležitými informacemi.n\n\n**Big** â nejdůležitÄjÅ¡Ã informace napsané velkými pÃsmeny\n\n**Graf** - Dive profile screen\n\n**O<sub>2</sub> sensors** â detailed state of the sensors\n\n**TTS** â Äas do vynoÅenà obrazovky s jedineÄnou hodnotou BO RMT a budoucà TTS\n\n**Cylinder press. \\[Num.\\] / \\[Graph\\] / \\[All\\]**\n\nUrÄuje způsob zobrazenà tlaku v lahvÃch na obrazovce s podrobnostmi. ÄÃselnÄ mÃsto Äasu a CNS nebo graficky mÃsto symbolů otevÅenà solenoidu.","textLarge":false,"imageOnRight":true,"image":{"recommendedSizes":{"width":"420","height":"280"}},"imageMobile":{"recommendedSizes":{"width":"750","height":"500"}}},"id":"#170","type":"component","lock":false,"position":85},{"name":"TextBlock","data":{"text":"### **Indication**\n\n**Auxiliary displays*
2*\n\nJedná se o nastavenà polohy displeje HUD a buddy displeje. Výchozà pozice pro HUD je na pravé stranÄ a na levé stranÄ pro BD.\n\n**Color blind mode**\n\nPokud na displeji HUD nerozeznáte modrá a zelená svÄtla LED, zapnÄte režim pro nevidomé barvy. Viz kapitola 1.10.3 Režim pro nevidomé barvy.\n\n### **Timeouts**\n\n**Key delay \\[0\\]**\n\nMinimálnà doba stisku klávesy (rozsah: 1 - 5, ve 100 ms).\n\n**Auto switch off \\[45\\]**\n\nPÅedstavuje Äasový úsek, po kterém se CCR Liberty pÅepne z povrchového režimu do pohotovostnÃho režimu (rozsah: 0 - 999 min.). Hodnota 0 deaktivuje automatické pÅepnutà do pohotovostnÃho režimu. Pokud nenà pÅipojeno žádné sluchátko, dojde k vypnutà po 150 minutách bez ohledu na nastavenÃ.RuÄnà nastavenà Äasu pouze v pÅÃpadÄ, že se nepoužÃvá synchronizace GPS.RuÄnà nastavenà Äasu pouze v pÅÃpadÄ, že se nepoužÃvá synchronizace GPS.\n\n### **Time & GPS**\n\n**Set time**\n\nRuÄnà nastavenà Äasu pouze v pÅÃpadÄ, že se nepoužÃvá synchronizace GPS.\n\n**Timezone + DST \\[ ' \\]**\n\nNastavenà Äasového pásma - nezbytné pro správnou synchronizaci s letnÃm/zimnÃm Äasem GPS.\n\n**Date format \\[ISO / EU / US\\]**\n\nISO \"YYYY-MM-DD\"\n\nEU \"DD.MM.YYYY\"\n\nUS \"MM/DD/YYYY\"\n\n**GPS Sync Time \\[On / Off\\]**\n\nAutomatická synchronizace Äasu podle GPS\n\n**GPS Log2SD \\[Off/DiveDay/Always\\]**\n\nZáznam ujeté trasy na SD kartu (ke staženà pÅes USB kabel) zaznamenává každých 20s polohu + HDOP (pÅesnost) *.GPX - xml formát pro google mapy.\n\nDiveDay - zaznamenává cca 30 minut pÅed ponorem a 30 minut po vynoÅenÃ, oznaÄuje mÃsto ponoru a vynoÅenÃ.\n\nAlways - zaznamenává vždy, pokud má signál ... nedoporuÄuje se, protože vygeneruje dostatek souborů na SD kartÄ.\n\n**GPS format \\[DDDDD...\\]**\n\nNastavenà formátu a zobrazenà souÅadnic\n\n \"DD.DDDDD\"\n \n \"DDMM.MMM\"\n \n\"DDMMSS.S\"\n\n### **Units & Misc**\n\n**Units \\[Metric\\]**\n\nPro celý pÅÃstroj lze nastavit metrické a imperiálnà jednotky. VÅ¡echny fyzikálnà výpoÄty se internÄ provádÄjà v metrické soustavÄ; výsledky se pÅevádÄjà pouze pro zobrazenÃ.\n\n**Salinity**\n\nTato funkce vyhodnocuje vhodnou salinitu vody (sladká/moÅská). Má pÅÃmý vliv na mÄÅenà hloubky.\n\n**Checklist \\[enabled\\]**\n\nPÅi vstupu do režimu CCR z nabÃdky povrchového režimu se zobrazà kontrolnà seznam. Ten lze vypnout.\n\n**BoCCR setting\\[Off/On\\]**\n\nV dalÅ¡Ãch nabÃdkách umožÅuje nastavenà pÅÃsluÅ¡ných položek pro kauci CCR (SmÄsi, Výchozà režim, Režim Bailout stby (CCR)).\n\n**Default mode \\[Main /Bailout\\]**\n\nVýchozà režim pÅÃstroje pÅi zapnutà potápÄnÃm / skokem do vody.\n\n**Help \\[On/Off\\]**\n\nNápovÄda pro každou položku nabÃdky, zobrazuje se po 10s na jednom Åádku.\n\n**Editor navig. \\[Tilt\\]**\n\nÄÃsla v editoru lze zvÄtÅ¡it nebo zmenÅ¡it naklonÄnÃm nebo klepnutÃm. Klepánà může vyžadovat urÄitý cvik. Nastavenà naklápÄnà nemÄÅte, pokud nemáte pádný důvod, proÄ dáváte pÅednost klepánÃ.\n\n**He measuring \\[TMX only\\]**\n\n**TMX only** - Senzory He se použÃvajà pouze v pÅÃpadÄ, že vybrané Åedidlo obsahuje > 20 % helia.\n**Never** - Senzory jsou trvale deaktivovány.","textLarge":false,"imageOnRight":true,"image":{"recommendedSizes":{"width":"420","height":"280"}},"imageMobile":{"recommendedSizes":{"width":"750","height":"500"}}},"id":"#171","type":"component","lock":false,"position":86},{"name":"Divider","data":{"color":"darkGray"},"id":"#172","type":"component","lock":false,"position":87},{"name":"SectionDivider","data":{"title":"2.4.7 Calibration"},"id":"#512","type":"component","lock":false,"position":88},{"name":"TextBlock","data":{"text":"### <span id=\"2-.-4-.-7-Calibration\">**2.4.7 Calibration**</span>\n\n**Calibrate He-Air**\n\nSenzory He se kalibrujà vzduchem. Senzor je dlouhodobÄ stabilnÃ, proto kalibraci provádÄjte pouze po výmÄnÄ senzoru nebo v pÅÃpadÄ pochybnostà o jeho pÅesnosti. Senzory musà být beze stop helia.\n\n**O<sub>2</sub> purity \\[99.5%\\].**\n\nLze nastavit koncentraci kyslÃku v kalibraÄnÃm plynu. Pokud je to možné, použijte ke kalibraci kyslÃk o ÄistotÄ nejménÄ 99,5 %.\n\nKe kalibraci nepoužÃvejte vzduch. Parciálnà tlak kyslÃku ve vzduchu pÅi atmosférickém tlaku se výraznÄ liÅ¡Ã od parciálnÃch tlaků urÄených nastavenými hodnotami. Na konci své životnosti může snÃmaÄ kyslÃku úspÄÅ¡nÄ projÃt kalibracà na 21 % (vzduch), ale nebude již schopen mÄÅit ppO<sub>2</sub> 1 bar nebo vyÅ¡Å¡Ã.\n \nViz také kapitola 3.2.8 Kalibrace Äidel kyslÃku a 3.2.5 KyslÃk.\n\n**Calibrate pressure**\n\n**Recomm. days \\[3 days\\]**\n\nRekalibrace kyslÃkových senzorů se doporuÄuje po urÄitém poÄtu dnà (rozsah: 0-30).\n\n**Horizontal calibration**\n\nAkcelerometry se použÃvajà k ovládánà pomocà naklápÄnà a klepánÃ. Musà být kalibrovány. PÅed zahájenÃm kalibrace položte handset na rovný povrch (napÅ. stůl).","textLarge":false,"imageOnRight":true,"image":{"recommendedSizes":{"width":"420","height":"280"}},"imageMobile":{"recommendedSizes":{"width":"750","height":"500"}}},"id":"#173","type":"component","lock":false,"position":89},{"name":"Divider","data":{"color":"darkGray"},"id":"#174","type":"component","lock":false,"position":90},{"name":"SectionDivider","data":{"title":"2.4.8 Faulty sensors"},"id":"#513","type":"component","lock":false,"position":91},{"name":"TextBlock","data":{"text":"### <span id=\"2-.-4-.-8-Faulty-sensors\">**2.4.8 Faulty sensors**</span>\n\n### **Oxygen sensors**\n\nJedná se o stav kyslÃkového senzoru overwiev. Na základÄ výsledků může uživatel vyÅadit jednotlivé kyslÃkové senzory pro výpoÄet ppO<sub>2</sub>.\n \n**Normal** - nebyla zjiÅ¡tÄna žádná porucha senzoru; senzor je použÃván jako zdroj dat.\n\n**Uncalibrated** â senzor nebyl kalibrován.\n\n**Excluded** â senzor automaticky vylouÄen algoritmem. Algoritmus může vrátit Äidlo do normálnÃho stavu, pokud zjistÃ, že důvod vylouÄenà již neexistuje.\n\n**Disabled** â senzor vylouÄen ruÄnÄ.\n\n**Error** â senzor nenà pÅÃtomen nebo je Å¡patný kontakt.\n\n**Offline** â senzor nenà k dispozici (digitálnà komunikace na úrovni modulu nefunguje).\n\n### **Helium sensors**\n\nJe možné zahrnout a vylouÄit senzory helia.\n\n**Normal** â nebyla zjiÅ¡tÄna žádná porucha senzoru; senzor je použÃván jako zdroj dat.\n\n**Uncalibrated** â senzor nebyl kalibrován.\n\n**Disabled** â sensor vylouÄen ruÄnÄ.\n\n**Error** â senzor nenà pÅÃtomen nebo je Å¡patný kontakt.\n\n**Offline** â senzor nenà k dispozici (digitálnà komunikace na úrovni modulu nefunguje).\n\n### **Pressure sensors**\n\nToto je pÅehled stavu snÃmaÄe tlaku. Na základÄ výsledků může být nutné, aby uživatel ruÄnÄ vylouÄil jednotlivé snÃmaÄe. NezaÄÃnejte ponor s vÃce než jednÃm nefunkÄnÃm snÃmaÄem tlaku.\n\n**Normal** â nebyla zjiÅ¡tÄna žádná porucha senzoru; senzor je použÃván jako zdroj dat.\n\n**Disabled** â senzor vylouÄen ruÄnÄ.\n\n**Error** â senzor nenà pÅÃtomen nebo je Å¡patný kontakt.\n\n**Offline** â senzor nenà k dispozici (digitálnà komunikace na úrovni modulu nefunguje).\n\nViz také kapitola 1.9.5 MÄÅenà tlaku a hloubky.\n\n### **Other devices**\n\nNesprávnÄ fungujÃcà cÃvku můžete vypnout. V takovém pÅÃpadÄ druhá cÃvka zcela pÅedbÃhá a jejà frekvence se upravà z 12 sekund na 6.PÅepÃnánà zdroje dat pro ÅÃzenà ÄásteÄného tlaku kyslÃku ve smyÄce\n \nO<sub>2</sub> - K mÄÅenà a ÅÃzenà tlaku kyslÃku se použÃvajà senzory kyslÃku.\n\nHe - SnÃmaÄe He se použÃvajà k nepÅÃmému mÄÅenà a kontrole kyslÃku.\n\nzdroj pO<sub>2</sub> je povolen pouze v pÅÃpadÄ, že je povoleno mÄÅenà helia.\n\n**pO<sub>2</sub> source**\n\nSwitching the data source for the control of oxygen partial-pressure in the loop\n \nO<sub>2</sub> â Oxygen sensors are used for measuring and controlling the oxygen\n\nHe â He sensors are used to indirectly measure and control the oxygen\n\npO<sub>2</sub> source is only allowed if helium measurement is enabled","textLarge":false,"imageOnRight":true,"image":{"recommendedSizes":{"width":"420","height":"280"}},"imageMobile":{"recommendedSizes":{"width":"750","height":"500"}}},"id":"#175","type":"component","lock":false,"position":92},{"name":"Divider","data":{"color":"darkGray"},"id":"#176","type":"component","lock":false,"position":93},{"name":"SectionDivider","data":{"title":"1. Example section title","skipToC":false},"id":"#554","type":"component","lock":false,"position":94},{"name":"SectionDivider","data":{"title":"2.5 Dive mode"},"id":"#514","type":"component","lock":false,"position":96},{"name":"TextBlock","data":{"text":"### <span id=\"2-.-5-Dive-mode\">**2.5 Režim potápÄnÃ**</span>","textLarge":false,"imageOnRight":true,"image":{"recommendedSizes":{"width":"420","height":"280"}},"imageMobile":{"recommendedSizes":{"width":"750","height":"500"}}},"id":"#445","type":"component","lock":false,"position":97},{"name":"SectionDivider","data":{"title":"2.5.1 Detailed screen"},"id":"#515","type":"component","lock":false,"position":98},{"name":"TextBlock","data":{"text":"\n### <span id=\"2-.-5-.-1-Detailed-screen\">**2.5.1 Detailed screen**</span>\n\nPrimárnà obrazovka zobrazuje vÅ¡echny potÅebné informace bÄhem ponoru. VÄtÅ¡inu informacà poskytujà jasné hodnoty a jednoznaÄné symboly.\n\n**Dive time** \nÄasovaÄ se spustà po ponoÅenà (hloubka > 1,5 m) a zastavà se po vynoÅenà (hloubka < 0,5 m). V pÅÃpadÄ ","textLarge":false,"imageOnRight":true,"image":{"recommendedSizes":{"width":"420","height":"280"},"mimetype":"image/png","size":267011,"hash":"6e7b59071d7f2f6ffb74
266372471916a6c2bcfb7","id":"cl3soub5jdeaq077628o2jzbz","filename":"divesoft-ccr-liberty-manual-2-5-1-01.png","category":"divesoft/","type":"image"},"imageMobile":{"recommendedSizes":{"width":"750","height":"500"}}},"id":"#177","type":"component","lock":false,"position":99},{"name":"TextBlock","data":{"text":"pobytu na hladinÄ (nebo ve velmi malé hloubce), po kterém následuje druhé ponoÅenà (bÄhem doby nastavené v Äasovém limitu pro ukonÄenà ponoru), bude uvedená doba ponoru odpovÃdat dobÄ od prvnÃho ponoÅenà vÄetnÄ doby na hladinÄ.\n\n**Depth**\n\nHloubku lze odeÄÃtat v jednotkách zvolených v nastavenà (m nebo ft). Hloubka se vypoÄÃtá z namÄÅeného hydrostatického tlaku. Pro výpoÄet hloubky lze nastavit hustotu sladké (výchozÃ) nebo moÅské vody (jednotky a slanost se nastavujà v Nastavenà â PÅedvolby).\n\nNastavenà sladké/moÅské vody nemá vliv na výpoÄet dekomprese. Dekomprese je založena na okolnÃm tlaku a je nezávislá na zobrazené hloubce.\n\n**No deco**\n\nMůžete zůstat po uvedenou dobu v aktuálnà hloubce a dýchat aktuálnà smÄs (aktuálnà obsah He a aktuálnà SP), abyste se vyhnuli povinnosti dekomprese. PÅedpokládá se vÅ¡ak, že potápÄÄ bude dodržovat doporuÄenou rychlost výstupu.\n\nBÄhem ponoru nastává situace, kdy indikátor No Deco již ukazuje nulovou hodnotu, ale hodnota dekompresnÃho stropu se stále nezobrazuje. Taková situace může trvat i nÄkolik desÃtek sekund. Tento scénáŠje způsoben tÃm, že doba No deco skonÄila a dekompresnà strop je pod úrovnà hladiny, ale jeho hodnota je tak nÃzká, že nenà tÅeba provádÄt postupnou dekompresi, protože se doporuÄuje volný výstup.\n\n**Ceiling**\n\nHloubka dekompresnÃho stropu se plynule snižuje až k hladinÄ. Zobrazené zastávky nejsou nikdy náhodné. Vždy se držte pod hloubkou stropu, i když je hloubka stropu velmi malá.\n\nUkazatel stropu v Liberty nahrazuje ukazatel dekompresnÃch zastávek. PotápÄÄ si zvolà hloubku, ve které provede dekompresnà zastávku, nebo plynule stoupá podle dekompresnÃho stropu. Tento pÅÃstup může být efektivnÄjÅ¡Ã z hlediska doby dekomprese. ReferenÄnÃm Äasem je TTS (Time To Surface - Äas do vynoÅenÃ). Nesledujte dekompresnà strop v malých hloubkách, pokud to podmÃnky neumožÅujÃ. Vlny, proudy, pozitivnà vztlak výstroje v malé hloubce, absence vizuálnà reference a dalÅ¡Ã faktory mohou způsobit nekontrolovaný výstup nad strop nebo zcela znemožnit dekompresi na této úrovni.\n\nVýstup nad strop generuje výstrahu. DalÅ¡Ã pÅekroÄenà o vÃce než 1 m (3 stopy) vede k dalÅ¡Ãmu výstražnému signálu. Oba alarmy jsou zaznamenány. VýpoÄet dekomprese bude pokraÄovat bez penalizace. Je na potápÄÄi, aby se rozhodl, jak minimalizovat pravdÄpodobnost vážných následků.\n\nDekomprese již nenà nutná, když zmizà hodnota stropu. V takovém pÅÃpadÄ je možné se vynoÅit.\n\n**TTS**\n\nDoba do vynoÅenà (TTS) zahrnuje celý dekompresnà profil. Zaokrouhlenà TTS je ovlivnÄno nastavenÃm v Menu / Nastavenà / Dekomprese / Nastavenà plánovaÄe / ZaokrouhlenÃ. Zaokrouhlovánà lze nastavit na 60 s, 30 s, 1 s.","textLarge":false,"imageOnRight":true,"image":{"recommendedSizes":{"width":"420","height":"280"}},"imageMobile":{"recommendedSizes":{"width":"750","height":"500"}}},"id":"#178","type":"component","lock":false,"position":100},{"name":"TextBlock","data":{"text":"**Symboly bateriÃ**\n\n**Kombinovaný grafický symbol**\n\nKombinovaný grafický symbol na detailnà obrazovce je urÄen pro rychlou orientaci. ÅÃká potápÄÄi, co je tÅeba udÄlat. Barva výstražných symbolů se mÄnà od žluté po Äervenou podle stupnÄ závažnosti.","textLarge":false,"imageOnRight":true,"image":{"recommendedSizes":{"width":"420","height":"280"}},"imageMobile":{"recommendedSizes":{"width":"750","height":"500"}}},"id":"#180","type":"component","lock":false,"position":101},{"name":"Image","data":{"firstImage":{"mimetype":"image/png","size":115199,"hash":"c91bfc4908da1cc1f39622863c1518ccd2046770","i
2d":"cl6m1m0g71jso0776pe5sjz02","filename":"divesoft-ccr-liberty-manual-2-5-1-01.png","category":"divesoft/","type":"image"},"secondImage":{},"image":{"type":"image"}},"id":"#486","type":"component","lock":false,"position":102},{"name":"TextBlock","data":{"text":"**t (Temperature)**\n\nTeplota vody se mÄÅà uvnitÅ skÅÃnÄ HS. Po zmÄnÄ teploty vody poÄkejte asi 1-2 minuty, dokud se údaj o teplotÄ neustálÃ. Teplota vzduchu je ovlivnÄna mnoha faktory a jedná se pouze o pÅibližný údaj. Pokud se vedle hodnoty teploty zobrazà žlutý vykÅiÄnÃk, znamená to, že druhé sluchátko nekomunikuje a teplota je vypoÄÃtána pouze na základÄ jednoho Äidla. V pÅÃpadÄ, že použÃváte pouze jedno sluchátko, můžete pÅÃstroj pÅepnout do boÄnÃho nastavenÃ: Setup / Preferences / Controls & Build / Mount -> **Side**.\n\n**CNS**\n\nTzv. âkyslÃkové hodinyâ pÅedstavujà procento spotÅeby limitu toxicity CNS. VýpoÄet vycházà z limitů expozice kyslÃku NOAA.\n\nViz také oddÃl 3.4.1 Dýchánà plynů s vysokým obsahem kyslÃku.\n\n**Diluent**\n\nZobrazà se aktuálnÄ použÃvaný diluent.\n\n**Solenoid symbols**\n\nV levém a pravém dolnÃm rohu jsou symboly oznaÄujÃcà stav solenoidů podle údajů z ÅÃdicÃch jednotek.\n\nX - solenoid je zavÅený\n\n= - solenoid je otevÅený \n\n**SP**\n\nPožadovaná hodnota je požadovaná hodnota ppO<sub>2</sub>. Hodnoty žádané hodnoty se obvykle zobrazujà bÃlou barvou. Hodnota žádané hodnoty se zobrazà žlutÄ, pokud nenà fyzicky dosažitelná (napÅ. žádaná hodnota 1,4 ve 2 metrech). Vyhodnocenà možnosti dosaženà žádané hodnoty je ovlivnÄno maximálnà hodnotou FO<sub>2</sub>. NapÅÃklad žádaná hodnota 1,3 ve 3 metrech může být dosažena, ale pouze pokud je ve smyÄce 100 % kyslÃku, ale pokud je FO<sub>2</sub> nastaveno na 80 %, pak se žádaná hodnota zobrazà žlutÄ a solenoid nebude pÅidávat kyslÃk tak dlouho, dokud hodnota ppO<sub>2</sub> neklesne pod 1,04bar \\[1,3Ã0,8\\]. Hodnota žádané hodnoty se zobrazà ÄervenÄ pouze pÅi zmÄnÄ Å¾Ã¡dané hodnoty.\n\nInformace o nastavenà žádané hodnoty naleznete v Äásti 2.6.3 Žádané hodnoty.\n\n**O<sub>2</sub> sensors**\n\nZobrazà se hodnota ppO<sub>2</sub> namÄÅená jednotlivými senzory O<sub>2</sub>.\n \n**ppO<sub>2</sub>**\n\nPPO<sub>2</sub> lze mÄÅit pÅÃmo (pomocà senzorů O<sub>2</sub>) nebo nepÅÃmo (pomocà senzorů frakce He). **Ukazuje průmÄrnou hodnotu**.\n\nViz kapitola 1.9.2 PÅÃmé mÄÅenà ppO<sub>2</sub> a 1.9.3 MÄÅenà obsahu He.\n \n**VykÅiÄnÃk**\n\nPokud se vedle hodnoty zobrazà žlutý vykÅiÄnÃk, znamená to, že byl vylouÄen jeden nebo vÃce senzorů. To se týká mÄÅenà ppO<sub>2</sub>, teploty, tlaku a helia.","textLarge":false,"imageOnRight":true,"image":{"recommendedSizes":{"width":"420","height":"280"}},"imageMobile":{"recommendedSizes":{"width":"750","height":"500"}}},"id":"#182","type":"component","lock":false,"position":103},{"name":"Divider","data":{"color":"darkGray"},"id":"#183","type":"component","lock":false,"position":104},{"name":"SectionDivider","data":{"title":"2.5.2 Synoptic screen"},"id":"#516","type":"component","lock":false,"position":105},{"name":"TextBlock","data":{"text":"### <span id=\"2-.-5-.-2-Synoptic-screen\">**2.5.2 Synoptic screen**</span>\n\nHodnota hloubky je snadno Äitelná. Je doplnÄna dalÅ¡Ãmi důležitými informacemi.\n\nVýznam hodnoty je uveden na displeji.","textLarge":false,"imageOnRight":true,"image":{"recommendedSizes":{"width":"420","height":"280"},"mimetype":"image/png","size":219240,"hash":"ee48c09d198c6529ce3205b72730f917228fefd2","id":"cl3sowabqded407763c9htbat","filename":"divesoft-ccr-liberty-manual-2-5-2-01.png","category":"divesoft/","type":"image"},"imageMobile":{"recommendedSizes":{"width":"750","height":"500"}}},"id":"#184","type":"component","lock":false,"position":106},{"name":"Divider","data":{"color":"darkGray"},"id":"#185","type":"component","lock":false,"position":107},{"name":"SectionDivider","data":{"title":"2.5.3 Big screen"},"id":"#517","type":"component","lock":false,"position":108},{"name":"TextBlock","data":{"text":"### <span id=\"2-.-5-.-3-Big-Screen\">**2.5.3 Big Screen**</span>\n\nNejdůležitÄjÅ¡Ã informace jsou napsány velkými pÃsmeny.\n\nTato obrazovka je užiteÄná pÅi velmi Å¡patné viditelnosti. Mnoho potápÄÄů dokáže ÄÃsla pÅeÄÃst i bez masky.","textLarge":false,"imageOnRight":true,"image":{"recommendedSizes":{"width":"420","height":"280"},"mimetype":"image/png","size":47878,"hash":"8ed138a52bbd01f1dce9ceacd5b488ba03648d87","id":"cl3sowphydedx07760c10vsvh","filename":"divesoft-ccr-liberty-manual-2-5-3-01.png","category":"divesoft/","type":"image"},"imageMobile":{"recommendedSizes":{"width":"750","height":"500"}}},"id":"#186","type":"component","lock":false,"position":109},{"name":"Divider","data":{"color":"darkGray"},"id":"#187","type":"component","lock":false,"position":110},{"name":"SectionDivider","data":{"title":"2.5.4 Dive profile screen"},"id":"#518","type":"component","lock":false,"position":111},{"name":"TextBlock","data":{"text":"### <span id=\"2-.-5-.-4-Dive-profile-screen\">**2.5.4 Dive profile screen**</span>","textLarge":false,"imageOnRight":true,"image":{"recommendedSizes":{"width":"420","height":"280"}},"imageMobile":{"recommendedSizes":{"width":"750","height":"500"}}},"id":"#446","type":"component","lock":false,"position":112},{"name":"TextBlock","data":{"text":"**Start**\n\nDoba ponoÅenà je užiteÄná pro kontrolu dodržovánà harmonogramu.\n\n**Avg**\n\nPrůmÄrná hloubka je vyznaÄena žlutou vodorovnou Äarou a žlutÄ zobrazeným ÄÃslem.\n\n**Current depth**\n\nViz levý dolnà roh.","textLarge":false,"imageOnRight":true,"image":{"recommendedSizes":{"width":"420","height":"280"},"mimetype":"image/png","size":132770,"hash":"e0c411ccc8489008f59c21b9f8a7a39e7b02b543","id":"cl3soxbimdeef0776m9v8n3cc","filename":"divesoft-ccr-liberty-manual-2-5-4-01.png","category":"divesoft/","type":"image"},"imageMobile":{"recommendedSizes":{"width":"750","height":"500"}}},"id":"#188","type":"component","lock":false,"position":113},{"name":"TextBlock","data":{"text":"**Dive time**\n\nÄas aktuálnÃho ponoru je umÃstÄn v pravém dolnÃm rohu.\n\n**Max**\n\nJedná se o maximálnà hloubku dosaženou bÄhem ponoru. Pole s touto hodnotou je umÃstÄno uprostÅed spodnÃho Åádku.","textLarge":false,"imageOnRight":true,"image":{"recommendedSizes":{"width":"420","height":"280"}},"imageMobile":{"recommendedSizes":{"width":"750","height":"500"}}},"id":"#189","type":"component","lock":false,"position":114},{"name":"Divider","data":{"color":"darkGray"}
2,"id":"#190","type":"component","lock":false,"position":115},{"name":"SectionDivider","data":{"title":"2.5.5 Sensors screen"},"id":"#519","type":"component","lock":false,"position":116},{"name":"TextBlock","data":{"text":"### <span id=\"2-.-5-.-5-Sensors-screen\">**2.5.5 Sensors screen**</span>\n\nNa této obrazovce se zobrazà hodnoty potenciálů senzorů a jejich kalibrované hodnoty ppO<sub>2</sub>.\n \n**Diluent**\n\nSloženà souÄasného Åedidla (O<sub>2</sub>/He)","textLarge":false,"imageOnRight":true,"image":{"recommendedSizes":{"width":"420","height":"280"},"mimetype":"image/png","size":348491,"hash":"7b19d012489be3020adfe70814c9a662e4d9187f","id":"cl3soyt73def80776x61en7r7","filename":"divesoft-ccr-liberty-manual-2-5-5-01.png","category":"divesoft/","type":"image"},"imageMobile":{"recommendedSizes":{"width":"750","height":"500"}}},"id":"#191","type":"component","lock":false,"position":117},{"name":"TextBlock","data":{"text":"**He0 / He1**\n\nObsah helia ve smyÄce zjiÅ¡tÄný jednotlivými senzory helia. Za ideálnÃch podmÃnek bude namÄÅená hodnota odpovÃdat podÃlu helia v Åedidle.\n\n**pO<sub>2</sub>**\n\nParciálnà tlak kyslÃku v Åedidle v aktuálnà hloubce.\n\n**pO<sub>2</sub> indirect**\n\nNepÅÃmé mÄÅenà ppO<sub>2</sub> pomocà heliových senzorů. BuÅka je vystÃnována modÅe. PÅi použità nepÅÃmého mÄÅenà ppO<sub>2</sub> pomocà heliových senzorů je buÅka rovnÄž vystÃnována modÅe.\n \n**Stack**\n\nDoba použità skruberu","textLarge":false,"imageOnRight":true,"image":{"recommendedSizes":{"width":"420","height":"280"}},"imageMobile":{"recommendedSizes":{"width":"750","height":"500"}}},"id":"#192","type":"component","lock":false,"position":118},{"name":"Divider","data":{"color":"darkGray"},"id":"#193","type":"component","lock":false,"position":119},{"name":"SectionDivider","data":{"title":"2.5.6 TTS screen"},"id":"#520","type":"component","lock":false,"position":120},{"name":"TextBlock","data":{"text":"### <span id=\"2-.-5-.-6-TTS-Screen\">**2.5.6 TTS Screen**</span>","textLarge":false,"imageOnRight":true,"image":{"recommendedSizes":{"width":"420","height":"280"}},"imageMobile":{"recommendedSizes":{"width":"750","height":"500"}}},"id":"#447","type":"component","lock":false,"position":121},{"name":"TextBlock","data":{"text":"Tato obrazovka obsahuje užiteÄné a jedineÄné informace o Äasovém limitu.\n\n**BO RMT**\n\nZbývajÃcà doba záchrany je doba, která urÄuje maximálnà délku pobytu v aktuálnà hloubce tak, aby zásoba záchranného plynu staÄila na celý výstup vÄetnÄ dekomprese.","textLarge":false,"imageOnRight":true,"image":{"recommendedSizes":{"width":"420","height":"280"},"mimetype":"image/png","size":10203,"hash":"112143db0d17de08fda0d10968f357ce9bba0b33","id":"cl3sozhgkdefk0776hb24hs47","filename":"divesoft-ccr-liberty-manual-2-5-6-01.png","category":"divesoft/","type":"image"},"imageMobile":{"recommendedSizes":{"width":"750","height":"500"}}},"id":"#194","type":"component","lock":false,"position":122},{"name":"TextBlock","data":{"text":"Algoritmus poÄÃtá vÅ¡echny nastavené plyny a jejich množstvà spolu se zadanou minutovou spotÅebou (RMV). Aby byl výpoÄet správný, je vždy nutné pÅesnÄ zadat objem, tlak a složenà plynu a v seznamu plynů mÃt pouze ty plyny, které se skuteÄnÄ použÃvajÃ. BO RMT se vypoÄÃtává na základÄ nastavenà Bailout GF. Pokud je jako zdroj bailoutu použit rebreather a v Nastavenà -> Různé je povolen režim Bo CCR, pak se BO RMT vypoÄÃtá na základÄ:\n\n- životnosti baterie\n- vyÄerpánà skruberu (Stack time)\n- AI i tlaku kyslÃku a zadané velikosti láhve, vypoÄÃtá metabolickou spotÅebu 1,6 l/min.\n\nTato hodnota se zobrazuje v režimu Bo CCR na obrazovce âSensors screenâ (Senzory) mÃsto senzorů helia. Po uplynutà doby platnosti BORMT spustà systém BoCCR alarm.\n\n**BO TTS**\n\nDoba potÅebná k vynoÅenà v pÅÃpadÄ výstupu na záchranný systém OC. Doba výstupu se vypoÄÃtá podle nastavenà Bailout GF\n\n**TTS (+2) (+5) (+10)**\n\nHodnoty tÄchto tÅà položek pÅedstavujà budoucà TTS (tj. délku výstupu, pokud potápÄÄ zůstane v aktuálnà hloubce po dobu následujÃcÃch 2, 5 nebo 10 minut). Ve fázi nasycenà ponoru se hodnoty postupnÄ zvyÅ¡ujÃ, ve fázi desaturace je tomu naopak.","textLarge":false,"imageOnRight":true,"image":{"recommendedSizes":{"width":"420","height":"280"}},"imageMobile":{"recommendedSizes":{"width":"750","height":"500"}}},"id":"#195","type":"component","lock":false,"position":123},{"name":"Divider","data":{"color":"darkGray"},"id":"#196","type":"component","lock":false,"position":124},{"name":"SectionDivider","data":{"title":"2.6 CCR mode"},"id":"#521","type":"component","lock":false,"position":125},{"name":"TextBlock","data":{"text":"### <span id=\"2-.-6-CCR-mode\">**2.6 CCR režim**</span>\n\nJedná se o primárnà režim potápÄnà s CCR Liberty.","textLarge":false,"imageOnRight":true,"image":{"recommendedSizes":{"width":"420","height":"280"}},"imageMobile":{"recommendedSizes":{"width":"750","height":"500"}}},"id":"#523","type":"component","lock":false,"position":126}
2,{"name":"SectionDivider","data":{"title":"2.6.1 Entering CCR mode"},"id":"#522","type":"component","lock":false,"position":127},{"name":"TextBlock","data":{"text":"### <span id=\"2-.-6-.-1-Entering-CCR-mode\">**2.6.1 Vstup do režimu CCR**</span>\n\nStandardnà způsob pÅepnutà do režimu CCR je jeho výbÄr v nabÃdce z režimu povrchu. Pokud dojde k ponoÅenà do hloubky vÄtÅ¡Ã než 1,5 m v povrchovém nebo pohotovostnÃm režimu, rebreather se automaticky pÅepne do režimu CCR. **Tento způsob pÅepÃnánà zámÄrnÄ nepoužÃvejte; je urÄen pouze pro nouzové situace**.","textLarge":false,"imageOnRight":true,"image":{"recommendedSizes":{"width":"420","height":"280"}},"imageMobile":{"recommendedSizes":{"width":"750","height":"500"}}},"id":"#197","type":"component","lock":false,"position":128},{"name":"TextBlock","data":{"text":"Proces pÅepnutà do režimu potápÄnà má následujÃcà průbÄh. ZvolenÃm režimu potápÄnà se okamžitÄ spustà vstÅikovánà kyslÃku na základÄ aktuálnÃho parciálnÃho tlaku kyslÃku a nastavených hodnot. SouÄasnÄ se automaticky ovÄÅà senzory kyslÃku a zkontroluje se jejich kalibrace. Pokud je kalibrace starÅ¡Ã než stanovený poÄet kalibraÄnÃch dnů nebo se napÄtà Äidel liÅ¡Ã o vÃce než 10 %, zobrazà se varovánà a doporuÄenà pro novou kalibraci kyslÃkových Äidel.","textLarge":false,"imageOnRight":true,"image":{"recommendedSizes":{"width":"420","height":"280"},"mimetype":"image/png","size":8501,"hash":"920623820d1535817d6faa937819d8843a2cf0b7","id":"cl3sp0emodegi07764zogkgpn","filename":"divesoft-ccr-liberty-manual-2-6-1-01.png","category":"divesoft/","type":"image"},"imageMobile":{"recommendedSizes":{"width":"750","height":"500"}}},"id":"#198","type":"component","lock":false,"position":129},{"name":"TextBlock","data":{"text":"DalÅ¡Ãm krokem je kontrolnà seznam pÅed ponorem. PotápÄÄ by mÄl postupovat podle tohoto seznamu krok za krokem a osobnÄ zkontrolovat vÅ¡echny položky na nÄm vyznaÄené. Na dalÅ¡Ã obrazovku pÅejdÄte pomocà spodnÃho tlaÄÃtka.\n\nPo zkontrolovánà vÅ¡ech položek kontrolnÃho seznamu se zobrazà obrazovka pÅed ponorem. PÅipravte pÅÃstroj na pÅeddechnutÃ. StisknutÃm hornÃho tlaÄÃtka odpoÄÃtejte Äas pÅeddechnutÃ. Pravidla a postup pro pÅeddechovánà jsou popsány v Äásti 3.2.12.","textLarge":false,"imageOnRight":true,"image":{"recommendedSizes":{"width":"420","height":"280"},"mimetype":"image/png","size":8323,"hash":"12cd9e9371199936a0bbcd75cfa44c23a03e9468","id":"cl3sp0wfhdegw0776zllm2kcg","filename":"divesoft-ccr-liberty-manual-2-6-1-02.png","category":"divesoft/","type":"image"},"imageMobile":{"recommendedSizes":{"width":"750","height":"500"}}},"id":"#199","type":"component","lock":false,"position":130},{"name":"TextBlock","data":{"text":"V pravém dolnÃm rohu se zobrazuje průmÄrná hodnota ppO<sub>2</sub>. VÅ¡echny senzory a dalÅ¡Ã hodnoty lze sledovat na druhém sluchátku, kde jsou pÅÃstupné vÅ¡echny obrazovky režimu potápÄnÃ. Pokud dojde k pÅeruÅ¡enà pÅeddechovánÃ, lze odpoÄÃtávánà vynulovat pomocà spodnÃho tlaÄÃtka.\n\nKonec pÅeddechovánà je ohlášen vibracemi a nápisem âFINISHEDâ. Pokud potápÄÄ nepokraÄuje sám, po nÄkolika sekundách se automaticky zobrazà základnà obrazovka režimu potápÄnÃ.","textLarge":false,"imageOnRight":true,"image":{"recommendedSizes":{"width":"420","height":"280"},"mimetype":"image/png","size":9118,"hash":"35e87c86be90d7102433cab5aa5e79bfe8fee55b","id":"cl3sp1ex8dehr0776eaobw544","filename":"divesoft-ccr-liberty-manual-2-6-1-03.png","category":"divesoft/","type":"image"},"imageMobile":{"recommendedSizes":{"width":"750","height":"500"}}},"id":"#200","type":"component","lock":false,"position":131},{"name":"Divider","data":{"color":"darkGray"},"id":"#201","type":"component","lock":false,"position":132},{"name":"SectionDivider","data":{"title":"2.6.2 Switching to other modes"},"id":"#524","type":"component","lock":false,"position":133},{"name":"TextBlock","data":{"text":"### <span id=\"2-.-6-.-2-Switching-to-other-modes\">**2.6.2 PÅepnutà do jiných režimů**</span>\n\nV nabÃdce je možné pÅepnout z režimu CCR na manuálnà režim CCR a režim záchranného OC. Pokud je aktuálnà hloubka menÅ¡Ã než 1,5 m, je možné pÅepnout do povrchového režimu a pohotovostnÃho režimu.","textLarge":false,"imageOnRight":true,"image":{"recommendedSizes":{"width":"420","height":"280"},"mimetype":"image/png","size":44666,"hash":"0b2e4d4edea8df37caccd66f62696a82b9e79b09","id":"cl3sp1yhodeio0776jdpt06g1","filename":"divesoft-ccr-liberty-manual-2-6-2-01.png","category":"divesoft/","type":"image"},"imageMobile":{"recommendedSizes":{"width":"750","height":"500"}}},"id":"#202","type":"component","lock":false,"position":134},{"name":"Divider","data":{"color":"darkGray"},"id":"#203","type":"component","lock":false,"position":135},{"name":"SectionDivider","data":{"title":"2.6.3 ppO2 regulation"},"id":"#525","type":"component","lock":false,"position":136},{"name":"TextBlock","data":{"text":"### <span id=\"2-.-6-.-3-ppO2-regulation\">**2.6.3 regulace ppO<sub>2</sub>**</span>\n \nZákladnà funkcà CCR Liberty je udržovat správný parciálnà tlak kyslÃku.\n\nPoužÃvá se prediktivnà algoritmus ÅÃzenà ppO<sub>2</sub>. NamÄÅený ppO<sub>2</sub> se upravuje podle matematického modelu dýchacà smyÄky. VýpoÄet dodávky O<sub>2</sub> a pÅÃpadného následného otevÅenà solenoidu se provádà v Å¡estisekundových intervalech. KyslÃk se pÅidává stÅÃdavÄ pomocà solenoidů odpovÃdajÃcÃch obÄma ÅÃdicÃm jednotkám.\n\nV pÅÃpadÄ, že nenà možné urÄit skuteÄnou hloubku (z důvodu poruchy nebo ruÄnÃho vylouÄenà vÅ¡ech tlakových Äidel), pÅecházà regulace dodávky kyslÃku na jednoduchý algoritmus.\n\n**Setpoint**\n\nPožadovaná hodnota je požadovaná hodnota ppO<sub>2</sub>; informace o nastavenà požadované hodnoty viz kapitola 2.4.2 Požadované hodnoty. DvÄ speciálnà hodnoty, ânÃzká požadovaná hodnotaâ a âvysoká požadovaná hodnotaâ, jsou pevnÄ stanoveny. Ty lze jednoduÅ¡e zvolit dlouhým stisknutÃm hornÃho tlaÄÃtka (pro vysokou žádanou hodnotu) nebo dolnÃho tlaÄÃtka (pro nÃzkou žádanou hodnotu).\n\nVe výchozÃm nastavenà má nÃzká požadovaná hodnota hodnotu 0,7 bar (70 kPa). Je možné ji pÅenastavit v rozsahu 0,4 až 1,3 bar.\n\nVe standardnÃm nastavenà má vysoká požadovaná hodnota hodnotu 1,3 bar (130 kPa). Je možné ji vynulovat v rozsahu 0,7 až 1,6 bar.\n\nPÅi spuÅ¡tÄnà režimu potápÄnà CCR je standardnÄ aktivována nÃzká požadovaná hodnota.\n\n**Descent setpoint**\n\nNastavená hodnota sestupu je urÄena pro situace, kdy potápÄÄ potÅebuje rychle sestoupit do dané hloubky, napÅÃklad pÅi potápÄnà v proudu. VyužÃvaný algoritmus využÃvá pÅirozený vzestup ppO<sub>2</sub> bÄhem sestupu. Je tÅeba rychle sestoupit; pÅirozený vzestup ppO<sub>2</sub> musà být rychlejÅ¡Ã než spotÅeba kyslÃku.\n\nPoužità nastavené hodnoty pro sestup musà být povoleno v konfiguraci.\n\nPokud je povoleno, je nastavená hodnota sestupu automaticky aktivována pÅi pÅepnutà z povrchového režimu do režimu CCR. Nelze ji aktivovat jiným způsobem. Nastavená hodnota klesánà má promÄnnou hodnotu. PoÄáteÄnà nastavená hodnota udává hodnotu ppO<sub>2</sub> na povrchu. V hloubce se aktuálnà nastavená hodnota lineárnÄ zvyÅ¡uje o 0,2 baru (20 kPa) na každých 10 m hloubky (tj. zvyÅ¡uje se o stejné absolutnà hodnoty jako pÅi potápÄnà s otevÅeným okruhem se vzduchem, pouze s jinou poÄáteÄnà hodnotou).\n\nPo dosaženà této hodnoty nebo po ukonÄenà Äi výrazném zpomalenà sestupu, nejpozdÄji vÅ¡ak po deseti minutách, se sestupová žádaná hodnota automaticky pÅepne na nÃzkou žádanou hodnotu.\n\nPÅi použità nastavené hodnoty sestupu musà uživatel průbÄžnÄ kontrolovat, zda nedosáhl nebo nepÅekroÄil maximálnà fyziologicky pÅÃpustnou hranici ppO<sub>2</sub>, a podle toho upravit rychlost sestupu nebo pÅijmout jiná opatÅenÃ.\n\nNastavenà sestupu lze znovu aktivovat klávesovou zkratkou nebo z nabÃdky Nastavenà (pokud se nacházÃme v p
2ÅÃsluÅ¡né hloubce).\n\nPokud je v nabÃdce Setup / Setpoints / nastaveno On+Sfc, pak sestupový setpoint na hladinÄ nikdy nevyprÅ¡Ã.\n\n**<span style=âcolor:redâ>UPOZORNÄNÃ: pokud je poÄáteÄnà hodnota SP sestupu nižšà než nastavená prahová hodnota pro alarm Low ppO<sub>2</sub>, pak dokud je SP sestupu aktivnÃ, alarm se spustà pouze v pÅÃpadÄ, že dosáhne hodnoty o 0,05bar nižšÃ, než je aktuálnà hodnota SP sestupu - to platà zejména v hloubkách menÅ¡Ãch než 6 m, kdy je SP sestupu nastaven na 0,2bar (na hladinÄ) a výchozà alarm Low ppO<sub>2</sub> je 0,3bar.</span>**.\n\n**Omezenà setpointu**\n\nKromÄ nastavené hodnoty je meznà hodnota žádané hodnoty definována okolnÃm tlakem. NapÅÃklad v hloubce 3 m, kde je hydrostatický tlak 1,3 baru, může ppO<sub>2</sub> pÅi použità Äistého kyslÃku dosáhnout maximálnÄ 1,3 baru.\n\nProtože dosaženà presice 100 % kyslÃku ve smyÄce nenà vždy praktické, je nastavená hodnota standardnÄ nastavena na 90 % okolnÃho tlaku. Tuto hodnotu lze pÅenastavit v rozmezà od 60 % do 96 %.\n\n**Nouzová kontrola ppO<sub>2</sub>**\n\nPokud nejsou vÅ¡echny chemické senzory platné (chyba, vypnuto atd.), hloubka je < 6 m/20 stop a zdrojem ppO<sub>2</sub> jsou senzory O<sub>2</sub>, provádà se každých 6 s nouzové vstÅikovánà O<sub>2</sub> + alarm.\n \nPÅÃstroj pÅedpokládá, že v hloubce nižšà než 6 m je riziko hypoxie vÄtÅ¡Ã než riziko hyperoxie, a zabraÅuje fatálnÃm následkům nefunkÄnÃch nebo vyÅazených senzorů. V takovém pÅÃpadÄ nesmà potápÄÄ pokraÄovat v sestupu, dokud se hodnota ppO<sub>2</sub> nestabilizuje a potápÄÄ si nenà jist dýchacà smÄsÃ.\n\n**Náhradnà kontrola ppO<sub>2</sub> nepÅÃmým mÄÅenÃm pomocà He senzorů**.\n\nPokud v režimu potápÄnà selžou vÅ¡echny chemické senzory, vyvolá se alarm âztraceno mÄÅenà pO<sub>2</sub>â.\n\nNepÅÃmé mÄÅenà ppO<sub>2</sub> pomocà senzorů helia lze aktivovat pouze ruÄnÄ, pokud je zapnuto nastavenà mÄÅenà helia (pouze TMX) a podÃl helia v Åedidle je vÄtÅ¡Ã než 20 %. PÅi použità nepÅÃmého mÄÅenà kyslÃku pomocà heliových senzorů se vždy ujistÄte, že jsou heliové senzory kalibrované a funkÄnÃ.\n\nPÅi nepÅÃmém mÄÅenà kyslÃku jsou vÅ¡echna pole zobrazená pomocà ppO<sub>2</sub> modrá.","textLarge":false,"imageOnRight":true,"image":{"recommendedSizes":{"width":"420","height":"280"}},"imageMobile":{"recommendedSizes":{"width":"750","height":"500"}}},"id":"#204","type":"component","lock":false,"position":137},{"name":"Divider","data":{"color":"darkGray"},"id":"#205","type":"component","lock":false,"position":138},{"name":"SectionDivider","data":{"title":"2.6.4 Decompression"},"id":"#526","type":"component","lock":false,"position":139},{"name":"TextBlock","data":{"text":"### <span id=\"2-.-6-.-4-Decompression\">**2.6.4 Dekomprese**</span>\n\nDekompresnà algoritmus bere v úvahu namÄÅené hodnoty ppO<sub>2</sub> a inertnà plyny podle nastaveného složenà Åedidla.\n\nBÄhem ponoru lze v nabÃdce nastavit bezpeÄnostnà úroveÅ pÅepÃnánÃm sady standardnÃch a záchranných gradientnÃch faktorů (GF), aniž by byl ovlivnÄn režim, ve kterém CCR Liberty pracuje.","textLarge":false,"imageOnRight":true,"image":{"recommendedSizes":{"width":"420","height":"280"}},"imageMobile":{"recommendedSizes":{"width":"750","height":"500"}}},"id":"#206","type":"component","lock":false,"position":140},{"name":"Divider","data":{"color":"darkGray"},"id":"#207","type":"component","lock":false,"position":141},{"name":"SectionDivider","data":{"title":"2.6.5 Specific handset control"},"id":"#527","type":"component","lock":false,"position":142},{"name":"TextBlock","data":{"text":"### <span id=\"2-.-6-.-5-Specific-handset-control\">**2.6.5 Specifické ovládánà handsetu>\n\nDlouhé stisknutà hornÃho tlaÄÃtka - dalÅ¡Ã vyÅ¡Å¡Ã požadovaná hodnota\n\nDlouhé stisknutà dolnà klávesy - dalÅ¡Ã nižšà požadovaná hodnota\n\nPokud jsou v nastavenà povoleny funkce Descent SP a Deco SP, docházà mezi nimi také k pÅepÃnánà pomocà klávesových zkratek.","textLarge":false,"imageOnRight":true,"image":{"recommendedSizes":{"width":"420","height":"280"}},"imageMobile":{"recommendedSizes":{"width":"750","height":"500"}}},"id":"#208","type":"component","lock":false,"position":143},{"name":"Divider","data":{"color":"darkGray"},"id":"#209","type":"component","lock":false,"position":144},{"name":"SectionDivider","data":{"title":"2.7 Manual CCR mode"},"id":"#528","type":"component","lock":false,"position":145},{"name":"TextBlock","data":{"text":"### <span id=\"2-.-7-Manual-CCR-mode\">**2.7 Manual CCR režim**</span>\n\nTento režim sloužà pÅedevÅ¡Ãm k výcviku","textLarge":false,"imageOnRight":true,"image":{"recommendedSizes":{"width":"420","height":"280"}},"imageMobile":{"recommendedSizes":{"width":"750","height":"500"}}},"id":"#530","type":"component","lock":false,"position":146},{"name":"SectionDivider","data":{"title":"2.7.1 Entering manual CCR mode"},"id":"#529","type":"component","lock":false,"position":147},{"name":"TextBlock","data":{"text":"### <span id=\"2-.-7-.-1-Entering-manual-CCR-mode\">**2.7.1 Vstup do manual CCR režimu**</span>\n\nV režimu CCR, záchranném režimu OC nebo povrchovém režimu je možné z nabÃdky pÅepnout na ruÄnà režim CCR.","textLarge":false,"imageOnRight":true,"image":{"recommendedSizes":{"width":"420","height":"280"},"mimetype":"image/png","size":284331,"hash":"302d44c8c131c82b67f9f11ccb6698f96b630887","i
2d":"cl3sp2j9qdekh077634if2l1l","filename":"divesoft-ccr-liberty-manual-2-7-1-01.png","category":"divesoft/","type":"image"},"imageMobile":{"recommendedSizes":{"width":"750","height":"500"}}},"id":"#210","type":"component","lock":false,"position":148},{"name":"Divider","data":{"color":"darkGray"},"id":"#211","type":"component","lock":false,"position":149},{"name":"SectionDivider","data":{"title":"2.7.2 Switching to other modes"},"id":"#531","type":"component","lock":false,"position":150},{"name":"TextBlock","data":{"text":"### <span id=\"2-.-7-.-2-Switching-to-other-modes\">**2.7.2 PÅepnutà do jiných režimů**</span>\n\nV nabÃdce je možné pÅepnout z manuálnÃho režimu CCR na režim CCR a režim záchrany OC. Pokud je aktuálnà hloubka menÅ¡Ã než 1,5 m, je možné pÅepnout do povrchového režimu a pohotovostnÃho režimu.","textLarge":false,"imageOnRight":true,"image":{"recommendedSizes":{"width":"420","height":"280"}},"imageMobile":{"recommendedSizes":{"width":"750","height":"500"}}},"id":"#212","type":"component","lock":false,"position":151},{"name":"Divider","data":{"color":"darkGray"},"id":"#213","type":"component","lock":false,"position":152},{"name":"SectionDivider","data":{"title":"2.7.3 ppO2 regulation"},"id":"#532","type":"component","lock":false,"position":153},{"name":"TextBlock","data":{"text":"### <span id=\"2-.-7-.-3-ppO2-regulation\">**2.7.3 regulace ppO<sub>2</sub>**</span>\n\nManuálnà režim CCR je založen na režimu CCR. Automatické doplÅovánà kyslÃku vÅ¡ak nenà k dispozici a regulace ppO<sub>2</sub> se provádà pouze ruÄnÄ. Zobrazenà ppO<sub>2</sub>, dekompresnÃch výpoÄtů a dalÅ¡Ãch údajů je funkÄnÃ.\n\nPÅedpokládá se, že uživatel pÅidává kyslÃk ruÄnÄ pomocà ruÄnÃho pÅepouÅ¡tÄcÃho ventilu nebo manipulacà s ventilem kyslÃkové láhve, pokud je nÄkterý solenoid zablokován v otevÅeném stavu.\n\nPokud hodnota ppO<sub>2</sub> klesne pod 0,3 baru, pak se kyslÃk z bezpeÄnostnÃch důvodů pÅidá do dýchacà smyÄky automaticky. To je možné pouze v pÅÃpadÄ, že jsou solenoidy funkÄnà a je k dispozici pÅÃvod kyslÃku.\n\nPÅi ruÄnÃm pÅidávánà kyslÃku do dýchacà smyÄky poÄÃtejte se zpoždÄnÃm mezi pÅidánÃm kyslÃku a zmÄnou namÄÅených hodnot. Toto zpoždÄnà je způsobeno tÃm, že kyslÃk se pÅidává do výdechového vaku a smÄs musà projÃt skrubrem, než se dostane ke snÃmaÄům.","textLarge":false,"imageOnRight":true,"image":{"recommendedSizes":{"width":"420","height":"280"}},"imageMobile":{"recommendedSizes":{"width":"750","height":"500"}}},"id":"#214","type":"component","lock":false,"position":154},{"name":"Divider","data":{"color":"darkGray"},"id":"#215","type":"component","lock":false,"position":155},{"name":"SectionDivider","data":{"title":"2.7.4 Decompression"},"id":"#533","type":"component","lock":false,"position":156},{"name":"TextBlock","data":{"text":"### <span id=\"2-.-7-.-4-Decompression\">**2.7.4 Dekomprese**</span>\n\nDekompresnà algoritmus bere v úvahu namÄÅené hodnoty ppO<sub>2</sub> a inertnà plyny podle nastaveného složenà Åedidla.","textLarge":false,"imageOnRight":true,"image":{"recommendedSizes":{"width":"420","height":"280"}},"imageMobile":{"recommendedSizes":{"width":"750","height":"500"}}},"id":"#216","type":"component","lock":false,"position":157},{"name":"Divider","data":{"color":"darkGray"},"id":"#217","type":"component","lock":false,"position":158},{"name":"SectionDivider","data":{"title":"2.8 Bailout OC mode"},"id":"#534","type":"component","lock":false,"position":159},{"name":"TextBlock","data":{"text":"### <span id=\"2-.-8-Bailout-OC-mode\">**2.8 Režim bailout OC**</span>\n\nTento režim sloužà pÅedevÅ¡Ãm k ÅeÅ¡enà nouzových situacÃ.","textLarge":false,"imageOnRight":true,"image":{"recommendedSizes":{"width":"420","height":"280"}},"imageMobile":{"recommendedSizes":{"width":"750","height":"500"}}},"id":"#448","type":"component","lock":false,"position":160},{"name":"SectionDivider","data":{"title":"2.8.1 Entering bailout OC mode"},"id":"#535","type":"component","lock":false,"position":161},{"name":"TextBlock","data":{"text":"### <span id=\"2-.-8-.-1-Entering-bailout-OC-mode\">**2.8.1 Vstup do bailout OC mode**</span>\n\nPÅepnutà do záchranného režimu OC lze provést z nabÃdky v režimu CCR, v ruÄnÃm režimu CCR nebo v povrchovém režimu.","textLarge":false,"imageOnRight":true,"image":{"recommendedSizes":{"width":"420","height":"280"},"mimetype":"image/png","size":65057,"hash":"5da459b4be10d42077c753844c0ef1d7ca25652c","id":"cl3sp33lxdel707760lymgnjr","filename":"divesoft-ccr-liberty-manual-2-8-1-01.png","category":"divesoft/","type":"image"},"imageMobile":{"recommendedSizes":{"width":"750","height":"500"}}},"id":"#218","type":"component","lock":false,"position":162},{"name":"Divider","data":{"color":"darkGray"},"id":"#219","type":"component","lock":false,"position":163},{"name":"SectionDivider","data":{"title":"2.8.2 Switching to other modes"},"id":"#536","type":"component","lock":false,"position":164},{"name":"TextBlock","data":{"text":"PÅepnutà do jiných režimů### <span id=\"2-.-8-.-2-Switching-to-othe-modes\">**2.8.2 PÅepnutà do jiných režimů**</span>\n\nV nabÃdce je možné pÅepnout z režimu záchranného OC na režim CCR a ruÄnà režim CCR. Pokud je aktuálnà hloubka menÅ¡Ã než 1,5 m, je možné pÅepnout do povrchového režimu a pohotovostnÃho režimu.","textLarge":false,"imageOnRight":true,"image":{"recommendedSizes":{"width":"420","height":"280"}},"imageMobile":{"recommendedSizes":{"width":"750","height":"500"}}},"id":"#220","type":"component","lock":false,"position":165},{"name":"Divider","data":{"color":"darkGray"},"id":"#221","type":"component","lock":false,"position":166},{"name":"SectionDivider","data":{"title":"2.8.3 Mixture"},"id":"#537","type":"component","lock":false,"position":167}
2,{"name":"TextBlock","data":{"text":"### <span id=\"2-.-8-.-3-Mixture\">**2.8.3 Mixture**</span>","textLarge":false,"imageOnRight":true,"image":{"recommendedSizes":{"width":"420","height":"280"}},"imageMobile":{"recommendedSizes":{"width":"750","height":"500"}}},"id":"#449","type":"component","lock":false,"position":168},{"name":"TextBlock","data":{"text":"V záchranném režimu se pÅedpokládá, že potápÄÄ nebude dýchat z dýchacà smyÄky pÅÃstroje, ale použije samostatný pÅÃstroj s otevÅeným okruhem. **Automatická regulace ppO<sub>2</sub> je v záchranném režimu deaktivována**; pÅÃstroj funguje pouze jako dekompresnà poÄÃtaÄ.\n\n**Z tohoto důvodu nesmÃte dýchat z pÅÃstroje, pokud je pÅepnut do záchranného režimu OC**.","textLarge":false,"imageOnRight":true,"image":{"recommendedSizes":{"width":"420","height":"280"},"mimetype":"image/png","size":66627,"hash":"968bc7affaab54ec4eddc0adc56b5d72c439e931","id":"cl3tsesumdnpp07760diugq68","filename":"divesoft-ccr-liberty-manual-2-8-3-01.png","category":"divesoft/","type":"image"},"imageMobile":{"recommendedSizes":{"width":"750","height":"500"}}},"id":"#222","type":"component","lock":false,"position":169},{"name":"TextBlock","data":{"text":"Up to eight breathing mixtures are can be available in this mode. The user can select the currently utilized mixture from the menu or can successively select individual mixtures with a long press of the upper or lower key. After switching to bailout OC mode, the configured default mixture is set.","textLarge":false,"imageOnRight":true,"image":{"recommendedSizes":{"width":"420","height":"280"}},"imageMobile":{"recommendedSizes":{"width":"750","height":"500"}}},"id":"#223","type":"component","lock":false,"position":170},{"name":"Divider","data":{"color":"darkGray"},"id":"#224","type":"component","lock":false,"position":171},{"name":"SectionDivider","data":{"title":"2.8.4 Decompression"},"id":"#538","type":"component","lock":false,"position":172},{"name":"TextBlock","data":{"text":"### <span id=\"2-.-8-.-4-Decompression\">**2.8.4 Dekomprese**</span>\n\nDekompresnà algoritmus zohledÅuje hodnoty dÃlÄÃch tlaků podle hloubky a smÄsi množin.\n\nPo pÅepnutà do záchranného režimu OC se automaticky nastavà úroveÅ bezpeÄnosti pomocà faktorů gradientu záchrany (GF). V nabÃdce je možné pÅepÃnat mezi standardnÃmi a záchrannými sadami GF, aniž by byl ovlivnÄn režim, ve kterém CCR Liberty pracuje. Pokud potápÄÄ bÄhem ponoru pÅepne zpÄt do režimu CCR, GF se automaticky pÅepne zpÄt na standardnà GF.","textLarge":false,"imageOnRight":true,"image":{"recommendedSizes":{"width":"420","height":"280"}},"imageMobile":{"recommendedSizes":{"width":"750","height":"500"}}},"id":"#225","type":"component","lock":false,"position":173},{"name":"Divider","data":{"color":"darkGray"},"id":"#226","type":"component","lock":false,"position":174},{"name":"SectionDivider","data":{"title":"2.8.5 Specific handset control"},"id":"#539","type":"component","lock":false,"position":175},{"name":"TextBlock","data":{"text":"### <span id=\"2-.-8-.-5-Specific-handset-control\">**2.8.5 Specifické ovládánà handsetu**</span>\n\nDlouhý stisk hornà klávesy - zmÄna smÄsi (cyklicky nahoru podle seznamu)\n\nDlouhé stisknutà dolnà klávesy - zmÄna smÄsi (cyklicky dolů podle seznamu)","textLarge":false,"imageOnRight":true,"image":{"recommendedSizes":{"width":"420","height":"280"}},"imageMobile":{"recommendedSizes":{"width":"750","height":"500"}}},"id":"#227","type":"component","lock":false,"position":176},{"name":"Divider","data":{"color":"darkGray"},"id":"#228","type":"component","lock":false,"position":177},{"name":"SectionDivider","data":{"title":"2.9 Ascent plan"},"id":"#540","type":"component","lock":false,"position":178},{"name":"TextBlock","data":{"text":"### <span id=\"2-.-9-Ascent-plan\">**2.9 Ascent plan**</span>","textLarge":false,"imageOnRight":true,"image":{"recommendedSizes":{"width":"420","height":"280"}},"imageMobile":{"recommendedSizes":{"width":"750","height":"500"}}},"id":"#450","type":"component","lock":false,"position":179},{"name":"TextBlock","data":{"text":"V jakémkoli režimu potápÄnà můžete zobrazit aktuálnà plán výstupu s celým průbÄhem dekomprese. AÄkoli se dekomprese zobrazuje na SvobodÄ pomocà hloubky dekompresnÃho stropu a Äasu do vynoÅenÃ, plán výstupu se zobrazuje v dekompresnÃch zastávkách v intervalech po 3 m. V poslednÃm sloupci se zobrazuje plyn, se kterým se poÄÃtá dekompresnà zastávka.","textLarge":false,"imageOnRight":true,"image":{"recommendedSizes":{"width":"420","height":"280"},"mimetype":"image/png","size":11362,"hash":"116a40e9031ce81d4b8c1a0e53302fe6b3aefe75","id":"cl3tsg9endnrs0776tdzumava","filename":"divesoft-ccr-liberty-manual-2-9-01.png","category":"divesoft/","type":"image"},"imageMobile":{"recommendedSizes":{"width":"750","height":"500"}}},"id":"#229","type":"component","lock":false,"position":180},{"name":"TextBlock","data":{"text":"Pokud je potápÄÄ v bezdekompresnÃm Äase, zobrazà se pouze âVolný výstupâ.\n\nVýpoÄet a zobrazenà plánu výstupu je také ovlivnÄno nastavenÃm plánovaÄe; zejména hloubkou poslednà dekompresnà zastávky (zda se výstup poÄÃtá se vÅ¡emi dostupnými smÄsmi), nebo pouze s aktuálnà smÄsÃ. Podrobnosti o nastavenà jsou uvedeny v kapitole 3.1.1 Nastavenà plánovaÄe.","textLarge":false,"imageOnRight":true,"image":{"recommendedSizes":{"width":"420","height":"280"}},"imageMobile":{"recommendedSizes":{"width":"750","height":"500"}}},"id":"#230","type":"component","lock":false,"position":181},{"name":"Divider","data":{"color":"darkGray"},"id":"#231","type":"component","lock":false,"position":182},{"name":"SectionDivider","data":{"title":"2.10 Setup in Dive mode"},"id":"#541","type":"component","lock":false,"position":183},{"name":"TextBlock","data":{"text":"### <span id=\"2-.-10-Setup-in-Dive-mode\">**2.10 Nastavenà v režimu potápÄnÃ**</span>\n\nBÄhem ponoru lze zmÄnit mnoho pÅedkonfigurovaných faktorů, napÅÃklad nastavit novou doÄasnou požadovanou hodnotu, pÅidat novou smÄs, odstranit ztracenou smÄs, zmÄnit Åedidlo nebo upravit jas displeje Äi HUD.","textLarge":false,"imageOnRight":true,"image":{"recommendedSizes":{"width":"420","height":"280"},"mimetype":"image/png","size":11373,"hash":"0eb5e9a69ad6c4a8a44f4868de0dff3131f96591","id":"cl3tsh3x1dnti0776t92yb1nn","filename":"divesoft-ccr-liberty-manual-2-10-01.png","category":"divesoft/","type":"image"},"imageMobile":{"recommendedSizes":{"width":"750","height":"500"}}},"id":"#232","type":"component","lock":false,"position":184},{"name":"TextBlock","data":{"text":"**Setpoint**\n\nYou can set a new temporary setpoint b
2y adding or subtracting from the value of the current setpoint. To increase the current setpoint, press +0.1, until you reach the desired setpoint. Once you have reached the desired value, move the cursor to Accept and confirm the change by pressing the upper button.","textLarge":false,"imageOnRight":true,"image":{"recommendedSizes":{"width":"420","height":"280"},"mimetype":"image/png","size":10244,"hash":"a2e79015033354895199fbbbac5762259a0683bb","id":"cl3tshi4rdnv707761zqqpqg8","filename":"divesoft-ccr-liberty-manual-2-10-02.png","category":"divesoft/","type":"image"},"imageMobile":{"recommendedSizes":{"width":"750","height":"500"}}},"id":"#233","type":"component","lock":false,"position":185},{"name":"TextBlock","data":{"text":"Chcete-li snÞit aktuálnà požadovanou hodnotu, pÅesuÅte kurzor na -0,1 a opakovanÄ stisknÄte hornà tlaÄÃtko, dokud nedosáhnete požadované hodnoty. Jakmile dosáhnete požadované hodnoty, pÅesuÅte kurzor na Accept a zmÄnu potvrÄte stisknutÃm hornÃho tlaÄÃtka.\n\nTyto nastavené hodnoty jsou pouze doÄasné. PÅepnutÃm na nÃzkou nebo vysokou žádanou hodnotu se doÄasná žádaná hodnota vymaže a pro jejà obnovenà je tÅeba zopakovat výše popsaný postup.\n\n**Set high**\n\nPÅepnutà na vysokou nastavenou hodnotu\n\n**Set low**\n\nPÅepnutà na nÃzkou nastavenou hodnotu\n\n**Faulty sensors**\n\nV pÅÃpadÄ poruchy jednoho nebo vÃce snÃmaÄů je nutné vadné snÃmaÄe vylouÄit z průmÄrovánÃ. NefunkÄnà Äidlo vyÅaÄte z provozu nebo pÅepnÄte režim mÄÅenà kyslÃku (Äidla kyslÃku nebo helia). Vadné snÃmaÄe by způsobily Å¡patné vyhodnocenà stavu jednotky, což by mohlo mÃt fatálnà následky. Postup pro vylouÄenà a zahrnutà vÅ¡ech Äidel je stejný jako postup v povrchovém režimu - viz kapitola 2.4.8 Vadná Äidla.\n\n**Bailout GF**\n\nK urychlenà dekomprese v pÅÃpadÄ nouze se použÃvajà bailout gradientnà faktory. TÃm se bezpeÄnostnà rezerva snÞà na pÅijatelnou minimálnà dobu pro bezpeÄný výstup na povrch. Po pÅepnutà pÅÃstroje na Bailout GF se tato položka zmÄnà na Standard GF, kterou lze poté použÃt k pÅepnutà zpÄt na standardnà gradientnà faktory.\n\n**Screens**\n\nTato funkce zapÃná nebo vypÃná nÄkteré obrazovky. Postup je stejný jako u nastavenà režimu povrchu; viz kapitola 2.4.6 PÅedvolby.\n\n**Diluents**\n\nFunkce nastavenà diluentu sloužà k pÅepnutà nebo nastavenà nového diluentu, pokud se použÃvá jiný diluent z off-board zdroje. Aby bylo Åedidlo použito správnÄ s ohledem na dekompresi a pomÄr He-N2, mÄlo by se provést propláchnutà Åedidlem, které nahradà původnà plyn.\n\n**Mixtures (OC mode only)**\n\nTuto funkci lze použÃt k úpravÄ aktuálnÃch záchranných smÄsà nebo k pÅidánà nové záchranné smÄsi. Je také možné zruÅ¡it výbÄr ztracené dekompresnà láhve, aby nebyla zapoÄÃtána do výpoÄtu výstupu. Nastavenà je stejné jako nastavenà smÄsà v povrchovém režimu: kapitola 2.4.3. Mixtures.\n\n**Brightness**\n\nNastavenà jasu displeje (1-10). Jas displeje významnÄ ovlivÅuje spotÅebu energie. Chcete-li Å¡etÅit baterii, snižte jas displeje na nejnižšà pÅijatelnou úroveÅ.\n\n**HUD brightness**\n\nJas diody HUD lze nastavit na 3 různé úrovnÄ. Ve velmi tmavých podmÃnkách může být plný jas diod dráždivý, ale na slunné mÄlÄinÄ může být nÃzký jas ménÄ viditelný. Intenzita se nastavuje stisknutÃm hornÃho tlaÄÃtka.","textLarge":false,"imageOnRight":true,"image":{"recommendedSizes":{"width":"420","height":"280"}},"imageMobile":{"recommendedSizes":{"width":"750","height":"500"}}},"id":"#234","type":"component","lock":false,"position":186},{"name":"Divider","data":{"color":"darkGray"},"id":"#235","type":"component","lock":false,"position":187},{"name":"SectionDivider","data":{"title":"2.11 Games"},"id":"#542","type":"component","lock":false,"position":188},{"name":"TextBlock","data":{"text":"### <span id=\"2-.-11-Games\">**2.11 Games**</span>\n\nNevypÃnejte chybové zprávy a oznámenÃ, pokud se hry hrajà pod vodou.\n\nUjistÄte se, že pÅi hranà bÄhem potápÄnà udržujete svou polohu. PravidelnÄ kontrolujte tlakomÄry a stav rebreatheru na druhém sluchátku. Hranà hry snižuje vaÅ¡i pozornost. Pamatujte: chcete se bezpeÄnÄ potápÄt, ne jen dosáhnout vyššà úrovnÄ ve h
2Åe!","textLarge":false,"imageOnRight":true,"image":{"recommendedSizes":{"width":"420","height":"280"}},"imageMobile":{"recommendedSizes":{"width":"750","height":"500"}}},"id":"#236","type":"component","lock":false,"position":189},{"name":"Divider","data":{"color":"darkGray"},"id":"#237","type":"component","lock":false,"position":190},{"name":"SectionDivider","data":{"title":"2.11.1 Sokoban"},"id":"#543","type":"component","lock":false,"position":191},{"name":"TextBlock","data":{"text":"### <span id=\"2-.-11-.-1-Sokoban\">**2.11.1 Sokoban**</span>","textLarge":false,"imageOnRight":true,"image":{"recommendedSizes":{"width":"420","height":"280"}},"imageMobile":{"recommendedSizes":{"width":"750","height":"500"}}},"id":"#451","type":"component","lock":false,"position":192},{"name":"TextBlock","data":{"text":"Sokoban je typ dopravnà hádanky, ve které hrÃ¡Ä (potápÄÄská maska se Å¡norchlem) tlaÄà lahve nebo bedny ve skladiÅ¡ti a snažà se je dostat na skladovacà mÃsta (Äervené teÄky).\n\nHra se hraje na hracà ploÅ¡e složené ze Ätverců, kde každý Ätverec pÅedstavuje buÄ podlahu, nebo zeÄ. NÄkteré Ätverce podlahy obsahujà válce a nÄkteré Ätverce podlahy jsou oznaÄeny jako skladovacà mÃsta.","textLarge":false,"imageOnRight":true,"image":{"recommendedSizes":{"width":"420","height":"280"},"mimetype":"image/png","size":44832,"hash":"84f46a5fc51478d379805207c4c60771801100b9","id":"cl3tsi2ppdnvv0776860cxafq","filename":"divesoft-ccr-liberty-manual-2-11-1-01.png","category":"divesoft/","type":"image"},"imageMobile":{"recommendedSizes":{"width":"750","height":"500"}}},"id":"#238","type":"component","lock":false,"position":193},{"name":"TextBlock","data":{"text":"The player is confined to the board and may move horizontally or vertically onto empty squares (never through walls or boxes). The player can also bump into a cylinder, which pushes it into the square beyond. Cylinders may not be pushed into other cylinders or walls, and they cannot be pulled. The puzzle is solved when all cylinders are in the storage locations.","textLarge":false,"imageOnRight":true,"image":{"recommendedSizes":{"width":"420","height":"280"}},"imageMobile":{"recommendedSizes":{"width":"750","height":"500"}}},"id":"#239","type":"component","lock":false,"position":194},{"name":"Divider","data":{"color":"darkGray"},"id":"#240","type":"component","lock":false,"position":195},{"name":"SectionDivider","data":{"title":"2.11.2 Snake"},"id":"#544","type":"component","lock":false,"position":196},{"name":"TextBlock","data":{"text":"### <span id=\"2-.-11-.-2-Snake\">**2.11.2 Snake**</span>","textLarge":false,"imageOnRight":true,"image":{"recommendedSizes":{"width":"420","height":"280"}},"imageMobile":{"recommendedSizes":{"width":"750","height":"500"}}},"id":"#452","type":"component","lock":false,"position":197},{"name":"TextBlock","data":{"text":"Snake je hra, ve které hrÃ¡Ä manévruje s Äárou (hadem), která roste do délky a sama je primárnà pÅekážkou.\n\nHrÃ¡Ä ovládá hlavu hada. PÅi pohybu vpÅed za sebou zanechává stopu, která pÅipomÃná pohybujÃcÃho se hada. Had má urÄitou délku. HrÃ¡Ä prohraje, když had narazà na hranici obrazovky, stopu nebo jinou pÅekážku, snà jed (lebku) nebo zemÅe hlady.","textLarge":false,"imageOnRight":true,"image":{"recommendedSizes":{"width":"420","height":"280"},"mimetype":"image/png","size":24729,"hash":"d4ffcad441d09b1d6b4e55e248c9092875d21f23","id":"cl3tsjasednx2077678ycg90e","filename":"divesoft-ccr-liberty-manual-2-11-1-02.png","category":"divesoft/","type":"image"},"imageMobile":{"recommendedSizes":{"width":"750","height":"500"}}},"id":"#241","type":"component","lock":false,"position":198},{"name":"TextBlock","data":{"text":"Had může pomalu ztrácet délku (každých 30 kroků), a když je pÅÃliÅ¡ krátký, umÃrá hlady.\n\nHrÃ¡Ä se pokouÅ¡Ã snÃst ryby tak, že do nich narazà hlavou hada. Každá snÄdená ryba hada prodlužuje, takže manévrovánà je postupnÄ obtÞnÄjÅ¡Ã.","textLarge":false,"imageOnRight":true,"image":{"recommendedSizes":{"width":"420","height":"280"}},"imageMobile":{"recommendedSizes":{"width":"750","height":"500"}}},"id":"#242","type":"component","lock":false,"position":199},{"name":"Divider","data":{"color":"darkGray"},"id":"#243","type":"component","lock":false,"position":200},{"name":"SectionDivider","data":{"title":"2.12 List of pop-up alarms and notifications on CCR Liberty"},"id":"#545","type":"component","lock":false,"position":201},{"name":"TextBlock","data":{"text":"### <span id=\"2-.-12-List-of-pop---up-alarms-and-notifications-on-CCR-Liberty\">**2.12 Seznam vyskakovacÃch alarmů a oznámenà v systému CCR Liberty**</span>\n\nToto je úplný seznam vÅ¡ech možných alarmů a zpráv, které se zobrazujà jako vyskakovacà okno na sluchátku Liberty CCR.\n\nZprávy jsou rozdÄleny do kategorià podle priority, pÅiÄemž âKritickáâ, âVysokáâ a âStÅednÃâ jsou vÅ¡echny nÄjakým druhem poruchy nebo chyby potápÄÄe.\n\nâOznámenÃâ jsou informativnà zprávy s nejnižšà prioritou, napÅ. ukonÄenà deco stopu apod.\n\nV odstavci âPÅizpůsobenÃâ je
2cesta pÅes menu k pÅÃsluÅ¡né položce s možnostà \\[výchozÃ\\] v hranatých závorkách.\n\nVezmÄte prosÃm na vÄdomÃ, že vÄtÅ¡ina položek menu je k dispozici pouze v povrchovém režimu, ale nÄkolik jich je k dispozici pouze v režimu potápÄnÃ.","textLarge":false,"imageOnRight":true,"image":{"recommendedSizes":{"width":"420","height":"280"}},"imageMobile":{"recommendedSizes":{"width":"750","height":"500"}}},"id":"#244","type":"component","lock":false,"position":202},{"name":"Divider","data":{"color":"darkGray"},"id":"#245","type":"component","lock":false,"position":203},{"name":"SectionDivider","data":{"title":"2.12.1 Critical priority"},"id":"#546","type":"component","lock":false,"position":204},{"name":"TextBlock","data":{"text":"### <span id=\"2-.-12-.-1-Critical-priority\">**2.12.1 Kritická priorita**</span>","textLarge":false,"imageOnRight":true,"image":{"recommendedSizes":{"width":"420","height":"280"}},"imageMobile":{"recommendedSizes":{"width":"750","height":"500"}}},"id":"#246","type":"component","lock":false,"position":205},{"name":"TextBlock","data":{"text":"### **<span style=\"background-color:red; width: 50%; color:white; display:block; padding-left: 50px; padding-bottom: 1.6rem\">Low pO<sub>2</sub></span>**\n\nSmyÄka ppO<sub>2</sub> klesla pod prahovou hodnotu âMin pO<sub>2</sub>â. Pokud ppO<sub>2</sub> klesne jeÅ¡tÄ vÃce, alarm se opakuje každých 0,1 baru.\n\nNapÅÃklad pÅi výchozÃm nastavenà ppO<sub>2</sub> 0,3 baru se prvnà alarm rozeznà pÅi ppO<sub>2</sub> tÄsnÄ pod 0,3 baru, dalÅ¡Ã pak pÅi 0,2 baru a pÅi 0,1 baru.\n\n**PÅizpůsobenÃ**\n\nNastavenà / Alarmy / Zdroje alarmů / Min pO<sub>2</sub> \\[0,3]\n \nPovrchový režim použÃvá pevnou prahovou hodnotu 0,18 bar.","textLarge":false,"imageOnRight":true,"image":{"recommendedSizes":{"width":"420","height":"280"}},"imageMobile":{"recommendedSizes":{"width":"750","height":"500"}}},"id":"#248","type":"component","lock":false,"position":207},{"name":"TextBlock","data":{"text":"### **<span style=\"background-color:red; width: 50%; color:white; display:block; padding-left: 50px; padding-bottom: 1.6rem\">High pO<sub>2</sub></span>**\n\nSmyÄka (nebo smÄs OC) ppO<sub>2</sub> pÅekroÄila prahovou hodnotu âMax pO<sub>2</sub>â. Pokud ppO<sub>2</sub> stále stoupá, alarm se opakuje každých 0,2 baru.\n\nNapÅÃklad pÅi výchozà hodnotÄ 1,6 baru se nejprve spustà alarm tÄsnÄ nad hodnotou 1,6 baru, poté pÅi 1,8 baru, 2,0 baru atd.\n\n**PÅizpůsobenÃ**\n\nCCR\n\nSetup / Alarms / Alarm Sources / Max pO<sub>2</sub> \\[1.6]\n\nOC\n\nSetup / Mixtures / Max pO<sub>2</sub> bottom \\[1.4]\n \nSetup / Mixtures / Max pO<sub>2</sub> deco \\[1.6]\n \nPlease note that internally the \"Setup / Mixtures / Max pO<sub>2</sub> deco\" equals \"Setup / Alarms / Alarm Sources / Max pO<sub>2</sub>\".\n\nZmÄnou jednoho se zmÄnà i druhý.","textLarge":false,"imageOnRight":true,"image":{"recommendedSizes":{"width":"420","height":"280"}},"imageMobile":{"recommendedSizes":{"width":"750","height":"500"}}},"id":"#250","type":"component","lock":false,"position":208},{"name":"TextBlock","data":{"text":"### **<span style=\"background-color:red; width: 50%; color:white; display:block; padding-left: 50px; padding-bottom: 1.6rem\">PO<sub>2</sub> measuring lost</span>**\n\nVÅ¡echny snÃmaÄe O<sub>2</sub> jsou nefunkÄnà nebo vyÅazené z provozu, Liberty nemá možnost snÃmat aktuálnà hodnotu ppO<sub>2</sub>.\n \nPokud použÃváte jako Åedidlo trimix a máte funkÄnà senzory helia, můžete ruÄnÄ pÅepnout na záložnà vypoÄtené Ätenà ppO<sub>2</sub> pomocà senzorů helia. Bude následovat oznámenà âpO<sub>2</sub> backup modeâ (záložnà režim) a vÅ¡echny hodnoty ppO<sub>2</sub> budou mÃt modré pozadà na znamenÃ, že nepocházejà z chemických kyslÃkových senzorů.\n\n**PÅizpůsobenÃ**\n\nPÅepnutà do záložnÃho režimu mÄÅenà O<sub>2</sub>:\n \nSetup / Faulty sensors / pO<sub>2</sub> source \\[O<sub>2</sub>]","textLarge":false,"imageOnRight":true,"image":{"recommendedSizes":{"width":"420","height":"280"}},"imageMobile":{"recommendedSizes":{"width":"750","height":"500"}}},"id":"#252","type":"component","lock":false,"position":209},{"name":"TextBlock","data":{"text":"### **<span style=\"background-color:red; width: 50%; color:white; display:block; padding-left: 50px; padding-bottom: 1.6rem\">Above ceiling</span>**\n\nPotápÄÄ je ménÄ než 1 m nad vypoÄteným dekompresnÃm stropem.","textLarge":false,"imageOnRight":true,"image":{"recommendedSizes":{"width":"420","height":"280"}},"imageMobile":{"recommendedSizes":{"width":"750","height":"500"}}},"id":"#254","type":"component","lock":false,"position":210},{"name":"TextBlock","data":{"text":"### **<span style=\"background-color:red; width: 50%; color:white; display:block; padding-left: 50px; padding-bottom: 1.6rem\">Very above ceiling</span>**\n\nPotápÄÄ je vÃce než 1 m nad vypoÄteným dekompresnÃm stropem.","textLarge":false,"imageOnRight":true,"image":{"recommendedSizes":{"width":"420","height":"280"}},"imageMobile":{"recommendedSizes":{"width":"750","height":"500"}}},"id":"#256","type":"component","lock":false,"position":211},{"name":"Divider","data":{"color":"darkGray"},"id":"#257","type":"component","lock":false,"position":212},{"name":"SectionDivider","data":{"title":"2.12.2 High priority"},"id":"#547","type":"component","lock":false,"position":213},{"name":"TextBlock","data":{"text":"### <span id=\"2-.12-.-2-High-priority\">**2.12.2 Vysoká priorita**</span>","textLarge":false,"imageOnRight":true,"image":{"recommendedSizes":{"width":"420","height":"280"}},"imageMobile":{"recommendedSizes":{"width":"750","height":"500"}}},"id":"#258","type":"component","lock":false,"position":214},{"name":"TextBlock","data":{"text":"### **<span style=\"background-color:red; width: 50%; color:white; display:block; padding-left: 50px; padding-bottom: 1.6rem\">Check O<sub>2</sub> sensors !</span>**\n\nTento alarm se objevà pouze v pÅÃpadÄ, že máte jeden nebo vÃce kyslÃkových senzorů vylouÄených, ale ne ruÄnÄ zakázaných. Alarm se spustÃ, jakmile automaticky vylouÄené Äidlo pÅekroÄà prahovou hodnotu pro alarm vysoké hladiny ppO<sub>2</sub> (viz Äást âKritickéâ).\n \nToto hlášenà je jasným signálem pro provedenà validace Äidel, obvykle propláchnutÃm Åedidlem. Hledáte potvrzenÃ, které senzory jsou vadné a které fungujà správnÄ (i ty vylouÄené). Jakmile o tom s jistotou rozhodnete, můžete vadné snÃmaÄe ruÄnÄ vypnout.\n\nExistuje možnost, že vylouÄené Äidlo (Äidla) je (jsou) jediné funkÄnà a ostatnà je (jsou) limitujÃcÃ, neschopné dosáhnout aktuálnà hodnoty ppO<sub>2</sub>. Tato situace již nastala, a je tedy jen otázkou Äasu, kdy se bude opakovat.\n\nPokud jste si jisti, že vylouÄený snÃmaÄ je skuteÄnÄ vadný, můžete jej ruÄnÄ vypnout, abyste tento alarm potlaÄili.\n\nUpozorÅujeme, že vylouÄený snÃmaÄ můžete také ruÄnÄ znovu zahrnout do obrazovky vadných snÃmaÄů.\n\n**PÅizpůsobenÃ**\n\nRuÄnà zakázánà a povolenà Äidel:\n\nSetup / Faulty sensors / Oxygen sensors","textLarge":false,"imageOnRight":true,"image":{"recommendedSizes":{"width":"420","height":"280"}},"imageMobile":{"recommendedSizes":{"width":"750","height":"500"}}},"id":"#260","type":"component","lock":false,"position":215},{"name":"TextBlock","data":{"text":"### **<span style=\"background-color:red; width: 50%; color:white; display:block; padding-left: 50px; padding-bottom: 1.6rem\">Oxygen #3 excluded</span>**\n\nJeden ze snÃmaÄů kyslÃku se odchyluje od průmÄru vypoÄteného z ostatnÃch tÅà snÃmaÄů o vÃce než 0,1 baru po dobu nejménÄ 15 sekund. Pokud nenà potápÄÄem zakázán, bude senzor opÄt automaticky povolen, jakmile se vejde do průmÄru po dobu alespoÅ 10 sekund. ZaÅazenà nevytváÅà žádný alarm ani upozornÄnÃ.\n\nUvÄdomte si, že po vyÅazenà jednoho Äidla se průmÄr ppO<sub>2</sub> vypoÄÃtá ze tÅà platných Äidel. Také jakékoli dalÅ¡Ã vylouÄenà porovnává jeden senzor s ostatnÃmi dvÄma, což je náchylnÄjÅ¡Ã k vylouÄenà platného senzoru, pokud se ostatnà dva stanou proudovÄ omezenými.\n\nPokud se chcete vyhnout automatickému zahrnutà jednou vylouÄeného Äidla, můžete jej ruÄnÄ zakázat.\n\n**PÅizpůsobenÃ**\n\nRuÄnà zakázánà a povolenà Äidel:\n\nSetup / Faulty sensors / Oxygen sensors","textLarge":false,"imageOnRight":true,"image":{"recommendedSizes":{"width":"420","height":"280"}},"imageMobile":{"recommendedSizes":{"width":"750","height":"500"}}},"id":"#262","type":"component","lock":false,"position":216},{"name":"TextBlock","data":{"text":"### **<span style=\"background-color:red; width: 50%; color:white; display:block; padding-left: 50px; padding-bottom: 1.6rem\">Pressure #1 excluded</span>**\n\nLiberty použÃvá celkem ÄtyÅi senzory, dva pro každou poÄÃtaÄovou jednotku. AÄkoli je to velmi vzácné, může se tato zpráva zobrazit.\n\nTato zpráva se může zobrazit po poÅ¡kozenà jemných tlakových Äidel (oznaÄených pÃsmenem âFâ v kontrole systému) pÅi potápÄnà do hloubky vÄtÅ¡Ã než 150 m.\n\n**PÅizpůsobenÃ**\n\nRuÄnÄ deaktivujte a povolte snÃmaÄe:\n\nSetup / Faulty sensors / Pressure sensors","textLarge":false,"imageOnRight":true,"image":{"recommendedSizes":{"width":"420","height":"280"}},"imageMobile":{"recommendedSizes":{"width":"750","height":"500"}}},"id":"#264","type":"component","lock":false,"position":217},{"name":"TextBlock","data":{"text":"### **<span style=\"background-color:red; width: 50%; color:white; display:block; padding-left: 50px; padding-bottom: 1.6rem\">Other CU down</span>**\n\nHlavice Liberty obsahuje dvÄ ÅÃdicà jednotky âCUâ, které jsou propojeny jednou komunikaÄnà linkou. Pokud jedna z CU pÅestane reagovat na 10 sekund, spustà se alarm.\n\nPokud jedna CU pÅestane fungovat, aÅ¥ už z důvodu slabé baterie nebo jakékoliv poruchy, druhá CU zůstane plnÄ funkÄnà a vstÅikuje kyslÃk pomocà vlastnÃho solenoidu. CU je omezena pouze tÃm, že má dva kyslÃkové Älánky, dva snÃmaÄe tlaku a jeden HS.\n\nPÅi použità pouze jednoho HS v boÄnà montáži se doporuÄuje pÅipojit HUD na jednu stranu a sluchátko na druhou stranu hlavy. Takže i pÅi provozu na jedné CU si zachováte možnost odeÄÃtat smyÄku ppO<sub>2</sub> na HS nebo HUD.","textLarge":false,"imageOnRight":true,"image":{"recommendedSizes":{"width":"420","height":"280"}},"imageMobile":{"recommendedSizes":{"width":"750","height":"500"}}},"id":"#266","type":"component","lock":false,"position":218},{"name":"TextBlock","data":{"text":"### **<span style=\"background-color:red; width: 50%; color:white; display:block; padding-left: 50px; padding-bottom: 1.6rem\">CNS O<sub>2</sub> toxicity 115%</span>**\n\nAlarm toxicity kyslÃku se rozeznà ve tÅech stupnÃch, a to pÅi 75 %, 90 % a 100 %. Upozornà potápÄÄe, že se blÞà limitnà hodnotÄ expozice kyslÃku NOAA.\n\nPokud potÅebujete prodloužit pobyt pod vodou a dosáhnete limitu CNS, můžete snÞit nastavenou hodnotu, abyste naÅ¡li kompromis mezi expozicà kyslÃku a dobou dekomprese.\n\n**PÅizpůsobenÃ**\n\nSetup / Alarms / Alarm Sources / CNS \\[On]","textLarge":false,"imageOnRight":true,"image":{"recommendedSizes":{"width":"420","height":"280"}},"imageMobile":{"recommendedSizes":{"width":"750","height":"500"}}},"id":"#268","type":"component","lock":false,"position":219},{"name":"TextBlock","data":{"text":"### **<span style=\"background-color:blue; width: 50%; color:white; display:block; padding-left: 50px; padding-bottom: 1.6rem\">Stack time 240 min</span>**\n\nAlarm ÄasovaÄe ÄisticÃho zaÅÃzenÃ. Äas upozornÄnà můžete v povrchové nabÃdce upravit podle svých zvyklostÃ. Také můžete pÅizpůsobit, zda má být ÄasovaÄ aktivnà na hladinÄ, nebo pouze pod vodou.\n\n**PÅizpůsobenÃ**\nSetup / Alarms / Notifications / Stack time \\[150â]\n\nSetup / Alarms / Notifications / Stack timer on sfc. \\[On]\n\nOn ⦠ÄasovaÄ bÄžà po celou dobu, kdy je Liberty v režimu potápÄnÃ, a to i na hladinÄ.\nOff ⦠ÄasovaÄ bÄžà pouze pod vodou (pod 1,5 m).","textLarge":false,"imageOnRight":true,"image":{"recommendedSizes":{"width":"420","height":"280"}},"imageMobile":{"recommendedSizes":{"width":"750","height":"500"}}},"id":"#270","type":"component","lock":false,"position":220},{"name":"TextBlock","data":{"text":"### **<span style=\"background-color:red; width: 50%; color:white; display:block; padding-left: 50px; padding-bottom: 1.6rem\">SLOW DOWN !!!</span>**\n\nRychlost výstupu pÅesáhla 10 m za minutu.\n\n**PÅizpůsobenÃ**\n\nSetup / Alarms / Alarm sources / Ascent rate \\[On]","textLarge":false,"imageOnRight":true,"image":{"recommendedSizes":{"width":"420","height":"280"}},"imageMobile":{"recommendedSizes":{"width":"750","height":"500"}}},"id":"#272","type":"component","lock":false,"position":221},{"name":"TextBlock","data":{"text":"### **<span style=\"background-color:red; width: 50%; color:white; display:block; padding-left: 50px; padding-bottom: 1.6rem\">pO<sub>2</sub> emergency mode</span>**\n\nOznámenà po ruÄnÃm pÅepnutà na výpoÄet ppO<sub>2</sub> z údajů ze senzorů helia. Viz také âztráta mÄÅenà pO<sub>2</sub>â.\n\n**PÅizpůsobenÃ**\n\nSetup / Faulty sensors / pO<sub>2</sub> source \\[O<sub>2</sub>]","textLarge":false,"imageOnRight":true,"image":{"recommendedSizes":{"width":"420","height":"280"}},"imageMobile":{"recommendedSizes":{"width":"750","height":"500"}}},"id":"#274","type":"component","lock":false,"position":222},{"name":"TextBlock","data":{"text":"### **<span style=\"background-color:blue; width: 50%; color:white; display:block; padding-left: 50px; padding-bottom: 1.6rem\">Pressure sens. diff.</span>**\n\nK dispozici jsou pouze dva snÃmaÄe tlaku, které se liÅ¡Ã o 1,5 m nebo vÃce. NapÅÃklad pÅi provozu na jedné jednotce CU, kdy je jemný snÃmaÄ tlaku vadný.\n\n**PÅizpůsobenÃ**\n\nSetup / Faulty sensors / Pressure sensors\n\nZakázat nebo povolit požadovaný snÃmaÄ tlaku.\n","textLarge":false,"imageOnRight":true,"image":{"recommendedSizes":{"width":"420","height":"280"}},"imageMobile":{"recommendedSizes":{"width":"750","height":"500"}}},"id":"#276","type":"component","lock":false,"position":223},{"name":"TextBlock","data":{"text":"### **<span style=\"background-color:blue; width: 50%; color:white; display:block; padding-left: 30px; padding-bottom: 1.6rem\">Pressure #3 sensor bad</span>**\n\nPressure sensor value differs from the average of other pressure sensors by 1.5m or more.\n\n**Customization**\n\nSetup / Faulty sensors / Pressure sensors\n\nDisable or enable desired pressure sensor.","textLarge":false,"imageOnRight":true,"image":{"recommendedSizes":{"width":"420","height":"280"}},"imageMobile":{"recommendedSizes":{"width":"750","height":"500"}}},"id":"#278","type":"component","lock":false,"position":224},{"name":"TextBlock","data":{"text":"### **<span style=\"background-color:red; width: 50%; color:white; display:block; padding-left: 50px; padding-bottom: 1.6rem\">High humidity CU L</span>**\n\nVzniká, když je vlhkost v CU vyÅ¡Å¡Ã než 75 %.","textLarge":false,"imageOnRight":true,"image":{"recommendedSizes":{"width":"420","height":"280"}},"imageMobile":{"recommendedSizes":{"width":"750","height":"500"}}},"id":"#280","type":"component","lock":false,"position":225},{"name":"TextBlock","data":{"text":"### **<span style=\"background-color:red; width: 50%; color:white; display:block; padding-left: 50px; padding-bottom: 1.6rem\">Low battery</span>**\n\nThe battery level has reached warning level. Liberty has two batteries â one for each side, each battery then has
2its own alarm.\n\n**Customization**\n\nSetup / Alarms / Alarm sources / Low battery % \\[25]\n\nPlease note that setting the level below 10% suppresses the âCritical batteryâ alarm.\n\nFurthermore, setting the alarm threshold too low, may result in warning too late to be useful.","textLarge":false,"imageOnRight":true,"image":{"recommendedSizes":{"width":"420","height":"280"}},"imageMobile":{"recommendedSizes":{"width":"750","height":"500"}}},"id":"#282","type":"component","lock":false,"position":226},{"name":"TextBlock","data":{"text":"### **<span style=\"background-color:red; width: 50%; color:white; display:block; padding-left: 50px; padding-bottom: 1.6rem\">Critical battery</span>**\n\nThe battery level has reached fixed level of 10%, the two batteries has separate alarms.\n\n**Customization**\n\nFixed at 10% battery level.\n\nThis alarm is not customizable, though please note that setting âLow batteryâ warning level below 10% suppresses the critical alarm. The diver will get only the âLow Batteryâ alarm.","textLarge":false,"imageOnRight":true,"image":{"recommendedSizes":{"width":"420","height":"280"}},"imageMobile":{"recommendedSizes":{"width":"750","height":"500"}}},"id":"#284","type":"component","lock":false,"position":227},{"name":"Divider","data":{"color":"darkGray"},"id":"#285","type":"component","lock":false,"position":228},{"name":"SectionDivider","data":{"title":"2.12.3 Medium priority"},"id":"#548","type":"component","lock":false,"position":229},{"name":"TextBlock","data":{"text":"### <span id=\"2-.-12-.-3-Medium-priority\">**2.12.3 StÅednà priorita**</span>","textLarge":false,"imageOnRight":true,"image":{"recommendedSizes":{"width":"420","height":"280"}},"imageMobile":{"recommendedSizes":{"width":"750","height":"500"}}},"id":"#286","type":"component","lock":false,"position":230},{"name":"TextBlock","data":{"text":"### **<span style=\"background-color:red; width: 50%; color:white; display:block; padding-left: 50px; padding-bottom: 1.6rem\">Slow down</span>**\n\nRychlost stoupánà nebo klesánà pÅekroÄila nastavenou hodnotu.\n\n**PÅizpůsobenÃ**\n\nSetup / Decompression / Rates & zones\n\nVezmÄte prosÃm na vÄdomÃ, že rychlost stoupánà a klesánà se použÃvá také pÅi plánovánà ponorů, TTS a výpoÄtech plánu výstupu.","textLarge":false,"imageOnRight":true,"image":{"recommendedSizes":{"width":"420","height":"280"}},"imageMobile":{"recommendedSizes":{"width":"750","height":"500"}}},"id":"#288","type":"component","lock":false,"position":231},{"name":"TextBlock","data":{"text":"### **<span style=\"background-color:blue; width: 50%; color:white; display:block; padding-left: 50px; padding-bottom: 1.6rem\">BO RMT 4´</span>**\n\nVarovánà pÅed zbývajÃcÃm Äasem záchrany, varovánà asi 5' pÅed vyprÅ¡enÃm. VÃce informacà naleznete v Äásti âBO RMT expiredâ nÞe.","textLarge":false,"imageOnRight":true,"image":{"recommendedSizes":{"width":"420","height":"280"}},"imageMobile":{"recommendedSizes":{"width":"750","height":"500"}}},"id":"#290","type":"component","lock":false,"position":232},{"name":"TextBlock","data":{"text":"### **<span style=\"background-color:red; width: 50%; color:white; display:block; padding-left: 50px; padding-bottom: 1.6rem\">BO RMT expired</span>**\n\nZbývajÃcà Äas do vyplacenà kauce vyprÅ¡el. To oznaÄuje bod ponoru, kdy OC Bailout bude trvat jen tehdy, pokud okamžitÄ zahájÃte výstup. VýpoÄty vycházejà z nastavenà dekomprese, povolených OC smÄsÃ, objemů a tlaků v lahvÃch, hodnoty dechové minuty atd.\n\n<span style=âcolor:redâ>**UpozornÄnÃ**</span>\n\nBO RMT má význam pouze tehdy, když máte vÅ¡echny konfigurace nastaveny pÅesnÄ pro aktuálnà ponor. Zejména nastavenà OC smÄsÃ, pokud máte povoleny jiné OC smÄsi, než které užÃváte pÅi ponoru, způsobÃ, že výpoÄet BORMT bude neplatný.","textLarge":false,"imageOnRight":true,"image":{"recommendedSizes":{"width":"420","height":"280"}},"imageMobile":{"recommendedSizes":{"width":"750","height":"500"}}},"id":"#292","type":"component","lock":false,"position":233},{"name":"TextBlock","data":{"text":"### **<span style=\"background-color:red; width: 50%; color:white; display:block; padding-left: 50px; padding-bottom: 1.6rem\">BO RMT expired CNS</span>**\n\nLiberty FW verze 2.12 a vyÅ¡Å¡Ã.\n\nZbývajÃcà doba záchrany pro režim duálnÃho CCR je aktivnà pouze tehdy, když je âBOCCR settingsâ (Nastavenà BOCCR)\npovoleno. Tento alarm je aktivnà pouze v režimu Bailout CCR.\
2n\nPoslednà slovo oznaÄuje, co je limitujÃcÃm faktorem. V okamžiku, kdy může být Battery, Stack (ZásobnÃk).\na CNS.\n\n**PÅizpůsobenÃ**\n\nSetup / Miscellaneous / BOCCR settings \\[Off]\n\nPÅepÃnaÄ Global Bailout CCR také rozhoduje o tom, zda výpoÄet BO RMT bude OC nebo CCR.","textLarge":false,"imageOnRight":true,"image":{"recommendedSizes":{"width":"420","height":"280"}},"imageMobile":{"recommendedSizes":{"width":"750","height":"500"}}},"id":"#294","type":"component","lock":false,"position":234},{"name":"TextBlock","data":{"text":"### **<span style=\"background-color:blue; width: 50%; color:white; display:block; padding-left: 50px; padding-bottom: 1.6rem\">Lost Gas EAN 50</span>**\n\nPouze v režimu otevÅeného okruhu.\n\nOznámenÃ, že nejlepÅ¡Ã smÄs v této hloubce je oznaÄena jako âztracenáâ, což vede k pÅepoÄtu plánu výstupu a TTS bez nejlepÅ¡Ã smÄsi. PÅepnutÃm na tento plyn se odstranà oznaÄenà âztracenoâ a znovu se pÅepoÄÃtá výstup vÄetnÄ aktuálnà nejlepÅ¡Ã smÄsi.\n\nToto hlášenà může být způsobeno napÅÃklad ignorovánÃm hlášenà âSwitch to EAN50â (PÅepnout na EAN50) ve výšce 21 m (viz nÞe). Algoritmus je 1<sup>prvnÃ</sup> oznámenÃ, 2' pauza, 2<sup>druhé</sup> oznámenÃ, 2' pauza a pokud ani v tomto okamžiku potápÄÄ nepÅeÅ¡el na doporuÄený plyn, je plyn oznaÄen jako âztracenýâ.\n\n**PÅizpůsobenÃ**\n\nSetup / Alarms / Notifications / Gas sw. reminder\\[Off]\n\nFunkce â Lost gas â je k dispozici pouze tehdy, když je zapnuta funkce â Gas sw. remainder â.","textLarge":false,"imageOnRight":true,"image":{"recommendedSizes":{"width":"420","height":"280"}},"imageMobile":{"recommendedSizes":{"width":"750","height":"500"}}},"id":"#296","type":"component","lock":false,"position":235},{"name":"Divider","data":{"color":"darkGray"},"id":"#297","type":"component","lock":false,"position":236},{"name":"SectionDivider","data":{"title":"2.14.4 Notifications"},"id":"#549","type":"component","lock":false,"position":237},{"name":"TextBlock","data":{"text":"### <span id=\"2-.-12-.-4-Notifications\">**2.12.4 OznámenÃ**</span>","textLarge":false,"imageOnRight":true,"image":{"recommendedSizes":{"width":"420","height":"280"}},"imageMobile":{"recommendedSizes":{"width":"750","height":"500"}}},"id":"#298","type":"component","lock":false,"position":238},{"name":"TextBlock","data":{"text":"### **<span style=\"background-color:blue; width: 50%; color:white; display:block; padding-left: 50px; padding-bottom: 1.6rem\">High setpoint</span>**\n\nHlášenà zmÄny nastavené hodnoty, automatické nebo ruÄnÃ. Automatické pÅepnutà na vysokou žádanou hodnotu lze konfigurovat v nabÃdce âSPh autoâ.\n\n**PÅizpůsobenÃ**\n\nSetup / Setpoints / SPh auto \\[Off]\n\nAutomatické pÅepnutà na vysokou nastavenou hodnotu, můžete nastavit hloubku pÅi klesánÃ, po urÄité dobÄ nebo hloubku pÅi stoupánÃ.","textLarge":false,"imageOnRight":true,"image":{"recommendedSizes":{"width":"420","height":"280"}},"imageMobile":{"recommendedSizes":{"width":"750","height":"500"}}},"id":"#300","type":"component","lock":false,"position":239},{"name":"TextBlock","data":{"text":"### **<span style=\"background-color:blue; width: 50%; color:white; display:block; padding-left: 50px; padding-bottom: 1.6rem\">Low setpoint</span>**\n\nHlášenà zmÄny nastavené hodnoty, automatické nebo ruÄnÃ.\n\nAutomatické pÅepnutà na nÃzkou žádanou hodnotu je možné pouze pÅi použità funkce sestupné žádané hodnoty. PÅi aktivnà sestupné žádané hodnotÄ se Liberty automaticky pÅepne na nÃzkou žádanou hodnotu, jakmile smyÄka ppO<sub>2</sub> dosáhne nÃzké žádané hodnoty nebo po 10' od ponoÅenÃ.\n \n**PÅizpůsobenÃ**\n\nSetup / Setpoints / Use descent SP \\[Off]\n\nSetup / Setpoints / ppO<sub>2</sub> descent \\[0.4]","textLarge":false,"imageOnRight":true,"image":{"recommendedSizes":{"width":"420","height":"280"}},"imageMobile":{"recommendedSizes":{"width":"750","height":"500"}}},"id":"#302","type":"component","lock":false,"position":240},{"name":"TextBlock","data":{"text":"### **<span style=\"background-color:blue; width: 50%; color:white; display:block; padding-left: 50px; padding-bottom: 1.6rem\">Setpoint 1.1</span>**\n\nRuÄnà zmÄna žádané hodnoty, ihned po nastavenà vlastnà SP.\n\n**PÅizpůsobenÃ**\n\nSetup / Setpoint / Accept\n\nVlastnà nastavená hodnota je k dispozici pouze v režimu potápÄnÃ.","textLarge":false,"imageOnRight":true,"image":{"recommendedSizes":{"width":"420","height":"280"}},"imageMobile":{"recommendedSizes":{"width":"750","height":"500"}}},"id":"#304","type":"component","lock":false,"position":241},{"name":"TextBlock","data":{"text":"### **<span style=\"background-color:blue; width: 50%; color:white; display:block; padding-left: 50px; padding-bottom: 1.6rem\">Mode BO CCR</span>**\n\nRuÄnà nebo automatické oznámenà zmÄny režimu - OC, CCR, mCCR, BO CCR.\n\nAutomatická zmÄna režimu je možná pouze z BO CCR na CCR, když ppO<sub>2</sub>
2 smyÄky klesne o 20 % pod ppO<sub>2</sub> Åedidla v aktuálnà hloubce. NapÅÃklad když potápÄÄ zaÄne dýchat z pÅÃstroje v režimu BO CCR, aniž by zmÄnil režim na CCR.\n\nUpozorÅujeme, že tato funkce je urÄena pouze pro pÅÃpad nouze.","textLarge":false,"imageOnRight":true,"image":{"recommendedSizes":{"width":"420","height":"280"}},"imageMobile":{"recommendedSizes":{"width":"750","height":"500"}}},"id":"#306","type":"component","lock":false,"position":242},{"name":"TextBlock","data":{"text":"### **<span style=\"background-color:blue; width: 50%; color:white; display:block; padding-left: 50px; padding-bottom: 1.6rem\">No deco end</span>**\n\nKonec bezdekompresnà Äásti ponoru.\n\n**PÅizpůsobenÃ**\n\nSetup / Alarms / Notifications / No deco end \\[On]","textLarge":false,"imageOnRight":true,"image":{"recommendedSizes":{"width":"420","height":"280"}},"imageMobile":{"recommendedSizes":{"width":"750","height":"500"}}},"id":"#308","type":"component","lock":false,"position":243},{"name":"TextBlock","data":{"text":"### **<span style=\"background-color:blue; width: 50%; color:white; display:block; padding-left: 50px; padding-bottom: 1.6rem\">Depth 55 m reached</span>**\n\nVlastnà hlášenà hloubky, potápÄÄ může nastavit tÅi hlášenà hloubky pro sestup a tÅi pro výstup.\n\n**PÅizpůsobenÃ**\n\nSetup / Alarms / Notifications / Depth & Time","textLarge":false,"imageOnRight":true,"image":{"recommendedSizes":{"width":"420","height":"280"}},"imageMobile":{"recommendedSizes":{"width":"750","height":"500"}}},"id":"#310","type":"component","lock":false,"position":244},{"name":"TextBlock","data":{"text":"### **<span style=\"background-color:blue; width: 50%; color:white; display:block; padding-left: 50px; padding-bottom: 1.6rem\">Time 33´ elapsed</span>**\n\nVlastnà upozornÄnà na uplynulý Äas ponoru, potápÄÄ může nastavit tÅi různá upozornÄnÃ.\n\n**PÅizpůsobenÃ**\n\nSetup / Alarms / Notifications / Depth & Time","textLarge":false,"imageOnRight":true,"image":{"recommendedSizes":{"width":"420","height":"280"}},"imageMobile":{"recommendedSizes":{"width":"750","height":"500"}}},"id":"#312","type":"component","lock":false,"position":245},{"name":"TextBlock","data":{"text":"### **<span style=\"background-color:blue; width: 50%; color:white; display:block; padding-left: 50px; padding-bottom: 1.6rem\">Bookmark 3</span>**\n\nOznámenÃ, že záložka uživatele byla uložena do protokolu potápÄnÃ.\n\n**PÅizpůsobenÃ**\n\nApplications / Add bookmark\n\nTato položka je k dispozici pouze v režimu potápÄnÃ.","textLarge":false,"imageOnRight":true,"image":{"recommendedSizes":{"width":"420","height":"280"}},"imageMobile":{"recommendedSizes":{"width":"750","height":"500"}}},"id":"#314","type":"component","lock":false,"position":246},{"name":"TextBlock","data":{"text":"### **<span style=\"background-color:blue; width: 50%; color:white; display:block; padding-left: 50px; padding-bottom: 1.6rem\">Switch to EAN50</span>**\n\nPouze otevÅený okruh.\n\nOznámenà o zmÄnÄ plynu na základÄ aktuálnà hloubky, dostupných smÄsà a nastaveného maximálnÃho ppO<sub>2</sub>.\n\n**PÅizpůsobenÃ**\n\nSetup / Alarms / Notifications / Gas sw. remainder \\[Off]","textLarge":false,"imageOnRight":true,"image":{"recommendedSizes":{"width":"420","height":"280"}},"imageMobile":{"recommendedSizes":{"width":"750","height":"500"}}},"id":"#316","type":"component","lock":false,"position":247},{"name":"TextBlock","data":{"text":"### **<span style=\"background-color:blue; width: 50%; color:white; display:block; padding-left: 50px; padding-bottom: 1.6rem\">EAN50</span>**\n\nPouze otevÅený okruh.\n\nPÅepnutà na smÄs OC, automatické hlášenà ihned po pÅepnutà plynu v nabÃdce jako potvrzenà úspÄÅ¡ného pÅepnutà plynu.","textLarge":false,"imageOnRight":true,"image":{"recommendedSizes":{"width":"420","height":"280"}},"imageMobile":{"recommendedSizes":{"width":"750","height":"500"}}},"id":"#318","type":"component","lock":false,"position":248},{"name":"TextBlock","data":{"text":"### **<span style=\"background-color:blue; width: 50%; color:white; display:block; padding-left: 50px; padding-bottom: 1.6rem\">Diluent TMX 10/50</span>**\n\nPÅepnutà na jiné Åedidlo, automatické oznámenà ihned po pÅepnutà diluentu v nabÃdce jako potvrzenà úspÄÅ¡ného pÅepnutà diluentu\n","textLarge":false,"imageOnRight":true,"image":{"recommendedSizes":{"width":"420","height":"280"}},"imageMobile":{"recommendedSizes":{"width":"750","height":"500"}}},"id":"#320","type":"component","lock":false,"position":249},{"name":"TextBlock","data":{"text":"### **<span style=\"background-color:blue; width: 50%; color:white; display:block; padding-left: 50px; padding-bottom: 1.6rem\">Factory defaults</span>**\n\nVÅ¡echna uživatelská nastavenà byla obnovena na výchozà továrnà nastavenÃ.\n\n**PÅizpůsobenÃ**\n\nSetup / Miscellaneous / Factory defaults","textLarge":false,"imageOnRight":true,"image":{"recommendedSizes":{"width":"420","height":"280"}},"imageMobile":{"recommendedSizes":{"width":"750","height":"500"}}},"id":"#322","type":"component","lock":false,"position":250},{"name":"Divider","data":{"color":"darkGray"},"id":"#458","type":"component","lock":false,"position":251},{"name":"ListOfLinks","data":{"links":[{"title":"< Previous page / Section: 1. Technical design","url":{"url":"/en/manuals/ccr-liberty-manual/ccr-liberty-manual-01","pageId":"cl43w74lpl8dk0858to9uhj2u"}
2,"id":"1"},{"title":"> Next page / Section: 3. Procedures","url":{"url":"/en/manuals/ccr-liberty-manual/ccr-liberty-manual-03","pageId":"cl43w7qiml8ek08588cha4oc2"},"id":"2"}],"activeTab":"2"},"id":"#476","type":"component","lock":false,"position":252},{"name":"Footer","data":{"copyrights":"Copyright © 2019 Divesoft LLC All rights reserved.","facebookUrl":{"urlNewWindow":true,"url":"https://www.facebook.com/divesoft/"},"youtubeUrl":{"url":"https://www.youtube.com/channel/UCHI2-kHmfoUlAdhQXPKl8lA/featured","urlNewWindow":true},"instagramUrl":{"url":"https://www.instagram.com/divesoft/","urlNewWindow":true},"contacts":"**Divesoft s.r.o.** \nHálkova 2495 \n413 01 Roudnice nad Labem \nCzech Republic \nTel.: +420 416 857 057 \nE-mail: [email protected]"},"id":"#1","type":"component","lock":false,"position":253},{"name":"Image","data":{"firstImage":{},"secondImage":{}},"id":"#481","type":"component","lock":false,"position":255}],"id":"root","idBuffer":"#555","lastCommit":"219ecbc2-1c93-4e51-9e1b-675842704fff"}},"annotations":[],"language":{"type":"id","generated":false,"id":"Language:cjv3kwvoj000u083611381c6o","typename":"Language"},"__typename":"PageTranslation"},"Page:cm0divz1e180h08186q8py4jd":{"id":"cm0divz1e180h08186q8py4jd","type":{"type":"id","generated":false,"id":"PageType:cjv3l213x004f08366hjufttp","typename":"PageType"},"tags":[],"translations({\"where\":{\"language\":{\"id\":\"cjv3kwvoj000u083611381c6o\"}}})":[{"type":"id","generated":false,"id":"PageTranslation:cm0divz1u180o081853jnd47w","typename":"PageTranslation"}],"__typename":"Page"},"PageTranslation:cm0divz1u180o081853jnd47w":{"id":"cm0divz1u180o081853jnd47w","name":"CCR Liberty Manual 03 CZ","createdAt":"2024-08-28T07:16:35.250Z","content":{"type":"json","json":{"content":[{"name":"Header","data":{"products":[{"title":"Accessories","description":"Backplates, Consumables. Tanks.","img":{"recommendedSizes":{"width":"235","height":"235"}},"url":""},{"title":"Accessories sets","description":"Protection, maintenance, cleaning.","img":{"recommendedSizes":{"width":"235","height":"235"}},"url":""},{"title":"Spare parts","description":"Spare parts and components.","img":{"recommendedSizes":{"width":"235","height":"235"}},"url":""},{"title":"Spare parts kits","description":"Completly Liberty spare parts kits.","img":{"recommendedSizes":{"width":"235","height":"235"}},"url":""}]},"id":"#0","type":"component","lock":false,"position":0},{"name":"Divider","data":{"color":"darkGray"},"id":"#471","type":"component","lock":false,"position":1},{"name":"SectionDivider","data":{"title":""},"id":"#573","type":"component","lock":false,"position":2},{"name":"TextBlock","data":{"text":"[**Section: 3. Procedures**](#3-.-Procedures)\n\n[3.1\tDive plan](#3-.-1-Dive-plan) \n[3.1.1\tPlanner settings](#3-.-1-.-1-Planner-settings) \n[3.1.2\tPlanning](#3-.-1-.-2-Planning) \n\n[3.2\tDive preparation](#3-.-2-Dive-preparation)\n\n[3.2.1\tReplacement of CO<sub>2</sub> sorbent](#3-.-2-.-1-Replacement-of-CO2-sorbent) \n[3.2.2\tAssembling the rebreather body](#3-.-2-.-2-Assembling-the-rebreather-body) \n[3.2.3\tMounting the rebreather body](#3-.-2-.-3-Mounting-the-rebreather-body) \n[3.2.4\tAttaching the counterlungs and hoses](#3-.-2-.-4-Attaching-the-counterlungs-and-hoses) \n[3.2.5\tCylinder filling](#3-.-2-.-5-Tank-filling) \n[3.2.6\tBattery charging](#3-.-2-.-6-Battery-charging) \n[3.2.7\tHelium sensor calibration](#3-.-2-.-7-Helium-sensor-calibration) \n[3.2.8\tCalibration of the oxygen sensors](#3-.-2-.-8-Calibration-of-the-oxygen-sensors) \n[3.2.9\tPreparing the bailout cylinder](#3-.-2-.-9-Preparing-the-bailout-cylinder) \n[3.2.10\tSetting parameters](#3-.-2-.-10-Setting-parameters) \n[3.2.11\tDirectional valve check](#3-.-2-.-11-Directional-valve-check) \n[3.2.12\tPhysical inspection](#3-.-2-.-12-Physical-inspection) \n\n[3.3\tPre-dive inspection](#3-.-3-Pre---dive-inspection)\n\n[3.3.1\tInternal testing of the control units](#3-.-3-.-1-Internal-testing-of-the-control-units) \n[3.3.2\tPressure sensor test](#3-.-3-.-2-Pressure-sensor-test) \n[3.3.3\tComparison of oxygen sensors and their calibration](#3-.-3-.-3-Comparison-of-oxygen-sensors-and-their-calibration) \n[3.3.4\tHelium-sensor test](#3-.-3-.-4-Helium---sensor-test) \n[3.3.5\tBattery testing](#3-.-3-.-5-Battery-testing) \n[3.3.6\tSolenoid testing](#3-.-3-.-6-Solenoid-testing) \n[3.3.7\tHUD inspection](#3-.-3-.-7-HUD-inspection) \n[3.3.8\tBD inspection](#3-.-3-.-8-BD-inspection) \n[3.3.9\tNegative pressure test](#3-.-3-.-9-Negative-pressure-test) \n[3.3.10\tPositive pressure test](#3-.-3-.-10-Positive-pressure-test) \n[3.3.11\tIP Pressure](#3-.-3-.-11-IP-Pressure) \n[3.3.12\tPredive checklist](#3-.-3-.-12-Predive-checklist) \n[3.3.13\tPrebreathe](#3-.-3-.-13-Prebreathe) \n\n[3.4\tDiving](#3-.-4-Diving)\n\n[3.4.1\tBreathing high oxygen content gases](#3-.-4-.-1-Breathing-high-oxygen-content-gases) \n[3.4.2\tPutting on the apparatus](#3-.-4-.-2-Putting-on-the-apparatus) \n[3.4.3\tUsing the DSV](#3-.-4-.-3-Using-the-DSV) \n[3.4.4\tMonitoring of devices](#3-.-4-.-4-Monitoring-of-devices) \n[3.4.5\tSwitching to CCR mode](#3-.-4-.-5-Switching-to-CCR-mode) \n[3.4.6\tWater entry](#3-.-4-.-6-Water-entry) \n[3.4.7\tSubmersion](#3-.-4-.-7-Submersion) \n[3.4.8\tIn-water check](#3-.-4-.-8-In---water-check) \n[3.4.9\tDescent](#3-.-4-.-9-Descent) \n[3.4.10\tControlling buoyancy and trim](#3-.-4-.-10-Controlling-buoyancy-and-trim) \n[3.4.11\tMask clearing](#3-.-4-.-11-Mask-clearing) \n[3.4.12\tIncreased physical exertion](#3-.-4-.-12-Increased-physical-exertion) \n[3.4.13\tAscent](#3-.-4-.-13-Ascent) \n\n[3.5\tPost-dive procedures](#3-.-5-Post---dive-procedures)\n\n[3.5.1\tImmediately after surfacing](#3-.-5-.-1-Immediately-after-surfacing) \n[3.5.2\tCO<sub>2</sub> scrubber maintenance](#3-.-5-.-2-CO2-scrubber-maintenance) \n[3.5.3\tCleaning and disinfection](#3-.-5-.-3-Cleaning-and-disinfection) \n[3.5.4\tBattery care](#3-.-5-.-4-Battery-care) \n[3.5.5\tDive log download](#3-.-5-.-5-Dive-log-download) \n[3.5.
26\tLong-term storage](#3-.-5-.-6-Long---term-storage) \n\n[3.6\tEmergency procedures](#3-.-6-Emergency-procedures)\n\n[3.6.1\tEmergency ascent (bailout)](#3-.-6-.-1-Emergency-ascent-(bailout)) \n[3.6.2\tOxygen-source malfunction](#3-.-6-.-2-Oxygen---source-malfunction) \n[3.6.3\tDiluent-source malfunction](#3-.-6-.-3-Diluent---source-malfunction) \n[3.6.4\tScrubber malfunction](#3-.-6-.-4-Scrubber-malfunction) \n[3.6.5\tInadvertent release of the mouthpiece](#3-.-6-.-5-Inadvertent-release-of-the-mouthpiece) \n[3.6.6\tFlooding](#3-.-6-.-6-Flooding) \n[3.6.7\tLoss of buoyancy](#3-.-6-.-7-Loss-of-buoyancy) \n[3.6.8\tRescue on the surface](#3-.-6-.-8-Rescue-on-the-surface) \n[3.6.9\tMalfunction of oxygen-concentration measuring](#3-.-6-.-9-Malfunction-of-oxygen---concentration-measuring) \n\n[3.7\tMaintenance](#3-.-7-Maintenance)\n\n[3.7.1\tTools and replacement parts](#3-.-7-.-1-Tools-and-replacement-parts) \n[3.7.2\tDetection of leaks](#3-.-7-.-2-Detection-of-leaks) \n[3.7.3\tRegular service inspection](#3-.-7-.-3-Regular-service-inspection) \n[3.7.4\tLong-term maintenance](#3-.-7-.-4-Long---term-maintenance) \n[3.7.5\tFirmware update](#3-.-7-.-5-Firmware-update) \n\n[3.8\tTransport](#3-.-8-Transport)\n\n[3.8.1\tBy car](#3-.-8-.-1-By-car) \n[3.8.2\tBy boat](#3-.-8-.-2-By-boat) \n[3.8.3\tBy plane](#3-.-8-.-3-By-plane) ","textLarge":false,"imageOnRight":true,"image":{"recommendedSizes":{"width":"420","height":"280"}},"imageMobile":{"recommendedSizes":{"width":"750","height":"500"}}},"id":"#470","type":"component","lock":false,"position":3},{"name":"Divider","data":{"color":"darkGray"},"id":"#215","type":"component","lock":false,"position":4},{"name":"SectionDivider","data":{"title":"3. Procedures"},"id":"#574","type":"component","lock":false,"position":5},{"name":"TextBlock","data":{"text":"### <span id=\"3-.-Procedures\">**3. Postupy**</span>","textLarge":false,"imageOnRight":true,"image":{"recommendedSizes":{"width":"420","height":"280"}},"imageMobile":{"recommendedSizes":{"width":"750","height":"500"}}},"id":"#576","type":"component","lock":false,"position":6},{"name":"SectionDivider","data":{"title":"3.1 Dive plan"},"id":"#575","type":"component","lock":false,"position":7},{"name":"TextBlock","data":{"text":"### <span id=\"3-.-1-Dive-plan\">**3.1 Plán ponoru**</span>\n\nPro plánovánà ponoru v užšÃm slova smyslu (plynové hospodáÅstvà a dekomprese) lze využÃt internà funkce CCR Liberty. PlánovaÄ vypoÄÃtá plán ponoru v režimu CCR nebo s nouzovým vyproÅ¡Å¥ovánÃm na otevÅeném okruhu. K výpoÄtu dekomprese se použÃvá algoritmus Bühlmann ZHL-16B (s nastavitelnými gradientnÃmi faktory) a také výpoÄet dekomprese on-line.","textLarge":false,"imageOnRight":true,"image":{"recommendedSizes":{"width":"420","height":"280"}},"imageMobile":{"recommendedSizes":{"width":"750","height":"500"}}},"id":"#324","type":"component","lock":false,"position":8},{"name":"Divider","data":{"color":"darkGray"},"id":"#325","type":"component","lock":false,"position":9},{"name":"SectionDivider","data":{"title":"3.1.1 Planner settings"},"id":"#577","type":"component","lock":false,"position":10},{"name":"TextBlock","data":{"text":"### <span id=\"3-.-1-.-1-Planner-settings\">**3.1.1 Nastavenà plánovaÄe**</span>","textLarge":false,"imageOnRight":true,"image":{"recommendedSizes":{"width":"420","height":"280"}},"imageMobile":{"recommendedSizes":{"width":"750","height":"500"}}},"id":"#460","type":"component","lock":false,"position":11},{"name":"TextBlock","data":{"text":"Pro zjednoduÅ¡enà ÅÃzenà plánovaÄe pÅebÃrá plánovaÄ vÅ¡echny nastavené hodnoty jako požadované hodnoty, dýchacà smÄsi, faktory sklonu a rychlost stoupánà z nastavenà zaÅÃzenÃ. Pro správný výpoÄet plánu je proto nutné nastavit tyto položky pÅesnÄ tak, jak budou použity pÅi skuteÄném ponoru.","textLarge":false,"imageOnRight":true,"image":{"recommendedSizes":{"width":"420","height":"280"},"mimetype":"image/png","size":10339,"hash":"52ad34c2e3862d7233dfc5143530d8429990292d","id":"cl3ve5jh4ebn90776n8lu3w1f","filename":"divesoft-ccr-liberty-manual-3-1-1-01.png","category":"divesoft/","type":"image"},"imageMobile":{"recommendedSizes":{"width":"750","height":"500"}}},"id":"#326","type":"component","lock":false,"position":12},{"name":"TextBlock","data":{"text":"**Zejména v pÅÃpadÄ dýchacÃch smÄsà pro záchranný ponor je nutné kontrolovat pouze ty smÄsi, které jsou bÄhem ponoru skuteÄnÄ k dispozici, a ujistit se, že jejich složenÃ, tlak a parametry lahve jsou nastaveny správnÄ.** Pokud jsou kontrolovány jiné smÄsi nebo smÄsi s vÄtÅ¡Ã nastavenou rezervou plynu, budou zahrnuty do plánovánà a způsobà vážné zkreslenà plánu ponoru, což může mÃt tragické následky.\n\nPodrobný nÃ
2¡vod pro nastavenà tÄchto parametrů najdete v následujÃcÃch kapitolách:\n\n- 2.4.2 Setpoints\n- 2.4.3 Mixtures\n- 2.4.4 Decompression","textLarge":false,"imageOnRight":true,"image":{"recommendedSizes":{"width":"420","height":"280"}},"imageMobile":{"recommendedSizes":{"width":"750","height":"500"}}},"id":"#327","type":"component","lock":false,"position":13},{"name":"Spacer","data":{"spacingLarge":30,"spacingSmall":20,"backgroundColor":"#ffffff"},"id":"#550","type":"component","lock":false,"position":14},{"name":"TextBlock","data":{"text":"V nastavenà smÄsi si poznamenejte minutový objem dýchánà vyjádÅený v litrech za minutu (l/min) nebo v krychlových stopách za minutu (cu ft/min). DoporuÄujeme zvolit dostateÄnou rezervu pro krizové situace. BÄhem zásahu CO<sub>2</sub> (hyperkapnie) může 78 ventilace potápÄÄe pÅekroÄit 50 l/min (1,8 cuft/min). Podrobnosti o nastavenà plánovaÄe viz. Menu / Setup / Decompression / Planner setup","textLarge":false,"imageOnRight":true,"image":{"recommendedSizes":{"width":"420","height":"280"},"mimetype":"image/png","size":11242,"hash":"14b52498940c26b81abfd66a2edfc9326e222218","id":"cl3ve7zbxebrl0776hfior3yq","filename":"divesoft-ccr-liberty-manual-3-1-1-02.png","category":"divesoft/","type":"image"},"imageMobile":{"recommendedSizes":{"width":"750","height":"500"}}},"id":"#328","type":"component","lock":false,"position":15},{"name":"TextBlock","data":{"text":"**Rounding**\n\nZde můžete nastavit dobu zaokrouhlovánà dekomprese na 60 sekund, 30 sekund nebo 1 sekundu.\n\n**Last stop**\n\nUrÄuje hloubku poslednà plánované zastávky 3 m (10 stop) nebo 6 m (20 stop).","textLarge":false,"imageOnRight":true,"image":{"recommendedSizes":{"width":"420","height":"280"},"mimetype":"image/png","size":10313,"hash":"b72b24022dab0e2d8b4d4af38d1de840b91ed5f5","id":"cl3ve8h4iebsp0776a964y44n","filename":"divesoft-ccr-liberty-manual-3-1-1-03.png","category":"divesoft/","type":"image"},"imageMobile":{"recommendedSizes":{"width":"750","height":"500"}}},"id":"#329","type":"component","lock":false,"position":16},{"name":"TextBlock","data":{"text":"**Ascent gas**\n\nUrÄete, zda chcete naplánovat záchranný výstup s použitÃm vÅ¡ech nastavených plynů, možnosti Optimálnà nebo pouze jednoho aktuálnÃho plynu. NejpoužÃvanÄjÅ¡Ãm plynem v plánovaÄi je možnost Current. Toto nastavenà také ovlivÅuje výpoÄet TTS bÄhem záchranného výstupu. Plánuje se buÄ se vÅ¡emi dostupnými smÄsmi (optimálnÃ), nebo pouze s aktuálnÃmi (aktuálnÃ).\n\n**Ascent SP\" \\[High] / \\[Current]**\n\nSetpoint, se kterým plánovaÄ poÄÃtá výstup (od konce Äasu dna). Aktuálnà je nastavenà nÃzké žádané hodnoty. Tuto možnost použijte, pokud se chcete po celý ponor potápÄt s nÃzkým SP nebo jednoduÅ¡e chcete zobrazit TTS s aktuálnà setpointem namÃsto vysokého SP.\n\n**Gas switch**\n\nTuto možnost vyberte, chcete-li nastavit minimálnà délku spÃnacÃho dorazu pro záchranný výstup s otevÅeným okruhem. PÅi této zastávce se potápÄÄ snažà využÃt vysoké ppO<sub>2</sub> a efektu kyslÃkového okna pÅi zmÄnÄ smÄsi. Hloubka zastávky se nastavà automaticky podle ppO<sub>2</sub> smÄsi. PÅi výstupu se použÃvá ppO<sub>2</sub> 1,6. PÅi výstupu se použÃvá ppO<sub>2</sub> 1,6. Pokud je zastávka hlubÅ¡Ã než prvnà dekompresnà zastávka, vytvoÅà se samostatná zastávka, která je zahrnuta do plánu výstupu a spotÅeby plynu. Pokud se hloubka nacházà ve stupÅové dekompresnà zónÄ, nastavenà urÄuje minimálnà délku zastávky. ÄÃselná hodnota pÅedstavuje délku v minutách. Pokud je zvolena nulová hodnota, zastávka se nezapoÄÃtává.\n\n**Deep stops**\n\nZde můžete zahrnout dalÅ¡Ã hluboké zastávky, abyste omezili tiché bubliny. Postup výpoÄtu Richarda Pyla se použÃvá ke snÞenà tlaku mezi zaÄátkem výstupu a hloubkou prvnà dekompresnà zastávky na polovinu. V této variantÄ je nutné zvážit nastavenà gradientnÃch faktorů tak, aby nedoÅ¡lo k nasycenà stÅednÃch a pomalých tkánÃ.\n\n**UpozornÄnÃ: V dneÅ¡nà dobÄ se použità deep stops nedoporuÄuje!
2**","textLarge":false,"imageOnRight":true,"image":{"recommendedSizes":{"width":"420","height":"280"}},"imageMobile":{"recommendedSizes":{"width":"750","height":"500"}}},"id":"#330","type":"component","lock":false,"position":17},{"name":"Divider","data":{"color":"darkGray"},"id":"#331","type":"component","lock":false,"position":18},{"name":"SectionDivider","data":{"title":"3.1.2 Planning"},"id":"#578","type":"component","lock":false,"position":19},{"name":"TextBlock","data":{"text":"### <span id=\"3-.-1-.-2-Planning\">**3.1.2 PlánovánÃ**</span>\n\nV plánovaÄi vyberte režim plánovánÃ. (CCR / Bailout).","textLarge":false,"imageOnRight":true,"image":{"recommendedSizes":{"width":"420","height":"280"}},"imageMobile":{"recommendedSizes":{"width":"750","height":"500"}}},"id":"#332","type":"component","lock":false,"position":20},{"name":"TextBlock","data":{"text":"Liberty umožÅuje výpoÄet plánu na každém sluchátku zvlášť, takže uživatel může souÄasnÄ plánovat celý ponor na rebreatheru a nouzový plán se záchranným výstupem na druhém sluchátku. StaÄà nastavit interval mezi vynoÅenÃm, cÃlovou hloubku a dobu ponoru. Äas na dnÄ zahrnuje i Äas sestupu.","textLarge":false,"imageOnRight":true,"image":{"recommendedSizes":{"width":"420","height":"280"},"mimetype":"image/png","size":10811,"hash":"c46721098eb811ac6c774eb1a08df716b7f20508","id":"cl3wtnmvuesnt0776ci6poyic","filename":"divesoft-ccr-liberty-manual-3-1-2-01.png","category":"divesoft/","type":"image"},"imageMobile":{"recommendedSizes":{"width":"750","height":"500"}}},"id":"#333","type":"component","lock":false,"position":21},{"name":"TextBlock","data":{"text":"V pÅÃpadÄ vÃce diluentů vyberte diluent, který bude použit na spodnà stranÄ. Interval na hladinÄ je plánovaná doba strávená na hladinÄ po ponoru. Tato hodnota se zadává kvůli zohlednÄnà zbytkového nasycenà tkánà z pÅedchozÃch ponorů a rychlosti desaturace bÄhem intervalu na hladinÄ.","textLarge":false,"imageOnRight":true,"image":{"recommendedSizes":{"width":"420","height":"280"},"mimetype":"image/png","size":10899,"hash":"82ef56ee9efb7cb5f48d6b328dbfefc56ce2e604","id":"cl3wto3eqeso707763nflum3z","filename":"divesoft-ccr-liberty-manual-3-1-2-02.png","category":"divesoft/","type":"image"},"imageMobile":{"recommendedSizes":{"width":"750","height":"500"}}},"id":"#334","type":"component","lock":false,"position":22},{"name":"TextBlock","data":{"text":"Po zadánà vÅ¡ech hodnot vyberte možnost Plan dive.\n\nV pÅÃpadÄ plánovánà ponoru CCR se zobrazà souhrn informacà o plánovaném ponoru (interval na hladinÄ, cÃlová hloubka, Äas na dnÄ, diluent).","textLarge":false,"imageOnRight":true,"image":{"recommendedSizes":{"width":"420","height":"280"},"mimetype":"image/png","size":11644,"hash":"dad90a4d48600861615757dd3b734d8a0cebe2dd","id":"cl3wtojntesok0776u24qwbwc","filename":"divesoft-ccr-liberty-manual-3-1-2-03.png","category":"divesoft/","type":"image"},"imageMobile":{"recommendedSizes":{"width":"750","height":"500"}}},"id":"#335","type":"component","lock":false,"position":23},{"name":"TextBlock","data":{"text":"- No deco - Äas bez dekomprese na dnÄ s aktuálnà smÄsÃ\n- TTS - celková doba výstupu na hladinu âTime to surfaceâ (Äas do vynoÅenÃ)\n- Total - celková doba ponoru\n- CNS - kumulovaná expozice CNS za plánovaný ponor\n- NoFly: - pÅedpokládaný Äasový limit letu po vynoÅenÃ.","textLarge":false,"imageOnRight":true,"image":{"recommendedSizes":{"width":"420","height":"280"}},"imageMobile":{"recommendedSizes":{"width":"750","height":"500"}}},"id":"#336","type":"component","lock":false,"position":24},{"name":"Spacer","data":{"spacingLarge":30,"spacingSmall":20,"backgroundColor":"#ffffff"},"id":"#552","type":"component","lock":false,"position":25},{"name":"TextBlock","data":{"text":"KromÄ toho se pÅi plánovánà záchranného režimu může zobrazit varovánà âNedostatek plynuâ, pokud zadané množstvà plynu nestaÄà k dokonÄenà výstupu v otevÅeném okruhu.\n\nStisknutÃm spodnÃho tlaÄÃtka pÅejdete na dalÅ¡Ã stránku. HornÃm tlaÄÃtkem se vrátÃte na pÅedchozà stránku.","textLarge":false,"imageOnRight":true,"image":{"recommendedSizes":{"width":"420","height":"280"}},"imageMobile":{"recommendedSizes":{"width":"750","height":"500"}}},"id":"#551","type":"component","lock":false,"position":26},{"name":"TextBlock","data":{"text":"Druhá obrazovka Bailout - âgas managementâ zobrazuje jednotlivé použité plyny a jejich spotÅebu v litrech (cu ft) a barech (PSI). Pokud tlak pÅekroÄà limity tlakové l
2áhve, je Äervený. V takovém pÅÃpadÄ je nutné do plánu ponoru pÅidat dalÅ¡Ã plyn. Pokud nemáte k dispozici dalÅ¡Ã plyn, zkraÅ¥te dobu ponoru nebo snižte cÃlovou hloubku.","textLarge":false,"imageOnRight":true,"image":{"recommendedSizes":{"width":"420","height":"280"},"mimetype":"image/png","size":10120,"hash":"f0d38786e219dd3e20d18cf1efab988d3699c392","id":"cl3wtoyw6esov0776xg6iyrpx","filename":"divesoft-ccr-liberty-manual-3-1-2-04.png","category":"divesoft/","type":"image"},"imageMobile":{"recommendedSizes":{"width":"750","height":"500"}}},"id":"#337","type":"component","lock":false,"position":27},{"name":"TextBlock","data":{"text":"Vyvarujte se snÞenà hodnoty RMV, protože plán ponoru by mÄl být vždy proveden s ohledem na možné krizové situace, kdy se pÅedpokládá zvýšená spotÅeba plynu.\n\nPokud je vaÅ¡e hospodaÅenà s plynem v poÅádku, stisknÄte spodnà tlaÄÃtko a pÅejdÄte na dalÅ¡Ã stránku.","textLarge":false,"imageOnRight":true,"image":{"recommendedSizes":{"width":"420","height":"280"},"mimetype":"image/png","size":11923,"hash":"febd4e076ae46160d66eb0e20569bf8075a85fc7","id":"cl3wtpe0iesp60776m8nyzoz3","filename":"divesoft-ccr-liberty-manual-3-1-2-05.png","category":"divesoft/","type":"image"},"imageMobile":{"recommendedSizes":{"width":"750","height":"500"}}},"id":"#338","type":"component","lock":false,"position":28},{"name":"TextBlock","data":{"text":"V levém sloupci (Dpt) jsou uvedeny hloubky jednotlivých kroků, vÄetnÄ Äasu na dnÄ (žlutÄ). Druhý sloupec (Time) urÄuje dobu strávenou v konkrétnà hloubce. TÅetà sloupec (RunT) pÅedstavuje aktuálnà Äas ponoru v okamžiku opuÅ¡tÄnà dané hloubky. Ätvrtý sloupec (Gas) urÄuje, jaký plyn se v dané hloubce použije. Plyny jsou barevnÄ oznaÄeny. ","textLarge":false,"imageOnRight":true,"image":{"recommendedSizes":{"width":"420","height":"280"},"mimetype":"image/png","size":10330,"hash":"8fe1c5330c95d982f6fb050fc95ec2a23dea8258","id":"cl3wtpsl5espk0776wql51orj","filename":"divesoft-ccr-liberty-manual-3-1-2-06.png","category":"divesoft/","type":"image"},"imageMobile":{"recommendedSizes":{"width":"750","height":"500"}}},"id":"#339","type":"component","lock":false,"position":29},{"name":"TextBlock","data":{"text":"SmÄsi helia jsou oznaÄeny hnÄdÄ, smÄsi nitroxu zelenÄ (různé odstÃny podle množstvà kyslÃku), vzduch nebo Åedidlo bÃle, kyslÃk modÅe.\n\nPokud je plán delÅ¡Ã než 8 kroků, pokraÄuje se na dalÅ¡Ã stranÄ. Souhrn je vyjádÅen růžovou barvou. Prvnà ÄÃslo pÅedstavuje celkový Äas výstupu a druhé ÄÃslo pÅedstavuje celkový Äas celého ponoru.","textLarge":false,"imageOnRight":true,"image":{"recommendedSizes":{"width":"420","height":"280"}},"imageMobile":{"recommendedSizes":{"width":"750","height":"500"}}},"id":"#340","type":"component","lock":false,"position":30},{"name":"Divider","data":{"color":"darkGray"},"id":"#341","type":"component","lock":false,"position":31},{"name":"SectionDivider","data":{"title":"3.2 Dive preparation"},"id":"#579","type":"component","lock":false,"position":32},{"name":"TextBlock","data":{"text":"### <span id=\"3-.-2-Dive-preparation\">**3.2 PÅÃprava na ponor**</span>","textLarge":false,"imageOnRight":true,"image":{"recommendedSizes":{"width":"420","height":"280"}},"imageMobile":{"recommendedSizes":{"width":"750","height":"500"}}},"id":"#580","type":"component","lock":false,"position":33},{"name":"SectionDivider","data":{"title":"3.2.1 Replacement of CO2 sorbent"},"id":"#581","type":"component","lock":false,"position":34},{"name":"TextBlock","data":{"text":"### <span id=\"3-.-2-.-1-Replacement-of-CO2-sorbent\">**3.2.1 VýmÄna sorbentu CO<sub>2</sub>**</span>\n \n**Životnost absorbentu**\n\nPrůbÄžnÄ evidujte rozsah spotÅeby skrubru. Nastavte Äasové upozornÄnà stack time a nezapomeÅte po výmÄnÄ sorbentu stack time vynulovat. V pÅÃpadÄ pochybnostà sorbent vymÄÅte.\n\nDoporuÄeným materiálem náplnÄ skruberu je sorbent Sofnolime 797 (výrobce: Molecular Products). Do kazety se vejde pÅibližnÄ 2,5 kg sorbentu.\n\nMaximálnà bezpeÄná provoznà doba sorbentu je 168 min, stanovená zkouÅ¡kou podle normy EN 14143:2013 (Älánek 6.6.2). BÄhem zkouÅ¡ky bylo do dýchacà smyÄky pÅidáno 1,6 l/min CO<sub>2</sub> pÅi ventilaÄnà rychlosti 40 l/min a výdechové teplotÄ 32 ± 4 °C;
2 jednotka byla ponoÅena do vody o teplotÄ 4 °C do hloubky 40 m s ppCO<sub>2</sub> 5mBar (zkouÅ¡ku poskytlo zaÅÃzenà Life Support Test Facility - LSTF 0916). Jedná se o nejhorÅ¡Ã možný scénáÅ, který zohledÅuje velmi vysokou úroveÅ tÄlesné námahy se spotÅebou kyslÃku 1,78 l/min.","textLarge":false,"imageOnRight":true,"image":{"recommendedSizes":{"width":"420","height":"280"}},"imageMobile":{"recommendedSizes":{"width":"750","height":"500"}}},"id":"#342","type":"component","lock":false,"position":35},{"name":"TextBlock","data":{"text":"Fyziologická hranice nenà ppCO<sub>2</sub> 5 mBar, ale desetkrát vyÅ¡Å¡Ã (Knafelc, 2000). Dechový kvocient 0,9 je pÅÃliÅ¡ vysoký; realistiÄtÄjÅ¡Ã odhad je 0,8-0,85. Životnost sorbentu je delÅ¡Ã (nebo bezpeÄnostnà rozpÄtà je vÄtÅ¡Ã), než se dÅÃve uvádÄlo.\n\nV průbÄhu životnosti sorbentu je povoleno vyjmout kazetu skruberu maximálnÄ dvakrát (viz oddÃl 3.5.2 Ãdržba skruberu CO<sub>2</sub>).\n \n**Postup výmÄny sorbentu**\n\nSe sorbentem zacházejte v souladu s pokyny výrobce. Dodržujte vÅ¡echny bezpeÄnostnà pokyny a použÃvejte ochranné pomůcky. PÅi likvidaci použitého sorbentu dbejte na ochranu životnÃho prostÅedÃ.\n\nZ kazety odstraÅte veÅ¡kerý obsah starého sorbentu.\n\nPokud rebreather dezinfikujete, postupujte podle oddÃlu 3.5.3 ÄiÅ¡tÄnà a dezinfekce. Je vhodnÄjÅ¡Ã dezinfikovat po ponoru, než Äekat delÅ¡Ã dobu.","textLarge":false,"imageOnRight":true,"image":{"recommendedSizes":{"width":"420","height":"280"}},"imageMobile":{"recommendedSizes":{"width":"750","height":"500"}}},"id":"#344","type":"component","lock":false,"position":36},{"name":"TextBlock","data":{"text":"UmÃstÄte kazetu skruberu na Äistý povrch. Manipulujte s nà Äistýma, důkladnÄ umytýma rukama. DoporuÄujeme použÃvat jednorázové chirurgické rukavice. ZneÄiÅ¡tÄnà kazety může kontaminovat dýchacà okruh a způsobit infekci. ZdánlivÄ Äistý povrch může být kontaminován mikroby, zejména v tropických a subtropických podmÃnkách.","textLarge":false,"imageOnRight":true,"image":{"recommendedSizes":{"width":"420","height":"280"},"mimetype":"image/png","size":251522,"hash":"c02517ee7a53f42d3780d5fa1437d9585f6f1205","id":"cl3wtqrgvespw0776sfimbqy5","filename":"divesoft-ccr-liberty-manual-3-2-1-01.png","category":"divesoft/","type":"image"},"imageMobile":{"recommendedSizes":{"width":"750","height":"500"}}},"id":"#345","type":"component","lock":false,"position":37},{"name":"TextBlock","data":{"text":"Pokud nemůžete zajistit Äistotu povrchu, položte kazetu na Äistou utÄrku.\n\nPÅi plnÄnà a jakékoli manipulaci s ÄisticÃm prostÅedkem dodržujte tyto hygienické zásady.\n\nPokud pracujete venku (doporuÄeno) a fouká alespoÅ mÃrný vÃtr, stoupnÄte si bokem k vÄtru a sorbent do kartuÅ¡e sypte pomalu z výšky pÅibližnÄ 20-30 cm. Nechte vÃtr, aby odstranil nejjemnÄjÅ¡Ã prachové Äástice.\n\nPokud pracujete v interiéru, sypte sorbent do kazety z minimálnà výšky. Prach ze sorbentu je agresivnà a může způsobit korozi. Proto nedoporuÄujeme pracovat se sorbentem napÅÃklad uvnitÅ automobilu.\n\nAbyste zabránili propadnutà sorbentu do centrálnà trubice, umÃstÄte pÅes otvor kovové diskové vÃko kanystru nebo jej ucpÄte jiným vhodným způsobem. Nasypte sorbent do kazety, dokud nebude pÅibližnÄ z jedné tÅetiny plná. Poté kazetu opatrnÄ zvednÄte a nechte ji tÅikrát spadnout z výšky pÅibližnÄ 1 cm (1/2\"). Tento postup opakujte, když je kazeta ze dvou tÅetin plná, a znovu, když je zcela plná. Kazeta je zcela plná, když sorbent dosáhne úrovnÄ mezi min. a max. ryskami vyznaÄenými na stÅedové trubici.\n\nPo naplnÄnà umÃstÄte kovový kotouÄ a pÅÃtlaÄnou desku s pružinou na hornà Äást sorbentu. Poté sejmÄte pÅÃtlaÄnou desku a vÃko a zkontrolujte, zda je povrch sorbentu vyrovnaný a zda se nevytvoÅily žádné kanálky. Kovový kotouÄ a pÅÃtlaÄnou desku s pružinou opÄt umÃstÄte na hornà Äást sorbentu; pÅitlaÄte a zajistÄte sestavu pojistným kroužkem. Pojistný kroužek musà zapadnout do drážky na pÅÃtlaÄné desce.\n\nNenÃ-li kazeta dostateÄnÄ naplnÄna, zůstane mezi okrajem vÃka a okrajem kovové mÅÞky mezera menÅ¡Ã než 6 mm nebo menÅ¡Ã. V takovém pÅÃpadÄ pÅidejte sorbent a poté kazetu protÅepejte a uzavÅete podle výše popsaného postupu.\n\nPokud je kazeta pÅeplnÄna, zůstane mezi okrajem vÃka a okrajem kovové sÃÅ¥ky mezera vÄtÅ¡Ã než 17 mm a nebude možné bez nadmÄrné sÃly vložit pojistný kroužek. V takovém pÅÃpadÄ odstraÅte p
2ÅebyteÄný sorbent Äistou lžiÄkou nebo jiným vhodným nástrojem. ProtÅepejte kazetu a opÄt zavÅete vÃko.\n\nPÅed vloženÃm kazety do nádoby ÄistiÄe zkontrolujte, zda je lapaÄ vody suchý. Pokud tomu tak nenÃ, vyjmÄte lapaÄ vody a vysuÅ¡te jej ruÄnÃkem.\n\n**Po každé výmÄnÄ absorbentu je tÅeba vynulovat ÄasovaÄ zásobnÃku Menu / PÅed ponoÅenÃm / Reset Äasu zásobnÃku**.\n\nStack time mÄÅà použÃvánà skruberu jednoduchým poÄÃtánÃm Äasu stráveného v režimu ponoru. Můžete nastavit, zda se Äas stack time poÄÃtá na hladinÄ, nebo ne.\n\nPrach ze sorbentu poÅ¡kozuje textilie, zejména polyamidové a bavlnÄné tkaniny. Proto po práci se scrubberem okamžitÄ vyperte ruÄnÃk, na kterém byla umÃstÄna kazeta, a veÅ¡keré obleÄenÃ, které bylo vystaveno působenà sorpÄnÃho prachu.\n\nNepracujte se sorbentem v blÃzkosti nosných popruhů, lan nebo dokonce kovového horolezeckého Äi speleologického vybavenÃ. V pÅÃpadÄ možného kontaktu se sorbentem je tÅeba lana a nosné popruhy okamžitÄ zlikvidovat, protože se může výraznÄ zhorÅ¡it jejich nosnost.\n\n**Stav sorbentu pÅed ponoÅenÃm**\n\nScrubber musà mÃt dostateÄnou absorpÄnà kapacitu pro plánovaný ponor.\n\nSorbent musà obsahovat urÄité množstvà vlhkosti, aby mohly probÃhat chemické reakce, které umožÅujà odstraÅovánà CO<sub>2</sub> z dýchacà smÄsi. To znamená, že skruber nesmà být zcela suchý nebo zmrzlý.\n\nV mrazivém poÄasà uložte rebreather pÅed ponorem do teplého prostoru. Pokud jste s pÅÃstrojem venku a dojde ke zpoždÄnÃ, udržujte teplotu sorbentu dýchánÃm z pÅÃstroje.","textLarge":false,"imageOnRight":true,"image":{"recommendedSizes":{"width":"420","height":"280"}},"imageMobile":{"recommendedSizes":{"width":"750","height":"500"}}},"id":"#346","type":"component","lock":false,"position":38},{"name":"Divider","data":{"color":"darkGray"},"id":"#347","type":"component","lock":false,"position":39},{"name":"SectionDivider","data":{"title":"3.2.2 Assembling the rebreather body"},"id":"#582","type":"component","lock":false,"position":40},{"name":"TextBlock","data":{"text":"### <span id=\"3-.-2-.-2-Assembling-the-rebreather-body\">**3.2.2 Sestavenà tÄla rebreatheru**</span>\n\nHlavu nasaÄte na kanystr skruberu CO<sub>2</sub>.","textLarge":false,"imageOnRight":true,"image":{"recommendedSizes":{"width":"420","height":"280"}},"imageMobile":{"recommendedSizes":{"width":"750","height":"500"}}},"id":"#348","type":"component","lock":false,"position":41},{"name":"TextBlock","data":{"text":"PÅi montáži hlavy zasuÅte kolÃk nádoby na Äisticà prostÅedky do otvoru na hlavÄ a hlavu zavÅete.\n\nZatlaÄte na hlavu shora, aby byla zcela usazena. Pokud je k úplnému uzavÅenà hlavy zapotÅebà velké sÃly, naneste na O-kroužek na hrdle hlavy malé množstvà maziva. Můžete také zvolit O-kroužek s menÅ¡Ãm průmÄrem průÅezu.","textLarge":false,"imageOnRight":true,"image":{"recommendedSizes":{"width":"420","height":"280"},"mimetype":"image/png","size":132334,"hash":"a8085b4ff0b53321c98fda11c12d5cc246db5b51","id":"cl3sobr7iddmg0776ktm8yy0m","filename":"divesoft-ccr-liberty-manual-1-9-01.png","category":"divesoft/","type":"image"},"imageMobile":{"recommendedSizes":{"width":"750","height":"500"}}},"id":"#349","type":"component","lock":false,"position":42},{"name":"Divider","data":{"color":"darkGray"},"id":"#350","type":"component","lock":false,"position":43},{"name":"SectionDivider","data":{"title":"3.2.3 Mounting the rebreather body"},"id":"#583","type":"component","lock":false,"position":44},{"name":"TextBlock","data":{"text":"### <span id=\"3-.-2-.-3-Mounting-the-rebreather-body\">**3.2.3 Montáž tÄla rebreatheru**</span>","textLarge":false,"imageOnRight":true,"image":{"recommendedSizes":{"width":"420","height":"280"}},"imageMobile":{"recommendedSizes":{"width":"750","height":"500"}}},"id":"#351","type":"component","lock":false,"position":45},{"name":"Image","data":{"firstImage":{"mimetype":"image/png","size":247396,"hash":"5e840dc45ec5bbf18431bbd22dc419b52e1dbd3f","id":"cl4gnp1dijpml0776jtxhs8r2","filename":"divesoft-ccr-liberty-manual-1-11-03.png","category":"divesoft/","type":"image"},"secondImage":{},"image":{"mimetype":"image/png","size":247396,"hash":"5e840dc45ec5bbf18431bbd22dc419b52e1dbd3f","id":"cl4gnp1dijpml0776jtxhs8r2","filename":"divesoft-ccr-liberty-manual-1-11-03.png","category":"divesoft/","type":"image"}},"id":"#352","type":"component","lock":false,"position":46}
2,{"name":"TextBlock","data":{"text":"**Postup:**\n\n1. Namontujte tÄlo pÅÃstroje na rám tak, aby prohlubnÄ ve spodnà Äásti zapadly do výstupků na základnÄ.\n2. ZvednÄte páÄku ve stÅedu zadnà desky.\n3. PÅitlaÄte tÄlo rebreatheru k backplate tak, aby jazýÄek v hornà Äásti backplate zapadl do vybránà v hlavÄ pÅÃstroje. V pÅÃpadÄ potÅeby silou zatlaÄte hornà Äást hlavy smÄrem dolů.\n4. StisknÄte páÄku uprostÅed pÅÃstroje a zkontrolujte, zda je zámek uzavÅen.\n5. Zkontrolujte, zda je pÅÃstroj pevnÄ pÅipevnÄn.\n6. ZajistÄte tÄlo pÅÃstroje pomocà zajiÅ¡Å¥ovacÃho pásku.","textLarge":false,"imageOnRight":true,"image":{"recommendedSizes":{"width":"420","height":"280"}},"imageMobile":{"recommendedSizes":{"width":"750","height":"500"}}},"id":"#353","type":"component","lock":false,"position":47},{"name":"Divider","data":{"color":"darkGray"},"id":"#354","type":"component","lock":false,"position":48},{"name":"SectionDivider","data":{"title":"3.2.4 Attaching the counterlungs and hoses"},"id":"#584","type":"component","lock":false,"position":49},{"name":"TextBlock","data":{"text":"### <span id=\"3-.-2-.-4-Attaching-the-counterlungs-and-hoses\">**3.2.4 PÅipevnÄnà protikusů a hadic**</span>\n\nPoloha dýchacÃch vaků vůÄi tÄlu potápÄÄe urÄuje práci pÅi dýchánÃ. Polohu upravÃte posu
2nutÃm hornÃho popruhu na zadnà stranÄ dýchacÃch vaků.\n\n**Postup:**\n\n1. PÅipevnÄte dýchacà vaky pomocà pÅezek tak, aby pÅepážky T-kusu byly zhruba v úrovni ramen a chlopnÄ se suchým zipem smÄÅovaly do stÅedu (k sobÄ).\n2. PÅipojte ruÄnà obtokový ventil Åedidla ke spodnà pÅepážce levého dýchacÃho vaku.\n3. PÅipojte pÅetlakový ventil ke spodnà pÅepážce pravého dýchacÃho vaku.\n4. PÅipojte ruÄnà pÅepouÅ¡tÄcà ventil kyslÃku ke stÅednà pÅepážce pravého dýchacÃho vaku.\n5. PÅipojte vdechovacà T-kus (bez pÅepážky) k hornà pÅepážce levého dýchacÃho vaku.\n6. PÅipojte výdechový T-kus (s pÅepážkou) k hornà pÅepážce pravého dýchacÃho vaku.\n7. PÅipojte koncové koleno vdechovacà (levé) vrapové hadice k otvoru uprostÅed hlavy.\n8. PÅipojte koncové koleno výdechové (pravé) vlnité hadice k otvoru na okraji hlavy.\n9. Krátkou kyslÃkovou hadici pÅiÅ¡roubujte k 9/16â kolenu na boku hlavy. UtáhnÄte spojku \nmatici pevnÄ dotáhnÄte rukou.\n10. VeÄte hadice LP k ADV a k ruÄnà dávce diluentu a hadici HP k manometru diluentu tak, aby spoleÄnÄ procházely pÅes ramennà popruh z vnÄjÅ¡Ã strany k vnitÅnà stranÄ popruhu.\n11. PÅipevnÄte zaÅÃzenà ADV k prostÅednà pÅepážce levého protilehlého závÄsu.\n12. PÅipojte rychlospojku hadice LP k ruÄnÃmu ruÄnà dávce diluentu.\n13. Narovnejte hadice a zajistÄte je pod klapkou na suchý zip levého dýchacÃho vaku.\n14. VeÄte hadici LP k ruÄnÃmu obtokovému ventilu Åedidla a hadici HP k tlakomÄru kyslÃku tak, aby jejich jednotka procházela spoleÄnÄ pÅes ramennà popruh z vnÄjÅ¡Ã strany na vnitÅnà stranu popruhu.\n15. PÅipojte rychlospojku hadice LP k ruÄnÃmu obtokovému ventilu kyslÃku.\n16. Narovnejte hadice a zajistÄte je pod klopou na suchý zip pravého dýchacÃho vaku.\n17. VeÄte hadici LP vztlakového zaÅÃzenà (BCD) pod prvnà gumiÄku na vlnité nafukovacà hadici BCD, pak pod gumiÄku na levém ramennÃm popruhu nad D-kroužkem a nakonec pod druhou gumiÄku na vrapové nafukovacà hadici.\n18. PÅipojte rychlospojku k inflátoru BCD.\n19. Upravte polohu hadice inflátoru BCD tak, aby byla pÅi potápÄnà snadno pÅÃstupná.","textLarge":false,"imageOnRight":true,"image":{"recommendedSizes":{"width":"420","height":"280"}},"imageMobile":{"recommendedSizes":{"width":"750","height":"500"}}},"id":"#355","type":"component","lock":false,"position":50},{"name":"Spacer","data":{"spacingLarge":30,"spacingSmall":20,"backgroundColor":"#ffffff"},"id":"#357","type":"component","lock":false,"position":51},{"name":"TextBlock","data":{"text":"PÅipojenà zaÅÃzenà ke konektorům viz také.\n\n- kapitola 1.3.1 Vrapové hadice\n- oddÃl 1.3.3 PÅipojenà k dýchacÃm vakům\n- oddÃl 1.4 Nádechový vak\n- a oddÃl 1.5 Výdechový vak","textLarge":false,"imageOnRight":true,"image":{"recommendedSizes":{"width":"420","height":"280"}},"imageMobile":{"recommendedSizes":{"width":"750","height":"500"}}},"id":"#356","type":"component","lock":false,"position":52},{"name":"Divider","data":{"color":"darkGray"},"id":"#358","type":"component","lock":false,"position":53},{"name":"SectionDivider","data":{"title":"3.2.5 Tank fillings"},"id":"#585","type":"component","lock":false,"position":54},{"name":"TextBlock","data":{"text":"### <span id=\"3-.-2-.-5-Tank-filling\">**3.2.5 PlnÄnà lahvÃ**</span>\n\nPÅi plnÄnà lahvà dýchacà smÄsà dodržujte postupy a pravidla, se kterými jste byli seznámeni v kurzu mÃchánà technických plynů (trimixový mixér apod.). Pokud jste takový kurz úspÄÅ¡nÄ neabsolvovali, pÅenechte mÃchánà smÄsi kvalifikované osobÄ.\n\nPÅi manipulaci s kyslÃkem dodržujte postupy a pravidla, se kterými jste byli seznámeni v kurzu trimixu a následnÄ v kurzu CCR Liberty. Pokud jste takový kurz úspÄÅ¡nÄ neabsolvovali, s pÅÃstrojem CCR Liberty nemanipulujte.\n\n**3.2.5.1 Diluent**\n\nZvolte diluent, který je schopen z dýchacà smyÄky vyplavit smÄs s vysokým obsahem kyslÃku. PÅipravte si Åedidlo tak, aby byl parciálnà tlak kyslÃku v nejvÄtÅ¡Ã hloubce vaÅ¡eho plánovaného ponoru o 0,2 baru nižšà než plánovaná nastavená hodnota. Parciálnà tlak dusÃku by nemÄl pÅekroÄit 4 bary (doporuÄuje se 3,2 baru).\nS ohledem na kompatibilitu s kyslÃkem a Äistotu pro kyslÃkovou službu dÃlů pracujÃcÃch s Åedidlem nepÅekraÄujte v Åedidle koncentraci kyslÃku 21 % (± 1 %). Minimálnà koncentrace kyslÃku je 5 %. \nKontaminace diluentu by nemÄla pÅekroÄit limity dané normou EN12021:2014. OddÃl 6.2 pÅi použità stlaÄeného vzduchu pro jednotku.\n\nUjistÄte se, že Åedicà prostÅedek byl naplnÄn kompresorem s ÅádnÄ udržovanými filtry. \n\nPlyn musà splÅovat požadavky normy EN12021:2014.\nPÅÃpadnÄ můžete použÃt osobnà filtr. PÅi použità kompresoru se spalovacÃm motorem zajistÄte, aby se výfukové plyny z motoru nedostaly do sánà kompresoru. \n\nSmÄsi s vyÅ¡Å¡Ãm obsahem helia pÅedstavujà vÃce výhod z nÄkolika důvodů. SmÄs s nÃzkým obsahem O2 na hladinÄ v malých hloubkách s nedostateÄnou dýchatelnostà vÅ¡ak výraznÄ zvyÅ¡uje rizika. \n\nPo naplnÄnà napiÅ¡te složenà smÄsi permanentnÃm fixem na Å¡tÃtek (kousek lepicà pásky) a pÅipevnÄte jej na láhev. \n\nSpotÅeba Åedidla závisà na profilu ponoru, Äetnosti a rozsahu zmÄn hloubky. Kapacita Åedidla nenà omezena Äasem, ale profilem ponoru. To je tÅeba brát v úvahu zejména pÅi plánovánà ponorů v jeskynÃch. Diluent se spotÅebovává pÅedevÅ¡Ãm bÄhem sestupu. BÄhem výstupu je teoretická spotÅeba
2nulová a jakákoli praktická spotÅeba je způsobena pÅedevÅ¡Ãm ÄiÅ¡tÄnÃm masky.\nNa základÄ praktických zkuÅ¡enostà je typická spotÅeba Åedidla pÅi jednoduchém ponoru do hloubky 40 m pÅibližnÄ 50 až 70 barů. Tato hodnota se obvykle nezvyÅ¡uje delÅ¡Ãm pobytem ve stejné hloubce. \n\nVždy si ponechte dostateÄnou bezpeÄnostnà rezervu (alespoÅ 50 barů) pro pÅÃpad neplánovaných situacÃ. Pokud je tlak v lahvi s Åedidlem nižšà než 70 barů, nemÄl by být zahájen ani krátký ponor. \n\nPodle norem, podle kterých je pÅÃstroj CCR Liberty certifikován a oznaÄen CE, se nepotápÄjte do hloubek vÄtÅ¡Ãch než 40 m. Proto je pÅÃstroj CCR Liberty certifikován CE do 40 m.\n\n**KyslÃk**\n\nPoužÃvejte kyslÃk urÄený k dýchánÃ. ZneÄiÅ¡tÄnà kyslÃkem nesmà pÅekroÄit limity dané normou EN 12021, oddÃl 6.2 vpÅÃpadÄ použità stlaÄeného vzduchu pro jednotku.\n\nDoporuÄujeme použÃvat kyslÃk o ÄistotÄ nejménÄ 99,5 %.\n\nSpotÅeba kyslÃku pro výpoÄet doby trvánà plynu je 1,78 l/min podle normy EN 14143:2014. UvážÃme-li poÄáteÄnà tlak v lahvi 200 barů a koneÄný tlak 50 barů v lahvi, vystaÄà zásoba kyslÃku na 253 minut. PÅi tomto výpoÄtu se neuvažuje kyslÃk obsažený v Åedidle.\n\nTyto podmÃnky odpovÃdajà vysoké fyzické námaze bÄhem ponoru. Pokud je potápÄÄ bÄhem ponoru klidný, spotÅeba se výraznÄ snÞà a množstvà kyslÃku i životnost sorbentu se prodloužÃ. Plán ponoru, který se spoléhá na to, že celý ponor bude probÃhat s malou námahou, je nepÅesný.\n\nKaždopádnÄ na ponor postaÄà láhev s kyslÃkem naplnÄná na 200 barů, což znaÄnÄ pÅesahuje dobu provozu sorbentu CO<sub>2</sub>.\n \nPokud je tlak v kyslÃkové lahvi nižšà než 70 barů, nemÄl by být zahájen ani krátký ponor.\n\nPodle platných technických norem je plnÄnà kyslÃku na provoznà tlak vyÅ¡Å¡Ã než 200 barů zakázáno.","textLarge":false,"imageOnRight":true,"image":{"recommendedSizes":{"width":"420","height":"280"}},"imageMobile":{"recommendedSizes":{"width":"750","height":"500"}}},"id":"#359","type":"component","lock":false,"position":55},{"name":"Divider","data":{"color":"darkGray"},"id":"#360","type":"component","lock":false,"position":56},{"name":"SectionDivider","data":{"title":"3.2.6 Battery charging"},"id":"#586","type":"component","lock":false,"position":57},{"name":"TextBlock","data":{"text":"### <span id=\"3-.-2-.-6-Battery-charging\">**3.2.6 NabÃjenà baterie**</span>\n\nPÅed nabÃjenÃm baterià vyjmÄte propojky ze zásuvek.","textLarge":false,"imageOnRight":true,"image":{"recommendedSizes":{"width":"420","height":"280"}},"imageMobile":{"recommendedSizes":{"width":"750","height":"500"}}},"id":"#361","type":"component","lock":false,"position":58},{"name":"TextBlock","data":{"text":"DoporuÄujeme nabÃt baterie na plnou kapacitu týden nebo ménÄ pÅed potápÄnÃm. PÅed krátkým ponorem (do jedné hodiny) je pÅÃpustné skladovat plnÄ nabité baterie po dobu až jednoho mÄsÃce.\n\nPÅed nabÃjenÃm baterie zcela nevybÃjejte. Životnost baterià se prodlužuje Äastým nabÃjenÃm.","textLarge":false,"imageOnRight":true,"image":{"recommendedSizes":{"width":"420","height":"280"},"mimetype":"image/png","size":188551,"hash":"d88ff998053f6a4f6a79a6749be714c9a1d64d5c","id":"cl3wtu44besu90776zexfy6el","filename":"divesoft-ccr-liberty-manual-3-2-6-01.png","category":"divesoft/","type":"image"},"imageMobile":{"recommendedSizes":{"width":"750","height":"500"}}},"id":"#362","type":"component","lock":false,"position":59},{"name":"TextBlock","data":{"text":"Pro nabÃjenà baterià použijte pÅiloženou nabÃjeÄku nebo jakoukoli nabÃjeÄku USB s proudem 2 A (vÄtÅ¡ina nabÃjeÄek použÃvaných v zásuvkách vozidla nenà dostateÄnÄ dimenzována). PlnÄ vybité baterie vyžadujà pÅibližnÄ osm hodin nabÃjenÃ.\n\nNabÃjenà z portu USB poÄÃtaÄe je možné, i když nabÃjenà probÃhá výraznÄ nižšÃm proudem. Doba potÅebná k nabità zcela vybitých baterià tÃmto způsobem je pÅibližnÄ 15 hodin. NabÃjenà z portu USB poÄÃtaÄe lze provádÄt pomocà adaptéru pÅipojeného k vnÄjÅ¡Ãmu konektoru sluchátka.\n\nV pÅipravujete CCR Liberty k potápÄnà nejdéle týden po nabitÃ, vložte propojky tak, aby jejich kolÃky byly zasunuty do konektoru. Dýchacà pÅÃstroj se tak pÅepne do pohotovostnÃho režimu a pomocà sluchátka bude možné zapnout ÅÃdicà jednotku. Pokud jsou jumpery zasunuty v opaÄné poloze s kolÃky ven; v této poloze je napájenà zcela odpojeno a ÅÃdicà jednotku nelze zapnout. Edici Liberty 2021 lze s pÅipojenými propojkami skladovat až půl roku. BÄhem této doby se baterie vybijà pÅibližnÄ na 50 %.\n\nBÄhem nabÃjenà je aktivnà 30sekundový Äasový limit pro vypnutÃ. Äasový limit se prodlužuje stisknutÃm tlaÄÃtka v editoru, nikoli vÅ¡ak naklánÄnÃm. BÄhem nabÃjenà nemÄÅte nastavenÃ, protože by mohlo dojÃt k náhlému vypnutà pÅÃstroje.","textLarge":false,"imageOnRight":true,"image":{"recommendedSizes":{"width":"420","height":"280"}},"imageMobile":{"recommendedSizes":{"width":"750","height":"500"}}},"id":"#363","type":"component","lock":false,"position":60},{"name":"Divider","data":{"color":"darkGray"},"id":"#364","type":"component","lock":false,"position":61},{"name":"SectionDivider","data":{"title":"3.2.7 Helium sensor calibration"},"id":"#587","type":"component","lock":false,"position":62},{"name":"TextBlock","data":{"text":"### <span id=\"3-.-2-.-7-Helium-sensor-calibration\">**3.2.7 Kalibrace heliového senzoru**</span>\n\nPro správné mÄÅenà helia ve smyÄce a nepÅÃmé mÄÅenà kyslÃku je nutné kalibrovat senzory helia pÅed jejich prvnÃm použitÃm nebo v pÅÃpadÄ, že jsou namÄÅené hodnoty nepÅesné.\n\nPÅed kalibracà se ujistÄte, že ve vstupnà komoÅe heliového senzoru (uvnitÅ hlavice) je pouze vzduch a žádný jiný plyn a že heliové senzory nejsou zneÄiÅ¡tÄny vlhkostÃ.\n\nSelect Menu / Setup / Calibration / Calibrate He â Air\n\nNamÄÅená rychlost zvuku by mÄla být pÅibližnÄ 0,5500 ms. Kalibraci spustÃte stisknutÃm tlaÄÃtka Start. Po ustálenà snÃmaÄů znovu stisknÄte hornà tlaÄÃtko âAcceptâ.","textLarge":false,"imageOnRight":true,"image":{"recommendedSizes":{"width":"420","height":"280"}},"imageMobile":{"recommendedSizes":{"width":"750","height":"500"}}},"id":"#365","type":"component","lock":false,"position":63},{"name":"Divider","data":{"color":"darkGray"},"id":"#366","type":"component","lock":false,"position":64},{"name":"SectionDivider","data":{"title":"3.2.8 Calibration of the oxygen sensors"},"id":"#588","type":"component","lock":false,"position":65}
2,{"name":"TextBlock","data":{"text":"### <span id=\"3-.-2-.-8-Calibration-of-the-oxygen-sensors\">**3.2.8 Kalibrace kyslÃkových senzorů**</span>\n\nVložte mÄÅicà sondu do nádechového otvoru (uprostÅed hlavy). Hlavu lze namontovat na kanystr skruberu, ale nenà to nutné. PÅipojte omezovaÄ průtoku k rychlospojce kyslÃkové hadice.","textLarge":false,"imageOnRight":true,"image":{"recommendedSizes":{"width":"420","height":"280"}},"imageMobile":{"recommendedSizes":{"width":"750","height":"500"}}},"id":"#367","type":"component","lock":false,"position":66},{"name":"Image","data":{"firstImage":{"mimetype":"image/png","size":104876,"hash":"6059043d7eb665b46a082524aa00b0fa836d7eff","id":"cl3wtwut8eswe0776pci03ujv","filename":"divesoft-ccr-liberty-manual-3-2-8-01.png","category":"divesoft/","type":"image"},"secondImage":{"mimetype":"image/png","size":87217,"hash":"7c383a0dc3753a8b09a3e033c70cdb37deebc044","id":"cl4gq10trjs290776zpt6gsqp","filename":"divesoft-ccr-liberty-manual-3-2-8-02.png","category":"divesoft/","type":"image"},"image":{"type":"image"}},"id":"#368","type":"component","lock":false,"position":67},{"name":"TextBlock","data":{"text":"SyÄivý zvuk, který doprovázà proudÄnà kyslÃku, je v tichém prostÅedà sotva slyÅ¡et. ProudÄnà je zÅetelnÄjÅ¡Ã, pokud výpustný otvor zakryjete navlhÄeným prstem. PÅipojte vzorkovacà trubiÄku mezi omezovaÄ průtoku a mÄÅicà sondu.\n\n**Postup:**\n\n1. SpusÅ¥te kalibraci Äidla O<sub>2</sub> na HS v nabÃdce PÅed ponorem â Kalibrace O<sub>2</sub>.\n2. VyÄkejte na stabilizaci mV (to může chvÃli trvat).\n3. SpusÅ¥te kalibraci\n4. Uložit\n\nBÄhem kalibrace se také zjiÅ¡Å¥uje stav životnosti senzoru.\n\nVe vyÅ¡Å¡Ãch nadmoÅských výškách nad hladinou moÅe klesá parciálnà tlak kyslÃku v kalibraÄnà smÄsi úmÄrnÄ nižšÃmu atmosférickému tlaku. CCR Liberty mÄÅà atmosférický tlak a zohledÅuje jej pÅi kalibraci. Proto ve vyÅ¡Å¡Ãch nadmoÅských výškách nad hladinou moÅe neprovádÄjte žádné korekce.","textLarge":false,"imageOnRight":true,"image":{"recommendedSizes":{"width":"420","height":"280"}},"imageMobile":{"recommendedSizes":{"width":"750","height":"500"}}},"id":"#369","type":"component","lock":false,"position":68},{"name":"Divider","data":{"color":"darkGray"},"id":"#370","type":"component","lock":false,"position":69},{"name":"SectionDivider","data":{"title":"3.2.9 Preparing the bailout cylinder"},"id":"#589","type":"component","lock":false,"position":70},{"name":"TextBlock","data":{"text":"### <span id=\"3-.-2-.-9-Preparing-the-bailout-cylinder\">**3.2.9 PÅÃprava bailout**</span>\n\nZáchranný pÅÃstroj musà zajistit spolehlivý návrat na hladinu kdykoli bÄhem ponoru.\n\nStandardnÃm ÅeÅ¡enÃm je použità odpovÃdajÃcÃho poÄtu stupÅových a dekompresnÃch lahvà se smÄsà podle hloubky, vzdálenosti a plánu záchrany. Pro hloubkové záložnà potápÄnà se doporuÄuje použÃt smÄs bohatou na He, a to bez ohledu na finanÄnà náklady. Tato smÄs se pravdÄpodobnÄ nebude použÃvat pÅi mnoha ponorech. VyÅ¡Å¡Ã obsah He má za následek menÅ¡Ã záporný vztlak, což umožÅuje pohodlnÄjÅ¡Ã pÅepravu lahve pod vodou.\n\nPÅÃprava lahvà záchranného stupnÄ je podobná jako pÅi potápÄnà s trimixem v otevÅeném okruhu. PÅi plánovánà a pÅÃpravÄ postupujte podle pravidel, se kterými jste byli seznámeni v kurzu trimixu.\n\nPlyn musà splÅovat požadavky normy EN12021:2014\n","textLarge":false,"imageOnRight":true,"image":{"recommendedSizes":{"width":"420","height":"280"}},"imageMobile":{"recommendedSizes":{"width":"750","height":"500"}}},"id":"#371","type":"component","lock":false,"position":71},{"name":"Divider","data":{"color":"darkGray"},"id":"#372","type":"component","lock":false,"position":72},{"name":"SectionDivider","data":{"title":"3.2.10 Setting parameters"},"id":"#590","type":"component","lock":false,"position":73},{"name":"TextBlock","data":{"text":"### <span id=\"3-.-2-.-10-Setting-parameters\">**3.2.10 Nastavenà parametrů**</span>\n\nNastavte nebo zkontrolujte nastavenà vÅ¡ech parametrů potápÄnÃ.\n\nPodrobný popis naleznete v Äásti 2.4 NastavenÃ.","textLarge":false,"imageOnRight":true,"image":{"recommendedSizes":{"width":"420","height":"280"}},"imageMobile":{"recommendedSizes":{"width":"750","height":"500"}}},"id":"#373","type":"component","lock":false,"position":74},{"name":"Divider","data":{"color":"darkGray"},"id":"#374","type":"component","lock":false,"position":75},{"name":"SectionDivider","data":{"title":"3.2.11 Directional valve check"},"id":"#591","type":"component","lock":false,"position":76},{"name":"TextBlock","data":{"text":"### <span id=\"3-.-2-.-11-Directional-valve-check\">**3.2.11 Directional valve check**</span>\n\nÃÄelem této zkouÅ¡ky je odhalit pÅÃpadné netÄsnosti smÄrových ventilů potápÄÄského/povrchového ventilu (DSV). Tento typ netÄsnosti by mohl v
2ážnÄ ohrozit potápÄÄe. Nenà možné sestavit celou dýchacà smyÄku ve Å¡patném smÄru, ale potápÄÄ si musà být jistý, že tato Äást nechybà nebo netÄsnÃ.\n\n**Postup:**\n\n1. NasaÄte kryt bajonetové zásuvky na oba T-kusy.\n2. Zakryjte levé (ânádechovéâ) koleno.\n3. Vložte náustek do úst, otevÅete DSV a zkuste se nadechnout. Vdechnutà by nemÄlo být možné. Levá vlnitá hadice se zhroutÃ. Výdech by mÄl být možný.\n4. ZavÅete náustek DSV a zkontrolujte, zda nedocházà k úniku (vlnitá hadice by mÄla zůstat zavalená).\n5. OtevÅete DSV, odpojte vdechovacà koleno a zakryjte pravé (výdechové) koleno krytem bajonetové zásuvky.\n6. NadechnÄte se z náustku a zkuste vydechnout. Nádech by mÄl být možný.\n7. ZatáhnÄte za výdechové koleno, abyste prodloužili vlnitou hadici na pravé stranÄ. Zkontrolujte, zda nedocházà k úniku (vlnovcová hadice zůstane vysunutá).\n\nPokud dojde k nÄjakému úniku, vymÄÅte smÄrové ventily nebo se nepotápÄjte.","textLarge":false,"imageOnRight":true,"image":{"recommendedSizes":{"width":"420","height":"280"}},"imageMobile":{"recommendedSizes":{"width":"750","height":"500"}}},"id":"#375","type":"component","lock":false,"position":77},{"name":"Divider","data":{"color":"darkGray"},"id":"#376","type":"component","lock":false,"position":78},{"name":"SectionDivider","data":{"title":"3.2.12 Physical inspection"},"id":"#592","type":"component","lock":false,"position":79},{"name":"TextBlock","data":{"text":"### <span id=\"3-.-2-.-12-Physical-inspection\">**3.2.12 Fyzická kontrola**</span>\n\nZkontrolujte, zda je zaÅÃzenà CCR Liberty kompletnÃ, správnÄ sestavené a mechanicky nepoÅ¡kozené.\n\nPokud je CCR Liberty provozován v rámci organizace, kde za fyzickou pÅÃpravu pÅÃstroje odpovÃdá nÄkdo jiný než potápÄÄ, doporuÄujeme mu poskytnout seznam podrobných organizaÄnÃch pravidel. Kontrolnà seznam pro montáž v editovatelné podobÄ je pÅipraven ke staženà na webových stránkách divesoft.com.","textLarge":false,"imageOnRight":true,"image":{"recommendedSizes":{"width":"420","height":"280"}},"imageMobile":{"recommendedSizes":{"width":"750","height":"500"}}},"id":"#378","type":"component","lock":false,"position":80},{"name":"Divider","data":{"color":"darkGray"},"id":"#379","type":"component","lock":false,"position":81},{"name":"SectionDivider","data":{"title":"3.3 Pre-dive inspection"},"id":"#593","type":"component","lock":false,"position":82},{"name":"TextBlock","data":{"text":"### <span id=\"3-.-3-Pre---dive-inspection\">**3.3 Kontrola pÅed ponorem**</span>","textLarge":false,"imageOnRight":true,"image":{"recommendedSizes":{"width":"420","height":"280"}},"imageMobile":{"recommendedSizes":{"width":"750","height":"500"}}},"id":"#465","type":"component","lock":false,"position":83},{"name":"TextBlock","data":{"text":"Postup pÅed ponorem (PDI) lze spustit v povrchovém režimu. Testovánà se provádà bezprostÅednÄ pÅed ponorem s plnÄ sestaveným rebreatherem se zapnutými ÅÃdicÃmi jednotkami.\n\nChcete-li spustit test, zvolte Menu/Predive/Predive check.","textLarge":false,"imageOnRight":true,"image":{"recommendedSizes":{"width":"420","height":"280"},"mimetype":"image/png","size":8900,"hash":"2df5ef52fc3c123c6127d977aab8e59e6332132a","id":"cl3wtvnyzesvo07768elop43o","filename":"divesoft-ccr-liberty-manual-3-3-01.png","category":"divesoft/","type":"image"},"imageMobile":{"recommendedSizes":{"width":"750","height":"500"}}},"id":"#380","type":"component","lock":false,"position":84},{"name":"TextBlock","data":{"text":"Uživatel potvrdà výsledky jednotlivých kontrolnÃch kroků:\n\nPro pokraÄovánà stisknÄte hornà tlaÄÃtko.\n\nFAIL - ÄásteÄné selhánà testu, ale ostatnà kroky PDI budou provedeny normálnÄ. Chcete-li pokraÄovat v PDI, stisknÄte spodnà tlaÄÃtko.\n\nABORT - pro ukonÄenà PDI stisknÄte obÄ tlaÄÃtka. PÅÃkaz ABORT je nutné použÃt také v pÅÃpadÄ, že je zjiÅ¡tÄna opravitelná závada a je nutné provést celé PDI znovu. PÅÃkaz ABORT se provede automaticky, pokud uživatel do dvou minut nereaguje na výzvu.\n\nVýsledky testovánà se zaznamenávajà do protokolu.\n\nBÄhem testu se nepÅidává žádný kyslÃk. Uživatel je pÅed zahájenÃm testu varován. Aby mohl test probÄhnout, musà být potvrzen.\n\nVýsledek testu informuje uživatele, zda je pÅÃstroj rozdÄlitelný, ale neovlivÅuje dalÅ¡Ã chovánà pÅÃstroje; zejména neblokuje funkce nezbytné pro provedenà ponoru (v souladu s odpovÄdnostà uživatele CCR Liberty uvedenou v úvodu). Ignorovánà závÄrů kontroly pÅed ponorem je volbou potápÄÄe, za kterou nese odpovÄdnost.","textLarge":false,"imageOnRight":true,"image":{"recommendedSizes":{"width":"420","height":"280"}},"imageMobile":{"recommendedSizes":{"width":"750","height":"500"}}},"id":"#381","type":"component","lock":false,"position":85},{"name":"Divider","data":{"color":"darkGray"},"id":"#382","type":"component","lock":false,"position":86},{"name":"SectionDivider","data":{"title":"3.3.1 Internal testing of the control units"},"id":"#594","type":"component","lock":false,"position":87},{"name":"TextBlock","data":{"text":"### <span id=\"3-.-3-.-1-Internal-testing-of-the-control-units\">**3.3.1 Internà testovánà ÅÃdicÃch jednotek**</span>","textLarge":false,"imageOnRight":true,"image":{"recommendedSizes":{"width":"420","height":"280"}},"imageMobile":{"recommendedSizes":{"width":"750","height":"500"}}},"id":"#467","type":"component","lock":false,"position":88},{"name":"TextBlock","data":{"text":"Na zaÄátku kontroly pÅed ponorem se automaticky spustà test komunikace mezi ÅÃdicÃmi jednotkami a perifernÃmi zaÅÃzenÃmi.\n\nTestovánà probÃhá automaticky. Potvrzenà uživatelem je vyžadováno pouze v pÅÃpadÄ, že je výsledek testu negativnÃ.","textLarge":false,"imageOnRight":true,"image":{"recommendedSizes":{"width":"420","height":"280"},"mimetype":"image/png","size":412273,"hash":"43e5c616cb2f0aaafff997c7725674ccb289a5fe","id":"cl3wtxzafesxh0776ptyxbc39","filename":"divesoft-ccr-liberty-manual-3-3-1-01.png","category":"divesoft/","type":"image"},"imageMobile":{"recommendedSizes":{"width":"750","height":"500"}}},"id":"#383","type":"component","lock":false,"position":89},{"name":"TextBlock","data":{"text":"Pokud jsou jednotlivé prvky syst
2ému správnÄ zapojeny, zobrazà se mezi nimi zelená Äára. Pokud spojenà z nÄjakého důvodu selhalo nebo pokud Äást systému chybà (napÅÃklad odpojené sluchátko), zobrazà se linka ÄervenÄ.","textLarge":false,"imageOnRight":true,"image":{"recommendedSizes":{"width":"420","height":"280"}},"imageMobile":{"recommendedSizes":{"width":"750","height":"500"}}},"id":"#384","type":"component","lock":false,"position":90},{"name":"Divider","data":{"color":"darkGray"},"id":"#385","type":"component","lock":false,"position":91},{"name":"SectionDivider","data":{"title":"3.3.2 Pressure sensor test"},"id":"#595","type":"component","lock":false,"position":92},{"name":"TextBlock","data":{"text":"### <span id=\"3-.-3-.-2-Pressure-sensor-test\">**3.3.2 Pressure sensor test**</span>","textLarge":false,"imageOnRight":true,"image":{"recommendedSizes":{"width":"420","height":"280"}},"imageMobile":{"recommendedSizes":{"width":"750","height":"500"}}},"id":"#468","type":"component","lock":false,"position":93},{"name":"TextBlock","data":{"text":"Systém zobrazà vÅ¡echny snÃmaÄe tlaku a oznaÄà je pÃsmeny C nebo F.\n\nC - hrubé. Hrubý snÃmaÄ tlaku, který mÄÅà tlak od hladiny vody do hloubky 300 m.\n\nF - jemný. Jemný snÃmaÄ tlaku, který mÄÅà atmosférický tlak do hloubky 10 m.","textLarge":false,"imageOnRight":true,"image":{"recommendedSizes":{"width":"420","height":"280"},"mimetype":"image/png","size":10613,"hash":"1f57735fd552ccf762ca078a45a0502aa9ad3be6","id":"cl3wtyxmaesxy0776nu6jgmk5","filename":"divesoft-ccr-liberty-manual-3-3-2-01.png","category":"divesoft/","type":"image"},"imageMobile":{"recommendedSizes":{"width":"750","height":"500"}}},"id":"#386","type":"component","lock":false,"position":94},{"name":"TextBlock","data":{"text":"ÃÄelem zkouÅ¡ky snÃmaÄe tlaku je zjistit, zda hodnoty snÃmaÄe tlaku odpovÃdajà skuteÄnému tlaku (nadmoÅské výšce) a nevykazujà žádné významné odchylky od oÄekávaného tlaku nebo od sebe navzájem.","textLarge":false,"imageOnRight":true,"image":{"recommendedSizes":{"width":"420","height":"280"}},"imageMobile":{"recommendedSizes":{"width":"750","height":"500"}}},"id":"#387","type":"component","lock":false,"position":95},{"name":"Divider","data":{"color":"darkGray"},"id":"#388","type":"component","lock":false,"position":96},{"name":"SectionDivider","data":{"title":"3.3.3 Comparison of oxygen sensors and their calibration"},"id":"#596","type":"component","lock":false,"position":97},{"name":"TextBlock","data":{"text":"### <span id=\"3-.-3-.-3-Comparison-of-oxygen-sensors-and-their-calibration\">**3.3.3 Srovnánà kyslÃkových senzorů a jejich kalibrace**</span>","textLarge":false,"imageOnRight":true,"image":{"recommendedSizes":{"width":"420","height":"280"}},"imageMobile":{"recommendedSizes":{"width":"750","height":"500"}}},"id":"#396","type":"component","lock":false,"position":98},{"name":"TextBlock","data":{"text":"Aktuálnà hodnoty jednotlivých senzorů se na displeji zobrazujà v milivoltech (hodnoty ppO<sub>2</sub> se zobrazujà ve sloupcÃch) podle poslednà kalibrace.\n\nÃÄelem testu je ovÄÅit, zda senzory kyslÃku nevykazujà odchylné hodnoty napÄtÃ, zda jsou správnÄ kalibrovány a zda kalibrace nenà pÅÃliÅ¡ stará. ","textLarge":false,"imageOnRight":true,"image":{"recommendedSizes":{"width":"420","height":"280"},"mimetype":"image/png","size":11936,"hash":"d9b299e2154467436419a2deac851637d895db13","id":"cl3wtzs3resye0776hwjxg0ft","filename":"divesoft-ccr-liberty-manual-3-3-3-01.png","category":"divesoft/","type":"image"},"imageMobile":{"recommendedSizes":{"width":"750","height":"500"}}},"id":"#390","type":"component","lock":false,"position":99},{"name":"TextBlock","data":{"text":"PÅi testovánà mÄjte na pamÄti, že senzory mÄÅà skuteÄnou hodnotu ppO<sub>2</sub> ve smyÄce. Pokud testovánà pÅedcházà manipulace s kyslÃkem, projevà se to na napÄtà senzoru.\n\nKontrola snÃmaÄe\n\n- Senzor je offline nebo hlásà chybu.\n- Senzory Online se kontrolujà na minimálnà napÄtÃ; na vzduchu na úrovni hladiny moÅe musà být namÄÅeno alespoÅ 5 mV.\n- Povolená tolerance mezi nejvÄtÅ¡Ãm a nejmenÅ¡Ãm napÄtÃm je 5 %.\n- KalibraÄnà stáÅà musà být menÅ¡Ã než hodnota nastavená v konfiguraci.\n\nSetup / Calibration / Recomm. Days","textLarge":false,"imageOnRight":true,"image":{"recommendedSizes":{"width":"420","height":"280"}},"imageMobile":{"recommendedSizes":{"width":"750","height":"500"}}},"id":"#397","type":"component","lock":false,"position":100},{"name":"Divider","data":{"color":"darkGray"},"id":"#391","type":"component","lock":false,"position":101},{"name":"SectionDivider","data":{"title":"3.3.4 Helium-sensor test"},"id":"#597","type":"component","lock":false,"position":102},{"name":"TextBlock","data":{"text":"### <span id=\"3-.-3-.-4-Helium---sensor-test\">**3.3.4 Test heliového senzoru**</span>\n\nProvede se test funkÄnosti senzorů koncentrace He. Uživatel je o probÃhajÃcÃm testu informován na dis
2pleji HS.","textLarge":false,"imageOnRight":true,"image":{"recommendedSizes":{"width":"420","height":"280"}},"imageMobile":{"recommendedSizes":{"width":"750","height":"500"}}},"id":"#392","type":"component","lock":false,"position":103},{"name":"TextBlock","data":{"text":"ÃÄelem testu heliových senzorů je zjistit, zda jsou senzory kalibrované nebo zda vykazujà normálnà hodnoty. Obrázek ukazuje Å¡patnou nebo chybÄjÃcà kalibraci zjiÅ¡tÄnou bÄhem testu. Test probÃhá automaticky. Potvrzenà uživatelem je nutné pouze v pÅÃpadÄ, že je výsledek testu negativnÃ.","textLarge":false,"imageOnRight":true,"image":{"recommendedSizes":{"width":"420","height":"280"},"mimetype":"image/png","size":9107,"hash":"cbac350fffd8edd7d50551c934af51dabccc72c1","id":"cl3wu08unesz30776s3jakkmx","filename":"divesoft-ccr-liberty-manual-3-3-4-01.png","category":"divesoft/","type":"image"},"imageMobile":{"recommendedSizes":{"width":"750","height":"500"}}},"id":"#393","type":"component","lock":false,"position":104},{"name":"Divider","data":{"color":"darkGray"},"id":"#394","type":"component","lock":false,"position":105},{"name":"SectionDivider","data":{"title":"3.3.5 Battery testing"},"id":"#598","type":"component","lock":false,"position":106},{"name":"TextBlock","data":{"text":"### <span id=\"3-.-3-.-5-Battery-testing\">**3.3.5 Testovánà bateriÃ**</span>","textLarge":false,"imageOnRight":true,"image":{"recommendedSizes":{"width":"420","height":"280"}},"imageMobile":{"recommendedSizes":{"width":"750","height":"500"}}},"id":"#399","type":"component","lock":false,"position":107},{"name":"TextBlock","data":{"text":"ObÄ baterie jsou zatÄžovány umÄlou zátÄžà způsobenou zámÄrnÄ zvýšenou spotÅebou energie procesory, pÅipojenými solenoidy (bez použità energeticky úsporného ÅÃzenÃ), vibraÄnÃmi motory a maximálnÃm jasem displeje HS. Po dokonÄenà testu se zobrazà stav obou baterià (v %) (vÄetnÄ odhadované doby trvánà baterià v režimu ponoru).","textLarge":false,"imageOnRight":true,"image":{"recommendedSizes":{"width":"420","height":"280"},"mimetype":"image/png","size":11045,"hash":"f4f218e9a7e67390b9fb41fce9757e82b2d6d775","id":"cl3wu0smceszr07762kw9wt6n","filename":"divesoft-ccr-liberty-manual-3-3-5-01.png","category":"divesoft/","type":"image"},"imageMobile":{"recommendedSizes":{"width":"750","height":"500"}}},"id":"#395","type":"component","lock":false,"position":108},{"name":"TextBlock","data":{"text":"Uživatel se pak rozhodne, zda považuje odhadovanou výdrž baterià za dostateÄnou pro plánovaný ponor.","textLarge":false,"imageOnRight":true,"image":{"recommendedSizes":{"width":"420","height":"280"}},"imageMobile":{"recommendedSizes":{"width":"750","height":"500"}}},"id":"#398","type":"component","lock":false,"position":109},{"name":"Divider","data":{"color":"darkGray"},"id":"#400","type":"component","lock":false,"position":110},{"name":"SectionDivider","data":{"title":"3.3.6 Solenoid testing"},"id":"#599","type":"component","lock":false,"position":111},{"name":"TextBlock","data":{"text":"### <span id=\"3-.-3-.-6-Solenoid-testing\">**3.3.6 Testovánà solenoidů**</span>","textLarge":false,"imageOnRight":true,"image":{"recommendedSizes":{"width":"420","height":"280"}},"imageMobile":{"recommendedSizes":{"width":"750","height":"500"}}},"id":"#401","type":"component","lock":false,"position":112},{"name":"TextBlock","data":{"text":"Levý solenoid se opakovanÄ tÅikrát otevÅe a zavÅe ve dvousekundovém intervalu s pracovnÃm cyklem 1:1. OÄekávaná aktivita solenoidu se zobrazà na displeji HS. NáslednÄ se stejným způsobem otestuje pravý solenoid.\n\nTest se cyklicky opakuje, pokud uživatel nepotvrdà výsledek nebo pokud nedojde k automatickému ukonÄenà PDI z důvodu neÄinnosti uživatele.","textLarge":false,"imageOnRight":true,"image":{"recommendedSizes":{"width":"420","height":"280"},"mimetype":"image/png","size":9088,"hash":"2106615ee0d4de7893c634f20d744932570f239f","id":"cl3wu18fqet030776xbrnpin4","filename":"divesoft-ccr-liberty-manual-3-3-6-01.png","category":"divesoft/","type":"image"},"imageMobile":{"recommendedSizes":{"width":"750","height":"500"}}},"id":"#402","type":"component","lock":false,"position":113},{"name":"Divider","data":{"color":"darkGray"},"id":"#403","type":"component","lock":false,"position":114},{"name":"SectionDivider","data":{"title":"3.3.7 HUD inspection"}
2,"id":"#600","type":"component","lock":false,"position":115},{"name":"TextBlock","data":{"text":"### <span id=\"3-.-3-.-7-HUD-inspection\">**3.3.7 HUD kontrola**</span>","textLarge":false,"imageOnRight":true,"image":{"recommendedSizes":{"width":"420","height":"280"}},"imageMobile":{"recommendedSizes":{"width":"750","height":"500"}}},"id":"#404","type":"component","lock":false,"position":116},{"name":"TextBlock","data":{"text":"Diody svÃtà modÅe, ÄervenÄ a zelenÄ ve tÅech krocÃch. SouÄasnÄ HS zobrazuje, které barvy se majà na HUD rozsvÃtit. TÅikrát se zobrazà tÅi různé kombinace barev, takže se testuje každá ze tÅà barev spektra RGB.\n\nTest se cyklicky opakuje, pokud uživatel nepotvrdà výsledek nebo pokud nedojde k automatickému ukonÄenà PDI z důvodu neÄinnosti uživatele.","textLarge":false,"imageOnRight":true,"image":{"recommendedSizes":{"width":"420","height":"280"},"mimetype":"image/png","size":334500,"hash":"d695cc0c1e0d34a9648a816734b13a91ee9538d6","id":"cl3wu1nilet0i0776syxvcc75","filename":"divesoft-ccr-liberty-manual-3-3-7-01.png","category":"divesoft/","type":"image"},"imageMobile":{"recommendedSizes":{"width":"750","height":"500"}}},"id":"#405","type":"component","lock":false,"position":117},{"name":"Divider","data":{"color":"darkGray"},"id":"#406","type":"component","lock":false,"position":118},{"name":"SectionDivider","data":{"title":"3.3.8 BD inspection"},"id":"#601","type":"component","lock":false,"position":119},{"name":"TextBlock","data":{"text":"### <span id=\"3-.-3-.-8-BD-inspection\">**3.3.8 BD kontrola**</span>\n\nDisplej kamaráda se pÅi nÃzké, stÅednà a vysoké intenzitÄ postupnÄ rozsvÃtà zelenÄ, pÅi nÃzké, stÅednà a vysoké intenzitÄ pak ÄervenÄ.","textLarge":false,"imageOnRight":true,"image":{"recommendedSizes":{"width":"420","height":"280"}},"imageMobile":{"recommendedSizes":{"width":"750","height":"500"}}},"id":"#407","type":"component","lock":false,"position":120},{"name":"TextBlock","data":{"text":" Na HS je souÄasnÄ zobrazen symbol stejné barvy; intenzita je indikována velikostà symbolu.\n\nTest se cyklicky opakuje, pokud uživatel nepotvrdà výsledek nebo pokud nedojde k automatickému ukonÄenà PDI z důvodu neÄinnosti uživatele.","textLarge":false,"imageOnRight":true,"image":{"recommendedSizes":{"width":"420","height":"280"},"mimetype":"image/png","size":298453,"hash":"30b15cb84bca2d8bef8021c1c494628a35f5cbb7","id":"cl3wu25iwet1d07767nr21jlo","filename":"divesoft-ccr-liberty-manual-3-3-8-01.png","category":"divesoft/","type":"image"},"imageMobile":{"recommendedSizes":{"width":"750","height":"500"}}},"id":"#408","type":"component","lock":false,"position":121},{"name":"Divider","data":{"color":"darkGray"},"id":"#409","type":"component","lock":false,"position":122},{"name":"SectionDivider","data":{"title":"3.3.9 Negative pressure test"},"id":"#602","type":"component","lock":false,"position":123},{"name":"TextBlock","data":{"text":"### <span id=\"3-.-3-.-9-Negative-pressure-test\">**3.3.9 Negative pressure test**</span>\n\n","textLarge":false,"imageOnRight":true,"image":{"recommendedSizes":{"width":"420","height":"280"}},"imageMobile":{"recommendedSizes":{"width":"750","height":"500"}}},"id":"#410","type":"component","lock":false,"position":124},{"name":"TextBlock","data":{"text":"ÃÄelem této zkouÅ¡ky je odhalit pÅÃpadnou netÄsnost v dýchacà smyÄce, která se objevÃ, když je tlak ve smyÄce nižšà než okolnà tlak. ZkouÅ¡ka se provádà bezprostÅednÄ pÅed potápÄnÃm s plnÄ sestaveným rebreatherem.","textLarge":false,"imageOnRight":true,"image":{"recommendedSizes":{"width":"420","height":"280"},"mimetype":"image/png","size":393022,"hash":"167befe4d52fad1b2cfe35d9a9c52e956e82ba90","id":"cl3wu2mxoet2e0776gicthbzg","filename":"divesoft-ccr-liberty-manual-3-3-9-01.png","category":"divesoft/","type":"image"},"imageMobile":{"recommendedSizes":{"width":"750","height":"500"}}},"id":"#411","type":"component","lock":false,"position":125},{"name":"TextBlock","data":{"text":"**Postup:**\n\n1. ZavÅete ventily diluentové a kyslÃkové lahve.\n2. OtevÅete ventil DSV a ústy vytvoÅte dostateÄný podtlak podle indikace na displeji HS. Podtlak je indikován bÃlým sloupcovým grafem. Pro dostateÄnou zkouÅ¡ku tÄsnosti se doporuÄuje vytvoÅit takový podtlak, pÅi kterém bÃlý sloupcový graf pÅejde pÅes zelené pole.\n3. UzavÅete DSV a zastavte veÅ¡keré pohyby s rebreatherem; zejména nepohybujte vaky a dýchacÃmi hadicemi. Po uzavÅenà náustku nasaÄte dýchacà hadici volnÄ na pÅÃstroj. Pohyb dýchacÃch hadic a protiplynů způsobuje zmÄny tlaku ve smyÄce a zkresluje výsledky mÄÅenÃ.\n4. PoÄkejte 60 sekund; na displeji se automaticky spustà odpoÄÃtávánÃ.\n5. ZkouÅ¡ku lze považovat za úspÄÅ¡nou, pokud je ztráta tlaku po 60 sekundách menÅ¡Ã než 10 mbar (poÄáteÄnà zmÄnu tlaku nepoÄÃtejte, protože je způsobena zmÄnou délky hadice).\n\nKoneÄné vyhodnocenà zkouÅ¡ky a potvrzenà výsledku je ponecháno na uváženà uživatele.\n\nViz také oddÃl 3.7.2 ZjiÅ¡Å¥ovánà netÄsnostÃ.\n\nPoznámka: I pÅes pozitivnà výsledek podtlakové zkouÅ¡ky může bÄhem ponoru dojÃt k netÄsnostem. To je nejÄastÄji způsobeno uvolnÄným nebo propÃchnutým gumovým náustkem.","textLarge":false,"imageOnRight":true,"image":{"recommendedSizes":{"width":"420","height":"280"}},"imageMobile":{"recommendedSizes":{"width":"750","height":"500"}}},"id":"#412","type":"component","lock":false,"position":126}
2,{"name":"Divider","data":{"color":"darkGray"},"id":"#413","type":"component","lock":false,"position":127},{"name":"SectionDivider","data":{"title":"3.3.10 Positive pressure test"},"id":"#603","type":"component","lock":false,"position":128},{"name":"TextBlock","data":{"text":"### <span id=\"3-.-3-.-10-Positive-pressure-test\">**3.3.10 Positive pressure test**</span>\n\nÃÄelem této zkouÅ¡ky je odhalit pÅÃpadné netÄsnosti v dýchacà smyÄce, které se objevÃ, když je tlak ve smyÄce vyÅ¡Å¡Ã než okolnà tlak.","textLarge":false,"imageOnRight":true,"image":{"recommendedSizes":{"width":"420","height":"280"},"mimetype":"image/png","size":133716,"hash":"7ea7fb756422457768b96068e602817a68a42618","id":"cl46yi2hxhec00776ph35h9fy","filename":"divesoft-ccr-liberty-manual-3-3-10-01.png","category":"divesoft/","type":"image"},"imageMobile":{"recommendedSizes":{"width":"750","height":"500"}}},"id":"#414","type":"component","lock":false,"position":129},{"name":"TextBlock","data":{"text":"**Postup:**\n\n1. ZavÅete ventil kyslÃkové lahve a otevÅete ventil lahve s Åedidlem.\n2. ZavÅete ventil DSV a zavÅete pÅetlakový ventil.\n3. Pomocà ruÄnÃho ventilu Åedidla vytvoÅte dostateÄný pÅetlak podle indikace na displeji HS. Pokud chcete Å¡etÅit plyn v lahvi s Åedidlem, je možné to provést také ústy. Pokud chcete pÅÃstroj nastavit rovnou na vyÅ¡Å¡Ã požadovanou hodnotu, natlakujte smyÄku kyslÃkem.\n4. Zastavte veÅ¡keré pohyby rebreatheru; zejména nepohybujte vaky a dýchacÃmi hadicemi.\n5. PoÄkejte 60 sekund; na displeji se automaticky spustà odpoÄÃtávánÃ.\n6. Výsledek je ovlivnÄn otevÅenÃm pÅetlakového ventilu, který je nastaven na maximálnà hodnotu 35 mbar. Pokud zaznamenáte únik tlaku nad tuto hodnotu, ovÄÅte, zda se jedná pouze o pÅetlakový ventil a zda únik nemá jiný zdroj. Tlak by již nemÄl klesnout pod nastavenou mez pÅetlakového ventilu.\n\nKoneÄné vyhodnocenà zkouÅ¡ky a potvrzenà výsledku ponechte na uváženà uživatele.","textLarge":false,"imageOnRight":true,"image":{"recommendedSizes":{"width":"420","height":"280"}},"imageMobile":{"recommendedSizes":{"width":"750","height":"500"}}},"id":"#415","type":"component","lock":false,"position":130},{"name":"TextBlock","data":{"text":"Viz také oddÃl 3.7.2 ZjiÅ¡Å¥ovánà netÄsnostÃ\n\nPo nalezenà a opravÄ netÄsnostà je tÅeba zopakovat vÅ¡echny tlakové zkouÅ¡ky. Za tÃmto úÄelem můžete použÃt nabÃdku Menu / Predive / Pressure tests, která pÅeskoÄà vÅ¡echny testy senzorů, baterie a solenoidu a rovnou spustà tlakové testy.","textLarge":false,"imageOnRight":true,"image":{"recommendedSizes":{"width":"420","height":"280"},"mimetype":"image/png","size":11457,"hash":"f6255d8dd32102a382baa03193553f9a74aadfbb","id":"cl46yizdjhedf0776x92u67xk","filename":"divesoft-ccr-liberty-manual-3-3-10-02.png","category":"divesoft/","type":"image"},"imageMobile":{"recommendedSizes":{"width":"750","height":"500"}}},"id":"#416","type":"component","lock":false,"position":131},{"name":"Divider","data":{"color":"darkGray"},"id":"#417","type":"component","lock":false,"position":132},{"name":"SectionDivider","data":{"title":"3.3.11 IP Pressure"},"id":"#604","type":"component","lock":false,"position":133},{"name":"TextBlock","data":{"text":"### <span id=\"3-.-3-.-11-IP-Pressure\">**3.3.11 StÅedotlak**</span>\n\nPoslednÃm bodem kontroly pÅed ponorem je kontrola tÄsnosti stÅedotlakého plynu. (Funguje pouze v pÅÃpadÄ, že jsou pÅipojeny pÅevodnÃky tlaku).\n\n1. Na obrazovce se zobrazà poÄáteÄnà tlak.\n2. OtevÅete tlakové lahve s kyslÃkem a Åedidlem, abyste natlakovali stÅedotlaký a vysokotlaký prostor.\n3. UzavÅete ventily tlakových lahvà a sledujte pÅÃpadný pokles tlaku pÅi odpoÄÃtávánà na displeji. Jakýkoli pokles tlaku signalizuje netÄsnost ve stÅedotlakém nebo vysokotlakém prostoru. Pokud k tomu dojde, zjistÄte a odstraÅte závadu pÅed ponorem.\n4. OpÄt plnÄ otevÅete ventily.","textLarge":false,"imageOnRight":true,"image":{"recommendedSizes":{"width":"420","height":"280"}},"imageMobile":{"recommendedSizes":{"width":"750","height":"500"}}},"id":"#418","type":"component","lock":false,"position":134},{"name":"Divider","data":{"color":"darkGray"},"id":"#419","type":"component","lock":false,"position":135},{"name":"SectionDivider","data":{"title":"3.3.12 Predive checklist"},"id":"#605","type":"component","lock":false,"position":136},{"name":"TextBlock","data":{"text":"### <span id=\"3-.-3-.-12-Predive-checklist\">**3.3.12 Kontrolnà seznam pÅed ponorem**</span>\n\nPo vstupu do režimu potápÄnà pÅÃstroj automaticky zkontroluje senzory kyslÃku a jejich kalibraci. V pÅÃpadÄ staré kalibrace nebo odchylky snÃmaÄe o vÃce než 10 % se zobrazà varovánà a doporuÄenà pro opÄtovnou kalibraci. Postupujte podle kontrolnÃho seznamu. PotápÄÄ je povinen osobnÄ ovÄÅit vÅ¡echny uvedené položky.","textLarge":false,"imageOnRight":true,"image":{"recommendedSizes":{"width":"420","height":"280"}},"imageMobile":{"recommendedSizes":{"width":"750","height":"500"}}},"id":"#420","type":"component","lock":false,"position":137},{"name":"PhotoGallery","data":{"title":"","description":"","divider":false,"images":[{"id":"
21","image":{"mimetype":"image/png","size":11409,"hash":"7c16dce318830579acebf8b66c5a9d85f5efc8bc","id":"cl4gq2874js2y0776jo4zlmcd","filename":"divesoft-ccr-liberty-manual-3-3-12-01.png","category":"divesoft/","type":"image"}},{"id":"2","image":{"mimetype":"image/png","size":9621,"hash":"2b1ef78b3719a8a6401dbcfc36374521f3a08112","id":"cl4gq36zkjs3o0776fsy1wqgv","filename":"divesoft-ccr-liberty-manual-3-3-12-02.png","category":"divesoft/","type":"image"}},{"id":"3","image":{"mimetype":"image/png","size":9546,"hash":"464cdba3513ecb149e3d162f26f613a68dd1f1b8","id":"cl4ml0xzskwsr0776k2bl1vm4","filename":"divesoft-ccr-liberty-manual-3-3-12-03.png","category":"divesoft/","type":"image"}},{"id":"4","image":{"mimetype":"image/png","size":10852,"hash":"f79618242aef29069dc1b192f2ae388c393f3961","id":"cl4ml1elxkwt00776ngivof19","filename":"divesoft-ccr-liberty-manual-3-3-12-04.png","category":"divesoft/","type":"image"}},{"id":"5","image":{"mimetype":"image/png","size":10130,"hash":"036dee34e46a9789285d7729d16c74c0003a96b2","id":"cl4pdfequlw5r07763vap9ko9","filename":"divesoft-ccr-liberty-manual-3-3-12-05.png","category":"divesoft/","type":"image"}},{"id":"6","image":{"mimetype":"image/png","size":9816,"hash":"ecaa1c6bcdf61c8f480d7735276686c4192b5edf","id":"cl4pdfvztlw5z0776rjt3fppp","filename":"divesoft-ccr-liberty-manual-3-3-12-06.png","category":"divesoft/","type":"image"}}],"activeTab":"6"},"id":"#560","type":"component","lock":false,"position":138},{"name":"Divider","data":{"color":"darkGray"},"id":"#424","type":"component","lock":false,"position":139},{"name":"SectionDivider","data":{"title":"3.3.13 Prebreathe"},"id":"#606","type":"component","lock":false,"position":140},{"name":"TextBlock","data":{"text":"### <span id=\"3-.-3-.-13-PÅeddýchánÃ\">**3.3.13 Prebreathe**</span>","textLarge":false,"imageOnRight":true,"image":{"recommendedSizes":{"width":"420","height":"280"}},"imageMobile":{"recommendedSizes":{"width":"750","height":"500"}}},"id":"#561","type":"component","lock":false,"position":141},{"name":"TextBlock","data":{"text":"PÅeddýchánà jednotky má zásadnà vliv na bezpeÄnost ponoru. DůraznÄ doporuÄujeme provést pÅeddýchánà pÅed každým ponorem a mezi jednotlivými ponory. PÅeddýchánà nesouvisà se spuÅ¡tÄnÃm chemické reakce skruberu, ale s **ovÄÅenÃm důležitých funkcà pÅÃstroje pÅed ponorem, zejména schopnosti pÅÃstroje udržet ppO<sub>2</sub> na nastavené hodnotÄ a funkÄnosti sorbentu**. ","textLarge":false,"imageOnRight":true,"image":{"recommendedSizes":{"width":"420","height":"280"},"mimetype":"image/png","size":8501,"hash":"9cd85732d21baf81adc8b320a89895d51b148dac","id":"cl46yk9v7hef70776qb7kiqtx","filename":"divesoft-ccr-liberty-manual-3-3-13-01.png","category":"divesoft/","type":"image"},"imageMobile":{"recommendedSizes":{"width":"750","height":"500"}}},"id":"#425","type":"component","lock":false,"position":142},{"name":"TextBlock","data":{"text":"ZatÃmco prvnà funkci lze snadno ovÄÅit pozorovánÃm kyslÃkových senzorů bÄhem dýchánà z pÅÃstroje, testovánà funkÄnosti absorbéru by mÄlo být provádÄno pouze za nÞe uvedených podmÃnek a zároveÅ by mÄlo být provádÄno podle reakcà vaÅ¡eho tÄla. Ani po pÄtiminutovém pÅedbÄžném dýchánà z jednotky nenà zaruÄeno, že byl zjiÅ¡tÄn Å¡patnÄ naplnÄný nebo chybÄjÃcà absorbér.","textLarge":false,"imageOnRight":true,"image":{"recommendedSizes":{"width":"420","height":"280"},"mimetype":"image/png","size":8323,"hash":"4b03dd986a135f691e03fbfcc12a602f0121530c","id":"cl4pdjxkzlw750776h2e5xn3f","filename":"divesoft-ccr-liberty-manual-3-3-13-02.png","category":"divesoft/","type":"image"},"imageMobile":{"recommendedSizes":{"width":"750","height":"500"}}},"id":"#562","type":"component","lock":false,"position":143},{"name":"Spacer","data":{"spacingLarge":30,"spacingSmall":20,"backgroundColor":"#ffffff"},"id":"#558","type":"component","lock":false,"position":144},{"name":"TextBlock","data":{"text":"**Postup:**\n\n1. ZajistÄte, aby bylo ve smyÄce dosaženo setpointů, aby nadmÄrné nafouknutà nevedlo k nadmÄrnému p
2ÅÃdavku kyslÃku, který by zkreslil výsledek testu.\n2. PÅed zahájenÃm testu zvolte bezpeÄné mÃsto, kde budete sedÄt po dobu jeho trvánÃ, aby nedoÅ¡lo ke zranÄnà v pÅÃpadÄ ztráty vÄdomÃ.","textLarge":false,"imageOnRight":true,"image":{"recommendedSizes":{"width":"420","height":"280"},"mimetype":"image/png","size":9118,"hash":"52645c1b10767458094a91d111e721494b78b09f","id":"cl46yl0ckhefs0776rtyp8tso","filename":"divesoft-ccr-liberty-manual-3-3-13-03.png","category":"divesoft/","type":"image"},"imageMobile":{"recommendedSizes":{"width":"750","height":"500"}}},"id":"#427","type":"component","lock":false,"position":145},{"name":"TextBlock","data":{"text":"3. NasaÄte si masku na obliÄej a nechte ji nasazenou po celou dobu testu, abyste zabránili nasávánà okolnÃho vzduchu nosem, což by ohrozilo pÅesnost testu.\n4. ZaÄnÄte dýchat ze zaÅÃzenà a spusÅ¥te odpoÄÃtávánà na sluchátku.\n5. Sledujte parciálnà tlak na druhém sluchátku a chovánà vÅ¡ech kyslÃkových Äidel.\n6. UjistÄte se, že se vám dýchá pohodlnÄ, že se dýchánà nezastavuje a že nemáte pocity duÅ¡nosti, nevolnosti, bolesti hlavy nebo
2jiné neobvyklé stavy.\n7. Po ukonÄenà testu s pozitivnÃm výsledkem můžete zahájit ponor.\n\n**UpozornÄnÃ: V pÅÃpadÄ, že se potápÄÄ ocitne v bezvÄdomÃ, je nutné, abyste se s nÃm potápÄli: Pokud provádÃte pÅeddýchánà pÅi teplotách pod bodem mrazu, v žádném pÅÃpadÄ nepÅestávejte dýchat z pÅÃstroje až do úplného ponoÅenÃ.** Pokud nedýcháte z pÅÃstroje, vystavujete se riziku, že meziprostor vaÅ¡eho skruberu zamrzne, což ztÞà jeho funkÄnost.","textLarge":false,"imageOnRight":true,"image":{"recommendedSizes":{"width":"420","height":"280"}},"imageMobile":{"recommendedSizes":{"width":"750","height":"500"}}},"id":"#428","type":"component","lock":false,"position":146},{"name":"Divider","data":{"color":"darkGray"},"id":"#429","type":"component","lock":false,"position":147},{"name":"SectionDivider","data":{"title":"3.4 Diving"},"id":"#607","type":"component","lock":false,"position":148},{"name":"TextBlock","data":{"text":"### <span id=\"3-.-4-Diving\">**3.4 PotápÄnÃ**</span>","textLarge":false,"imageOnRight":true,"image":{"recommendedSizes":{"width":"420","height":"280"}},"imageMobile":{"recommendedSizes":{"width":"750","height":"500"}}},"id":"#609","type":"component","lock":false,"position":149},{"name":"SectionDivider","data":{"title":"3.4.1 Breathing high oxygen content gases"},"id":"#608","type":"component","lock":false,"position":150},{"name":"TextBlock","data":{"text":"### <span id=\"3-.-4-.-1-Breathing-high-oxygen-content-gases\">**3.4.1 Dýchánà plynů s vysokým obsahem kyslÃku**</span>\n\nSmÄs v okruhu CCR Liberty obvykle obsahuje kyslÃk o mnohem vyÅ¡Å¡Ãm parciálnÃm tlaku než vzduch, který dýcháme na povrchu.\n\n**Akutnà otrava kyslÃkem (CNS)**\n\nVystavenà vysokému parciálnÃmu tlaku kyslÃku může za urÄitých okolnostà způsobit akutnà otravu kyslÃkem (CNS). Ta může potenciálnÄ způsobit utonutà postižené osoby.\n\nTakzvané âkyslÃkové hodinyâ pÅedstavujà procento spotÅeby limitnà hodnoty otravy CNS. Omezte maximálnà parciálnà tlak a celkovou expozici tak, aby nemohlo dojÃt k akutnà otravÄ kyslÃkem, podle následujÃcà tabulky NOAA.","textLarge":false,"imageOnRight":true,"image":{"recommendedSizes":{"width":"420","height":"280"}},"imageMobile":{"recommendedSizes":{"width":"750","height":"500"}}},"id":"#430","type":"component","lock":false,"position":151},{"name":"Image","data":{"firstImage":{"mimetype":"image/png","size":63964,"hash":"ee4a7322a8faf2997de324da37e8ed36aaf6c9cf","id":"cl6j58e6r0np30776s5w6ebw7","filename":"divesoft-ccr-liberty-manual-3-4-1-01.png","category":"divesoft/","type":"image"},"secondImage":{},"image":{"type":"image"}},"id":"#566","type":"component","lock":false,"position":152},{"name":"TextBlock","data":{"text":"","textLarge":false,"imageOnRight":true,"image":{"recommendedSizes":{"width":"420","height":"280"}},"imageMobile":{"recommendedSizes":{"width":"750","height":"500"}}},"id":"#565","type":"component","lock":false,"position":153},{"name":"TextBlock","data":{"text":"**CelotÄlová toxicita kyslÃku**\n\nDlouhodobé vystavenà parciálnÃmu tlaku kyslÃku vyÅ¡Å¡Ãmu než 0,5 baru, které je bÄžné pÅi použità CCR Liberty, vede k celotÄlové (nebo plicnÃ) otravÄ kyslÃkem. PÅi expozicÃch bÄžných pro amatérské technické potápÄnà nejsou pÅÃznaky celotÄlové toxicity významné. PÅi potápÄnà s rebreatherem je vÅ¡ak potápÄÄ vystaven relativnÄ vysokému parciálnÃmu tlaku kyslÃku po celou dobu ponoru, na rozdÃl od potápÄnà s otevÅeným okruhem. PÅekroÄenà prahu celotÄlové toxicity je velmi nebezpeÄné.\n\nPÅi velmi dlouhých ponorech nebo sériÃch ponorů s rebreatherem je nutné kalkulovat s dlouhodobými expoziÄnÃmi limity a omezit celkovou expozici.\n\nHlavnÃm pÅÃznakem chronické toxicity je doÄasné snÞenà vitálnà kapacity plic. DalÅ¡Ãm pÅÃznakem může být krátkozrakost (hyperoxická krátkozrakost). PÅÃznaky mohou pÅetrvávat nÄkolik mÄsÃců.\n\nPokud je ppO<sub>2</sub> ⥠1,4 baru, pak je limit toxicity pro CNS vždy kratÅ¡Ã než limit plicnà toxicity.\n\nPro výpoÄty týkajÃcà se chronické toxicity použijte metodu REPEX, kterou jste se nauÄili v kurzu potápÄnà s nitroxem. CCR Liberty neprovádà výpoÄty spojené s chronickou toxicitou kyslÃku.","textLarge":false,"imageOnRight":true,"image":{"recommendedSizes":{"width":"420","height":"280"}},"imageMobile":{"recommendedSizes":{"width":"750","height":"500"}}},"id":"#432","type":"component","lock":false,"position":154},{"name":"Divider","data":{"color":"darkGray"},"id":"#433","type":"component","lock":false,"position":155},{"name":"SectionDivider","data":{"title":"3.4.2 Putting on the apparatus"},"id":"#610","type":"component","lock":false,"position":156},{"name":"TextBlock","data":{"text":"### <span id=\"3-.-4-.-2-Putting-on-the-apparatus\">**3.4.2 Nasazenà pÅÃstroje**</span>\n\nPo kontrole pÅed ponorem postavte zaÅÃzenà CCR Liberty na stojan na pevný povrch - na zem, na lavici nebo stůl nebo do nákladového prostoru vozidla. Dýchacà pÅÃstroj ÅádnÄ zajistÄte, aby nemohl spadnout, napÅÃklad tak, že jej pÅidržà partner.\n\n**Postup:**\n\n01. PÅehoÄte dýchacà vaky a vlnité hadice s DSV na opaÄnou stranu tÄla rebreatheru.\n02. UmÃstÄte se pod ramennà popruhy. 101\n03. NasaÄte si ramennà popruhy, ideálnÄ obÄma rukama souÄasnÄ.\n04. Postavte se na obÄ nohy. Vzhledem k hmotnosti zaÅÃzenà CCR Liberty se vyvarujte otáÄenà páteÅe, které by mohlo vést ke zranÄnÃ. Než se postavÃte, opatrnÄ zaujmÄte polohu v
2kleÄe a poté se postavte.\n05. VezmÄte rozkrokový pásek mezi nohama a provleÄte pÅezku pásku okem rozkrokového pásku.\n06. JemnÄ utáhnÄte pás a zapnÄte sponu pásu.\n07. PÅeklopte dýchacà vaky a vlnité hadice s DSV dopÅedu.\n08. PÅipevnÄte dýchacà vaky k rozkrokovým V-páskům pomocà pÅezek.\n09. UjistÄte se, že jsou vÅ¡echny popruhy dostateÄnÄ utažené a nejsou pÅekroucené.\n10. PÅipevnÄte ruce k zápÄstÃ. UjistÄte se, že jsou kabely HS omotány kolem vaÅ¡ich \npaže.\n11. UjistÄte se, že je HUD pÅipevnÄn k DSV a jeho kabel je omotán kolem vlnité hadice.\n12. Zkontrolujte pÅÃstupnost nafukovacÃho zaÅÃzenà BCD.","textLarge":false,"imageOnRight":true,"image":{"recommendedSizes":{"width":"420","height":"280"}},"imageMobile":{"recommendedSizes":{"width":"750","height":"500"}}},"id":"#434","type":"component","lock":false,"position":157},{"name":"Divider","data":{"color":"darkGray"},"id":"#458","type":"component","lock":false,"position":158},{"name":"SectionDivider","data":{"title":"3.4.3 Using the DSV"},"id":"#611","type":"component","lock":false,"position":159},{"name":"TextBlock","data":{"text":"### <span id=\"3-.-4-.-3-Using-the-DSV\">**3.4.3 PoužÃvánà systému DSV**</span>\n\nPokud nemáte DSV v ústech, musà být vždy zavÅený. PÅed vyjmutÃm z úst jej zavÅete, po vloženà do úst jej otevÅete a pÅed vdechnutÃm DSV vyprázdnÄte vyfouknutÃm vody.\n\nOtevÅenà DSV, když jej nemáte v ústech, způsobà okamžitou ztrátu vztlaku a mohlo by dojÃt k zaplavenà dýchacà smyÄky.","textLarge":false,"imageOnRight":false,"image":{"recommendedSizes":{"width":"420","height":"280"}},"imageMobile":{"recommendedSizes":{"width":"750","height":"500"}}},"id":"#457","type":"component","lock":false,"position":160},{"name":"Divider","data":{"color":"darkGray"},"id":"#463","type":"component","lock":false,"position":161},{"name":"SectionDivider","data":{"title":"3.4.4 Monitoring of devices"},"id":"#612","type":"component","lock":false,"position":162},{"name":"TextBlock","data":{"text":"### <span id=\"3-.-4-.-4-Monitoring-of-devices\">**3.4.4 Monitorovánà zaÅÃzenÃ**</span>\n\n**Parciálnà tlak kyslÃku**\n\nVždy musÃte znát koncentraci kyslÃku (ppO<sub>2</sub>) v dýchacà smyÄce. NauÄte se použÃvat HUD pro průbÄžné monitorovánÃ, protože vám umožnà soustÅedit se na jiné úkoly.","textLarge":false,"imageOnRight":true,"image":{"recommendedSizes":{"width":"420","height":"280"},"mimetype":"image/png","size":78961,"hash":"33957b4de0a8fafa1dc92a074a00eea790c64bff","id":"cl4f9icvcjazw0776s28m14ul","filename":"divesoft-ccr-liberty-manual-3-4-4-01.png","category":"divesoft/","type":"image"},"imageMobile":{"recommendedSizes":{"width":"750","height":"500"}}},"id":"#459","type":"component","lock":false,"position":163},{"name":"TextBlock","data":{"text":"**Vždy je tÅeba znát své ppO<sub>2</sub>!**\n\nPravidelnÄ také kontrolujte parciálnà tlak kyslÃku na displeji handsetu. Pokud se hodnoty z různých Äidel liÅ¡Ã, zkontrolujte, zda nÄkterému z Äidel nekonÄà životnost.\n\nPÅi výrazné zmÄnÄ hloubky vÄnujte zvýšenou pozornost údaji ppO<sub>2</sub>.","textLarge":false,"imageOnRight":true,"image":{"recommendedSizes":{"width":"420","height":"280"},"mimetype":"image/png","size":348491,"hash":"f2c030e839adbb4fdbd7cad9d7120c04cf9270b4","id":"cl4f9iqt0jb070776gpmefth5","filename":"divesoft-ccr-liberty-manual-3-4-4-02.png","category":"divesoft/","type":"image"},"imageMobile":{"recommendedSizes":{"width":"750","height":"500"}}},"id":"#472","type":"component","lock":false,"position":164},{"name":"TextBlock","data":{"text":"Nespoléhejte se pouze na alarm indikujÃcà snÞený parciálnà tlak kyslÃku.\n\nSnÞený parciálnà tlak kyslÃku je signalizován také na displeji kamaráda. Seznamte své partnery pÅi potápÄnà se signály BD, aby byli schopni vÄas rozpoznat, že potÅebujete pomoc.\n\nPro sledovánà ppO<sub>2</sub> nestaÄà sledovat průmÄrnou hodnotu vÅ¡ech Äidel, která je zvýraznÄna vÄtÅ¡Ãm pÃsmem. Je tÅeba sledovat vÅ¡echny senzory, a to buÄ na hlav
2nÃm displeji sluchátka, nebo na obrazovce obsahujÃcà vÅ¡echny senzory. V pÅÃpadÄ, že nÄkdo pochybuje o zobrazeném mÄÅenà jednoho nebo vÃce senzorů, porovnejte hodnoty nepÅÃmého mÄÅenà kyslÃku se senzory helia (pouze pokud je podÃl helia v Åedidle vÄtÅ¡Ã než 20 % a mÄÅenà helia je povoleno v nastavenÃ). Tyto hodnoty naleznete na obrazovce napÄtà Äidel.\n\nDalÅ¡Ã možnostà je propláchnutà Åedidlem (správnÄ nauÄené v kurzu CCR Liberty Diver), po kterém porovnáte výsledek s hodnotou v levém dolnÃm rohu na obrazovce napÄtà senzoru. TÃm zÃskáte hodnotu ppO<sub>2</sub> Åedidla v aktuálnà hloubce. Senzor, který po propláchnutà Åedidlem odpovÃdá zobrazené hodnotÄ, lze považovat za platný. Dávejte pozor, pokud použÃváte hypoxické Åedidlo v malé hloubce.\n\nSystém může automaticky deaktivovat jeden nebo dva senzory. Vždy použÃvejte zdravý rozum a ujistÄte se, že vyÅazené senzory jsou skuteÄnÄ ty vadné, a ne naopak.\n\n**Tlak kyslÃku a diluentu**\n\nDoporuÄujeme kontrolovat tlak kyslÃku a diluentu pÅibližnÄ jednou za pÄt minut.\n\nV porovnánà s pÅÃstrojem s otevÅeným okruhem majà lahve s kyslÃkem a Åedidlem malý objem. I malá netÄsnost může způsobit rychlou ztrátu tlaku. Proto je nutné kontrolovat tlakomÄry kyslÃku a diluentu (SPG) ÄastÄji než pÅi potápÄnà s otevÅeným okruhem.","textLarge":false,"imageOnRight":true,"image":{"recommendedSizes":{"width":"420","height":"280"}},"imageMobile":{"recommendedSizes":{"width":"750","height":"500"}}},"id":"#473","type":"component","lock":false,"position":165},{"name":"Divider","data":{"color":"darkGray"},"id":"#475","type":"component","lock":false,"position":166},{"name":"SectionDivider","data":{"title":"3.4.5 Switching to CCR mode"},"id":"#613","type":"component","lock":false,"position":167},{"name":"TextBlock","data":{"text":"### <span id=\"3-.-4-.-5-Switching-to-CCR-mode\">**3.4.5 PÅepnutà do režimu CCR**</span>\n\nV povrchovém režimu otevÅete nabÃdku a pÅepnÄte na režim CCR.\n\nProveÄte kontrolu podle zobrazeného kontrolnÃho seznamu.","textLarge":false,"imageOnRight":true,"image":{"recommendedSizes":{"width":"420","height":"280"}},"imageMobile":{"recommendedSizes":{"width":"750","height":"500"}}},"id":"#474","type":"component","lock":false,"position":168},{"name":"Divider","data":{"color":"darkGray"},"id":"#477","type":"component","lock":false,"position":169},{"name":"SectionDivider","data":{"title":"3.4.6 Water entry"},"id":"#614","type":"component","lock":false,"position":170},{"name":"TextBlock","data":{"text":"### <span id=\"3-.-4-.-6-Water-entry\">**3.4.6 Vstup do vody**</span>\n\nNevstupujte do vody, aniž byste provedli kontrolu pÅed ponorem podle kapitoly 3.3 Kontrola pÅed ponorem!\n\nDoporuÄujeme dýchat z rebreatheru alespoÅ tÅi minuty tÄsnÄ pÅed vstupem do vody, abyste se ujistili, že rebreather a zbytek pÅÃstroje fungujà správnÄ.\n\nV mrazivém poÄasà nenechávejte scrubber po pÅenesenà rebreatheru z teplého prostÅedà vychladnout. Omezte vystavenà rebreatheru mrazivému vzduchu. V pÅÃpadÄ potÅeby udržujte sorbent v teple dýchánÃm z rebreatheru.\n\nDoporuÄujeme postupnÄ vstupovat do vody a rebreather pomalu ponoÅovat.\n\nPokud je nutné skoÄit do vody, použijte metodu âobÅÃho krokuâ, pÅi nÞ nohy a hýždÄ dopadajà do vody jako prvnÃ, ÄÃmž chránà dýchacà vaky a vlnité hadice pÅed pÅÃmým nárazem. PÅi vstupu do vody tÃmto způsobem mÄjte v ústech DSV; v okamžiku vstupu je mÄjte zavÅené. Na náhlý vstup do vody musà dohlÞet osoba kvalifikovaná poskytnout pomoc v pÅÃpadÄ, že nastanou problémy.\n\nPo vstupu do vody proveÄte kontrolu bublin. Vzhledem k malému objemu lahvà s kyslÃkem a Åedidlem mohou drobné netÄsnosti ve vysokotlaké a nÃzkotlaké Äásti, vést k rychlému poklesu tlaku v lahvÃch.","textLarge":false,"imageOnRight":true,"image":{"recommendedSizes":{"width":"420","height":"280"}},"imageMobile":{"recommendedSizes":{"width":"750","height":"500"}}},"id":"#478","type":"component","lock":false,"position":171},{"name":"Divider","data":{"color":"darkGray"},"id":"#476","type":"component","lock":false,"position":172},{"name":"SectionDivider","data":{"title":"3.4.7 Submersion"},"id":"#615","type":"component","lock":false,"position":173},{"name":"TextBlock","data":{"text":"### <span id=\"3-.-4-.-7-Submersion\">**3.4.7 ZanoÅenÃ**</span>\n\nBÄhem ponoÅenà použÃvejte kompenzátor (BCD) ke kontrole vztlaku.\n\nZvolte pÅimÄÅené množstvà zátÄže s ohledem na pÅÃpadnou zmÄnu hmotnosti bÄhem ponoru. NepÅetÄžujte se, abyste si ponoÅenà usnadnili. Na rozdÃl od potápÄnà s otevÅeným okruhem je snÞenà hmotnosti v důsledku spotÅeby plynů minimálnÃ. PÅÃpadné použità záchranného pÅÃstroje v otevÅeném okruhu má na snÞenà hmotnosti významnÄjÅ¡Ã vliv. UrÄenà správného množstvà zátÄže je jednou z dovednostÃ, které se nauÄÃte v kurzu CCR Liberty.","textLarge":false,"imageOnRight":true,"image":{"recommendedSizes":{"width":"420","height":"280"}},"imageMobile":{"recommendedSizes":{"width":"750","height":"500"}}},"id":"#479","type":"component","lock":false,"position":174},{"name":"Divider","data":{"color":"darkGray"},"id":"#483","type":"component","lock":false,"position":175},{"name":"SectionDivider","data":{"title":"3.4.8 In-water check"},"id":"#616","type":"component","lock":false,"position":176},{"name":"TextBlock","data":{"text":"### <span id=\"3-.-4-.-8-In---water-check\">**3.4.8 Kontrola ve vodÄ**</span>\n\nOvÄÅte systém kontroly ppO<sub>2</sub> a nastavte vztlak.\n\nProveÄte s partnerem pro potápÄnà kontrolu bublin. ProvÄÅte vÅ¡echny Äásti dýchacà smyÄky ve smÄru proudÄnà plynu. OtáÄejte se ve vodorovném smÄru pomocà âvrtulnÃkového obratuâ.\n\nZkontrolujte svůj záchranný zdroj. NÄkolikrát se nadechnÄte z vyproÅ¡Å¥ovacà láhve, abyste zjistili, zda je regulátor snadno a rychle dostupný a funkÄnÃ. Zkontrolujte tlak v záchranné lahvi.","textLarge":false,"imageOnRight":true,"image":{"recommendedSizes":{"width":"420","height":"280"}},"imageMobile":{"recommendedSizes":{"width":"750","height":"500"}}},"id":"#484","type":"component","lock":false,"position":177},{"name":"Divider","data":{"color":"darkGray"},"id":"#482","type":"component","lock":false,"position":178},{"name":"SectionDivider","data":{"title":"3.4.9 Descent"},"id":"#617","type":"component","lock":false,"position":179},{"name":"TextBlock","data":{"text":"### <span id=\"3-.-4-.-9-Descent\">**3.4.9 Sestup**</span>\n\nBÄhem sestupu pÅidává ADV do dýchacà smyÄky diluent; diluent můžete pÅidat také ruÄnÄ. Åedidlo se pÅidává do inhalaÄnÃho vaku. BÄhem rychlého sestupu je smÄs dodávaná do DSV prakticky totožná s Åedidlem.\n\nPokud použijete Åedidlo s nÃzkým obsahem kyslÃku (napÅ. p
2Åi zahájenà sestupu do velké hloubky), je nutné výraznÄ omezit rychlost sestupu. PokraÄujte v tom, dokud nedosáhnete hloubky, kde ppO<sub>2</sub> v Åedidle pÅesáhne 0,2 baru. Je také možné izolovat ADV a podávat Åedidlo ruÄnÄ pro maximálnà kontrolu nad vstÅikovaným hypoxickým Åedidlem.\n\nNesestupujte rychle, abyste dosáhli hloubky, ve které je smÄs dýchatelná. NÃzký parciálnà tlak kyslÃku ve smyÄce vede k podstatnÄ rychlejÅ¡Ã ztrátÄ vÄdomÃ, než když sestupujete pÅi zadrženém dechu. Nepodstupujte toto riziko.\n\nPo dokonÄenà sestupu je možné izolovat ADV, aby se pÅesnÄ udržel optimálnà objem smyÄky.","textLarge":false,"imageOnRight":true,"image":{"recommendedSizes":{"width":"420","height":"280"}},"imageMobile":{"recommendedSizes":{"width":"750","height":"500"}}},"id":"#485","type":"component","lock":false,"position":180},{"name":"Divider","data":{"color":"darkGray"},"id":"#481","type":"component","lock":false,"position":181},{"name":"SectionDivider","data":{"title":"3.4.10 Controlling buoyancy and trim"},"id":"#618","type":"component","lock":false,"position":182},{"name":"TextBlock","data":{"text":"### <span id=\"3-.-4-.-10-Controlling-buoyancy-and-trim\">**3.4.10 ÅÃzenà vztlaku a trimu**</span>\n\nPÅi potápÄnà s rebreatherem nelze vztlak ÅÃdit dýchánÃm jako pÅi potápÄnà s otevÅeným okruhem. Protože dýcháte v uzavÅeném okruhu, nemá to žádný vliv na celkový vztlak.\n\nKorekce vztlaku, byÅ¥ malá, je ÅÃzena pomocà kompenzátoru.\n\nPro velmi malé, doÄasné zvýšenà vztlaku (napÅ. pÅi plavánà pÅes pÅekážku) můžete mÃsto použità kompenzátoru pÅidat do dýchacà smyÄky malé množstvà Åedidla. Tento způsob je sice pohodlný, ale vede také k vÄtÅ¡Ã spotÅebÄ kyslÃku a Åedidla. Pamatujte: plavánà kolem pÅekážky je lepÅ¡Ã než plavánà pÅes ni.\n\nOmezte korekce rovnováhy na minimum použitÃm jiných zdrojů vztlaku, napÅÃklad suchého obleku. Zvýšená obtÞnost ovládánà nÄkolika bodů vztlaku může potápÄÄe pÅetÞit
2úkoly.\n\nOptimálnà trim potápÄÄe je horizontálnÃ, a to i pÅi klesánà a stoupánÃ. BÄhem kurzu potápÄnà s CCR Liberty zjistÃte optimálnà polohu zátÄže. NepoužÃvejte zátÄžový pás.\n\nPÅi nácviku dosaženà správného vyváženà a trimu se snažte zůstat bez pohybu a nemÄnit hloubku ani polohu tÄla po dobu nÄkolika desÃtek sekund.\n\nPÅi potápÄnà je vždy zapotÅebà záložnà systém buouancy. Může to být napÅÃklad suchý oblek, jednorázová zátÄž, zvedacà vak.","textLarge":false,"imageOnRight":true,"image":{"recommendedSizes":{"width":"420","height":"280"}},"imageMobile":{"recommendedSizes":{"width":"750","height":"500"}}},"id":"#486","type":"component","lock":false,"position":183},{"name":"Divider","data":{"color":"darkGray"},"id":"#435","type":"component","lock":false,"position":184},{"name":"SectionDivider","data":{"title":"3.4.11 Mask clearing"},"id":"#619","type":"component","lock":false,"position":185},{"name":"TextBlock","data":{"text":"### <span id=\"3-.-4-.-11-Mask-clearing\">**3.4.11 Vylévánà masky**</span>\n\nPÅi potápÄnà s rebreatherem se může znaÄná Äást smÄsi spotÅebované bÄhem ponoru ztratit pÅi vyprazdÅovánà masky. Proto omezte vyprazdÅovánà masky na minimum.","textLarge":false,"imageOnRight":true,"image":{"recommendedSizes":{"width":"420","height":"280"}},"imageMobile":{"recommendedSizes":{"width":"750","height":"500"}}},"id":"#487","type":"component","lock":false,"position":186},{"name":"Divider","data":{"color":"darkGray"},"id":"#491","type":"component","lock":false,"position":187},{"name":"SectionDivider","data":{"title":"3.4.12 Increased physical exertion"},"id":"#620","type":"component","lock":false,"position":188},{"name":"TextBlock","data":{"text":"### <span id=\"3-.-4-.-12-Increased-physical-exertion\">**3.4.12 Zvýšená fyzická námaha**</span>\n\nSystém CCR Liberty pÅidává kyslÃk do dýchacà smyÄky podle potÅeby. Na rozdÃl od nÄkterých mechanických dýchacÃch pÅÃstrojů nevede zvýšená fyzická námaha ke snÞenà parciálnÃho tlaku kyslÃku.\n\nV pÅÃpadÄ delÅ¡Ã fyzické námahy Äasto kontrolujte tlak v kyslÃkové lahvi.\n\nZvýšenou fyzickou námahu zohlednÄte pÅi plánovánà dekomprese.\n\nZvýšená námaha způsobuje také vÄtÅ¡Ã produkci CO<sub>2</sub>. KromÄ zkrácenà životnosti výdÅevy má zvýšená produkce CO<sub>2</sub> (spolu se snÞenou ventilacà v důsledku hustoty plynu) významný vliv na zvýšenà arteriálnÃho CO<sub>2</sub>. Tento jev způsobuje vÄtÅ¡Ã náchylnost ke kyslÃkové toxicitÄ a dusÃkové narkóze. Existuje také riziko akutnà hyperkapnie. VyhnÄte se zvýšené zátÄži v hloubce.","textLarge":false,"imageOnRight":true,"image":{"recommendedSizes":{"width":"420","height":"280"}},"imageMobile":{"recommendedSizes":{"width":"750","height":"500"}}},"id":"#492","type":"component","lock":false,"position":189},{"name":"Divider","data":{"color":"darkGray"},"id":"#490","type":"component","lock":false,"position":190},{"name":"SectionDivider","data":{"title":"3.4.13 Ascent"},"id":"#621","type":"component","lock":false,"position":191},{"name":"TextBlock","data":{"text":"### <span id=\"3-.-4-.-13-Ascent\">** 3.4.13 Výstup**\n\nZa normálnÃch podmÃnek (tj. pÅi stoupánà rychlostà menÅ¡Ã než 15 m/min., pÅi minimálnà nastavené hodnotÄ 0,8 bar) a normálnÄ fungujÃcÃm pÅÃstroji nedocházà k poklesu parciálnÃho tlaku kyslÃku (ppO<sub>2</sub>) pod meznà hodnotu 0,16 bar.\n\nPokud dojde k neúmyslnému rychlému výstupu v malých hloubkách, vÄnujte velkou pozornost ppO<sub>2</sub>. Je možné, že dojde ke krátkodobému poklesu, který se vÅ¡ak automaticky upravà dvÄma až tÅemi vdechy.\n\nPÅed zahájenÃm výstupu zkontrolujte, zda je ventil kyslÃkové lahve zcela otevÅený.\n\nBÄhem výstupu docházà k expanzi dýchacà smÄsi v okruhu v důsledku snÞenà okolnÃho tlaku. PÅebyteÄnou dýchacà smÄs je nutné vypudit. K tomuto úÄelu sloužà pÅetlakový ventil na výdechovém (pravém) protiplÃÅ¡ti. PÅetlakový ventil zcela otevÅete. NÄkteÅà potápÄÄi považujà za vhodnÄjÅ¡Ã vypudit pÅebyteÄnou dýchacà smÄs nosem pÅes masku. NevypouÅ¡tÄjte pÅebyteÄný plyn ústy, protože se tÃm zvyÅ¡uje riziko úniku vody do dýchacÃho okruhu pÅes náustek.","textLarge":false,"imageOnRight":true,"image":{"recommendedSizes":{"width":"420","height":"280"}},"imageMobile":{"recommendedSizes":{"width":"750","height":"500"}}},"id":"#493","type":"component","lock":false,"position":192},{"name":"Divider","data":{"color":"darkGray"},"id":"#489","type":"component","lock":false,"position":193},{"name":"SectionDivider","data":{"title":"3.5 Post-dive procedures"},"id":"#622","type":"component","lock":false,"position":194},{"name":"TextBlock","data":{"text":"### <span id=\"3-.-5-Post---dive-procedures\">**3.5 Postupy po ponoru**</span>","textLarge":false,"imageOnRight":true,"image":{"recommendedSizes":{"width":"420","height":"280"}},"imageMobile":{"recommendedSizes":{"width":"750","height":"500"}}},"id":"#624","type":"component","lock":false,"position":195},{"name":"SectionDivider","data":{"title":"3.5.1 Immediately after surfacing"},"id":"#623","type":"component","lock":false,"position":196},{"name":"TextBlock","data":{"text":"### <span id=\"3-.-5-.-1-Immediately-after-surfacing\">**3.5.1 BezprostÅednÄ po vynoÅenÃ**</span>\n\nZavÅete DSV, uložte rebreather na vhodné mÃsto, uzavÅete ventily válců a vypnÄte ÅÃdicà jednotky.\n\nPokud je k dispozici stabilnÃ, pevný a rovný povrch, postavte rebreather na stojan a proveÄte opatÅenà proti jeho pádu.\n\nPokud se nacházÃte v terénu, kde nenà možné rebreather postavit na stojan, položte jej.\n\nPÅi manipulaci s rebreatherem vÄnujte zvláštnà pozornost ochranÄ vlnitých hadic pÅed poÅ¡kozenÃm.\n\nObecnÄ platÃ, že po každém ponoru nebo alespoÅ na konci potápÄÄského dne je nutné vysuÅ¡it lapaÄ vody. Odpojte hlavu, vyjmÄte kartuÅ¡ový filtr, vyjmÄte lapaÄ vody a vysuÅ¡te jej papÃrovou utÄrkou. Použijte dalÅ¡Ã papÃrovou utÄrku, abyste vysuÅ¡ili vnÄjÅ¡Ã povrch kartuÅ¡e.\n\nHlavu je tÅeba nechat vyschnout, aby byla zajiÅ¡tÄna správná funkÄnost Äidel kyslÃku a helia. Héliové senzory jsou citlivé na vlhkost a kondenzaci. Protože vlhkost může kondenzovat pÅÃmo uvnitÅ senzoru, je nezbytné hlavu po potápÄnà Åá
2dnÄ vysuÅ¡it.\n\nTo je důležité pro zajiÅ¡tÄnà dlouhé životnosti a funkÄnosti senzorů.\n\nV oblastech nebo obdobÃch se zvýšenou vlhkostà důraznÄ doporuÄujeme použÃvat ventilátor pro vysouÅ¡enà hlavy DIVESOFT.","textLarge":false,"imageOnRight":true,"image":{"recommendedSizes":{"width":"420","height":"280"}},"imageMobile":{"recommendedSizes":{"width":"750","height":"500"}}},"id":"#494","type":"component","lock":false,"position":197},{"name":"Divider","data":{"color":"darkGray"},"id":"#488","type":"component","lock":false,"position":198},{"name":"SectionDivider","data":{"title":"3.5.2 CO2 scrubber maintenance"},"id":"#625","type":"component","lock":false,"position":199},{"name":"TextBlock","data":{"text":"### <span id=\"3-.-5-.-2-CO2-scrubber-maintenance\">**3.5.2 CO<sub>2</sub> údržba skruberu**</span>\n\nPokud je kapacita sorbentu dostateÄná (s rezervou pro dalÅ¡Ã plánovaný ponor a bez dezinfekce rebreatheru do dalÅ¡Ãho ponoru), je možné znovu vložit kartuÅ¡i do kanystru a ponechat ji v rebreatheru. OtevÅený scrubber kanystr můžete ponechat maximálnÄ 24 hodin, pokud je uložen na suchém mÃstÄ. Pro delÅ¡Ã skladovánà nasaÄte suchou hlavu a uzavÅete otvory dýchacà smyÄky. DoporuÄujeme použÃt âkryt drhnoucÃho zaÅÃzenà DIVESOFT s nálepkamiâ. DoporuÄujeme na nÄ napsat datum prvnÃho naplnÄnà a Äasy jednotlivých ponorů, pÅi kterých byl scrubber použit. Po výmÄnÄ sorbentu nálepku vymÄÅte. Použitý a zapeÄetÄný scrubber neskladujte déle než 30 dnà po jeho prvnÃm použitÃ.","textLarge":false,"imageOnRight":true,"image":{"recommendedSizes":{"width":"420","height":"280"}},"imageMobile":{"recommendedSizes":{"width":"750","height":"500"}}},"id":"#495","type":"component","lock":false,"position":200},{"name":"Divider","data":{"color":"darkGray"},"id":"#480","type":"component","lock":false,"position":201},{"name":"SectionDivider","data":{"title":"3.5.3 Cleaning and disinfection"},"id":"#626","type":"component","lock":false,"position":202},{"name":"TextBlock","data":{"text":"### <span id=\"3-.-5-.-3-Cleaning-and-disinfection\">**3.5.3 ÄiÅ¡tÄnà a dezinfekce**</span>\n\nPÅi použÃvánà je dýchacà smyÄka rebreatheru kolonizována mikroorganismy z dýchacÃho ústrojà potápÄÄe a z vnÄjÅ¡Ãho prostÅedÃ. ÃÄelem pravidelného ÄiÅ¡tÄnà a dezinfekce je zabránit pomnoženà tÄchto mikrobů v mÃÅe, která by pÅedstavovala nebezpeÄà pro uživatele, a zabránit pÅenosu infekce mezi různými uživateli.\n\nOd prvnÃho ponoru po dezinfekci do dalÅ¡Ã dezinfekce nesmà uplynout vÃce než týden, pokud je zaÅÃzenà CCR Liberty skladováno na chladném mÃstÄ. PÅi skladovánà rebreatheru pÅi teplotÄ vyÅ¡Å¡Ã než 25 °C se tento interval zkracuje na ÄtyÅi dny; týdennà interval lze dodržet pouze u kartuÅ¡e s ÄistiÄem. Nezáležà na tom, kolik ponorů bÄhem uvedeného obdobà podniknete.\n\nPÅed výmÄnou uživatelů pÅÃstroje CCR Liberty je vždy nutná dezinfekce. Nikdy nepůjÄujte ani nepůjÄujte rebreather, který nebyl dezinfikován! K pÅenosu infekce může dojÃt pÅi jediném vdechnutÃ. Nakažený uživatel nemusà mÃt nutnÄ Å¾Ã¡dné pÅÃznaky infekce.\n\nÄiÅ¡tÄnà zaÄnÄte opláchnutÃm sestaveného rebreatheru Äistou Äerstvou vodou. Rozeberte rebreather na jednotlivé Äásti.\n\n**Postup:**\n\n1. VyjmÄte zátÄžový systém.\n2. OdÅ¡roubujte a odpojte kyslÃkovou láhev a láhev s Åedidlem, do vstupů regulátoru vložte vodotÄsné zátky.\n3. VyjmÄte HUD z DSV.\n4. VyjmÄte dýchacà vaky s vlnitými hadicemi z hlavy.\n5. Z dýchacÃch vaků vyjmÄte ADV, ruÄnà ventily a pÅetlakový ventil.\n6. Odpojte dýchacà vaky od popruhů.\n7. SejmÄte hlavu s pÅipojenými sluchátky a HUD.\n8. VyjmÄte ÄistiÄ CO<sub>2</sub> z kazety a bezpeÄnÄ jej zlikvidujte.\n9. VyjmÄte nádobku s ÄistiÄem z opÄrné desky a odstraÅte lapaÄ vody.\n\nHlavu s ovládacÃmi jednotkami uložte na Äisté, chladné a suché mÃsto.\n\n10. PÅipravte antiseptický roztok do vhodné nádoby, zbavené mechanických a chemických neÄistot. K dezinfekci je vhodná napÅÃklad vana, vana na maltu nebo velká nádoba Tupperware.\n\nPro bÄžnou dezinfekci použijte 0,5% koncentrovaný antiseptický roztok Divesoft. PÅi práci s antiseptickým prostÅedkem postupujte podle návodu.\n\nOpláchnÄte Äistou Äerstvou vodou a do vany umÃstÄte hadici, sifon, sestavu vlnité hadice s otevÅeným DSV, dýchacà vaky a filtr CO<sub>2</sub>. Manipulacà se sestavou vlnité hadice a DSV vypusÅ¥te vzduch tak, aby antiseptický roztok vyplnil celý prostor (tato nezbytná dovednost se vyuÄuje v
2kurzu CCR Liberty). Dýchacà vaky zcela naplÅte antiseptickým roztokem.\n\nPokud zaznamenáte růst plÃsnÃ, je nutné provést důkladnou dezinfekci a vyÄiÅ¡tÄnà povrchu. VÄtÅ¡inu povrchů lze otÅÃt hadrem napuÅ¡tÄným antiseptikem. K ÄiÅ¡tÄnà vnitÅnÃch povrchů vlnitých hadic použijte kartÃ¡Ä na lahve nebo trubky.\n\nPonechte dÃly v antiseptickém roztoku po dobu jedné hodiny. Po dokonÄenà vyjmÄte dÃly a opláchnÄte je Äistou Äerstvou vodou, poté je nechte uschnout. DÃly nesuÅ¡te na pÅÃmém sluneÄnÃm svÄtle.\n\nPokud je vyžadována intenzivnÄjÅ¡Ã dezinfekce, použijte koncentrovanÄjÅ¡Ã roztok (maximálnÄ 2 %) nebo nechte dÃly v antiseptickém roztoku delÅ¡Ã dobu (maximálnÄ ÄtyÅi hodiny).\n\nMÃsto dezinfekce Divesoft lze použÃt jiný antiseptický prostÅedek na bázi kvartérnÃch amonných solÃ, který je kompatibilnà s materiály, z nichž je vyroben CCR Liberty. Výrobce zaÅÃzenà CCR Liberty nezaruÄuje kompatibilitu jiných antiseptických prostÅedků než dezinfekce Divesoft. V žádném pÅÃpadÄ nepoužÃvejte prostÅedky na bázi chlóru.\n\nZa normálnÃch okolnostà nenà tÅeba dezinfikovat hlavu, ADV, ruÄnà obtokové ventily a pÅetlakový ventil.\n\nPokud je nutná důkladnÄjÅ¡Ã dezinfekce, lze z hlavy vyjmout kyslÃkové senzory a zbývajÃcà Äásti omýt antiseptickým roztokem. ADV, ruÄnà obtokové ventily a pÅetlakový ventil lze dezinfikovat ponoÅenÃm do antiseptického roztoku.\n\nAntiseptický roztok je vysoce toxický pro vodnà organismy. Zlikvidujte jej způsobem Å¡etrným k životnÃmu prostÅedÃ.","textLarge":false,"imageOnRight":true,"image":{"recommendedSizes":{"width":"420","height":"280"}},"imageMobile":{"recommendedSizes":{"width":"750","height":"500"}}},"id":"#501","type":"component","lock":false,"position":203},{"name":"Divider","data":{"color":"darkGray"},"id":"#500","type":"component","lock":false,"position":204},{"name":"SectionDivider","data":{"title":"3.5.4 Battery care"},"id":"#627","type":"component","lock":false,"position":205},{"name":"TextBlock","data":{"text":"### <span id=\"3-.-5-.-4-Battery-care\">**3.5.4 PéÄe o baterie**</span>\n\nZabraÅte úplnému vybità bateriÃ. Pokud je to možné, nabÃjejte baterie po každém dni potápÄnÃ.","textLarge":false,"imageOnRight":true,"image":{"recommendedSizes":{"width":"420","height":"280"}},"imageMobile":{"recommendedSizes":{"width":"750","height":"500"}}},"id":"#502","type":"component","lock":false,"position":206},{"name":"Divider","data":{"color":"darkGray"},"id":"#499","type":"component","lock":false,"position":207},{"name":"SectionDivider","data":{"title":"3.5.5 Dive log download"},"id":"#628","type":"component","lock":false,"position":208},{"name":"TextBlock","data":{"text":"### <span id=\"3-.-5-.-5-Dive-log-download\">**3.5.5 Staženà záznamu ponoru**</span>","textLarge":false,"imageOnRight":true,"image":{"recommendedSizes":{"width":"420","height":"280"}},"imageMobile":{"recommendedSizes":{"width":"750","height":"500"}}},"id":"#549","type":"component","lock":false,"position":209},{"name":"TextBlock","data":{"text":"Po odpojenà handsetu a pÅipojenà vÃceúÄelového konektoru USB ke konektoru sluchátka na hlavÄ (bez pÅipojeného sluchátka) je pamÄÅ¥ záznamu ponoru pÅÃstroje CCR Liberty pÅÃstupná pÅes rozhranà USB v režimu velkokapacitnÃho úložiÅ¡tÄ. To znamená, že pro poÄÃtaÄ, ke kterému je pÅipojen kabel USB, se jevà jako bÄžný flash disk s omezenÃm pouze pro ÄtenÃ. Záznamy o jednotlivých ponorech se ukládajà jako samostatné soubory do složky divelog.","textLarge":false,"imageOnRight":true,"image":{"recommendedSizes":{"width":"420","height":"280"},"mimetype":"image/png","size":63200,"hash":"14c287d4f5be3e063f08b9ce65b0b95177301707","id":"cl4f9gg1xjay00776mrymfaxc","filename":"divesoft-ccr-liberty-manual-3-5-5-01.png","category":"divesoft/","type":"image"},"imageMobile":{"recommendedSizes":{"width":"750","height":"500"}}},"id":"#503","type":"component","lock":false,"position":210}
2,{"name":"TextBlock","data":{"text":"ÅÃdicà jednotka (CU) nabÃzà možnost vloženà karty micro DC. Tuto kartu instaluje výrobce a ukládá se na ni samostatný záznam o ponoru (který nenà závislý na pamÄti CU). Kapacita karty je dostateÄná pro ukládánà podrobných záznamů po celou dobu životnosti pÅÃstroje, aÄkoli potápÄÄ může záznamy z karty kdykoli vymazat. PÅÃstup ke kartÄ je obecnÄ stejný jako k pamÄÅ¥ovému zaÅÃzenà pÅes USB kabel, i když v pÅÃpadÄ poÅ¡kozenà CU lze kartu micro SD vyjmout z konektoru na desce ÅÃdicà jednotky a záznam z ponoru pÅeÄÃst pomocà bÄžné ÄteÄky.\n\nPotápÄÄ může nahrát záznamy o ponorech Liberty do cloudu na adrese [wetnotes.com](https://wetnotes.com).\n\n**Bezdrátové stahovánà záznamů o ponorech (Bluetooth)**\n\nModel 2021 Edition je vybaven pÅipojenÃm Bluetooth, které umožÅuje bezdrátové stahovánà denÃků. Pro pÅipojenà k osobnÃmu poÄÃtaÄi nebo mobilnÃmu telefonu je tÅeba stáhnout aplikaci [Divesoft.App](https://www.divesoft.com/en/app) pro mobilnà telefony nebo [Divesoft.Center](https://www.divesoft.com/en/center) pro Windows a Mac.\n\n\n**PárovánÃ**\n\nSpusÅ¥te aplikaci v mobilnÃm telefonu nebo osobnÃm poÄÃtaÄi. V systému Liberty zadejte Menu\\Aplikace\\Bluetooth. TÃm se aktivuje signál Bluetooth a zaÅÃzenà by se mÄlo objevit v aplikaci. PÅidejte zaÅÃzenà a postupujte podle pokynů aplikace.","textLarge":false,"imageOnRight":true,"image":{"recommendedSizes":{"width":"420","height":"280"}},"imageMobile":{"recommendedSizes":{"width":"750","height":"500"}}},"id":"#504","type":"component","lock":false,"position":211},{"name":"Divider","data":{"color":"darkGray"},"id":"#498","type":"component","lock":false,"position":212},{"name":"SectionDivider","data":{"title":"3.5.6 Long-term storage"},"id":"#629","type":"component","lock":false,"position":213},{"name":"TextBlock","data":{"text":"### <span id=\"3-.-5-.-6-Long---term-storage\">**3.5.6 Dlouhodobé skladovánÃ**</span>\n\nPÅed uskladnÄnÃm dýchacÃho pÅÃstroje na dobu delÅ¡Ã než jeden týden postupujte podle oddÃlu 3.5.3 ÄiÅ¡tÄnà a dezinfekce.\n\nPokud je CCR Liberty skladován v suchém a Äistém prostÅedÃ, nepÅipojujte sestavu vlnité hadice s DSV k hlavÄ nebo k dýchacÃm vakům a rebreather skladujte otevÅený. Prach se vyskytuje témÄÅ vÅ¡ude a je nevyhnutelný. Omezte hromadÄnà prachu napÅÃklad tÃm, že pÅÃstroj pÅikryjete vypraným prostÄradlem. Odpojenou sestavu vlnovcové hadice skladujte ve vhodné nádobÄ, která umožnà jejà úplné vysuÅ¡enÃ.\n\nSkladujete-li zaÅÃzenà CCR Liberty v prostÅedà s nižšÃm stupnÄm Äistoty, napÅÃklad v domácnosti s domácÃmi zvÃÅaty, skladujte jej smontované a uzavÅené (bez sorbentu).\n\nPÅed uloženÃm uzavÅeného rebreatheru musà být vÅ¡echny jeho Äásti důkladnÄ vysuÅ¡eny, vÄetnÄ vÅ¡ech záhybů na vlnitých hadicÃch a vnitÅnÃho povrchu vaků.\n\nBaterie nabÃjejte alespoÅ jednou za Å¡est mÄsÃců.\n\nPokud po uskladnÄnà pÅÃstroje po dobu delÅ¡Ã než jeden mÄsÃc zjistÃte, že uvnitÅ pÅÃstroje pÅetrvává vlhkost nebo je z vlnitých hadic cÃtit zatuchlina Äi plÃseÅ, je nutné pÅÃstroj znovu vydezinfikovat.\n\nPÅi skladovánà rebreatheru dbejte na to, aby žádné gumové Äásti (hadice, kabely) nebyly skÅÃpnuté nebo stlaÄené.\n\nUjistÄte se, že je rebreather bezpeÄnÄ upevnÄn a že se o nÄj neopÃrajà žádné jiné pÅedmÄty.","textLarge":false,"imageOnRight":true,"image":{"recommendedSizes":{"width":"420","height":"280"}},"imageMobile":{"recommendedSizes":{"width":"750","height":"500"}}},"id":"#505","type":"component","lock":false,"position":214},{"name":"Divider","data":{"color":"darkGray"},"id":"#497","type":"component","lock":false,"position":215},{"name":"SectionDivider","data":{"title":"3.6 Emergency procedures"},"id":"#630","type":"component","lock":false,"position":216},{"name":"TextBlock","data":{"text":"### <span id=\"3-.-6-Emergency-procedures\">**3.6 Nouzové postupy**</span>\n\nPÅedcházejte vzniku mimoÅádných situacà prostÅednictvÃm kvalitnÃho Å¡kolenÃ. NepÅekraÄujte limity své potápÄÄské kvalifikace. PeÄlivÄ dodržujte pÅedepsané postupy pÅed každým ponorem, bÄhem nÄj a po nÄm. V pÅÃpadÄ, že pÅed ponorem zjistÃte problém spojený s rebreatherem a nejste schopni jej vyÅeÅ¡it, nepotápÄjte se s rebreatherem bez ohledu na závažnost problému.","textLarge":false,"imageOnRight":true,"image":{"recommendedSizes":{"width":"420","height":"280"}},"imageMobile":{"recommendedSizes":{"width":"750","height":"500"}}},"id":"#506","type":"component","lock":false,"position":217},{"name":"Divider","data":{"color":"darkGray"},"id":"#511","type":"component","lock":false,"position":218},{"name":"SectionDivider","data":{"title":"3.6.1 Emergency ascent (bailout)"},"id":"#631","type":"component","lock":false,"position":219},{"name":"TextBlock","data":{"text":"### <span id=\"3-.-6-.-1-Emergency-ascent-(bailout)\">
2**3.6.1 Nouzový výstup (bailout)**</span>\n\nZ bezpeÄnostnÃch důvodů je nutné mÃt pÅi každém potápÄnà na rebreatheru záchranný pÅÃstroj. BÄžným typem záložnÃho pÅÃstroje je standardnà stage láhev.\n\nPokud bÄhem ponoru dojde k poruÅ¡e CCR Liberty, kterou nejste schopni vyÅeÅ¡it nebo pÅesnÄ identifikovat, nebo pokud máte podezÅenÃ, že s rebreatherem nenà nÄco v poÅádku, pÅepnÄte na záchranný pÅÃstroj:\n\n1. UveÄte záchranný dýchacà pÅÃstroj do pohotovostnà polohy,\n2. vydechnÄte do okruhu a zavÅete DSV, ale v plicÃch držte dostateÄné množstvà plynu pro odstranÄnà vody z náustku záchranného pÅÃstroje,\n3. ProveÄte standardnà postup spojený se zahájenÃm dýchánà ze záchranného pÅÃstroje, napÅ. u stupÅovitých tlakových lahvà zkontrolujte, zda dýcháte ze správné stupÅové tlakové lahve.\n\nPokud následnÄ poruchu dýchacÃho pÅÃstroje vyÅeÅ¡Ãte nebo pokud zjistÃte, že pÅÃÄina problému je mimo dýchacà pÅÃstroj, můžete pokraÄovat v dýchánà z dýchacÃho pÅÃstroje.\n\nPo pÅepnutà do záchranného režimu OC se automaticky nastavà bezpeÄnostnà úroveÅ pomocà faktorů záchranného gradientu (BoGF). V nabÃdce je možné pÅepÃnat mezi standardnÃmi a záchrannými sadami GF, aniž by byl ovlivnÄn režim, ve kterém CCR Liberty pracuje.\n\nZnalosti a dovednosti souvisejÃcà s použÃvánÃm stupÅové láhve jsou nezbytným požadavkem pro každého zájemce o potápÄnà na pÅÃstroji CCR Liberty. V kurzu potápÄnà s pÅÃstrojem CCR Liberty akreditovaném výrobcem se použÃvánà stupÅových lahvà pro záložnà úÄely důkladnÄ procviÄuje.","textLarge":false,"imageOnRight":true,"image":{"recommendedSizes":{"width":"420","height":"280"}},"imageMobile":{"recommendedSizes":{"width":"750","height":"500"}}},"id":"#512","type":"component","lock":false,"position":220},{"name":"Divider","data":{"color":"darkGray"},"id":"#496","type":"component","lock":false,"position":221},{"name":"SectionDivider","data":{"title":"3.6.2 Oxygen-source malfunction"},"id":"#632","type":"component","lock":false,"position":222},{"name":"TextBlock","data":{"text":"### <span id=\"3-.-6-.-2-Oxygen---source-malfunction\">**3.6.2 Porucha zdroje kyslÃku**</span>\n\n**NÃzký tlak v kyslÃkové lahvi**\n\nV tomto pÅÃpadÄ je nutné ponor ukonÄit.\n\nNejpozdÄji pÅi poklesu parciálnÃho tlaku kyslÃku v okruhu pod 0,3 bar je nutné pÅejÃt na záchranný dýchacà pÅÃstroj.\n\nPokud tato situace nastane v důsledku nedostateÄné důkladnosti pÅi pÅÃpravÄ na ponor nebo v důsledku neprovádÄnà pravidelné kontroly tlaku bÄhem ponoru, zvažte, zda pro vás potápÄnà s rebreatherem nepÅedstavuje pÅÃliÅ¡ velké riziko.\n\n**Solenoidy pÅestaly dodávat kyslÃk**.\n\nPokud parciálnà tlak klesne výraznÄ pod nastavenou hodnotu, ale v kyslÃkové lahvi je stále dostateÄný tlak, použijte k pÅidánà kyslÃku ruÄnà obtokový ventil.\n\nKyslÃk pÅidávejte postupnÄ krátkými stisky. Dýchejte pravidelnÄ. KyslÃk bude dodáván do výdechového vaku. Trvá nÄkolik vdechů, než se kyslÃk ve výdechovém vaku smÃsà s dýchacà smÄsà a dostane se ke snÃmaÄům na stranÄ vdechovánÃ.\n\nPokud situace pÅetrvává, kontrolujte dodávku kyslÃku ruÄnÄ. Ve stabilizovaném stavu (nÃzká úroveÅ námahy v pevné hloubce) je nutné pÅidávat kyslÃk pÅibližnÄ jednou až dvakrát za minutu.\n\nTato porucha nepÅedstavuje pro potápÄÄe bezprostÅednà hrozbu. NepokraÄujte vÅ¡ak v sestupu nebo pronikánÃ. Zahajte výstup nebo návrat.\n\n**Manuálnà pÅepouÅ¡tÄcà ventil O<sub>2</sub> volnÄ protéká**.\n\nOdpojte rychlouzávÄr. Odpojenà rychlospojky způsobà pÅeruÅ¡enà dodávky kyslÃku pÅes ruÄnà obtokový ventil.\n\nTato porucha nepÅedstavuje bezprostÅednà ohroženà potápÄÄe. NepokraÄujte vÅ¡ak v sestupu nebo průniku. Zahajte výstup nebo návrat.\n\n**RuÄnà pÅepouÅ¡tÄcà ventil nefunguje, kyslÃk se po stisknutà nepÅidává**.\n\nTato porucha nepÅedstavuje pro potápÄÄe bezprostÅednà nebezpeÄÃ. V sestupu nebo průniku vÅ¡ak nepokraÄujte. Zahajte výstup nebo návrat.\n\n**Dodávka kyslÃku nefunguje ani pomocà solenoidů, ani pomocà ruÄnÃho obtokového ventilu**.\n\nV tomto pÅÃpadÄ je nutné ponor ukonÄit.\n\nJe nutné pÅejÃt na záchranný dýchacà pÅÃstroj nejpozdÄji v okamžiku, kdy parciálnà tlak kyslÃku v okruhu klesne pod 0,3 bar.","textLarge":false,"imageOnRight":true,"image":{"recommendedSizes":{"width":"420","height":"280"}},"imageMobile":{"recommendedSizes":{"width":"750","height":"500"}}},"id":"#513","type":"component","lock":false,"position":223},{"name":"Divider","data":{"color":"darkGray"},"id":"#510","type":"component","lock":false,"position":224},{"name":"SectionDivider","data":{"title":"3.6.3 Diluent-source malfunction"},"id":"#633","type":"component","lock":false,"position":225},{"name":"TextBlock","data":{"text":"### <span id=\"3-.-6-.-3-Diluent---source-malfunction\">**3.6.3 Porucha zdroje diluentu**</span>\n\n**NÃzký tlak v lahvi s diluentem**\n\nV tomto pÅÃpadÄ je nutné ponor ukonÄit. BÄhem výstupu se diluent v okruhu rozpÃná a doplÅuje tak svůj objem v okruhu. Pokud je to možné, nezvyÅ¡ujte bÄhem návratu hloubku.\n\nDokud je objem diluentu v okruhu dostateÄný, je možné dýchat z rebreatheru. Pokud nenà dostateÄný, je nutné pÅejÃt na záchranný dýchacà pÅÃstroj.\n\nMÄjte na pamÄti, že v tomto pÅÃpadÄ nenà možné provést standardnà postup pÅi vysokém ppO<sub>2</sub> (propláchnutà okruhu, pÅidánà Åedidla) a že takovou situaci lze ÅeÅ¡it pouze okamžitým pÅepnutÃm na záchranný dýchacà pÅÃstroj, který byste mÄli mÃt v pohotovostnà poloze.\n\n**ADV volný průtok**\n\nUzavÅete ADV posunutÃm lÃmce. TÃm dojde k pÅeruÅ¡enà dodávky diluentu pÅes ADV.\n\nTato porucha nepÅedstavuje bezprostÅednà ohroženà uživatele. PotápÄnà může pokraÄovat ruÄnÃm pÅidávánÃm ÅedicÃho prostÅedku do okruhu.\n\n**RuÄnà pÅepouÅ¡tÄcà ventil s volným průtokem**\n\nOdp
2ojte rychlouzávÄr. Odpojenà rychloupÃnacÃho konektoru způsobà pÅeruÅ¡enà dodávky diluentu prostÅednictvÃm MAV.\n\nTato porucha nepÅedstavuje bezprostÅednà ohroženà uživatele. PotápÄnà může pokraÄovat automatickým dodávánÃm ÅedicÃho prostÅedku do okruhu pomocà ADV. RuÄnà dodávku ÅedicÃho prostÅedku lze provést stisknutÃm ADV.\n\n**RuÄnà dávka nefunguje, diluent se po stisknutà ventilu nedoplÅuje**.\n\nTato porucha nepÅedstavuje bezprostÅednà ohroženà uživatele. PotápÄnà může pokraÄovat automatickým dodávánÃm ÅedicÃho prostÅedku do okruhu pomocà ADV. RuÄnà dodávku ÅedicÃho prostÅedku lze provést stisknutÃm ADV.\n\n**Nefunguje ani ADV, ani ruÄnà obtokový ventil**.\n\nPokud manometr diluentu ukazuje dostateÄný tlak, doÅ¡lo pravdÄpodobnÄ k poruÅ¡e prvnÃho stupnÄ regulátoru diluentu a diluent již nenà možné do okruhu pÅidávat.\n\nV takovém pÅÃpadÄ je nutné ponor ukonÄit. BÄhem výstupu se Åedidlo v okruhu rozpÃná a doplÅuje tak svůj objem v okruhu. Pokud je to možné, nezvyÅ¡ujte bÄhem návratu hloubku.\n\nPokud je objem diluentu v okruhu dostateÄný, je možné dýchat z rebreatheru. Pokud nenà dostateÄný, je nutné pÅejÃt na záchranný dýchacà pÅÃstroj.\n\nMÄjte na pamÄti, že v tomto pÅÃpadÄ nenà možné provést standardnà postup pÅi vysokém ppO<sub>2</sub> (propláchnutà okruhu, doplnÄnà diluentu) a že takovou situaci lze ÅeÅ¡it pouze okamžitým pÅepnutÃm na záchranný dýchacà pÅÃstroj, který byste mÄli mÃt v pohotovostnà poloze.","textLarge":false,"imageOnRight":true,"image":{"recommendedSizes":{"width":"420","height":"280"}},"imageMobile":{"recommendedSizes":{"width":"750","height":"500"}}},"id":"#514","type":"component","lock":false,"position":226},{"name":"Divider","data":{"color":"darkGray"},"id":"#509","type":"component","lock":false,"position":227},{"name":"SectionDivider","data":{"title":"3.6.4 Scrubber malfunction"},"id":"#634","type":"component","lock":false,"position":228},{"name":"TextBlock","data":{"text":"### <span id=\"3-.-6-.-4-Scrubber-malfunction\">**3.6.4 Porucha skruberu**</span>\n\nPokud cÃtÃte potÅebu zrychleného dýchánà (což vyluÄuje úroveÅ vaÅ¡Ã námahy), je možné, že je v okruhu pÅÃtomna vyÅ¡Å¡Ã kontaminace oxidem uhliÄitým v důsledku poruchy skrubruberu. Mezi dalÅ¡Ã pÅÃznaky zásahu CO<sub>2</sub> patÅà nevolnost, bolest hlavy, zmatenost.\n\nNaopak dalÅ¡Ã možnou pÅÃÄinou podobných pÅÃznaků je psychosomatická hyperventilace a snÞený obsah oxidu uhliÄitého v krvi a dalÅ¡Ãch tÄlesných tkánÃch. K tomu obvykle docházà v důsledku zvýšené psychické zátÄže, napÅÃklad když je potápÄÄ konfrontován s pÅetÞenÃm úkoly.\n\nPokud jsou pÅÃznaky závažné, okamžitÄ pÅepnÄte na záchranný dýchacà pÅÃstroj, protože hrozà ztráta vÄdomÃ. Co nejdÅÃve proveÄte nÄkolik pomalých, hlubokých vdechů ze záložnÃho dýchacÃho pÅÃstroje. SamozÅejmÄ byste nikdy nemÄli dopustit, aby taková situace pÅeÅ¡la do stadia závažných pÅÃznaků.\n\nPokud pÅi dýchánà pociÅ¥ujete nepÅÃjemné pocity, ale pÅÃznaky nejsou natolik závažné, aby pÅedstavovaly riziko ztráty vÄdomÃ, otestujte koncentraci oxidu uhliÄitého v krvi. ZůstaÅte na mÃstÄ, aniž byste se pohybovali; v žádném pÅÃpadÄ výraznÄ nemÄÅte hloubku. Pokuste se zadržet dech na deset sekund.\n\nPokud nejste schopni zadržet dech nebo je to velmi obtÞné, je zÅejmé, že skruber nefunguje správnÄ (pÅedÄasné vyÄerpánà sorbentu, výskyt kanálků v sorbentu, kterými vzduch obcházà skruber) nebo doÅ¡lo k mechanické závadÄ, která způsobila, že vzduch skruberem neprocházà nebo procházà jen ÄásteÄnÄ (závada smÄrového ventilu na náustku, spojenà nádechové a výdechové strany mimo skruber). PÅepnÄte na záchranný režim a ukonÄete ponor.\n\nPokud zadrženà dechu nezpůsobuje problémy, skrubber pracuje správnÄ. BÄhem nÄkolika následujÃcÃch minut omezte vÅ¡echny ostatnà Äinnosti a soustÅeÄte se na pomalé, rovnomÄrné dýchánÃ.","textLarge":false,"imageOnRight":true,"image":{"recommendedSizes":{"width":"420","height":"280"}},"imageMobile":{"recommendedSizes":{"width":"750","height":"500"}}},"id":"#515","type":"component","lock":false,"position":229},{"name":"Divider","data":{"color":"darkGray"},"id":"#508","type":"component","lock":false,"position":230}
2,{"name":"SectionDivider","data":{"title":"3.6.5 Inadvertent release of the mouthpiece"},"id":"#635","type":"component","lock":false,"position":231},{"name":"TextBlock","data":{"text":"### <span id=\"3-.-6-.-5-Inadvertent-release-of-the-mouthpiece\">**3.6.5 Neúmyslné uvolnÄnà náustku**</span>\n\nKdyž náustek vypadne potápÄÄi z úst, má DSV tendenci plavat. Jeho spojenà s dýchacÃm vakem vÅ¡ak zabraÅuje tomu, aby náustek vyplaval mimo dosah potápÄÄe.\n\nPokud náustek vypadne, okamžitÄ jej vložte zpÄt do úst. Pokud je náustek vrácen dostateÄnÄ rychle, nedostane se do dýchacà smyÄky žádné významné množstvà vody.\n\nPokud by se tento problém rychle nevyÅeÅ¡il, doÅ¡lo by k zaplavenà smyÄky. V takovém pÅÃpadÄ postupujte podle následujÃcÃho oddÃlu 3.6.6 ZaplavenÃ.\n\nNa DSV může být umÃstÄn popruh (bungee lano), který držà náustek a zabraÅuje jeho náhodnému vypadnutÃ. Upravte délku bungee posunutÃm uzlů.","textLarge":false,"imageOnRight":true,"image":{"recommendedSizes":{"width":"420","height":"280"}},"imageMobile":{"recommendedSizes":{"width":"750","height":"500"}}},"id":"#516","type":"component","lock":false,"position":232},{"name":"Divider","data":{"color":"darkGray"},"id":"#521","type":"component","lock":false,"position":233},{"name":"SectionDivider","data":{"title":"3.6.6 Flooding"},"id":"#636","type":"component","lock":false,"position":234},{"name":"TextBlock","data":{"text":"### <span id=\"3-.-6-.-6-Flooding\">**3.6.6 ZaplavenÃ**\n\t\nPravdÄpodobnost významného zaplavenà dýchacÃho okruhu je velmi nÃzká. Po peÄlivém sestavenà pÅÃstroje a provedenà pÅedepsaných postupů pÅed ponorem lze zaplavenà vylouÄit, pokud nedojde k závažnému naruÅ¡enà integrity dýchacÃho okruhu v důsledku mechanického poÅ¡kozenÃ. V pÅÃpadÄ výrazného zaplavenà je nutné okamžitÄ pÅejÃt na záchranný dýchacà pÅÃstroj a použÃt kompenzátor (BCD), aby se zabránilo ztrátÄ vztlaku.\n\nNevdechujte, pokud smÄs z DSV rebreatheru obsahuje tekutinu. V extrémnÃm pÅÃpadÄ by mohla obsahovat tzv. žÃravý koktejl (tj. žÃravou smÄs s rozpuÅ¡tÄným louhem ze sorbentu).\n\nMenÅ¡Ã množstvà vody se může dostat do okruhu pÅes otevÅený DSV, když náustek vypadne potápÄÄi z úst. V takovém pÅÃpadÄ se voda dostane do výdechového vaku. I když to nepÅedstavuje bezprostÅednà nebezpeÄÃ, doporuÄuje se vodu z výdechového vaku co nejdÅÃve vypudit pÅetlakovým ventilem. ÃplnÄ otevÅete pÅetlakový ventil a vypusÅ¥te kompenzátor vztlaku. Aby nedoÅ¡lo k výrazné zmÄnÄ vztlaku. PÅidejte do okruhu Åedidlo pomocà ruÄnÃho pÅepouÅ¡tÄcÃho ventilu. ZaujmÄte takovou polohu, aby se pÅetlakový ventil dostal do nejnižšÃho bodu výdechového vaku. VypusÅ¥te vodu z vaku tlakem na vak rukou.","textLarge":false,"imageOnRight":true,"image":{"recommendedSizes":{"width":"420","height":"280"}},"imageMobile":{"recommendedSizes":{"width":"750","height":"500"}}},"id":"#522","type":"component","lock":false,"position":235},{"name":"Divider","data":{"color":"darkGray"},"id":"#520","type":"component","lock":false,"position":236},{"name":"SectionDivider","data":{"title":"3.6.7 Loss of buoyancy"},"id":"#637","type":"component","lock":false,"position":237},{"name":"TextBlock","data":{"text":"### <span id=\"3-.-6-.-7-Loss-of-buoyancy\">**3.6.7 Ztráta vztlaku**</span>\n\nZákladnÃm nástrojem pro kontrolu vztlaku je kompenzátor (tj. zaÅÃzenà pro kontrolu vztlaku nebo BCD). Pokud kompenzátor nenà funkÄnÃ, použijte jiné prostÅedky k dosaženà vztlaku.\n\nPokud nosnost kompenzátoru nestaÄà nebo pokud se nepodaÅà kompenzátor naplnit (aÅ¥ už pomocà motorového inflátoru nebo ústnÄ), použijte k dosaženà vztlaku suchý oblek. Uživatel CCR Liberty musà mÃt dostateÄné znalosti a dovednosti, aby mohl bezpeÄnÄ použÃvat suchý oblek jako záložnà zdroj vztlaku.\n\nPokud nenà možné dosáhnout dostateÄného vztlaku pomocà kompenzátoru a suchého obleku a pokud nenà jiná vhodná možnost, vyhoÄte zátÄž. Pokud nenà nutné zátÄž zcela odhodit, pokuste se dosáhnout vztlaku tak, že nejprve odstranÃte zátÄž na levé stranÄ a poté, je-li to nutné, na pravé stranÄ. Odhozenà zátÄže na levé stranÄ pomáhá dostat vypouÅ¡tÄcà ventil suchého obleku a nafukovacà ventil kompenzátoru do lepÅ¡Ã polohy pro vyfouknutÃ.\n\nOdhozenà balastu je dovednost, která kromÄ obratnosti a pohyblivosti vyžaduje výcvik pod dohledem instruktora v potápÄÄském kurzu CCR Liberty.","textLarge":false,"imageOnRight":true,"image":{"recommendedSizes":{"width":"420","height":"280"}},"imageMobile":{"recommendedSizes":{"width":"750","height":"500"}}},"id":"#523","type":"component","lock":false,"position":238},{"name":"Divider","data":{"color":"darkGray"},"id":"#519","type":"component","lock":false,"position":239},{"name":"SectionDivider","data":{"title":"3.6.8 Rescue on the surface"},"id":"#638","type":"component","lock":false,"position":240},{"name":"TextBlock","data":{"text":"### <span id=\"3-.-6-.-8-Rescue-on-the-surface\">**3.6.8 Záchrana na hladinÄ**</span>\n\nPÅi pomoci zranÄnému uživateli CCR Liberty na hladinÄ je možné zvýšit vztlak vyhozenÃm zátÄže.\n\nI když je život potápÄÄe vážnÄ ohrožen a bÄhem záchranné akce by bylo nutné odstranit veÅ¡keré vybavenÃ, mÄl by být vztlak zajiÅ¡tÄn uzavÅenÃm DSV, nafouknutÃm kompenzaÄnÃch kÅÃdel a vyhozenÃm balastu. Ãplné odstranÄ
2nà CCR Liberty a veÅ¡kerého dalÅ¡Ãho vybavenà pÅipevnÄného k postroji může být ÄasovÄ nároÄné. DostateÄný vztlak, který poskytuje CCR Liberty, může pomoci pÅi záchranném procesu.","textLarge":false,"imageOnRight":true,"image":{"recommendedSizes":{"width":"420","height":"280"}},"imageMobile":{"recommendedSizes":{"width":"750","height":"500"}}},"id":"#524","type":"component","lock":false,"position":241},{"name":"Divider","data":{"color":"darkGray"},"id":"#518","type":"component","lock":false,"position":242},{"name":"SectionDivider","data":{"title":"3.6.9 Malfunction of oxygen-concentration measuring"},"id":"#639","type":"component","lock":false,"position":243},{"name":"TextBlock","data":{"text":"### <span id=\"3-.-6-.-9-Malfunction-of-oxygen---concentration-measuring\">**3.6.9 Porucha mÄÅenà koncentrace kyslÃku**</span>\n\nPokud jsou chemické senzory kyslÃku nefunkÄnà (vylouÄené, vypnuté, chybové nebo ve stavu offline, viz oddÃl 2.4.8 Vadné senzory) a jako Åedidlo se použÃvá trimix a senzory helia jsou funkÄnÃ, pak lze CCR Liberty pÅepnout na nepÅÃmé stanovenà ppO<sub>2</sub> mÄÅenÃm obsahu helia. Viz oddÃl 1.9.3 MÄÅenà obsahu He.\n\nTento postup považujte za nouzový pouze v pÅÃpadÄ, že nenà možné postupovat podle oddÃlu 3.6.1 Nouzový výstup (bailout).","textLarge":false,"imageOnRight":true,"image":{"recommendedSizes":{"width":"420","height":"280"}},"imageMobile":{"recommendedSizes":{"width":"750","height":"500"}}},"id":"#525","type":"component","lock":false,"position":244},{"name":"Divider","data":{"color":"darkGray"},"id":"#517","type":"component","lock":false,"position":245},{"name":"SectionDivider","data":{"title":"3.7 Maintenance"},"id":"#640","type":"component","lock":false,"position":246},{"name":"TextBlock","data":{"text":"### <span id=\"3-.-7-Maintenance\">**3.7 Ãdržba**</span>\n\nÃdržba vÄetnÄ potÅebných technických informacà je popsána v pÅÃruÄce pro údržbu. V uživatelské pÅÃruÄce jsou popsány pouze základnà operace údržby, které by mÄl zvládnout každý uživatel CCR Liberty.\n\nPro údržbu dÃlů, které pÅicházejà do styku s kyslÃkem pod tlakem, použÃvejte pouze mazivo kompatibilnà s kyslÃkem.","textLarge":false,"imageOnRight":true,"image":{"recommendedSizes":{"width":"420","height":"280"}},"imageMobile":{"recommendedSizes":{"width":"750","height":"500"}}},"id":"#526","type":"component","lock":false,"position":247},{"name":"Divider","data":{"color":"darkGray"},"id":"#532","type":"component","lock":false,"position":248},{"name":"SectionDivider","data":{"title":"3.7.1 Tools and replacement parts"},"id":"#641","type":"component","lock":false,"position":249},{"name":"TextBlock","data":{"text":"### <span id=\"3-.-7-.-1-Tools-and-replacement-parts\">**3.7.1 Nástroje a náhradnà dÃly**</span>\n\nVaÅ¡e sada nástrojů pro ÅeÅ¡enà problémů v terénu by mÄla obsahovat:\n\n- Chirurgické rukavice\n- roli papÃrových ruÄnÃků\n- P
2E sáÄek pro uloženà kazety s ÄisticÃm prostÅedkem\n- hÅibové ventily DSV (2 ks)\n- náustek\n- Utahovacà pásky\n- mazivo kompatibilnà s kyslÃkem\n- Å¡estihranné klÃÄe 2,5 mm a 3 mm\n- kÅÞový Å¡roubovák Ä. 1\n- Nástroj na odstraÅovánà tÄsnicÃch kroužků (trsátko na tÄsnicà kroužky, trsátko, bambusové párátko).\n- Nastavitelný klÃÄ\n- Lepicà páska\n- Permanentnà vodÄodolný popisovaÄ pro psanà na lepicà pásku\n- Sada tÄsnicÃch kroužků","textLarge":false,"imageOnRight":true,"image":{"recommendedSizes":{"width":"420","height":"280"}},"imageMobile":{"recommendedSizes":{"width":"750","height":"500"}}},"id":"#533","type":"component","lock":false,"position":250},{"name":"Divider","data":{"color":"darkGray"},"id":"#531","type":"component","lock":false,"position":251},{"name":"SectionDivider","data":{"title":"3.7.2 Detection of leaks"},"id":"#642","type":"component","lock":false,"position":252},{"name":"TextBlock","data":{"text":"### <span id=\"3-.-7-.-2-Detection-of-leaks\">**3.7.2 Detekce netÄsnosti**\n\nPokud nenà zdroj netÄsnosti zÅejmý, doporuÄujeme na jednotku zatlaÄit, aby se netÄsnost naÅ¡la.\n\nNetÄsnosti lze obvykle zjistit ponoÅenÃm Äásti nebo celého rebreatheru do vody pÅi souÄasném vyvÃjenà tlaku v dýchacà smyÄce. NetÄsnosti je také možné najÃt nanesenÃm mýdlového roztoku na urÄité mÃsto.\n\nPo odstranÄnà problému je tÅeba zopakovat negativnà a pozitivnà tlakové zkouÅ¡ky.","textLarge":false,"imageOnRight":true,"image":{"recommendedSizes":{"width":"420","height":"280"}},"imageMobile":{"recommendedSizes":{"width":"750","height":"500"}}},"id":"#534","type":"component","lock":false,"position":253},{"name":"Divider","data":{"color":"darkGray"},"id":"#530","type":"component","lock":false,"position":254},{"name":"SectionDivider","data":{"title":"3.7.3 Regular service inspection"},"id":"#643","type":"component","lock":false,"position":255}
2,{"name":"TextBlock","data":{"text":"### <span id=\"3-.-7-.-3-Regular-service-inspection\">**3.7.3 Pravidelné servisnà prohlÃdky**</span>\n\nCCR Liberty vyžaduje každoroÄnà servisnà prohlÃdky (maximálnÄ 12 mÄsÃců) nebo po 150 hodinách použÃvánÃ, podle toho, co nastane dÅÃve.\n\nServisnà prohlÃdky musà provádÄt servisnà technik certifikovaný spoleÄnostà Liberty Systems nebo je musà provádÄt výrobce. VýmÄna souÄástà a proces kontroly jsou v dobÄ kontroly urÄeny pokyny výrobce.","textLarge":false,"imageOnRight":true,"image":{"recommendedSizes":{"width":"420","height":"280"}},"imageMobile":{"recommendedSizes":{"width":"750","height":"500"}}},"id":"#535","type":"component","lock":false,"position":256},{"name":"Divider","data":{"color":"darkGray"},"id":"#529","type":"component","lock":false,"position":257},{"name":"SectionDivider","data":{"title":"3.7.4 Long-term maintenance"},"id":"#644","type":"component","lock":false,"position":258},{"name":"TextBlock","data":{"text":"### <span id=\"3-.-7-.-4-Long---term-maintenance\">**3.7.4 Dlouhodobá údržba**</span>\n\n**Senzory kyslÃku**\n\nPÅi kalibraci kyslÃkových senzorů se kontroluje stupeÅ jejich opotÅebenÃ. Senzory mohou samozÅejmÄ náhle dosáhnout konce své životnosti i bÄhem ponoru, zejména v prostÅedà s vysokým parciálnÃm tlakem kyslÃku. Proto doporuÄujeme vymÄnit senzory nejpozdÄji do jednoho roku od jejich uvedenà do provozu nebo max. 18 mÄsÃců od data výroby.\n\nNicménÄ, i pÅes správné zacházenÃ, mohou senzory, vykazovat odchylky nebo omezenà i bÄhem jejich doporuÄené životnosti. Z tohoto důvodu doporuÄujeme pravidelnÄ použÃvat sadu DIVESOFT pro testovánà snÃmaÄů kyslÃku a testovat linearitu snÃmaÄů. Je to jediný pÅesný a bezpeÄný způsob, jak odhalit vadný nebo omezený senzor.\n\nVymÄnÄné snÃmaÄe nenà nutné vyÅazovat. I když stupeÅ opotÅebenà Äidla bránà spolehlivému mÄÅenà vyÅ¡Å¡Ãch parciálnÃch tlaků kyslÃku v rebreatheru, je Äasto užiteÄné pro mÄÅenà nižšÃch parciálnÃch tlaků kyslÃku pÅi pÅÃpravÄ smÄsÃ.\n\n**Hadice**\n\nPokud nÄkterá hadice vykazuje známky nadmÄrného opotÅebenà nebo pokud je pÅi kontrole bublin (viz kapitola 3.4.8 Kontrola ve vodÄ) zjiÅ¡tÄno jejà poÅ¡kozenÃ, vymÄÅte ji. Hadice by mÄly být vymÄnÄny bÄhem roÄnà kontroly z důvodu bÄžného opotÅebenÃ.\n\nŽivotnost hadic je maximálnÄ pÄt let od jejich prvnÃho použità a maximálnÄ sedm let od data výroby.\n\n**Popruhy**\n\nPopruhy postroje jsou vysoce odolné. Popruh, který byl poÅ¡kozen na okraji, by mÄl být vymÄnÄn pouze v pÅÃpadÄ, že byl pÅeÅÃznut na vÃce než tÅetinu své Å¡ÃÅky.\n\nPopruhy se obvykle vymÄÅujà z estetických důvodů. VýmÄnu si můžete objednat pÅi objednánà pravidelné servisnà prohlÃdky.","textLarge":false,"imageOnRight":true,"image":{"recommendedSizes":{"width":"420","height":"280"}},"imageMobile":{"recommendedSizes":{"width":"750","height":"500"}}},"id":"#536","type":"component","lock":false,"position":259},{"name":"Divider","data":{"color":"darkGray"},"id":"#678","type":"component","lock":false,"position":260},{"name":"SectionDivider","data":{"title":"1. Example section title","skipToC":false},"id":"#680","type":"component","lock":false,"position":261},{"name":"TextBlock","data":{"text":"### **3.7.6 Pokyny pro údržbu bloku kyslÃkových Äidel**\nSprávná údržba bloku kyslÃkových Äidel je klÃÄová pro prodlouženà životnosti kabeláže Äidel a zajiÅ¡tÄnà pÅesného mÄÅenà kyslÃku. ÅiÄte se tÄmito pokyny pro údržbu kyslÃkových Äidel vaÅ¡eho CCR Liberty:\nBÄžný postup suÅ¡enÃ\n\nPo každém ponoru nebo potápÄÄském dni důkladnÄ vysuÅ¡te kyslÃková Äidla.\n#### Za normálnÃch podmÃnek:\n\n1. OtevÅete hlavu rebreatheru.\n1. Položte hlavu vzhůru nohama v dobÅe vÄtraném prostoru.\n1. Nechte ji zcela vyschnout.\n\n\n\n#### ProstÅedà s vysokou vlhkostÃ\nV oblastech se zvýšenou vlhkostÃ:\n\n1. Použijte speciálnà vÄtrák od Divesoftu.\n1. PÅipojte vÄtrák pÅÃmo na nádechovou trubku bloku Äidel (nacházà se na spodnà stranÄ hlavy).\n1. Nechte vÄtrák v provozu, dokud nejsou Äidla zcela suchá.\n\n#### Extrémnà podmÃnky nebo zaplavenÃ\nPokud byl pÅÃstroj vystaven extrémnà vlhkosti nebo zaplavenÃ:\n\n1. VyjmÄte blok kyslÃkových Äidel z hlavy rebreatheru.\n1. OpatrnÄ otevÅete blok Äidel.\n1. SuÅ¡te komponenty v klimatizované mÃstnosti.\
2n1. PÅed opÄtovným sestavenÃm se ujistÄte, že jsou vÅ¡echny Äásti důkladnÄ vysuÅ¡ené.\n\n\n**Poznámka**: Správné vysuÅ¡enà kyslÃkových Äidel po použità je nezbytné pro udrženà pÅesnosti Äidel a prevenci koroze kabeláže.\n\nVždy se ÅiÄte kompletnÃm uživatelským manuálem CCR Liberty pro úplné postupy údržby a bezpeÄnostnà pokyny.","textLarge":false,"imageOnRight":true,"image":{"recommendedSizes":{"width":"420","height":"280"}},"imageMobile":{"recommendedSizes":{"width":"750","height":"500"}}},"id":"#677","type":"component","lock":false,"position":262},{"name":"Divider","data":{"color":"darkGray"},"id":"#528","type":"component","lock":false,"position":263},{"name":"SectionDivider","data":{"title":"3.7.6 Firmware update"},"id":"#645","type":"component","lock":false,"position":264},{"name":"TextBlock","data":{"text":"### <span id=\"3-.-7-.-6-Firmware-update\">**3.7.6 Aktualizace firmwaru**</span>","textLarge":false,"imageOnRight":true,"image":{"recommendedSizes":{"width":"420","height":"280"}},"imageMobile":{"recommendedSizes":{"width":"750","height":"500"}}},"id":"#548","type":"component","lock":false,"position":265},{"name":"TextBlock","data":{"text":"Elektronika CCR Liberty má dva různé typy firmwaru (FW): jeden pro ÅÃdicà jednotku, druhý pro sluchátko. Aktuálnà verzi je možné stáhnout ze stránky podpory na adrese [www.CCRLiberty.com](http://www.CCRLiberty.com). ProveÄte aktualizaci FW za úÄelem zachovánà certifikace CE podle popisu na stránce podpory. Aktualizace provádÄjte s hlavou vyjmutou z tÄla rebreatheru.","textLarge":false,"imageOnRight":true,"image":{"recommendedSizes":{"width":"420","height":"280"},"mimetype":"image/png","size":148109,"hash":"bd669b96297ca31aea8b7cdbdcb01e34742bd006","id":"cl4f96q1fjas807760uv8l6s8","filename":"divesoft-ccr-liberty-manual-3-7-5-01.png","category":"divesoft/","type":"image"},"imageMobile":{"recommendedSizes":{"width":"750","height":"500"}}},"id":"#537","type":"component","lock":false,"position":266},{"name":"TextBlock","data":{"text":"Pro aktualizaci nového firmwaru použijte DIVESOFT.CENTER Na následujÃcÃm odkazu najdete software ke staženÃ, uživatelskou pÅÃruÄku a dalÅ¡Ã důležité informace [https://www.divesoft.com/en/center](https://www.divesoft.com/en/center).\n\n**Minimálnà požadavky na operaÄnà systém pro funkci Bluetooth**\n\n**macOS**\nmacOS 11 (Big Sur)\nStarÅ¡Ã verze systému macOS pouze funkce USB\n\n**Windows**\nWindows 10 nebo novÄjÅ¡Ã\nDÅÃvÄjÅ¡Ã verze systému Windows Pouze funkce USB\n\n**Linux**\nJakékoli 64bitové sestavenÃ","textLarge":false,"imageOnRight":true,"image":{"recommendedSizes":{"width":"420","height":"280"}},"imageMobile":{"recommendedSizes":{"width":"750","height":"500"}}},"id":"#538","type":"component","lock":false,"position":267},{"name":"Divider","data":{"color":"darkGray"},"id":"#527","type":"component","lock":false,"position":268},{"name":"SectionDivider","data":{"title":"3.8 Transport"},"id":"#646","type":"component","lock":false,"position":269},{"name":"TextBlock","data":{"text":"### <span id=\"3-.-8-Transport\">**3.8 Transport**</span>","textLarge":false,"imageOnRight":true,"image":{"recommendedSizes":{"width":"420","height":"280"}},"imageMobile":{"recommendedSizes":{"width":"750","height":"500"}}},"id":"#648","type":"component","lock":false,"position":270},{"name":"SectionDivider","data":{"title":"3.8.1 By car"},"id":"#647","type":"component","lock":false,"position":271},{"name":"TextBlock","data":{"text":"### <span id=\"3-.-8-.-1-By-car\">**3.8.1 By car**</span>\n\nCCR Liberty pÅepravujte v kufÅÃku, ve kterém byl dodán. UjistÄte se, že je kufr bezpeÄnÄ upevnÄn a že se v nákladovém prostoru vozidla nepohybuje.\n\nPraÅ¡nost sorbentu se zvyÅ¡uje, je-li pÅepravován ve volném stavu v distribuÄnà nádobÄ. LepÅ¡Ã je pÅevážet sorbent v rozdÄlovacà kazetÄ.","textLarge":false,"imageOnRight":true,"image":{"recommendedSizes":{"width":"420","height":"280"}},"imageMobile":{"recommendedSizes":{"width":"750","height":"500"}}},"id":"#539","type":"component","lock":false,"position":272},{"name":"Divider","data":{"color":"darkGray"},"id":"#545","type":"component","lock":false,"position":273},{"name":"SectionDivider","data":{"title":"3.8.2 By boat"},"id":"#649","type":"component","lock":false,"position":274},{"name":"TextBlock","data":{"text":"### <span id=\"3-.-8-.-2-By-boat\">**3.8.2 LodÃ**</span>\n\nNa potápÄÄské lodi je obvykle možné pÅÃstroj pÅipevnit k lavici.\n\nK upevnÄnà rebreatheru použijte pÅibližnÄ 1,5-2 m dlouhé lano s bezpeÄnými uzly. PÅÃstroj pÅivažte k vhodné konstrukci.\n\nCCR Liberty pÅipravený k ponoru zajistÄte pÅehozenÃm lana pÅes tlakové lahve a zadnà desku, pÅiÄemž kanystr na skrubery musà být pÅitisknutý k zadnà Äásti laviÄky.\n\nPokud potÅebujete pÅÃstroj CCR Liberty pÅipravit k potápÄnà na palubÄ lodi, pÅipevnÄte jej k laviÄce pomocà otvorů v hornà Äásti zadnà desky. TÃm zÃskáte plný pÅÃstup k lahvÃm pro jejich plnÄnà a můžete snadno vyjmout hlavu a scrubber kanystr.","textLarge":false,"imageOnRight":true,"image":{"recommendedSizes":{"width":"420","height":"280"}},"imageMobile":{"recommendedSizes":{"width":"750","height":"500"}}},"id":"#546","type":"component","lock":false,"position":275}
2,{"name":"SectionDivider","data":{"title":"3.8.3 By plane"},"id":"#650","type":"component","lock":false,"position":276},{"name":"TextBlock","data":{"text":"### <span id=\"3-.-8-.-3-By-plane\">**3.8.3 Letadlem**</span>\n\n**Tlakové lahve**\n\nPÅedpisy leteckých spoleÄnostà obecnÄ vyžadujÃ, aby vÅ¡echny pÅepravované tlakové lahve byly prázdné s odmontovanými ventily. Ventily vložte do Äistých PE sáÄků (Ziploc) a hrdla lahvà pÅelepte lepicà páskou, abyste zabránili kontaminaci. Je možné, že bezpeÄnostnà pracovnÃci budou chtÃt nahlédnout dovnitÅ lahvÃ, nepoužÃvejte tÄsné zátky, které se obtÞnÄ odstraÅujÃ.\n\nPÅi odbavovánà zavazadel na letiÅ¡ti upozornÄte letiÅ¡tnà personál, že máte v zavazadle prázdné tlakové lahve. V závislosti na mÃstnÃch pÅedpisech je možné, že budete muset tlakové lahve odnést ke speciálnà odbavovacà pÅepážce.\n\nZvažte, zda by nebylo lepÅ¡Ã si tlakové lahve pronajmout v cÃlové destinaci. PotápÄÄská centra vybavená pro potápÄnà s uzavÅeným okruhem majà obvykle k dis
2pozici tlakové lahve, které lze použÃt s CCR Liberty. Pokud si chcete zajistit zapůjÄenà lahve, což doporuÄujeme, podÃvejte se na specifikace velikostÃ, které jsou k dispozici na adrese [divesoft.com](https://www.divesoft.com).\n\nPÅi cestovánà letadlem doporuÄujeme oddÄlit hlavu pÅÃstroje a pÅepravovat ji v pÅÃruÄnÃm zavazadle. VýraznÄ tak snÞÃte hmotnost odbaveného zavazadla a nejdražšà a nejcitlivÄjÅ¡Ã Äást pÅÃstroje budete mÃt pod neustálým dohledem. BuÄte pÅipraveni vysvÄtlit letiÅ¡tnÃmu personálu, že hlava je důležitou souÄástà modernÃho potápÄÄského vybavenà a že máte tento návod u sebe.\n\n**Sorbent**\n\nKanystr se sorbentem by mÄl být prázdný. Pokud pÅevážÃte i zásobu sorbentu, musà být v původnÃm obalu nebo ve vhodnÄ pevné a vzduchotÄsné nádobÄ. Seznamte se s pÅedpisy týkajÃcÃmi se letecké pÅepravy sorbentu. Zvažte možnost zakoupenà sorbentu v mÃstÄ urÄenÃ.\n\n**Hlava**\n\nPro úÄely letecké pÅepravy musà být baterie odpojeny vyjmutÃm nebo otoÄenÃm bateriových propojek. NepÅepravujte zaÅÃzenà CCR Liberty v pohotovostnÃm režimu.","textLarge":false,"imageOnRight":true,"image":{"recommendedSizes":{"width":"420","height":"280"}},"imageMobile":{"recommendedSizes":{"width":"750","height":"500"}}},"id":"#547","type":"component","lock":false,"position":277},{"name":"Divider","data":{"color":"darkGray"},"id":"#544","type":"component","lock":false,"position":278},{"name":"TextBlock","data":{"text":"### 3.9 ZnaÄenÃ","textLarge":false,"imageOnRight":true,"image":{"recommendedSizes":{"width":"420","height":"280"}},"imageMobile":{"recommendedSizes":{"width":"750","height":"500"}}},"id":"#673","type":"component","lock":false,"position":279},{"name":"Image","data":{"firstImage":{"mimetype":"image/jpeg","size":174629,"hash":"35aae634269ecc42d0cfa9165b640ba69cad7176","id":"clw6g5a1cxpe50776k39auz28","filename":"ce-marking-2024.jpg","category":"divesoft/","type":"image"},"secondImage":{},"image":{"type":"image"}},"id":"#676","type":"component","lock":false,"position":280},{"name":"TextBlock","data":{"text":"### 3.10 NOTIFIKOVANà OSOBY\n**NaÅÃzenà EU 2016/425 o **PPE do** \nNotifikovaná osoba Ä. 0598 SGS FIMKO P.O.Box 30 (Särkiniementie 3), 00211 Helsinki, Finsko Od 9. prosince 2020 \n**oznaÄenà UKCA ** \nAutorizovaný orgán Ä. 0120, SGS United Kingdom Ltd. Unit 202b, Worle Parkway, Weston-super-Mare, BS22 6WA, Spojené královstvÃ. \nProhlášenà o shodÄ je k dispozici na adrese:\nhttps://divesoft.com/en/products/ccr-liberty/documents\n","textLarge":false,"imageOnRight":true,"image":{"recommendedSizes":{"width":"420","height":"280"}},"imageMobile":{"recommendedSizes":{"width":"750","height":"500"}}},"id":"#674","type":"component","lock":false,"position":281},{"name":"TextBlock","data":{"text":"### 3.11 VÃROBCE\nVýrobek vyrobený spoleÄnostà \n**Divesoft s.r.o. ** \nHálkova 2495 \n413 01 Roudnice nad Labem \nCzech Republic \n","textLarge":false,"imageOnRight":true,"image":{"recommendedSizes":{"width":"420","height":"280"}},"imageMobile":{"recommendedSizes":{"width":"750","height":"500"}}},"id":"#675","type":"component","lock":false,"position":282},{"name":"SectionDivider","data":{"title":"CCR Liberty User Manual"},"id":"#651","type":"component","lock":false,"position":283},{"name":"TextBlock","data":{"text":"### **CCR Liberty Uživatelská pÅÃruÄka**\n\n- **Autor** \nAdam Procháska, Jakub Å imánek, AleÅ¡ Procháska.\n\n- **Vydavatel** \nDivesoft s.r.o.\ndivesoft.com\n\n- **VydánÃ** \nRevize 2.17.3/100\nDatum revize 22.03.2025\n\n**Použità této pÅÃruÄky schválil** \nLucie Å mejkalová, generálnà Åeditelka\n\n","textLarge":false,"imageOnRight":true,"image":{"recommendedSizes":{"width":"420","height":"280"}},"imageMobile":{"recommendedSizes":{"width":"750","height":"500"}}},"id":"#553","type":"component","lock":false,"position":284},{"name":"Spacer","data":{"spacingLarge":30,"spacingSmall":20,"backgroundColor":"#ffffff"},"id":"#570","type":"component","lock":false,"position":285},{"name":"Divider","data":{"color":"darkGray"},"id":"#664","type":"component","lock":false,"position":286}
2,{"name":"Spacer","data":{"spacingLarge":30,"spacingSmall":20,"backgroundColor":"#ffffff"},"id":"#665","type":"component","lock":false,"position":287},{"name":"Image","data":{"firstImage":{"mimetype":"image/jpeg","size":1208946,"hash":"0d8eac71f8f6b62c2f4348d8f341b8d9ea3d0572","id":"clvz7vt9uvmit0776uus96nng","filename":"d2c346b4f22242e7aca37d8c11e07e2c2mxvjwqvzsowcbd1-0.jpg","category":"divesoft/","type":"image"},"secondImage":{}},"id":"#669","type":"component","lock":false,"position":288},{"name":"Image","data":{"firstImage":{"mimetype":"image/jpeg","size":1034021,"hash":"9af8d179e10b41638faa45d0f908b412e7c44663","id":"clvz7w6zyvmj80776gplmr6ek","filename":"d2c346b4f22242e7aca37d8c11e07e2c2mxvjwqvzsowcbd1-1.jpg","category":"divesoft/","type":"image"},"secondImage":{}},"id":"#670","type":"component","lock":false,"position":289},{"name":"Spacer","data":{"spacingLarge":30,"spacingSmall":20,"backgroundColor":"#ffffff"},"id":"#672","type":"component","lock":false,"position":290},{"name":"Divider","data":{"color":"darkGray"},"id":"#671","type":"component","lock":false,"position":291},{"name":"Spacer","data":{"spacingLarge":30,"spacingSmall":20,"backgroundColor":"#ffffff"},"id":"#663","type":"component","lock":false,"position":292},{"name":"Image","data":{"firstImage":{"mimetype":"image/jpeg","size":1249482,"hash":"d984dd9af94b443ea1574cc77f0e4342c3c959b6","id":"clvz7nvfcvmds0776bi4fk7nv","filename":"bc725b308155464de13abfe0e063e7cbpkwoueq3xhbzwtmb-0.jpg","category":"divesoft/","type":"image"},"secondImage":{},"image":{"type":"image"}},"id":"#569","type":"component","lock":false,"position":293},{"name":"Image","data":{"firstImage":{"mimetype":"image/jpeg","size":1079201,"hash":"3ab8e7433a980c629e324b1406585cbf48e1c59e","id":"clvz7oa2avmdy0776zhkdswjr","filename":"bc725b308155464de13abfe0e063e7cbpkwoueq3xhbzwtmb-1.jpg","category":"divesoft/","type":"image"},"secondImage":{},"image":{"type":"image"}},"id":"#568","type":"component","lock":false,"position":294},{"name":"Spacer","data":{"spacingLarge":30,"spacingSmall":20,"backgroundColor":"#ffffff"},"id":"#658","type":"component","lock":false,"position":295},{"name":"Divider","data":{"color":"darkGray"},"id":"#659","type":"component","lock":false,"position":296},{"name":"Spacer","data":{"spacingLarge":30,"spacingSmall":20,"backgroundColor":"#ffffff"},"id":"#661","type":"component","lock":false,"position":297},{"name":"Image","data":{"firstImage":{"mimetype":"image/png","size":3766776,"hash":"618ded0a1bef546ceb27ae8bcb11bcc798b296f5","id":"cl6j5ije20npp07762e27f01k","filename":"divesoft-ccr-liberty-manual-4-0-0-01.png","category":"divesoft/","type":"image"},"secondImage":{},"image":{"type":"image"}},"id":"#567","type":"component","lock":false,"position":298},{"name":"Divider","data":{"color":"darkGray"},"id":"#571","type":"component","lock":false,"position":299},{"name":"Spacer","data":{"spacingLarge":30,"spacingSmall":20,"backgroundColor":"#ffffff"},"id":"#572","type":"component","lock":false,"position":300},{"name":"Spacer","data":{"spacingLarge":30,"spacingSmall":20,"backgroundColor":"#ffffff"},"id":"#654","type":"component","lock":false,"position":301},{"name":"Image","data":{"firstImage":{"mimetype":"image/png","size":186352,"hash":"5e5580af1a1002a73f82d9f1e40c7b72b004f2bb","id":"clajg0y7f1ggc0776ygy77wt9","filename":"certifikat-gb18-962366-2.png","category":"divesoft/","type":"image"},"secondImage":{},"file":{"mimetype":"image/png","size":303208,"hash":"f81d5a99d97cfd8a1c70427c50e1a1e6af0efcd2","id":"clajfkopy1g230776i748yayx","filename":"certifikat-gb18-962366.png","category":"divesoft/","type":"file"},"image":{"type":"image"}},"id":"#652","type":"component","lock":false,"position":302},{"name":"Image","data":{"firstImage":{"mimetype":"image/jpeg","size":707161,"hash":"817b94362dd3819c7abb71120efb08a5133808af","id":"clvz835kzvmly0776650axxii","filename":"declaration-of-conformity-ce-2024-signed-ls.jpg","category":"divesoft/","type":"image"},"secondImage":{},"image":{"type":"image"}},"id":"#657","type":"component","lock":false,"position":303},{"name":"Image","data":{"firstImage":{"mimetype":"image/jpeg","size":689534,"hash":"ef0019ae899c787907d366804f2b9c3802c6f28d","id":"clvz83f4mvmm40776yb4hq0x8","filename":"declaration-of-conformity-ukca-2024-signed-ls.jpg","category":"divesoft/","type":"image"},"secondImage":{},"image":{"type":"image"}},"id":"#656","type":"component","lock":false,"position":304},{"name":"Divider","data":{"color":"darkGray"},"id":"#507","type":"component","lock":false,"position":306},{"name":"ListOfLinks","data":{"links":[{"title":"< Previous page / Section: 2. Control-unit operation","url":{"url":"/en/manuals/ccr-liberty-manual/ccr-liberty-manual-02","pageId":"cl43w7gb7l8e20858xrzqgqz9"}
2,"id":"1"}],"activeTab":"2"},"id":"#464","type":"component","lock":false,"position":310},{"name":"Footer","data":{"copyrights":"Copyright © 2019 Divesoft LLC All rights reserved.","facebookUrl":{"urlNewWindow":true,"url":"https://www.facebook.com/divesoft/"},"youtubeUrl":{"url":"https://www.youtube.com/channel/UCHI2-kHmfoUlAdhQXPKl8lA/featured","urlNewWindow":true},"instagramUrl":{"url":"https://www.instagram.com/divesoft/","urlNewWindow":true},"contacts":"**Divesoft s.r.o.** \nHálkova 2495 \n413 01 Roudnice nad Labem \nCzech Republic \nTel.: +420 416 857 057 \nE-mail: [email protected]"},"id":"#1","type":"component","lock":false,"position":311}],"id":"root","idBuffer":"#681","lastCommit":"030d3015-d700-4281-9675-8344fa51100c"}},"annotations":[],"language":{"type":"id","generated":false,"id":"Language:cjv3kwvoj000u083611381c6o","typename":"Language"},"__typename":"PageTranslation"},"Page:cm0xhhruc1rsa0817exbpr1rq":{"id":"cm0xhhruc1rsa0817exbpr1rq","type":{"type":"id","generated":false,"id":"PageType:cjv3l213x004f08366hjufttp","typename":"PageType"},"tags":[{"type":"id","generated":false,"id":"Tag:cjv3szrcv01bz0836yo8myb0r","typename":"Tag"},{"type":"id","generated":false,"id":"Tag:cm5ww05zc1b5d0803zglvz927","typename":"Tag"}],"translations({\"where\":{\"language\":{\"id\":\"cjv3kwvoj000u083611381c6o\"}}})":[{"type":"id","generated":false,"id":"PageTranslation:cm0xhhruv1rsh0817xo09iis7","typename":"PageTranslation"}],"__typename":"Page"},"PageTranslation:cm0xhhruv1rsh0817xo09iis7":{"id":"cm0xhhruv1rsh0817xo09iis7","name":"In Bikini Atoll with CCR Liberty family","createdAt":"2024-09-11T06:32:56.646Z","content":{"type":"json","json":{"content":[{"name":"Header","data":{"products":[{"title":"Accessories","description":"Backplates, Consumables. Tanks.","img":{"recommendedSizes":{"width":"235","height":"235"}},"url":""},{"title":"Accessories sets","description":"Protection, maintenance, cleaning.","img":{"recommendedSizes":{"width":"235","height":"235"}},"url":""},{"title":"Spare parts","description":"Spare parts and components.","img":{"recommendedSizes":{"width":"235","height":"235"}},"url":""},{"title":"Spare parts kits","description":"Completly Liberty spare parts kits.","img":{"recommendedSizes":{"width":"235","height":"235"}},"url":""}]},"id":"#0","type":"component","lock":false,"position":0},{"name":"BlogArticle","data":{"title":"In Bikini Atoll with CCR Liberty family","perex":"In August, 2024, I had the amazing opportunity to go on a diving trip to Bikini Atoll with the Liberty CCR family. The trip was organized by the Liberty Divers Club and run by Dirty Dozen Expeditions and was specifically for divers using the Liberty CCR. I signed up for the trip even though I didn't have much experience in wreck diving. However, the idea of exploring the wrecks, particularly the B17 Bomber around the world, had always intrigued me in a mysterious way. I made up my mind to dive the best wrecks in the world.","content":"\n\n**How I got started**\n\nI began my diving journey in 2017 after accepting an invitation from a colleague and quickly became passionate about it. I dived locally in Hong Kong every weekend and traveled overseas for diving almost every month. I was always looking for the best training and gear, and I was especially drawn to sidemount diving because it allowed for extended range and high individualization. As I progressed, I struggled with the weight and fit of multiple tanks. This led me to discover the Liberty sidemount CCR. I was drawn to it because of the user-friendly interface and DiveSoftâs education content. It helped ease my transition into the CCR world.\n\nI fell in love with my Liberty sidemount, and have been ever since. It is reliable and has never failed me during critical training dives or remote trips. Its redundancy helped me to complete a deco obligation without urgent bailout, giving me ample time underwater to solve problems.\n\nAfter three years of diving the CCR Liberty, I had accumulated about 230 dives, in a total of 280 hours. I felt ready to put it to good use.\n\n\n\nAs a woman in the tech diving community, I initially felt self-conscious and faced many unsolicited pieces of advice and comments. However, with time, I gained confidence and began to appreciate the privileges and support I had in pursuing my passion for diving.\n\n\n\n**Getting ready for Bikini*
2*\n\nPreparing for the Bikini trip for me was a meticulous process, including completing a 60m trimix CCR course, advanced wreck diving training, and a 14-day diving trip to Chuuk as a warm-up. I spent time in Chuuk configuring my equipment to ensure optimal trim and buoyancy for navigating the wrecks in Bikini.\n\nThere was some banging around at the tight corner of the staircase in Chuuk, but the Liberty handled the roughness despite a few scratches and oil stains on the unit.\n\nPacking for a remote trip with the full setup gear was never easy. I managed to utilize the two free 23kg bags of United Airlines, with each suitcase carrying the Liberty and SeaCraft GO DPV. All regs and batteries went into the carry-on and backpacks.\n\n\n\nYet I underestimated the logistics to Bikini, especially knowing I needed a visa for both Guam and the Marshall Islands as a Hong Kong passport holder. We needed to count stops with the \"Island Hopper\" and hoped our luggage arrived at the same spot.\n\nBut it was worth it when I landed in Kwajalein, the military base which led to Ebeye, a residential area. I learnt about the day-to-day life of a local Marshallese and enjoyed a beautiful stroll on the atoll.\n\n\n\n**Is Bikini worth it?**\n\nMany divers have asked me if diving in Bikini Atoll was worth it, considering the cost and logistical challenges. While it is indeed more expensive and less accessible than other diving destinations like Chuuk, the experience was absolutely worthwhile for me.\n\n\n\nBikini Atoll is like Chuuk 2.0, with amazing wildlife. It is shielded from currents and wakes, as Chuuk is, but it is better because it is also a sanctuary for juvenile sharks and rays, as well as many \"economically important species\" that have been hunted to extinction in many places. \nThe weather was amazing, with bright sunlight during the day and the clearest sky to see the moon and stars at night. We went on the Bikini Atoll for an archeological visit - it was surreal as the time froze the moment the lone watchman had to abandon the location.\n\nDespite the smaller number of wrecks, the iconic sites in Bikini, such as the USS Saratoga, were incredibly well-preserved and held a vivid history that made the trip unforgettable. The dentist's, the sick bay and the dive locker live up to their fame.\n\nBehind every iconic wide-angle shot is a photographer squeezed into a tight corner, striving to capture the whole room along with a seemingly effortless diver.\n\n\n\nAnother of my favorite wrecks is the IJN Nagato, which provides the most iconic studio shot. The illuminated double 16-inch guns at the bottom, the four propellers and two rudders on the top, make for an unforgettable Bikini Atoll postc
2ard shot.\n\nDiving alongside a diverse group of passionate wreck divers in a paradise-like location with rich history is truly exceptional.\n\n\n\n**So what's next for me?**\n\nI've checked the boxes of Chuuk and Bikini within a year. What's left? There are so many wrecks out there waiting for me - the Red Sea, Croatia, Malta, the Great Lakes, even the HMHS Britannic, and the list goes on.\n\nThis trip has energized and motivated me. It shows the possibilities of life and how rewarding it can be when we aim for something great, take calculated risks, and prepare with focus and intention.\n\n\n\nI also want to share my passion and knowledge with others. After years of fun diving, I want to become an instructor and in the future, a tech instructor, so I can inspire more divers to pursue their passion and dreams.\n\nI'm already looking forward to the next Liberty Divers Club trip and another epic journey as a team. Will you join me?\n\n\n\n**About the Author: **\n\nDan Sun is a technical diver, sailor and titanium hardware seller based in Hong Kong. She writes about her experience pursuing ocean sports on Instagram and LinkedIn.\n\n\n \nPhotos:\nJakub Slama, Aron Arngrimsson","showTags":false,"showDate":true,"image":{"mimetype":"image/jpeg","size":1006139,"hash":"985463585203c9510ac4ac3a5aad64dce6222e42","id":"cm0wgzmz6f7fc0776yzx3gdl6","filename":"dan-sun-in-bikini-atoll-with-ccr-liberty-family-01.jpg","category":"divesoft/","type":"image"}},"id":"#2","type":"component","lock":false,"position":1},{"name":"ProductShowcase","data":{"backgroundColor":"#ffffff","isTextDark":true,"isImageRight":false,"image":{"recommendedSizes":{"width":"485","height":"485"},"mimetype":"image/jpeg","size":325967,"hash":"8881d35b6f82afc091eee1d1afcbce495207ce2e","id":"cm16dulp7006b08745kgahkc6","filename":"dd-l3.jpg","category":"divesoft/","type":"image"},"imageMobile":{"recommendedSizes":{"width":"510","height":"510"}},"isTitleH1":false,"title":"","subtitle":"","description":"Liberty Divers Club. Join a travel club of passionate rebreather divers who share a desire\nfor an exciting underwater experience undertaken on the CCR Liberty platform.\n\nDirty Dozen Expeditions specializes in creating expertly curated technical diving itineraries that explore some of the most remote places on the planet. ","hideDescriptionOnMobile":false,"areButtons":true,"firstTitle":"libertydivers.com","firstUrl":{"url":"https://libertydivers.com","urlNewWindow":true},"secondTitle":"dirtydozenexpeditions.com","secondUrl":{"url":"https://dirtydozenexpeditions.com","urlNewWindow":true}},"id":"#25","type":"component","lock":false,"position":3},{"name":"ProductShowcase","data":{"componentTemplateId":"cm9h4wr6ugjv10803yqs3tp71"},"id":"#21","type":"component","lock":false,"position":6},{"name":"Footer","data":{"copyrights":"Copyright © 2019 Divesoft LLC All rights reserved.","facebookUrl":{"urlNewWindow":true,"url":"https://www.facebook.com/divesoft/"},"youtubeUrl":{"url":"https://www.youtube.com/@divesoft_tv","urlNewWindow":true},"instagramUrl":{"url":"https://www.instagram.com/divesoft/","urlNewWindow":true},"contacts":"**Divesoft s.r.o.** \nHálkova 2495 \n413 01 Roudnice nad Labem \nCzech Republic \nTel.: +420 416 857 057 \nE-mail: [email protected]","twitterUrl":{"url":"","urlNewWindow":true,"pageId":"cjv3l26tp004p0836i54n4u7a"}},"id":"#1","type":"component","lock":false,"position":7}],"id":"root","idBuffer":"#26","lastCommit":"d0c5676a-96f7-432f-9468-89f566a5e2ac"}},"annotations":[],"language":{"type":"id","generated":false,"id":"Language:cjv3kwvoj000u083611381c6o","typename":"Language"},"__typename":"PageTranslation"},"Page:cm10uxl432jv50817ssiujost":{"id":"cm10uxl432jv50817ssiujost","type":{"type":"id","generated":false,"id":"PageType:cjv3l213x004f08366hjufttp","typename":"PageType"},"tags":[],"translations({\"where\":{\"language\":{\"id\":\"cjv3kwvoj000u083611381c6o\"}}})":[{"type":"id","generated":false,"id":"PageTranslation:cm10uxl4h2jvc0817rhgd1v3i","typename":"PageTranslation"}],"__typename":"Page"},"PageTranslation:cm10uxl4h2jvc0817rhgd1v3i":{"id":"cm10uxl4h2jvc0817rhgd1v3i","name":"Regulatory information","createdAt":"2024-09-13T15:12:27.953Z","content":{"type":"json","json":{"content":[{"name":"Header","data":{"showShadow":true},"id":"#15","type":"component","lock":false,"position":0},{"name":"Spacer","data":{"spacingLarge":30,"spacingSmall":20,"backgroundColor":"#ffffff"},"id":"#17","type":"component","lock":false,"position":1},{"name":"SectionDivider","data":{"title":"Regulatory Information","skipToC":true},"id":"#16","type":"component","lock":false,"position":2},{"name":"TextBlock","data":{"text":"# Regulatory Information","textLarge":false,"imageOnRight":true,"image":{"recommendedSizes":{"width":"420","height":"280"}},"imageMobile":{"recommendedSizes":{"width":"750","height":"500"}}},"id":"#2","type":"component","lock":false,"position":3},{"name":"Spacer","data":{"spacingLarge":30,"spacingSmall":20,"backgroundColor":"#ffffff"},"id":"#4","type":"component","lock":false,"position":4},{"name":"SectionDivider","data":{"title":"1. USA-Federal Communications Commission (FCC)","skipToC":false},"id":"#18","type":"component","lock":false,"position":5},{"name":"TextBlock","data":{"text":"### 1) USA-Federal Communications Commission (FCC) \nThis equipment has been tested and found to comply with the limits for a Class B digital device, pursuant to part 15 of the FCC Rules. These limits are designed to provide reasonable protection against harmful interference in a residential installation. This equipment generates, uses and can radiate radio frequency energy and, if not installed and used in accordance with the instructions, may cause harmful interference to radio communications. However, there is no guarantee that interference will not occur in a particular installation. If this equipment does cause harmful interference to radio or television reception, which can be determined by turning the equipment off and on, the user is encouraged to try to correct the interference by one or more of the following measures:\n* Reorient or relocate the receiving antenna.\n* Increase the separation between the equipment and receiver.\n* Connect the equipment into an outlet on a circuit different from that to which the receiver is connected.\n* Consult the dealer or an experienced radio/TV technician for help. \n\nAny changes or modifications not expressly approved by the party responsible for compliance could void the userâs authority to operate the equipment.\n\n","textLarge":false,"imageOnRight":true,"image":{"recommendedSizes":{"width":"420","height":"280"}},"imageMobile":{"recommendedSizes":{"width":"750","height":"500"}}},"id":"#3","type":"component","lock":false,"position":6},{"name":"TextBlock","data":{"text":"**Caution: Exposure to Radio Frequency Radiation.** \nThis device must not be co-located or operating in conjunction with any other antenna or transmitter.\n\n**Liberty CCR** Contains FCC ID: 2AA9B05 \n**DNA (Divesoft Nitrox Analyzer)** Contains FCC ID: 2AA9B05 \n**ECHO** Contains FCC ID: 2AA9B05 \n**Freedom+** Contains FCC ID: XPYBMD380\n","textLarge":false,"imageOnRight":true,"image":{"recommendedSizes":{"width":"420","height":"280"}},"imageMobile":{"recommendedSizes":{"width":"750","height":"500"}}},"id":"#5","type":"component","lock":false,"position":7},{"name":"Spacer","data":{"spacingLarge":30,"spacingSmall":20,"backgroundColor":"#ffffff"},"id":"#8","type":"component","lock":false,"position":8},{"name":"SectionDivider","data":{"title":"2. Canada (ISED)","skipToC":false},"id":"#19","type":"component","lock":false,"position":9},{"name":"TextBlock","data":{"text":"### 2) Canada (ISED) \nThis device complies with Industry Canada license exempt RSS standard(s). \nOperation is subject to the following two conditions: \n1.\tThis device may not cause interference, and \n2.\tThis device must accept any interference, including interference that may cause âun
2desired operation of the device.â\n\nLe présent appareil est conforme aux CNR d'Industrie Canada applicables aux-appareils radio exempts de licence. L'exploitation est autorisée aux deux conditions suivantes: \n1.\tL'appareil ne doit pas produire de brouillage, et \n2.\tL'utilisateur de l'appareil doit accepter tout brouillage radioélectrique subi, même si le brouillage est susceptible d'en compromettre le fonctionnement.â\n","textLarge":false,"imageOnRight":true,"image":{"recommendedSizes":{"width":"420","height":"280"}},"imageMobile":{"recommendedSizes":{"width":"750","height":"500"}}},"id":"#6","type":"component","lock":false,"position":10},{"name":"TextBlock","data":{"text":"**Caution: Exposure to Radio Frequency Radiation.** \nThe installer of this radio equipment must ensure that the antenna is located or pointed such that it does not emit RF field in excess of Health Canada limits for the general population; consult Safety Code 6, obtainable from Health Canadaâs website.\n\n**Liberty CCR** Contains TX module ID: 12208A-05 \n**DNA (Divesoft Nitrox Analyzer)** Contains TX module ID: 12208A-05 \n**ECHO** Contains TX module ID: 12208A-05 \n**Freedom+** Contains TX module ID: 8595A-BMD380\n","textLarge":false,"imageOnRight":true,"image":{"recommendedSizes":{"width":"420","height":"280"}},"imageMobile":{"recommendedSizes":{"width":"750","height":"500"}}},"id":"#7","type":"component","lock":false,"position":11},{"name":"Spacer","data":{"spacingLarge":30,"spacingSmall":20,"backgroundColor":"#ffffff"},"id":"#9","type":"component","lock":false,"position":12},{"name":"SectionDivider","data":{"title":"3. EU and UK Conformance Statements","skipToC":false},"id":"#20","type":"component","lock":false,"position":13},{"name":"TextBlock","data":{"text":"### 3) EU and UK Conformance Statements\n* Depth and time measurements conform with the EN 13319:2000 - Diving Accessories - depth gauges and combined depth and time monitoring devices.\n* This device conforms to Directive 2014/53/EU for Radio Equipment.\n* This device contains a Bluetooth wireless communication interface that operates at 2.43 GHz at a maximum transmit power of 2.5 mW (+4 dBm).\n* This device conforms to Directive 2011/65/EU Restriction of the use of certain hazardous substances in electrical and electronic equipment (ROHS).\n* Declarations of conformity are available at: https://www.divesoft.com/en/support/declarations\n","textLarge":false,"imageOnRight":true,"image":{"recommendedSizes":{"width":"420","height":"280"}},"imageMobile":{"recommendedSizes":{"width":"750","height":"500"}}},"id":"#10","type":"component","lock":false,"position":14},{"name":"Spacer","data":{"spacingLarge":30,"spacingSmall":20,"backgroundColor":"#ffffff"},"id":"#11","type":"component","lock":false,"position":15},{"name":"Divider","data":{"color":"darkGray"},"id":"#13","type":"component","lock":false,"position":16},{"name":"Spacer","data":{"spacingLarge":30,"spacingSmall":20,"backgroundColor":"#ffffff"},"id":"#14","type":"component","lock":false,"position":17},{"name":"Footer","data":{"copyrights":"Copyright © 2019 Divesoft LLC All rights reserved.","facebookUrl":"","youtubeUrl":"","instagramUrl":"","contacts":"**Divesoft, s.r.o.** Hálkova 2495 413 01 Roudnice nad Labem Äeská republika Tel.: +420 416 857 057 E-mail: [email protected]"},"id":"#1","type":"component","lock":false,"position":19}],"id":"root","idBuffer":"#21","lastCommit":"6ae89b9b-76e7-43b8-b53d-55b04512dc58"}},"annotations":[],"language":{"type":"id","generated":false,"id":"Language:cjv3kwvoj000u083611381c6o","typename":"Language"},"__typename":"PageTranslation"},"Page:cm1evxo544dge08177rmhsl6i":{"id":"cm1evxo544dge08177rmhsl6i","type":{"type":"id","generated":false,"id":"PageType:cjv3l213x004f08366hjufttp","typename":"PageType"},"tags":[],"translations({\"where\":{\"language\":{\"id\":\"cjv3kwvoj000u083611381c6o\"}}})":[{"type":"id","generated":false,"id":"PageTranslation:cm1evxo5s4dgl0817254nhwpr","typename":"PageTranslation"}],"__typename":"Page"},"PageTranslation:cm1evxo5s4dgl0817254nhwpr":{"id":"cm1evxo5s4dgl0817254nhwpr","name":"Divesoft.app User manual EN","createdAt":"2024-09-23T10:49:17.968Z","content":{"type":"json","json":{"content":[{"name":"Header","data":{"products":[{"title":"Accessories","description":"Backplates, Consumables. Tanks.","img":{"recommendedSizes":{"width":"235","height":"235"}},"url":""},{"title":"Accessories sets","description":"Protection, maintenance, cleaning.","img":{"recommendedSizes":{"width":"235","height":"235"}},"url":""},{"title":"Spare parts","description":"Spare parts and components.","img":{"recommendedSizes":{"width":"235","height":"235"}},"url":""}
2,{"title":"Spare parts kits","description":"Completly Liberty spare parts kits.","img":{"recommendedSizes":{"width":"235","height":"235"}},"url":""}]},"id":"#0","type":"component","lock":false,"position":0},{"name":"SectionDivider","data":{"title":"User manual","skipToC":false},"id":"#121","type":"component","lock":false,"position":1},{"name":"ProductShowcase","data":{"backgroundColor":"#ffffff","isTextDark":true,"isImageRight":true,"image":{"mimetype":"image/png","size":683750,"hash":"dcb228b4496fd32086758328351c31032ec2ab0f","id":"cklt97w397hpn0776h75hdllm","filename":"divesoft-app.png","category":"divesoft/","type":"image"},"imageMobile":{},"title":"User manual","subtitle":"Divesoft.app","description":"App version 1.19.0 \nDocument version 24/10/2024","hideDescriptionOnMobile":false,"areButtons":false,"firstTitle":"Learn more >","firstUrl":"","secondTitle":"Configurator >","secondUrl":""},"id":"#46","type":"component","lock":false,"position":2},{"name":"Divider","data":{"color":"darkGray"},"id":"#53","type":"component","lock":false,"position":3},{"name":"SectionDivider","data":{"title":"Introduction","skipToC":false},"id":"#168","type":"component","lock":false,"position":4},{"name":"TextBlock","data":{"text":"Welcome to the user manual of DIVESOFT.APP, your indispensable companion for Divesoft devices. This mobile app has been designed to enhance the functionality of your diving equipment and make it easier to use.\n\n## Key features\n**For Nitrox DNA Analyzer** \n* Displays the composition of the gas in the diving cylinder\n* An essential accessory for effective use of the analyzer \n\n\n**For Freedom+ dive computer and CCR Liberty rebreather**\n* Uploading firmware updates\n* Download, store and view dive logs\n* Advanced dive planning for open (OC) and closed (CCR) circuit\n* Planning diving events\n* Reporting device problems\n* Access to off-line device user manuals \n\n\n**Special features for CCR Liberty**\n* Detailed and clear assembly checklist\n* Allows everyone to properly assemble and check the device before diving\n\n\nDIVESOFT.APP is designed to enhance your diving experience and ensure safer and more efficient use of your Divesoft equipment. This manual will guide you through all the features of the application and help you to make the most of its potential. \nThe app is constantly growing and being developed so that you can take advantage of even more sophisticated and unique features in the future to make your dive preparation easier. \n","textLarge":false,"imageOnRight":true,"image":{"recommendedSizes":{"width":"420","height":"280"}},"imageMobile":{"recommendedSizes":{"width":"750","height":"500"}}},"id":"#169","type":"component","lock":false,"position":5},{"name":"Divider","data":{"color":"darkGray"},"id":"#176","type":"component","lock":false,"position":6},{"name":"SectionDivider","data":{"title":"1. Main menu","skipToC":false},"id":"#172","type":"component","lock":false,"position":7},{"name":"TextBlock","data":{"text":"## Main menu\nIt is displayed when the application is opened and consists of 10 tiles of individual widgets, which will be presented below. In the upper right corner there is a pencil icon for editing the Main Menu.\n### Edit the main menu\nClick on the pencil icon in the top right corner\nA list of widgets will be displayed. In the left part, the handles are marked with dots. Hold the grip to move the widgets to the desired position.\n### To activate and deactivate gadgets\nThe green check mark symbols are shown on the right. A widget with this icon is displayed in the main menu. Tap the checkmark icon to deactivate the gadget and the icon changes to a red cross.\n### Selecting the default gadget\nThe DIVESOFT.APP application can be set so that when you open it, the selected gadget is opened directly. Typically, DNA analyzer users who use the application only or mostly for breath analysis have the default Analyzer gadget set.\nIf you set a default gadget, all other gadgets are still available. Tap the menu icon on the top right or the back button to get to the Main Menu.\nTo set the default gadget, click the top grey bar and select the desired gadget. You can reverse the step by selecting a hyphen instead of a miniapplication.\n","textLarge":false,"imageOnRight":true,"image":{"recommendedSizes":{"width":"420","height":"280"}},"imageMobile":{"recommendedSizes":{"width":"750","height":"500"}}},"id":"#171","type":"component","lock":false,"position":8},{"name":"Divider","data":{"color":"darkGray"},"id":"#60","type":"component","lock":false,"position":9},{"name":"SectionDivider","data":{"title":"2. Assemblies","skipToC":false},"id":"#174","type":"component","lock":false,"position":10},{"name":"TextBlock","data":{"text":"## Assemblies\nThe mini-application assemblies serve as assembly instructions and checklist for all variants of the CCR Liberty rebreather. It also offers a separate calibration check for the oxygen sensors. \n### Building the unit with a checklist\n* Open the Assemblies widget and select one of the checklist options based on your CCR Liberty configuration. \n* Assign the instrument you will be assembling. If you do not have a device assigned, press the Add new device button. \n* You can assign a device manually or connect directly to the device using Bluetooth. In this case, activate Bluetooth on theCCR Liberty (Menu\\Applications\\Bluetooth) and select the device from the menu.\n* Press the Start Check button\n* Follow the on-screen instructions to verify that you have actually performed the action or that the part is in place and functional. In this case, press the Done button. If everything is not as it should be or you want to return to this step later, press Skip this
2step. You will then see in the final summary which steps you have skipped and need to return to.\n* To return to the previous step of the checklist, press the top left arrow or the back arrow on your mobile phone.\n* To end the build prematurely, press Quit at the top right. \n\n**Warning: if you end the build prematurely, the checklist will not be saved and will not offer you a summary of the skipped steps. This could lead to the omission of an important point with fatal consequences!**\n### Final summary\nIf you reach the end of the checklist during the build, the app will give you a summary of all the steps with their statuses. Check the entire list carefully to make sure you have completed all assembly and checklist steps.\nWhen you are finished with the assembly and checking, press the Complete assembly button. The wishlist will be saved and can be retrieved in the history by pressing the icon on the bottom right.\n### History of Checklists\nUse the icon on the bottom right to open the checklist history. The dates of the checklist and the completeness of the checklist (unfulfilled steps / total steps) are recorded. By clicking on the checklist you can see which steps have not been fulfilled. \n**Delete checklist from history** \nSlide the selected item in the \"Assemblies\" list to the left. A trash can icon will appear, click on it and then confirm.\n","textLarge":false,"imageOnRight":true,"image":{"recommendedSizes":{"width":"420","height":"280"}},"imageMobile":{"recommendedSizes":{"width":"750","height":"500"}}},"id":"#177","type":"component","lock":false,"position":11},{"name":"Divider","data":{"color":"darkGray"},"id":"#178","type":"component","lock":false,"position":12},{"name":"SectionDivider","data":{"title":"3. Planner","skipToC":false},"id":"#173","type":"component","lock":false,"position":13},{"name":"TextBlock","data":{"text":"## Planner\nIt allows you to plan any dive, including the most challenging technical or rebreather dives. \n**Please note**: **The dive planner is intended for use by trained and qualified divers only**. Decompression calculations are determined by publicly available decompression algorithms, but even following them exactly will not guarantee the absence of decompression sickness or other ascent-related accidents. Even if all decompression procedures are followed, a life-threatening situation, injury or death may occur. \n**Note: **Before using the scheduler itself, pay close attention to the scheduler settings in the Setting gadget. In particular, it is advisable to create your used cylinder inventory for the open circuit. Of course, it is possible to change the settings later during the actual dive planning.\n### Opening the planner - List of plans\nWhen you open the mini-application of the planner, a list of already scheduled dives will be displayed. Saving individual plans is useful if you dive in the same or similar locations and the already created plans will become universal helpers during your underwater wanderings. \n### Creating a new plan\n* Tap the red + button on the top right\n* Name the plan\n* Specify with a checkbox whether the plan is with a rebreather (CCR) or a conventional SCUBA (OC)\n* Determine the maximum depth and time at the bottom\n* Enter the altitude at which the dive will take place\n* Note: Altitude can significantly affect the decompression procedure. Do not neglect this setting when diving in mountain lakes.\n* Select the gases from the store that you will use during the dive. Oxygen and diluent can be edited at this time. Other gases cannot be edited at this time. This is possible in the Cylinders setting in the Settings widget or directly during the plan.\n* Press the red Start planning button\n","textLarge":false,"imageOnRight":true,"image":{"recommendedSizes":{"width":"420","height":"280"}},"imageMobile":{"recommendedSizes":{"width":"750","height":"500"}}},"id":"#180","type":"component","lock":false,"position":14},{"name":"SectionDivider","data":{"title":"3.1 Planner interface","skipToC":false},"id":"#182","type":"component","lock":false,"position":15}
2,{"name":"TextBlock","data":{"text":"## Planner interface\n### Mode \nin the case of CCR planning, the first line is dedicated to switching the mode between CCR and Bailout plan. Both plans are calculated simultaneously and can be switched and compared freely. In OC mode this line is missing. \n### Graphical display of gas consumption:\nThe consumption of all selected gases is graphically displayed above the dive profile itself. The slanted curve symbolizes the gas loss in a given dive phase. The colour coding symbolises the type of gas and the sufficiency or insufficiency of the gas. \n**White** = air \n**Green** = Nitrox \n**Brown** = Trimix \n**Blue** = Oxygen \n**Yellow** = Gas supply is below the specified minimum level at the end of use \n**Red** = Insufficient gas for scheduled dive \n","textLarge":false,"imageOnRight":true,"image":{"recommendedSizes":{"width":"420","height":"280"}},"imageMobile":{"recommendedSizes":{"width":"750","height":"500"}}},"id":"#181","type":"component","lock":false,"position":16},{"name":"TextBlock","data":{"text":"### Dive profile\nGraphical representation of the dive in a classical form with depth scale on the Y-axis and time on the X-axis. \nThe course of the dive is shown by the white curve defined by the individual points \nChanges during the dive are marked as points. Any of the points can be edited, added or removed. \nThe orange curve symbolizes the calculated ascent plan \nThe points at which the gas is changed (switched) are marked with a \"flag\" with the gas name \nThe blue curve represents the PO2 \nThe red curve represents the decompression ceiling and defines the decompression zone of critical supersaturation \nThe gradient factors currently used are listed in the bottom right corner\n### Edit a profile point\nHold to activate the selected point, and the point will be highlighted and a red trash can icon will appear. The edit box for the point appears below the profile. \nYou can edit a point in two ways: by dragging and editing the edit fields\nDrag - drag the point to the desired location. Rulers for depth and time lead from the point to the exact location.\nEditing fields: enter the desired values in the fields \n**RunT**: runtime - absolute time of the dive \n**Stop**: relative time spent in the level \n**Depth** - depth of level \n### Adding a profile point \nTap the red + symbol below the dive profile. Tap the desired point location. After adding a point, you can of course edit it, see previous paragraph.\n### Deleting a profile point\nActivate the selected point by holding it down and the point will be highlighted and a red bin icon will appear. Tap the bin to confirm the deletion of the point.\n","textLarge":false,"imageOnRight":true,"image":{"recommendedSizes":{"width":"420","height":"280"}},"imageMobile":{"recommendedSizes":{"width":"750","height":"500"}}},"id":"#183","type":"component","lock":false,"position":17},{"name":"TextBlock","data":{"text":"### Information line\nDisplays total dive time and accumulated OTUs and CNS\n### Profile - list\nIt contains a description of the individual dive points and its course. To view the line information, click\nThe description of the dive consists of two basic parts Bottom and Ascent. \n**Bottom** contains all the points you specify during the dive on the bottom \n**Ascent** describes all the dive points calculated by the application. \nThe graphic symbol indicates whether it is a descent, ascent, stop or gas switch.\nEach line states: \n**Depth** \n**Stop** = time spent at depth, or time required to move to that point (descent, ascent) \n**RunT** = absolute dive time at the moment of reaching this point \n**PO2 / mix** = partial pressure of oxygen at a given point \n**Print** - the printer icon allows you to convert the dive description to PDF format and send it to a connected printer or save it. \nThe row can be closed again by clicking the arrow on the top right\n","textLarge":false,"imageOnRight":true,"image":{"recommendedSizes":{"width":"420","height":"280"}},"imageMobile":{"recommendedSizes":{"width":"750","height":"500"}}},"id":"#184","type":"component","lock":false,"position":18},{"name":"TextBlock","data":{"text":"### Gas management - list\nThe color coding of this line symbolizes the sufficiency or insufficiency of the gas supply for the planned dive. \n**White**= sufficient gas supply \n**Yellow**= the supply of one or more selected gases is below the set minimum pressure level (below the reserve) \n**Red** = insufficient gas for the planned dive \nAfter clicking on the Gas Management line, the boxes for each gas are displayed. Each box contains the following information: \n**Gas composition** - Gas name in the symbolic cylinder \n**Cylinder volume**\n**Initial cylinder pressure** \n**Maximum permissible oxygen partial pressure** for this cylinder \n**MOD** \n**Pressure required ** \n**Pressure at the end**\n#### Removing the cylinder\nTap the gas box\n#### Cylinder editing \nHold the cylinder box for a long time. You can then change all the attributes of the cylinder.\n#### Adding a new cylinder\nClick on the red symbol + Add dive cylinder \nThe list can be closed again by clicking the arrow on the top right\n","textLarge":false,"imageOnRight":true,"image":{"recommendedSizes":{"width":"420","height":"280"}},"imageMobile":{"recommendedSizes":{"width":"750","height":"500"}}},"id":"#185","type":"component","lock":false,"position":19},{"name":"TextBlock","data":{"text":"### Hazards - List\nDisplays a warning before safe limits are exceeded. \nThe colour coding of this line symbolises the severity of the exceedance \n**White** = no threat \n**Yellow** = borderline \n**Red** = serious risk \nClick on a row to see details of the risks \n### Delete a created plan \nIn the list of created plans, slide the selected row to the left. A red bin icon will appear and click on it. Confirm the deletion of the plan.\n","textLarge":false,"imageOnRight":true,"image":{"recommendedSizes":{"width":"420","height":"280"}},"imageMobile":{"recommendedSizes":{"width":"750","height":"500"}}},"id":"#186","type":"component","lock":false,"position":20},{"name":"Divider","data":{"color":"darkGray"},"id":"#179","type":"component","lock":false,"position":21},{"name":"SectionDivider","data":{"title":"4. ToDo list","skipToC":false},"id":"#170","type":"component","lock":false,"position":22},{"name":"TextBlock","data":{"text":"## ToDo list\nUse it to create and use your own checklists so you never forget anything on your diving events. \n### Create a new ToDo sheet\n* Tap the red + button on the top right \n* Select one of the offered templates (Templates) \n* Check your gear or tasks and tick them off the list.\n* The finished checklist is saved to the history\n### Delete ToDo sheet from history\nSlide the selected item in the \"My ToDo Lists\" list to the left. A trash can icon will appear and tap it to confirm.\n### Create a custom template (Template)\nIf you use the same equipment or task list for your non-diving expeditions, create your own template.\n* Click the ToDo templates icon on the bottom right\n* Add a new template by clicking on the red + button\n* Name your new template\n* Click on the Add template items button to select one of the predefined templates \n* Add new items by pressing the red + button\n* You can delete unnecessary items by moving the row from right to left\n* Click the New template button to save your new template\n","textLarge":false,"imageOnRight":true,"image":{"recommendedSizes":{"width":"420","height":"280"}},"imageMobile":{"recommendedSizes":{"width":"750","height":"500"}}},"id":"#187","type":"component","lock":false,"position":23},{"name":"Divider","data":{"color":"darkGray"},"id":"#189","type":"component","lock":false,"position":24},{"name":"SectionDivider","data":{"title":"5. Trips","skipToC":false},"id":"#188","type":"component","lock":false,"position":25},{"name":"TextBlock","data":{"text":"## Trips\nIt organizes and consolidates all the tasks such as plans, checklists, instrument preparations, calibrations, and dive logs from your dive trip.\n### Create a new trip (Trip)\n* Tap the red + button on the top right\n* Name your trip\n* Add trip description\n* Set the trip start date\n* Set the end date of the trip\n* Press the Create trip button\n* During this period, add all the tasks in the app to this trip and find them clearly in one place.\n","textLarge":false,"imageOnRight":true,"image":{"recommendedSizes":{"width":"420","height":"280"}},"imageMobile":{"recommendedSizes":{"width":"750","height":"500"}}},"id":"#190","type":"component","lock":false,"position":26},{"name":"Divider","data":{"color":"darkGray"},"id":"#192","type":"component","lock":false,"position":27},{"name":"SectionDivider","data":{"title":"6. Devices","skipToC":false},"id":"#191","type":"component","lock":false,"position":28},{"name":"TextBlock","data":{"text":"## Devices\nConnects the app to your device. It is used to download dive logs, updates, repairs, download system information and report device problems with automatic upload of necessary data from your device. For rebreather CCR Liberty can track the age of oxygen sensors.\n### Connecting devices\nActivate Buetooth on the DIVESOFT device (see the manual for the device)\nSelect a device from the Online menu. If there are no visible devices in the menu, add a device with the red + button on the top right.\n### Dive logs\nHere you have the option to download logs from your device to the Wetnotes.com cloud or offline to your phone.\n### Advanced\n#### Uploading firmware from a file\nThe Advanced option offers you to load the firmware from a file. Press the Advanced button and select Choose firmware. Locate the firmware file and start the update. \n#### Downloading a system file\nIf Customer and Technical Support asks you for a Syslog, you can download it here by pressing Download and syslog.\n#### Reporting a problem \nPress Report and Problem. Fill in the required information and a description of the problem. Press download and submit. The application will download the automated syslog and the last ten dives and send it to DIVESOFT Technical Support together with your description and contact details.\n","textLarge":false,"imageOnRight":true,"image":{"recommendedSizes":{"width":"420","height":"280"}},"imageMobile":{"recommendedSizes":{"width":"750","height":"500"}}},"id":"#193","type":"component","lock":false,"position":29},{"name":"Divider","data":{"color":"darkGray"},"id":"#197","type":"component","lock":false,"position":30},{"name":"SectionDivider","data":{"title":"7. Settings","skipToC":false},"id":"#194","type":"component","lock":false,"position":31},{"name":"TextBlock","data":{"text":"## Settings\nExtensive application, scheduler, analyzer and user profile settings. \n\nThe settings are divided into four basic sections, which are listed on the bottom line of the screen: Planner, Cylinders, Analyzer, User \
2n\n**Note**: before setting the values for the first time, you can change the metric/imperial units in the User settings to the ones you want. \n\n### Planner settings\nSelect the type of dive you will be shooting for CCR = Rebreather, OC = Open Circuit\n#### CCR settings\n**SP Descent** - PO2 setpoint to be used during descent in the planner. Note that this is not the variable descent setpoint known from the CCR Liberty setup, but a fixed setpoint for the entire descent until maximum depth is reached. \n**SP bottom** - setpoint used in the deep part of the dive \n**SP deco** - setpoint used for ascent. It starts at the exit start point.\n#### OC settings and common settings\nThe following items are common to both CCR and OC. \n\n**SAC stress** - Surface consumption on the open circuit for the duration of the emergency. Consumption is recalculated for ambient pressure. Set high consumption for realistic planning when a critical underwater problem is being addressed at the worst possible moment. In the case of a CO2 hit, consumption can rise well over 75 l/min. The SAC stress value is calculated into the plan for the time specified in the Stress time item. \n\n**SAC Deco** - Surface consumption on open circuit after Stress time.\n\n**Stress time** - time during which high SAC stress consumption is calculated. Consider the set length for realistic bailout gas consumption planning.\n\n**Problem solving time** - the time that is added to the time at the bottom in the event of a bailout. This includes time for problem solving such as switching the gas, deploying the buoy, alerting the team, bailing out, etc. \n\n**Loop volume** - the volume of the breathing loop for calculating diluent consumption. For realistic diluent consumption planning, we recommend at least doubling the actual value to account for depth changes while on the bottom and minor gas leaks.\n\n**Metabolic consumption** - physiological oxygen consumption. When adjusting, take into account possible emergency situations, dive conditions and minor gas leaks.\n\n**Ascent rate zones**: set the ascent rates in three different depth ascent zones. Define the depth zones to the right of the imaginary ascent profile shown by the diagonal line. The ascent velocities in each zone are to the left of the imaginary profile. \nClick on a specific entry and change it in the field below.\n\n**Descent rate**: set the descent rate. \n\n**GF Low/High**: gradient factors for modifying the ascent curve of the standard ascent. GF Low modifies the depth of the first stop (a lower value generates a deeper first stop). GF High determines the degree of tissue saturation at the time of emergence compared to the Buhlmann algorithm. Simplistically, the lower the number, the more conservative. The recommended setting is 40/75.\n\n**BO GF Low/High**: setting gradient factors for bailout ascent. It is assumed that when switching to bailout the diver wants to leave the water faster. For this reason it is possible to set a slightly more aggressive GF.\n\n**END**: Setting the equivalent narcotic depth. Generates a warning if the END is exceeded when using a breathing mixture at a given depth. The optimum END setting is 28 - 30 m.\n\n**Oxygen is Narcotic**: Indicates whether the narcotic potential of oxygen is included in the END calculation.\n\n**Deco algorithm**: choose from two Decompression Algorithms. ZHL16B is originally designed for decompression tables. ZHL16C is originally designed for dive computers and is slightly more conservative.\n\n**Salinity**: choose in which water you will dive - sea water, fresh water or defined salinity EN 13319 corresponding to approximately brackish water.\n\n**Last stop depth**: specify the depth of the last decompression stop.\n\n**Deco step**: this item specifies the decompression step size, eg. 2/3/6m or 7/10/20ft.\n\n**End pressure**: Safety margin of pressure in the cylinder (how much must remain in the cylinder)\n","textLarge":false,"imageOnRight":true,"image":{"recommendedSizes":{"width":"420","height":"280"}},"imageMobile":{"recommendedSizes":{"width":"750","height":"500"}}},"id":"#196","type":"component","lock":false,"position":32},{"name":"TextBlock","data":{"text":"### Cylinders setting\nSetting up scuba tanks and mixtures. This app assumes that divers own a certain stock of cylinders in their warehouse, which they use over and over again, selecting the ones that are suitable for a given dive. In particular, rebreather divers have filled bailout cylinders that they usually do not use during the dive. For this reason, this part of the app is conceived as a kind of personal cyl
2inder storage. You can add, edit and remove cylinders at will. \n\n**Note**: When you enter a schedule, you are selecting a mixture from this store and cannot edit it at that time. However, it can be edited in the plan itself.\n\n**On-board oxygen**: oxygen settings for Rebreather. Item cannot be removed. The volume and pressure of the cylinder can be adjusted by pressing the red Edit button.\n\n **On-board diluent**: diluent gas for Rebreather. Item cannot be removed. Volume, cylinder pressure and mixture can be adjusted by pressing the red Edit button. In the lower boxes, the maximum operating depth of the MOD mixture and the minimum depth of use with respect to the amount of oxygen (use of hypoxic mixtures) are calculated. The MOD is calculated with a PO2 0.2 bar lower than the setpoint for the bottom to ensure that the diluent is still usable for gas dilution.\n\n#### M OC cyl. Room: open circuit cylinder storage \n##### Adding a new mixture\nPress the red + button to the right of the elevator. \n##### Deleting the mixture\nDrag the mixture line to the left. A red bin icon will appear. Tap it to confirm the deletion of the mixture.\n##### Editing the mixture\nClick on the mixture to open the editor. \nAdjust the **volume** of the cylinder, the actual **pressure** in the cylinder gas storage. \n\n**PO2 limit**: the maximum oxygen partial pressure limit that determines the maximum depth of use of the mixture. A change in this factor has a major effect on the distribution of mixtures at depth during ascent and thus on their consumption. The default value is 1.4 bar.\n\n**MOD ** - maximum operating depth of the mixture according to the native Limit PO2 \n\n**Minimum depth** - minimum depth of use with respect to the amount of oxygen (use of hypoxic mixtures).\n","textLarge":false,"imageOnRight":true,"image":{"recommendedSizes":{"width":"420","height":"280"}},"imageMobile":{"recommendedSizes":{"width":"750","height":"500"}}},"id":"#199","type":"component","lock":false,"position":33},{"name":"TextBlock","data":{"text":"### Analyzer settings\nSet the required partial pressures to calculate the MOD maximum operating depth\n","textLarge":false,"imageOnRight":true,"image":{"recommendedSizes":{"width":"420","height":"280"}},"imageMobile":{"recommendedSizes":{"width":"750","height":"500"}}},"id":"#208","type":"component","lock":false,"position":34},{"name":"TextBlock","data":{"text":"### User settings\nSet up an account to log into the Wetnotes.com app and service and select your home country \n\nChange your **unit of measure** settings to suit your nature\n\n**Enable BETA features**: available only for beta testers of the application. By enabling, you agree to use and test features that have not been fully tested. These features will be made available to you when you are added to the app tester list and enable this button in the app. \n\n**Subscribe to BETA FW**: Subscribe to use BETA Firmware on your device. By enabling it, you agree to use and test the untested features of your device. Once you are added to the device's tester list and enable this button in the app, you will be able to download the beta firmware.\n\n**Delete accoun**t: delete the current user account\nApp version: tap this item to open the app version details\n","textLarge":false,"imageOnRight":true,"image":{"recommendedSizes":{"width":"420","height":"280"}},"imageMobile":{"recommendedSizes":{"width":"750","height":"500"}}},"id":"#209","type":"component","lock":false,"position":35},{"name":"Divider","data":{"color":"darkGray"},"id":"#200","type":"component","lock":false,"position":36},{"name":"SectionDivider","data":{"title":"8. Manuals","skipToC":false},"id":"#195","type":"component","lock":false,"position":37},{"name":"TextBlock","data":{"text":"## Manuals\nDisplays offline versions of the user manuals for all DIVESOFT devices.\n","textLarge":false,"imageOnRight":true,"image":{"recommendedSizes":{"width":"420","height":"280"}},"imageMobile":{"recommendedSizes":{"width":"750","height":"500"}}},"id":"#210","type":"component","lock":false,"position":38},{"name":"Divider","data":{"color":"darkGray"},"id":"#214","type":"component","lock":false,"position":39},{"name":"SectionDivider","data":{"title":"9. Analyzer","skipToC":false},"id":"#211","type":"component","lock":false,"position":40}
2,{"name":"TextBlock","data":{"text":"## Analyzer\nProvides a remote display to the DNA analyzer\n### Connection to Analyzer\nClick on the three dots on the top right. A list of available analyzers within 10 meters will be displayed. The analyzer number corresponds to the serial number. The assigned analyzer will continue to be associated with your mobile phone or app. To disconnect or change the analyzer the app is paired with, press the three dots again and then press the red Disconnect from Analyzer button.\n### Calibration\nCalibration is required before the first use of the analyzer, without which the analyzer function is not available at all. Prepare the calibration gas and press the Calibrate button. There are two options to choose from: Air and Oxygen. \n\n**Please note**: It is absolutely essential that the gas you actually use for calibration is washed out! Failure to do so will result in erroneous measurements that can result in serious injury or death.\n\nAfter selecting the gas, apply the analyzer to the calibration gas (in the case of air, make sure that there is actually air on the sensor - for example, by sucking the gas out of the sensor compartment so that air is flowing to the sensor) and wait for the sensor voltage to stabilize (reading in mV). Then press the Calibrate button.\n### Measurements\nOnce the application has been calibrated with the analyzer attached, simply attach the analyzer to the gas being analyzed or connect it to a gas-connected flow restrictor and open the analyzed gas cylinder. Read the gas composition values on the display. The maximum operating depths (MOD) for the gas and the selected partial pressures are also displayed.\n\n","textLarge":false,"imageOnRight":true,"image":{"recommendedSizes":{"width":"420","height":"280"}},"imageMobile":{"recommendedSizes":{"width":"750","height":"500"}}},"id":"#213","type":"component","lock":false,"position":41},{"name":"Divider","data":{"color":"darkGray"},"id":"#215","type":"component","lock":false,"position":42},{"name":"SectionDivider","data":{"title":"10. Report issue","skipToC":false},"id":"#212","type":"component","lock":false,"position":43},{"name":"TextBlock","data":{"text":"## Report issue\nA place to contact DIVESOFT customer support and report any problem with any DIVESOFT product.\n","textLarge":false,"imageOnRight":true,"image":{"recommendedSizes":{"width":"420","height":"280"}},"imageMobile":{"recommendedSizes":{"width":"750","height":"500"}}},"id":"#217","type":"component","lock":false,"position":44},{"name":"Divider","data":{"color":"darkGray"},"id":"#216","type":"component","lock":false,"position":45},{"name":"Footer","data":{"copyrights":"Copyright © 2019 Divesoft LLC All rights reserved.","cookiesUrl":"","facebookUrl":{"url":"https://www.facebook.com/divesoft"},"instagramUrl":{"url":"https://www.instagram.com/divesoft/"},"youtubeUrl":{"url":"https://www.youtube.com/channel/UCHI2-kHmfoUlAdhQXPKl8lA"},"twitterUrl":{"url":"https://twitter.com/divesoft"},"linkedinUrl":{"url":"https://www.linkedin.com/company/divesoft/"}},"id":"#175","type":"component","lock":false,"position":46}],"id":"root","idBuffer":"#218","lastCommit":"12245eed-7e19-48c8-94f4-1072fdef64a0"}},"annotations":[],"language":{"type":"id","generated":false,"id":"Language:cjv3kwvoj000u083611381c6o","typename":"Language"},"__typename":"PageTranslation"},"Page:cm1hnvll84w1y081776bnhrg6":{"id":"cm1hnvll84w1y081776bnhrg6","type":{"type":"id","generated":false,"id":"PageType:cjv3l213x004f08366hjufttp","typename":"PageType"},"tags":[],"translations({\"where\":{\"language\":{\"id\":\"cjv3kwvoj000u083611381c6o\"}}})":[{"type":"id","generated":false,"id":"PageTranslation:cm1hnvllp4w250817h41duj72","typename":"PageTranslation"}],"__typename":"Page"},"PageTranslation:cm1hnvllp4w250817h41duj72":{"id":"cm1hnvllp4w250817h41duj72","name":"Divesof.app User manual CZ","createdAt":"2024-09-25T09:27:02.941Z","content":{"type":"json","json":{"content":[{"name":"Header","data":{"products":[{"title":"Accessories","description":"Backplates, Consumables. Tanks.","img":{"recommendedSizes":{"width":"235","height":"235"}},"url":""},{"title":"Accessories sets","description":"Protection, maintenance, cleaning.","img":{"recommendedSizes":{"width":"235","height":"235"}},"url":""},{"title":"Spare parts","description":"Spare parts and components.","img":{"recommendedSizes":{"width":"235","height":"235"}},"url":""}
2,{"title":"Spare parts kits","description":"Completly Liberty spare parts kits.","img":{"recommendedSizes":{"width":"235","height":"235"}},"url":""}]},"id":"#0","type":"component","lock":false,"position":0},{"name":"SectionDivider","data":{"title":"User manual","skipToC":false},"id":"#121","type":"component","lock":false,"position":1},{"name":"ProductShowcase","data":{"backgroundColor":"#ffffff","isTextDark":true,"isImageRight":true,"image":{"mimetype":"image/png","size":683750,"hash":"dcb228b4496fd32086758328351c31032ec2ab0f","id":"cklt97w397hpn0776h75hdllm","filename":"divesoft-app.png","category":"divesoft/","type":"image"},"imageMobile":{},"title":"Uživatelský manuál","subtitle":"Divesoft.app","description":"Verze aplikace 1.9.0 \nVerze dokumentu 23.10.2024","hideDescriptionOnMobile":false,"areButtons":false,"firstTitle":"Learn more >","firstUrl":"","secondTitle":"Configurator >","secondUrl":""},"id":"#46","type":"component","lock":false,"position":2},{"name":"Divider","data":{"color":"darkGray"},"id":"#53","type":"component","lock":false,"position":3},{"name":"SectionDivider","data":{"title":"1. Example section title","skipToC":false},"id":"#168","type":"component","lock":false,"position":4},{"name":"TextBlock","data":{"text":"VÃtejte v uživatelském manuálu aplikace DIVESOFT.APP, vaÅ¡eho nepostradatelného spoleÄnÃka pro zaÅÃzenà Divesoft. Tato mobilnà aplikace byla navržena s cÃlem rozÅ¡ÃÅit funkce vaÅ¡eho potápÄÄského vybavenà a usnadnit jeho použÃvánÃ.\n## KlÃÄové funkce\n### Pro nitroxový Analyzátor DNA\nâ¢\tZobrazuje složenà plynu v potápÄÄské lahvi \nâ¢\tNezbytný doplnÄk pro efektivnà využità analyzátoru\n### Pro potápÄÄský poÄÃtaÄ Freedom+ a rebreather CCR Liberty \nâ¢\tUpload aktualizacà firmwaru \nâ¢\tStahovánÃ, ukládánà a zobrazovánà záznamů ponorů \nâ¢\tPokroÄilé plánovánà ponorů pro otevÅený (OC) i uzavÅený (CCR) okruh \nâ¢\tPlánovánà potápÄÄských akcà \nâ¢\tReportovánà problémů se zaÅÃzenÃm \nâ¢\tPÅÃstup k off-line uživatelským manuálům zaÅÃzenà \n### Speciálnà funkce pro CCR Liberty\nâ¢\tPodrobný a pÅehledný assembly checklist\nâ¢\tUmožÅuje každému správnÄ sestavit a zkontrolovat pÅÃstroj pÅed potápÄnÃm\n\nDIVESOFT.APP je navržena tak, aby vylepÅ¡ila vaÅ¡i potápÄÄskou zkuÅ¡enost a zajistila bezpeÄnÄjÅ¡Ã a efektivnÄjÅ¡Ã využità vaÅ¡eho vybavenà Divesoft. Tento manuál vás provede vÅ¡emi funkcemi aplikace a pomůže vám maximálnÄ využÃt jejà potenciál. \nAplikace neustále roste a je vyvÃjena tak, abyste v budoucnu mohli využÃvat jeÅ¡tÄ vÃce sofistikovaných a unikátnÃch funkcÃ, které vám usnadnà pÅÃpravu na potápÄnÃ. \n","textLarge":false,"imageOnRight":true,"image":{"recommendedSizes":{"width":"420","height":"280"}},"imageMobile":{"recommendedSizes":{"width":"750","height":"500"}}},"id":"#169","type":"component","lock":false,"position":5},{"name":"Divider","data":{"color":"darkGray"},"id":"#176","type":"component","lock":false,"position":6},{"name":"SectionDivider","data":{"title":"1. Example section title","skipToC":false},"id":"#172","type":"component","lock":false,"position":7},{"name":"TextBlock","data":{"text":"# Hlavnà menu\nJe zobrazeno pÅi otevÅenà aplikace skládá se z 10-ti dlaždic jednotlivých miniaplikacÃ, které budou pÅedstaveny nÞe. V pravém hornÃm rohu se nacházà ikona s tužkou pro úpravu HlavnÃho menu.\n## Ãprava hlavnÃho menu\nKliknÄte na ikonu s tužkou v pravém hornÃm rohu\nZobrazà se seznam miniaplikacÃ. V levé Äásti jsou teÄkami naznaÄené úchopky. PÅidrženÃm úchopky posouvejte miniaplikace na žádanou pozici.\n## Aktivace a deaktivace miniaplikacÃ\nV pravé Äásti jsou zobrazeny zelené symboly zaÅ¡krtávátka. Miniaplikace s touto ikonou je zobrazována v hlavnÃm menu. KlepnutÃm na ikonu zaÅ¡krtávátka miniaplikaci deaktivujete a ikona se zmÄnà na Äervený kÅÞek.\n## Volba defaultnà miniaplikace\nAplikaci DIVESOFT.APP je možno nastavit tak, aby pÅi jejà otevÅenà byla rovnou otevÅena zvolená miniaplikace. Typicky uživatelé analyzátoru DNA, kteÅà aplikaci použÃvajà pouze nebo vÄtÅ¡inou jen pro analýzu dýchacà smÄsi majà nastavenu defaultnà miniaplikaci Analyzer.\n\nPokud nastavÃte defaultnà miniaplikaci, jsou vÅ¡echny ostatnà miniaplikace stále dostupné. KlepnutÃm na ikonu menu vpravo
2nahoÅe nebo na tlaÄÃtko zpÄt se dostanete do HlavnÃho menu.\nPro nastavenà defaultnà miniaplikace klepnÄte na hornà šedý Åádek a zvolte požadovanou miniaplikaci. Krok můžete vrátit tÃm, že mÃsto miniaplikace zvolÃte pomlÄku.\n\n","textLarge":false,"imageOnRight":true,"image":{"recommendedSizes":{"width":"420","height":"280"}},"imageMobile":{"recommendedSizes":{"width":"750","height":"500"}}},"id":"#171","type":"component","lock":false,"position":8},{"name":"Divider","data":{"color":"darkGray"},"id":"#60","type":"component","lock":false,"position":9},{"name":"SectionDivider","data":{"title":"1. Example section title","skipToC":false},"id":"#174","type":"component","lock":false,"position":10},{"name":"TextBlock","data":{"text":"# Assemblies\nMiniaplikace assemblies sloužà jako montážnà návod a kontrolnà seznam pro vÅ¡echny varianty rebreatheru CCR Liberty. NabÃzà rovnÄž i samostatnou kontrolu kalibrace kyslÃkových Äidel. \n## Sestavenà pÅÃstroje s kontrolnÃm seznamem\n* OtevÅete miniaplikaci Assemblies a vyberte jednu z možnostà kontrolnÃho seznamu podle vaÅ¡Ã konfigurace CCR Liberty. \n* PÅiÅaÄte pÅÃstroj, který budete skládat. Pokud nemáte pÅÃstroj pÅiÅazený, stisknÄte tlaÄÃtko Add new device. Můžete pÅiÅadit zaÅÃzenà manuálnÄ nebo propojit pÅÃmo se zaÅÃzenÃm pomocà Bluetooth. V takovém pÅÃpadÄ aktivujte Bluetooth naCCR Liberty (Menu\\Applications\\Bluetooth) a vyberte zaÅÃzenà z nabÃdky.\n* StisknÄte tlaÄÃtko Start Check\n* Následujte pokyny na obrazovce a ovÄÅujte, že jste daný úkon skuteÄnÄ provedli, nebo že je daná souÄást pÅÃstroje na svém mÃstÄ a funkÄnÃ. V takovém pÅÃpadÄ stisknÄte tlaÄÃtko Done. Pokud nenà vÅ¡e tak, jak by mÄlo být nebo se k tomuto kroku chcete vrátit pozdÄji, stisknÄte Skip this step. V závÄreÄném shrnutà pak uvidÃte které kroky jste vynechali a je tÅeba se k nim vrátit.\n* Pro návrat k pÅedchozÃmu kroku checklistu stisknÄte Å¡ipku vlevo nahoÅe, nebo Å¡ipku zpÄt na vaÅ¡em mobilnÃm telefonu.\n* Chcete-li sestavenà pÅÃstroje pÅedÄasnÄ ukonÄit, stisknÄte Quit vpravo nahoÅe. \n\n**VarovánÃ:** UkonÄÃte-li pÅedÄasnÄ sestavovánà pÅÃstroje, checklist nebude uložen a nenabÃdne vám shrnutà pÅeskoÄených kroků. Mohlo by dojÃt k opomenutà nÄkterého z důležitých bodů s fatálnÃmi následky! \n## ZávÄreÄné shrnutÃ\nDojdete-li bÄhem sestavovánà na konec checklistu, aplikace vám nabÃdne souhrn vÅ¡ech kroků s jejich statuty. Zkontrolujte peÄlivÄ celý seznam, zda jste splnili vÅ¡echny kroky montáže a kontroly.\nJestliže jste se sestavenÃm a kontrolou hotovà stisknÄte tlaÄÃtko Complete assembly. Chcecklist se uložà a lze ho dohledat v historii stisknutÃm ikony vpravo dole.\n## Historie Checklistů\nIkonou vpravo dole otevÅete historii checklistů. Jsou evidovány datumy provedeného checklistu a kompletnost checklistu (nesplnÄné kroky / celkem kroků). RozkliknutÃm lze zobrazit, které kroky nebyly splnÄny.\n## Smazánà checklistu z historie\nVybranou položku ve výÄtu âAssembliesâ posuÅte doleva. Zobrazà se ikona s popelnicà na kteru klepnÄte a následnÄ potvrÄte.\n","textLarge":false,"imageOnRight":true,"image":{"recommendedSizes":{"width":"420","height":"280"}},"imageMobile":{"recommendedSizes":{"width":"750","height":"500"}}},"id":"#177","type":"component","lock":false,"position":11},{"name":"Divider","data":{"color":"darkGray"},"id":"#178","type":"component","lock":false,"position":12},{"name":"SectionDivider","data":{"title":"1. Example section title","skipToC":false},"id":"#173","type":"component","lock":false,"position":13},{"name":"TextBlock","data":{"text":"# Planner\n\nUmožÅuje naplánovat jakýkoli ponor vÄetnÄ tÄch nejnároÄnÄjÅ¡Ãch technických ponorů nebo ponorů s rebreatherem. \n\n**UpozornÄnÃ:** PlánovaÄ ponorů je urÄen pouze pro vyÅ¡kolené a trénované potápÄÄe. VýpoÄet dekomprese je stanoven dle veÅejnÄ dostupných dekompresnÃch algoritmů, ale ani jejich pÅesné dodrženà nezaruÄà absenci dekompresnà nemoci nebo jiné nehody spojené s výstupem. I pÅes dodrženà vÅ¡ech dekompresnÃch postupů může nastat život ohrožujÃcà situace, zranÄnà nebo smrt.\n\n**UpozornÄnÃ:** PÅed samotným použitÃm plánovaÄe je vÄnovat zvýšenou pozornost nastavenà plánovaÄe v miniaplikaci Setting. Zejména je vhodné vytvoÅit si vaÅ¡i použÃvanou zásobu lahvà pro otevÅený okruh. SamozÅejmÄ Å¾e je možné nastavenà mÄnit i pozdÄji bÄhem samotného plánovánà ponoru\n\n## OtevÅenà plánovaÄe â Seznam plánů\nPÅi otevÅenà miniaplikace plánovaÄe se zobrazà seznam již naplánovaných ponorů. Ukládánà jednotlivých plánů je vhodné pokud se potápÃte na stejných nebo podobných lokalitách a již vytvoÅené plány se tak stanou univerzálnÃmi pomocnÃky pÅi vaÅ¡ich toulkách pod vodnà hladinou. \n## VytvoÅenà nového plánu\n* KlepnÄte na Äervené tlaÄÃtko + vpravo nahoÅe\n* Pojmenujte plán\n* UrÄete zaÅ¡krtávátkem zda je plán s rebreatherem (CCR) nebo konvenÄnÃm pÅÃstrojem (OC)\n* UrÄete maximálnà hloubku a Äas na dnÄ\n* Zadejte nadmoÅskou v
2ýšku ve které bude ponor probÃhat \n\n**UpozornÄnÃ:** NadmoÅská výška může významnÄ ovlivnit dekompresnà postup. Nezanedbávejte toto nastavenà v pÅÃpadÄ potápÄnà v horských jezerech.\n\n* Vyberte plyny ze skladu, které budete bÄhem ponoru použÃvat. KyslÃk a diluent můžete v tuto chvÃli editovat. Ostatnà plyny v tuto chvÃli editovat nelze. To je možné v nastavenà Cylinders v miniaplikaci Settings a nebo pÅÃmo v průbÄhu plánu.\n* StisknÄte Äervené tlaÄÃtko Start planning\n","textLarge":false,"imageOnRight":true,"image":{"recommendedSizes":{"width":"420","height":"280"}},"imageMobile":{"recommendedSizes":{"width":"750","height":"500"}}},"id":"#180","type":"component","lock":false,"position":14},{"name":"SectionDivider","data":{"title":"1. Example section title","skipToC":false},"id":"#182","type":"component","lock":false,"position":15},{"name":"TextBlock","data":{"text":"## ProstÅedà plánovaÄe\n#### Režim\nv pÅÃpadÄ CCR plánovánà je prvnà Åádek vÄnován pÅepÃnánà režimu mezi CCR a Bailout plánem. Oba plány jsou poÄÃtány souÄasnÄ a lze mezi nimi volnÄ pÅepÃnat a porovnávat. V OC režimu tento Åádek chybÃ.\n\n#### Grafické zobrazenà spotÅeby plynu:\nNad samotným profilem ponoru je graficky znázornÄna spotÅeba vÅ¡ech zvolených plynů. Å ikmá kÅivka symbolizuje úbytek plynu v dané fázi ponoru. Barevné kódovánà symbolizuje druh plynu a dostateÄnos Äi nedostateÄnost plynu.\n\n**BÃlá** = vzduch \n**Zelená** = Nitrox \n**HnÄdá** = Trimix \n**Modrá** = kyslÃk \n**Žlutá** = Zásoba plynu je na konci použità pod urÄenou minimálnà úrovnà \n**Äervená** = Nedostatek plynu pro naplánovaný ponor\n\n","textLarge":false,"imageOnRight":true,"image":{"recommendedSizes":{"width":"420","height":"280"}},"imageMobile":{"recommendedSizes":{"width":"750","height":"500"}}},"id":"#181","type":"component","lock":false,"position":16},{"name":"TextBlock","data":{"text":"### Profil ponoru\nGrafické zobrazenà ponoru klasickou formou se stupnicà hloubky na ose Y a Äasu na ose X. \nPrůbÄh ponoru je znázornÄn bÃlou kÅivkou definovanou jednotlivými body \nZmÄny v průbÄhu ponoru jsou oznaÄeny jako body. Kterýkoli z bodů je možné editovat, pÅidat nebo odebrat. \n**Oranžová kÅivka** symbolizuje vypoÄtený plán výstupu \nBody, ve kterých docházà ke zmÄnÄ (pÅepÃnánÃ) plynu jsou oznaÄeny âvlajeÄkouâ s názvem plynu \n**Modrá kÅivka** vyjadÅuje průbÄh PO2 \n**Äervená kÅivka** reprezentuje průbÄh dekompresnÃho stropu a vymezuje dekompresnà zónu kritického pÅesycenà \nV pravém dolnÃm rohu jsou uvedeny aktuálnÄ použÃvané **gradientnà faktory**\n#### Editace bodu profilu\nVybraný bod aktivujte podrženÃm, pÅiÄemž se bod zvýraznà a objevà se Äervená ikona s popelnicÃ. Pod profilem se zobrazà editaÄnà pole daného bodu. \nEditovat bod je možné dvÄma způsoby: PotaženÃm a editacà editaÄnÃch polà \n**PotaženÃ** â potáhnÄte bod na požadované mÃsto. Od bodu vedou pravÃtka pro hloubku a Äas pro pÅesné umÃstÄnà na požadované mÃsto. \n**Editacà polÃ**: do polà vepiÅ¡te požadované hodnoty \n**RunT**: runtime â absolutnà Äas průbÄhu ponoru \n**Stop**: relativnà Äas strávený v dané úrovni \n**Depth** â hloubka úrovnÄ \n#### PÅidánà bodu profilu\nKlepnÄte na Äervený symbol + pod profilem ponoru. KlepnÄte na požadované mÃsto umÃstÄnà bodu. Po pÅidánà bodu je samozÅejmÄ možné jej editovat, viz pÅedchozà odstavec.\n#### Smazánà bodu profilu\nVybraný bod aktivujte podrženÃm, pÅiÄemž se bod zvýraznà a objevà se Äervená ikona s popelnicÃ.KlepnÄte na popelnici a potvrÄte smazánà bodu.\n","textLarge":false,"imageOnRight":true,"image":{"recommendedSizes":{"width":"420","height":"280"}},"imageMobile":{"recommendedSizes":{"width":"750","height":"500"}}},"id":"#183","type":"component","lock":false,"position":17},{"name":"TextBlock","data":{"text":"### InformaÄnà Åádek\nZobrazuje celkový Äas ponoru a nashromáždÄné OTU a CNS\n### Åádek Profile\nObsahuje popis jednotlivých bodů ponoru a jeho průbÄh. Pro zobrazenà informacà Åádek rozkliknÄte\nPopis ponoru se skládá ze dvou základnÃch Äástà Bottom a Ascent. \n**Bottom** obsahuje vÅ¡echny vámi zadané body průbÄhu ponoru na dnÄ \n**Ascent** popisuje vÅ¡echny body ponoru vypoÄÃtané aplikacÃ. \nGrafický symbol naznaÄuje, zda se jedná o sestup, výstup, zastávku Äi pÅepnutà plynu. \nV každém Åádku je uvedena: \n**Hloubka** \n**Stop** = doba strávená v hloubce, pÅÃpadnÄ doba potÅebná na pÅesun k tomuto bodu (sestup, výstup) \n**RunT** = absolutnà Äas ponoru ve chvÃli dosaženà tohoto bodu \
2n**PO2 / mix** = parciálnà tlak kyslÃku v daném bodÄ \n**Tisk** â ikona tiskáry umožÅuje pÅevedenà popisu ponoru do formátu PDF a odeslánà na pÅipojenou tiskárnu nebo uloženÃ. \nÅádek lze opÄt zavÅÃt klepnutÃm na Å¡ipku vpravo nahoÅe\n","textLarge":false,"imageOnRight":true,"image":{"recommendedSizes":{"width":"420","height":"280"}},"imageMobile":{"recommendedSizes":{"width":"750","height":"500"}}},"id":"#184","type":"component","lock":false,"position":18},{"name":"TextBlock","data":{"text":"## Åádek Gas management\nBarevné kódovánà tohoto Åádku symbolizuuje dostateÄnost Äi nedostateÄnost zásoby plynu pro naplánovaný ponor. \n**BÃlá** = dostateÄná zásoba plynu \n**Žlutá** = zásoba jednoho nebo vÃce vybraných plynů je pod nastavenou minimálnà úrovnà tlaku (pod rezervou) \n**Äervená** = nedostateÄné množstvà plynu pro naplánovaný ponor\n\nPo rozkliknutà Åádku Gas Management jsou zobrazeny boxy pro jednotlivé plyny. Každý box obsahuje tyto informace: \n**Složenà plynu** â Název plynu v symbolické lahvi \n**Objem lahve** \n**PoÄáteÄnà tlak v lahvi** \n**Maximálnà povolený parciálnà tlak kyslÃku pro tuto lahev** \n**MOD** = maximálnà operaÄnà hloubka \n**Tlak potÅebný** \n**Tlak na konci** \n### Odebránà lahve \nKlepnÄte na box plynu \n### Editace lahve \nDlouze podržte box lahve. NáslednÄ můžete mÄnit vÅ¡echny atributy lahve. \n### PÅidánà nové lahve \nKlepnÄte na Äervený symbol + Add dive cylinder \nÅádek lze opÄt zavÅÃt klepnutÃm na Å¡ipku vpravo nahoÅe\n\n","textLarge":false,"imageOnRight":true,"image":{"recommendedSizes":{"width":"420","height":"280"}},"imageMobile":{"recommendedSizes":{"width":"750","height":"500"}}},"id":"#185","type":"component","lock":false,"position":19},{"name":"TextBlock","data":{"text":"### Åádek Hazards\nZobrazuje varovánà pÅed pÅekroÄenÃm bezpeÄných limitů. \nBarevné kódovánà tohoto Åádku symbolizuuje závažnost pÅekroÄenà limitů \n**BÃlá** = žádné ohroženà \n**Žlutá** = na hranici pÅÃpustnosti \n**Äervená** = vážné riziko \nRozkliknutÃm Åádku zobrazÃte podrobnosti o rizicÃch \n## Vymazánà vytvoÅeného plánu\nV seznamu vytvoÅených plánů posuÅte vybraný Åádek doleva. Zobrazà se Äervená ikona s popelnicà a na tu klepnÄte. PotvrÄte smazánà plánu.\n\n","textLarge":false,"imageOnRight":true,"image":{"recommendedSizes":{"width":"420","height":"280"}},"imageMobile":{"recommendedSizes":{"width":"750","height":"500"}}},"id":"#186","type":"component","lock":false,"position":20},{"name":"Divider","data":{"color":"darkGray"},"id":"#179","type":"component","lock":false,"position":21},{"name":"SectionDivider","data":{"title":"1. Example section title","skipToC":false},"id":"#170","type":"component","lock":false,"position":22},{"name":"TextBlock","data":{"text":"# ToDo list\nSloužà k vytvoÅenà a použÃvánà vlastnÃch kontrolnÃch seznamů, abyste si na vaÅ¡e potápÄÄské akce nikdy nic nezapomnÄli. \n## VytvoÅenà nového ToDo listu\n* KlepnÄte na Äervené tlaÄÃtko + vpravo nahoÅe\n* Vyberte jednu z nabÃzených pÅedloh (Templates) \n* Kontrolujte vaÅ¡i výstroj nebo úkoly a zaÅ¡krtávejte je v seznamu.\n* Hotový checklist se uložà do historie\n## Smazánà ToDo listu z historie\n* Vybranou položku ve výÄtu âMy ToDo Listsâ posuÅte doleva. Zobrazà se ikona s popelnicà na kterou klepnÄte a následnÄ potvrÄte.\n## VytvoÅenà vlastnà pÅedlohy (Template)\n* PoužÃváte-li stejný soupis výstroje Äi úkolů pro vaÅ¡e nejen potápÄÄské výpravy, vytvoÅte si vlastnà pÅedlohu.\n* KlepnÄte na ikonu ToDo templates vpravo dole\n* PÅidejte nový template klepnutÃmna Äervené tlaÄÃtko +\n* Pojmenujte svůj nový template\n* KlepnutÃm na tlaÄÃtko Add template items můžete vybrat jeden z pÅedpÅipravených templatů \n* PÅidávejte nové položky stisknutÃm Äerveného tlaÄÃtka +\n* NepotÅebné položky můžete mazat posunutÃm Åádku zprava doleva\n* KlepnutÃm na tlaÄÃtko New template váš n
2ový template uložÃte\n","textLarge":false,"imageOnRight":true,"image":{"recommendedSizes":{"width":"420","height":"280"}},"imageMobile":{"recommendedSizes":{"width":"750","height":"500"}}},"id":"#187","type":"component","lock":false,"position":23},{"name":"Divider","data":{"color":"darkGray"},"id":"#189","type":"component","lock":false,"position":24},{"name":"SectionDivider","data":{"title":"1. Example section title","skipToC":false},"id":"#188","type":"component","lock":false,"position":25},{"name":"TextBlock","data":{"text":"# Trips\nZpÅehledÅuje a sdružuje vÅ¡echny úkony jako plány, checklisty, pÅÃpravy pÅÃstroje, kalibrace, a záznamy ponorů z vaÅ¡eho potápÄÄského výletu.\n## VytvoÅenà nového výletu (Trip)\n* KlepnÄte na Äervené tlaÄÃtko + vpravo nahoÅe\n* Pojmenujte váš výlet\n* PÅidejte popis výletu\n* Nastavte datum zaÄátku výlet\n* Nastavte datum konce výletu\n* StisknÄte tlaÄÃtko Create trip\n\nBÄhem tohoto obdobà pÅidávejte vÅ¡echny úkony v aplikaci do tohoto výletu a pÅehlednÄ je najdete na jednom mÃstÄ.\n\n","textLarge":false,"imageOnRight":true,"image":{"recommendedSizes":{"width":"420","height":"280"}},"imageMobile":{"recommendedSizes":{"width":"750","height":"500"}}},"id":"#190","type":"component","lock":false,"position":26},{"name":"Divider","data":{"color":"darkGray"},"id":"#192","type":"component","lock":false,"position":27},{"name":"SectionDivider","data":{"title":"1. Example section title","skipToC":false},"id":"#191","type":"component","lock":false,"position":28},{"name":"TextBlock","data":{"text":"# Dives\nShromažÄuje vaÅ¡e záznamy ponorů, a vytváÅà tak váš potápÄÄský denÃk. U každého ponoru naleznete maximum informacà stažených z vaÅ¡eho potápÄÄského poÄÃtaÄe Freedom+ nebo CCR Liberty.\n\nZáznamy ponorů v Dives jsou synchronizovány s vaÅ¡Ãm úÄtem na Wetnotes.com (je nutné být pÅihlášen pod stejným úÄtem â emailovou adresou)\n\nPo otevÅenà se zobrazà seznam ponorů \nKlepnutÃm na ponor otevÅete detaily ponoru \n## Editace ponoru\nPonor nenà možné editovat v aplikaci. Pro editaci záznamu ponoru využijte on-lin službu Wetnotes.com\n","textLarge":false,"imageOnRight":true,"image":{"recommendedSizes":{"width":"420","height":"280"}},"imageMobile":{"recommendedSizes":{"width":"750","height":"500"}}},"id":"#218","type":"component","lock":false,"position":29},{"name":"Divider","data":{"color":"darkGray"},"id":"#220","type":"component","lock":false,"position":30},{"name":"SectionDivider","data":{"title":"1. Example section title","skipToC":false},"id":"#219","type":"component","lock":false,"position":31},{"name":"TextBlock","data":{"text":"# Devices\nPropojuje aplikaci s vaÅ¡Ãm zaÅÃzenÃm. Sloužà ke stahovánà záznamů ponorů, updatům, opravám, staženà systémových informacà a reportovánà problému se zaÅÃzenÃm s automatickým odeslánÃm potÅebných dat z vaÅ¡eho zaÅÃzenÃ. Pro rebreather CCR Liberty dokáže sledovat stáÅà kyslÃkových Äidel.\n\n## PÅipojenà zaÅÃzenÃ\nAktivujte Buetooth na zaÅÃzenà DIVESOFT (viz manuál pro dané zaÅÃzenÃ) \nVyberte zaÅÃzenà z nabÃdky Online. Pokud nejsou žádná viditelná zaÅÃzenà v nabÃdce, pÅidejte zaÅÃzenà Äerveným tlaÄÃtkem + vpravo nahoÅe.\n### Dive logs\nZde máte možnost stáhnout logy z vaÅ¡eho zaÅÃzenà do cloudu Wetnotes.com nebo offline do vaÅ¡eho telefonu.\n### Advanced\n#### Nahránà firmwaru ze souboru \nMožnost Advanced vám nabÃzà nahránà firmwaru ze souboru. StisknÄte tlaÄÃtko Advanced a zvolte Choose firmware. Vyhledejte soubor s firmwarem a spusÅ¥te aktualizaci. \n#### Staženà systémového souboru\nZažádá-li vás zákaznická a techncká podpora o Syslog, zde ho můžete stáhnout stisknutÃm Download a syslog.\n#### Reportovánà problému \nStisknÄte Report a problém. VyplÅte požadované údaje a popis problému. StisknÄte download and submit. Aplikace stáhne automatisky syslog a poslednÃch deset ponorů a spolu s vaÅ¡Ãm popisem a kontaktem jej zaÅ¡le technické podpoÅe DIVESOFT.\n","textLarge":false,"imageOnRight":true,"image":{"recommendedSizes":{"width":"420","height":"280"}},"imageMobile":{"recommendedSizes":{"width":"750","height":"500"}}},"id":"#193","type":"component","lock":false,"position":32},{"name":"Divider","data":{"color":"darkGray"},"id":"#197","type":"component","lock":false,"position":33},{"name":"SectionDivider","data":{"title":"1. Example section title","skipToC":false},"id":"#194","type":"component","lock":false,"position":34},{"name":"TextBlock","data":{"text":"# Settings\nRozsáhlá nastavenà aplikace, plánovaÄe, analyzátoru a uživatelská nastavenà profilu.\n\nNastavenà je rozdÄleno do ÄtyÅ základnÃch sekcÃ, které jsou uvedeny na spodnÃm Åádku obrazovky: Planner, Cylinders, Analyzer, User\n\n**Poznámka**: pÅed prvnÃm nastavovánÃm hodnot můžete zmÄnit jednotky metrické/imperiálnà v nastavenà User na vámi požadované.\n## Planner nastavenÃ\nVyberte pro jaký typ ponoru budete natavovat \n**CCR** = Rebreather, **OC** = otevÅený okruh \n### CCR nastavenà \n**SP Descent** â setpoint PO2, který bude použit bÄhem sestupu v plánovaÄi. Pozor nejedná se o variabilnà descent setpoint známý z nastavenà CCR Liberty, ale o fixnà setpoint po celou dobu sestupu až po dosaženà maximálnà hloubky.\n**SP bottom** â setpoint použÃvaný v hluboké Äásti ponoru\n**SP deco** â setpoint použÃvaný pro výstup. ZaÄÃná v bodÄ zahájenà výstupu.\n### OC nastavenà a spoleÄné nastavenÃ\nNásledujÃcà položky jsou spoleÄné pro CCR i OC. \n**SAC stress** â Povrchová spotÅeba
2na otevÅeném okruhu po dobu nouzové situace. SpotÅeba je pÅepoÄÃtávána pro okolnà tlak. Nastavujte vysokou spotÅebu pro realistické plánovánà ve chvÃli, kdy je ÅeÅ¡en zásadnà problém pod vodou v nejhorÅ¡Ãm možném okamžiku. V pÅÃpadÄ CO2 hitu může spotÅeba vyrůst i hodnÄ pÅes 75 l/min. Hodnota SAC stress je poÄÃtána do plánu po dobu stanovenou v položce Stress time. \n**SAC Deco** â Povrchová spotÅeba na otevÅeném okruhu po uplynutà Stress time. \n**Stress time** - Äas bÄhem kterého je poÄÃtána vysoká spotÅeba SAC stress. Zvažte nastavenou délku pro realistické plánovánà bailoutové spotÅeby plynu. \n**Problem solving time** â Äas, který je pÅiÄten k Äasu na dnÄ v pÅÃpadÄ pÅechodu na bailout. Je zapoÄÃtán Äas pro ÅeÅ¡enà problému jako je pÅepnutà plynu, vystÅelenà bóje, upozornÄnà týmu, vyproÅ¡tÄnà se apod. \n**Loop volume** â objem dýchacà smyÄky pro výpoÄet spotÅeby diluentu. Pro realistické plánovánà spotÅeby diluentu doporuÄujeme skuteÄnou hodnotu pÅinejmenÅ¡Ãm zdvojnásobit, aby byly brány v úvahu zmÄny hloubky bÄhem pobytu na dnÄ a drobné úniky plynu.\nMetabolic consumption â fyziologická spotÅeba kyslÃku. PÅi nastavenà berte v úvahu pÅÃpadnou nouzovou situaci, podmÃnky ponoru a drobné úniky plynu. \n**Ascent rate zones**: nastavte výstupové rychlosti ve tÅech různých hloubkových zónách výstupu. Hloubkové zóny definujte vpravo od pomyslného profilu výstupu znázornÄného Å¡ikmou úseÄkou. Rychlosti výst upu v jednotlivých zónách jsou nalevo od pomyslného profilu. \nKlepnÄte na konkrétnà údaj a zmÄÅte ho v poli nÞe. \n**Descent rate**: nastavenà rychlosti sestupu. \n**GF Low / High**: gradientnà faktory pro modifikaci výstupové kÅivky standardnÃho výstupu. GF low modifikuje hloubku prvnà zastávky (nižšà hodnota generuje hlubÅ¡Ã prvnà zastávku). GF High urÄuje mÃru nasycenà tkánà v okamžiku vynoÅenà ve srovnánà s Buhlmannovým algoritmem. ZjednoduÅ¡enÄ lze ÅÃci, že ÄÃm nižšà ÄÃslo, tÃm konzervativnÄjÅ¡Ã. DoporuÄené nastavenà je 40/75. \n**BO GF Low / High**: nastavenà gradientnÃch faktorů pro bailout výstup. PÅedokládá se, že pÅi pÅechodu na bailout potápÄÄ chce rychleji opustit vodu. Z toho důvodu je možné nastavit o nÄco agresivnÄjÅ¡Ã GF. \n**END**: Nastavenà ekvivalentnà narkotické hloubky. Generuje varovánà pÅi pÅekroÄenà END pÅi použità dýchacà smÄsi v dané hloubce. Optimálnà nastavenà END je 28 â 30 m. \n**Oxygen is Narcotic**: UrÄuje, zda je pÅi výpoÄtu END zapoÄÃtán narkotický potenciál kyslÃku. \n**Deco algorithm**: Vyberte ze dvou dekompresnÃch Algoritmů. ZHL16B je původnÄ urÄen pro dekompresnà tabulky. ZHL16C je původnÄ urÄen pro potápÄÄské poÄÃtaÄe a je mÃrnÄ konzervativnÄjÅ¡Ã. \n**Salinity:** UrÄete v jaké vodÄ se budete potápÄt - slaná, sladká nebo definovaná salinita EN 13319 odpovÃdajÃcà pÅibližnÄ brakické vodÄ. \n**Last stop depth**: UrÄete jaká bude hloubka poslednà dekompresnà zastávky. \n**Deco step**: UrÄete po jak velkých krocÃch budou plánovány vaÅ¡e dekompresnà zastávky \n**End pressure**: BezpeÄnostnà rezerva tlaku v lahvi (kolik musà v lahvi zůstat)\n","textLarge":false,"imageOnRight":true,"image":{"recommendedSizes":{"width":"420","height":"280"}},"imageMobile":{"recommendedSizes":{"width":"750","height":"500"}}},"id":"#196","type":"component","lock":false,"position":35},{"name":"TextBlock","data":{"text":"## Cylinders\nNastavenà potápÄÄských lahvà a smÄsÃ. Tato aplikace pÅedpokládá, že potápÄÄi vlastnà urÄitou zásobu lahvà ve svém skladu, které použÃvajà stále dokola a vybÃrajà ty, které se hodà pro daný ponor. Zejména rebreatherovà potápÄÄi majà naplnÄné bailoutové lahve, které vÄtÅ¡inou bÄhem ponoru nespotÅebovávajÃ. Z tohoto důvodu je tato Äást aplikace pojata jako takový osobnà sklad lahvÃ. Lahve můžete pÅidávat, editovat a odebÃrat podle libosti.\n\n**UpozornÄnÃ**: PÅi zadávánà plánu vybÃráte smÄs z tohoto skladu a nelze ji v ten okamžik editovat. Lze ji vÅ¡ak upravit v plánu samotném. \n\n**On-board oxygen**: Nastavenà kyslÃku pro Rebreather. Položku nelze odebrat. Lze nastavit objem a tlak lahve po stisknutà Äerveného tlaÄÃtka Edit.\n\n**On-board diluent**: ÅedÃcà plyn pro Rebreather. Položku nelze odebrat. Lze nastavit objem, tlak lahve a smÄs po stisknutà Äerveného tlaÄÃtka Edit. Ve spodnÃch kolonkách se vypoÄÃtá maximálnà operaÄnà hloubka smÄsi MOD a minimálnà hloubka použità s ohledem na množstvà kyslÃku (použità hypoxických smÄsÃ). MOD je poÄÃtán s PO2 o 0,2 bar nižšÃm, než je setpoint pro dno, aby byl diluent stále použitelný pro ÅedÄnà plynu.\n\n### M OC cyl. Room: sklad lahvà pro otevÅený okruh. \n#### PÅidánà nové smÄsi\nStisknÄte Äervené tlaÄÃtko + vpravo povýš. \n#### Smazánà smÄsi\nPotáhnÄte Åádek smÄsi doleva. Zobrazà se Äervená ikonka popelnice. KlepnÄte na nà a potvrÄte smazánà smÄsi.\n#### Editace smÄsi\nKlepnutÃm na danou smÄs otevÅete editaci smÄsi. \nNastavte objem lahve, skuteÄný tlak v lahvi, složenà plynu. \n\n**Limit PO2**: limit maximálnÃho parciálnÃho tlaku kyslÃku, který urÄuje maximálnà hloubku použità smÄsi. ZmÄna tohoto faktoru má zásadnà vliv na rozloženà smÄsà v hloubkách bÄhem výstupu a tÃm i jejich spotÅebu. Defaultnà hodnota je 1,4 bar. \n**MOD** â maximálnà operaÄnà hloubka smÄsi dle nastaveného Limit PO2 \n**Minimum depth** - minimálnà hloubka použità s ohledem na množstvà kyslÃku (použità hypoxických smÄsÃ). \n","textLarge":false,"imageOnRight":true,"image":{"recommendedSizes":{"width":"420","height":"280"}},"imageMobile":{"recommendedSizes":{"width":"750","height":"500"}}},"id":"#199","type":"component","lock":false,"position":36},{"name":"TextBlock","data":{"text":"## Analyzer nastavenÃ\nNastavte požadované parciálnà tlaky pro výpoÄet MOD maximálnà operaÄnà hloubky\n","textLarge":false,"imageOnRight":true,"image":{"recommendedSizes":{"width":"420","height":"280"}},"imageMobile":{"recommendedSizes":{"width":"750","height":"500"}}},"id":"#208","type":"component","lock":false,"position":37},{"name":"TextBlock","data":{"text":"## User nastavenÃ\n\nNastavte úÄet pro pÅihlaÅ¡ován do aplikace a služby Wetnotes.com a vyberte svou domovskou zemi\n\nZmÄÅte si **nastavenà mÄrných jednotek** dle své pÅirozenosti\n\n**Enable BETA features**: pouze pro beta testery aplikace. PovolenÃm souhlasÃte s použitÃm ne zcela otestovaných funkcà a jejich testovánÃm. Tyto funkce vám budou zpÅÃstupnÄny po zaÅazenà na seznam testerů aplikace a zapnutÃm tohoto tlaÄÃtka v aplikaci.\n\n**Subscribe to BETA FW**: PÅihlášenà k použÃvánà BETA Firmwaru v zaÅÃzenÃ. PovolenÃm souhlasÃte s použitÃm ne zcela otestovaných funkcà vaÅ¡eho zaÅÃzenà a jejich testovánÃm. Po zaÅazenà na seznam testerů daného zaÅÃzenà a zapnutÃm tohoto tlaÄÃtka v aplikaci zÃskáte možnost staženà beta firmwaru.\n\n**Delete account**: Smazánà aktuálnÃho uživatelského úÄtu \n**Verze aplikace**: PoklepánÃm na tuto položku otevÅete podrobnosti o verzi aplikace\n","textLarge":false,"imageOnRight":true,"image":{"recommendedSizes":{"width":"420","height":"280"}},"imageMobile":{"recommendedSizes":{"width":"750","height":"500"}}},"id":"#209","type":"component","lock":false,"position":38},{"name":"Divider","data":{"color":"darkGray"},"id":"#200","type":"component","lock":false,"position":39},{"name":"SectionDivider","data":{"title":"1. Example section title","skipToC":false},"id":"#195","type":"component","lock":false,"position":40}
2,{"name":"TextBlock","data":{"text":"# Manuals\nZobrazuje offline verze uživatelských manuálů pro vÅ¡echna zaÅÃzenà DIVESOFT.\n","textLarge":false,"imageOnRight":true,"image":{"recommendedSizes":{"width":"420","height":"280"}},"imageMobile":{"recommendedSizes":{"width":"750","height":"500"}}},"id":"#210","type":"component","lock":false,"position":41},{"name":"Divider","data":{"color":"darkGray"},"id":"#214","type":"component","lock":false,"position":42},{"name":"SectionDivider","data":{"title":"1. Example section title","skipToC":false},"id":"#211","type":"component","lock":false,"position":43},{"name":"TextBlock","data":{"text":"# Analyzer\nPoskytuje vzdálený displej k analyzátoru DNA\n## Spojenà s Analyzátorem\nKlepnÄte na tÅi teÄky vpravo nahoÅe. Zobrazà se výÄet dostupných analyzátorů, které jsou v dosahu 10 metrů. ÄÃslo analyzátoru odpovÃdá výrobnÃmu ÄÃslu. PÅiÅazený analyzátor bude i nadále asociován s vaÅ¡Ãm mobilnÃm telefonem respektive aplikacÃ. Chcete-li odpojit nebo zmÄnit analyzátor se kterým je aplikace spárována, stisknÄte opÄt tÅi teÄky a následnÄ stisknÄte Äervené tlaÄÃtko Disconnect from Analyzer.\n## Kalibrace\nPÅed prvnÃm použitÃm analyzátoru je nutná kalibrace, bez které nenà funkce analyzátoru vůbec dostupná. PÅipravte si kalibraÄnà plyn a stisknÄte tlaÄÃtko Calibrate. Na výbÄr je ze dvou možnostà vzduch (Air) a kyslÃk (Oxygen). \n\n**UpozornÄnÃ**: Je zcela zásadnÃ, aby byl vybrán právÄ takový plyn, který skuteÄnÄ ke kalibraci použijete! V opaÄném pÅÃpadÄ dojde k chybnému mÄÅenÃ, které může mÃt za následek vážná zranÄnà Äi smrt.\nPo výbÄru plynu pÅiložte analyzátor ke kalibraÄnÃmu plynu (v pÅÃpadÄ vzduchu se ujistÄte, že na Äidle je skuteÄnÄ vzduch â napÅÃklad odsátÃm plynu z prostoru Äidla, ÄÃmž na Äidlo proudà právÄ vzduch) a vyÄkejte na stabilizaci napÄtà Äidla (údaj v mV). Poté stisknÄte tlaÄÃtko Calibrate.\n## MÄÅenÃ\nJakmile je aplikace zkalibrována s pÅipojeným analyzátorem, staÄà analyzátor pÅiložit k analyzovanému plynu, nebo propojit s omezovaÄem průtoku pÅipojeným na plyn a otevÅÃt lahev s analyzovaným plynem. Na displeji odeÄÃtejte hodnoty složenà plynu. Dále jsou zobrazovány maximálnà operaÄnà hloubky (MOD) pro daný plyn a zvolené parciálnà tlaky.\n\n","textLarge":false,"imageOnRight":true,"image":{"recommendedSizes":{"width":"420","height":"280"}},"imageMobile":{"recommendedSizes":{"width":"750","height":"500"}}},"id":"#213","type":"component","lock":false,"position":44},{"name":"Divider","data":{"color":"darkGray"},"id":"#215","type":"component","lock":false,"position":45},{"name":"SectionDivider","data":{"title":"1. Example section title","skipToC":false},"id":"#212","type":"component","lock":false,"position":46}
2,{"name":"TextBlock","data":{"text":"# Report issue\nProstor ke kontaktu se zákaznickou podporou DIVESOFT a reportovánà jakéhokoli problému s jakýmkoli výrobkem spoleÄnosti DIVESOFT.\n","textLarge":false,"imageOnRight":true,"image":{"recommendedSizes":{"width":"420","height":"280"}},"imageMobile":{"recommendedSizes":{"width":"750","height":"500"}}},"id":"#217","type":"component","lock":false,"position":47},{"name":"Divider","data":{"color":"darkGray"},"id":"#216","type":"component","lock":false,"position":48},{"name":"Footer","data":{"copyrights":"Copyright © 2019 Divesoft LLC All rights reserved.","cookiesUrl":"","facebookUrl":{"url":"https://www.facebook.com/divesoft"},"instagramUrl":{"url":"https://www.instagram.com/divesoft/"},"youtubeUrl":{"url":"https://www.youtube.com/channel/UCHI2-kHmfoUlAdhQXPKl8lA"},"twitterUrl":{"url":"https://twitter.com/divesoft"},"linkedinUrl":{"url":"https://www.linkedin.com/company/divesoft/"}},"id":"#175","type":"component","lock":false,"position":49}],"id":"root","idBuffer":"#221","lastCommit":"48acf1e1-d330-4d1c-92bc-1c8b540306b5"}},"annotations":[],"language":{"type":"id","generated":false,"id":"Language:cjv3kwvoj000u083611381c6o","typename":"Language"},"__typename":"PageTranslation"},"Page:cm1j7dd3t588s0817fj01jh0k":{"id":"cm1j7dd3t588s0817fj01jh0k","type":{"type":"id","generated":false,"id":"PageType:cjv3l213x004f08366hjufttp","typename":"PageType"},"tags":[],"translations({\"where\":{\"language\":{\"id\":\"cjv3kwvoj000u083611381c6o\"}}}
2)":[{"type":"id","generated":false,"id":"PageTranslation:cm1j7dd45588z08176irv6n39","typename":"PageTranslation"}],"__typename":"Page"},"PageTranslation:cm1j7dd45588z08176irv6n39":{"id":"cm1j7dd45588z08176irv6n39","name":"Divesoft.app","createdAt":"2024-09-26T11:20:30.629Z","content":{"type":"json","json":{"content":[{"name":"Header","data":{"products":[{"title":"Accessories","description":"Backplates, Consumables. Tanks.","img":{"recommendedSizes":{"width":"235","height":"235"}},"url":""},{"title":"Accessories sets","description":"Protection, maintenance, cleaning.","img":{"recommendedSizes":{"width":"235","height":"235"}},"url":""},{"title":"Spare parts","description":"Spare parts and components.","img":{"recommendedSizes":{"width":"235","height":"235"}},"url":""},{"title":"Spare parts kits","description":"Completly Liberty spare parts kits.","img":{"recommendedSizes":{"width":"235","height":"235"}},"url":""}]},"id":"#0","type":"component","lock":false,"position":0},{"name":"LinkCrossroad","data":{"title":"User Manuals","subtitle":"","showBreadcrumbs":true,"hideHeader":false,"firstTitle":"Choose Language","firstColumn":"1","firstLinks":[{"title":"English Language","url":"","anchor":"support-divesoft.app-manuals-english","id":"1"},{"id":"6","title":"Czech Language","anchor":"support-divesoft.app-manuals-czech"}],"secondTitle":"","secondColumn":"1","secondLinks":[],"thirdTitle":"","thirdColumn":"1","thirdLinks":[],"fourthTitle":"","fourthColumn":"1","fourthLinks":[],"fifthTitle":"","fifthColumn":"1","fifthLinks":[],"activeTab":"1"},"id":"#2","type":"component","lock":false,"position":1},{"name":"Spacer","data":{"spacingLarge":"50","spacingSmall":"50","backgroundColor":"#ffffff"},"id":"#3","type":"component","lock":false,"position":2},{"name":"LinkAnchor","data":{"anchorId":"support-ccr-liberty-manuals-english"},"id":"#4","type":"component","lock":false,"position":3},{"name":"DownloadsNew","data":{"backgroundColor":"#ffffff","title":"English Manuals","subtitle":"Divesoft.app","showBreadcrumbs":false,"hideHeader":false,"files":[{"id":"3","title":"Divesoft.app User Manual - Online version","subtitle":"","isTitleBold":false,"url":{"url":"/en/manuals/divesoft-app-user-manual-en","mediaData":{"mimetype":"application/pdf","size":6686172,"hash":"e9332173874a2e721ff2dff36d9457c68e740265","id":"cl2rd8azg3xvz07766ygpqt5j","filename":"liberty-en-manual.pdf","category":"divesoft/docs/","type":"file"},"urlNewWindow":true,"pageId":"cm1evxo544dge08177rmhsl6i"},"urlText":"Open"}],"activeTab":"3"},"id":"#5","type":"component","lock":false,"position":4},{"name":"LinkAnchor","data":{"anchorId":"support-divesoft.app-manuals-czech"},"id":"#6","type":"component","lock":false,"position":5},{"name":"DownloadsNew","data":{"backgroundColor":"#ffffff","title":"Czech Manuals","subtitle":"Divesoft.app","showBreadcrumbs":false,"hideHeader":false,"files":[{"id":"2","title":"Divesoft.app Uživtelský manuál - Online version","url":{"url":"/en/manuals/divesoft-app-user-manual-cz","pageId":"cm1hnvll84w1y081776bnhrg6","urlNewWindow":true},"urlText":"OtevÅÃt","isTitleBold":false}],"activeTab":"2"},"id":"#15","type":"component","lock":false,"position":14},{"name":"Footer","data":{"copyrights":"Copyright © 2019 Divesoft LLC All rights reserved.","facebookUrl":"","youtubeUrl":"","instagramUrl":"","contacts":"**Divesoft, s.r.o.** Hálkova 2495 413 01 Roudnice nad Labem Äeská republika Tel.: +420 416 857 057 E-mail: [email protected]"},"id":"#1","type":"component","lock":false,"position":15}],"id":"root","idBuffer":"#16","lastCommit":"9eeb2a9f-daf2-4a51-940d-6c643175ee75"}},"annotations":[],"language":{"type":"id","generated":false,"id":"Language:cjv3kwvoj000u083611381c6o","typename":"Language"},"__typename":"PageTranslation"},"Page:cm1j7jpxs58am0817odencavx":{"id":"cm1j7jpxs58am0817odencavx","type":{"type":"id","generated":false,"id":"PageType:cjv3l213x004f08366hjufttp","typename":"PageType"},"tags":[],"translations({\"where\":{\"language\":{\"id\":\"cjv3kwvoj000u083611381c6o\"}}})":[{"type":"id","generated":false,"id":"PageTranslation:cm1j7jpy758at0817on7mgapq","typename":"PageTranslation"}],"__typename":"Page"},"PageTranslation:cm1j7jpy758at0817on7mgapq":{"id":"cm1j7jpy758at0817on7mgapq","name":"User manuals","createdAt":"2024-09-26T11:25:27.199Z","content":{"type":"json","json":{"content":[{"name":"Header","data":{"products":[{"title":"Accessories","description":"Backplates, Consumables. Tanks.","img":{"recommendedSizes":{"width":"235","height":"235"}},"url":""},{"title":"Accessories sets","description":"Protection, maintenance, cleaning.","img":{"recommendedSizes":{"width":"235","height":"235"}},"url":""},{"title":"Spare parts","description":"Spare parts and components.","img":{"recommendedSizes":{"width":"235","height":"235"}},"url":""}
2,{"title":"Spare parts kits","description":"Completly Liberty spare parts kits.","img":{"recommendedSizes":{"width":"235","height":"235"}},"url":""}]},"id":"#0","type":"component","lock":false,"position":0},{"name":"LinkCrossroad","data":{"title":"Divesoft.app","subtitle":"","showBreadcrumbs":true,"hideHeader":false,"firstTitle":"Choose Language","firstColumn":"1","firstLinks":[{"title":"English Language","url":"","anchor":"support-divesoft.app-manuals-english","id":"1"},{"id":"6","title":"Czech Language","anchor":"support-divesoft.app-manuals-czech"}],"secondTitle":"","secondColumn":"1","secondLinks":[],"thirdTitle":"","thirdColumn":"1","thirdLinks":[],"fourthTitle":"","fourthColumn":"1","fourthLinks":[],"fifthTitle":"","fifthColumn":"1","fifthLinks":[],"activeTab":"1"},"id":"#2","type":"component","lock":false,"position":1},{"name":"Spacer","data":{"spacingLarge":"50","spacingSmall":"50","backgroundColor":"#ffffff"},"id":"#3","type":"component","lock":false,"position":2},{"name":"LinkAnchor","data":{"anchorId":"support-ccr-liberty-manuals-english"},"id":"#4","type":"component","lock":false,"position":3},{"name":"DownloadsNew","data":{"backgroundColor":"#ffffff","title":"English Manuals","subtitle":"Divesoft.app","showBreadcrumbs":false,"hideHeader":false,"files":[{"id":"3","title":"Divesoft.app User Manual - Online version","subtitle":"","isTitleBold":false,"url":{"url":"/en/manuals/divesoft-app-user-manual-en","mediaData":{"mimetype":"application/pdf","size":6686172,"hash":"e9332173874a2e721ff2dff36d9457c68e740265","id":"cl2rd8azg3xvz07766ygpqt5j","filename":"liberty-en-manual.pdf","category":"divesoft/docs/","type":"file"},"urlNewWindow":true,"pageId":"cm1evxo544dge08177rmhsl6i"},"urlText":"Open"}],"activeTab":"3"},"id":"#5","type":"component","lock":false,"position":4},{"name":"LinkAnchor","data":{"anchorId":"support-divesoft.app-manuals-czech"},"id":"#6","type":"component","lock":false,"position":5},{"name":"DownloadsNew","data":{"backgroundColor":"#ffffff","title":"Czech Manuals","subtitle":"Divesoft.app","showBreadcrumbs":false,"hideHeader":false,"files":[{"id":"2","title":"Divesoft.app Uživtelský manuál - Online version","url":{"url":"/en/manuals/divesoft-app-user-manual-cz","pageId":"cm1hnvll84w1y081776bnhrg6","urlNewWindow":true},"urlText":"Open","isTitleBold":false}],"activeTab":"2"},"id":"#15","type":"component","lock":false,"position":14},{"name":"Footer","data":{"componentTemplateId":"cjvwimxrl08e40798hjs5ek9w"},"id":"#1","type":"component","lock":false,"position":15}],"id":"root","idBuffer":"#16","lastCommit":"ce5ca132-a78c-4e87-ae6e-43bae2036e63"}},"annotations":[],"language":{"type":"id","generated":false,"id":"Language:cjv3kwvoj000u083611381c6o","typename":"Language"},"__typename":"PageTranslation"},"Page:cm24hw4rb917x0817cy5o7ph3":{"id":"cm24hw4rb917x0817cy5o7ph3","type":{"type":"id","generated":false,"id":"PageType:cjv3l213x004f08366hjufttp","typename":"PageType"},"tags":[{"type":"id","generated":false,"id":"Tag:cm5ww05zc1b5d0803zglvz927","typename":"Tag"}],"translations({\"where\":{\"language\":{\"id\":\"cjv3kwvoj000u083611381c6o\"}}})":[{"type":"id","generated":false,"id":"PageTranslation:cm24hw4rr91840817iui5md1s","typename":"PageTranslation"}],"__typename":"Page"},"PageTranslation:cm24hw4rr91840817iui5md1s":{"id":"cm24hw4rr91840817iui5md1s","name":"My diving journey to CCR Liberty","createdAt":"2024-10-11T08:58:12.134Z","content":{"type":"json","json":{"content":[{"name":"Header","data":{"products":[{"title":"Accessories","description":"Backplates, Consumables. Tanks.","img":{"recommendedSizes":{"width":"235","height":"235"}},"url":""},{"title":"Accessories sets","description":"Protection, maintenance, cleaning.","img":{"recommendedSizes":{"width":"235","height":"235"}},"url":""},{"title":"Spare parts","description":"Spare parts and components.","img":{"recommendedSizes":{"width":"235","height":"235"}},"url":""},{"title":"Spare parts kits","description":"Completly Liberty spare parts kits.","img":{"recommendedSizes":{"width":"235","height":"235"}},"url":""}]},"id":"#0","type":"component","lock":false,"position":0},{"name":"BlogArticle","data":{"title":"My diving journey to CCR Liberty","perex":"My first diving experience came during a holiday when I succumbed to the lure of an animator who enticed me to try out the diving apparatus in the pool. The nice thing was that I took the PADI OWD course in Egypt and instead of pool dives, the \"controlled\" conditions were in a beautiful sandy lagoon surrounded by coral. So logically, the AOWD course followed a year later in a similar location.","content":"For the next few years I did s
2ome occasional diving in summer resorts and warm seas. A shift came when I headed to the Austrian Lakes with a group of divers called Kapr Divers. Here I saw something I had only read about up until then. The divers had dry suits, lots of gear and were diving unimaginably deep. When the instructor of Kapr Diver - Petr Slezak asked me if I wanted to learn more about technical diving, there was no waiting!\n\n\nPhoto: René Valvoda, recreational diving at Easter Island\n\nHowever, the very beginning of technical diving was not easy for me. I was motivated by the feeling that technical diving with its principles and doubling of equipment is in principle safer and that it is actually rather a coincidence that I even survived the years of recreational diving ð.\n\n\nPhoto: Kapr Divers, exploration of the Judit Bridge foundations using open-circuit (OC)\n\nMy status as a technical diver opened the way to interesting places around the world and at home. I was never particularly good at history, but adding information and historical context about sunken ships or flooded buildings made the dives themselves a more comprehensive experience.\n\nAnother logical consideration to get to more wrecks and interesting places was the inclusion of Helium-added mixtures.\n\nThe combination of the cost of deep diving with Trimix, and the limited dive time due to the amount of mixtures in the bottles led to logical considerations on how to solve these handicaps. Moreover, despite my best efforts, my surface equivalent consumption (SAC) was above that of my dive partners and I was always the one turning the dive and thus planning it. In 2015, a \"meeting\" was held at Kapr Divers which resulted in the consideration of purchasing rebreathers, i.e. closed circuit breathing apparatus. This would solve the cost of diving with Trimix and partly limit the number of dives with a lot of mixtures. Another advantage considered was the quiet operation underwater and therefore the possibility of better fish observation. The positive impact of the still ideal mix in the rebreathers on overall post-dive fatigue and decompression progress was also an assumed plus.\n\n\nPhoto: Kapr Divers, team dive with open-circuit to 100m at Attersee\n\nIn the end, the three of us decided: this was the way to go! One of the reasons was that we just wanted to move up to the next level. The very desire and logical arguments described above were supplemented by the calculation of the return on the considerable sum invested in the rebreather. The result was shocking, and the payback came after only a few dozen dives with the Trimix, which for us represented a period of about one year with our style of diving.\n\nIt was kind of just a formality to confirm the choice of which particular device to use . Our consideration led us to the CCR Liberty. Moreover, this instrument could newly boast CE certification, which made it unique at the time. However, the Liberty's uniqueness is much broader than that, and quite crucial in terms of safety and practicality of diving. The device is very well ergonomically designed and all key components are duplicated.\n\n\nPhoto: Kapr Divers, diving at OrlÃk Dam with CCR Liberty\n\nBuying a CCR Liberty and taking the CCR Liberty diver course completely changed my diving options. I started using the Trimix for dives that I had previously done with air. The cost of the dive was completely negligible but the dimension of the dive with the TMX changed significantly compared to air. Gradually I had the opportunity to visit many other great wrecks and dive sites. Flooded caves were suddenly divable much further from the entrance. But there were also some negative observations. While I didn't have to constantly refill my breathing cylinders during the dive, I again had to keep a number of cylinders in reserve for use as backups to the primary CCR Liberty unit. But this fact was amply redeemed by the wonderful dives that would have been almost impossible using OC technology. Worthy of mention is the breathtaking neck of the German submarine U 455 at 120 meters off Genoa, Italy, the wreck of the tanker Haven there, or the repeated nearly four-hour dives in the iconic French Ressel Cave. I was also able to spend much more time at the now famous B-17 wreck.\n\n\nPhoto: Marian Chachalák, dive with back-mounted CCR Liberty on the B-17 bomber wreck â Vis, Croatia\n\nOver time, I have added the option of diving with the CCR Liberty in the \"back mount\" configuration by purchasing a conversion kit. This allowed me to reduce the weight of the transported gear and increase the agility during dives. This option has been especially useful for dives in narrow caves and wreck penetrations. Despite my initial opinion that this is not a configuration suitable for Trimix diving due to the backup and drysuit inflation solution, I am now enthusiastic about Trimix dives with the need for a two-bottle backup. Especially when diving at Truk Lagoon I appreciated this. The overall weight of the unit for airplane transport allowed the use of a single piece of luggage, and the two backup cylinders provided ample space for dives to depths of around 60 meters. Most air dives were also enjoyable and I appreciated the use of the CCR in this area.\n\n\nPhoto: Marian Chachalák, dive with side-mounted CCR Liberty in the flooded Kobanya mine, Budapest\n\nThe last CCR course I took, on the other hand, took me a very big step forward. Under the vision of interesting expeditions, I decided to replace a number of backup bottles with a second \"backup\" CCR Liberty device. The concept is relatively simple, but it has taken me that much further. The primary CCR Liberty dive unit is backed up by a second CCR Liberty unit in a Side Mount configuration. A single bottle of OC backup is already sufficient for this setup in case of a complicated transition between instruments. Overall, this setup of two CCR Liberty and one bottle is sufficient for any depth while maintaining CO2 absorber time in an appropriate planning strategy. The great advantage of this configuration is that Divesoft, as the only manufacturer, has software that provides the decompression profile calculation on both units identically and without the need for an additional computer allows a
2safe transition from one unit to the other at any stage of the dive. With this equipment, I have participated in several diving expeditions to identify previously undived wrecks. Apart from discoveries in the Atlantic Ocean around the Faroe Islands or Orkney. I had the opportunity to be a member of the expedition that successfully identified the WWI German minelaying submarine UC - 55 in the area of the Scottish Shetland Islands. I consider this dive to a depth of 105 metres in the harsh conditions of the North Sea to be iconic and unforgettable.\n\n\nPhoto: Tomáš Zloch, dive with back-mounted and bailout side-mounted CCR Liberty, wreck of Olsana, Faroe Islands\n\nIn my diving practice I have encountered many divers using different CCR instruments or different configurations of CCR Liberty. I have participated in many emotional debates on the topic of which instrument or configuration is best. Certainly the key takeaway is that something a little different suits everyone, and as long as you are used to your apparatus and configuration, diving responsibly and safely, you are not wrong. For me, Divesoft is the clear choice. Beyond the instrument concept and the constant evolution, I have to appreciate the support I get to enjoy. At the same time, I have also been involved in several small improvements based on my own experience and this is another important factor for me if the manufacturer is inspired by the users.\n\nI wish everyone a wonderful and safe diving in any mode, conditions and equipment\n\n\n\n**About the Author: **\n\nMartin Mako JaneÄek \n[facebook.com/mako.janecek](https://www.facebook.com/mako.janecek)","showTags":false,"showDate":true,"image":{"mimetype":"image/jpeg","size":1618178,"hash":"ea5e0de412c60d75f065c39c0a5de50a00ba94ed","id":"cm1yxhmgn82lm0874n5xbb6w1","filename":"martin-mako-janecek-my-diving-journey-to-ccr-liberty-0.jpg","category":"divesoft/","type":"image"},"publishDate":""},"id":"#2","type":"component","lock":false,"position":1},{"name":"BlogArticle","data":{"title":"Moje potápÄÄská cesta kâ¯CCR Liberty ","perex":"Moje prvnà potápÄÄské zkuÅ¡enosti pÅiÅ¡li bÄhem dovolené, kdy jsem podlehl vábenà animátora, který lákal na vyzkouÅ¡enà potápÄÄského pÅÃstroje v bazénu. PÅÃjemné bylo, že jsem PADI OWD kurz absolvoval v EgyptÄ a mÃsto bazénových ponorů se âkontrolovanéâ podmÃnky nacházely v krásné pÃseÄné lagunÄ obklopené korály. A tedy logicky o rok pozdÄji následoval AOWD kurz na podobném mÃstÄ.","content":"\nDalÅ¡Ãch nÄkolik let jsem se obÄasnÄ vÄnoval potápÄnà v letnÃch letoviscÃch a teplých moÅÃch. Posun nastal, když jsem zamÃÅil kâ¯Rakouským jezerům se skupinou potápÄÄů Kapr Divers. Zde jsem vidÄl nÄco, o Äem jsem do té doby jen Äetl. PotápÄÄi mÄli suché obleky, velké množstvà výstroje a potápÄli se nepÅedstavitelnÄ hluboko. Když se mÄ instruktor Kapr Diver - Petr Slezák zeptal, zdali se nechci o technickém potápÄnà dozvÄdÄt nÄco vÃc, nebylo na co Äekat! \n\nÃplné zaÄátky technického potápÄnà nebyly vÅ¡ak pro mÄ jednoduché. Motivacà pro mÄ byl pocit, že technické potápÄnà svými principy a zdvojenÃm výstroje je vâ¯zásadÄ bezpeÄnÄjÅ¡Ã a že je vlastnÄ spÃÅ¡ náhoda, že jsem roky rekreaÄnÃho potápÄnà vlastnÄ pÅežil ð. \n\nStatus technického potápÄÄe mi otevÅel cestu na zajÃmavá svÄtová i domácà mÃsta. Nikdy mÄ dÄjepis nijak zvlášť neÅ¡el, ale doplnÄnà si informacà a historických souvislostà o potopených lodÃch, Äi zatopených budovách mÄ samotné ponory doplnilo na komplexnÄjÅ¡Ã zážitek. \n\nDalÅ¡Ã logickou úvahou, jak se dostat kâ¯dalÅ¡Ãm vrakům a zajÃmavým mÃstům bylo zaÅazenà smÄsà doplnÄných o Helium. \n\nSpojenà cenové nákladnosti hloubkového potápÄnà sâ¯Trimixem a omezená doba ponorů daná množstvÃm smÄsà vâ¯lahvÃch vedla kâ¯logickým úvahám, jak tyto handicapy vyÅeÅ¡it. NavÃc i pÅes veÅ¡kerou snahu se moje ekvivalentnà hladinová spotÅeba (SAC) pohybovala nad spotÅebou parťáků a byl jsem vždy tÃm, kdo ponor otáÄel, a tÃm také i plánoval. Vâ¯roce 2015 probÄhla vâ¯Kapr Divers âporadaâ jejÃmž výsledkem byla úvaha o poÅÃzenà rebreatrů, tedy pÅÃstrojů sâ¯uzavÅeným dýchacÃm okruhem. To by mi vyÅeÅ¡ilo cenovou nákladnost potápÄnà sâ¯Trimixem a ÄásteÄnÄ i limitaci ponorů množstvÃm smÄsÃ. DalÅ¡Ã zvažovanou výhodou byl tichý provoz pod vodou a tedy možnost lépe pozorovat ryby. PÅedpokládaným kladem byl také pozitivnà dopad stále ideálnà smÄsi vâ¯rebreatherů na celkovou únavu po ponoru a průbÄh dekomprese. \n\nNakonec jsme se tÅi rozhodli: touto cesto půjdeme! Jeden zâ¯důvodů bylo i to, že jsme prostÄ chtÄli postoupit na dalÅ¡Ã stupÃnek. Samotnou touhu a logické argumenty popsané výše jsme doplnili i o výpoÄet návratnosti nemalé Äástky do poÅÃzenà rebreathru. Výsledek byl až Å¡okujÃcà a nÃ
2¡vratnost vycházela už po nÄkolika desÃtkách ponorů sâ¯Trimixem, což pro nás pÅedstavovalo obdobà okolo jednoho roku pÅi naÅ¡em stylu potápÄnÃ. \n\nTak trochu jen formálnÃm krokem bylo potvrzenà výbÄru, jaký konkrétnà pÅÃstroj zvolit. NaÅ¡e úvaha nás vedla kâ¯CCR Liberty. NavÃc tento pÅÃstroj se mohl novÄ pyÅ¡nit CE certifikacÃ, což ho vâ¯té dobÄ Äinilo unikátnÃ. Unikátnost Liberty je ale mnohem Å¡irÅ¡Ã a zâ¯pohledu bezpeÄnosti a praktiÄnosti potápÄnà zcela zásadnÃ. PÅÃstroj je velmi dobÅe ergonomicky navržen a vÅ¡echny klÃÄové komponenty jsou zdvojeny. \n\nKoupÄ CCR Liberty a absolvovanà kurzu CCR Liberty diver úplnÄ zmÄnilo moje potápÄÄské možnosti. Trimix jsem zaÄal využÃvat i na ponory, které jsem dÅÃve realizoval se vzduchem. Cena ponoru byla zcela zanedbatelná a rozmÄr ponoru sâ¯TMX se oproti vzduchu výraznÄ zmÄnil. PostupnÄ jsem mÄl možnost navÅ¡tÃvit Åadu dalÅ¡Ãch skvÄlých vraků a potápÄÄských mÃst. Zatopené jeskynÄ se najednou daly potápÄt mnohem dál od vstupu. Objevily se ale i negativnà poznatky. Sice jsem nemusel neustále plnit lahve pro dýchánà bÄhem ponoru, ale zase jsem musel mÃt vâ¯zásobÄ Åadu lahvà pro využità jako zálohy primárnà jednotky CCR Liberty. Ale tento fakt byl bohatÄ vykoupen nádhernými ponory, které by sâ¯využitÃm OC technologie nebyly témÄÅ možné. Za zmÃnku stojà úchvatný vratk nÄmecké ponorky U 455 ve 120 metrech u italského Janova, vrak tankeru Haven tamtéž, Äi opakované témÄÅ ÄtyÅhodinové ponory vâ¯ikonické francouzské jeskyni Ressel. Také u již známého vraku letadla B-17 jsem mohl trávit mnohem delÅ¡Ã dobu. \n\nVâ¯průbÄhu Äasu jsem doplnil možnost potápÄnà sâ¯CCR Liberty vâ¯konfiguraci pÅÃstroje âna zádechâ o možnost varianty Side Mount a to dokoupenÃm konversion kitu. Dovolilo mi to snÞit váhu transportované výstroje a zvýšit obratnost pÅi ponorech. Tato varianta se mi osvÄdÄila pÅedevÅ¡Ãm pro ponory vâ¯Ãºzkých jeskynÃch a penetracÃch do vraků. PÅes původnà názor, že se nejedná o konfiguraci vhodnou pro Trimixové potápÄnà zâ¯důvodu ÅeÅ¡enà zálohy a napouÅ¡tÄnà suchého obleku jsem nynà nadÅ¡ený i pro Trimixové ponory sâ¯nutnostà zálohy do dvou lahvÃ. PÅedevÅ¡Ãm pÅi potápÄnà na Truk Lagoon jsem toto ocenil. Celková váha pÅÃstroje pro dopravu letadlem dovolovala využità jediného zavazadla a dvÄ záložnà lahve poskytovali dostateÄný prostor pro ponory do hloubek okolo 60 metrů. VÄtÅ¡ina vzduchových ponorů byla také pÅÃjemná a využità CCR jsem vâ¯této oblasti velmi ocenil. \n\nPoslednà CCR kurz, který
2jsem absolvoval mÄ naopak posunul o hodnÄ velký krok vpÅed. Pod vidinou zajÃmavých expedic jsem se rozhodl nahradit množstvà záložnÃch lahvà druhým âzáložnÃmâ CCR Liberty pÅÃstrojem. Koncept je pomÄrnÄ jednoduchý, ale o to dál mÄ posunul. Primárný potápÄÄský pÅÃstroj CCR Liberty je zálohován druhým pÅÃstrojem CCR Liberty vâ¯konfiguraci Side Mount. Kâ¯této sestavÄ již dostaÄuje jediná lahev OC zálohy pro pÅÃpad komplikovaného pÅechodu mezi pÅÃstroji. CelkovÄ tato sestava dvou CCR Liberty a jedné lahve je dostateÄná pro jakékoliv hloubky pÅi dodrženà Äasu pohlcovaÄe CO2 vâ¯odpovÃdajÃcà strategii plánovánÃ. SkvÄlou výhodou této konfigurace je, že Divesoft, jako jediný výrobce má software, který zajiÅ¡Å¥uje výpoÄet dekompresnÃho profilu na obou jednotkách totožnÄ a bez nutnosti dalÅ¡Ãho poÄÃtaÄe umožÅuje bezpeÄný pÅechod zâ¯jedná jedné jednotky na druhou vâ¯jakoukoliv fázi ponoru. Sâ¯tÃmto vybavenÃm jsem se zúÄastnil nÄkolika potápÄÄských expedic, které mÄli za cÃl identifikovat do té doby nepotápÄné vraky. Mimo objevy vâ¯Atlanstkém ocenu vâ¯okolà Faerských ostrovů, Äi OrknejÃ. Jsem mÄl možnost být Älenem expedice, která úspÄÅ¡nÄ identifikovala nÄmeckou minonosnou ponorku UC â 55 zâ¯prvnà svÄtové války vâ¯oblasti skotských Shetlandských ostrovů. Tento ponor do hloubky 105 metrů vâ¯nelehkých podmÃnkách SevernÃho moÅe považuji za ikonický a nezapomenutelný. \n\nVâ¯mé potápÄÄské praxi jsem se setkal sâ¯Åadou potápÄÄů využÃvajÃcÃch různé CCR pÅÃstroje, Äi různé konfigurace CCR Liberty. ÃÄastnil jsem se Åady emotivnÃch debat na téma, který pÅÃstroj, Äi konfigurace je nejlepÅ¡Ã. RozhodnÄ klÃÄový poznatek je, že každému vyhovuje trochu nÄco jiného a pokud je zvyklý na svůj pÅÃstroj a konfiguraci, potápà odpovÄdnÄ a bezpeÄnÄ, nenà to Å¡patnÄ. Za mÄ je Divesoft jasná volba. Mimo koncept pÅÃstroje a neustálý vývoj, musÃm ocenit i podporu, kterou mám možnost využÃvat. ZároveÅ jsem se nÄkolikrát podÃlet i na drobných vylepÅ¡enÃch na základÄ vlastnà zkuÅ¡enostizkuÅ¡enosti, a to je pro mÄ i dalÅ¡Ã důležitý faktor, pokud se výrobce nechá inspirovat uživateli. \n\nVÅ¡em pÅeji krásné a bezpeÄné potápÄnÃpotápÄnÃ, a to vâ¯jakémkoliv režimu, podmÃnkách a vybavenÃ. ","showTags":false,"showDate":false},"id":"#24","type":"component","lock":false,"position":2},{"name":"ProductShowcase","data":{"componentTemplateId":"cm9h4wr6ugjv10803yqs3tp71"},"id":"#21","type":"component","lock":false,"position":5},{"name":"Footer","data":{"copyrights":"Copyright © 2019 Divesoft LLC All rights reserved.","facebookUrl":{"urlNewWindow":true,"url":"https://www.facebook.com/divesoft/"},"youtubeUrl":{"url":"https://www.youtube.com/@divesoft_tv","urlNewWindow":true},"instagramUrl":{"url":"https://www.instagram.com/divesoft/","urlNewWindow":true},"contacts":"**Divesoft s.r.o.** \nHálkova 2495 \n413 01 Roudnice nad Labem \nCzech Republic \nTel.: +420 416 857 057 \nE-mail: [email protected]","twitterUrl":{"url":"","urlNewWindow":true,"pageId":"cjv3l26tp004p0836i54n4u7a"}},"id":"#1","type":"component","lock":false,"position":6}],"id":"root","idBuffer":"#25","lastCommit":"7af21a4e-0957-411b-a14f-0a92e701e4f7"}},"annotations":[{"type":"id","generated":true,"id":"PageTranslation:cm24hw4rr91840817iui5md1s.annotations.0","typename":"PageAnnotation"},{"type":"id","generated":true,"id":"PageTranslation:cm24hw4rr91840817iui5md1s.annotations.1","typename":"PageAnnotation"},{"type":"id","generated":true,"id":"PageTranslation:cm24hw4rr91840817iui5md1s.annotations.2","typename":"PageAnnotation"}],"language":{"type":"id","generated":false,"id":"Language:cjv3kwvoj000u083611381c6o","typename":"Language"},"__typename":"PageTranslation"},"PageTranslation:cm24hw4rr91840817iui5md1s.annotations.0":{"key":"title","value":"My diving journey to CCR Liberty","__typename":"PageAnnotation"},"PageTranslation:cm24hw4rr91840817iui5md1s.annotations.1":{"key":"image","value":"{\"mimetype\":\"image/jpeg\",\"size\":1618178,\"hash\":\"ea5e0de412c60d75f065c39c0a5de50a00ba94ed\",\"id\":\"cmpci6q5x4ka10800dc31p3ol\",\"filename\":\"ea5e0de412c60d75f065c39c0a5de50a00ba94ed-martin-mako-janecek-my-diving-journey-to-ccr-liberty-0.jpg\",\"category\":\"divesoft/\",\"type\":\"image\"}","__typename":"PageAnnotation"},"PageTranslation:cm24hw4rr91840817iui5md1s.annotations.2":{"key":"perex","value":"My first diving experience came during a holiday when I succumbed to the lure of an animator who enticed me to try out the diving apparatus in the pool. The nice thing was that I took the PADI OWD course in Egypt and instead of pool dives, the \"controlled\" conditions were in a beautiful sandy lagoon surrounded by coral. So logically, the AOWD course followed a year later in a similar location.","__typename":"PageAnnotation"},"Page:cm2yl9dfiefwq081726r9lwgi":{"id":"cm2yl9dfiefwq081726r9lwgi","type":{"type":"id","generated":false,"id":"PageType:cjv3l213x004f08366hjufttp","typename":"PageType"},"tags":[{"type":"id","generated":false,"id":"Tag:ckp59jt9n48lj0788mfuqrhym","typename":"Tag"}],"translations({\"where\":{\"language\":{\"id\":\"cjv3kwvoj000u083611381c6o\"}}})":[{"type":"id","generated":false,"id":"PageTranslation:cm2yl9dfyefwx0817fiou4t28","typename":"PageTranslation"}],"__typename":"Page"},"PageTranslation:cm2yl9dfyefwx0817fiou4t28":{"id":"cm2yl9dfyefwx0817fiou4t28","name":"Service","createdAt":"2024-11-01T10:25:34.030Z","content":{"type":"json","json":{"content":[{"name":"Header","data":{"products":[{"title":"Accessories","description":"Backplates, Consumables. Tanks.","img":{"recommendedSizes":{"width":"235","height":"235"}},"url":""},{"title":"Accessories sets","description":"Protection, maintenance, cleaning.","img":{"recommendedSizes":{"width":"235","height":"235"}},"url":""},{"title":"Spare parts","description":"Spare parts and components.","img":{"recommendedSizes":{"width":"235","height":"235"}},"url":""}
2,{"title":"Spare parts kits","description":"Completly Liberty spare parts kits.","img":{"recommendedSizes":{"width":"235","height":"235"}},"url":""}]},"id":"#0","type":"component","lock":false,"position":0},{"name":"ServiceConfigurator","data":{"isUnderMaintenance":false,"treeId":"66b346819d4fe2cb240023be","servicePoints":{"datasourceId":"cjvz0fl7504bm0742u9axw37g","data":{"name":"%name%","country":"%country%","city":"%city%","zip":"%zip%","address":"%address%","lat":"%lat%","lng":"%lon%","service":"%service%","email":"%email%","authorizedService":"%authorizedService%","acceptsNewService":"%acceptsNewService%","analyzers":"%analyzers%","ccrLiberty":"%ccrLiberty%","freedomHandset":"%freedomHandset%","freedomHandsetButtons":"%freedomHandsetButtons%","authorizedServiceMultipoint":"%authorizedServiceMultipoint%"},"filters":[]}},"id":"#2","type":"component","lock":false,"position":1},{"name":"Footer","data":{"copyrights":"Copyright © 2019 Divesoft LLC All rights reserved.","facebookUrl":"","youtubeUrl":"","instagramUrl":"","contacts":"**Divesoft, s.r.o.** Hálkova 2495 413 01 Roudnice nad Labem Äeská republika Tel.: +420 416 857 057 E-mail: [email protected]"},"id":"#1","type":"component","lock":false,"position":2}],"id":"root","idBuffer":"#3","lastCommit":"a9734981-5d05-4d36-a9c4-e3409c47828c"}},"annotations":[],"language":{"type":"id","generated":false,"id":"Language:cjv3kwvoj000u083611381c6o","typename":"Language"},"__typename":"PageTranslation"},"Page:cm3conxas02k108290ydqnbep":{"id":"cm3conxas02k108290ydqnbep","type":{"type":"id","generated":false,"id":"PageType:cjv3l213x004f08366hjufttp","typename":"PageType"},"tags":[{"type":"id","generated":false,"id":"Tag:cjv3szrcv01bz0836yo8myb0r","typename":"Tag"},{"type":"id","generated":false,"id":"Tag:cm5ww0t651b710803pcl02cn4","typename":"Tag"}],"translations({\"where\":{\"language\":{\"id\":\"cjv3kwvoj000u083611381c6o\"}}})":[{"type":"id","generated":false,"id":"PageTranslation:cm3conxbi02k80829s2311t17","typename":"PageTranslation"}],"__typename":"Page"},"PageTranslation:cm3conxbi02k80829s2311t17":{"id":"cm3conxbi02k80829s2311t17","name":"Would You Trust Your Life to a Machine?","createdAt":"2024-11-11T07:09:38.286Z","content":{"type":"json","json":{"content":[{"name":"Header","data":{"products":[{"title":"Accessories","description":"Backplates, Consumables. Tanks.","img":{"recommendedSizes":{"width":"235","height":"235"}},"url":""},{"title":"Accessories sets","description":"Protection, maintenance, cleaning.","img":{"recommendedSizes":{"width":"235","height":"235"}},"url":""},{"title":"Spare parts","description":"Spare parts and components.","img":{"recommendedSizes":{"width":"235","height":"235"}},"url":""},{"title":"Spare parts kits","description":"Completly Liberty spare parts kits.","img":{"recommendedSizes":{"width":"235","height":"235"}},"url":""}]},"id":"#0","type":"component","lock":false,"position":0},{"name":"BlogArticle","data":{"title":"Would You Trust Your Life to a Machine?","perex":"Here's How We Build Our Rebreather to Keep You Alive. \n\nIn the depths of the ocean, your life depends on the equipment you're using. When it comes to our CCR Liberty rebreather, we at Divesoft take this responsibility with utmost seriousness. Our testing process is so meticulous, it would make NASA engineers proud.","content":"**The Brain of the Beast**\n\nJust like the human brain has two hemispheres, our CCR Liberty features dual control units (CUs). But before these electronic \"brains\" are installed, we put them through rigorous testing that would make your smartphone's quality control look like child's play.\n\nWe connect each control unit to our [specialized testing equipment](https://www.divesoft.com/en/blog/how-do-we-test-each-ccr-liberty) that checks: \n⢠Bluetooth functionality \n⢠Solenoid communication \n⢠Sensor interfaces \n⢠Power systems \n⢠Handset communication \n⢠Display functionality \n⢠Firmware operations \n\nThe units must perfectly measure oxygen, pressure, and helium levels using our calibration devices that simulate real-world conditions. It's like having a flight simulator, but for your life support system.\n\n\n\n**The Oxygen Dance** \n\nThe oxygen solenoids - crucial components that regulate your breathing mixture - undergo their own baptism. We pressure-test and submerge them in distilled water to ensure zero leakage. We scrutinize each solenoid for proper dosing, like a precision medical instrument.\n\n\n\n**Pressure Testing: Going to the Extremes** \n\nThink 340 meters underwater sounds deep? That's exactly what we test our units for. We subject the head unit to 3.5 MPa of pressure - equivalent to the crushing depths where only the bravest divers venture. Any structural weakness shows up at just 1 MPa, ensuring nothing slips through the cracks.\n\n\n\n**The Supporting Cast** \n\nWe put our handsets - your underwater control panels - through a two-stage trial: \n1. First pressure test without electronics \n2. Final pressure test at a staggering 30 MPa with all components installed\n\nWe subject the Head-Up Display and Buddy Display to similar scrutiny, while we test the Manual Addition Valves (MAV), Automatic Diluent Valve (ADV), Dive Surface Valve (DSV), and Bailout Valve (BOV) both individually and as part of the complete breathing loop.\n\n\n\n**The Final Symphony** \n\nOur grand finale involves: \n⢠Complete assembly \n⢠Visual inspection following our detailed manuals \n⢠Sensor calibration \n⢠System checks \n⢠Component serial number registration \n⢠Pre-dive verification \n\n\n\n**Documentation: Nothing Left to Chance** \n\nWe record every single step in a 17-page assembly journal unique to each unit. It's like a birth certificate, medical history, and passport all in one. \nWe document every serial number, test result, and assembly step with precision that would satisfy the most demanding regulatory bodies.\n\n\n\n**Why So Thorough?** \n\n
2Because when you're 100 meters underwater, \"good enough\" isn't good enough. Our testing process isn't just about quality control - it's about ensuring you return to the surface every single time.\n\nThe next time you see [our CCR Liberty rebreather](https://www.divesoft.com/en/blog/how-to-chose-the-right-ccr-rebreather-for-you), remember: behind its sleek exterior lies hundreds of hours of our testing, checking, and verification [in Divesoft lab](https://www.divesoft.com/en/blog/divesoft-lab). \nBecause in the underwater world, second chances are rare, and we make sure you won't need one.\n\n","showTags":false,"showDate":true,"image":{"mimetype":"image/jpeg","size":1330826,"hash":"7e2dfd8ac1b9db18f3d74da4ccc98e3141e4711d","id":"cm3cowi4c1s6v0850djs41yje","filename":"would-you-trust-your-life-to-a-machine.jpg","category":"divesoft/","type":"image"}},"id":"#2","type":"component","lock":false,"position":1},{"name":"ProductShowcase","data":{"componentTemplateId":"cm9h4wr6ugjv10803yqs3tp71"},"id":"#21","type":"component","lock":false,"position":7},{"name":"Footer","data":{"copyrights":"Copyright © 2019 Divesoft LLC All rights reserved.","facebookUrl":{"urlNewWindow":true,"url":"https://www.facebook.com/divesoft/"},"youtubeUrl":{"url":"https://www.youtube.com/@divesoft_tv","urlNewWindow":true},"instagramUrl":{"url":"https://www.instagram.com/divesoft/","urlNewWindow":true},"contacts":"**Divesoft s.r.o.** \nHálkova 2495 \n413 01 Roudnice nad Labem \nCzech Republic \nTel.: +420 416 857 057 \nE-mail: [email protected]","twitterUrl":{"url":"","urlNewWindow":true,"pageId":"cjv3l26tp004p0836i54n4u7a"}},"id":"#1","type":"component","lock":false,"position":8}],"id":"root","idBuffer":"#27","lastCommit":"6c2e2854-2876-47ad-8fbe-372e276a8278"}},"annotations":[],"language":{"type":"id","generated":false,"id":"Language:cjv3kwvoj000u083611381c6o","typename":"Language"},"__typename":"PageTranslation"},"Page:cm3pooxr001s90829sc8oheuc":{"id":"cm3pooxr001s90829sc8oheuc","type":{"type":"id","generated":false,"id":"PageType:cjv3l213x004f08366hjufttp","typename":"PageType"},"tags":[{"type":"id","generated":false,"id":"Tag:ckp59jt9n48lj0788mfuqrhym","typename":"Tag"},{"type":"id","generated":false,"id":"Tag:cmgfchuc23glr0832td37smec","typename":"Tag"}],"translations({\"where\":{\"language\":{\"id\":\"cjv3kwvoj000u083611381c6o\"}}})":[{"type":"id","generated":false,"id":"PageTranslation:cm3pooxtl01sg0829ci2lh23p","typename":"PageTranslation"}],"__typename":"Page"},"PageTranslation:cm3pooxtl01sg0829ci2lh23p":{"id":"cm3pooxtl01sg0829ci2lh23p","name":"Testing configurator - Sandbox","createdAt":"2024-11-20T09:31:25.880Z","content":{"type":"json","json":{"content":[{"name":"Header","data":{"products":[{"title":"Accessories","description":"Backplates, Consumables. Tanks.","img":{"recommendedSizes":{"width":"235","height":"235"}},"url":""},{"title":"Accessories sets","description":"Protection, maintenance, cleaning.","img":{"recommendedSizes":{"width":"235","height":"235"}},"url":""},{"title":"Spare parts","description":"Spare parts and components.","img":{"recommendedSizes":{"width":"235","height":"235"}},"url":""},{"title":"Spare parts kits","description":"Completly Liberty spare parts kits.","img":{"recommendedSizes":{"width":"235","height":"235"}},"url":""}]},"id":"#0","type":"component","lock":false,"position":0},{"name":"Configurator","data":{"isUnderMaintenance":false,"treeId":"62508b052ca30398878d4376","instructorUrl":{}},"id":"#2","type":"component","lock":false,"position":1},{"name":"Footer","data":{"copyrights":"Copyright © 2019 Divesoft LLC All rights reserved.","facebookUrl":"","youtubeUrl":"","instagramUrl":"","contacts":"**Divesoft, s.r.o.** Hálkova 2495 413 01 Roudnice nad Labem Äeská republika Tel.: +420 416 857 057 E-mail: [email protected]"},"id":"#1","type":"component","lock":false,"position":2}],"id":"root","idBuffer":"#3","lastCommit":"c7a627db-f9ba-4e46-8275-6d4f71a2e408"}},"annotations":[],"language":{"type":"id","generated":false,"id":"Language:cjv3kwvoj000u083611381c6o","typename":"Language"},"__typename":"PageTranslation"},"Page:cm4jzxd9x00s008374jvhc8va":{"id":"cm4jzxd9x00s008374jvhc8va","type":{"type":"id","generated":false,"id":"PageType:cjv3l213x004f08366hjufttp","typename":"PageType"},"tags":[{"type":"id","generated":false,"id":"Tag:cjv3szrcv01bz0836yo8myb0r","typename":"Tag"},{"type":"id","generated":false,"id":"Tag:cly72rlmrv2ht07358rq07kkr","typename":"Tag"},{"type":"id","generated":false,"id":"Tag:cm5ww0t651b710803pcl02cn4","typename":"Tag"}],"translations({\"where\":{\"language\":{\"id\":\"cjv3kwvoj000u083611381c6o\"}}})":[{"type":"id","generated":false,"id":"PageTranslation:cm4jzxdb
2100s70837dzrluagr","typename":"PageTranslation"}],"__typename":"Page"},"PageTranslation:cm4jzxdb100s70837dzrluagr":{"id":"cm4jzxdb100s70837dzrluagr","name":"Divesoft Lab","createdAt":"2024-12-11T14:39:00.252Z","content":{"type":"json","json":{"content":[{"name":"Header","data":{"products":[{"title":"Accessories","description":"Backplates, Consumables. Tanks.","img":{"recommendedSizes":{"width":"235","height":"235"}},"url":""},{"title":"Accessories sets","description":"Protection, maintenance, cleaning.","img":{"recommendedSizes":{"width":"235","height":"235"}},"url":""},{"title":"Spare parts","description":"Spare parts and components.","img":{"recommendedSizes":{"width":"235","height":"235"}},"url":""},{"title":"Spare parts kits","description":"Completly Liberty spare parts kits.","img":{"recommendedSizes":{"width":"235","height":"235"}},"url":""}]},"id":"#0","type":"component","lock":false,"position":0},{"name":"BlogArticle","data":{"title":"Divesoft Lab","perex":"For divers, especially those venturing into the extremes of technical diving, safety and reliability are non-negotiable. This is the reason the Divesoft Lab was created. We are doing our best to ensure the equipment you dive with is thoroughly tested, understood, and the way we make it makes sense and is backed up by real experimental data.","content":"The crown jewel of the Divesoft Lab is Big Bertha, a custom-designed pressure chamber capable of simulating dives to depths of 300 meters. Big Bertha is much more than a simple pressure chamber; it mimics real-world underwater conditions with remarkable accuracy. Every diver has experienced first-hand, the water temperature can have a large impact on your body, we are making sure that the impact it has on your kit is minimal. Variable water temperatures ranging from a near-freezing 1°C to a scorching 60°C allow for [testing in most conceivable environments](https://www.divesoft.com/en/blog/how-do-we-test-each-ccr-liberty). \n\n\n\nWhat sets Big Bertha apart is its high fidelity simulated respiration system. This system replicates a diverâs breathing cycle, including body-temperature warming and moisture addition to the gas, oxygen consumption, and COâ production. Paired with an array of sensors monitoring temperature, pressure, COâ levels, and other critical variables, Big Bertha provides an unparalleled evaluation of equipment performance under real-world diving conditions. We use this data to further optimize our equipmentâs performance. \n\n\n\nBeyond pressure testing, the lab houses a hydrostatic imbalance testing system. This setup evaluates how water pressure interacts with a diver's breathing apparatus during movement when they assume different positions underwater. The measurements done here are focused on preventing lung damage from hydrostatic imbalancesâa potential risk if pressure differences between the diverâs lungs and their rebreather's breathing loop are not within certain levels. \n\nAnother standout feature of the Divesoft Laboratory is its dedicated setup for analyzing scrubber performance. Scrubbers, which remove COâ from the breathing loop in rebreathers, are a critical component of devices like the CCR Liberty. The labâs equipment allows us to evaluate scrubber depletion, identify potential breakthrough points, and optimize overall performance. \n\nMoreover, a smaller automated pressure chamber tests the reliability of oxygen sensors under high partial pressures of oxygen. These tests simulate extreme diving scenarios to ensure that the sensors remain accurate and functional in the most demanding conditions. \n\n\n\nThe CCR Liberty rebreather is a great example of how these testing methods translate into superior product performance. This rebreather features dual control units for redundancy, advanced oxygen monitoring, and customizable dive interfaces. Its solenoids and sensors undergo meticulous pressure testing, ensuring reliability even at crushing depths. At Divesoft, every aspect of product development is a blend of precision engineering and an unyielding commitment to diver safety. From Big Berthaâs high-pressure simulations to hydrostatic imbalance testing, the company goes to extraordinary lengths to ensure its products perform flawlessly. Whether exploring a shipwreck, mapping underwater caves, or setting records in technical diving, divers can [trust that their Divesoft gear](https://www.divesoft.com/en/blog/would-you-trust-your-life-to-a-machine) has been tested far beyond the limits they will face.","showTags":false,"showDate":true,"image":{"mimetype":"image/jpeg","size":1228119,"hash":"61b8c27499c83e555a14589c9a8ce6f71ce04191","id":"cm4jzozok17db0850uhqy02ye","filename":"divesoft-lab-00.jpg","category":"divesoft/","type":"image"}},"id":"#2","type":"component","lock":false,"position":1},{"name":"ProductShowcase","data":{"componentTemplateId":"cm9h4wr6ugjv10803yq
2s3tp71"},"id":"#21","type":"component","lock":false,"position":11},{"name":"Footer","data":{"copyrights":"Copyright © 2019 Divesoft LLC All rights reserved.","facebookUrl":{"urlNewWindow":true,"url":"https://www.facebook.com/divesoft/"},"youtubeUrl":{"url":"https://www.youtube.com/@divesoft_tv","urlNewWindow":true},"instagramUrl":{"url":"https://www.instagram.com/divesoft/","urlNewWindow":true},"contacts":"**Divesoft s.r.o.** \nHálkova 2495 \n413 01 Roudnice nad Labem \nCzech Republic \nTel.: +420 416 857 057 \nE-mail: [email protected]","twitterUrl":{"url":"","urlNewWindow":true,"pageId":"cjv3l26tp004p0836i54n4u7a"}},"id":"#1","type":"component","lock":false,"position":12}],"id":"root","idBuffer":"#31","lastCommit":"a726a4d5-17fb-4cd3-a652-fac907073183"}},"annotations":[],"language":{"type":"id","generated":false,"id":"Language:cjv3kwvoj000u083611381c6o","typename":"Language"},"__typename":"PageTranslation"},"Page:cm5u4v8is0q9j0803u8nstt5y":{"id":"cm5u4v8is0q9j0803u8nstt5y","type":{"type":"id","generated":false,"id":"PageType:cjv3l213x004f08366hjufttp","typename":"PageType"},"tags":[{"type":"id","generated":false,"id":"Tag:cjv3szrcv01bz0836yo8myb0r","typename":"Tag"},{"type":"id","generated":false,"id":"Tag:cm5ww0t651b710803pcl02cn4","typename":"Tag"}],"translations({\"where\":{\"language\":{\"id\":\"cjv3kwvoj000u083611381c6o\"}}})":[{"type":"id","generated":false,"id":"PageTranslation:cm5u4v8jv0q9q0803g9tmqaqa","typename":"PageTranslation"}],"__typename":"Page"},"PageTranslation:cm5u4v8jv0q9q0803g9tmqaqa":{"id":"cm5u4v8jv0q9q0803g9tmqaqa","name":"Advanced Rescue Techniques for Technical Divers","createdAt":"2025-01-12T21:34:42.954Z","content":{"type":"json","json":{"content":[{"name":"Header","data":{"products":[{"title":"Accessories","description":"Backplates, Consumables. Tanks.","img":{"recommendedSizes":{"width":"235","height":"235"}},"url":""},{"title":"Accessories sets","description":"Protection, maintenance, cleaning.","img":{"recommendedSizes":{"width":"235","height":"235"}},"url":""},{"title":"Spare parts","description":"Spare parts and components.","img":{"recommendedSizes":{"width":"235","height":"235"}},"url":""},{"title":"Spare parts kits","description":"Completly Liberty spare parts kits.","img":{"recommendedSizes":{"width":"235","height":"235"}},"url":""}]},"id":"#0","type":"component","lock":false,"position":0},{"name":"BlogArticle","data":{"title":"Advanced Rescue Techniques for Technical Divers","perex":"Many moons ago, I felt somewhat subdued after completing a rescue course, where I had far too many questions left unanswered following the basic rescue âscenariosâ. Agreed, itâs not really ethical, nor is it possible to simulate the countless possible scenarios that could arrive in any given situation. The best we can do is train for some worst case scenarios and practice until we canât get them wrong, rightâ¦?","content":"\n\nThe main diving safety technique required, was to rescue an unconscious breathing diver from the bottom. The other criteria, such as rescuing a non-breathing diver, would be more of a body recovery, so weâll use the unconscious breathing diver scenario, since there could be more possibilities to address with this situation. Other scenarios to consider may involve the egress of the victim in difficult surface conditions, but a fair amount of common sense can dictate the best course of action based on what weâve learned already from manuals.\nIn-water diver safety and rescues have been my focussed goal for many years as an educator, experimenting with multiple concepts, not just for single cylinder divers, but also for twin cylinder Backmount or Sidemount divers, multiple stage/deco cylinder or rebreather divers.\nI would prefer to call it advanced rescue diving techniques, to be an addendum, rather than to replace existing skillsets.\nLetâs assume we have a victim lying on the sea bed, or a wreck or a cave, we wouldnât want to create another diving incident, by having two casualties, so please make sure you receive the right rescue training using correct diving techniques. One of the most important skills required for this, is to be able to hover. This is the balance of neutral buoyancy, without kicking or sculling to maintain position with very little effort. This is one of the fundamental diving techniques associated with any kind of scuba diving. Without this, a diverâs brain is less able to deal with anything extra than complex motor skills, determined to keep the body in position within the water column.\n\n\n\nAs with any rescue situation, it is paramount to asses the situation, rather than jumping straight in. What does that involve? Well, on open circuit itâs easy to tell if the victim is breathing or not, because there would be bubbles present escaping from the victimâs regulator heading to the surface. On CCR you have to know what to look for, that would be a rhythmic expanding and contracting movement of the counterlung indicating a tidal volume, which may be quite small when the victim is unconscious. Also itâs worth noting that if the victim is not in e-CCR mode or using a constant flow unit, the victim is actually metabolising the oxygen in the loop, which may lead to hypoxia and asphyxiation if left for too long. So itâs vital to know how to add oxygen to the loop in any case.\n\n\n\nIn an i
2deal world, buddy checks between each member of team should be done to be more aware of what type of unit they are diving and discuss and/or confirm safety protocols, whilst they go about their business before the dive. We all know too well, that the complacency is to our own detriment. \n\n\n\nIt must be said that âgag strapsâ here in a rescue scenario, are a very advantageous piece of diving safety equipment. Yes, they may look a bit odd, but your family would be more happy if you gave yourself every chance to come home safely after every dive. There are always discussions for and against gag straps, but as with every single piece of equipment in diving, there is a gradient percentage of pros and the same to oppose. When the pros outweigh the cons, then itâs an overall plus! We can all sometimes take for granted our abilities as competent technical divers, but in the end we canât breathe water, yet. \n\n\n\nGoing back to the observations, itâs about learning as much as possible quickly, before engaging in any rescue attempt. Establishing the victim is unconscious but breathing, light signalling in front of the victim, waving a hand across the mask, gentle/firm squeezes to the arm or hand, being careful not to jolt the divers position. Itâs clear then theyâre unconscious. Now equipment checks⦠cylinder valves open, contents gauges check and handset/s check for PO2. Now where is that O2 MAV⦠? One of the many clever ideas made by Divesoft, was to put the MAVs right next to the mouth, itâs such an accessible place not just for the diver but also for the potential rescuer.\n\n\n\nSo letâs discuss the rescuer⦠the rescue attempt could be done in either warm wetsuit, or cold drysuit environments. Clearly fixed buoyancy can lend itself here to the victim, simply because a diver could be in trim as a result of that perfect physiology and body fat index with a neoprene covering and nicely trimmed out unit. Otherwise, air space in the drysuit, could be more tricky to deal with alongside the art of negotiating how much air to add/vent from the wing, as well as the counterlung during ascent. So here is where the rescuer takes over the entire control of the buoyancy of the combined package of the victim and rescuer. The rescuer knows exactly where their own buoyancy inflators are, whilst very used to using them and completely accessible to them. \nThere were generically idillic reasons for giving the buoyancy to the victim, basically in case the rescuer lost grip of the victim, the victim would ascend to the surface. In this case, the possibility the victim may not have sufficient gas for buoyancy to get them off the deck, so the wing is kept empty, since theyâre âattachedâ anyway.\nIn this technique the victim could be âattachedâ to the rescuer via a large double-ender, connected from the rescuerâs front crotch D-ring, attaching to the victimâs rear crotch D-ring or rear metal frame of the unit. Both rescuer above and victim underneath are almost sandwiched together facing the same direction, with plenty of room for the rescuer to navigate their hand/arm between them to access the rescuerâs inflators. \n\n\n\nMost importantly, the rescuer has one hand available to hold the loop firmly in place in the victims mouth, which can be interchanged between left or right hand. Whilst the other hand can be placed on the victims shoulder to steady the positional trim and control both pitch and roll, which in turn vents air from the victimâs drysuit and helps their feet up as and when needed. All this while the rescuer keeps in their usual comfortable trim. It would be like picking up any weight while attaching it to your harness D-ring, essentially turning your harness into an effective piece of rescue scuba gear.\nWhilst ascending in trim, venting off excess gas from the rescuerâs drysuit and/or wing, while doing the same for the victimâs drysuit.\nThe expanding gas from the victimâs loop can be vented in a few ways, either letting it vent from the mouth or manually pulling the dump valve if itâs accessible. The PO2 must monitored and maintained, easily done thanks to Divesoftâs MAV positions.\nControl is the key element here, buoyancy and PO2 control. If the unitâs on auto then life is somewhat easier. If itâs only manual, then you have your work cut out. With the help of the âthird handâ of the double-ender, significantly makes a rescue easier, whilst maintaining a constant ambidextrous contact of the victimâs loop in their mouth, with the other hand to navigate between rescue diverâs inflation/vents and victimâs counterlung and oxygen MAV.\nAs mentioned earlier, practice doesnât make perfect, only permanence.\n\nGarry Dallas \nhttps://simplysidemount.com","showTags":false,"showDate":true,"image":{"mimetype":"image/jpeg","size":880493,"hash":"b16f21178342d3d5a8846aa58c66be66cc1d3b11","i
2d":"cm5patx348aud0850395udke7","filename":"garry-dallas-rescue-techniques-00.jpg","category":"divesoft/","type":"image"}},"id":"#2","type":"component","lock":false,"position":1},{"name":"ProductShowcase","data":{"componentTemplateId":"cm9h4wr6ugjv10803yqs3tp71"},"id":"#21","type":"component","lock":false,"position":12},{"name":"Footer","data":{"copyrights":"Copyright © 2019 Divesoft LLC All rights reserved.","facebookUrl":{"urlNewWindow":true,"url":"https://www.facebook.com/divesoft/"},"youtubeUrl":{"url":"https://www.youtube.com/@divesoft_tv","urlNewWindow":true},"instagramUrl":{"url":"https://www.instagram.com/divesoft/","urlNewWindow":true},"contacts":"**Divesoft s.r.o.** \nHálkova 2495 \n413 01 Roudnice nad Labem \nCzech Republic \nTel.: +420 416 857 057 \nE-mail: [email protected]","twitterUrl":{"url":"","urlNewWindow":true,"pageId":"cjv3l26tp004p0836i54n4u7a"}},"id":"#1","type":"component","lock":false,"position":13}],"id":"root","idBuffer":"#32","lastCommit":"5cc11f1e-dce6-4e0c-bc16-4e01140a3502"}},"annotations":[],"language":{"type":"id","generated":false,"id":"Language:cjv3kwvoj000u083611381c6o","typename":"Language"},"__typename":"PageTranslation"},"Page:cm6aogy1f0ylr0803g7o52mxr":{"id":"cm6aogy1f0ylr0803g7o52mxr","type":{"type":"id","generated":false,"id":"PageType:cjv3l213x004f08366hjufttp","typename":"PageType"},"tags":[{"type":"id","generated":false,"id":"Tag:cjv3szrcv01bz0836yo8myb0r","typename":"Tag"},{"type":"id","generated":false,"id":"Tag:cm5ww05zc1b5d0803zglvz927","typename":"Tag"}],"translations({\"where\":{\"language\":{\"id\":\"cjv3kwvoj000u083611381c6o\"}}})":[{"type":"id","generated":false,"id":"PageTranslation:cm6aogy2g0yly08033rp0scm1","typename":"PageTranslation"}],"__typename":"Page"},"PageTranslation:cm6aogy2g0yly08033rp0scm1":{"id":"cm6aogy2g0yly08033rp0scm1","name":"Understanding How Long Does a Cylinder Lasts for Scuba Diving","createdAt":"2025-01-24T11:27:47.319Z","content":{"type":"json","json":{"content":[{"name":"Header","data":{"products":[{"title":"Accessories","description":"Backplates, Consumables. Tanks.","img":{"recommendedSizes":{"width":"235","height":"235"}},"url":""},{"title":"Accessories sets","description":"Protection, maintenance, cleaning.","img":{"recommendedSizes":{"width":"235","height":"235"}},"url":""},{"title":"Spare parts","description":"Spare parts and components.","img":{"recommendedSizes":{"width":"235","height":"235"}},"url":""},{"title":"Spare parts kits","description":"Completly Liberty spare parts kits.","img":{"recommendedSizes":{"width":"235","height":"235"}},"url":""}]},"id":"#0","type":"component","lock":false,"position":0},{"name":"BlogArticle","data":{"title":"Understanding How Long a Cylinder Lasts for Scuba Diving ","perex":"Some call the diving cylinder a diving bottle, tank, and some even call them oxygen tanks, but no matter what you call them, when preparing for a scuba adventure, one of the most critical considerations is understanding the duration of your diving cylinder. Factors such as the cylinder sizes, depth, and breathing rate play a significant role in determining how long your diving tank will last.","content":"## Key Factors Affecting Scuba Diving Oxygen Tank Time \n\nThe time a scuba tank lasts underwater depends on multiple variables: \n\n1. **Tank Size**: The standard scuba tank size is typically 80 cubic feet of compressed air at 3,000 psi, or a 12-liter tank pressurized to 230 bar. Smaller or larger tanks are available to cater to different diving needs, including smaller aluminum tanks for shorter dives or high-capacity steel tanks for extended underwater explorations. \n\n2. **Depth**: As depth increases, so does the pressure, leading to a higher air consumption rate. For example, the pressure doubles at 33 feet (10 meters) underwater, meaning you consume air twice as fast as at the surface. This is because you need to consume gas at the same pressure as your surroundings \n\n3. **Breathing Rate**: A diver's breathing rate, measured as Surface Air Consumption (SAC), varies based on factors like fitness, stress levels, and underwater activity. A relaxed diver can extend their diving air tank time significantly compared to a stressed one. \n\n\n\n## Calculating Scuba Tank Time \n\nTo estimate how long your diving oxygen tank will take, a scuba tank time calculator can be invaluable. Here's a simplified method: \n\n1. Determine your SAC rate. For example, if you consume 0.5 cubic feet of air per minute at the surface, your SAC rate is 0.5. The same process will work if you like to measure your SAC in liters \n\n2. Factor in depth pressure. At 66 feet (20 meters), the pressure is three times that of the surface. \n\n3. Calculate tank duration. \n\n- Air per minute = SAC rate à depth pressure. \n\n- Total time = Tank capacity / Air per minute. \n\n- Using an 80 cubic foot tank at 3,000 psi: \n\n A diver with a SAC rate of 0.5 at 66 feet would consume 1.5 cubic feet of air per minute. With an 80 cubic foot tank, theyâd have about 53 minutes of dive time (80 / 1.5). \n\n- Using a 12-liter tank at 230 bar: \n\n A diver with a SAC rate of 20 liters at 20 meters would consume 60 liters of air per minute. With 2760 liters in their tank, they would have about 46 minutes of dive time (12*230/60) \n \n## Quick note about rebreathers \n\nIf you decide to dive with a [closed-circuit rebreather](https://eshop.divesoft.com/products/ccr-liberty) your consumption will no longer be determined by your SAC rate, but by the speed at which your body metabolizes oxygen. When using a rebreather, you donât need to consider the aspect of depth. \n\nIf we use the same calculation we used above, but now for rebreathers: \n\n- Using a 3-liter tank at 300 bar: \n\n A diver with a metabolic consumption of 1 liter per minute will consume the 900 liters of oxygen in their tank in 900 minutes, independent of the depth. \n\nThis number is so high that the diver will frequently be limited by other factors, like scrubber duration or cold exposure, rather than by the gas they carry. This, however, goes beyond the scope of this article. If you want to learn more, you can read our post about our [scrubber duration research](https://www.divesoft.com/en/blog/how-do-we-test-each-ccr-liberty). \n\n\n \n## Scuba Tank Setup and Maintenance \n\nA reliable scuba tank setup is vital for safe and enjoyable diving. Key components include: \n\n**Valve System**: Ensures smooth air delivery. \n\n**Regulator**: Controls the pressure and supplies breathable air. \n\n**Gauge**: Monitors air pressure to track remaining tank time. \n\nPro
2per maintenance of your diving air tank extends its lifespan. Always rinse the outside of your tank with fresh water post-dive and store it in a cool, dry place.\n\n## Enhancing Dive Time Efficiency \n\nTo maximize your scuba diving oxygen tank time: \n\n- Maintain a slow, steady breathing pattern. \n\n- Practice buoyancy control to minimize unnecessary movements. \n\n- Avoid overexertion and stay relaxed. \n\n\n\n## Conclusion \n\nUnderstanding the nuances of your scuba tank, including the standard scuba tank size and variables affecting air consumption, is essential for planning a safe dive. Whether using a single diving tank or engaging in double tank diving, careful preparation and the use of a scuba tank time calculator can ensure a seamless underwater experience. By mastering your equipment and diving techniques, youâll make the most of your underwater adventures while prioritizing safety. ","showTags":false,"showDate":false,"image":{"mimetype":"image/jpeg","size":1587542,"hash":"5d7a065a3f80f02e77dcd496ef155c1f2b80d7eb","id":"cm6aplfumm90u0850pa7a48ya","filename":"understanding-how-long-does-a-cylinder-lasts-for-scuba-diving.jpg","category":"divesoft/","type":"image"}},"id":"#2","type":"component","lock":false,"position":1},{"name":"ProductShowcase","data":{"componentTemplateId":"cm9h4wr6ugjv10803yqs3tp71"},"id":"#4","type":"component","lock":false,"position":2},{"name":"Footer","data":{"copyrights":"Copyright © 2019 Divesoft LLC All rights reserved.","facebookUrl":"","youtubeUrl":"","instagramUrl":"","contacts":"**Divesoft, s.r.o.** Hálkova 2495 413 01 Roudnice nad Labem Äeská republika Tel.: +420 416 857 057 E-mail: [email protected]"},"id":"#1","type":"component","lock":false,"position":4}],"id":"root","idBuffer":"#5","lastCommit":"7ba31e00-6617-44f3-8b8e-faa4733281de"}},"annotations":[],"language":{"type":"id","generated":false,"id":"Language:cjv3kwvoj000u083611381c6o","typename":"Language"},"__typename":"PageTranslation"},"Page:cm6kkp0m62w7w0803ry3v5uq5":{"id":"cm6kkp0m62w7w0803ry3v5uq5","type":{"type":"id","generated":false,"id":"PageType:cjv3l213x004f08366hjufttp","typename":"PageType"},"tags":[{"type":"id","generated":false,"id":"Tag:cjv3szrcv01bz0836yo8myb0r","typename":"Tag"},{"type":"id","generated":false,"id":"Tag:cm5ww05zc1b5d0803zglvz927","typename":"Tag"}],"translations({\"where\":{\"language\":{\"id\":\"cjv3kwvoj000u083611381c6o\"}}})":[{"type":"id","generated":false,"id":"PageTranslation:cm6kkp0ms2w83080398m4m58n","typename":"PageTranslation"}],"__typename":"Page"},"PageTranslation:cm6kkp0ms2w83080398m4m58n":{"id":"cm6kkp0ms2w83080398m4m58n","name":"What Are the Types of Scuba Diving","createdAt":"2025-01-31T09:39:47.187Z","content":{"type":"json","json":{"content":[{"name":"Header","data":{"products":[{"title":"Accessories","description":"Backplates, Consumables. Tanks.","img":{"recommendedSizes":{"width":"235","height":"235"}},"url":""},{"title":"Accessories sets","description":"Protection, maintenance, cleaning.","img":{"recommendedSizes":{"width":"235","height":"235"}},"url":""},{"title":"Spare parts","description":"Spare parts and components.","img":{"recommendedSizes":{"width":"235","height":"235"}},"url":""},{"title":"Spare parts kits","description":"Completly Liberty spare parts kits.","img":{"recommendedSizes":{"width":"235","height":"235"}},"url":""}]},"id":"#0","type":"component","lock":false,"position":0},{"name":"BlogArticle","data":{"title":"What Are the Types of Scuba Diving","perex":"Scuba diving is a versatile and exciting activity that offers a wide range of experiences for divers of all skill levels. There are many ways of dividing up scuba diving. The most common are recreational and technical, by the target of the dive, by the environment of the dive, and much more. Bellow we will explore the different types, and highlight their key features.","content":"## Recreational Diving \n\nRecreational diving is the most common type of scuba diving, designed for enjoyment rather than professional or scientific purposes. Divers typically stay within the limits of open water diving depth, which is generally up to 40 meters (130 feet). This category includes activities like: \n\n### Night Diving \n\nExploring underwater environments after sunset, where specialized equipment like dive lights reveals nocturnal marine life. \n\n### Wreck Diving \n\nInvestigating sunken ships, planes, or other man-made structures, offering a mix of history and adventure. \n\n### Drift Diving \n\nLetting the current carry you along, providing a unique way to explore large areas with minimal effort. \n\n\n\n## Technical diving \n\nThe definition of [technical diving](https://www.divesoft.com/en/blog/what-is-technical-diving) can be fuzzy at times. There are multiple schools of thought, but they almost all agree that technical diving involves diving in an overhead environment, an environment in which the surface is not directly accessible. Or when mixtures other than air, or sometimes nitrox, are used. \n\n## Rebreather Diving \n\n[Rebreather diving](https://www.divesoft.com/en/products/ccr-liberty) is a subset of recreational diving that uses advanced equipment to recycle exhaled air, allowing for longer dives and reduced bubble production. This technology is ideal for photographing marine life, exploring fragile ecosystems without disturbing them, or diving for extended periods. \n\n## Scientific Diving \n\nScientific diving involves underwater research and data collection, often conducted by marine biologists, archaeologists, or geologists. These dives require specialized training and equipment to ensure safety while performing tasks such as sample collection, habitat surveys, and underwater photography. \n\n\n\n## Cave Diving and Cavern Diving \n\nCave diving involves exploring underwater caves beyond the reach of natural light, often requiring specialized gear and training. Cavern diving, a less advanced version, stays within the light zone and is more accessible to intermediate divers. \n\n\n\n## Deep Sea Diving \n\n[Deep sea diving](https://www.divesoft.com/en/blog/what-is-deep-diving) pushes beyond recreational diving limits, often exceeding depths of 40 meters. This type of diving requires technical training and specialized equipment to handle increased pressure and decompression stops. \n\n## Rescue Diving \n\nRescue diving focuses on training divers to manage emergencies underwater and assist other divers in distress. This type of diving is a critical skill for advanced divers and diving professionals. \n\n## Ice Diving \n\nIce diving takes place beneath frozen surfaces, offering a unique and challenging experience. Divers must cut an entry hole in the ice and rely on safety lines to navigate the cold, dark waters. \n\n## Altitude Diving \n\nAltitude diving occurs at locations above 300 meters (1,000 feet) sea level, such as mountain lakes. The reduced atmospheric pressure at these altitudes requires adjustments to dive planning and decompression. \n\n## River Diving \n\nRiver scuba diving, or simply river diving, involves navigating freshwater rivers, often with strong currents. This type of diving is excellent for exploring unique ecosystems and submerged artifacts but requires careful planning and drift-diving techniques. \n\nDiving is a very diverse sport, and it requires proper training and [equipment](https://eshop.divesoft.com/) to practice it safely. If you want to try any of the types of diving listed above, contact your local dive center. ","showTags":false,"showDate":true,"image":{"mimetype":"image/jpeg","size":231079,"hash":"e4ec7f875a5f89b59748350d40bfd5ca32d8aa03","id":"ck85q7ian1a6n0776gyjpgllq","filename":"aboutus-03.jpg","category":"divesoft/","type":"image","alt":"Rebreather divers"}},"id":"#2","type":"component","lock":false,"position":1},{"name":"ProductShowcase","data":{"componentTemplateId":"cm9h4wr6ugjv10803yqs3tp71"},"id":"#21","type":"component","lock":false,"position":13},{"name":"Footer","data":{"copyrights":"Copyright © 2019 Divesoft LLC All rights reserved.","facebookUrl":{"urlNewWindow":true,"url":"https://www.facebook.com/divesoft/"},"youtubeUrl":{"url":"https://www.youtube.com/@divesoft_tv","urlNewWindow":true},"instagramUrl":{"url":"https://www.instagram.com/divesoft/","urlNewWindow":true},"contacts":"**Divesoft s.r.o.** \nHálkova 2495 \n413 01 Roudnice nad Labem \nCzech Republic \nTel.: +420 416 857 057 \nE-mail: [email protected]","twitterUrl":{"url":"","urlNewWindow":true,"pageId":"cjv3l26tp004p0836i54n4u7a"}},"id":"#1","type":"component","lock":false,"position":14}],"id":"root","idBuffer":"#33","lastCommit":"29916890-3606-4084-90fe-069b5b706328"}},"annotations":[],"language":{"type":"id","generated":false,"id":"Language:cjv3kwvoj000u083611381c6o","typename":"Language"},"__typename":"PageTranslation"},"Page:cm6p1pmdr3t6a0803fv915pka":{"id":"cm6p1pmdr3t6a0803fv915pka","type":{"type":"id","generated":false,"id":"PageType:cjv3l213x004f08366hjufttp","typename":"PageType"},"tags":[],"translations({\"where\":{\"language\":{\"id\":\"cjv3kwvoj000u083611381c6o\"}}})":[{"type":"id","generated":false,"id":"PageTranslation:cm6p1pmeb3t6h08030joox8il","typename":"PageTranslation"}],"__typename":"Page"},"PageTranslation:cm6p1pmeb3t6h08030joox8il":{"id":"cm6p1pmeb3t6h08030joox8il","name":"Flow limiters","createdAt":"2025-02-03T12:47:13.570Z","content":{"type":"json","json":{"content":[{"name":"Header","data":{"products":[{"title":"Accessories","description":"Backplates, Consumables. Tanks.","img":{"recommendedSizes":{"width":"235","height":"235"}},"url":""},{"title":"Accessories sets","description":"Protection, maintenance, cleaning.","img":{"recommendedSizes":{"width":"235","height":"235"}},"url":""},{"title":"Spare parts","description":"Spare parts and components.","img":{"recommendedSizes":{"width":"235","height":"235"}},"url":""},{"title":"Spare parts kits","description":"Completly Liberty spare parts kits.","img":{"recommendedSizes":{"width":"235","height":"235"}},"url":""}]},"id":"#0","type":"component","lock":false,"position":0},{"name":"LinkCrossroad","data":{"title":"Flow limiters","subtitle":"","showBreadcrumbs":true,"hideHeader":false,"firstTitle":"Choose Category","firstColumn":"1","firstLinks":[{"title":"User manual","url":{"url":"/en/support/flow-limiters/user-manuals","mediaData":{"mimetype":"application/pdf","size":4225099,"hash":"2372b31c0cf1fd57bf45a46cdf9b00a82099d456","id":"ck88hk63q1tzd0776fdtkhfok","filename":"bov-en-manual.pdf","category":"divesoft/docs/","type":"file"},"urlNewWindow":"","pageId":"cm6p1uk903tbx0803mfdygau2"},"anchor":"","id":"1"}],"secondTitle":"","secondColumn":"1","secondLinks":[],"thirdTitle":"","thirdColumn":"1","thirdLinks":[],"fourthTitle":"","fourthColumn":"1","fourthLinks":[],"fifthTitle":"","fifthColumn":"1","fifthLinks":[],"activeTab":"1"},"id":"#3","type":"component","lock":false,"position":1},{"name":"Footer","data":{"copyrights":"Copyright © 2019 Divesoft LLC All rights reserved.","facebookUrl":"","youtubeUrl":"","instagramUrl":"","contacts":"**Divesoft, s.r.o.** Hálkova 2495 413 01 Roudnice nad Labem Äeská republika Tel.: +420 416 857 057 E-mail: [email protected]"},"id":"#1","type":"component","lock":false,"position":10}],"id":"root","idBuffer":"#11","lastCommit":"68dac14b-f043-4f03-b470-0bc033f2d90b"}},"annotations":[],"language":{"type":"id","generated":false,"id":"Language:cjv3kwvoj000u083611381c6o","typename":"Language"},"__typename":"PageTranslation"},"Page:cm6p1uk903tbx0803mfdygau2":{"id":"cm6p1uk903tbx0803mfdygau2","type":{"type":"id","generated":false,"id":"PageType:cjv3l213x004f08366hjufttp","typename":"PageType"},"tags":[],"translations({\"where\":{\"language\":{\"id\":\"cjv3kwvoj000u083611381c6o\"}}})":[{"type":"id","generated":false,"id":"PageTranslation:cm6p1uk9e3tc40803yg7i8u2f","typename":"PageTranslation"}],"__typename":"Page"},"PageTranslation:cm6p1uk9e3tc40803yg7i8u2f":{"id":"cm6p1uk9e3tc40803yg7i8u2f","name":"User Manuals","createdAt":"2025-02-03T
212:51:04.081Z","content":{"type":"json","json":{"content":[{"name":"Header","data":{"products":[{"title":"Accessories","description":"Backplates, Consumables. Tanks.","img":{"recommendedSizes":{"width":"235","height":"235"}},"url":""},{"title":"Accessories sets","description":"Protection, maintenance, cleaning.","img":{"recommendedSizes":{"width":"235","height":"235"}},"url":""},{"title":"Spare parts","description":"Spare parts and components.","img":{"recommendedSizes":{"width":"235","height":"235"}},"url":""},{"title":"Spare parts kits","description":"Completly Liberty spare parts kits.","img":{"recommendedSizes":{"width":"235","height":"235"}},"url":""}]},"id":"#0","type":"component","lock":false,"position":0},{"name":"Spacer","data":{"spacingLarge":"50","spacingSmall":"50","backgroundColor":"#ffffff"},"id":"#3","type":"component","lock":false,"position":2},{"name":"DownloadsNew","data":{"backgroundColor":"#ffffff","title":"User manuals","subtitle":"","showBreadcrumbs":false,"hideHeader":false,"files":[{"id":"4","title":"Professional Flow limiter Mk1","url":{"url":"/en/manuals/professional-flow-limiter-mk1-quick-reference-en","pageId":"cm6p4768i3we00803rmhblalc"},"urlText":"Open"},{"id":"3","title":"Professional Flow limiter Mk2","subtitle":"","isTitleBold":false,"url":{"url":"/en/manuals/professional-flow-limiter-mk2-quick-reference-en","mediaData":{"mimetype":"application/pdf","size":6686172,"hash":"e9332173874a2e721ff2dff36d9457c68e740265","id":"cl2rd8azg3xvz07766ygpqt5j","filename":"liberty-en-manual.pdf","category":"divesoft/docs/","type":"file"},"urlNewWindow":false,"pageId":"clloxy7n3708p0735122lbaxh"},"urlText":"Open"}],"activeTab":"3"},"id":"#5","type":"component","lock":false,"position":4},{"name":"Footer","data":{"copyrights":"Copyright © 2019 Divesoft LLC All rights reserved.","facebookUrl":{"urlNewWindow":true,"url":"https://www.facebook.com/divesoft/"},"youtubeUrl":{"url":"https://www.youtube.com/@divesoft_tv","urlNewWindow":true},"instagramUrl":{"url":"https://www.instagram.com/divesoft/","urlNewWindow":true},"contacts":"**Divesoft s.r.o.** \nHálkova 2495 \n413 01 Roudnice nad Labem \nCzech Republic \nTel.: +420 416 857 057 \nE-mail: [email protected]","twitterUrl":{"url":"","urlNewWindow":true,"pageId":"cjv3l26tp004p0836i54n4u7a"}},"id":"#1","type":"component","lock":false,"position":15}],"id":"root","idBuffer":"#16","lastCommit":"187e0ffb-4c34-4e13-a869-59a084cb706c"}},"annotations":[],"language":{"type":"id","generated":false,"id":"Language:cjv3kwvoj000u083611381c6o","typename":"Language"},"__typename":"PageTranslation"},"Page:cm6p4768i3we00803rmhblalc":{"id":"cm6p4768i3we00803rmhblalc","type":{"type":"id","generated":false,"id":"PageType:cjv3l213x004f08366hjufttp","typename":"PageType"},"tags":[],"translations({\"where\":{\"language\":{\"id\":\"cjv3kwvoj000u083611381c6o\"}}})":[{"type":"id","generated":false,"id":"PageTranslation:cm6p476933we70803byho2kdc","typename":"PageTranslation"}],"__typename":"Page"},"PageTranslation:cm6p476933we70803byho2kdc":{"id":"cm6p476933we70803byho2kdc","name":"Professional flow limiter Mk1","createdAt":"2025-02-03T13:56:51.686Z","content":{"type":"json","json":{"content":[{"name":"Header","data":{"products":[{"title":"Accessories","description":"Backplates, Consumables. Tanks.","img":{"recommendedSizes":{"width":"235","height":"235"}},"url":""},{"title":"Accessories sets","description":"Protection, maintenance, cleaning.","img":{"recommendedSizes":{"width":"235","height":"235"}},"url":""},{"title":"Spare parts","description":"Spare parts and components.","img":{"recommendedSizes":{"width":"235","height":"235"}},"url":""},{"title":"Spare parts kits","description":"Completly Liberty spare parts kits.","img":{"recommendedSizes":{"width":"235","height":"235"}},"url":""}]},"id":"#0","type":"component","lock":false,"position":0},{"name":"SectionDivider","data":{"title":"Quick reference","skipToC":false},"id":"#28","type":"component","lock":false,"position":1},{"name":"ProductShowcase","data":{"backgroundColor":"#ffffff","isTextDark":true,"isImageRight":true,"image":{"mimetype":"image/png","size":676184,"hash":"f583f9a6d5e753a9b3526472703e6ed0269ac6fb","id":"ckecjunc7fwep077647jf3ozz","filename":"8021-professional-flow-limiter.png","category":"divesoft/","type":"image"},"imageMobile":{},"title":"Quick reference","subtitle":"Professional flow limiter Mk1","description":"version 2022/06 \n\n#8021, #8063, #8065","hideDescriptionOnMobile":false,"areButtons":false,"firstTitle":"Learn more >","firstUrl":"","secondTitle":"Configurator >","secondUrl":""},"id":"#2","type":"component","lock":false,"position":2},{"name":"Divider","data":{"color":"darkGray"},"id":"#24","type":"component","lock":false,"position":3},{"name":"SectionDivider","data":{"title":"Operating instructions","skipToC":false},"id":"#29","type":"component","lock":false,"position":4},{"name":"TextBlock","data":{"text":"1. Connect the Professional Flow
2Limiter Mk1 to the fitting of your cylinder valve. Stay in a safe direction. Do not stand in the direction of the gas flow.\n\n2. For the first use, or after the nozzle has been turned clockwise to a hard stop, turn the gas sampling nozzle counterclockwise several turns. \n\n3. Slowly open the cylinder valve. Gas should be flowing through the device, you may not hear it once the hose is attached. Correct flow rate is 0.2-0.4 lpm.\n\n4. Connect your analyzer to the gas sampling nozzle via the Connection hose #8009 (not included).\n\n5. Take your measurements.\n\n6. Close the cylinder valve.\n\n7. Turn the relief valve screw clockwise to vent the remaining gas from the device. Do not unscrew the relief valve all the way out to prevent the stainless steel ball from falling out.*\n\n8. Turn the gas sampling nozzle counterclockwise ¼ - ½ turn to return it to a sampling position for the next use. \n\n9. Disconnect the device from cylinder valve.\n\n*It is not necessary to turn the nozzle clockwise to a hard stop, doing so will completely halt flow if desired.","textLarge":false,"imageOnRight":true,"image":{"recommendedSizes":{"width":"420","height":"280"}},"imageMobile":{"recommendedSizes":{"width":"750","height":"500"}}},"id":"#8","type":"component","lock":false,"position":5},{"name":"Divider","data":{"color":"darkGray"},"id":"#23","type":"component","lock":false,"position":6},{"name":"Footer","data":{"copyrights":"Copyright © 2019 Divesoft LLC All rights reserved.","facebookUrl":{"urlNewWindow":true,"url":"https://www.facebook.com/divesoft/"},"youtubeUrl":{"url":"https://www.youtube.com/channel/UCHI2-kHmfoUlAdhQXPKl8lA/featured","urlNewWindow":true},"instagramUrl":{"url":"https://www.instagram.com/divesoft/","urlNewWindow":true},"contacts":"**Divesoft s.r.o.** \nHálkova 2495 \n413 01 Roudnice nad Labem \nCzech Republic \nTel.: +420 416 857 057 \nE-mail: [email protected]","twitterUrl":{"url":"https://twitter.com/divesoft","urlNewWindow":true}},"id":"#1","type":"component","lock":false,"position":7}],"id":"root","idBuffer":"#30","lastCommit":"7c331295-037f-4e59-8a3e-9067a23342cc"}},"annotations":[],"language":{"type":"id","generated":false,"id":"Language:cjv3kwvoj000u083611381c6o","typename":"Language"},"__typename":"PageTranslation"},"Page:cm6rm219h4nds0803ymo2uq2e":{"id":"cm6rm219h4nds0803ymo2uq2e","type":{"type":"id","generated":false,"id":"PageType:cjv3l213x004f08366hjufttp","typename":"PageType"},"tags":[{"type":"id","generated":false,"id":"Tag:cjv3szrcv01bz0836yo8myb0r","typename":"Tag"},{"type":"id","generated":false,"id":"Tag:cm5ww05zc1b5d0803zglvz927","typename":"Tag"}],"translations({\"where\":{\"language\":{\"id\":\"cjv3kwvoj000u083611381c6o\"}}})":[{"type":"id","generated":false,"id":"PageTranslation:cm6rm21a04ndz0803z3c8axta","typename":"PageTranslation"}],"__typename":"Page"},"PageTranslation:cm6rm21a04ndz0803z3c8axta":{"id":"cm6rm21a04ndz0803z3c8axta","name":"What is a Dive Computer?","createdAt":"2025-02-05T07:52:17.399Z","content":{"type":"json","json":{"content":[{"name":"Header","data":{"products":[{"title":"Accessories","description":"Backplates, Consumables. Tanks.","img":{"recommendedSizes":{"width":"235","height":"235"}},"url":""},{"title":"Accessories sets","description":"Protection, maintenance, cleaning.","img":{"recommendedSizes":{"width":"235","height":"235"}},"url":""},{"title":"Spare parts","description":"Spare parts and components.","img":{"recommendedSizes":{"width":"235","height":"235"}},"url":""},{"title":"Spare parts kits","description":"Completly Liberty spare parts kits.","img":{"recommendedSizes":{"width":"235","height":"235"}},"url":""}]},"id":"#0","type":"component","lock":false,"position":0},{"name":"BlogArticle","data":{"title":"What is a Dive Computer?","perex":"A dive computer is an essential tool for scuba divers, helping them monitor depth, time, and decompression status to ensure a safe dive. Also known as a **diving computer** or **scuba dive computer**, this device continuously calculates and displays critical dive information, reducing the risk of decompression sickness. Some computers also allow the divers to
2store a range of gases used during diving, alerting them about when to switch between them, shortening their decompression time.","content":"## How Does a Dive Computer Work? \nThe primary function of a **dive computer** is to track a diverâs depth and the dive time, applying decompression algorithms, such as the [Buhlmann decompression algorithm](https://en.wikipedia.org/wiki/B%C3%BChlmann_decompression_algorithm) to calculate nitrogen or other inert gas absorption and the decompression profile the diver should follow. This allows for real-time adjustments to a diverâs ascent profile, making dives safer and more efficient compared to traditional dive tables. \n\n## Choosing the Best Dive Computer \nWhen looking to **buy a dive computer**, divers should consider factors such as display readability, battery life, and algorithm options. **Dive computer reviews** highlight popular models, from entry-level devices to advanced **tech dive computers** used for deep or mixed-gas diving. Some well-known brands include Suunto, Shearwater, and [Divesoft Freedom](https://www.divesoft.com/en/products/freedomplus-computers), which is highly regarded among technical divers for its customizability and ruggedness. \n\n\n\n## Features of a Dive Watch Computer \nMany modern **dive computers** double as wristwatches, making them convenient for everyday wear. A **dive watch computer** typically includes air and nitrox compatibility, wireless air integration, and customizable alarms. They are however built as a wat
2ch first and a dive computer second. They might be sufficient for easier dives, but serious divers appreciate the readability, reliability and advanced features of dedicated dive computers \n\n## Advanced Dive Computer Software \nModern **dive computer software** allows divers to log and analyze their dives by syncing data to a computer or smartphone. This also includes pre-dive planning where the diver can verify their dive plan, making sure their gases are sufficient and that their diving computer will take the correct amounts of gas into account when planning a dive. Modern dive computers can also take your surface air consumption (SAC) rate into account when planning dives, making sure that each diver has enough gas, no matter the dive. \n\n\n\n## Dive Computer Accessories \nThe best dive computer accessory is a second dive computer, ensuring redundancy during difficult dives. If you wish to bling out your dive computer a **dive computer case** will help protect the device. Above water a dive computer carrying case is a good idea to ensure safety during transport. \n\n## Buying a Second Hand Dive Computer \nFor budget-conscious divers, purchasing a **second hand dive computer** can be a cost-effective option. However, it is crucial to check the battery life, display condition, and any prior use history before making a purchase. Make sure that the model of [dive computer ](https://eshop.divesoft.com/products/computers-freedom)you are purchasing is being supported by the manufacturer, so your Diving computer firmware can stay up to date. \n\n\n\n## Conclusion \nA **dive computer** is an indispensable piece of diving equipment that enhances safety and convenience underwater. Whether you are a recreational diver looking for a reliable **scuba dive computer** or a technical diver in need of a specialized diving computer such as the **Divesoft Freedom computer**, researching **dive computer reviews** and understanding **what does a dive computer do** will help you make an informed choice and select the best dive computer for your specific use case.","showTags":false,"showDate":true,"image":{"mimetype":"image/jpeg","size":2048448,"hash":"dd45c562a9e5cb8daa3bf102b8fb4f6bb81f0fcc","id":"cm6ksm9sr7zqe0850oohwtmfo","filename":"freedom.jpg","category":"divesoft/","type":"image"},"publishDate":"02/05/2025"},"id":"#2","type":"component","lock":false,"position":1},{"name":"ProductShowcase","data":{"componentTemplateId":"cm9h4wr6ugjv10803yqs3tp71"},"id":"#21","type":"component","lock":false,"position":14},{"name":"Footer","data":{"copyrights":"Copyright © 2019 Divesoft LLC All rights reserved.","facebookUrl":{"urlNewWindow":true,"url":"https://www.facebook.com/divesoft/"},"youtubeUrl":{"url":"https://www.youtube.com/@divesoft_tv","urlNewWindow":true},"instagramUrl":{"url":"https://www.instagram.com/divesoft/","urlNewWindow":true},"contacts":"**Divesoft s.r.o.** \nHálkova 2495 \n413 01 Roudnice nad Labem \nCzech Republic \nTel.: +420 416 857 057 \nE-mail: [email protected]","twitterUrl":{"url":"","urlNewWindow":true,"pageId":"cjv3l26tp004p0836i54n4u7a"}},"id":"#1","type":"component","lock":false,"position":15}],"id":"root","idBuffer":"#34","lastCommit":"c8ffb121-b8d1-4cdb-8094-eed23ee64436"}},"annotations":[],"language":{"type":"id","generated":false,"id":"Language:cjv3kwvoj000u083611381c6o","typename":"Language"},"__typename":"PageTranslation"},"Page:cm71owk2g6tab0803321rni5n":{"id":"cm71owk2g6tab0803321rni5n","type":{"type":"id","generated":false,"id":"PageType:cjv3l213x004f08366hjufttp","typename":"PageType"},"tags":[{"type":"id","generated":false,"id":"Tag:cjv3szrcv01bz0836yo8myb0r","typename":"Tag"},{"type":"id","generated":false,"id":"Tag:cm5ww0t651b710803pcl02cn4","typename":"Tag"}],"translations({\"where\":{\"language\":{\"id\":\"cjv3kwvoj000u083611381c6o\"}}})":[{"type":"id","generated":false,"id":"PageTranslation:cm71owk2u6tai0803p63cxxm1","typename":"PageTranslation"}],"__typename":"Page"},"PageTranslation:cm71owk2u6tai0803p63cxxm1":{"id":"cm71owk2u6tai0803p63cxxm1","name":"Understanding and Preventing the Bends When Diving","createdAt":"2025-02-12T09:09:42.438Z","content":{"type":"json","json":{"content":[{"name":"Header","data":{"products":[{"title":"Accessories","description":"Backplates, Consumables. Tanks.","img":{"recommendedSizes":{"width":"235","height":"235"}},"url":""},{"title":"Accessories sets","description":"Protection, maintenance, cleaning.","img":{"recommendedSizes":{"width":"235","height":"235"}},"url":""},{"title":"Spare parts","description":"Spare parts and components.","img":{"recommendedSizes":{"width":"235","height":"235"}},"url":""}
2,{"title":"Spare parts kits","description":"Completly Liberty spare parts kits.","img":{"recommendedSizes":{"width":"235","height":"235"}},"url":""}]},"id":"#0","type":"component","lock":false,"position":0},{"name":"BlogArticle","data":{"title":"Understanding and Preventing the Bends When Diving ","perex":"","content":"## What is the Bends in Diving?\nThe Bends, also known as decompression sickness, is a condition that occurs when dissolved gases, primarily nitrogen, come out of solution in the bodyâs tissues and form bubbles as the diver ascends. These bubbles can cause severe pain, neurological issues, and other complications. \n\n## What is the Bends Caused by Scuba Diving?\nDecompression sickness is caused by badly controlled ascents. When a diver descends, the pressure increases, causing nitrogen from the gas they breathe to more easily dissolve into their tissues. If a diver surfaces too quickly, the rapid pressure decrease causes the nitrogen to form bubbles in the tissues and bloodstream. These bubbles cause the symptoms of decompression sickness. \n\n\n\n## How Do You Get the Bends Diving?\nThe bends occurs when divers: \n- Surface too quickly after a dive. \n- Exceed safe dive times or depths outlined in dive tables. \n- Fail to follow proper decompression stops during deep or prolonged dives. \n- Dive multiple times in a day without adequate surface intervals. \n\nNon diving issues include: \n- Dehydration. \n- Poor physical fitness. \n\n## How long should I wait between diving and flying?\nAfter diving, it is essential to wait enough time before flying to reduce the risk of decompression sickness. The general guidelines are: \n\nWait at least **12 hours** after a single no-decompression dive. \n\nWait **18-24** hours after multiple dives or dives requiring decompression stops. Flying soon after diving exposes you to lower air pressure, increasing the risk of nitrogen bubbles forming in your bloodstream, much like a quick ascend would. \n\n## What Is Decompression Sickness?\nDecompression sickness is a medical condition resulting from the formation of nitrogen bubbles in the body. Symptoms include: \n- Joint and muscle pain. \n- Dizziness, nausea, and fatigue. \n- Skin rashes or itching. \n- Neurological symptoms like confusion or paralysis in severe cases. \n\n\n\n\n## Why Is Decompression Sickness Called the Bends?\nThe nickname \"the bends\" stems from the posture divers often assume when suffering from the condition. Severe joint pain, particularly in the knees and elbows, can cause divers to hunch or bend over in discomfort. \n\n## Long-Term Effects of Decompression Sickness\nWhile many divers recover fully with prompt treatment, severe or untreated cases of decompression sickness can lead to lasting effects, including: \n- Chronic joint pain or arthritis. \n- Neurological damage, such as memory loss or motor function impairment. \n- Pulmonary complications. \n- Death \n\n## How to Treat Decompression Sickness\nTreatment for decompression sickness typically involves: \n- Administering oxygen: Pure oxygen helps reduce nitrogen levels in the body. \n- Recompression therapy: This involves placing the affected diver in a hyperbaric chamber to simulate pressure at depth and gradually reduce it, allowing nitrogen bubbles to dissolve safely. \n- Hydration and rest: Supp
2ort recovery and reduce symptoms. Immediate medical attention is essential for anyone suspected of having decompression sickness. \n\n\n\n## Types of Decompression Sickness\nDecompression sickness is classified into two main types: \n\n- Type 1: Involves mild symptoms such as joint pain and skin rashes. \n- Type 2: Affects the nervous system, lungs, or cardiovascular system and can be life-threatening if not treated promptly. \n\n## Preventing Decompression Sickness\n\nTo prevent the bends, divers should:\n- Ascend slowly, adhering to the recommended ascent rate of 30 feet per minute.\n- Perform safety stops at 3-6 meters or 15-20 feet for 3-5 minutes during the ascent. \n- Use [dive computers](https://eshop.divesoft.com/products/computers-freedom) or tables to plan dives within no-decompression limits. \n- Stay hydrated and maintain good physical fitness. \n- Allow adequate surface intervals between dives and wait for the recommended time before flying. \n\nBy understanding the causes, symptoms, and prevention strategies, divers can minimize the risk of decompression sickness and enjoy safer underwater experiences. If you want to learn more about the physiology and medicine of diving, we recommend you visit the [Divers Alert Network](https://dan.org/).\n\n ","showTags":false,"showDate":true,"image":{"mimetype":"image/jpeg","size":757630,"hash":"d4949453cc5969d0751c5b9664d65fd3f0473588","id":"cm71opnomi6fa08504vlwlaty","filename":"understanding-and-preventing-the-bends-when-diving-00.jpg","category":"divesoft/","type":"image","alt":"Understanding and Preventing the Bends When Diving "},"publishDate":"02/12/2025"},"id":"#2","type":"component","lock":false,"position":1},{"name":"ProductShowcase","data":{"componentTemplateId":"cm9h4wr6ugjv10803yqs3tp71"},"id":"#21","type":"component","lock":false,"position":15},{"name":"Footer","data":{"copyrights":"Copyright © 2019 Divesoft LLC All rights reserved.","facebookUrl":{"urlNewWindow":true,"url":"https://www.facebook.com/divesoft/"},"youtubeUrl":{"url":"https://www.youtube.com/@divesoft_tv","urlNewWindow":true},"instagramUrl":{"url":"https://www.instagram.com/divesoft/","urlNewWindow":true},"contacts":"**Divesoft s.r.o.** \nHálkova 2495 \n413 01 Roudnice nad Labem \nCzech Republic \nTel.: +420 416 857 057 \nE-mail: [email protected]","twitterUrl":{"url":"","urlNewWindow":true,"pageId":"cjv3l26tp004p0836i54n4u7a"}},"id":"#1","type":"component","lock":false,"position":16}],"id":"root","idBuffer":"#35","lastCommit":"aace5160-ba20-4a6c-9818-422702acec79"}},"annotations":[],"language":{"type":"id","generated":false,"id":"Language:cjv3kwvoj000u083611381c6o","typename":"Language"},"__typename":"PageTranslation"},"Page:cm71q6oaw6udb0803012xg12r":{"id":"cm71q6oaw6udb0803012xg12r","type":{"type":"id","generated":false,"id":"PageType:cjv3l213x004f08366hjufttp","typename":"PageType"},"tags":[{"type":"id","generated":false,"id":"Tag:cjv3szrcv01bz0836yo8myb0r","typename":"Tag"},{"type":"id","generated":false,"id":"Tag:cm5ww05zc1b5d0803zglvz927","typename":"Tag"}],"translations({\"where\":{\"language\":{\"id\":\"cjv3kwvoj000u083611381c6o\"}}})":[{"type":"id","generated":false,"id":"PageTranslation:cm71q6obb6udi0803sfzmumpz","typename":"PageTranslation"}],"__typename":"Page"},"PageTranslation:cm71q6obb6udi0803sfzmumpz":{"id":"cm71q6obb6udi0803sfzmumpz","name":"What is Technical Diving?","createdAt":"2025-02-12T09:45:34.103Z","content":{"type":"json","json":{"content":[{"name":"Header","data":{"products":[{"title":"Accessories","description":"Backplates, Consumables. Tanks.","img":{"recommendedSizes":{"width":"235","height":"235"}},"url":""},{"title":"Accessories sets","description":"Protection, maintenance, cleaning.","img":{"recommendedSizes":{"width":"235","height":"235"}},"url":""},{"title":"Spare parts","description":"Spare parts and components.","img":{"recommendedSizes":{"width":"235","height":"235"}},"url":""}
2,{"title":"Spare parts kits","description":"Completly Liberty spare parts kits.","img":{"recommendedSizes":{"width":"235","height":"235"}},"url":""}]},"id":"#0","type":"component","lock":false,"position":0},{"name":"BlogArticle","data":{"title":"What is Technical Diving?","perex":"Technical diving is a specialized form of scuba diving that goes beyond the limits of recreational diving. It involves diving to greater depths, exploring underwater caves, shipwrecks, or other challenging environments, and often requires advanced training, equipment, and planning. Technical diving opens the door to deeper underwater exploration but comes with higher risks and demands a higher level of expertise. \n\nThe exact definition of what technical diving is can vary. Some define it as diving with mixtures other than air, some define it as diving in an overhead environment (such as caves, wrecks, or dives where decompression occurs). ","content":"## Key Features of Technical Diving \n\nTechnical diving is distinct from recreational diving in several ways: \n\n- **Depth Limits**: Recreational divers are typically limited to a maximum depth of 40 meters (130 feet). In contrast, technical diving depth limits can exceed 100 meters (330 feet) depending on the diverâs training and the [type of dive](https://www.divesoft.com/en/blog/what-are-the-types-of-scuba-diving) being conducted. Diving to such depths requires careful planning to manage decompression stops, gas mixtures, and equipment configurations. \n- **Specialized Equipment**: Technical divers often use advanced gear, including: \n\t- Twin tanks or [rebreathers](https://eshop.divesoft.com/products/ccr-liberty) for extended underwater time. \n\t- Multiple stage tanks with different gas mixes for varying depth levels or for decompression. \n\t- Redundant safety systems to minimize risk. \n- **Complex Dive Planning**: Tech diving involves meticulous preparation, including detailed dive plans, gas management, and contingency strategies to address potential emergencies. \n\n- **Challenging Environments**: Technical diving often takes place in unique and demanding locations, such as: \n\t- **Cave diving**: Exploring underwater cave systems requires exceptional navigational skills and specialized training. \n\t- **Wreck diving**: Investigating sunken ships offers a glimpse into history but can involve tight spaces and unstable structures. \n\t- **[Deep sea diving](https://www.divesoft.com/en/blog/what-is-deep-diving)**: Descending to extreme depths unveils environments rarely seen by humans. \n\n\n\n## Training and Certification \n\nTo embark on technical diving, divers must undergo rigorous training and get appropriate certifications. These certifications teach divers advanced skills, such as: \n\n- Decompression procedures \n- Gas blending for mixed gases (e.g., trimix, heliox) \n- Use of technical diving hand signals to ensure clear communication underwater \n- Emergency protocols for handling equipment failures or lost gas supplies \n\n**Tech Diving Courses** are progressive, starting with entry-level certifications like \"Intro to Tech\" or \"Advanced Nitrox,\" and advancing to specialties such as cave diving or rebreather training. Each course builds on foundational skills, ensuring divers are prepared for the challenges of technical dives. \n\n\n\n## The Role of Technical Diving Hand Signals \n\nCommunication is crucial in technical diving, where voice communication is impossible, and visibility may be limited. Technical diving hand signals go beyond the basic signals used in recreational diving. These signals convey critical information, such as: \n\n- Gas-switch notifications \n- Emergency indications (e.g., out of air, low on gas) \n- Depth or time reminders \n- Navigation instructions in caves or wrecks \n\nDivers must master these signals to ensure effective teamwork and safety. \n\n\n\n## The Allure of Technical Diving \n\nThe appeal of technical diving lies in its ability to take divers where few have ventured. Exploring the depths of a wreck or navigating intricate cave systems offers unparalleled excitement and discovery. However, itâs not for everyone; the financial cost, physical demands, and inherent risks make it a pursuit for dedicated and well-prepared individuals. \n\n## Conclusion \n\nTechnical diving, or tech diving, represents the pinnacle of underwater exploration, offering divers the opportunity to push beyond traditional limits. With the right training, equipment, and mindset, technical diving can unlock incredible underwater adventures, from the depths of the ocean to the hidden chambers of underwater caves. For those seeking to go deeperâboth physically and metaphoricallyâtechnical diving is the ultimate journey.","showTags":false,"showDate":true,"image":{"mimetype":"image/jpeg","size":1126777,"hash":"fe3825115a4295950f67e1b253e44bc7296c8424","id":"cm71qowyei9vz0850rxhmbjk5","filename":"what-is-technical-diving-00.jpg","category":"divesoft/","type":"image","alt":"What is Technical Diving?"},"publishDate":"02/19/2025"},"id":"#2","type":"component","lock":false,"position":1},{"name":"ProductShowcase","data":{"componentTemplateId":"cm9h4wr6ugjv10803yq
2s3tp71"},"id":"#21","type":"component","lock":false,"position":16},{"name":"Footer","data":{"copyrights":"Copyright © 2019 Divesoft LLC All rights reserved.","facebookUrl":{"urlNewWindow":true,"url":"https://www.facebook.com/divesoft/"},"youtubeUrl":{"url":"https://www.youtube.com/@divesoft_tv","urlNewWindow":true},"instagramUrl":{"url":"https://www.instagram.com/divesoft/","urlNewWindow":true},"contacts":"**Divesoft s.r.o.** \nHálkova 2495 \n413 01 Roudnice nad Labem \nCzech Republic \nTel.: +420 416 857 057 \nE-mail: [email protected]","twitterUrl":{"url":"","urlNewWindow":true,"pageId":"cjv3l26tp004p0836i54n4u7a"}},"id":"#1","type":"component","lock":false,"position":17}],"id":"root","idBuffer":"#36","lastCommit":"c1780e8f-3a6e-4b97-b4a7-3c070b890ca6"}},"annotations":[],"language":{"type":"id","generated":false,"id":"Language:cjv3kwvoj000u083611381c6o","typename":"Language"},"__typename":"PageTranslation"},"Page:cm7j0o17o0byw0803hbonvfvl":{"id":"cm7j0o17o0byw0803hbonvfvl","type":{"type":"id","generated":false,"id":"PageType:cjv3l213x004f08366hjufttp","typename":"PageType"},"tags":[{"type":"id","generated":false,"id":"Tag:cjv3szrcv01bz0836yo8myb0r","typename":"Tag"},{"type":"id","generated":false,"id":"Tag:cm5ww05zc1b5d0803zglvz927","typename":"Tag"}],"translations({\"where\":{\"language\":{\"id\":\"cjv3kwvoj000u083611381c6o\"}}})":[{"type":"id","generated":false,"id":"PageTranslation:cm7j0o18m0bz308039kuxiewt","typename":"PageTranslation"}],"__typename":"Page"},"PageTranslation:cm7j0o18m0bz308039kuxiewt":{"id":"cm7j0o18m0bz308039kuxiewt","name":"Car Wrecks in Lake Attersee","createdAt":"2025-02-24T12:11:05.158Z","content":{"type":"json","json":{"content":[{"name":"Header","data":{"products":[{"title":"Accessories","description":"Backplates, Consumables. Tanks.","img":{"recommendedSizes":{"width":"235","height":"235"}},"url":""},{"title":"Accessories sets","description":"Protection, maintenance, cleaning.","img":{"recommendedSizes":{"width":"235","height":"235"}},"url":""},{"title":"Spare parts","description":"Spare parts and components.","img":{"recommendedSizes":{"width":"235","height":"235"}},"url":""},{"title":"Spare parts kits","description":"Completly Liberty spare parts kits.","img":{"recommendedSizes":{"width":"235","height":"235"}},"url":""}]},"id":"#0","type":"component","lock":false,"position":0},{"name":"BlogArticle","data":{"title":"Car Wrecks in Lake Attersee","perex":"After a few minutes of swimming in shallow water, we reach a vertical rock wall. We exchange the OK signal and begin our descent. Itâs summer; the water at the surface is 21°C, but the temperature drops as we go deeper. However, visibility improves. At 92 meters, itâs pitch dark, the temperature is 5°C, and visibility exceeds 20 meters. We check our [bailout rebreathers](https://www.divesoft.com/en/blog/diving-with-bailout-rebreather) and search around us with the narrow beams of our lights. Following our planned direction, the shapes of what weâre looking for slowly emerge from the darkness. Excitement fills the group as we call out to each other, the sound muffled by our regulators and distorted by the helium in our breathing mix. But weâve found it. The wreck of an old car is right in front of us.","content":"## Training and Certification \n\n \nLake Attersee is the third-largest lake in Austria, located in the Upper Austria region known as the Salzkammergut. The lake spans 46.7 km² and stretches 20 km from north to south, with a maximum depth of 170 meters. It lies at an altitude of 476 meters. Its clear waters attract divers from many neighboring countries. For the [Kapr Divers](https://www.kaprdivers.cz) team from Prague, Czech Republic, Attersee is almost a home site. Just 350 km away, we make an average of ten multi-day trips here each year. \n\n\nIn summer, the shallow, warm waters provide an ideal environment for beginners to develop their skills and observe aquatic life, such as lush plants, perch, pike, and, with some luck, eels. The deeper zones, however, offer fantastic opportunities for technical dives. Depths between 30 and 100 meters maintain low temperatures year-round but often provide excellent visibility exceeding 20 meters. For deeper dives, we choose locations with rocky walls, allowing us to descend quickly. While the underwater rocky landscapes are stunning, this year, our exploration of deeper areas had another purpose: searching for 80-year-old car wrecks. \n\n \n\n## The History of Attersee and Its Wrecks\nThe area around Attersee has been inhabited for over
26,000 years, as evidenced by archaeological finds. In prehistoric times, stilt houses stood along its shores, forming small villages. The remains of these stilt dwellings, found in several Alpine lakes, are part of a UNESCO World Heritage Site. Although the lake no longer freezes over in winter, historical records show that it was last completely frozen from January 29 to March 31, 1963. This could explain some of the wrecks, possibly from cars falling through the ice. However, this remains unconfirmed, as does the theory of accidents involving cars plunging off the road into the water. \n\n\n\n## Wreck Diving at Attersee\nThe lakeâs southern region hosts several car wrecks, accessible from shore at locations like Wandl and BMW Dixi. To date, weâve mapped four car wrecks in this area. Two shallow ones (a BMW Dixi and a Jeep) are in depths of 5 and 12 meters. \n\n \n\nThey are nearly disintegrated and will likely vanish entirely in a few years. The most intact and visually striking wreck, in my opinion, is the Steyr Baby, lying at 62 meters. This car, manufactured in the 1940s, is remarkably preserved. It still has its wheels, front window, headlights, part of the steering wheel, and dashboard. It rests on a slope with fine sediment, where one careless movement can reduce visibility to zero. \n\n \n\nAnother wreck in this area is a Chevrolet Master at 50 meters. While well-preserved, itâs not as intact as the Steyr Baby. Missing its wheels, the wreck shows damage on the passenger door and rear fender, suggesting a possible road accident. A few meters shallower are the remains of a truck, which weâve yet to explore in detail. \n\n \n\nIn the eastern part of the lake, near Schwarze Brücke, two wrecks lie side by side at a depth of 92 meters. One is a Volkswagen Kübelwagen, a military vehicle produced between 1940 and 1945. The other, leaning against the Volkswagen on its deeper side, is a Chrysler from around 1930. \n\n \n\nDiving in such cold waters and depths requires advanced training, proper education, and reliable equipment. Experience with dry suits and hypoxic trimix gases is essential. For exploring Atterseeâs deep waters, our team relies on [Divesoft Liberty rebreathers](https://www.divesoft.com/en/products/ccr-liberty). When diving beyond 60 meters, we streamline logistics by using two rebreathers: one as the primary device and the other as a [bailout](https://www.divesoft.com/en/products/ccr-liberty/bail-out-rebreather).\n\n \n\nAbout the Author:\n\n[Petr Slezák](https://www.divesoft.com/en/ambassadors/petrslezak) \n[facebook.com/petr.slezak.kapr.divers](https://www.facebook.com/petr.slezak.kapr.divers)\n\n \n\n \nCzech version:\n\n## Vraky starých aut v jezeru Attersee \n \nPo nÄkolika minutách plavánà v mÄlké vodÄ se dostáváme ke kolmé skalnà stÄnÄ. VymÄnÃme si signál OK a zahájÃme sestup. Je léto, voda má na hladinÄ 21 °C, ale s pÅibývajÃcà hloubkou teplota klesá. Zato viditelnost se zlepÅ¡uje. V 92 m je úplná tma, teplota 5 °C a viditelnost vÃce než 20 m. Kontrolujeme bailout rebreathery a úzkými kužely naÅ¡ich svÃtilen pátráme kolem sebe.
2Vydáme se naplánovaným smÄrem a po pár minutách se ze tmy vynoÅà obrysy toho, co hledáme. Máme radost, voláme na sebe, což tlumà ústenky a zkresluje helium v dýchacà smÄsi, ale naÅ¡li jsme to. Vrak starého auta je pÅÃmo pÅed námi. \n \nJezero Attersee je tÅetà nejvÄtÅ¡Ã jezero v Rakousku. Nacházà se ve spolkové zemi Hornà Rakousko v oblasti zvané Solná komora. Rozloha jezera je 46,7 km², od severu k jihu mÄÅà 20 km. Max. hloubka je 170 m. Ležà v nadmoÅské výšce 476 m. Jeho Äistá a svÄtlá voda láká potápÄÄe z mnoha okolnÃch zemÃ. Pro tým Kapr Divers z Prahy, CZ je jezero témÄÅ domáckou lokalitou. S dojezdovou vzdálenostà 350 km k jezeru vyrážÃme na nÄkolikadennà výlety průmÄrnÄ dest krát do roka. MÄlká a teplá voda je v létÄ ideálnÃm prostÅedÃm pro trénink zaÄáteÄnÃků, kteÅà zde mohou rozvÃjet své dovednosti a pozorovat vzrostlé vodnà rostliny, okouny, Å¡tiky a s trochou Å¡tÄstà i úhoÅe. HlubÅ¡Ã zóny pÅinášà skvÄlou možnost pro technické ponory. V hloubkách mezi 30 až 100 metrů je celoroÄnÄ nÃzká teplota, ale zpravidla vynikajÃcà viditelnost, mnohdy pÅesahujÃcà 20 m. Pro ponory do vÄtÅ¡Ãch hloubek volÃme lokality se skalnatými stÄnami, abychom se do hloubky dostali relativnÄ rychle. Samotné skalnaté podvodnà scenérie jsou úchvatné, ale letos jsme se vÄnovali průzkumu hloubek z jiného důvodu. Hledali jsme 80 let staré vraky. Vraky aut. \n \nOblast okolo jezera byla osÃdlena dle archeologických nálezů již pÅed 6000 lety. Podél bÅehu jezera, které má ledovcový původ, stála v prehistorickém obdobà obydlà na kůlech a tvoÅila malé vesnice. Jejich pozůstatky můžeme na nÄkolika mÃstech v jezeÅe vidÄt dodnes. Tato kůlová obydlà vyskytujÃcà se i na jiných mÃstech v Alpách byla zaÅazena na seznam SvÄtového dÄdictvà UNESCO. Jezero v souÄasnosti v zimÄ nezamrzá, ale v historii tomu mohlo být jinak. Důvodem je jednak velký objem, který zabraÅuje rychlému ochlazenÃ, ale také obsah minerálů a soli ve vodÄ. Podle mÃstnÃch kronik bylo jezero naposledy zamrzlé souvislou ledovou pokrývkou od 29. ledna do 31. bÅezna 1963. \nJednou z pÅÃÄin, proÄ jsou na dnÄ jezera vraky aut, je hypoteticky i to, že se pod nimi prolomil led. Hypotéza je nepotvrzená stejnÄ jako nehoda na silnici a následný pád do vody. \n \nV jižnà Äásti jezera se nacházà hned nÄkolik vraků aut. Dostupné jsou ze bÅehu z lokalit Wandl a BMW Dixi. Zmapované máme k dneÅ¡nÃmu dni v této oblasti 4 vraky aut. Ty dva mÄlké (BMW Dixi a Jeep) jsou již témÄÅ rozpadlé a za pár let z nich pravdÄpodobnÄ nezbyde již vůbec nic. Jsou v hloubkách 5 m a 12 m. Z mého pohledu nejzachovalejÅ¡Ã a na pohled nejhezÄà je vrak Steyr Baby v hloubce 62 m. Je velmi zachovalý. Nikdo nevÃ, jak dlouho je pod vodou, ale vyrábÄl se ve 40. letech minulého stoletÃ. Dodnes má kola, pÅednà okno, svÄtlomety, Äást volantu i palubnà desku. Ležà ve svahu s velmi jemným sedimentem a tak staÄà jeden neopatrný pohyb potápÄÄe a viditelnost klesne na nulu. \nDalÅ¡Ã vrak auta v této lokalitÄ je Chevrolet Master v hloubce 50 m. Je také dost zachovalý, vÄ. volantu, ale ne tak, jako Steyr Baby. Chybà kola a na pravé stranÄ na dveÅÃch spolujezdce a na pravém zadnÃm blatnÃku jsou viditelná poÅ¡kozenÃ, takže v tomto pÅÃpadÄ se spÃÅ¡e pÅiklánÃm k nehodÄ na silnici (nacházà se pÅÃmo u bÅehu). Jen o pár metrů mÄlÄeji od tohoto vraku jsou zbytky nÄjakého nákladnÃho auta, ale to budeme muset teprve prozkoumat. \n \nVe východnà Äásti jezera poblÞ lokality Schwarze brucke jsou v hloubce 92 m dva vraky aut bezprostÅednÄ vedle sebe. Ležà ve svahu. Ten blÞe ke bÅehu je vrak Volkswagen Kübelwagen, což byl vojenský osobnà automobil vyrábÄný mezi lety 1940 a 1945. Druhý vrak opÃrajÃcà se o hlubÅ¡Ã stranu Volkswagenu je Chrysler, model vyrábÄný kolem roku 1930. \nPotápÄnà ve studené vodÄ do takových hloubek klade vysoké nároky na trénink a vzdÄlánà potápÄÄů, jakož i na jejich vybavenÃ. SamozÅejmostà jsou zkuÅ¡enosti se suchým oblekem a s dýchánÃm hypoxických trimixových smÄsÃ. Průzkum hlubokých vod jezera Attersee naÅ¡emu týmu zjednoduÅ¡uje použità rebreatherů Divesoft Liberty. K ponorům do hloubek vÄtÅ¡Ãch než
260 metrů zefektivÅuje logistiku použità dvou rebreatherů, jeden v režimu primárnÃho pÅÃstroje, druhý v režimu bailout (záložnà pÅÃstroj).","showTags":false,"showDate":true,"image":{"mimetype":"image/png","size":3771772,"hash":"1e9a0ede417082536dbec01d6d16fdb2e60ab006","id":"cm7j0xkrossfi0850csheanxm","filename":"cover.png","category":"divesoft/","type":"image","alt":"Car Wrecks in Lake Attersee"},"publishDate":"02/26/2025"},"id":"#2","type":"component","lock":false,"position":1},{"name":"ProductShowcase","data":{"componentTemplateId":"cm9h4wr6ugjv10803yqs3tp71"},"id":"#21","type":"component","lock":false,"position":17},{"name":"Footer","data":{"copyrights":"Copyright © 2019 Divesoft LLC All rights reserved.","facebookUrl":{"urlNewWindow":true,"url":"https://www.facebook.com/divesoft/"},"youtubeUrl":{"url":"https://www.youtube.com/@divesoft_tv","urlNewWindow":true},"instagramUrl":{"url":"https://www.instagram.com/divesoft/","urlNewWindow":true},"contacts":"**Divesoft s.r.o.** \nHálkova 2495 \n413 01 Roudnice nad Labem \nCzech Republic \nTel.: +420 416 857 057 \nE-mail: [email protected]","twitterUrl":{"url":"","urlNewWindow":true,"pageId":"cjv3l26tp004p0836i54n4u7a"}},"id":"#1","type":"component","lock":false,"position":18}],"id":"root","idBuffer":"#37","lastCommit":"59176c66-5342-48fd-9a33-e2ed4916b634"}},"annotations":[],"language":{"type":"id","generated":false,"id":"Language:cjv3kwvoj000u083611381c6o","typename":"Language"},"__typename":"PageTranslation"},"Page:cm7uibgnd3dzx0803qnwpozbb":{"id":"cm7uibgnd3dzx0803qnwpozbb","type":{"type":"id","generated":false,"id":"PageType:cjv3l213x004f08366hjufttp","typename":"PageType"},"tags":[{"type":"id","generated":false,"id":"Tag:cjv3szrcv01bz0836yo8myb0r","typename":"Tag"},{"type":"id","generated":false,"id":"Tag:cm5ww05zc1b5d0803zglvz927","typename":"Tag"}],"translations({\"where\":{\"language\":{\"id\":\"cjv3kwvoj000u083611381c6o\"}}})":[{"type":"id","generated":false,"id":"PageTranslation:cm7uibgnz3e040803w1moh1c1","typename":"PageTranslation"}],"__typename":"Page"},"PageTranslation:cm7uibgnz3e040803w1moh1c1":{"id":"cm7uibgnz3e040803w1moh1c1","name":"Nitrox diving","createdAt":"2025-03-04T13:10:39.646Z","content":{"type":"json","json":{"content":[{"name":"Header","data":{"products":[{"title":"Accessories","description":"Backplates, Consumables. Tanks.","img":{"recommendedSizes":{"width":"235","height":"235"}},"url":""},{"title":"Accessories sets","description":"Protection, maintenance, cleaning.","img":{"recommendedSizes":{"width":"235","height":"235"}},"url":""},{"title":"Spare parts","description":"Spare parts and components.","img":{"recommendedSizes":{"width":"235","height":"235"}},"url":""},{"title":"Spare parts kits","description":"Completly Liberty spare parts kits.","img":{"recommendedSizes":{"width":"235","height":"235"}},"url":""}]},"id":"#0","type":"component","lock":false,"position":0},{"name":"BlogArticle","data":{"title":"What is Nitrox Diving? ","perex":"Nitrox diving, also known as enriched air nitrox (EANx) diving, is a form of scuba diving that uses a gas mixture containing more oxygen and less nitrogen than standard air. Traditional compressed air contains approximately 21% oxygen and 79% nitrogen, whereas nitrox typically contains between 32% and 36% oxygen. This alteration in gas composition allows for longer bottom times and reduced nitrogen absorption, making it a popular choice among recreational and technical divers.","content":"\n\n## Benefits of Nitrox Diving\nOne of the primary advantages of nitrox diving is the reduced nitrogen intake, which lowers the risk of decompression sickness (DCS). Divers using enriched air nitrox can extend their no-decompression limits (NDLs), allowing for longer dives at moderate depths. Additionally, since there is less nitrogen in the gas mixture, divers often experience less fatigue after multiple dives. \n\n## Nitrox Diving Calculations\nDiving with nitrox requires specific calculations to ensure safety. These calculations include: \n\n- **Maximum Operating Depth (MOD):** The depth limit where the partial pressure of oxygen (PPO2) does not exceed a safe threshold, typically 1.4 to 1.6 ppO2 (partial pressure of oxygen) for recreational diving. \n\n- **Equivalent Air Depth (EAD):** A formula that helps divers determine the nitrogen exposure equivalent to diving on regular air. \n\n- **Oxygen Exposure Limits:** Managing oxygen toxicity risks by monitoring cumulative exposure over time. \n\n\n\n## Essential Nitrox Diving Equipment\n- **Gas Analyzer:** A handheld [device](https://www.divesoft.com/en/products/analyzers) used to measure the oxygen content in a nitrox tank to ensure the mixture is safe for the planned dive. \n\n- **Nitrox Regulator:** A regulator rated for oxygen-rich environments to prevent ignition risks associated with high oxygen concentrations. \
2n\n- **Diving computer:** A [computer](https://www.divesoft.com/en/products/freedomplus-computers), that can help you track your depth, oxygen exposure and dive time is invaluable for safe diving \n\n\n\n## Scuba Nitrox Certification and Training\nTo safely dive with nitrox, divers must complete a **scuba nitrox certification** course. This **nitrox diving course** covers essential topics such as gas composition, physiological effects, dive planning, and emergency procedures. Most major scuba certification agencies offer nitrox training, often available as an add-on to standard open-water certification. \n\n\n\n## Nitrox vs. Air:\nWhen comparing **nitrox vs. air**, the choice depends on the dive profile. Nitrox is advantageous for reducing nitrogen exposure and extending bottom times, making it ideal for multiple dives per day or prolonged moderate-depth dives. However, nitrox is not suitable for deep diving beyond its MOD (maximum operating depth) due to increased oxygen toxicity risks. Standard air remains the better choice for deeper dives up to the depth of 40 meters. \n\n## Conclusion\nNitrox diving is a valuable tool for divers seeking extended [bottom times](https://eshop.divesoft.com/freedom-full-trimix-computer/8457) and reduced nitrogen exposure. However, proper training, equipment, and calculations are essential to ensure safety. By obtaining a **scuba nitrox certification** and using the appropriate gear, divers can maximize the benefits of enriched air nitrox while minimizing potential risks.","showTags":false,"showDate":true,"image":{"mimetype":"image/jpeg","size":2194805,"hash":"4d8ef826e0568edcc8a556f2bc9feeb68fe4f820","id":"cm7w27ex82d3s0850dr3brivx","filename":"nitrox-diving-00.jpg","category":"divesoft/","type":"image","alt":"What is Nitrox Diving?"},"publishDate":"03/05/2025"},"id":"#2","type":"component","lock":false,"position":1},{"name":"ProductShowcase","data":{"componentTemplateId":"cm9h4wr6ugjv10803yqs3tp71"},"id":"#21","type":"component","lock":false,"position":17},{"name":"Footer","data":{"copyrights":"Copyright © 2019 Divesoft LLC All rights reserved.","facebookUrl":{"urlNewWindow":true,"url":"https://www.facebook.com/divesoft/"},"youtubeUrl":{"url":"https://www.youtube.com/@divesoft_tv","urlNewWindow":true},"instagramUrl":{"url":"https://www.instagram.com/divesoft/","urlNewWindow":true},"contacts":"**Divesoft s.r.o.** \nHálkova 2495 \n413 01 Roudnice nad Labem \nCzech Republic \nTel.: +420 416 857 057 \nE-mail: [email protected]","twitterUrl":{"url":"","urlNewWindow":true,"pageId":"cjv3l26tp004p0836i54n4u7a"}},"id":"#1","type":"component","lock":false,"position":18}],"id":"root","idBuffer":"#37","lastCommit":"357f3011-9113-4fe7-b174-c721968a1d32"}},"annotations":[],"language":{"type":"id","generated":false,"id":"Language:cjv3kwvoj000u083611381c6o","typename":"Language"},"__typename":"PageTranslation"},"Page:cm8ptyp2v9lgb0803u3ba0ha0":{"id":"cm8ptyp2v9lgb0803u3ba0ha0","type":{"type":"id","generated":false,"id":"PageType:cjv3l213x004f08366hjufttp","typename":"PageType"},"tags":[{"type":"id","generated":false,"id":"Tag:cjv3szrcv01bz0836yo8myb0r","typename":"Tag"},{"type":"id","generated":false,"id":"Tag:cm5ww0t651b710803pcl02cn4","typename":"Tag"}],"translations({\"where\":{\"language\":{\"id\":\"cjv3kwvoj000u083611381c6o\"}}})":[{"type":"id","generated":false,"id":"PageTranslation:cm8ptyp3b9lgi0803wu86q6b7","typename":"PageTranslation"}],"__typename":"Page"},"PageTranslation:cm8ptyp3b9lgi0803wu86q6b7":{"id":"cm8ptyp3b9lgi0803wu86q6b7","name":"Cave diving","createdAt":"2025-03-26T11:17:30.887Z","content":{"type":"json","json":{"content":[{"name":"Header","data":{"products":[{"title":"Accessories","description":"Backplates, Consumables. Tanks.","img":{"recommendedSizes":{"width":"235","height":"235"}},"url":""},{"title":"Accessories sets","description":"Protection, maintenance, cleaning.","img":{"recommendedSizes":{"width":"235","height":"235"}},"url":""},{"title":"Spare parts","description":"Spare parts and components.","img":{"recommendedSizes":{"width":"235","height":"235"}},"url":""}
2,{"title":"Spare parts kits","description":"Completly Liberty spare parts kits.","img":{"recommendedSizes":{"width":"235","height":"235"}},"url":""}]},"id":"#0","type":"component","lock":false,"position":0},{"name":"BlogArticle","data":{"title":"Cave diving, for people who have never been","perex":"Cave diving is one of the most challenging and rewarding forms of scuba diving, offering a unique opportunity to explore breathtaking underwater cave systems. Unlike traditional open-water diving, cave diving requires specialized skills, advanced training, and specific cave diving equipment to navigate submerged passages safely. This article explores the essentials of cave scuba diving, including the different types, required training, safety precautions, and why cave diving is considered one of the most extreme underwater activities.","content":"\n\n## The Different Types of Cave Diving\n\nCave diving itself is not strictly split into different categories, it itself is a subcategory of SCUBA diving. The most important role of cave diving is played by the caves themselves. Caves in Florida are not the same as caves in France, caves carved out by the sea are going to be different than caves carved out by streams or rivers. There are however a few descriptors that could be used for a cave dive, that most divers will recognize: \n\n- **Freshwater Cave Diving** â Common in karst landscapes, these caves feature crystal-clear water and intricate passageways. \n\n- **Deep Sea Cave Diving** â Involves exploring submerged caves in oceanic environments, often requiring technical diving skills. \n\n- **Exploration Cave Diving** â Pushing the limits of human endurance, this form of diving often involves deep, narrow, or particularly difficult pushes into cave systems. \n\n- **Sidemount Cave Diving** â Using sidemount configurations for better maneuverability in tight spaces. \n\n- **No Mount Cave Diving** â An extreme form of exploration where divers remove their tanks to squeeze through ultra-tight restrictions. \n\n\n\n\n## Cave Diving Training and Certification\n\nCave diving is not for beginners. It requires rigorous cave diving training from a capable instructor and a certification from a recognized authority. A cave diving course typically includes: \n\n- **Diving in a Cave Environment** â Learning to navigate, plan, and execute dives safely. \n\n- **Cave Diving Equipment Usage** â Mastering specialized gear such as a cave diving rebreather, cave diving helmet, and primary and backup lighting. \n\n- **Cave Diving Reel Handling** â Ensuring a secure route back to the entrance. \n\n- **Cave Diving Rescue Techniques** â Essential skills to handle emergencies in confined underwater spaces. \n\n\n\n## Essential Cave Diving Equipment\n\nTo ensure safety and efficiency, cave divers rely on a comprehensive cave diving equipment list, which includes: \n\n- **Cave Diving Helmet** â Protects against low-hanging rock formations. \n\n- **Primary and Backup Lights** â Essential for visibility in pitch-black environments. \n\n- **[Cave Diving Reel](https://eshop.divesoft.com/products/reels)** â Used to maintain a guide line back to the entrance. \n\n- **Redundant Air Supply** â Often in the form of sidemount or back-mounted tanks. Many divers also opt to use a rebreather as it drastically extends the time a diver can spend underwater \n\n\n\n## How Dangerous is Cave Diving? Understanding the Risks\n\nMany people ask, **\"Why is cave diving so dangerous?\"** The answer lies in the combination of factors such as confined spaces, lack of direct access to the surface, and the potential for equipment failure. **Cave diving fatalities** often result from poor planning, improper training, or failure to follow safety protocols. \n\nHowever, with proper training, a solid dive plan, and reliable equipment, the risks can be mitigated significantly. Modern advancements in **[cave diving equipment](https://eshop.divesoft.com/products/ccr-liberty)** and **cave diving rescue** techniques have contributed to safer cave diving expeditions worldwide. \n\n\n\n## Cave Diving Facts and Expeditions\n\n- The worldâs deepest known cave dive took place in the [Hranická Propast](https://en.wikipedia.org/wiki/Hranice_Ab
2yss) in the Czech Republic. \n\n- Some of the most famous **cave diving expeditions** include explorations of Mexicoâs cenotes and Floridaâs extensive underground river systems. \n\n- The longest known underwater cave system, Sac Actun in Mexico, stretches over 350 km. \n\n## Conclusion\n\nCave diving is an exhilarating and highly technical activity that requires dedication, proper [cave diving training](https://www.divesoft.com/en/instructors), and [high-quality equipment](https://eshop.divesoft.com/). Whether exploring deep cave diving sites, participating in cave diving expeditions, or mastering the use of a cave diving rebreather, divers must prioritize safety and preparedness. While cave diving fatalities highlight the inherent dangers, understanding and respecting the risks make this sport a fascinating yet demanding endeavor. For those ready to take the plunge, a cave diving course with a reputable instructor is the first step toward unlocking the mysteries of the underwater world.","showTags":false,"showDate":true,"image":{"mimetype":"image/jpeg","size":941386,"hash":"f268d5e088887d68d02925dff4677a2b566ea457","id":"cm8pugs8bdbdp0850q7o1ahth","filename":"divesoft-photo-062c.jpg","category":"divesoft/","type":"image","alt":"Cave diving"},"publishDate":"03/27/2025"},"id":"#2","type":"component","lock":false,"position":1},{"name":"ProductShowcase","data":{"componentTemplateId":"cm9h4wr6ugjv10803yqs3tp71"},"id":"#21","type":"component","lock":false,"position":18},{"name":"Footer","data":{"copyrights":"Copyright © 2019 Divesoft LLC All rights reserved.","facebookUrl":{"urlNewWindow":true,"url":"https://www.facebook.com/divesoft/"},"youtubeUrl":{"url":"https://www.youtube.com/@divesoft_tv","urlNewWindow":true},"instagramUrl":{"url":"https://www.instagram.com/divesoft/","urlNewWindow":true},"contacts":"**Divesoft s.r.o.** \nHálkova 2495 \n413 01 Roudnice nad Labem \nCzech Republic \nTel.: +420 416 857 057 \nE-mail: [email protected]","twitterUrl":{"url":"","urlNewWindow":true,"pageId":"cjv3l26tp004p0836i54n4u7a"}},"id":"#1","type":"component","lock":false,"position":19}],"id":"root","idBuffer":"#38","lastCommit":"3d7d3078-7978-4724-b4f3-562ba6f99c1c"}},"annotations":[],"language":{"type":"id","generated":false,"id":"Language:cjv3kwvoj000u083611381c6o","typename":"Language"},"__typename":"PageTranslation"},"Page:cm99l1yayeijj0803qpv7qu1f":{"id":"cm99l1yayeijj0803qpv7qu1f","type":{"type":"id","generated":false,"id":"PageType:cjv3l213x004f08366hjufttp","typename":"PageType"},"tags":[{"type":"id","generated":false,"id":"Tag:cly72rlmrv2ht07358rq07kkr","typename":"Tag"},{"type":"id","generated":false,"id":"Tag:cm5ww05zc1b5d0803zglvz927","typename":"Tag"},{"type":"id","generated":false,"id":"Tag:cm5ww0t651b710803pcl02cn4","typename":"Tag"},{"type":"id","generated":false,"id":"Tag:cmqtb0dz5gcr90826mxwvssx3","typename":"Tag"}],"translations({\"where\":{\"language\":{\"id\":\"cjv3kwvoj000u083611381c6o\"}}})":[{"type":"id","generated":false,"id":"PageTranslation:cm99l1ybheijq0803f2v8qrfm","typename":"PageTranslation"}],"__typename":"Page"},"PageTranslation:cm99l1ybheijq0803f2v8qrfm":{"id":"cm99l1ybheijq0803f2v8qrfm","name":"How to find a diving buddy for your expeditions","createdAt":"2025-04-09T07:03:29.789Z","content":{"type":"json","json":{"content":[{"name":"Header","data":{"products":[{"title":"Accessories","description":"Backplates, Consumables. Tanks.","img":{"recommendedSizes":{"width":"235","height":"235"}},"url":""},{"title":"Accessories sets","description":"Protection, maintenance, cleaning.","img":{"recommendedSizes":{"width":"235","height":"235"}},"url":""},{"title":"Spare parts","description":"Spare parts and components.","img":{"recommendedSizes":{"width":"235","height":"235"}},"url":""},{"title":"Spare parts kits","description":"Completly Liberty spare parts kits.","img":{"recommendedSizes":{"width":"235","height":"235"}},"url":""}]},"id":"#0","type":"component","lock":false,"position":0},{"name":"BlogArticle","data":{"title":"How to Find a Dive Buddy You Can Trust","perex":"Every diver needs a wingman. Not just someone to enter the water with, but someone they can rely on when things do not go exactly as planned. In diving, we call that person a buddy.\n\nWhether you're exploring a shallow reef, completing your first wreck dive, or preparing for a technical expedition, the person beside you plays an important role in your safety, confidence, and enjoyment underwater.\n\nThe best dive partnerships grow through trust, good communication, and time spent diving together.\n\nIf you are wondering how to find a dive buddy you can trust, the strongest teams are usually built long before entering the water. ","content":"### Why Your Buddy Matters\n\nMost divers learn the buddy system during their first certification course.\n\nAt first, it may seem simple. Stay together, check each other's equipment, and help if something goes wrong.\n\nAs divers gain experience, they begin to understand that a good buddy provides much more than an extra set of eyes underwater.\n\nA trusted partner helps with planning, navigation, problem-solving, and decision-making. They help keep dives enjoyable, reduce stress, and often notice things you might miss yourself.\n\nFor technical and CCR divers, the importance of a reliable partner becomes even more obvious.\n\n*âThe importance of a dive buddy returned but with new significance;
2 the bailout gas carried by a buddy is factored into my dive/emergency plan, as my bailout is into his.â*\nâ Richie Kohler, expedition wreck explorer\n\nThe deeper the dive and the more ambitious the objective, the more important the team becomes.\n\nBut the principle remains the same at every level of diving.\n\n**Trust matters.**\n\n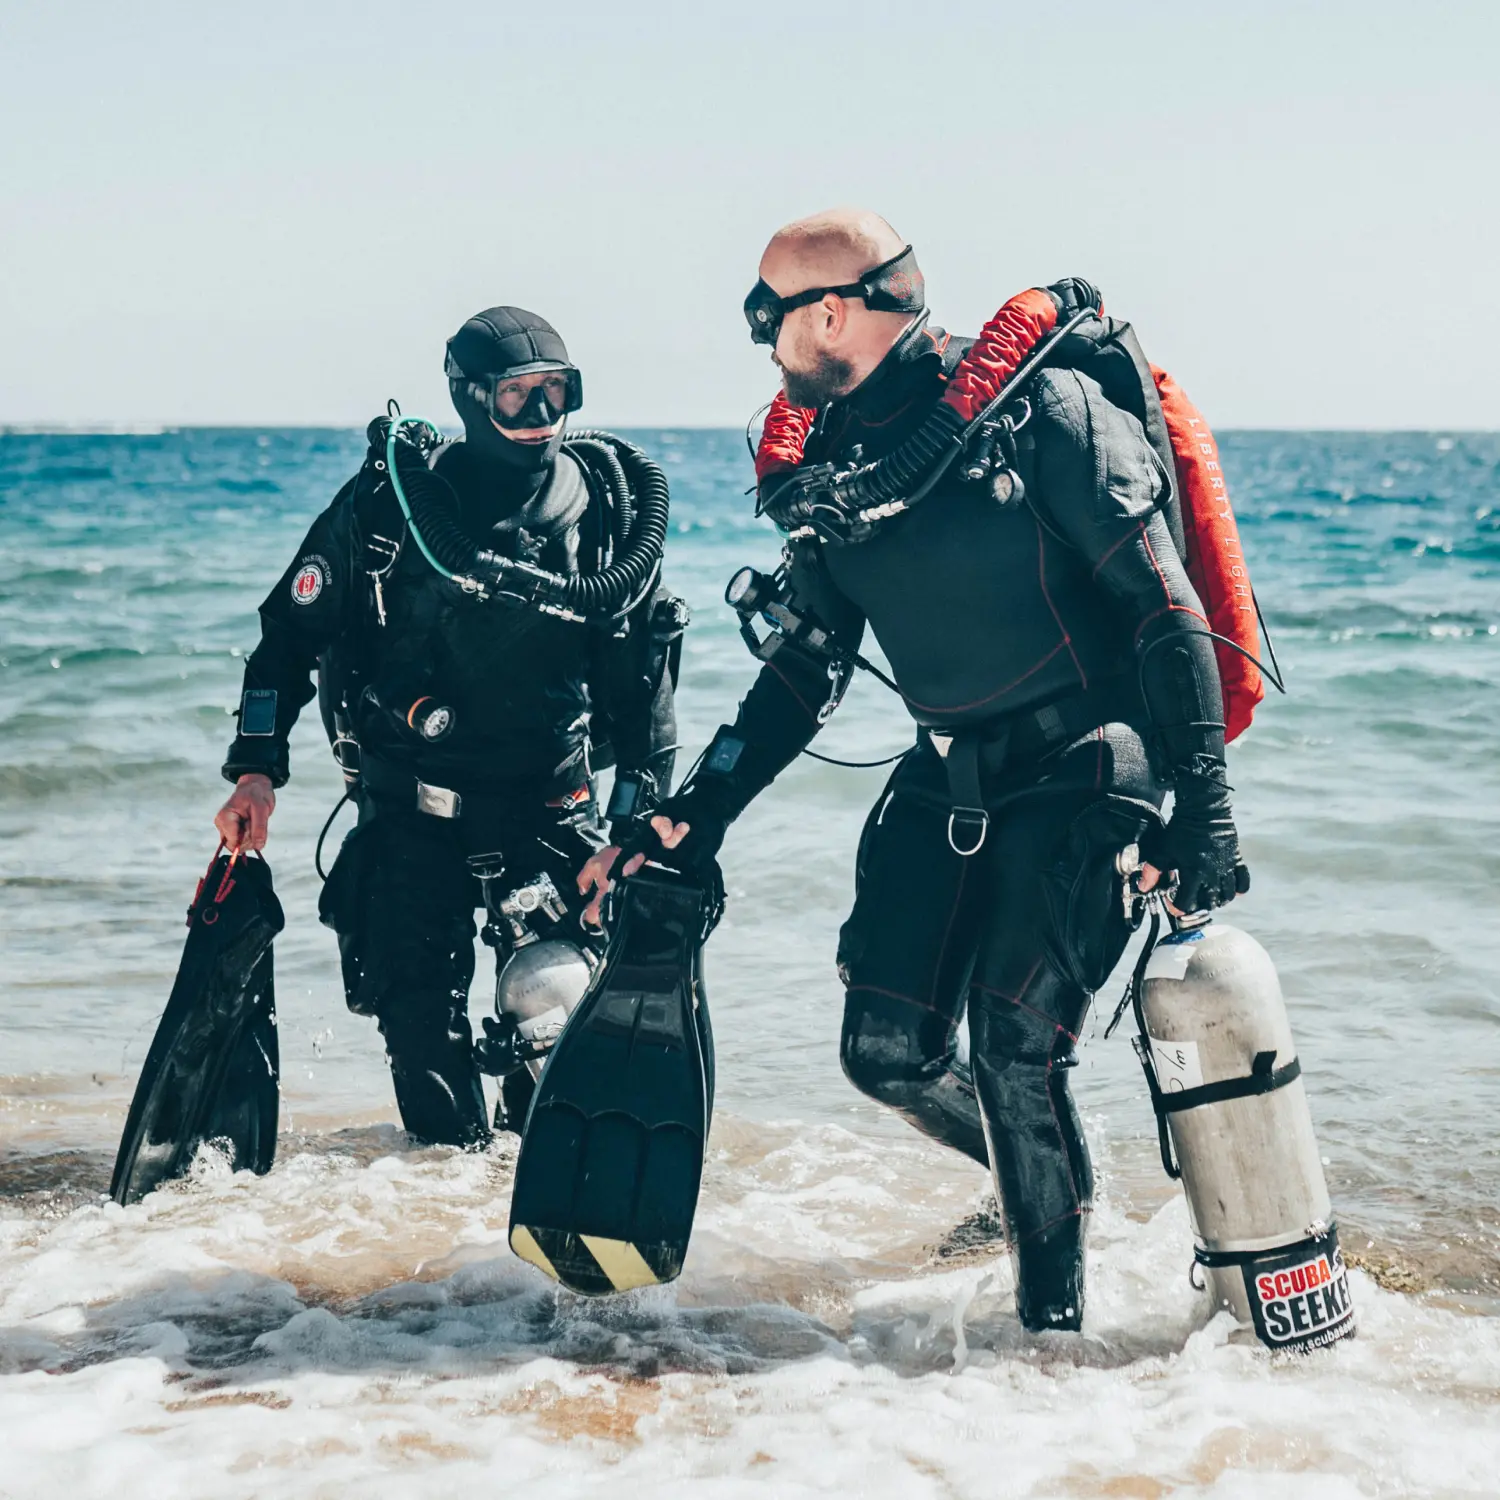\n \n### What Makes a Good Diving Buddy?\n\nMany divers assume the best buddy is simply the most experienced diver available.\n\nIn reality, strong partnerships are usually built on compatibility rather than impressive certifications or logbook numbers.\n\n#### Similar Experience and Goals\n\nDivers do not need identical certifications, but they should feel comfortable with similar types of dives.\n\nA relaxed reef dive, a deep wreck, and a cave exploration all require different expectations. Good buddies understand what they are trying to achieve and share a similar level of comfort in the environment.\n\n#### Shared Approach to Planning\n\nReliable divers prepare before the dive.\n\nThey discuss objectives, review procedures, and make sure everybody understands the plan. Small conversations before entering the water often prevent misunderstandings later.\n\n#### Compatible Equipment and Procedures\n\nFor recreational diving, a good scuba buddy should understand the dive plan, communicate clearly, and stay within agreed limits.\n\nFor technical and CCR dives, compatibility also includes certification depth, unit familiarity, and decompression discipline. A buddy should be trained for the planned depth, understand the equipment being used, and follow a decompression strategy that fits the team plan.\n\n#### Calm Communication\n\nOne of the most valuable qualities in a diving partner is composure.\n\nWhen something unexpected happens, divers who communicate clearly and remain calm often solve problems more effectively than those with the most impressive certifications.\n \n### Trust Is Built on Small Dives\n\nMany divers meet future buddies online.\nVery few build trust there.\n\nConfidence in a buddy usually develops after spending time diving together.\n\nBefore planning a demanding expedition, a deep wreck dive, or a major CCR project, spend time diving together in less demanding conditions.\n\nA controlled shake-down dive at moderate depth can reveal how a potential dive buddy plans, communicates, checks equipment, and reacts when conditions change.\nA simple local dive often reveals more about a potential buddy than dozens of online conversations.\n\nPay attention to how they prepare, communicate, and react when plans change.\nAfter the dive, talk openly about what went well and what could be improved.\nFor more advanced dives, debriefing can also include SAC rates, bubble checks, dive computer data, or Liberty sensor logs.\nTechnical divers often go one step further by practicing emergency procedures together. \n\nLost-unit drills, bailout scenarios, COâ breakthrough drills, light failures, and other exercises help build confidence in the team long before those skills are ever needed. \nThe strongest dive teams are rarely formed overnight.\n\nThey are built one dive at a time.\n \n \n \n### Where to Find a Dive Buddy\n\nFortunately, divers have more ways than ever to connect with like-minded people.\n\nThere is no single dive buddy finder that works for everyone. Most divers find reliable diving buddies through a mix of local dive centres, clubs, training programs, online communities, social media groups, and repeated dives with people they already know.\n\n#### Local Dive Centres and Clubs\n\nMany divers first get to know future buddies during a course, a club dive, or a trip with a local dive centre. Sharing a boat, a training day, or a weekend diving trip is often how long-term diving partnerships begin. \n\nFor recreational divers, local clubs and dive centres are often the easiest way to meet a reliable scuba buddy gradually. For technical and CCR divers, centres that support CCR fills, trimix fills, or technical charters are especially useful places to meet partners with similar training, equipment, and goals.\n\n#### Online Diving Communities\n\nOnline communities such as ScubaBoard and DiveBuddy include dedicated sections where divers look for training partners, teammates, and expedition companions. \n\nFor technical and CCR divers, these communities can also help connect people with similar equipment, certification levels, and dive objectives. \n\nExample request:\n*âRecent Mod 1 certified on SF2 CCR⦠another CCR or SCCR diver would be great, but happy to dive with OC.â*\n\nWhen posting a dive buddy request, include the date, location, planned maximum depth, unit or equipment configuration, certification level, and dive objective. Clear details help other divers quickly understand whether the plan fits their skills, experience, and equipment.\n\n#### Social Media Groups\n\nFacebook groups, Discord servers, and Reddit communities focu
2sed on scuba diving, technical diving, and rebreathers can be excellent places to connect with local divers.\nSearching hashtags such as **#CCRLIBERTY** can often lead to active discussions, planned trips, and new diving contacts.\n\n#### Liberty Divers Club\n\nThe Liberty Divers Club connects Liberty CCR owners from around the world. Members regularly share dive plans, organize expeditions, and meet for projects ranging from local dives to major explorations.\n \n#### Dive Events and Training Programs\n\nSome diving partnerships start during training.\nOthers begin at events like Operation CCR, EuroTek, TEKCamp, or Divesoft gatherings, where divers meet people with similar interests and future diving goals.\n \n### Potential Red Flags\n\nNot every diver is the right teammate.\n\nSome habits are worth noticing early:\n\n* Repeated changes to the dive plan without discussing them with the team\n* Frequent late arrivals or last-minute changes without clear communication\n* Showing up without the equipment or information needed for the planned dive\n* Skipping pre-dive checks\n* Modifying life-support equipment without proper validation\n* Competitive or ego-driven attitudes\nReluctance to discuss mistakes or learn from feedback\n\nMany divers prefer to get to know a buddy gradually through regular dives and time spent underwater together.\n \n### Planning Together\n\nGood teams communicate clearly and plan consistently.\n\nTools such as [Divesoft.app] (https://www.divesoft.com/en/app) help divers share decompression and gas plans, synchronize logs, manage checklists, and review dives together. Working from the same information reduces misunderstandings and helps everyone stay aligned throughout a project.\n\nWhether planning a recreational dive trip or a technical expedition, preparation becomes easier when the entire team shares the same plan.\n \n### The Best Dive Teams Are Built, Not Found\n\nAsk experienced divers how they met their favourite dive buddy and you'll often hear a similar story. Most divers prefer to see how someone plans, communicates, and behaves underwater before relying on them during more demanding dives.\n\nThey usually develop through regular dives, honest communication, and mutual respect.\nTraining, equipment, and experience all contribute to safer and more enjoyable diving.\n\nOver time, most divers come to a similar conclusion. The divers people trust most are not always those with the longest logbooks or the latest equipment.\n\nThey are the ones who communicate clearly, prepare carefully, and stay dependable when conditions become more challenging than expected.\n \n 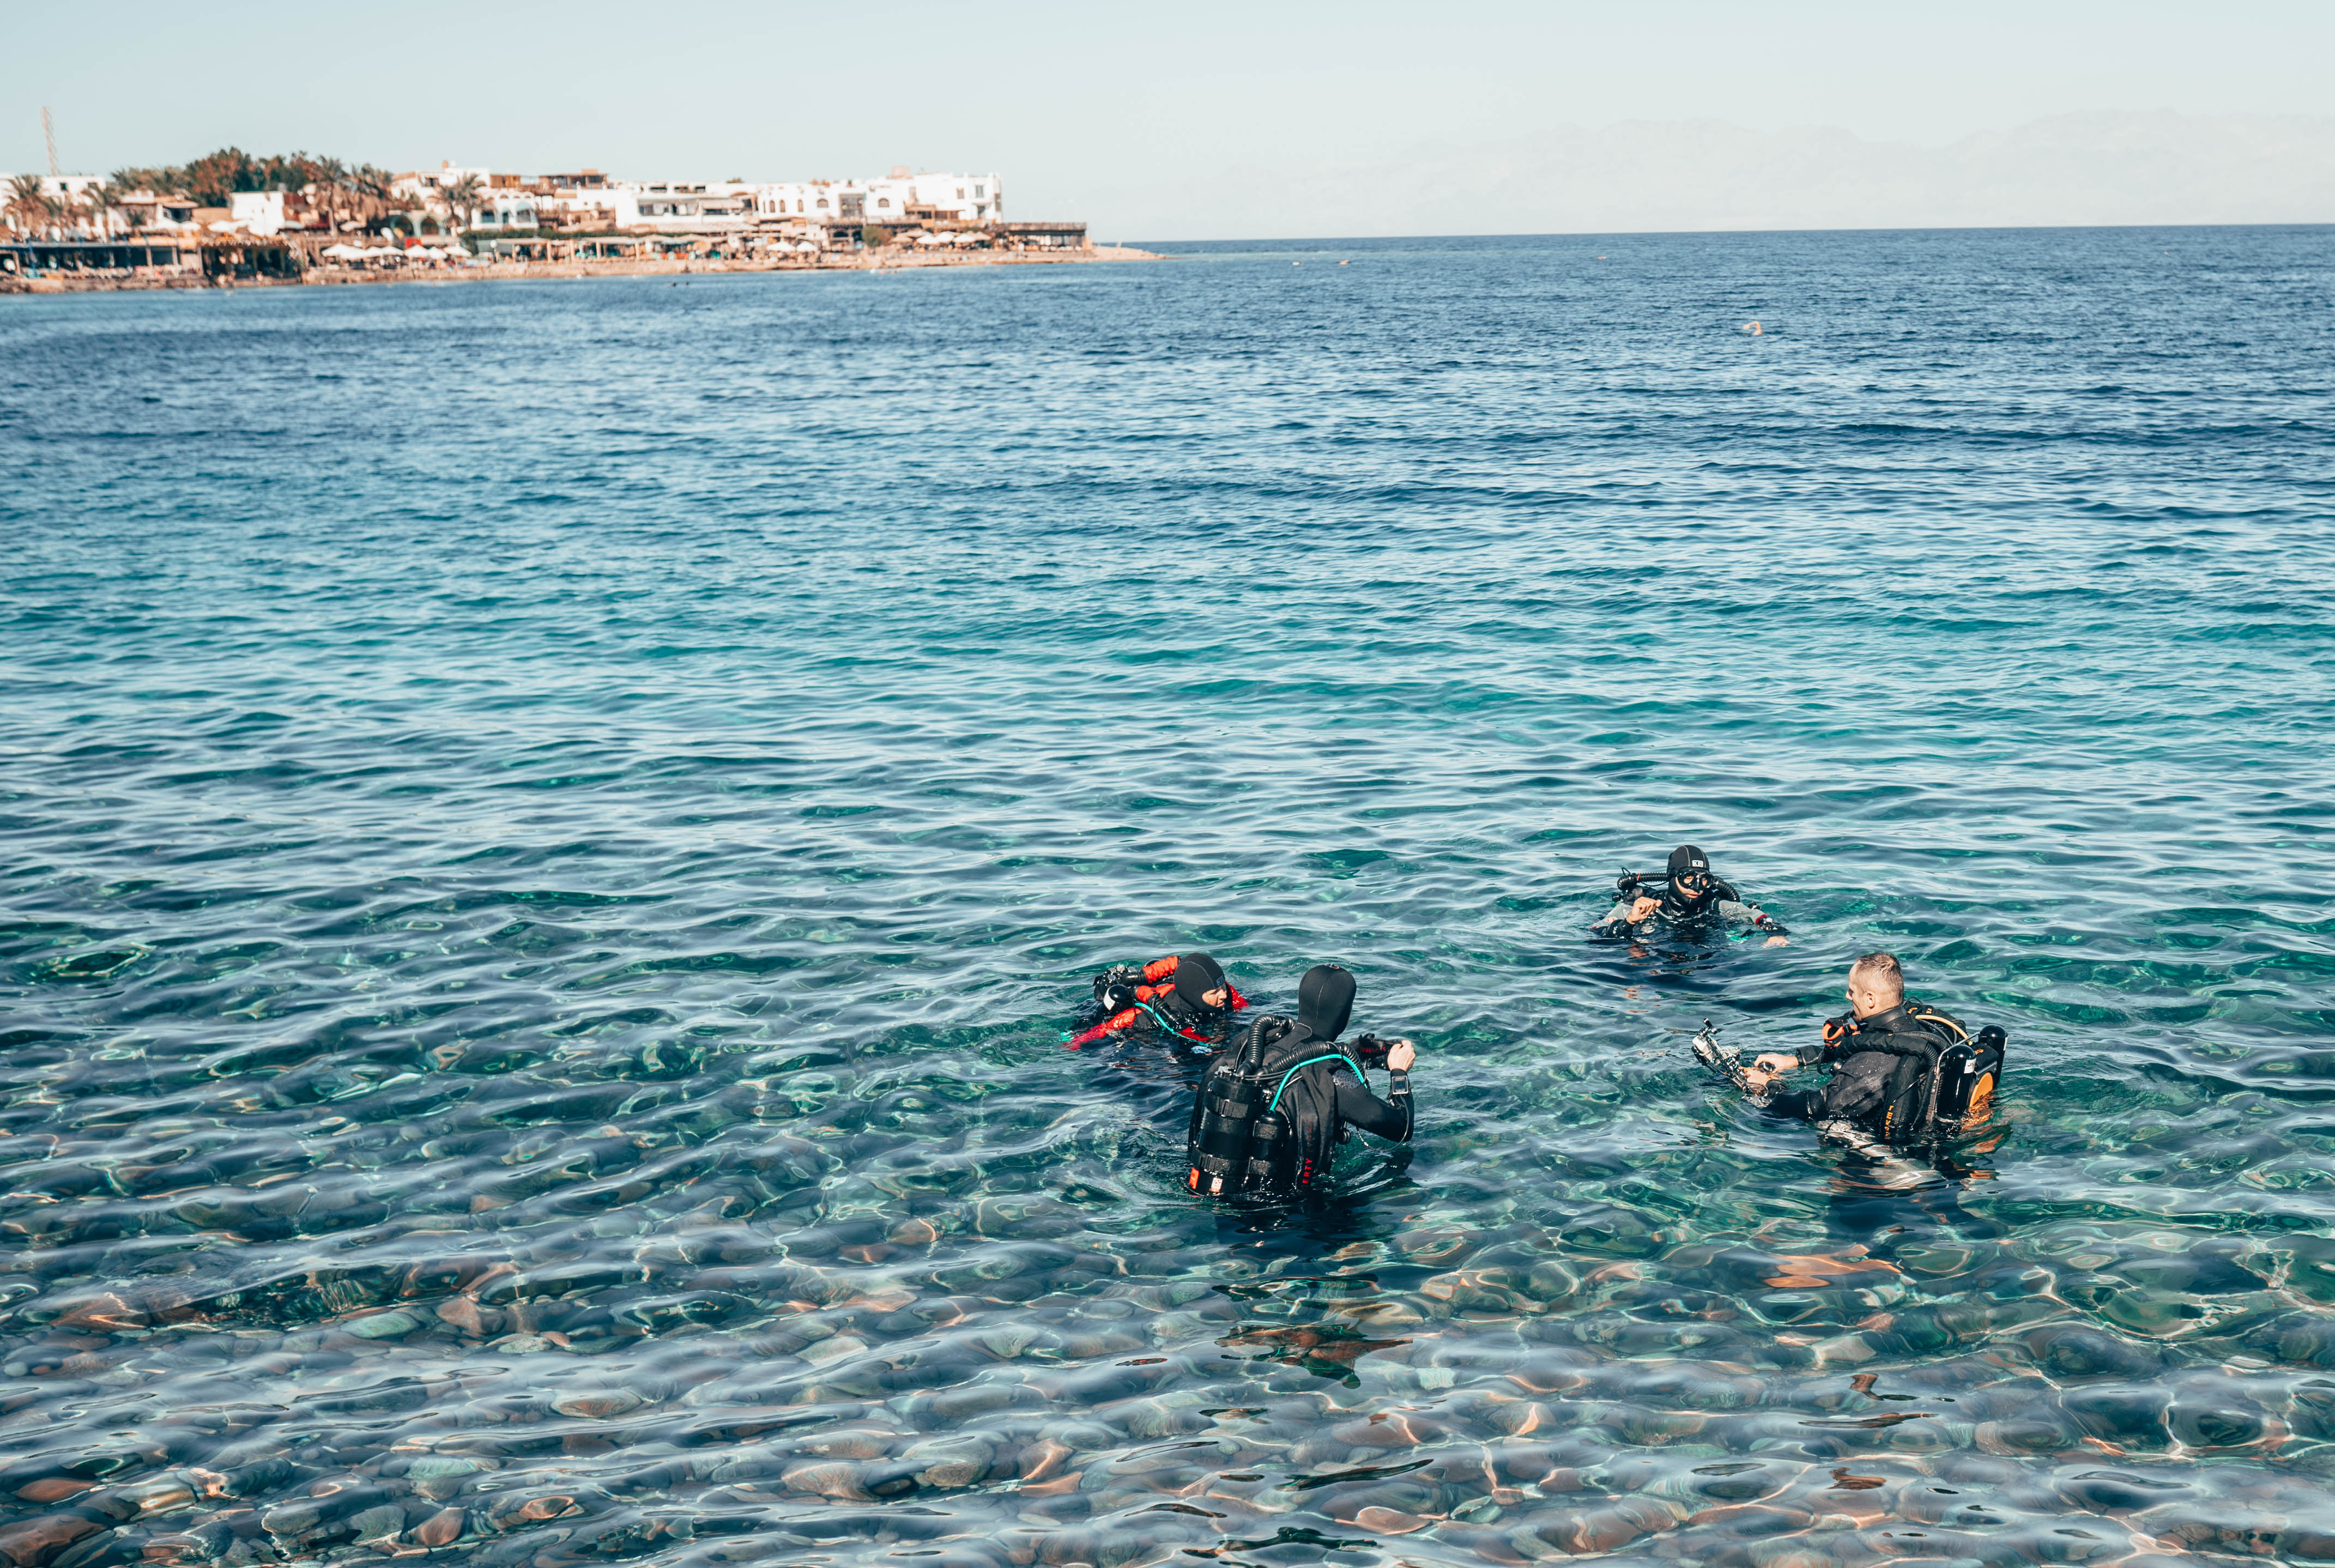\n\n### Looking for a Dive Buddy?\n\nWhether you are looking for a recreational dive partner, preparing for your first CCR expedition, or planning your next technical project, finding people with similar goals is often the first step.\n\nJoin the Liberty Divers Club, meet divers from around the world, and discover new opportunities for future dives and expeditions.\n\n* [Join Liberty Divers Club] (https://www.divesoft.com/en/libertydiversclub)\n\n* [Download Divesoft.app] (https://www.divesoft.com/en/app)\n\n* [Explore Liberty CCR] (https://www.divesoft.com/en/products/ccr-liberty)\n\n*Author: Divesoft*","showTags":false,"showDate":true,"image":{"mimetype":"image/jpeg","size":3334744,"hash":"1c50d3c7e21718be0915e3bc269f382d91102823","id":"cmpzdfdeuciun0800oydxumls","filename":"z2a0194-3.jpg","category":"divesoft/","type":"image","alt":"Two divers before entering the water."},"publishDate":"04/28/2025"},"id":"#2","type":"component","lock":false,"position":1},{"name":"ProductShowcase","data":{"backgroundColor":"#ffffff","isTextDark":true,"isImageRight":false,"image":{"recommendedSizes":{"width":"485","height":"485"},"mimetype":"image/png","size":1301657,"hash":"43e9e651a9f52d00f08256ebeafeddc32164c11f","id":"cm737a5egjeyt08505ycj0rdm","filename":"divesoft-app-202502-01.png","category":"divesoft/","type":"image"},"imageMobile":{"recommendedSizes":{"width":"510","height":"510"}},"isTitleH1":false,"title":"Divesoft.app","subtitle":"Plan your decompression, gasses, utilize checklists, check your logs + more.","description":"All for Free.","hideDescriptionOnMobile":false,"areButtons":false,"firstTitle":"Learn more >","firstUrl":{"url":"/en/app","pageId":"ckfccnc4a98bx0788f7enal83"},"secondTitle":"Configurator >","secondUrl":""},"id":"#21","type":"component","lock":false,"position":19},{"name":"Footer","data":{"copyrights":"Copyright © 2019 Divesoft LLC All rights reserved.","facebookUrl":{"urlNewWindow":true,"url":"https://www.facebook.com/divesoft/"},"youtubeUrl":{"url":"https://www.youtube.com/@divesoft_tv","urlNewWindow":true},"instagramUrl":{"url":"https://www.instagram.com/divesoft/","urlNewWindow":true},"contacts":"**Divesoft s.r.o.** \nHálkova 2495 \n413 01 Roudnice nad Labem \nCzech Republic \nTel.: +420 416 857 057 \nE-mail: [email protected]","twitterUrl":{"url":"","urlNewWindow":true,"pageId":"cjv3l26tp004p0836i54n4u7a"}},"id":"#1","type":"component","lock":false,"position":20}],"id":"root","idBuffer":"#39","lastCommit":"819211ca-e8f4-47fa-a690-a29bd7caa0a1"}},"annotations":[{"type":"id","generated":true,"id":"PageTranslation:cm99l1ybheijq0803f2v8qrfm.annotations.0","typename":"PageAnnotation"},{"type":"id","generated":true,"id":"PageTranslation:cm99l1ybheijq0803f2v8qrfm.annotations.1","typename":"PageAnnotation"},{"type":"id","generated":true,"id":"PageTranslation:cm99l1ybheijq0803f2v8qrfm.annotations.2","typename":"PageAnnotation"}],"language":{"type":"id","generated":false,"id":"Language:cjv3kwvoj000u083611381c6o","typename":"Language"},"__typename":"PageTranslation"},"PageTranslation:cm99l1ybheijq0803f2v8qrfm.annotations.0":{"key":"title","value":"How to Find a Dive Buddy You Can Trust","__typename":"PageAnnotation"},"PageTranslation:cm99l1ybheijq0803f2v8qrfm.annotations.1":{"key":"perex","value":"Every diver needs a wingman.\nNot just someone to enter the water with, but someone they can rely on when things do not go exactly as planned.\nIn diving, we call that person a buddy.\nWhether you're exploring a shallow reef, completing your first wreck dive, or preparing for a technical expedition, the person beside you plays an important role in your safety, confidence, and enjoyment underwater.\nThe best dive partnerships grow through trust, good communication, and time spent diving together. If you are wondering how to find a dive buddy you can trust, the strongest teams are usually built long before entering the water. ","__typename":"PageAnnotation"},"PageTranslation:cm99l1ybheijq0803f2v8qrfm.annotations.2":{"key":"image","value":"{\"mimetype\":\"image/jpeg\",\"size\":1150757,\"hash\":\"8a9b8425166eb373425f1ad362cb5d90e5c082e3\",\"
2id\":\"cma2iss5pt2ht0850hhux516j\",\"filename\":\"how-to-find-a-diving-buddy-for-your-expeditions-00.jpg\",\"category\":\"divesoft/\",\"type\":\"image\",\"alt\":\"Diving Buddy\"}","__typename":"PageAnnotation"},"Page:cm99l5bsxein70803kfblojon":{"id":"cm99l5bsxein70803kfblojon","type":{"type":"id","generated":false,"id":"PageType:cjv3l213x004f08366hjufttp","typename":"PageType"},"tags":[{"type":"id","generated":false,"id":"Tag:cjv3szrcv01bz0836yo8myb0r","typename":"Tag"},{"type":"id","generated":false,"id":"Tag:cm5ww05zc1b5d0803zglvz927","typename":"Tag"},{"type":"id","generated":false,"id":"Tag:cmfp50qhi00lk08324ek37f9g","typename":"Tag"}],"translations({\"where\":{\"language\":{\"id\":\"cjv3kwvoj000u083611381c6o\"}}})":[{"type":"id","generated":false,"id":"PageTranslation:cm99l5btleine080308cv9w4q","typename":"PageTranslation"}],"__typename":"Page"},"Tag:cmfp50qhi00lk08324ek37f9g":{"id":"cmfp50qhi00lk08324ek37f9g","name":"Blog: Jakub Å imánek","__typename":"Tag"},"PageTranslation:cm99l5btleine080308cv9w4q":{"id":"cm99l5btleine080308cv9w4q","name":"CCR rebreathers differences and what to look for","createdAt":"2025-04-09T07:06:07.257Z","content":{"type":"json","json":{"content":[{"name":"Header","data":{"products":[{"title":"Accessories","description":"Backplates, Consumables. Tanks.","img":{"recommendedSizes":{"width":"235","height":"235"}},"url":""},{"title":"Accessories sets","description":"Protection, maintenance, cleaning.","img":{"recommendedSizes":{"width":"235","height":"235"}},"url":""},{"title":"Spare parts","description":"Spare parts and components.","img":{"recommendedSizes":{"width":"235","height":"235"}},"url":""},{"title":"Spare parts kits","description":"Completly Liberty spare parts kits.","img":{"recommendedSizes":{"width":"235","height":"235"}},"url":""}]},"id":"#0","type":"component","lock":false,"position":1},{"name":"BlogArticle","data":{"title":"CCR rebreathers differences and what to look for","perex":"Considering an electronic CCR (eCCR) rebreather for your next diving adventure? Choosing the right eCCR isn't just about investing in advanced equipment; it's about maximizing safety, performance, and long-term value. This guide is specifically crafted for technically-minded divers exploring eCCR options, seeking clarity on critical differences between top models like the Divesoft Liberty and its competitors. Dive into the specifics and discover exactly what makes an eCCR system superior.","content":"## Why Choose eCCR Over mCCR?\n\n### Automation and Safety\n\nModern diving technology has dramatically enhanced diver safety through electronic control systems. eCCR systems automatically maintain optimal breathing mixtures, allowing divers to focus on situational awareness and reducing the chance of human error.\n\n### Limitations of Manual Systems\n\nManual CCRs (mCCR), while offering precise control, require constant attentionâespecially during ascent when oxygen management becomes critical. In emergency situations, task-overload can easily distract divers, increasing the risk of dangerous hypoxia.\n\n\n### Standard eCCR Systems\n\nStandard eCCRs reduce diver workload by automating oxygen injection based on real-time sensor readings. This allows divers to focus on navigation, buoyancy, and situational awareness. However, many commercially available eCCR models do not offer robust backup systems. In the event of an electronic failureâsuch as a controller or sensor malfunctionâthere is often no secondary system to seamlessly take over. This lack of redundancy can place divers at risk, especially during deep or extended dives where bailout options are limited.\n\n\n### Redundancy in Modern eCCRs\n\nConcerns over electronic failures once favored mCCR systems. However, todayâs eCCRs, including the Liberty, incorporate robust redundancy, making them highly reliable even in the rare case of individual system component failure.\n\n\n### Hybrid CCRs\n\nHybrid systems (hCCR) combine manual and electronic components. While they use the same constant flow orifice (jet) as mCCRâthus being depth-limited like mCCRâthey have an advantage in that the electronics monitor the oxygen partial pressure. However, unlike eCCR systems, these electronics are usually not redundant.\n\n\n \nâ¡ï¸ Read: [5 Basic Principles of Rebreather and One Extra](https://www.divesoft.com/en/blog/5-basic-principles-of-rebreather-and-one-extra) and learn more about all rebreather types.\n\n\n## What Sets Divesoft Liberty Apart?\n\n### Complete System Redundancy\n\n#### Reliable Backup Electronics\n\nUnlike many other CCRs, the Liberty features fully redundant electronics. Any single electronic component failure is automatically backed up, ensuring uninterrupted and safe operation.\n\n### Unique Modular Design\n\n#### Versatile Configuration Options\n\nQuick transitions between backmount and sidemount configurations enhance versatility for technical and recreational divers alike.\n\n### Advanced Safety Features\n\n#### Diagnostics and Sensor Redundancy\n\nRedundant electronics and sensor systems provide unmatched safety and clear, real-time diagnostics.\n\n### Global Support Network\n\n#### Liberty Divers Club & Social Media Groups\n\nAn extensive international service network ensures reliable support worldwide. And importantly: diving is a community experience.\n\n**Not having anybody to share your experience with can hinder your development**. It's essential to have a network of fellow divers using the same system.\n\n\n\nJoin the [Liberty Divers Club](https://www.libertydivers.com/) or connect through groups on social media to find dive buddies, share knowledge, and keep progressing together.\n\n### Superior Electronics\n\n#### Intuitive Interface and Long Battery Life\n\nUser-friendly interfaces and excellent battery efficiency make the Liberty ideal for long, demanding dives.\n\n### Optimal Breathing Comfort\n\n#### Effortless Breathing in All Positions\n\nThe Liberty ensures consistently effortless breathing in all diving positions, improving comfort, reducing fatigue, and enhancing diver performance.\n\n## Common Buyer Mistakes to Avoid\n\n### Prioritizing Cost Over Value\n\nOpting for a lower-cost system might seem like a smart move upfront, but in the long term, it can compromise safety and performance. Cheaper systems often cut cornersâwhether it's through limited sensor redundancy, lack of reliable electronics, or offering only manual (mCCR) operation. As covered earlier, mCCR systems demand high attention and carry increased risks in high-stress environments.\n\nChoosing a reliable, well-supported eCCR like the Liberty helps ensure you're investing in a system that can grow with you and perform consistently in all conditions.\n\n### Overlooking Serviceability\n\nSelecting an eCCR without accessible local service options can become costly and inconvenient.\n\n\n\nâ¡ï¸ Find your nearest service technician: [Locate support near you](https://www.divesoft.com/en/service-points)\n\n### Underestimating Training Needs\n\neCCRs require specialized training.\n\nWe offer a comprehensive learning path to help you succeed. \nâ¡ï¸ Find your nearest instructor or dealer: [Locate instructor near you](https://www.divesoft.com/en/instructors) \nâ¡ï¸ Read: [7 Steps to Becoming a Rebreather Diver](https://www.divesoft.com/en/blog/7-steps-to-becoming-a-rebreather-diver) and learn about certifications and course offerings.\n\n## Take the Next Step with Confidence\n\nThe [right eCCR rebreather](https://www.divesoft.com/en/blog/how-to-chose-the-right-ccr-rebreather-for-you) will transform your diving experience. With clear insights on essential features and common pitfalls, you're prepared to choose confidently. If safety, versatility, and global support matter to you, the Divesoft Liberty clearly stands out.\n\n**Ready to explore further?** [Schedule your demo dive today](https://www.divesoft.com/en/products/ccr-liberty/try-dive) and experience the Liberty difference firsthand!\n\nAuthor: [Jakub Å imánek](https://www.divesoft.com/en/about-us/jakub-simanek)","showTags":false,"showDate":true,"image":{"mimetype":"image/jpeg","size":719976,"hash":"e07ac232c3a61b82bbab9b5ab1a65a5faacb08cd","id":"cm9tu0pi6pyv30850sajd5bj1","filename":"divesoft-photo-013-1.jpg","category":"divesoft/","type":"image"},"publishDate":"04/21/2025"},"id":"#2","type":"component","lock":false,"position":2},{"name":"Image","data":{"firstImage":{"recommendedSizes":{"width":"1000","height":"1000"},"type":"image"},"secondImage":{"recommendedSizes":{"width":"1000","height":"1000"},"mimetype":"image/jpeg","size":87579,"hash":"691df2fd18b9cee1bf0c1c709751c6f93f35
27475","id":"cm9ty48uaq2ls08503yim9fxz","filename":"untitled.jpg","category":"divesoft/","type":"image"}},"id":"#40","type":"component","lock":false,"position":3},{"name":"ProductShowcase","data":{"backgroundColor":"#ffffff","isTextDark":true,"isImageRight":false,"image":{"recommendedSizes":{"width":"485","height":"485"},"mimetype":"image/png","size":1301657,"hash":"43e9e651a9f52d00f08256ebeafeddc32164c11f","id":"cm737a5egjeyt08505ycj0rdm","filename":"divesoft-app-202502-01.png","category":"divesoft/","type":"image"},"imageMobile":{"recommendedSizes":{"width":"510","height":"510"}},"isTitleH1":false,"title":"Divesoft.app","subtitle":"Plan your decompression, gasses, utilize checklists, check your logs + more.","description":"All for Free.","hideDescriptionOnMobile":false,"areButtons":false,"firstTitle":"Learn more >","firstUrl":{"url":"/en/app","pageId":"ckfccnc4a98bx0788f7enal83"},"secondTitle":"Configurator >","secondUrl":""},"id":"#21","type":"component","lock":false,"position":4},{"name":"Footer","data":{"copyrights":"Copyright © 2019 Divesoft LLC All rights reserved.","facebookUrl":{"urlNewWindow":true,"url":"https://www.facebook.com/divesoft/"},"youtubeUrl":{"url":"https://www.youtube.com/@divesoft_tv","urlNewWindow":true},"instagramUrl":{"url":"https://www.instagram.com/divesoft/","urlNewWindow":true},"contacts":"**Divesoft s.r.o.** \nHálkova 2495 \n413 01 Roudnice nad Labem \nCzech Republic \nTel.: +420 416 857 057 \nE-mail: [email protected]","twitterUrl":{"url":"","urlNewWindow":true,"pageId":"cjv3l26tp004p0836i54n4u7a"}},"id":"#1","type":"component","lock":false,"position":5}],"id":"root","idBuffer":"#45","lastCommit":"656e8ecd-5ac5-4676-918d-60b66a74bbfb"}},"annotations":[],"language":{"type":"id","generated":false,"id":"Language:cjv3kwvoj000u083611381c6o","typename":"Language"},"__typename":"PageTranslation"},"Page:cm9ck8ii6fc740803kny0qqjo":{"id":"cm9ck8ii6fc740803kny0qqjo","type":{"type":"id","generated":false,"id":"PageType:cjv3l213x004f08366hjufttp","typename":"PageType"},"tags":[{"type":"id","generated":false,"id":"Tag:cjv3szrcv01bz0836yo8myb0r","typename":"Tag"},{"type":"id","generated":false,"id":"Tag:cm5ww0t651b710803pcl02cn4","typename":"Tag"}],"translations({\"where\":{\"language\":{\"id\":\"cjv3kwvoj000u083611381c6o\"}}})":[{"type":"id","generated":false,"id":"PageTranslation:cm9ck8iinfc7b0803t0es7h5k","typename":"PageTranslation"}],"__typename":"Page"},"PageTranslation:cm9ck8iinfc7b0803t0es7h5k":{"id":"cm9ck8iinfc7b0803t0es7h5k","name":"What is Deep Diving","createdAt":"2025-04-11T09:03:54.814Z","content":{"type":"json","json":{"content":[{"name":"Header","data":{"products":[{"title":"Accessories","description":"Backplates, Consumables. Tanks.","img":{"recommendedSizes":{"width":"235","height":"235"}},"url":""},{"title":"Accessories sets","description":"Protection, maintenance, cleaning.","img":{"recommendedSizes":{"width":"235","height":"235"}},"url":""},{"title":"Spare parts","description":"Spare parts and components.","img":{"recommendedSizes":{"width":"235","height":"235"}},"url":""},{"title":"Spare parts kits","description":"Completly Liberty spare parts kits.","img":{"recommendedSizes":{"width":"235","height":"235"}},"url":""}]},"id":"#0","type":"component","lock":false,"position":0},{"name":"BlogArticle","data":{"title":"What is Deep Diving?","perex":"Deep sea diving is a fascinating and challenging aspect of underwater exploration that takes divers far beyond the limits of recreational scuba diving. Whether conducted for scientific research, technical exploration, or sheer adventure, deep diving requires specialized equipment, training, and expertise.","content":"Defining Deep Sea Diving \n\nDeep diving generally refers to any dive that exceeds the standard recreational depth limit of **40 meters (130 feet)**. This [type of diving](https://www.divesoft.com/en/blog/what-are-the-types-of-scuba-diving) includes technical diving, commercial diving, and exploration dives that often require the use of mixed gas breathing systems, rebreathers, and advanced decompression procedures. \n\n\n\nHow Deep Can You Go Scuba Diving? \n\nThe depth a diver can reach depen
2ds on training, equipment, and the breathing gas mixture used. \n\n**Recreational scuba diving** is typically limited to **40 meters (130 feet)** using standard air tanks. \n\n**Technical divers** using trimix or other specialized gas blends can exceed **100 meters (328 feet)**. \n\n**Commercial and saturation divers**, who work on deep-sea structures, often reach depths of **300 meters (984 feet)** or more while using advanced diving systems. \n\n**The world record for deep diving on an open-circuit scuba system is 332 meters (1,090 feet)**, achieved by Ahmed Gabr in 2014. \n\n\n\nEssential Equipment for Deep Diving \n\nGoing beyond recreational depths requires specialized equipment to ensure safety and manage the physiological challenges of deep pressure and gas narcosis. Some essential equipment includes: \n\n**Mixed Gas Systems**: Deep dives often require breathing gases like **helium-oxygen (heliox)** or **trimix (helium, oxygen, and nitrogen)** to prevent nitrogen narcosis and oxygen toxicity. Some divers have been experimenting with using more exotic gases, such as hydrogen as a part of their breathing mixture. \n\n**Decompression Computers**: These help divers manage complex ascent schedules to avoid decompression sickness (the bends). They do this by using various tissue saturation algorithms, such as the Buhlman model. \n\n**Rebreathers**: Unlike traditional open-circuit scuba gear, rebreathers recycle exhaled air by removing carbon dioxide and replenishing oxygen, allowing for extended dive times by limiting the gas use to the actual metabolic consumption of the diver. \n\n**Deep Diving Suit**: A crucial piece of gear for extreme depths, deep sea diving suits, such as atmospheric diving suits (ADS), protect divers from immense pressure and enable them to operate at depths of **up to 610 meters (2,000 feet)**. These suits are, however, only rarely used and are saved for extreme conditions. \n\n\n\nRisks and Challenges of Deep Diving \n\nDeep sea diving presents unique risks that require careful preparation and adherence to safety protocols: \n\n**Decompression Sickness (DCS)**: Prolonged exposure to high-pressure environments increases inert gas absorption in the body, which must be safely released during ascent. It is important to be weary of aspects such as cold exposure and dehydration which can greatly affect the off-gassing time \n\n**Nitrogen Narcosis**: The onset of this effect is highly personal, some divers can start feeling it at depths of **30 meters (100 feet)**, others start to get ânarkedâ at depths of 50 meters (160 ft). Nitrogen can have an intoxicating effect, impairing judgment, reaction time, and coordination. \n\n**Oxygen Toxicity
2**: High partial pressures of oxygen at depth can cause seizures, which is why [technical divers](https://www.divesoft.com/en/blog/what-is-technical-diving) use hypoxic gas blends to mitigate this risk. Such blends are not usable in shallower depths, since they do not contain enough oxygen to sustain life at lower pressures. \n\n**Equipment Failure**: At extreme depths, standard scuba gear may malfunction with higher probability, requiring redundancy and backup systems. \n\n\n\nThe Future of Deep Diving \n\nAdvancements in technology continue to push the limits of how deep humans can explore underwater. Innovations in [rebreather technology](https://www.divesoft.com/en/products/ccr-liberty), **diving suits, and remotely operated vehicles (ROVs)** are expanding our ability to explore the depths safely and efficiently. Whether for commercial work, scientific discovery, or personal achievement, deep diving remains one of the most challenging and awe-inspiring pursuits in the diving world. \n\nAuthor: Adam Prochaska","showTags":false,"showDate":true,"publishDate":"04/15/2025","image":{"mimetype":"image/jpeg","size":974817,"hash":"093b4a31716cbc0bfe2ec1b1414c078890d43226","id":"cm9i76f0kmyqx0850bnzd1smh","filename":"divesoft-photo-018-1.jpg","category":"divesoft/","type":"image"}},"id":"#2","type":"component","lock":false,"position":1},{"name":"ProductShowcase","data":{"componentTemplateId":"cm9h4wr6ugjv10803yqs3tp71"},"id":"#3","type":"component","lock":false,"position":3},{"name":"Footer","data":{"copyrights":"Copyright © 2019 Divesoft LLC All rights reserved.","facebookUrl":"","youtubeUrl":"","instagramUrl":"","contacts":"**Divesoft, s.r.o.** Hálkova 2495 413 01 Roudnice nad Labem Äeská republika Tel.: +420 416 857 057 E-mail: [email protected]"},"id":"#1","type":"component","lock":false,"position":4}],"id":"root","idBuffer":"#5","lastCommit":"2d574c7f-8c6c-4ef7-b20d-5a7bb0d76817"}},"annotations":[],"language":{"type":"id","generated":false,"id":"Language:cjv3kwvoj000u083611381c6o","typename":"Language"},"__typename":"PageTranslation"},"Page:cm9ckxruefcc608037xn6eibo":{"id":"cm9ckxruefcc608037xn6eibo","type":{"type":"id","generated":false,"id":"PageType:cjv3l213x004f08366hjufttp","typename":"PageType"},"tags":[{"type":"id","generated":false,"id":"Tag:cjv3szrcv01bz0836yo8myb0r","typename":"Tag"},{"type":"id","generated":false,"id":"Tag:cm5ww05zc1b5d0803zglvz927","typename":"Tag"},{"type":"id","generated":false,"id":"Tag:cmfp50qhi00lk08324ek37f9g","typename":"Tag"}],"translations({\"where\":{\"language\":{\"id\":\"cjv3kwvoj000u083611381c6o\"}}})":[{"type":"id","generated":false,"id":"PageTranslation:cm9ckxrusfccd0803ae1wenuk","typename":"PageTranslation"}],"__typename":"Page"},"PageTranslation:cm9ckxrusfccd0803ae1wenuk":{"id":"cm9ckxrusfccd0803ae1wenuk","name":"How to chose the right CCR rebreather for YOU","createdAt":"2025-04-11T09:23:33.316Z","content":{"type":"json","json":{"content":[{"name":"Header","data":{"products":[{"title":"Accessories","description":"Backplates, Consumables. Tanks.","img":{"recommendedSizes":{"width":"235","height":"235"}},"url":""},{"title":"Accessories sets","description":"Protection, maintenance, cleaning.","img":{"recommendedSizes":{"width":"235","height":"235"}},"url":""},{"title":"Spare parts","description":"Spare parts and components.","img":{"recommendedSizes":{"width":"235","height":"235"}},"url":""},{"title":"Spare parts kits","description":"Completly Liberty spare parts kits.","img":{"recommendedSizes":{"width":"235","height":"235"}},"url":""}]},"id":"#0","type":"component","lock":false,"position":0},{"name":"BlogArticle","data":{"title":"How to Choose the Rightâ¯CCRâ¯Rebreather for YOU","perex":"Choosing a CCR rebreather is personal. Discover how to match features, accessories and final loadâout to your diving style and goals â and why Liberty might be your perfect fit.","content":"\n## Introduction â Why Your Choice Really Matters \nA [closedâcircuit rebreather (CCR)](https://www.divesoft.com/en/blog/ccr-rebreathers-differences-and-what-to-look-for) is the gateway to longer, quieter and more immersive divesâbut it is also the single largest gear commitment most technical divers will ever make. The unit that thrills your [dive buddy](https://www.divesoft.com/en/blog/how-to-find-a-diving-buddy-for-your-expeditions) may be a nightmare for your logistics or training path. This guide walks y
2ou stepâbyâstep through aligning rebreather features with your own diving profile, avoiding the common pitfalls that catch many CCR newcomers, and understanding where the Divesoftâ¯Liberty shines.\n\n## 1)â¯â¯Know Your Diving Profile\n\n| Style | Typical Depth/Duration | Core Requirements |\n| ----------------------------- | -------------------------- | ------------------------------------------------------------ |\n| **Recreational deep & deco** | â¤â¯60â¯m / â¤â¯120â¯min | Compact formâfactor, simple workâflow ||\n| **Cave & wreck** | 30â100â¯m / 90â240â¯min | High redundancy, sidemount or lowâprofile backâmount options ||\n| **Expedition** | 60â120â¯m / 4â¯h+ | Rockâsolid reliability, fieldâserviceable parts ||\n| **Professional** | Variable / high duty cycle | Data connectivity, robust global service network |\n\n\n\n<br>\n\n### Five Questions to Clarify Your Needs\n1. How deep and how long do I regularly plan to dive? \n2. Will I mostly dive in buddy teams, mixed OC/CCR groups, or CCRâonly? \n3. Which environments dominate my bucket listâcaves, wrecks, cold water, warm oceans? \n4. How often do I fly with dive gear, and how weightâsensitive is my travel? \n5. Is there certified training and servicing for my chosen unit within reasonable distance? \n\n<br>\n\n## 2)â¯â¯Key Factors When Selecting a CCR\n<br>\n<div style=\"margin:10px 0; overflow-y: scroll; background:; padding: 10px\">\n<table style=\"min-width: 700px\">\n\t\n\t<tr style=\"border-bottom: 2px solid gray;\">\n\t\t<th style=\"padding:10px;\">Factor</th>\n\t\t<th style=\"padding:10px\">Why It Matters</th>\n\t\t<th style=\"padding:10px\">What to Check</th>\n\t</tr>\n\t<tr style=\"border-bottom: 1px solid gray;\">\n\t\t<th style=\"padding:10px\">Reliability</th>\n\t\t<td style=\"padding:10px\">Your life support must survive abuse and errors.</td>\n\t\t<td style=\"padding:10px\">Depth rating, thirdâparty test reports, materials, track record.</td>\n\t</tr>\n\t<tr style=\"border-bottom: 1px solid gray;\">\n\t\t<th style=\"padding:10px\">Safety</th>\n\t\t<td style=\"padding:10px\">Extra sensors and power rails buy time when things go south.</td>\n\t\t<td style=\"padding:10px\">3+ Oâ sensors, dual batteries, independent HUD, mechanical bailâout valve (BOV).</td>\n\t</tr>\n\t<tr style=\"border-bottom: 1px solid gray;\">\n\t\t<th style=\"padding:10px\">Modularity</th>\n\t\t<td style=\"padding:10px\">Your ambitions will grow. Your unit should keep up.</td>\n\t\t<td style=\"padding:10px\">Sidemount kit, dual scrubber options, addâon bailout CCR, firmware upgrades.</td>\n\t</tr>\n\t<tr style=\"border-bottom: 1px solid gray;\">\n\t\t<th style=\"padding:10px\">Training & Service Network</th>\n\t\t<td style=\"padding:10px\">Community and instructors shorten the learning curve.</td>\n\t\t<td style=\"padding:10px\">Instructor density, online resources, global vs. regional support.</td>\n\t</tr>\n\t<tr>\n\t\t<th style=\"padding:10px\">Purchase Price</th>\n\t\t<td style=\"padding:10px\">Total Cost of Ownership (TCO) tells the real story.</td>\n\t\t<td style=\"padding:10px\">Calculate purchaseâ¯+â¯consumablesâ¯+â¯service over 5â10â¯years.</td>\n\t</tr>\n</table>\n</div>\n\n<br>\n\n\n<br>\n\n## 3.â¯â¯Classic Mistakes to Avoid\n**Ignoring service availability** â the nearest authorised technician is on another continent.\n\n**Chasing the latest hype** â âEveryone on Instagram has Brandâ¯X.â Hype â suitability.\n\n**Shortâterm thinking** â a unit that cannot evolve into caves or deeper range forces a repurchase.\n\n**Underestimating operational costs** â specialty sorb or sensors can exceed the original price tag over time.\n\n**Unrealistic expectations** â a CCR is not magic; drills, discipline and maintenance still define safety.\n\n<br>\n\n## 4.â¯â¯Why the Divesoftâ¯Liberty Could Be Your Ideal Match\n\n\n\n**Fully redundant electronics** \nTwin independent control computers backed by four oxygen sensors keep [lifeâsupport](https://www.divesoft.com/en/blog/would-you-trust-your-life-to-a-machine) decisions safe even if one subsystem fails, so you can continue the dive or surface with confidence.\n\n**Variable scrubber options (2â¯Ãâ¯2â¯kg or 1â¯Ãâ¯3â¯kg)** \nChoose the lighter twoâkilogram cartridges for travel and short deco dives, or drop in the single threeâkilogram scrubber for extended runtimesâwithout changing frames or accessories.\n\n**One platform, multiple configurations** \nBackâmount, Sidemount and compact Libertyâ¯Lite share the same core electronics and workâflow. You invest once and reconfigure later as your diving style evolves.\n\n**Intuitive multilingual user interface** \nClear, iconâdriven menusâavailable in English, Czech and other languagesâreduce training time and mental workload when taskâloaded in complex environments.\n\n**Robust EUâ¯&â¯US service network** \nFactoryâtrained technicians on both sides of the Atlantic ensure quick turnaround, readily available spares and expert support by phone or email when you need it most.\n\n**Active global community and training ladder** \nFrom entryâlevel 30â¯m CCR to full c
2ave and extreme exploration, Liberty instructors and online groups provide a continuous learning path and a wealth of shared experience.\n\n<br>\n\n## Conclusion & Next Steps\n\n\n<br>\n\nThe âbestâ [CCR](https://www.divesoft.com/en/products/ccr-liberty) is not the most popular or the flashiest on social media; it is the unit that safely and economically supports your diving ambitions today and five years from now. If you want a platform that grows with you, come and experience the [Divesoftâ¯Liberty](https://www.divesoft.com/en/products/ccr-liberty) in person.\n\n<br>\n\n#### Book Your Demo Dive Today \nClick below to pick a date, and let us show you how Liberty can unlock new underwater horizons. \n\n\nAuthor: [Jakub Å imánek](https://www.divesoft.com/en/about-us/jakub-simanek)","showTags":false,"showDate":true,"image":{"mimetype":"image/jpeg","size":800336,"hash":"61ce04856af6b7b62f717f084b97d556168e4939","id":"cmackrzu3w0fj0850zkgfveih","filename":"divesoft-photo-006-1.jpg","category":"divesoft/","type":"image"},"publishDate":"05/06/2025"},"id":"#2","type":"component","lock":false,"position":1},{"name":"HubSpotForm","data":{"backgroundColor":"#ffffff","isTitleH1":false,"title":"Try the CCR Liberty","subtitle":"Contact us for demo!","showBreadcrumbs":false,"hideHeader":false,"portalId":"145642557","formId":"33ca3699-344e-40b8-926b-6c2c8d83543f"},"id":"#40","type":"component","lock":false,"position":2},{"name":"ProductShowcase","data":{"backgroundColor":"#ffffff","isTextDark":true,"isImageRight":false,"image":{"recommendedSizes":{"width":"485","height":"485"},"mimetype":"image/png","size":1301657,"hash":"43e9e651a9f52d00f08256ebeafeddc32164c11f","id":"cm737a5egjeyt08505ycj0rdm","filename":"divesoft-app-202502-01.png","category":"divesoft/","type":"image"},"imageMobile":{"recommendedSizes":{"width":"510","height":"510"}},"isTitleH1":false,"title":"Divesoft.app","subtitle":"Plan your decompression, gasses, utilize checklists, check your logs + more.","description":"All for Free.","hideDescriptionOnMobile":false,"areButtons":false,"firstTitle":"Learn more >","firstUrl":{"url":"/en/app","pageId":"ckfccnc4a98bx0788f7enal83"},"secondTitle":"Configurator >","secondUrl":""},"id":"#21","type":"component","lock":false,"position":21},{"name":"Footer","data":{"copyrights":"Copyright © 2019 Divesoft LLC All rights reserved.","facebookUrl":{"urlNewWindow":true,"url":"https://www.facebook.com/divesoft/"},"youtubeUrl":{"url":"https://www.youtube.com/@divesoft_tv","urlNewWindow":true},"instagramUrl":{"url":"https://www.instagram.com/divesoft/","urlNewWindow":true},"contacts":"**Divesoft s.r.o.** \nHálkova 2495 \n413 01 Roudnice nad Labem \nCzech Republic \nTel.: +420 416 857 057 \nE-mail: [email protected]","twitterUrl":{"url":"","urlNewWindow":true,"pageId":"cjv3l26tp004p0836i54n4u7a"}},"id":"#1","type":"component","lock":false,"position":22}],"id":"root","idBuffer":"#41","lastCommit":"a241c661-b5b9-42c5-abb3-cb0cf1405406"}},"annotations":[],"language":{"type":"id","generated":false,"id":"Language:cjv3kwvoj000u083611381c6o","typename":"Language"},"__typename":"PageTranslation"},"Page:cm9cm8xmufcmc08033nld7l9d":{"id":"cm9cm8xmufcmc08033nld7l9d","type":{"type":"id","generated":false,"id":"PageType:cjv3l213x004f08366hjufttp","typename":"PageType"},"tags":[{"type":"id","generated":false,"id":"Tag:cjv3szrcv01bz0836yo8myb0r","typename":"Tag"},{"type":"id","generated":false,"id":"Tag:cm5ww05zc1b5d0803zglvz927","typename":"Tag"},{"type":"id","generated":false,"id":"Tag:cm5ww0t651b710803pcl02cn4","typename":"Tag"},{"type":"id","generated":false,"id":"Tag:cmfp50qhi00lk08324ek37f9g","typename":"Tag"}],"translations({\"where\":{\"language\":{\"id\":\"cjv3kwvoj000u083611381c6o\"}}})":[{"type":"id","generated":false,"id":"PageTranslation:cm9cm8xndfcmj0803yqqmh6dr","typename":"PageTranslation"}],"__typename":"Page"},"PageTranslation:cm9cm8xndfcmj0803yqqmh6dr":{"id":"cm9cm8xndfcmj0803yqqmh6dr","name":"Diving groups: why you should never dive alone","createdAt":"2025-04-11T10:00:13.656Z","content":{"type":"json","json":{"content":[{"name":"Header","data":{"products":[{"title":"Accessories","description":"Backplates, Consumables. Tanks.","img":{"recommendedSizes":{"width":"235","height":"235"}},"url":""},{"title":"Accessories sets","description":"Protection, maintenance, cleaning.","img":{"recommendedSizes":{"width":"235","height":"235"}},"url":""},{"title":"Spare parts","description":"Spare parts and components.","img":{"recommendedSizes":{"width":"235","height":"235"}},"url":""}
2,{"title":"Spare parts kits","description":"Completly Liberty spare parts kits.","img":{"recommendedSizes":{"width":"235","height":"235"}},"url":""}]},"id":"#0","type":"component","lock":false,"position":0},{"name":"BlogArticle","data":{"title":"Diving Groups: Why You Should Never Dive Alone","perex":"How the diveâbuddy system keeps you safer, calmer, andâ¯moreâ¯adventurousâno matter your certification level.","content":"\n## Introduction â The Allure and the Threat of Solo Dives\nThe oceanâs pull is powerful. On a glassâflat morning with perfect viz, it can be tempting to slip beneath the surface on your own scheduleâjust you and the blue. Yet that same temptation masks the single greatest preventable hazard in recreational scuba: diving alone. Whether youâve logged five dives or fiveâ¯thousand, decades of incident reports agree on one thingâmost diving fatalities involve factors a buddy or group could have mitigated or prevented.\n\nThis article unpacks the real soloâdiving risks, highlights the practical benefits of group diving, and offers actionable diving safety tips that will make every descent saferâ¯â¦â¯and a lot more fun.\n\n\n\n<br>\n\n## 1)â¯â¯Solo Diving Risks You Canât Ignore\n**Equipment Failure** \nA blown Oâring, stuck inflator, or computer blackout can escalate in seconds when you have no backup. A buddy brings an extra air source, redundant gauges, and two extra hands to fix or abort the dive quickly.\n\n**Medical Emergencies** \nCramps, sudden fatigue, vertigo, or the first signs of decompression sickness demand immediate aid. A partner can share air, assist a controlled ascent, and administer Oâ topside while summoning further help.\n\n**Navigation Errors** \nCurrents shift, visibility drops, and compasses occasionally fail. Extra eyes on landmarks and shared decisionâmaking mean the team is far less likely to be swept off courseâor can find its way back together if it is.\n\n**Task Overload & Panic** \nStress compounds rapidly when every issue is yours alone. A calm teammate can spot the early signs of panic, coach you through problemâsolving steps, and keep the situation from snowballing.\n\n**Delayed Rescue** \nSurface support may not notice a missing solo diver until itâs too late. Buddy pairs and teams have builtâin checkâin procedures that ensure everyone is accounted for on schedule, drastically shortening response times in an emergency.\n\n\n\n<br>\n\n## 2)â¯â¯The Big Benefits of Group Diving\n#### 2.1â¯â¯Exponential Safety\nA group multiplies resources: spare masks, extra SMBs, shared tools, andâmost importantâadditional brains making sound decisions. In a threeâperson team, any single catastrophic gear failure still leaves two full gas supplies ready to assist.\n\n#### 2.2â¯â¯Skills Growth Through Observation\nLearning accelerates when you watch others manage buoyancy, run a reel, or shoot a DSMB. Debriefing as a team turns every dive into a compact workshop where you capture lessons solo divers might never notice.\n\n#### 2.3â¯â¯Stress Buffer and Mental Bandwidth\nKnowing someone has your back lowers background anxiety, freeing mental cycles for better trim, photography, or simply soaking in the scenery.\n\n#### 2.4â¯â¯Community and Motivation\nHumans are wired for shared adventure. Group diving builds friendships, fosters mentorship, and fuels the positive peer pressure that keeps you training, logging dives, and exploring new environments.\n\n#### 2.5â¯â¯Access to Advanced Sites\nMany operators require a minimum of two (often three) divers to charter remote reefs, deep walls, or wreck penetrations. Joining a group literally opens doors solo divers canât swim through.\n\n\n\n<br>\n\n## 3)â¯â¯RealâWorld Examples (and One Hilarious Cautionary Tale)\n##### The Stuck Inflator Valve â Cenotes, Mexico.\nA diverâs power inflator jammed fully open at 18â¯m. His buddy, two meters away, disconnected the LP hose and prevented a runaway ascentâtextbook save in ten seconds. Alone, it might have ended in a ceiling impact or embolism.\n\n##### Lost in Kelp â California Channelâ¯Islands.\nEven with a compass, a solo diver drifted into heavy kelp and spent critical minutes entangled near the surface surge. A passing threeâperson team noticed his frantic bubbles, cut him loose, and escorted him back to the anchor line.\n\n##### Sudden Vertigo â Redâ¯Sea Night Dive.\nAn experienced photographer became disoriented and began an uncontrolled descent. His group leader spotted the erratic light beam, arrested the descent, and completed a controlled ascent with a safety stop.\n\n##### The BackâZipper Blues â Slapy Reservoir, Czechia (Humour Break).\nAn unnamed friend once drove to the Slapy dam determined to enjoy some peaceful meâtime underwater. He parked on a steep roadside, suited upâand discovered the flaw in his plan: a rearâentry drysuit zipper. With nobody around to zip him up, he stood on the shoulder hitchâhiking until a curious driver obliged. \nZipped at last, he scrambled down the slope to the water⦠when nature called. Hard. Panicked, he clambered back up, eyes bulging, and flagged another passing car to unzip him. He made itâbarely preserving his dignity. Business handled, he hitchâhiked a third time to get reâzipped, slid down the bank once more, and finally submerged.\nMoral of the story? Even the most routine solo dive can turn into a slapstick epic when you skip the dive buddy system advantages.\n\n\n\n## 4)â¯â¯Practical GroupâDiving Best Practices \n**Plan as a Team.** \nAgree on max depth, bottom time, gas limits, turn pressure, hand signals, and lostâbuddy procedures before you splash.\n\n**Assign Roles. ** \nRotate who leads, who navigates, and who runs the safetyâstop timer. Clear roles prevent âsomeone else will do itâ complacency.\n\n**Stay In Formation.** \nStandard triangle (three divers) or sideâbyâside (two divers) positions keep everyone in sight and within armâs reach for airâsharing.\n\n**Use Compatible Gear.** \nCheck hose lengths, clip points, and gas mixes to avoid surprises. Agree on a common ascent rate and safetyâstop depth.\n\n**Debrief Honestly. ** \nFive minutes on the surface covering what went right and wrong cements learning and deepens trust.\n\n\n\n<br>\n\n## 5)â¯â¯Counterargumentsâand Why They Fall Short \n**âBut Iâm a SelfâReliant Diverâ** \nThat specialty is about redundancy (two regs, two computers, pony bottle), not rejecting buddies. It prepares you for the rare separation, not routine solo dives. | \n**âBuddies Slow Me Downâ** \nChoose partners with matching objectives and agree on pace. Efficiency comes from planning, not solitude. \n**âI Dive Solo for Photographyâ** \nA patient buddy can hover behind or above you, acting as a safety lookout while you frame the shotâand even model for scale! \n**âGroups Cause Entanglementâ** \nProper spacing, trim, and situational awareness prevent this. Solo divers are statistically more likely to get caught because no one is watching their fins. \n\n## 6)â¯â¯QuickâReference Diving Safety Tips \n\nMaintain a 3â to 5âminute safety stop on every diveâeven if your computer says âNo stop required.â\n\nCarry an audible (whistle) and visual (SMB) signaling device, and confirm everyone knows how to deploy them.\n\nPractice airâsharing drills every few dives to keep muscle memory sharp.\n\nLog dives together and review SAC rates to improve team gas planning.\n\nEnroll in rescue and firstâaid training as a group for cohesive response skills.\n\n<br>\n\n### Make Your Next Dive a Team Dive \n\nReady to levelâup your group diving game? Share this article with your favorite dive partner, schedule a refresher rescueâskills session, and plan your next adventure together. The best memoriesâand the safest divesâare made together.\n\nAuthor: [Jakub Å imánek](https://www.divesoft.com/en/about-us/jakub-simanek)","showTags":false,"showDate":true,"image":{"mimetype":"image/jpeg","size":819042,"hash":"694bdf9e7e18599ba2909b431cceda1a6a11664b","id":"cmanzd6vfzkaj0850kmocpn4k","filename":"divesoft-photo-187-1.jpg","category":"divesoft/","type":"image"},"publishDate":"05/14/2025"},"id":"#2","type":"component","lock":false,"position":1},{"name":"ProductShowcase","data":{"backgroundColor":"#ffffff","isTextDark":true,"isImageRight":false,"image":{"recommendedSizes":{"width":"485","height":"485"},"mimetype":"image/png","size":1301657,"hash":"43e9e651a9f52d00f08256ebeafeddc32164c11f","id":"cm737a5egjeyt08505ycj0rdm","filename":"divesoft-app-202502-01.png","category":"divesoft/","type":"image"},"imageMobile":{"recommendedSizes":{"width":"510","height":"510"}},"isTitleH1":false,"title":"Divesoft.app","subtitle":"Plan your decompression, gasses, utilize checklists, check your logs + more.","description":"All for Free.","hideDescriptionOnMobile":false,"areButtons":false,"firstTitle":"Learn more >","firstUrl":{"url":"/en/app","pageId":"ckfccnc4a98bx0788f7enal83"},"secondTitle":"Configurator >","secondUrl":""},"id":"#21","type":"component","lock":false,"position":20},{"name":"Footer","data":{"copyrights":"Copyright © 2019 Divesoft LLC All rights reserved.","facebookUrl":{"urlNewWindow":true,"url":"https://www.facebook.com/divesoft/"},"youtubeUrl":{"url":"https://www.youtube.com/@divesoft_tv","urlNewWindow":true},"instagramUrl":{"url":"https://www.instagram.com/divesoft/","urlNewWindow":true},"contacts":"**Divesoft s.r.o.** \nHálkova 2495 \n413 01 Roudnice nad Labem \nCzech Republic \nTel.: +420 416 857 057 \nE-mail: [email protected]","twitterUrl":{"url":"","urlNewWindow":true,"pageId":"cjv3l26tp004p0836i54n4u7a"}},"id":"#1","type":"component","lock":false,"position":21}],"id":"root","idBuffer":"#40","lastCommit":"3966c434-7f9b-4dc0-90ff-61377227cd17"}},"annotations":[],"language":{"type":"id","generated":false,"id":"Language:cjv3kwvoj000u083611381c6o","typename":"Language"},"__typename":"PageTranslation"},"Page:cm9cm99vbfcn70803af85jguv":{"id":"cm9cm99vbfcn70803af85jguv","type":{"type":"id","generated":false,"id":"PageType:cjv3l213x004f08366hjufttp","typename":"PageType"},"tags":[{"type":"id","generated":false,"id":"Tag:cjv3szrcv01bz0836yo8myb0r","typename":"Tag"},{"type":"id","generated":false,"id":"Tag:cm5ww05zc1b5d0803zglvz927","typename":"Tag"},{"type":"id","generated":false,"id":"Tag:cmfp50qhi00lk08324ek37f9g","typename":"Tag"}],"translations({\"where\":{\"language\":{\"id\":\"cjv3kwvoj000u083611381c6o\"}}})":[{"type":"id","generated":false,"id":"PageTranslation:cm9cm99vufcne0803ejahz0kn","typename":"PageTranslation"}],"__typename":"Page"},"PageTranslation:cm9cm99vufcne0803ejahz0kn":{"id":"cm9cm99vufcne0803ejahz0kn","name":"CCR rebreather properties that you MUST evaluate before buying","createdAt":"2025-04-11T10:00:29.513Z","content":{"type":"json","json":{"content":[{"name":"Header","data":{"products":[{"title":"Accessories","description":"Backplates, Consumables. Tanks.","img":{"recommendedSizes":{"width":"235","height":"235"}},"url":""},{"title":"Accessories sets","description":"Protection, maintenance, cleaning.","img":{"recommendedSizes":{"width":"235","height":"235"}},"url":""},{"title":"Spare parts","description":"Spare parts and components.","img":{"recommendedSizes":{"width":"235","height":"235"}},"url":""}
2,{"title":"Spare parts kits","description":"Completly Liberty spare parts kits.","img":{"recommendedSizes":{"width":"235","height":"235"}},"url":""}]},"id":"#0","type":"component","lock":false,"position":0},{"name":"BlogArticle","data":{"title":"CCR rebreather properties that you MUST evaluate before buying","perex":"\nThinking about taking the silent-bubble plunge? The next ten minutes could save you thousands of eurosâand, more importantly, keep you breathing easy when youâre 60 m deep.\n\n","content":"> âThere is no perfect rebreather, but you can find the right rebreather for you if you are willing to do a little work.â \nâJill Heinerth â Canadian cave explorer, filmmaker and author in article â10 Things to Know Before Buying a Rebreatherâ, DIVER Magazine, 14. 1. 2019\n\n\n### Why choosing the right rebreather matters\n* **Cost of ownership**: â¬6 000ââ¬12 000 upfront, plus sensors, sorb, servicing, and annual training refreshers \n* **Risk of malfunction**: POâ spikes, flooded scrubbers, or electronics failures donât forgive sloppy choices \n* **Long-term commitment**: Youâll train, maintain, and travel with this unit for 5â10 yearsâmake sure it fits you \n\n*The initial purchase includes everything you need to dive, but consumablesâespecially sensors and sorbâshift to predictable, recurring costs. Build them into your yearly budget so your life-support system stays reliable and certification-compliant. Both CCR Liberty backmount and Liberty Sidemount arrive with a full set of four oxygen sensors already installed.*\n\n\n________________________________________\n### Key CCR rebreather properties to evaluate\n#### 1 Oxygen sensor type & reliability\nThree independent galvanic sensors are the industry minimum. Look for:\n* Automatic voting logic that ignores a rogue sensor\n* User-selectable calibration set-points (0.7 bar & 1.3 bar)\n* Replace-by date stamped < 12 months out\nLiberty spotlight: CCR Liberty doubles down on redundancy with two totally independent control units, each carrying its own battery, depth sensor, and dedicated Oâ/He sensor setâso one side can fail while the other keeps regulating the loop oceanquest.se.\n________________________________________\n#### 2 Scrubber duration & performance\nAsk for the CE EN 14143 scrubber test sheet. Compare:\n* Certified duration at 4 °C / 40 m (cold-water worst case)\n* Sorb material (Sofnolime 797 vs. generic)\n* Axial vs. radial canister designâradial gives more even gas flow\nRule of thumb: ⥠4 h cold-water duration for serious expedition work.\n\n\n________________________________________\n#### 3 Electronics, HUD & alarms\nYour brain isnât enough in narcosis. Insist on:\n* Independent primary & secondary computers\n* Full-colour HUD with peripheral-vision LEDs plus tactile or audible alerts\n* Field-swappable battery packs rated to > 70 dives per charge\n________________________________________\n#### 4 Work of breathing (WOB) & comfort\nLower WOB = less COâ retention = lower fatigue. Look for:\n* CE test result ⤠3.0 J/L @ 40 m & 40 RMV (Liberty has 2.16 J/L only!!!)\n* Counter-lung placement that matches your trim (back-mounted for cavers, chest for photogs)\n* Wide-bore hoses to cut flow resistance\n________________________________________\n#### 5 Redundancy & bailout systems\n*\tBailout valve (BOV) integratedâone bite switches to open circuit\n*\tOff-board gas ports for deco or cave cylinders\n*\tSpare controller orterials\nMarine-grade stainless steel, titanium, anodised aluminium, or Delrin, shrug off salt and drops. Carbon fibre for specific applications.\n\n\n**Need a deeper dive?** See our step-by-step method in [How to choose the right CCR rebreather for you](https://www.divesoft.com/en/blog/how-to-chose-the-right-ccr-rebreather-for-you).\n\n\n________________________________________\n\n### Common mistakes when buying a rebreather\n**Case file**: An experienced diver picked a bargain unit lacking local instructors. Six months later his firmware bricked; shipping to the factory cost â¬500 and delayed a Red Sea trip. \n1.\tFocusing only on priceâcheap today can be lethal tomorrow. \n2.\tIgnoring training availabilityâno instructor, no progression. \n3.\tUnder-estimating maintenanceâannual overhauls average â¬400ââ¬600. \n\nIf you avoid just one of these pitfalls, this guide paid for itselfâunderwater and topside.\n________________________________________\n### Final bubbles\nChoosing a CCR is less about brand hype and more about matching hard specs to your diving reality. Evaluate each property methodically, talk to divers who log serious bottom time, and refer back to the checklist before you part with a single euro. CCR Liberty and Liberty Sidemount set a high benchmarkâuse it to judge every other unit in the showroom. Safe, silent diving starts nowâsee you on the loop!\n\n\n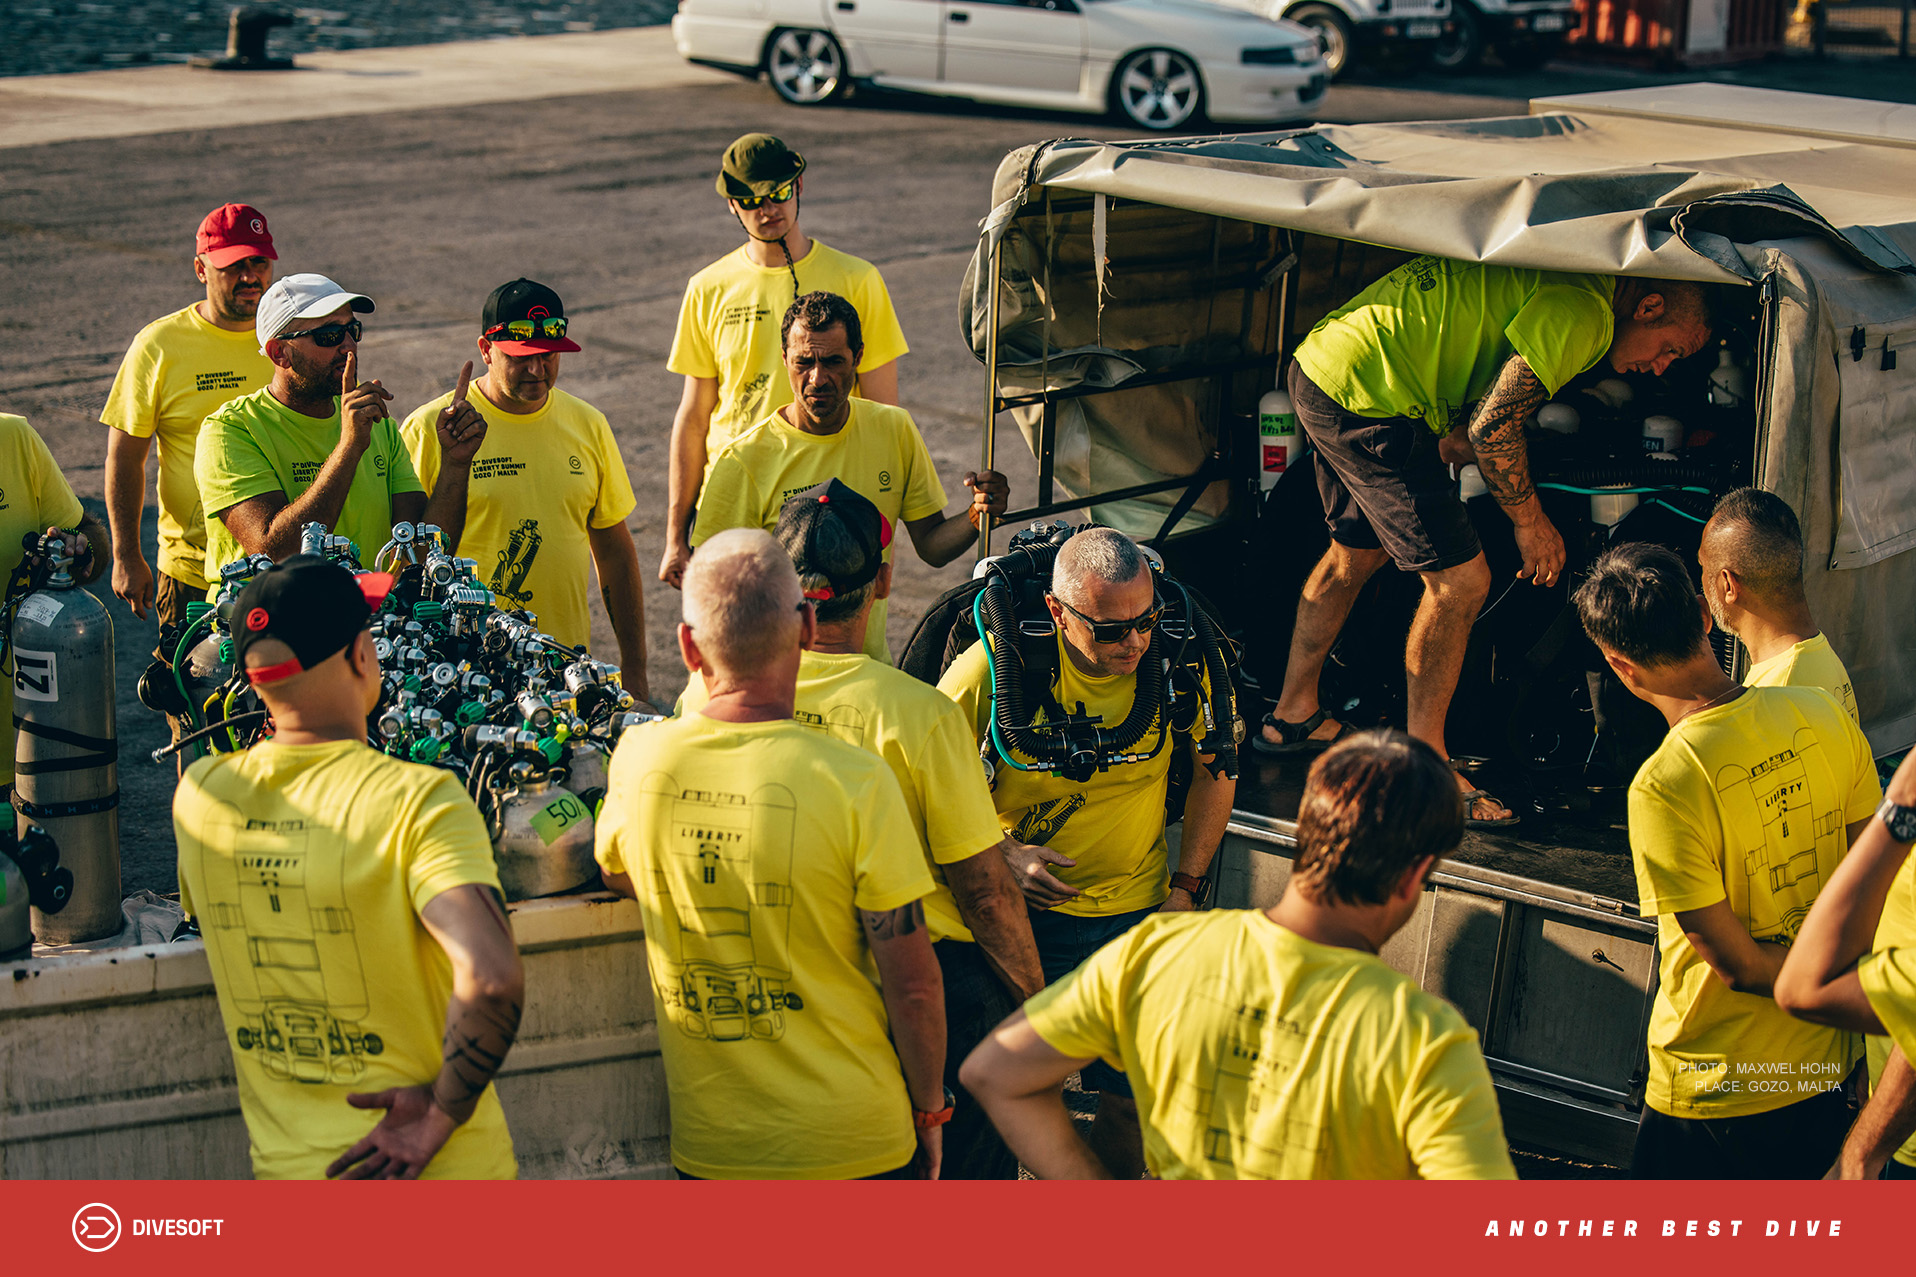\n\n\n\n\nAuthor: [Jakub Å imánek](https://www.divesoft.com/en/about-us/jakub-simanek)","showTags":false,"showDate":true,"image":{"mimetype":"image/jpeg","size":1053244,"hash":"d8ee78bd6c4fbd7080ca0deb308a29b6ade4ade8","id":"cmaze9h1i3dlt0850z9bps2q2","filename":"divesoft-photo-133-1.jpg","category":"divesoft/","type":"image"},"publishDate":"05/22/2025"},"id":"#2","type":"component","lock":false,"position":1},{"name":"ProductShowcase","data":{"backgroundColor":"#ffffff","isTextDark":true,"isImageRight":false,"image":{"recommendedSizes":{"width":"485","height":"485"},"mimetype":"image/png","size":1301657,"hash":"43e9e651a9f52d00f08256ebeafeddc32164c11f","id":"cm737a5egjeyt08505ycj0rdm","filename":"divesoft-app-202502-01.png","category":"divesoft/","type":"image"},"imageMobile":{"recommendedSizes":{"width":"510","height":"510"}},"isTitleH1":false,"title":"Divesoft.app","subtitle":"Plan your decompression, gasses, utilize checklists, check your logs + more.","description":"All for Free.","hideDescriptionOnMobile":false,"areButtons":false,"firstTitle":"Learn more >","firstUrl":{"url":"/en/app","pageId":"ckfccnc4a98bx0788f7enal83"},"secondTitle":"Configurator >","secondUrl":""},"id":"#21","type":"component","lock":false,"position":20},{"name":"Footer","data":{"copyrights":"Copyright © 2019 Divesoft LLC All rights reserved.","facebookUrl":{"urlNewWindow":true,"url":"https://www.facebook.com/divesoft/"},"youtubeUrl":{"url":"https://www.youtube.com/@divesoft_tv","urlNewWindow":true},"instagramUrl":{"url":"https://www.instagram.com/divesoft/","urlNewWindow":true},"contacts":"**Divesoft s.r.o.** \nHálkova 2495 \n413 01 Roudnice nad Labem \nCzech Republic \nTel.: +420 416 857 057 \nE-mail: [email protected]","twitterUrl":{"url":"","urlNewWindow":true,"pageId":"cjv3l26tp004p0836i54n4u7a"}},"id":"#1","type":"component","lock":false,"position":21}],"id":"root","idBuffer":"#40","lastCommit":"43139e09-e316-4593-992a-87170f8678cf"}},"annotations":[],"language":{"type":"id","generated":false,"id":"Language:cjv3kwvoj000u083611381c6o","typename":"Language"},"__typename":"PageTranslation"},"Page:cm9cm9iu9fcnp080331j8i7ls":{"id":"cm9cm9iu9fcnp080331j8i7ls","type":{"type":"id","generated":false,"id":"PageType:cjv3l213x004f08366hjufttp","typename":"PageType"},"tags":[{"type":"id","generated":false,"id":"Tag:cjv3szrcv01bz0836yo8myb0r","typename":"Tag"},{"type":"id","generated":false,"id":"Tag:cm5ww0t651b710803pcl02cn4","typename":"Tag"},{"type":"id","generated":false,"id":"Tag:cmfp50qhi00lk08324ek37f9g","typename":"Tag"}],"translations({\"where\":{\"language\":{\"id\":\"cjv3kwvoj000u083611381c6o\"}}})":[{"type":"id","generated":false,"id":"PageTranslation:cm9cm9iupfcnw08038h25nljc","typename":"PageTranslation"}],"__typename":"Page"},"PageTranslation:cm9cm9iupfcnw08038h25nljc":{"id":"cm9cm9iupfcnw08038h25nljc","name":"Best rebreather (CCR) for technical deep diving","createdAt":"2025-04-11T10:00:41.137Z","content":{"type":"json","json":{"content":[{"name":"Header","data":{"products":[{"title":"Accessories","description":"Backplates, Consumables. Tanks.","img":{"recommendedSizes":{"width":"235","height":"235"}},"url":""},{"title":"Accessories sets","description":"Protection, maintenance, cleaning.","img":{"recommendedSizes":{"width":"235","height":"235"}},"url":""},{"title":"Spare parts","description":"Spare parts and components.","img":{"recommendedSizes":{"width":"235","height":"235"}},"url":""}
2,{"title":"Spare parts kits","description":"Completly Liberty spare parts kits.","img":{"recommendedSizes":{"width":"235","height":"235"}},"url":""}]},"id":"#0","type":"component","lock":false,"position":0},{"name":"BlogArticle","data":{"title":"Best rebreather (CCR) for technical deep diving","perex":"Looking for the best CCR setup for deep technical diving? Discover the top-performing rebreathers, expert configuration tips, and safety considerations before your next expedition.","content":"## Introduction â Why Your CCR Matters at 100â¯m+\nWhen the helium bill climbs higher than the flight to your dive site, the last thing you want to doubt is your life support system. **Choosing (and configuring) the right closed circuit rebreather (CCR) can make the difference between a textbook dive and a bailout scramble**. In this guide weâll walk through proven Liberty CCR setups for dives beyond 60â¯m / 200â¯ft, lay out the engineering that keeps them running, and share field feedback from the explorers who trust them at depth.\n\n<br>\n\n### Who This Guide Is For\n*\tAdvanced recreational divers transitioning to their first CCR course or Mod 1 trimix training.\n*\tExperienced trimix divers extending bottom times beyond recreational limits.\n*\tCave divers negotiating variable depth passages where diluent consumption spikes.\n*\tTechnical instructors spec ing student units for advanced courses.\n*\tExpedition leaders planning multi hour decompression schedules.\n* Whether youâre comparing units for your very first Mod 1 class or selecting a redundant stack for a 200â¯m project, this guide will help you chooseâand configureâthe right Liberty platform. \n\n<br>\n\n\n\n<br>\n\n### New to Technical Diving? Read This First\nBefore we plunge into deep end configurations, nail these fundamentals: \n**1.\tTraining before hardware** â Agencies like TDI, IANTD, BSAC or RAID insist on an air diluent CCR course (Mod 1) before any helium or cave curriculum. A solid foundation needs to be laid before tackling the hard stuff. \n**2.\tEntry level Liberty package** â The standard Liberty Backmount with 2â¯Ãâ¯3â¯L cylinders, single HUD, and 2 Liberty handsets meets every agencyâs starter spec while lightening the rig for skill drills. \n**3.\tService & mentoring network** â New CCR divers lean on instructor and dealer support. Divesoftâs certified service hubs in 28 countries slash downtime the first time you flood a handset seal. \n\nKeep these points in mind as you dive into the advanced chapters below; the engineering that keeps Liberty alive at 300â¯m also rewards your first 40â¯m deco dive. \n\n<br>\n\n## What Makes DeepâRated CCR Setups Different?\n\n<br>\n\n<div style=\"margin:10px 0; overflow-y: scroll; background:; padding: 10px\">\n <table style=\"min-width: 700px\">\n <tr>\n <td style=\"padding: 10px\" colspan=\"3\">\n <h3>Deep-Rated CCR Challenges & Liberty Solutions</h3>\n </td>\n </tr>\n <tr style=\"border-bottom: 2px solid gray;\">\n <th style=\"padding:10px;\">Challenge</th>\n <th style=\"padding:10px;\">Why It Matters Below 60 m</th>\n <th style=\"padding:10px;\">Liberty Engineering Response</th>\n </tr>\n <tr style=\"border-bottom: 1px solid gray;\">\n <th style=\"padding:10px;\">High ambient pressure</th>\n <td style=\"padding:10px;\">Increases work of breathing (WOB) and can collapse loop hoses.</td>\n <td style=\"padding:10px;\">Sophisticated design and internal aerodynamics keep WOB < 2.4â¯J/L @ 100â¯m.v</td>\n </tr>\n <tr style=\"border-bottom: 1px solid gray;\">\n <th style=\"padding:10px;\">Complex gas mixes (trimix / heliox)</th>\n <td style=\"padding:10px;\">Precise POâ control needed to avoid CNS toxicity & ICD.</td>\n <td style=\"padding:10px;\">4-oxygen-sensor voting (quad-sensor redundancy) & optional helium FOâ linearization firmware.</td>\n </tr>\n <tr style=\"border-bottom: 1px solid gray;\">\n <th style=\"padding:10px;\">Bail-out logistics</th>\n <td style=\"padding:10px;\">Open-circuit deco gas at depth is heavy & costly.</td>\n <td style=\"padding:10px;\">Integrated Bail-Out Valve (BOV) and dual independent scrubbers enable on-board CCR bail-out.</td> \n\n\t\t\t\n<br>\n\n## Top Liberty CCR Setups for Deep Technical Diving\n\n### 1. Liberty Backmount â The Expedition Workhorse\n**Ideal For**: Trimix divers on multi stage open water descents, liveaboard operations. \n\n##### Core Specs:\n*\t2.5 or 3.3 kg radial scrubbers \n*\tDual electronics \n*\tIntegrated BOV \n* **Why It Excels:** Familiar twin set trim, easy cylinder switchover, and a backplate that matches standard DIR harness spacing. \n\t\t\t\n \n\n<br>\n\n### 2. Liberty Heavy â All in One Backmount \n\n**Ideal For**: Divers who prefer a single back mounted system with integrated diluent and bailout, particularly in DIR/GUE style setups.\n#####\tCore Specs:\n* Electronics & scrubber architecture identical to Liberty Backmount)\n*\tCylinder accommodation: twin 7â¯L or twin 3â¯L steels plus 3â¯L oxygen centre mounted\n*\tIntegrated Liberty Heavy backplate & wing (25â¯kg lift) for familiar twin set trim \n \n#####\tGUE Configuration â 2 à 7â¯L diluent + 3â¯L Oâ\n**Pros**: All gases on the back; uncluttered chest D rings for stage handling; single gas switch discipline. \n**Cons**: Truly deep dives (>150â¯m) still call for extra off board stages; large diluent volume makes mix changes costly; loop diluent use depletes bailout reserve. \n \n##### Lightweight Configuration â 2 à 3â¯L diluent\n*\tDrops ~5â¯kg from rig weight yet keeps Heavyâs rigid chassis; ideal for travel or training dives â¤100â¯m. \n \n##### Versatility & Ergonomics \n*\tCam bands accept varied cylinder diameters without shims.\n*\tBackplate geometry mirrors standard DIR harness so divers keep muscle memory in the water.\n\n<br>\n\n### 3. Liberty Sidemount â The Tight Passage Specialist or as a secondary rebreather\n**Ideal For**: Cave explorers, wreck penetrations, divers who prefer side mount cylinder distribution.\n##### Core Specs:\n*\t2l oxygen & diluent cylinders \n*\tRequires experience with multi-stage sidemount bailout\n*\tIdeal as a bailout rebreather to backmount or second sidemount unit\n*\t**Why It Excels:** \n> * Streamlined profile keeps the loop off the floor in silty restrictions\n> * Quick clip harness simplifies donning in small inflatables\n\n \n\n<br>\n\n\n### 4. Liberty DUAL (Liberty Backmout + Sidemount or Dual Sidemount) \n**Ideal For**: Record depth attempts, commercial bell standby, filmmakers who simply cannot surface.\n#####\tCore Specs:\n*\tTwo completely independent Liberty heads, loops & scrubbers\n*\tAutomatic master/slave handover on POâ deviation >0.2â¯bar for >30â¯s\n*\tWeight: 34â¯kg in dive trim (without cylinders)\n* **Why It Excels**: \n> * Redundant loop in case of flooding the primary. \n> * True two double brains redundancy: each half can drive its own solenoid & HUD.\n> * Serves as self contained bail out â just one open circuit stage required for all depths. \n\n<br>\n\n\n \n\n<br>\n\n## Configuration Tips for Depth & Duration\n**Cylinder Size & Positioning**\n*\t3â¯L steel diluent + 3â¯L Oâ covers 120â¯m descent with 20â¯min bottom and full CCR bail out margin.\n*\tPush deeper? Clip on 7â¯L off board diluent.\n \n**Work of Breathing & Counterlung Placement**\n\n*\tFront mounted counterlungs (FMCL) sit high on the chest, keeping differential hydrostatic pressure minimal and work of breathing (WOB) as low as 1.8â¯J/L at 100â¯m â this is why the original Liberty FML remains the benchmark for deep mix dives.\n*\tBack mounted counterlungs (BMCL) trade a slight WOB increase (~0.3â¯J/L higher in a 30° head up posture) for uncluttered chest D rings, crucial when you stage multiple bailout cylinders during deep descents.\n*\tChoosing FMCLâ¯vsâ¯BMCL: If your dive plan involves long penetrations with frequent bailout cylinder handling (typical on 150â¯m ocean drops), many teams pick BMCL for workspace. For maximal respiratory comfort on fixed rope vertical descents, FMCL wins.\n \n**Off Board Diluent Strategy (Critical for Cave Profiles)**\n\t\t\t\n*\tWhy it matters: Cave profiles surge through depth changes, forcing the loop to add gas constantly. An off board diluent stage prevents low volume warnings and keeps work of breathing down.\n*\tStandard setup: 7â¯L aluminium left clip with QC 6 quick connect hose feeding the diluent MAV.\n*\tAlternative (ADV manifold): Fit the [<span style=\"color:red\">Divesoft Off Board Manifold</span>](https://eshop.divesoft.com/off-board-manifold/8440) to the Automatic Diluent Valve â plug any off board bottle via QC 6 in seconds and swap or share gas under load.\n* Carry a second off board diluent (travel mix) for the shallow exit and as contingency for COâ breakthrough bailout.\n*\tDeco marathon? Off board your Oâ too: Plumb a QC 6 hose from the oxygen MAV so you can swap in a fresh high pressure Oâ bottle at the 6â¯m stop.\n> *\tConnector orientation best practice: âQC 6 on oxygen should be male on the rebreather side, the opposite of diluent, to make misconnections physically impossible,â notes \n>** Tonda PtáÄek**, elite Czech cave explorer.\n*\tDrill it: Practise feather drills and hose swaps so every teammate can donate or receive off board gas.\n\n<br>\n\n\n \n\n<br>\n\n\n## Bail Out CCR: Liberty SM as Redundant Life Support\nUsing a second Liberty Side Mount unit as bailout instead of stacking open circuit stages slashes drag and helium spend on >80â¯m dives. Libertyâs dedicated Bail out CCR firmware mirrors sensor status from the primary until activation, then runs fully independent once switched. \nM
2aster this only after a specialised course. The worldâs first Bail out Rebreather curriculum was written by Jakub Å imánek (author of this article) in 2023 and is now taught under TDI/RAID. \n\n<br>\n\n## Conclusion â Choosing Your Life Support Partner\nDeep technical dives demand hardware that feels boringly reliable when everything else gets exciting. Libertyâs modular platform lets you pick the footprint (SM, Backmount, Heavy, or dual) that meets your risk envelope while keeping sensor voting, redundant electronics, and hot swappable batteries common across the line. Compare your mission profile against the tables above, and youâll descend knowing your CCR is dialed long before you crack open the helium.\nReady to spec your unit? Reach out to a Divesoft or chat with one of our instructors for a demo dive. \n\n<br>\n\nAuthor: [Jakub Å imánek](https://www.divesoft.com/en/about-us/jakub-simanek)","showTags":false,"showDate":true,"image":{"mimetype":"image/jpeg","size":564144,"hash":"d9fb5fb1710874bab8406ec345bbf359348cf67b","id":"cmb99ay556thq0850vudd2ifq","filename":"divesoft-photo-136-1.jpg","category":"divesoft/","type":"image"},"publishDate":"05/26/2025"},"id":"#2","type":"component","lock":false,"position":1},{"name":"ProductShowcase","data":{"backgroundColor":"#ffffff","isTextDark":true,"isImageRight":false,"image":{"recommendedSizes":{"width":"485","height":"485"},"mimetype":"image/png","size":1301657,"hash":"43e9e651a9f52d00f08256ebeafeddc32164c11f","id":"cm737a5egjeyt08505ycj0rdm","filename":"divesoft-app-202502-01.png","category":"divesoft/","type":"image"},"imageMobile":{"recommendedSizes":{"width":"510","height":"510"}},"isTitleH1":false,"title":"Divesoft.app","subtitle":"Plan your decompression, gasses, utilize checklists, check your logs + more!!","description":"All for Free.","hideDescriptionOnMobile":false,"areButtons":false,"firstTitle":"Learn more >","firstUrl":{"url":"/en/app","pageId":"ckfccnc4a98bx0788f7enal83"},"secondTitle":"Configurator >","secondUrl":""},"id":"#21","type":"component","lock":false,"position":22},{"name":"Footer","data":{"copyrights":"Copyright © 2019 Divesoft LLC All rights reserved.","facebookUrl":{"urlNewWindow":true,"url":"https://www.facebook.com/divesoft/"},"youtubeUrl":{"url":"https://www.youtube.com/@divesoft_tv","urlNewWindow":true},"instagramUrl":{"url":"https://www.instagram.com/divesoft/","urlNewWindow":true},"contacts":"**Divesoft s.r.o.** \nHálkova 2495 \n413 01 Roudnice nad Labem \nCzech Republic \nTel.: +420 416 857 057 \nE-mail: [email protected]","twitterUrl":{"url":"","urlNewWindow":true,"pageId":"cjv3l26tp004p0836i54n4u7a"}},"id":"#1","type":"component","lock":false,"position":23}],"id":"root","idBuffer":"#42","lastCommit":"37051c0e-d0e4-4d5f-a1cf-4641274bae35"}},"annotations":[],"language":{"type":"id","generated":false,"id":"Language:cjv3kwvoj000u083611381c6o","typename":"Language"},"__typename":"PageTranslation"},"Page:cm9cm9zjtfco708030k4hhma9":{"id":"cm9cm9zjtfco708030k4hhma9","type":{"type":"id","generated":false,"id":"PageType:cjv3l213x004f08366hjufttp","typename":"PageType"},"tags":[{"type":"id","generated":false,"id":"Tag:cjv3szrcv01bz0836yo8myb0r","typename":"Tag"},{"type":"id","generated":false,"id":"Tag:cm5ww05zc1b5d0803zglvz927","typename":"Tag"},{"type":"id","generated":false,"id":"Tag:cm5ww0t651b710803pcl02cn4","typename":"Tag"},{"type":"id","generated":false,"id":"Tag:cm5ww0z2w1b7708035dpdbq9a","typename":"Tag"},{"type":"id","generated":false,"id":"Tag:cmfp50qhi00lk08324ek37f9g","typename":"Tag"}],"translations({\"where\":{\"language\":{\"id\":\"cjv3kwvoj000u083611381c6o\"}}})":[{"type":"id","generated":false,"id":"PageTranslation:cm9cm9zk6fcoe08033ohijfg9","typename":"PageTranslation"}],"__typename":"Page"},"PageTranslation:cm9cm9zk6fcoe08033ohijfg9":{"id":"cm9cm9zk6fcoe08033ohijfg9","name":"Liberty rebreathers manufacturing - behind the curtains","createdAt":"2025-04-11T10:01:02.789Z","content":{"type":"json","json":{"content":[{"name":"Header","data":{"products":[{"title":"Accessories","description":"Backplates, Consumables. Tanks.","img":{"recommendedSizes":{"width":"235","height":"235"}},"url":""},{"title":"Accessories sets","description":"Protection, maintenance, cleaning.","img":{"recommendedSizes":{"width":"235","height":"235"}},"url":""},{"title":"Spare parts","description":"Spare parts and components.","img":{"recommendedSizes":{"width":"235","height":"235"}},"url":""}
2,{"title":"Spare parts kits","description":"Completly Liberty spare parts kits.","img":{"recommendedSizes":{"width":"235","height":"235"}},"url":""}]},"id":"#0","type":"component","lock":false,"position":1},{"name":"BlogArticle","data":{"title":"Liberty rebreathers manufacturing - behind the curtains","perex":"Step inside the world of Liberty rebreathers. This exclusive behind the scenes story shows how cutting edge CCRs are engineered, tested, and built for deep diving reliability.","content":"## Introduction â Why Weâre Lifting the Curtain\nCurious how a fault tolerant closed circuit rebreather (CCR) is born? This behind the scenes tour reveals exactly **how we turn raw titanium, aerospace grade electronics and decades of dive experience into the [Liberty CCR](https://www.divesoft.com/en/products/ccr-liberty)**. Keep reading to discover the precision machines, the obsessive testing culture andâmost importantlyâthe people who make Liberty the gold standard for technical diving. \n\n> â*The whole point of opening our doors is to prove that every nut, every line of code and every assembled unit can be trusted when youâre 100 m below the surface.*â \nâ AleÅ¡ Procháska, Co founder & CTO \n\nWhat Youâll See in This Walkthrough \n* Rapid prototyping in our in house R&D lab \n* Five axis CNC machining of critical housings \n* Electronics assembly in an ISO class clean zone \n* Big Bertha depth simulation tests to 300 m \n* Real diver feedback loops feeding the next software build \n\n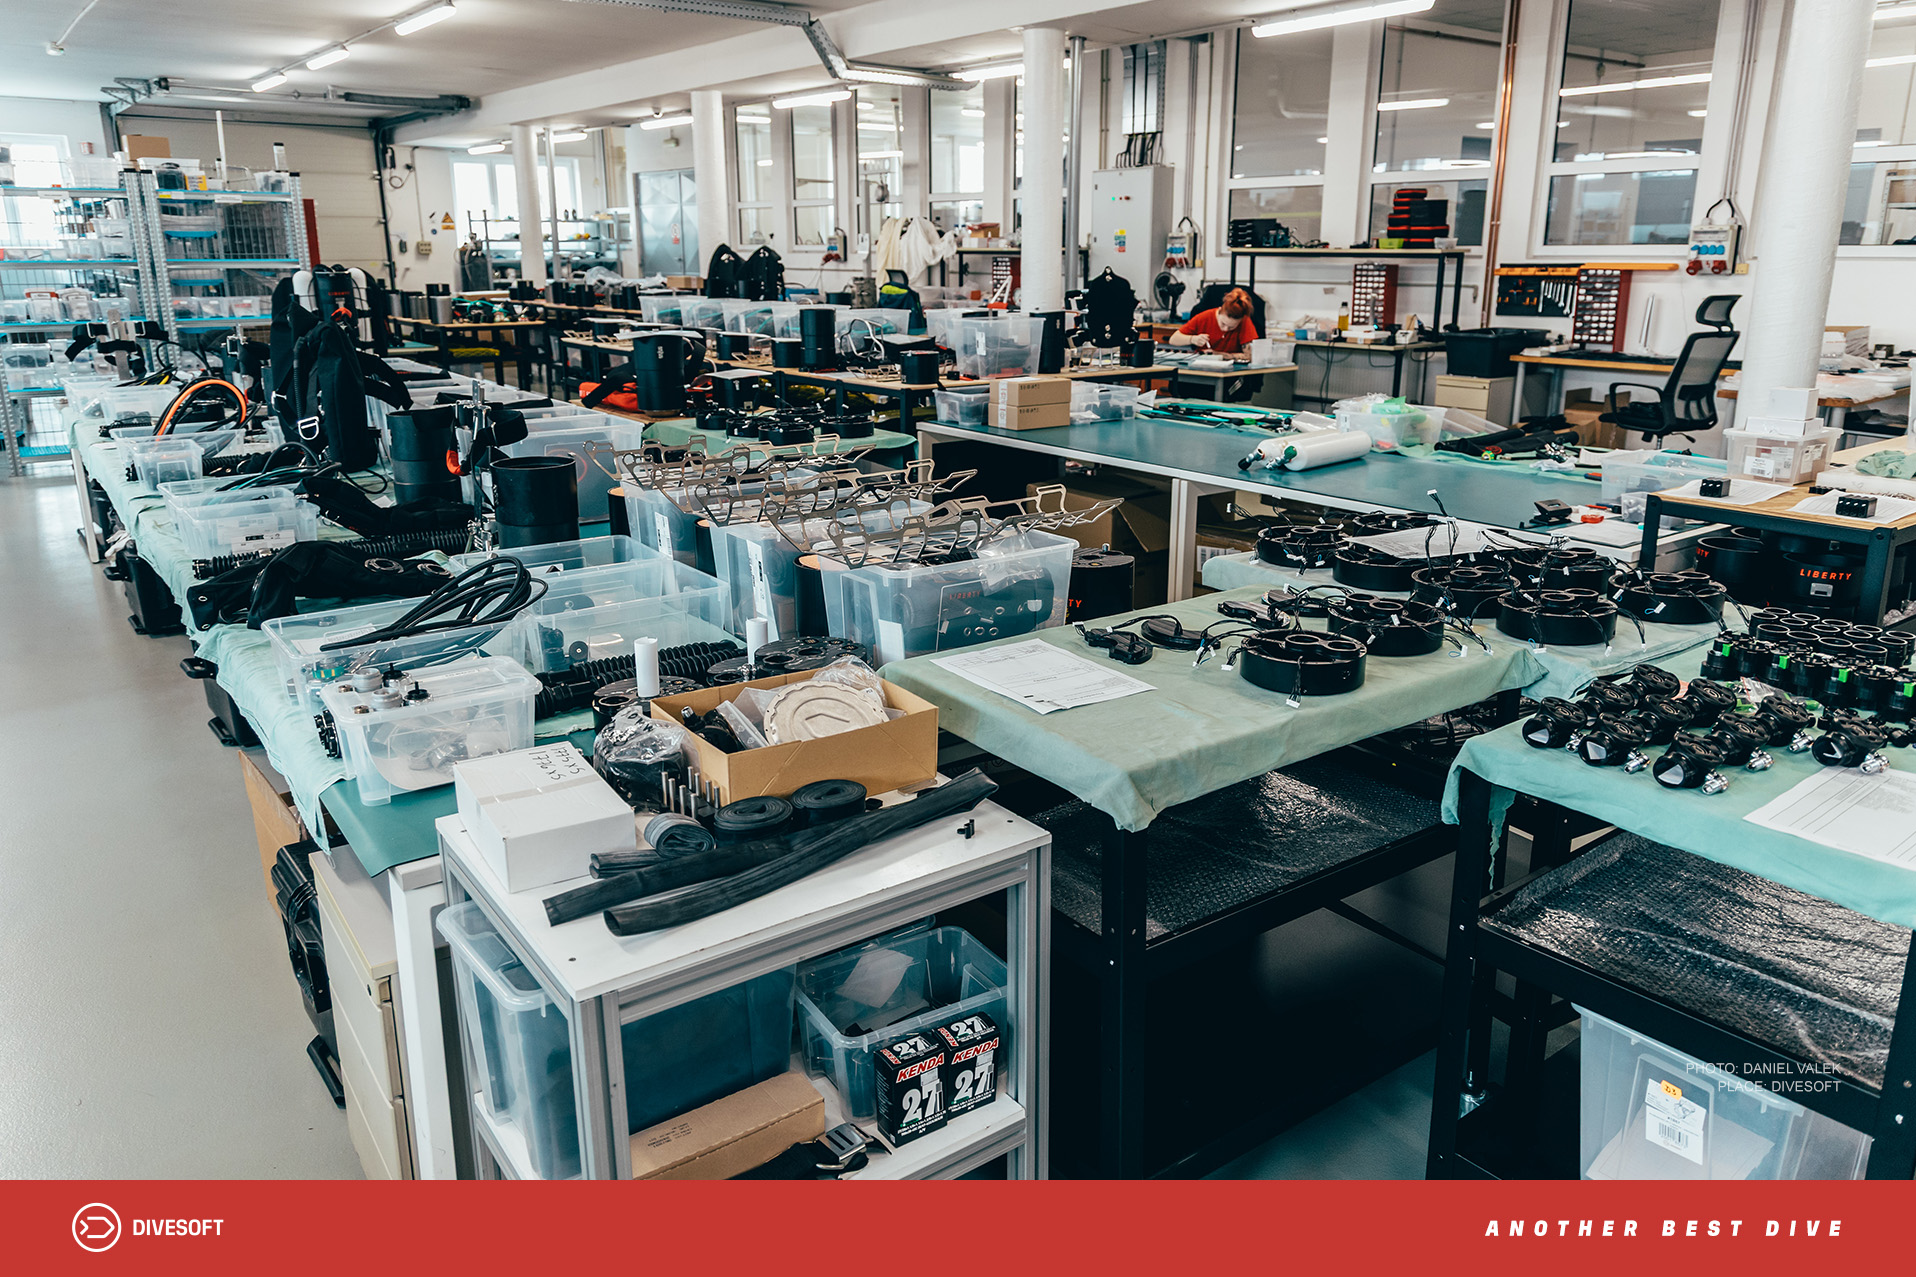\n\n________________________________________\n## Brand Transparency: Engineering Obsession & Passion for Safety\nLiberty is built in **our own state of the art facility just north of Prague**. Controlling the full value chain means we can guarantee: \n* 100 % traceability of every componentâfrom oxygen sensors to O rings. \n* Redundant electronics philosophy: no single failure or even multiple failures can disable the life support loop. \n * [CE & EN 14143 certification](https://foxer360-media-library.s3.eu-central-1.amazonaws.com/divesoft/docs/fbffa38fbe29542d87ed7a2dfe99e836397998b8_cw-pper-1-04-2025-module-beng.pdf) for temperatures 4 â 34â¯Â°C and depths to 100 m (Heliox 10/90). \n\nOur factory was built from what was originally a carpenter's factory, which was in a desperate state. When the owners AleÅ¡ and Lucie bought the building in 2010 they carried out a thorough and costly renovation that turned a complete ruin into a modern, clean and functional world-class facility. \n\nAles Procháska is a precise and technically minded person. His motivation was to create for himself and his speleo diving community a device that can work in all conditions and can be relied on not only on the way to the far ends of the cave, but especially on the way back. He has equipped the robust and cleverly thought-out design with a unique fully redundant control system that is fail-proof. \n\nFor inclusion on the European market, but also as proof of Liberty's quality, we have undergone a CE certification process. Laboratory tests in ANSTI in the UK, Military Technical Institute in the Czech Republic and later in our own fully equipped laboratory prove that Liberty can be relied upon in all circumstances. [Module D certification](https://foxer360-media-library.s3.eu-central-1.amazonaws.com/divesoft/docs/5c1ef7448ed48df14a57f94c01bbb9c02ffa9384_form9-pcw-01-pper-certyfikat-zg-odnosci-z-typem-w-oparciu-o-zapewnienie-jakosci-procesu-produkcj-i-modul-d-edycja-20241126.pdf) proves the quality of our processes and annual audits keep it at the highest level.\n\n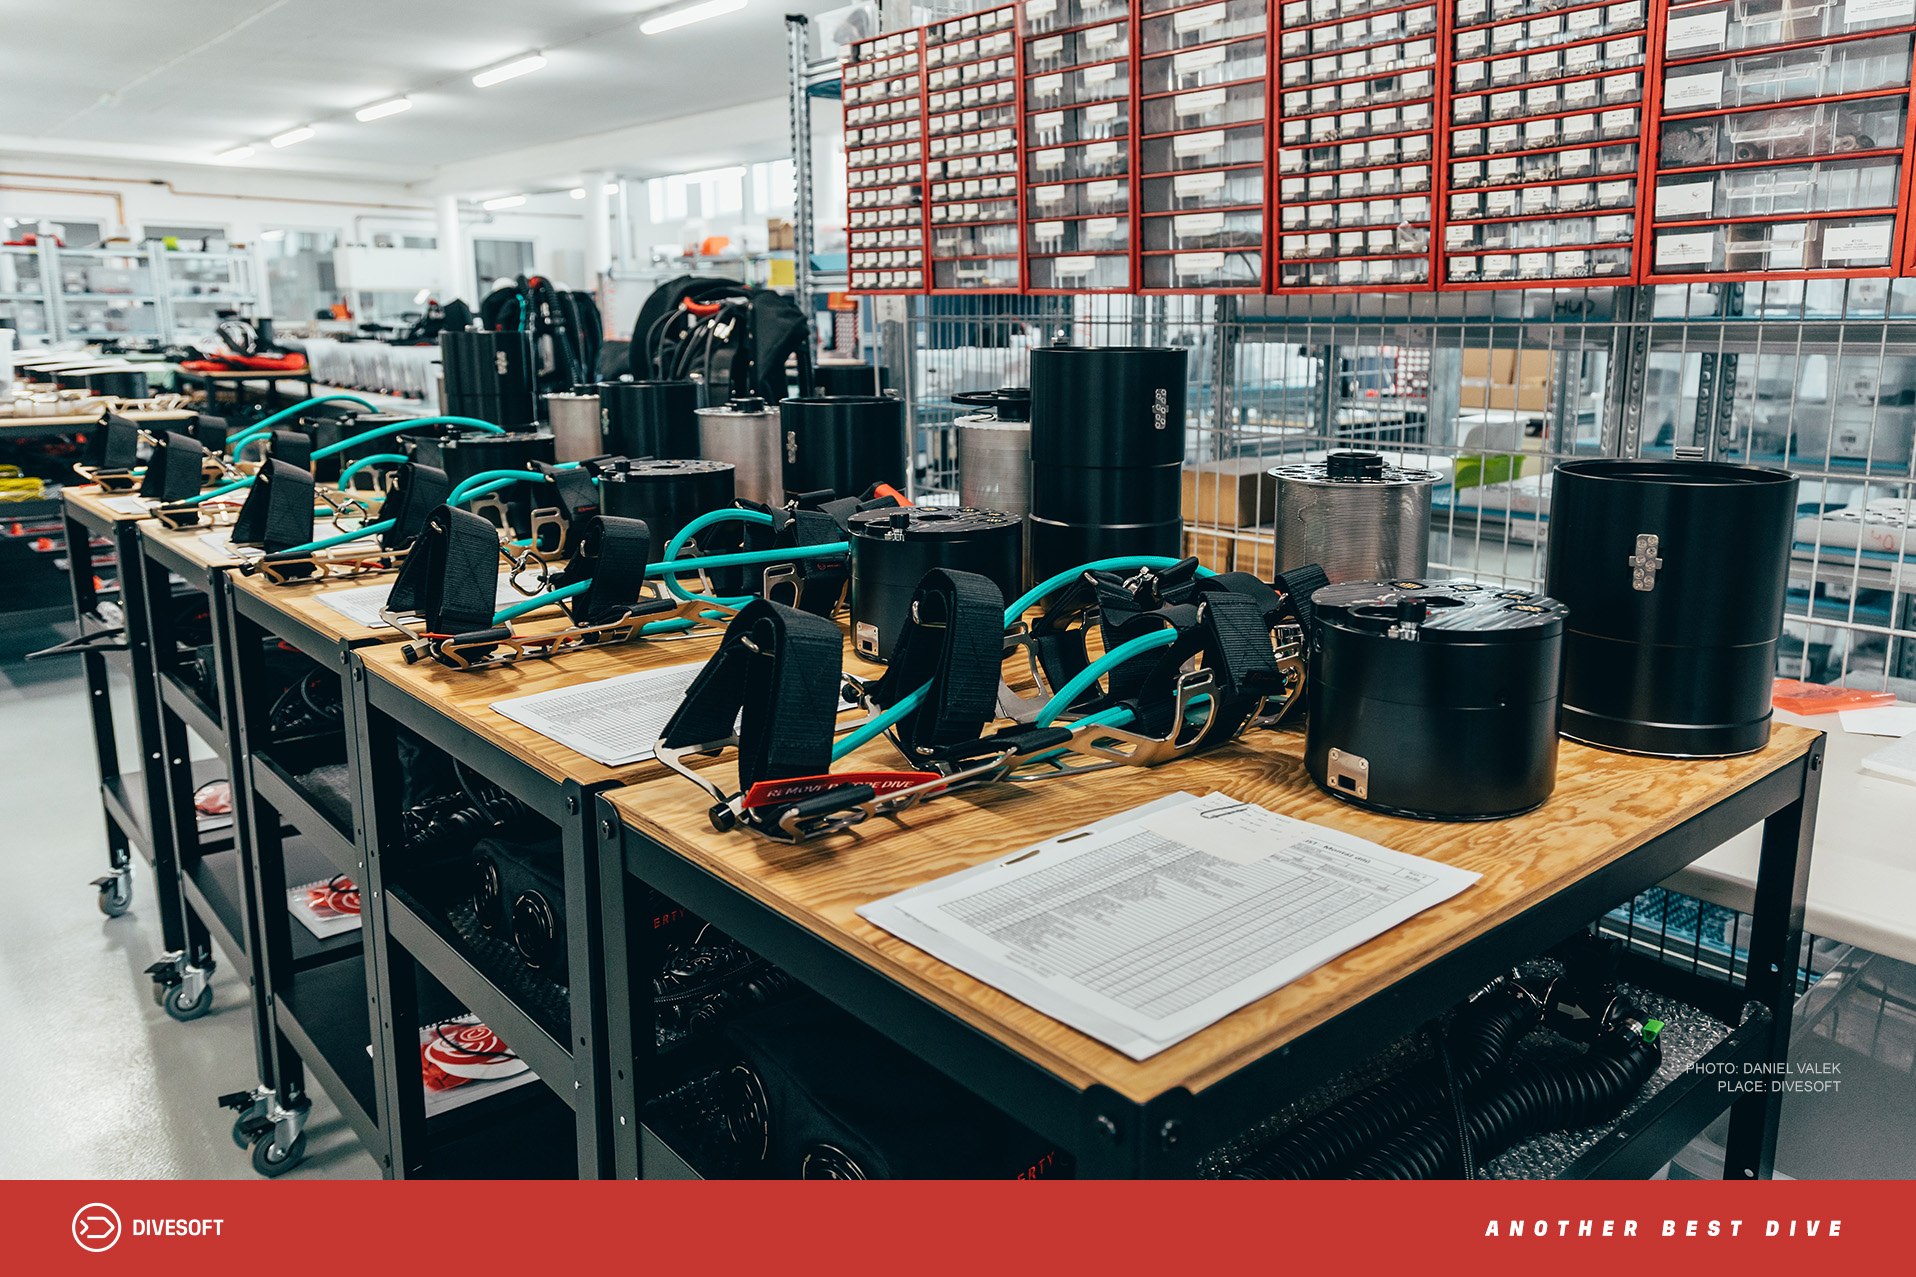\n\n________________________________________\n## Inside the Factory: Step by Step Manufacturing Walk Through\n#### 1 | Design & Prototyping\nOur engineers model every part in SolidWorks and validate it in finite element simulations before 3 D printing functional prototypes within 48 hours. Rapid iteration lets us fail fast on landânot in the water.\n#### 2 | Material Sourcing & CNC Machining\n* Titanium & marine grade stainless steel are delivered with mill certificates.\n* Five axis CNC mills achieve tolerances to ±5 µm on the Liberty head and connectors and all other milled components.\n#### 3 | Electronics & Sensor Integration\nThe electronics are stress tested and their functionality is verified. [Oxygen sensors](https://eshop.divesoft.com/oxygen-sensor-divesoft-22d/3092) are batch checked in a proprietary pressure chamber that c
2orrelates each sensorâs mV output to partial pressureâallowing the Liberty to reject âlazyâ cells automatically.\n#### 4 | Assembly & Functional Testing\nA specially trained and experienced Divesoft technician assembles each unit from the ground up. Once the final quality control checks are completed, the technician passes the unit for final boxing, following a detailed 95-point checklist. \n\nEach unit has its own station and as it grows, so do the entries in the assembly and service log. It's a kind of \"birth certificate\" of the unit. \n\nThere is every component that is assembled into the device, its serial number and every operation that is performed with the unit is recorded. In the same way, all data is entered into the digital system. In this way, every operation and component that has ever been inserted into a particular unit can be traced back perfectly.\n\n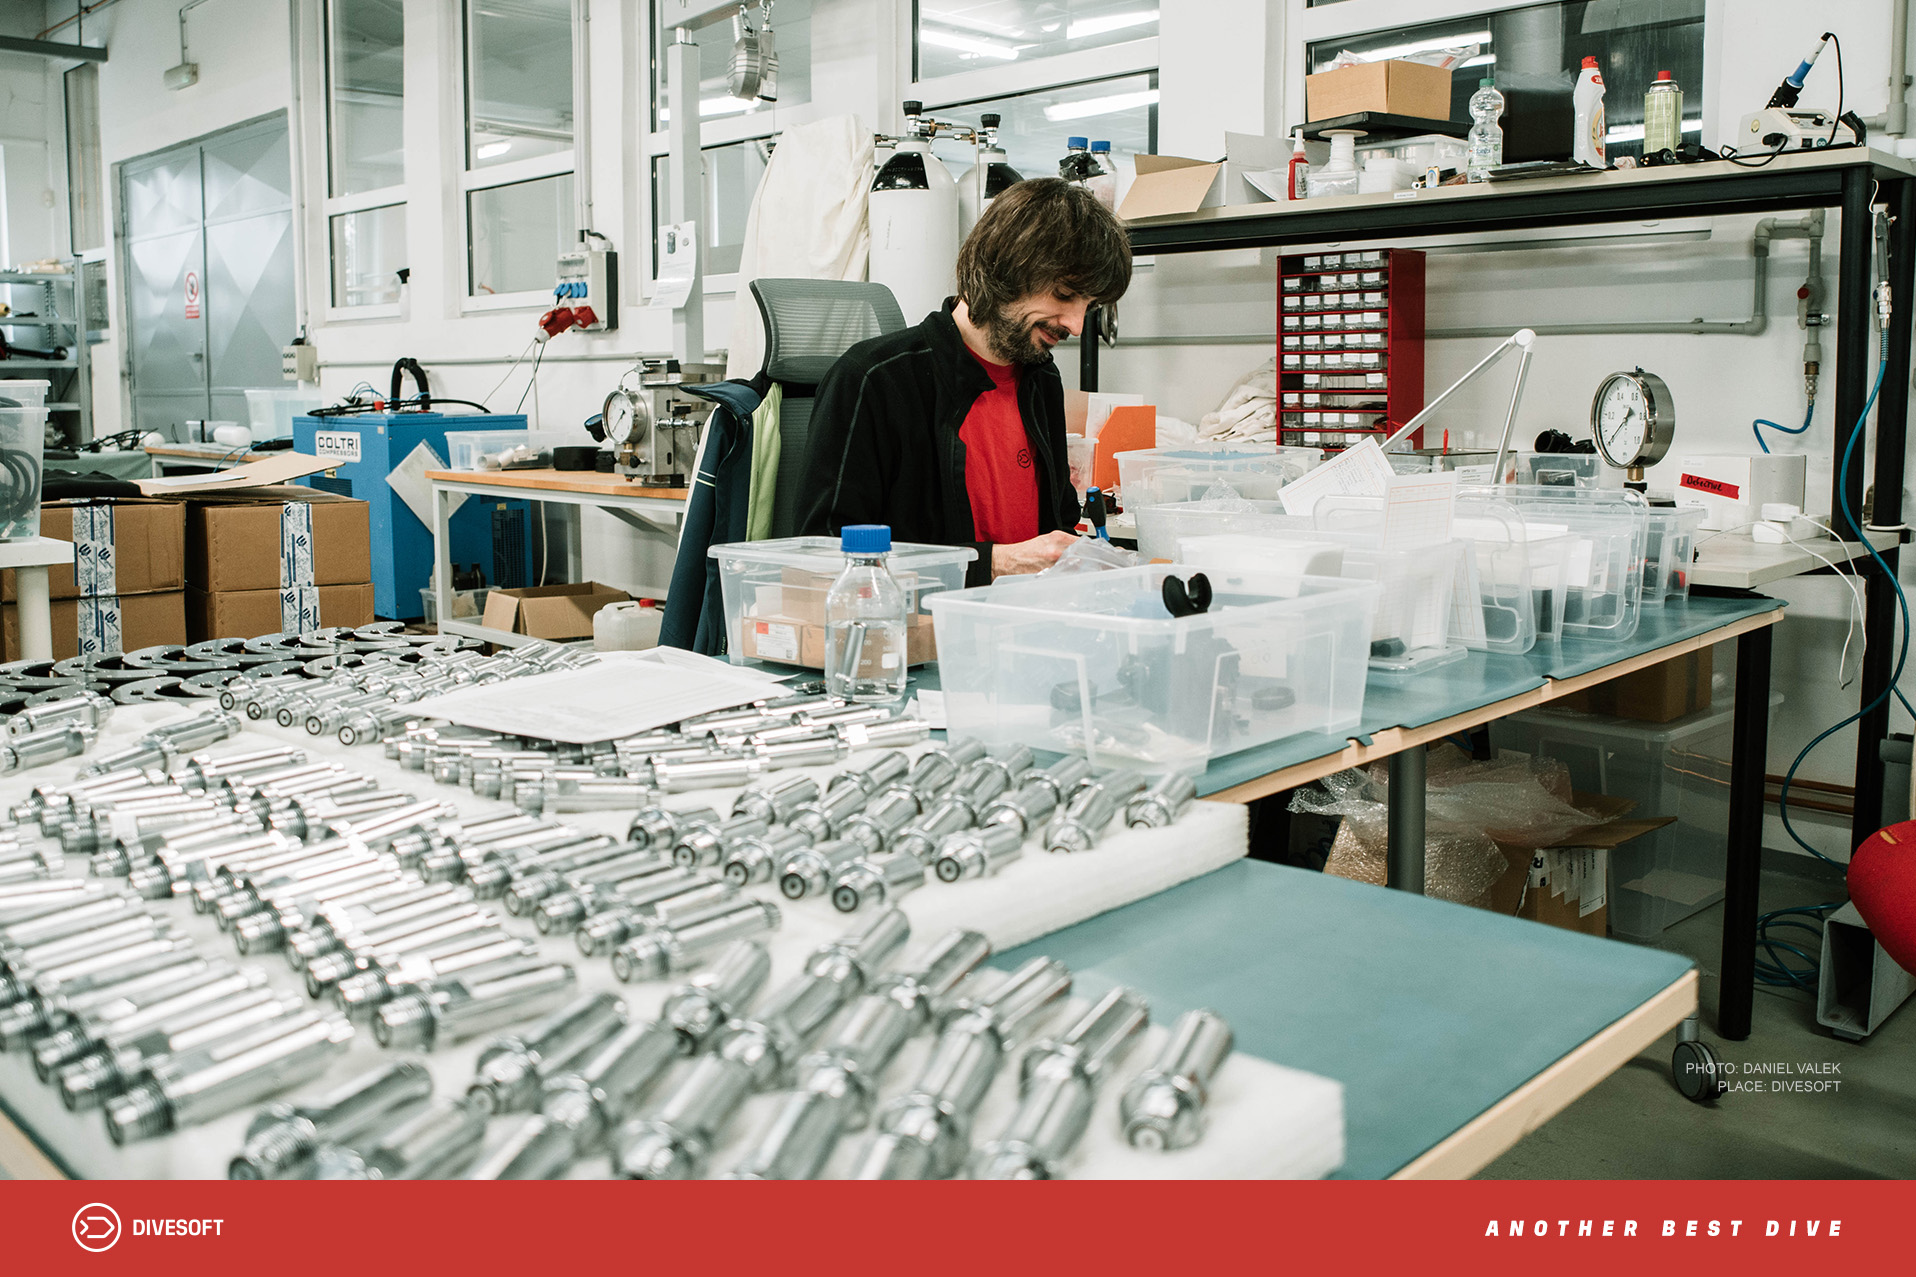\n\n________________________________________\n## Quality Control & Testing Protocols\n#### Depth Simulations on Big Bertha\nLiberty spent countless hours on âIron Manâ inside Big Bertha, a custom pressure chamber capable of simulating 300 m dives. Design of all the components, work of breathing, the sensors, solenoid timings and PPOâ controls were logged at 50â¯Hz so anomalies could be spotted long before the design was finalized and the unit reached its final state. \n\n#### Redundancy Checks\nTwo complete, isolated control boards run in parallel. During testing we force fail each board; the surviving board must maintain loop control within ±0.05 bar. If it canât, the unit is quarantined for root cause analysis.\n\n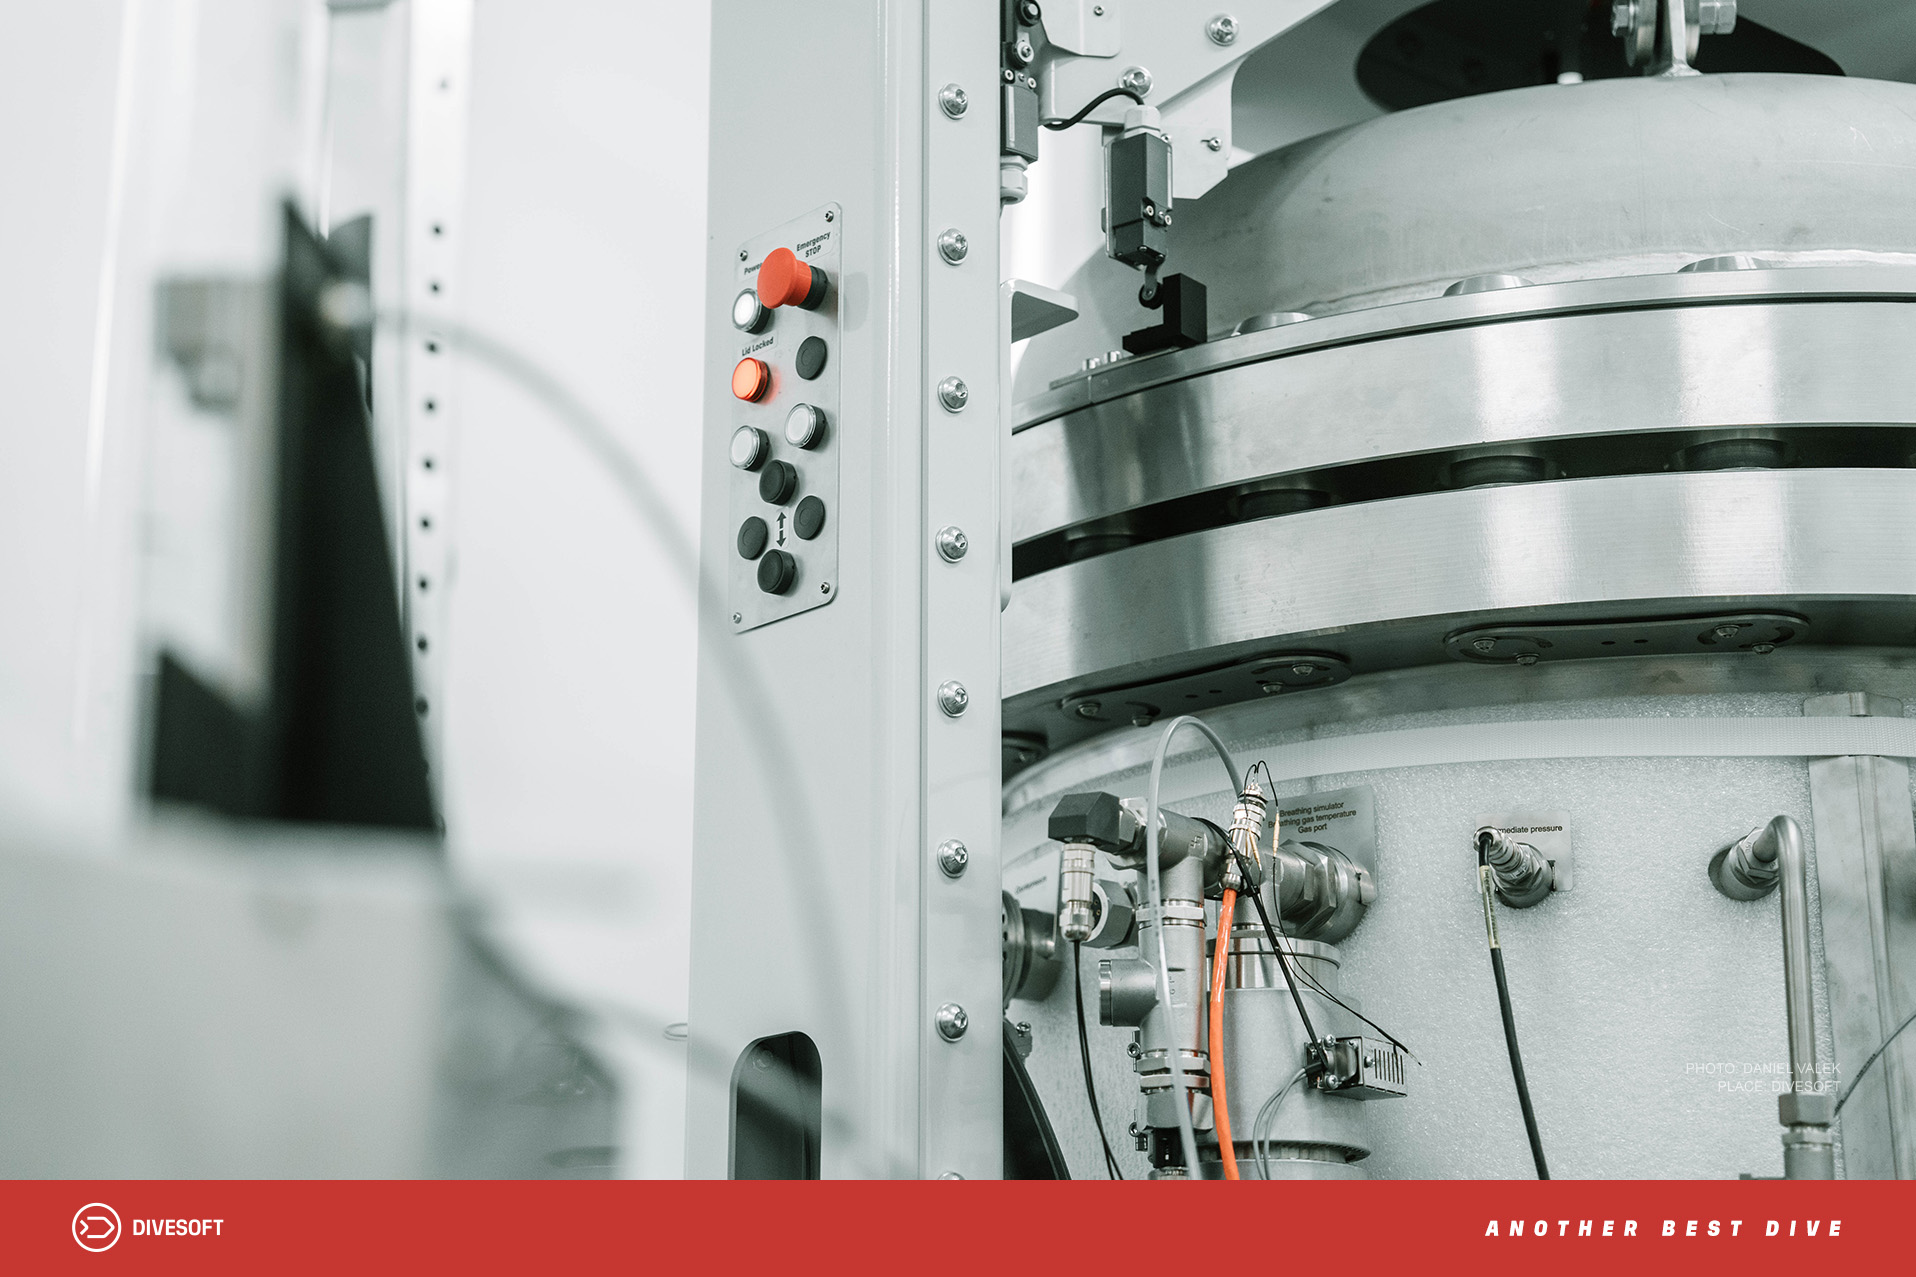\n\n________________________________________\n\n<br>\n\n<div style=\"margin:10px 0; overflow-y: scroll; background:; padding: 10px\">\n <table style=\"min-width: 700px\">\n <tr>\n <td style=\"padding: 10px\" colspan=\"3\">\n <h3>Meet the People Behind Liberty CCRs</h3>\n </td>\n </tr>\n <tr style=\"border-bottom: 2px solid gray;\">\n <th style=\"padding:10px;\">Name</th>\n <th style=\"padding:10px;\">Role</th>\n <th style=\"padding:10px;\">Quote</th>\n </tr>\n <tr style=\"border-bottom: 1px solid gray;\">\n <th style=\"padding:10px;\">AleÅ¡ Procháska</th>\n <td style=\"padding:10px;\">Co founder & CTO</td>\n <td style=\"padding:10px;\">âIf we canât measure it, we redesign until we can.â < 2.4â¯J/L @ 100â¯m.v</td>\n </tr>\n <tr style=\"border-bottom: 1px solid gray;\">\n <th style=\"padding:10px;\">OndÅej Zouna</th>\n <td style=\"padding:10px;\">Chief fitter</td>\n <td style=\"padding:10px;\">âI treat every head like itâs going on my own back.â</td>\n </tr>\n <tr style=\"border-bottom: 1px solid gray;\">\n <th style=\"padding:10px;\">Martin TopÅ¡</th>\n <td style=\"padding:10px;\">Designer</td>\n <td style=\"padding:10px;\">âRedundancy is great, but knowing why a component failed is better.â</td> \n\t\t\t </tr>\n <tr style=\"border-bottom: 1px solid gray;\">\n <th style=\"padding:10px;\">Jakub Å imánek</th>\n <td style=\"padding:10px;\">Factory Trainer</td>\n <td style=\"padding:10px;\">âMy favourite sound is no bubbles at 90â¯m.â</td> \n\n\n\t\t\t\n<br>\n\nName\tRole\tQuote\nAleÅ¡ Procháska\tCo founder & CTO\tâIf we canât measure it, we redesign until we can.â\nOndÅej Zouna\tChief fitter\tâI treat every head like itâs going on my own back.â\nMartin TopÅ¡\tDesigner\tâRedundancy is great, but knowing why a component failed is better.â\nJakub Å imánek\tFactory Trainer\tâMy favourite sound is no bubbles at 90â¯m.â\n________________________________________\n## How Our Philosophy Shapes the Product\n#### Safety First\nDual independent power supplies and full sensor voting keep you breathing even in the case of multiple failures. \n\n#### Modularity \n* Backmount or sidemount conversions use the same core electronicsâfuture proofing your investment.\nRelentless Innovation \n* Recent firmware updates have introduced Closed Cylinder Detection, an integrated splash checklist accessible directly on the handset, and the unique bailout CCR mode, among a range of other hardware and software innovations.\n\n#### Real Diver Feedback Loops\nWe work with a large community of test divers. We actively communicate with them, and we pull dive logs, correlate them with user interviews and schedule sprint reviews; 70 % of firmware revisions originate from field feedback.\n#### Ready to Dive Deeper?\nâ¢\tBook a factory tour: Walk the production line in person.\nâ¢\tHave questions? Contact our team or schedule a demo dive.\nYour next great adventure starts with gear built by people who dive as hard as you do.\n________________________________________\n\nAuthor: [Jakub Å imánek](https://www.divesoft.com/en/about-us/jakub-simanek)","showTags":false,"showDate":true,"image":{"mimetype":"image/jpeg","size":770676,"hash":"9d77160586fd9c9e93f2dcf9810434be2b9c7bf6","id":"cmcvno0tbpspb0850xyza6wsp","filename":"divesoft-photo-209-1.jpg","category":"divesoft/","type":"image"},"publishDate":"07/09/2025"},"id":"#2","type":"component","lock":false,"position":2},{"name":"ProductShowcase","data":{"backgroundColor":"#ffffff","isTextDark":true,"isImageRight":false,"image":{"recommendedSizes":{"width":"485","height":"485"},"mimetype":"image/png","size":1301657,"hash":"43e9e651a9f52d00f08256ebeafeddc32164c11f","id":"cm737a5egjeyt08505ycj0rdm","filename":"divesoft-app-202502-01.png","category":"divesoft/","type":"image"},"imageMobile":{"recommendedSizes":{"width":"510","height":"510"}},"isTitleH1":false,"title":"Divesoft.app","subtitle":"Plan your decompression, gasses, utilize checklists, check your logs + more.","description":"All for Free.","hideDescriptionOnMobile":false,"areButtons":false,"firstTitle":"Learn more >","firstUrl":{"url":"/en/app","pageId":"ckfccnc4a98bx0788f7enal83"},"secondTitle":"Configurator >","secondUrl":""},"id":"#21","type":"component","lock":false,"position":4},{"name":"Footer","data":{"copyrights":"Copyright © 2019 Divesoft LLC All rights reserved.","facebookUrl":{"urlNewWindow":true,"url":"https://www.facebook.com/divesoft/"},"youtubeUrl":{"url":"https://www.youtube.com/@divesoft_tv","urlNewWindow":true},"instagramUrl":{"url":"https://www.instagram.com/divesoft/","urlNewWindow":true},"contacts":"**Divesoft s.r.o.** \nHálkova 2495 \n413 01 Roudnice nad Labem \nCzech Republic \nTel.: +420 416 857 057 \nE-mail: [email protected]","twitterUrl":{"url":"","urlNewWindow":true,"pageId":"cjv3l26tp004p0836i54n4u7a"}},"id":"#1","type":"component","lock":false,"position":5}],"id":"root","idBuffer":"#45","lastCommit":"9a456c48-8f47-4e3b-a899-30d8d20aa78f"}},"annotations":[],"language":{"type":"id","generated":false,"id":"Language:cjv3kwvoj000u083611381c6o","typename":"Language"},"__typename":"PageTranslation"},"Page:cm9cmaa8qfcop0803sk0u4y0h":{"id":"cm9cmaa8qfcop0803sk0u4y0h","type":{"type":"id","generated":false,"id":"PageType:cjv3l213x004f08366hjufttp","typename":"PageType"},"tags":[{"type":"id","generated":false,"id":"Tag:ckp59jt9n48lj0788mfuqrhym","typename":"Tag"},{"type":"id","generated":false,"id":"Tag:cmgfchuc23glr0832td37smec","typename":"Tag"}],"translations({\"where\":{\"language\":{\"id\":\"cjv3kwvoj000u083611381c6o\"}}})":[{"type":"id","generated":false,"id":"PageTranslation:cm9cmaa94fcow0803ln9ys1sw","typename":"PageTranslation"}],"__typename":"Page"},"PageTranslation:cm9cmaa94fcow0803ln9ys1sw":{"id":"cm9cmaa94fcow0803ln9ys1sw","name":"Best technical diving locations","createdAt":"2025-04-11T10:01:16.647Z","content":{"type":"json","json":{"content":[{"name":"Header","data":{"products":[{"title":"Accessories","description":"Backplates, Consumables. Tanks.","img":{"recommendedSizes":{"width":"235","height":"235"}},"url":""},{"title":"Accessories sets","description":"Protection, maintenance, cleaning.","img":{"recommendedSizes":{"width":"235","height":"235"}},"url":""},{"title":"Spare parts","description":"Spare parts and components.","img":{"recommendedSizes":{"width":"235","height":"235"}},"url":""}
2,{"title":"Spare parts kits","description":"Completly Liberty spare parts kits.","img":{"recommendedSizes":{"width":"235","height":"235"}},"url":""}]},"id":"#0","type":"component","lock":false,"position":0},{"name":"Footer","data":{"copyrights":"Copyright © 2019 Divesoft LLC All rights reserved.","facebookUrl":"","youtubeUrl":"","instagramUrl":"","contacts":"**Divesoft, s.r.o.** Hálkova 2495 413 01 Roudnice nad Labem Äeská republika Tel.: +420 416 857 057 E-mail: [email protected]"},"id":"#1","type":"component","lock":false,"position":1}],"id":"root","idBuffer":"#2","lastCommit":"fd7ba897-6b02-494c-ba3f-fc8ace8e755a"}},"annotations":[],"language":{"type":"id","generated":false,"id":"Language:cjv3kwvoj000u083611381c6o","typename":"Language"},"__typename":"PageTranslation"},"Page:cm9cmakodfcp708036cgi4tz0":{"id":"cm9cmakodfcp708036cgi4tz0","type":{"type":"id","generated":false,"id":"PageType:cjv3l213x004f08366hjufttp","typename":"PageType"},"tags":[{"type":"id","generated":false,"id":"Tag:ckp59jt9n48lj0788mfuqrhym","typename":"Tag"},{"type":"id","generated":false,"id":"Tag:cmgfchuc23glr0832td37smec","typename":"Tag"}],"translations({\"where\":{\"language\":{\"id\":\"cjv3kwvoj000u083611381c6o\"}}})":[{"type":"id","generated":false,"id":"PageTranslation:cm9cmakorfcpe08034abd70eg","typename":"PageTranslation"}],"__typename":"Page"},"PageTranslation:cm9cmakorfcpe08034abd70eg":{"id":"cm9cmakorfcpe08034abd70eg","name":"CCR diving experience: interviews with our best instructors","createdAt":"2025-04-11T10:01:30.171Z","content":{"type":"json","json":{"content":[{"name":"Header","data":{"products":[{"title":"Accessories","description":"Backplates, Consumables. Tanks.","img":{"recommendedSizes":{"width":"235","height":"235"}},"url":""},{"title":"Accessories sets","description":"Protection, maintenance, cleaning.","img":{"recommendedSizes":{"width":"235","height":"235"}},"url":""},{"title":"Spare parts","description":"Spare parts and components.","img":{"recommendedSizes":{"width":"235","height":"235"}},"url":""},{"title":"Spare parts kits","description":"Completly Liberty spare parts kits.","img":{"recommendedSizes":{"width":"235","height":"235"}},"url":""}]},"id":"#0","type":"component","lock":false,"position":0},{"name":"BlogArticle","data":{"title":"CCR First Dive: Experience for Life","perex":"## From Steam Engines to Bullet Trains\nWhen you dive with a classic open-circuit system, itâs a bit like riding an old steam trainâbubbles splash behind you like steam from a locomotive, you hear the gentle gurgle of your regulator, and everything runs on well-practiced habits. As you inhale, youâll float up a bit; as you exhale, youâll drift down. Youâve been balancing your buoyancy this way since your first Open Water course, and by now youâre really good at itâyou can hover in place as if nailed to the seabed. But what if someone took away that locomotive and plunked you into a Shinkansen? Thatâs exactly the feeling I had on my very first dive with a CCR (Closed Circuit Rebreather).","content":"\n\n## Time to Take the Plunge⦠But How?\nMy first encounter with a CCR was anything but ordinary. At that time, I was already a technical diving instructor and had been studying CCRs with great enthusiasm for a long time. It happened shortly after I began working for DIVESOFT. The Liberty was still a functional prototype awaiting its first CE certification, and I was prepping it for testing.\n\n## An Anchor Hunt, CCR-Style \nOur in-house programmer, nicknamed âTermitâ (a tireless workhorse and coding elder statesman), owns a boat on the OrlÃk reservoir. He managed to lose his anchor somewhere in the middle of a cove and asked me for help retrieving it. Of course, we leapt at the chance! AleÅ¡ Procháska suggested we do the job on rebreathersâand I was thrilled⦠but diving my CCR for the first time while hunting for a lost anchor?\n\n## Assembling the Prototype: First Impressions \nI set up the unit almost entirely on my ownâI knew it inside out. This prototype differed from todayâs production Liberty units in several key ways: it featured a front-mounted counterlung (FMCL) instead of the now-common back-mounted style; its electronics ran on two sets of six AA batteries that had to be swapped after every dive; the Automatic Diluent Valve (ADV) sat at the bottom of the counterlung and was completely different in design; and both inhale and exhale counterlungs had large overpressure relief valves. Many solutions were awaiting final tweaks, so prepping the prototype wasnât without its challenges.\
2n\n## Suiting Up and Diving In \nAleÅ¡ coached me through a final checklist, and then I donned the rig. My first impression wasnât greatâtwo bulky counterlungs on my chest and a thick corrugated hose whipping around made me feel clumsy, and the sun beat down mercilessly. But the moment we slipped beneath the surface, all awkwardness vanished. My senses snapped to attention: my eyes darted side to side, my ears strained for silence, and my fingers hovered over the inflator, ready to perform the subtle lung-compensating work Iâd spent years perfecting.\n\n## Expectations vs. Reality Underwater \nI anticipated the hot blast of air from the scrubber, but at first I couldnât distinguish it. I expected total silence, yet when I focused closely, the sounds reminded me of breathing through a snorkel. The whirr of the solenoid was barely audibleâand in shallow water, it threw me off balance when it injected oxygen just after Iâd achieved perfect trim.\n\n## The Dive: Crystal Clarity and Quick Recovery \nItâs been ages, but I still remember that sunlit, golden waterâunusually clear for this spot. We found the anchor quickly, around 22 meters down. I was amazed by the razor-sharp displays on our handheld units, glowing like twin jewels in the dusky depths, clearly showing every vital reading.\n\n## The Ascent Surprise: Mastering Buoyancy Again \nSurfacing was my biggest shock. Iâd anticipated the different buoyancy, the silence, and all the other CCR quirksâbut I wasnât prepared for the pressure in my lungs during ascent. On open-circuit, you simply breathe out and let the excess gas escape. Here, I learned fast that I had to actively purge gas outside the loop or crack the overpressure valves.\n\nI emerged utterly exhilarated. I wished AleÅ¡ didnât have to rush homeâI could have floated there until the scrubber ran dry. In the years that followed, however, I more than made up for it.\n\n## From Student to Mentor: A CCR Journey \nSince then, Iâve logged hundredsâif not thousandsâof hours on the Liberty, and Iâve guided countless divers, instructors, and instructor-trainers into the CCR world. Iâve tried other units along the way, but itâs hard to beat starting out on the very best.\n\n\n\n<br>\n\n\nAuthor: [Jakub Å imánek](https://www.divesoft.com/en/about-us/jakubsimanek)","showTags":false,"showDate":true,"image":{"mimetype":"image/jpeg","size":819042,"hash":"694bdf9e7e18599ba2909b431cceda1a6a11664b","id":"cmanzd6vfzkaj0850kmocpn4k","filename":"divesoft-photo-187-1.jpg","category":"divesoft/","type":"image"},"publishDate":"07/22/2025"},"id":"#2","type":"component","lock":false,"position":1},{"name":"ProductShowcase","data":{"backgroundColor":"#ffffff","isTextDark":true,"isImageRight":false,"image":{"recommendedSizes":{"width":"485","height":"485"},"mimetype":"image/png","size":1301657,"hash":"43e9e651a9f52d00f08256ebeafeddc32164c11f","id":"cm737a5egjeyt08505ycj0rdm","filename":"divesoft-app-202502-01.png","category":"divesoft/","type":"image"},"imageMobile":{"recommendedSizes":{"width":"510","height":"510"}},"isTitleH1":false,"title":"Divesoft.app","subtitle":"Plan your decompression, gasses, utilize checklists, check your logs + more.","description":"All for Free.","hideDescriptionOnMobile":false,"areButtons":false,"firstTitle":"Learn more >","firstUrl":{"url":"/en/app","pageId":"ckfccnc4a98bx0788f7enal83"},"secondTitle":"Configurator >","secondUrl":""},"id":"#21","type":"component","lock":false,"position":20},{"name":"Footer","data":{"copyrights":"Copyright © 2019 Divesoft LLC All rights reserved.","facebookUrl":{"urlNewWindow":true,"url":"https://www.facebook.com/divesoft/"},"youtubeUrl":{"url":"https://www.youtube.com/@divesoft_tv","urlNewWindow":true},"instagramUrl":{"url":"https://www.instagram.com/divesoft/","urlNewWindow":true},"contacts":"**Divesoft s.r.o.** \nHálkova 2495 \n413 01 Roudnice nad Labem \nCzech Republic \nTel.: +420 416 857 057 \nE-mail: [email protected]","twitterUrl":{"url":"","urlNewWindow":true,"pageId":"cjv3l26tp004p0836i54n4u7a"}},"id":"#1","type":"component","lock":false,"position":21}],"id":"root","idBuffer":"#40","lastCommit":"a3a19693-9f07-4f88-ab3d-6737f901630f"}},"annotations":[],"language":{"type":"id","generated":false,"id":"Language:cjv3kwvoj000u083611381c6o","typename":"Language"},"__typename":"PageTranslation"},"Page:cm9cmaw8ofcpp08036xtrr2xl":{"id":"cm9cmaw8ofcpp08036xtrr2xl","type":{"type":"id","generated":false,"id":"PageType:cjv3l213x004f08366hjufttp","typename":"PageType"},"tags":[{"type":"id","generated":false,"id":"Tag:ckp59jt9n48lj0788mfuqrhym","typename":"Tag"},{"type":"id","generated":false,"id":"Tag:cmgfchuc23glr0832td37smec","typename":"Tag"}],"translations({\"where\":{\"language\":{\"id\":\"cjv3kwvoj000u083611381c6o\"}}})":[{"type":"id","generated":false,"id":"PageTranslation:cm9cmaw94fcpw0803o2ut7emr","typename":"PageTranslation"}],"__typename":"Page"},"PageTranslation:cm9cmaw94fcpw0803o2ut7emr":{"id":"cm9cmaw94fcpw0803o2ut7emr","name":"Diving with Liberty rebreather: stories of inspiration","createdAt":"2025-04-11T10:01:45.160Z","content":{"type":"json","json":{"content":[{"name":"Header","data":{"products":[{"title":"Accessories","description":"Backplates, Consumables. Tanks.","img":{"recommendedSizes":{"width":"235","height":"235"}},"url":""},{"title":"Accessories sets","description":"Protection, maintenance, cleaning.","img":{"recommendedSizes":{"width":"235","height":"235"}},"url":""},{"title":"Spare parts","description":"Spare parts and components.","img":{"recommendedSizes":{"width":"235","height":"235"}},"url":""}
2,{"title":"Spare parts kits","description":"Completly Liberty spare parts kits.","img":{"recommendedSizes":{"width":"235","height":"235"}},"url":""}]},"id":"#0","type":"component","lock":false,"position":0},{"name":"Footer","data":{"copyrights":"Copyright © 2019 Divesoft LLC All rights reserved.","facebookUrl":"","youtubeUrl":"","instagramUrl":"","contacts":"**Divesoft, s.r.o.** Hálkova 2495 413 01 Roudnice nad Labem Äeská republika Tel.: +420 416 857 057 E-mail: [email protected]"},"id":"#1","type":"component","lock":false,"position":1}],"id":"root","idBuffer":"#2","lastCommit":"fd7ba897-6b02-494c-ba3f-fc8ace8e755a"}},"annotations":[],"language":{"type":"id","generated":false,"id":"Language:cjv3kwvoj000u083611381c6o","typename":"Language"},"__typename":"PageTranslation"},"Page:cm9cmb4xvfcq70803npa2a2qo":{"id":"cm9cmb4xvfcq70803npa2a2qo","type":{"type":"id","generated":false,"id":"PageType:cjv3l213x004f08366hjufttp","typename":"PageType"},"tags":[{"type":"id","generated":false,"id":"Tag:ckp59jt9n48lj0788mfuqrhym","typename":"Tag"},{"type":"id","generated":false,"id":"Tag:cmgfchuc23glr0832td37smec","typename":"Tag"}],"translations({\"where\":{\"language\":{\"id\":\"cjv3kwvoj000u083611381c6o\"}}})":[{"type":"id","generated":false,"id":"PageTranslation:cm9cmb4yafcqe0803c1evfxh1","typename":"PageTranslation"}],"__typename":"Page"},"PageTranslation:cm9cmb4yafcqe0803c1evfxh1":{"id":"cm9cmb4yafcqe0803c1evfxh1","name":"Professional diving: why do you NEED a rebreather?","createdAt":"2025-04-11T10:01:56.434Z","content":{"type":"json","json":{"content":[{"name":"Header","data":{"products":[{"title":"Accessories","description":"Backplates, Consumables. Tanks.","img":{"recommendedSizes":{"width":"235","height":"235"}},"url":""},{"title":"Accessories sets","description":"Protection, maintenance, cleaning.","img":{"recommendedSizes":{"width":"235","height":"235"}},"url":""},{"title":"Spare parts","description":"Spare parts and components.","img":{"recommendedSizes":{"width":"235","height":"235"}},"url":""},{"title":"Spare parts kits","description":"Completly Liberty spare parts kits.","img":{"recommendedSizes":{"width":"235","height":"235"}},"url":""}]},"id":"#0","type":"component","lock":false,"position":0},{"name":"Footer","data":{"copyrights":"Copyright © 2019 Divesoft LLC All rights reserved.","facebookUrl":"","youtubeUrl":"","instagramUrl":"","contacts":"**Divesoft, s.r.o.** Hálkova 2495 413 01 Roudnice nad Labem Äeská republika Tel.: +420 416 857 057 E-mail: [email protected]"},"id":"#1","type":"component","lock":false,"position":1}],"id":"root","idBuffer":"#2","lastCommit":"fd7ba897-6b02-494c-ba3f-fc8ace8e755a"}},"annotations":[],"language":{"type":"id","generated":false,"id":"Language:cjv3kwvoj000u083611381c6o","typename":"Language"},"__typename":"PageTranslation"},"Page:cm9cmbvrqfcqp0803v4w6227l":{"id":"cm9cmbvrqfcqp0803v4w6227l","type":{"type":"id","generated":false,"id":"PageType:cjv3l213x004f08366hjufttp","typename":"PageType"},"tags":[{"type":"id","generated":false,"id":"Tag:ckp59jt9n48lj0788mfuqrhym","typename":"Tag"},{"type":"id","generated":false,"id":"Tag:cmgfchuc23glr0832td37smec","typename":"Tag"}],"translations({\"where\":{\"language\":{\"id\":\"cjv3kwvoj000u083611381c6o\"}}})":[{"type":"id","generated":false,"id":"PageTranslation:cm9cmbvs4fcqw0803bd6wdwjb","typename":"PageTranslation"}],"__typename":"Page"},"PageTranslation:cm9cmbvs4fcqw0803bd6wdwjb":{"id":"cm9cmbvs4fcqw0803bd6wdwjb","name":"Liberty rebreathers CO2 scrubber duration: how often should you change","createdAt":"2025-04-11T10:02:31.203Z","content":{"type":"json","json":{"content":[{"name":"Header","data":{"products":[{"title":"Accessories","description":"Backplates, Consumables. Tanks.","img":{"recommendedSizes":{"width":"235","height":"235"}},"url":""},{"title":"Accessories sets","description":"Protection, maintenance, cleaning.","img":{"recommendedSizes":{"width":"235","height":"235"}},"url":""},{"title":"Spare parts","description":"Spare parts and components.","img":{"recommendedSizes":{"width":"235","height":"235"}},"url":""}
2,{"title":"Spare parts kits","description":"Completly Liberty spare parts kits.","img":{"recommendedSizes":{"width":"235","height":"235"}},"url":""}]},"id":"#0","type":"component","lock":false,"position":0},{"name":"Footer","data":{"copyrights":"Copyright © 2019 Divesoft LLC All rights reserved.","facebookUrl":"","youtubeUrl":"","instagramUrl":"","contacts":"**Divesoft, s.r.o.** Hálkova 2495 413 01 Roudnice nad Labem Äeská republika Tel.: +420 416 857 057 E-mail: [email protected]"},"id":"#1","type":"component","lock":false,"position":1}],"id":"root","idBuffer":"#2","lastCommit":"fd7ba897-6b02-494c-ba3f-fc8ace8e755a"}},"annotations":[],"language":{"type":"id","generated":false,"id":"Language:cjv3kwvoj000u083611381c6o","typename":"Language"},"__typename":"PageTranslation"},"Page:cm9cmceztfcr70803bovcofh0":{"id":"cm9cmceztfcr70803bovcofh0","type":{"type":"id","generated":false,"id":"PageType:cjv3l213x004f08366hjufttp","typename":"PageType"},"tags":[{"type":"id","generated":false,"id":"Tag:cjv3szrcv01bz0836yo8myb0r","typename":"Tag"},{"type":"id","generated":false,"id":"Tag:cm5ww05zc1b5d0803zglvz927","typename":"Tag"},{"type":"id","generated":false,"id":"Tag:cmfp50qhi00lk08324ek37f9g","typename":"Tag"}],"translations({\"where\":{\"language\":{\"id\":\"cjv3kwvoj000u083611381c6o\"}}})":[{"type":"id","generated":false,"id":"PageTranslation:cm9cmcf06fcre0803ia2g0enw","typename":"PageTranslation"}],"__typename":"Page"},"PageTranslation:cm9cmcf06fcre0803ia2g0enw":{"id":"cm9cmcf06fcre0803ia2g0enw","name":"CCR first dive: experience for life","createdAt":"2025-04-11T10:02:56.117Z","content":{"type":"json","json":{"content":[{"name":"Header","data":{"products":[{"title":"Accessories","description":"Backplates, Consumables. Tanks.","img":{"recommendedSizes":{"width":"235","height":"235"}},"url":""},{"title":"Accessories sets","description":"Protection, maintenance, cleaning.","img":{"recommendedSizes":{"width":"235","height":"235"}},"url":""},{"title":"Spare parts","description":"Spare parts and components.","img":{"recommendedSizes":{"width":"235","height":"235"}},"url":""},{"title":"Spare parts kits","description":"Completly Liberty spare parts kits.","img":{"recommendedSizes":{"width":"235","height":"235"}},"url":""}]},"id":"#0","type":"component","lock":false,"position":0},{"name":"BlogArticle","data":{"title":"CCR first dive: experience for life","perex":"## From Steam Engines to Bullet Trains\nWhen you dive with a classic open-circuit system, itâs a bit like riding an old steam trainâbubbles splash behind you like steam from a locomotive, you hear the gentle gurgle of your regulator, and everything runs on well-practiced habits. As you inhale, youâll float up a bit; as you exhale, youâll drift down. Youâve been balancing your buoyancy this way since your first Open Water course, and by now youâre really good at itâyou can hover in place as if nailed to the seabed. But what if someone took away that locomotive and plunked you into a Shinkansen? Thatâs exactly the feeling I had on my very first dive with a [CCR (Closed Circuit Rebreather)](https://www.divesoft.com/en/products/ccr-liberty).","content":"## Time to Take the Plunge⦠But How? \nMy first encounter with a CCR was anything but ordinary. At that time, I was already a technical diving instructor and had been studying CCRs with great enthusiasm for a long time. It happened shortly after I began working for [DIVESOFT](https://www.divesoft.com/). The Liberty was still a functional prototype awaiting its first CE certification, and I was prepping it for testing.\n\n\n\n## An Anchor Hunt, CCR-Style \nOur in-house programmer, nicknamed âTermitâ (a tireless workhorse and coding elder statesman), owns a boat on the OrlÃk reservoir. He managed to lose his anchor somewhere in the middle of a cove and asked me for help retrieving it. Of course, we leapt at the chance! AleÅ¡ Procháska suggested we do the job on rebreathersâand I was thrilled⦠but diving my CCR for the first time while hunting for a lost anchor?\n\n## Assembling the Prototype: First Impressions \nI set up the unit almost entirely on my ownâI knew it inside out. This prototype differed from todayâs production Liberty units in several key ways: it featured a front-mounted counterlung ([FMCL](https://www.divesoft.com/en/products/ccr-liberty/ccr-liberty-bmcl-fmcl)) instead of the now-common back-mounted style; its electronics ran on two sets of six AA batteries that had to be swapped after every dive; the Automatic Diluent Valve ([ADV](https://www.divesoft.com/en/products/bovdsvadv)) sat at the bottom of the counterlung and was completely different in design; and both inhale and exhale counterlungs had large overpressure relief valves. Many solutions were awaiting final tweaks, so prepping the prototype wasnât without its challenges.\
2n\n\n\n## Suiting Up and Diving In \nAleÅ¡ coached me through a final checklist, and then I donned the rig. My first impression wasnât greatâtwo bulky counterlungs on my chest and a thick corrugated hose whipping around made me feel clumsy, and the sun beat down mercilessly. But the moment we slipped beneath the surface, all awkwardness vanished. My senses snapped to attention: my eyes darted side to side, my ears strained for silence, and my fingers hovered over the inflator, ready to perform the subtle lung-compensating work Iâd spent years perfecting.\n\n## Expectations vs. Reality Underwater \nI anticipated the hot blast of air from the scrubber, but at first I couldnât distinguish it. I expected total silence, yet when I focused closely, the sounds reminded me of breathing through a snorkel. The whirr of the solenoid was barely audibleâand in shallow water, it threw me off balance when it injected oxygen just after Iâd achieved perfect trim.\n\n\n\n## The Dive: Crystal Clarity and Quick Recovery \nItâs been ages, but I still remember that sunlit, golden waterâunusually clear for this spot. We found the anchor quickly, around 22 meters down. I was amazed by the razor-sharp displays on our handheld units, glowing like twin jewels in the dusky depths, clearly showing every vital reading.\n\n## The Ascent Surprise: Mastering Buoyancy Again \nSurfacing was my biggest shock. Iâd anticipated the different buoyancy, the silence, and all the other CCR quirksâbut I wasnât prepared for the pressure in my lungs during ascent. On open-circuit, you simply breathe out and let the excess gas escape. Here, I learned fast that I had to actively purge gas outside the loop or crack the overpressure valves.\n\nI emerged utterly exhilarated. I wished AleÅ¡ didnât have to rush homeâI could have floated there until the scrubber ran dry. In the years that followed, however, I more than made up for it.\n\n## From Student to Mentor: A CCR Journey \nSince then, Iâve logged hundredsâif not thousandsâof hours on the Liberty, and Iâve guided countless divers, instructors, and instructor-trainers into the CCR world. Iâve tried other units along the way, but itâs hard to beat starting out on the very best.\n\n\nAuthor: [Jakub Å imánek](https://www.divesoft.com/en/about-us/jakub-simanek)","showTags":false,"showDate":true,"publishDate":"07/22/2025","image":{"mimetype":"image/jpeg","size":839532,"hash":"6217a330a82157b0468f0fadba6a408225ea778d","id":"cmdhar8vixj7z0850xavnkh26","filename":"divesoft-photo-010-0.jpg","category":"divesoft/","type":"image"}},"id":"#2","type":"component","lock":false,"position":1},{"name":"BlogArticle","data":{"title":"","perex":"## Iâll Never Dive a Rebreatherâ⦠But Why Not Give It a Try? \nI remember my first day diving with a rebreather. It was during a demo event held occasionally by one of the local dive centers. At the time, I wasnât sure if rebreather diving was the right path for meâI thought OC trimix was probably the highest level Iâd ever go. Still, I was curious to experience it firsthand. Since the dive center was offering try-dives with rebreathers, I figuredâwhy not? Why not try something different?\nAt the event, there were two different units available. I had the chance to try both in a pool after a quick introduction to how they functioned. Before that day, I had always thought of rebreathers as extremely complicated, overly sophisticated, and difficult to understand. But once I saw the units in person, I realized they werenât nearly as intimidating as I had imagined.","content":"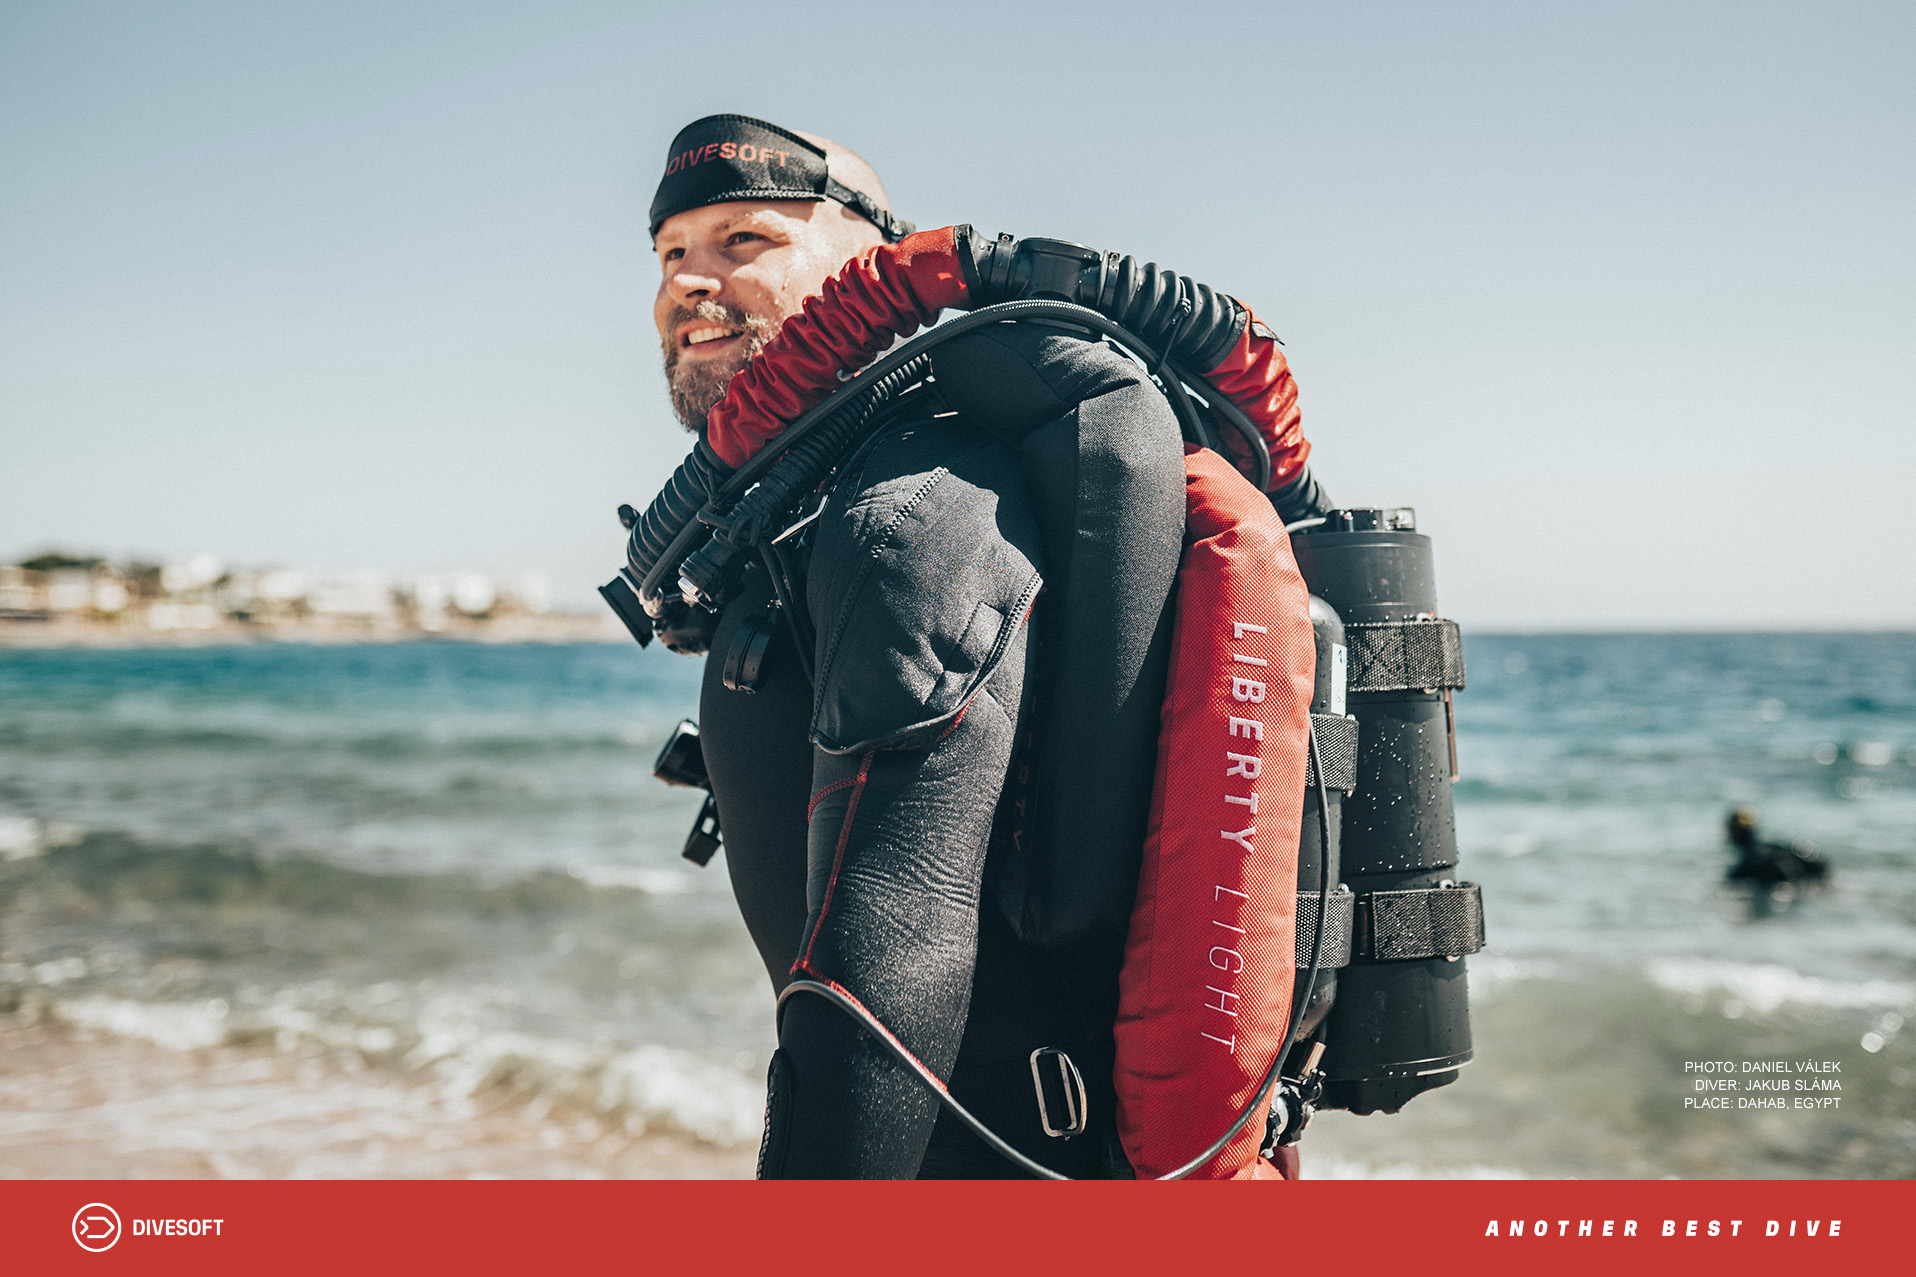\n\n## Very Different Than Expected \nThat first pool session was eye-opening. The pool was around 3 meters deep, and I started off kneeling on the bottom before experimenting with my buoyancy. I just looked up and relaxed. The first thing I noticed was the silence. It struck me immediately. That silence was the very first sensation I remember from diving on a rebreather. Suddenly, my perception of the underwater world shifted I hadnât realized just how loud open circuit actually was. From that moment on, I always noticed the noise of OC diving.\nThat also explained why my underwater photos often had fish tails in themâonce the fish heard me, theyâd swim away. Now that I dive mostly with a rebreather, especially as an underwater photographer, the fish come to me. When youâre on a rebreather, you can hear OC divers approaching from far away. That contrastâbetween silence and noiseâwas one of the key sensations I remember from that first try-dive.\nThe next thing I noticed was buoyancy control. At the time, I already had several hundred OC dives under my belt, and Iâd often heard that the better you are on OC, the harder it is to adapt to a rebreather. But during that first dive, buoyancy felt surprisingly natural. I didnât fully understand what the handset was showing meâPPO2 readings of sensors were not as familiar as they are nowâbut that didnât matter at the time. What mattered was how I experienced the underwater world.\n\n\n\n## An Experience That Changes Everything \nWe go diving to absorb the underwater world, and I immediately recognized how much better a rebreather allowed me to do just that. It was the beginning of what I now think of as truly âZENâ underwater moments. Diving became an escapeâno phones, no stress, a quiet exploration in weightlessness. It opened up a whole new dimension.\n\n\n\n## The Initial Experience Down the Line \nLater on, I came to appreciate the practical benefits of rebreathers too: dramatically extended dive times, warmer breathing gas that kept me comfortable on longer dives, the silence, and simpler gas logistics with
2no underwater gas switching. These were just bonuses on top of the transformative experience.\nEventually, I found myself enjoying the entire process of rebreather divingâfrom prepping the unit to being part of the rebreather community, exchanging experiences, and reaching sites most divers never get to see. The rebreather extended my range and gave me access to truly rare underwater locations.\nI would absolutely recommend that anyone try a rebreather at least once, even if you donât plan to get one. The experience itselfâhow different it feelsâis well worth it. Try it and see where it takes you.\n\nAuthor: Jakub Sláma","showTags":false,"showDate":false},"id":"#3","type":"component","lock":false,"position":2},{"name":"Image","data":{"firstImage":{"recommendedSizes":{"width":"1000","height":"1000"}},"secondImage":{"recommendedSizes":{"width":"1000","height":"1000"}}},"id":"#7","type":"component","lock":false,"position":3},{"name":"ProductShowcase","data":{"componentTemplateId":"cm9h4wr6ugjv10803yqs3tp71"},"id":"#6","type":"component","lock":false,"position":4},{"name":"Footer","data":{"copyrights":"Copyright © 2019 Divesoft LLC All rights reserved.","facebookUrl":"","youtubeUrl":"","instagramUrl":"","contacts":"**Divesoft, s.r.o.** Hálkova 2495 413 01 Roudnice nad Labem Äeská republika Tel.: +420 416 857 057 E-mail: [email protected]"},"id":"#1","type":"component","lock":false,"position":7}],"id":"root","idBuffer":"#8","lastCommit":"4fdbf2e6-4206-4392-96b9-2b7199ce73b2"}},"annotations":[],"language":{"type":"id","generated":false,"id":"Language:cjv3kwvoj000u083611381c6o","typename":"Language"},"__typename":"PageTranslation"},"Page:cm9cmcoo1fcrp0803vl5desvj":{"id":"cm9cmcoo1fcrp0803vl5desvj","type":{"type":"id","generated":false,"id":"PageType:cjv3l213x004f08366hjufttp","typename":"PageType"},"tags":[{"type":"id","generated":false,"id":"Tag:cjv3szrcv01bz0836yo8myb0r","typename":"Tag"},{"type":"id","generated":false,"id":"Tag:cm5ww05zc1b5d0803zglvz927","typename":"Tag"},{"type":"id","generated":false,"id":"Tag:cmfp50qhi00lk08324ek37f9g","typename":"Tag"}],"translations({\"where\":{\"language\":{\"id\":\"cjv3kwvoj000u083611381c6o\"}}})":[{"type":"id","generated":false,"id":"PageTranslation:cm9cmcoojfcrw0803dsui6xh9","typename":"PageTranslation"}],"__typename":"Page"},"PageTranslation:cm9cmcoojfcrw0803dsui6xh9":{"id":"cm9cmcoojfcrw0803dsui6xh9","name":"CCR safety rules and procedures","createdAt":"2025-04-11T10:03:08.658Z","content":{"type":"json","json":{"content":[{"name":"Header","data":{"products":[{"title":"Accessories","description":"Backplates, Consumables. Tanks.","img":{"recommendedSizes":{"width":"235","height":"235"}},"url":""},{"title":"Accessories sets","description":"Protection, maintenance, cleaning.","img":{"recommendedSizes":{"width":"235","height":"235"}},"url":""},{"title":"Spare parts","description":"Spare parts and components.","img":{"recommendedSizes":{"width":"235","height":"235"}},"url":""},{"title":"Spare parts kits","description":"Completly Liberty spare parts kits.","img":{"recommendedSizes":{"width":"235","height":"235"}},"url":""}]},"id":"#0","type":"component","lock":false,"position":1},{"name":"BlogArticle","data":{"title":"CCR safety rules and procedures","perex":"Closed-circuit rebreathers (CCRs) can feel like stepping into the future of diving: extended bottom times, near-silent bubbles, minimal gas waste. Yet beneath the high-tech allure lies a set of fundamentally simpleâbut absolutely vitalâprocedures. Think of CCR safety not as rocket science, but as disciplined habit-forming. With the right mindset and an instructor who refuses to cut corners, anyone can master these checks and enjoy safer, more rewarding dives.","content":"### 1. Pre-Dive Preparation \nA rigorous pre-dive preparation process is non-negotiable. Whether you use a paper checklist or, as many [Liberty CCR](https://www.divesoft.com/en/products/ccr-liberty) owners do, the [Divesoft.App](https://www.divesoft.com/en/app) on your smartphone, step through every assembly and function test systematically. The Divesoft.App not only guides you through each valve, sensor calibration and line routing with photos and descriptions, but it even calculates expected voltages for your oxygen cellsâflagging anomalies before you submerge. Crucially, it enforces a positive- and negative-pressure leak test to verify loop-integrity: flooding a CCR underwater is irreparable and forces an immediate bailout.\n\n**âWe may be able to prevent as many as 90 % of fatal rebreather accidents by merely using and adhering to a checklist and doing it for every dive.**â \nâ Jill Heinerth, Rebreather Training Council: â[Why and how do you use checklists?](https://rebreathertrainingcouncil.org/safety-initiatives/checklists/why-use-checklists/jill-heinerth-2/)â\n\n\n\n### 2. Splash-Entry Checklist\nJust before entering the water, perform a splash-entry check. On [Liberty CCR](https://www.divesoft.com/en/products/ccr-liberty)s this is built into the unitâs software: verify cylinder valves are fully open, setpoints displayed correctly, the ADV, MAV and BOV are functioning, and your bailout system is armed. Back-mounted units allow you to cycle through this on your wrist-mounted console; side-mount setups typically have the checklist in front of you on a tablet or slate. This step ensures all vital systems are âgoâ before gravity takes over.\n\n\n\n### 3. Pre-Breathing Sequence \nA five-minute pre-breathing on the loop remains standard to confirm oxygen injection and loop integrity. However, relying on it to validate scrubber performance is misleading. In a randomized, single-blind study led by Dr. Simon Mitchell, 90 percent of divers failed to detect a partially failed or absent COâ absorbent during a five-minute prebreatheâhighlighting its insensitivity to real scrubber faults. \nUse prebreathe to check work-of-breathing, POâ response, and loop-comfortâbut never as proof of a correctly packed or effective scrubber.\n\nThe primary study is:\n\nDeng C, Pollock NW, Gant N, Hannam JA, Dooley A, Mesley P, Mitchell SJ.\nâThe five-minute prebreathe in evaluating carbon dioxide absorption in a closed-circuit rebreather: a randomised
2single-blind study.â\nDiving and Hyperbaric Medicine. 2015 Mar; 45(1): 16â24. PMID: 25964034.\nAvailable from: https://www.dhmjournal.com/images/Journals/45/DHM_Vol45_No1.pdf \n\n\n\n### 4. In-Water Function Check at 5 m\nOnce youâre at about 5 m:\n\n* Inspect your buddyâs loop for unexpected bubbles.\n* Re-confirm POâ stability on both consoles.\n* Practice an emergency switch to open-circuit bailout.\n\nThis mutual check turns theory into muscle memory and builds confidence before committing to the planned depth.\n\n\n\n### Tom Mountâs âRules for Safe CCR Divingâ \nOriginating with Tom Mount, founder of IANTD, these principles encapsulate the mindset every CCR diver must adopt. \nEach of the following points could be discussed in detail and a separate article could be written about it. Here just a short characeristics\n\n**Avoid Complacency ** \nEven a perfectly functioning CCR can lull you into autopilot. Maintain constant vigilanceâskip nothing.\n\n**1. Avoid Distraction** \nKeep your focus on the dive; minor interruptions can cascade into major errors.\n\n**2. Be a Disciplined Diver** \nFollow procedures consistently, even when conditions are calm.\n\n**3. Be a Thinking Diver** \nContinually assess and adapt; donât rely solely on routine.\n\n**4. Always Know Your POâ** \nMonitor your partial pressure of oxygen frequentlyâboth high and low extremes are life-threatening.\n\n**5. Donât Be Cheap** \nDon't skimp on sensors, sorbent or helium. Don't prolong their lifespan just to save money and lose a life.\n\n**6. CCR Is Your Primary SCUBA** \nYou have CCR, so dive with CCR even where it's not absolutely necessary. If you don't dive with it regularly, you'll lose the habits you've learned.\n\n**7. Practice Bailout Periodically ** \nRehearse switching to open-circuit bailout until it becomes reflexive. Practice other life-saving scenarios.\n\n**8. Assume Devices Will Fail** \nDesign your dive plan around redundancy and conservative bailouts. \n\n**9. Accept That Emergencies Will Happen** \nMental rehearsal of worst-case scenarios sharpens your response under stress.\n\n**10. Do Not Start with Known Failure** \nIf any component fails a pre-dive or in-water check, stand down and resolve it.\n\n\n\n\n### Choosing the Right Instructor \nNone of these procedures matter without solid instruction. Seek an instructor who:\n\n* **Emphasizes Theory & Practice:** You should fully understand gas dynamics, sensor operation and failure modes before your first open-water dive.\n* **Insists on Checklists:** Every step must be done in order, every timeâno shortcuts.\n* **Fosters Critical Thinking:** Training scenarios should include simulated failures to build decision-making skills under pressure.\n* **Protects No-Go Zones:** Depth and decompression limits must be conservative; your instructor should never rush you.\n\nWith careful preparation, systematic checks and a vigilant mindset, CCR diving is no more difficult than mastering any advanced technical skillâit just demands respect for its complexity. By following these rules and choosing a rigorous instructor, youâll unlock the silent, extended dives CCRs promise while keeping every excursion safe and enjoyable.\n\n\n________________________________________\n\nAuthor: [Jakub Å imánek](https://www.divesoft.com/en/about-us/jakub-simanek)","showTags":false,"showDate":true,"image":{"mimetype":"image/jpeg","size":1086367,"hash":"cba11723cb878f2cbd1a46df01a8ad414edff1ea","id":"cmdrb2iwo0ppj0850drnxxfz6","filename":"divesoft-photo-167-0.jpg","category":"divesoft/","type":"image"},"publishDate":"08/05/2025"},"id":"#2","type":"component","lock":false,"position":2},{"name":"ProductShowcase","data":{"backgroundColor":"#ffffff","isTextDark":true,"isImageRight":false,"image":{"recommendedSizes":{"width":"485","height":"485"},"mimetype":"image/png","size":1301657,"hash":"43e9e651a9f52d00f08256ebeafeddc32164c11f","id":"cm737a5egjeyt08505ycj0rdm","filename":"divesoft-app-202502-01.png","category":"divesoft/","type":"image"},"imageMobile":{"recommendedSizes":{"width":"510","height":"510"}},"isTitleH1":false,"title":"Divesoft.app","subtitle":"Plan your decompression, gasses, utilize checklists, check your logs + more.","description":"All for Free.","hideDescriptionOnMobile":false,"areButtons":false,"firstTitle":"Learn more >","firstUrl":{"url":"/en/app","pageId":"ckfccnc4a98bx0788f7enal83"},"secondTitle":"Configurator >","secondUrl":""},"id":"#21","type":"component","lock":false,"position":4},{"name":"Footer","data":{"copyrights":"Copyright © 2019 Divesoft LLC All rights reserved.","facebookUrl":{"urlNewWindow":true,"url":"https://www.facebook.com/divesoft/"},"youtubeUrl":{"url":"https://www.youtube.com/@divesoft_tv","urlNewWindow":true},"instagramUrl":{"url":"https://www.instagram.com/divesoft/","urlNewWindow":true},"contacts":"**Divesoft s.r.o.** \nHálkova 2495 \n413 01 Roudnice nad Labem \nCzech Republic \nTel.: +420 416 857 057 \nE-mail: [email protected]","twitterUrl":{"url":"","urlNewWindow":true,"pageId":"cjv3l26tp004p0836i54n4u7a"}},"id":"#1","type":"component","lock":false,"position":5}
2],"id":"root","idBuffer":"#45","lastCommit":"942a47bf-db29-4b28-9804-40244d1dafe4"}},"annotations":[{"type":"id","generated":true,"id":"PageTranslation:cm9cmcoojfcrw0803dsui6xh9.annotations.0","typename":"PageAnnotation"},{"type":"id","generated":true,"id":"PageTranslation:cm9cmcoojfcrw0803dsui6xh9.annotations.1","typename":"PageAnnotation"},{"type":"id","generated":true,"id":"PageTranslation:cm9cmcoojfcrw0803dsui6xh9.annotations.2","typename":"PageAnnotation"}],"language":{"type":"id","generated":false,"id":"Language:cjv3kwvoj000u083611381c6o","typename":"Language"},"__typename":"PageTranslation"},"PageTranslation:cm9cmcoojfcrw0803dsui6xh9.annotations.0":{"key":"title","value":"","__typename":"PageAnnotation"},"PageTranslation:cm9cmcoojfcrw0803dsui6xh9.annotations.1":{"key":"perex","value":"","__typename":"PageAnnotation"},"PageTranslation:cm9cmcoojfcrw0803dsui6xh9.annotations.2":{"key":"image","value":"null","__typename":"PageAnnotation"},"Page:cm9cmd8k7fcs70803aca70x55":{"id":"cm9cmd8k7fcs70803aca70x55","type":{"type":"id","generated":false,"id":"PageType:ck2yidrqj00wv0821oy820vu1","typename":"PageType"},"tags":[{"type":"id","generated":false,"id":"Tag:cjv3szrcv01bz0836yo8myb0r","typename":"Tag"},{"type":"id","generated":false,"id":"Tag:cm5ww05zc1b5d0803zglvz927","typename":"Tag"},{"type":"id","generated":false,"id":"Tag:cmfp50qhi00lk08324ek37f9g","typename":"Tag"}],"translations({\"where\":{\"language\":{\"id\":\"cjv3kwvoj000u083611381c6o\"}}})":[{"type":"id","generated":false,"id":"PageTranslation:cm9cmd8klfcse0803p5q6kwlq","typename":"PageTranslation"}],"__typename":"Page"},"PageTranslation:cm9cmd8klfcse0803p5q6kwlq":{"id":"cm9cmd8klfcse0803p5q6kwlq","name":"CCR (rebreather) diving training: how it goes and what to expect","createdAt":"2025-04-11T10:03:34.437Z","content":{"type":"json","json":{"content":[{"name":"Header","data":{"showShadow":true},"id":"#4","type":"component","lock":false,"position":0},{"name":"BlogArticle","data":{"title":"CCR (rebreather) diving training: how it goes and what to expect","perex":"Training on a closed-circuit rebreather CCR is often described as a new beginning. Even if you have years of open-circuit experience, much of what youâve learned will only partially transfer. Instead, youâll face an array of new skills, concepts, and procedures. To take this step, you already need to be comfortable in the water: navigating, moving with control, managing buoyancy, and calmly handling basic emergencies. Being âat homeâ underwater is essential, because CCR training will demand your full focus on the new challenges rebreathers bring.","content":"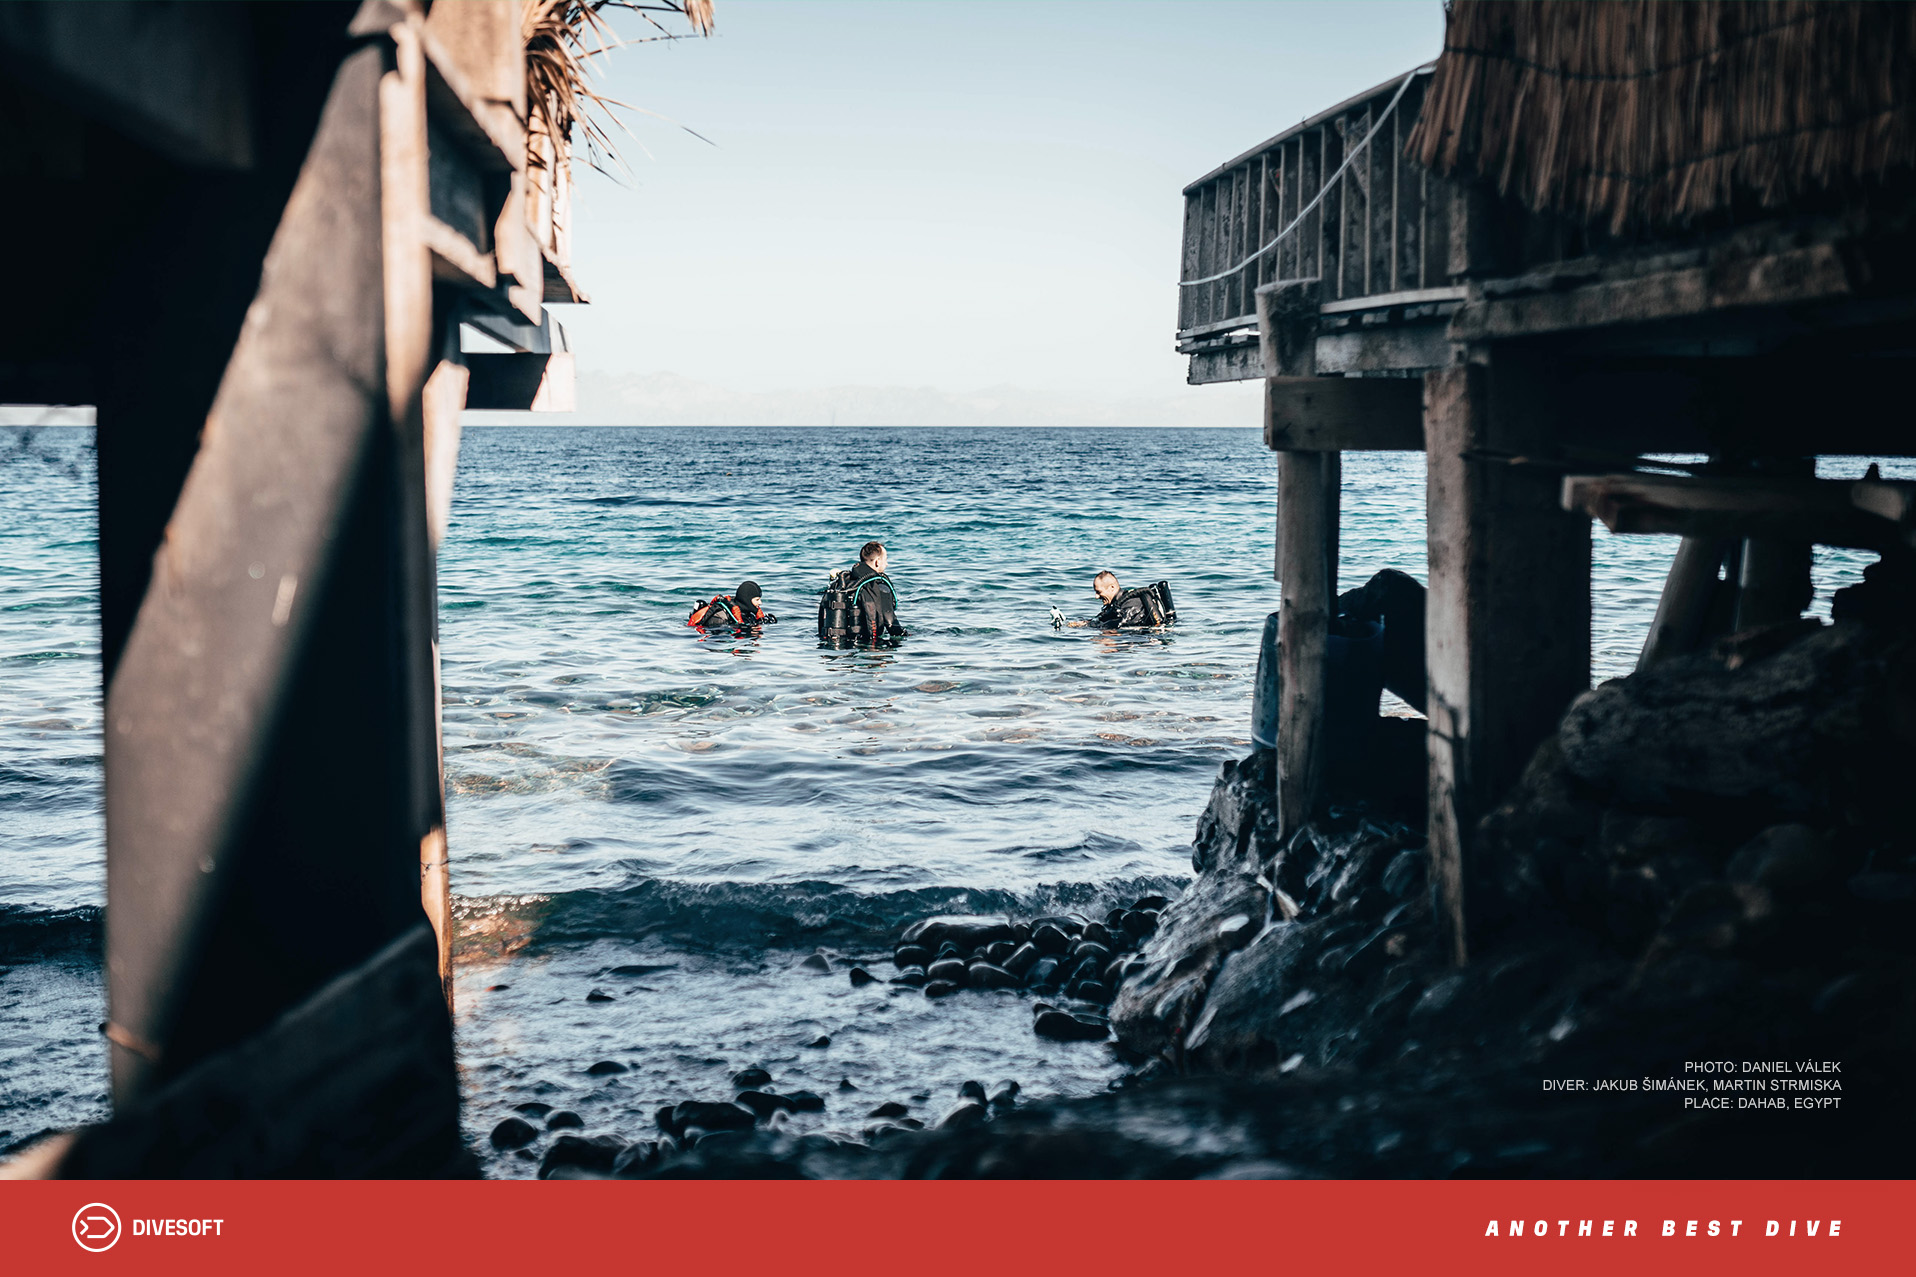\n\n### The Theory: Building a New Foundation\n\nBefore you enter the water with a CCR, you spend significant time in the classroom. The theoretical part of the training covers the principles and science behind the equipment:\n\n* **CCR systems**: Understanding how closed and semi-closed circuits work.\n* **Construction and components**: What makes up a rebreather, and the function of each part.\n* **Physics**: Critical for grasping how CCR behaves differently from open circuit.\n* **Physiology**: Oxygen and COâ management, gas density, human limits, decompression.\n* **Chemistry**: How scrubbers work and why COâ absorption matters.\n* **Electronics and controls**: Familiarity with the unitâs displays, alarms, and logic.\n* **Dive planning with CCR**: Dealing with bailout strategies, runtime limits, and contingencies.\n\nThis background knowledge is vital. You are not just learning how to use a new piece of kitâyouâre learning how to understand and trust the machine that will sustain your breathing in places where surfacing is not an option.\n\n\n\n### The Practice: From Dry Runs to Real Dives\n\nOnce the theory is in place, training moves into practice.\n\n* **Dry preparation**: Assembly, disassembly, maintenance, and using [checklists](https://www.divesoft.com/en/app) for pre-dive tests.\n* **Confined water sessions**: Initial dives in a pool or sheltered water.\n* **Open-water dives**: Progressing to controlled environments and eventually real diving scenarios.\n* **Skills development**:\n1. Entries and ascents with a CCR \n1. Mastering buoyancy in a new way (counterlungs change everything) \n1. Monitoring and adjusting POâ \n1. Manual control of POâ \n1. Exercises to internalize CCR principles \n1. Emergency responsesâhypoxia, hyperoxia, hypercapnia, floods, electronics failures\n\nEmergency drills make up a large part of [CCR training](https://www.divesoft.com/en/instructors). Different agencies teach multiple approachesâsometimes in parallel, sometimes tailored to their philosophy. Manufacturers also influence training: for the Liberty CCR, Divesoft appointed Jakub Å imánek to define unit-specific training standards. Over the years, he has prepared dozens of instructors and instructor-trainers, shaping consistent practices around this unit.\n\n\n\n### Why Training Matters\n\nExperienced rebreather divers often emphasize that solid training is what allows you to safely unlock the potential of a CCR. These perspectives align with what training agencies and the Rebreather Training Council (RTC) stress: CCR diving is a discipline of precision, redundancy, and planning. The unit itself may be robustââLiberty is certified to the highest international standards, which is a peace of mind for technical diversââbut itâs the diverâs preparation that makes the difference.\n\n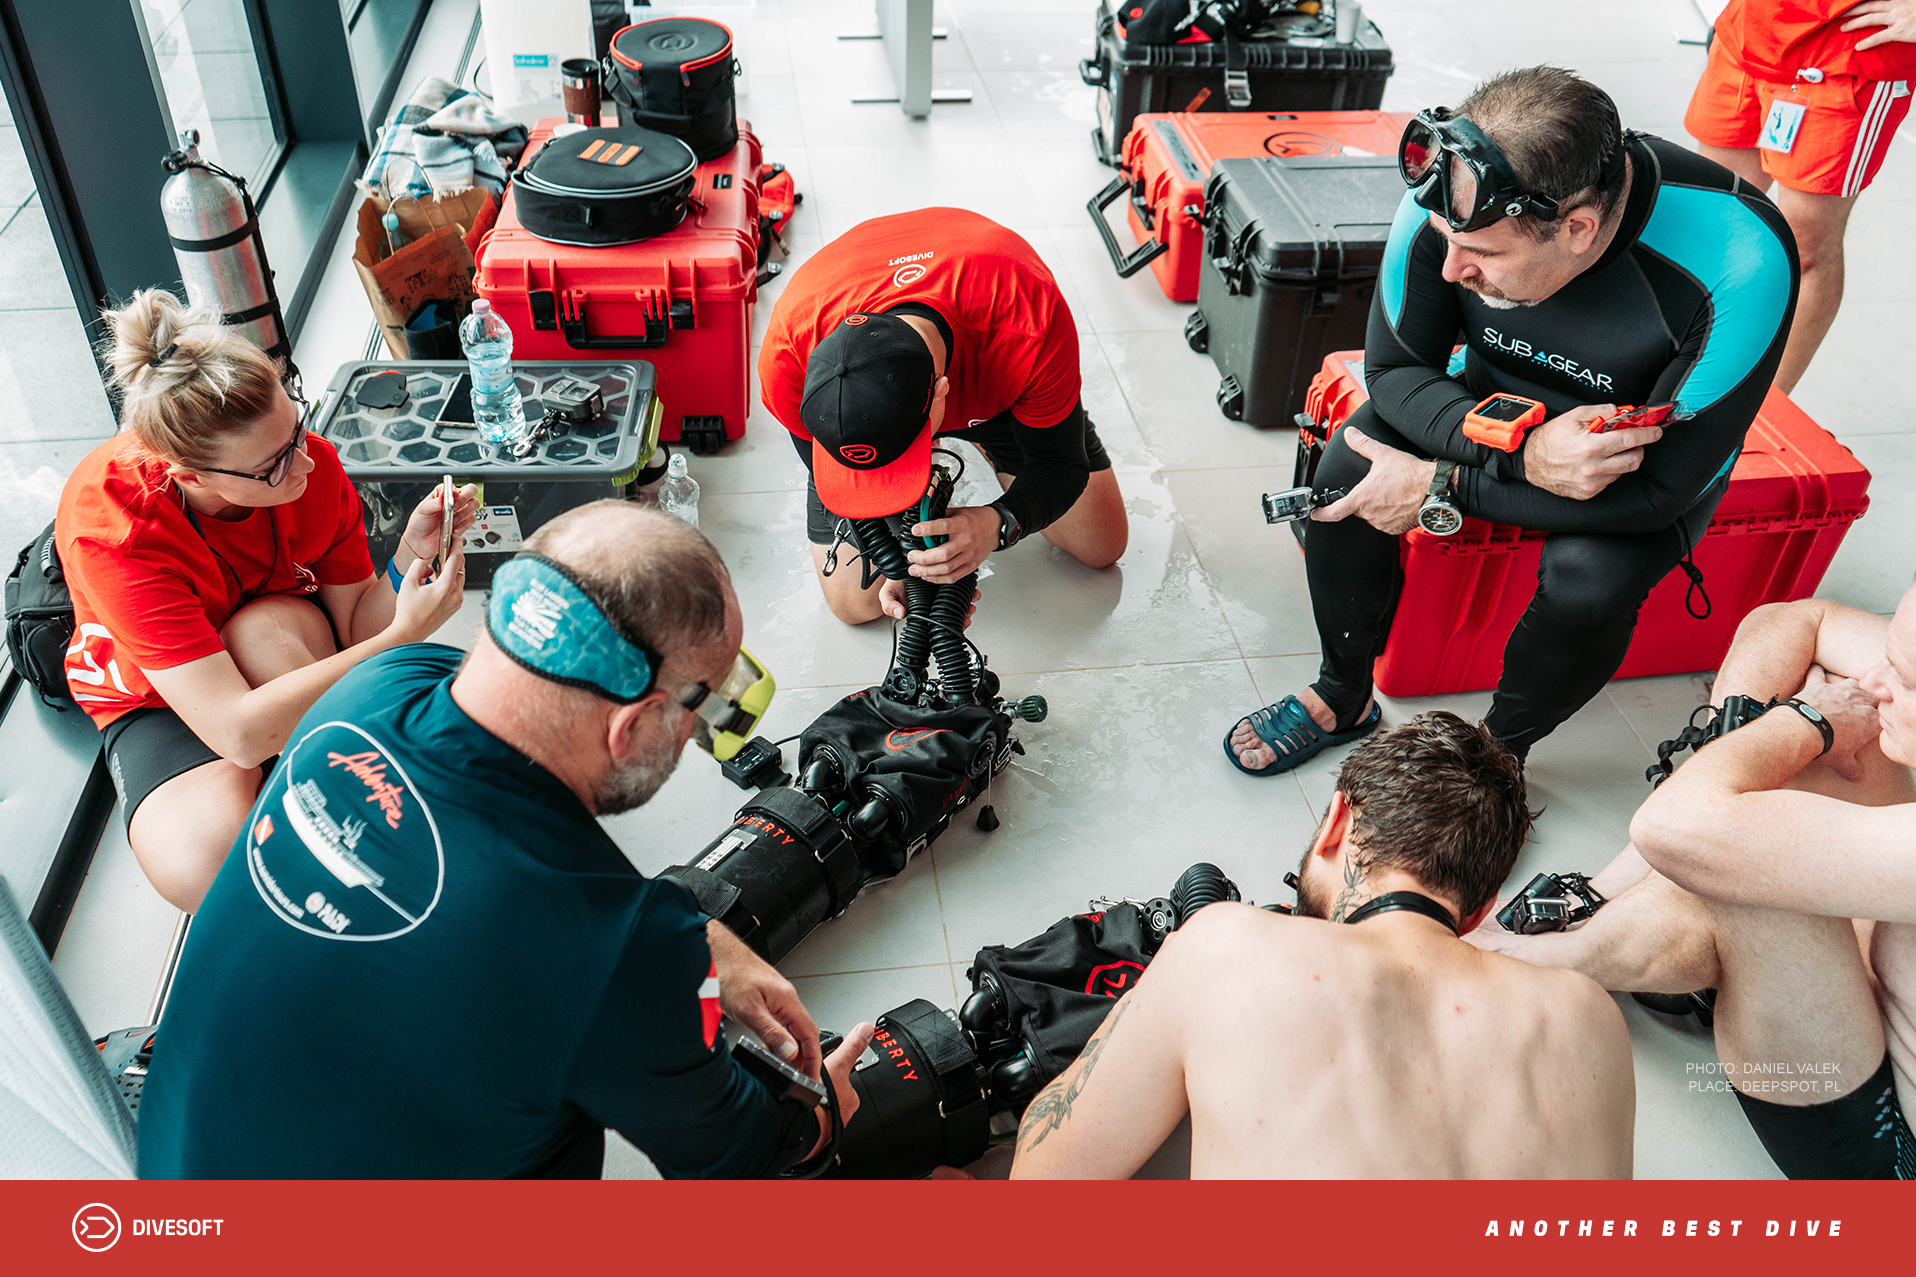\n\n### What to Expect as a Student\n\nExpect to feel like a beginner again. Youâll spend long hours repeating drills, sometimes until they feel automatic. Youâll analyze problems, solve them, and then solve them again in different ways. Youâll learn to slow down, think ahead, and make decisions based on gas management, POâ monitoring, and unit behavior.\n\nThe process can be humblingâbut itâs also rewarding. By the end of the course, you wonât just know how to dive a CCR. Youâll understand the why behind every procedure, and youâll have the confidence to handle the unexpected.\n\n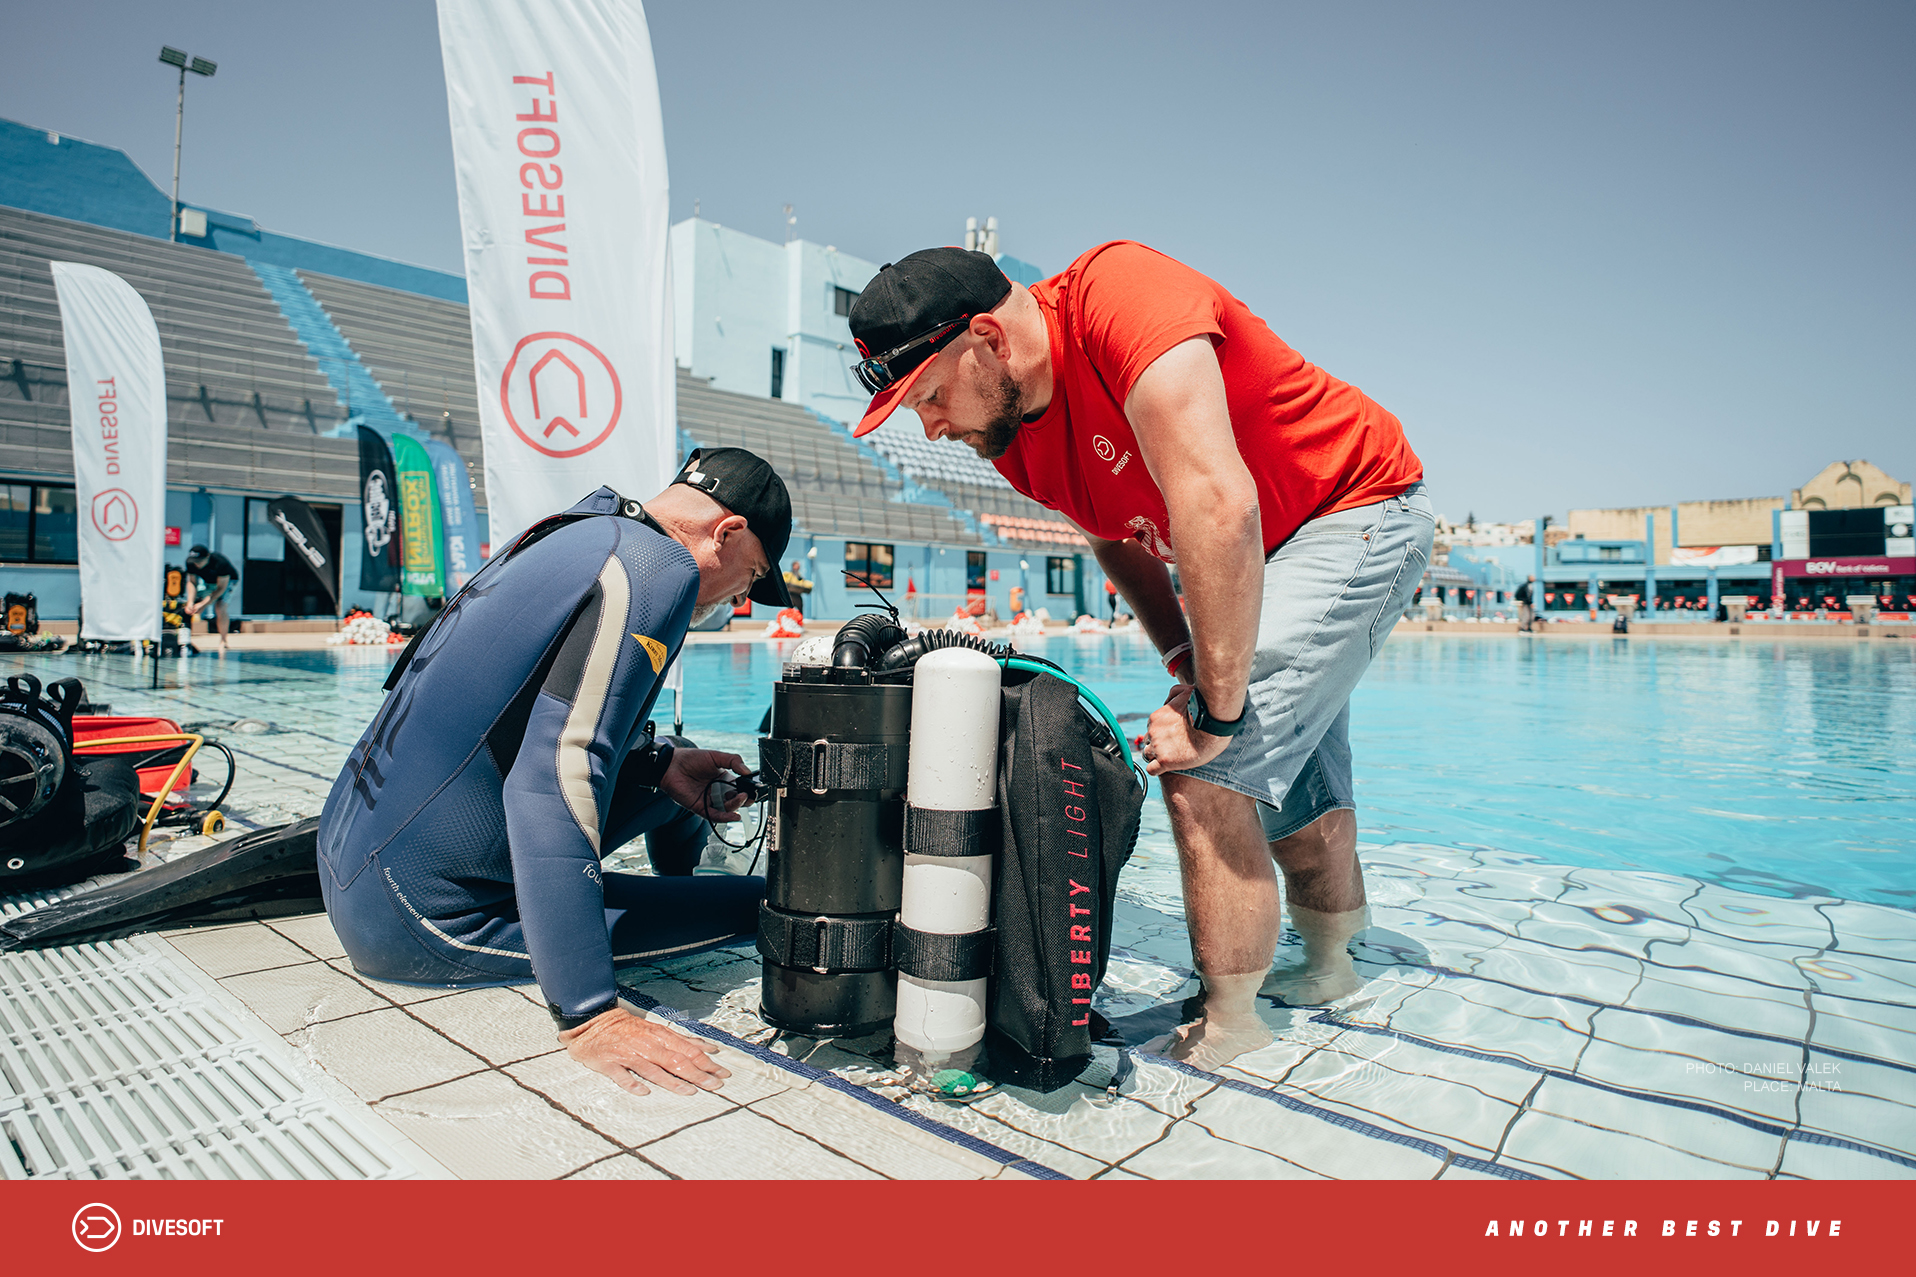\n\n### A Gateway to Exploration\n\nWhen training is complete, a CCR opens doors to dives that were once beyond reachâlonger bottom times, quieter encounters with marine life, and the ability to explore caves and wrecks with a different margin of safety. As one review put it, âFor deep technical and exploration, [Liberty CCR](https://www.divesoft.com/en/products/ccr-liberty) is among the most robust and configurableâ.\n\nBut reaching that point begins with training: structured, demanding, and transformative. If youâre ready to start, prepare to relearn diving from the ground up.\n\n[The previous article](https://www.divesoft.com/en/blog/what-is-a-rebreather-do-i-need-one-as-a-recreational-diver) can help you with that. \n\n* [Jakub Å imánek](https://www.divesoft.com/en/about-us/jakub-simanek), Divesoft Factory IT\n","showTags":false,"showDate":false,"image":{"mimetype":"image/jpeg","size":800870,"hash":"d8d11a4b6426c0dd3c2e61f61df67d211e10e7df","id":"cmeijmu0ia56a0850wj5p5erl","filename":"divesoft-photo-159-1.jpg","category":"divesoft/","type":"image","alt":"Rebreather diver, Adam Prochaska"}},"id":"#3","type":"component","lock":false,"position":1},{"name":"ProductShowcase","data":{"componentTemplateId":"cm9h4wr6ugjv10803yqs3tp71"},"id":"#7","type":"component","lock":false,"position":3},{"name":"Footer","data":{"copyrights":"Copyright © 2019 Divesoft LLC All rights reserved.","facebookUrl":{"urlNewWindow":true,"url":"https://www.facebook.com/divesoft/"},"youtubeUrl":{"url":"https://www.youtube.com/channel/UCHI2-kHmfoUlAdhQXPKl8lA/featured","urlNewWindow":true},"instagramUrl":{"url":"https://www.instagram.com/divesoft/","urlNewWindow":true},"contacts":"**Divesoft s.r.o.** \nHálkova 2495 \n413 01 Roudnice nad Labem \nCzech Republic \nTel.: +420 416 857 057 \nE-mail: [email protected]"},"id":"#1","type":"component","lock":false,"position":5}],"id":"root","idBuffer":"#10","lastCommit":"9deed358-2481-4040-b2af-d79b12ddac8c"}},"annotations":[],"language":{"type":"id","generated":false,"id":"Language:cjv3kwvoj000u083611381c6o","typename":"Language"},"__typename":"PageTranslation"},"Page:cm9cmdlxcfcsp0803p0d518jj":{"id":"cm9cmdlxcfcsp0803p0d518jj","type":{"type":"id","generated":false,"id":"PageType:cjv3l213x004f08366hjufttp","typename":"PageType"},"tags":[{"type":"id","generated":false,"id":"Tag:cjv3szrcv01bz0836yo8myb0r","typename":"Tag"},{"type":"id","generated":false,"id":"Tag:cm5ww05zc1b5d0803zglvz927","typename":"Tag"},{"type":"id","generated":false,"id":"Tag:cmfp50qhi00lk08324ek37f9g","typename":"Tag"}],"translations({\"where\":{\"language\":{\"id\":\"cjv3kwvoj000u083611381c6o\"}}})":[{"type":"id","generated":false,"id":"PageTranslation:cm9cmdlxrfcsw08036zlor12o","typename":"PageTranslation"}],"__typename":"Page"},"PageTranslation:cm9cmdlxrfcsw08036zlor12o":{"id":"cm9cmdlxrfcsw08036zlor12o","name":"Most common diving mistakes: this could save your life!","createdAt":"2025-04-11T10:03:51.759Z","content":{"type":"json","json":{"content":[{"name":"Header","data":{"products":[{"title":"Accessories","description":"Backplates, Consumables. Tanks.","img":{"recommendedSizes":{"width":"235","height":"235"}},"url":""},{"title":"Accessories sets","description":"Protection, maintenance, cleaning.","img":{"recommendedSizes":{"width":"235","height":"235"}},"url":""},{"title":"Spare parts","description":"Spare parts and components.","img":{"recommendedSizes":{"width":"235","height":"235"}},"url":""}
2,{"title":"Spare parts kits","description":"Completly Liberty spare parts kits.","img":{"recommendedSizes":{"width":"235","height":"235"}},"url":""}]},"id":"#0","type":"component","lock":false,"position":0},{"name":"BlogArticle","data":{"title":"Most common diving mistakes: this could save your life!","perex":"Scuba diving opens a gateway to another world â one of silence, freedom, and beauty. Yet beneath the surface, danger always lurks. Decades of accident reports consistently reveal one uncomfortable truth: most diving accidents are caused by human error. In fact, between 60â80% of all diving incidents could have been prevented with better preparation, decision-making, or awareness.\n\nThis article summarizes key findings from recent studies and highlights the most common mistakes divers make â and how you can avoid them.","content":"## How often is human error to blame?\nSeveral independent reports agree: human mistakes dominate as the root cause of diving incidents.\n\nA comprehensive review of 185 fatal accidents involving Czech and Slovak divers (1965â2025) found that the overwhelming majority were caused by poor decisions, inadequate preparation, or ignoring personal health. Only a very small percentage were due to pure equipment failure ([Hovorka & Belica, 2025, Smrtelné nehody Äeských a slovenských potápÄÄů](https://swarm.craa.cz/wp-content/uploads/2025/08/Smrtelne-nehody-ceskych-a-slovenskych-potapecu-1965-2025.pdf)\n).\n\nThe British Sub-Aqua Club Annual Diving Incident Report 2023 recorded 355 incidents (113 overseas), with human error present in more than 70% of cases. Fatalities were most often linked to rapid ascents, poor gas planning, or panic underwater ([BSAC, 2023](https://www.bsac.com/document/bsac-diving-incidents-report-2023/1bsac-diving-incident-report-2023.pdf\n).\n\nGlobally, the Divers Alert Network (DAN) Annual Diving Report has repeatedly shown that around 80% of both fatal and non-fatal incidents include human error as a primary or contributing factor ([DAN Annual Diving Reports](https://dan.org/research-reports/publication-library/?utm_source=chatgpt.com)\n).\n\n## The most common mistakes that cost lives\n#### 1. Poor planning and decision-making\n\nMany accidents begin before the diver even enters the water. Choosing a site beyond oneâs training, ignoring weather or current conditions, or planning dives that exceed safe depth or gas reserves are recurring patterns.\n\n#### 2. Inadequate equipment checks\n\nSimple oversights â forgetting to open a tank valve, skipping the buddy check, or diving with poorly maintained gear â are frequent triggers of emergencies that could have been easily prevented.\n\n#### 3. Panic and poor problem-solving underwater\n\nWhen something goes wrong, panic can turn a minor issue into a fatal one. Studies show that divers often fail to apply their training in stressful situations, leading to uncontrolled ascents, out-of-air situations, or drowning.\n\n#### 4. Ignoring health and fitness\n\nUnderlying health conditions â especially cardiac problems, obesity, or poor physical fitness â are a common factor in fatal diving accidents. In many cases, divers underestimated their limitations or continued diving despite clear medical contraindications.\n\n## What this means for divers\n\nThe message from all these reports is clear: diving is not inherently dangerous, but divers can make it dangerous. By recognizing how often human error leads to tragedy, every diver can take steps to reduce their personal risk:\n\nRespect your training limits and gain experience gradually.\n\nNever skip equipment checks and buddy procedures.\n\nPractice emergency drills until they become automatic.\n\nTake health and fitness seriously â your body is your life support system.\n\n## Final thoughts\n\nWhile diving equipment continues to evolve and become more reliable, the greatest safety improvement lies in human behavior. Paying attention to these lessons, learned through hundreds of accidents, could literally save your life.\n\nStay safe, dive smart, and remember: prevention is always easier than rescue.\n\n\n\n\nAuthor: [Jakub Å imánek](https://www.divesoft.com/en/about-us/jakub-simanek)\n\nâImages featured in this blog are for illustrative purposes only and may not represent the actual products, services, or situations described.â","showTags":false,"showDate":true,"publishDate":"09/01/2025","image":{"mimetype":"image/jpeg","size":1800183,"hash":"0e806cece324b6f63990e77400812175747fa4ba","id":"cmf18imuifnwz08504trr0ja7","filename":"foto-clanek-mistakes-1.jpg","category":"divesoft/","type":"image"}},"id":"#2","type":"component","lock":false,"position":1},{"name":"ProductShowcase","data":{"componentTemplateId":"cm9h4wr6ugjv10803yq
2s3tp71"},"id":"#6","type":"component","lock":false,"position":5},{"name":"Footer","data":{"copyrights":"Copyright © 2019 Divesoft LLC All rights reserved.","facebookUrl":"","youtubeUrl":"","instagramUrl":"","contacts":"**Divesoft, s.r.o.** Hálkova 2495 413 01 Roudnice nad Labem Äeská republika Tel.: +420 416 857 057 E-mail: [email protected]"},"id":"#1","type":"component","lock":false,"position":8}],"id":"root","idBuffer":"#9","lastCommit":"6d541884-0682-4ead-bec4-ecbc1d381371"}},"annotations":[],"language":{"type":"id","generated":false,"id":"Language:cjv3kwvoj000u083611381c6o","typename":"Language"},"__typename":"PageTranslation"},"Page:cm9cneisbfd730803ij7pwjju":{"id":"cm9cneisbfd730803ij7pwjju","type":{"type":"id","generated":false,"id":"PageType:cjv3l213x004f08366hjufttp","typename":"PageType"},"tags":[{"type":"id","generated":false,"id":"Tag:cjv3szrcv01bz0836yo8myb0r","typename":"Tag"},{"type":"id","generated":false,"id":"Tag:cl28w8de8gdo20858cjkbufee","typename":"Tag"},{"type":"id","generated":false,"id":"Tag:clw52z09zlclk0735mxb7v53p","typename":"Tag"},{"type":"id","generated":false,"id":"Tag:cm5ww05zc1b5d0803zglvz927","typename":"Tag"},{"type":"id","generated":false,"id":"Tag:cm5ww0t651b710803pcl02cn4","typename":"Tag"},{"type":"id","generated":false,"id":"Tag:cmfp50qhi00lk08324ek37f9g","typename":"Tag"}],"translations({\"where\":{\"language\":{\"id\":\"cjv3kwvoj000u083611381c6o\"}}})":[{"type":"id","generated":false,"id":"PageTranslation:cm9cneistfd7a0803smdeghui","typename":"PageTranslation"}],"__typename":"Page"},"PageTranslation:cm9cneistfd7a0803smdeghui":{"id":"cm9cneistfd7a0803smdeghui","name":"CCR (rebreather) dive planning: how to and complete checklist","createdAt":"2025-04-11T10:32:33.964Z","content":{"type":"json","json":{"content":[{"name":"Header","data":{"products":[{"title":"Accessories","description":"Backplates, Consumables. Tanks.","img":{"recommendedSizes":{"width":"235","height":"235"}},"url":""},{"title":"Accessories sets","description":"Protection, maintenance, cleaning.","img":{"recommendedSizes":{"width":"235","height":"235"}},"url":""},{"title":"Spare parts","description":"Spare parts and components.","img":{"recommendedSizes":{"width":"235","height":"235"}},"url":""},{"title":"Spare parts kits","description":"Completly Liberty spare parts kits.","img":{"recommendedSizes":{"width":"235","height":"235"}},"url":""}]},"id":"#0","type":"component","lock":false,"position":0},{"name":"BlogArticle","data":{"title":"CCR (rebreather) dive planning: step by step","perex":"Some time ago, we published a very detailed [two-part article on dive planning](https://www.divesoft.com/en/blog/a-comprehensive-guide-to-technical-dive-planning-part-1), which covered both [open circuit and closed circuit diving](https://www.divesoft.com/en/blog/a-comprehensive-guide-to-technical-dive-planning-part-2), including thorough preparation for the dive itself. In todayâs article, we will **focus specifically and practically on planning a closed-circuit rebreather (CCR) dive for beginners.**\n\n","content":"> âAfter my first 10 hours on a rebreather, I was a real expert. Another 40 hours of dive time later, I considered myself a novice. When I completed about 100 hours of rebreather diving, I realized I was only just a beginner.â \n> â **Richard Pyle**, reflecting on the steep learning curve of rebreather diving [blog.padi.com](https://blog.padi.com/tec-dossier-jonas-samuelsson/#:~:text=Open,%E2%80%9D)\n\n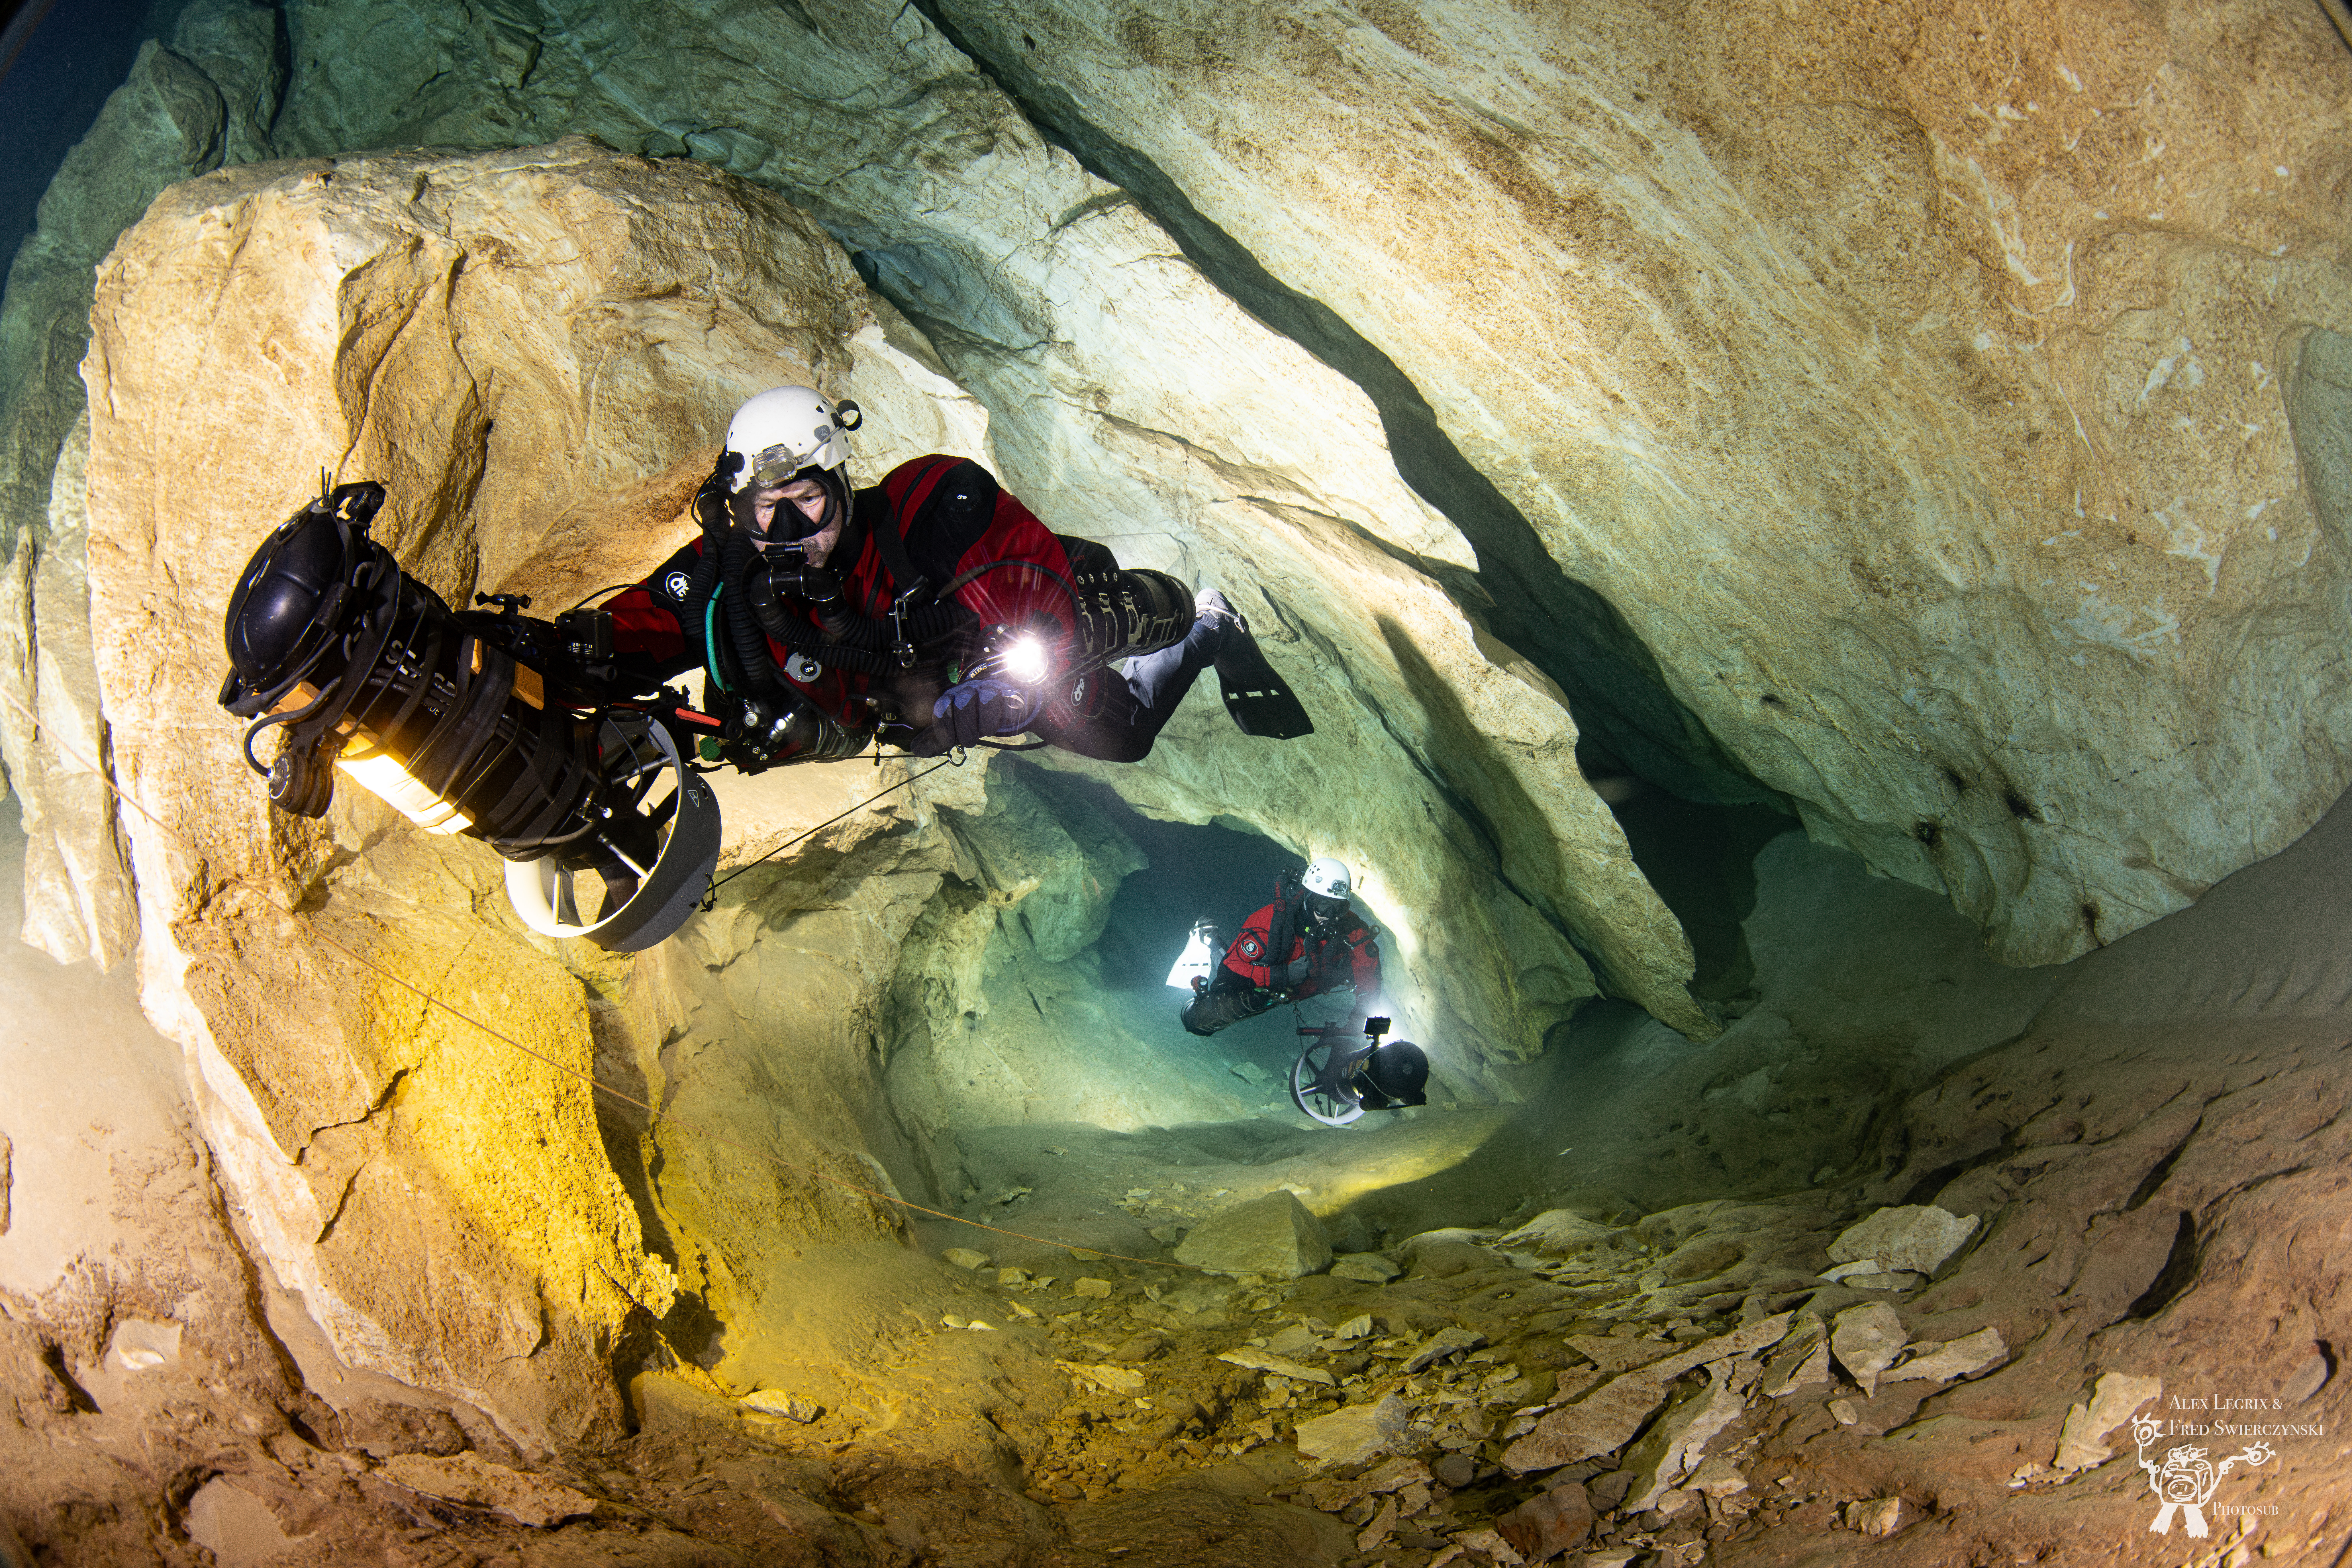\n\nWhen diving, everything is interconnected, and the plan must form a coherent whole. It is therefore essential to establish a clear starting point. Naturally, the starting values are depth and bottom time. We generally dive to different depths for varying lengths of time. While we usually have a clear idea of the intended depth, determining bottom time is not always simple, as it is often limited by available gas supply and the required decompression obligation. Sometimes we must use the method of halving the interval, choosing a bottom time that fits within our gas reserves. When we talk about gas supply in closed-circuit diving, we mostly mean bailout gas. Especially for beginners, it is not assumed that dives will be carried out at the limits of rebreather gas capacity. The simplest scenario, of course, is when we have a very specific bottom time required to achieve our goal.\n\n\n### Starting Point â Depth and Time\n\nTo make things clearer, letâs plan a wreck dive. This is simple because wreck dives usually begin from a boat, descending down a line directly to the target depth. Time is then spent at roughly the same depth, give or take a few meters (unless itâs a very large wreck). Letâs assume this wreck lies at 35 meters. I chose this depth deliberately, as I consider it the maximum for air diluent CCR diving.\n\nHow long do we need to spend at the wreck? Suppose the wreck is 50 meters long. The typical swimming speed of a technical diver ranges from 10 to 15 meters per minute. Since weâre not racing but rather observing and exploring, weâll choose a more conservative valueâ5 meters per minute. To swim around the 50-meter wreck, that gives us about 20 minutes.\n\n\n### Choosing the Setpoint\
2n\nTo plan decompression, we must first decide on the setpointâthe partial pressure of oxygen during the CCR dive. Looking at CNS exposure tables, we find that at a PO2 of 1.3\n\nbar, the maximum exposure is 180 minutes. This is more than enough for our purposes. A higher constant PO2 would not be safe. Lower setpoints are used for dives deeper than 50 m or under demanding conditions (currents, cold water, heavy workload).\n\nFor descent, we use a lower setpoint, as high PO2 is unsuitable at the surface and would rise dangerously during descent. A common descent setpoint is 0.7 bar. With the [Liberty CCR](https://www.divesoft.com/en/products/ccr-liberty), we can also set a âdescent setpointâ that increases proportionally with depth, saving oxygen. For example, this could be set at 0.4 bar.\n\n### Gas Selection\n\nIn this example, we will use air as the diluent, since the article is aimed at beginners. Nitrox is not suitable as a diluent because it would exceed our planned setpoint. However, nitrox is better suited as bailout gas. At the planned maximum depth of 35 m, the pressure is 4.5 bar. At a maximum PO2 of 1.6 bar for the bailout cylinder, this gives us nitrox 35 (1.6 / 4.5 = 0.35). We will use the standard nitrox 32.\n\n\n### Ascent Planning\n\nWe now know enough to plan ascent and decompression. The best tool is a decompression planner. A good choice is divesoft.app, which provides advanced CCR dive planning. Using gradient factors 40/75 (a conservative and safe setting), the result is a single stop at 6 m for 2 minutes (with ascent speed of 9 m/min).\n\n\n### Gas Management\n\nGas planning for this dive is straightforward. Diluent is calculated by multiplying depth pressure and loop volume, then conservatively by 2.5. In our case: 4.5 bar à 10 liters à 2.5 = 112.5 liters. In a 3-liter cylinder, that is 37.5 bar. We also know dives should not begin with less than 100 bar.\n\nOxygen is even simpler. Total dive time is 27 minutes. At a conservative consumption of 2 liters/min, that equals 54 liters, or 18 bar in a 3-liter cylinder.\n\n\n### Scrubber Duration\n\nWe must also consider scrubber duration. The minimum duration is 2 hours 47 minutes, even under heavy workload and cold water. Our 27-minute dive is well within this.\n\n\n### Plan B â The âShit Planâ\n\nThe most important aspect of CCR planning is preparing for emergencies where the unit cannot be used to ascend. This could be a flooded unit or (although unlikely with Liberty) a total electronics failure.\n\nAt any point, we must be able to ascend on open circuit. We need sufficient bailout gas to cover the remaining bottom time plus a safety margin (usually 3 minutes), with breathing rates elevated due to stressâoften 50 liters/min. Hypercapnia, very relevant in CCR diving, must be considered.\n\nOn open circuit, PO2 will decrease during ascent, so decompression will be less efficient than with CCR. Adding 3 minutes bottom time and switching to open circuit extends decompression to a 1-minute stop at 9 m and 9 minutes at 6 m.\n\nCalculating gas use for this profile: 2076 liters of nitrox 32 are required. In a 12-liter cylinder, that is 173 bar; in an AL80, it is 187 bar.\n\n\n### Conclusion\n\nThis example shows that even a relatively short, simple dive can become bailout-gas-limited in an emergency. If air were used instead of nitrox, gas supply would not suffice. Always plan dives carefully to avoid unpleasant or dangerous situations\n\nAuthor: [Jakub Å imánek](https://www.divesoft.com/en/about-us/jakub-simanek)\n","showTags":false,"showDate":true,"publishDate":"09/26/2025","image":{"mimetype":"image/jpeg","size":3591367,"hash":"74a7474b18a92a2baef49c5016766117af8bb0a4","id":"cmg0q69meqyub08506ue6gu50","filename":"dsc00263-160.jpg","category":"divesoft/","type":"image"}},"id":"#2","type":"component","lock":false,"position":1},{"name":"Image","data":{"firstImage":{"recommendedSizes":{"width":"1000","height":"1000"},"mimetype":"image/jpeg","size":3591367,"hash":"74a7474b18a92a2baef49c5016766117af8bb0a4","id":"cmg0q69meqyub08506ue6gu50","filename":"dsc00263-160.jpg","category":"divesoft/","type":"image"},"secondImage":{"recommendedSizes":{"width":"1000","height":"1000"},"mimetype":"image/jpeg","size":25097796,"hash":"c31a11b0ab59b4f733f46f8823ad8ba92870ca7a","id":"cmg0q8uy5qyvt0850pp96ddc8","filename":"dsc-1609-2-enhanced-nr-full.jpg","category":"divesoft/","type":"image"}},"id":"#7","type":"component","lock":false,"position":2},{"name":"ProductShowcase","data":{"componentTemplateId":"cm9h4wr6ugjv10803yq
2s3tp71"},"id":"#3","type":"component","lock":false,"position":6},{"name":"Footer","data":{"copyrights":"Copyright © 2019 Divesoft LLC All rights reserved.","facebookUrl":"","youtubeUrl":"","instagramUrl":"","contacts":"**Divesoft, s.r.o.** Hálkova 2495 413 01 Roudnice nad Labem Äeská republika Tel.: +420 416 857 057 E-mail: [email protected]"},"id":"#1","type":"component","lock":false,"position":7}],"id":"root","idBuffer":"#8","lastCommit":"093d2b3c-9ba2-47ff-b58d-fccdb1c88ec7"}},"annotations":[],"language":{"type":"id","generated":false,"id":"Language:cjv3kwvoj000u083611381c6o","typename":"Language"},"__typename":"PageTranslation"},"Page:cm9cnfdzqfd8j0803zvobabx9":{"id":"cm9cnfdzqfd8j0803zvobabx9","type":{"type":"id","generated":false,"id":"PageType:cjv3l213x004f08366hjufttp","typename":"PageType"},"tags":[{"type":"id","generated":false,"id":"Tag:cjv3szrcv01bz0836yo8myb0r","typename":"Tag"},{"type":"id","generated":false,"id":"Tag:clw52z09zlclk0735mxb7v53p","typename":"Tag"},{"type":"id","generated":false,"id":"Tag:cm5ww05zc1b5d0803zglvz927","typename":"Tag"},{"type":"id","generated":false,"id":"Tag:cmfp50qhi00lk08324ek37f9g","typename":"Tag"}],"translations({\"where\":{\"language\":{\"id\":\"cjv3kwvoj000u083611381c6o\"}}})":[{"type":"id","generated":false,"id":"PageTranslation:cm9cnfe06fd8q080316slqvug","typename":"PageTranslation"}],"__typename":"Page"},"PageTranslation:cm9cnfe06fd8q080316slqvug":{"id":"cm9cnfe06fd8q080316slqvug","name":"CCR (rebreather) maintenance: how often visit authorised service center","createdAt":"2025-04-11T10:33:14.406Z","content":{"type":"json","json":{"content":[{"name":"Header","data":{"products":[{"title":"Accessories","description":"Backplates, Consumables. Tanks.","img":{"recommendedSizes":{"width":"235","height":"235"}},"url":""},{"title":"Accessories sets","description":"Protection, maintenance, cleaning.","img":{"recommendedSizes":{"width":"235","height":"235"}},"url":""},{"title":"Spare parts","description":"Spare parts and components.","img":{"recommendedSizes":{"width":"235","height":"235"}},"url":""},{"title":"Spare parts kits","description":"Completly Liberty spare parts kits.","img":{"recommendedSizes":{"width":"235","height":"235"}},"url":""}]},"id":"#0","type":"component","lock":false,"position":0},{"name":"BlogArticle","data":{"title":"CCR (rebreather) maintenance: how often visit authorised service center","perex":"Owning a CCR (closed-circuit rebreather) like the Liberty is not just about enjoying long bottom times and silent dives â itâs also a commitment to ongoing care. In this article I break the topic into two parts:\n\n1 What maintenance the CCR user should do themselves, after each dive or on short cycles\n\n2 What needs to be done by a trained service technician or factory, and how often\n\nBy combining both, a diver maximizes the reliability and safety of the rebreather â avoiding unpleasant surprises far from home.","content":"Owning a CCR (closed-circuit rebreather) like the Liberty is not just about enjoying long bottom times and silent dives â itâs also a commitment to ongoing care. In this article I break the topic into two parts:\n\nWhat maintenance the CCR user should do themselves, after each dive or on short cycles\n\nWhat needs to be done by a trained service technician or factory, and how often\n\nBy combining both, a diver maximizes the reliability and safety of the rebreather â avoiding unpleasant surprises far from home.\n\n### Part 1: User-Level Daily and Routine Care\n\n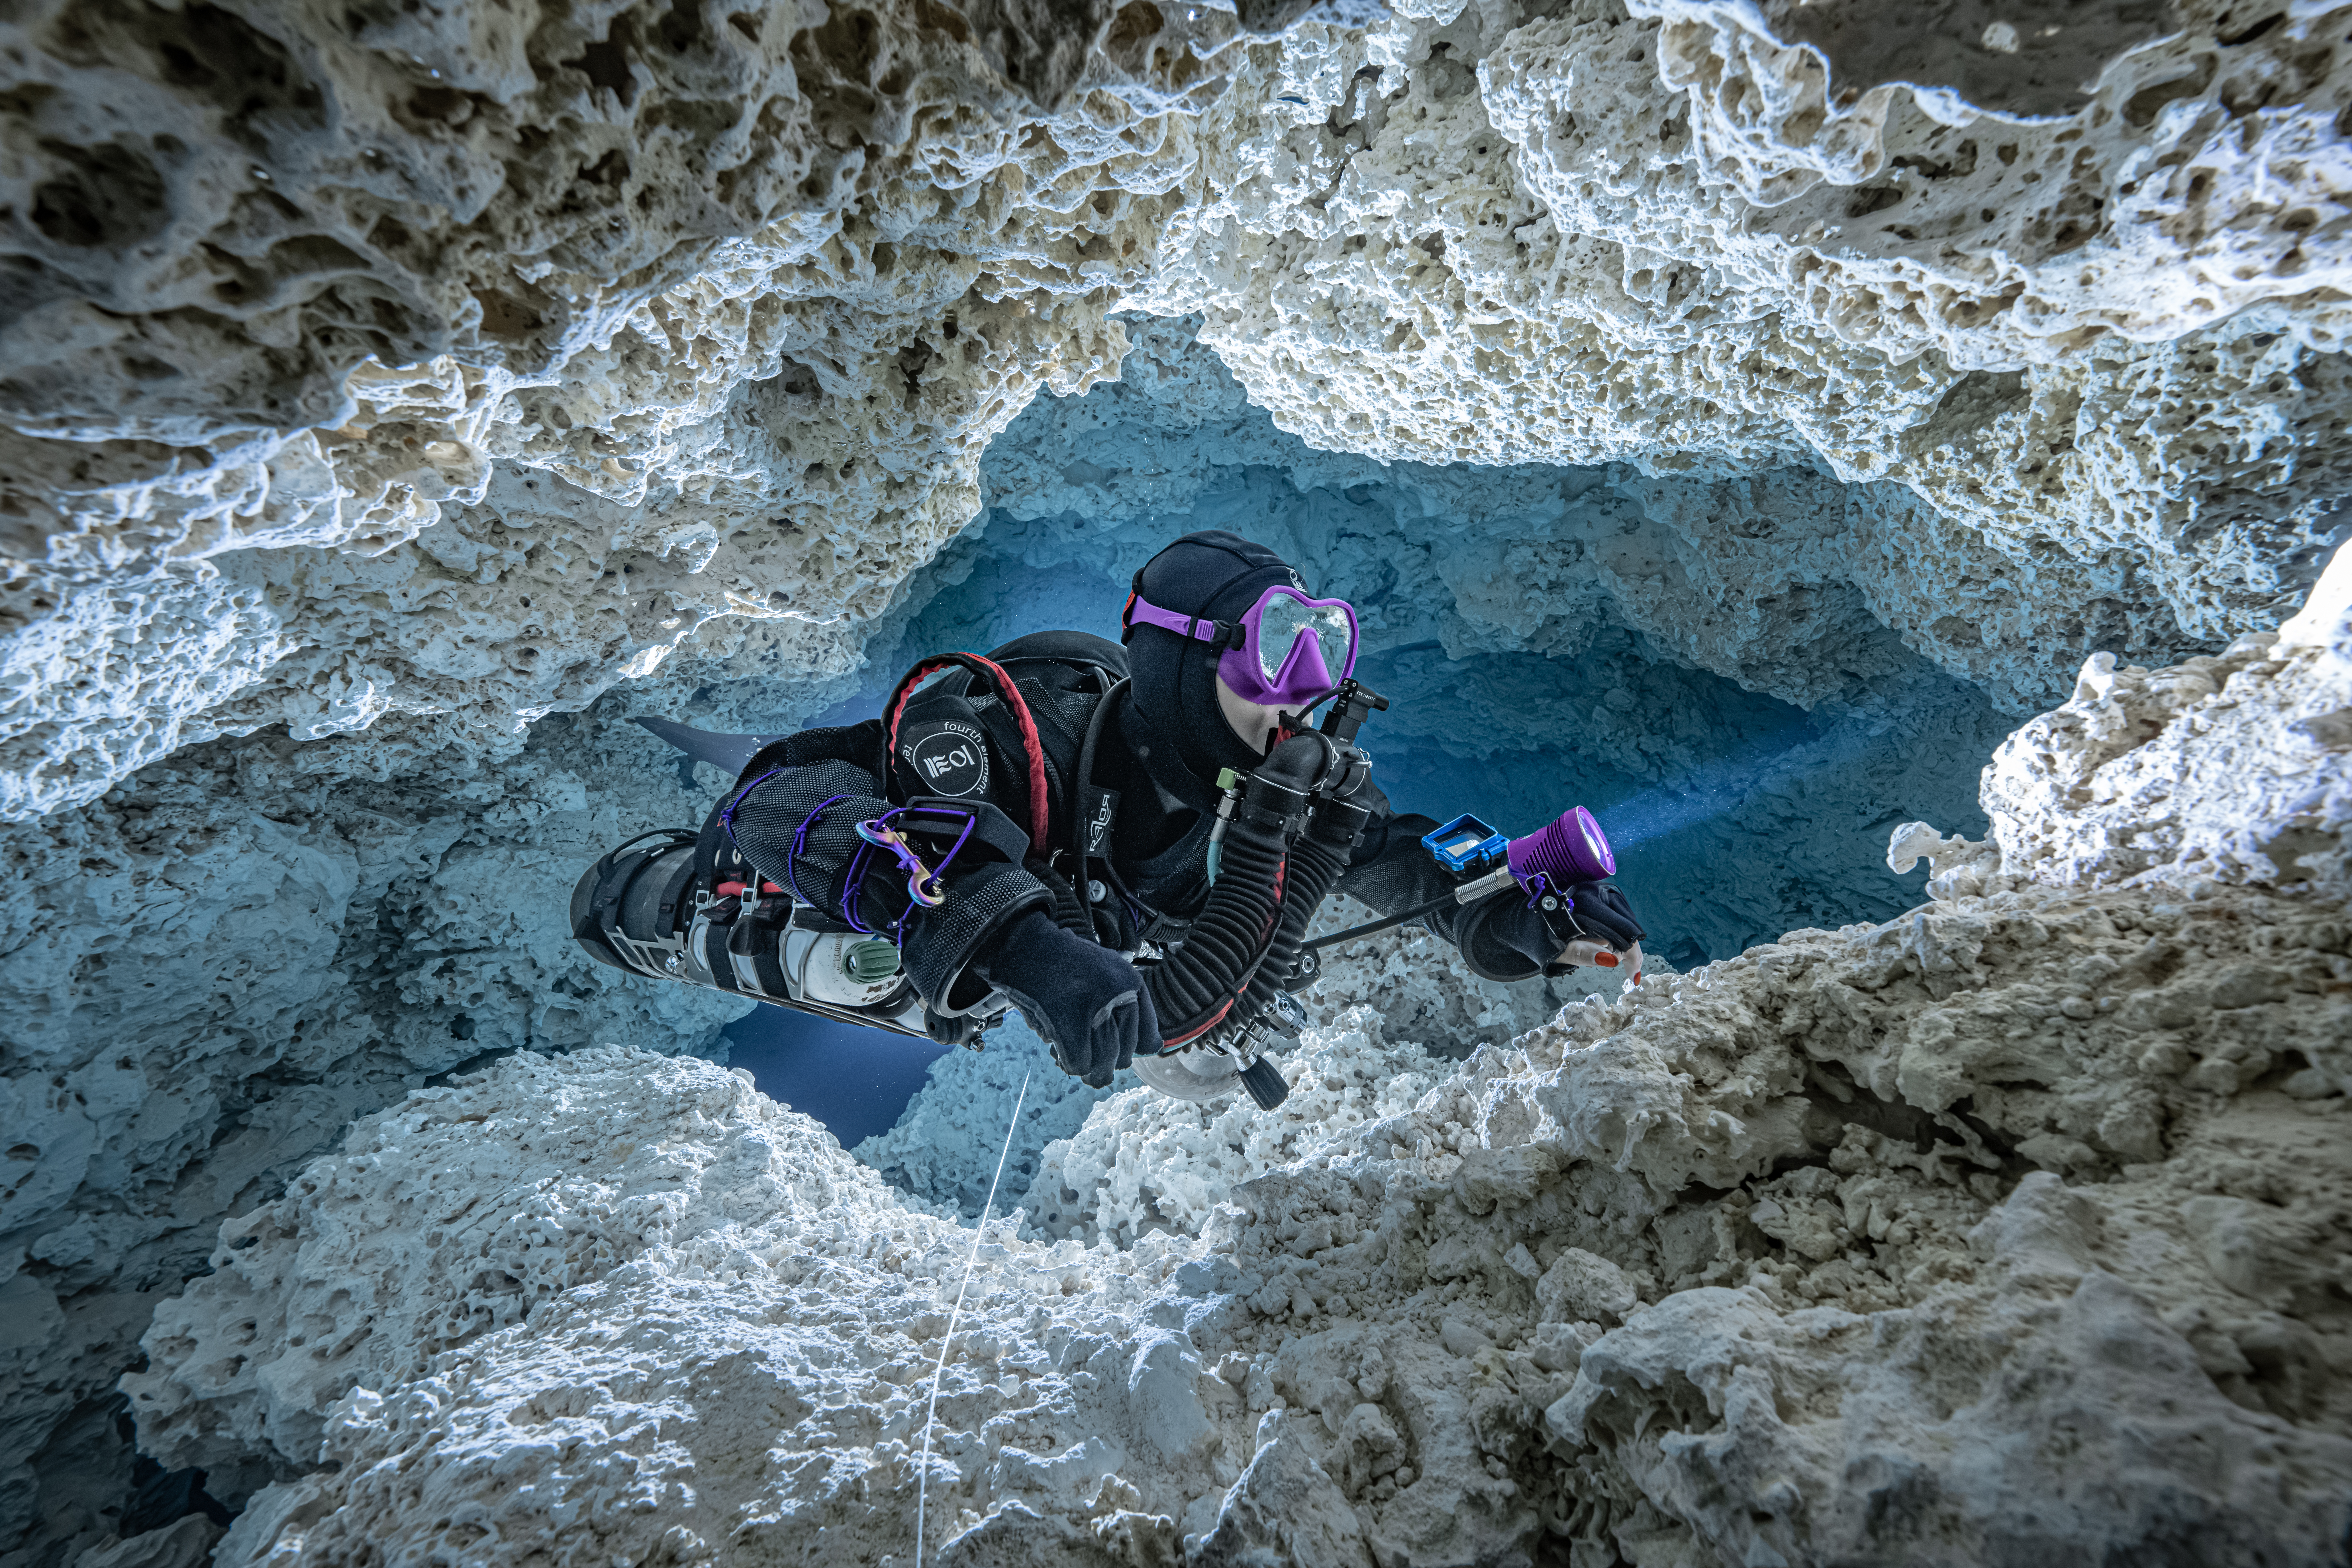\n\nThink of your CCR as a delicate instrument: the better you treat it after each dive, the fewer problems youâll face later. Hereâs what every Liberty user (and CCR diver in general) should adopt as habits.\n\n##### a) Rinse, flush, and dry\n\n* **Rinse external parts with fresh water** immediately after surfacing. Salt and debris can creep into small gaps, causing corrosion or salt crystals that lead to leaks.\n\n* **Flush breathing hoses / loop with fresh water**(diluent side, if permitted by your loop design) to remove saltwater or contaminants.\n \n* **Flush counterlungs
2** (both inhalation and exhalation bags) with clean fresh water, then drain and let them dry thoroughly.\n \n* **Keep the scrubber canister open** or ventilated while drying, but never let scrubber granules go soggy or be left wet.\n\n##### b) Disinfection of the breathing loop\n\nBecause your loop and counterlungs become an extension of your lungs, microbes matter. In between dives (especially over multiple dives in a day) you should:\n\n* **Remove any fluid** from exhaust hoses or water traps,\n\n* **Use a mild, CCR-safe disinfectant** to treat the breathing loop, DSV, BOV, and counterlungs (e.g. virucidal/disinfectant solutions recommended by manufacturer or known safe agents).\n \n* **Rinse thoroughly with fresh water** afterwards, to avoid residual chemicals.\n\n##### c) Inspect and lubricate O-rings and seals\n\n* Each time you assemble or disassemble components (lungs, covers, ports, valves), inspect all accessible O-rings for nicks, cuts, deformation, or hardness.\n\n* Use a proper oxygen-compatible lubricant (thin film) on O-rings. Donât over-lubricate â excess grease can attract grit or degrade over time.\n\n* Replace O-rings that show any sign of wear.\n\n##### d) Battery care and power management\n\n* Maintain optimal battery charge levels. Avoid deep discharges or leaving cells entirely flat for extended periods, as this degrades capacity over time.\n \n* If your CCR uses removable or rechargeable batteries (for electronics, controllers, displays), store them partially charged if storing the unit long term.\n \n* Monitor battery voltage and state-of-health â if cells begin to show early degradation, schedule replacement sooner.\n \n##### e) Desalination after saltwater dives\n\n* After diving in seawater, especially in warm tropical conditions, thoroughly flush all metallic, anodised, or exposed parts (bolts, housings, manifold, external parts). Salt crystals accelerate corrosion and may cause tight spots, galvanic behaviour, or leak paths.\n\n* In humid, salty environments, even storing in protective bags doesnât completely spare salt creep â ensure full rinsing.\n\n##### f) Wing / buoyancy bladder\n\n* Donât forget your wing (lift bladder). Rinse it internally (inflate partially, flush inside), disinfect internally (if geometry allows), rinse, and ensure it is dry (or at least moisture-free) before storage.\n\n* Inspect internal seam lines, inflator hoses, inflation/deflation valves for salt deposits or evidence of wear.\n\n##### Why this user care matters\nAs the training site RebreatherPro notes:\n\n*âIf you take the time to keep up with day-to-day maintenance then you will reduce the possibilities of failures, but also help to make it work more efficiently and extend its life.â* \n[Rebreatherpro-Training](https://www.rebreatherpro-training.com/general-rebreather-care-and-maintenance-ptf342?utm_source=chatgpt.com)\n\nIn short: diligent user maintenance doesnât replace factory service, but it reduces the risk of sudden failures, extends component life, and keeps your unit in shape until its scheduled professional servicing.\n\n### Part 2: Authorised / Factory Service â What, When, and Why\n\n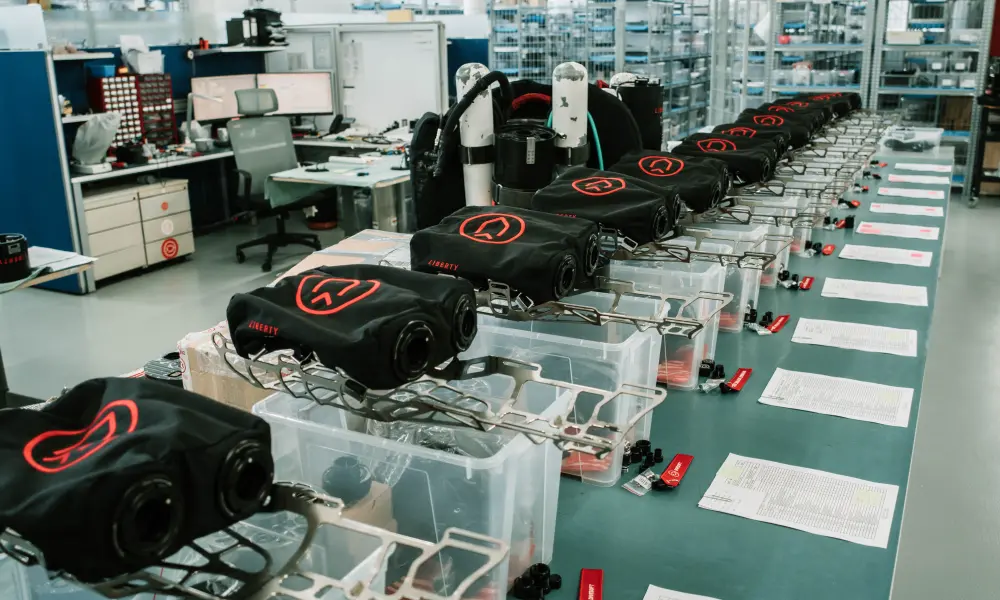\n\nNo matter how careful you are, certain maintenance tasks are better left (or required by warranty) to authorised service centers or factory technicians. A CCR is life-support equipment, and many internal parts are not accessible or advisable for user servicing. Hereâs how to structure your service schedule and what to expect, with some Divesoft-Libertyâspecific guidelines.\n\n##### Why professional service is essential\n\nWhen youâre heading off to a remote dive destination, you canât afford to discover a cracked counterlung, a failed O-ring, or misadjusted regulators right before your first dive.\nRegular professional service is your guarantee of reliability â professionals will disassemble, inspect, pressure-test, replace wear parts, verify alignment, and ensure all parameters (e.g. intermediate pressure, electronics, solenoids) are within specification.\n\n
2Indeed, many CCR manufacturers stipulate service intervals. For example, an authorised Poseidon service center states that Poseidon CCRs must be serviced at least every two years (104 weeks) by qualified personnel. \naltalena.com.au\n\n##### Divesoft / Liberty service guidelines\n\n[Divesoft publishes](https://www.divesoft.com/en/support/ccr-liberty-rebreather/service-operations?utm_source=chatgpt.com) a schedule of recommended services and quoted parts for the Liberty. Some highlights (as of current published data):\n\n* Replacement of corrugated breathing hoses every 5 years for loop hoses (backmount) or side mount, as salt aging/creep may degrade hose materials. \ndivesoft.com\n\n* Replacement of intermediate pressure (IP) hoses and high pressure (HP) hoses every 5 years (or per configuration) \ndivesoft.com\n\n* Regular service of MAVs, first stages, OPVs with sealing components, cleaning, relubrication, and pressure testing. \ndivesoft.com\n\nAlso, the Divesoft service operations page includes cost and scope for many of these tasks â e.g. full refurbishment, replacement of hoses, cleaning + disinfection, etc. \n[divesoft.com](https://www.divesoft.com/en/support/ccr-liberty-rebreather/service-operations?utm_source=chatgpt.com)\n\n##### Recommended service intervals (general CCR practice, adapted)\n\nBelow is a realistic schedule (you should always follow Divesoftâs latest manual recommendations):\n\n| Interval | What to do | Reason / notes |\n| ---------------------- | ----------------------------------------------------------------------------------------------------------------------- | ---------------------------------------------------------------------------------------- |\n| **Annually** | Full inspection, cleaning, seal replacement, pressure test, electronics check, flow checks, solenoid clean, calibration | This is the âbasic tune-upâ that catches wear early |\n| **Every 3 years** | In addition to annual tasks: consider battery replacement (if applicable) | Batteries (especially lithium or rechargeable packs) degrade over time even with low use |\n| **Every 5 years** | Replace all breathing hoses (corrugated loops), replace IP/HP hoses, bulkhead O-rings, solenoid O-rings | Hose material ages, loses elasticity, becomes susceptible to leakage or collapse |\n| **On fault detection** | If any abnormal readings, sensor drift, leaks, crack, corrosion, etc. | Donât wait until next scheduled service â schedule immediate inspection |\n\n\n\nNote that some service centers (for other CCR brands) recommend doing the full body service every 36 months (3 years) as a baseline. For example, East Coast Divers describes a 36-month service involving disassembly, cleaning, inspection, and replacement of recommended parts. \n They also note that for heavy use, you might shorten that interval. \n[East Coast Divers](https://ecdivers.com/equipment-service/ccr-rebreather-service/?utm_source=chatgpt.com)\n\n##### Example: what a Liberty full service should cover\n\nAlthough I donât have the full internal Divesoft service checklist (your âattached documentsâ), based on what Divesoft publishes, the service should include:\n\n* Disassembly of MAVs, first stages, OPVs, cleaning, replacing all sealing parts, relubrication, assembly, and underwater pressure test\n\n* Disassembly, cleaning and inspection of the ADV (membrane), replacing O-rings, testing\n\n* Cleaning + disinfection of gas paths and components exposed to breathing gas\n\n* Calibration of electronics, firmware update, sensor diagnostics\n\n* Replacement of recommended hoses (if 5-year threshold), replacement of sealing / O-ring kits\n\n* Inspect structural components (frame, backplate, manifold), connectors, wiring, cable terminations\n\n* Final leak test, functional test, full certification and service report\n\nIf any wear or damage is found beyond tolerances, the service center should contact you to approve additional repairs or part replacements.\n\n##### Consequences of skipping or delaying service\n\n* Increased chance of in-dive failures (leaks, O-ring blowouts, sensor faults)\n\n* Degradation of hose materials, leading to microcracks or collapse under pressure\n\n* Corrosion or salt intrusion in internal passages, leading to restrictive flow or malfunctions\n\n* Warranty invalidation (many manufacturers require regular authorised servicing)\n\n**Loss of trust in your own equipment â the last thing you want is a failure during an expedition**\n\nAs a diver put it on a forum:\n\n*âNote, just because a manufacturer offers parts for sale, it does not mean that you can get parts in a timely manner ⦠Shearwater will not send you parts to fix their products.â* \n[scubaboard.com](https://scubaboard.com/community/threads/rebreather-service-self-or-factory-only.652384/?utm_source=chatgpt.com)\n\nThat is, in remote locations, you may
2not be able to source critical spare parts â so you must rely on the fact that your CCR is already fully serviced and trustworthy.\n\n### Final Thoughts\n\nOwning a CCR Liberty (or any advanced CCR) is an investment â in performance, freedom, and safety. But that investment only pays off if you match it with proper maintenance discipline and regular professional servicing.\n\nUser-level care after each dive (flushing, disinfection, inspection, lubrication, battery care) is your first line of defense\n\nProfessional service at scheduled intervals is your safety net, ensuring that hidden wear or degradation is caught and corrected\n\nSkimping on service is like skipping oil changes on a high-performance engine â sooner or later something will go wrong at the worst possible moment\n\nIf youâre headed off on a remote dive trip, you donât want to discover a cracked counterlung, a leaking hose, or failed electronics right before your first dive. Regular servicing is your insurance. \n\nAuthor: Jakub Å imánek","showTags":false,"showDate":true,"image":{"mimetype":"image/jpeg","size":2832782,"hash":"b93224652d9b0106128b15aa09f5eba9480a4ed3","id":"cmgermaawue8s0850mld5ju7y","filename":"titulka-photo-daniel-valek.jpg","category":"divesoft/","type":"image"},"publishDate":"10/02/2025"},"id":"#2","type":"component","lock":false,"position":1},{"name":"ProductShowcase","data":{"componentTemplateId":"cm9h4wr6ugjv10803yqs3tp71"},"id":"#21","type":"component","lock":false,"position":5},{"name":"Footer","data":{"copyrights":"Copyright © 2019 Divesoft LLC All rights reserved.","facebookUrl":{"urlNewWindow":true,"url":"https://www.facebook.com/divesoft/"},"youtubeUrl":{"url":"https://www.youtube.com/@divesoft_tv","urlNewWindow":true},"instagramUrl":{"url":"https://www.instagram.com/divesoft/","urlNewWindow":true},"contacts":"**Divesoft s.r.o.** \nHálkova 2495 \n413 01 Roudnice nad Labem \nCzech Republic \nTel.: +420 416 857 057 \nE-mail: [email protected]","twitterUrl":{"url":"","urlNewWindow":true,"pageId":"cjv3l26tp004p0836i54n4u7a"}},"id":"#1","type":"component","lock":false,"position":6}],"id":"root","idBuffer":"#25","lastCommit":"37e21045-046c-4601-8288-0350ec7f527c"}},"annotations":[],"language":{"type":"id","generated":false,"id":"Language:cjv3kwvoj000u083611381c6o","typename":"Language"},"__typename":"PageTranslation"},"Page:cm9cnfr52fd98080350l77m3z":{"id":"cm9cnfr52fd98080350l77m3z","type":{"type":"id","generated":false,"id":"PageType:cjv3l213x004f08366hjufttp","typename":"PageType"},"tags":[{"type":"id","generated":false,"id":"Tag:cjv3szrcv01bz0836yo8myb0r","typename":"Tag"},{"type":"id","generated":false,"id":"Tag:cl28w8de8gdo20858cjkbufee","typename":"Tag"},{"type":"id","generated":false,"id":"Tag:cm5ww05zc1b5d0803zglvz927","typename":"Tag"},{"type":"id","generated":false,"id":"Tag:cm5ww0t651b710803pcl02cn4","typename":"Tag"},{"type":"id","generated":false,"id":"Tag:cmfp50qhi00lk08324ek37f9g","typename":"Tag"}],"translations({\"where\":{\"language\":{\"id\":\"cjv3kwvoj000u083611381c6o\"}}})":[{"type":"id","generated":false,"id":"PageTranslation:cm9cnfr5nfd9f0803ub46t5lg","typename":"PageTranslation"}],"__typename":"Page"},"PageTranslation:cm9cnfr5nfd9f0803ub46t5lg":{"id":"cm9cnfr5nfd9f0803ub46t5lg","name":"CCR diving certification courses: how it goes and what you need to know","createdAt":"2025-04-11T10:33:31.451Z","content":{"type":"json","json":{"content":[{"name":"Header","data":{"products":[{"title":"Accessories","description":"Backplates, Consumables. Tanks.","img":{"recommendedSizes":{"width":"235","height":"235"}},"url":""},{"title":"Accessories sets","description":"Protection, maintenance, cleaning.","img":{"recommendedSizes":{"width":"235","height":"235"}},"url":""},{"title":"Spare parts","description":"Spare parts and components.","img":{"recommendedSizes":{"width":"235","height":"235"}},"url":""},{"title":"Spare parts kits","description":"Completly Liberty spare parts kits.","img":{"recommendedSizes":{"width":"235","height":"235"}},"url":""}]},"id":"#0","type":"component","lock":false,"position":1},{"name":"BlogArticle","data":{"title":"CCR diving certification courses: how it goes and what you need to know","perex":"In this article, weâll walk through what a CCR Liberty certification course involves, why a high standard of instruction matters, the role of the Rebreather Training Council (RTC) and ISO standards, and how to choose a training path that sets you up for success.","content":"\n### How a CCR Liberty Course Typically Proceeds\n\nA quality[ CCR Liberty](https://www.divesoft.com/en/products/ccr-liberty) training track will resemble the following progression. Note: each training agency (e.g., DIVESOFT, partner instructor groups) may tailor it, but the structure should meet or exceed [RTC] (https://rebreathertrainingcouncil.org/?utm_source=chatgpt.com) (or equivalent) standards.\n##### Prerequisites\nBefore enrolling, divers are typically expected to have: \n* Advanced Open Water (or equivalent)\n* Nitrox certification (Advanced Nitrox with stage cylinder recommended)\n* Strong buoyancy control and trim\n* A minimum number of logged dives often 30â50 (100 recommended)\n* Recent diving activity\n* Medical clearance as required \n\n**These ensure youâre ready for the cognitive load and risks CCR introduces.**\n##### Course Phases \n1. 1.\t**Classroom / Theory** \nTheory is meant to prepare you for whatever the real world underwater has in store for you. You should be able to understand and fully grasp the principles of rebreather diving.\nYou will study diving p
2hysiology (Oâ toxicity, COâ retention, hypoxia), gas control, loop mechanics, electronics, failure modes, emergency decision trees, and dive planning (diluent, bailout, decompression).\n2.\t**Confined Water / Pool Work** \nIn the pool, you will get used to new equipment that is so different from the device you are used to. In the confines of the pool, you will be safe and confident enough to try everything you need before you are exposed to the other influences of the real underwater world.\nUnder instructor supervision, you practice:\n* Loop pre-breathing, flood management, purge/clear procedures\n* Manual POâ control (if applicable)\n* Bailout drills (switching to open circuit)\n* Buoyancy and trim control with full loop\n* Simulated failures (sensor dropouts, flooding, etc.)\n3.\t**Open Water Dives** \nUnder the supervision of an experienced instructor, you will learn everything you need to know for self-sufficient diving with a rebreather in real conditions.\nYouâll execute a series of 8 dives âprogressing in complexity and depth (commonly to 30 m for entry-level). Tasks include:\n* Detailed pre-dive checklists\n* In-water loop monitoring and adjustment\n* Controlled ascents and gas switching\n* Emergency responses (e.g. high POâ, cell failure, flood)\n* Post-dive checks, maintenance, sensor calibration, and data logging \n4.\t**Certification Debrief & Final Assessment** \nYou will be evaluated on theory, skills, emergency handling, and dive logs. The instructor confirms that you are competent and comfortable to proceed. \n\nTimeframe is often **5â7 days**, depending on your pace and local conditions.\n________________________________________\n\n\n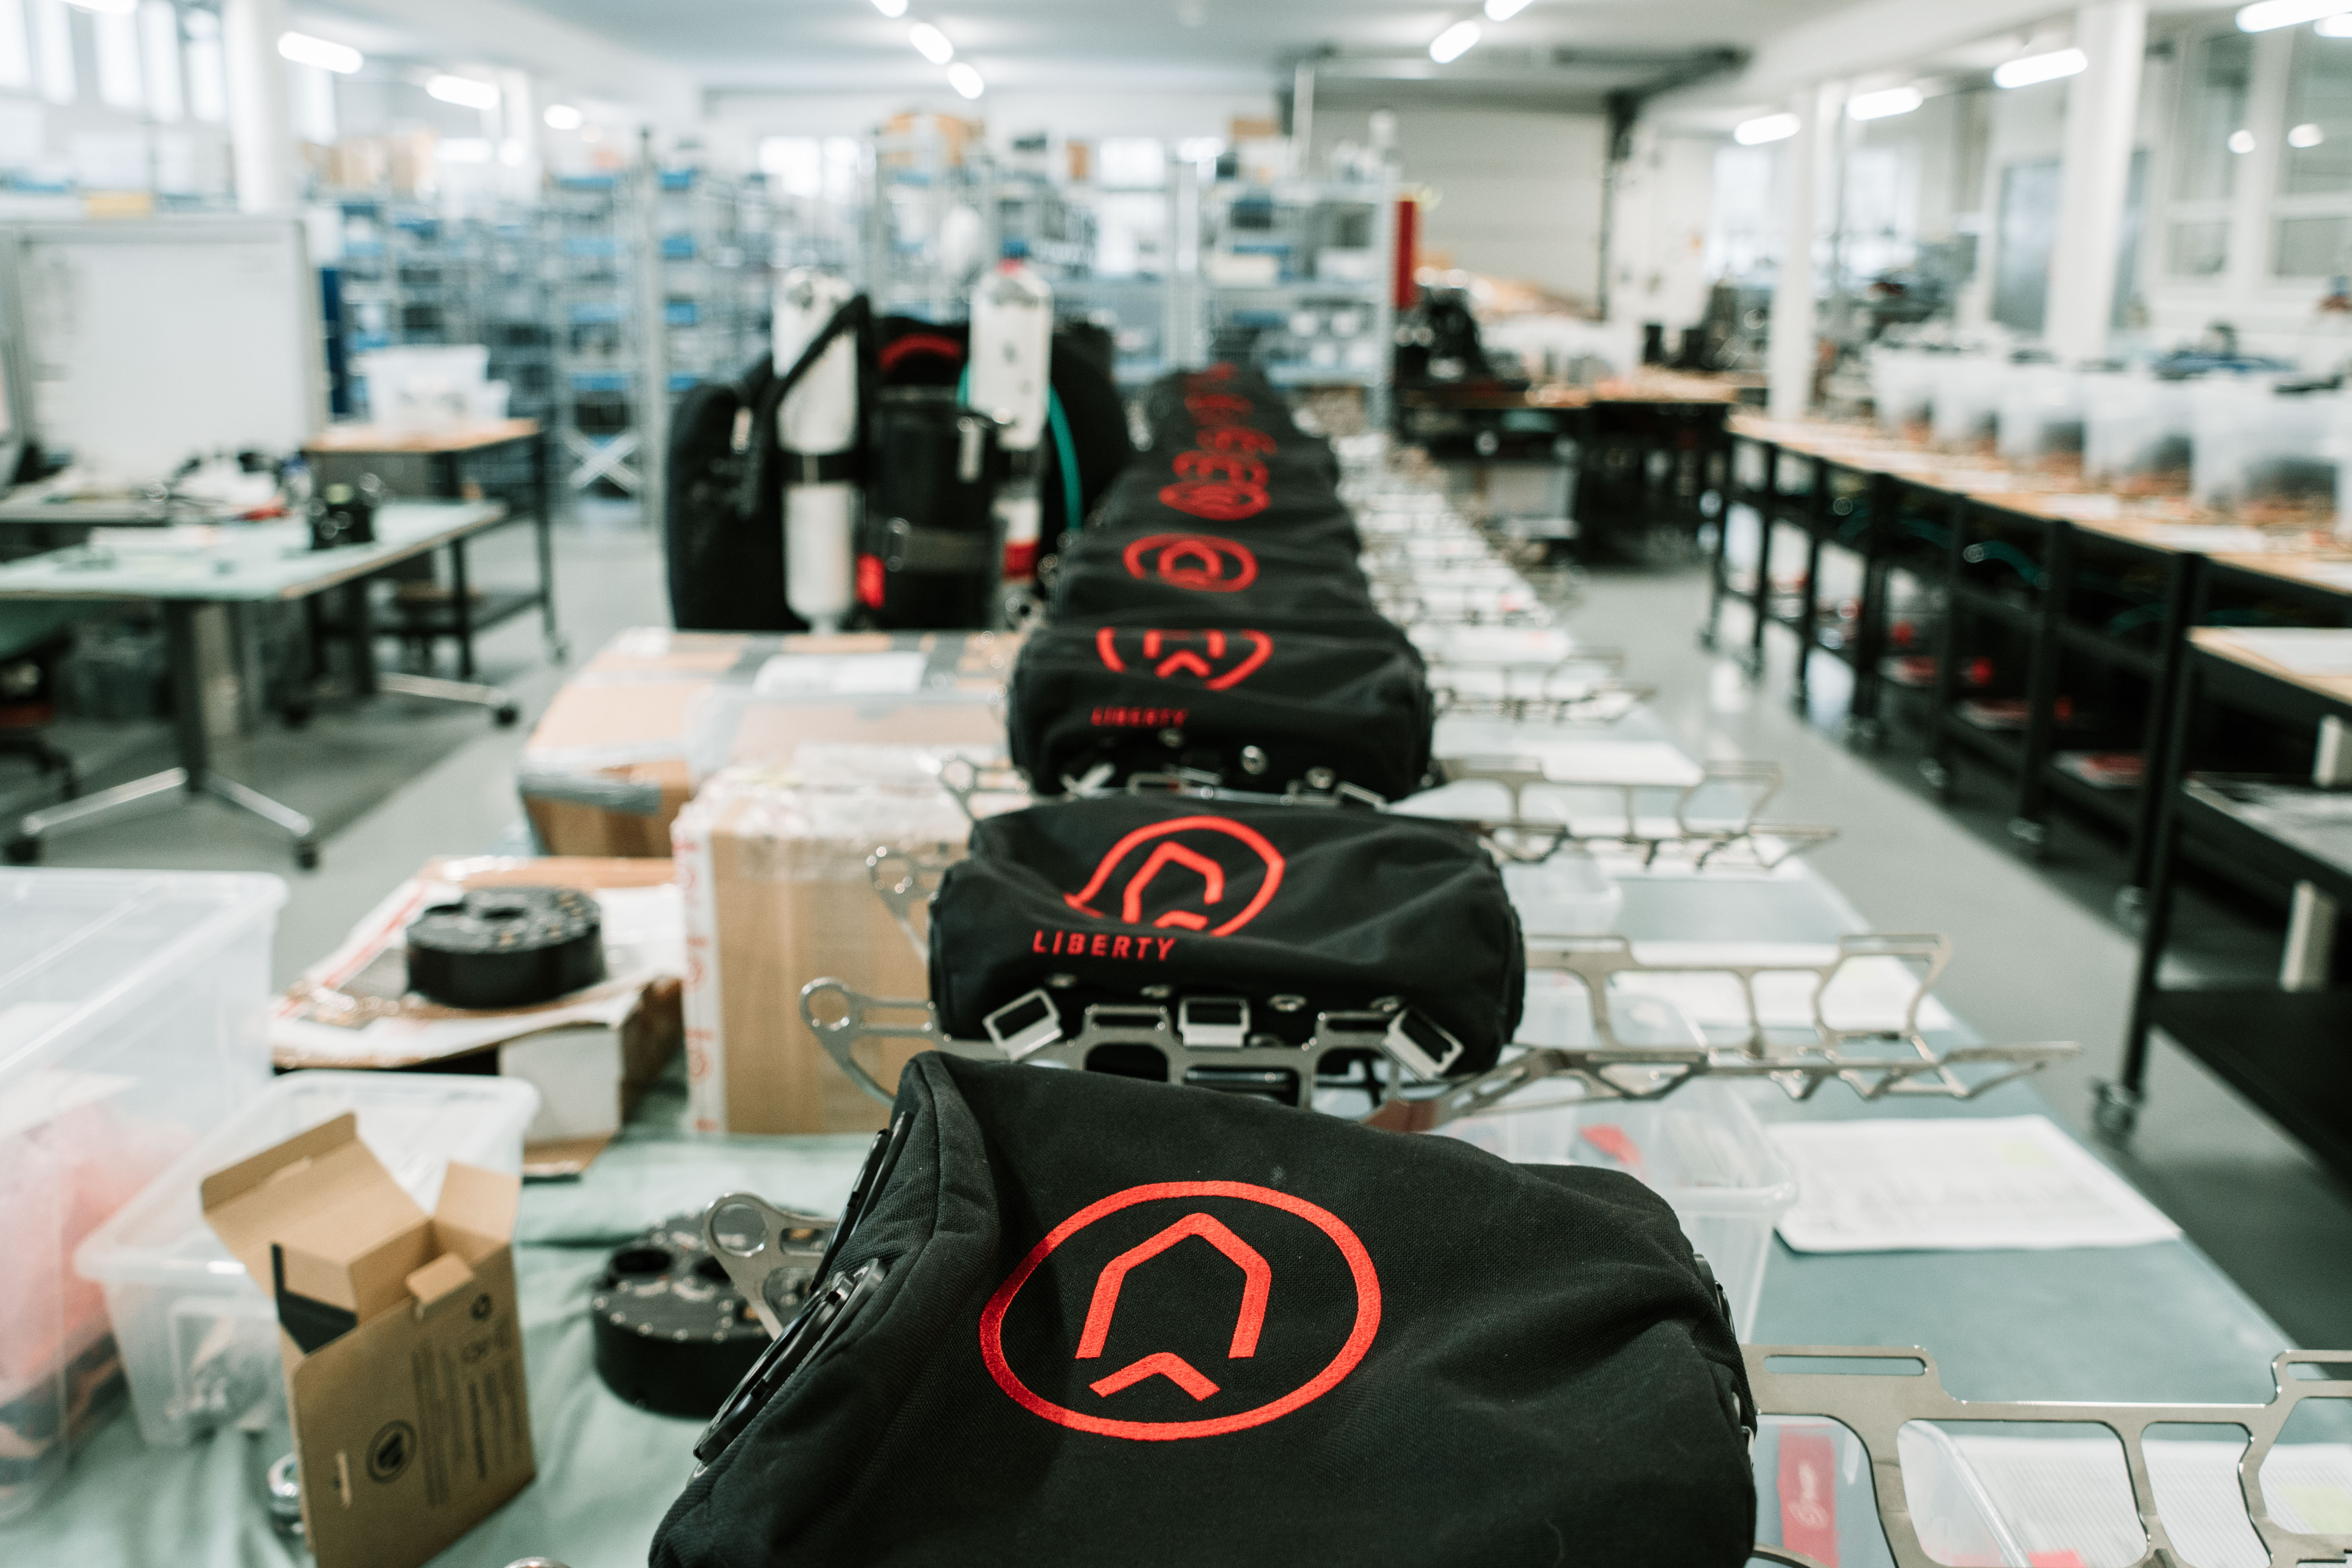\n\n### Risks & Reality: Why Rigorous Training Is Non-Negotiable \nCCR diving introduces hazards not encountered in open circuit: **hypoxia, hyperoxia, hypercapnia, COâ retention, sensor failure, flooding, loop failures**. Because of these, every CCR diver relies heavily on systematic habits, checklists, and overlearning of critical drills.\n\nAs experienced technical diver and educator Phil Short once put it: \n*âTraining is not just about learning to operate the machine â itâs about learning to think like a rebreather diver.â* \nâ **Phil Short, explorer and diving educator** [(source)](https://www.tdisdi.com/?p=48407&utm_source=chatgpt.com) \n\nThat mindset â cautious, methodical, and self-aware â is what turns complex equipment into a safe tool for exploration.\nTherefore, your instructor, training syllabus, and continued practice after certification are your real life-zone of safety.\n________________________________________\n### The Path of Progression \nOnce certified as an entry-level CCR Air Diluent Diver (40 m), you can progress to: \n1.\t**CCR Air Diluent Decompression** (30 m) \n2.\t**CCR Air Diluent Decompression** (40 m) \n3.\t**CCR Trimix** (60 m) â introduces helium and decompression management \n4.\t**Advanced Trimix** (100 m+) â for deep exploration and technical diving \n\n\nEach step builds upon experience logged on your rebreather and expands both knowledge and confidence. \n\n##### RTC & ISO: The Framework Behind Quality CCR Training \n[The Rebreather Training Council (RTC)](https://rebreathertrainingcouncil.org/?utm_source=chatgpt.com) brings together major training agencies to align minimum curricula and safety expectations for rebreather courses. RTC also works with manufacturers via CRISAG to align diver training and equipment considerations. Crucially, RTC holds Category C liaison status with ISO/TC 228 WG 1 (Diving Services) and contributed to drafting the ISO rebreather diver training standards now in force. rebreathertrainingcouncil.org+2rebreathertrainingcouncil.org+2\n\nCurrent ISO standards for CCR diver training: \n* ISO 24804:2022* â Rebreather diver training: No-decompression diving. Competencies for rebreather dives to 30 m without mandatory decompression using nitrox. iso.org+1\n* ISO 24805:2022 â Rebreather diver training: Decompression diving to 45 m. Competencies for dives requiring decompression to 40 m on nitrox or to 45 m on trimix. iso.org+1\n* ISO 24806:2023 â Rebreather diver training: Decompression diving to 60 m. Competencies for decompression dives to 60 m using helium-containing mixes. iso.org\n* ISO 24807:2023 â Rebreather diver training: Decompression diving to 100 m. Competencies for decompression dives to 100 m using helium-containing mixes. iso.org\n\n(As background, RTC had earlier published its own Level 1â3 technical standards; many agency syllabi map closely to these levels and now align with ISO.) rebreathertrainingcouncil.org+1\n\n**Why this matters**: ISO/RTC alignment gives students and operators a common languageâdepth/gas limits, core skills, evaluation criteriaâso your certificationâs implications are clear when you travel or join new teams.\n\nExplorer and educator** Jill Heinerth** puts it plainly: \n*âTraining agencies have the opportunity to set the ground rules right from the beginning and guide divers to recognize that the general safety rules have been developed from practical experiences.â* [intotheplanet.com](https://www.intotheplanet.com/)\n\nThat cultureâstandards, repeatable habits, and instructor accountabilityâturns complex equipment into a safe tool for exploration.\n\n \n\nTraining on Liberty: What to Look for\nIf you choose to train using the [Liberty](https://www.divesoft.com/en/products/ccr-liberty) rebreather, here are some criteria to keep in mind so your training is meaningful and future-proof:\nâ¢\tUnit-specific instruction â CCR certification is machine-specific. If your training is on [Liberty] (https://www.divesoft.com/en/products/ccr-liberty), thatâs the unit you should continue to use (or do a crossover for others).\nâ¢\tRedundancy & failure simulation â your course should include drills for sensor dropouts, loop flooding, solenoid malfunctions, etc.\nâ¢\tMaintenance & c
2alibration training â you should learn to inspect, replace, and calibrate Oâ sensors, scrubber media, and seals.\nâ¢\tExtended scenario dives â look for courses that go beyond ideal conditions (currents, limited visibility, off-gassing complexity).\nâ¢\tEmphasis on human factors & non-technical skills â your course should also teach judgement, situational awareness, communication, and error recognition.\nPost-certification, commit to regular practice, maintain checklists, retrofit firmware updates, and engage with the [Liberty / CCR community to stay sharp.] (https://www.facebook.com/groups/104210749916042)\n________________________________________\n\nFinal Thoughts & Advice\nCCR Liberty diving holds tremendous promise â elegance, efficiency, and deeper exploration. But it is not a shortcut. The safety margin in rebreather diving is less forgiving than ever, so you must:\n1.\tChoose a training provider that adheres to or exceeds RTC / ISO standards\n2.\tBe ready for intensive theory, hands-on confined water, and challenging open-water drills\n3.\tTreat checklists and emergency procedures as sacred\n4.\tPractice regularly after certification\n5.\tRespect your limits, and expand gradually\nDive safe, stay curious â and let Liberty open new windows into the underwater world.\n\n\nAuthor: Jakub Å imánek","showTags":false,"showDate":true,"image":{"mimetype":"image/jpeg","size":647608,"hash":"9f1abb59838a49a01fa222cd19f9ae12101d8e67","id":"cmgyrza0s0hyx0850fo7vlxwx","filename":"titulka-ccr-classes.jpg","category":"divesoft/","type":"image"},"publishDate":"10/13/2025"},"id":"#2","type":"component","lock":false,"position":2},{"name":"ProductShowcase","data":{"componentTemplateId":"cm9h4wr6ugjv10803yqs3tp71"},"id":"#9","type":"component","lock":false,"position":3},{"name":"Footer","data":{"copyrights":"Copyright © 2019 Divesoft LLC All rights reserved.","facebookUrl":"","youtubeUrl":"","instagramUrl":"","contacts":"**Divesoft, s.r.o.** Hálkova 2495 413 01 Roudnice nad Labem Äeská republika Tel.: +420 416 857 057 E-mail: [email protected]"},"id":"#1","type":"component","lock":false,"position":4}],"id":"root","idBuffer":"#11","lastCommit":"62218c15-ec4d-4cdf-8ee1-72cfd235564e"}},"annotations":[],"language":{"type":"id","generated":false,"id":"Language:cjv3kwvoj000u083611381c6o","typename":"Language"},"__typename":"PageTranslation"},"Page:cm9coazvwfdk10803da2ixhdm":{"id":"cm9coazvwfdk10803da2ixhdm","type":{"type":"id","generated":false,"id":"PageType:cjv3l213x004f08366hjufttp","typename":"PageType"},"tags":[{"type":"id","generated":false,"id":"Tag:cjv3szrcv01bz0836yo8myb0r","typename":"Tag"},{"type":"id","generated":false,"id":"Tag:cl28w8de8gdo20858cjkbufee","typename":"Tag"},{"type":"id","generated":false,"id":"Tag:clw52z09zlclk0735mxb7v53p","typename":"Tag"},{"type":"id","generated":false,"id":"Tag:cm5ww05zc1b5d0803zglvz927","typename":"Tag"},{"type":"id","generated":false,"id":"Tag:cmfp50qhi00lk08324ek37f9g","typename":"Tag"}],"translations({\"where\":{\"language\":{\"id\":\"cjv3kwvoj000u083611381c6o\"}}})":[{"type":"id","generated":false,"id":"PageTranslation:cm9coazwffdk80803qwzztu2b","typename":"PageTranslation"}],"__typename":"Page"},"PageTranslation:cm9coazwffdk80803qwzztu2b":{"id":"cm9coazwffdk80803qwzztu2b","name":"Life-changing experience: why you should try CCR diving","createdAt":"2025-04-11T10:57:49.119Z","content":{"type":"json","json":{"content":[{"name":"Header","data":{"products":[{"title":"Accessories","description":"Backplates, Consumables. Tanks.","img":{"recommendedSizes":{"width":"235","height":"235"}},"url":""},{"title":"Accessories sets","description":"Protection, maintenance, cleaning.","img":{"recommendedSizes":{"width":"235","height":"235"}},"url":""},{"title":"Spare parts","description":"Spare parts and components.","img":{"recommendedSizes":{"width":"235","height":"235"}},"url":""},{"title":"Spare parts kits","description":"Completly Liberty spare parts kits.","img":{"recommendedSizes":{"width":"235","height":"235"}},"url":""}]},"id":"#0","type":"component","lock":false,"position":0},{"name":"BlogArticle","data":{"title":"Life-changing Experience: Why You Should Try CCR Diving","perex":"Imagine diving in complete silence, surrounded by the deep blue, without a single bubble to disturb the calm â staying underwater for over an hour, breathing warm, recycled air, and feeling like youâve become part of the ocean itself. Thatâs what closed-circuit rebreather (CCR) diving offers: freedom, time, and a connection with the underwater world that open-circuit scuba canât match. For me, it was more than just a new way to dive â it was a life-changing experience that redefined everything I thought I knew about the ocean.","content":"From the first moment I learned about rebreathers, I was fascinated. I still remember being sixteen when the Dräger Dolphin appeared on the market â that small white box that promised longer bottom times, shorter decompression, warm breathing gas, and almost no bubbles. It was a semi-closed circuit system, and at the time, I knew almost nothing about rebreathers except what I had read in old Svazarm* diving manuals. Those books, written during the socialist era, were my first window into the world of technical diving, and they sparked a passion that would later define my life.\n\nWhen the yellow Inspiration rebreather was introduced, it completely blew my mind. An electronically controlled, fully closed circuit system that optimized the use of breathing gas, allowing deep, long dives â it was like something out of science fiction. I devoured every article, every bit of literature I could find, preparing myself for the day I would finally dive with one.\n\n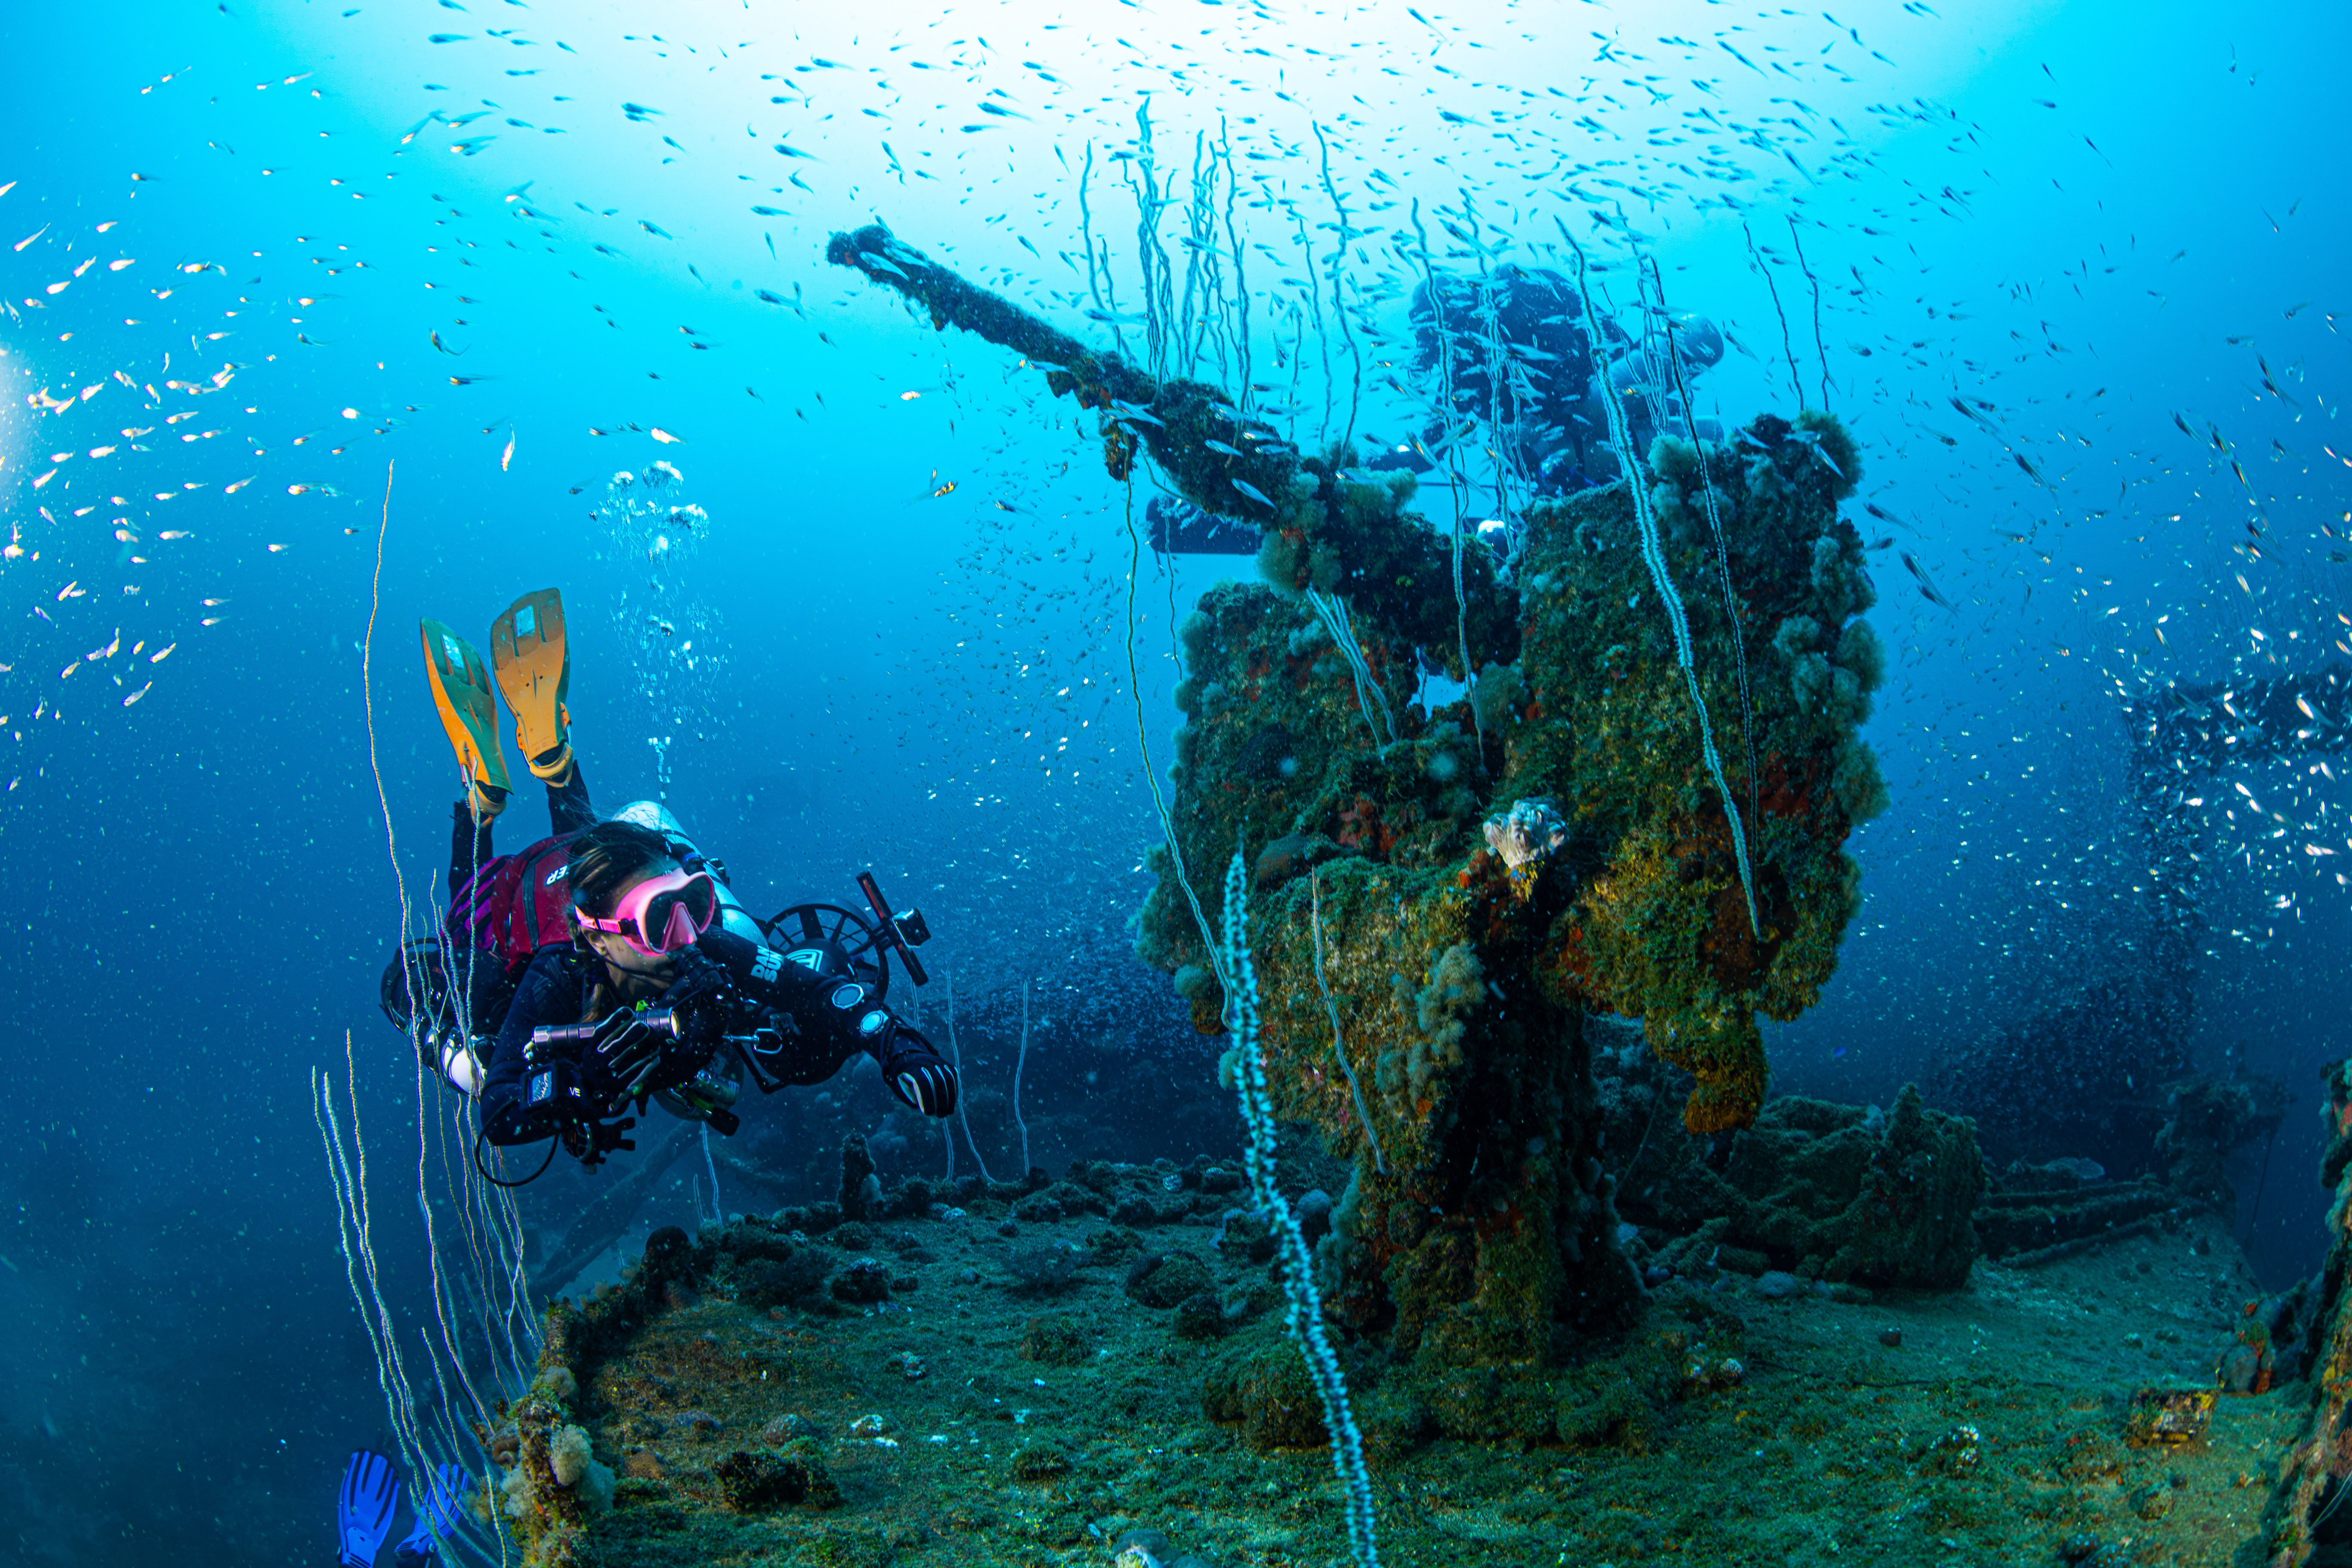\n\nThat day came when I got the chance to dive with the first functional prototype of the [Liberty rebreather](https://www.divesoft.com/en/products/ccr-liberty). It was a dream come true. Suddenly, I had access to adventures that would have been difficult, extremely expensive due to helium costs, or even impossible with open-circuit scuba. Theoretical knowledge is one thing, but the first-hand experience of buoyancy control, silence, and freedom that the [Liberty](https://www.divesoft.com/en/products/ccr-liberty) provided was something else entirely.\n\nIâll never forget one of my first dives as a CCR diver â exploring a wreck at 30 meters with an air diluent. I spent nearly an hour inside and around the wreck, fully immersed in the experience. Normally, such a dive would require at least an hour of decompression, but this time my decompression lasted only twelve minutes. I was amazed â it felt like breaking the rules of physics, like bending time itself.\n\nYears later, as a seasoned CCR instructor trainer, I still felt the same sense of wonder. I remember diving the Spiegel Grove wreck at 40 meters with my friend [Joe Bosquez](https://www.youtube.com/watch?v=WILI-2KPKSs). With us was a group of recreational open-circuit divers. At first, the wreck was crowded, bubbles everywhere, but after a short while the noise faded and the place became ours alone. We drifted silently among massive goliath groupers, sharks, turtles, giant barracudas, and moray eels â the kind of peaceful, intimate underwater encounter that only rebreather diving can offer.\n\nAbout forty minutes later, a cloud of bubbles appeared above us â the same recreational divers returning for their second dive. They stayed for a brief moment before surfacing again. When our bottom time finally ended, we met them on the deco line and surfaced together. The contrast was striking: while they had just begun their second short dive, we were ending a single, long, relaxed, and unforgettable one.\n\n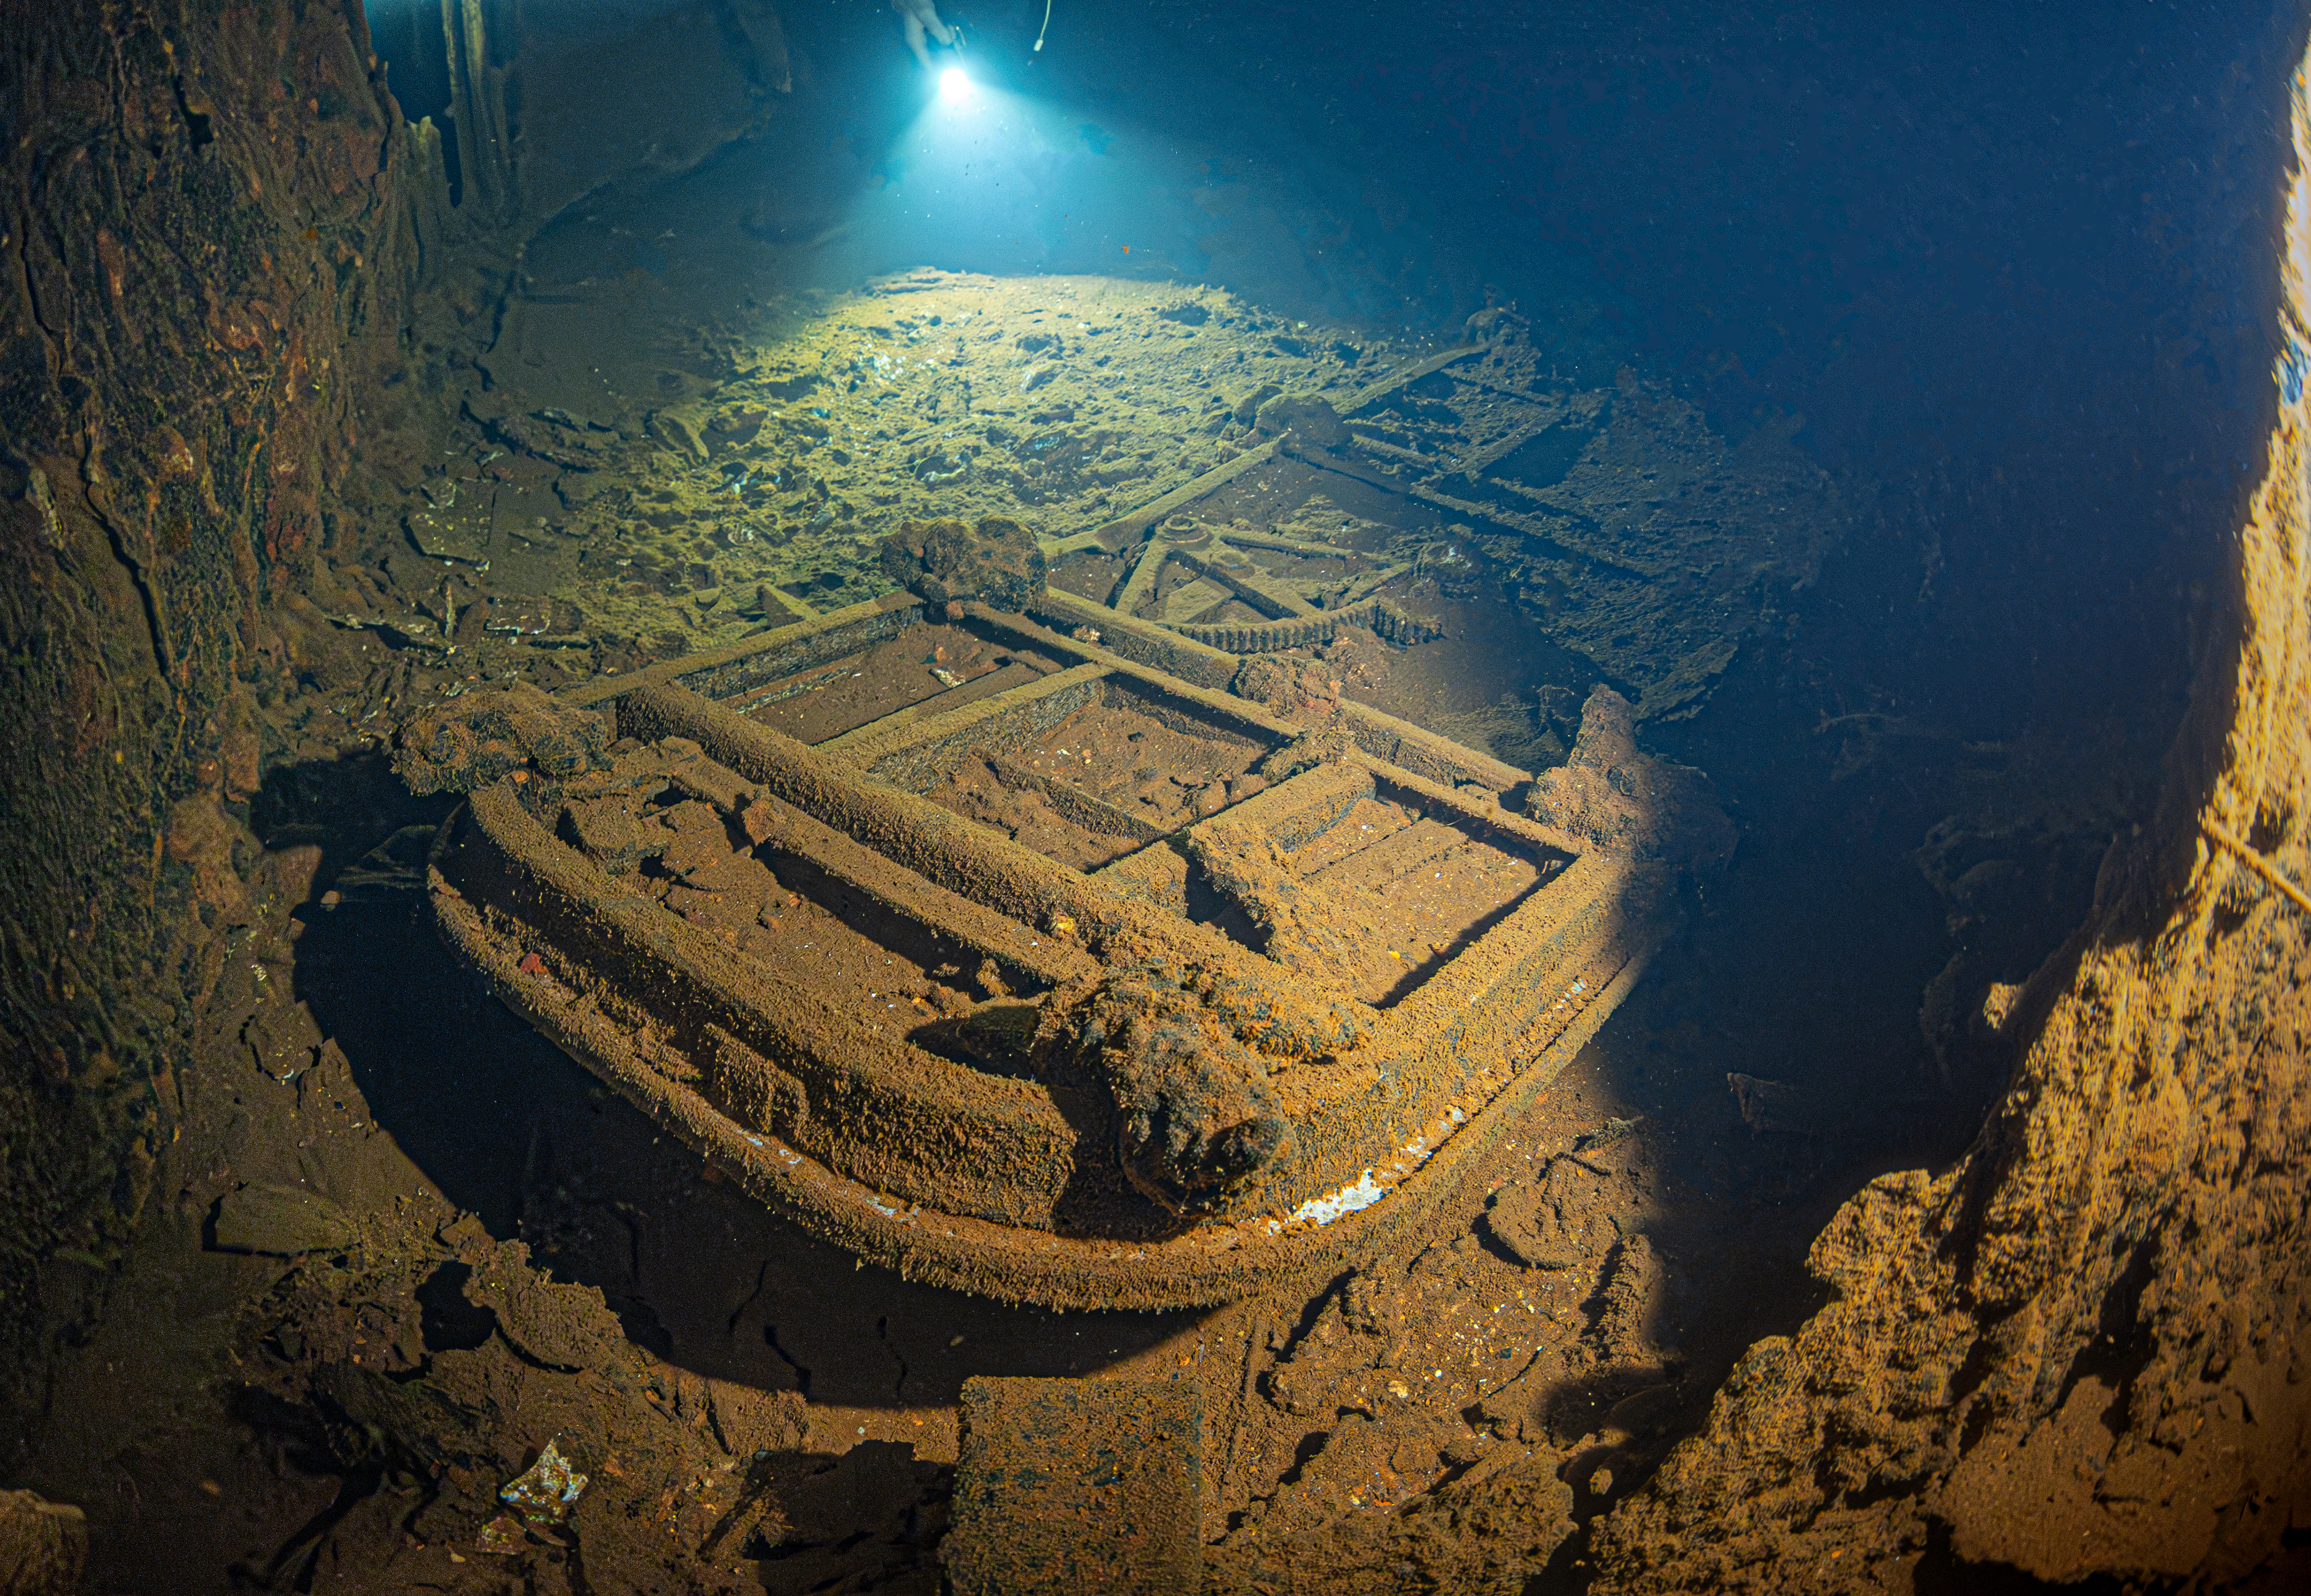\n\nThatâs the magic of CCR diving. It gives you time â time to explore, to observe, to breathe in silence and become part of the underwater world rather than just a visitor. Itâs more than a technical upgrade; itâs a transformation in how you experience diving itself.\n\nIf youâve ever dreamed of staying longer below the surface, of exploring the ocean as freely as possible, CCR diving is a life-changing experience you should try. It opens a new world â one of silence, precision, and endless discovery.\n\n*Note: *âSvazarmâ (Union for Cooperation with the Army) was a Czechoslovak organization active during the socialist period that trained civilians in various technical and military-related disciplines, including diving, aviation, and radio operation. Its diving manuals were among the first sources of underwater knowledge for many Czech and Slovak divers.*\n\n\nAuthor: [Jakub Å imánek](https://www.divesoft.com/en/about-us/jakub-simanek)","showTags":false,"showDate":true,"publishDate":"11/11/2025","image":{"mimetype":"image/jpeg","size":990049,"hash":"c7247dac333d189c52caf45683931d31a732f2f5","id":"cmhudijjfatpf08507egaidb5","filename":"titulka-experience.jpg","category":"divesoft/","type":"image"}},"id":"#2","type":"component","lock":false,"position":1},{"name":"ProductShowcase","data":{"componentTemplateId":"cm9h4wr6ugjv10803yq
2s3tp71"},"id":"#6","type":"component","lock":false,"position":5},{"name":"Footer","data":{"copyrights":"Copyright © 2019 Divesoft LLC All rights reserved.","facebookUrl":"","youtubeUrl":"","instagramUrl":"","contacts":"**Divesoft, s.r.o.** Hálkova 2495 413 01 Roudnice nad Labem Äeská republika Tel.: +420 416 857 057 E-mail: [email protected]"},"id":"#1","type":"component","lock":false,"position":8}],"id":"root","idBuffer":"#9","lastCommit":"23739aa9-d889-4b08-b483-bd3a44f6cbc4"}},"annotations":[],"language":{"type":"id","generated":false,"id":"Language:cjv3kwvoj000u083611381c6o","typename":"Language"},"__typename":"PageTranslation"},"Page:cm9cobgfnfdl50803o4nzn2zf":{"id":"cm9cobgfnfdl50803o4nzn2zf","type":{"type":"id","generated":false,"id":"PageType:cjv3l213x004f08366hjufttp","typename":"PageType"},"tags":[{"type":"id","generated":false,"id":"Tag:cjv3szrcv01bz0836yo8myb0r","typename":"Tag"},{"type":"id","generated":false,"id":"Tag:cl28w8de8gdo20858cjkbufee","typename":"Tag"},{"type":"id","generated":false,"id":"Tag:clw52z09zlclk0735mxb7v53p","typename":"Tag"},{"type":"id","generated":false,"id":"Tag:clw52zeqhlclq0735wrys6js8","typename":"Tag"},{"type":"id","generated":false,"id":"Tag:cm5ww05zc1b5d0803zglvz927","typename":"Tag"},{"type":"id","generated":false,"id":"Tag:cm5ww0t651b710803pcl02cn4","typename":"Tag"},{"type":"id","generated":false,"id":"Tag:cm5ww0z2w1b7708035dpdbq9a","typename":"Tag"},{"type":"id","generated":false,"id":"Tag:cmfp50qhi00lk08324ek37f9g","typename":"Tag"}],"translations({\"where\":{\"language\":{\"id\":\"cjv3kwvoj000u083611381c6o\"}}})":[{"type":"id","generated":false,"id":"PageTranslation:cm9cobgg4fdlc0803ulfp6mjh","typename":"PageTranslation"}],"__typename":"Page"},"PageTranslation:cm9cobgg4fdlc0803ulfp6mjh":{"id":"cm9cobgg4fdlc0803ulfp6mjh","name":"Liberty rebreathers purchasing process: what to expect when you order","createdAt":"2025-04-11T10:58:10.563Z","content":{"type":"json","json":{"content":[{"name":"Header","data":{"products":[{"title":"Accessories","description":"Backplates, Consumables. Tanks.","img":{"recommendedSizes":{"width":"235","height":"235"}},"url":""},{"title":"Accessories sets","description":"Protection, maintenance, cleaning.","img":{"recommendedSizes":{"width":"235","height":"235"}},"url":""},{"title":"Spare parts","description":"Spare parts and components.","img":{"recommendedSizes":{"width":"235","height":"235"}},"url":""},{"title":"Spare parts kits","description":"Completly Liberty spare parts kits.","img":{"recommendedSizes":{"width":"235","height":"235"}},"url":""}]},"id":"#0","type":"component","lock":false,"position":0},{"name":"BlogArticle","data":{"title":"Liberty rebreathers purchasing process: what to expect when you order","perex":"The Liberty rebreather from the Czech company Divesoft ranks among the worldâs top CCR systems. It is robust, safe, modular, and proven across all types of technical divingâfrom wreck exploration to extreme cave expeditions. However, purchasing a Liberty is different from buying standard recreational diving gear. **Liberty units are sold exclusively through certified instructors**, who guide new users through the entire process, from choosing the right model to completing the configuration.\n\nThis article summarizes all steps required to purchase a Liberty rebreatherâfrom selecting an instructor to receiving your unit.\n\n\n","content":"## 1. Choosing the Right Instructor â The Key Step in the Process\nThe first and most important step is finding a certified Liberty instructor. Without an instructor, it is not possible to order the unit or complete the mandatory CCR training.\nWhere can you find instructors? \nDivesoft maintains an up-to-date list of certified instructors on its website: \nð https://www.divesoft.com/en/instructors\n\n**Why is choosing the right instructor so important?**\n*\tYour instructor is your guide to the technology. They explain the differences between Liberty versions (Backmount vs. Sidemount), help assess your needs, and advise on suitable configurations.\n*\tThey help with the setup. This includes selecting cylinders, scrubber type, electronics, accessories, and bailout solutions.\n*\tThey submit the order. After you finalize your configuration on the Divesoft website and send it in, both you and your instructor receive a copy. The instructor reviews it and places the final order with Divesoft.\n*\tThey provide the mandatory training. Purchasing a CCR without proper training makes as little sense as buying an aircraft without a pilot license. Good references and mutual trust are crucial.\nHow to choose an instructor\n*\tCheck experience and references\n*\tConsider their specializationâcaves, wrecks, deep diving\n*\tHave a consultation to see whether their teaching style suits you\n*\tIdeally select someone who can support you long-term, not just during the course\n\n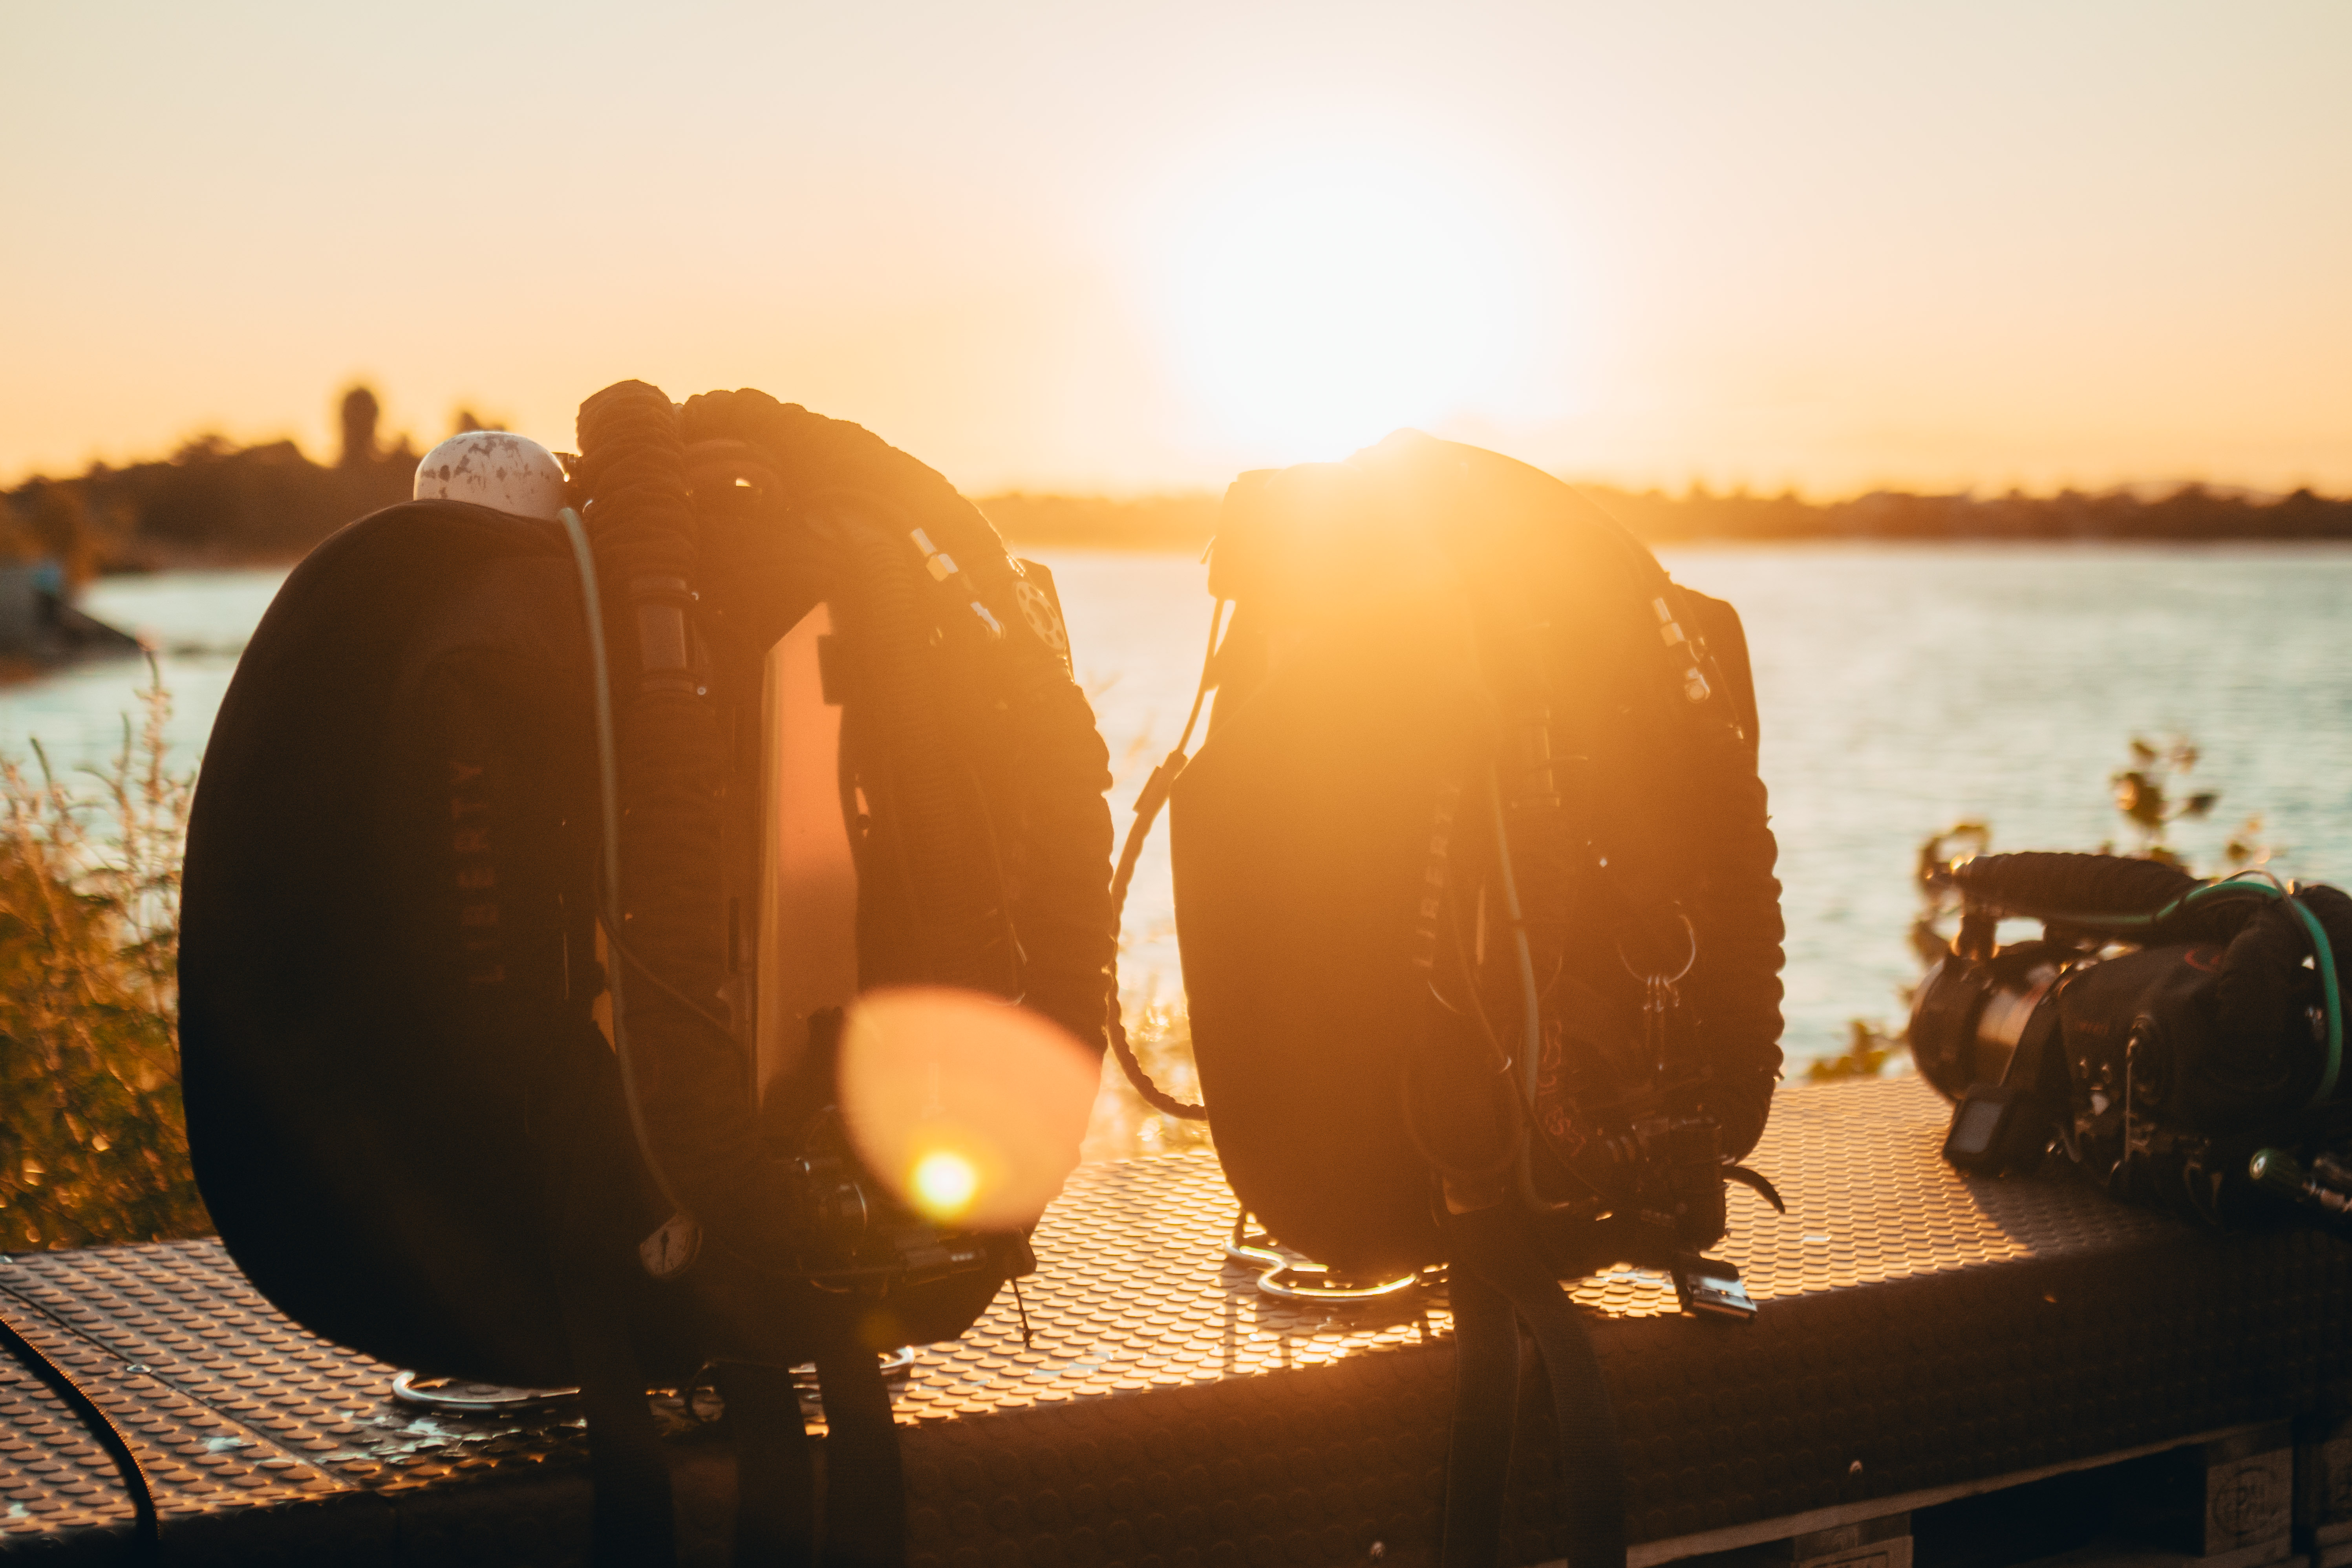\n________________________________________\n## 2. Choosing Your Liberty Model\nLiberty is a modular system available in two main versions: \n\n**Backmount (BM) Liberty**\n*\tIdeal for technical and wreck diving\n*\tWorn on the back\n*\tExtremely stable and balanced platform \n\n**Sidemount (SM) Liberty**\n*\tPopular in cave diving\n*\tVery compact\n*\tExcellent maneuverability in restricted spaces\n\n\n**Pre-built Sidemount Liberty units in stock ** \n\nIf you want to avoid waiting, Divesoft often keeps pre-assembled Sidemount Liberty units in stock.\nThese can be delivered very quicklyâoften within just a few days.\n________________________________________\n## 3. Configuring Your Rebreather\nOnce you have an instructor, youâll work together to configure your unit.\n[The Divesoft online configurator](https://www.divesoft.com/en/ccr-liberty?config=eyJ0cmVlSWQiOiI2Mjk3M2NmZmRlYWMzNWUzMDQ4MmFlYzAiLCJub2RlR3VpZHMiOltdLCJkZXRhaWxOb2RlR3VpZCI6IiIsInNldHVwRGV0YWlscyI6e30sImRldGFpbFNldHVwIjp7InF1ZXN0aW9uR3VpZCI6IiIsImFuc3dlckd1aWQiOiIifSwiYWNjZXNzb3J5Q2F0ZWdvcmllcyI6e30sImRldGFpbEFjY2Vzc29yeSI6eyJjYXRlZ29yeUd1aWQiOiIiLCJxdWVzdGlvbkd1aWQiOiIiLCJhbnN3ZXJHdWlkIjoiIn19&step=nodes
2)\nDivesoft provides an online configurator where you can choose every detail of your setup.\nThe process works like this: \n1. You fill in your configuration according to your instructorâs recommendations. \n2. You submit the form to Divesoft directly from the configurator. \n3. A copy is automatically sent to the customer, who will send it to the selected instructor. \n4. The instructor places the final order with Divesoft.\n\nThis ensures you receive a configuration tailored to your experience, diving style, and long-term goals.\n\n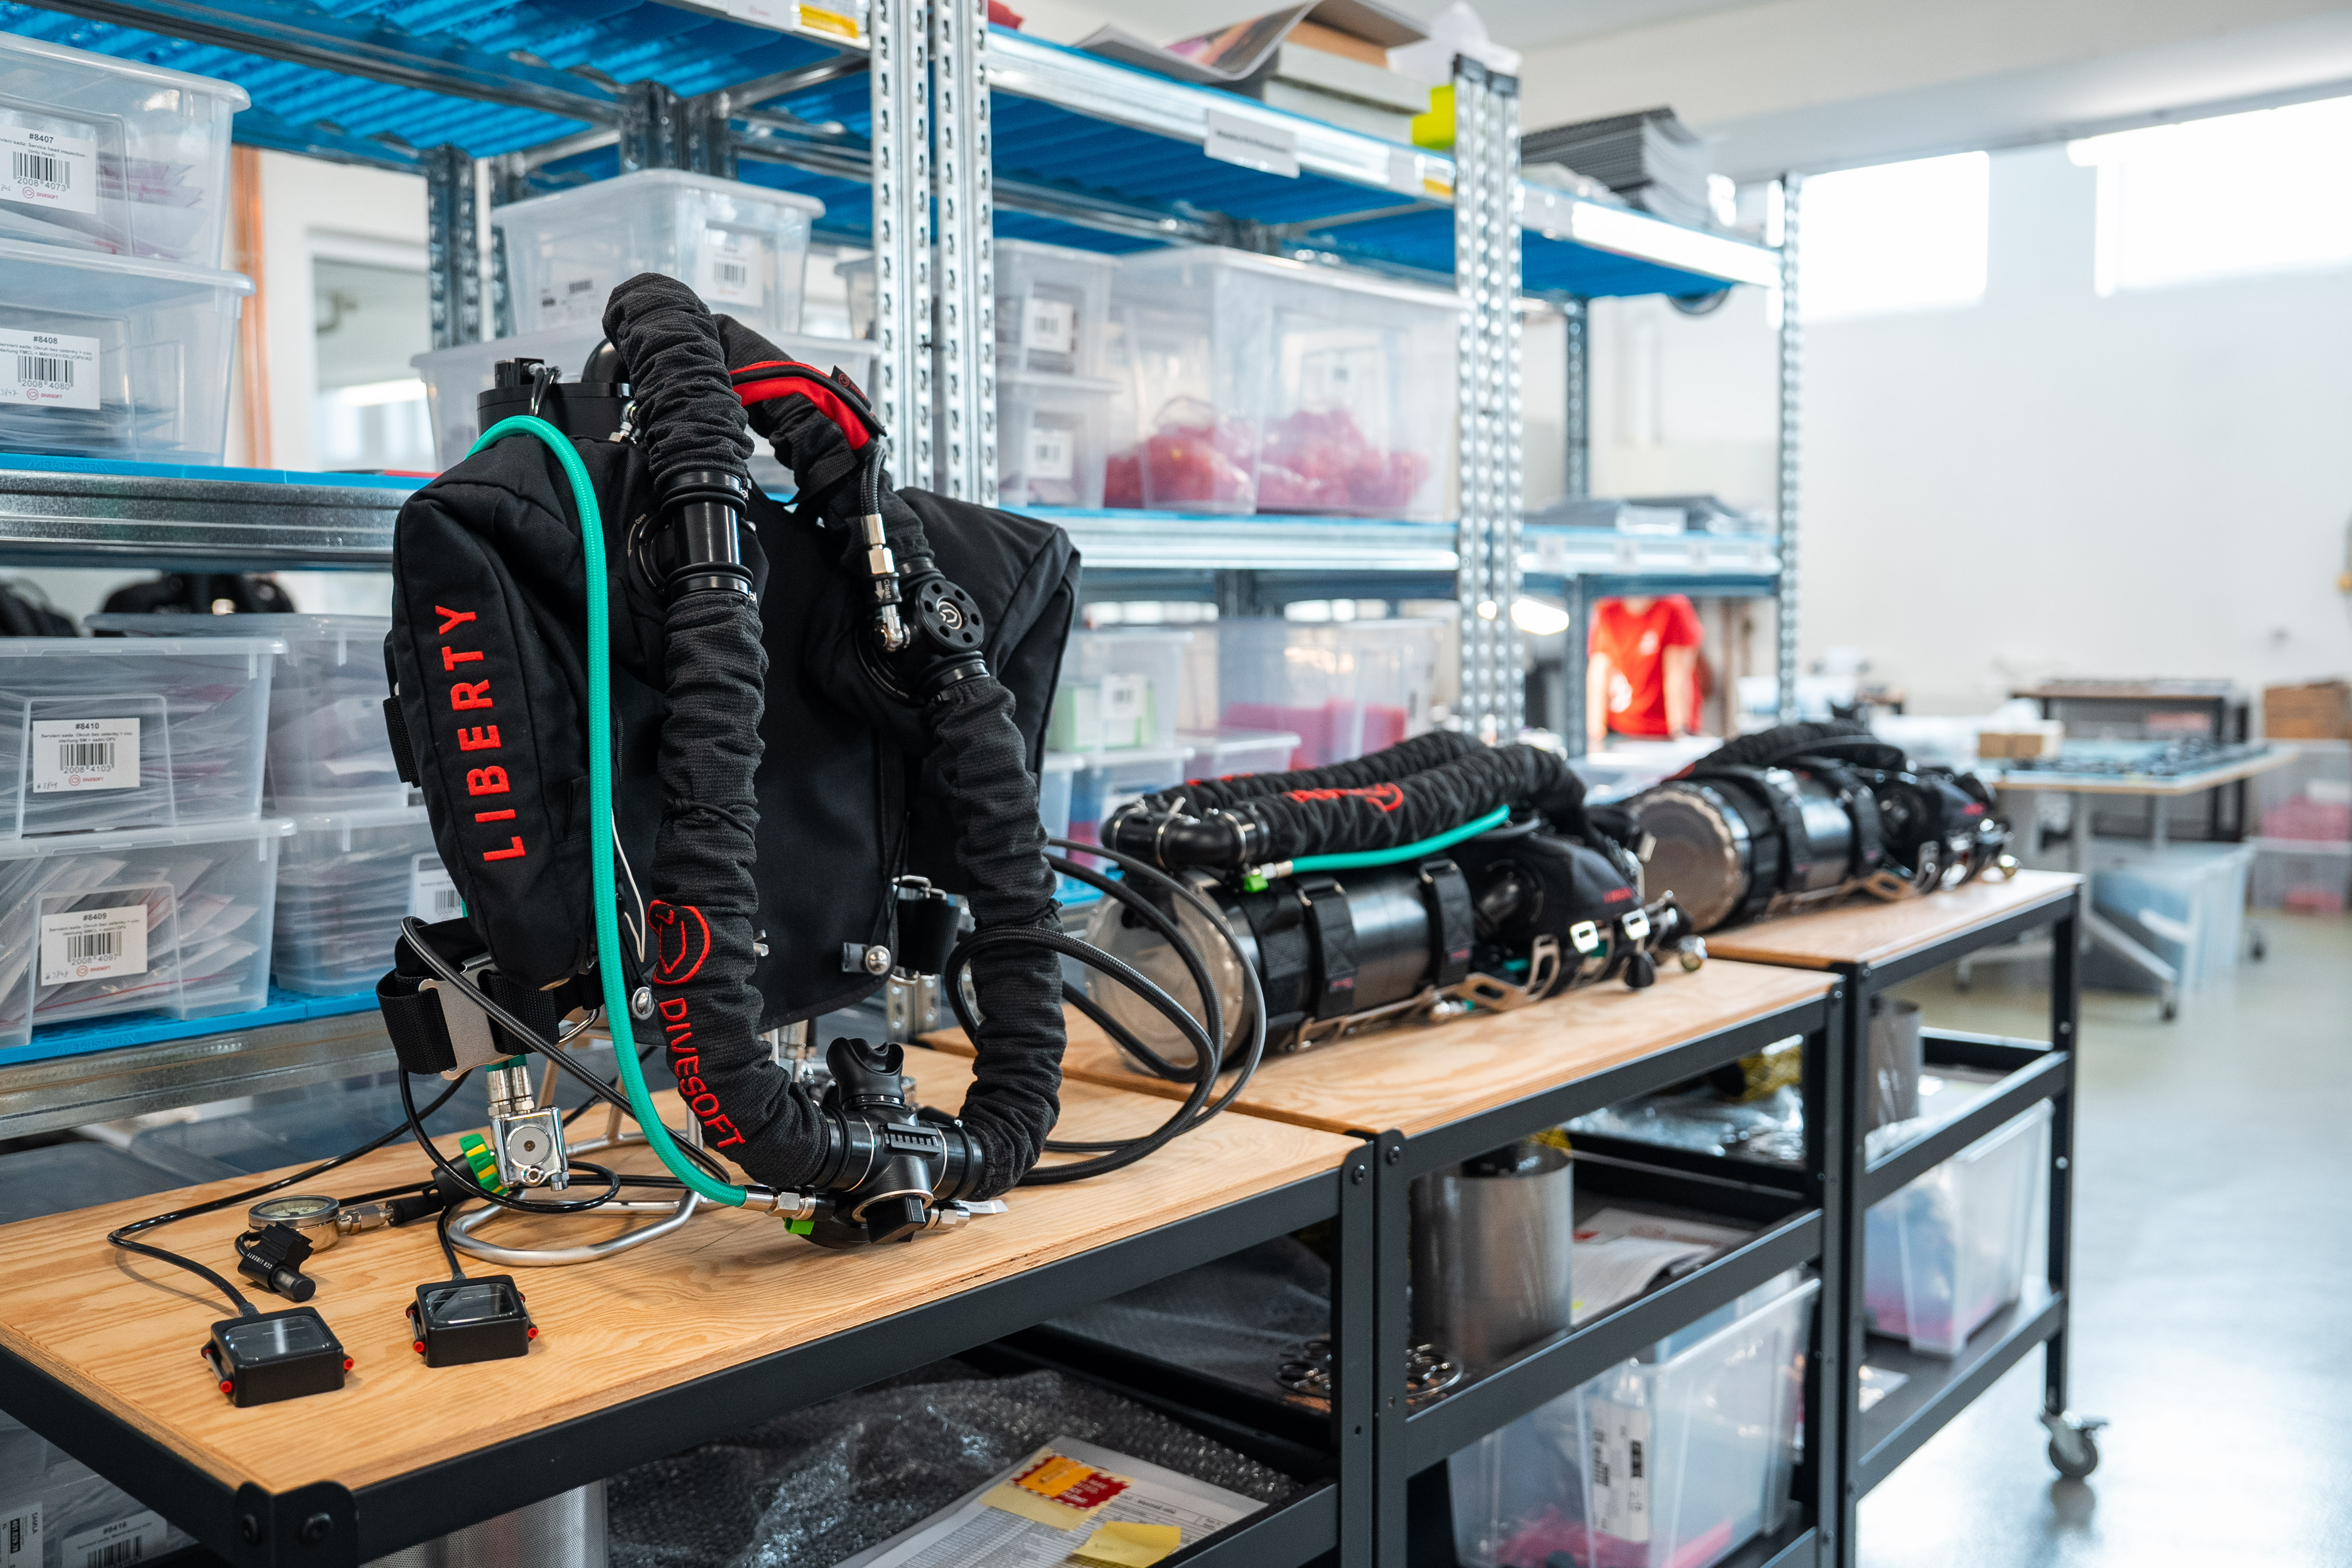\n________________________________________\n## 4. Production and Delivery â How Long Does It Take?\nDivesoft manufactures Liberty units based on each customerâs chosen configuration.\nThis means:\n*\tPre-built Sidemount Liberty units can be delivered almost immediately.\n*\tCustom configurations require several weeks for production.\nLead time varies with factory workload\nDuring periods of high demand, production queues can be longer. Your instructor will tell you the current delivery estimates.\n________________________________________\n## 5. Handover and Training\nOnce your unit arrives, the final steps include:\n*\tInstructor handover of the rebreather\n*\tInitial setup and system orientation\n*\tMandatory CCR Liberty training, which is essential for safe operation\nOnly after completing the training are you fully prepared to use your Liberty rebreather responsibly.\n________________________________________\n## Conclusion\nBuying a Liberty rebreather from Divesoft is a coordinated process built around working with a certified instructor, ensuring every diver receives a unit tailored to their needs and the knowledge to operate it safely. From choosing an instructor, through configuration, to production and trainingâeverything is designed to provide you with both a world-class rebreather and the necessary support.\nIf you are considering purchasing your own Liberty, the first step is to select an instructor and arrange an initial consultation. This begins your journey toward one of the most advanced rebreathers available today.\n\n\nAuthor: [Jakub Å imánek](https://www.divesoft.com/en/about-us/jakub-simanek)\n","showTags":false,"showDate":true,"publishDate":"11/24/2025","image":{"mimetype":"image/jpeg","size":397313,"hash":"86e082e660c4096d5ae7580ae668036865db59c0","id":"cmid53m50g9w108508mpzmn5z","filename":"titulka-purchase.jpg","category":"divesoft/","type":"image"}},"id":"#2","type":"component","lock":false,"position":1},{"name":"ProductShowcase","data":{"componentTemplateId":"cm9h4wr6ugjv10803yqs3tp71"},"id":"#3","type":"component","lock":false,"position":7},{"name":"Footer","data":{"copyrights":"Copyright © 2019 Divesoft LLC All rights reserved.","facebookUrl":"","youtubeUrl":"","instagramUrl":"","contacts":"**Divesoft, s.r.o.** Hálkova 2495 413 01 Roudnice nad Labem Äeská republika Tel.: +420 416 857 057 E-mail: [email protected]"},"id":"#1","type":"component","lock":false,"position":8}],"id":"root","idBuffer":"#9","lastCommit":"ff38de58-6ccd-4c3f-83fd-eb6b19684aed"}},"annotations":[{"type":"id","generated":true,"id":"PageTranslation:cm9cobgg4fdlc0803ulfp6mjh.annotations.0","typename":"PageAnnotation"},{"type":"id","generated":true,"id":"PageTranslation:cm9cobgg4fdlc0803ulfp6mjh.annotations.1","typename":"PageAnnotation"},{"type":"id","generated":true,"id":"PageTranslation:cm9cobgg4fdlc0803ulfp6mjh.annotations.2","typename":"PageAnnotation"}],"language":{"type":"id","generated":false,"id":"Language:cjv3kwvoj000u083611381c6o","typename":"Language"},"__typename":"PageTranslation"},"PageTranslation:cm9cobgg4fdlc0803ulfp6mjh.annotations.0":{"key":"title","value":"Liberty rebreathers purchasing process: what to expect when you order","__typename":"PageAnnotation"},"PageTranslation:cm9cobgg4fdlc0803ulfp6mjh.annotations.1":{"key":"perex","value":"The **[Liberty rebreather](https://www.divesoft.com/en/products/ccr-liberty)** rebreather from the Czech company [Divesoft](https://www.divesoft.com/) ranks among the worldâs top [CCR systems](https://www.divesoft.com/en/blog/5-basic-principles-of-rebreather-and-one-extra). It is robust, safe, modular, and proven across all types of technical divingâfrom wreck exploration to extreme cave expeditions. However, purchasing a **[Liberty](https://www.divesoft.com/en/products/ccr-liberty)** is different from buying standard recreational diving gear. **Liberty units are sold exclusively through certified instructors
2**, who guide new users through the entire process, from choosing the right model to completing the configuration.\n\nThis article summarizes all steps required to purchase a Liberty rebreatherâfrom selecting an instructor to receiving your unit.","__typename":"PageAnnotation"},"PageTranslation:cm9cobgg4fdlc0803ulfp6mjh.annotations.2":{"key":"image","value":"null","__typename":"PageAnnotation"},"Page:cm9cobsqpfdm008036g7ghoo2":{"id":"cm9cobsqpfdm008036g7ghoo2","type":{"type":"id","generated":false,"id":"PageType:cjv3l213x004f08366hjufttp","typename":"PageType"},"tags":[{"type":"id","generated":false,"id":"Tag:ckp59jt9n48lj0788mfuqrhym","typename":"Tag"},{"type":"id","generated":false,"id":"Tag:cmgfchuc23glr0832td37smec","typename":"Tag"}],"translations({\"where\":{\"language\":{\"id\":\"cjv3kwvoj000u083611381c6o\"}}})":[{"type":"id","generated":false,"id":"PageTranslation:cm9cobsr3fdm70803iao3ecax","typename":"PageTranslation"}],"__typename":"Page"},"PageTranslation:cm9cobsr3fdm70803iao3ecax":{"id":"cm9cobsr3fdm70803iao3ecax","name":"Liberty rebreathers maintenance: complete CHECKLIST","createdAt":"2025-04-11T10:58:26.511Z","content":{"type":"json","json":{"content":[{"name":"Header","data":{"products":[{"title":"Accessories","description":"Backplates, Consumables. Tanks.","img":{"recommendedSizes":{"width":"235","height":"235"}},"url":""},{"title":"Accessories sets","description":"Protection, maintenance, cleaning.","img":{"recommendedSizes":{"width":"235","height":"235"}},"url":""},{"title":"Spare parts","description":"Spare parts and components.","img":{"recommendedSizes":{"width":"235","height":"235"}},"url":""},{"title":"Spare parts kits","description":"Completly Liberty spare parts kits.","img":{"recommendedSizes":{"width":"235","height":"235"}},"url":""}]},"id":"#0","type":"component","lock":false,"position":0},{"name":"Footer","data":{"copyrights":"Copyright © 2019 Divesoft LLC All rights reserved.","facebookUrl":"","youtubeUrl":"","instagramUrl":"","contacts":"**Divesoft, s.r.o.** Hálkova 2495 413 01 Roudnice nad Labem Äeská republika Tel.: +420 416 857 057 E-mail: [email protected]"},"id":"#1","type":"component","lock":false,"position":1}],"id":"root","idBuffer":"#2","lastCommit":"fd7ba897-6b02-494c-ba3f-fc8ace8e755a"}},"annotations":[],"language":{"type":"id","generated":false,"id":"Language:cjv3kwvoj000u083611381c6o","typename":"Language"},"__typename":"PageTranslation"},"Page:cm9coc98sfdmi08035dz1mfwn":{"id":"cm9coc98sfdmi08035dz1mfwn","type":{"type":"id","generated":false,"id":"PageType:cjv3l213x004f08366hjufttp","typename":"PageType"},"tags":[{"type":"id","generated":false,"id":"Tag:ckp59jt9n48lj0788mfuqrhym","typename":"Tag"},{"type":"id","generated":false,"id":"Tag:cmgfchuc23glr0832td37smec","typename":"Tag"}],"translations({\"where\":{\"language\":{\"id\":\"cjv3kwvoj000u083611381c6o\"}}})":[{"type":"id","generated":false,"id":"PageTranslation:cm9coc997fdmp0803pzji9iwb","typename":"PageTranslation"}],"__typename":"Page"},"PageTranslation:cm9coc997fdmp0803pzji9iwb":{"id":"cm9coc997fdmp0803pzji9iwb","name":"Scuba diving vs. rebreathers: Longer times and better view","createdAt":"2025-04-11T10:58:47.898Z","content":{"type":"json","json":{"content":[{"name":"Header","data":{"products":[{"title":"Accessories","description":"Backplates, Consumables. Tanks.","img":{"recommendedSizes":{"width":"235","height":"235"}},"url":""},{"title":"Accessories sets","description":"Protection, maintenance, cleaning.","img":{"recommendedSizes":{"width":"235","height":"235"}},"url":""},{"title":"Spare parts","description":"Spare parts and components.","img":{"recommendedSizes":{"width":"235","height":"235"}},"url":""},{"title":"Spare parts kits","description":"Completly Liberty spare parts kits.","img":{"recommendedSizes":{"width":"235","height":"235"}},"url":""}]},"id":"#0","type":"component","lock":false,"position":0},{"name":"Footer","data":{"copyrights":"Copyright © 2019 Divesoft LLC All rights reserved.","facebookUrl":"","youtubeUrl":"","instagramUrl":"","contacts":"**Divesoft, s.r.o.** Hálkova 2495 413 01 Roudnice nad Labem Äeská republika Tel.: +420 416 857 057 E-mail: [email protected]"},"id":"#1","type":"component","lock":false,"position":1}],"id":"root","idBuffer":"#2","lastCommit":"fd7ba897-6b02-494c-ba3f-fc8ace8e755a"}},"annotations":[],"language":{"type":"id","generated":false,"id":"Language:cjv3kwvoj000u083611381c6o","typename":"Language"},"__typename":"PageTranslation"},"Page:cm9tyz4tvizoc0803mmf9n11r":{"id":"cm9tyz4tvizoc0803mmf9n11r","type":{"type":"id","generated":false,"id":"PageType:cjv3l213x004f08366hjufttp","typename":"PageType"},"tags":[],"translations({\"where\":{\"language\":{\"id\":\"cjv3kwvoj000u083611381c6o\"}}})":[{"type":"id","generated":false,"id":"PageTranslation:cm9tyz4ucizoj0803got4klr8","typename":"PageTranslation"}],"__typename":"Page"},"PageTranslation:cm9tyz4ucizoj0803got4klr8":{"id":"cm9tyz4ucizoj0803got4klr8","name":"Try the CCR Liberty","createdAt":"2025-04-23T13:28:36.420Z","content":{"type":"json","json":{"content":[{"name":"Header","data":{"products":[{"title":"Accessories","description":"Backplates, Consumables. Tanks.","img":{"recommendedSizes":{"width":"235","height":"235"}},"url":""},{"title":"Accessories sets","description":"Protection, maintenance, cleaning.","img":{"recommendedSizes":{"width":"235","height":"235"}},"url":""},{"title":"Spare parts","description":"Spare parts and components.","img":{"recommendedSizes":{"width":"235","height":"235"}},"url":""}
2,{"title":"Spare parts kits","description":"Completly Liberty spare parts kits.","img":{"recommendedSizes":{"width":"235","height":"235"}},"url":""}]},"id":"#0","type":"component","lock":false,"position":0},{"name":"HubSpotForm","data":{"backgroundColor":"#ffffff","isTitleH1":false,"title":"Try the CCR Liberty","subtitle":"Contact us for demo!","showBreadcrumbs":false,"hideHeader":false,"portalId":"145642557","formId":"f1af2831-43c5-4be8-baa8-a343bc3415ad"},"id":"#3","type":"component","lock":false,"position":1},{"name":"Footer","data":{"componentTemplateId":"cjvwimxrl08e40798hjs5ek9w"},"id":"#1","type":"component","lock":false,"position":3}],"id":"root","idBuffer":"#4","lastCommit":"13d68e04-b21c-453b-b135-6861a0721783"}},"annotations":[],"language":{"type":"id","generated":false,"id":"Language:cjv3kwvoj000u083611381c6o","typename":"Language"},"__typename":"PageTranslation"},"Page:cmbqb5e09xyws0803y3rgyeuu":{"id":"cmbqb5e09xyws0803y3rgyeuu","type":{"type":"id","generated":false,"id":"PageType:cjv3l213x004f08366hjufttp","typename":"PageType"},"tags":[{"type":"id","generated":false,"id":"Tag:cjv3szrcv01bz0836yo8myb0r","typename":"Tag"},{"type":"id","generated":false,"id":"Tag:clw52z09zlclk0735mxb7v53p","typename":"Tag"},{"type":"id","generated":false,"id":"Tag:cm5ww05zc1b5d0803zglvz927","typename":"Tag"},{"type":"id","generated":false,"id":"Tag:cm5ww0t651b710803pcl02cn4","typename":"Tag"},{"type":"id","generated":false,"id":"Tag:cmfp50qhi00lk08324ek37f9g","typename":"Tag"}],"translations({\"where\":{\"language\":{\"id\":\"cjv3kwvoj000u083611381c6o\"}}})":[{"type":"id","generated":false,"id":"PageTranslation:cmbqb5e0mxywz0803sjn3gl4w","typename":"PageTranslation"}],"__typename":"Page"},"PageTranslation:cmbqb5e0mxywz0803sjn3gl4w":{"id":"cmbqb5e0mxywz0803sjn3gl4w","name":"CCR (rebreather) diving equipment: what do you need for safe diving","createdAt":"2025-06-10T09:17:43.606Z","content":{"type":"json","json":{"content":[{"name":"Header","data":{"products":[{"title":"Accessories","description":"Backplates, Consumables. Tanks.","img":{"recommendedSizes":{"width":"235","height":"235"}},"url":""},{"title":"Accessories sets","description":"Protection, maintenance, cleaning.","img":{"recommendedSizes":{"width":"235","height":"235"}},"url":""},{"title":"Spare parts","description":"Spare parts and components.","img":{"recommendedSizes":{"width":"235","height":"235"}},"url":""},{"title":"Spare parts kits","description":"Completly Liberty spare parts kits.","img":{"recommendedSizes":{"width":"235","height":"235"}},"url":""}]},"id":"#0","type":"component","lock":false,"position":3},{"name":"BlogArticle","data":{"title":"CCR (rebreather) diving equipment: what do you need for safe diving","perex":"Discover what gear every CCR diver needs beyond the rebreather itself â from properly sized wings and backup computers to bailout systems and essential service kits. Stay safe and precise with Divesoft.","content":"\n\nClosed-circuit rebreathers (CCRs) have expanded the boundaries of what divers can safely explore â deeper depths, longer runtimes, and environments once considered unreachable.\nBut with this advanced technology comes a new level of responsibility: **proper equipment selection and preparation.**\n\nâ*Rebreathers are nothing more than tools to allow you to remain underwater for an extended period.*â\n** \nâ Jeffrey E. Bozanic, Mastering Rebreathers (Second Edition)**\n\nTools, however, are only as reliable as the diver who maintains and configures them. This guide focuses on the supporting equipment that ensures your CCR diving is safe, efficient, and fully under control.\n\n### In-Water Equipment: Beyond the Rebreather\n#### BCD / Wing System\n\nUnlike open-circuit setups, a CCR diver must be ready for the unlikely â but potentially critical â **flooding of the rebreather unit.**\nA fully flooded loop or scrubber can instantly add up to **10 kilograms of negative buoyancy**, which must be compensated for by your buoyancy system.\n\nUnfortunately, most manufacturers underestimate the lift required for CCRs, offering wings that are simply too small.\nChoose a **BCD or wing with generous lift capacity**, stable geometry, and a durable bladder to remain positively buoyant even if your unit floods completely.\n\n#### Dive Computers\n\nThe [Divesoft Liberty CCR] (https://www.divesoft.com/en/products/ccr-liberty)\nis built with** full redundancy** â dual controllers, dual displays, and dual power supplies.\nFor most dives, thatâs all you need. However, many experienced technical divers still carry a [Divesoft Freedom](https://eshop.divesoft.com/products/computers-freedom?currency=CZK)\n computer as an **independent backup**, especially on expedition-level dives.\n\nThe Freedom provides an additional, fully autonomous depth and decompression reference â because in technical diving, redundancy equals safety.\n\n#### Gas Analyzers\n\nEven for recreational CCR diving, a gas analyzer is an absolutely essential piece of safety equipment. **Every diver must personally analyze the gas mixture** in their cylinders and verify the actual oxygen and, when applicable, helium content. \n\nAs Jeff Bozanic emphasizes, â*You must personally analyze or directly observe the analysis of the breathing gas you will be using.*â\nAn unknown or incorrectly analyzed mix can lead to hypoxia, hyperoxia, or serious decompression errors.\n\n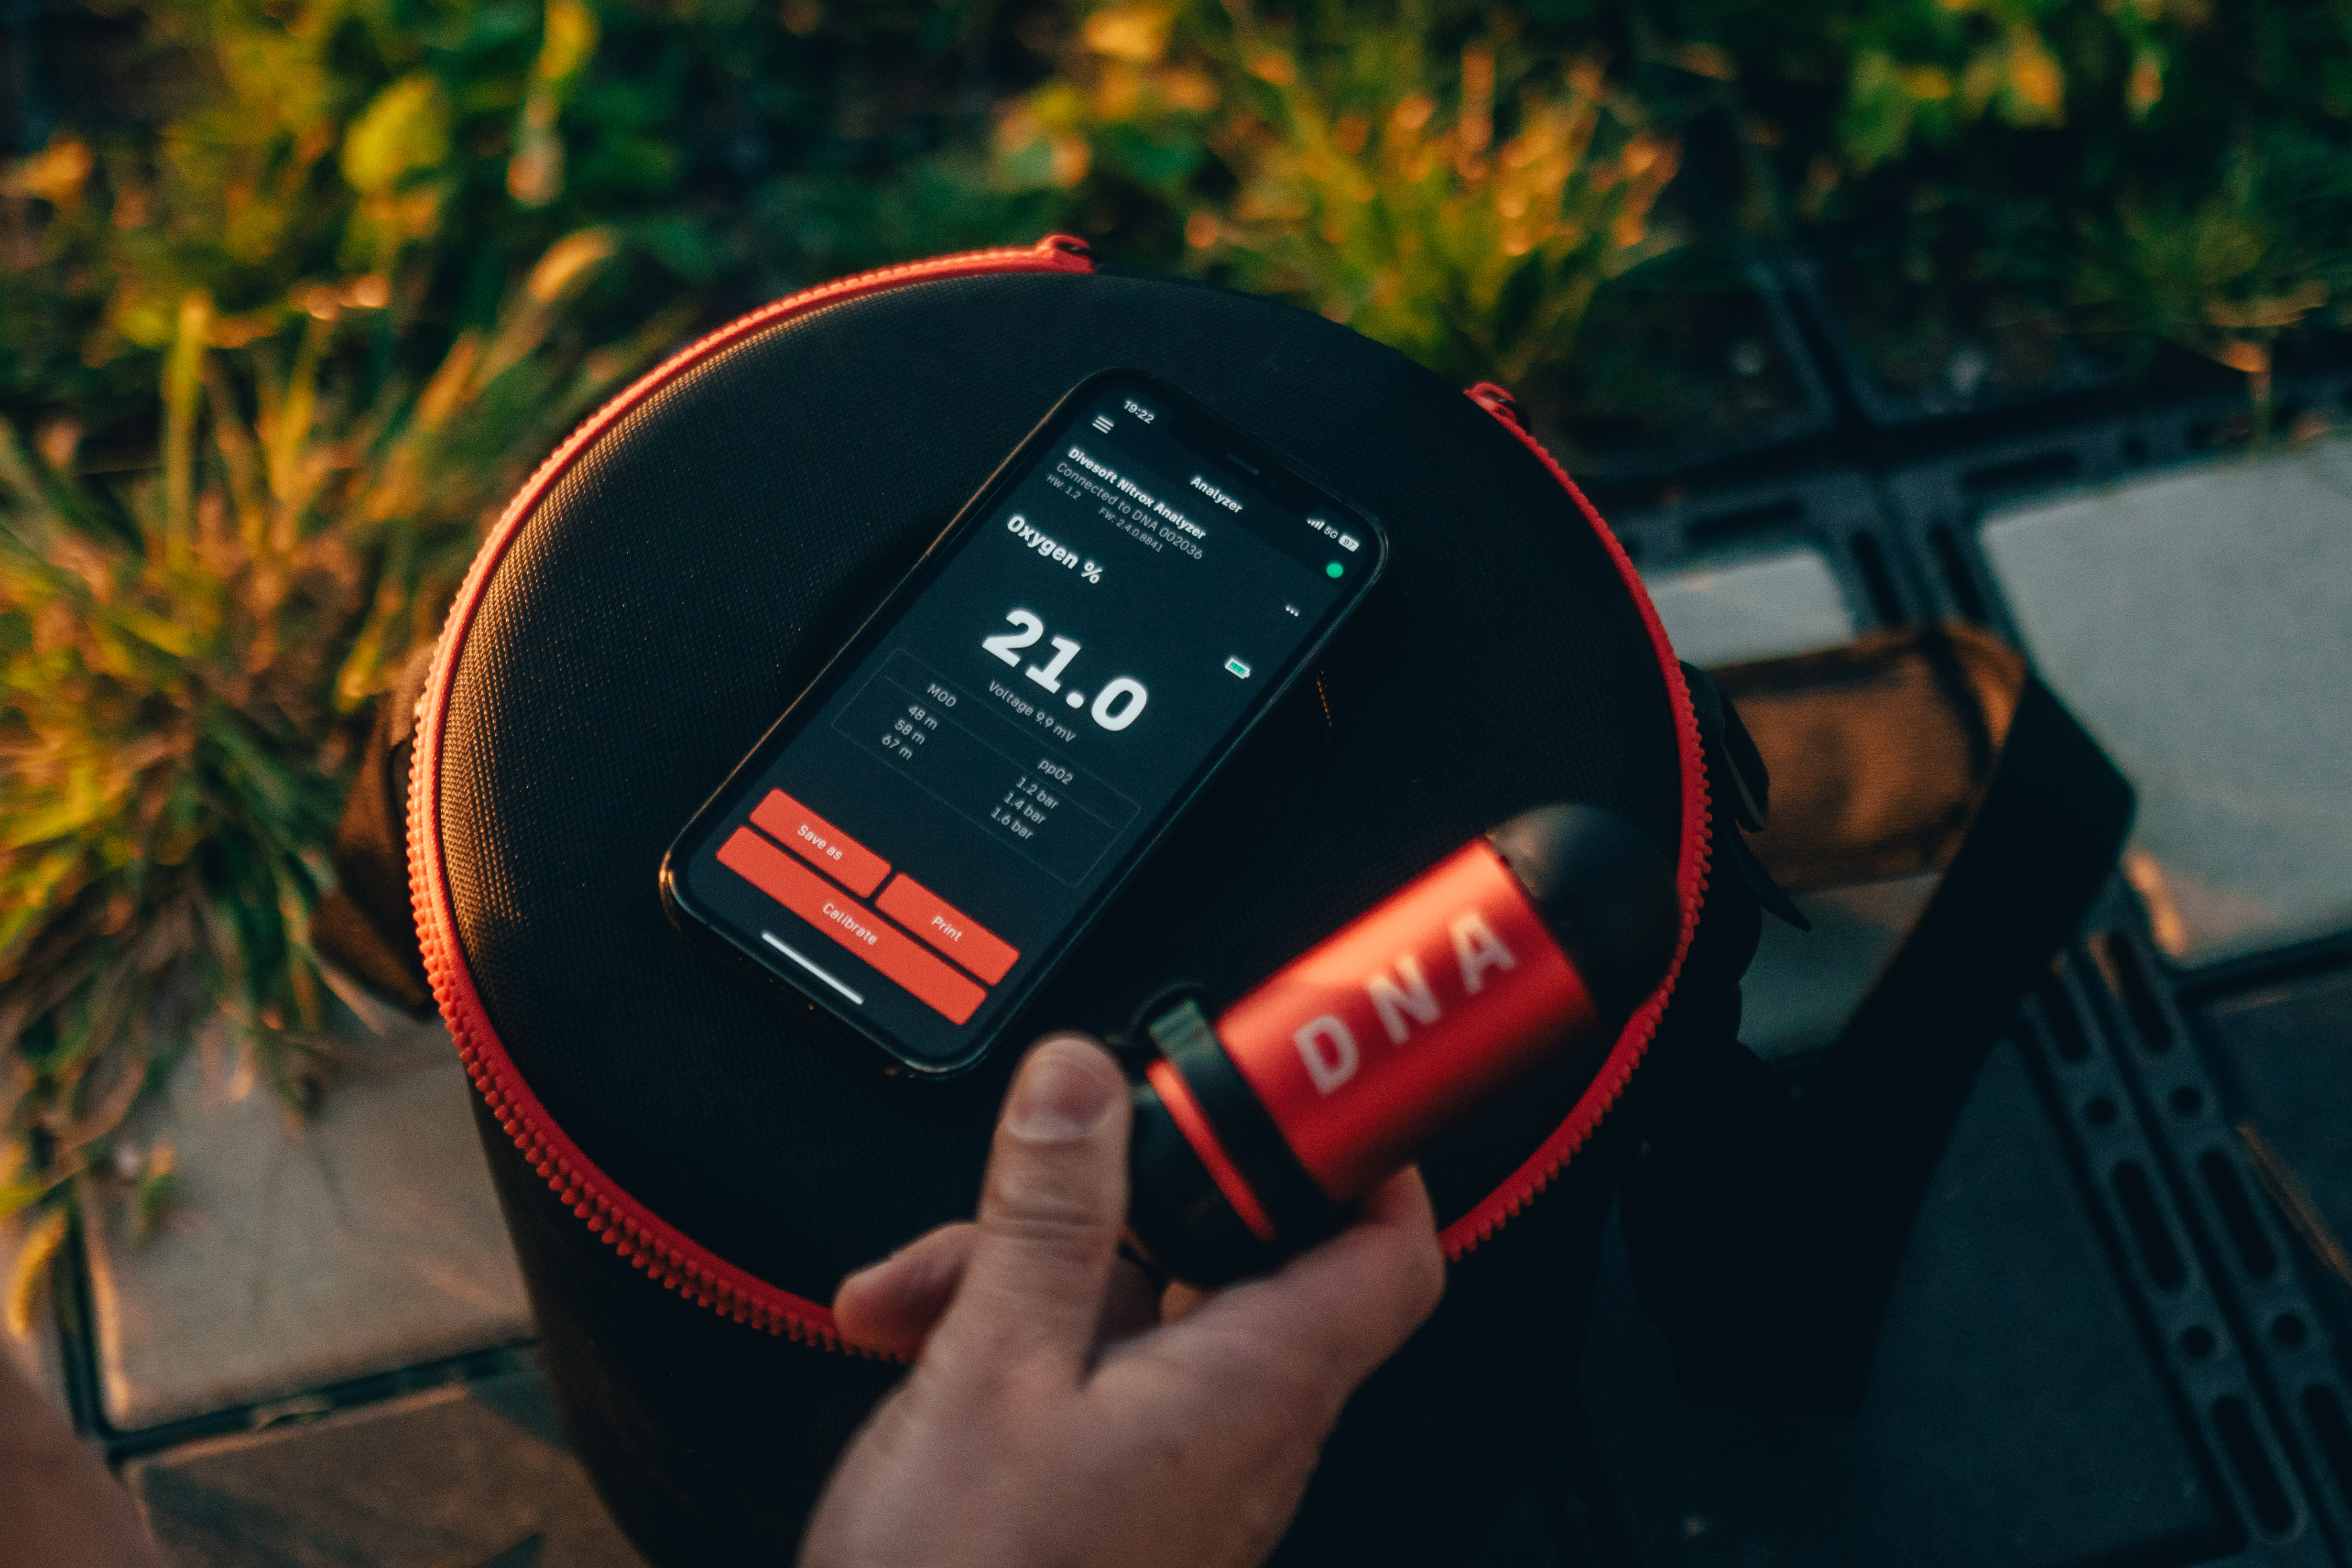\n\nBeginning CCR divers should at least own a nitrox analyzer, such as the [Divesoft DNA] (https://www.divesoft.com/en/products/analyzers/dna). \nHowever, it is better to invest directly in a combined He/Oâ analyzer, such as the [Divesoft He/Oâ Analyzer] (https://www.divesoft.com/en/products/analyzers/analyzer-he-o2) or the more compact [Divesoft SOLO] (https://www.divesoft.com/en/products/analyzers/analyzer-solo). \nEven if you start diving with a plain air diluent, you will very soon progress to deeper CCR dives where trimix anal
2ysis becomes essential â requiring accurate measurement of both oxygen and helium content.\n\n#### Fins: Precision and Buoyancy Balance\n\nFin choice is more than comfort â it directly impacts your **trim and propulsion contro**l. \nFor CCR and technical diving, **shorter, wider fins with stiff blades** are ideal. They deliver precise feedback for techniques like the frog kick, modified flutter, or back kick, enabling fine positioning without disturbing silt or fragile environments.\n\n##### Fin buoyancy matters:\n\n* In cold water with a drysuit, heavy rubber fins offset the positive buoyancy of drysuit boots, maintaining a balanced horizontal trim.\n\n* In warm water and wetsuits, heavy fins cause the legs to sink. Choose lightweight or neutrally buoyant fins for a stable, efficient posture.\n\nA well-trimmed diver conserves gas, reduces workload, and optimizes scrubber efficiency â improving both safety and performance.\n\n#### Surface Marker Buoy (SMB / DSMB)\n\nEvery CCR diver should carry a Delayed Surface Marker Buoy (DSMB) â itâs not optional.\nWithout bubbles to mark your position, a DSMB is your only visible link to the surface.\n\nIt serves several key purposes:\n\n1. Emergency ascent signaling: alert surface support in the event of an equipment or gas issue.\n\n3. Marking your ascent line: useful in open water or poor visibility where no fixed line is available.\n\n1. Decompression in currents: provides a stable reference point while maintaining your position in moving water.\n\nChoose a **high-visibility DSMB** (orange or yellow, minimum 1.5 m) and a **reliable reel or spool**. Practice deployment frequently, including from depth and while neutrally buoyant.\n\nâ*Evaluate the conditions before every dive; ensure that they fit your personal capabilities*.â \n**â Jeffrey E. Bozanic, Mastering Rebreathers (Second Edition)**\n\nFor diving to greater depths, you need a rope that is long enough to be able to **release a buoy from the bottom or from the deck of a wreck**. This is necessary if you lose your bearings and cannot return to the ascent rope. \n\n**The only option then is to rely on a line with a buoy**. The [Divesoft reel] (https://www.divesoft.com/en/products/others/reels) is a perfect and reliable choice that will suffice for all conceivable dives. It has saved the lives of many divers in this way.\n\n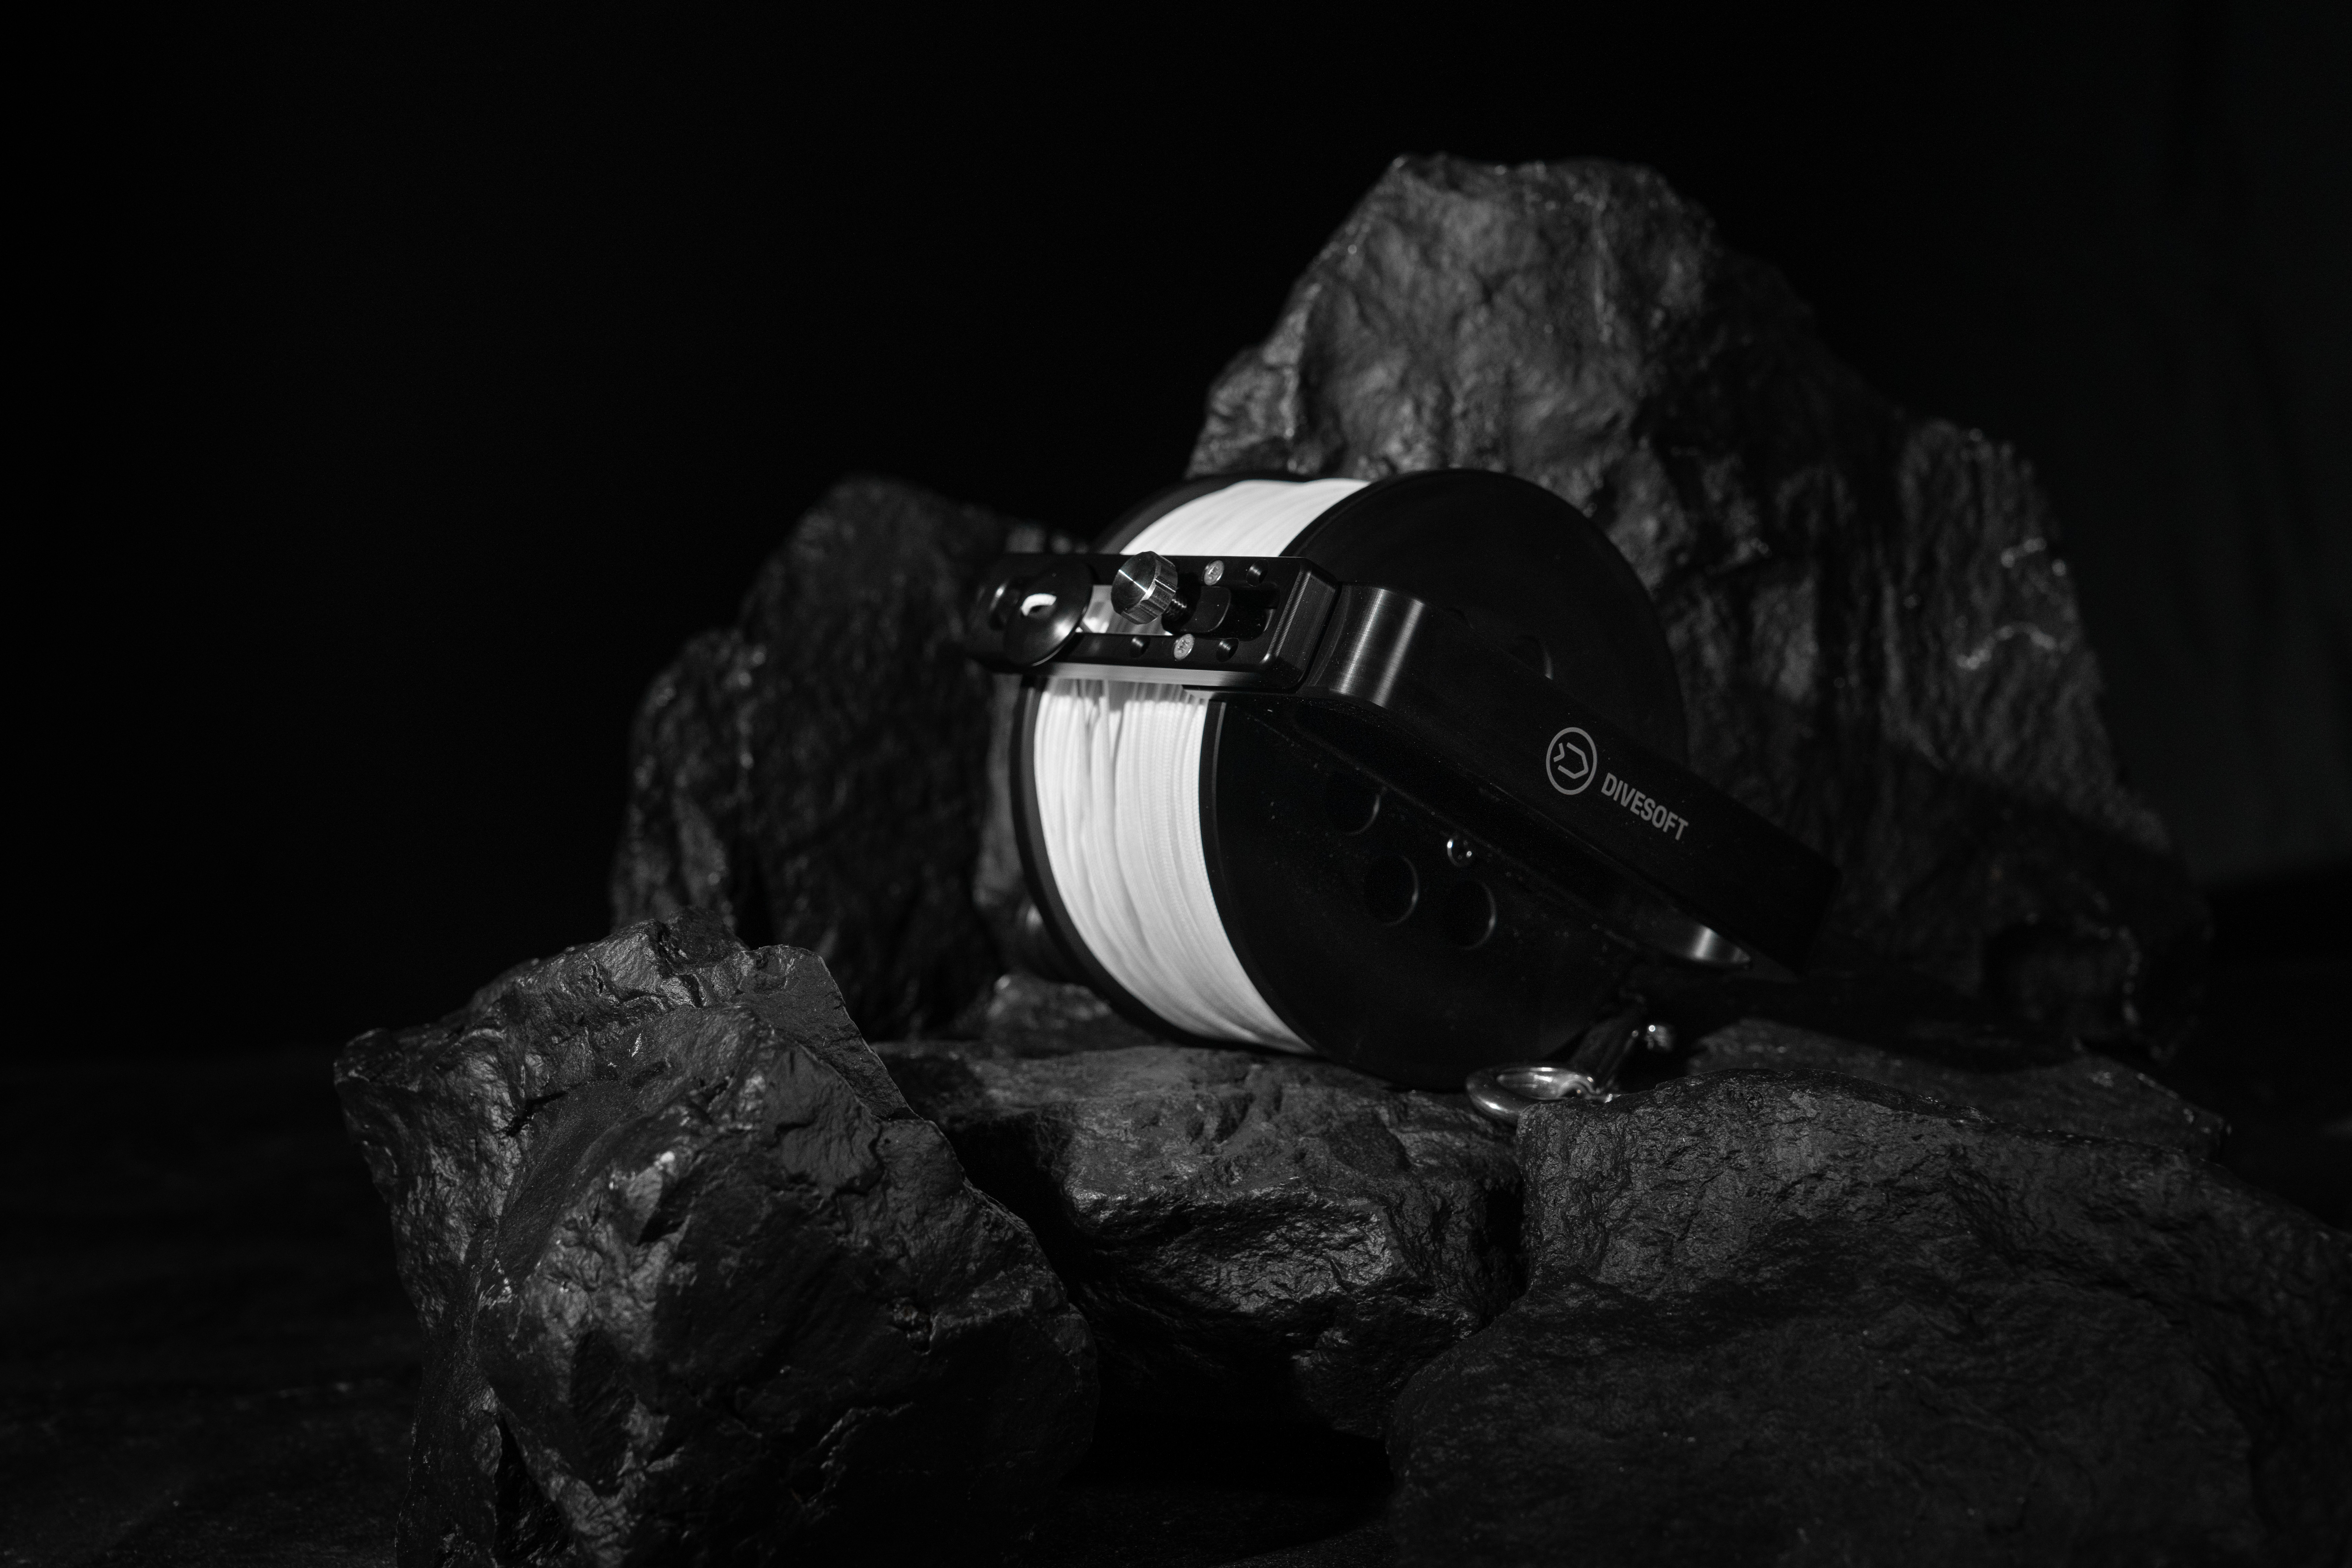\n\n#### Bailout Configuration: Your Last Line of Defense\n\nIn CCR diving, your bailout system is your true safety reserve â a fully independent life-support system.\nIt must allow you to ascend safely on open circuit, from the deepest and most demanding point of your dive, with all decompression stops completed.\n\n##### Sizing and Gas Planning\n\n**Always plan bailout gas for the worst-case scenario**.\nThat means considering depth, decompression time, current, stress, and elevated SAC rates.\nBailout gases are **for emergencies only** and should never be consumed during normal operation.\n\nExperienced CCR divers maintain several bailout cylinders with different gas mixes â typically deep, intermediate, and decompression gases â and select the right combination for each dive.\n\nFor example, \nâ I personally use a total of six different tanks: an air tank for simple dives to 30 m, Helitrox 30/30 for dives to 40 m or as travel/deco gas, 15/60 and 12/80 for great depths, and finally EAN50 and oxygen as decompression mixtures.\n\n##### Regulator and Hose Routing\n\nClean routing and reliability are key:\n\n* Hoses should **run along the cylinder** for a streamlined, snag-free setup.\n\n* **Use a swivel turret first stage** or angled ports for flexibility and tidy routing.\n\n* The [Divesoft Technical Adapter] (https://www.divesoft.com/en/products/others/apeks-technical-connection) for Apeks DST \n provides perfect hose alignment for CCR bailout systems.\n\n\n##### Additional Utility Connections\n\nA well-equipped bailout first stage can do more than deliver breathing gas.\n* An **inflator-style quick-connect hose** adds valuable versatility:\n\n- Serves as an **independent drysuit inflation source** if onboard diluent isnât accessible.\n- Can **connect to the Manual Addition Valve (MAV)** for manual oxygen addition when needed.\n\n* Add **high-flow connectors like Swagelok or Omniswivel** to connect on-board and off-board gas in case of loss or for complex dive profiles.\n\nThis setup ensures full control over loop oxygen and buoyancy â even when operating on bailout gas.\n\nâ*Failure to plan for bailout is planning to fail. Redundancy is not optional â itâs what keeps you alive when everything else stops working.* â\n**â Jeffrey E. Bozanic, Mastering Rebreathers (Second Edition)\n**\n\n### Service and Spare Parts: What Keeps You Diving\n\nA well-prepared diverâs toolkit is as important as the rebreather itself.\nHaving the right parts and tools on hand can turn potential dive cancellations into minor delays.\n\n**Recommended Service Kit**\n\n* O-rings and seals (oxygen-compatible)\n\n* Spare oxygen sensors, properly calibrated and stored\n\n* Lubricants: oxygen-safe (e.g., Krytox®)\n\n* Tools: hex keys, spanners, O-ring picks, flow meters, IP gauges\n\n* Hoses and valves for Oâ, diluent, and bailout systems\n\n* Disinfectants: iodine-based or Virkon S®\n\n* Spare batteries and cables for HUDs, handsets, and analyzers\n\nâ*Properly caring for equipment after every dive will extend its usable life, preserve its value, and, most importantly, minimize the chance of failure during a dive.*â \n**â Jeffrey E. Bozanic, Mastering Rebreathers (Second Edition)**\n\nDivesoftâs Philosophy: Precision in Every Breath\n\nAt Divesoft, we believe that safety begins long before you enter the water.\nFrom Liberty CCR systems with full redundancy, to Freedom dive computers and gas analyzers, every product is engineered to support your dive with precision and reliability.\n\n\n \n\n\nAuthor: Jakub Å imánek","showTags":false,"showDate":true,"image":{"mimetype":"image/jpeg","size":397950,"hash":"31975e7693d9a9ba9df36050e6a2592d73822fd6","id":"cmh39kawx2i960850nldgnr40","filename":"titulka-equipment.jpg","category":"divesoft/","type":"image"},"publishDate":"10/27/2025"},"id":"#2","type":"component","lock":false,"position":4},{"name":"ProductShowcase","data":{"componentTemplateId":"cm9h4wr6ugjv10803yq
2s3tp71"},"id":"#9","type":"component","lock":false,"position":5},{"name":"Image","data":{"firstImage":{"recommendedSizes":{"width":"1000","height":"1000"}},"secondImage":{"recommendedSizes":{"width":"1000","height":"1000"}}},"id":"#11","type":"component","lock":false,"position":6},{"name":"Footer","data":{"copyrights":"Copyright © 2019 Divesoft LLC All rights reserved.","facebookUrl":"","youtubeUrl":"","instagramUrl":"","contacts":"**Divesoft, s.r.o.** Hálkova 2495 413 01 Roudnice nad Labem Äeská republika Tel.: +420 416 857 057 E-mail: [email protected]"},"id":"#1","type":"component","lock":false,"position":7}],"id":"root","idBuffer":"#14","lastCommit":"5805aeb7-1572-49a2-a336-00b3c502e3dc"}},"annotations":[{"type":"id","generated":true,"id":"PageTranslation:cmbqb5e0mxywz0803sjn3gl4w.annotations.0","typename":"PageAnnotation"},{"type":"id","generated":true,"id":"PageTranslation:cmbqb5e0mxywz0803sjn3gl4w.annotations.1","typename":"PageAnnotation"},{"type":"id","generated":true,"id":"PageTranslation:cmbqb5e0mxywz0803sjn3gl4w.annotations.2","typename":"PageAnnotation"}],"language":{"type":"id","generated":false,"id":"Language:cjv3kwvoj000u083611381c6o","typename":"Language"},"__typename":"PageTranslation"},"PageTranslation:cmbqb5e0mxywz0803sjn3gl4w.annotations.0":{"key":"title","value":"CCR Diving Equipment: What You Really Need for Safe Diving","__typename":"PageAnnotation"},"PageTranslation:cmbqb5e0mxywz0803sjn3gl4w.annotations.1":{"key":"image","value":"{\"mimetype\":\"image/webp\",\"size\":100924,\"hash\":\"52ee411786269e63dc0bc1c16878a3968c96b7ae\",\"id\":\"cmobhmy981d7q08006lzleu4m\",\"filename\":\"31975e7693d9a9ba9df36050e6a2592d73822fd6-titulka-equipment-1752-1752.webp\",\"category\":\"divesoft/\",\"type\":\"image\",\"alt\":\"Liberty CCR rebreather\"}","__typename":"PageAnnotation"},"PageTranslation:cmbqb5e0mxywz0803sjn3gl4w.annotations.2":{"key":"perex","value":"A rebreather is only part of the system. Safe CCR diving depends just as much on everything around it, from a properly sized wing to reliable bailout gas and backup electronics. Each piece has a clear role, especially when something goes wrong. This article breaks down the essential supporting equipment and explains how it all works together to keep the dive under control","__typename":"PageAnnotation"},"Page:cmdilgyg40c7p0832bv637gsr":{"id":"cmdilgyg40c7p0832bv637gsr","type":{"type":"id","generated":false,"id":"PageType:cjv3l213x004f08366hjufttp","typename":"PageType"},"tags":[{"type":"id","generated":false,"id":"Tag:cmll0x5mkc477088966r6jlvb","typename":"Tag"},{"type":"id","generated":false,"id":"Tag:cmob87uaz0cj20889yu4125yr","typename":"Tag"}],"translations({\"where\":{\"language\":{\"id\":\"cjv3kwvoj000u083611381c6o\"}}})":[{"type":"id","generated":false,"id":"PageTranslation:cmdilgygt0c7w0832h6z102dj","typename":"PageTranslation"}],"__typename":"Page"},"Tag:cmob87uaz0cj20889yu4125yr":{"id":"cmob87uaz0cj20889yu4125yr","name":"Staff: Company Cofounder","__typename":"Tag"},"PageTranslation:cmdilgygt0c7w0832h6z102dj":{"id":"cmdilgygt0c7w0832h6z102dj","name":"AleÅ¡ Procháska","createdAt":"2025-07-25T09:03:54.749Z","content":{"type":"json","json":{"content":[{"name":"Header","data":{"products":[{"title":"Accessories","description":"Backplates, Consumables. Tanks.","img":{"recommendedSizes":{"width":"235","height":"235"}},"url":""},{"title":"Accessories sets","description":"Protection, maintenance, cleaning.","img":{"recommendedSizes":{"width":"235","height":"235"}},"url":""},{"title":"Spare parts","description":"Spare parts and components.","img":{"recommendedSizes":{"width":"235","height":"235"}},"url":""},{"title":"Spare parts kits","description":"Completly Liberty spare parts kits.","img":{"recommendedSizes":{"width":"235","height":"235"}},"url":""}]},"id":"#0","type":"component","lock":false,"position":0},{"name":"TeamProfile","data":{"motto":"People You Can Rely On. \nGear You Can Trust.","aboutUrl":{"url":"/en/about-us","pageId":"ckgdfcdf4afxt0788jj7dwb6x"},"fullName":"AleÅ¡ Procháska","position":"Company co-founder","qualifications":"* Cave\n* Trimix\n* CCR","about":"As a child, I watched J.Y. C
2ousteauâs shows and was tempted to try diving myself. At that time, it was practically impossible in our country, but later the opportunity arose. I tried it and found that it was exactly what I enjoyed. From that moment on, I stopped pursuing other sports, even those that were interesting and technically demanding, like paragliding. It became clear that diving was the right sport for me.\n\nFor me, diving is primarily unlimited movement in complete calm. I enjoy observing underwater life, but what truly draws me even in lifeless terrain or deep inside a cave - is the act of diving itself. Itâs like walking in the woods or on a mountain trail, but with breathing apparatus, a computer, flashlights, a compass, guide lines, and other technical equipment. This interest in well-prepared, perfectly functioning technology is the second aspect of diving that captivates me. I like knowing every detail and being able to control it.\n\nOne unforgettable experience showed me that neither duration nor depth, nor even the equipment, determines a diveâs significance. While snorkeling in Norway, above the Arctic Circle, a killer whale swam up to me while hunting herring. It looked at me, and when it saw my clumsiness and inability to stun a herring with a fin stroke, it turned and gave me one. That day, we had herring for dinner. I had heard that killer whales share their food, but seeing it firsthand was incredible\n\nCurrently, I focus on automated testing of diving equipment. Our laboratory allows us to measure parameters and test breathing apparatus and other gear even at depths a diver could never reach. These machines can withstand extreme conditions and help identify areas where equipment needs improvement or modification.\n\nMy journey with Divesoft started simply. I noticed that certain technical equipment didnât exist or could be improved, so I began making it myself. Friends wanted to try it, and from there, founding Divesoft and manufacturing it professionally was the natural next step. For me, a diver should never feel limited by equipment. Thatâs why CCR is my choice, I can dive as long as I want, not just until my gas runs out.\n\nDiving plays a fundamental role in my life because Iâve combined my hobby with my profession. When Iâm not diving, I work on developing diving technology and when Iâm not working, I can dive. It feels like the right choice. After work, I enjoy working in the workshop, where I can work on something that combines mechanics, physics, electronics, and programming. I imagine the ideal relaxation as precision work and the process of finding solutions.\n","contact":"","images":[{"id":"1","image":{"mimetype":"image/jpeg","size":712211,"hash":"61484d4be63ae875fd3661e898eace659705f550","id":"cmlgfwrdolmcv0800crv1ua97","filename":"prochaska.jpg","category":"divesoft/","type":"image","alt":"photo of AleÅ¡ Procháska, Company Co-Founder from Divesoft"}}],"equipment":[{"id":"1","title":"Liberty <light>Heavy</light>","eshopUrl":{"url":"/en/products/ccr-liberty","pageId":"cjv3rpryz00iw0836lc0zx81j"},"image":{"mimetype":"image/png","size":5119796,"hash":"306f09c9913b45581e7a0c11c698358833067623","id":"cmnq5f3mqhznk0800xitdqu7w","filename":"liberty-heavy.png","category":"divesoft/","type":"image","alt":"Liberty Heavy"}},{"id":"2","title":"ANALYZER He/O<sub>2</sub>","eshopUrl":{"url":"https://www.divesoft.com/en/products/analyzers/analyzer-he-o2"},"image":{"mimetype":"image/png","size":3203637,"hash":"c291e73219753bfa13df291c799813b3c9f0990c","id":"cmnq5h86hhzpb0800r68torxv","filename":"heo2.png","category":"divesoft/","type":"image","alt":"Analyzer He/O2"}}],"activeTab":"1"},"id":"#2","type":"component","lock":false,"position":1},{"name":"JsonLD","data":{"jsonLD":"{\n \"@context\": \"https://schema.org/\",\n \"@type\": \"Person\",\n \"@id\": \"https://www.divesoft.com/en/about-us/ales-prochaska#person\",\n \"name\": \"AleÅ¡ Procháska\",\n \"givenName\": \"AleÅ¡\",\n \"familyName\": \"Procháska\",\n \"jobTitle\": \"Company Co-Founder\",\n \"knowsAbout\": [\n \"Cave diving\",\n \"Trimix diving\",\n \"CCR diving\"\n ],\n \"worksFor\": {\n \"@type\": \"Organization\",\n \"@id\": \"https://www.divesoft.com/#organization\",\n \"name\": \"Divesoft\",\n \"url\": \"https://www.divesoft.com/\",\n \"logo\": \"https://www.divesoft.com/assets/divesoft/images/logo.svg\"\n }
2,\n \"founder\": {\n \"@type\": \"Organization\",\n \"name\": \"Divesoft\"\n },\n \"alumniOf\": {\n \"@type\": \"Organization\",\n \"name\": \"Divesoft\"\n },\n \"url\": \"https://www.divesoft.com/en/about-us/ales-prochaska\",\n \"image\": \"http://foxer360-media-library.s3.eu-central-1.amazonaws.com/divesoft/61484d4be63ae875fd3661e898eace659705f550_prochaska.jpg\",\n \"description\": \"AleÅ¡ Procháska began his Divesoft journey by creating equipment he felt was missing, which led to co-founding the company. He focuses on CCR diving to avoid limiting divers.\",\n \"mainEntityOfPage\": {\n \"@type\": \"ProfilePage\",\n \"@id\": \"https://www.divesoft.com/en/about-us/ales-prochaska#profile\",\n \"headline\": \"Profil AleÅ¡e Prochásky\",\n \"url\": \"https://www.divesoft.com/en/about-us/ales-prochaska\",\n \"about\": {\n \"@type\": \"Person\",\n \"@id\": \"https://www.divesoft.com/en/about-us/ales-prochaska#person\"\n }\n }\n}"},"id":"#3","type":"component","lock":false,"position":2},{"name":"Footer","data":{"copyrights":"Copyright © 2019 Divesoft LLC All rights reserved.","facebookUrl":"","youtubeUrl":"","instagramUrl":"","contacts":"**Divesoft, s.r.o.** Hálkova 2495 413 01 Roudnice nad Labem Äeská republika Tel.: +420 416 857 057 E-mail: [email protected]"},"id":"#1","type":"component","lock":false,"position":3}],"id":"root","idBuffer":"#4","lastCommit":"03409967-6af1-408e-9ab1-7988579b85c8"}},"annotations":[{"type":"id","generated":true,"id":"PageTranslation:cmdilgygt0c7w0832h6z102dj.annotations.0","typename":"PageAnnotation"},{"type":"id","generated":true,"id":"PageTranslation:cmdilgygt0c7w0832h6z102dj.annotations.1","typename":"PageAnnotation"},{"type":"id","generated":true,"id":"PageTranslation:cmdilgygt0c7w0832h6z102dj.annotations.2","typename":"PageAnnotation"}],"language":{"type":"id","generated":false,"id":"Language:cjv3kwvoj000u083611381c6o","typename":"Language"},"__typename":"PageTranslation"},"PageTranslation:cmdilgygt0c7w0832h6z102dj.annotations.0":{"key":"title","value":"AleÅ¡ Procháska","__typename":"PageAnnotation"},"PageTranslation:cmdilgygt0c7w0832h6z102dj.annotations.1":{"key":"perex","value":"","__typename":"PageAnnotation"},"PageTranslation:cmdilgygt0c7w0832h6z102dj.annotations.2":{"key":"image","value":"null","__typename":"PageAnnotation"},"Page:cmdilhy9d0c8l0832bkenadk9":{"id":"cmdilhy9d0c8l0832bkenadk9","type":{"type":"id","generated":false,"id":"PageType:cjv3l213x004f08366hjufttp","typename":"PageType"},"tags":[{"type":"id","generated":false,"id":"Tag:cmll0x5mkc477088966r6jlvb","typename":"Tag"},{"type":"id","generated":false,"id":"Tag:cmob883jm0cje08897pcfhqyj","typename":"Tag"}],"translations({\"where\":{\"language\":{\"id\":\"cjv3kwvoj000u083611381c6o\"}}})":[{"type":"id","generated":false,"id":"PageTranslation:cmdilhy9s0c8s0832dmjjmmzz","typename":"PageTranslation"}],"__typename":"Page"},"Tag:cmob883jm0cje08897pcfhqyj":{"id":"cmob883jm0cje08897pcfhqyj","name":"Staff: IT","__typename":"Tag"},"PageTranslation:cmdilhy9s0c8s0832dmjjmmzz":{"id":"cmdilhy9s0c8s0832dmjjmmzz","name":"Jakub HeÄko","createdAt":"2025-07-25T09:04:41.152Z","content":{"type":"json","json":{"content":[{"name":"Header","data":{"products":[{"title":"Accessories","description":"Backplates, Consumables. Tanks.","img":{"recommendedSizes":{"width":"235","height":"235"}},"url":""},{"title":"Accessories sets","description":"Protection, maintenance, cleaning.","img":{"recommendedSizes":{"width":"235","height":"235"}},"url":""},{"title":"Spare parts","description":"Spare parts and components.","img":{"recommendedSizes":{"width":"235","height":"235"}},"url":""},{"title":"Spare parts kits","description":"Completly Liberty spare parts kits.","img":{"recommendedSizes":{"width":"235","height":"235"}},"url":""}]},"id":"#0","type":"component","lock":false,"position":0},{"name":"TeamProfile","data":{"motto":"People You Can Rely On. \nGear You Can Trust.","aboutUrl":{"url":"/en/about-us","pageId":"ckgdfcdf4afxt0788jj7dwb6x"},"fullName":"Jakub HeÄko","position":"Chief Technical Officer","qualifications":"* IANTD CCR Trimix Diver\n* ASTD Technical Cave Diver","about":"I came to diving after many years of swimming in a local water rescue club. Once I tried scuba, it quickly became my new favorite sport. What I enjoy most is the space-like feeling underwater: quiet, peaceful, weightless. Especially on closed circuit, everything slows down in the best way. The most memorable dives for me have been caving in Sardinia, walking kilometers deep into the cave system, passing through multiple siphons with sand and crystalclear water. Itâs a mix of exploration and concentration that I find addictive. Iâm most at home in the dark. Think Czech dams, where every dive feels like a night dive. And that suits me perfectly. I spend most of my time on Czech dams like Slapy and OrlÃk, where you can see everything from old house foundations to trees and big catfish hiding in the roots. Iâm happiest when I can dive every week. For me, diving is the ultimate form of recreation, no matter the conditions. Weekend dives on local dams, a safari boat on the Red Sea, or caving in zero visibility, it all has its own charm.\n\n
2My Divesoft story began when I was a Freedom diver and a bit of a nitpicker. A friend introduced me to AleÅ¡ Procháska, and in 2017 I became part of the Divesoft team. I enjoy the variety: general software development, troubleshooting real hardware, and helping with the more complex support cases. \n\nAs for gear, Iâll recommend any sidemount wing, as long as you can clip a Liberty eCCR SM onto it. ⨠If Iâm not at my desk, youâll probably find me somewhere near the water. Outside of diving (and anything involving water), I clear my head by rock climbing or doing anything that has to do with rocks. And when I want to switch off completely, I read Tom Clancy novels.\n","contact":"","images":[{"id":"1","image":{"mimetype":"image/jpeg","size":849525,"hash":"75b6fdc6f3083e7955d697f56ee8b22f884b545b","id":"cmlgfotcwlm140800kawiduut","filename":"hecko.jpg","category":"divesoft/","type":"image","alt":"photo of Jakub HeÄko, Chief Technical Officer from Divesoft"}}],"equipment":[{"id":"1","title":"LIBERTY <light>LIGHT</light>","eshopUrl":{"url":"https://www.divesoft.com/en/ccr-liberty","mediaData":{"mimetype":"image/jpeg","size":50745,"hash":"6c22b8a5eba20aaf637c4d14496dc84fca8db4cd","id":"cjxc5i4lo079407760imjcn2n","filename":"sidemount-.jpg","category":"divesoft/","type":"image"}},"image":{"mimetype":"image/png","size":902116,"hash":"bcdd815c30b6f23dc503851747d0970a20d5b6aa","id":"cmo9uzcp90m9h08003z0wvkqs","filename":"render13.png","category":"divesoft/","type":"image","alt":"Liberty Light"}}],"activeTab":"1"},"id":"#2","type":"component","lock":false,"position":1},{"name":"JsonLD","data":{"jsonLD":"{\n \"@context\": \"https://schema.org/\",\n \"@type\": \"Person\",\n \"@id\": \"https://www.divesoft.com/en/about-us/jakub-hecko#person\",\n \"name\": \"Jakub HeÄko\",\n \"givenName\": \"Jakub\",\n \"familyName\": \"HeÄko\",\n \"jobTitle\": \"Chief Technical Officer\",\n \"knowsAbout\": [\n \"IANTD CCR Trimix Diver\",\n \"ASTD Technical Cave Diver\",\n \"Software development\",\n \"Hardware troubleshooting\",\n \"Technical support\"\n ],\n \"worksFor\": {\n \"@type\": \"Organization\",\n \"@id\": \"https://www.divesoft.com/#organization\",\n \"name\": \"Divesoft\",\n \"url\": \"https://www.divesoft.com/\",\n \"logo\": \"https://www.divesoft.com/assets/divesoft/images/logo.svg\"\n },\n \"url\": \"https://www.divesoft.com/en/about-us/jakub-hecko\",\n \"image\": \"http://foxer360-media-library.s3.eu-central-1.amazonaws.com/divesoft/75b6fdc6f3083e7955d697f56ee8b22f884b545b_hecko.jpg\",\n \"description\": \"Jakub HeÄko joined Divesoft in 2017 as a Freedom diver and now works as Chief Technical Officer, contributing across software, hardware troubleshooting, and complex technical support.\",\n \"mainEntityOfPage\": {\n \"@type\": \"ProfilePage\",\n \"@id\": \"https://www.divesoft.com/en/about-us/jakub-hecko#profile\",\n \"headline\": \"Profil Jakuba HeÄka\",\n \"url\": \"https://www.divesoft.com/en/about-us/jakub-hecko\",\n \"about\": {\n \"@type\": \"Person\",\n \"@id\": \"https://www.divesoft.com/en/about-us/jakub-hecko#person\"\n }\n }\n}"},"id":"#3","type":"component","lock":false,"position":2},{"name":"Footer","data":{"copyrights":"Copyright © 2019 Divesoft LLC All rights reserved.","facebookUrl":"","youtubeUrl":"","instagramUrl":"","contacts":"**Divesoft, s.r.o.** Hálkova 2495 413 01 Roudnice nad Labem Äeská republika Tel.: +420 416 857 057 E-mail: [email protected]"},"id":"#1","type":"component","lock":false,"position":3}],"id":"root","idBuffer":"#4","lastCommit":"60e87f27-6571-4aff-88fe-083196d088e7"}},"annotations":[{"type":"id","generated":true,"id":"PageTranslation:cmdilhy9s0c8s0832dmjjmmzz.annotations.0","typename":"PageAnnotation"},{"type":"id","generated":true,"id":"PageTranslation:cmdilhy9s0c8s0832dmjjmmzz.annotations.1","typename":"PageAnnotation"},{"type":"id","generated":true,"id":"PageTranslation:cmdilhy9s0c8s0832dmjjmmzz.annotations.2","typename":"PageAnnotation"}],"language":{"type":"id","generated":false,"id":"Language:cjv3kwvoj000u083611381c6o","typename":"Language"},"__typename":"PageTranslation"},"PageTranslation:cmdilhy9s0c8s0832dmjjmmzz.annotations.0":{"key":"title","value":"Jakub HeÄko","__typename":"PageAnnotation"},"PageTranslation:cmdilhy9s0c8s0832dmjjmmzz.annotations.1":{"key":"perex","value":"","__typename":"PageAnnotation"},"PageTranslation:cmdilhy9s0c8s0832dmjjmmzz.annotations.2":{"key":"image","value":"null","__typename":"PageAnnotation"},"Page:cmdipepgt00xb08322to2saio":{"id":"cmdipepgt00xb08322to2saio","type":{"type":"id","generated":false,"id":"PageType:cjv3l213x004f08366hjufttp","typename":"PageType"},"tags":[],"translations({\"where\":{\"language\":{\"id\":\"cjv3kwvoj000u083611381c6o\"}}})":[{"type":"id","generated":false,"id":"PageTranslation:cmdipepix00xi0832mp22d5hu","typename":"PageTranslation"}],"__typename":"Page"},"PageTranslation:cmdipepix00xi0832mp22d5hu":{"id":"cmdipepix00xi0832mp22d5hu","name":"ECHO Quick reference","createdAt":"2025-07-25T10:54:08.312Z","content":{"type":"json","json":{"content":[{"name":"Header","data":{"products":[{"title":"Accessories","description":"Backplates, Consumables. Tanks.","img":{"recommendedSizes":{"width":"235","height":"235"}},"url":""},{"title":"Accessories sets","description":"Protection, maintenance, cleaning.","img":{"recommendedSizes":{"width":"235","height":"235"}},"url":""},{"title":"Spare parts","description":"Spare parts and components.","img":{"recommendedSizes":{"width":"235","height":"235"}},"url":""}
2,{"title":"Spare parts kits","description":"Completly Liberty spare parts kits.","img":{"recommendedSizes":{"width":"235","height":"235"}},"url":""}]},"id":"#0","type":"component","lock":false,"position":0},{"name":"SectionDivider","data":{"title":"User manual","skipToC":false},"id":"#121","type":"component","lock":false,"position":1},{"name":"ProductShowcase","data":{"backgroundColor":"#ffffff","isTextDark":true,"isImageRight":true,"image":{},"imageMobile":{},"title":"Quick Reference","subtitle":"ECHO Analyzer","description":"version 2026/04/21 \n\n#8500\n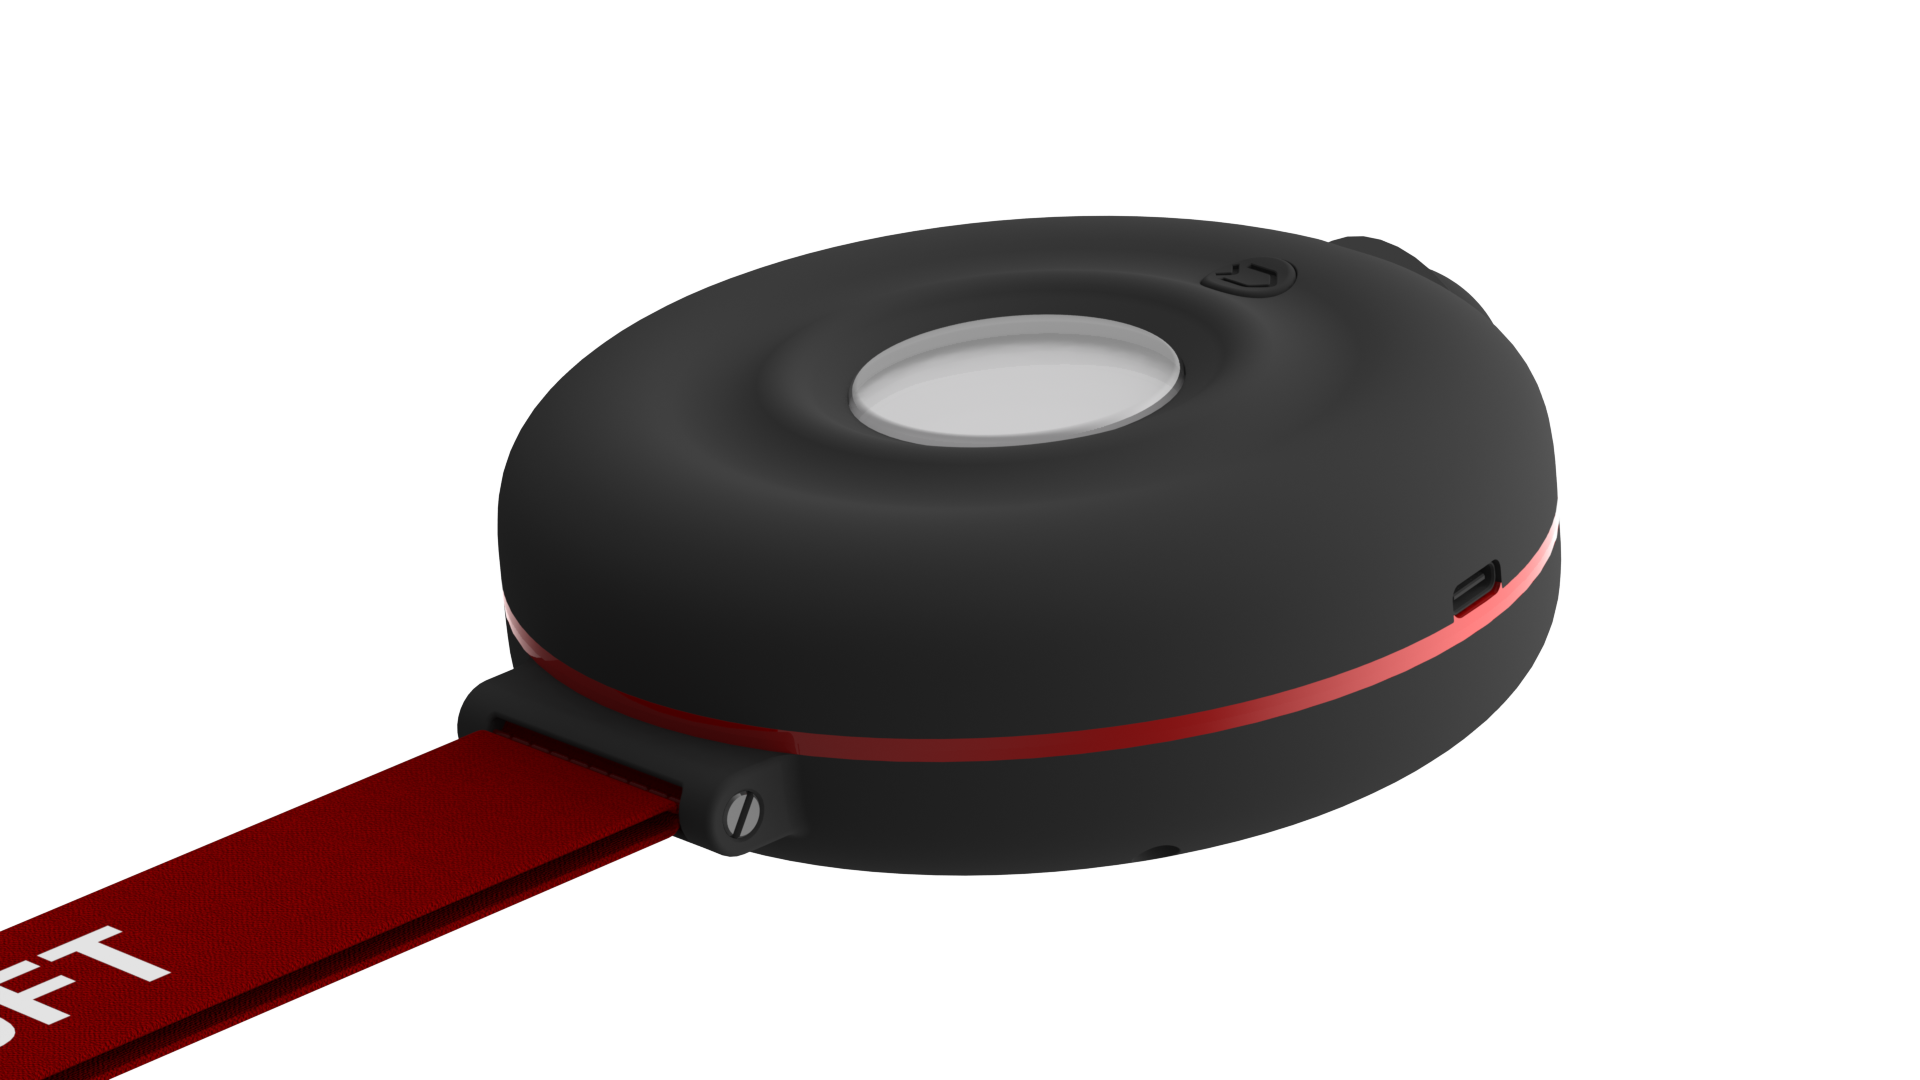","hideDescriptionOnMobile":false,"areButtons":false,"firstTitle":"Learn more >","firstUrl":"","secondTitle":"Configurator >","secondUrl":""},"id":"#46","type":"component","lock":false,"position":2},{"name":"Divider","data":{"color":"darkGray"},"id":"#53","type":"component","lock":false,"position":3},{"name":"SectionDivider","data":{"title":"Safety warning"},"id":"#120","type":"component","lock":false,"position":4},{"name":"TextBlock","data":{"text":"### **Intended Use** \n\nECHO is designed for analysis of **oxygen (Oâ), helium (He)**, and **carbon monoxide (CO)** in diving breathing gases composed exclusively of air, pure oxygen, and pure helium.\n\nThe analyzer **is not a certified measuring instrument**. Measured values are informative only and must not be used as sole confirmation of gas composition.","textLarge":false,"imageOnRight":true,"image":{"recommendedSizes":{"width":"420","height":"280"}},"imageMobile":{"recommendedSizes":{"width":"750","height":"500"}}},"id":"#52","type":"component","lock":false,"position":5},{"name":"Divider","data":{"color":"darkGray"},"id":"#60","type":"component","lock":false,"position":6},{"name":"SectionDivider","data":{"title":"04. Operating the analyzer","skipToC":false},"id":"#126","type":"component","lock":false,"position":7},{"name":"TextBlock","data":{"text":"### **Analyzer control** \n\n**ECHO has a single multifunction button. Switching on/off and control is done by long or short press of this button.**\n\n**SWITCH ON** \nLong press of the button (3s)\n\n**ENTER MENU** \nLong press of the button\n\n**MENU SCROLLING** \nShort button press\n\n**MENU CONFIRM** \nLong press of the button\n\n**LEAVE MENU** \nShort press to scroll to Quit and confirm with a long press\n\n**SWITCH OFF** \nEnter menu (long press) Select Switch off (long press)\n\n**RESET** \nHold button for 15+ seconds, ECHO will restart even when seemingly stuck or non-responsive.","textLarge":false,"imageOnRight":true,"image":{"recommendedSizes":{"width":"420","height":"280"}},"imageMobile":{"recommendedSizes":{"width":"750","height":"500"}}},"id":"#61","type":"component","lock":false,"position":8},{"name":"Divider","data":{"color":"darkGray"},"id":"#63","type":"component","lock":false,"position":9},{"name":"SectionDivider","data":{"title":"05. Measuring O2 and He concentration","skipToC":false},"id":"#127","type":"component","lock":false,"position":10},{"name":"TextBlock","data":{"text":"### **Gas Analysis**\n\n* Analyzer switches automatically to Oâ and He measurement mode after power-on.\n\n* Place the built-in flow limiter on the cylinder valve (air, nitrox).\n\n* For helium mixtures, use an external flow limiter.\n\n* Slowly open the valve.\n\n* Wait 5â10 seconds and always wait for values to stabilize before reading results.\n\nValues are shown on:\n\n* ECHO display\n\n* Mobile device (if connected via Divesoft.App)","textLarge":false,"imageOnRight":true,"image":{"recommendedSizes":{"width":"420","height":"280"}},"imageMobile":{"recommendedSizes":{"width":"750","height":"500"}}},"id":"#64","type":"component","lock":false,"position":11},{"name":"Divider","data":{"color":"darkGray"},"id":"#66","type":"component","lock":false,"position":12},{"name":"SectionDivider","data":{"title":"1. Gas Analysis Tips","skipToC":false},"id":"#216","type":"component","lock":false,"position":13},{"name":"TextBlock","data":{"text":"### **ECHO Likes to Breathe **\n \n* Measurements are only valid with gas actively flowing. \n* Calibrate once before your first measurement of the day â not between measurements. \n* If the device has been sitting idle with a different gas inside, flush it before use. \n \n**A bit more detail **\n\n* ECHO has a long gas path combining up to four sensors. \n* With active flow it flushes completely within 5 seconds â but without it, stale gas can slowly linger and produce a seemingly drifting reading. \n \n**Flushing with air **\n\n* If the device has been sitting with a different gas inside, give it a few good breaths: 2â5 passes of air with ~20-second pauses in between. \n* In normal use, you don't need to think about this â a stable reading is reached within seconds of gas flow starting. \n* This means waving ECHO around will not fill it with air â you need to properly induce airflow, placing ECHO on a cylinder valve or using a professional flow limiter. \n \n\n**Calibration tips **\n\n* Prefer using a compressed gas source â e.g. a cylinder with air or oxygen. \n* When using ambient air, draw from the gas inlet â fresh air will enter through the exhaust port near the oxygen sensor. ","textLarge":false,"imageOnRight":true,"image":{"recommendedSizes":{"width":"840","height":"560"}},"imageMobile":{"recommendedSizes":{"width":"750","height":"500"}}},"id":"#213","type":"component","lock":false,"position":14},{"name":"Divider","data":{"color":"darkGray"},"id":"#209","type":"component","lock":false,"position":15}
2,{"name":"SectionDivider","data":{"title":"06. Display modes","skipToC":false},"id":"#128","type":"component","lock":false,"position":16},{"name":"TextBlock","data":{"text":"### **Carbon Monoxide (CO) Detection**\n\n* Warning threshold: 5 ppm CO.\n* CO concentration is displayed in ppm.\n * On ECHO screen only when above warning limit.\n * In the Divesoft.App, indicated by a color bar, tap on the bar to show ppm.\n * Green <1 ppm\n * Yellow 1<<5 ppm\n * Red >5 ppm\n* **CAUTION** \n * Test only using suitable Bump Gas with CO concentration <100ppm !\n * Testing on higher concentrations can permanently damage the CO sensor\n * Under no circumstances test the ECHO using exhaust from a car or other internal combustion engine.","textLarge":false,"imageOnRight":true,"image":{"recommendedSizes":{"width":"840","height":"560"}},"imageMobile":{"recommendedSizes":{"width":"750","height":"500"}}},"id":"#187","type":"component","lock":false,"position":17},{"name":"Divider","data":{"color":"darkGray"},"id":"#70","type":"component","lock":false,"position":18},{"name":"SectionDivider","data":{"title":"06.1 Calibration of the oxygen sensor","skipToC":false},"id":"#129","type":"component","lock":false,"position":19},{"name":"TextBlock","data":{"text":"### **Mobile App â Divesoft.App**\n\n**Download**: https://www.divesoft.com/en/app \nAvailable for Android and iOS.\n\nFunctions:\n* Extended data display\n* Gas calculations and gas mixing\n* MOD calculation\n* Sensor calibration (including 3-point Oâ calibration)\n* Firmware updates\n* Printing gas labels (PDF)","textLarge":false,"imageOnRight":true,"image":{"recommendedSizes":{"width":"420","height":"280"}},"imageMobile":{"recommendedSizes":{"width":"750","height":"500"}}},"id":"#72","type":"component","lock":false,"position":20},{"name":"Divider","data":{"color":"darkGray"},"id":"#71","type":"component","lock":false,"position":21},{"name":"SectionDivider","data":{"title":"07. Other functions","skipToC":false},"id":"#145","type":"component","lock":false,"position":22},{"name":"TextBlock","data":{"text":"### **Connecting to Mobile App**\n\n* ECHO does not require to be \"paired\", just open DivesoftApp / Analyzer or Devices and connect.\n* Flashing Bluetooth symbol: disconnected (available for new connection)\n* Solid Bluetooth symbol: connected\n \n**If connection fails**:\n\n* Check ECHO screen, whether is the Bluetooth icon blinking. \n * If the bluetooth symbol does not blink, it means some connection is active (ie. other phone). To make ECHO drop the connection and make it available for a new one, simply power it off and back on.\n* Exit the DivesoftApp, and reopen it. \n * Possibly force-close it / remove from background Apps.\n* Check whether there is no pending update to the DIvesoftApp","textLarge":false,"imageOnRight":true,"image":{"recommendedSizes":{"width":"420","height":"280"}},"imageMobile":{"recommendedSizes":{"width":"750","height":"500"}}},"id":"#144","type":"component","lock":false,"position":23},{"name":"Divider","data":{"color":"darkGray"},"id":"#74","type":"component","lock":false,"position":24},{"name":"SectionDivider","data":{"title":"07.2 Gas mixing solver","skipToC":false},"id":"#131","type":"component","lock":false,"position":25},{"name":"TextBlock","data":{"text":"### **Calibration (Oâ)**\n\n* One-point and two-point calibration: on device or in app\n\n* Three-point calibration: app only (recommended for hypoxic gases)\n\n* Calibrate regularly (recommended at least monthly, ideally before use)\n\n**Helium sensor:**\n\n* Factory calibrated\n* No calibration required\n* No menu option available","textLarge":false,"imageOnRight":true,"image":{"recommendedSizes":{"width":"840","height":"560"}},"imageMobile":{"recommendedSizes":{"width":"750","height":"500"}}},"id":"#193","type":"component","lock":false,"position":26},{"name":"Divider","data":{"color":"darkGray"},"id":"#80","type":"component","lock":false,"position":27},{"name":"SectionDivider","data":{"title":"07.4 Gas purity","skipToC":false},"id":"#159","type":"component","lock":false,"position":28},{"name":"TextBlock","data":{"text":"### **Battery**\n\n* Rechargeable lithium battery\n\n* Charging via USB-C, 5 V / 1 A\n\n* Typical charging time: ~2.5 h\n\n* Battery icon shown on display\n\n* Best battery health: keep between 20â80%","textLarge":false,"imageOnRight":true,"image":{"recommendedSizes":{"width":"840","height":"560"}},"imageMobile":{"recommendedSizes":{"width":"750","height":"500"}}},"id":"#174","type":"component","lock":false,"position":29},{"name":"Divider","data":{"color":"darkGray"},"id":"#160","type":"component","lock":false,"position":30},{"name":"SectionDivider","data":{"title":"07.5 Ambient pressure","skipToC":false},"id":"#133","type":"component","lock":false,"position":31},{"name":"TextBlock","data":{"text":"### **Storage (Long-Term)**\n\n* Store in clean, dry environment (10â30 °C)\n\n* Battery charge: ~40â60%\n\n* Avoid solvent vapors and contaminated air\n\n* Allow device to reach room temperature before use","textLarge":false,"imageOnRight":true,"image":{"recommendedSizes":{"width":"840","height":"560"}},"imageMobile":{"recommendedSizes":{"width":"750","height":"500"}}},"id":"#175","type":"component","lock":false,"position":32},{"name":"Divider","data":{"color":"darkGray"},"id":"#81","type":"component","lock":false,"position":33},{"name":"SectionDivider","data":{"title":"08. Special accessories","skipToC":false},"id":"#143","type":"component","lock":false,"position":34},{"name":"TextBlock","data":{"text":"### **Maintenance**\n\n* Oâ galvanic sensor: replace after approx. 12â24 months\n\n* CO sensor: manufacturer lifetime 2 years from unpacking\n\n* Solid-state Oâ
2 (DVOâ) and He sensors: 10+ years / unlimited lifetime","textLarge":false,"imageOnRight":true,"image":{"recommendedSizes":{"width":"840","height":"560"}},"imageMobile":{"recommendedSizes":{"width":"750","height":"500"}}},"id":"#176","type":"component","lock":false,"position":35},{"name":"Divider","data":{"color":"darkGray"},"id":"#83","type":"component","lock":false,"position":36},{"name":"SectionDivider","data":{"title":"08.2 Voltage measuring","skipToC":false},"id":"#135","type":"component","lock":false,"position":37},{"name":"TextBlock","data":{"text":"### **Printing Gas Labels**\n\n* Available only in Divesoft.App\n\n* Press Print â PDF saved on phone\n* PDF can be sent to a label printer for cylinder marking, see the [Divesoft.Blog](https://www.divesoft.com/en/blog/cylinder-labeling)","textLarge":false,"imageOnRight":true,"image":{"recommendedSizes":{"width":"840","height":"560"}},"imageMobile":{"recommendedSizes":{"width":"750","height":"500"}}},"id":"#198","type":"component","lock":false,"position":38},{"name":"Divider","data":{"color":"darkGray"},"id":"#87","type":"component","lock":false,"position":39},{"name":"SectionDivider","data":{"title":"08.3 Resistance measuring","skipToC":false},"id":"#136","type":"component","lock":false,"position":40},{"name":"TextBlock","data":{"text":"### **Full Documentation**\n\nFor complete safety instructions, detailed explanations, calibration tables, and technical specifications, refer to the [full ECHO User Manual](https://www.divesoft.com/en/manuals/8500-echo-user-manual)","textLarge":false,"imageOnRight":true,"image":{"recommendedSizes":{"width":"840","height":"560"}},"imageMobile":{"recommendedSizes":{"width":"750","height":"500"}}},"id":"#178","type":"component","lock":false,"position":41},{"name":"Divider","data":{"color":"darkGray"},"id":"#112","type":"component","lock":false,"position":42},{"name":"SectionDivider","data":{"title":"13.1 Error messages","skipToC":false},"id":"#156","type":"component","lock":false,"position":43},{"name":"TextBlock","data":{"text":"### **ECHO ANALYZER - QUICK REFERENCE** \nDate of issue: 02 February 2026 \nHW 1.0, FW 2.0.0 \nAuthor: Jakub Å imánek \nPublished by Divesoft s.r.o.","textLarge":false,"imageOnRight":true,"image":{"recommendedSizes":{"width":"420","height":"280"}},"imageMobile":{"recommendedSizes":{"width":"750","height":"500"}}},"id":"#119","type":"component","lock":false,"position":44},{"name":"Divider","data":{"color":"darkGray"},"id":"#208","type":"component","lock":false,"position":45}],"id":"root","idBuffer":"#217","lastCommit":"28570be9-e5d5-425e-966a-deabeb7bdb89"}},"annotations":[],"language":{"type":"id","generated":false,"id":"Language:cjv3kwvoj000u083611381c6o","typename":"Language"},"__typename":"PageTranslation"},"Page:cmdipfr8v00xz08322hw227s8":{"id":"cmdipfr8v00xz08322hw227s8","type":{"type":"id","generated":false,"id":"PageType:cjv3l213x004f08366hjufttp","typename":"PageType"},"tags":[],"translations({\"where\":{\"language\":{\"id\":\"cjv3kwvoj000u083611381c6o\"}}})":[{"type":"id","generated":false,"id":"PageTranslation:cmdipfr9i00y608322kqj6rfk","typename":"PageTranslation"}],"__typename":"Page"},"PageTranslation:cmdipfr9i00y608322kqj6rfk":{"id":"cmdipfr9i00y608322kqj6rfk","name":"ECHO User manual","createdAt":"2025-07-25T10:54:57.221Z","content":{"type":"json","json":{"content":[{"name":"Header","data":{"products":[{"title":"Accessories","description":"Backplates, Consumables. Tanks.","img":{"recommendedSizes":{"width":"235","height":"235"}},"url":""},{"title":"Accessories sets","description":"Protection, maintenance, cleaning.","img":{"recommendedSizes":{"width":"235","height":"235"}},"url":""},{"title":"Spare parts","description":"Spare parts and components.","img":{"recommendedSizes":{"width":"235","height":"235"}},"url":""},{"title":"Spare parts kits","description":"Completly Liberty spare parts kits.","img":{"recommendedSizes":{"width":"235","height":"235"}},"url":""}]},"id":"#0","type":"component","lock":false,"position":0},{"name":"SectionDivider","data":{"title":"User manual","skipToC":false},"id":"#121","type":"component","lock":false,"position":1},{"name":"ProductShowcase","data":{"backgroundColor":"#ffffff","isTextDark":true,"isImageRight":true,"image":{},"imageMobile":{},"title":"User manual","subtitle":"ECHO Analyzer","description":"version 2026/04/21\n\n#8500\n","hideDescriptionOnMobile":false,"areButtons":false,"firstTitle":"Learn more >","firstUrl":"","secondTitle":"Configurator >","secondUrl":""},"id":"#46","type":"component","lock":false,"position":2},{"name":"Divider","data":{"color":"darkGray"},"id":"#47","type":"component","lock":false,"position":3},{"name":"SectionDivider","data":{"title":"","skipToC":true},"id":"#122","type":"component","lock":false,"position":4},{"name":"TextBlock","data":{"text":"### **Content** \n\n[Safety warning](#Safety-warning) \n[00. ECHO likes to breathe](#00.-ECHO-likes-to-breathe) \n[01. About firmware and hardware versions](#01.-About-firmware-and-hardware-versions) \n[
202. Measuring principle](#02.-Measuring-principle) \n[03. Analyzer control](#03.-Analyzer-control) \n[04. Connection to mobile app](#04.-Connection-to-mobile-app) \n[05. Calibration of the oxygen sensor](#05.-Calibration-of-the-oxygen-sensor) \n[06. Calibration Using the Mobile Application](#06.-Calibration-Using-the-Mobile-Application) \n[07. Ambient pressure](#07.-Ambient-pressure) \n[08. Helium sensor calibration](#08.-Helium-sensor-calibration) \n[09. Carbon monoxide sensor calibration](#09.-Carbon-monoxide-sensor-calibration) \n[09.1 Bump Test](#09.1-Bump-Test) \n[10. Measuring O2 and He concentration](#10.-Measuring-O2-and-He-concentration) \n[11. CO detection](#11.-CO-detection) \n[12. Maximum Operating Depth (MOD) Display](#12.-Maximum-Operating-Depth-(MOD)-Display) \n[13. Printing an Analyzed Gas Label](#13.-Printing-an-Analyzed-Gas-Label) \n[14. Setup menu](#14.-Setup-menu) \n[15. Measurement units](#15.-Measurement-units) \n[16. Gas calculations using a mobile app](#16.-Gas-calculations-using-a-mobile-app) \n[17. Charging and battery status](#17.-Charging-and-battery-status) \n[18. Oxygen Sensor Replacement](#18.-Oxygen-Sensor-Replacement) \n[19. CO Sensor Replacement](#19.-CO-Sensor-Replacement) \n[20. Battery replacement](#20.-Battery-replacement) \n[21. Firmware Update](#21.-Firmware-Update) \n[22. Storage when not in use for long periods](#22.-Storage-when-not-in-use-for-long-periods) \n[23. Error and Warning Messages](#23.-Error-and-Warning-Messages) \n[24. Technical data](#23.-Technical-data) \n[25. Manual version](#24.-Manual-version) ","textLarge":false,"imageOnRight":true,"image":{"recommendedSizes":{"width":"420","height":"280"}},"imageMobile":{"recommendedSizes":{"width":"750","height":"500"}}},"id":"#49","type":"component","lock":false,"position":5},{"name":"Divider","data":{"color":"darkGray"},"id":"#53","type":"component","lock":false,"position":6},{"name":"SectionDivider","data":{"title":"Safety warning"},"id":"#120","type":"component","lock":false,"position":7},{"name":"TextBlock","data":{"text":"### <span id=\"Safety-warning\">**Safety warning**</span>\n\n* This analyzer is designed for measuring the content of oxygen and helium in an air-oxygen-helium gas mixture and possible carbon monoxide contamination. It cannot be used to analyze mixes containing other gases, including, for instance, mixes prepared using anything but pure gases or mixes in which air has been replaced with pure nitrogen (without atmospheric argon).\n\n* The physical and chemical principles of the sensors used do not guarantee that the sensors will be selectively sensitive to a specific gas (oxygen, helium); there are a number of gases to which the sensors respond. Therefore, the gas composition shown by the analyzer does not mean by itself that the real composition of the mix is equal to the displayed values. \n\n* The displayed mix composition is invalid unless the mixing technology ensures that there are no other gases present in the mix except air, pure oxygen and pure helium. \n\n* The analyzer is not a certified measuring instrument. The results of measuring are only informative and it is not possible to use such results where a certified measuring instrument is required. \n\n* When analyzing mixes in situations where the incorrect composition of the mixes could cause material damage, injury to health or threaten human health or life, for example in the case of breathing mixes for diving, the results of the analysis may not be used as confirmation of the correct mix composition. In these cases, the analyzer can only be used as an aid for increasing the probability that such incorrect mix composition will be detected before its use. \n\n* The correctness of the mix composition must be established by the technology used to prepare it. The correct preparation of breathing mixes for diving (nitrox â oxygen-enriched air, trimix â a mixture of air, oxygen and helium, heliox â a mixture of oxygen and helium) requires special knowledge and experience which is possible to gain, for example, through an appropriate course. A failure to apply such knowledge c
2an lead to an incorrect mix, even though the results of the analysis are seemingly correct. Such a situation can also be the result of a failure to take into account the influence of temperature and compressibility, an insufficient blending of the mix and other factors. \n\n* Please remember that the analyzer can be broken or damaged and that the oxygen sensor is by its nature subject to ageing and thus its properties deteriorate. Therefore always verify the measured data in another way, such as by precise preparation of the mix, another analytical method, etc. In addition, the measured value must be subject to critical assessment using a common-sense approach and if it differs from the allowable variation of mixing accuracy, it must be considered invalid.","textLarge":false,"imageOnRight":true,"image":{"recommendedSizes":{"width":"420","height":"280"}},"imageMobile":{"recommendedSizes":{"width":"750","height":"500"}}},"id":"#52","type":"component","lock":false,"position":8},{"name":"Divider","data":{"color":"darkGray"},"id":"#54","type":"component","lock":false,"position":9},{"name":"TextBlock","data":{"text":"### <span id=\"00.-ECHO-likes-to-breathe\">**00. ECHO likes to breathe (Important handling tips)**</span>\n \n* Measurements are only valid with gas actively flowing. \n* Calibrate once before your first measurement of the day â not between measurements. \n* If the device has been sitting idle with a different gas inside, flush it before use. \n \n**A bit more detail **\n\n* ECHO has a long gas path combining up to four sensors. \n* With active flow it flushes completely within 5 seconds â but without it, stale gas can slowly linger and produce a seemingly drifting reading. \n \n**Flushing with air **\n\n* If the device has been sitting with a different gas inside, give it a few good breaths: 2â5 passes of air with ~20-second pauses in between. \n* In normal use, you don't need to think about this â a stable reading is reached within seconds of gas flow starting. \n* This means waving ECHO around will not fill it with air â you need to properly induce airflow, placing ECHO on a cylinder valve or using a professional flow limiter. \n \n\n**Calibration tips **\n\n* Prefer using a compressed gas source â e.g. a cylinder with air or oxygen. \n* When using ambient air, draw from the gas inlet â fresh air will enter through the exhaust port near the oxygen sensor. ","textLarge":false,"imageOnRight":true,"image":{"recommendedSizes":{"width":"840","height":"560"}},"imageMobile":{"recommendedSizes":{"width":"750","height":"500"}}},"id":"#210","type":"component","lock":false,"position":10},{"name":"Divider","data":{"color":"darkGray"},"id":"#209","type":"component","lock":false,"position":11},{"name":"SectionDivider","data":{"title":"01. About firmware and hardware versions","skipToC":false},"id":"#123","type":"component","lock":false,"position":12},{"name":"TextBlock","data":{"text":"### <span id=\"01.-About-firmware-and-hardware-versions\">**01. About firmware and hardware versions**</span>\n\nThe He/O2 analyzer is equipped with a microprocessor whose program (firmware) is continuously updated. This manual is for the initial firmware release 1.6.3, but the manual can be applied to any hardware version. \n","textLarge":false,"imageOnRight":true,"image":{"recommendedSizes":{"width":"420","height":"280"}},"imageMobile":{"recommendedSizes":{"width":"750","height":"500"}}},"id":"#51","type":"component","lock":false,"position":13},{"name":"Divider","data":{"color":"darkGray"},"id":"#56","type":"component","lock":false,"position":14},{"name":"SectionDivider","data":{"title":"02. Measuring principle","skipToC":false},"id":"#124","type":"component","lock":false,"position":15},{"name":"TextBlock","data":{"text":"### <span id=\"02.-Measuring-principle\">**02. Measuring principle**</span>\n\n\nThe described measuring principle is valid only for mixes of air, oxygen and helium. \n\nAn electrochemical sensor is used to determine the oxygen content. The voltage at the sensorâs output is proportional to the oxygen content in the analyzed mix. The sensor has a limited service life and the proportionality of the dependence of voltage on the oxygen content changes over time; therefore, it has to be regularly calibrated. It is possible to choose between single-point, two-point and three-point calibration. Single-point calibration is fast, especially if air is chosen as the calibrating mix. For greater accuracy of the measurement, two-point calibration is used with two different mixes, typically air and pure oxygen. For strongly hy
2poxic mixes, i.e. mixes containing less than approximately 15% oxygen, three-point calibration is recommended. In this case, the third calibration gas should be a gas with zero oxygen content, i.e. pure helium or argon. \n\nHelium content is determined on the basis of measuring the speed of sound in the analyzed mix. The speed of sound depends on the content of helium and oxygen, and the temperature of the mix. The dependence of the speed of sound on pressure is small and can be disregarded under normal atmospheric pressure. \n\nAt 0º C the speed of sound is approximately 970 m/s in pure helium, 330 m/s in air and 315 m/s in pure oxygen. Raising the temperature by one degree increases the speed of sound by 0.175 %. The speed of sound in the mix is described by a non-linear function of temperature, oxygen content and helium content. \n\nThe content of helium is determined by measuring the speed of sound, temperature of the mix and the content of oxygen. When measuring the concentration of helium, it is therefore necessary to have the oxygen sensor correctly calibrated or to know the oxygen content and enter it into the instrument. \n\nThe speed of sound is measured directly as the time it takes for an acoustic impulse to travel between two microphones. This measurement is performed alternately in both directions to make it possible to eliminate the influence of the gas flow-rate in the probe on the calculation. The acoustic impulses are heard as weak âclicksâ from the probe in the helium-measuring mode. \n\nGas is delivered to the analyzer from a sampler connected to the compressed-gas tank and the gas flow is controlled using a nozzle to provide the volume needed for the analysis.","textLarge":false,"imageOnRight":true,"image":{"recommendedSizes":{"width":"420","height":"280"}},"imageMobile":{"recommendedSizes":{"width":"750","height":"500"}}},"id":"#55","type":"component","lock":false,"position":16},{"name":"Divider","data":{"color":"darkGray"},"id":"#60","type":"component","lock":false,"position":17},{"name":"SectionDivider","data":{"title":"3. Analyzer control","skipToC":false},"id":"#126","type":"component","lock":false,"position":18},{"name":"TextBlock","data":{"text":"### <span id=\"03.-Analyzer-control\">**03. Analyzer control**</span>\n\n**ECHO has a single multifunction button. Switching on/off and control is done by long or short press of this button.**\n\n**SWITCH ON** \nLong press of the button (1s)\n\n**CALL MENU ** \nLong press of the button\n\n**MENU SCROLLING ** \nShort button press\n\n**POSITION SELECTION** \nLong press of the button\n\n**LEAVE MENU** \nShort press to scroll to Quit and confirm with a long press\n\n**SWITCH OFF** \nExtra long press (3s) or from the menu\n\n**RESET** \nIn case of an unresponsive device, hold button for 15s or longer, the device will go through a full power cycle.","textLarge":false,"imageOnRight":true,"image":{"recommendedSizes":{"width":"420","height":"280"}},"imageMobile":{"recommendedSizes":{"width":"750","height":"500"}}},"id":"#61","type":"component","lock":false,"position":19},{"name":"Divider","data":{"color":"darkGray"},"id":"#63","type":"component","lock":false,"position":20},{"name":"SectionDivider","data":{"title":"04. Connection to mobile app","skipToC":false},"id":"#127","type":"component","lock":false,"position":21},{"name":"TextBlock","data":{"text":"### <span id=\"04.-Connection-to-mobile-app\">**04. Connection to mobile app**</span>","textLarge":false,"imageOnRight":false,"image":{"recommendedSizes":{"width":"840","height":"560"}},"imageMobile":{"recommendedSizes":{"width":"750","height":"500"}}},"id":"#212","type":"component","lock":false,"position":22},{"name":"Image","data":{"firstImage":{"recommendedSizes":{"width":"2000","height":"2000"},"mimetype":"image/png","size":1301657,"hash":"43e9e651a9f52d00f08256ebeafeddc32164c11f","id":"cm737a5egjeyt08505ycj0rdm","filename":"divesoft-app-202502-01.png","category":"divesoft/","type":"image"},"secondImage":{"recommendedSizes":{"width":"2000","height":"2000"}},"isHorizontal":true},"id":"#211","type":"component","lock":false,"position":23},{"name":"TextBlock","data":{"text":"The values displayed on the device screen and the availability of advanced functions are limited. A significant extension of data visualization, control options, and the use of calculated values for gas preparation is achieved by connecting the analyzer to the Divesoft.App mobile application. \n\nThe mobile application is available for smartphones running Android and Apple iOS operating systems.\
2n\n**Download the mobile app** \nhttps://www.divesoft.com/en/app\n\n**Connection indication** \nBluetooth symbol flashes - ECHO is not paired with the app - available \nBluetooth symbol solid - ECHO is connected to the device \n\n**Connecting** \n1.\tSwitch on ECHO \n2.\tTurn on the mobile app in Analyzer mode \n3.\tThe app will offer you the available Bluetooth analyzers. If it doesn't, press the three dots on the top right. \n4.\tSelect your ECHO from the list \n5.\tDone \n\n**Troubleshooting Connection Issues** \nIf the mobile application does not show your ECHO analyzer, there are two possibilities - depending on the Bluetooth symbol on the ECHO display: \n\n**SOLID** \nEven though your DivesoftApp is not connected. \nSome connection to your ECHO is still pending, ECHO allows only one device connected at one time. \nFastest fix is to power cycle (OFF-ON) the ECHO, which will reset the connection and ECHO will be accepting new one. \n\n**FLASHING** \nECHO is ready, but the DivesoftApp does not seem to register it properly. \nExit the DivesoftApp and reopen.\nPossibly force-stop the App by dragging it out of the list of background running Apps.\nIf that does not work, switch off bluetooth on your phone and switch it back on, or try restarting whole phone.\n","textLarge":false,"imageOnRight":true,"image":{"recommendedSizes":{"width":"420","height":"280"}},"imageMobile":{"recommendedSizes":{"width":"750","height":"500"}}},"id":"#64","type":"component","lock":false,"position":24},{"name":"Divider","data":{"color":"darkGray"},"id":"#66","type":"component","lock":false,"position":25},{"name":"SectionDivider","data":{"title":"05. Calibration of the oxygen sensor","skipToC":false},"id":"#128","type":"component","lock":false,"position":26},{"name":"TextBlock","data":{"text":"### <span id=\"05.-Calibration-of-the-oxygen-sensor\">**05. Calibration of the oxygen sensor**</span>\n\nThe oxygen sensorâs properties change over time and it is therefore necessary to recalibrate it. We recommend that such calibration be performed at least once a month. ECHO analyzer has a built-in barometer sensor, which corrects itself. If you require the most precise results, calibrate the sensor before each measuring.\n\n**NOTE:** Solid state O2 sensor calibration interval is 6 months, or if value in ambient air significantly differ from expected - when accounted for humidity - see table at the end of this chapter.\n\nCalibration of the sensor is performed as either single-point or two-point or three-point. \n\nDuring **single-point calibration**, the content of oxygen in air, which is known and constant (20.95 %), is measured by the sensor. The calibration constant of the sensor is set so that the instrument displays 21.0 % (after rounding).\n\n**Two-point calibration** proceeds in the same manner as single-point calibration, but uses two calibration gases â pure oxygen and air. Two-point calibration is more arduous as it requires the use of oxygen. However, it provides more precise results during measuring.\n\n**Thee-point calibration** is recommended only for measuring hypoxic mixes, containing less than approximately 15 % oxygen. In this case, the third calibration gas should be a gas with zero oxygen content, i.e. pure helium or argon.\nThree-point calibration before measuring mixtures with a higher oxygen content can, on the contrary, lead to inaccurate measurements.\n\nThe values displayed on the device screen and the availability of advanced functions are limited. A significant extension of data visualization, control options, and the use of calculated values for gas preparation is achieved by connecting the analyzer to the Divesoft.App mobile application.\nCalibration can be performed either directly through the device menu or, after connecting to the analyzer, within the Divesoft.App environment. One-point and two-point calibration can be carried out directly on the device, while three-point calibration is available exclusively through the mobile application.\n\nEnter the menu (long press) Scroll to Calibration with short presses and confirm (long press).\n\nShort press to scroll through the options. Long press to select one of the options.\n\n**O2 Sensor** â recommended to be performed regularly with a maximum interval of one day\n\n**He Sensor** â the helium sensor does not need to be calibrated at all, or only in the case of an aberrant helium measurement. If you still decide to calibrate the helium sensor, then calibrate in air and without flow (disconnected tubing).\n\n**Return** â takes you level back in the menu\n\n**Quit** â return to the main screen\n\n**Oxygen sensor calibration** \nShort press to cycle through the options. Long press to select one of the options.\n\n#### Air\n**calibrate with air** \n1.\tIt is necessary to ensure that there is air on the sensor. If you have measured a gas other than air before calibration, you can speed up the venting of the measuring labyrinth by sucking the gas out of the measuring inlet port with your mouth. \n2.\tLong press to select Air calibration\n3.\tShort press to start calibration / Long press to cancel calibration\n4.\tWait for the values to stabilize (the countdown at the bottom of the screen)\n5.\tConfirm the calibration with short press\n","textLarge":false,"imageOnRight":true,"image":{"recommendedSizes":{"width":"840","height":"560"}},"imageMobile":{"recommendedSizes":{"width":"750","height":"500"}}},"id":"#187","type":"component","lock":false,"position":27},{"name":"Image","data":{"firstImage":{"recommendedSizes":{"width":"2000","height":"2000"},"mimetype":"image/png","size":2697,"hash":"6295f5befb81c1332d07f
26e067d10bd8b7b27414","id":"cml6bhgyohoij0800uvxyijkj","filename":"calibrate-o2-start.png","category":"divesoft/","type":"image"},"secondImage":{"recommendedSizes":{"width":"2000","height":"2000"},"mimetype":"image/png","size":2580,"hash":"dd76b1d2d213ea2bd3a7739cbbc19c38596d3a65","id":"cml6biaqvhojq0800u0lsh45p","filename":"calibrate-o2-stable.png","category":"divesoft/","type":"image"}},"id":"#189","type":"component","lock":false,"position":28},{"name":"TextBlock","data":{"text":"\n\n#### Oxygen\n**calibrate with 100% oxygen.** \n1.\tIt is necessary to ensure that 100% oxygen is present at the sensor. Use a gas source where you can be sure of the correct composition, quality and purity. For calibration, preferably connect one of the DIVESOFT flow limiters and connect the tubing to the ECHO inlet measuring port. \n2.\tLong press to select Oxygen calibration \n3.\tShort press to start calibration / Long press to cancel calibration \n4.\tWait for the values to stabilize (the countdown at the bottom of the screen) \n5.\tConfirm the calibration with short press\n\n#### Air+O2\ntwo-point calibration with air and oxygen for more accurate calibration.\nLong press to select Air+O2 \n\n**Step 1 â air** \n1.\tIt is necessary to ensure that there is air on the sensor. If you have measured a gas other than air before calibration, you can speed up the venting of the measuring labyrinth by sucking the gas out of the measuring inlet port with your mouth. \n2.\tShort press to start calibration / Long press to cancel calibration \n3.\tWait for the values to stabilize (the countdown at the bottom of the screen) \n4.\tShort press to confirm the calibration step 1 and move to calibration step 2\n\n","textLarge":false,"imageOnRight":true,"image":{"recommendedSizes":{"width":"420","height":"280"}},"imageMobile":{"recommendedSizes":{"width":"750","height":"500"}}},"id":"#67","type":"component","lock":false,"position":29},{"name":"Image","data":{"firstImage":{"recommendedSizes":{"width":"2000","height":"2000"},"mimetype":"image/png","size":2736,"hash":"426ee10034f54d38c539e2044f28222143b6b166","id":"cml6bmqimhop60800rsi44j8u","filename":"calibrate-o2-stable-2points.png","category":"divesoft/","type":"image"},"secondImage":{"recommendedSizes":{"width":"2000","height":"2000"}}},"id":"#191","type":"component","lock":false,"position":30},{"name":"TextBlock","data":{"text":"**Step 2 - oxygen** \n1.\tIt is necessary to ensure that 100% oxygen is present at the sensor. Use a gas source where you can be sure of the correct composition, quality and purity. For calibration, preferably connect one of the DIVESOFT flow limiters and connect the tubing to the ECHO inlet measuring port. \n2.\tShort press to start calibration / Long press to cancel calibration \n3.\tWait for the values to stabilize (the countdown at the bottom of the screen) \n4.\tConfirm the calibration with short press\n\n#### **Correction of the oxygen content in the air** \nThe oxygen content of the air is not constant, but varies with ambient conditions. The amount of oxygen is displaced by water vapour in the air. Therefore, the oxygen content decreases with increasing temperature and humidity. To accurately calibrate the oxygen sensor, use the correction tables below and set the correct value when calibrating to ambient air.","textLarge":false,"imageOnRight":true,"image":{"recommendedSizes":{"width":"840","height":"560"}},"imageMobile":{"recommendedSizes":{"width":"750","height":"500"}}},"id":"#190","type":"component","lock":false,"position":31},{"name":"Image","data":{"firstImage":{"recommendedSizes":{"width":"2000","height":"2000"},"mimetype":"image/png","size":56549,"hash":"77b5cb5bb92c2d01d32efd855e0bec8e1739e51f","id":"cmovazc3788zb0800kft7fvwt","filename":"air-o2-correction-chart-wide.png","category":"divesoft/","type":"image","alt":"Air O2 content correction chart"},"secondImage":{"recommendedSizes":{"width":"2000","height":"2000"}},"isHorizontal":true},"id":"#213","type":"component","lock":false,"position":32},{"name":"Divider","data":{"color":"darkGray"},"id":"#70","type":"component","lock":false,"position":33},{"name":"SectionDivider","data":{"title":"06. Calibration Using the Mobile Application","skipToC":false},"id":"#129","type":"component","lock":false,"position":34},{"name":"TextBlock","data":{"text":"### <span id=\"06.-Calibration-Using-the-Mobile-Application\">**06. Calibration Using the Mobile Application**</span>\n\nCalibration Using the Mobile Application\nCalibration performed through the Divesoft.App is more user-friendly, clearer, and provides extended functionality compared to calibration performed directly on the device. In addition, the mobile application allows three-point calibration, which improves accuracy when anal
2yzing hypoxic gas mixtures. \nTo use the mobile application, the app must be downloaded, installed, and paired with the ECHO analyzer (see chapter Connection to Mobile App).","textLarge":false,"imageOnRight":true,"image":{"recommendedSizes":{"width":"840","height":"560"}},"imageMobile":{"recommendedSizes":{"width":"750","height":"500"}}},"id":"#214","type":"component","lock":false,"position":35},{"name":"Image","data":{"firstImage":{"recommendedSizes":{"width":"2000","height":"2000"},"mimetype":"image/png","size":1058697,"hash":"f0e5595f9b7745ffe03d606ff4fab5c78af68924","id":"cml6f1tfxhsiu0800jkzgneif","filename":"multipoint-calibration.png","category":"divesoft/","type":"image","alt":"Multi point calibration"},"secondImage":{"recommendedSizes":{"width":"2000","height":"2000"}},"isHorizontal":false},"id":"#215","type":"component","lock":false,"position":36},{"name":"TextBlock","data":{"text":"**Calibration Procedure** \n1.\tAfter pairing, open the Divesoft.App. \n2.\tEnter the Analyzer section. \n3.\tPress and hold the red âCalibrateâ button. \n4.\tSelect one-point, two-point, or three-point calibration. \n(An explanation of calibration types and their recommended use is provided in Chapter 05 â Calibration of the Oxygen Sensor.) \n5.\tConnect the calibration gas and open the valve. \n6.\tWait until the sensor reading stabilizes. \n7.\tOnce the sensor is stable, confirm the calibration point in the application and connect the next calibration gas if required.\n","textLarge":false,"imageOnRight":true,"image":{"recommendedSizes":{"width":"420","height":"280"}},"imageMobile":{"recommendedSizes":{"width":"750","height":"500"}}},"id":"#72","type":"component","lock":false,"position":37},{"name":"Image","data":{"firstImage":{"recommendedSizes":{"width":"2000","height":"2000"},"mimetype":"image/png","size":858881,"hash":"9d1e3c64c08ecfc85a04ce7d8792d96245fcf53b","id":"cml6fc4wuhst70800gwgp3b4u","filename":"single-point-calibration.png","category":"divesoft/","type":"image","alt":"Single point calibration"},"secondImage":{"recommendedSizes":{"width":"2000","height":"2000"}}},"id":"#217","type":"component","lock":false,"position":38},{"name":"TextBlock","data":{"text":"**Multi-Point Calibration Notes** \nâ¢\tWhen performing two-p
2oint or three-point calibration, calibration can begin with any calibration gas. \nâ¢\tThe calibration points may be completed in any order, allowing flexibility based on gas availability. \nâ¢\tThis approach is especially useful in field conditions or when working with hypoxic mixtures.","textLarge":false,"imageOnRight":true,"image":{"recommendedSizes":{"width":"840","height":"560"}},"imageMobile":{"recommendedSizes":{"width":"750","height":"500"}}},"id":"#216","type":"component","lock":false,"position":39},{"name":"Divider","data":{"color":"darkGray"},"id":"#71","type":"component","lock":false,"position":40},{"name":"SectionDivider","data":{"title":"07. Ambient pressure","skipToC":false},"id":"#145","type":"component","lock":false,"position":41},{"name":"TextBlock","data":{"text":"### <span id=\"07.-Ambient-pressure\">**07. Ambient pressure**</span>\n\nAnalyzer is equipped with a barometric pressure sensor. Thanks to this device can be calibrated for the atmospheric conditions and altitude. The atmospheric pressure and altitude can be displayed in the menu ambient pressure. Altitude is calculated from the ambient pressure and, depending on atmospheric conditions may differ from reality.\n","textLarge":false,"imageOnRight":true,"image":{"recommendedSizes":{"width":"420","height":"280"}},"imageMobile":{"recommendedSizes":{"width":"750","height":"500"}}},"id":"#144","type":"component","lock":false,"position":42},{"name":"SectionDivider","data":{"title":"08. Helium sensor calibration","skipToC":false},"id":"#130","type":"component","lock":false,"position":43},{"name":"TextBlock","data":{"text":"### <span id=\"08.-Helium-sensor-calibration\">**08. Helium sensor calibration**</span>\n\nThe helium sensor used in the ECHO analyzer is factory calibrated during the manufacturing process. Thanks to the measurement technology employed, the sensor exhibits excellent long-term stability, and no user calibration is required during normal operation. \nBecause helium measurement does not rely on consumable or aging-sensitive components, the sensor output remains stable over time. As a result, routine or periodic calibration of the helium sensor is not necessary. \nFor this reason, helium sensor calibration is not available in the ECHO device menu, and no calibration option is provided for helium measurement.\n","textLarge":false,"imageOnRight":true,"image":{"recommendedSizes":{"width":"840","height":"560"}},"imageMobile":{"recommendedSizes":{"width":"750","height":"500"}}},"id":"#171","type":"component","lock":false,"position":44},{"name":"Divider","data":{"color":"darkGray"},"id":"#74","type":"component","lock":false,"position":45},{"name":"SectionDivider","data":{"title":"09. Carbon monoxide sensor calibration","skipToC":false},"id":"#131","type":"component","lock":false,"position":46}
2,{"name":"TextBlock","data":{"text":"### <span id=\"09.-Carbon-monoxide-sensor-calibration\">**09. Carbon monoxide sensor calibration**</span>\n\n\n**Why Calibration Is Necessary** \nOver time, electrochemical sensors experience a gradual drift in their output signal. \n\nElectrochemical CO sensors have a finite operational lifetime, regardless of use. The factory installed sensor has a manufacturer rated lifetime of 2 years from the date of manufacture.\n\n**Important:** The sensor must be replaced regardless of apparent function once the rated service life has elapsed. An aged sensor may continue to produce readings while having significantly reduced sensitivity, potentially failing to alarm at dangerous concentrations.\n\n**Calibration Interval** \nThe sensor should be calibrated at least every 6 months, or: \n* After any sensor replacement \n* After exposure to very high CO concentrations (above sensor range) \n* After extended storage (>3 months without use) \n* If the zero reading shows persistent non-zero offset in clean air \n \n \n**Calibration Procedure**\n* Perform CO sensor zero calibration preferably outside or in a well ventilated room - clean air is absolute necessity.\n * Do not attempt a calibration in a parking lot, underground parking garage or other enclosed space with a vehicles nearby.\n* Flush the analyzer with a clean air, or wave it for 15 seconds to get the fresh air to the sensor near the outled vent.\n* Ensure the analyzer has been powered on for at least 5 minutes to allow the sensor to stabilize.\n* Navigate to the Calibrate / Gas Sensors / Gas1 zero and follow the on-screen instructions.\n\n\n\n\n\n","textLarge":false,"imageOnRight":true,"image":{"recommendedSizes":{"width":"840","height":"560"}},"imageMobile":{"recommendedSizes":{"width":"750","height":"500"}}},"id":"#172","type":"component","lock":false,"position":47},{"name":"Divider","data":{"color":"darkGray"},"id":"#75","type":"component","lock":false,"position":48},{"name":"TextBlock","data":{"text":"### <span id=\"09.1-Bump-Test\">**09.1 Bump Test**</span>\n\nA bump test (functional test) is a quick exposure to a known concentration of CO to verify that the sensor responds and the alarm triggers correctly. It is not a substitute for full calibration â it confirms the sensor and alarm system are functional, not that the readings are accurate to a specific value. \n\n**A bump test should be performed:**\n\n* Before each day of use in safety-critical applications \n* Before each dive trip or operational deployment \n* After any period of storage exceeding 3 months \n\nThis is consistent with best practices for electrochemical gas detectors and with guidance from organizations such as the Industrial Scientific Gas Detection safety standards. \n\n**Bump Test Procedure** \n\n1. Perform bump test outside, or open a window, Carbon Monoxide is a dangerous gas in higher concentrations. \n1. Power on the analyzer and allow it to warm up (minimum 5 minutes). \n1. Confirm the reading in clean air is 0 ppm (or within ±1 ppm). \n1. Apply bump test gas (10 â 50ppm CO) into the ECHO inlet for 5s. \n\t* CAUTION do not use bump gas with CO concentration above 100ppm, which may result in a permanent CO sensor damage. \n1. Confirm: \n\t* The reading shows at least 80% of the bump gas CO concentration within 30 seconds \n\t* The audible and/or visual alarm activates as long as above 5ppm \n\t* Remove gas, flush ECHO with air, and confirm the reading returns to near zero within 60 seconds. \n \n**Fail condition:** If the sensor does not respond, does not reach the expected concentration, or the alarm does not trigger, remove the analyzer from service immediately and perform a full calibration or replace the sensor. \n\nRecord the bump test result (pass/fail) in the maintenance log. ","textLarge":false,"imageOnRight":false,"image":{"recommendedSizes":{"width":"840","height":"560"}},"imageMobile":{"recommendedSizes":{"width":"750","height":"500"}}},"id":"#208","type":"component","lock":false,"position":49},{"name":"Divider","data":{"color":"darkGray"},"id":"#207","type":"component","lock":false,"position":50},{"name":"SectionDivider","data":{"title":"10. Measuring O2 and He concentration","skipToC":false},"id":"#132","type":"component","lock":false,"position":51},{"name":"TextBlock","data":{"text":"### <span id=\"10.-Measuring-O2-and-He-concentration\">**10. Measuring O2 and He concentration**</span>\n","textLarge":false,"imageOnRight":true,"image":{"recommendedSizes":{"width":"840","height":"560"}},"imageMobile":{"recommendedSizes":{"width":"750","height":"500"}}},"id":"#193","type":"component","lock":false,"position":52},{"name":"Image","data":{"firstImage":{"recommendedSizes":{"width":"2000","height":"2000"},"mimetype":"image/png","size":2043,"hash":"16030f42575f5bafdd564858f6f46e12caa51926","id":"cml6g3t3uhtgr0800nc4peunb","filename":"measure-screen.png","category":"divesoft/","type":"image"},"secondImage":{"recommendedSizes":{"width":"2000","height":"2000"}}},"id":"#192","type":"component","lock":false,"position":53},{"name":"TextBlock","data":{"text":"The ECHO analyzer is designed for simple and reliable analysis of breathing gases used in diving. The ECHO analyzer allows users to monitor measured gas values directly on the ECHO device display or, when connected to a mobile device, on a smartphone or tablet using the Divesoft.App in Analyzer mode. \n\nThe analyzer is equipped with a built-in basic flow limiter, which can be placed directly against the cylinder valve. This solution is suitable for the analysis of air and nitrox mixtures. ","textLarge":false,"imageOnRight":true,"image":{"recommendedSizes":{"width":"840","height":"560"},"mimetype":"image/png","size":11621382,"hash":"546d513940d9d58d0b40de5b14c06fca748d73f2","id":"cml6nno5ei1190800yxo595v8","filename":"zapojeni-profi-detail.png","category":"divesoft/","type":"image"},"imageMobile":{"recommendedSizes":{"width":"750","height":"500"}}},"id":"#218","type":"component","lock":false,"position":54},{"name":"TextBlock","data":{"text":"For helium-containing mixtures (trimix or heliox), the use of an additional external flow limiter is recommended. A dedicated flow limiter (e.g. Flow
2Limiter Mk2) ensures accurate and stable gas sampling while minimizing unnecessary gas loss during the analysis process.\n\n**Analysis Steps ** \n1.\tEnsure that the analyzer is powered on.\nUpon activation, the analyzer automatically switches to oxygen and helium measurement mode. No additional setup is required. \n2.\tPlace the built-in flow limiter against the cylinder valve.\nIf an external flow limiter is used, connect the flow limiter to the cylinder valve and link it to the opening of the ECHO flow limiter using the supplied hose. \n3.\tSlowly open the cylinder valve to allow gas to flow into the analyzer. \n4.\tAfter approximately 5â10 seconds, the measured gas composition will be displayed on the ECHO analyzer screen.\nIf the analyzer is connected to the mobile application, the measured values will also be displayed on the mobile device. \n5.\tWait until the displayed values stabilize before recording or confirming the measurement result. Stable readings are essential for accurate gas analysis.\n","textLarge":false,"imageOnRight":true,"image":{"recommendedSizes":{"width":"840","height":"560"}},"imageMobile":{"recommendedSizes":{"width":"750","height":"500"}}},"id":"#173","type":"component","lock":false,"position":55},{"name":"Divider","data":{"color":"darkGray"},"id":"#80","type":"component","lock":false,"position":56},{"name":"SectionDivider","data":{"title":"11. CO detection","skipToC":false},"id":"#159","type":"component","lock":false,"position":57},{"name":"TextBlock","data":{"text":"### <span id=\"11.-CO-detection\">**11. CO detection**</span>\n\nCarbon monoxide is a substance that is produced by imperfect combustion. It is therefore present around open fires or in the exhaust gases of combustion engines. Carbon monoxide has a direct effect on human health and is life-threatening in combination with high ambient pressure.\nThe natural concentration of carbon monoxide in the air is around 0-10 ppm, in urban areas this can be as high as 20 ppm. The first signs of carbon monoxide poisoning at atmospheric pressure appear at a concentration of around 200 ppm, with life-threatening concentrations above 400 ppm.\n\nIn a hyperbaric environment the partial pressure of CO increases, therefore when using diving breathing gases the maximum permissible level of CO in the mixture is 5 ppm.\n \n**If the limit is exceeded, an alarm appears on the ECHO display followed by audible alarm.**\n\nIn the Divesoft.App, you can click the Gas quality bar, which will show you the current CO concentration. In case of dangerous values, **the bar will turn red and warn you of the dangerous value**.\n\n**CAUTION** \n* Under no circumstances place the ECHO near an internal combustion engine exhaust.\n* Exposing ECHO to CO concentration over 100ppm can permanently damage the CO sensor !\n","textLarge":false,"imageOnRight":true,"image":{"recommendedSizes":{"width":"840","height":"560"}},"imageMobile":{"recommendedSizes":{"width":"750","height":"500"}}},"id":"#174","type":"component","lock":false,"position":58},{"name":"Image","data":{"firstImage":{"recommendedSizes":{"width":"2000","height":"2000"},"mimetype":"image/png","size":2027,"hash":"0a7161e28b517d81d2e6c9bf6b7e9608b4782ca5","id":"cml6giy3uhtxn0800ihptcp7w","filename":"alarm-screen.png","category":"divesoft/","type":"image"},"secondImage":{"recommendedSizes":{"width":"2000","height":"2000"}}},"id":"#195","type":"component","lock":false,"position":59},{"name":"Divider","data":{"color":"darkGray"},"id":"#160","type":"component","lock":false,"position":60},{"name":"SectionDivider","data":{"title":"12. Maximum Operating Depth (MOD) Display","skipToC":false},"id":"#133","type":"component","lock":false,"position":61},{"name":"TextBlock","data":{"text":"### <span id=\"12.-Maximum-Operating-Depth-(MOD)-Display\">**12. Maximum Operating Depth (MOD) Display**</span>\n\nThe calculation and display of Maximum Operating Depth (MOD) are available exclusively through the mobile application. When the analyzer is connected to the mobile device, MOD values are shown in the Divesoft.App in Analyzer mode.\nThe application displays three separate MOD values, each corresponding to a different maximum allowable oxygen partial pressure (POâ).\n\n**Default MOD Settings**\nBy default, the following POâ limits are used for MOD calculation: \n\nâ¢\tPOâ = 1.2 bar \nâ¢\tPOâ = 1.4 bar \nâ¢\tPOâ = 1.6 bar \n\nThese values correspond to **commonly accepted oxygen exposure limits in diving practice**:\n\nâ¢\tPOâ 1.4 bar â standard limit for recreational diving \nâ¢\tPOâ 1.6 bar â typical limit for decompression gases \nâ¢\tPOâ 1.2 bar â a conservative limit suitable for demanding conditions or increased safety margins","textLarge":false,"imageOnRight":true,"image":{"recommendedSizes":{"width":"840","height":"560"}},"imageMobile":{"recommendedSizes":{"width":"750","height":"500"}}},"id":"#220","type":"component","lock":false,"position":62},{"name":"TextBlock","data":{"text":"**Customizing POâ Limits** \nIf different POâ limits are required, the values can be adju
2sted directly in the mobile application. This may be useful, for example, when analyzing diluent gases, where a lower maximum POâ value (such as POâ = 1.0 bar) is preferred.\n\n**To change the POâ limits:** \n1.\tOpen the Divesoft.App. \n2.\tSwitch to the Analyzer section using the bottom navigation bar. \n3.\tEnter the Analyzer settings. \n4.\tAdjust the POâ values as required. \nThe MOD values will be recalculated automatically based on the new settings.\n","textLarge":false,"imageOnRight":true,"image":{"recommendedSizes":{"width":"840","height":"560"}},"imageMobile":{"recommendedSizes":{"width":"750","height":"500"}}},"id":"#175","type":"component","lock":false,"position":63},{"name":"Image","data":{"firstImage":{"recommendedSizes":{"width":"2000","height":"2000"},"mimetype":"image/png","size":532079,"hash":"1da6ea27f1de94d237d5cdd3889e7b1403f049a1","id":"cml6gfojjhtta08003tmbmsp8","filename":"mod.png","category":"divesoft/","type":"image"},"secondImage":{"recommendedSizes":{"width":"2000","height":"2000"}},"isHorizontal":true},"id":"#223","type":"component","lock":false,"position":64},{"name":"Divider","data":{"color":"darkGray"},"id":"#81","type":"component","lock":false,"position":65},{"name":"SectionDivider","data":{"title":"13. Printing an Analyzed Gas Label","skipToC":false},"id":"#143","type":"component","lock":false,"position":66},{"name":"TextBlock","data":{"text":"### <span id=\"13.-Printing-an-Analyzed-Gas-Label\">**13. Printing an Analyzed Gas Label**</span>\n\nPrinting a gas analysis label is available only through the Divesoft.App.\n\nAfter completing the gas analysis and connecting the analyzer to the mobile application, proceed as follows: \n1.\tIn the Divesoft.App, press the Print button. \n2.\tThe application generates a PDF (.pdf) file, which is saved on the mobile device. \n3.\tThe PDF file can be shared using any compatible application on the smartphone or tablet. \n4.\tThe label can be sent to a label printer and printed for marking the cylinder with the analyzed gas information.\n\nThis function allows clear and standardized labeling of breathing gas cylinders directly after analysis.\n","textLarge":false,"imageOnRight":true,"image":{"recommendedSizes":{"width":"840","height":"560"}},"imageMobile":{"recommendedSizes":{"width":"750","height":"500"}}},"id":"#176","type":"component","lock":false,"position":67},{"name":"Image","data":{"firstImage":{"recommendedSizes":{"width":"2000","height":"2000"},"mimetype":"image/png","size":77397,"hash":"70ee875c1e8706d1bd7b3abf51985aa8d4b5488c","id":"cml6h0k6uhul90800vz9lqy5t","filename":"tmx-21-75-tag.png","category":"divesoft/","type":"image"},"secondImage":{"recommendedSizes":{"width":"2000","height":"2000"}}},"id":"#224","type":"component","lock":false,"position":68},{"name":"Divider","data":{"color":"darkGray"},"id":"#83","type":"component","lock":false,"position":69},{"name":"SectionDivider","data":{"title":"08.2 Voltage measuring","skipToC":false},"id":"#135","type":"component","lock":false,"position":70},{"name":"TextBlock","data":{"text":"### <span id=\"14.-Setup-menu\">**14. Setup menu**</span>\n\n*Enter the menu by press and hold the button.* ","textLarge":false,"imageOnRight":true,"image":{"recommendedSizes":{"width":"840","height":"560"}},"imageMobile":{"recommendedSizes":{"width":"750","height":"500"}}},"id":"#198","type":"component","lock":false,"position":71},{"name":"Image","data":{"firstImage":{"recommendedSizes":{"width":"2000","height":"2000"},"mimetype":"image/png","size":1935,"hash":"95d89b7a0b51d7c7528f344ddb05141dfb2bf7bd","id":"cml6h25dvhum70800e0wuzn2e","filename":"main-menu.png","category":"divesoft/","type":"image"},"secondImage":{"recommendedSizes":{"width":"2000","height":"2000"}}},"id":"#197","type":"component","lock":false,"position":72},{"name":"TextBlock","data":{"text":"\nThe Setup menu provides access to device configuration and system settings. It contains the following items: \n**\nâ¢\tConfig. \nâ¢\tScreen \nâ¢\tFactory def. \nâ¢\tReturn \nâ¢\tQuit** \nSelecting Return moves one level back in the menu structure.\nSelecting Quit exits the menu and returns the device to measurement mode.\n________________________________________\n**Config.** \nThe Config. menu contains sensor-related configuration options. \n\n**Sensor** \nSelect the currently used oxygen sensor type: \nâ¢\t**R22**\nStandard galvanic oxygen sensor. \nâ¢\t**DVO2**\nSolid-state oxygen sensor. \n\nâ ï¸ **Important:**\nOnly Dive Oâ
2solid-state oxygen sensors are supported.\nTo connect a Dive Oâ sensor, a special interface cable is required and must be requested separately. \nDive Oâ sensor characteristics: \nâ¢\tExtremely long service life (more than 10 years) \nâ¢\tReduced calibration requirements \nâ¢\tMust not be exposed to temperatures exceeding 60 °C \n\n**Nâ Src** \nSelect the nitrogen reference source used for calculations: \nâ¢\tAtmospheric nitrogen with residual argon \nâ¢\tPure nitrogen \nThis setting is intended primarily for laboratory measurements or specialized use.\nFor standard diving gas analysis, the difference between these options is negligible.\nUnits\nSetting measurement units between imperial and metric\n\n________________________________________\n**Screen** \nThe Screen menu allows customization of display appearance. \nAvailable options: \nâ¢\t**Orient.**\nSets the display orientation in 90° increments. \nâ¢\t**Inverse**\nSwitches display rendering between: \n\to\tblack text on a white background, and \n\to\twhite text on a black background. \nâ¢\t**Splash**\nConfigures the startup screen animation: \no\tFull â full startup animation \no\tShort â displays only hardware and software version information \n________________________________________\n**Factory def.** \nSelecting Factory def. restores all device settings to their original factory defaults.\n","textLarge":false,"imageOnRight":true,"image":{"recommendedSizes":{"width":"840","height":"560"}},"imageMobile":{"recommendedSizes":{"width":"750","height":"500"}}},"id":"#177","type":"component","lock":false,"position":73},{"name":"Divider","data":{"color":"darkGray"},"id":"#87","type":"component","lock":false,"position":74},{"name":"SectionDivider","data":{"title":"15. Measurement units","skipToC":false},"id":"#136","type":"component","lock":false,"position":75},{"name":"TextBlock","data":{"text":"### <span id=\"15.-Measurement-units\">**15. Measurement units**</span>\n\nThe ECHO analyzer supports **both metric and imperial unit** systems. The selected unit system affects the display of depth and pressure-related values where applicable.\n\nRegardless of the selected unit system, the following measurement units are always used: \nâ¢\tOxygen partial pressure (POâ): displayed in bar \nâ¢\tGas composition: displayed in percent (%) \nâ¢\tCarbon monoxide (CO): displayed in parts per million (ppm) \n\n**Carbon Monoxide Unit â ppm** \nppm (parts per million) is a unit expressing the concentration of a gas as the number of parts of that gas per one million parts of the gas mixture. \nIn practical terms: \nâ¢\t1 ppm means 1 part of CO per 1,000,000 parts of breathing gas \nâ¢\tppm is a ratio, not an absolute pressure value\n\n**Relationship Between ppm and Pressure** \nAlthough ppm is a concentration ratio, it is directly related to pressure: \nâ¢\tThe partial pressure of CO is proportional to its concentration (ppm) and the ambient pressure. \nâ¢\tAs ambient pressure increases (for example with depth), the partial pressure of CO increases, even if the ppm value remains the same. \nThis means that: \nâ¢\tA gas mixture with a fixed CO concentration (e.g. 5 ppm) becomes more hazardous at greater depths, because the CO partial pressure rises with increasing pressure. \n\nFor this reason, CO limits are defined in ppm at surface pressure, and strict limits are applied to breathing gases intended for diving.\n","textLarge":false,"imageOnRight":true,"image":{"recommendedSizes":{"width":"840","height":"560"}},"imageMobile":{"recommendedSizes":{"width":"750","height":"500"}}},"id":"#178","type":"component","lock":false,"position":76},{"name":"Divider","data":{"color":"darkGray"},"id":"#88","type":"component","lock":false,"position":77},{"name":"SectionDivider","data":{"title":"16. Gas calculations using a mobile app","skipToC":false},"id":"#137","type":"component","lock":false,"position":78},{"name":"TextBlock","data":{"text":"### <span id=\"16.-Gas-calculations-using-a-mobile-app\">**16. Gas calculations using a mobile app**</span>\n\nBy using the mobile application, the functionality of the ECHO analyzer is significantly extended. One of the key features is the ability to perform breathing gas calculations for dive planning and gas mixing c
2alculations, including the generation of a final gas preparation recipe.\nAll calculations are performed within the Divesoft.App after the analyzer is connected.","textLarge":false,"imageOnRight":true,"image":{"recommendedSizes":{"width":"840","height":"560"}},"imageMobile":{"recommendedSizes":{"width":"750","height":"500"}}},"id":"#225","type":"component","lock":false,"position":79},{"name":"Image","data":{"firstImage":{"recommendedSizes":{"width":"2000","height":"2000"},"mimetype":"image/png","size":433435,"hash":"46fad01dcd8ba8da5f5859a06412f9c11699338c","id":"cml6j6d74hwc10800emc4x2yw","filename":"blender.png","category":"divesoft/","type":"image"},"secondImage":{"recommendedSizes":{"width":"2000","height":"2000"}},"isHorizontal":true},"id":"#226","type":"component","lock":false,"position":80},{"name":"TextBlock","data":{"text":"________________________________________\n**Ideal Gas Calculation** \nThe application allows calculation of an ideal breathing gas for a specific dive depth based on user-defined parameters.\nThe gas composition is calculated according to the parameters that are actively entered. If certain parameters are not specified, the application automatically prioritizes the remaining defined limits.\n\nFor example: \nâ¢\tIf a maximum gas density is specified but END is not entered, the application calculates the gas based on the maximum allowed density and the configured maximum POâ. The corresponding END is then calculated automatically. \nâ¢\tThe same logic applies to other parameters such as POâ limits, END, or gas density.\n\nConversely, if a specific gas composition is entered, the application calculates the usable depth range and the gas properties at the selected depth.\n________________________________________\n**Gas Mixing** \nTo prepare a gas mixture, enter the existing gas in the cylinder at the bottom of the screen. The application then calculates a step-by-step filling procedure to achieve the desired final mixture.\n\nAn option â**Heliair only**â can be enabled to avoid the addition of pure oxygen during the mixing process.\n________________________________________\n**Simulator** \nThe Simulator tab allows calculation of the resulting gas mixture when combining gases with defined pressure and volume by gas transfer.\n\nThis includes: \nâ¢\tMixing gases from multiple cylinders (multi-step gas transfer) \nâ¢\tTopping up a mixture with compressor air to a specified pressure \nAdditional cylinders can be added to simulate complex or multi-stage filling procedures.\n________________________________________\n**Saving Gas Mixtures** \nAny calculated or simulated gas mixture can be saved in the My Cylinders section for later reference or reuse.\n","textLarge":false,"imageOnRight":true,"image":{"recommendedSizes":{"width":"840","height":"560"}},"imageMobile":{"recommendedSizes":{"width":"750","height":"500"}}},"id":"#179","type":"component","lock":false,"position":81},{"name":"Divider","data":{"color":"darkGray"},"id":"#91","type":"component","lock":false,"position":82},{"name":"SectionDivider","data":{"title":"09. Set-up","skipToC":true},"id":"#140","type":"component","lock":false,"position":83},{"name":"TextBlock","data":{"text":"### <span id=\"17.-Charging-and-battery-status\">**17. Charging and battery status**</span>\n\n**Charging the Battery** \nCharge the ECHO analyzer using its USB-C charging port and a standard USB power adapter with an output of 5 V and at least 0.5 A.\nUse a high-quality USB-C cable intended for charging electronic devices. \nâ ï¸ **Do not use fast-charging or high-voltage chargers**. The analyzer is designed for standard USB power only.\n\n**Battery Status Indication** \nThe current battery charge level is displayed on the right side of the ECHO display as a battery icon. This indicator provides a quick overview of the remaining battery capacity during operation.\n\n**Battery Charging Guidelines and Best Practices** \nThe ECHO analyzer uses a rechargeable lithium-based battery. To maximize battery lifespan and maintain reliable performance, please observe the following recommendations: \nâ¢\tThe battery performs best when kept between 20% and 80% charge during regular use. \nâ¢\tFrequent deep discharge to 0% should be avoided whenever possible. \nâ¢\tContinuous charging at 100% for extended periods may accelerate battery aging. \n\n**Recommended Charging Practice**\nâ¢\tRecharge the analyzer when the battery level drops to approximately 20â30%. \nâ¢\tDisconnect the charger once the battery is fully charged. \nâ¢\tAvoid leaving the device permanently connected to the charger. \n\n**When Not to Charge the Battery** \nâ¢\tDo not charge the analyzer if it has been exposed to extreme temperatures. \nâ¢\tAvoid charging if the device is very hot or very cold; allow it to return to room temperature first. \nâ¢\tDo not charge the battery if the device or cable is visibly damaged.\n\n**Storage Recommendations** \nFor long-term storage: \nâ¢\tStore the analyzer with the battery charged to approximately 40â60%. \nâ¢\tRecharge the battery periodically (every few months) to prevent deep discharge. \nFollowing these guidelines helps reduce battery wear and ensures long service life of the internal accumulator.\n","textLarge":false,"imageOnRight":true,"image":{"recommendedSizes":{"width":"840","height":"560"}},"imageMobile":{"recommendedSizes":{"width":"750","height":"500"}}},"id":"#180","type":"component","lock":false,"position":84},{"name":"Divider","data":{"color":"darkGray"},"id":"#92","type":"component","lock":false,"position":85},{"name":"SectionDivider","data":{"title":"18. Oxygen Sensor Replacement","skipToC":false},"id":"#146","type":"component","lock":false,"position":86},{"name":"TextBlock","data":{"text":"### <span id=\"18.-Oxygen-Sensor-Replacement\">**18. Oxygen Sensor Replacement**</span>\n\nGalvanic oxygen sensors have a limited service life because the sensing reaction gradually consumes the internal materials. Under normal operating conditions, the oxygen sensor typically requires replacement after **12â24 months**, depending on usage, exposure, and environmental conditions.","textLarge":false,"imageOnRight":true,"image":{"recommendedSizes":{"width":"840","height":"560"}},"imageMobile":{"recommendedSizes":{"width":"750","height":"500"}}},"id":"#230","type":"component","lock":false,"position":87},{"name":"Image","data":{"firstImage":{"recommendedSizes":{"width":"2000","height":"2000"},"mimetype":"image/png","size":7188042,"hash":"39e77ad43cbedea4a9acd996c07d843d6f1541dc","id":"cml6kxg96hyfw0800ylr72xw8","filename":"vymena-baterie-a-o2-cidla.png","category":"divesoft/","type":"image","alt":"Opened ECHO"},"secondImage":{"recommendedSizes":{"width":"2000","height":"2000"}},"isHorizontal":true},"id":"#229","type":"component","lock":false,"position":88},{"name":"TextBlock","data":{"text":"**Replacement Procedure** \n1.\tEnsure the analyzer is powered off and disconnected from any gas source. \n2.\tUsing a suitable tool, loosen and remove the five screws on the rear side of the analyzer. \n3.\tCarefully open the rear cover of the analyzer. \n4.\tDisconnect the oxygen sensor cable from the electronics. \n5.\tUnscrew the oxygen sensor from the analyzer housing. \n6.\tDisconnect the Molex connector from the sensor cable. \n7.\tConnect the sensor cable to the new oxygen sensor using the Molex connector. \n8.\tScrew the new oxygen sensor into the analyzer housing. \n9.\tReconnect the sensor cable to the electronics. \n10.\tClose the rear cover and secure it with the five screws. \n\n**Please note:** R22 sensor cable is not compatible with solid state O2 sensor.","textLarge":false,"imageOnRight":true,"image":{"recommendedSizes":{"width":"840","height":"560"}},"imageMobile":{"recommendedSizes":{"width":"750","height":"500"}}},"id":"#231","type":"component","lock":false,"position":89},{"name":"Image","data":{"firstImage":{"recommendedSizes":{"width":"2000","height":"2000"},"mimetype":"image/png","size":3016395,"hash":"6b235d11eb8dc881fa21213bf9cd2f120363f9ba","i
2d":"cml6lfx3mhyvn08004qav7utl","filename":"sensor-replacement.png","category":"divesoft/","type":"image","alt":"ECHO O2 sensor replacement"},"secondImage":{"recommendedSizes":{"width":"2000","height":"2000"}},"isHorizontal":true},"id":"#232","type":"component","lock":false,"position":90},{"name":"TextBlock","data":{"text":"**Important Note** \nâ ï¸ **Do not screw the oxygen sensor into the analyzer with the cable attached. \nDoing so may twist or damage the sensor cable.**\n","textLarge":false,"imageOnRight":true,"image":{"recommendedSizes":{"width":"840","height":"560"}},"imageMobile":{"recommendedSizes":{"width":"750","height":"500"}}},"id":"#181","type":"component","lock":false,"position":91},{"name":"Divider","data":{"color":"darkGray"},"id":"#96","type":"component","lock":false,"position":92},{"name":"SectionDivider","data":{"title":"19. CO Sensor Replacement","skipToC":false},"id":"#147","type":"component","lock":false,"position":93},{"name":"TextBlock","data":{"text":"### <span id=\"19.-CO-Sensor-Replacement\">**19. CO Sensor Replacement**</span>\n\nThe CO sensor replacement is performed by the authorized service points, since it consists of multiple steps - CO sensor replacement, factory calibration data update and a bump test.\nPlease get in touch with one of our service points or ask your dealer to schedule a CO sensor replacement.\n[**Divesoft Service Points Map**](https://www.divesoft.com/en/service-points)","textLarge":false,"imageOnRight":true,"image":{"recommendedSizes":{"width":"840","height":"560"}},"imageMobile":{"recommendedSizes":{"width":"750","height":"500"}}},"id":"#182","type":"component","lock":false,"position":94},{"name":"Divider","data":{"color":"darkGray"},"id":"#85","type":"component","lock":false,"position":95},{"name":"SectionDivider","data":{"title":"20. Battery replacement","skipToC":false},"id":"#148","type":"component","lock":false,"position":96},{"name":"TextBlock","data":{"text":"### <span id=\"20.-Battery-replacement\">**20. Battery replacement**</span>\n\nThe ECHO analyzer is powered by a rechargeable lithium-ion battery. Over time and after many charge cycles, the battery capacity gradually decreases. When noticeably reduced operating time is observed, the battery should be replaced.\n\n**Replacement Procedure** \n1.\tEnsure the analyzer is powered off and disconnected from any power source. \n2.\tUsing a suitable tool, loosen and remove the five screws on the rear side of the analyzer. \n3.\tCarefully open the rear cover of the analyzer. \n4.\tRemove the battery from its holder by gently releasing it from the slot. \n5.\tDisconnect the battery cable, which is permanently attached to the battery. \n6.\tInsert the new battery into the designated holder. \n7.\tConnect the battery cable to the electronics. \n8.\tClose the rear cover and secure it with the five screws.","textLarge":false,"imageOnRight":true,"image":{"recommendedSizes":{"width":"840","height":"560"}},"imageMobile":{"recommendedSizes":{"width":"750","height":"500"}}},"id":"#233","type":"component","lock":false,"position":97},{"name":"Image","data":{"firstImage":{"recommendedSizes":{"width":"2000","height":"2000"},"mimetype":"image/png","size":2262167,"hash":"ea434d1a7efadac8cf04968e7e2aecd19908315a","id":"cml6mx1i2i0h008005dys2i9q","filename":"battery-replacement.png","category":"divesoft/","type":"image","alt":"ECHO battery replacement"},"secondImage":{"recommendedSizes":{"width":"2000","height":"2000"}},"isHorizontal":true},"id":"#234","type":"component","lock":false,"position":98},{"name":"Divider","data":{"color":"darkGray"},"id":"#236","type":"component","lock":false,"position":99},{"name":"SectionDivider","data":{"title":"21. Firmware Update","skipToC":false},"id":"#237","type":"component","lock":false,"position":100},{"name":"TextBlock","data":{"text":"### <span id=\"21.-Firmware-Update\">**21. Firmware Update**</span>
2\n\n\nThe ECHO firmware can be updated wirelessly using the Divesoft.app mobile application, available for both Android and iOS devices.\n\n**Updating the Firmware** \n1. Turn on the ECHO device. \n2. Open the Divesoft.app application on your mobile phone. \n3. On the main screen, select the DEVICES tile. \n4. Divesoft.App will automatically start searching for nearby devices. (Make sure Bluetooth is enabled on your mobile phone.) \n5. If do not see your ECHO, use the red \"plus\" in the upper right corner. \n6. Select the appropriate ECHO device from the list of detected devices. \n7. If a new firmware version is available, the application will automatically offer the update. \n8. Start the update process in the application. \n9. The firmware update will then proceed automatically.\n\n**Important Notes** \n* Positively do not use the \"nRF DFU App\" for ECHO update.\n* Keep your phone within Bluetooth range of the ECHO device during the entire update process. \n* Do not turn off the ECHO device or close the application while the update is in progress. \n* After the update is completed, the device may restart automatically.\n* If your bluetooth update fails, use USB cable and [center.divesoft.com](https://center.divesoft.com)","textLarge":false,"imageOnRight":true,"image":{"recommendedSizes":{"width":"840","height":"560"}},"imageMobile":{"recommendedSizes":{"width":"750","height":"500"}}},"id":"#235","type":"component","lock":false,"position":101},{"name":"Divider","data":{"color":"darkGray"},"id":"#97","type":"component","lock":false,"position":102},{"name":"SectionDivider","data":{"title":"22. Storage when not in use for long periods","skipToC":false},"id":"#149","type":"component","lock":false,"position":103},{"name":"TextBlock","data":{"text":"### <span id=\"22.-Storage-when-not-in-use-for-long-periods\">**22. Storage when not in use for long periods**</span>\n\nIf the ECHO analyzer will not be used for an extended period of time, proper storage helps maintain device performance and prolong the service life of internal components.\n\nGeneral Storage Conditions \nâ¢\tStore the analyzer in a clean, dry environment. \nâ¢\tAvoid exposure to direct sunlight, moisture, and dust. \nâ¢\tRecommended storage temperature is 10 °C to 30 °C. \n\nBattery \nâ¢\tStore the analyzer with the battery charged to approximately 40â60%. \nâ¢\tAvoid storing the device with a fully discharged or fully charged battery. \nâ¢\tRecharge the battery periodically during long-term storage to prevent deep discharge. \n\nOxygen and CO Sensors \nâ¢\tStore the analyzer in clean air, free of solvent vapors, exhaust gases, or other contaminants. \nâ¢\tAvoid exposure to high concentrations of oxygen, carbon monoxide, or other reactive gases. \nâ¢\tDo not store the device in sealed containers with chemicals or fuels.\n\nAdditional Notes \nâ¢\tAvoid mechanical stress or pressure on the device during storage. \nâ¢\tAllow the analyzer to reach room temperature before use after long-term storage.\n","textLarge":false,"imageOnRight":true,"image":{"recommendedSizes":{"width":"840","height":"560"}},"imageMobile":{"recommendedSizes":{"width":"750","height":"500"}}},"id":"#184","type":"component","lock":false,"position":104},{"name":"Divider","data":{"color":"darkGray"},"id":"#99","type":"component","lock":false,"position":105},{"name":"SectionDivider","data":{"title":"22. Error and Warning Messages","skipToC":false},"id":"#150","type":"component","lock":false,"position":106},{"name":"TextBlock","data":{"text":"### <span id=\"23.-Error-and-Warning-Messages\">**22. Error and Warning Messages**</span>\n\nThe ECHO analyzer continuously monitors the status of its internal components and sensors. If a fault or abnormal condition is detected, an error or warning message is displayed on the screen.\nThis chapter explains the meaning of these messages and provides basic guidance on how to proceed.\n________________________________________\n##### Messages Displayed During Power-On \n**ERROR: Oâ sensor missing, damaged or misconfigured** \nNo functional oxygen sensor was detected. \nThis error may occur if: \nâ¢\tA solid-state oxygen sensor is connected but does not communicate with the device. \nâ¢\tAn electrochemical oxygen sensor is connected, but its output voltage is below 0.5 mV. \n\n**Action:** \nCheck that a compatible oxygen sensor is correctly connected and configured. Replace the sensor if necessary.\n________________________________________\n**WARNING: Oâ sensor too weak â Replace sensor**\nThe electrochemical oxygen sensor output is low (sensor voltage < 5 mV). \nThis warning may al
2so appear temporarily if the analyzer was previously exposed to a hypoxic gas mixture. \n\n**Action:** \nIf the warning persists, replace the oxygen sensor.\n________________________________________\n**ERROR: xxx doesnât work correctly** \nA malfunction was detected in one of the internal components. \nThe placeholder xxx may refer to one of the following: \nâ¢\tHe sensor \nâ¢\tBluetooth adapter \nâ¢\tBarometer \nâ¢\tHumidity sensor \nâ¢\tCO sensor \n\nFor the CO sensor, this error may indicate that: \nâ¢\tThe CO sensor is not installed, \nâ¢\tThe sensor does not communicate correctly \nâ¢\tA different type of sensor is installed instead of a CO sensor. \n\n**Action:** \nExcept for sensor replacement or correction of an incorrect sensor type, these errors require service inspection.\n________________________________________\n**WARNING: Low / High temperature â may work incorrectly** \nThe internal temperature of the analyzer is outside the specified operating range of 5 °C to 40 °C. \n\n**Action: **\nAllow the device to acclimate until it reaches the normal operating temperature range.\n________________________________________\n##### Messages Displayed During Operation \n**HAL ERROR: file fff, line X**\nAn internal firmware error has occurred. \n\n**Action:** \nPlease contact the Divesoft support and provide detailed information about the manipulation that preceeded the error. Usually the error disappears over the pover cycle. If the error persists, please contact authorized service centre.\n________________________________________\n**Troubleshooting Summary** \nâ¢\tOâ sensor errors can usually be resolved by checking, replacing, or correctly configuring the oxygen sensor. \nâ¢\tCO sensor errors may be resolved if an incorrect sensor is installed; otherwise, service is required. \nâ¢\tTemperature warnings are resolved by returning the device to the specified operating temperature range. \nâ¢\tAll other hardware or system errors require professional service intervention.\n","textLarge":false,"imageOnRight":true,"image":{"recommendedSizes":{"width":"840","height":"560"}},"imageMobile":{"recommendedSizes":{"width":"750","height":"500"}}},"id":"#185","type":"component","lock":false,"position":107},{"name":"Divider","data":{"color":"darkGray"},"id":"#101","type":"component","lock":false,"position":108},{"name":"SectionDivider","data":{"title":"24. Technical data","skipToC":false},"id":"#151","type":"component","lock":false,"position":109},{"name":"TextBlock","data":{"text":"### <span id=\"23.-Technical-data\">**23. Technical data**</span>\n\nThe ECHO analyzer is a compact, portable breathing gas analyzer designed for reliable analysis of oxygen, helium, and carbon monoxide in diving gases. The device combines long battery life, advanced sensor technology, and wireless connectivity with a mobile application.","textLarge":false,"imageOnRight":true,"image":{"recommendedSizes":{"width":"840","height":"560"}},"imageMobile":{"recommendedSizes":{"width":"750","height":"500"}}},"id":"#227","type":"component","lock":false,"position":110},{"name":"Image","data":{"firstImage":{"recommendedSizes":{"width":"2000","height":"2000"},"mimetype":"image/png","size":307692,"hash":"c240335c7f0cec4531841741c261854a37f36b92","id":"cmovafwtc88ik0800v8aqmdtk","filename":"echo-dimensions.png","category":"divesoft/","type":"image"},"secondImage":{"recommendedSizes":{"width":"2000","height":"2000"}}},"id":"#228","type":"component","lock":false,"position":111},{"name":"TextBlock","data":{"text":"________________________________________\n**Display** \nâ¢\tType: HR-TFT (High Reflective TFT) \nâ¢\tDescription: \nHigh-contrast display with excellent readability, including outdoor and bright-light conditions\n(HR-TFT = High Reflective Thin-Film Transistor display)\n________________________________________\n**Power Supply** \nâ¢\tBattery type: Rechargeable lithium battery \nâ¢\tBattery capacity: 3.7 Wh \nâ¢\tOperating time: \no\tup to 100 hours with R22S galvanic Oâ sensor \no\tup to 50 hours with DVOâ solid-state Oâ
2 sensor \nâ¢\tCharging interface: USB-C \nâ¢\tCharging parameters: 5 V / 1 A \nâ¢\tTypical charging time: approx. 2.5 hours \n________________________________________\n**Sensors** \n**Oxygen (Oâ)** \nâ¢\tR22S galvanic oxygen sensor (standard) \nâ¢\tDVOâ solid-state oxygen sensor (optional) \no\tSolid-state measurement technology \no\tExtremely long service life \no\tUnder normal use, expected to last for the entire lifetime of the analyzer \no\tFor dive centers and filling stations, expected service life 10+ years\n\n**Helium (He)** \nâ¢\tSolid-state helium sensor \nâ¢\tService life: unlimited \nâ¢\tFactory calibrated \nâ¢\tNo user calibration required \n\n**Carbon Monoxide (CO)** \nâ¢\tElectrochemical CO sensor \nâ¢\tManufacturer-guaranteed lifetime: 2 years from unpacking \nâ¢\tRecommended zero calibration: every 2â6 months in clean air \nâ¢\tCO warning threshold: 5 ppm \n________________________________________\n**Connectivity and Features** \nâ¢\tBluetooth Low Energy (BLE) \nâ¢\tConnection to Divesoft.App \no\tLarge and clear display of measured values \no\tExtended data visualization \no\tCalibration of sensors \no\tFirmware updates \no\tLabel printing via the mobile application \n________________________________________\n**Mechanical Design** \nâ¢\tCompact handheld housing \nâ¢\tIntegrated wrist strap \n________________________________________\n**Dimensions** \nâ¢\tMain body diameter: approx. 127 mm \nâ¢\tBody thickness: approx. 37.5 mm \nâ¢\tBody width: approx. 110 mm \nâ¢\tOverall length (including strap): approx. 410 mm\nâ¢\tWeight 288g\n________________________________________\n**Operating temperature** \nâ¢\t0 to +45° C (32 â 113° F) \n⢠Keep in mind that R22S oxygen sensor can show slow response time when below 5° C (41° F) \n⢠Store at temperature 10 - 30° C (50 - 86° F)\n\n\n\n","textLarge":false,"imageOnRight":true,"image":{"recommendedSizes":{"width":"840","height":"560"}},"imageMobile":{"recommendedSizes":{"width":"750","height":"500"}}},"id":"#186","type":"component","lock":false,"position":112},{"name":"Image","data":{"firstImage":{"recommendedSizes":{"width":"2000","height":"2000"}},"secondImage":{"recommendedSizes":{"width":"2000","height":"2000"}}},"id":"#188","type":"component","lock":false,"position":113},{"name":"Divider","data":{"color":"darkGray"},"id":"#112","type":"component","lock":false,"position":114},{"name":"SectionDivider","data":{"title":"24. Manual version","skipToC":false},"id":"#156","type":"component","lock":false,"position":115},{"name":"TextBlock","data":{"text":"### <span id=\"24.-Manual-version\">**ECHO ANALYZER - USER MANUAL**</span>\n\nDate of issue: 02 February 2026 \nHW 1.0, FW 2.0.0\nAuthor: Jakub Å imánek \nPublished by Divesoft s.r.o.","textLarge":false,"imageOnRight":true,"image":{"recommendedSizes":{"width":"420","height":"280"}},"imageMobile":{"recommendedSizes":{"width":"750","height":"500"}}},"id":"#119","type":"component","lock":false,"position":116}],"id":"root","idBuffer":"#238","lastCommit":"dcfe1e0e-eb4f-4d96-8422-f4d4303b8e16"}},"annotations":[],"language":{"type":"id","generated":false,"id":"Language:cjv3kwvoj000u083611381c6o","typename":"Language"},"__typename":"PageTranslation"},"Page:cmdo5gsze02qc0832lf2bbv7e":{"id":"cmdo5gsze02qc0832lf2bbv7e","type":{"type":"id","generated":false,"id":"PageType:cjv3l213x004f08366hjufttp","typename":"PageType"},"tags":[],"translations({\"where\":{\"language\":{\"id\":\"cjv3kwvoj000u083611381c6o\"}}})":[{"type":"id","generated":false,"id":"PageTranslation:cmdo5gt1l02qj0832x9unnxkm","typename":"PageTranslation"}],"__typename":"Page"},"PageTranslation:cmdo5gt1l02qj0832x9unnxkm":{"id":"cmdo5gt1l02qj0832x9unnxkm","name":"Stock unit","createdAt":"2025-07-29T06:22:30.920Z","content":{"type":"json","json":{"content":[{"name":"Header","data":{"products":[],"activeTab":"1","showShadow":false},"id":"#0","type":"component","lock":false,"position":0},{"name":"ProductCrossroadNew","data":{"componentTemplateId":"cmo5ko5huwtv40889ugkkecht"},"id":"#125","type":"component","lock":false,"position":1},{"name":"HeroV2","data":{"slides":[{"media":{"recommendedSizes":{"width":"3840","height":"2560"},"mimetype":"image/png","size":2027671,"hash":"96ca45698790c997cea44dcc7d0db8e4faff779d","id":"cmo67awffmzg60800bp0vcrdk","filename":"liberty-architecture-story-4.png","category":"divesoft/","type":"image"},"productName":"LIBERTY STOCK UNITS","title":"No Waiting. Just Diving.","linkTitle":"Pick your Liberty. Dive now.","link":{"url":"https://eshop.divesoft.com","urlNewWindow":true}
2,"autoplayDuration":9000,"id":"1","linkUrl":{"url":"https://eshop.divesoft.com/products/stock-units?currency=CZK","urlNewWindow":true}}],"activeTab":"1"},"id":"#126","type":"component","lock":false,"position":2},{"name":"Spacer","data":{"spacingLarge":"80","spacingSmall":"80","backgroundColor":"#ffffff"},"id":"#130","type":"component","lock":false,"position":3},{"name":"ImageTextBlock","data":{"backgroundColor":"white","content":"# **One Liberty. Different Ways to Dive.**\n\nLiberty Stock Units are preconfigured, assembled, and ready to ship.\nChoose from proven Liberty rebreather configurations optimized for different styles of diving.\n\nFrom lightweight travel setups to advanced technical exploration, every Liberty Stock Unit is fully assembled, tested, and ready for the water.\n\nChoose your configuration and start diving without waiting for a custom build.\n\n\n","links":[{"title":"Get yours now","url":{"url":"https://eshop.divesoft.com/products/stock-units?currency=CZK","urlNewWindow":true},"color":"black","id":"1"}],"isMirrored":false,"image":{"recommendedSizes":{"width":"1500","height":"1500"},"mimetype":"image/jpeg","size":1418402,"hash":"df3b601f440a8f44b5e9d1dd75160d76d4ce6bb0","id":"cmpb0monl3sqj08007ipxjyl8","filename":"dsc-6791.jpg","category":"divesoft/","type":"image"},"activeTab":"1"},"id":"#128","type":"component","l
Line numbers count LF bytes from the start of the resource, as the search results do. Vendor segments are library code the classifier recognised; they are stored but not indexed. Bytes are shown as Latin1 characters, one per byte.